 Prologue: A Rogue's Welcome
 Chapter 1: Castle and Dragon
 Chapter 2: The Great Boggly Tree
 Chapter 4: For Pigs the Bell Tolls
 Chapter 5: The Key to Pirates
 Chapter 6: 3 Days of Excess
 Chapter 7: Mario Shoots the Moon
 Chapter 8: The Thousand-Year Door
This survey will take about 1 minute.
Your answers will help us to improve our website.
Paper Mario: The Thousand-Year Door (TTYD)
Chapter 3: Of Glitz and Glory Walkthrough
★ TTYD Switch Remake is now available!
┗ Remake Differences | New Gold Medal Badge!
★ Tips for Beginners | Secrets and Combat Tips
┗ How to Level Up Fast | How to Farm Coins
☆ Best Moves | Best Partners | Best Badges
★ All Walkthroughs | All Star Pieces | All Shine Sprites

Game8's walkthrough for Paper Mario: The Thousand-Year Door's (TTYD) Chapter 3, Of Glitz and Glory. Read on for a detailed guide for this chapter, including locations of collectibles, locations of note in Glitzville, enemies, as well as useful tips for completing this chapter!
| ◄ Previous Chapter | Next Chapter ▶ |
|---|---|
| Chapter 2: The Great Boggly Tree |
Chapter 4: For Pigs The Bell Tolls |
List of Contents
Chapter 3: Of Glitz and Glory Story Walkthrough
| ★Recommended Stats★ | ||||||||
|---|---|---|---|---|---|---|---|---|
| Chapter 3 Main Objectives | ||||||||
| 1 | Treasures in Glitzville | |||||||
| 2 | The Glitzville Glizzy └ How to Customize Yoshi's Colors |
|||||||
| 3 | Hammer Time | |||||||
| 4 | Tale as Old as Time | |||||||
| 5 | The Walls Have Gas | |||||||
| 6 | Don't Poison My Man Jolene | |||||||
| 7 | Taking Out the Rawk Hawk | |||||||
| 8 | Grubba the Big Man | |||||||
| Peach Interlude | ||||||||
| Bowser Interlude | ||||||||
| 11 | Darkness in Twilight Town | |||||||
Click on any of the links above to jump to the section!
Treasures in Glitzville Walkthrough
| Objectives | |
|---|---|
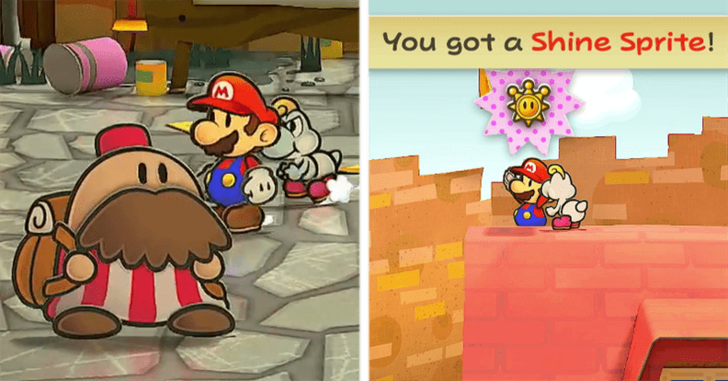
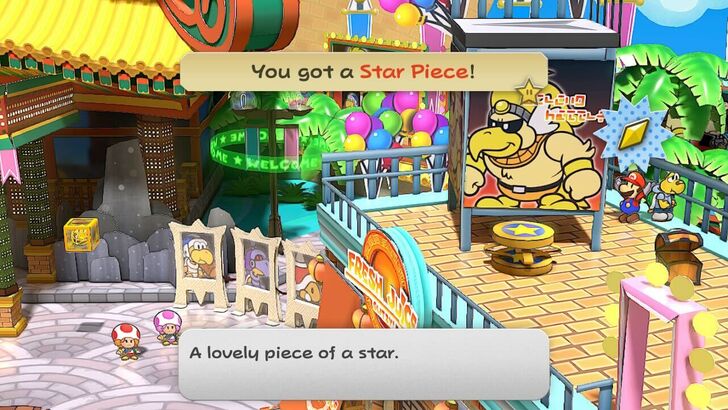
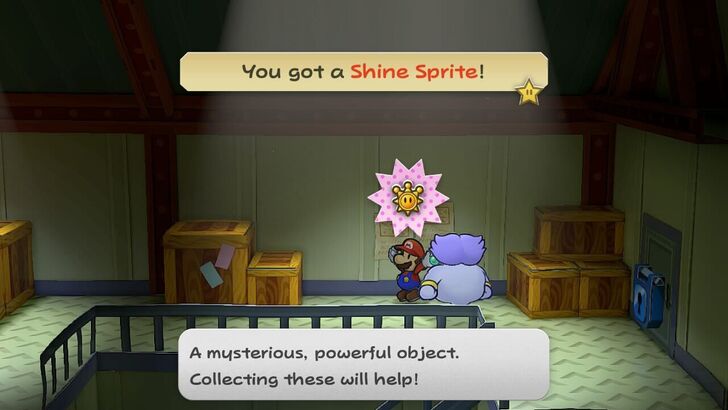
| 1 | 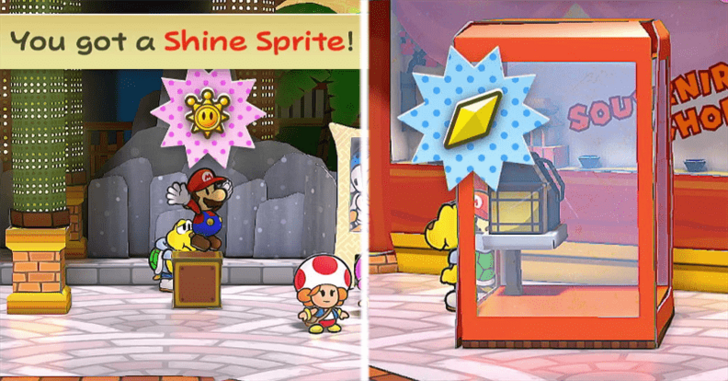 After dropping in Glitzville feel free to explore around for treasures like Star Pieces. For the Shine Sprite, use your hammer under the box to reveal a hidden yellow box you can stand on. Click here for All Collectible Locations ► |
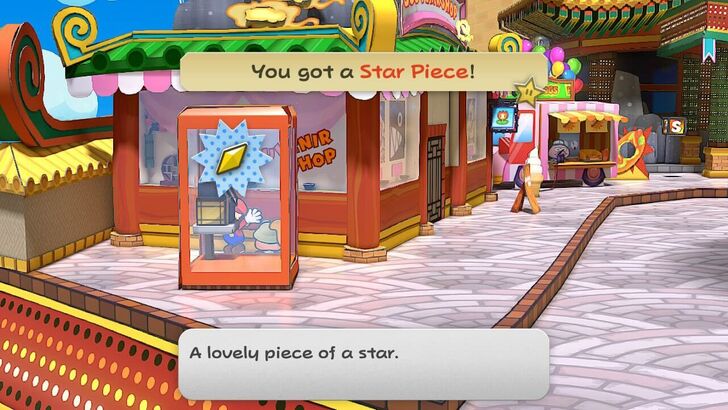
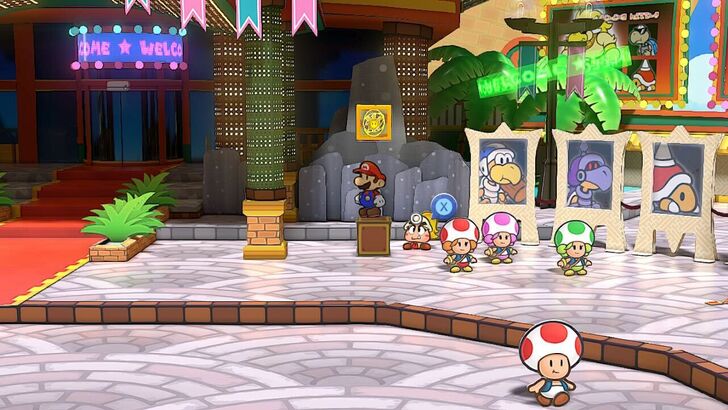
| 2 | 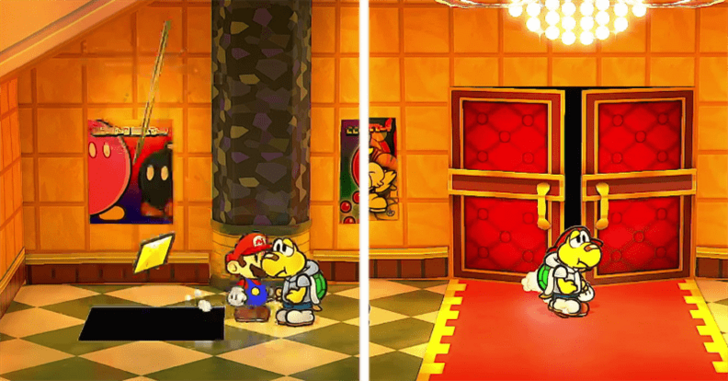 Once you're done exploring, you can enter the Glitz Pit to continue the story. Go in front of the Bob-omb poster for a Star Piece and head into the big door. |
| 3 | 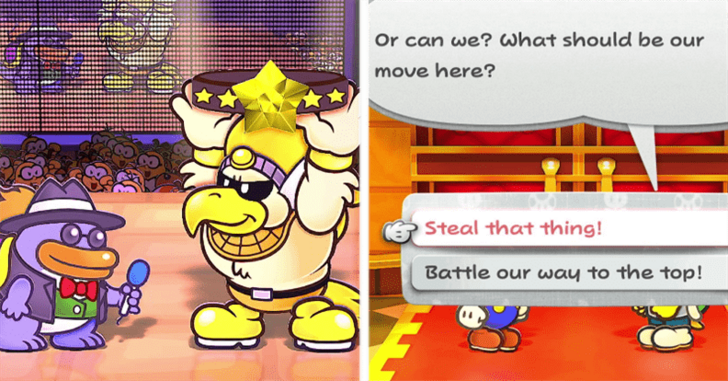 Walk in and you'll see Rawk Hawk who just won another fight. He will show off his belt which has the Crystal Star! You can choose to either steal or fight for it, wither way you're gonna fight for it. |
| 4 | 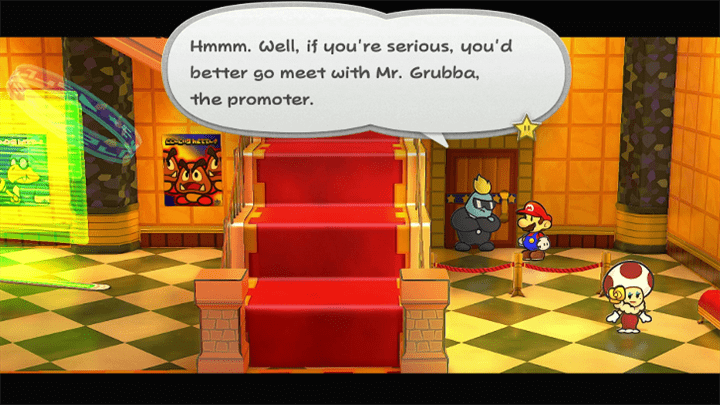 Once the scene finishes, head either left or right and talk to the bouncer. He will tell you to talk to Mr Grubba for sign-ups. |
| 5 | 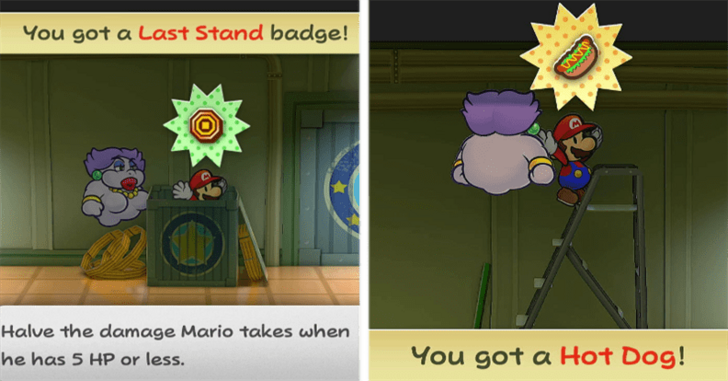 If you entered from the right side, while walking down the hall, you can jump on one of the boxes to get the Last Stand Badge and there's a hotdog on top of a ladder. Keep heading down the hall Mr Grubba's office is the one with the brown door. |
| 6 | 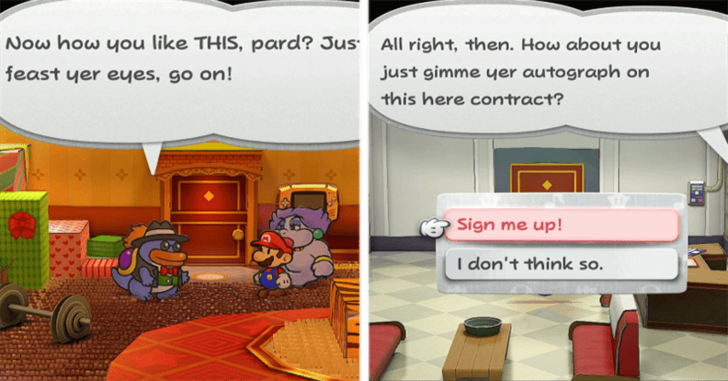 After that annoying scene, you will be escorted to the champion's room and then the major-leaguer's room. He will then ask you to sign a contract, giving you the new title, "The Great Gonzales" |
| 7 |  After that tour, Grubba will get Jolene to take you to the minor-leaguers' room and explain the rules of the tournament to you. Remember these as your Victory won't count if you don't fulfill the conditions! |
| 8 | 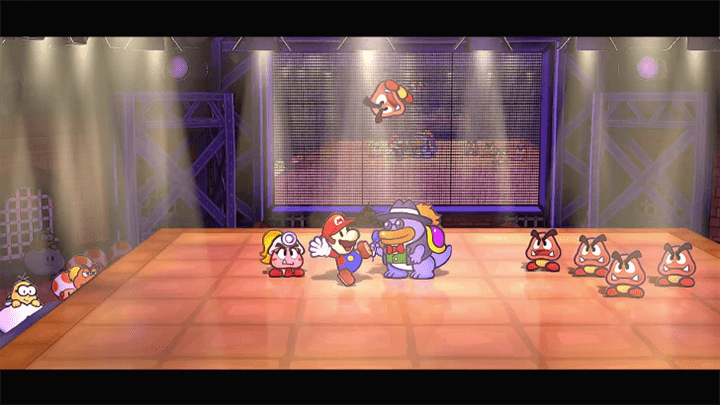 After being explained the rules and scheduling your match with the GBA, a security guard will escort you to your first match against Goombas. Minor League Match Guides ► |
| 9 | 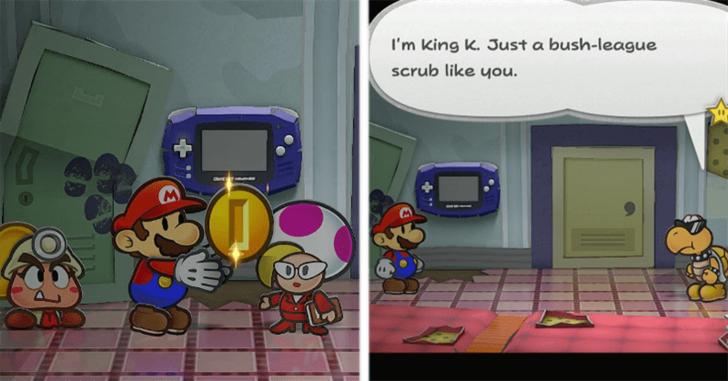 After that fight, you will get a few coins from Jolene and you will be free to do what you want. Heal and Save as needed and talk to some of your new friends. |
| 10 |  The main gimmick of this Chapter is simply rising through the ranks until you win the Crystal Star Belt, so stock up on items as needed after each match. Click here for All Match Guides ► |
The Glitzville Glizzy Walkthrough
| Objectives | |
|---|---|
| 1 | 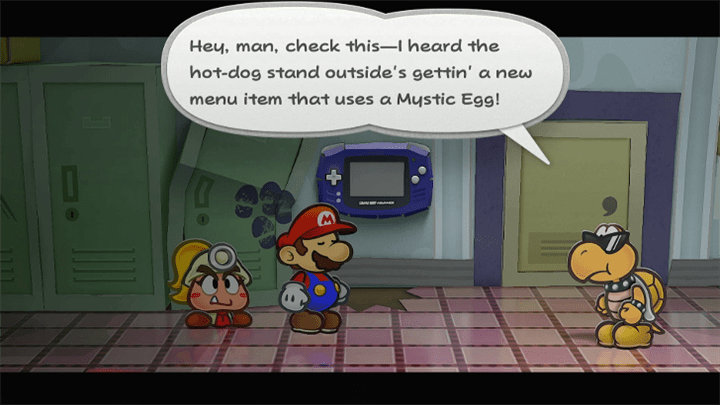 Keep battling until you reach the Rank 15 match. King K. Will then tell you that Hoogle is selling a new type of Hot Dog. |
| * | 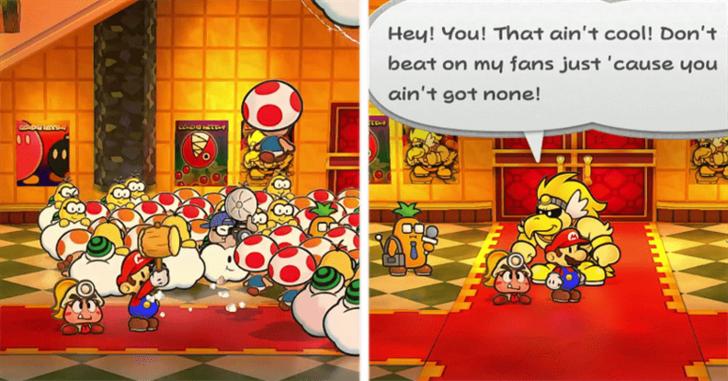 On your way out, you can go and hit Rawk Hawk's fans to get a funny scene. |
| 2 | 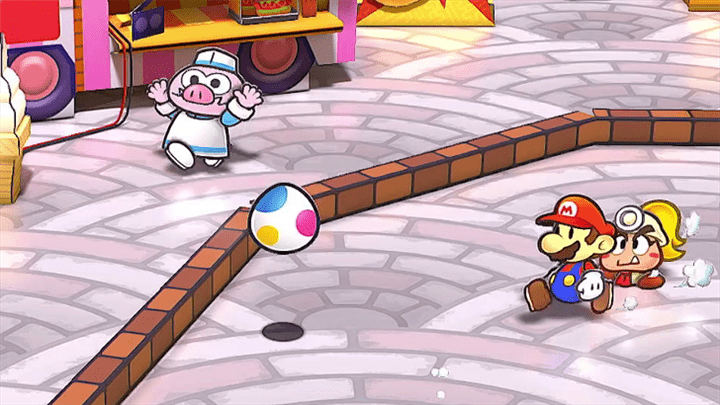 Head outside and head to the hotdog stand on the left side of the town square. You will find Hoogle chasing down a familiar looking egg. |
| 3 | 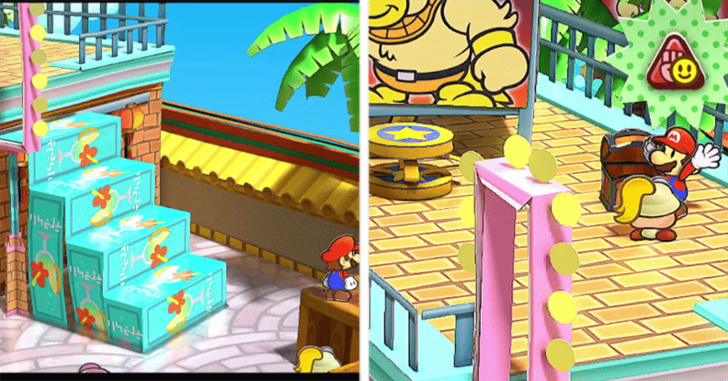 Help out Hoogle and the Egg will jump on the stand. Head to the eastern area of the town square and set up the stairs where you can get the Power Plus P Badge on top of the roof. |
| 4 |  Use the spring and use the Plane Mode platform to grab the Egg on above the stand. |
| 5 | 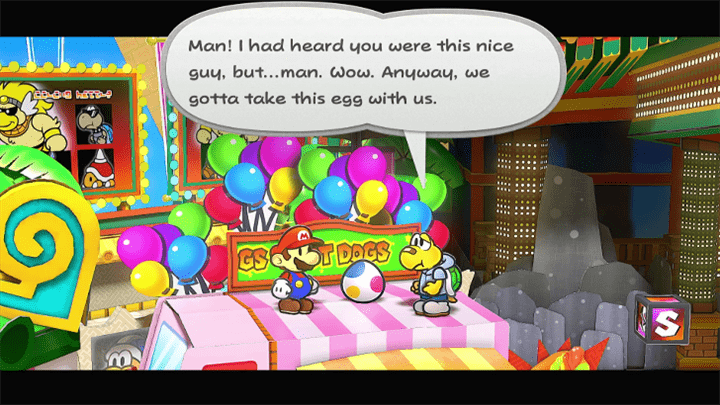 After getting the egg you will be given no choice but to keep the egg as a partner until it hatches. |
| 6 | 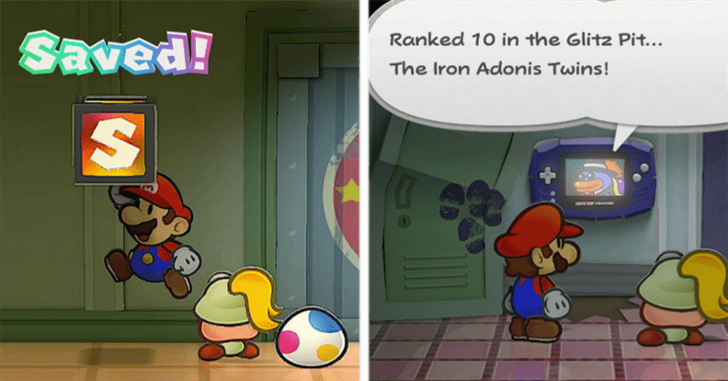 After getting your egg, you can proceed to Glitz Pit and make your way until the Rank 10 Match. Before you battle them, make sure to save if you want to choose a specific color for your Yoshi. |
| 7 | 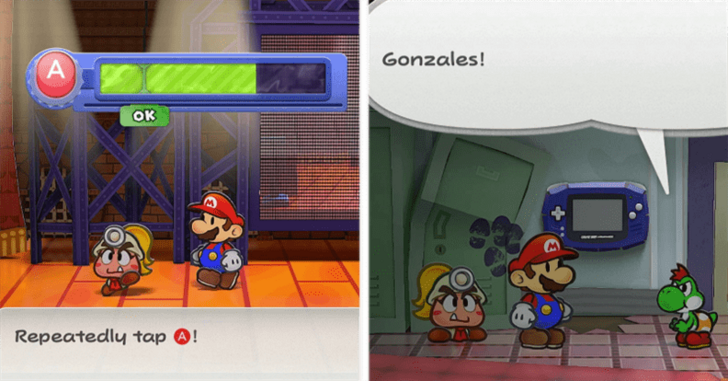 After you save, start the match and immediately run away. Your Egg will hatch into a Yoshi and will be a different color depending on how much time you spent since getting it. |
How to Choose Which Color Yoshi You Get
| Initial Color | Time to Wait | Result |
|---|---|---|
| Green | 6 Minutes | Red |
| Red | 3 Minutes | Blue |
| Blue | 2 Minutes | Orange |
| Orange | 4 Minutes | Pink |
| Pink | 3 Minutes | Black |
| Black | 1 Minute | White |
| White | 1 Minute | Green |
If you want a specific color of Yoshi, first you need to save the game and set the match up. When the turn starts, run away and the Yoshi will approach you. Take note of its color and reset your game.
After resetting your game and reloading your save, reschedule the battle and wait for the total amount of time until you get the color of Yoshi you want and run away again this Yoshi should be the correct color.
For example, your first Yoshi was Red and you want White, so you have to wait a total of 14 minutes to get the White one.
Hammer Time Walkthrough
| Objectives | |
|---|---|
| 1 | 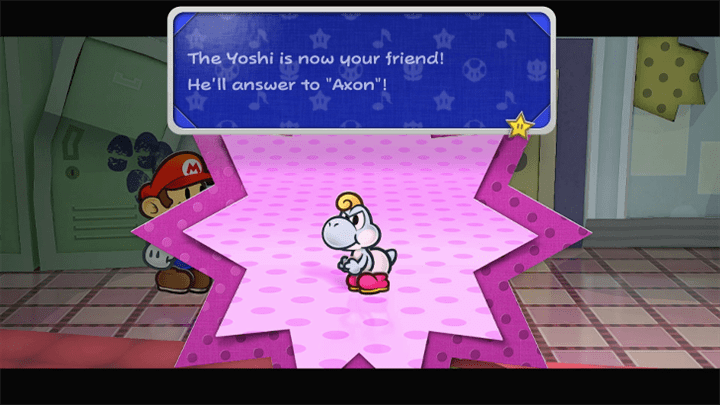 Once you get your desired Yoshi, you are now thrust with the responsibility to name your new child. For simplicity, we will still call it Yoshi. Click here for Yoshi's Skill Guide ► |
| 2 | 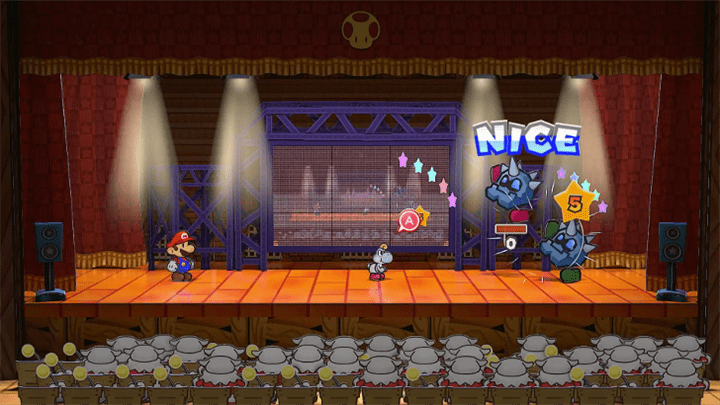 After you get your Yoshi, you are now able to defeat the Clefts with its Gulp attack! |
| 3 | 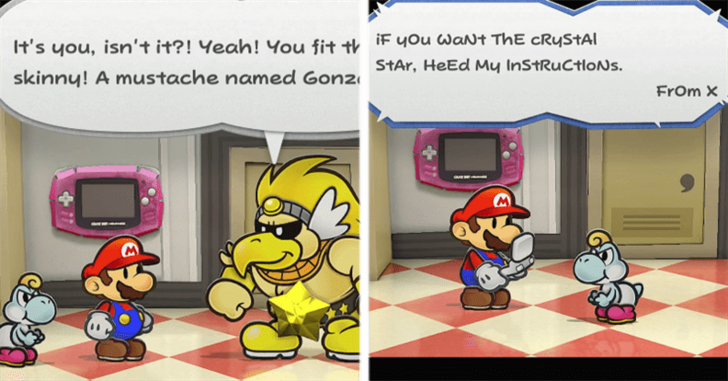 After winning your Rank 10 Match, Jolene and Grubba will take you up into the major-leagues. After another cutscene with Rawk Hawk, you will receive an e-mail from someone named X who will tell you where the real Crystal Star is. Major League Match Guides ► |
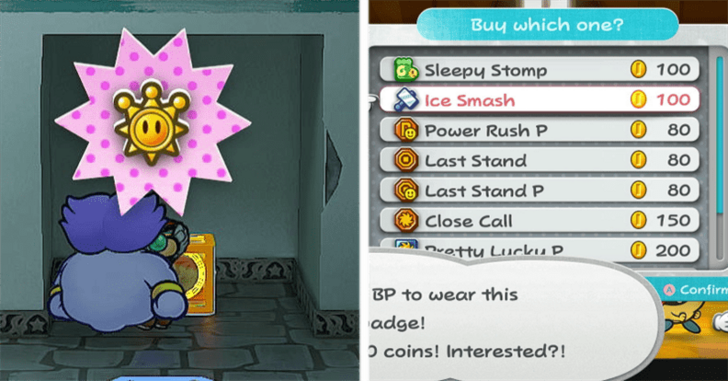
| 4 |  Grab the Ice Storm and Power Punch inside the lockers and you will be free to continue climbing the Ranks. |
| * |  Since you have a new partner, it would be wise to go back to Rogueport and grab a few new Star Pieces and upgrade your Yoshi. You can restock on certain items too if you're running low. |
| 5 | 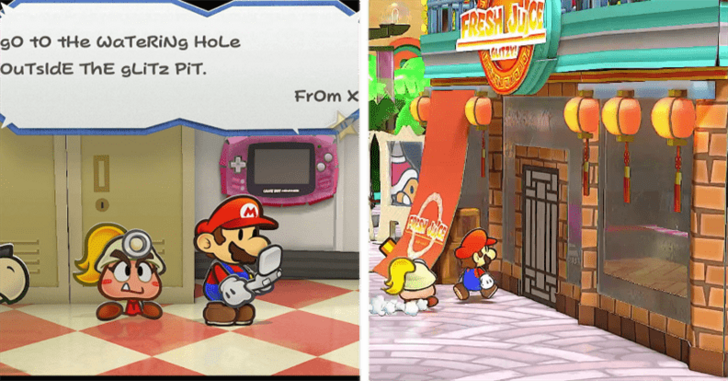 Once you complete your Rank 8 match, X will e-mail you again telling you to go to the watering hole. Follow his instructions, and head for the juice bar outside the Glitz Pit. |
| 6 | 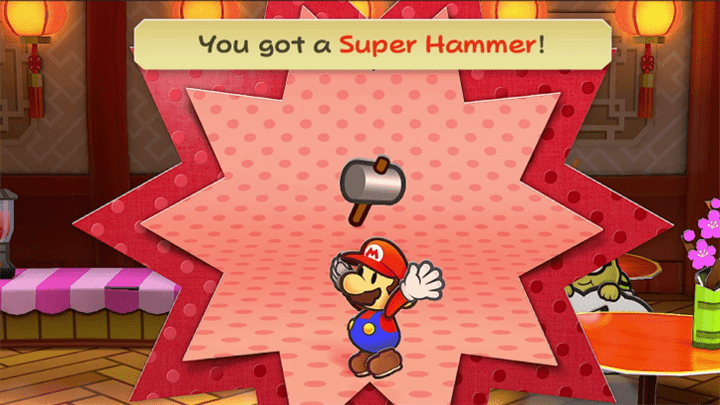 After getting out of the Glitz pit, head east and enter the building with the oriental looking lanterns. Talk to the master with the glasses and he will give you a package containing the Super Hammer! |
| 7 | 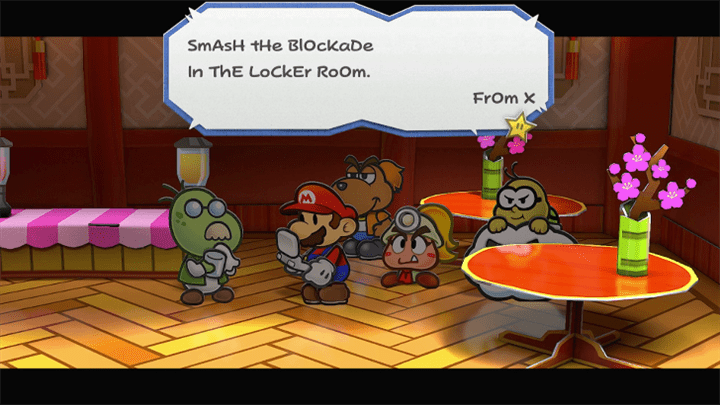 After getting the Super Hammer and the tutorial, you will-receive another email telling you to break the big yellow block in the minor-league room. Go back to the Glitz Pit and return to your old minor-league room. |
| 8 | 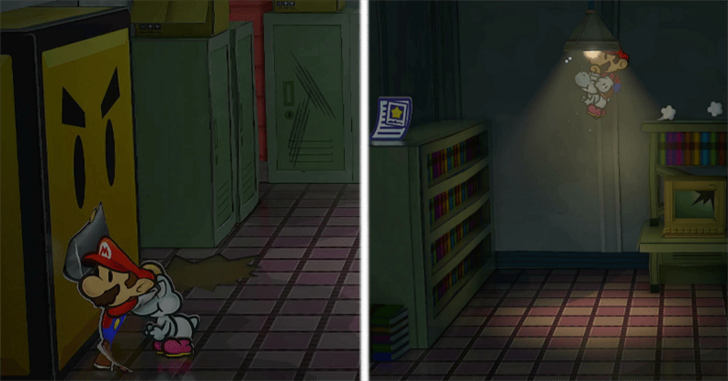 Head to the left side of the room and use your new Super Hammer to break the said block. Get inside the hole and then climb up on the desk's shelf and use Yoshi to flutter jump to the other bookshelf. |
| 9 | 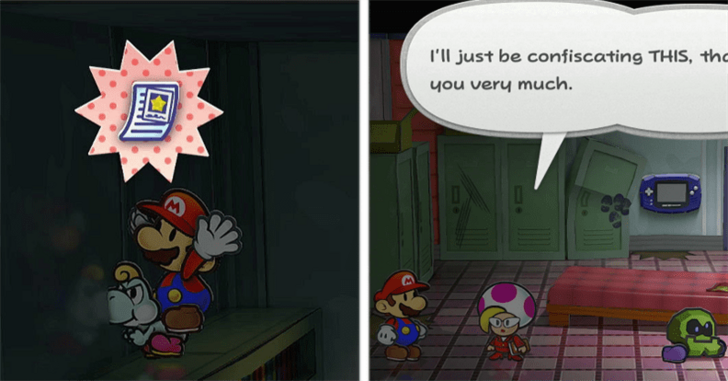 Grab the paper and return to the minor-league room. Jolene will confiscate the paper. Feel free to return to the major-league room and get ready for the next battle. |
| 10 | 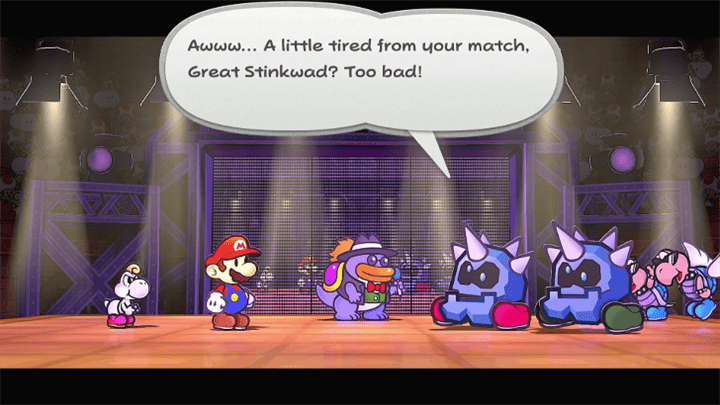 Directly after the battle, the iron Clefts will ask for a rematch. |
Tale as Old as Time Walkthrough
| Objectives | |
|---|---|
| 1 | 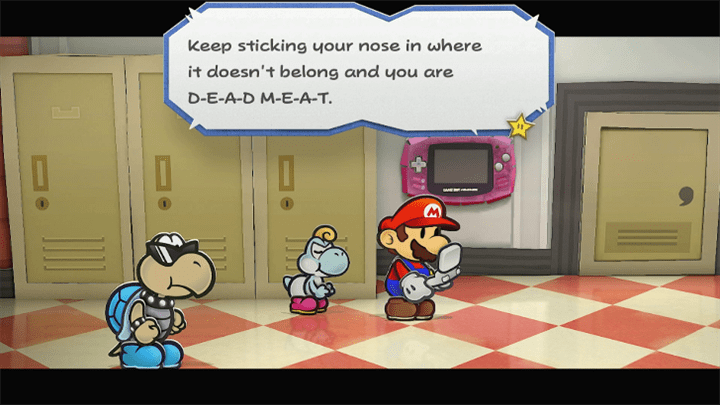 After beating them, you will then receive a threatening e-mail demanding you to stop snooping. Just go ahead and schedule your next Rank match after that. |
| 2 | 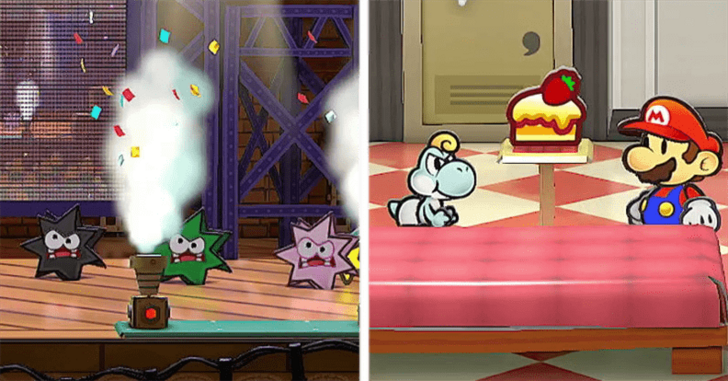 After the Fuzzy match, Jolene seems to be in a good mood and brought cake. Feel free to eat it to regain some HP, FP, and Star Power. Schedule your next Rank match afterwards. |
| 3 | 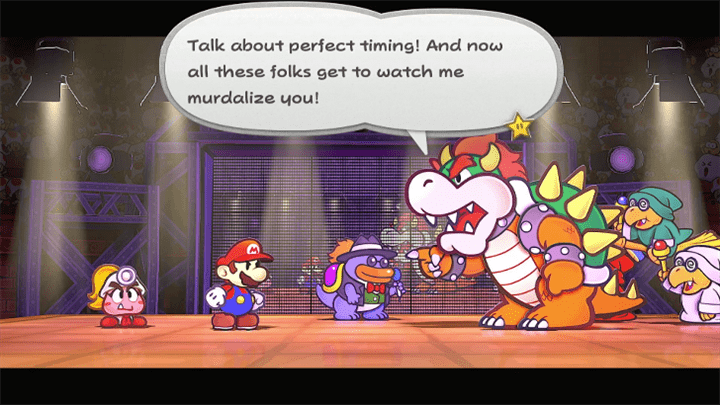 After winning the Rank 5 Match, Mario's past comes to bite him as he will be challenged by King Koopa himself, Bowser! Click here for Bowser Miniboss Guide ► |
| 4 | 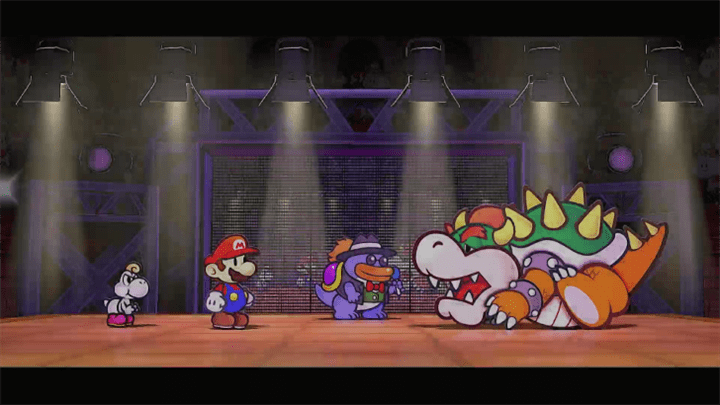 Once you beat Bowser, he'll walk away disappointed and now you can go ahead and schedule your next Rank Match. |
| 5 |  Beat the Rank 4 Match against the Dark Craw and X will e-mail you asking you to go to the Phone Booth outside. Proceed to follow what this stranger is telling you. |
| 6 | 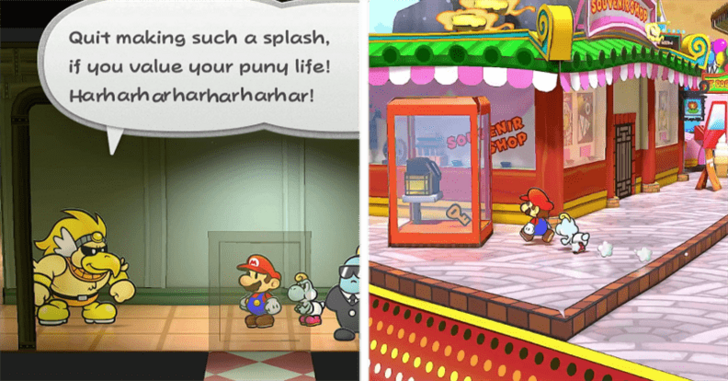 On the way, Rawk Hawk will taunt you saying that you should just give up on that championship title. Ignore what he says and keep heading to the Phone Booth outside the Pit. |
| 7 | 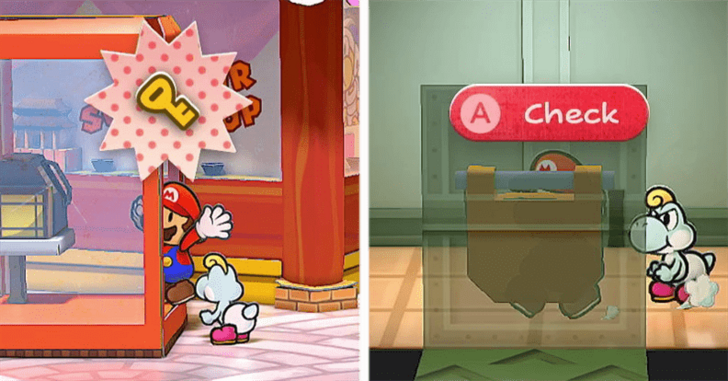 After arriving to the phone booth, pick up the key inside and get back inside the Glitz Pit's hallway and look for the door with a padlock on it right next to Grubba's office. |
Super Smash Brothers Walkthrough
| Objectives | |
|---|---|
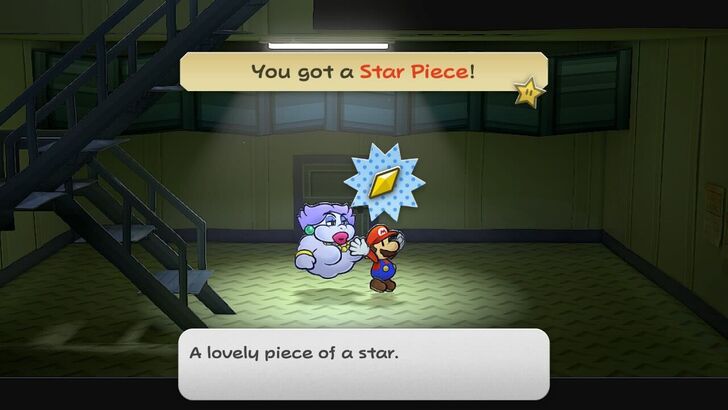
| 1 | 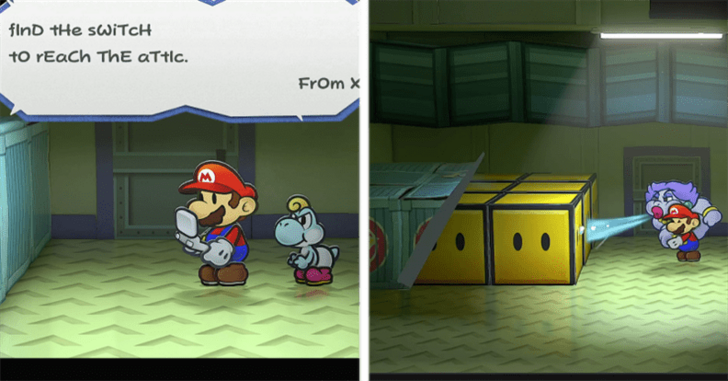 When you enter the locked room, to nobody's surprise its Ms. Mowz. She'll kiss Mario, and then leave (again). You will then be e-mailed by X again to find a switch for the stairs. |
| 2 | 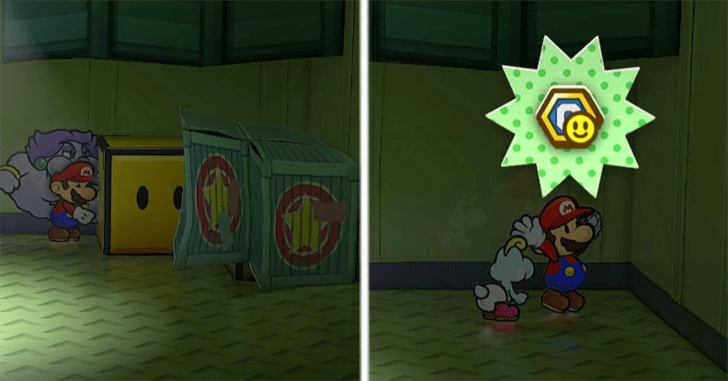 Bring out Flurrie and use her to blow the boxes to reveal that they can be hit with your hammer. Break them for a Charge P Badge and reveal the switch. |
| 3 | 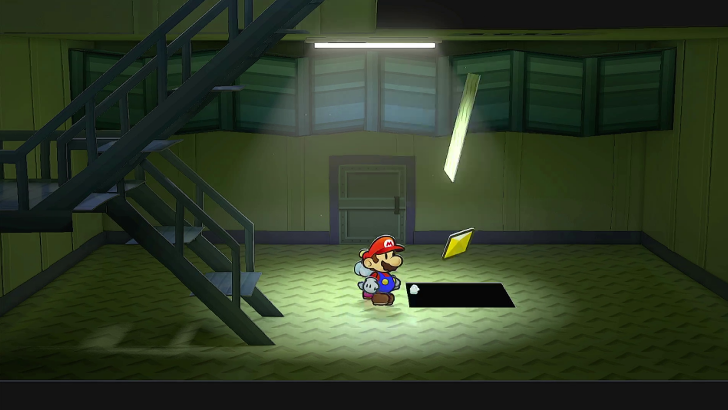 Use the switch to reveal the staircase. Before you ascend, use your Spin Jump to grab a Star Piece in the middle of the room. |
| 4 | 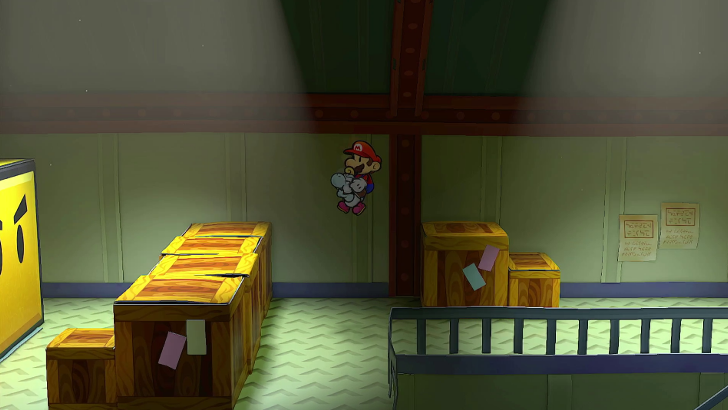 Climb up the stairs and head left since the door to right is locked. Use Yoshi to get on top of the boxes. |
| 5 | 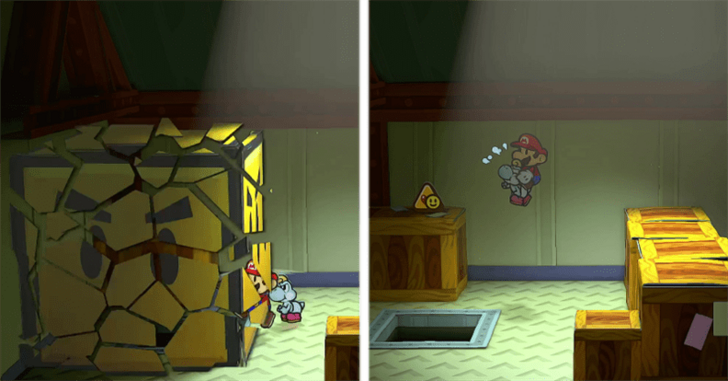 Break the huge block and you will reveal a badge. You can use either Koops or Yoshi grab the HP Plus P Badge. |
| 6 | 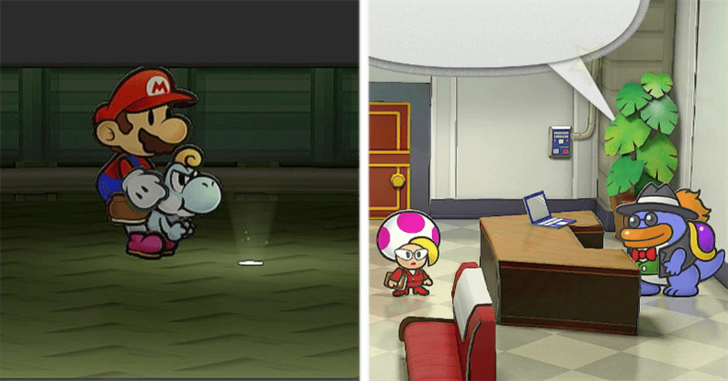 After grabbing the badge, head down the hole where the block used to be and head right until you see a tiny hole. Examine the hole to start a cutscene involving Grubba and Jolene. |
| 7 | 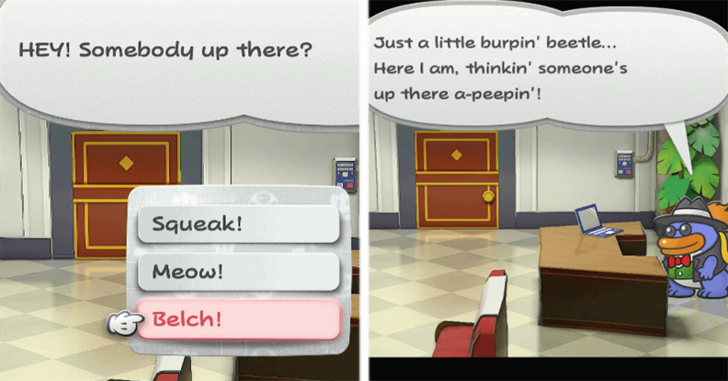 Once you learn about the disappearances, Grubba will hear the whispering between you and your partner. Pick any of the noises but the funniest choice would be is to Burp. |
| 8 | 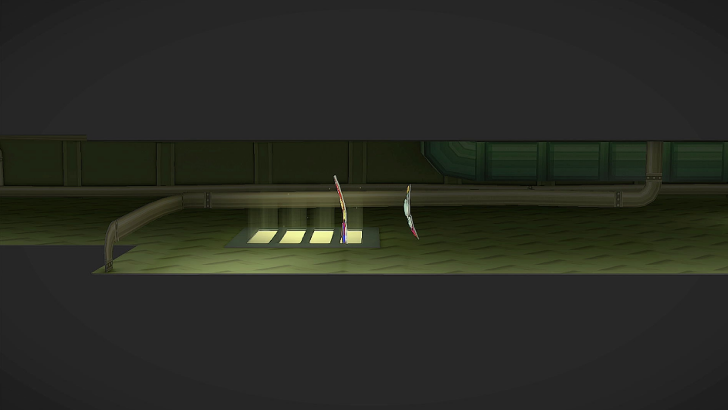 Once you're done snooping around, head left and slip through the vents with your paper mode and get ready for your next match. |
Don't Poison My Man Jolene Walkthrough
| Objectives | |
|---|---|
| 1 | 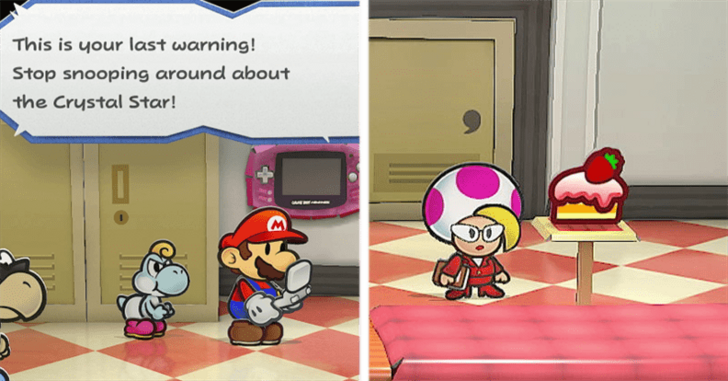 After winning your Rank 3 match, another threatening email will be sent to you. Go ahead and schedule your next match and Jolene will then come in with cake saying it's from a fan. |
| 2 | 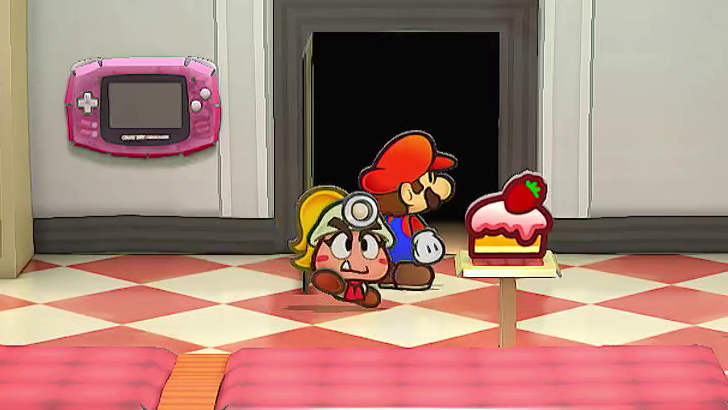 Do not eat that cake as it is tainted with poison and will make any of your partners unable to fight. So just go ahead and start your Rank 2 Match. |
| 3 | 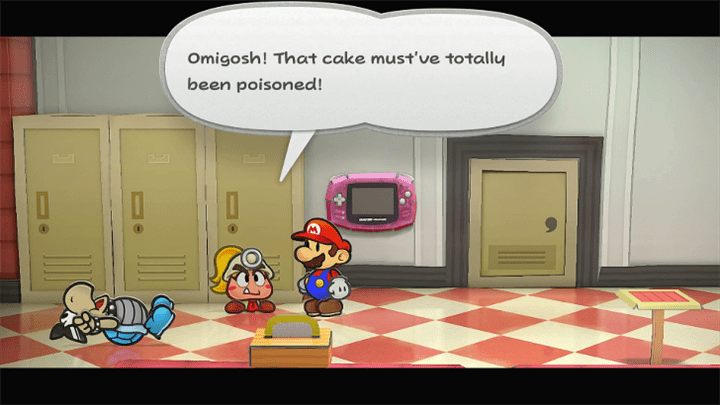 When you go back to the room, the Koopa has eaten poisoned cake. Prepare yourself for your next match and go ahead and schedule it. |
| 4 |  After you win your Rank 1 match, X will e-mail you instructing you to blow away the posters in the Pit's lobby. |
| 5 | 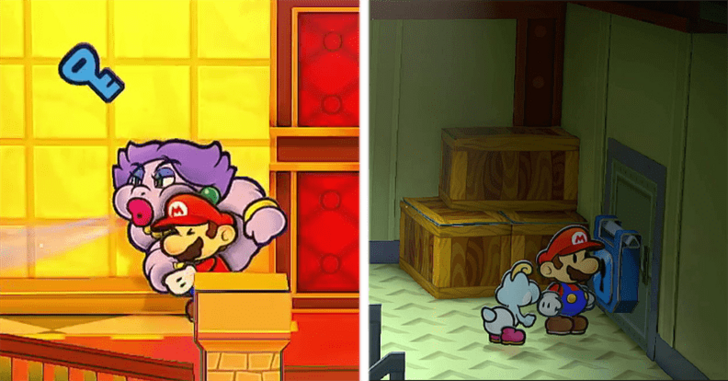 Head to the lobby and blow the poster to the left of the upstairs door. You will find a Storage Key under it. Obviously,, this goes to the locked door in the Storage Room so head there. |
| 6 | 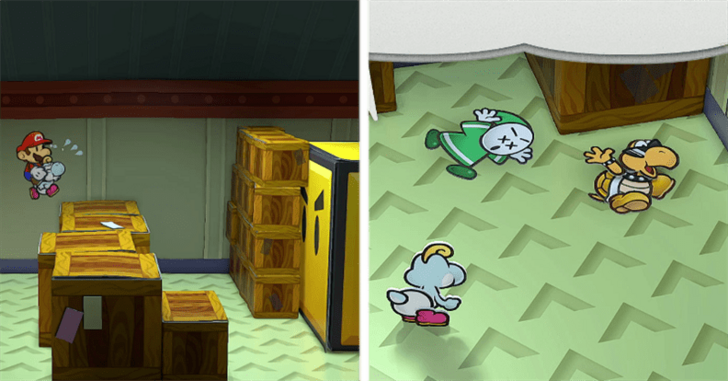 Once you get to the room, use Yoshi to flutter to a Yellow block. Break it with your Super Hammer to find the flattened bodies of King K. and Bandy Andy. |
| 7 |  The two will tell you what happened to them and afterwards you can just grab the Star Piece and leave. Head to the locker room and schedule your championship fight. |
| 8 | 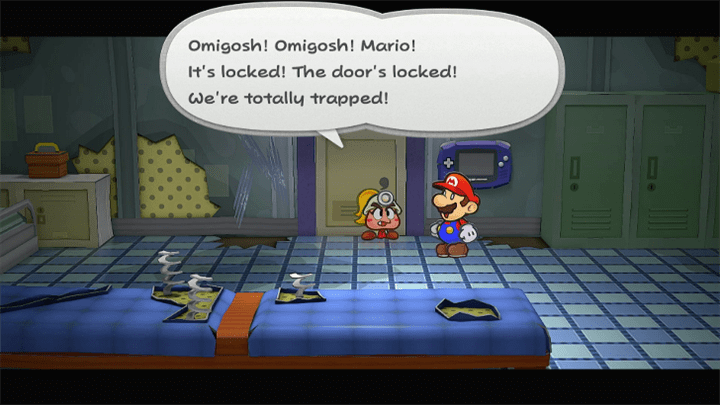 The security guard will then take you to the minor-league room and lock you there. meanwhile, a cutscene will play as Grubba hypes up the audience while they wonder where you are. |
Taking Out the Rawk Hawk Walkthrough
| Objectives | |
|---|---|
| 1 | 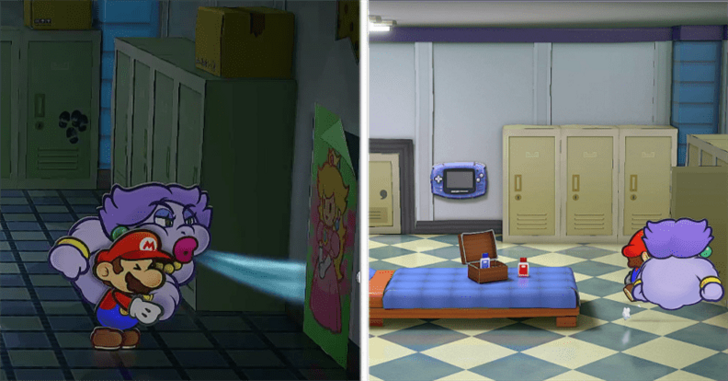 After your partner informs that you are locked in, so head to the back-right corner of the room to see a poster of Princess Peach. use Flurry to blow it away to reveal another room. |
| 2 | 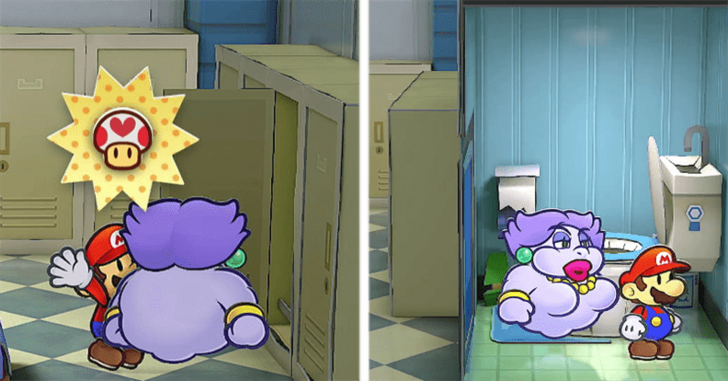 Pass through the room and open the door to see that you are now in a major-league room. Grab the Life Shroom and head into the washroom where you will see... a toilet. |
| 3 | 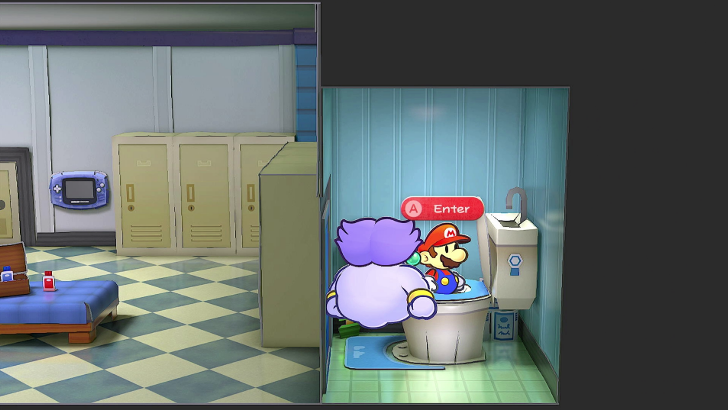 Use the toilet as a pipe so you can now head back to your own major-league room. use this chance to heal, save, and feel free to step out into the arena. |
| 4 | 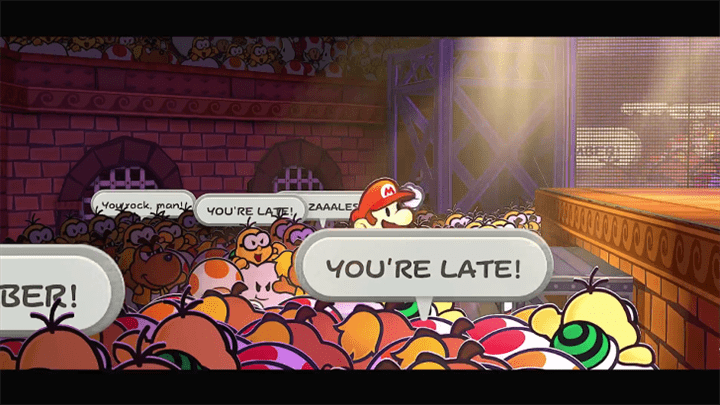 The crowd goes wild as you enter and here's your match to beat Rawk Hawk and earn the championship title! |
| 5 | 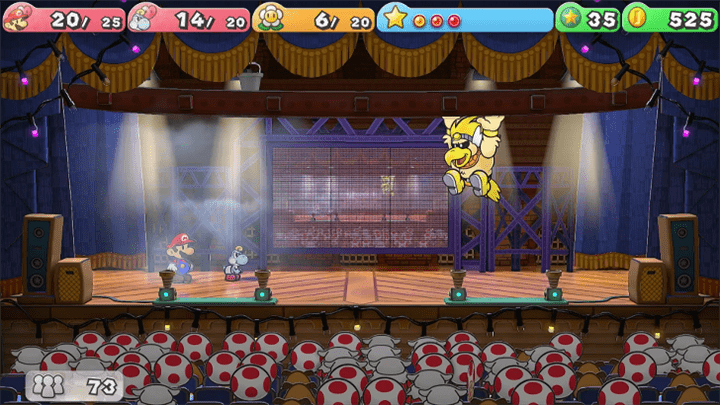 After getting to the stage, Rawk Hawk will reveal he's the one sabotaging you, so this is your chance for payback. Rawk Hawk likes to slide around and hang on the girder, so its recommended to have Yoshi as your partner. Rawk Hawk Boss Fight Guide ► |
| 6 |  After winning the fight, Grubba will then present you the Championship Belt. Jolene will then lead you into the champion's quarters. Your partner will then notice a strange noise. |
Grubba the Big Man Walkthrough
| Objectives | |
|---|---|
| 1 | 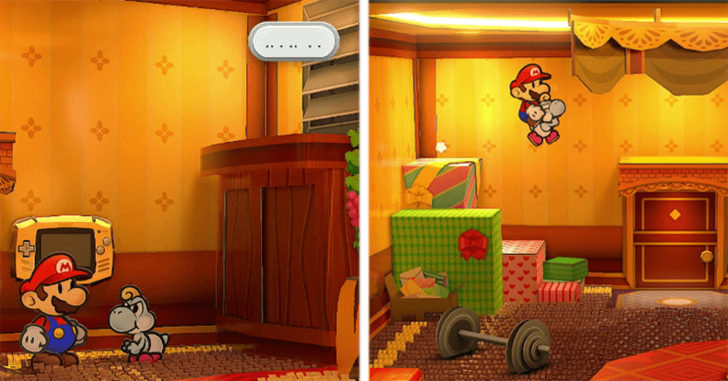 Climb up the presents on the upper-left hand corner of the room, and use Yoshi to get to the ledge above the door. |
| 2 |  Use Yoshi again so get onto the ledge next to the poster of Mario and use your Super Hammer to break it open. |
| 3 |  Walk inside the duct until you reach the right side of the duct and listen in on Grubba talking to himself. |
| 4 | 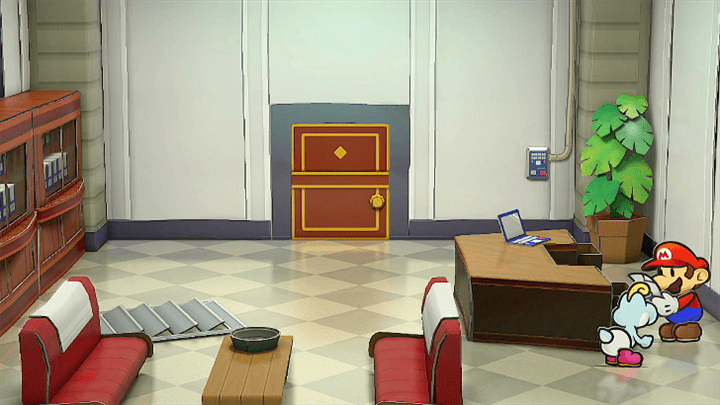 After being a snoop, bash the vent in front of you to get in Grubba's office. You are now free to explore this area. |
| * |  Go check behind the plant and the drawer nearest to the laptop to get Star Pieces. |
| 5 | 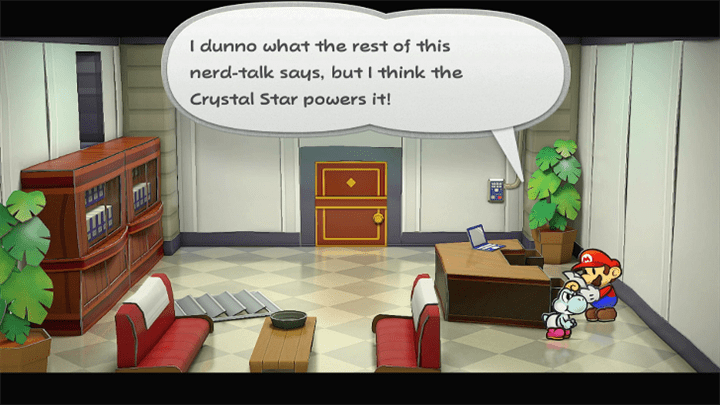 Once you are ready, open the drawer in the left-side of the desk to grab the papers Grubba was talking about. Here, you'll learn where the real Crystal Star is. |
| 6 | 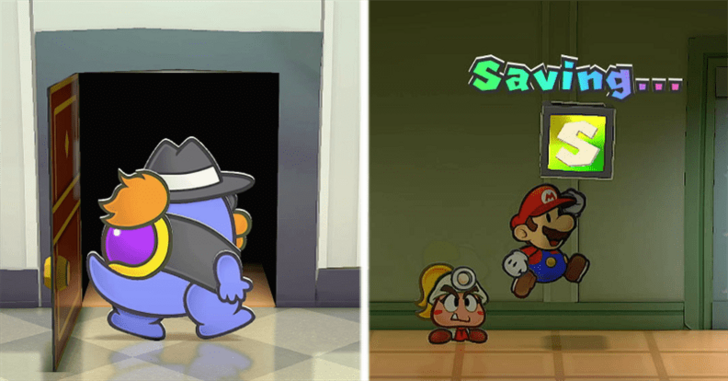 Grubba will then walk in on you snooping and once found out for his crimes, will run away. Make sure to heal, save, and restock as needed and head into the ring for the final fight. |
| 7 | 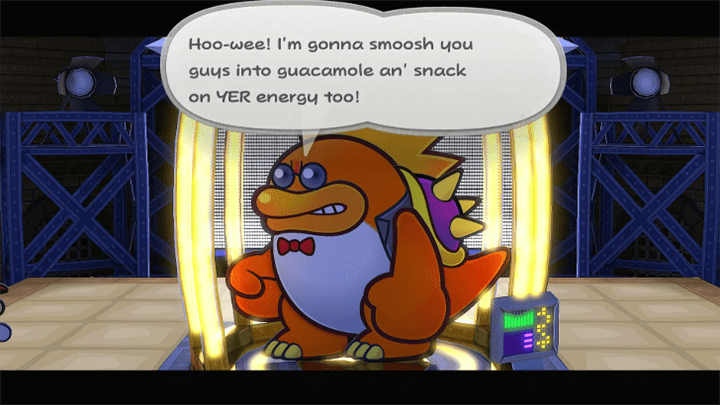 As you get to the ring, Grubba will spill the beans and then the boss fight will start after he uses the Crystal Star to make himself huge. Click here for Grubba Boss Fight Guide ► |
| 8 | 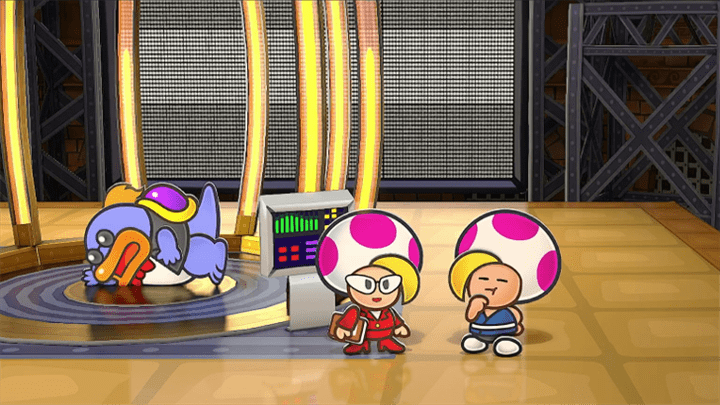 After beating Grubba, Jolene will step in and reveals she is X and how the first champion, Prince Mush disappeared. The Crystal Star will then start to undo all the things that has happened including returning the missing Prince Mush. |
| 9 | 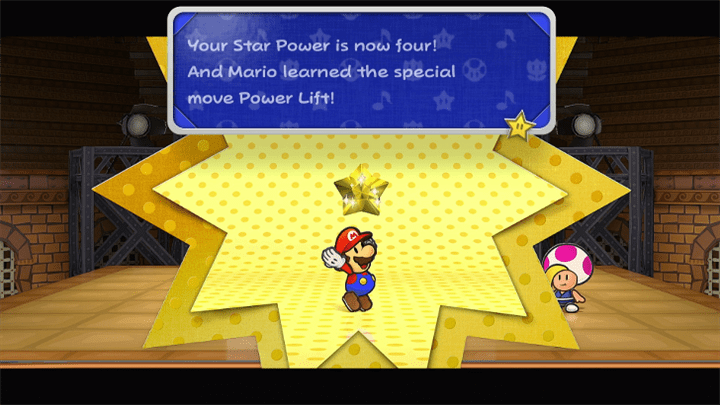 After Prince Mush's return, you will then be given the Crystal Star and you will now have 4 SP and a new Special! |
Peach Interlude Walkthrough

After another cutscene with Grodus, TEC-XX will ask Peach to impersonate an X-Naut to ask Grodus about some data. TEC will then help Peach sneak around in diguise, and while you don't get much on an answer, Peach will be able to send yet another e-mail to Mario.
Peach Interlude Complete Walkthrough
Bowser Interlude Walkthrough
Heading to the Great Boggly Tree, Kammy and the Elder Puni get to a bit of an argument and learn that Mario has already gotten the Crystal Star here. Bowser will then resolve to beat Mario, kidnap the Princess, and obtain all the Crystal Stars!
Bowser Interlude Complete Walkthrough
Darkness in Twilight Town Walkthrough
| Objectives | |
|---|---|
| 1 | 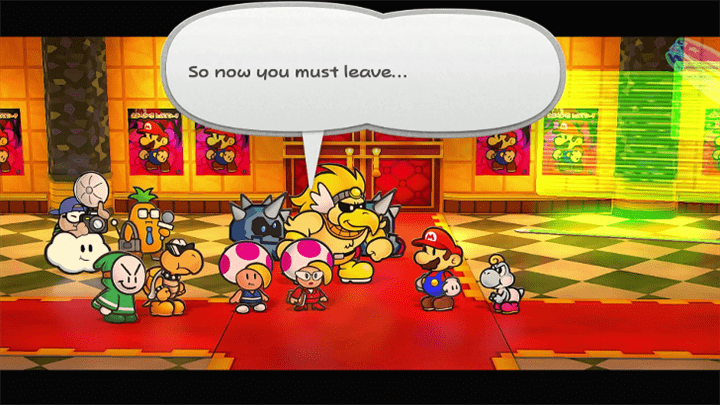 After saying farewell to your new friends, you can now get out of there and head back to Rogueport via blimp. |
| * |  Before heading to the Platform in front of the Thousand-Year Door, you can explore around and make use of your new Super Hammer and Yoshi's Flutter Jump to get some treasures you couldn't get beforehand. |
| 2 | 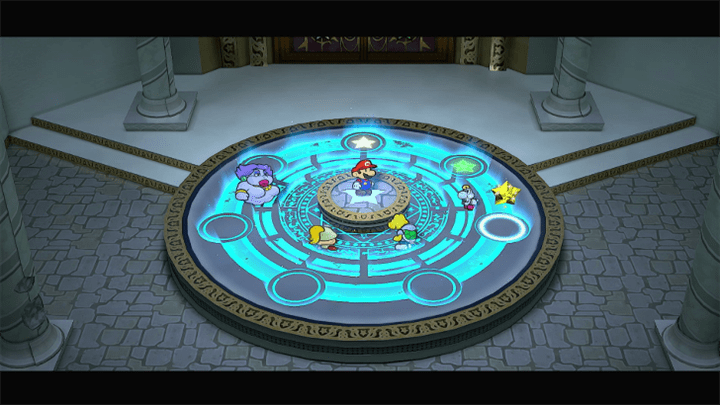 Head back from the sewers and head into the podium of the Thousand-Year Door. You learn that the next Crystal Star is in some woods West of Rogueport. You will then be teleported to Professor Frankly's to find out what to do next. |
| 3 | 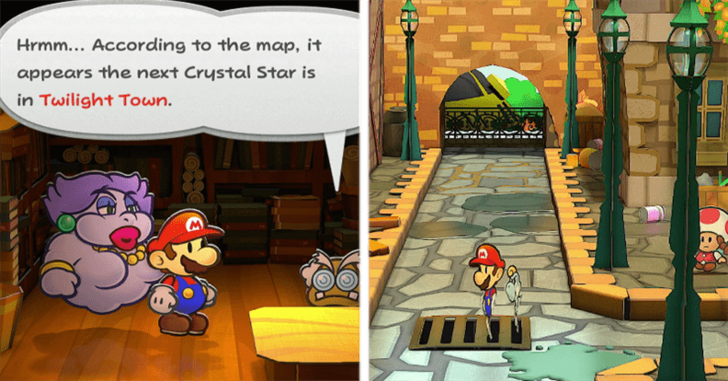 After some more exposition from the professor, he will tell you that the next Crystal Star is in Twilight Town. Head west of Rogueport and use your Paper form to slip through the grate. |
| 4 | 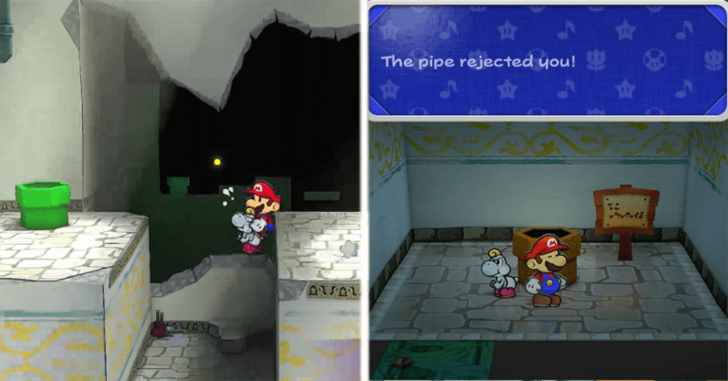 Use Yoshi's Flutter Jump to get to the opposite side. Enter the door and go down the pipe, enjoy the cutscene, and you are now rejected by the pipe! |
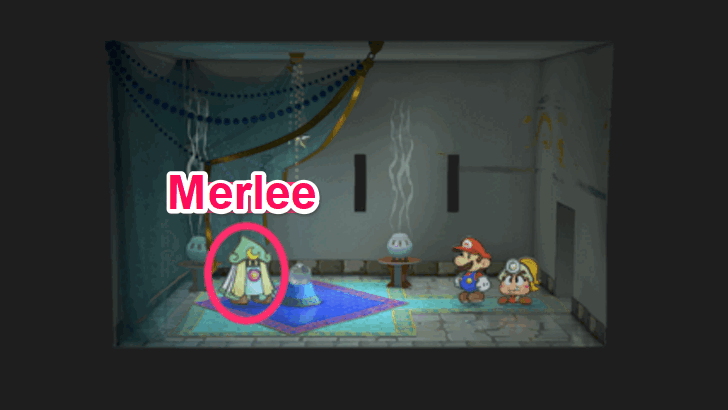
| 5 | 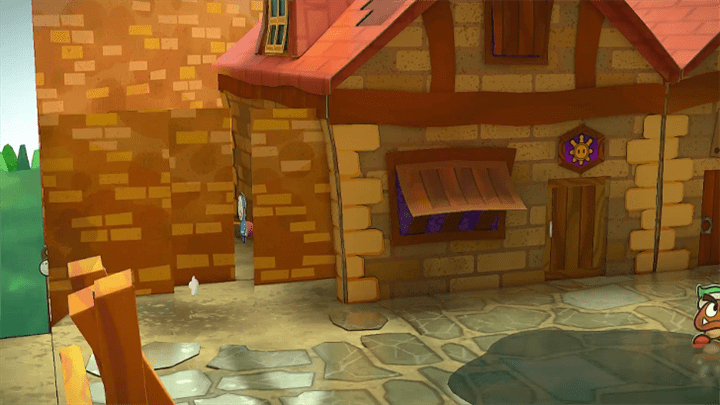 Once you get need to do everything you need, head back to Professor Frankly. He'll tell you to meet with somone named Darkly. Go to the wall beside Merlon's place and head into the alleyway to the left of it. |
| 6 | Talk to the creepy guy with Yellow eyes, that's Darkly. He'll tell you that you need an item with your name on it, so he will put Mario's name on his overalls. |
| 7 | 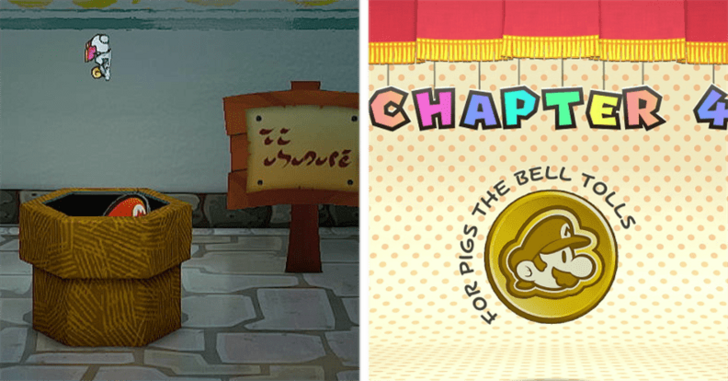 Head back to the pipe to Twilight Town, enjoy the cutscene, and you are now in Chapter 4. |
Glitz Pit Match Enemies and Bosses
| All Glitz Pit Battles | ||
|---|---|---|
| Minor League | Major League | Bosses |
Minor League Enemies
| Rank | Name |
|---|---|
| 19 | The Goomba Bros. |
| 18 | The KP Koopas |
| 17 | The Pokey Triplets |
| 16 | The Dead Bones |
| 15 | Spike Storm |
| 14 | The Hand-It-Overs |
| 13 | The Mind-Bogglers |
| 12 | The Punk Rocks |
| 11 | The Bob-omb Squad |
| Replacement | Wings of Night |
| Replacement | The Destructors |
These rankings may change slightly for each playthrough.
#19: The Goomba Bros.
| Enemy | HP | Atk | Def |
|---|---|---|---|
| 2 | 1 | 0 |
The Goomba Bros. are a team of five Goombas. One of them will attack before the match officially begins, triggering a First Strike on your opponent's side.
Use any AoE damaging skill like Koops' Power Shell, a POW Block, Multibounce, or Earth Quake.
#18: The KP Koopas
| Enemy | HP | Atk | Def |
|---|---|---|---|
| 4 | 2 | 1 | |
| 4 | 2 | 1 |
The KP Koopas are a team of two KP Koopas, one of which is Mario's minor league roommate King K, and one KP Paratroopa.
Quake Hammer is useful here as it can also damage the flying enemies. Gale Force and any other attack can work too.
#17: The Pokey Triplets
| Enemy | HP | Atk | Def |
|---|---|---|---|
| 4 | 3 | 0 |
The Pokey Triplets are a trio of Pokeys. However, more can be summoned if not defeated quickly.
Keep your distance and use Power Shell or your Hammer to take care of the Pokeys.
#16: The Dead Bones
| Enemy | HP | Atk | Def |
|---|---|---|---|
| 1 | 2 | 1 |
The Dead Bones are a team of three Dull Bones. Dull Bones have the ability to create more Dull Bones.
Use any AoE damaging skill like Koops' Power Shell, a POW Block, Multibounce, or Earth Quake.
#15: Spike Storm
| Enemy | HP | Atk | Def |
|---|---|---|---|
| 5 | 2 | 0 | |
| 3 | 3 | 3 |
Spike Storm is a team consisting of two Spinies and one Lakitu. Take note that the Lakitu can add more Spinies onto their side, so it's best to defeat this one first.
Keep your distance and use Piecing Blow as it is the best strategy for this. You can also flip them with Quake Hammer.
#14: The Hand-It-Overs
| Enemy | HP | Atk | Def |
|---|---|---|---|
| 5 | 2 | 0 | |
| 8 | 3 | 0 |
The Hand-It-Overs consist of two Bandits and two Big Bandits, including one of Mario's minor league roommates, Bandy Andy.
These guys will steal your items, just use and Earth Tremor if you have the Star Points. Two POW Blocks can also do the job.
#13: The Mind-Bogglers
| Enemy | HP | Atk | Def |
|---|---|---|---|
| 4 | 2 | 0 | |
| 5 | 2 | 0 | |
| 3 | 2 | 0 |
The Mind-Bogglers are a team of Boggly Woods enemies, consisting of a Pale Piranha, a Dark Puff, and a Pider.
Earth Tremor, two Fire Flowers, or two Ice Storms can take these out in one hit.
#12: The Punk Rocks
| Enemy | HP | Atk | Def |
|---|---|---|---|
| 3 | 2 | 2 |
The Punk Rocks consist of three Hyper Bald Clefts, including Mario's minor league roommate, Cleftor.
Keep your distance and use Piecing Blow or Power Smash as these is the best strategy for this. You can also just use an Earth Tremor or an Earth Quake.
#11: The Bob-omb Squad
| Enemy | HP | Atk | Def |
|---|---|---|---|
| 4 | 2 | 1 |
The Bob-omb Squad consists of four Bob-ombs, including Mario's minor league roommate, Master Crash.
A Fire Flower can immediately end the fight. Keep your distance once the fuses are lit.
Replacement Team: Wings of Night
| Enemy | HP | Atk | Def |
|---|---|---|---|
| 6 | 3 | 0 |
The Wings of Night is a team of fours Swoopers added into the roster after Mr. Swoop is introduced. This team serves as the replacement for the KP Koopas after King K disappears. However, they start at rank 20.
Mario will not fight against this team unless he loses against the entirety of the minor league. After Chapter 3, the Wings of Night will no longer be a part of the Glitz Pit roster.
Replacement Team: The Destructors
| Enemy | HP | Atk | Def |
|---|---|---|---|
| 3 | 1 | 0 | |
| 3 | 1 | 0 |
The Destructors are a team of two Spinia and two Spania. They are added into the minor league after the disappearance of Bandy Andy, replacing the Hand-It-Overs.
This team is easy to miss, since Mario can only battle this team if he loses against everyone in the major league and drops back down into the minor league. After Chapter 3, The Destructors will no longer be a part of the Glitz Pit roster.
Major League Enemies
| All Glitz Pit Battles | ||
|---|---|---|
| Minor League | Major League | Bosses |
| Rank | Name |
|---|---|
| 10 | The Armored Harriers |
| 9 | The Tiny Spinies |
| 8 | The Poker Faces |
| 6 | The Shellshockers |
| 7 | The Fuzz |
| 5 | The Magikoopa Masters |
| 4 | Craw-Daddy |
| 3 | Hamma, Bamma, and Flare |
| 2 | Chomp Country |
| 1 | The Koopinator |
These rankings may change slightly for each playthrough.
#10: The Armored Harriers
| Enemy | HP | Atk | Def |
|---|---|---|---|
| 6 | 4 | N/A | |
| 6 | 4 | N/A |
The Armored Harriers are the gatekeepers of the major league, consisting of two Iron Clefts with an undeterminable Defense stat. Mario has no way of winning his first encounter with these enemies and must either run away or lose the initial fight.
Once Yoshi hatches from the egg, he can use his Gulp attack to defeat the Armored Harriers.
#9: The Tiny Spinies
| Enemy | HP | Atk | Def |
|---|---|---|---|
| 5 | 3 | 4 |
The Tiny Spinies are two Red Spike Tops that include Mario's major league roommate, Spiky Joe.
An Earth Tremor, two Fire Flowers, or two Ice Storms can take these out in one hit.
#8: The Poker Faces
| Enemy | HP | Atk | Def |
|---|---|---|---|
| 2 | 1 | 4 |
The Poker Faces are a team consisting of two Bristles. They can be easily defeated using a POW Block or the Quake Hammer attack.
Use a POW Block, an Earth Quake, or an Earth Tremor. Flurrie's Gale Force is the only other thing you can do.
#7: The Shellshockers
| Enemy | HP | Atk | Def |
|---|---|---|---|
| 8 | 3 | 1 | |
| 8 | 3 | 1 |
The Shellshockers, led by Mario's major league roommate, Shellshock, consists of two Shady Koopas and one Shady Paratroopa. After this rank 7 battle, the Armored Harriers will rematch Mario.
An Earth Tremor, two Fire Flowers, or two Ice Storms can take these out in one hit.
#6: The Fuzz
| Enemy | HP | Atk | Def |
|---|---|---|---|
| 3 | 1 | 0 | |
| 5 | 3 | 0 | |
| 6 | 3 | 0 |
The Fuzz is a team consisting of one Fuzzy, one Green Fuzzy, and one Flower Fuzzy. Take note that the Green Fuzzy can multiply, so it's best to take this one out quickly.
#5: Craw-Daddy
| Enemy | HP | Atk | Def |
|---|---|---|---|
| 20 | 6 | 0 |
Craw-Daddy is a one-man fighter, but his high HP and Attack stats make him a formidable foe. After the rank 5 battle, Bowser will suddenly make an appearance and challenge Mario.
Focus on using Power Smash and Yoshi's Gulp. Mini-Egg is also a good option.
#4: The Magikoopa Masters
| Enemy | HP | Atk | Def |
|---|---|---|---|
| 7 | 4 | 0 | |
| 7 | 4 | 0 | |
| 7 | 4 | 0 |
The Magikoopa Masters consist of one Red Magikoopa, one White Magikoopa, and one Green Magikoopa. All three will use disruptive moves, with the red one primarily buffing her teammates, the white one healing, and the green one giving her team status conditions such as invisibility.
These cannot be taken out in one hit. The fastest way is to use an Earth Tremor followed by a Fire Flower or Ice Storm.
#3: Hamma, Bamma, and Flare
| Enemy | HP | Atk | Def |
|---|---|---|---|
| 7 | 4 | 1 | |
| 7 | 2 | 1 | |
| 7 | 3 | 1 |
Hamma, Bamma, and Flare are a three-Koopa Bro team, which includes Mario's major league roommate, Hamma Jamma. All three have different fighting styles aligned with their respective weapons.
These cannot be taken out in one hit. The fastest way is to use an Earth Tremor followed by a Fire Flower or Ice Storm.
#2: Chomp Country
| Enemy | HP | Atk | Def |
|---|---|---|---|
| 6 | 5 | 3 |
Chomp Country is a team consisting of two Red Chomps. If you let Mario eat the cake Jolene places in the locker room before this fight, it will poison Mario's partner, leaving him to fight by himself.
Yoshi's Gulp, Piercing Blow, and Power Smash are the only attacks than can hurt these. You can also use an Earth Tremor if you have the Star Points.
#1: The Koopinator
| Enemy | HP | Atk | Def |
|---|---|---|---|
| 25 | 5 | 2 |
The Koopinator is a Dark Koopatrol and one of Mario's major league roommates.
Mini-Egg at the first turn. You can then proceed to beat it up with Gulp and Power Smash or an Earth Tremor when you are able to.
Tattle Log: List of All Enemies
Champion and Other Glitz Pit Bosses
| All Glitz Pit Battles | ||
|---|---|---|
| Minor League | Major League | Bosses |
| List of Bosses in The Glitz Pit | ||||
|---|---|---|---|---|
| Enemy | How to Beat | HP | Atk | Def |
| Use powerful jump and hammer attacks. | 30 | 3 | 1 | |
| Use Yoshi's Gulp attack. | 6 | 4 | N/A | |
| Use Yoshi's Gulp attack. | 6 | 4 | N/A | |
| Use powerful jump and hammer attacks and use Body Slam when at the ceiling. | 40 | 4 | 0 | |
| Use Mini-Egg attack and follow up with powerful jump and hammer moves. | 60 | 4 | 0 | |
| Use powerful jump and hammer attacks. | 96 | 6 | 6 | |
In addition to battling them in order to get into the major league, Mario will face the Armored Harriers as surprise mini bosses after Mario finishes the rank 7 battle in the major league.
After finishing the rank 4 battle, Bowser will come in and challenge Mario. For this battle, he will have 30 HP, 3 Attack, and 1 Defense.
Mario will face Rawk Hawk in the expected championship battle. However, the final boss of Chapter 3 is Macho Grubba.
Chapter 3 Collectibles and Items
Star Pieces
| Done? | Location | In-Game Image |
|---|---|---|
|
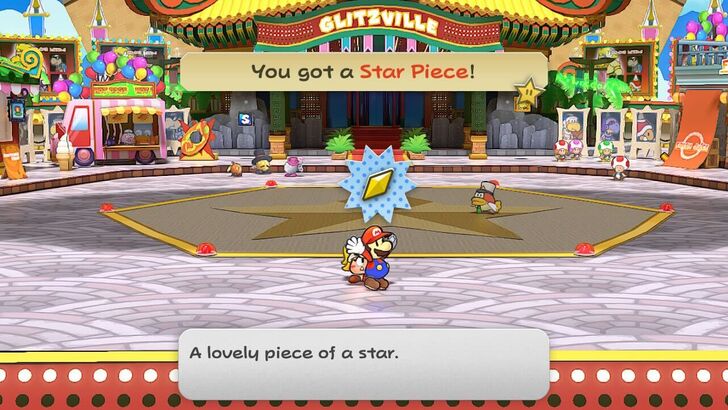
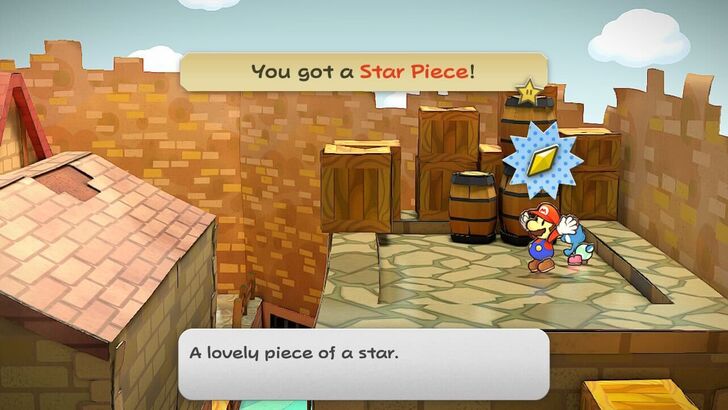
Glitzville
In the leftmost corner in the juice bar in the east. |
 |
|
|
Glitzville
Behind the phone booth in the southwest side. |
 |
|
|
Glitzville
Behind the plants on the east side by the stairs to Glitz Pit. |
 |
|
|
Glitzville
Under the Rawk Hawk sign on the roof of the juice bar. Use Koops to get it. |
 |
|
|
Glitzville
Beneath a panel in the south side part of Glitzville. |
 |
|
|
Glitz Pit
Beneath a panel in the wall corner between the stairs and ring door in the 1F lobby. |
 |
|
|
Glitz Pit
Beneath a panel in the middle of 1F storage room. |
 |
|
|
Glitz Pit
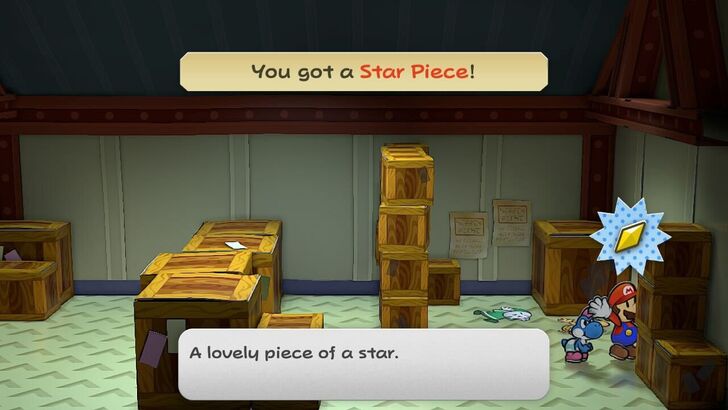
Behind some boxes in the far right corner of 2F storage room. |
 |
|
|
Glitz Pit
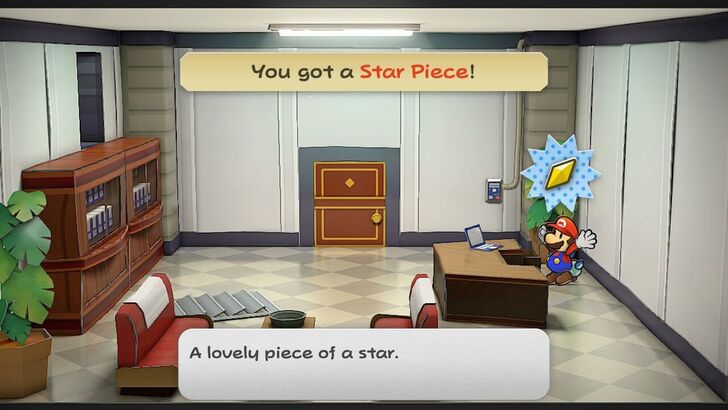
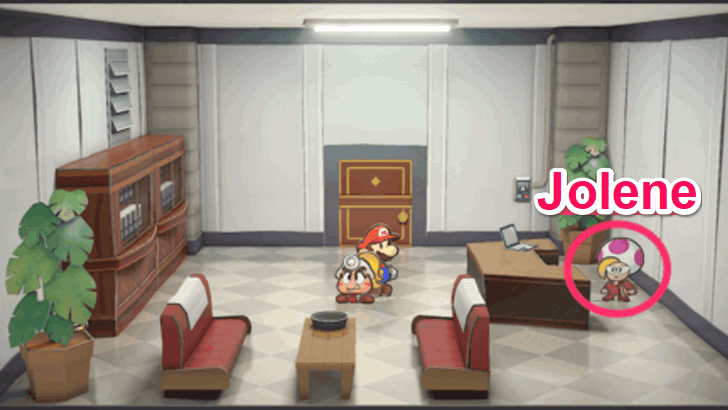
Behind the plant in the left side corner of Grubba and Jolene's Office. |
 |
|
|
Glitz Pit
In the desk drawer by the computer of Grubba and Jolene's office. |
 |
|
|
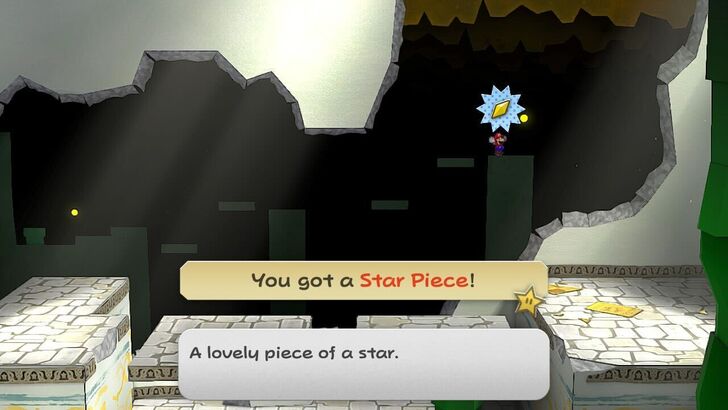
Rogueport Sewers
On the last platform in the background of the west entrance of B1F, accessible through a pipe at the west of the room. |
 |
|
|
Rogueport
Beneath a panel in the roof of the leftmost house of the east area. |
 |
|
|
Rogueport
Behind Admiral Bobbery's chimney. |
 |
Shine Sprites
| Done? | Location | In-Game Image |
|---|---|---|
|
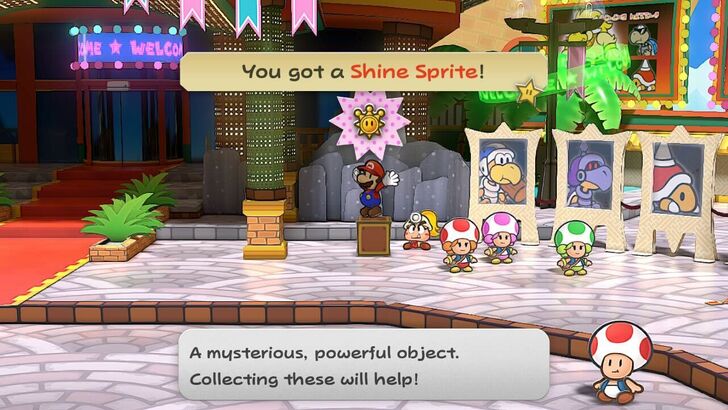
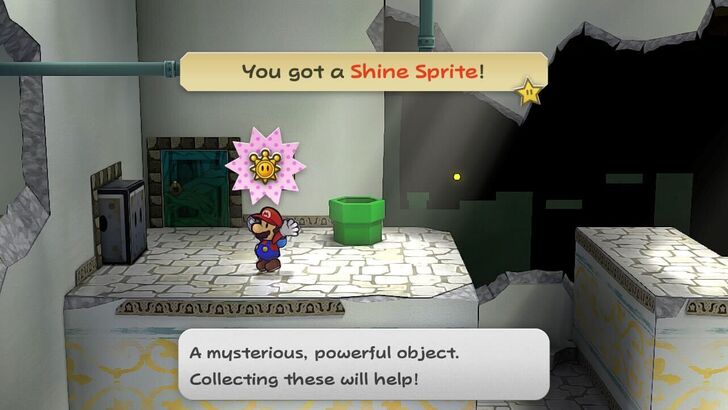
Glitzville
Easily visible right outside the Glitz Pit. Hit the hidden block first in order to get this Shine Sprite. |
 |
|
|
Rogueport Sewers
Found on the furthest left platform in the west entrance room of B1F. |
 |
|
|
Rogueport
At the back of the rightmost house. Use Paper Mode to pass through the gap. |
 |
|
|
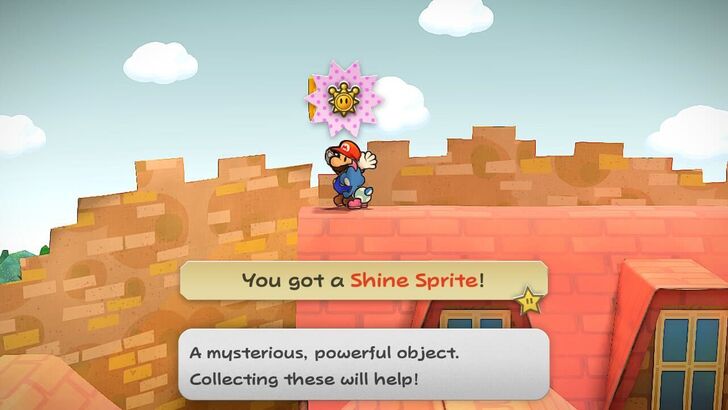
Rogueport
On the left of the house with a red roof on the east side of town. |
 |
|
|
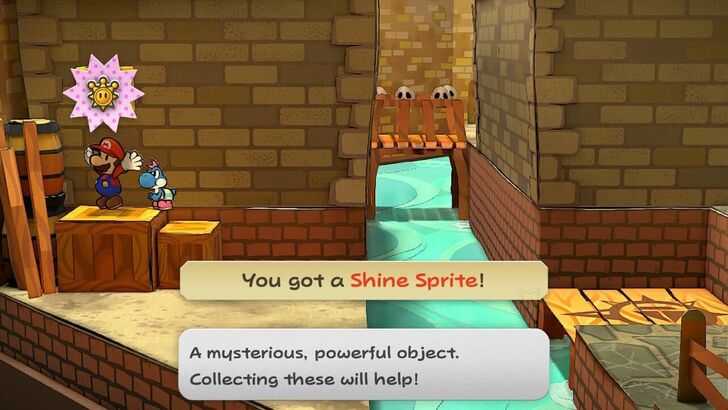
Rogueport Sewers
Found behind the breakable yellow block in the Warp Pipe room. |
 |
|
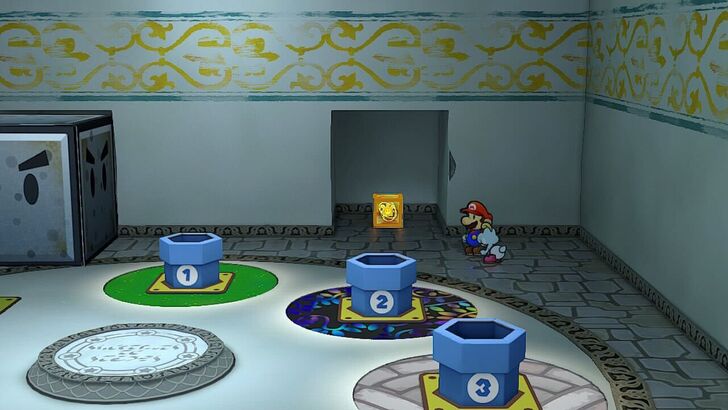
|
Glitz Pit
Found on the second floor of the storage room in the Glitzville Arena. |
 |
Blocks
Hidden Blocks
| Done? | Location and Item | In-Game Image |
|---|---|---|
|
Glitzville
Found directly under the Shine Sprite near the Glitz Pit's entrance. Reveal the hidden block by hitting it with Mario's hammer. Item: 1 Coin |
 |
Locations Available in Chapter 3
Boggly Woods and The Great Tree
| New Locations Available in Chapter 3 | |
|---|---|
 Glitz Pit Glitz Pit |
 Glitzville Glitzville |
Upon starting Chapter 3, you will gain access to Glitzville and the Glitz Pit. There is a shortcut to Glitzville you can unlock after beating Chapter 3 and unlocking the Pipe in the Pipe Zone!
Chapter 3 Trouble Center Quests
The following Troubles will be unlocked after completing Chapter 3.
| Done? | Client | Details and Rewards |
|---|---|---|
 |
Request: Heartful Cake Recipe... Reward: 30 Coins Unlock: After Chapter 3 Get the Heartful Cake recipe by talking to Toce T. in Petalburg. Talk to Marlee and she will ask you to get Cake Mix. You can buy Cake Mix from the Pianta Parlor for 6 piantas. |
|
 |
Request: Help Wanted! Reward: 30 Coins Unlock: After Chapter 3 Jolene has moved into Mr. Grubb's office and needs the storage room beside it to be clear of stinky garbage. Pick up 20 pairs of Battle Trunks from the storeroom. |
|
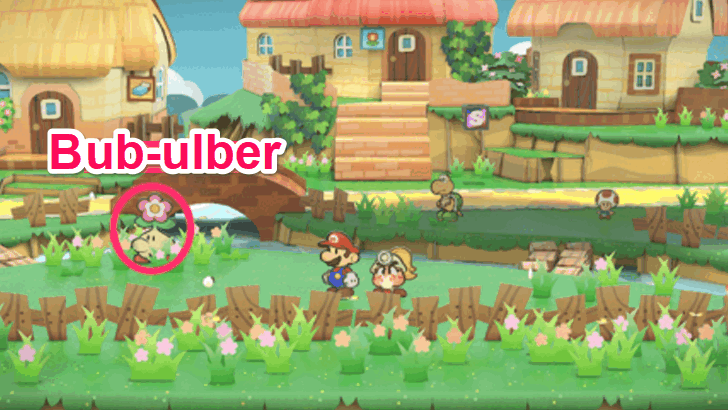 |
Request: The Food I Want Reward: Dried Bouquet Unlock: After Chapter 3 Go to Petalburg and give Bub-ulber each food item that they request. Bub-ulber will ask for 2 Hot Dogs and a Mousse Cake. |
Paper Mario: The Thousand-Year Door Related Guides

Chapter Walkthroughs
Other Walkthroughs
| Other Walkthroughs | ||
|---|---|---|
| Peach Intermissions |
Bowser Intermissions |
 Trouble Center Trouble Center |
Comment
1  Anonymous almost 2 years
Bristles/Poker Faces are immune to Yoshi's Gulp. Their bristles will get him. The only way you can actually use the Gulp to my knowledge is with a Spike Guard badge which is a badge blocked by the place in the sewers with the spikes up and down.. you need Vivian to get this.. No idea why this was posted as something you can do.
Author
Paper Mario: The Thousand-Year Door (TTYD) Walkthrough & Guides Wiki
Chapter 3: Of Glitz and Glory Walkthrough
Please participate in our site
improvement survey
03/2026
improvement survey
03/2026
Would you assist in
improving Game8's site?
improving Game8's site?

×
We are listening to our users' valuable opinions and discussing how to act on them.
The information collected through this survey will be used for the purpose of improving our services. In addition, the information will only be disclosed a part of a statistic in a format that will not allow identification of personal information.
Begin Survey
Not Now
×
Please rate each item regarding Game8.co's Advertisements.
Amount of Ads
Very Dissatisfied
Somewhat Dissatisfied
Fine
Somewhat Satisfied
Highly Satisfied
Placement of Ads
Timing of Ad Display
Ad Loading Speed
Safeness of Ads
Content of Ads
×
Please rate each item regarding Game8.co's Quality of Articles.
Amount of information
Very Dissatisfied
Somewhat Dissatisfied
Fine
Somewhat Satisfied
Highly Satisfied
Frequency of updates
Speed of new information
Accuracy of articles
Understandibility of articles
Readability of sentences
×
Please rate each item regarding Game8.co's Usability of the Site.
Ease of finding information
Very Dissatisfied
Somewhat Dissatisfied
Fine
Somewhat Satisfied
Highly Satisfied
Loading Speed
Use of Color
Font Size
Visibility of Images
Easy to Understand Layout
×
Please rate each item regarding Game8.co's Message Boards, Comments.
Ease of Writing
Very Dissatisfied
Somewhat Dissatisfied
Fine
Somewhat Satisfied
Highly Satisfied
Readability
Ease in Finding Information
Comment Quality
Comment Quantity
Admin Response
×
Please rate each item regarding Game8.co's Site's new design.
Please rate our site's new design
Very Dissatisfied
Somewhat Dissatisfied
Fine
Somewhat Satisfied
Highly Satisfied
Do you think that the website's design change makes the site easier to use?
Has the new design made it easier for you to find information on the site?
Has the new design improved the overall visual appeal of the site?
How would you rate your overall satisfaction with the new design of the site?
×
How likely are you to recommend Game8 to someone you know?
Very Unlikely
0
1
2
3
4
5
6
7
8
9
10
Very Likely
If you have other opinions regarding potential improvement to the website, please share them with us. We would appreciate your honest opinion.
Note: This is a free response section, so you can proceed without entering anything.
Note: Please be sure not to enter any kind of personal information into your response.
Note: Please be sure not to enter any kind of personal information into your response.
×
Thank You
×
Thank you for participating in our survey! Your answers will help us to improve the quality of our website and services.
We hope you continue to make use of Game8.
We hope you continue to make use of Game8.
Close
Rankings
- We could not find the message board you were looking for.
Gaming News


![Monster Hunter Stories 3 Review [First Impressions] | Simply Rejuvenating](https://img.game8.co/4438641/2a31b7702bd70e78ec8efd24661dacda.jpeg/thumb)


Popular Games

Genshin Impact Walkthrough & Guides Wiki
Honkai: Star Rail Walkthrough & Guides Wiki
Umamusume: Pretty Derby Walkthrough & Guides Wiki
Pokemon Pokopia Walkthrough & Guides Wiki
Resident Evil Requiem (RE9) Walkthrough & Guides Wiki
Monster Hunter Wilds Walkthrough & Guides Wiki
Wuthering Waves Walkthrough & Guides Wiki
Arknights: Endfield Walkthrough & Guides Wiki
Pokemon FireRed and LeafGreen (FRLG) Walkthrough & Guides Wiki
Pokemon TCG Pocket (PTCGP) Strategies & Guides Wiki


Recommended Games
Diablo 4: Vessel of Hatred Walkthrough & Guides Wiki
Fire Emblem Heroes (FEH) Walkthrough & Guides Wiki
Yu-Gi-Oh! Master Duel Walkthrough & Guides Wiki
Super Smash Bros. Ultimate Walkthrough & Guides Wiki
Pokemon Brilliant Diamond and Shining Pearl (BDSP) Walkthrough & Guides Wiki
Elden Ring Shadow of the Erdtree Walkthrough & Guides Wiki
Monster Hunter World Walkthrough & Guides Wiki
The Legend of Zelda: Tears of the Kingdom Walkthrough & Guides Wiki
Persona 3 Reload Walkthrough & Guides Wiki
Cyberpunk 2077: Ultimate Edition Walkthrough & Guides Wiki


All rights reserved
© Nintendo. Games are property of their respective owners. Nintendo of America Inc. Headquarters are in Redmond, Washington, USA
The copyrights of videos of games used in our content and other intellectual property rights belong to the provider of the game.
The contents we provide on this site were created personally by members of the Game8 editorial department.
We refuse the right to reuse or repost content taken without our permission such as data or images to other sites.
Just played thru this chapter and Yoshi's gulp is effective on both enemy types.