 Prologue: A Rogue's Welcome
 Chapter 1: Castle and Dragon
 Chapter 2: The Great Boggly Tree
 Chapter 3: Of Glitz and Glory
 Chapter 4: For Pigs the Bell Tolls
 Chapter 5: The Key to Pirates
 Chapter 7: Mario Shoots the Moon
 Chapter 8: The Thousand-Year Door
This survey will take about 1 minute.
Your answers will help us to improve our website.
Paper Mario: The Thousand-Year Door (TTYD)
Chapter 6: 3 Days of Excess Walkthrough
★ TTYD Switch Remake is now available!
┗ Remake Differences | New Gold Medal Badge!
★ Tips for Beginners | Secrets and Combat Tips
┗ How to Level Up Fast | How to Farm Coins
☆ Best Moves | Best Partners | Best Badges
★ All Walkthroughs | All Star Pieces | All Shine Sprites
Game8's walkthrough for Paper Mario: The Thousand-Year Door's (TTYD) Chapter 6, 3 Days of Excess. Read on for a detailed guide for this chapter, including locations of collectibles, locations of note in Excess Express and Poshley Heights, enemies, as well as useful tips for completing this chapter!
| ◄ Previous Chapter | Next Chapter ▶ |
|---|---|
| Chapter 5: The Key to Pirates |
Chapter 7: Mario Shoots The Moon |
List of Contents
Chapter 6: 3 Days of Excess Story Walkthrough
| ★Recommended Stats★ | ||||||||
|---|---|---|---|---|---|---|---|---|
| Chapter 6 Main Objectives | ||||||||
| 1 | All Aboard The Socialite Train | |||||||
| 2 | Case of the Missing Items | |||||||
| 3 | Riverside Station | |||||||
| 4 | Borrowing Boots at the Library | |||||||
| 5 | Puffballs and Smorg | |||||||
| 6 | Poshley Heights and Sanctum | |||||||
| Peach Interlude | ||||||||
| Bowser Interlude | ||||||||
| 9 | Moon's Pale Light | |||||||
Click on any of the links above to jump to the section!
All Aboard The Socialite Train Walkthrough
| Objectives | |
|---|---|
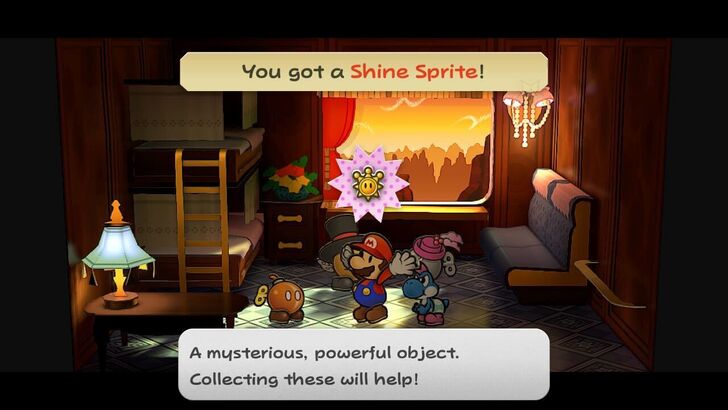
| 1 | 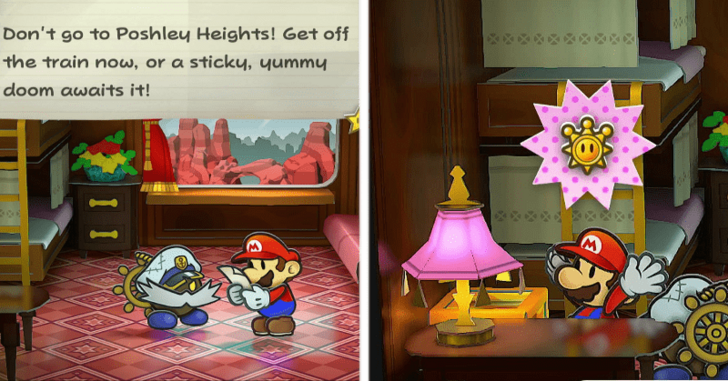 You will start the Chapter in your Cabin, Cabin 005, where you find a note thats seems to have put you into a sticky situation. Grab the Shine Sprite and the Dried Shroom in the nightstand in your room. |
| * |  Cabin #004 and the Engine Room have a few Star Pieces you can grab while Spin Jumping grab those if you want. The Engine Room is past the Green Car right of the Red Car. |
| 2 | 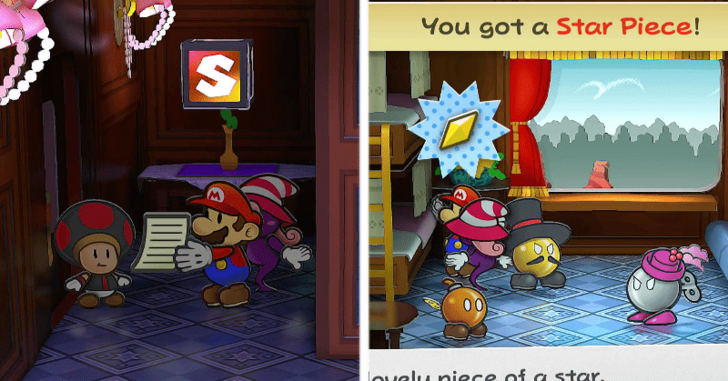 Head left of the Red Car to progress into the Dining Area and keep going left into the Blue Car and tell the Toad at the end of the car about the sticky threat. Drop by Cabin #008 for a Star Piece in the nightstand. |
| 3 | 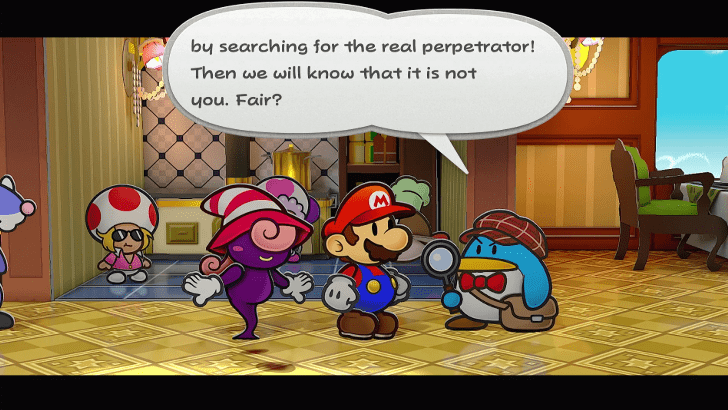 Head back to the Dining Car and you'll see a commotion happening in the kitchen! It looks like the Stew Pot has gone missing and after a few finger pointing, Pennington appoints you to look for it. |
| 4 | 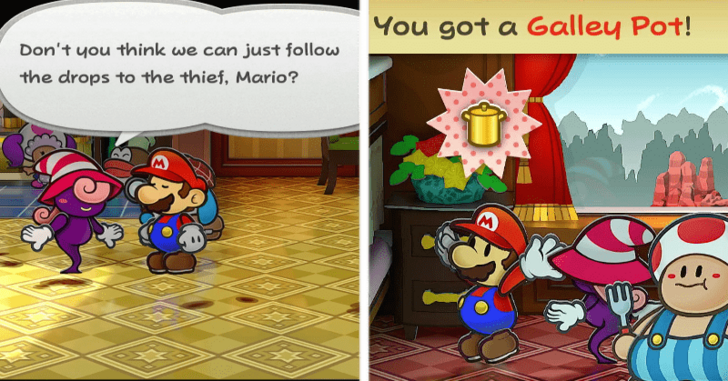 Check the trail from the Kitchen and follow it. It will lead you into the Red Car into Cabin 003 where the gourmand Toad is. Talk to him and then check his nightstand and you'll find the pot under some magazines. |
| 5 | 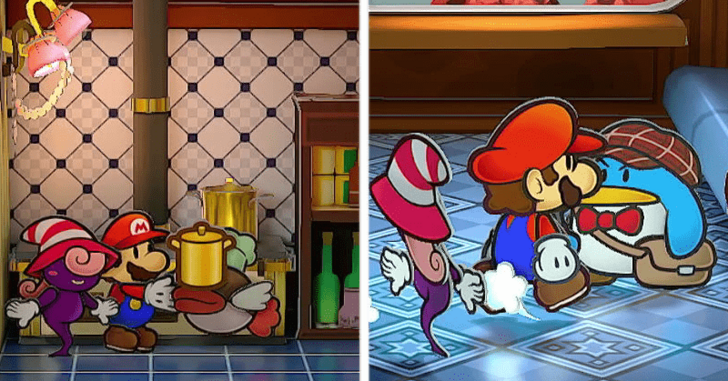 Pennington will drop by the cabin and ask you to go to his room to discuss about the note. Head to the Blue Car but drop by the Kitchen to give Chef Shimi the pot back for a Star Piece. |
| 6 | 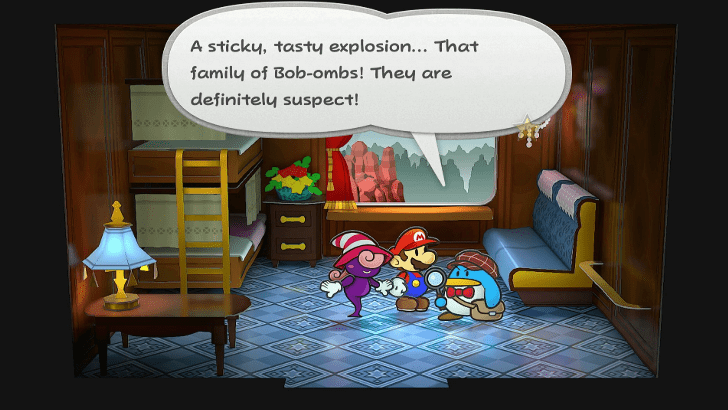 Talk to Pennington and he will deduce you're Luigi and tells you to investigate the Bob-omb family in Cabin 008. |
| 7 | 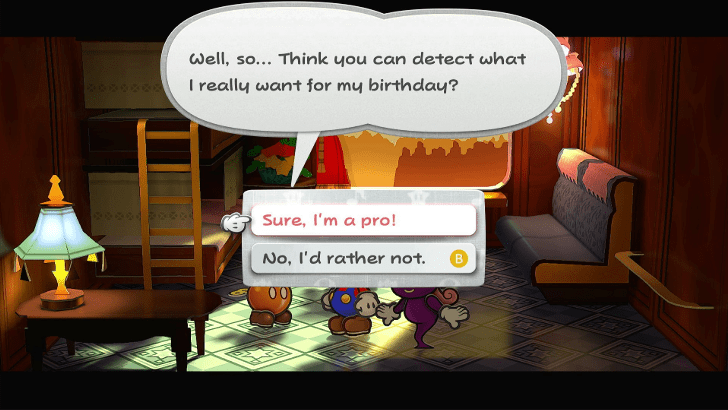 Head inside Cabin 008 and you'll notice the two parents arguing about which present to give their kid. Talk to Bub (the kid) and he'll tell you that he doesn't want either presents. |
| 8 |  After being asked to get Bub what he actually wants. Talk to the Conductor Toad and he'll tell you Bub wants to be a Train Engineer. Head to the engine room and talk to the engineer for his autograph. |
| 9 | 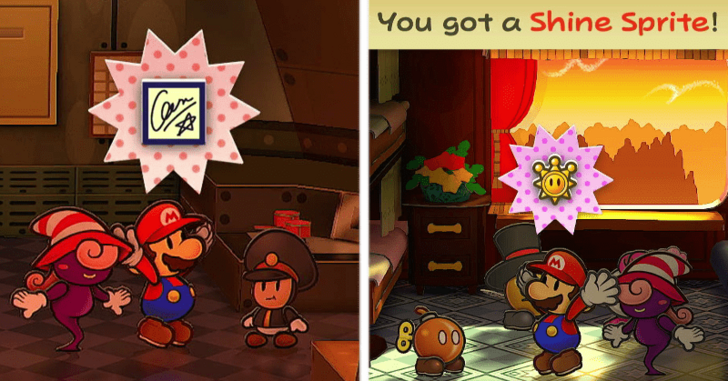 Head back to Bub in Cabin 008 and he'll give you a Shine Sprite as thanks. Head back to Cabin 006 and Pennington will tell you that the conductor is looking for you. |
Case of the Missing Items Walkthrough
| Objectives | |
|---|---|
| 1 | 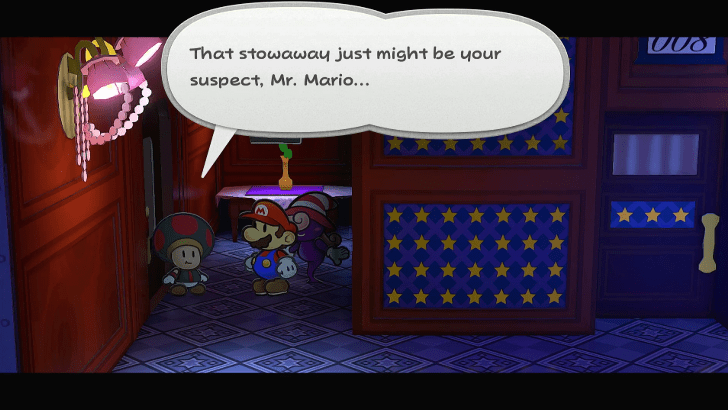 Talk to the conductor and he'll say that a blanket went missing after giving them out to passengers. He says a stowaway might have gotten on board and it might be your sticky guy. |
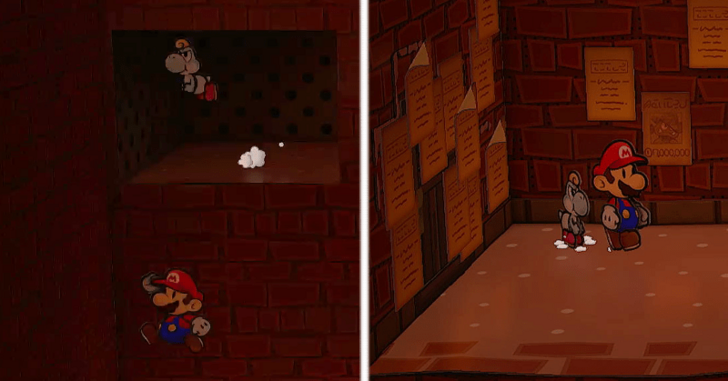
| 2 | 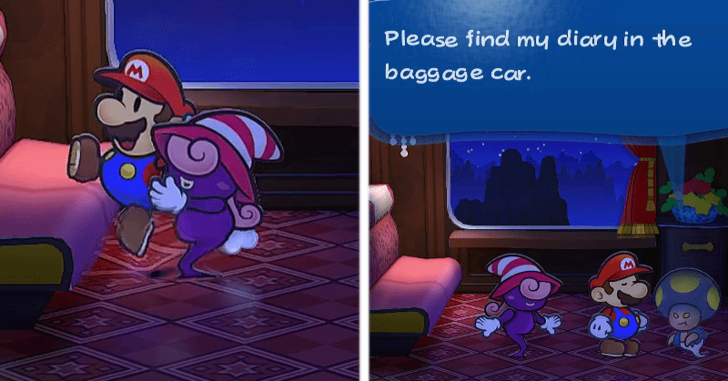 Go to Cabin #004 and use Vivian's Veil to see that a Ghost Toad is there. After admitting to taking the blanket, he'll return it in exchange for a favor. The Toad's items seem to be in the train and wants you to grab its diary. |
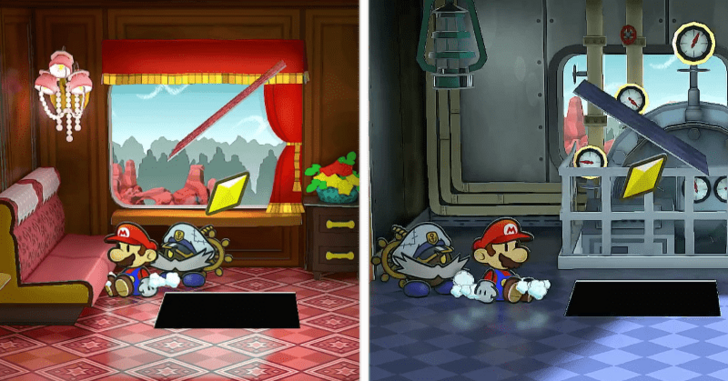
| 3 | 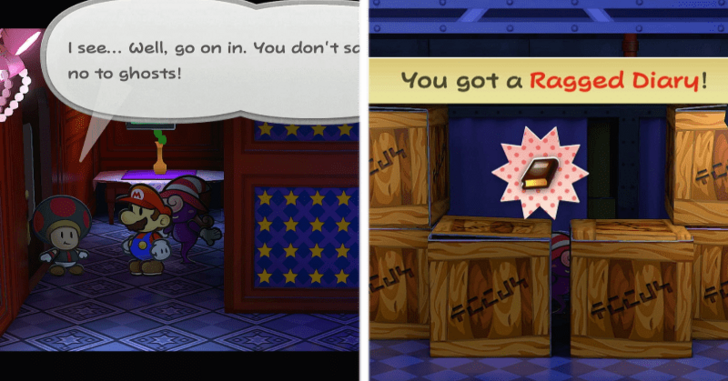 Go back and talk to the conductor who is more than happy to let you into the baggage car. Keep heading left and you'll see a gap that you can slip through by using Paper mode. You can find the diary here. |
| * | 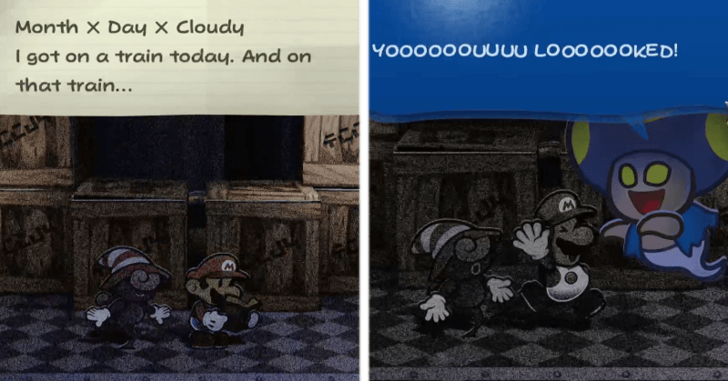 You can actually read the diary but make sure you save first as doing so will get you into an automatic Game Over! |
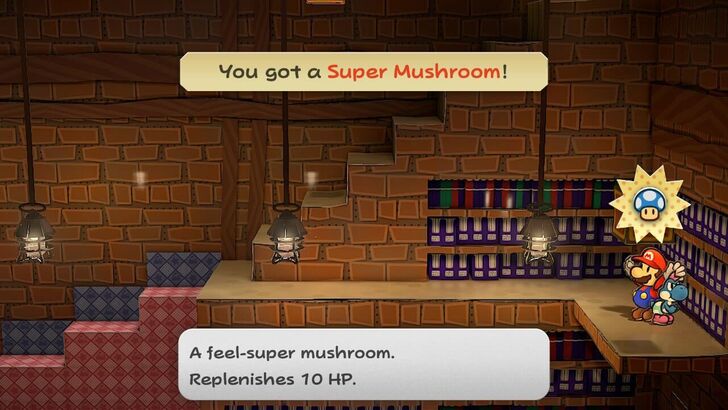
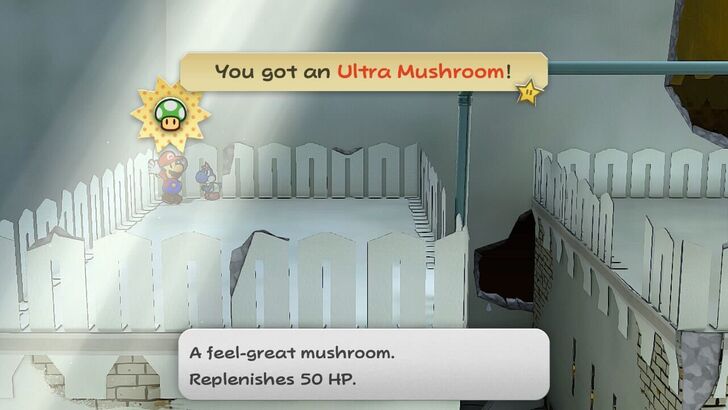
| 4 | 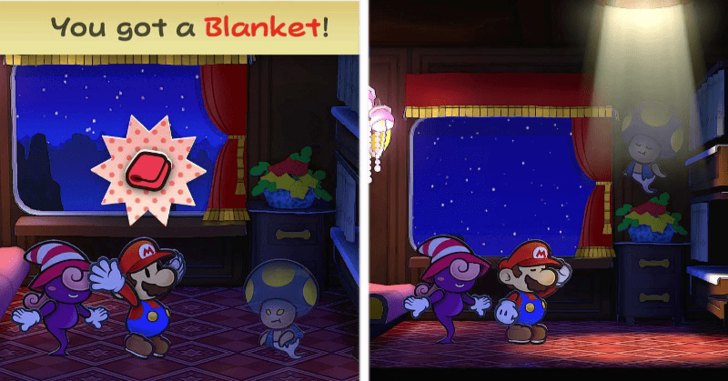 Go back to Cabin 004 and give the ghost its diary back and in doing so helps him pass on. But not really, he'll give you the blanket and you can go back to the conductor and he'll reward you with a Super Mushroom. |
| 5 | 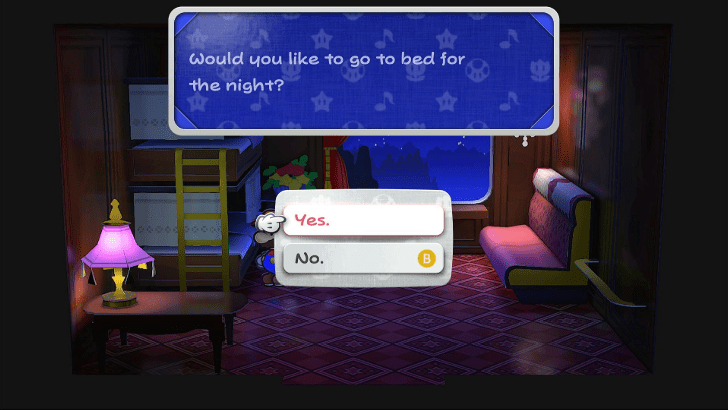 Head back to your room and turn in for the night. If you want to grab a few Star Pieces or items, feel free to do so. |
| 6 | 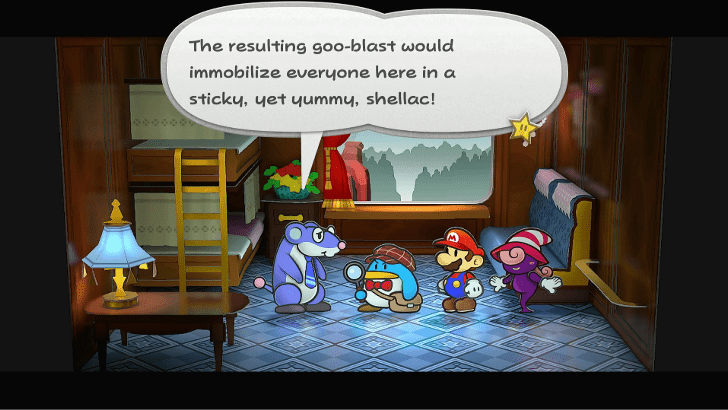 Head straight into Pennington's Cabin and it seems like a few passengers have lost valuables and Rattoey's Briefcase is one of them. It seems like this is the Sticky Explosion you were threatened with so go find the culprit. |
| 7 | 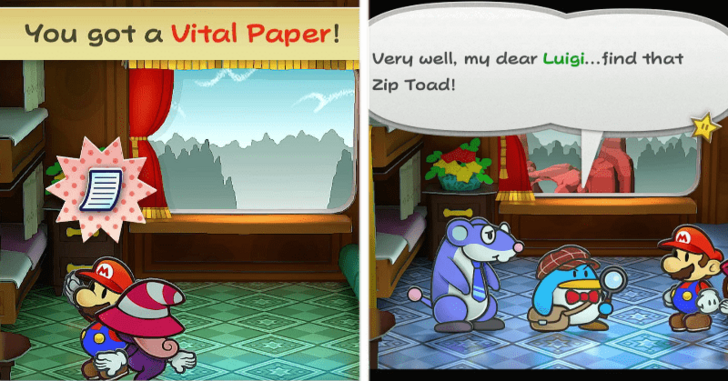 Go into the now empty Cabin 001 and you will find one of Ratooey's Contracts. Return to Pennington and he'll confirm that Zip Toad is the culprit. |
| 8 | 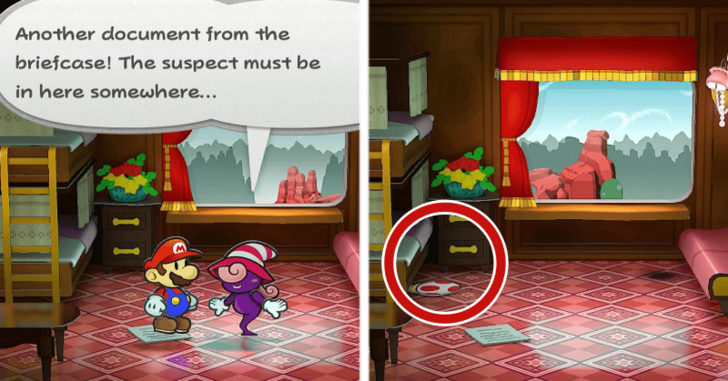 Head into your own cabin, Cabin 005, and you will see another contract on the floor. Use Vivian's Veil to conceal yourself and wait for Zip Toad to reveal himself in your room. |
| 9 | 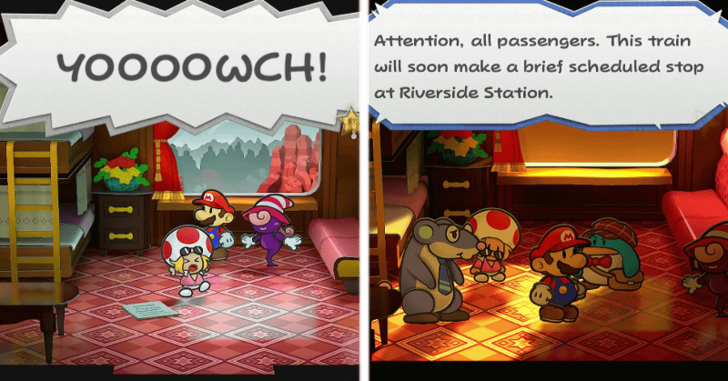 He will get spooked and run around the room, so go catch him. Once caught, you and the other will confirm that Zip Toad is the thief. The PA will then announce that the train will stop over on Riverside Station. |
| 10 | 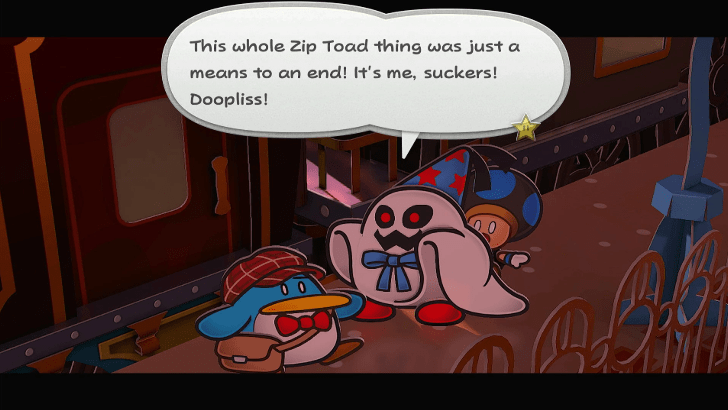 Once you arrive at the station, a cutscene will play revealing that Zip Toad is actually Doopliss and runs away. |
| * | 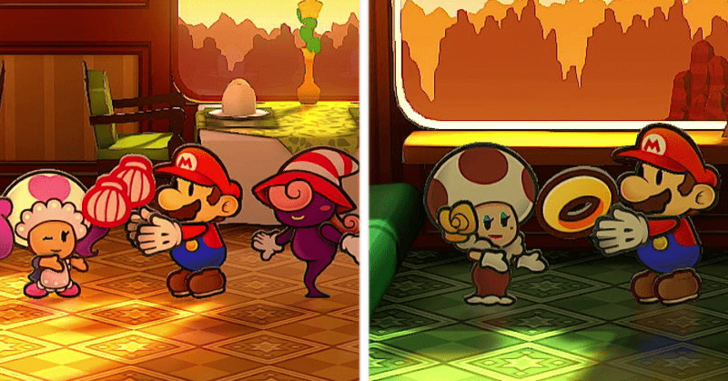 Before leaving, make sure to give the Shell Earrings to the waitress and the Gold Ring to Toodles for a Star Piece and 30 coins. |
Riverside Station Walkthrough
| Objectives | |
|---|---|
| 1 | 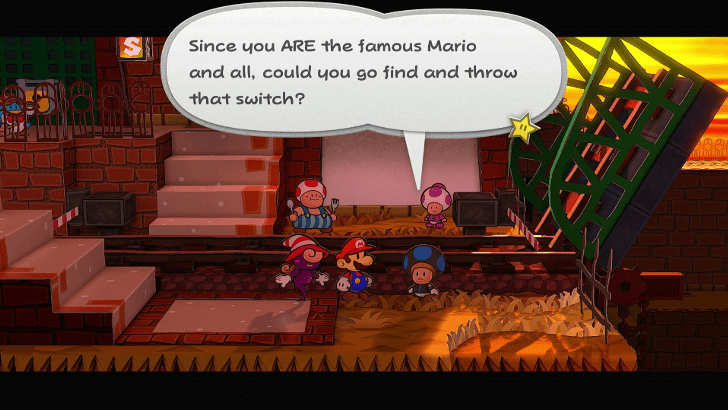 Once youre ready, hop off the train and go to the drawbridge. Talk to the conductor and he'll ask you to go inside the station because he's too scared. Use the Key the Toad gave you to unlock the door, Save and Heal if you need it. |
| 2 |  Inside, you can ignore the badge and make a beeline for the door on the right side of the room. The badge can be picked up later and you need to use the elevator at a later point anyways. |
| 3 | 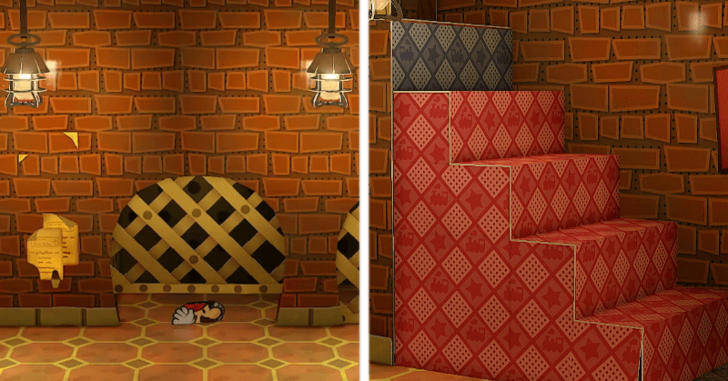 Inside the room, there some latticework fences. Use Tube Mode to get under the first one and hit the switch to reveal a staircase. Get out of the fence and head up the stairs, and enter the door on the top. |
| 4 | 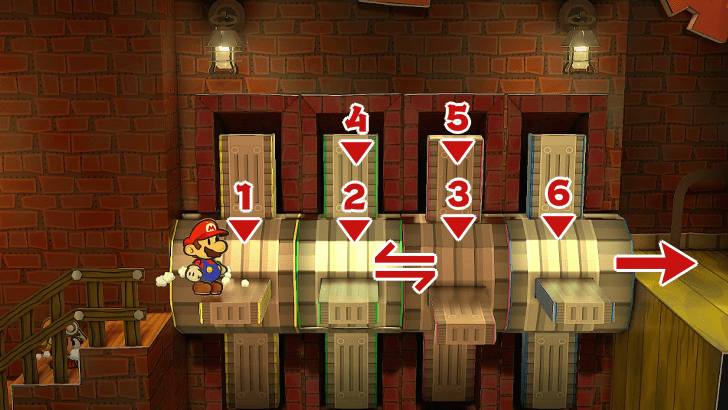 For the next room, defeat the Ruff Puffs first before getting on gears that you need to time your jumps in. In the middle, you need to jump from the pink gear back to the green one to move forward. Once you cross the gears, use Tube mode to get under the spinning column. |
| 5 | 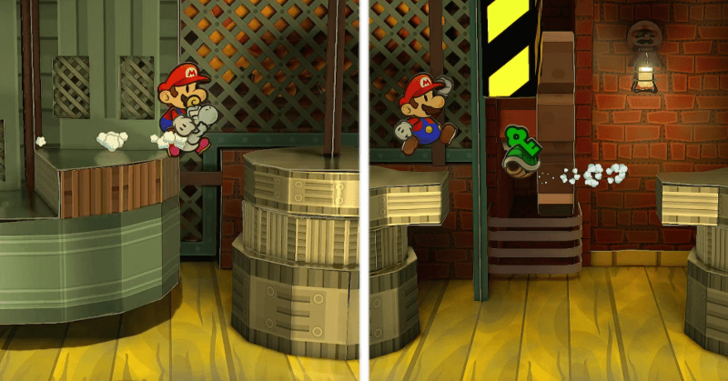 Duck out of Tube Mode when you see the brown gear with the Item Box on top of it. Use that to platform yourself to the right until you hit a wall that goes up and down. While you can use Yoshi to grab it, just use Koops to save yourself the hassle. |
| 6 |  Grab the Star Piece behind the gear column while you're there to save yourself of having to platform on the gears again. Afterwards, go back to the latticework fence room and unlock the door on the right. |
| 7 | 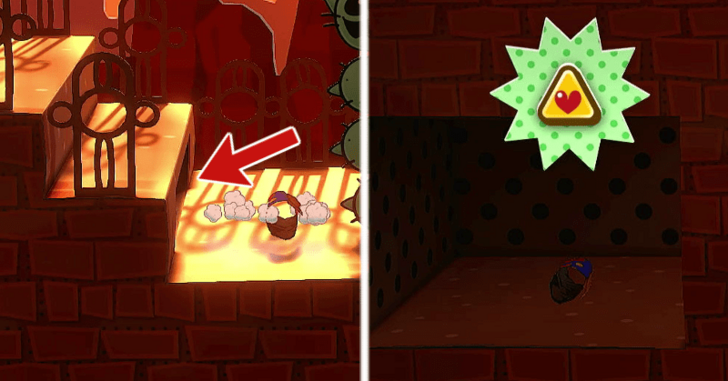 Now that you're outside head down the first set of steps and there's a hole under it. Use Tube Mode to go into the hole and get yourself the HP Plus Badge. |
| * |  You can jump down from here but we recommend going the long way to grab a few items and a Shine Sprite. |
| 8 |  Head back up from the slope and head right. You'll encounter a few enemies but along the way you will see a block. Jump on the block to reveal a hidden block with a Thunder Rage in it. |
| 9 | 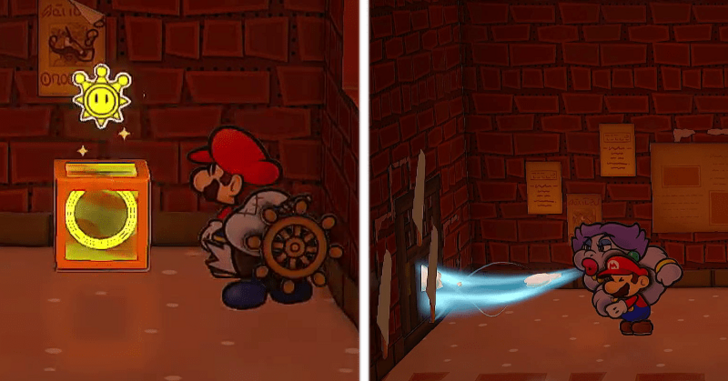 Keep heading down the stairs, and you will see a Shine Sprite. Use your hammer on it and keep heading west until you hit a dead-end. Use Flurrie's skill on the wall to reveal a door. Head into the new door. |
| 10 | 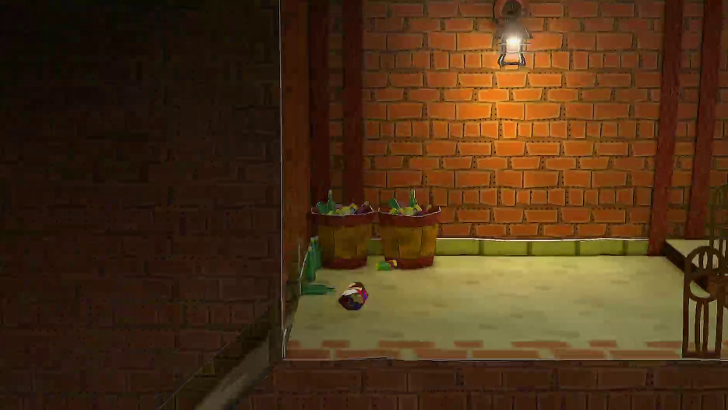 Once inside, keep heading down the steps and there will be a fork in the road, head down the Tube Mode hole on the left. |
| 11 | 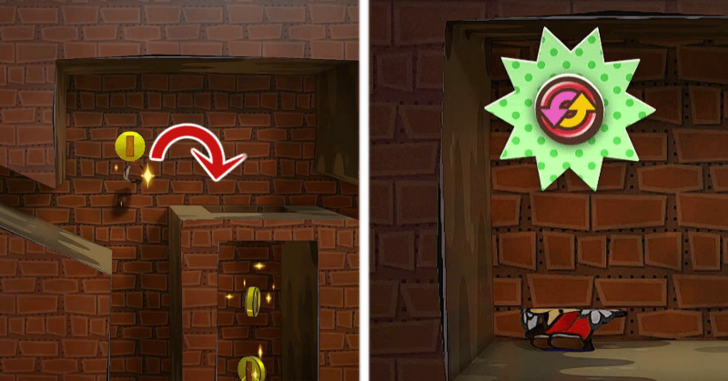 Head right and jump across the gap into the hole. After the initial free fall, head left and jump another gap to get a P-Up, D-Down Badge. |
| 12 | 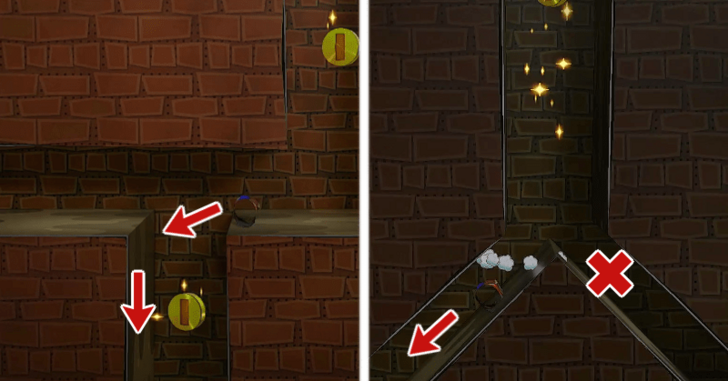 Head back right and fall into the hole from the right side of the gap, this is make sure you end up on the left side of the fork in the hole. Just follow the path going left and you should end up in a dumpster with a Super Mushroom. |
| * |  If you mess up, you will end up in a dumpster next to some Poison Pokey you can beat them up for Star Points. If you wanna head back up, just use the springboard at the rightmost side of the room and head left to get back to the Tube Mode hole. |
Borrowing Boots at the Library Walkthrough
| Objectives | |
|---|---|
| 1 | 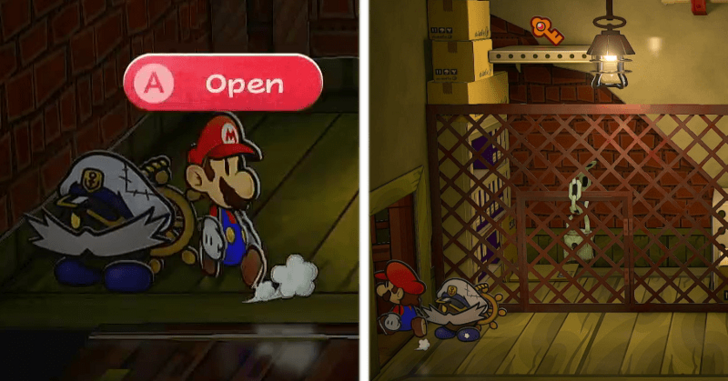 After getting down the chute and into the Dumpster, head to the door on your left. The room is mostly empty other than a Key you cannot grab yet. Just go left into the next door. |
| 2 | 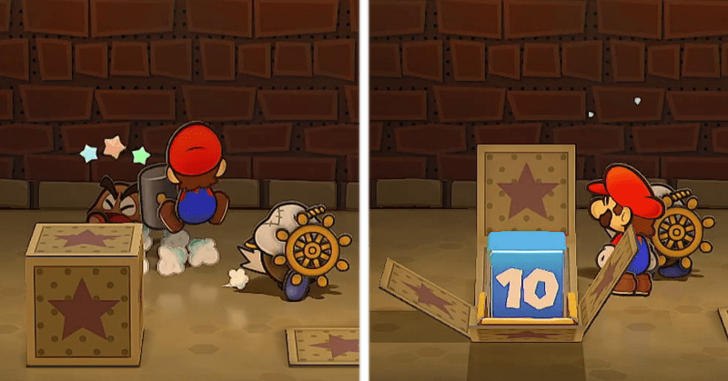 Once you're in the library section, just beat up the Goombas and head left where there are switch blocks with numbers on them. Hit the blocks based on the number written on them. |
| 3 |  After hitting the blocks 1, 3, and 10 times respectively, hit the button and a staircase will appear. Head up the stairs until you see a doorway. There's a Shine Sprite along the way so make sure to use Koops to grab that as well. |
| 4 | 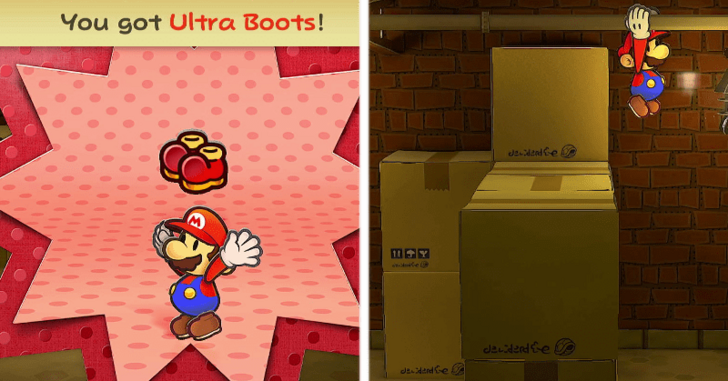 Head inside the doorway and open the chest to get the Ultra Boots! After the tutorial, head left to grab the pipes with your new Spring Jump and shimmy your way to the right. |
| 5 | 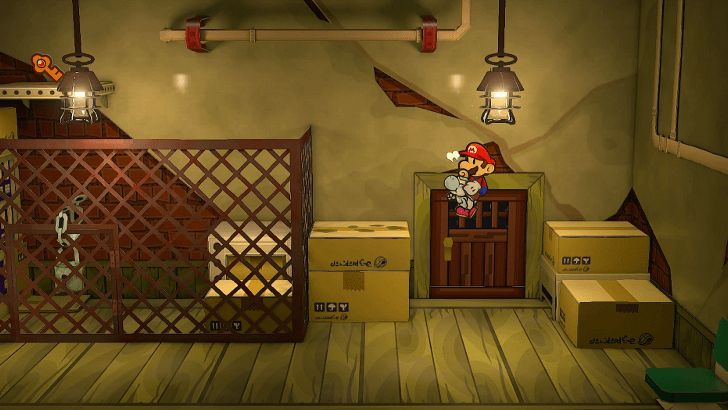 Use Paper Mode to slip through the grates and you are now back in the empty room with the key. Head to the right side of the room and get on top of the boxes. Use Yoshi to Flutter Jump across the Boxes to get under the pipe. |
| 6 | 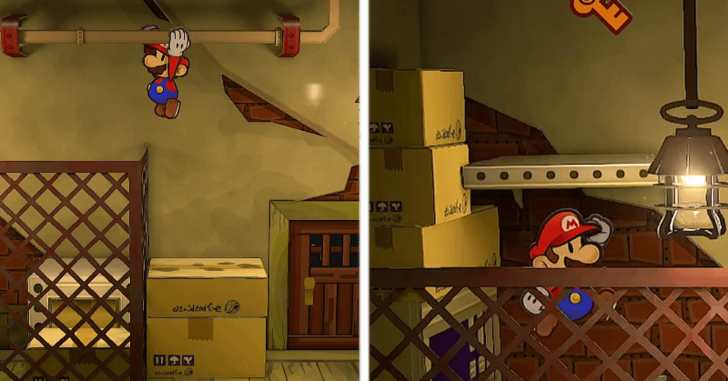 Use your Spring Jump to grab onto the pipe and shimmy yourself to the left. Get under the ledge with the Key and use your Spring Jump again to bash your head on the ledge to drop the Elevator Key. |
| 7 |  Grab the Elevator Key and hit the lock to get out of the cage. You now need to trek all the way back to the entrance. |
| * |  If you wanna head back up, just use the springboard at the rightmost side of the dumpster room and head left to get back to the Tube Mode hole. |
| 8 | 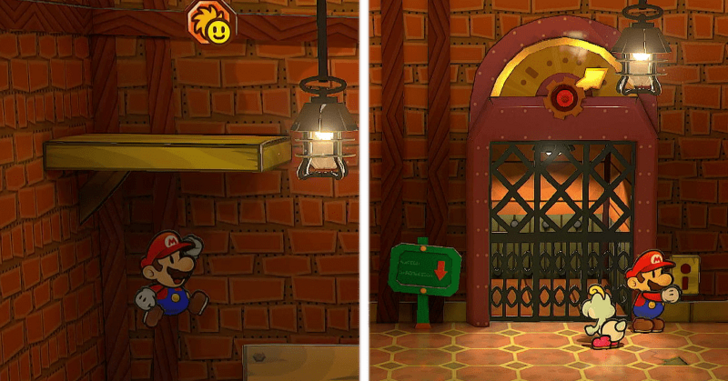 Once you get back to the entrance grab the Close Call P Badge by slamming into the ledge with your Spring Jump. You can then head into the elevator and use the Key on it. |
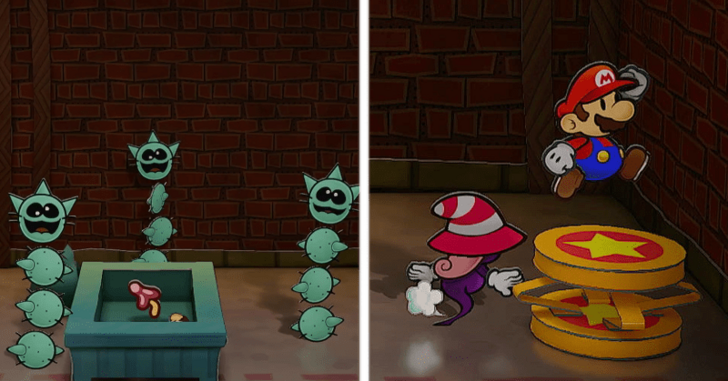
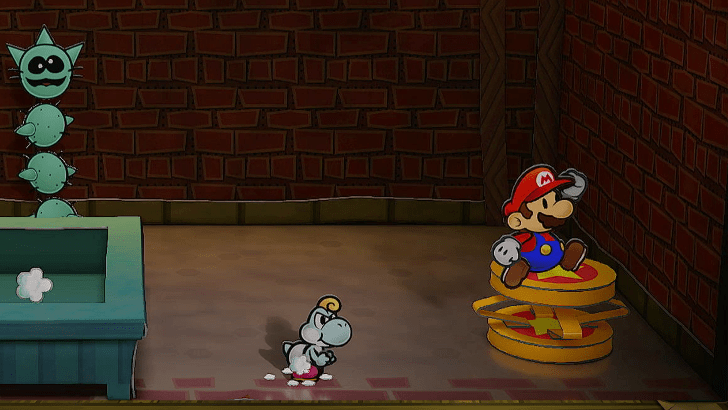
| 9 | 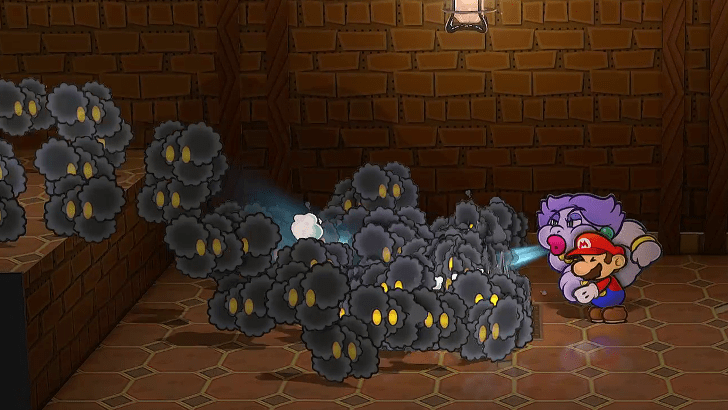 Hop on the elevator to slowly descend into the bottom floor where you see Fuzzy like creatures. Use either Flurrie to blow them away or your Super Hammer to scare them away. |
| 10 | 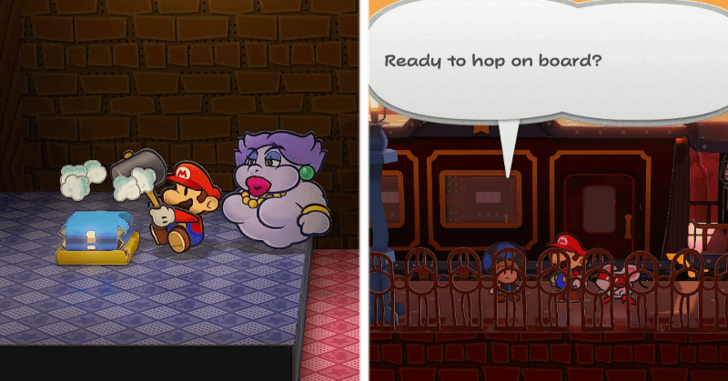 Once the creatures leave, flip the switch to reveal a staircase and hit the ! Block to lower the drawbridge. After the cutscene, you can leave the Station and talk to the conductor. |
Puffballs and Smorg Walkthrough
| Objectives | |
|---|---|
| 1 | 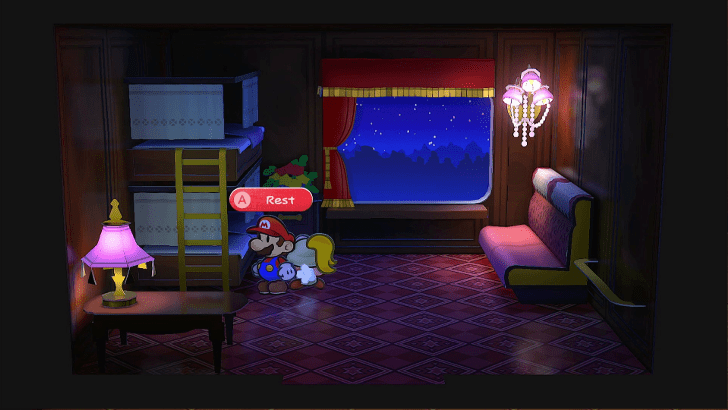 After talking to the conductor, head back inside the train. You can talk to the other passengers or just turn in and rest in your Cabin. |
| 2 | 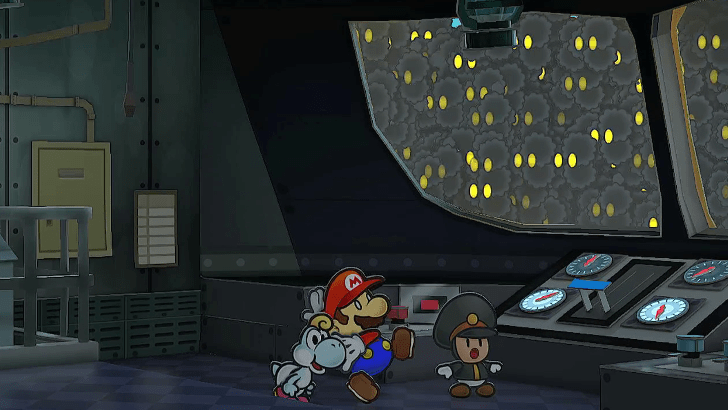 It's the next day and the other passengers are nowhere to be found. Head straight to the engineer and he'll tell you he hasn't noticed any missing passengers. Puffballs will then attack the windshield. |
| 3 | 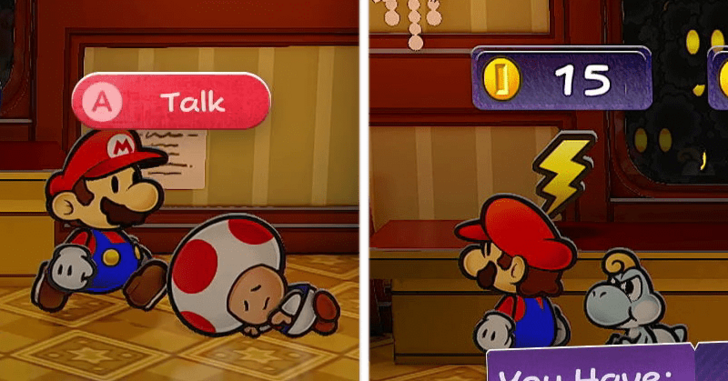 Head back to the Dining Car and go inside the shop and talk to the shopkeeper and grab a few Thunder Rages for the upcoming fight. |
| 4 | 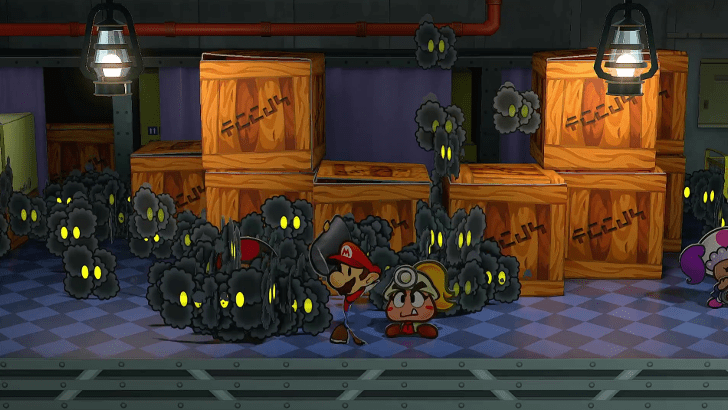 Head to the Baggage Car, make sure to save, and it has been infested with the Puffballs once you get inside. Use Flurrie or your Hammer to get rid of them. |
| 5 | 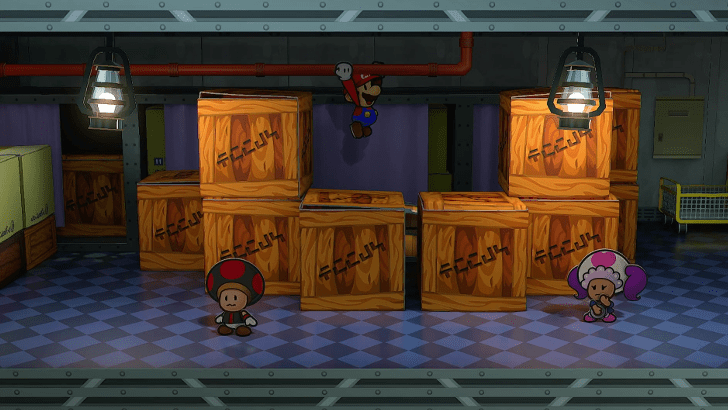 After getting rid of the Puffballs and being thanked by the passengers, use your Paper Mode to slip through some boxes and Spring jump your way up to the pipe. Shimmy your way to the left to get outside the train. |
| 6 | 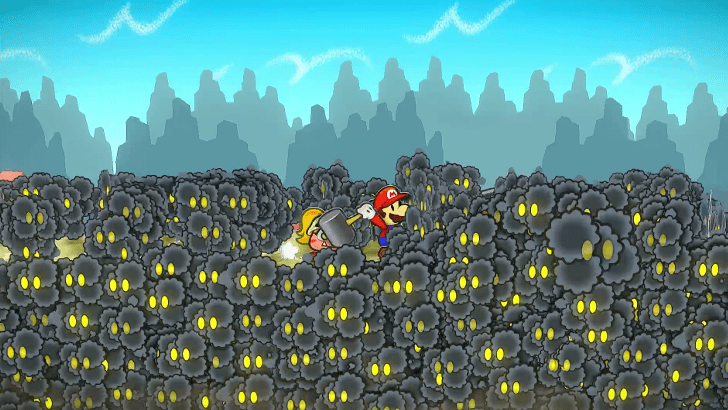 Once outside, you will see that the train has been overrun by the Puffballs. Use your hammer to get rid of the ones stopping you while you head right. |
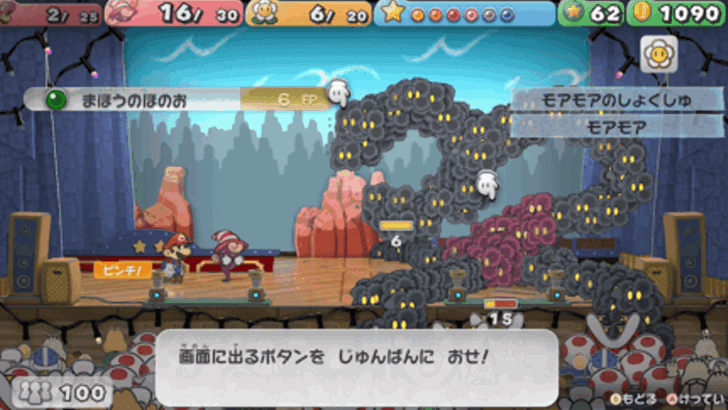
| 7 | 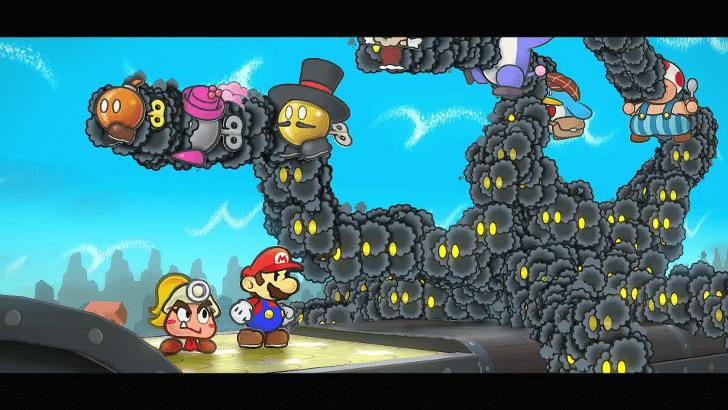 Keep heading right and you will see the Puffballs converge with the passengers to form Smorg! Get ready for the boss fight. Click here for Smorg Fight Guide ► |
| 8 | 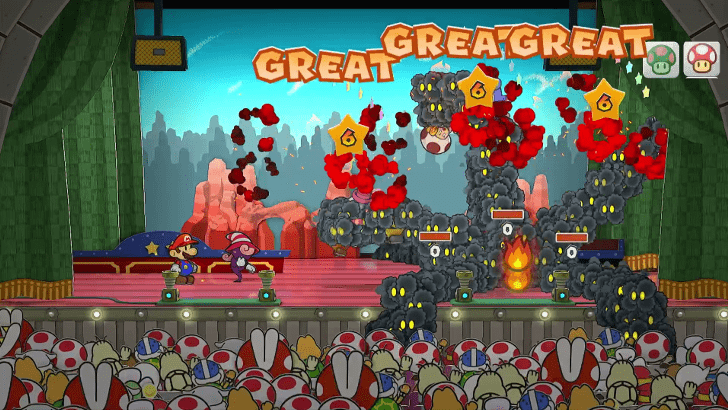 Smorg is pretty simple you just need to attack its arms with any AoE attack like the Thunder Rage, Vivian's Fiery Jinx, or Bobbery's Bob-ombast. Once its appendages go down, hit it with your strongest moves. |
| 9 | 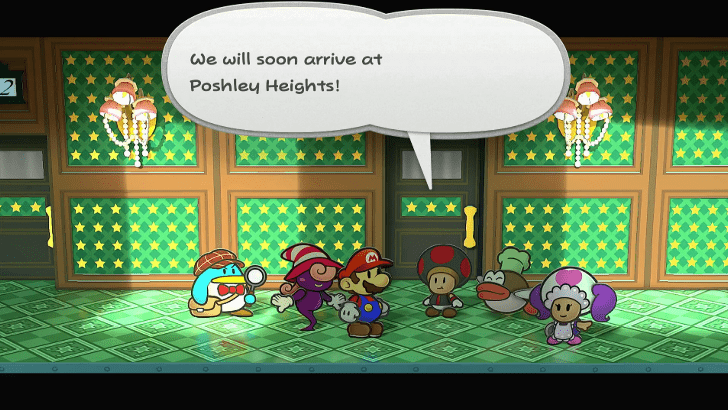 Once defeated, you will be teleported back inside and being thanked for saving everyone. The PA will then announce your arrival to Poshley Heights. Feel free to head out once you're ready. |
Poshley Heights and Sanctum Walkthrough
| Objectives | |
|---|---|
| 1 | 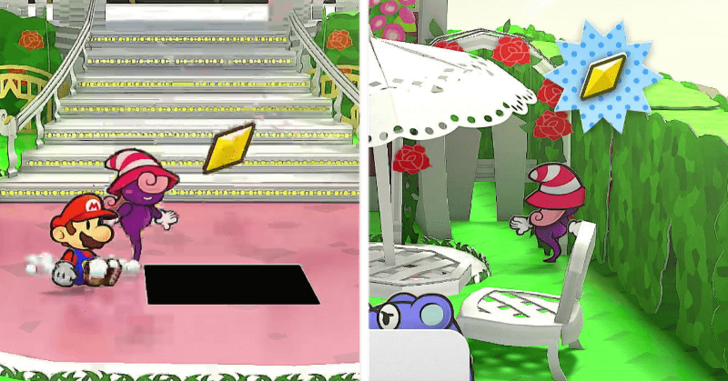 Feel free to explore Poshley Heights before heading to the Crystal Star. You can Spin Jump in the middle of the Plaza Station for a Star Piece. All Poshley Heights Star Pieces Guide ► |
| 2 |  Make sure to save and once you have done everything you need to around town, head east of the Inn to get to the Poshley Sanctum. |
| * |  There is a Shine Sprite you can get near the topiary at the right. You need to Spring Jump to get it as there is no hidden block under it . |
| 3 | 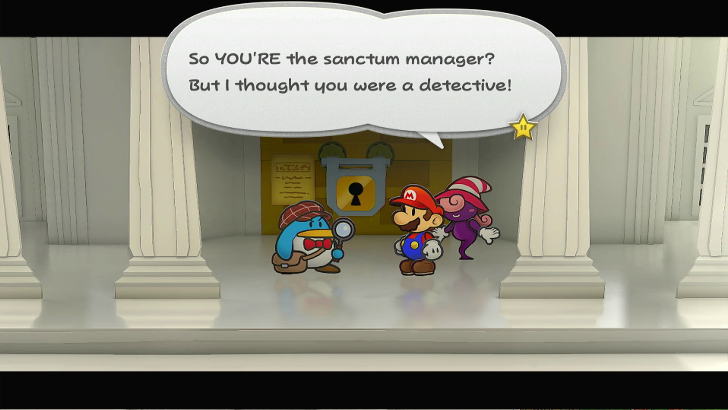 Head to the door and it seems to be locked and the owner is out for a trip. Fortunately, Pennington is the owner and he is more than happy to let you in and grab the Crystal Star. |
| 4 | 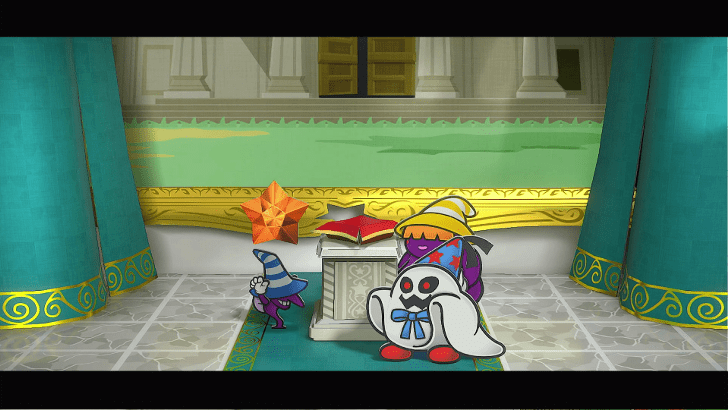 Head inside and it seems the Shadow Sirens and Dooplis got there before you. They will leave and when all hope is lost, Pennington says that the one they got was a fake and makes you grab the Real one at the back. |
| 5 | 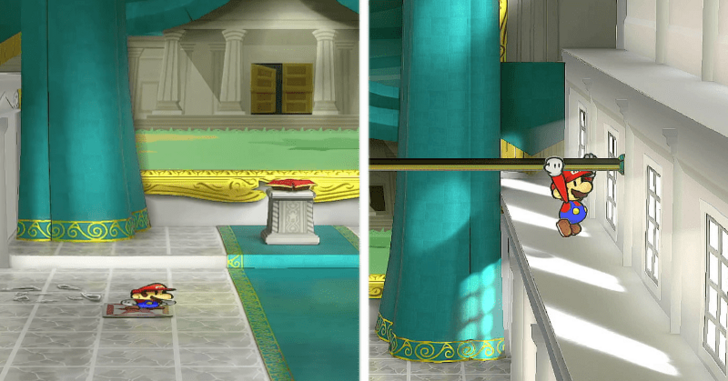 Look for the Star Tile on the floor and Spring Jump your way to the bar. Shimmy to the right and drop down when you get to the ledge. |
| 6 | 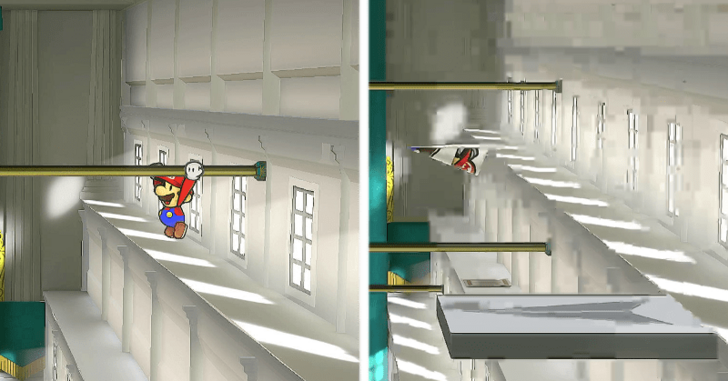 Keep heading south and you'll find another Star Tile. Again, Spring Jump and shimmy to the right. Head up, Star Tile, Spring Jump, and shimmy to the right until you reach the top most ledge and see the Plane Platform. |
| 7 | 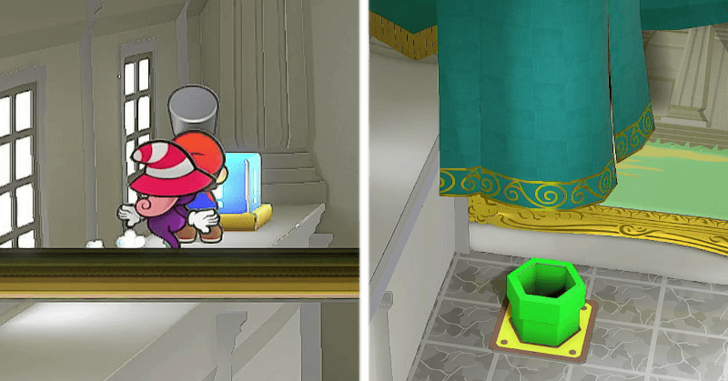 Using the Plane Mode, head to the left and use the Star Tiles to Spring Jump until you get to the top most ledge. Hit the ! Switch at the end and you'll reveal a Pipe. Feel free to drop down and head into the pipe. |
| 8 | 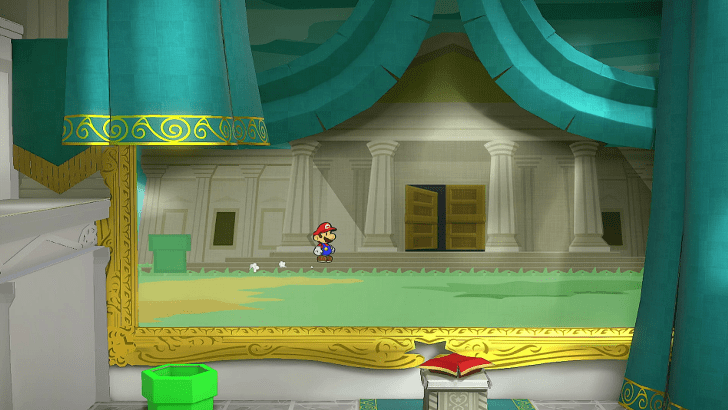 Once inside the pipe, you will become part of the painting, head towards the door and you'll find yourself in a replica of the Sanctum but blue and filled with Boos. |
| * | 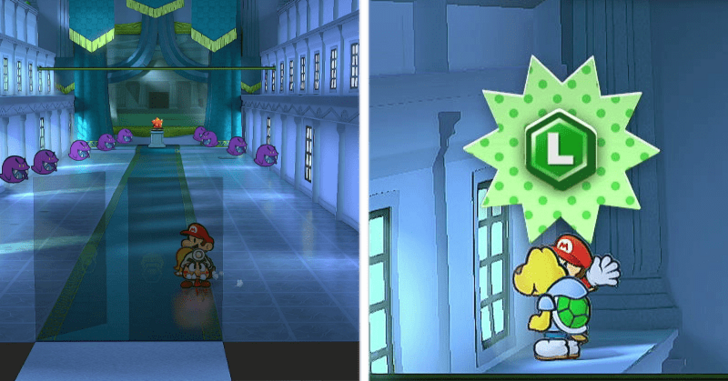 Since the room is an exact replica, just use the same Star Tiles and Plane Platform to grab yourself the L Emblem and the Shine Sprite. |
| 9 | 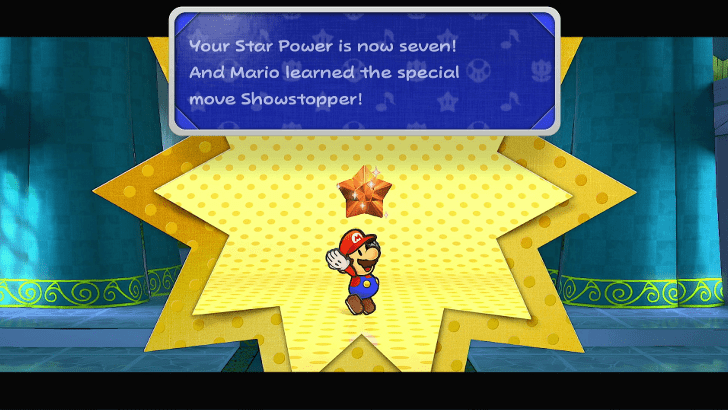 Head down the hall and the Crystal Star is right the waiting on the podium. Grab it and you will now have 7 SP and a new Special! |
| 10 | 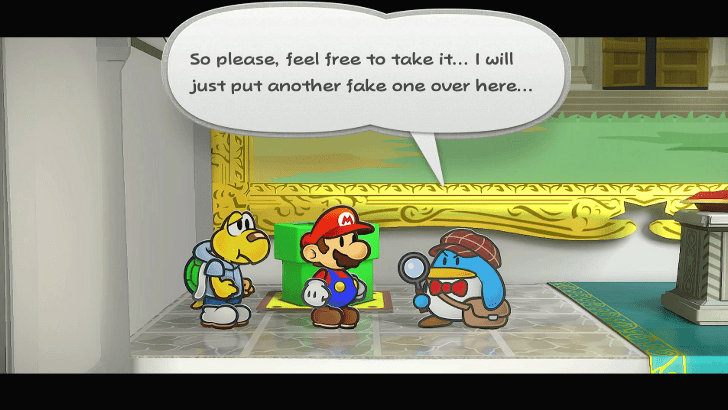 After getting the Crystal Star, head back to the first Sanctum where Pennington will let you keep the Star and put a new one up for display. Leave the Sanctum and Peach's Interlude will start! |
Peach Interlude Walkthrough
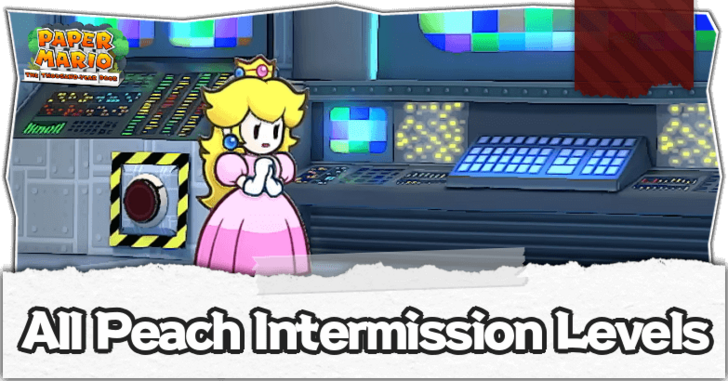
Grodus gets word that the Crystal Star the Shadow Sirens have is a fake so he thinks of a new plan. Meanwhile, TEC-XX tells Peach everything and lets Peach send Mario a message that they are on the Moon.
In the middle of the e-mail, Grodus will barge in and reboots TEC. Luckily, they manage to send the e-mail just before TEC-XX is rebooted and Peach is taken away.
Peach Interlude Complete Walkthrough
Bowser Interlude Walkthrough
Kammy tells Bowser that she has found an underground chamber and Bowser decides to blast through himself. You will have another Super Bowser Bros. level and he will be taken to a gym.
At the gym, they find Rawk Hawk's Crystal Star Belt. The man himself walks in and after being flattened by King Koopa, says that the one on the wall is a fake and the Great Gonzales has the real one.
Bowser Interlude Complete Walkthrough
Moon's Pale Light Walkthrough
| Objectives | |
|---|---|
| 1 | 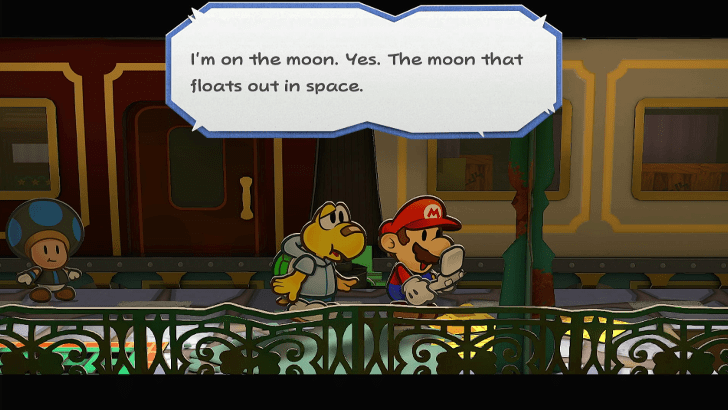 Instead of saying your goodbyes, you jet head back to Rogueport. Once you step off, you will receive your usual email from Peach. Head back to Rogueport's Town Square. |
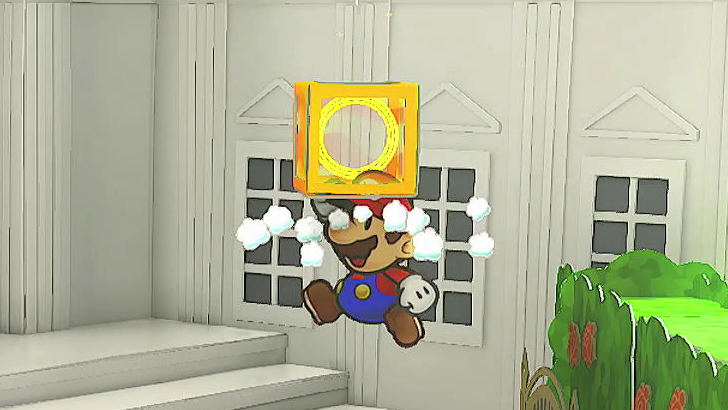
| 2 | 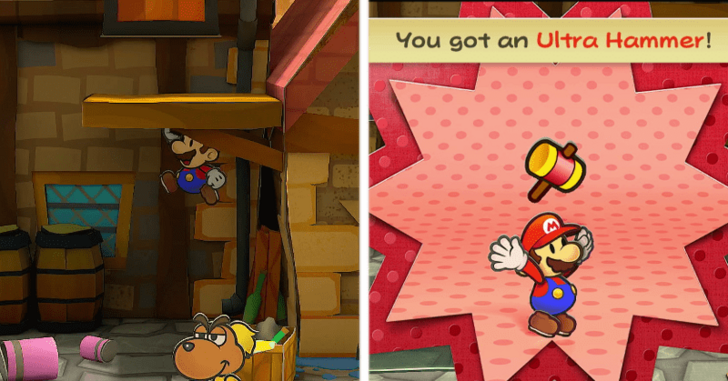 Once you're there, Spring Jump under the large chest next to the barrels to knock it down. Open the chest, and you can get the Ultra Hammer! |
| 3 | 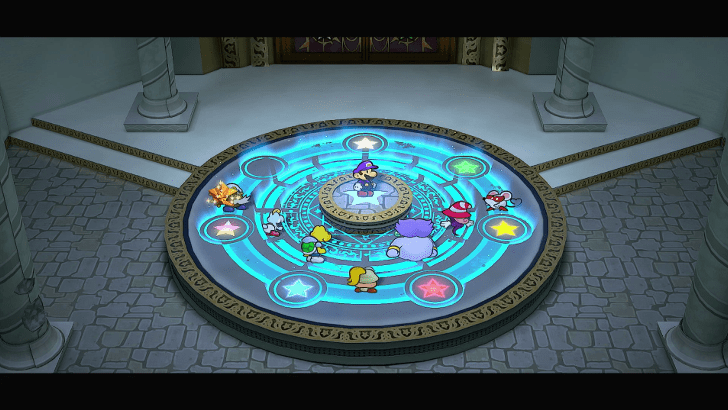 Head down in the sewers, head into the podium of the Thousand-Year Door. You learn that the next Crystal Star is in the Moon. You will then be teleported to Professor Frankly's to find out what to do next. |
| 4 |  Frankly doesn't know how to get there and asks you to give him some time to research. This will take real in-game time so go hunt for some Collectibles, do some Troubles, or even do the Pit of 100 Trials to pass the time. |
| 5 | 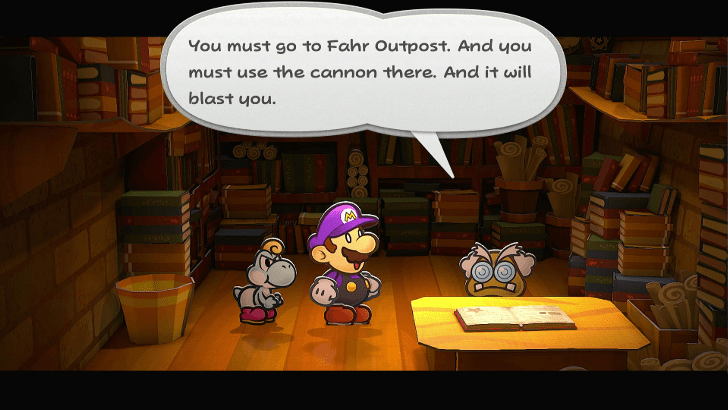 After a few minutes have passed, return to Frankly's house. He will tell you that there's a cannon in Fahr Outpost that can shoot you to the moon. |
| 6 | 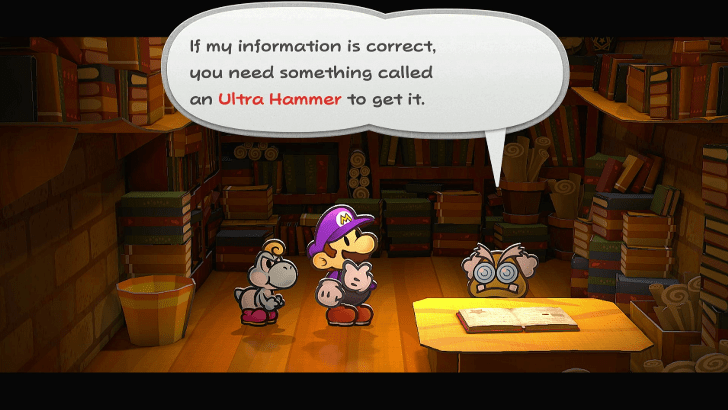 You need the Ultra Hammer to get to the Pipe, so go grab it if you haven't been following along! . |
| 7 | 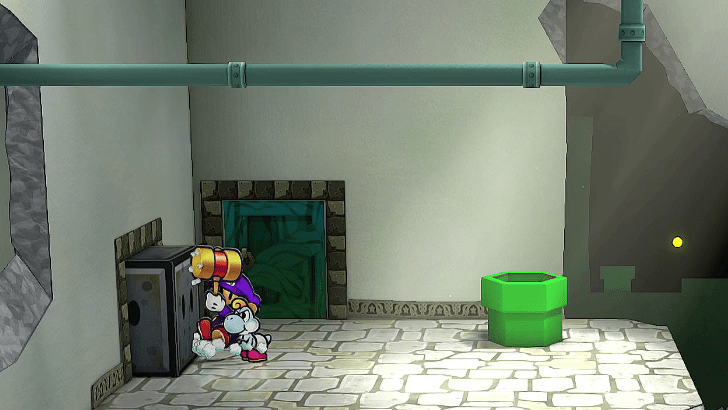 Go through the sewers through the grate in west Rogueport, break the gray Block on the ledge to access the pipe inside! |
| * | 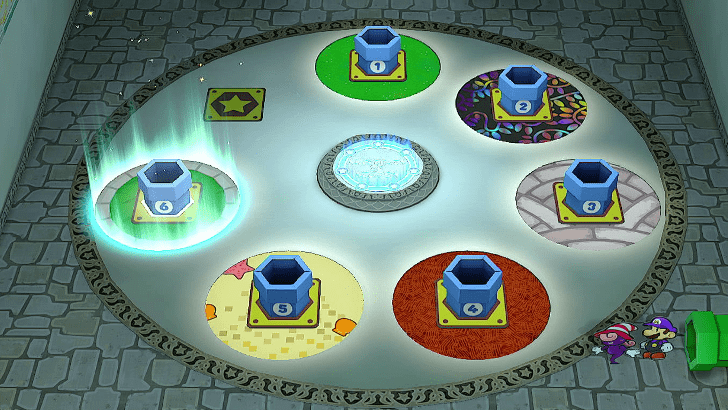 Before starting Chapter 7, it is recommended you unlock the new Pipe Zone in Rogueport Sewers. This will save you a lot of headache in the upcoming area. |
| 8 |  Head inside the Pipe and you are now in Chapter 7! |
Chapter 6 Collectibles and Items
Star Pieces
| Done? | Location | In-Game Image |
|---|---|---|
|
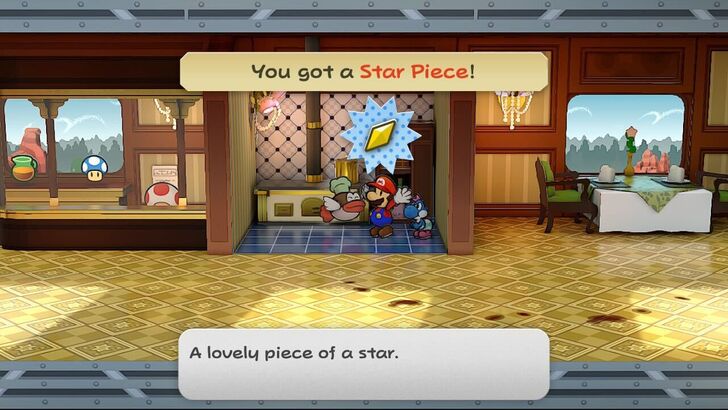
Excess Express
Beneath a panel in the southwest corner of cabin 004. |
 |
|
|
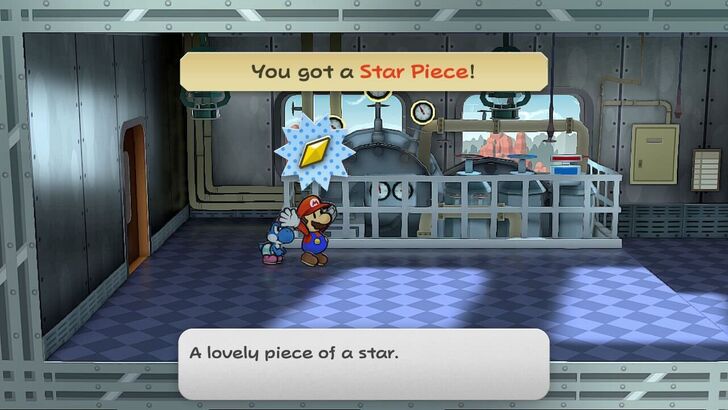
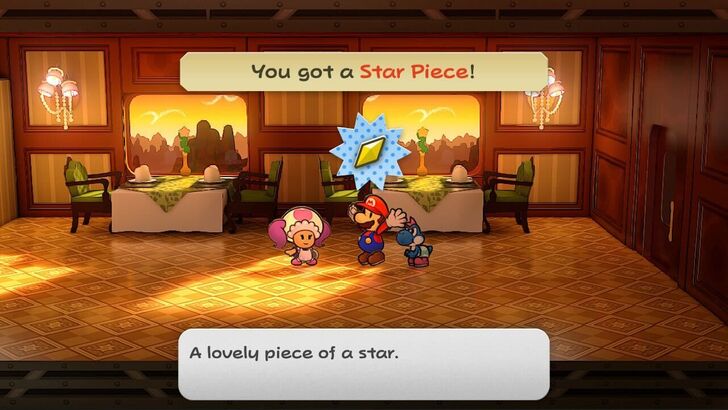
Excess Express
Beneath a panel in front of the gauge in the engineer's room. |
 |
|
|
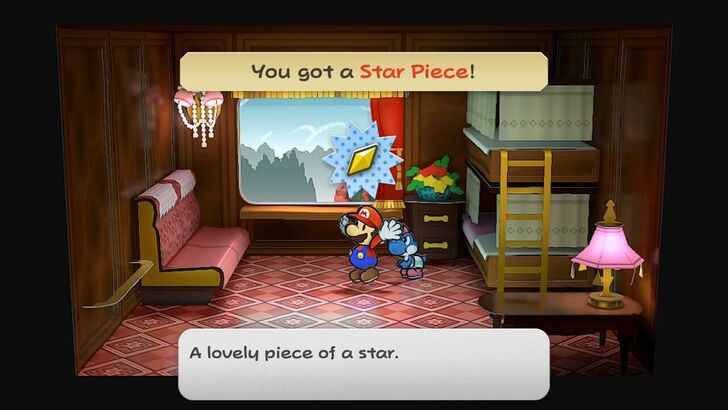
Excess Express
Inside the drawer of cabin 008. |
 |
|
|
Excess Express
Given to Mario by Chef Shimi as a reward for giving back his Galley Pot. |
 |
|
|
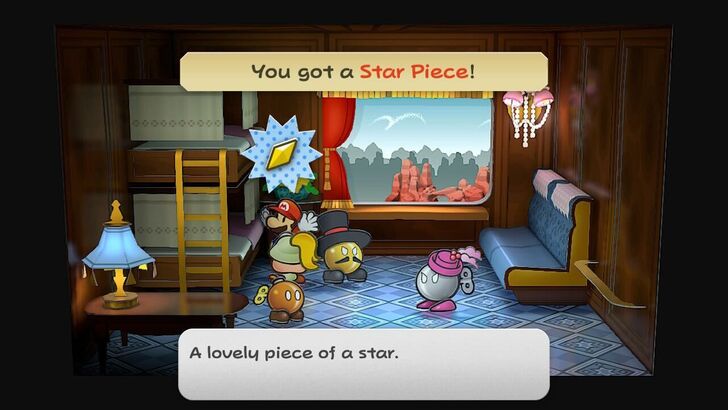
Excess Express
Given to Mario by the Express waitress in the dining car as a reward for giving back her Shell Earrings. |
 |
|
|
Riverside Station
At the back of the rightmost gear by the station. |
 |
|
|
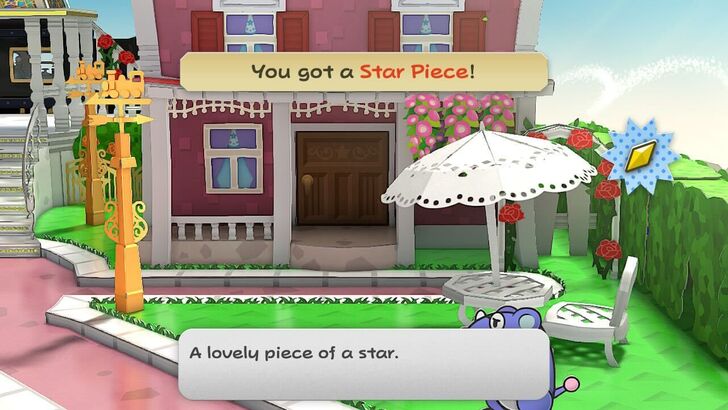
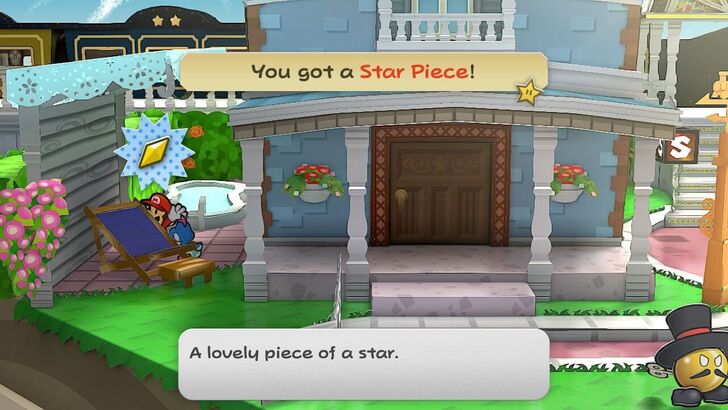
Poshley Heights
In the hedge on the right of Toodles's house. |
 |
|
|
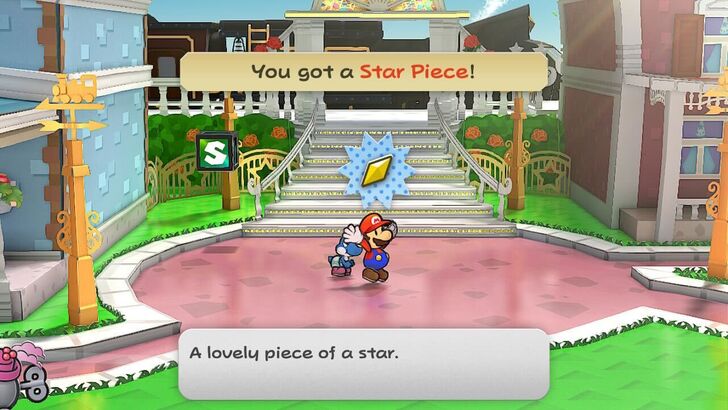
Poshley Heights
Beneath a panel in the floor with a red circle in front of the station. |
 |
|
|
Poshley Heights
Behind the chair on the left side of Goldbob's house. |
 |
|
|
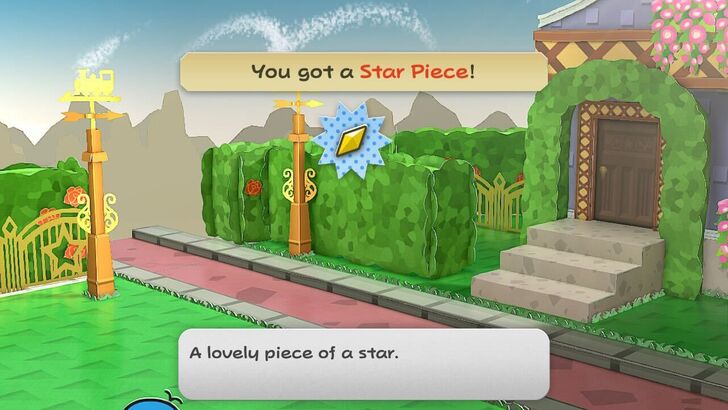
Poshley Heights
In the corner of the hedge at the northwest of the penguin's house. |
 |
|
|
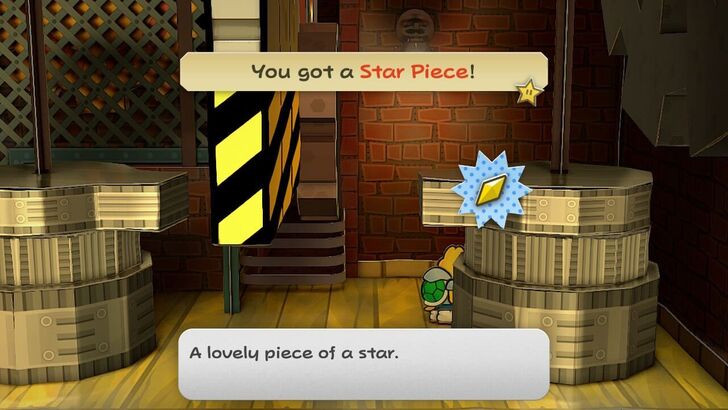
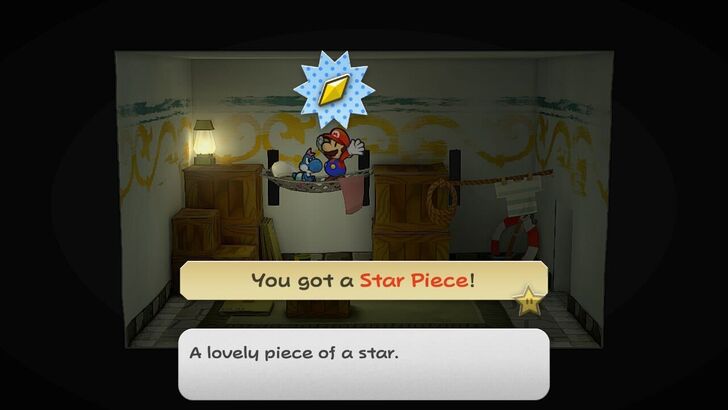
Rogueport Sewers
On the hammock in the east of B1F, accessed through a pipe on the northern area requiring a spring jump. |
 |
Shine Sprites
| Done? | Location | In-Game Image |
|---|---|---|
|
Excess Express
Behind the table in cabin 005, Mario's cabin. |
 |
|
|
Excess Express
Give Bub the Bob-omb the engineer's autograph to receive a Shine Sprite. |
 |
|
|
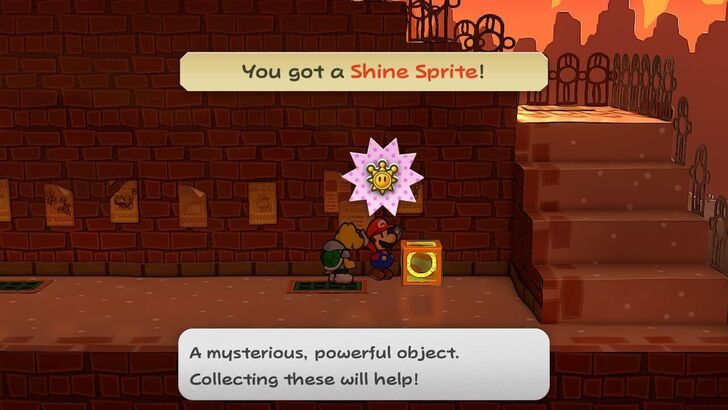
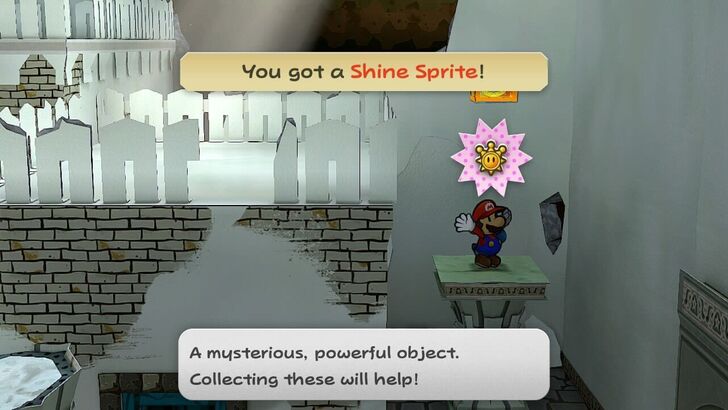
Riverside Station
Found on the steps behind the station. |
 |
|
|
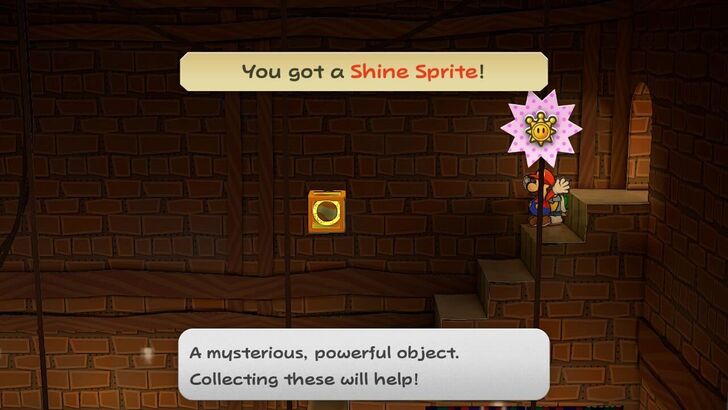
Riverside Station
Near the top of the unfolding stairs after you hit the numerical switches. Throw Koops at the Shine Sprite to get it. |
 |
|
|
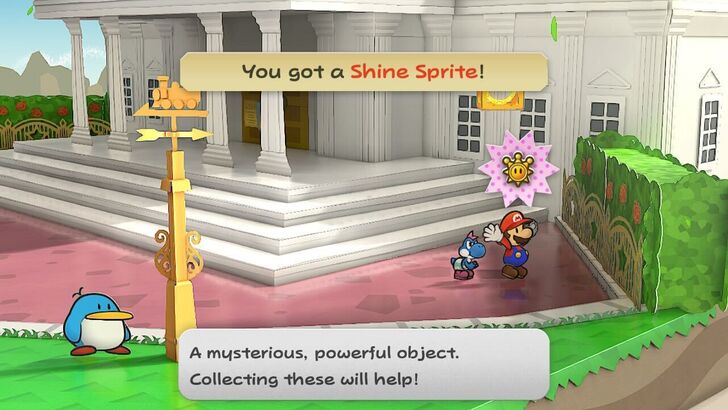
Poshley Heights
Outside of Poshley Sanctum, found on the right side of the entrance. Access the Shine Sprite by performing a Spring Jump. |
 |
|
|
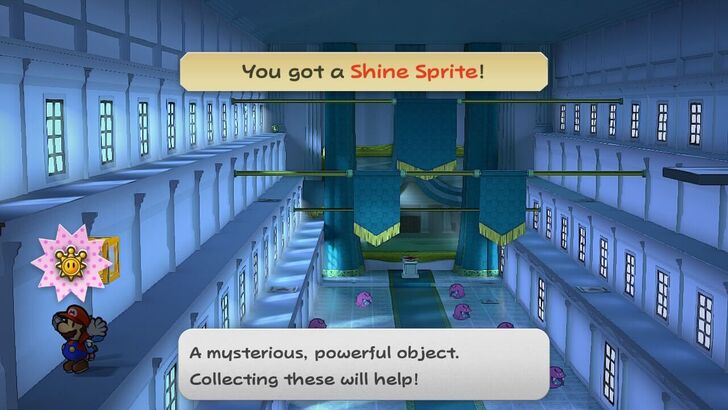
Poshley Sanctum
Beyond the painting, on a ledge to the left. Cross the overhead bars. |
 |
|
|
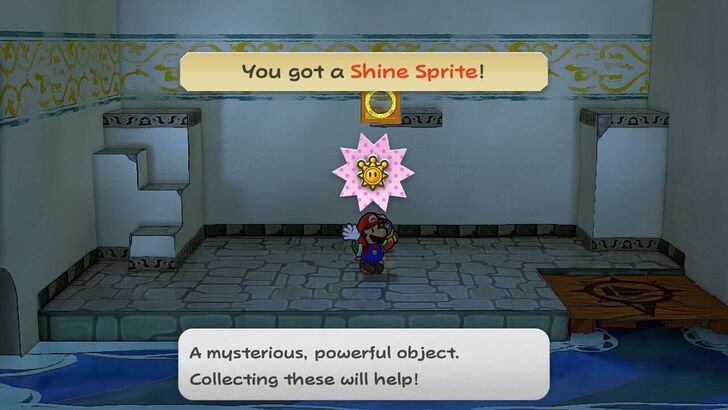
Rogueport Sewers
Above the pedestal next to where Dazzle is found, accessed with the Spring Jump. |
 |
|
|
Rogueport Sewers
Can be found in a hidden room accessible with Boat Mode on B2F. You need Spring Jump to get this Shine Sprite. |
 |
Blocks
Hidden Blocks
| Done? | Location and Item | In-Game Image |
|---|---|---|
|
Riverside Station
Found in the area with Poison Pokeys, right above the block. Item: Thunder Rage |
 |
|
|
Riverside Station
Found past the area with the numerical switches and unfolding stairs. Item: Super Shroom |
 |
|
|
Rogueport Sewers
Found above Herb T.'s house. Item: Life Shroom |
 |
|
|
Rogueport Sewers
Found above Herb T.'s house. Item: Power Plus P |
 |
Chapter 6 Enemy List
Riverside Station Enemies
| List of Enemies in Riverside Station | |||
|---|---|---|---|
| Enemy | HP | Atk | Def |
| 2 | 1 | 0 | |
| 5 | 3 | 4 | |
| 8 | 4 | 0 | |
| 7 | 4 | 0 | |
Poshley Sanctum Enemies
| List of Enemies in Poshley Sanctum | |||
|---|---|---|---|
| Enemy | HP | Atk | Def |
| 8 | 5 | 0 | |
Chapter 6 Boss Guides
Smorg Boss Guide
| Enemy | HP | Atk | Def |
|---|---|---|---|
| 4 | 3 | 0 |
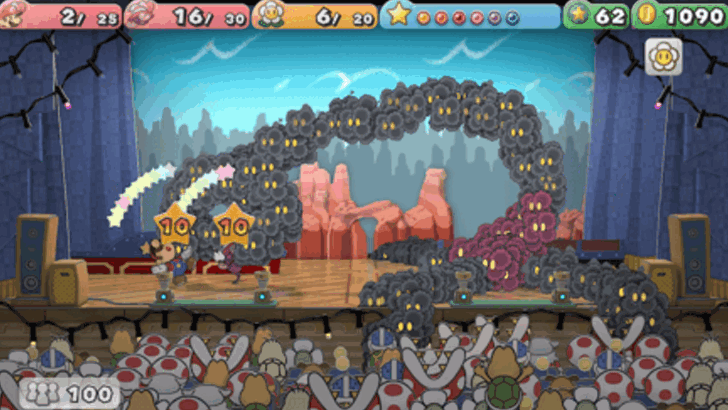
Defeat the Tentacles with Spread Attacks
The body of Smorg cannot be damaged until you defeat the tentacles, unless you use spread attacks like Vivian's Fiery Jinx move, Bobbery's Bob-ombast, or Thunder Rage to damage them both at the same time.
Note that the tentacles can revive immediately after you defeat them, so it's a good idea to keep using spread attacks against them.
Focus your Attacks on the Body
Once you have dealt enough damage, the tentacles will transform, and you will be able to damage the body of Smorg, which is the one you need to focus all your attacks on.
Note that you can damage both the tentacles and the body of Smorg at the same time by using spread attacks.
Always Maintain 10 HP
Smorg's attack after transforming into a tentacle is very powerful, so it's a good idea to stay at 10 HP or higher. You can use the Sweet Treat and Sweet Feast special moves to keep your HP above 10 with their tremendous healing.
Locations Available in Chapter 6
Excess Express, Riverside Station, Poshley Heights and Poshley Sanctum
| New Locations Available in Chapter 6 | |
|---|---|
 Excess Express Excess Express |
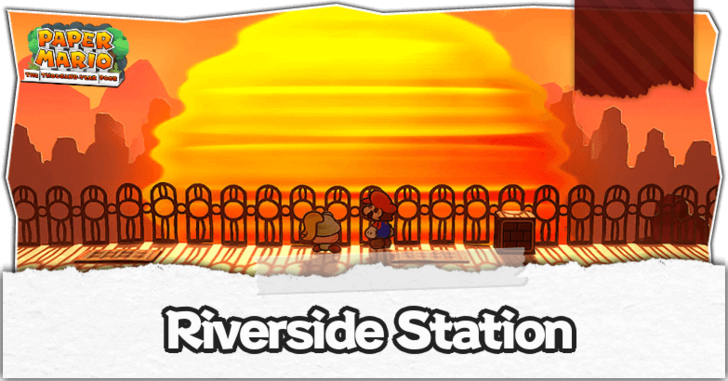 Riverside Station Riverside Station |
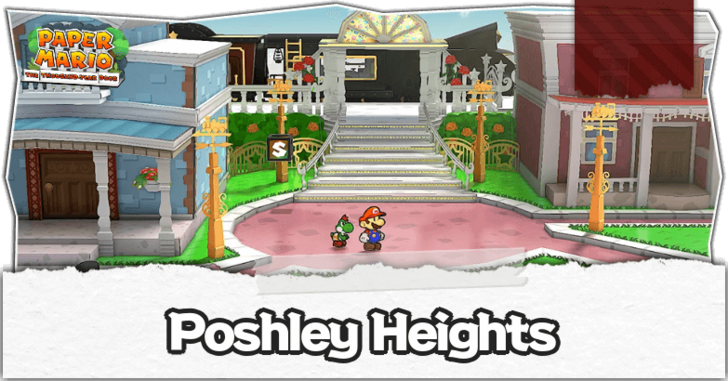 Poshley Heights Poshley Heights |
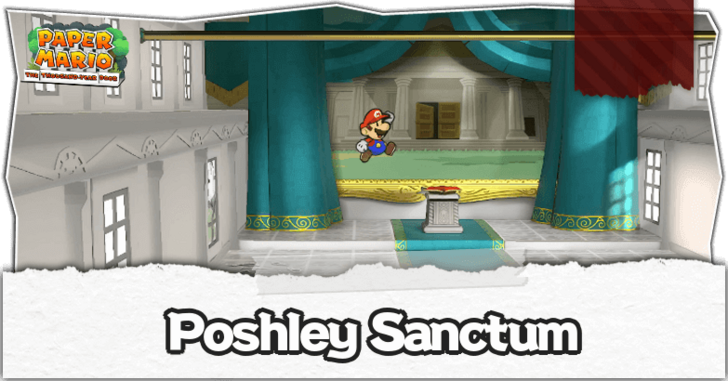 Poshley Sanctum Poshley Sanctum |
Upon starting Chapter 6, you will gain access to Excess Express, Riverside Station, Poshley Heights, and the Poshley Sanctum. There is a shortcut to Poshley Heights you can unlock after beating Chapter 6 and unlocking the Pipe in the Pipe Zone!
Chapter 6 Trouble Center Quests
The following Troubles will be unlocked after completing Chapter 6.
| Done? | Client | Details and Rewards |
|---|---|---|
 |
Request: Get These Ingredients! Reward: 40 Coins Unlock: After Chapter 6 Chef Shimi needs 3 ingredients—Mystic Egg, Keel Mango, and Golden Leaf—that he needs for cooking. |
|
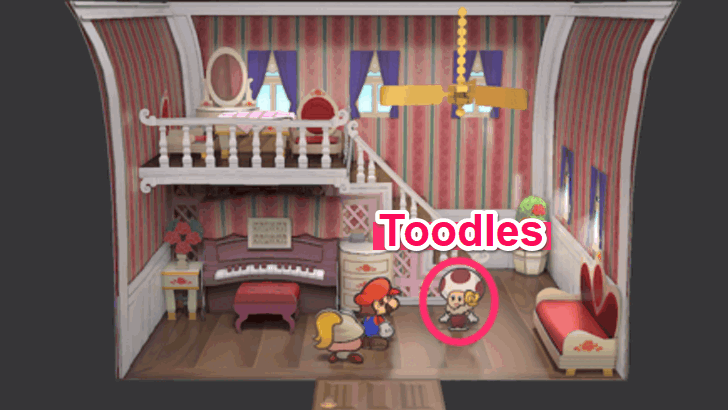 |
Request: I Need My Magazine. Reward: Platinum Card Unlock: After Chapter 6 Toodles, who lives in Poshley Heights, is asking for help getting her Wrestling Mag back from Jolene, who works far away at Glitzville. |
|
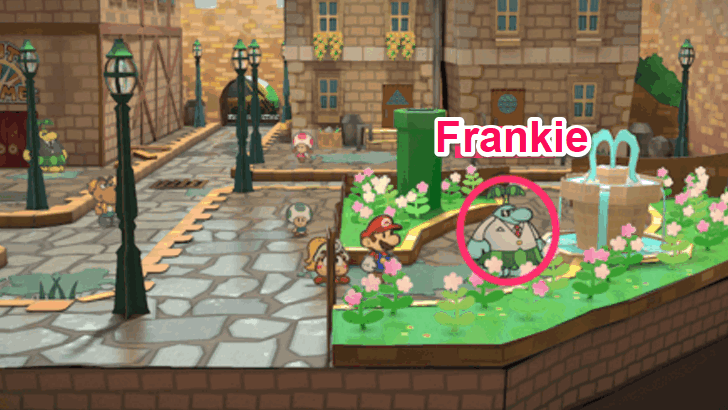 |
Request: Important Thing! Reward: Gold Card Unlock: After Chapter 6 Find Frankie's Wedding Ring on top of the wall of east Rogueport. |
|
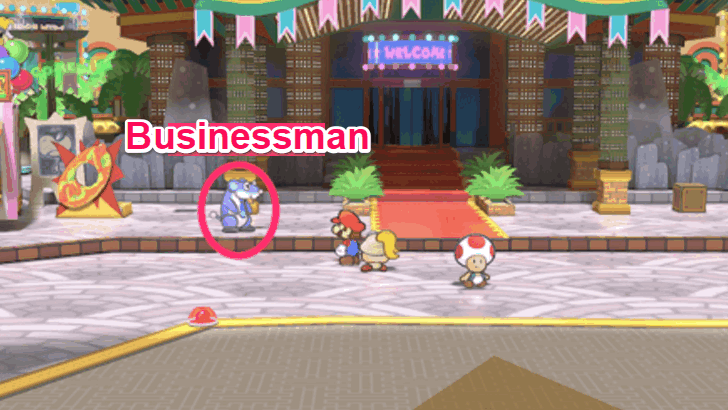 |
Request: Security Code... Reward: Hot Sauce Unlock: After Chapter 6 A Ratooey businessman needs help with the security code for his briefcase. The hint for the code would be the number of chairs inside some of the houses. |
Paper Mario: The Thousand-Year Door Related Guides

Chapter Walkthroughs
Other Walkthroughs
| Other Walkthroughs | ||
|---|---|---|
| Peach Intermissions |
Bowser Intermissions |
 Trouble Center Trouble Center |
Comment
1  Anonymous almost 2 years
The panels at Riverside Station were changed from the original gamecube.. If you updated this guide fr Switch it would have been really helpful to know this as I had to use a video.. It's not as easy as it was and involves jumping across and isn't as simple. Maybe making a note that it was changed and telling people how to cross it would have helped
Author

Paper Mario: The Thousand-Year Door (TTYD) Walkthrough & Guides Wiki
Chapter 6: 3 Days of Excess Walkthrough
Please participate in our site
improvement survey
03/2026
improvement survey
03/2026
Would you assist in
improving Game8's site?
improving Game8's site?

×
We are listening to our users' valuable opinions and discussing how to act on them.
The information collected through this survey will be used for the purpose of improving our services. In addition, the information will only be disclosed a part of a statistic in a format that will not allow identification of personal information.
Begin Survey
Not Now
×
Please rate each item regarding Game8.co's Advertisements.
Amount of Ads
Very Dissatisfied
Somewhat Dissatisfied
Fine
Somewhat Satisfied
Highly Satisfied
Placement of Ads
Timing of Ad Display
Ad Loading Speed
Safeness of Ads
Content of Ads
×
Please rate each item regarding Game8.co's Quality of Articles.
Amount of information
Very Dissatisfied
Somewhat Dissatisfied
Fine
Somewhat Satisfied
Highly Satisfied
Frequency of updates
Speed of new information
Accuracy of articles
Understandibility of articles
Readability of sentences
×
Please rate each item regarding Game8.co's Usability of the Site.
Ease of finding information
Very Dissatisfied
Somewhat Dissatisfied
Fine
Somewhat Satisfied
Highly Satisfied
Loading Speed
Use of Color
Font Size
Visibility of Images
Easy to Understand Layout
×
Please rate each item regarding Game8.co's Message Boards, Comments.
Ease of Writing
Very Dissatisfied
Somewhat Dissatisfied
Fine
Somewhat Satisfied
Highly Satisfied
Readability
Ease in Finding Information
Comment Quality
Comment Quantity
Admin Response
×
Please rate each item regarding Game8.co's Site's new design.
Please rate our site's new design
Very Dissatisfied
Somewhat Dissatisfied
Fine
Somewhat Satisfied
Highly Satisfied
Do you think that the website's design change makes the site easier to use?
Has the new design made it easier for you to find information on the site?
Has the new design improved the overall visual appeal of the site?
How would you rate your overall satisfaction with the new design of the site?
×
How likely are you to recommend Game8 to someone you know?
Very Unlikely
0
1
2
3
4
5
6
7
8
9
10
Very Likely
If you have other opinions regarding potential improvement to the website, please share them with us. We would appreciate your honest opinion.
Note: This is a free response section, so you can proceed without entering anything.
Note: Please be sure not to enter any kind of personal information into your response.
Note: Please be sure not to enter any kind of personal information into your response.
×
Thank You
×
Thank you for participating in our survey! Your answers will help us to improve the quality of our website and services.
We hope you continue to make use of Game8.
We hope you continue to make use of Game8.
Close
Rankings
- We could not find the message board you were looking for.
Gaming News


![Everwind Review [Early Access] | The Shaky First Step to A Very Long Journey](https://img.game8.co/4440226/ab079b1153298a042633dd1ef51e878e.png/thumb)

![Monster Hunter Stories 3 Review [First Impressions] | Simply Rejuvenating](https://img.game8.co/4438641/2a31b7702bd70e78ec8efd24661dacda.jpeg/thumb)
Popular Games

Genshin Impact Walkthrough & Guides Wiki
Honkai: Star Rail Walkthrough & Guides Wiki
Umamusume: Pretty Derby Walkthrough & Guides Wiki
Pokemon Pokopia Walkthrough & Guides Wiki
Resident Evil Requiem (RE9) Walkthrough & Guides Wiki
Monster Hunter Wilds Walkthrough & Guides Wiki
Wuthering Waves Walkthrough & Guides Wiki
Arknights: Endfield Walkthrough & Guides Wiki
Pokemon FireRed and LeafGreen (FRLG) Walkthrough & Guides Wiki
Pokemon TCG Pocket (PTCGP) Strategies & Guides Wiki


Recommended Games
Diablo 4: Vessel of Hatred Walkthrough & Guides Wiki
Fire Emblem Heroes (FEH) Walkthrough & Guides Wiki
Yu-Gi-Oh! Master Duel Walkthrough & Guides Wiki
Super Smash Bros. Ultimate Walkthrough & Guides Wiki
Pokemon Brilliant Diamond and Shining Pearl (BDSP) Walkthrough & Guides Wiki
Elden Ring Shadow of the Erdtree Walkthrough & Guides Wiki
Monster Hunter World Walkthrough & Guides Wiki
The Legend of Zelda: Tears of the Kingdom Walkthrough & Guides Wiki
Persona 3 Reload Walkthrough & Guides Wiki
Cyberpunk 2077: Ultimate Edition Walkthrough & Guides Wiki


All rights reserved
© Nintendo. Games are property of their respective owners. Nintendo of America Inc. Headquarters are in Redmond, Washington, USA
The copyrights of videos of games used in our content and other intellectual property rights belong to the provider of the game.
The contents we provide on this site were created personally by members of the Game8 editorial department.
We refuse the right to reuse or repost content taken without our permission such as data or images to other sites.
The details for getting the Autograph need a slight amendment! After talking to the Conductor at the rear of the train, players need to talk to Zip Toad in cabin 001 first before the train engineer to get the "Autograph" answer to Bub the Bob-omb's riddle for what he wants.