This survey will take about 1 minute.
Your answers will help us to improve our website.
Overwatch 2
Nepal Map Tips and Best Team
The Halloween Terror event is now live!
★10/25/2022 Patch Notes | Dev Blog #6
★ Hero Tier List: Best Characters to Play
┗Best Tanks | Best DPS | Best Supports
★ Heroes | Beginner's Guide | Competitive Mode Explained
┗Tank Guides | DPS Guides | Support Guides

Nepal is a Control map in Overwatch 2. Read on to learn the map's basic information, the best team composition and strategy, health pack locations, and more on the Nepal map!
List of Contents
Nepal Map Overview
Nepal Basic Information
 |
|
| Location | Nepal |
|---|---|
| Game Mode | Control |
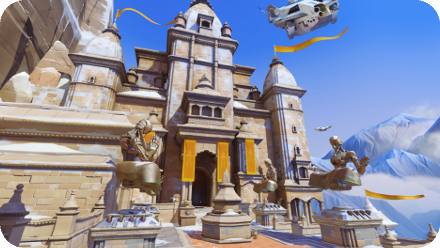
Nepal Description
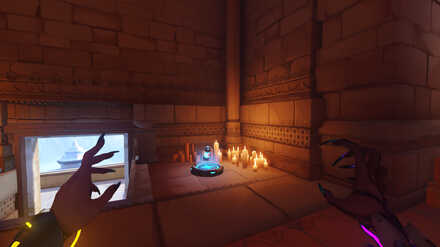
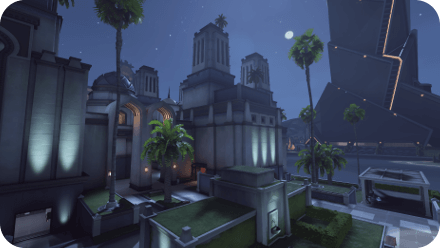
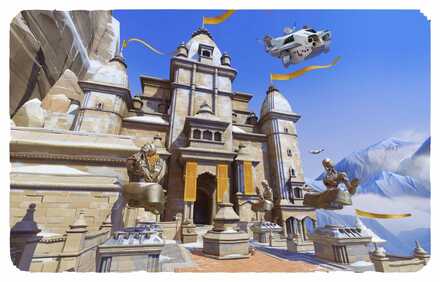
The Nepal map sends players to fight inside a snowy monastery, where they battle for control inside its Village, Shrine, and Sanctum. This map features many angles of attack for both teams, making it a fantastic stage for high-intensity Control matches.
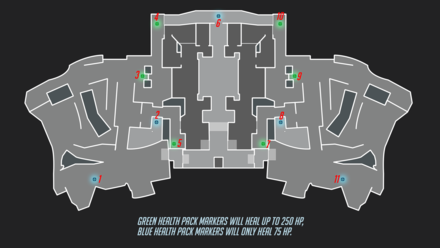
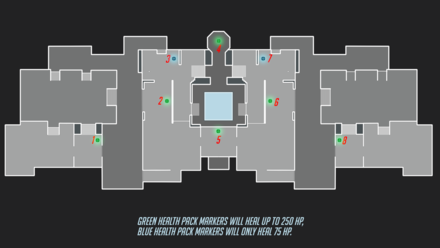
Nepal Health Pack Locations
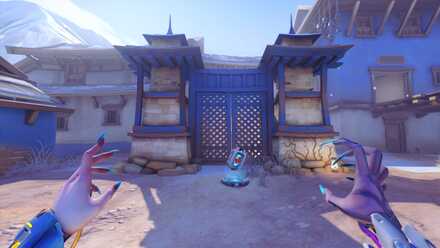
Village
| Map Layout | |
|---|---|
 |
|
| 1 | 2 |
 Found right outside the westernmost team's upper spawn point exit. |
 Found in a corner to the right of the western gate to the control point. |
| 3 | 4 |
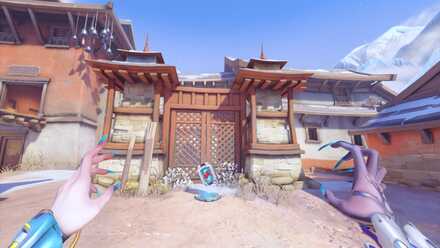 Found behind the red wooden structure across the western gate to the control point. |
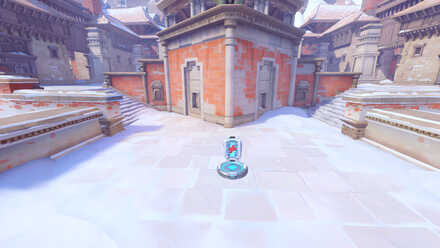
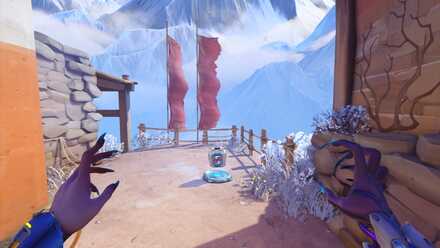 Found on the fenced western cliffside next to two red flags before the control point. |
| 5 | 6 |
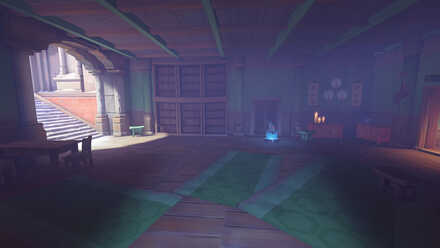
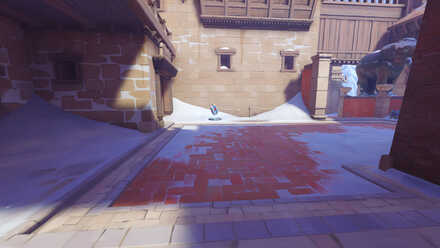
 Found on the ground floor of the red building southwest of the control point. |
 Found on the wooden cliffside platform directly across the control point. |
| 7 | 8 |
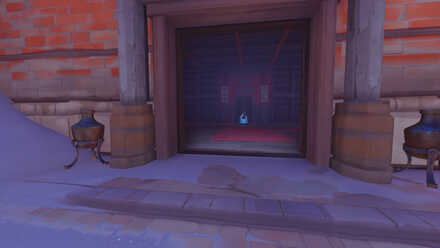
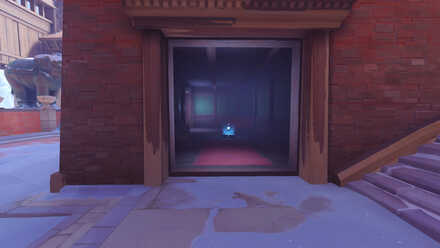
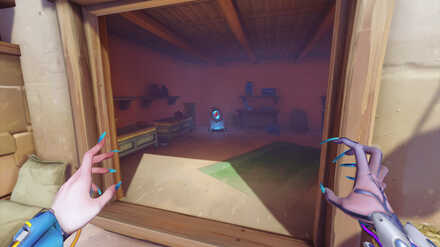 Found on the ground floor of the blue building southeast of the control point. |
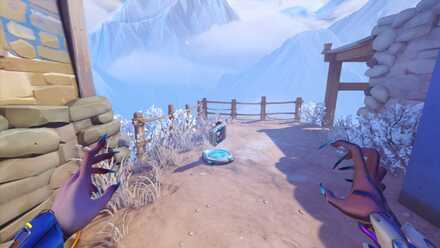 Found on the fenced eastern cliffside before the control point. |
| 9 | 10 |
 Found behind the blue wooden structure across the eastern gate to the control point. |
 Found in a corner to the right of the eastern gate to the control point. |
| 11 | |
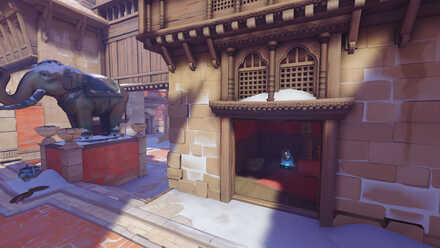
 Found right outside the easternmost team's upper spawn point exit. |
|
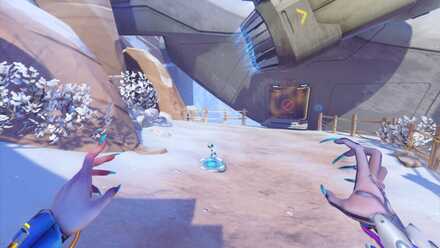
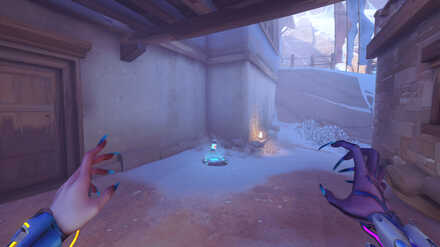
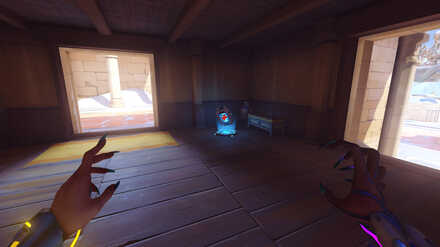
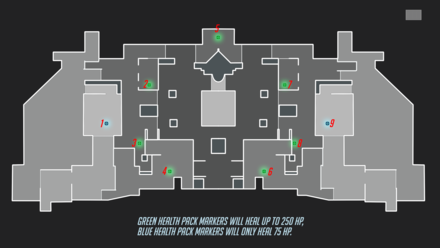
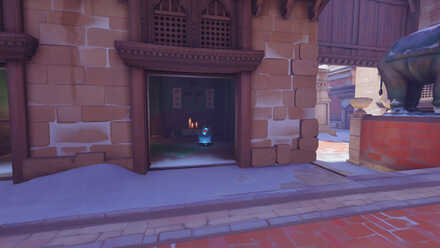
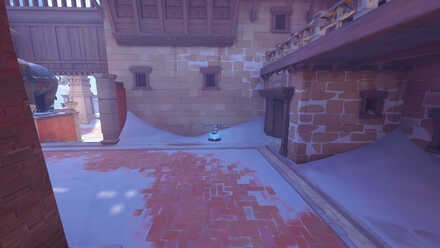
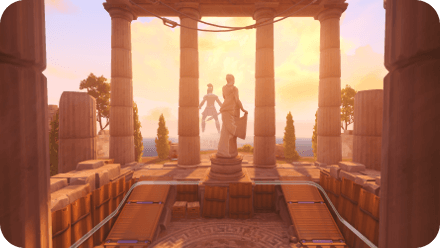
Sanctum
| Map Layout | |
|---|---|
 |
|
| 1 | 2 |
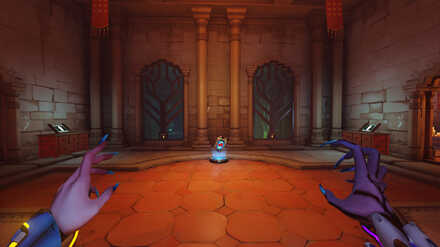
 Found inside the structure to the right of the westernmost team's spawn point. |
 Found directly past the sanctum's westernmost entrance. |
| 3 | 4 |
 Found down the steps to the left of the health pack in #2. |
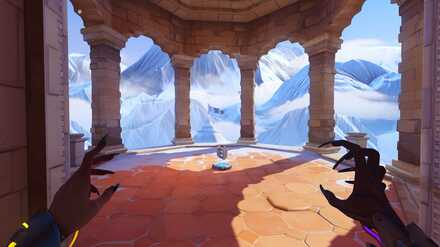 Found inside the cliffside gazebo across from the control point. |
| 5 | 6 |
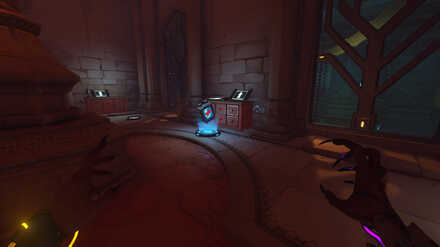 Found inside the room overlooking the control point. |
 Found directly past the sanctum's easternmost entrance. |
| 7 | 8 |
 Found down the steps to the right of the health pack in #6 . |
 Found inside the structure to the left of the easternmost team's spawn point. |
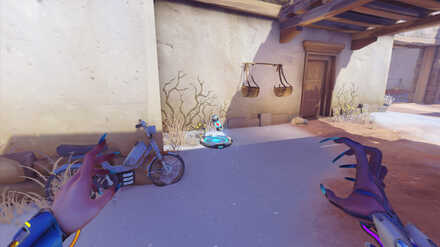
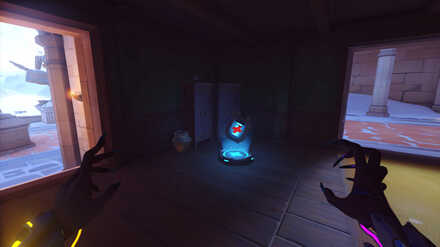
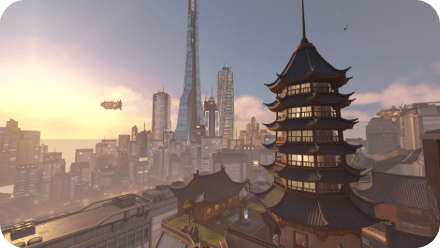
Shrine
| Map Layout | |
|---|---|
 |
|
| 1 | 2 |
 Found on the ground floor of the building in front of the westernmost team's spawn point. |
 Found in a corner to the left of the western gate to the control point. |
| 3 | 4 |
 Found in a room to the right of the western gate to the control point. |
 Found on the ground floor of the building southwest of the control point. |
| 5 | 6 |
 Found on the cliffside overhang across from the control point. |
 Found on the ground floor of the building southeast of the control point. |
| 7 | 8 |
 Found in a room to the right of the eastern gate to the control point. |
 Found in a corner to the left of the eastern gate to the control point. |
| 9 | |
 Found on the ground floor of the building in front of the easternmost team's spawn point. |
|
Nepal Tips and Strategies
Take Advantage of Cramped Control Points
Nepal features control points located in small and cramped locations, making them havens for close-range firefights. Use this to your advantage when pushing toward teams defending control points by using Heroes like Reaper, Junkrat, and Zarya, who excel at fighting in tight spaces.
Be Wary of Flanking Routes
Nepal also features plenty of flanking routes through its many narrow buildings and pathways. Due to this, be particularly mindful of flanking heroes like Genji, Reaper, and Sombra in this map, as they can take advantage of the terrain to strike from unexpected angles.
Shove Foes into Sanctum's Pitfall
Next to Sanctum's control point is a large bottomless pit that acts as an environmental hazard that both teams should always be wary of. Shove careless foes into this pitfall for easy eliminations by using Heroes with pushing abilities, like Lúcio, D.Va, and Orisa.
Nepal Best Team Composition
Best Nepal Team
| Best Tank | 
|
|---|---|
| Best DPS | 

|
| Best Supports | 

|
Team Explanation
This team works well on all three points in Nepal, taking advantage of the map's unique terrain, tight choke points, and ample flanking routes.
- Winston quickly closes the distance with key enemy targets and teammates in need with Jump Pack and rapidly wears down foes with Tesla Cannon. His Barrier Projector is also a potent defensive tool in Nepal, providing ample cover and space control when securing the control point. Primal Rage excels at further disrupting the enemy team's positioning, capable of isolating crucial targets into corners and shoving enemies into the map's pitfalls.
- Genji swiftly maneuvers Nepal's flanking routes with Cyber-Agility and Swift Strike, letting him quickly eliminate crucial targets from multiple angles. His Deflect is also a great tool for reflecting shots in the map's longer sightlines and during frantic close-range firefights. When engaging in fights around the control point, Dragonblade and Swift Strike resets let him quickly tear through multiple enemies.
- Sojourn is capable of dueling both close-range fighters and enemy snipers with her Railgun, especially when empowered by her Overclock ultimate. Her Power Slide's high jump also allows her to cross the map's small gaps and reach its vantage points and flanking routes. To control space and deal with foes inside the control point, Sojourn's Disruptor Shot provides her with heavy area-based damage that also snares foes.
- Ana takes advantage of Nepal's natural cover and longer sightlines to support her team from afar with Biotic Rifle. Her Sleep Dart and Biotic Grenade are also excellent tools for disabling crucial enemy targets and dealing with clumped-up groups of foes in the map's cramped rooms. Nano Boost also pairs well with Genji and Sojourn, providing them with increased damage output and survivability.
- Lúcio improves his team's mobility with Speed Boost and Amp It Up, letting them secure Nepal's control points before the enemy team. He also provides potent area-based healing and survivability with his Healing Boost and Sound Barrier. Lúcio's Soundwave is also particularly potent in Sanctum due to the large pitfall beside the control point.
Alternatives (Situational Picks)
| Tank | Damage | Support |
|---|---|---|


|


|


|
Alternative Tanks
- D.Va: D.Va is a potent alternative Tank in Nepal. She quickly bursts down foes in the map's narrow corridors with Fusion Cannons and Micro Missiles and efficiently shields her team from projectiles with Defense Matrix. Her Boosters also shine in Sanctum, letting her easily shove foes into the control point's pitfall. Self Destruct can also be a devastating ultimate when positioned properly along Nepal's choke points and control points.
- Orisa: Orisa is another well-rounded alternative Tank for Nepal. Fortify and Javelin Spin let Orisa efficiently soak heavy damage and block deadly projectiles, making her incredibly tough to take down. She also has strong disruptive tools in Energy Javelin and Terra Surge, each of them incredibly potent when used in fights along the map's narrow streets and cramped control points.
- Reinhardt: Reinhardt offers excellent cover along the Nepal's narrow corridors and sightlines with Barrier Field and deals massive damage up close with Rocket Hammer. The map's terrain also lets Reinhardt have an easier time landing multihit Fire Strikes and deadly Charges. When fighting around the control point, Earthshatter can disrupt entire enemy teams and sets them up for other abilities.
- Zarya: Zarya provides excellent damage mitigation with her Barriers, which also empowers her Particle Cannon and lets her take down groups of foes with ease. Graviton Surge is a potent disruptive ultimate when used in Nepal's control points and choke points, especially when combined with her allies' other ultimates.
Alternative Damage
- Junkrat: Junkrat can apply constant pressure toward Nepal's cramped control points and choke points with his Frag Launcher and easily wipes out grouped-up foes with Rip-Tire. He can also reach the map's vantage points and deal heavy burst damage with Concussion Mine while covering flanks and disrupting team fights with Steel Trap.
- Mei: Nepal's unique terrain pairs well with all of Mei's skills, making her a great alternative Damage Hero. The map's ample cover, flanking routes, and cramped areas make up for her low mobility and let her make the most out of her Endothermic Blaster and Blizzard. Her Ice Wall is also incredibly potent in Nepal, capable of blocking entire pathways and isolating foes.
- Reaper and Sombra: These two are excellent alternative flankers in Nepal. Reaper can maneuver around the map's flanking routes with Shadow Step before dealing devastating damage up close with Hellfire Shotguns and Death Blossom. Sombra offers more utility and disruption, moving around unseen with Stealth to disrupt and dispatch key enemy targets with Hack and EMP.
Alternative Supports
- Baptiste: Baptiste offers potent area-based healing in Nepal's cramped terrain with Biotic Launcher and Regenerative Burst while fortifying his team's positioning with Immortality Field and Amplification Matrix. He can also access the map's high ground with Exo Boost, providing him with better angles for healing allies and shooting foes.
- Moira: Nepal's narrow pathways and cramped areas let Moira efficiently use her Biotic Grasp and Biotic Orb, providing excellent healing and damage output for her team. Her Fade is also a potent mobility tool for crossing the map's short gaps and escaping behind natural cover. Coalescence also provides potent healing and damage when fighting around control points and choke points.
- Kiriko: Kiriko is an excellent alternative Support in Nepal. She can quickly move through the map's cramped terrain with Swift Step to escape from danger and reach teammates in need. Her Protection Suzu is also incredibly potent when used in the map's choke points and control points, especially against enemy Ana players. Kitsune Rush also excels at attacking and defending control points with its numerous potent buffs.
Overwatch 2 Related Guides

Control Maps
 Ilios Ilios |
 Lijiang Tower Lijiang Tower |
 Oasis Oasis |
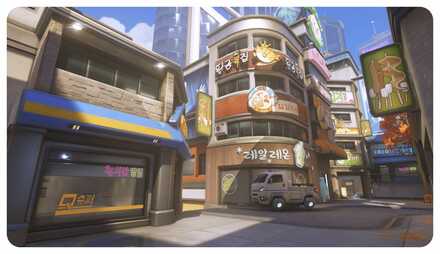 Busan Busan |
 Nepal Nepal |
Escort Maps
 Circuit RoyalNEW Circuit RoyalNEW |
 Dorado Dorado |
 Route 66 Route 66 |
 Watchpoint: Gibraltar Watchpoint: Gibraltar |
 Junkertown Junkertown |
Hybrid Maps
 MidtownNEW MidtownNEW |
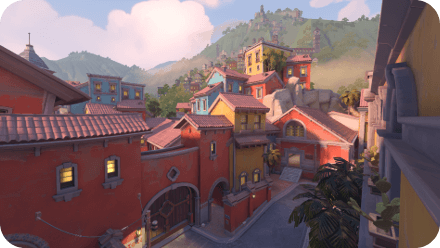
 ParaísoNEW ParaísoNEW |
 Eichenwalde Eichenwalde |
 King's Row King's Row |
 Hollywood Hollywood |
Push Maps
 ColosseoNEW ColosseoNEW |
 New Queen StreetNEW New Queen StreetNEW |
 EsperançaNEW EsperançaNEW |
Author

Nepal Map Tips and Best Team
Please participate in our site
improvement survey
03/2026
improvement survey
03/2026
Would you assist in
improving Game8's site?
improving Game8's site?

×
We are listening to our users' valuable opinions and discussing how to act on them.
The information collected through this survey will be used for the purpose of improving our services. In addition, the information will only be disclosed a part of a statistic in a format that will not allow identification of personal information.
Begin Survey
Not Now
×
Please rate each item regarding Game8.co's Advertisements.
Amount of Ads
Very Dissatisfied
Somewhat Dissatisfied
Fine
Somewhat Satisfied
Highly Satisfied
Placement of Ads
Timing of Ad Display
Ad Loading Speed
Safeness of Ads
Content of Ads
×
Please rate each item regarding Game8.co's Quality of Articles.
Amount of information
Very Dissatisfied
Somewhat Dissatisfied
Fine
Somewhat Satisfied
Highly Satisfied
Frequency of updates
Speed of new information
Accuracy of articles
Understandibility of articles
Readability of sentences
×
Please rate each item regarding Game8.co's Usability of the Site.
Ease of finding information
Very Dissatisfied
Somewhat Dissatisfied
Fine
Somewhat Satisfied
Highly Satisfied
Loading Speed
Use of Color
Font Size
Visibility of Images
Easy to Understand Layout
×
Please rate each item regarding Game8.co's Message Boards, Comments.
Ease of Writing
Very Dissatisfied
Somewhat Dissatisfied
Fine
Somewhat Satisfied
Highly Satisfied
Readability
Ease in Finding Information
Comment Quality
Comment Quantity
Admin Response
×
Please rate each item regarding Game8.co's Site's new design.
Please rate our site's new design
Very Dissatisfied
Somewhat Dissatisfied
Fine
Somewhat Satisfied
Highly Satisfied
Do you think that the website's design change makes the site easier to use?
Has the new design made it easier for you to find information on the site?
Has the new design improved the overall visual appeal of the site?
How would you rate your overall satisfaction with the new design of the site?
×
How likely are you to recommend Game8 to someone you know?
Very Unlikely
0
1
2
3
4
5
6
7
8
9
10
Very Likely
If you have other opinions regarding potential improvement to the website, please share them with us. We would appreciate your honest opinion.
Note: This is a free response section, so you can proceed without entering anything.
Note: Please be sure not to enter any kind of personal information into your response.
Note: Please be sure not to enter any kind of personal information into your response.
×
Thank You
×
Thank you for participating in our survey! Your answers will help us to improve the quality of our website and services.
We hope you continue to make use of Game8.
We hope you continue to make use of Game8.
Close
Rankings
- We could not find the message board you were looking for.
Gaming News


![Slay the Spire 2 Review [Early Access] | Still the Deckbuilder to Beat](https://img.game8.co/4433115/44e19e1fb0b4755466b9e516ec7ffb1e.png/thumb)

![Resident Evil Village Review [Switch 2] | Almost Flawless Port](https://img.game8.co/4432790/e1859f64830960ce4248d898f8cd38d9.jpeg/thumb)
Popular Games

Genshin Impact Walkthrough & Guides Wiki
Honkai: Star Rail Walkthrough & Guides Wiki
Umamusume: Pretty Derby Walkthrough & Guides Wiki
Pokemon Pokopia Walkthrough & Guides Wiki
Resident Evil Requiem (RE9) Walkthrough & Guides Wiki
Monster Hunter Wilds Walkthrough & Guides Wiki
Wuthering Waves Walkthrough & Guides Wiki
Arknights: Endfield Walkthrough & Guides Wiki
Pokemon FireRed and LeafGreen (FRLG) Walkthrough & Guides Wiki
Pokemon TCG Pocket (PTCGP) Strategies & Guides Wiki


Recommended Games
Fire Emblem Heroes (FEH) Walkthrough & Guides Wiki
Diablo 4: Vessel of Hatred Walkthrough & Guides Wiki
Yu-Gi-Oh! Master Duel Walkthrough & Guides Wiki
Super Smash Bros. Ultimate Walkthrough & Guides Wiki
Pokemon Brilliant Diamond and Shining Pearl (BDSP) Walkthrough & Guides Wiki
Elden Ring Shadow of the Erdtree Walkthrough & Guides Wiki
Monster Hunter World Walkthrough & Guides Wiki
The Legend of Zelda: Tears of the Kingdom Walkthrough & Guides Wiki
Persona 3 Reload Walkthrough & Guides Wiki
Cyberpunk 2077: Ultimate Edition Walkthrough & Guides Wiki


All rights reserved
©2022 BLIZZARD ENTERTAINMENT, INC. ALL RIGHTS RESERVED. All trademarks referenced herein are the properties of their respective owners.
The copyrights of videos of games used in our content and other intellectual property rights belong to the provider of the game.
The contents we provide on this site were created personally by members of the Game8 editorial department.
We refuse the right to reuse or repost content taken without our permission such as data or images to other sites.