Bestower of All Chapter 8: At Journey's End Walkthrough
☆ How to Unlock All 36 Characters
★ Tier Lists: Best Characters and Best Jobs
☆ Farming Guides: EXP, JP, Money
★ Forbidden Weapon Locations
☆ Battle-Tested Equipment Locations
★ Endings Guide | Post-Game Guide

At Journey's End is the eight chapter of the Bestower of All questline of Octopath Traveler 0 (Octopath 0). Here's a walkthrough of At Journey's End, along with boss guides and tips for completing the quest!
| ◀ Previous Chapter | Next Chapter ▶ |
|---|---|
| Sazantos | - |
List of Contents
At Journey's End Details and Unlock Condition
| Chapter | Bestower of All - Chapter 8 | Location | Frostlands Region, Flamebearer's Shrine |
|---|---|
| Rec. Level | 63 |
| Quest Description | |
| After overcoming the Flamebringer's trial, the protagonist travels to the Heavens in pursuit of Sazantos. | |
At Journey's End is automatically unlocked after completing Chapter 7 Sazantos and officially starts when you arrive to the Heavens using the shrine. In this chapter you will explore the Heavens and find out more about Sazantos.
At Journey's End Walkthrough
Quest Objectives
| 1 |  Head to the Heaven's from the Shrine. Interact with the shrine to get to the Heavens. |
|---|---|
| 2 |  Proceed into the Heavens. Enter the gate of the Heavens and continue ahead to trigger a cutcsene. |
| 3 |  Explore Wishvale. After the scene ends, step outside the house and explore Utopia: Wishvale. Once you're done exploring, proceed to the village square to progress the quest. Afterwards, several markers will show up on your map. |
| 4 |  Make your way to each marker to trigger a scene: • The church • The theatre (Watch the play) • The planting plot • In front of the watermill |
| 5 |  Speak to Sazantos. Finally, speak to Sazantos at the northern end of Utopia: Wishvale. He will ask if you want to stay in his utopia. If you choose Yes, a brief scene will play out, and then the game will return to the Title Screen, earning a Bad End. You must choose No to continue the game. Note: You can choose yes first if you want to see the Bad End, but make sure to save before talking to Sazantos. ▶ Endings Guide |
| 6 |  Illuminate everyone. After selecting No, you will unlock the Illuminate path action. You only need to illuminate all your companions, NPCs are not included. You can easily identify the ones you can illuminate by the ring symbol that appears in the Path Action bubble above their heads when you get close to them. |
| 7 |  Stia is the nearest one that you can start with, just a bit south from Sazantos. The others are at the following locations: • Reime - Near the protagonist's house. • Ophilia - Next to the church's log storage. • Pius - Inside the church. • Rondo - Beside the pedestal in the village square. • Delitia - Beside the item shop. • Ludo - Behind the counter of the item shop. • Tressa - Beside the counter of the item shop. • Heidne - Next to the round table inside the item shop. • Bargello - Next to the cow pen by the crop plot. • Phenn - Next to the first bench near the crop plot. • Esperre - Beside the tree near the watermill. • Olberic - At the southeastern end of Utopia: Wishvale, where the graveyard should be. • Alfyn - Next to the first bench at the southwestern end of Utopia: Wishvale. • Carinda - Next to the second bench at the southwestern end of Utopia: Wishvale along with Macy. • Macy - Beside Carinda at the southwestern end of Utopia: Wishvale. • Solon - As Trompeur the Merchant, by the table nearest to the tavern's entrance. • Richard - As Charles the Traveler, at the same table with Solon. • Tatloch - Beside a table in the tavern, next to her panther. • Eltrix - At the same table with Tatloch. • Celsus - Inside the tavern's sleeping quarters. • Therion - In front of the horse enclosure at the western end of Utopia: Wishvale. • H'aanit - Inside the house, beside the horse enclosure. • Saoirse - In front of the Theatropolis-based multipurpose building. • Viator - Inside the theater, to the left side of the entrance. • Primrose - Inside the theater, at the left side of the stage. • Goodwin - Inside the theater, at the right side of the stage. • Alexia - In front of the bookshelf in the northeast part of the library. • Xerc - In the middle of the library, by the window. • Cyrus - In front of the bookshelf in the western part of the library. • Laurana - In the salon of the Theatropolis-based multipurpose building, near a chair next to her grandmother. • Alaune - In the salon, behind Laurana and near the couch next to her sister. |
| 8 |  Speak to Sazantos. After illuminating all your companions, return to the northern end of Utopia: Wishvale and speak to Sazantos. He will ask you one last time if you truly think his utopia is abhorrent. Reject Sazantos to progress the quest, however you won't be able to return to Utopia: Wishvale anymore after. |
| 9 |  Proceed into the Heavens. After the dialogue, move up ahead and interact with the northernmonst pedestal to teleport to your next destination, the Seas of Servility. The goal is to activate each pedestal of fire so you can get to the Heavens. |
| 10 |  You will find yourself in the Seas of Servility: Hollow Path. Examine the book near the pedestal and then board the ship. |
| 11 |  In the first level of the Seas of Servility, sail your ship to the easternmost building to activate the blue switch and the northeasternmost building for the green switch. This will light the blue and green crystals and open the door to the second level. Other structures contain chests, while the first building also holds Lyblac's Journal. Note: In the building, where you find the blue switch is also an optional elite enemy, the Sanct Oliphant. Additionally, any inaccessible chests you see can be looted by gaining access from later areas. |
| 12 |  Upon reaching the second level of the Seas of Servility, head to the northwest end to grab the chest. Afterward, enter the nearby building to activate the green switch. |
| 13 |  At the center of the second level are two entrances to the same area, but with access to different passages. The left passage contains a chest, while the right is where you'll find the blue switch. |
| 14 |  Finally, after activating both switches, head to the northeastern building and go through the opened door to reach the third level. Make sure to prepare for a boss fight and save before leaving the Seas of Servility: Divine Path. |
| 15 |  The third level of the Seas of Servility is just a small area. Loot the chest on the west side, then defeat the Sacred Beast of the Seas to clear the path. Afterwards, interact with the marker to exit the area. |
| 16 |  Once you have returned to the Garden of Sin, you will find that the north fire pedestal is lit up. Interact with the pedestal to the left to proceed to the Sands of Rapacity. |
| 17 |  Sands of Rapacity has only one floor, but you'll need to operate several orange switches to create bridges to move forward. Additionally, you will also need to flip a green and blue switch to reach the final orange switch. The waterfall sands in this area will lead you to the inaccessible chests at the Seas of Servility. |
| 18 |  Once you arrive at Sands of Rapacity, examine the book next to the teleport pedestal. Next, continue forward where you'll find the first orange switch. Activating this switch will destroy the bridge to your right and create a bridge to your left. You can opt to flip this later if you want to defeat the optional elite enemy Sanct Garmr. Otherwise, flip it on then cross the bridge to the southwest end of the area. |
| 19 |  Grab the chest to the south, then activate the second orange switch in the passage ahead. This will trigger a bridge leading to the middle part of the Sands of Rapacity. |
| 20 |  Cross the bridge that appeared towards north and head west, then activate the third orange switch. |
| 21 |  You can bypass the fourth orange switch since the bridge further north is already fully formed, but flipping it will reveal a path to a chest to the right. Note that this destroys the northern section of the bridge, so you'll need to hit the switch a second time to restore the path once you're done. |
| 22 |  Once you reach the northern section, operate the fifth orange switch to the northwest to create a path toward the green switch, then head across to activate it. |
| 23 |  Next, use the sixth orange switch to the northeast to create a path, allowing you to reach and activate the blue switch. |
| 24 |  With both the green and blue switches active, the path to the last switch will emerge. Head across and trigger the seventh orange switch, which finally bridges the gap to the northernmost end of the Sands of Rapacity. |
| 25 |  Continue forward to face the Sacred Beast of the Sands. After defeating the area boss, return to the Garden of Sin. |
| 26 |  Back in the Garden of Sin, you will find that the Sands of Rapacity pedestal now glows with fire. With that accomplished, approach and interact with the pedestal to the right to reach the Skies of Vanity. |
| 27 |  The Skies of Vanity is divided into three levels, featuring separate sections on the first floor. To move between them, you must use the various lifts scattered throughout the area. Your goal is to light up the green and blue crystals, to make the central lift to the top level appear. Note: At the eastern end of Skies of Vanity is an optional elite enemy, the Sanct Cauchemar. |
| 28 |  Upon arriving at the first level in Skies of Vanity, start by examining the book next to the teleport pedestal. Afterwards, proceed to the east and take the first lift upward to the second level. |
| 29 |  On the second level level, turn left and head northwest to find the lift leading back down to the first level. |
| 30 |  Once you're back at the first level, head to the northwesternmost side to find and activate the green switch, marking the first step toward unlocking the central lift. |
| 31 |  After activating the green switch, return to the second level using the lift to the south of your current platform. Next, head to the northeast lift, which will carry you down to a separate section of the third level containing the blue switch. |
| 32 |  Proceed to the northernmost end of your current platform to find and activate the blue switch. With both crystals now lit, the central lift will manifest. To reach it, return to the second level and head back to the middle of the area, where you can now ascend to the top floor. |
| 33 |  Prepare for a boss fight and save your game, then ascend to the top floor using the central lift. |
| 34 |  Continue forward to face the Sacred Beast of the Skies. After defeating the area boss, return to the Garden of Sin. |
| 35 |  Back at the Garden of Sin, all three silver pedestals are now lit up, making the central golden pedestal also ablaze with fire. Interact with the golden pedestal to be transported to the Altar of Heavenly Peals. Note: You can fast travel to Wishvale and rest at your bed to fully replenish your HP and SP before proceeding to the major boss fight. |
| 36 |  Confront Sazantos. When you're done preparing, head to the Altar of Heavenly Peals and continue forward to face Sazantos. He has two forms, Saint Sazantos and Orsazantos. |
| 37 |  Touch the Light. After defeating Sazantos' two phases, touch the light that suddenly appears. |
| 38 |  Explore the world. You will find yourself in a wide expanse of snowy landscape with just a single house in the distance. Move north and enter the house to trigger a scene. |
| 39 |  Do what you desire. After the cutscene and speaking with the NPCs, exit the house and keep heading south to leave the area. |
| 40 |  Touch the Light. You will return to the Altar of Heavenly Peals. Touch the light once again, to fight the final boss of this chapter, Bestower of All. Make sure to be prepared and save, as this will be a long fight. |
| 41 |  Head to Castle Edoras. After the final battle and the cutscene, you will regain control of your character. Make your way to the front of Castle Edoras. |
| 42 |  Meet with Alaune. Lastly, enter Castle Edoras and head to Alaune's bedroom for the final scene. Congratulations, you have completed the normal ending of Octopath Traveler 0! |
At Journey's End Bosses
Sacred Beast of the Seas
| Enemy Information | |
|---|---|
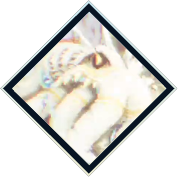 Sacred Beast of the Seas
|
|
| Shield Points (SP) | 26 SP |
| Weaknesses | |
The Sacred Beast of the Seas mostly use Physical attacks, so using Physical Defense buffs on your team and Physical Attack debuffs on this boss makes it easier to focus on offense.
Sacred Beast of the Seas Boss Guide
Sacred Beast of the Sands
| Enemy Information | |
|---|---|
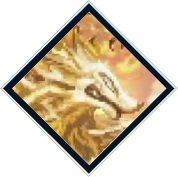 Sacred Beast of the Sands
|
|
| Shield Points (SP) | 24 SP |
| Weaknesses | |
Sacred Beast of the Sands can attack twice per turn and can easily unleash its boosted attack, Roar of the Heavens, shortly after readying it. Make sure to focus on depleting its Shield Points even before the boosted attack notification appears to prevent its use.
Sacred Beast of the Sands Boss Guide
Sacred Beast of the Skies
| Enemy Information | |
|---|---|
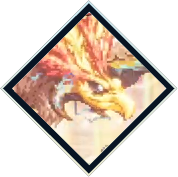 Sacred Beast of the Skies
|
|
| Shield Points (SP) | 24 SP |
| Weaknesses | |
Whenever the Sacred Beast of the Skies recovers from a shield break, it will start doing a countdown. After five turns, it will use Divine Judgement which is a strong attack that hits all characters on the front row.
You can prevent this by breaking its shield again while doing a countdown. Bring characters that can hit the boss' weakness with skills that hit multiple times, such as Alexia's Duskblight or Phenn's Repeated Shot.
Sacred Beast of the Skies Boss Guide
Octopath Traveler 0 (Octopath 0) Related Guides

All Major Questlines
All Main Quest Walkthroughs
Comment
Author

Bestower of All Chapter 8: At Journey's End Walkthrough
Rankings
- We could not find the message board you were looking for.
Gaming News

![The Liar Princess and the Blind Prince Review [PC] | Lovely to Look at but Tedious to Play](https://img.game8.co/4442586/8d95f5faf05780f1765ce7e0938bd825.jpeg/show)

![Monster Hunter Stories 3 Review [First Impressions] | Simply Rejuvenating](https://img.game8.co/4438641/2a31b7702bd70e78ec8efd24661dacda.jpeg/thumb)
![The Seven Deadly Sins: Origin Review [First Impressions] | A Promising Start](https://img.game8.co/4440581/584e0bfb87908f12c4eab6e846eb1afd.png/thumb)
Popular Games

Genshin Impact Walkthrough & Guides Wiki
Umamusume: Pretty Derby Walkthrough & Guides Wiki
Pokemon Pokopia Walkthrough & Guides Wiki
Honkai: Star Rail Walkthrough & Guides Wiki
Monster Hunter Stories 3: Twisted Reflection Walkthrough & Guides Wiki
Arknights: Endfield Walkthrough & Guides Wiki
Wuthering Waves Walkthrough & Guides Wiki
Zenless Zone Zero Walkthrough & Guides Wiki
Pokemon TCG Pocket (PTCGP) Strategies & Guides Wiki
Monster Hunter Wilds Walkthrough & Guides Wiki


Recommended Games
Fire Emblem Heroes (FEH) Walkthrough & Guides Wiki
Diablo 4: Vessel of Hatred Walkthrough & Guides Wiki
Cyberpunk 2077: Ultimate Edition Walkthrough & Guides Wiki
Yu-Gi-Oh! Master Duel Walkthrough & Guides Wiki
Super Smash Bros. Ultimate Walkthrough & Guides Wiki
Pokemon Brilliant Diamond and Shining Pearl (BDSP) Walkthrough & Guides Wiki
Elden Ring Shadow of the Erdtree Walkthrough & Guides Wiki
Monster Hunter World Walkthrough & Guides Wiki
The Legend of Zelda: Tears of the Kingdom Walkthrough & Guides Wiki
Persona 3 Reload Walkthrough & Guides Wiki


All rights reserved
© SQUARE ENIX
The company names, product names and system names are trademarks or registered trademarks of their respective companies.
The copyrights of videos of games used in our content and other intellectual property rights belong to the provider of the game.
The contents we provide on this site were created personally by members of the Game8 editorial department.
We refuse the right to reuse or repost content taken without our permission such as data or images to other sites.