Bestower of All Questline Wallkthrough
☆ How to Unlock All 36 Characters
★ Tier Lists: Best Characters and Best Jobs
☆ Farming Guides: EXP, JP, Money
★ Forbidden Weapon Locations
☆ Battle-Tested Equipment Locations
★ Endings Guide | Post-Game Guide
Bestower of All is a major questline in Octopath Traveler 0 (Octopath 0). Here's a list of all the Main Quests in Bestower of All, how to unlock the questline, and walkthroughs for each Main Quest!
List of Contents
How to Unlock Bestower of All
Complete Kindlers of the Flame Questline
You must complete the Kindlers of the Flame questline, which involves inviting new residents and rebuilding the village of Wishvale. The Rekindling the Flame side stories are tied to the main quest, so do them whenever they pop up in Wishvale to continue.
Kindlers of the Flame Questline Walkthrough
Complete Bestower of Wealth, Power, and Fame Questlines
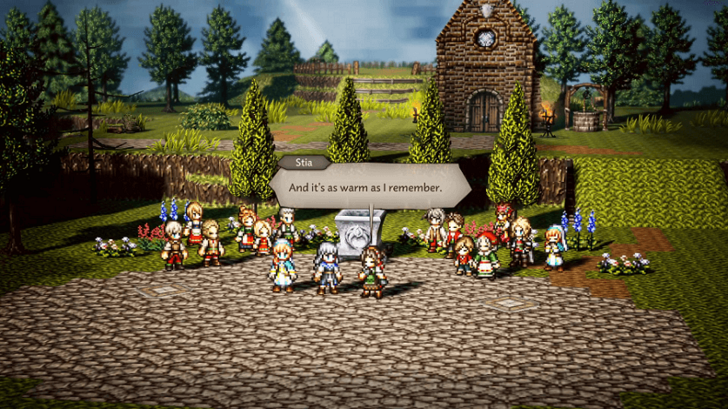
You must complete the Bestower of Wealth, Power, and Fame questlines before starting Bestower of All. Once all three are finished, and you have also completed Kindlers of the Flame, speak to Stia in Wishvale to begin the final main questline.
Bestower of All Main Quests
| Ch. | Quest | Location | Lv. |
|---|---|---|---|
| Prologue | The Black Flame | Wishvale Woodlands Region |
48 |
| 1 | Between Life and Death | Cragspear Cliftlands Region |
51 |
| 2 | Hill of the Dead | Castle Edoras Cliftlands Region |
51 |
| 3 | Castle of the Hollow Queen | Castle Edoras Cliftlands Region |
53 |
| 4 | A Nation Frozen in Time | Castle Edoras Cliftlands Region |
55 |
| 5 | The Gate of Finis | Flamesgrace Frostlands Region |
57 |
| 6 | Precipice of Loss | The Gate of Finis Corridors of Contrition Region |
59 |
| 7 | Sazantos | Wishvale Woodlands Region |
61 |
| 8 | At Journey's End | Flamebearer's Shrine Frostlands Region |
63 |
| Finale | At Journey's End (True Ending) | Garden of Sin The Heavens Region |
65 |
Bestower of All Walkthrough
Prologue: The Black Flame
| 1 | 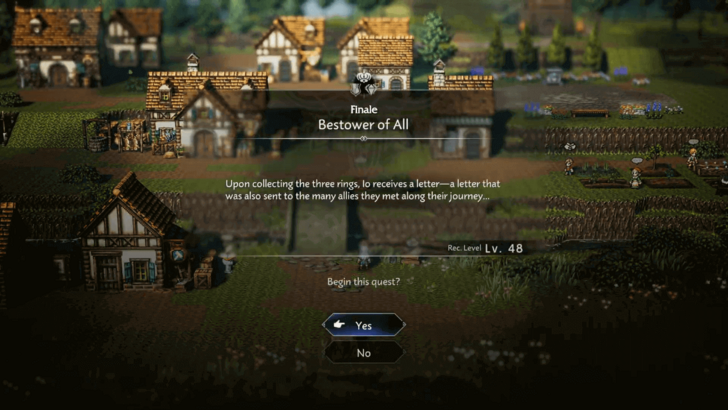 Speak to Stia in Wishvale. Head to Wishvale and speak with Stia to start the quest. |
|---|---|
| 2 | 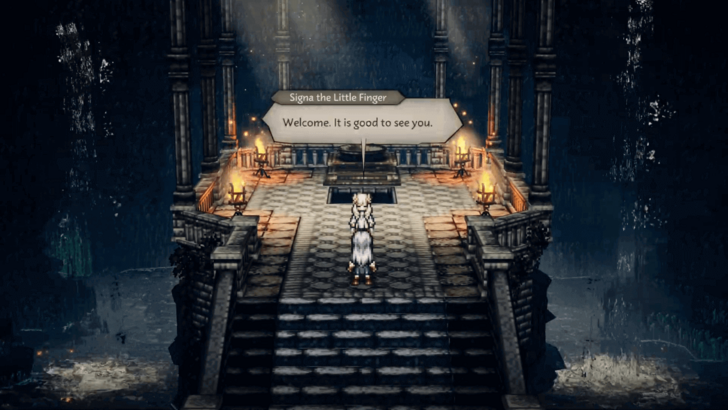 Head to the Isle of Orsa. Fast travel to the Isle of Orsa and make your way to the altar. |
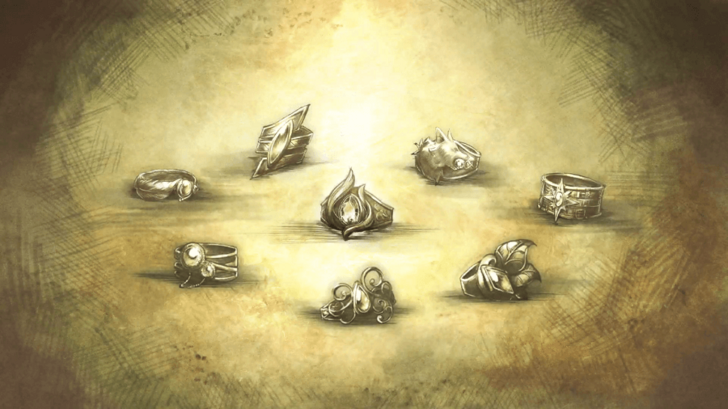
| 3 | 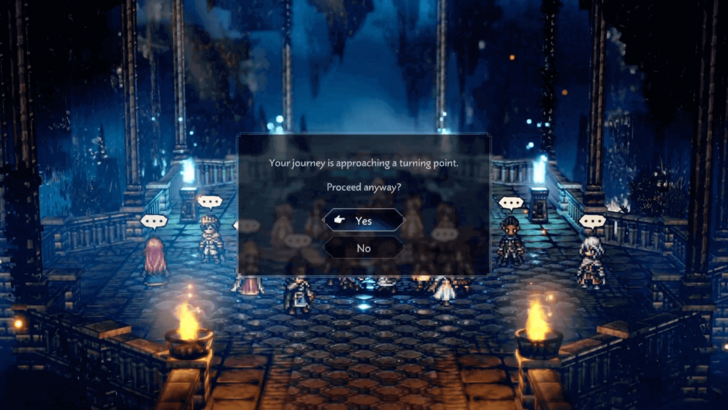 Speak to the ring maidens. Proceed inside where you'll find the other Lights of Orsterra waiting. If you talk to King Richard, you will receive river beans. You can also talk to the others, but you won't receive anything from them. Speaking to the ringmaidens is a turning point in the game, so before continuing you can do other side quests first and upgrade your town. Once you're ready, talk to Signa the Little Finger. |
| 4 |  Give the rings to Finis. After Finis tells his story, hand over the ring to him. You will end up fighting three soul monsters: the Suffering Soul, Seething Soul, and Shrieking Soul. After defeating them, the prologue is completed. |
Chapter 1: Between Life and Death
| 1 | 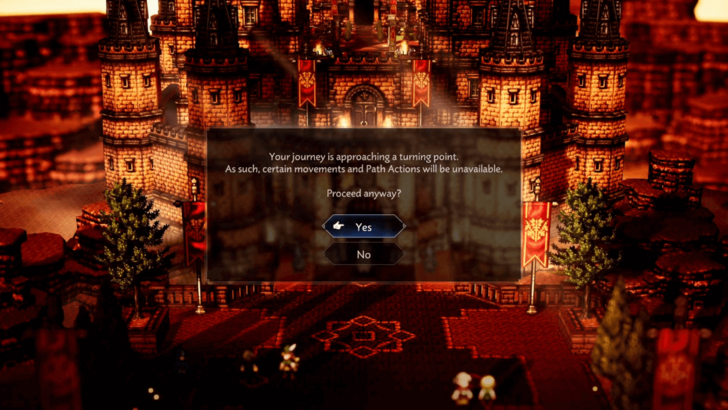 Talk to Krauser. After the cutscene, you'll be in front of the castle in Cragspear. Once you're ready to start the chapter, talk to Krauser. |
|---|---|
| 2 | 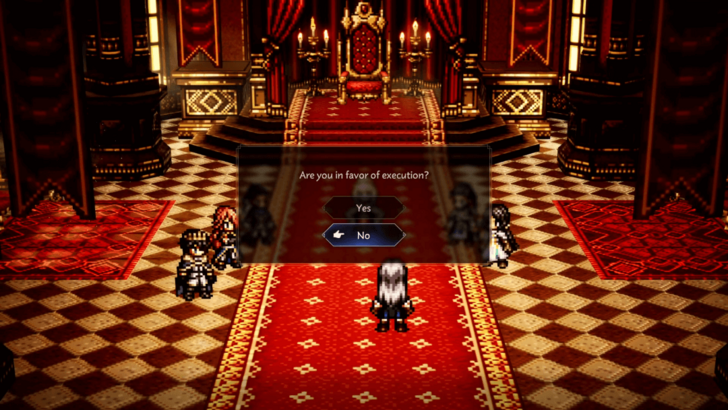 Enter the throne room. Once inside the castle, go inside the throne room. The remaining Guardians of Light will have a meeting regarding Tatloch's fate. You will be asked if you choose to execute Tatloch or spare her. No matter what you choose, it won't affect the story, as the the meeting will be interrupted. |
| 3 | 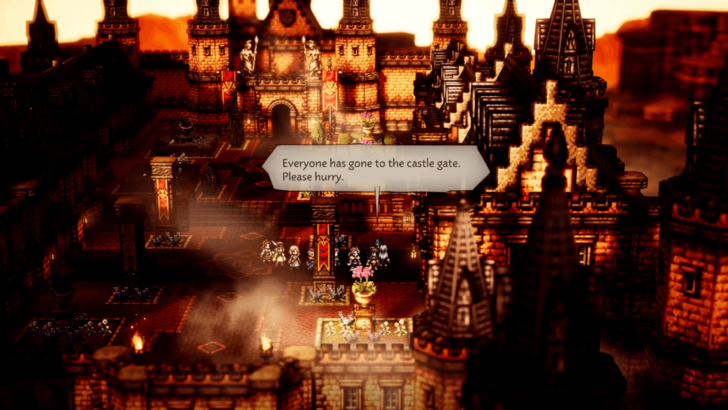 Head to the castle square. Head to the castle square to trigger the next scene. |
| 4 |  Go to where the ring points. When you regain control, enter the portal. |
| 5 | 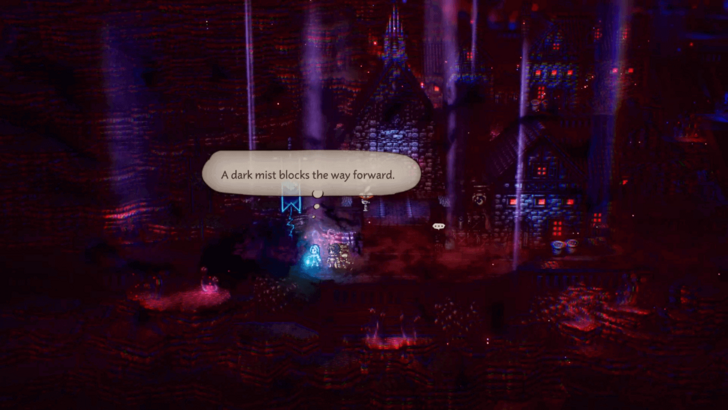 You will arrive in Hell: Cragspear. Head west towards the marked location on the map, you will find that your path is blocked. |
| 6 | 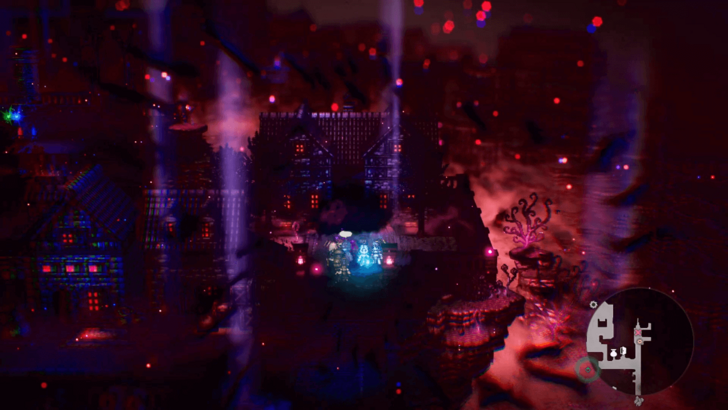 Go northeast and contend against the Power-Drunk Soldier to obtain the Edoras Soldier's Curse that will remove the blocking mist. |
| 7 | 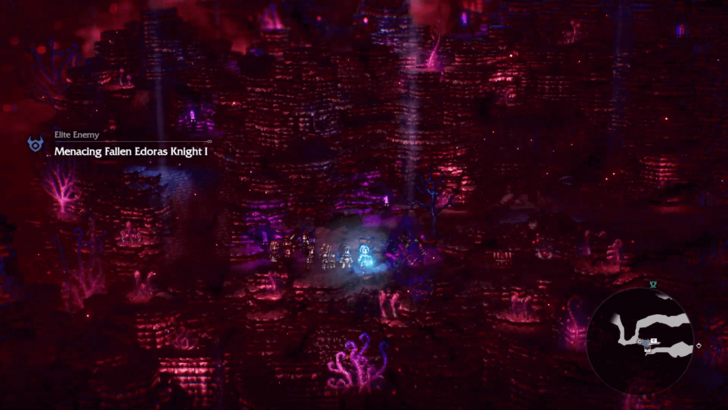 After getting the item, head west until you reach Hell: Geist Canyon. Note: There is a Menacing Fallen Edoras Knight I, an optional elite enemy, to the southwest of Hell: Geist Canyon. The chest behind it contains an Enchanted Rod . |
| 8 |  Proceed to the north and prepare for a boss fight. Be sure to save before heading to Signa. She will summon Fallen Mahrez against you. |
| 9 | 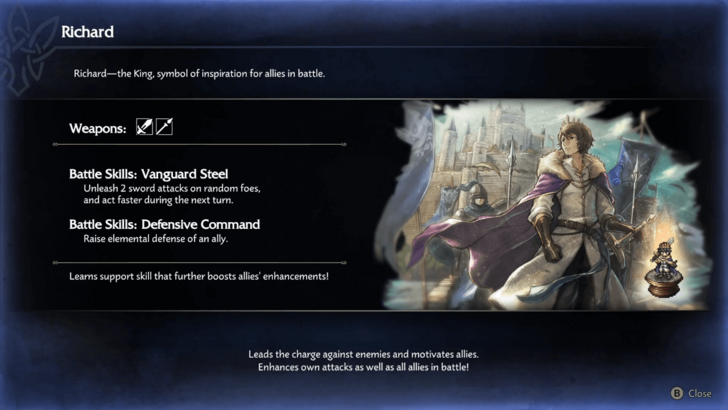 After defeating Fallen Mahrez and finishing the cutscene, Richard will join your party, completing the Between Life and Death chapter. |
Between Life and Death Walkthrough
Chapter 2: Hill of the Dead
| 1 | 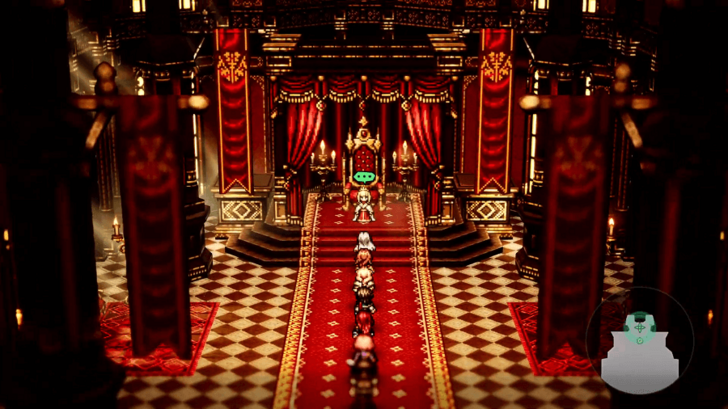 Speak to Alaune. Head to Castle Edoras in the Cliftlands Region, and speak to Alaune in the throne room to start the quest. |
|---|---|
| 2 | 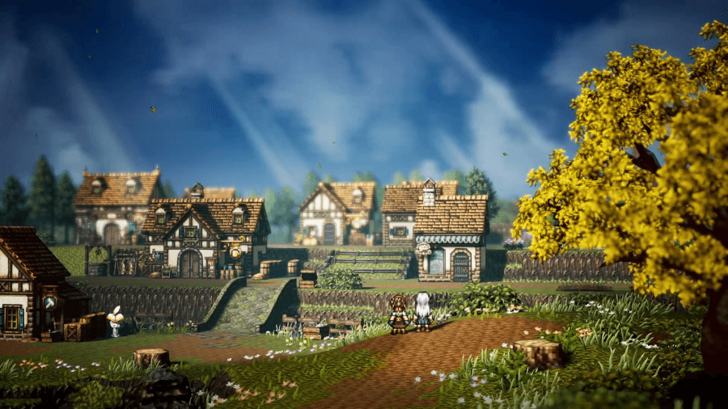 Speak to Stia in Wishvale. Go to Wishvale and speak to Stia, who is near the entrance. A cutscene will play where you vow to go after Sazantos. |
| 3 | 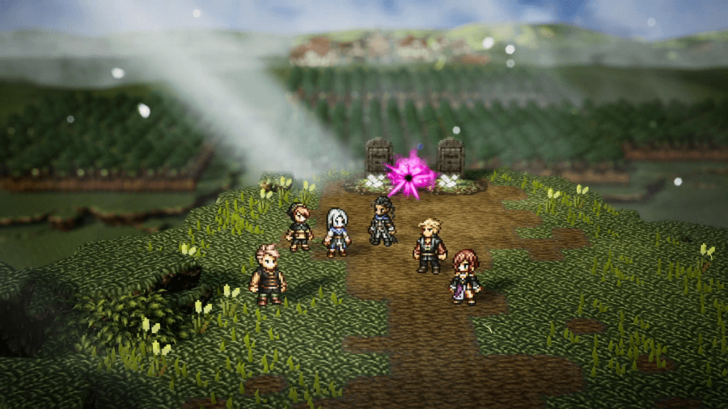 Head to Bargello's hideout. Head to Valore and go to Bargello's spot at the southern part of town. During the cutscene, agree to go back to Hell with him. |
| 4 | 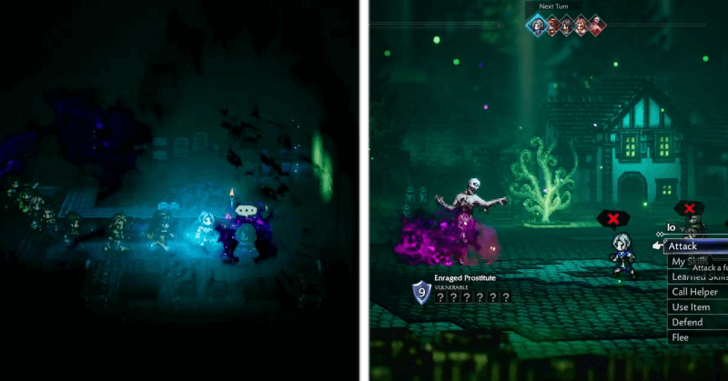 Head to Hell's White Grape Hill. To gain access to the White Grape Hill, you must first defeat two specific enemies in a Contend battle around the area. The first one is the Enraged Prostitute, which you can find in the second building, located to the leftmost on the north side of the area. Contend with and defeat her to get the Enraged Prostitute's Curse that gives you access to the Hell: Valore area to the east. |
| 5 | 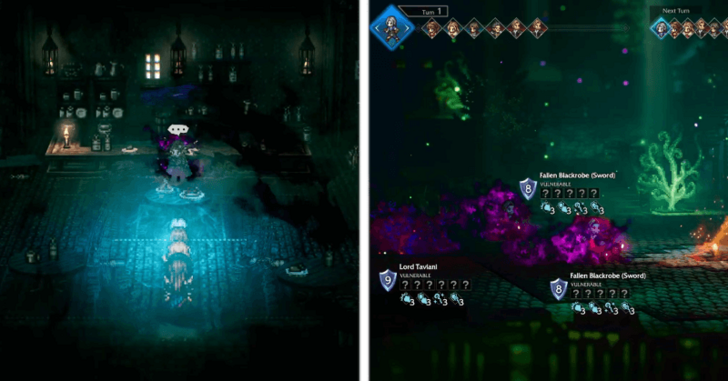 With the path to Hell: Valore open, head there and go to where Bargello’s hideout would be in the real world. Inside, you will find Taivani. Contend with and defeat him as well to obtain his curse, which unlocks the southern path back at the Main Boulevard. |
| 6 | 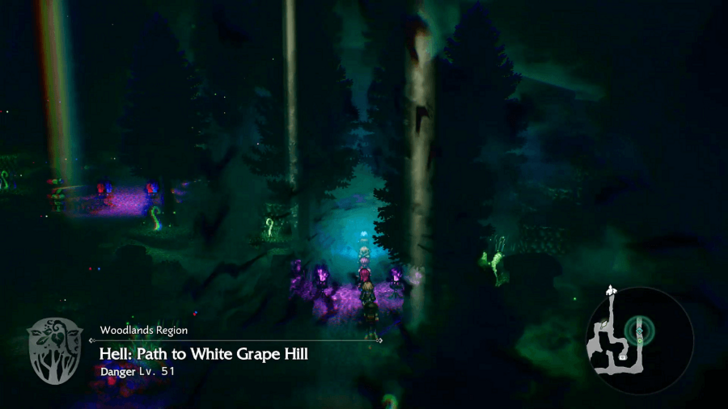 In the Hermina's Manse path, the path that goes closer to White Grape Hill is on the northeast of the area. |
| 7 | 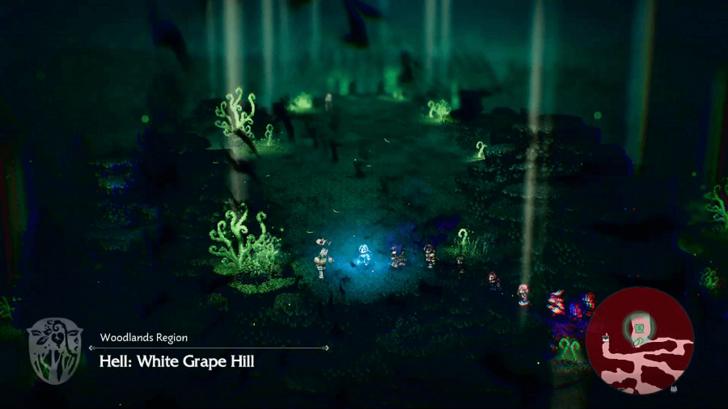 In the path before White Grape Hill are several treasure chests and an Elite Enemy: Menacing Fallen Direfang. The White Grape Hill area entrance is in the north with a save point just before the entrance. |
| 8 | 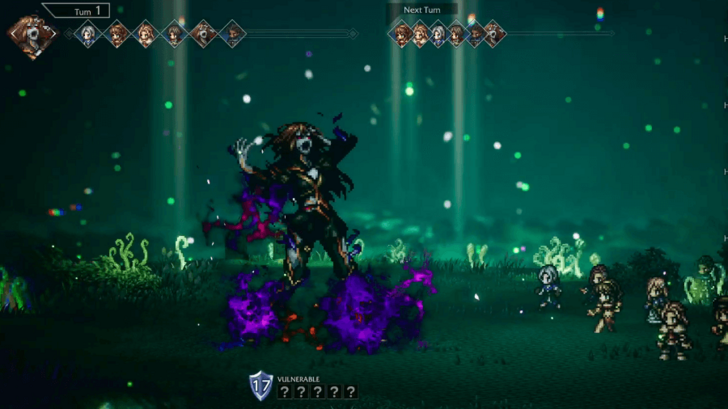 Defeat Fallen Sonia. Approach Sonia on the hill to start the boss fight against Fallen Sonia, your rematch with her in Hell. She has high Speed and frequently uses row-wide attacks, so use Speed buffs on your party or debuff her Speed to act earlier in each turn. Fallen Sonia is weak to Swords, Bows, Staves, Ice, and Light. |
| 9 | 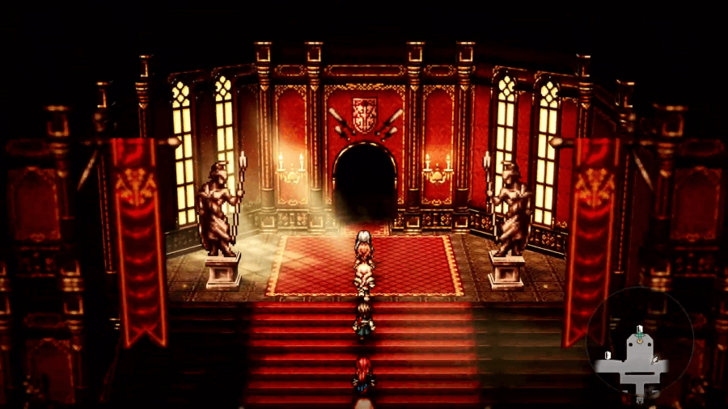 Enter the throne room. After defeating Fallen Sonia, you will be transported back to the real world, and Bargello will officially join your party. Head back to Castle Edoras, but make sure you are fully prepared for another boss fight before entering the throne room. As you enter, a cutscene immediately plays that leads to a boss fight with Fallen Erica. |
| 10 | 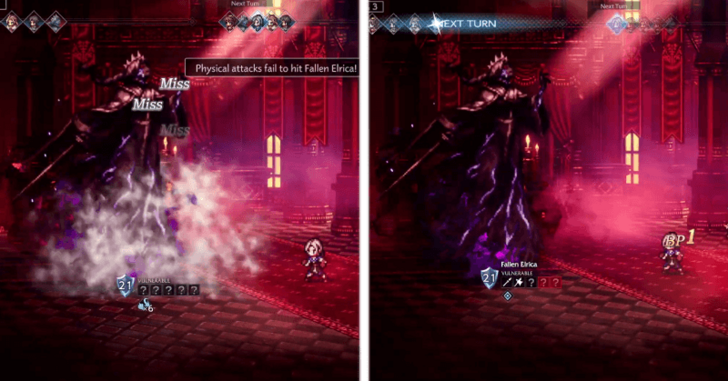 Defeat Fallen Erica. Fallen Erica uses stances that temporarily nullify certain attack types, such as Physical Evasion Stance, which causes most physical attacks to miss, and Stand Firm, which removes her elemental weaknesses. Pay close attention to her active stance each turn and adjust your attacks accordingly. Fallen Erica is weak to Polearms, Axes, Tomes, Lightning, and Dark. |
Chapter 3: Castle of the Hollow Queen
| 1 | 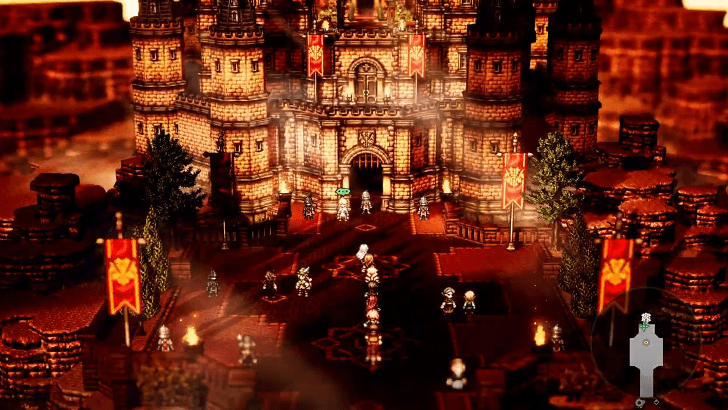 Speak to Rondo You can find Rondo at the entrance of Castle Edoras. Before talking to him, however, make sure you've wrapped up any active Side Stories as fast travel and certain Path Actions will be disabled once you proceed and may affect their progression. |
|---|---|
| 2 |  Proceed through Castle Edoras in Hell After the cutscene with Sazantos and regaining control of your character, start exploring the Castle Edoras in Hell by entering the room to the right and going through the door at the top of the stairs. |
| 3 |  The dining hall contains two chests: one at the top right corner and another on the left wall that is accessible by passing through the room to your left. After getting the chests, exit through the lower left side. |
| 4 | 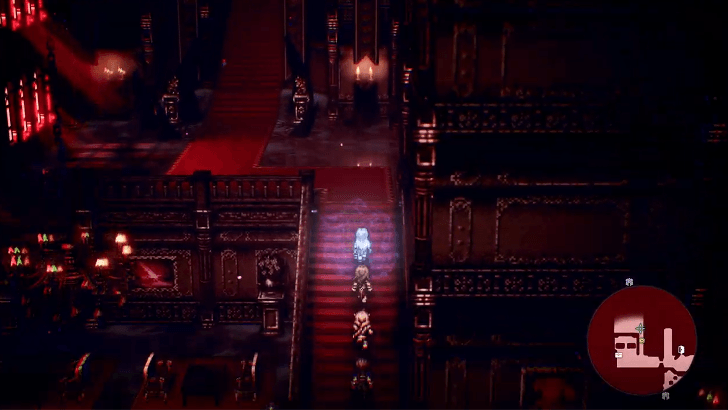 Run to the far left side of the floor, open the chest next to the chairs, then go up the stairs for a cutscene with Sazantos. Go up the stairs to Hell: Castle Edoras - 2F after the cutscene. |
| 5 | 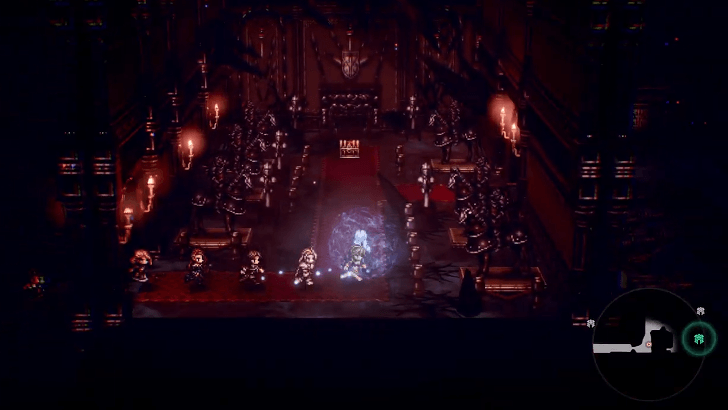 Grab the contents of the chest near the stairs you went up from and the chest in the armor room, then make for the Remembrance Hall on the far right end of the floor. |
| 6 | 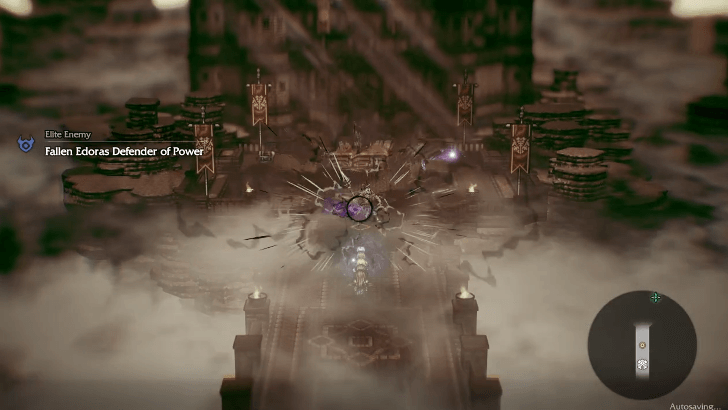 Defeat the Elite Enemy on the bridge, Fallen Edoras Defender of Power. This Elite Enemy doesn't have a special gimmick other than its "roar of anguish" where it increases its own attack stats but lowers its defenses. Use this opportunity to exploit its weakness to Axes, Bows, Staves, Lightning, and Light. |
| 7 |  There are two NPCs ahead who you can get items from through Path Actions, as well as a chest to the left. Interact with the glowing orb on the right for a cutscene to get Elrica's Curse - Dying Wish. |
| 8 |  Go back to the previous room and dispel the dark mist blocking the stairs to your right, then go up the stairs to Hell: Castle Edoras - 3F. |
| 9 |  Climb the next staircase on the left and enter the theater where you'll find two chests. Exit to the left and go up to Hell: Castle Edoras - 4F. |
| 10 | 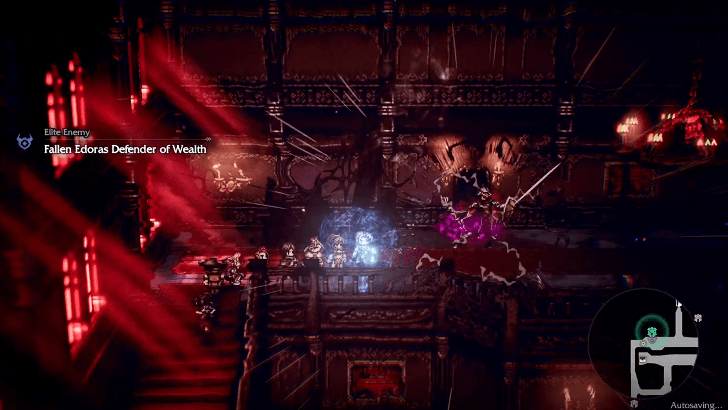 You'll get another cutscene, where Rondo splits from the group to fend off the Fallen, upon entering the room in the middle. Go down to the next room and take an immediate left to find Fallen Edoras Defender of Wealth. This Elite Enemy is weak to Swords, Daggers, Axes, Fire, and Ice. Before passing through the doorway behind it, there are two chests on the hall below and another on the training area outside. |
| 11 |  Past where the Defender of Wealth was are two NPCs you can use Path Actions on, a cabin with a chest inside, and the second memory. Interact with the orb to obtain Elrica's Curse - Deepest Desire. |
| 12 | 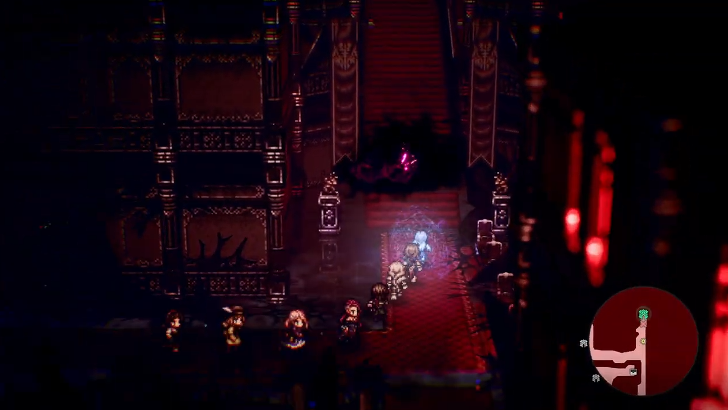 Get back inside the castle and dispel the dark mist on the right side so you can reach Hell: Castle Edoras - 5F. |
| 13 | 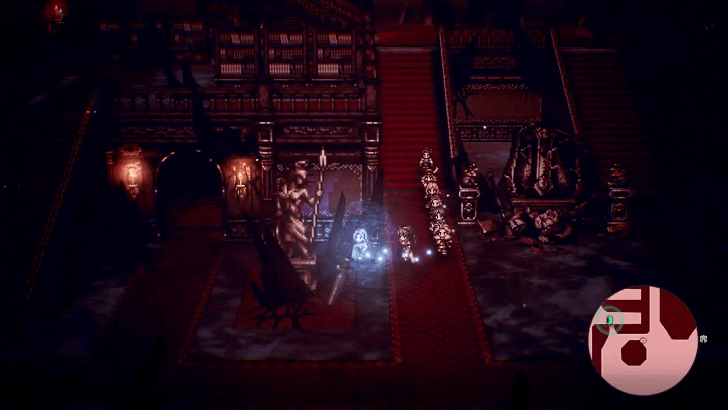 There are several doors here that you can take time to explore for to get items, including the staircase on the bottom right corner that leads to an isolated part of Hell: Castle Edoras - 6F. Once you're ready to proceed, enter the doorway on the left of the statues in the main room. |
| 14 | 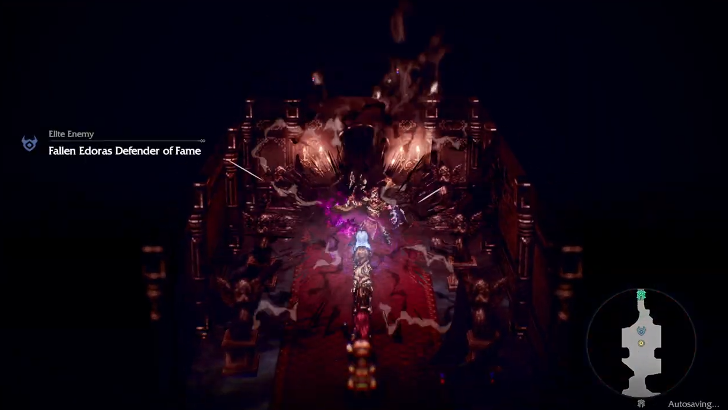 Follow the path until you find the Fallen Edoras Defender of Fame. This Elite Enemy is weak to Spears, Tomes, Fans, Ice, and Wind. After defeating the Fallen Edoras, exit through the door behind it and interact with the memory by the grave to obtain Elrica's Curse - ???. You can also mug the attendant NPC nearby to get some items before you leave. |
| 15 | 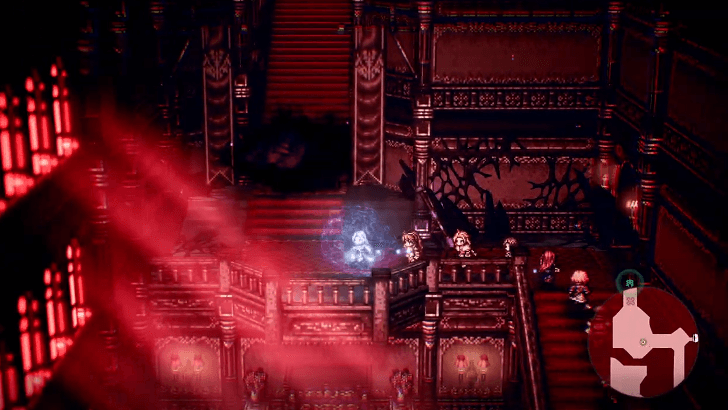 Confront Elrica You can now dispel the final dark mist in the castle. Go back to the main room and go through the door on the top left corner. Climb the stairs and remove the mist to gain access to Hell: Castle Edoras - 6F. |
| 16 | 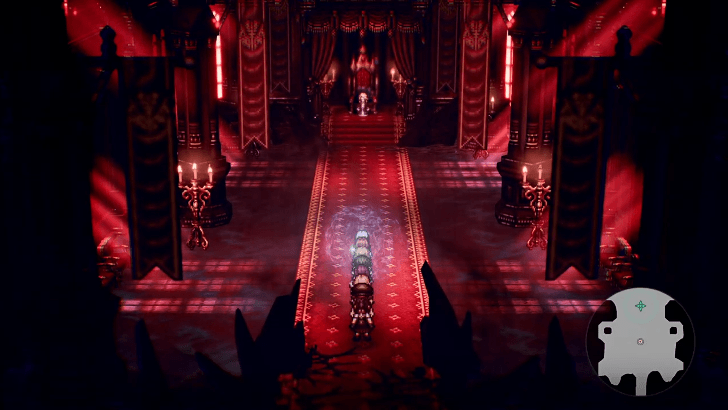 Save before entering the throne room and approach Elrica, who will summon the Fallen Lebrandt to fight. Fallen Lebrandt can use Unwavering to set his Shield Points to 99 and follow up with an attack that will hit the entire front row in the next turn. If you can tank this attack, Fallen Lebrandt will deal huge damage to himself. Fallen Lebrandt is weak to Spears, Bows, Staves, Fire, and Dark. |
| 17 | 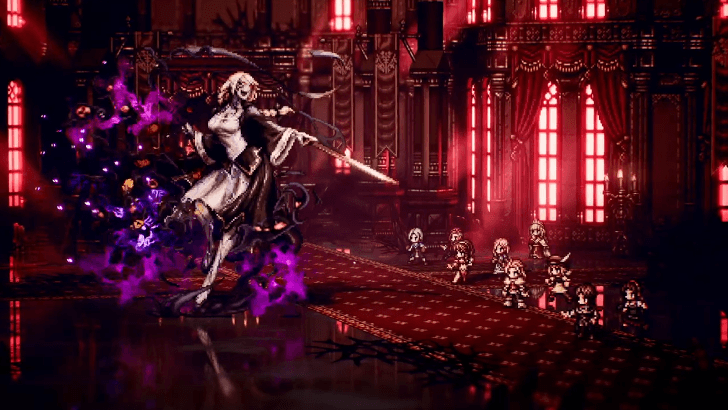 A boss fight against Cursed Princess Elrica will start right after defeating Fallen Lebrandt. Elrica's attacks can inflict Dread, which prevents the target from recovering BP for three turns. She can also disrupt your setup by preventing a party member from switching out. Once her HP drops down to critical level, Elrica will gain 99 Shield Points and prepare the Sword of Darkness attack. As it is impossible to shred that much SP, have your front row stack defense buffs instead so the chosen target can tank the attack. Cursed Princess Elrica is initially weak to Axes, Tomes, Ice, Wind, and Light, but can switch them to Swords, Fans, Fire, Lightning, and Light. |
Castle of the Hollow Queen Walkthrough
Chapter 4: A Nation Frozen in Time
| 1 | 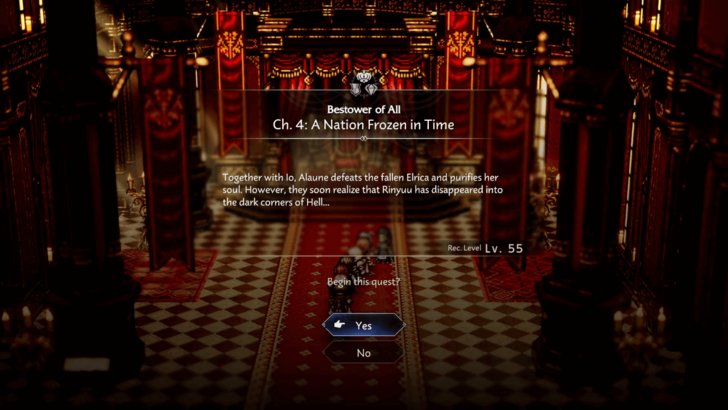 Speak to King Solon. Enter the throne room of Castle Edoras and talk to King Solon. After the cutscene, Tatloch joins your party and can now be a resident of Wishvale. |
|---|---|
| 2 |  Head to the Valley of Death. Head to the Valley of Death and proceed to its west exit. |
| 3 | 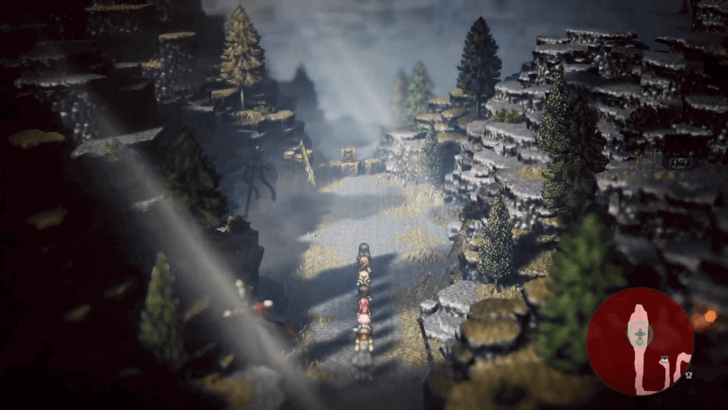 Search for clues to the Gate of Finis. After the dialogue, head for the exit to your left toward the Valley of Death: West. Then, make your way to the northwest part of the area—the location where you previously fought General Krauser—to find a portal. |
| 4 |  Proceed through Hornburg in Hell. Upon entering the portal, you'll be transported to Hell: Hornburg Pass. Collect the nearby chests as you explore. Upon reaching the center of the area, a scene will trigger, revealing your path is blocked. |
| 5 | 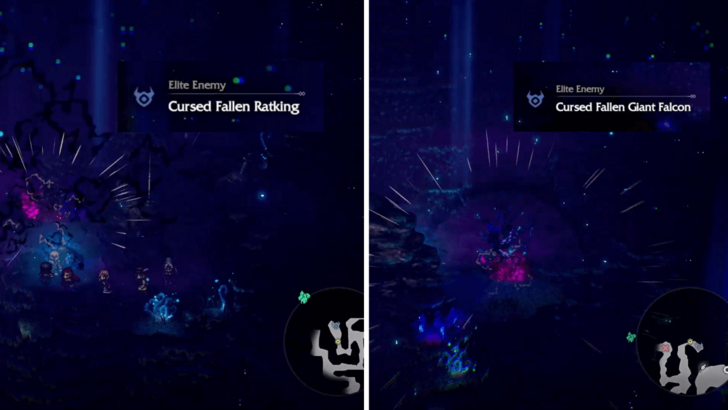 To remove the mist, you need to defeat the Elite Enemies Cursed Fallen Giant Falcon (northeast) and Cursed Fallen Rat King (northwest). Once they are eliminated, take the southwest exit of Hell: Hornburg Pass and continue to Hell: Hornburg Castle's throne room. |
| 6 | 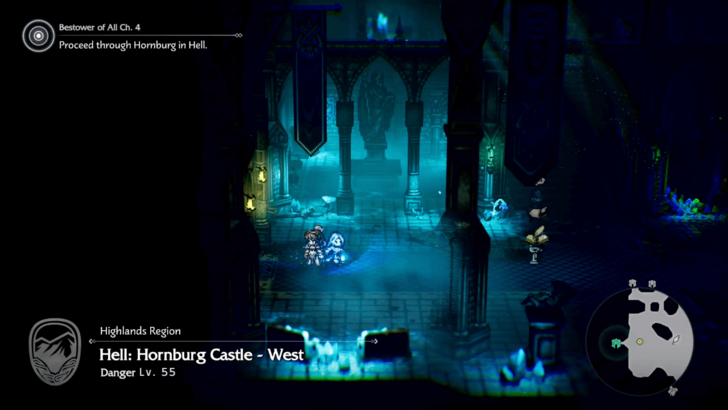 You will find that the path to the throne room is locked. Follow the marker to Hell: Hornburg Castle - West, where King Richard will find a way to open the west door. |
| 7 | 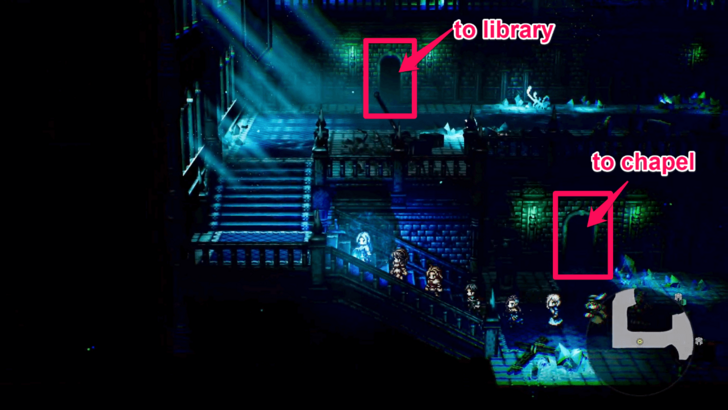 Proceed to the west side of the castle. If you enter the castle's chapel, you'll find that the doors there are also locked, so enter the library upstairs. Note: Inside the castle's chapel, there is an optional Menacing Fallen Hornburg Knight Elite Enemy. Behind him is a chest that contains a Swiftstrike Mastery. |
| 8 | 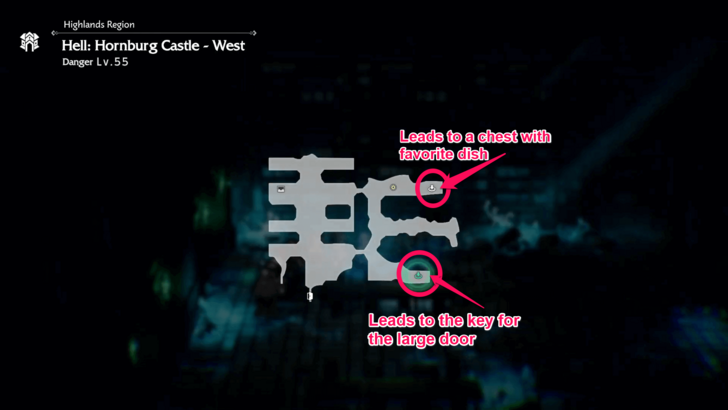 Examine the eastern doors in the library to open them. In the newly accessed room, you will find two holes in the floor. Each hole leads to a room below containing a chest. |
| 9 | 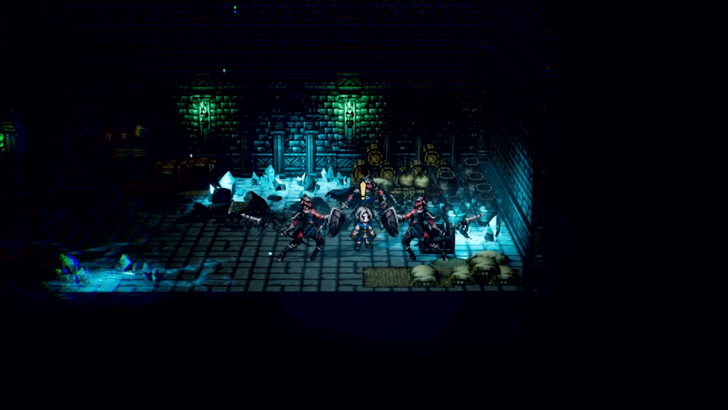 The hole above will lead you to a chest that contains your favorite dish. However, when you approach the chest, you will be forced into a fight against three Fallen Hornburg Soldiers. After defeating them, exit through the left door. This door leads to the chapel, from which you can return to the library. |
| 10 |  Next, enter the second hole which leads to a chest containing an Herb of Vitality and a lever. After collecting the herb, pull the lever on the right side of the room to obtain the Key to the Large Door. Take the exit towards the chapel once again. |
| 11 | 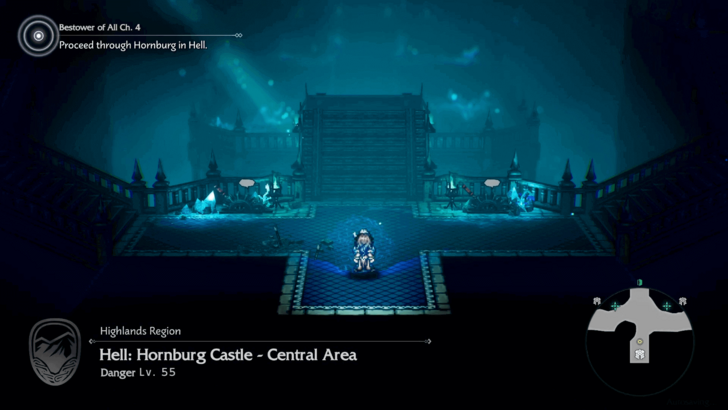 Return to the central area of the castle and use the key you got to unlock the large door. Upon entering, you'll find that the drawbridge to the throne room is lifted up, and you will need two keys to operate the devices located on both sides of the stairs. |
| 12 |  Proceed to Hell: Hornburg Castle - Western Central Area and enter the easternmost room upstairs, then jump down the hole. |
| 13 |  Examine the drawer beside the desk to find a Brass Key, then exit via the door upstairs to return to Hell: Hornburg Castle - Western Central Area. |
| 14 |  Use the Brass Key to open the large door on the second floor—the one you passed through when going to the bedroom. |
| 15 | 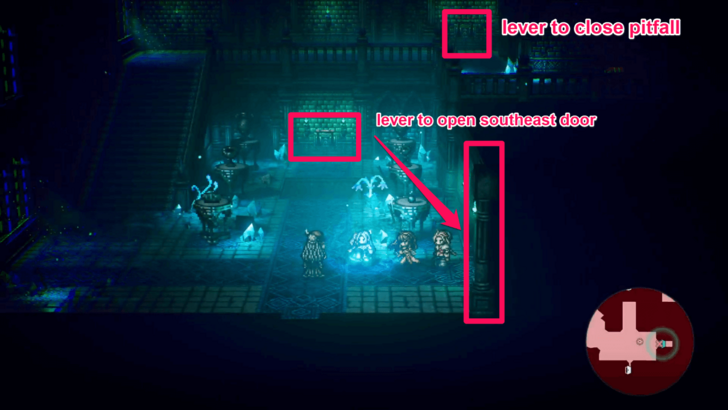 Up ahead in the room is a lever. However, there is a pitfall on the floor in front of it which leads to the room directly below. You can fall through if you wish to get an Inspiriting Plum Basket and unlock the door below. Otherwise, climb the stairs and pull the lever above. This closes the pitfall, allowing you to safely reach the main lever. |
| 16 | 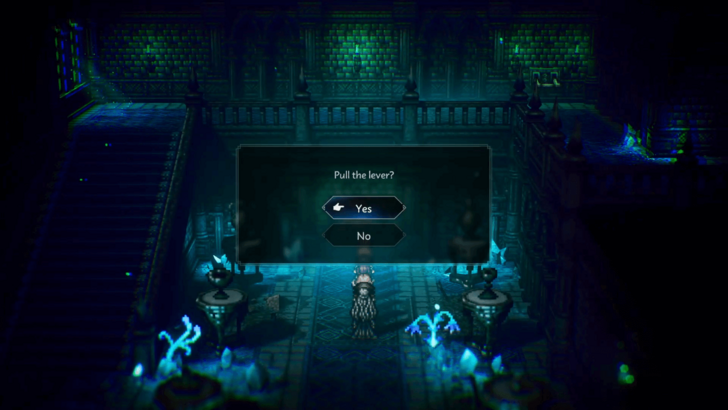 Head downstairs and pull the main lever to open the southeast door in the room. |
| 17 | 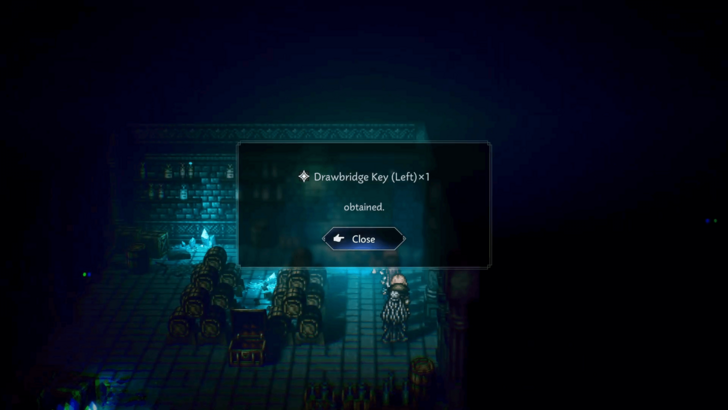 Enter the opened room and jump down the hole. You'll find yourself in the cellar. Examine the shining object on the northeast part of the room to obtain the Left Drawbridge Key. |
| 18 | 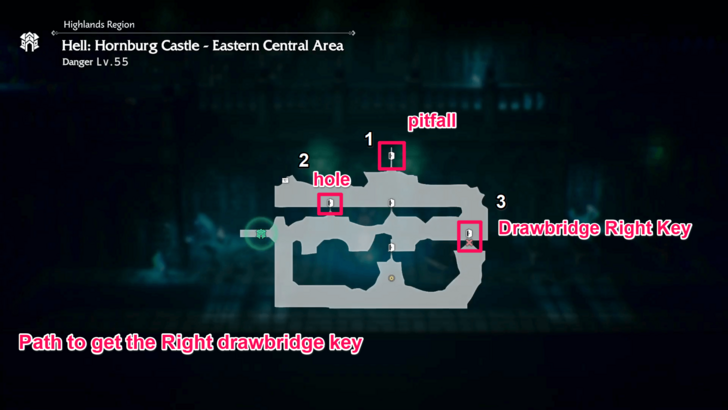 Next, return to the central area and head to Hell: Hornburg Castle - Eastern Central Area. The first room on the first floor of the Eastern Central Area holds an optional elite enemy: the Menacing Sacred Flame Guardian. Defeat it to access a chest containing the Ardante Attire. While the other rooms on the Eastern Central Area only contain chests, the room you need to enter to progress is found on the third floor. |
| 19 | 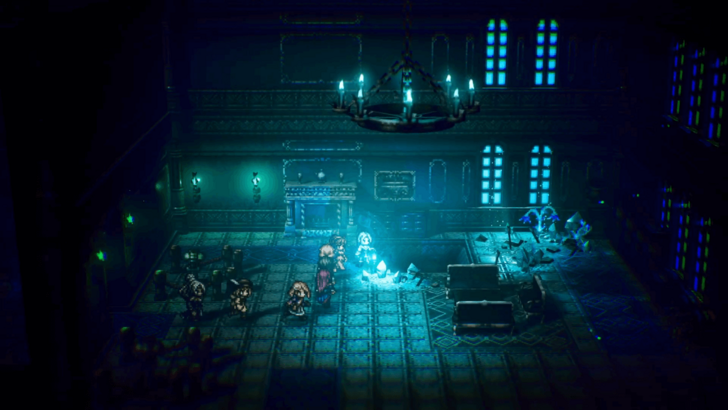 Proceed to the room on the third floor and jump into the pitfall to reach the room directly below. |
| 20 |  You will land on the right side of the pitfall in the first room on the second floor. From there, move to the right and jump down the hole. |
| 21 |  You have now reached the room behind the large door on the first floor. Pick up the shining object located on the northeast part of the area to get the Drawbridge Key Right. |
| 22 |  Return to Hell: Hornburg Castle - Central Area and use the left and right keys on the devices on each side of the Drawbridge to lower it. Finally, cross the drawbridge and save. Make sure to prepare for a fight. |
| 23 | 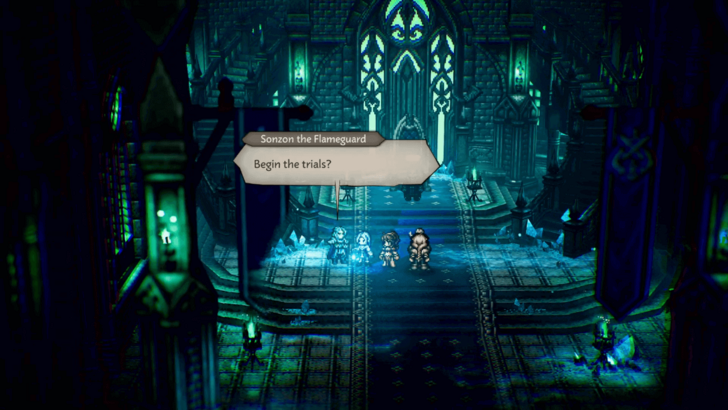 Undertake Sonzon's trial. Enter the throne room and continue forward to trigger a cutscene. Afterwards, talk to Sonzon the Flameguard and choose to begin the trials. You will engage in a fight against Rondo of the Knights Ardante and a couple of Sacred Flames. To pass the trial, you must eliminate all Sacred Flames—both those currently present and any that are summoned later. Defeating Rondo is not required. However, if Rondo is defeated before all the Sacred Flames have been eliminated, you will fail and be forced to repeat the trial. |
| 24 | 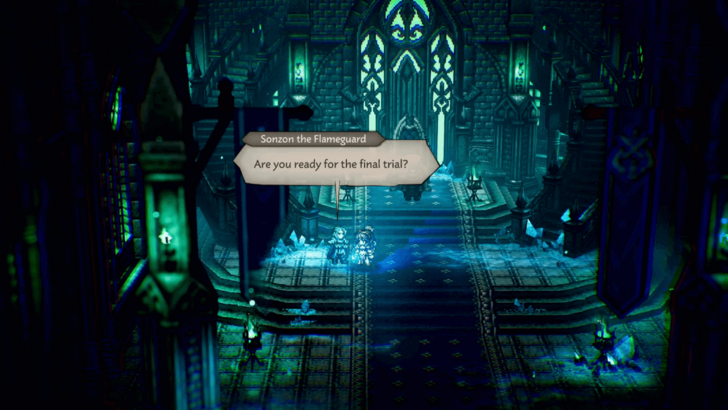 Undertake the final trial. After passing the first trial, speak to Sonzon the Flameguard again to begin the final trial. You'll need to defeat him to succeed. Once the cutscene ends, Rondo the Knight Ardante will now become a member of your party, and the A Nation Frozen in Time chapter is complete. |
A Nation Frozen in Time Walkthrough
Chapter 5: The Gate of Finis
| 1 |  Speak to Rondo. Head to the Flamesgrace Cathedral entrance and speak to Rondo by the cathedral doors. |
|---|---|
| 2 | 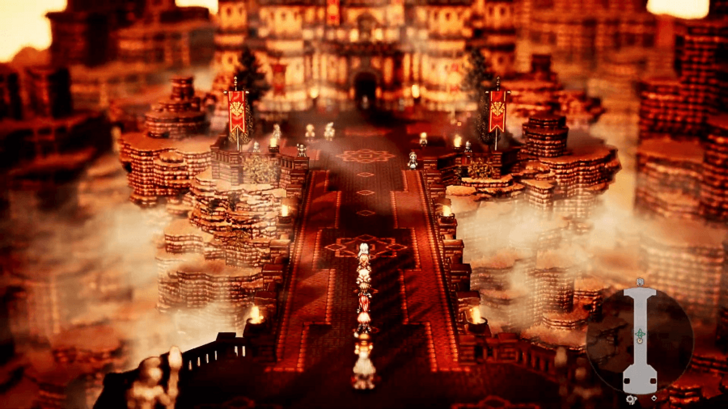 Head to the Castle Edoras gate. Go to the Castle Edoras Gate, by travelling to Cragspear and approaching the castle from the south. A cutscene will play as you walk across the bridge. |
| 3 | 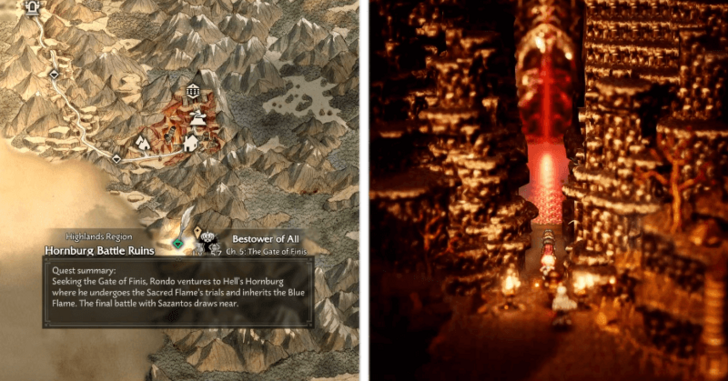 Head to the Gate of Finis. After the cutscene, you can now fast travel to the Hornburg Battle Ruins from the world map. From there, follow the path to the Gate of Finis. |
| 4 | 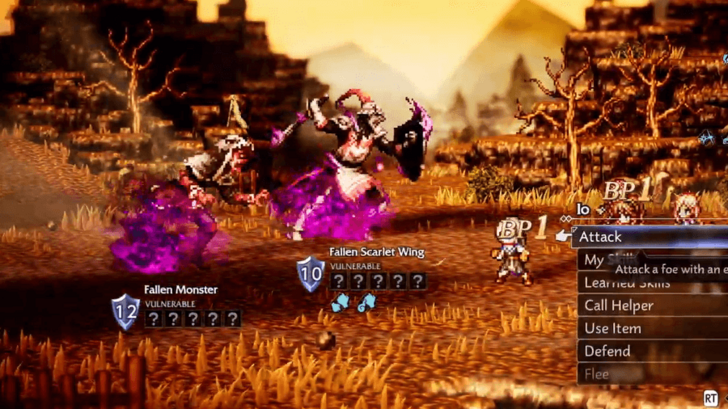 Upon reaching the gate, a cutscene will play, followed by a duo miniboss fight. The Fallen Scarlet Wing and Fallen Monster both have high HP. |
| 5 | 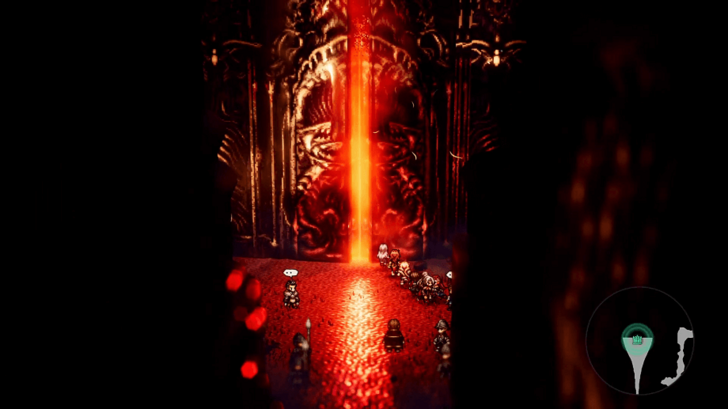 Proceed into the Gate of Finis. After the cutscene that plays once you defeat both monsters, enter through the large door. |
| 6 | 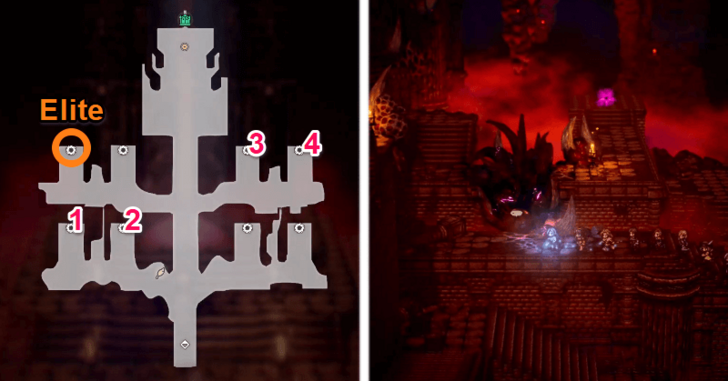 The Corridors of Contrition contain several portals, each leading to a journal entry and a Treasure Chest. To open the path forward, you must destroy the tentacles in four of the portals in order. 1. Bottom left portal. 2. Portal next to portal 1. 3. Top right portal. 4. Portal next to portal 3. The Elite Enemy, Menacing Fallen Monster is found in the top-left most portal in the area. |
| 7 | 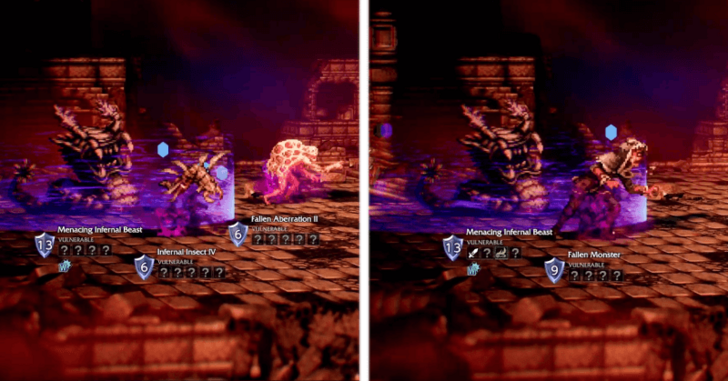 When destroying the tentacles in portals 2 and 4 (the ones next to the bridge), you will face a Menacing Infernal Beast elite along with its minions before destroying it. |
| 8 | 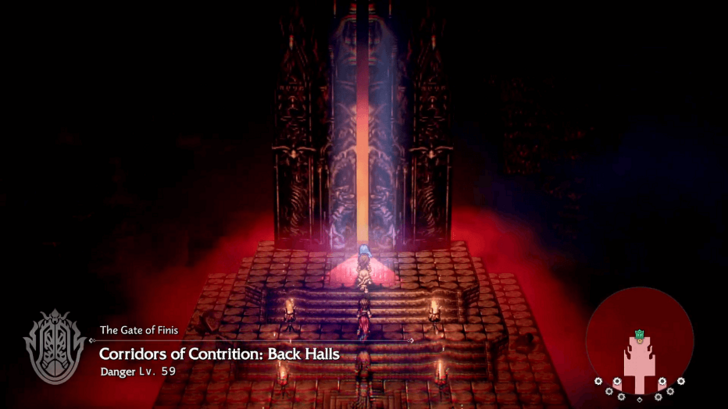 Once all tentacles are clear, head down the middle towards the Corridors of Contrition: Back Halls. |
| 9 | 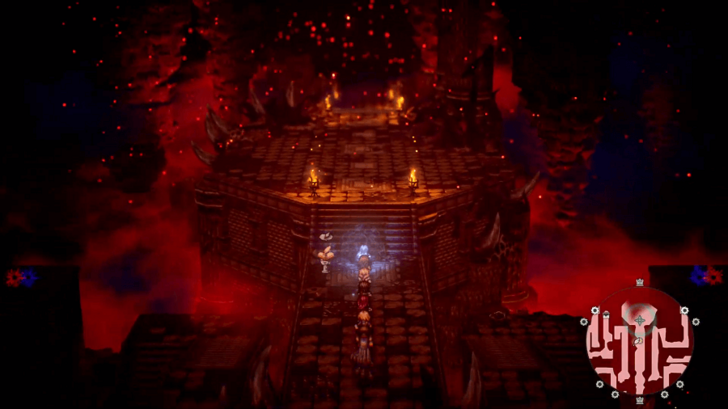 Defeat Cursed Commander Tytos. Keep going down the middle path until you reach the save point. Past it is a boss fight against Cursed Commander Tytos after the cutscene. |
| 10 | 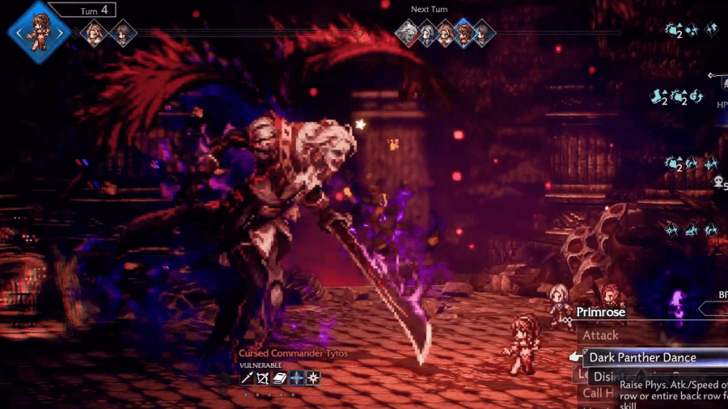 You will face Tytos again in his new Cursed Commander form. The fight is similar to the first phase of his boss fight before, but he now has a massive 25 Shield Points. The Cursed Commander Tytos boss is weak to Polearms, Bows, Tomes, Ice, and Light damage. |
| 11 |  After besting Cursed Commander Tytos, you will be returned outside the gate. Head back into the Corridors of Contrition and return to the area where you fought Tytos to begin Chapter 6: Precipice of Loss. |
Chapter 6: Precipice of Loss
| 1 | 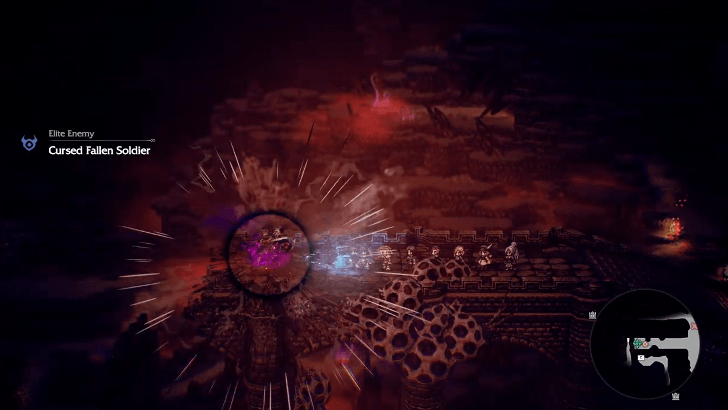 Proceed further into the Gate of Finis Walk along the bridge then turn left from the dark mist to find the Cursed Fallen Soldier Elite Enemy. You'll need to defeat it to find a memory that will dispel the mist and continue onward. The Cursed Fallen Soldier is weak to Spears, Bows, Tomes, Wind, and Dark. |
|---|---|
| 2 | 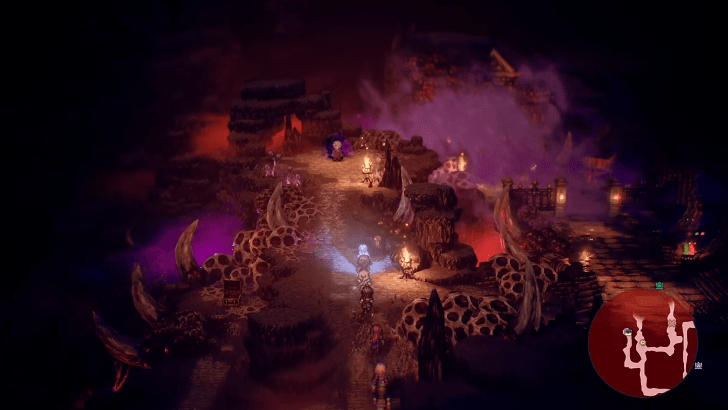 Walk past where the dark mist was, then go left once you reach the split. This slope leads to a simple maze below where you can find chests and the Menacing Infernal Sludge Elite Enemy. |
| 3 |  Make your way to the northwest section of the maze to find a Fallen Lady-in-Waiting, then talk to her to engage her group in combat. Defeat them to clear the fog at the end of the path to your right. |
| 4 | 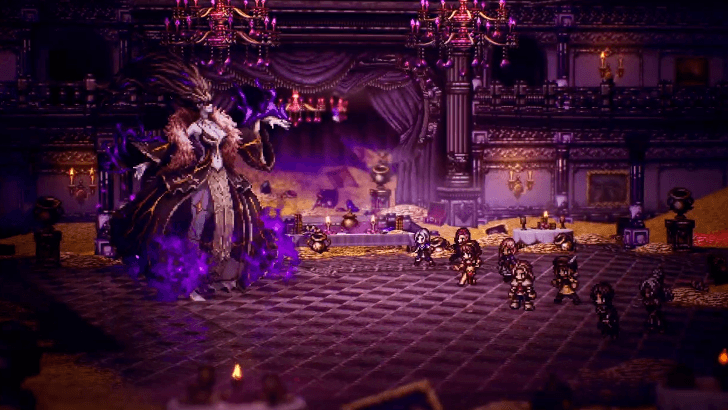 Now, take the right path and enter Wealth's Dominion. Make sure to save and prepare before entering the gold-filled dining hall as a boss fight against Cursed Lady Herminia will immediately follow. Herminia can inflict the SP Sap debuff, which drains SP from targets per turn, on your front row once she has full BP. This won't be that much of a problem if you can rush her with your attacks. She also has a delayed attack that will damage your front row after a countdown, which is not exactly a devastating one especially if you always stack defense buffs on your party. Cursed Lady Herminia is weak to Daggers, Axes, Tomes, Lightning, and Wind. |
| 5 | 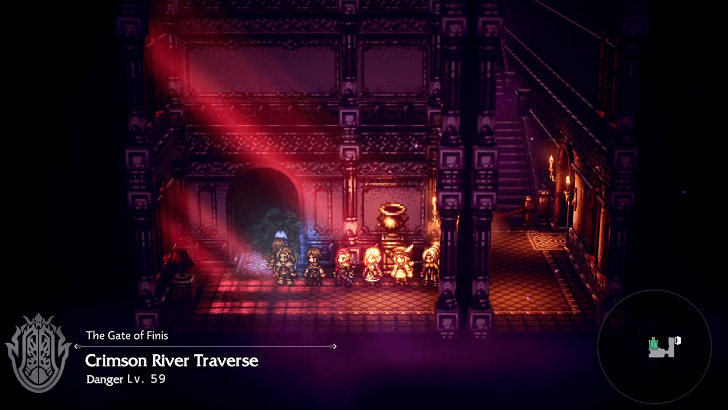 Exit to the left and enter the Crimson River Traverse. |
| 6 | 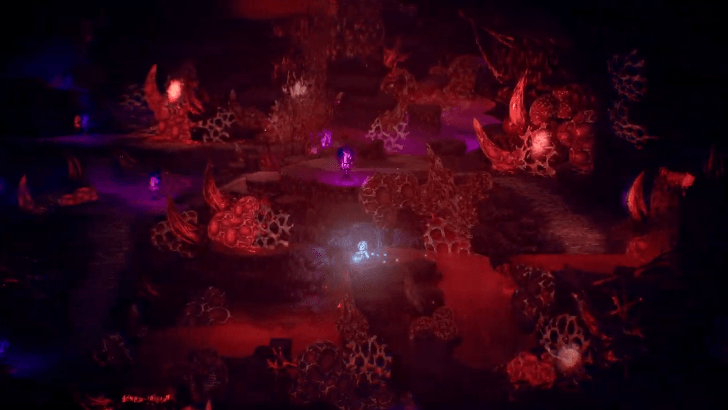 Use the winding paths on the left side to reach the top. Along the way up are also falls marked by downward arrows with a circle that you can utilize to reach platforms with chests. |
| 7 | 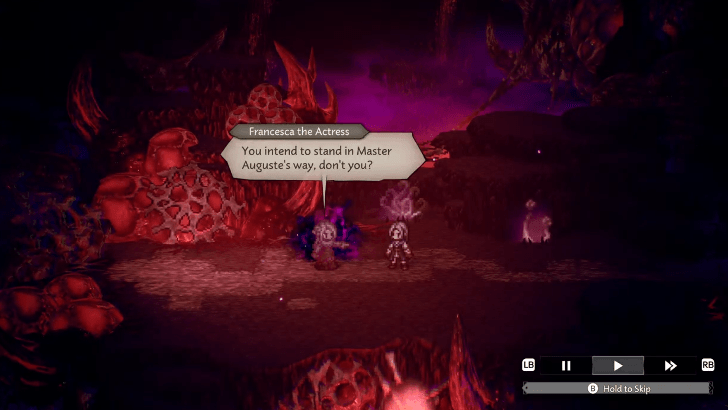 Find the Fallen Francesca at the top and defeat her to unseal the gate below the platform where she is. Fallen Francesca is weak to Polearms, Bows, Fans, Fire, and Lightning. |
| 8 | 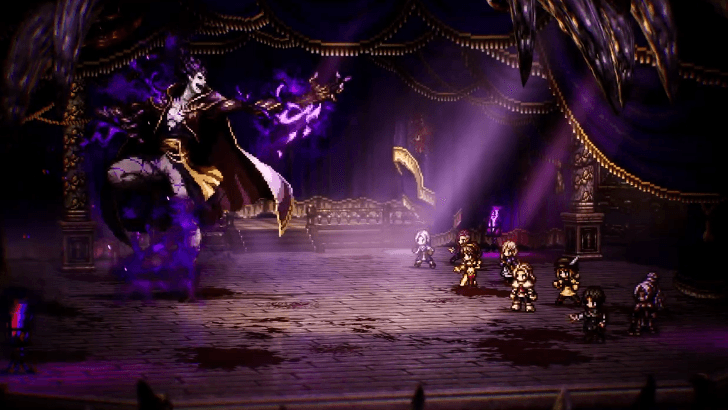 Enter Fame's Dominion through the gate and go up the upper floor. Like earlier, save and prepare before following Auguste inside the theatre to fight his Cursed Master Auguste version. Auguste will start the fight by increasing resistance to all non-weakness attacks. Try to only use attacks he is weak to—Swords, Bows, Fans, Ice, and Light—to make the most out of your turns. He can also use Mass Fatal Sentence to instantly down an entire row of party members after 3 turns. Quickly break Auguste before the countdown ends to dispel this debuff. |
| 9 | 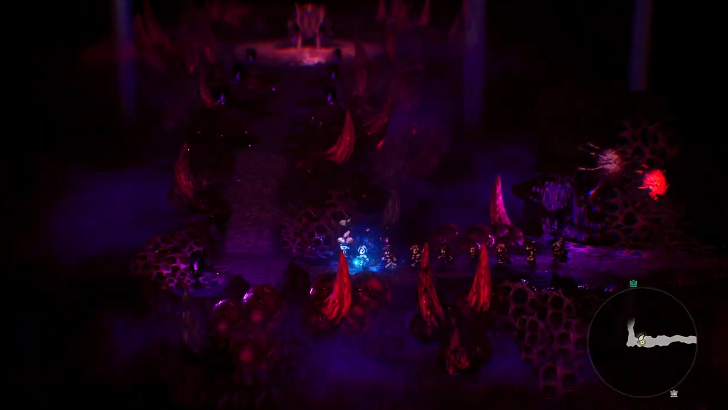 After defeating Cursed Master Auguste, proceed to the "backstage" to enter Hell's Abyss. Follow the path to the end, past the save point, to reach the Ridge of the Imprisoned God. |
| 10 | 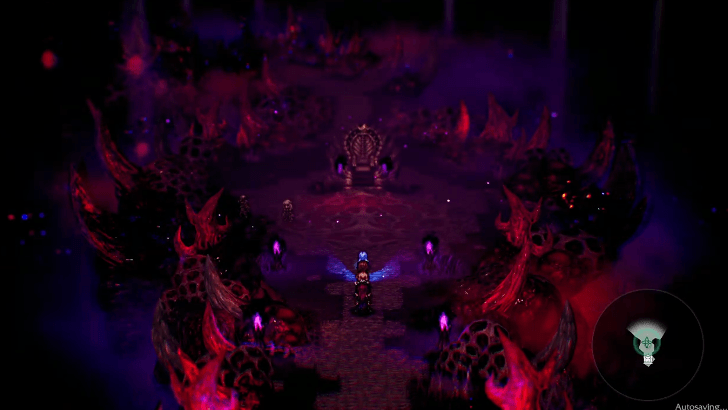 Approach the throne in the middle of the path for a cutscene with Sazantos. |
| 11 | 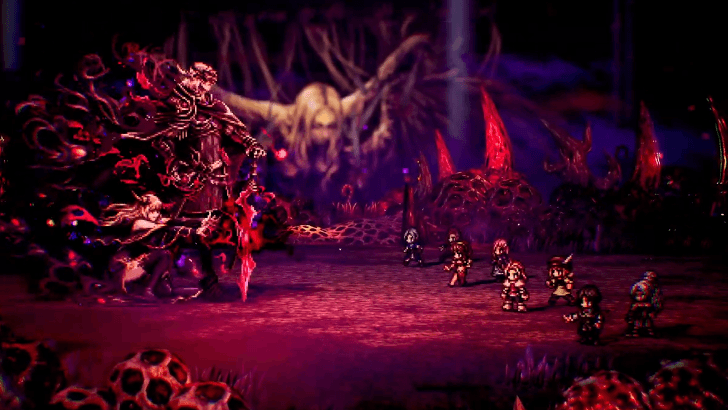 Confront Sazantos Make for the end of the path to find Sazantos and Dark Priestess Signa and defeat them in battle! Signa will protect Sazantos and block all weakpoint attacks from the get-go. While you can still reveal Sazantos' weaknesses, he will not receive increased damage and have his Shield Points depleted even after getting hit with attacks from these types. You'll have to take out Signa first to remove this protection from Sazantos. Signa is weak to Swords, Polearms, Axes, Ice, and Light, while Sazantos is weak to Polearms, Fans, Ice, Lightning, and Light. |
Chapter 7: Sazantos
| 1 | 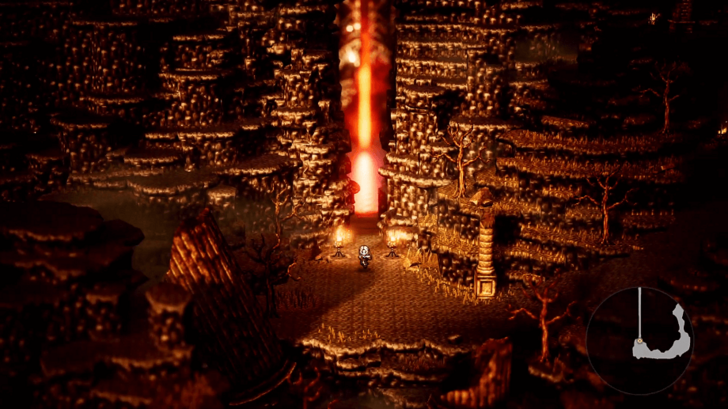 Return to Wishvale. Exit the cavern by going south, and a prompt will pop up for you to fast travel to Wishvale. Return there to progress the quest. |
|---|---|
| 2 |  Leave the Hub. At the hub, exit to be greeted by Stia and the others before you leave. Go to the Wishvale Trail. |
| 3 | 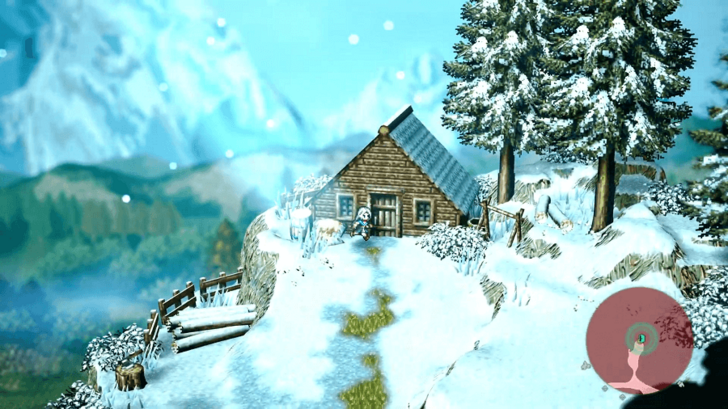 Search for clues. Head to Nomos' hideout to the east near the Cerulean Cavern entrance. |
| 4 |  Interact with the letter left behind in the cabin, prompting you to find Flamebearer's Shrine. |
| 5 | 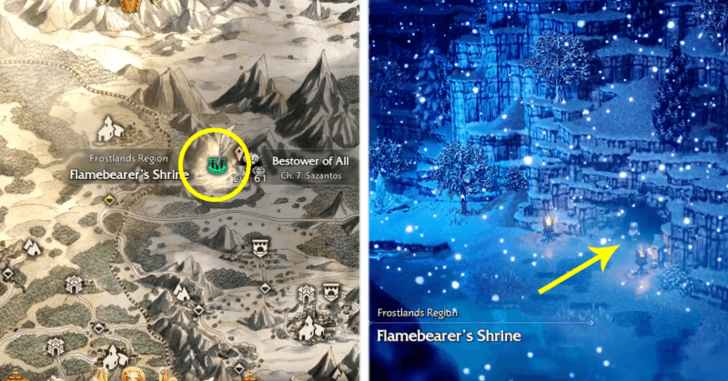 Head to the Flamebearer's Shrine. Continue to the Cerulean Cavern and go towards the exit to the Flamebearer's Shrine in the Frostlands Region. |
| 6 | 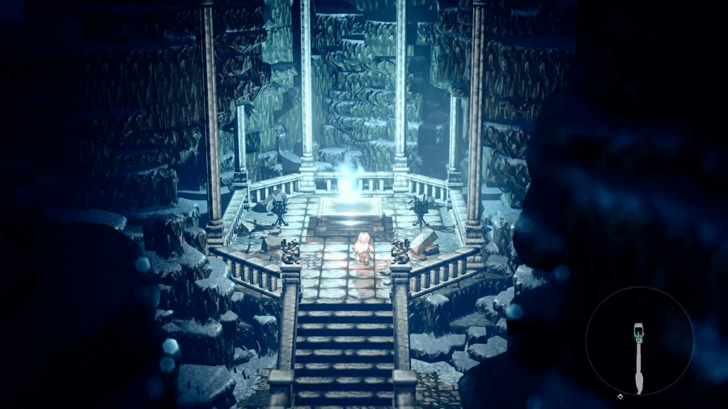 Once inside, interact with the flame to start a cutscene, and the game will transition to a new area. |
| 7 | 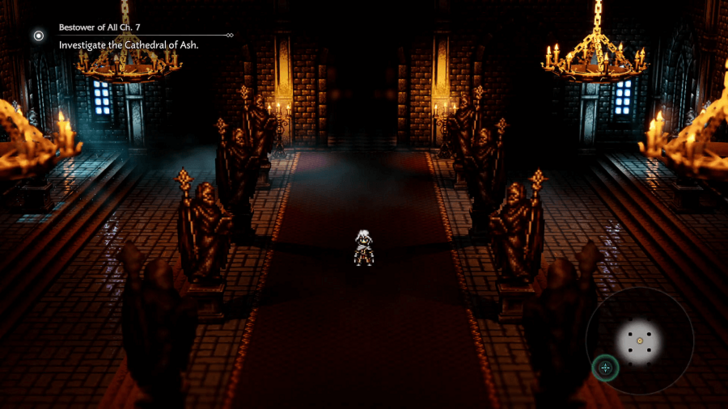 Investigate the Cathedral of Ash. Now playing as Sazantos, you must gather information from two NPCs in the Cathedral of Ash: the Dedicated Cleric and Deacon Guillaume found in the nearby rooms. |
| 8 |  Find the Dedicated Cleric in the room to the left and use the Inquire Path Action to obtain her information. |
| 9 |  Head to the farthest room to the right of the cleric to meet Deacon Guillaume, then use Inquire to gather his information as well. |
| 10 |  Read the Twelve Heavenly Scriptures. Interact with the four statues in the corner to obtain the required books that unlock the next puzzle. |
| 11 |  Search the rooms in the Great Cathedral. In the second room on the left, interact with the desk and place the books in the correct order to open the hidden door. Book Order: 1. Dreisang, the Archmagus's Writings 2. Balogar, the Runeblade's Writings 3. Winnehild, Warbringer's Writings 4. Steorra, Starseer's Writings |
| 12 | 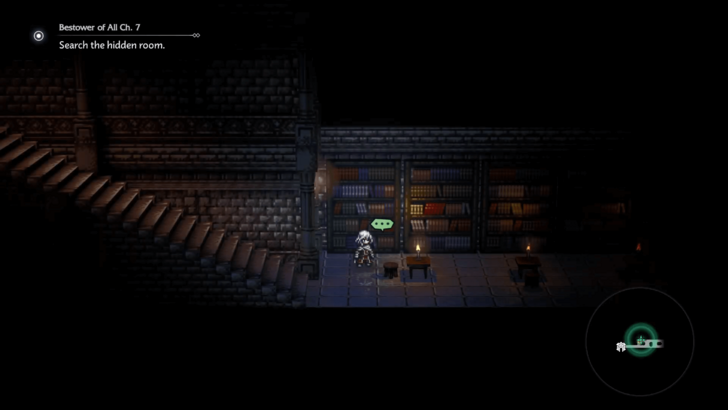 Search the hidden room. Head down the steps into the hidden room and interact with a writing on each bookshelf. After reading the final book at the end of the room, a cutscene will play.. |
| 13 | 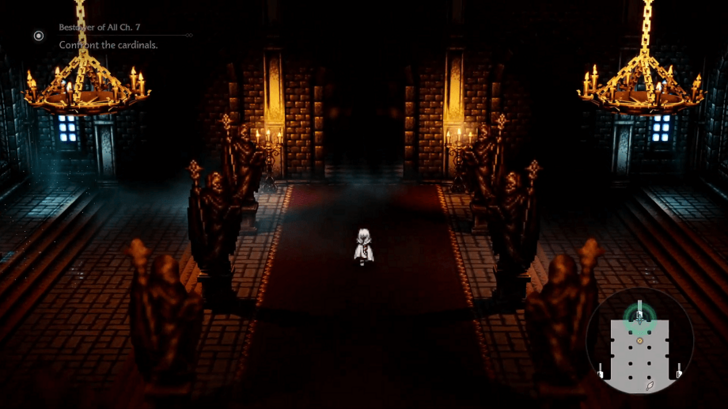 Confront the cardinals. After the cutscene, go through the large central doorway to confront the cardinals. |
| 14 | 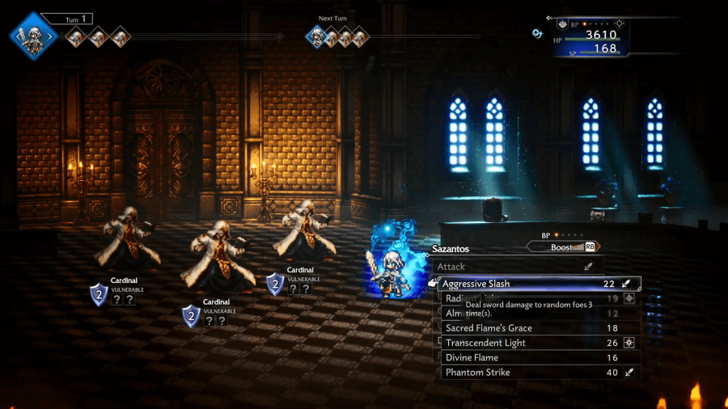 Defeat the three Cardinals in battle, each only having 2 Shield Points and are weak to Sword damage. |
| 15 |  Purge all desire. Head to the Cathedral of Ash: Underground and make your way to the northernmost room to face Cardinal Tegaraf.. |
| 16 | 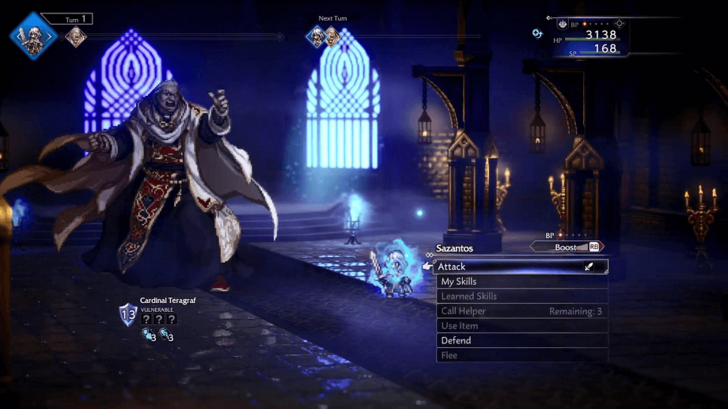 Cardinal Tegaraf has 13 Shield Points and is weak to Sword and Dark damage. Watch for his charge attack, which you can easily interrupt using Sazantos’ multi-hit skills to break his shield. |
| 17 | 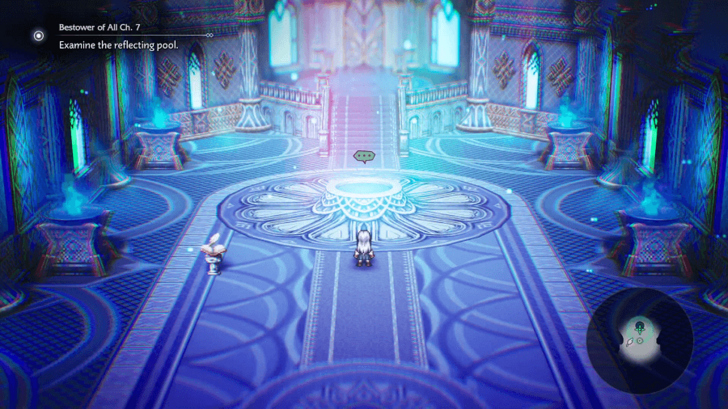 Examine the reflecting pool. Now back to playing as your protagonist, interact with the reflecting pool well straight ahead. |
| 18 | 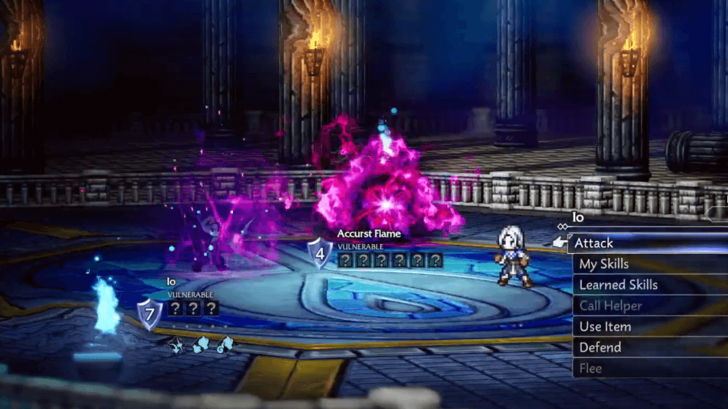 Face off against your shadow. In the room with your shadow, use Inquire to trigger a battle against yourself. |
| 19 | 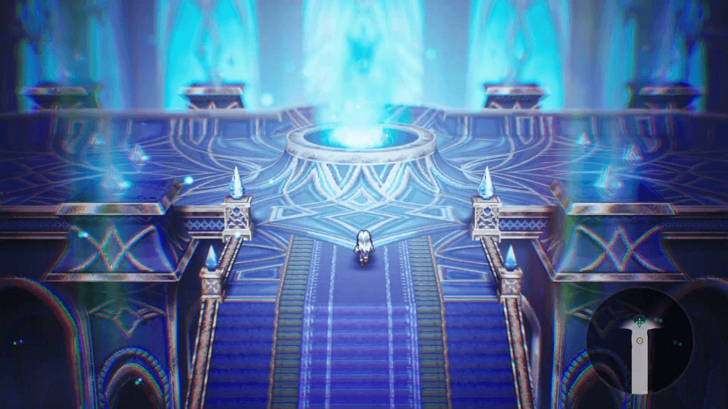 Head further into the sanctum. After the fight, head north to the massive blue flame shrine to complete the quest and immediately begin Chapter 8, At Journey's End. |
Chapter 8: At Journey's End
| 1 |  Head to the Heaven's from the Shrine. Interact with the shrine to get to the Heavens. |
|---|---|
| 2 |  Proceed into the Heavens. Enter the gate of the Heavens and continue ahead to trigger a cutcsene. |
| 3 |  Explore Wishvale. After the scene ends, step outside the house and explore Utopia: Wishvale. Once you're done exploring, proceed to the village square to progress the quest. Afterwards, several markers will show up on your map. |
| 4 |  Make your way to each marker to trigger a scene: • The church • The theatre (Watch the play) • The planting plot • In front of the watermill |
| 5 |  Speak to Sazantos. Finally, speak to Sazantos at the northern end of Utopia: Wishvale. He will ask if you want to stay in his utopia. If you choose Yes, a brief scene will play out, and then the game will return to the Title Screen, earning a Bad End. You must choose No to continue the game. Note: You can choose yes first if you want to see the Bad End, but make sure to save before talking to Sazantos. ▶ Endings Guide |
| 6 |  Illuminate everyone. After selecting No, you will unlock the Illuminate path action. You only need to illuminate all your companions, NPCs are not included. You can easily identify the ones you can illuminate by the ring symbol that appears in the Path Action bubble above their heads when you get close to them. |
| 7 |  Stia is the nearest one that you can start with, just a bit south from Sazantos. The others are at the following locations: • Reime - Near the protagonist's house. • Ophilia - Next to the church's log storage. • Pius - Inside the church. • Rondo - Beside the pedestal in the village square. • Delitia - Beside the item shop. • Ludo - Behind the counter of the item shop. • Tressa - Beside the counter of the item shop. • Heidne - Next to the round table inside the item shop. • Bargello - Next to the cow pen by the crop plot. • Phenn - Next to the first bench near the crop plot. • Esperre - Beside the tree near the watermill. • Olberic - At the southeastern end of Utopia: Wishvale, where the graveyard should be. • Alfyn - Next to the first bench at the southwestern end of Utopia: Wishvale. • Carinda - Next to the second bench at the southwestern end of Utopia: Wishvale along with Macy. • Macy - Beside Carinda at the southwestern end of Utopia: Wishvale. • Solon - As Trompeur the Merchant, by the table nearest to the tavern's entrance. • Richard - As Charles the Traveler, at the same table with Solon. • Tatloch - Beside a table in the tavern, next to her panther. • Eltrix - At the same table with Tatloch. • Celsus - Inside the tavern's sleeping quarters. • Therion - In front of the horse enclosure at the western end of Utopia: Wishvale. • H'aanit - Inside the house, beside the horse enclosure. • Saoirse - In front of the Theatropolis-based multipurpose building. • Viator - Inside the theater, to the left side of the entrance. • Primrose - Inside the theater, at the left side of the stage. • Goodwin - Inside the theater, at the right side of the stage. • Alexia - In front of the bookshelf in the northeast part of the library. • Xerc - In the middle of the library, by the window. • Cyrus - In front of the bookshelf in the western part of the library. • Laurana - In the salon of the Theatropolis-based multipurpose building, near a chair next to her grandmother. • Alaune - In the salon, behind Laurana and near the couch next to her sister. |
| 8 |  Speak to Sazantos. After illuminating all your companions, return to the northern end of Utopia: Wishvale and speak to Sazantos. He will ask you one last time if you truly think his utopia is abhorrent. Reject Sazantos to progress the quest, however you won't be able to return to Utopia: Wishvale anymore after. |
| 9 |  Proceed into the Heavens. After the dialogue, move up ahead and interact with the northernmonst pedestal to teleport to your next destination, the Seas of Servility. The goal is to activate each pedestal of fire so you can get to the Heavens. |
| 10 |  You will find yourself in the Seas of Servility: Hollow Path. Examine the book near the pedestal and then board the ship. |
| 11 |  In the first level of the Seas of Servility, sail your ship to the easternmost building to activate the blue switch and the northeasternmost building for the green switch. This will light the blue and green crystals and open the door to the second level. Other structures contain chests, while the first building also holds Lyblac's Journal. Note: In the building, where you find the blue switch is also an optional elite enemy, the Sanct Oliphant. Additionally, any inaccessible chests you see can be looted by gaining access from later areas. |
| 12 |  Upon reaching the second level of the Seas of Servility, head to the northwest end to grab the chest. Afterward, enter the nearby building to activate the green switch. |
| 13 |  At the center of the second level are two entrances to the same area, but with access to different passages. The left passage contains a chest, while the right is where you'll find the blue switch. |
| 14 |  Finally, after activating both switches, head to the northeastern building and go through the opened door to reach the third level. Make sure to prepare for a boss fight and save before leaving the Seas of Servility: Divine Path. |
| 15 |  The third level of the Seas of Servility is just a small area. Loot the chest on the west side, then defeat the Sacred Beast of the Seas to clear the path. Afterwards, interact with the marker to exit the area. |
| 16 |  Once you have returned to the Garden of Sin, you will find that the north fire pedestal is lit up. Interact with the pedestal to the left to proceed to the Sands of Rapacity. |
| 17 |  Sands of Rapacity has only one floor, but you'll need to operate several orange switches to create bridges to move forward. Additionally, you will also need to flip a green and blue switch to reach the final orange switch. The waterfall sands in this area will lead you to the inaccessible chests at the Seas of Servility. |
| 18 |  Once you arrive at Sands of Rapacity, examine the book next to the teleport pedestal. Next, continue forward where you'll find the first orange switch. Activating this switch will destroy the bridge to your right and create a bridge to your left. You can opt to flip this later if you want to defeat the optional elite enemy Sanct Garmr. Otherwise, flip it on then cross the bridge to the southwest end of the area. |
| 19 |  Grab the chest to the south, then activate the second orange switch in the passage ahead. This will trigger a bridge leading to the middle part of the Sands of Rapacity. |
| 20 |  Cross the bridge that appeared towards north and head west, then activate the third orange switch. |
| 21 |  You can bypass the fourth orange switch since the bridge further north is already fully formed, but flipping it will reveal a path to a chest to the right. Note that this destroys the northern section of the bridge, so you'll need to hit the switch a second time to restore the path once you're done. |
| 22 |  Once you reach the northern section, operate the fifth orange switch to the northwest to create a path toward the green switch, then head across to activate it. |
| 23 |  Next, use the sixth orange switch to the northeast to create a path, allowing you to reach and activate the blue switch. |
| 24 |  With both the green and blue switches active, the path to the last switch will emerge. Head across and trigger the seventh orange switch, which finally bridges the gap to the northernmost end of the Sands of Rapacity. |
| 25 |  Continue forward to face the Sacred Beast of the Sands. After defeating the area boss, return to the Garden of Sin. |
| 26 |  Back in the Garden of Sin, you will find that the Sands of Rapacity pedestal now glows with fire. With that accomplished, approach and interact with the pedestal to the right to reach the Skies of Vanity. |
| 27 |  The Skies of Vanity is divided into three levels, featuring separate sections on the first floor. To move between them, you must use the various lifts scattered throughout the area. Your goal is to light up the green and blue crystals, to make the central lift to the top level appear. Note: At the eastern end of Skies of Vanity is an optional elite enemy, the Sanct Cauchemar. |
| 28 |  Upon arriving at the first level in Skies of Vanity, start by examining the book next to the teleport pedestal. Afterwards, proceed to the east and take the first lift upward to the second level. |
| 29 |  On the second level level, turn left and head northwest to find the lift leading back down to the first level. |
| 30 |  Once you're back at the first level, head to the northwesternmost side to find and activate the green switch, marking the first step toward unlocking the central lift. |
| 31 |  After activating the green switch, return to the second level using the lift to the south of your current platform. Next, head to the northeast lift, which will carry you down to a separate section of the third level containing the blue switch. |
| 32 |  Proceed to the northernmost end of your current platform to find and activate the blue switch. With both crystals now lit, the central lift will manifest. To reach it, return to the second level and head back to the middle of the area, where you can now ascend to the top floor. |
| 33 |  Prepare for a boss fight and save your game, then ascend to the top floor using the central lift. |
| 34 |  Continue forward to face the Sacred Beast of the Skies. After defeating the area boss, return to the Garden of Sin. |
| 35 |  Back at the Garden of Sin, all three silver pedestals are now lit up, making the central golden pedestal also ablaze with fire. Interact with the golden pedestal to be transported to the Altar of Heavenly Peals. Note: You can fast travel to Wishvale and rest at your bed to fully replenish your HP and SP before proceeding to the major boss fight. |
| 36 |  Confront Sazantos. When you're done preparing, head to the Altar of Heavenly Peals and continue forward to face Sazantos. He has two forms, Saint Sazantos and Orsazantos. |
| 37 |  Touch the Light. After defeating Sazantos' two phases, touch the light that suddenly appears. |
| 38 |  Explore the world. You will find yourself in a wide expanse of snowy landscape with just a single house in the distance. Move north and enter the house to trigger a scene. |
| 39 |  Do what you desire. After the cutscene and speaking with the NPCs, exit the house and keep heading south to leave the area. |
| 40 |  Touch the Light. You will return to the Altar of Heavenly Peals. Touch the light once again, to fight the final boss of this chapter, Bestower of All. Make sure to be prepared and save, as this will be a long fight. |
| 41 |  Head to Castle Edoras. After the final battle and the cutscene, you will regain control of your character. Make your way to the front of Castle Edoras. |
| 42 |  Meet with Alaune. Lastly, enter Castle Edoras and head to Alaune's bedroom for the final scene. Congratulations, you have completed the normal ending of Octopath Traveler 0! |
True Ending: At Journey's End
| 1 |  Activate the strange monument. After Chapter 8’s ending cutscenes, you will return to the Garden of Sin with a strange monument to the right of the stairs. Activate it and agree to roll back to just after the battle against Orsazantos. We recommend making a save point before doing this. |
|---|---|
| 2 |  Head to Flamebearer's Shrine. After the rollback, travel first to Flamebearer's Shrine to the west of heaven. |
| 3 |  Touch the light. Inside the shrine, touch the blue flame at the end of the hall to travel to the Flamebearer's Shrine: Sanctum. |
| 4 |  In the Sanctum, go up the stairs north into the next room. There is a save point in the hall before the stairs. |
| 5 |  Take on the trial. Keep going north until you reach the large blue flame shrine. Activate it and take on the trial to battle Aelfric the Flamebearer. |
| 6 |  Defeat Aelfric the Flamebearer. Aelfric the Flamebearer is a lengthy boss fight with multiple Aelfrics you must defeat. After defeating the first Aelfric phase, he will respawn a few more times, each with a different set of weaknesses. |
| 7 |  Head to the Heavens. After besting Aelfric, activate the glowing light portal slightly left of the shrine. Accept the prompt to travel back to the Heavens. |
| 8 |  Go to the Altar of Heavenly Peals. Enter the Garden of Sin from the entrance while in the Heavens. |
| 9 |  Keep heading north through until you reach the shrines and save point again, and activate the frontmost fire to travel to the Altar of Heavenly Peals. |
| 10 |  Touch the light at the top of the Altar to travel back to the home of you and Sazantos. |
| 11 |  Head to the cabin. Go north and enter the cabin. |
| 12 |  Do what you desire. Use the Illuminate path action on all three of the NPCs in the cabin to proceed to the true ending: Illuminate Order: 1.: The Protagonist, the baby in the cradle 2.: Pharamea, next to the cradle 3.: Sazantos after Illuminating the first two After Illuminating all three, a cutscene will transition and bring you back to the Altar of Heavenly Peals with Sazantos. |
| 13 |  Confront Galdera. To initiate the true final boss, activate the purple light in front of you and select Save and Proceed. After saving, you can set up your parties, as you will be facing Ol’galdera using all the companions you have unlocked. The battle is divided into eight squads, which rotate each turn to the next party you prepared. Ideally, you should have all 36 Characters available to fully form your teams. Once your parties are ready, proceed to the final battle. ▶︎ List of All Characters and How to Recruit |
| 14 |  Defeat Ol'galdera. Ol’galdera is a lengthy fight but manageable with proper preparation. Make sure each formation has a dedicated healer, and that all characters are well leveled and properly equipped. Focus on destroying the Void-Sundering Arm and Demonic Spear first to make the encounter significantly easier. The boss also has multiple weakness changes, so keep that in mind when selecting your attacks. ▶︎ Or'galdera Weaknesses and Boss Guide |
| 15 |  After defeating Ol'galdera, the rest is watching the true ending unfold before you can enter the post game! Here, you can fight the Optional Super Boss, or finish other content not yet complete. ▶︎ Post Game Guide |
At Journey's End (True Ending) Walkthrough
Octopath Traveler 0 (Octopath 0) Related Guides

All Major Questlines
All Main Quest Walkthroughs
Comment
Author

Bestower of All Questline Wallkthrough
Rankings
- We could not find the message board you were looking for.
Gaming News

![The Seven Deadly Sins: Origin [First Impressions] | A Promising Start](https://img.game8.co/4440581/584e0bfb87908f12c4eab6e846eb1afd.png/show)

![Monster Hunter Stories 3 Review [First Impressions] | Simply Rejuvenating](https://img.game8.co/4438641/2a31b7702bd70e78ec8efd24661dacda.jpeg/thumb)
![The Seven Deadly Sins: Origin [First Impressions] | A Promising Start](https://img.game8.co/4440581/584e0bfb87908f12c4eab6e846eb1afd.png/thumb)
Popular Games

Genshin Impact Walkthrough & Guides Wiki
Umamusume: Pretty Derby Walkthrough & Guides Wiki
Pokemon Pokopia Walkthrough & Guides Wiki
Honkai: Star Rail Walkthrough & Guides Wiki
Monster Hunter Stories 3: Twisted Reflection Walkthrough & Guides Wiki
Arknights: Endfield Walkthrough & Guides Wiki
Wuthering Waves Walkthrough & Guides Wiki
Zenless Zone Zero Walkthrough & Guides Wiki
Pokemon TCG Pocket (PTCGP) Strategies & Guides Wiki
Monster Hunter Wilds Walkthrough & Guides Wiki


Recommended Games
Fire Emblem Heroes (FEH) Walkthrough & Guides Wiki
Diablo 4: Vessel of Hatred Walkthrough & Guides Wiki
Cyberpunk 2077: Ultimate Edition Walkthrough & Guides Wiki
Yu-Gi-Oh! Master Duel Walkthrough & Guides Wiki
Super Smash Bros. Ultimate Walkthrough & Guides Wiki
Pokemon Brilliant Diamond and Shining Pearl (BDSP) Walkthrough & Guides Wiki
Elden Ring Shadow of the Erdtree Walkthrough & Guides Wiki
Monster Hunter World Walkthrough & Guides Wiki
The Legend of Zelda: Tears of the Kingdom Walkthrough & Guides Wiki
Persona 3 Reload Walkthrough & Guides Wiki


All rights reserved
© SQUARE ENIX
The company names, product names and system names are trademarks or registered trademarks of their respective companies.
The copyrights of videos of games used in our content and other intellectual property rights belong to the provider of the game.
The contents we provide on this site were created personally by members of the Game8 editorial department.
We refuse the right to reuse or repost content taken without our permission such as data or images to other sites.