Master of Wealth Questline Walkthrough
☆ How to Unlock All 36 Characters
★ Tier Lists: Best Characters and Best Jobs
☆ Farming Guides: EXP, JP, Money
★ Forbidden Weapon Locations
☆ Battle-Tested Equipment Locations
★ Endings Guide | Post-Game Guide
Master of Wealth is a major questline in Octopath Traveler 0 (Octopath 0). Here's a list of all the Main Quests in Master of Wealth, how to unlock the questline, and walkthroughs for each Main Quest!
| “Master of” Quest Line | ||
|---|---|---|
List of Contents
How to Unlock Master of Wealth
Choose Any Path at the End of the Prologue

The Master of Wealth questline is unlocked by choosing any of the three cards at the end of the Prologue. Your choice here only determines the path where you'll get bonus influence on, and the other two questlines will still be available regardless of which you pick.
Should You Choose Wealth, Power, or Fame?
Master of Wealth Main Quests
| Ch. | Quest | Location | Lv. |
|---|---|---|---|
| 1 | The Covetous Witch | Valore Woodlands Region |
6 |
| 2 | A Flower Blooms | Valore Woodlands Region |
10 |
| 3 | Herminia the Huntress | Valore Woodlands Region |
16 |
Master of Wealth Walkthrough
| Jump to a Chapter! | ||
|---|---|---|
| Chapter 1 | Chapter 2 | Chapter 3 |
Chapter 1: The Covetous Witch
| 1 | 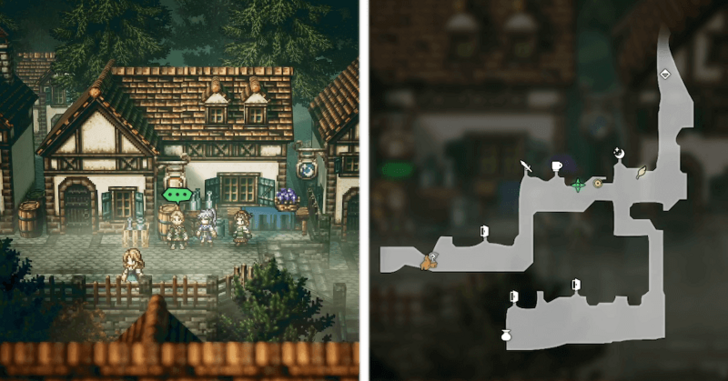 Gather information about Herminia. Head to Valore, located south of Wishvale, which is also in the Woodlands Region. Once there, speak to the Fierce-Looking Man standing in the center of town to start the quest. |
|---|---|
| 2 | 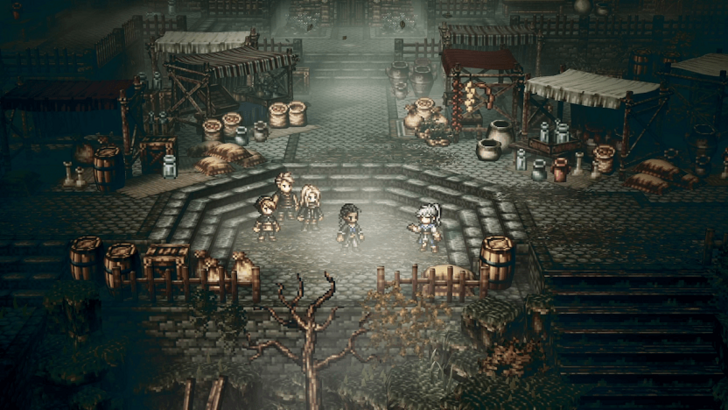 Head west to the Volare: Main Boulevard area and meet Bargello in the central plaza. The dialogue choices you pick in the cutscene do not matter, as the story will progress without any differences. |
| 3 | 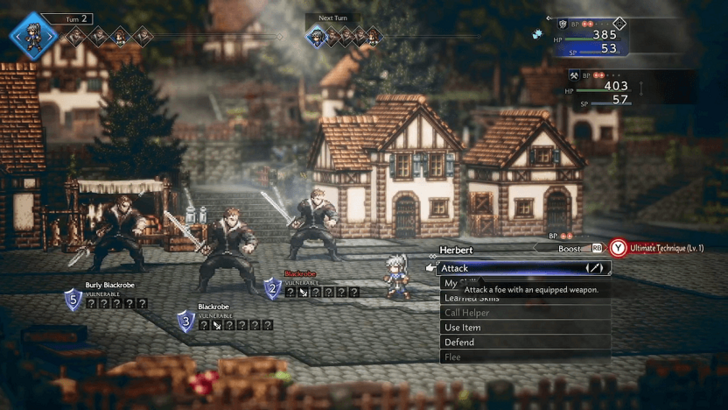 At the end of the cutscene, you will battle a group of Blackrobes, who are fairly easy to defeat. Afterward, join Bargello’s plan to infiltrate one of Herminia’s parties. |
| 4 |  Head to Herminia's Manse. Head south of the plaza to an alternate path towards Herminia's mansion. Before heading there, we recommend taking the time to recruit Celsus at the tavern to the west of the plaza, and gather Helpers around town. |
| 5 | 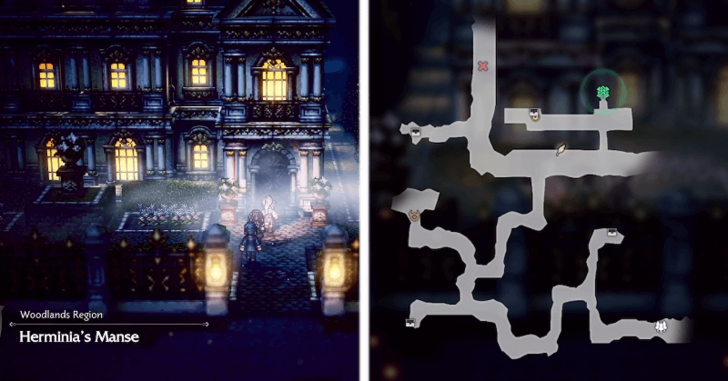 The path to Herminia’s estate has hostile Monsters and several Treasure Chests with useful resources. Fighting the Monsters is recommended, as the extra EXP will help in the upcoming boss fight. |
| 6 | 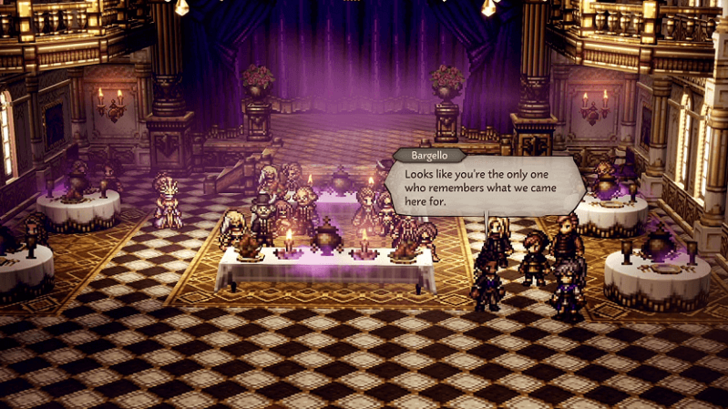 Inside Herminia’s mansion, the party sequence is entirely dialogue. After the cutscenes, you will return outside with your party and Bargello. |
| 7 | 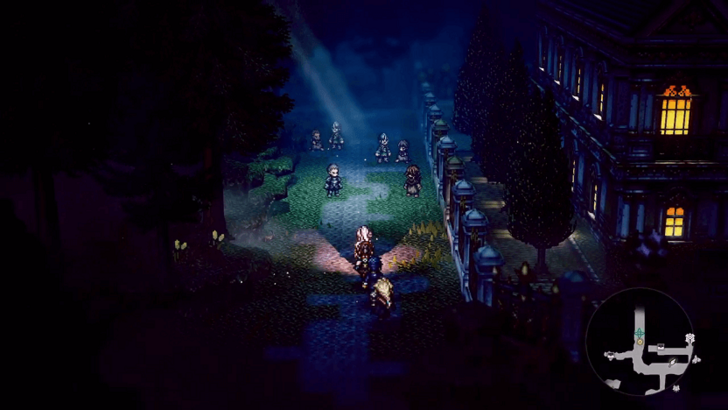 Confront the man who killed the slaves. Once outside, you must help Bargello confront the man, triggering the boss fight. Before engaging, make sure your party's HP and SP are topped up, and you have a few Healing Grapes on hand. You do not have to confront him immediately, so feel free to go back to Valore or leave town to stock up on items or recruit more allies. Being at least Lvl. 10 with more than three party members is recommended for a smoother boss fight. |
| 8 | 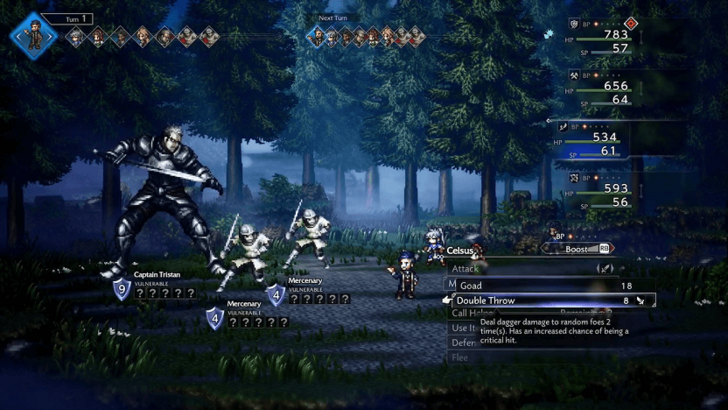 Defeat Captain Tristan. Captain Tristan is a tough early boss, with him and his minions dealing heavy damage. Try to deal with the Mercenaries first before focusing Captain Tristan. ▶︎ Captain Tristan Weaknesses and Boss Guide |
| 9 | 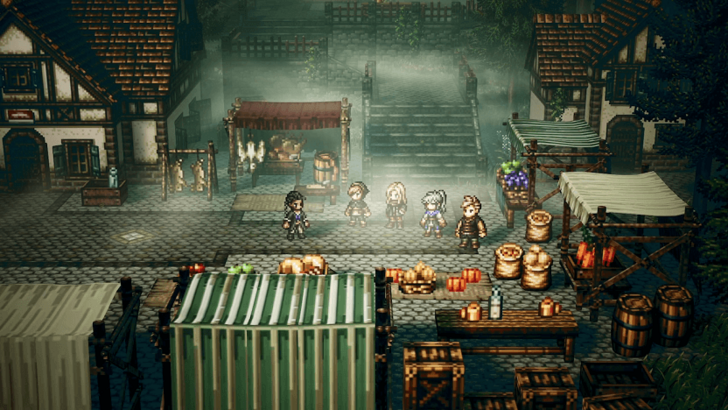 Go to Taivani's hideout and speak to Bargello. After defeating the boss, return to Valore to regroup with Bargello and his gang. Following the cutscene, the next chapter, A Flower Blooms, is immediately available when you speak to Bargello again in town. |
The Covetous Witch Walkthrough
Chapter 2: A Flower Blooms
| 1 | 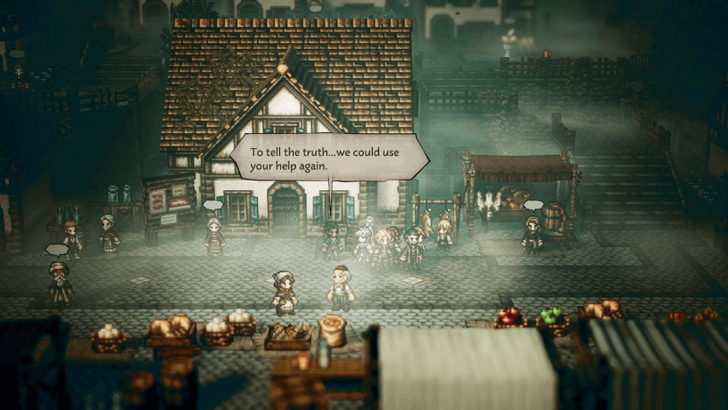 Speak to Bargello. Speak to Bargello on the south side of town in Valore and accept his offer to help him again. |
|---|---|
| 2 | 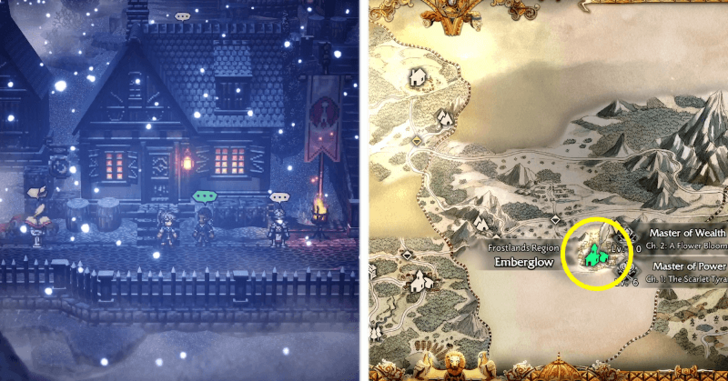 Go to Emberglow in the Frostlands. Travel to Emberglow, located east of Valore via the Valore Trail and the Emberglow Wilds. Once you arrive, meet Bargello near the town entrance. |
| 3 |  Meet up with Taviani at the Snowbloom Ruins. After speaking with Bargello, head to the Snowbloom Ruins in the northern part of the Emberglow Wilds. Meet the crew inside to continue. |
| 4 | 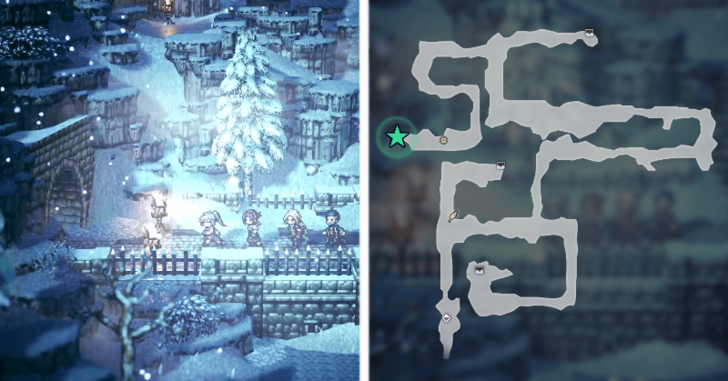 Go to the Subterranean Snow Ruins. Traverse the ruins and make your way to the Subterranean Snow Ruins at the end. The path going there contains Monsters and Treasure Chests for loot. |
| 5 | 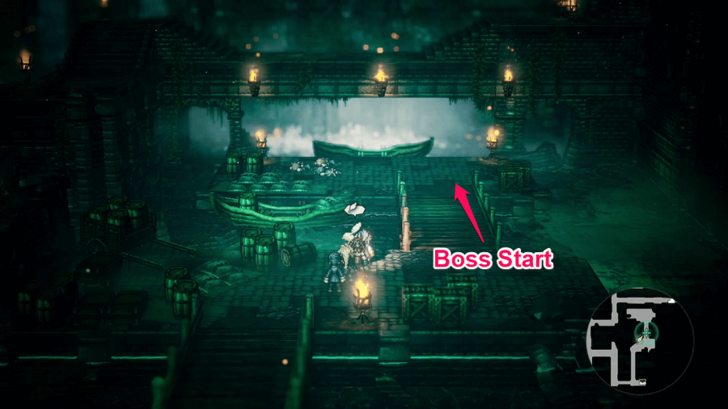 Interfere with Herminia's business deal. Now underground, fight through the Monsters and collect the Treasure Chests along the way. At the end of the path, you will reach a save point. Past the bridge near the save point is the start of the tough Sonia boss fight. Before starting the boss fight, you can return anytime to stock up on paralysis cures and reach at least Lvl. 12. Having a full party of 8 travelers also makes the fight more forgiving. |
| 6 | 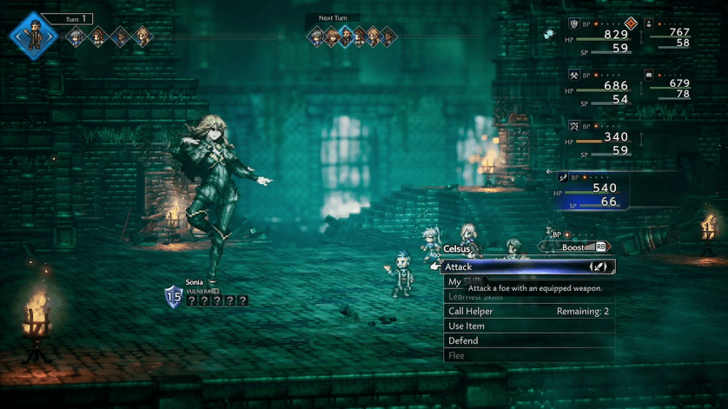 Defeat Sonia. Sonia is fast, evasive, and hits hard with rapid attacks. She can also inflict Paralysis, so bring items like Herbs of Vigor to recover. She ramps up her attacks around 50% HP, so be ready with plenty of healing skills and recovery items. |
| 7 | After defeating Sonia and watching the cutscene, you will be transported back to Valore. Speak to Bargello once more, located inside his tavern on the south side of town, to begin Chapter 3, Herminia the Huntress. |
Chapter 3: Herminia the Huntress
| 1 |  Speak to Bargello. Find Bargello inside his hideout in Valore to start the quest. The building is at the south end of the first area. |
|---|---|
| 2 | 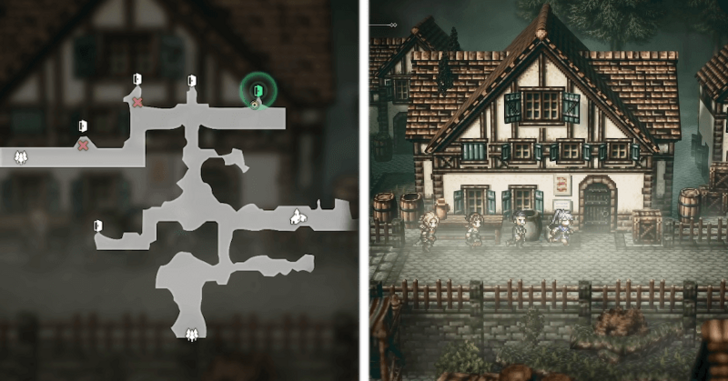 Go to Rosso's hideout. Go to Rosso’s hideout in the Valore Main Boulevard on the north side of the area. Entering the building will trigger the boss fight with Rosso immediately after the cutscene, so make sure you are stocked up on HP and SP, and save beforehand just in case. |
| 2 |  Defeat Rosso. Rosso deals heavy damage and frequently enters a phase where he becomes highly resistant to both Physical and Elemental attacks. Even though your damage will be low during his resistance phases, you can still break his Shield Points, so prioritize multi-hit BP attacks to break his guard. |
| 4 | 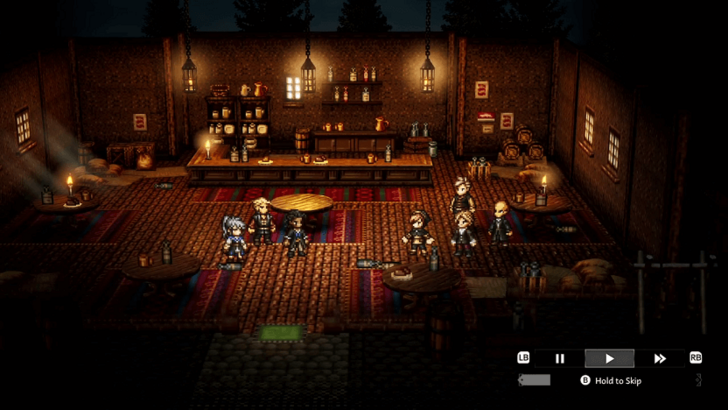 Return to Bargello's hideout. Before returning to Bargello’s hideout, rest to recover your HP and SP, as heading there will automatically transition you to Herminia’s Manse after the cutscene. |
| 5 | 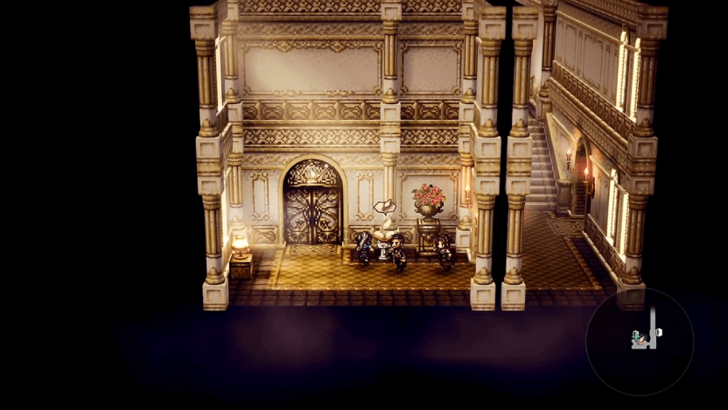 Search for Lady Herminia. Enter the mansion and turn left. The door will be locked, so you must explore the rest of the mansion to find the key. Expect random hostile encounters along the way. |
| 6 | 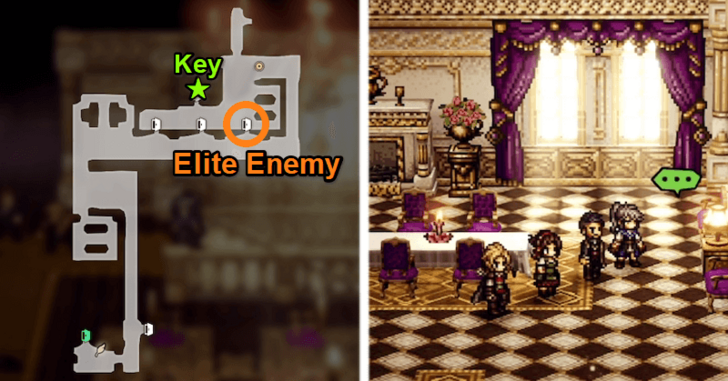 Search for the key to the locked door. The key is located in the northernmost part of the mansion, up the stairs. There are several chests on the way there, as well as the Elite Enemy: Herminia's Mighty Soldier II in the room just before the key room. |
| 7 | 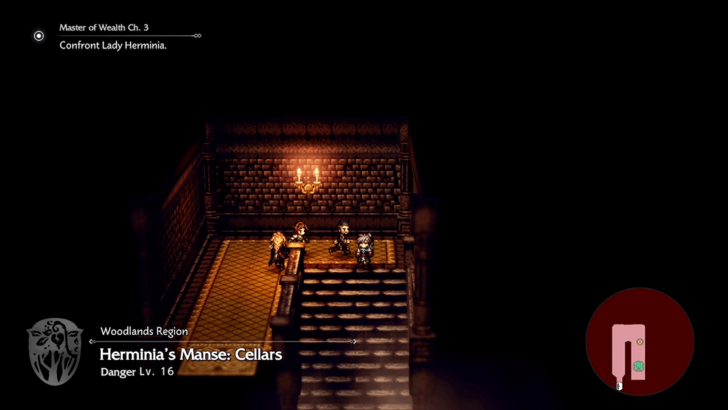 Unlock the door. Head back to the locked door and open it with the key. This leads to the Herminia's Manse Caverns area below. |
| 8 | 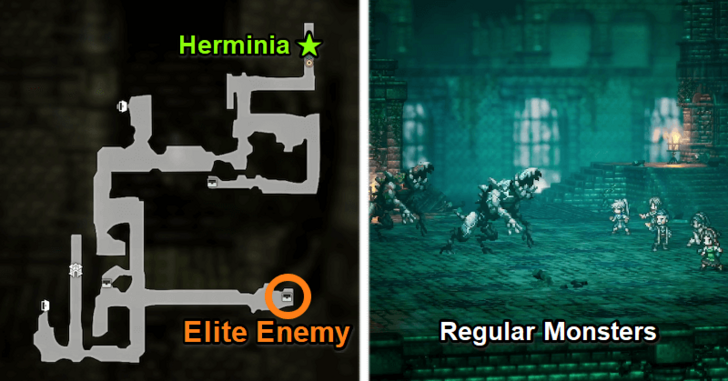 Confront Lady Herminia. Traverse the caverns and defeat the Monsters along the way. An Elite Enemy: Menacing Sticky Slug can be found on the southeast side of the area. The door to the Herminia boss fight is located in the northernmost section of the caverns. |
| 9 | 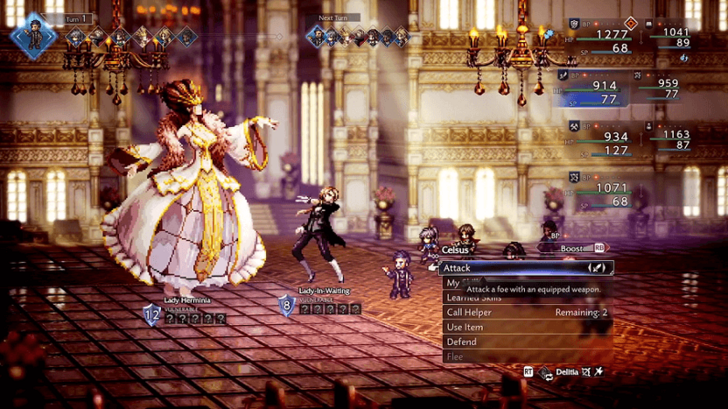 Lady Herminia (First Phase) Lady Herminia is accompanied by her Lady-in-Waiting, who can both attack you and heal Herminia. Focus on Lady Herminia first, breaking her guard to prevent her dangerous sleep attacks. The Lady-in-Waiting’s healing is small, and her attacks are weak compared to Herminia's. She transitions to a second phase after both her and the Lady-In-Waiting are defeated. |
| 10 | 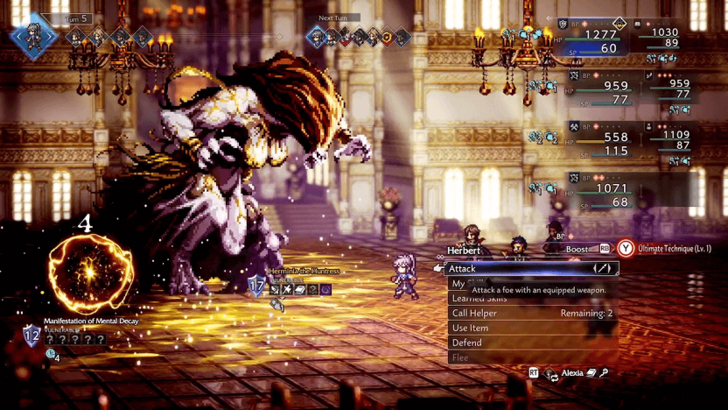 Herminia the Huntress (Second Phase) In her second phase, Herminia has increased HP and Shield Points. Watch out for when she summons the Manifestations of Mental Decay, as they count down to unleash a devastating attack. Prioritize destroying the Manifestations when they appear to avoid the attack, but be careful if one casts the All-Attack Counter Stance. Avoid attacking it until the effect ends. |
| 11 | 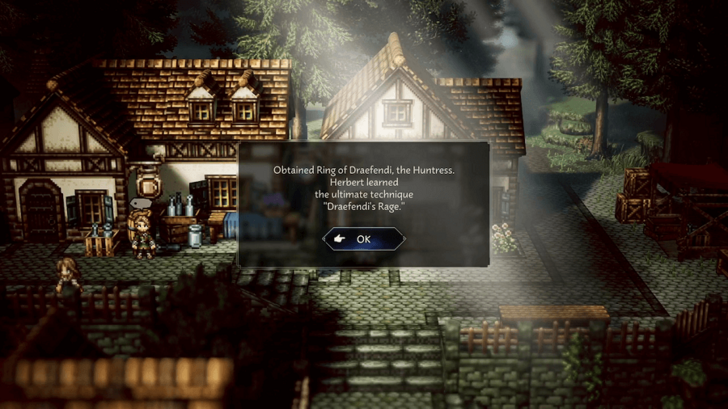 After winning the battle, you will be transported back to Valore and unlock the ultimate technique: Draefendi’s Rage. You can then continue by completing the Master of Power or Master of Fame questlines, or start the The Rings Sealed Away quest once all three are finished. |
Herminia the Huntress Walkthrough
Octopath Traveler 0 (Octopath 0) Related Guides

All Major Questlines
All Main Quest Walkthroughs
Comment
Author

Master of Wealth Questline Walkthrough
Rankings
- We could not find the message board you were looking for.
Gaming News

![The Seven Deadly Sins: Origin Review [First Impressions] | A Promising Start](https://img.game8.co/4440581/584e0bfb87908f12c4eab6e846eb1afd.png/show)

![Monster Hunter Stories 3 Review [First Impressions] | Simply Rejuvenating](https://img.game8.co/4438641/2a31b7702bd70e78ec8efd24661dacda.jpeg/thumb)
![The Seven Deadly Sins: Origin Review [First Impressions] | A Promising Start](https://img.game8.co/4440581/584e0bfb87908f12c4eab6e846eb1afd.png/thumb)
Popular Games

Genshin Impact Walkthrough & Guides Wiki
Umamusume: Pretty Derby Walkthrough & Guides Wiki
Pokemon Pokopia Walkthrough & Guides Wiki
Honkai: Star Rail Walkthrough & Guides Wiki
Monster Hunter Stories 3: Twisted Reflection Walkthrough & Guides Wiki
Arknights: Endfield Walkthrough & Guides Wiki
Wuthering Waves Walkthrough & Guides Wiki
Zenless Zone Zero Walkthrough & Guides Wiki
Pokemon TCG Pocket (PTCGP) Strategies & Guides Wiki
Monster Hunter Wilds Walkthrough & Guides Wiki


Recommended Games
Fire Emblem Heroes (FEH) Walkthrough & Guides Wiki
Diablo 4: Vessel of Hatred Walkthrough & Guides Wiki
Cyberpunk 2077: Ultimate Edition Walkthrough & Guides Wiki
Yu-Gi-Oh! Master Duel Walkthrough & Guides Wiki
Super Smash Bros. Ultimate Walkthrough & Guides Wiki
Pokemon Brilliant Diamond and Shining Pearl (BDSP) Walkthrough & Guides Wiki
Elden Ring Shadow of the Erdtree Walkthrough & Guides Wiki
Monster Hunter World Walkthrough & Guides Wiki
The Legend of Zelda: Tears of the Kingdom Walkthrough & Guides Wiki
Persona 3 Reload Walkthrough & Guides Wiki


All rights reserved
© SQUARE ENIX
The company names, product names and system names are trademarks or registered trademarks of their respective companies.
The copyrights of videos of games used in our content and other intellectual property rights belong to the provider of the game.
The contents we provide on this site were created personally by members of the Game8 editorial department.
We refuse the right to reuse or repost content taken without our permission such as data or images to other sites.