This survey will take about 1 minute.
Your answers will help us to improve our website.
Manor Lords
Build Order and What to Build First
★ Beginner's Guide | Game Setup
┗ Build Order and What to Build First
☆ How to Trade | Fertility Guide | Farming Guide
★ How to Get Regional Wealth
☆ How to Upgrade Burgage Plots
★ How to Make Ale
Knowing the build order for buildings and what to build first for your settlement is key to winning and surviving in Manor Lords. See the build order of buildings from start to finish, as well as the first ten buildings you need to build first!
List of Contents
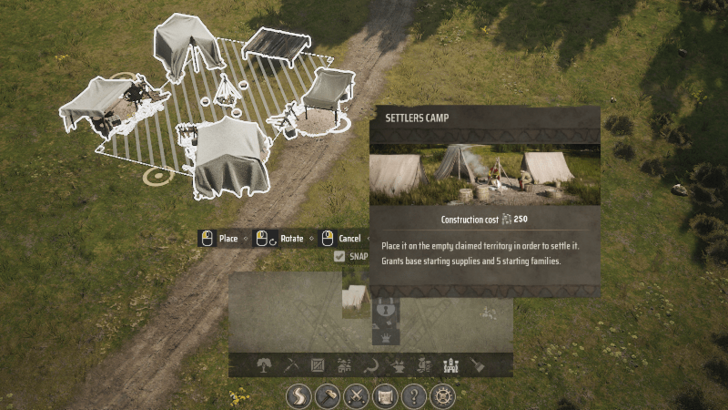
10 Buildings to Build First
Knowing what to build first is essential to surviving in the early stages of the game. Considering supplies are limited, you must be careful not to waste any precious resource that can permanently affect your run negatively.
Here is a list of the first 10 buildings you need to build and why:
| # | Building | Explanation |
|---|---|---|
| 1 |
 Storehouse Storehouse
 Granary Granary
|
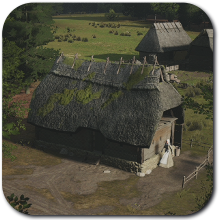
The Storehouse and Granary is your general storage for food and non-food items. All players are given a hefty provision at the start of the game and they are extremely important for your settlement's early survival. Building these storage buildings avoids spoilage of these items due to weather effects. |
| 2 |
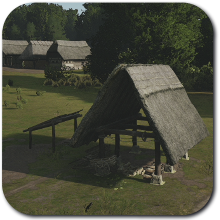
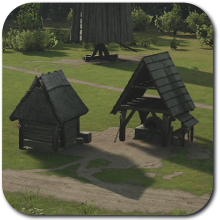
 Hunting Camp Hunting Camp
|
The Hunting Camp will provide food and hides for your settlement. This is extremely important for survival. It also has no resource cost, so you can build it without making a dent in your inventory. |
| 3 |
 Logging Camp Logging Camp
|
Next, focus on getting Timber for constructing additional buildings around your settlement. The Logging Camp is the way to go here. |
| 4 |
 Woodcutter's Lodge Woodcutter's Lodge
|
In addition to the Logging Camp, try building one Woodcutter's Lodge as well to passively accumulate Firewood for your first Winter. |
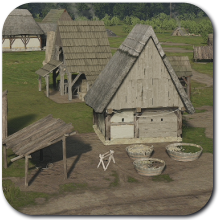
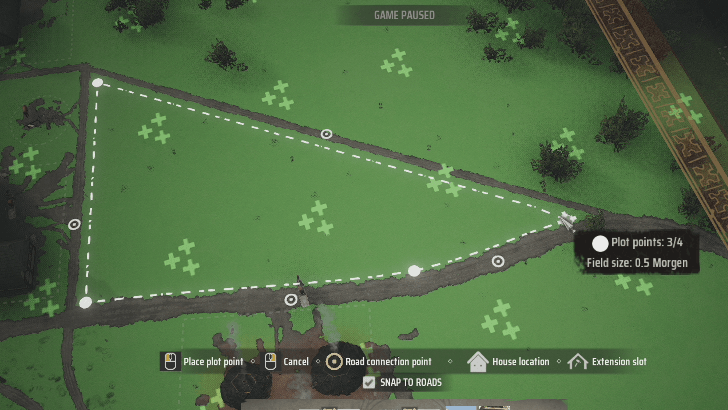
| 5 | Burgage Plots | At this point, create Burgage plots to provide residence for your populace. Build your first five (5) first then expand at a careful pace, checking if your food supplies can take the brunt of citizen expansion. Aim to have 7-10 plots so you can upgrade to a small village with an ample workforce. |
| 6 |
 Marketplace Marketplace
|
Build a marketplace to facilitate the distribution of food, clothing, and fuel to your burgage plots. This will ensure survival and increases approval ratings. |
| 7 |
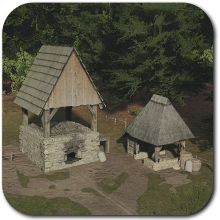
 Forager Hut Forager Hut
|
If there is a nearby Berry deposit, build a forager hut so you can have a more stable source of food. This becomes imperative if the same berry deposit is rich. |
| 8 |
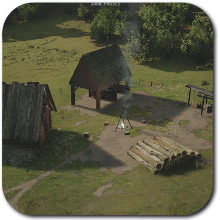
 Well Well
|
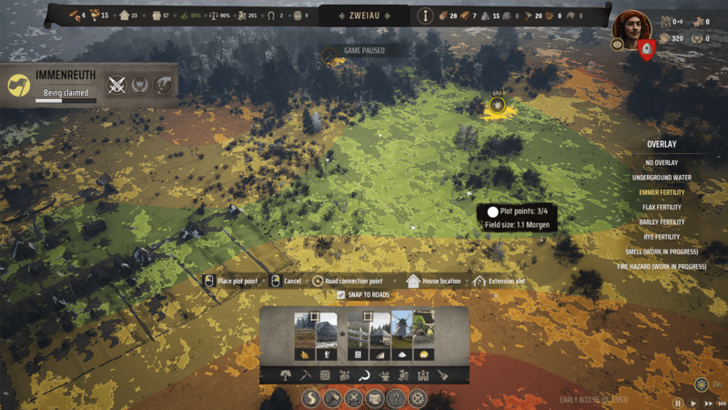
Since you have a burgage plot already, you must now build a Well to provide water. Make sure to check the Underground Water overlay in the Construction menu and put the Well in a space with a good underground water reserve. |
| 9 |
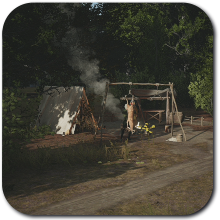
 Tannery Tannery
|
Provide clothing for your citizens so they can survive the incoming Winter. This is also the easiest way to satisfy the clothing needs of burgage plot residents as you will have a lot of Hides from your Hunting Camp. |
| 10 |
 Stonecutter Camp Stonecutter Camp
|
Look for a Fieldstone deposit in your region and build a Stonecutter Camp. This enables you to construct more buildings that require stones. |
Build Order At The Start
(Camp to Small Village)
The starting build order is all about setting up your resources so you can grow into a Small Village and don't fail in your first Winter. Make sure to slowly but surely build these up while keeping careful track of your resource lifespan (the barrel icon to the left of your region's name).
- Set Up Storage Buildings
- Set Up a Hunting Camp
- Aim to Get Timber
- Passively Store Firewood for Winter
- Setup Burgage Plots For Living Quarters
- Build a Marketplace
- Build a Forager Hut
- Construct a Well
- Build a Tannery
- Expand and Aim to Get Stones
Set Up Storage Buildings
| Building | Description |
|---|---|
|
Granary
|
Workers collect, store, and distribute goods using the Pantry. Stores up to 500 food resources or Ale. If needed, they will also automatically set up stalls on the marketplace to distribute the stored goods to Burgage Plots. |
|
Storehouse
|
Workers collect, store and distribute goods using Generic Storage. Stores up to 250 non-food resources. If needed, they will also automatically set up stalls on the marketplace to distribute the stored goods to Burgage Plots. |
The game will provide you with a hefty amount of starting resources at the start of the game. Because you don't have storage buildings, they will be stacked in the open - exposed to weather effects. It is important to save these resources by creating storage buildings first.
Set Up a Hunting Camp
| Building | Description |
|---|---|
|
Hunting Camp
|
Workers hunt wild animals and produce meat and hides. Can set a Hunting Limit - meaning the camp will stop working if the population of the prey drops to equal the limit. |
The Hunting Camp will be your main source of food in the early game. You can also construct the building even without resources so it's the perfect starting building for everyone.
Aim to Get Timber
| Building | Description |
|---|---|
|
Logging Camp
|
Workers fell nearby trees to produce Timber. |
Aim to get Timber next so you can cover the cost of constructing early-game buildings. Most of them will cost Timber, so this is required.
Passively Store Firewood for Winter
| Building | Description |
|---|---|
|
Woodcutter's Lodge
|
Workers fell nearby trees to produce Firewood. |
After setting up a Timber source, consider setting up a Firewood source. Your settlement will thank you for passively saving Firewood on the side so you can survive the first Winter.
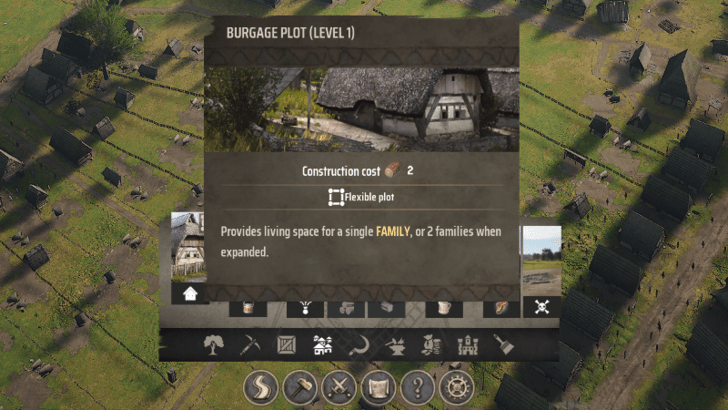
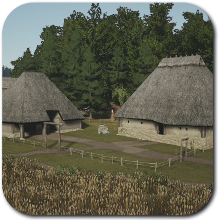
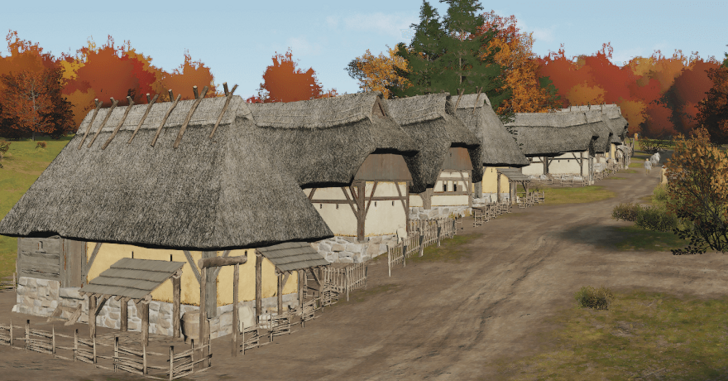
Setup Burgage Plots For Living Quarters
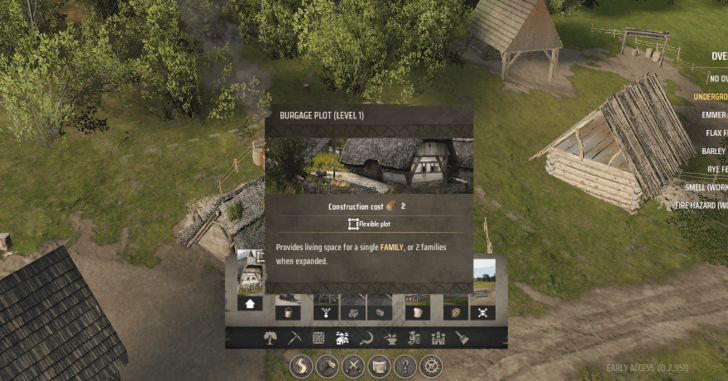
Set up Burgage Plots as these will provide housing for your citizens. Try to build extra burgage plots and homes so more people will move in. Beware, only expand if your food and fuel in the storage can take it.
How to Upgrade Your Burgage Plot and Levels
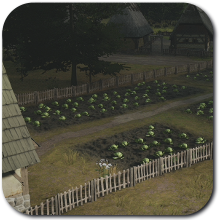
Focus on Putting Up Vegetable Gardens and Chicken Coops
| Building | Description |
|---|---|
 Vegetable Garden Vegetable Garden
|
A backyard extension that allows production of vegetables. Requires plowing and harvesting labor. The yield depends on plot size. |
 Chicken Coop Chicken Coop
|
A backyard extension that allows a passive yield of Eggs. |
Using the starting regional wealth provided by the game, convert some Burgage Plots into Vegetable Gardens and Chicken Coops. This ensures a steady supply of food throughout the settlement.
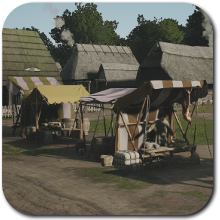
Build a Marketplace
| Building | Description |
|---|---|
|
Marketplace
|
Provides space for assigned families to set up stalls and distribute their produce to the Burgage Plots. A healthy supply and demand ratio of goods is needed to fulfill Residential Requirements and keep Approval high. |
Build a Marketplace to get your economy going. This will also facilitate the distribution of food, clothing, and fuel around your settlement. It is also required at this point since burgage homeowners will rely on Marketplaces for their basic needs.
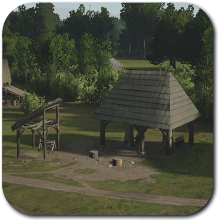
Build a Forager Hut
| Building | Description |
|---|---|
|
Forager Hut
|
Workers gather Berries from nearby Berry Deposits. Can be upgraded to have a Herb Garden for 2 Planks and 25 Regional Wealth, allowing the production of Herbs. |
If there are Berry deposits in your region, consider putting a Forager Hut near it. This will further secure your source of food.
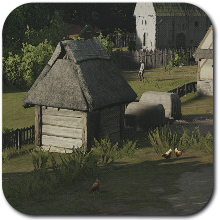
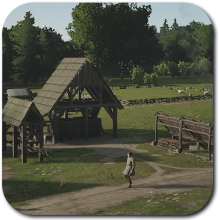
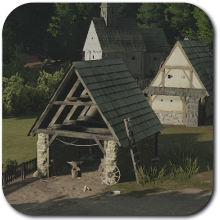
Construct a Well
| Building | Description |
|---|---|
|
Well
|
Provides Drinking Water to Burgage Plots. Also enables Firefighting. Can be built anywhere if the game setting is set to unconstrained, else it must be built over Underground Water sources. |
Burgage Plots will need water to function, and the best method to provide water is to construct Wells. Make sure to check the Underground Water overlay in the Construction Menu and build the Well above a good water reserve.
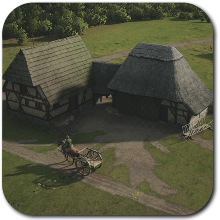
Build a Tannery
| Building | Description |
|---|---|
|
Tannery
|
Workers use Hides to produce Leather. Does not need refueling every month. |
Build a Tannery towards the end of the early game so you can provide clothing to your citizens. This will also help in achieving Level 2 burgage plots.
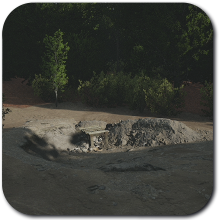
Expand and Aim to Get Stones
| Building | Description |
|---|---|
|
Stonecutter Camp
|
Workers gather Stone from nearby Fieldstone deposits. |
Now, we arrive in the Stone Age. Look for Fieldstone deposits in the region and build a Stonecutter Camp nearby. Gather Stones so you can build even more buildings.
Build Order in the Early Game
(Small to Medium Village)
This section will talk about the build order of buildings as you go from a Small Village to a Medium Village. As usual, make sure to only expand if you have a lot of Food and Fuel surplus.
- Get Your First Development
- Buy Another Ox and Get Another Hitching Post
- Build a Sawpit
- Upgrade Your Storage Buildings
- Build a Manor
- Build More Burgage Plots to Get More Families
- Build a Church
- Upgrade Burgage Plots to Level 2
Get Your First Development

After levelling up your village to a Small Village, you will be provided with one (1) development point. We suggest getting the Charcoal Burning development as it will significantly reduce your worry concerning heating requirements in Winter. Not only that, you can accumulate supplies to use in future Industry buildings.
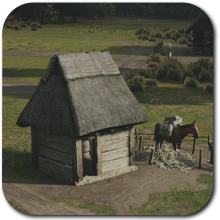
Buy Another Ox and Get Another Hitching Post
| Building | Description |
|---|---|
 Hitching Post Hitching Post
|
Provides 1 Stable Space and enables ordering of horses or oxen. Assigned families become permanent Ox Guides, which speeds up travel and logistics. |
At this point, you may want to purchase another Ox for your settlement. This will make building faster in general and allow you to use the Sawpit. You will be notified that you don't have enough space for another Ox, so we suggest building another hitching post to accommodate the new animal.
You can then individually update each hitching post into a Small Stable when you get access to Planks.
Build a Sawpit
| Building | Description |
|---|---|
 Sawpit Sawpit
|
Workers transform Timber into Planks. Can set a Construction reserve for Timber - meaning the building will stop providing Timer if the number of stock in the storage is equal to the limit. |
Next, focus on making Planks so you can upgrade buildings and create more advanced ones. Make sure to have an Oxen available to pull Timber into the Sawpit for processing.
Upgrade Your Storage Buildings
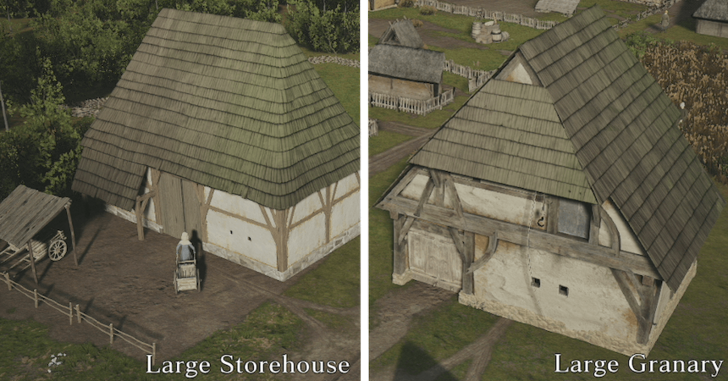
At this point, you will find yourself with full storage most of the time. We suggest upgrading your storage buildings into their Large counterparts to significantly increase your storage space.
Build a Manor
| Building | Description |
|---|---|
 Manor Manor
|
Residence of you and your Retinue. Grants 250 Influence, raises the Administration Level by 1, and enables players to tax their people. It requires Fuel to operate. Only one (1) Manor can be constructed per region. After building your very first Manor, the starting retinue will join you in your palace for free. Manors have an area around them where they can be upgraded with various modules. |
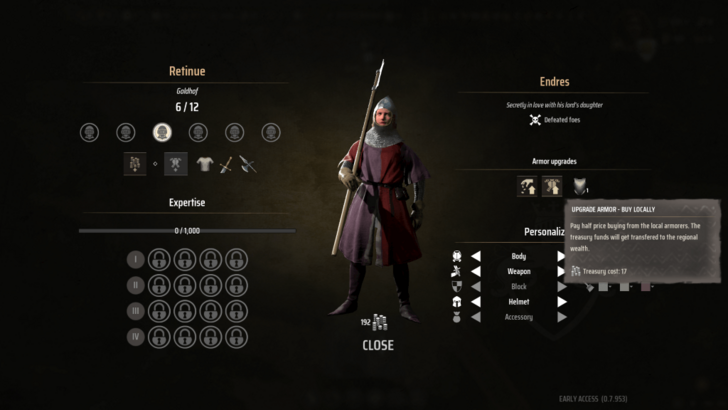
You'd also want to build a Manor so you can start taxing your citizens for Treasury funds and passively gain Influence for future regional expansions. Do note that making tax rates too high will cause your approval rate to drop so balance them out based on your current approval rating.
This will also provide you with a bunch of Retinue, a special subgroup of your army that is stronger than regular units. You can use them to defend against raiders until you can create a proper army.
Taxes Guide: How to Increase Treasury
Form Your First Spear Militia
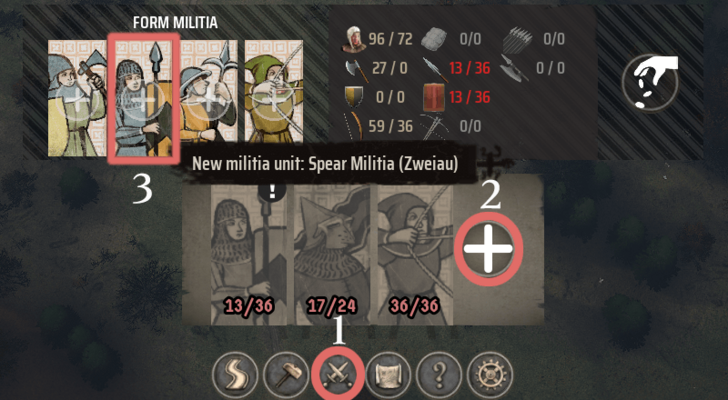
After getting a storehouse and 5 plots of land, you will be provided with 20 spears and 20 shields to use. This can be used by your very own Spear Militia so try to create one to support your Retinue.
This way you can not only defend your village but also pick out Bandit Camps all over the map for Influence points so you can expand later on.
Build More Burgage Plots to Get More Families
At this point, 10 families is not enough to sustain your village's workforce demand so try putting more plots so people will move in. Aim to have fifteen (15) families in your settlement while carefully balancing their requirements for Food and Fuel.
How to Get More Families and Increase Population
Build a Church
| Building | Description |
|---|---|
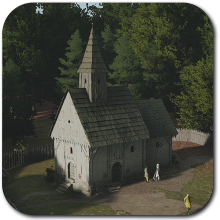 Wooden Church Wooden Church
|
Fulfils 1 level of Faith requirement for Burgage plots. Provides Hallowed Ground for Burial of the dead villagers and workers become Gravediggers. |
Next, you'd want to build a Church to increase your burgage plots to Level 2. Level 2 burgage plots unlock more processing buildings for weapons, armor, and more food variety.
Upgrade Burgage Plots to Level 2
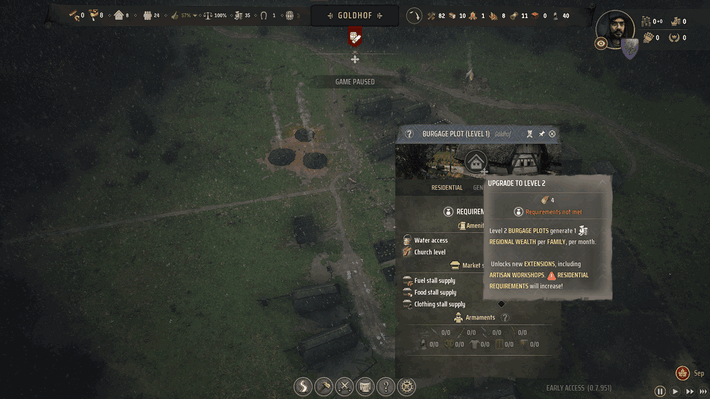
At this point of the game, you should have fulfilled the requirements for your Level 1 Burgage Plots to be upgraded to Level 2. Slowly upgrade the plots until you get at least 2 Burgage Plots at level 2. This will upgrade your settlement into a Medium Village.
Build Order in the Early-Mid Game (Medium to Large Village)
This section will talk about what to build to reach the Large Village status. This phase will focus more on starting up mining, processing ores, and setting up trade routes for your settlement.
- Spend Your Second Development Point
- Start Mining!
- Build a Bloomery or Clay Furnace
- Get the Blacksmith's Workshop Burgage Extension
- Process Iron Slabs into Weapons
- Build a Joiner's Workshop for Shields
- Setup Trading Posts
- Upgrade 3 More Burgage Plots to Level 2
Spend Your Second Development Point
After levelling up your village to a Medium Village, you will be provided with another development point. First, check your map if your current region has Rich Iron or Clay Deposits. If yes, get the Deep Mining development so you can have a steady stream of ores for trading. If not, settle with getting the Forest Management development to double your Berry yields.
Start Mining!
| Building | Description |
|---|---|
 Mining Pit Mining Pit
|
Used to extract Iron Ore from Iron Deposits, and Clay from Clay Deposits. Can be upgraded into a Deep Mine using the Deep Mining development. |
Look through your region and put Mining Pits around mining nodes. Mine Iron Ores and Clay for processing shortly. For rich deposits, make sure to convert them into Deep Mines so you have an infinite source of Iron and Clay.
Build a Bloomery or Clay Furnace
| Building | Description |
|---|---|
 Bloomery Bloomery
|
Workers convert Iron Ore into Iron Slabs. Also needs to be refueled every month. |
 Clay Furnace Clay Furnace
|
Converts Clay to Roof Tiles. Must be refueled once per month. |
At this point in the game, you should start processing your Iron Ores and Clay that are stuck in your Storehouses. This starts with the Bloomery and Clay Furnace.
Depending on which has the Rich deposit in your region, you'd want to prioritize processing those first.
Get the Blacksmith's Workshop Burgage Extension
| Building | Description |
|---|---|
 Blacksmith's Workshop Blacksmith's Workshop
|
A backyard extension that allows production of Tools, Sidearms, Spears, and Polearms from Iron Slabs and/or Planks. Converts all inhabitants into Artisans, locking them from being assigned to other jobs. |
If you're processing Iron Slabs, get the Blacksmith's Workshop first so you can process Iron Slabs into Weapons.
Process Iron Slabs into Weapons
| Raw Material | → | Product |
|---|---|---|
| Iron Ore | → | Iron Slab |
| Iron Slabs | → | Sidearms |
|
Iron Slabs + Planks |
→ | Spears |
|
Iron Slabs + Planks |
→ | Polearms |
Now, it is time to use the infinite Iron deposit that you have been harvesting since the early game. Shift the focus of all Blacksmiths that are previously working on Tools to now work on weapons. You can also trade the extra weapons to get Regional Wealth.
Based on the unit type that you chose, create their corresponding weapons. We suggest forming either Militia Footmen and/or Spear Militia and pair them with your Retinue.
Required Armaments
| Militia | Weapons |
|---|---|
| Militia Footmen | Sidearms, Small Shields |
| Spear Militia | Spears, Large Shields |
| Polearm Militia | Polearms |
| Archer Militia | Warbows |
All Recruits and Best Unit Types
Build a Joiner's Workshop for Shields
| Building | Description |
|---|---|
 Joiner's Workshop Joiner's Workshop
|
A backyard extension that allows production of Wooden Parts and Shields from Planks. Converts all inhabitants into Artisans, locking them from being assigned to other jobs. |
Some of the stronger units in Manor Lords use a shield, so you have to convert a Lv. 2 Burgage plot into a Joiner's Workshop to make them. Shields only cost Planks to make so it should be fairly easy to process.
Setup Trading Posts
| Building | Description |
|---|---|
 Trading Post Trading Post
|
A building that is responsible for trading imported goods. Enables trading with visiting merchants, tradepoints, and trading posts in other regions. When employed, 1 family member travels to the nearest possible destination to conduct trade, while other family members manage the inventory. The family can also automatically set up stalls on the marketplace to sell imported goods. |
 Livestock Trading Post Livestock Trading Post
|
A building that is responsible for trading livestocks. Provides 4 Pasture and 2 Stable Spaces for the livestock in its inventory. |
To stabilize your resources even more, try your hands at trading using the Trading Posts. Remember to only sell the surplus items that you have. We suggest exporting Iron Slabs and importing Wheat for Bread - until you get a Field.
Upgrade 3 More Burgage Plots to Level 2
In case you have not, at this point you should now upgrade three (3) more Burgage plots to Level 2 and finalize your movement to a Large Village. Congratulations!
Build Order in the Mid Game
(Large Village to Small Town)
The jump you need to do to reach Small Town marks the most significant infrastructure development players need to undertake. Getting to Small Town status requires three (3) Level 3 Burgage Plots which requires quite a lot of new buildings for resource processing.
Do not rush this phase as it is very easy to overwhelm your supplies and leave your settlement without Food.
- Spend Your Third Development Point
- Expand to Other Regions
- Start Your Farms!
- Aim to Have at Least 25 Families
- Start Producing Bread
- Start Your Ale Production
- All Lv. 1 Burgage Produce Vegetables & Eggs
- Start Your Clothing Production
- Build a Clay Furnace for Roof Tiles
- Upgrade To a Small Stone Church
- Upgrade Burgages As Small Town Requirements
Spend Your Third Development Point
After reaching Large Village status, you will be rewarded with a development point. We suggest getting the Forest Management development if you haven't already because we'll need the extra Berry resource to create Dyes.
Forest Management Development Details
Expand To Other Regions
Jumping from a Large Village to a Small Town is a huge undertaking and will eat up a lot of resources. Furthermore, since you're now starting to build your army by mass-producing weapons, you're going to have to expand to be stable with resources. Use the Influence points you have collected so far to expand.
How to Expand to Other Territories
① Set Up a Minimal Settlement
We suggest setting up the auxiliary settlement to only do what they are intended to do in that region: harvest resources and trade them. You do not have to expand it the same way as your main base.
Additionally, you only need to put level 1 burgage plots here since most processing will be done at home. Just make sure you have the basic needs like food and fuel covered by also constructing gathering buildings like the Hunting Camp and the Forager's Hut.
You should also only take developments that will benefit the production of that region the most. For example, if your auxiliary region is set to farm crops, then all developments that improve crop yields and performance should be prioritized.
② Transport Goods with Pack Station or Trading Post
| Building | Description |
|---|---|
 Pack Station Pack Station
|
Sets up a Barter Connection, allowing you to send and receive goods between the current and another owned region. Employ Mules to transport up to 20 goods per trip. |
|
Trading Post
|
A building that is responsible for trading imported goods. Enables trading with visiting merchants, tradepoints, and trading posts in other regions. When employed, 1 family member travels to the nearest possible destination to conduct trade, while other family members manage the inventory. The family can also automatically set up stalls on the marketplace to sell imported goods. |
Now, you also have to setup a way for these two regions to transport goods between each other. We suggest using a Trading Post since it is the most efficient way, but you can use a Pack Station for a smaller quantity of goods.
③ Provide Protection from Raiders!
This is an entirely new settlement, so bandits will inevitably try and raid your base. Protect your settlement by having an army on standby and clear up bandit camps on the side. You will be warned a year early if raiders are going to attack, so send troops as reinforcement as soon as you see the notification.
All Recruits and Best Unit Types
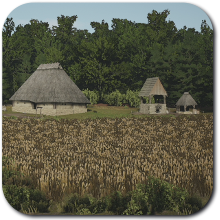
Start Your Farms!
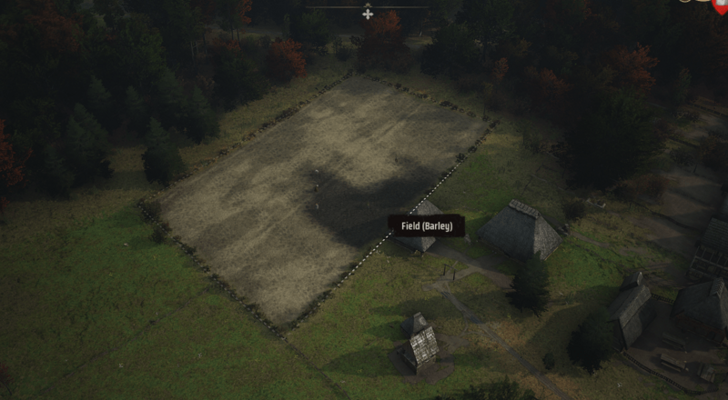
At this point in the game, you should start farming crops and sheep for various raw materials that will be processed later on.
Start a Crop Farming System
| Building | Description |
|---|---|
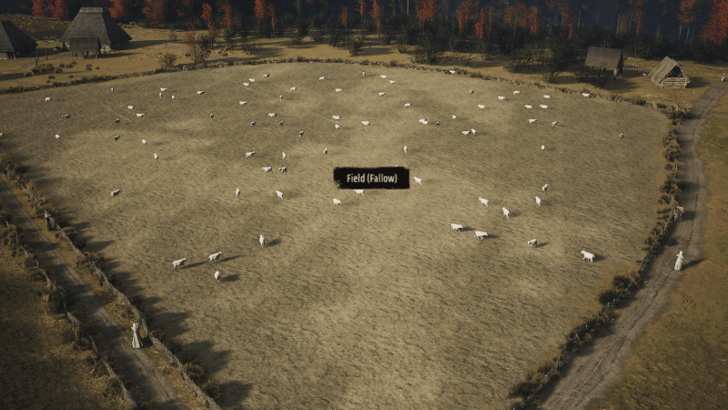
 Field Field
|
A space to grow crops like Wheat, Flax & Barley. To employ peasants on the fields, you need to build a Farmhouse. Note that larger fgields would yield more crops but would take longer to plow. |
 Farmhouse Farmhouse
|
Used to employ families on the Field. Farm workers plow the fields as soon as the Winter passes, but no later than November then they sow them with the chosen crop. |
Wheat is going to be the raw material for Bread, Barley for Ale, and Flax for Linen. Make sure to follow a good crop rotation strategy to maximize yields. Aim to have a steady flow of each for your settlement. Make sure to have enough family to manage your field and assign them to the Farmhouse.
How to Farm Crops - Farming Guide
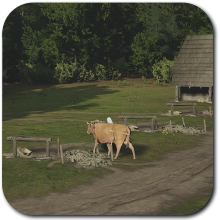
Farm Sheep for Their Wool
| Building | Description |
|---|---|
 Pasture Pasture
|
Provides pasture space for livestock. |
 Sheep Farm Sheep Farm
|
Workers collect Wool from grazing Sheep. The Sheep must first be imported via the Livestock Trader. The sheep farm also has 5 Pasture Space. |
Lastly, you're going to need a Sheep Farm to manage your Sheep. We suggest importing 5-10 Sheep from the Livestock Trading Post and assigning a family to the Sheep Farm to trim their Wool.
How to Farm Livestock - Farming Guide
Aim to Have at Least 25 Families
Since we're going to need a bunch of workers for our settlement, we'd need to build burgage plots so families can move in. Aim to get 25 Families while making sure you have enough Food in the Pantry for them.
Start Producing Bread
| Raw Material | → | Product |
|---|---|---|
| Wheat | → | Grain |
| Grain | → | Flour |
| Flour | → | Bread |
With an abundance of Wheat in your storage at this point, you're gonna need to process it into Bread. This ensures that you have a self-sustaining supply of food for your settlement.
① Build a Windmill
| Building | Description |
|---|---|
 Windmill Windmill
|
Converts Grain into Flour. Works most efficiently on empty land, unobstructed by buildings or trees. |
After Wheat is threshed in a Farmhouse, you must build a Windmill to process it into Flour. This is the main ingredient and requirement for Bread.
Flour: How to Get and How to Use
② Get a Communal Oven
| Building | Description |
|---|---|
 Communal Oven Communal Oven
|
Workers use Flour to produce Bread. Not as efficient as using the Bakery Burgage Plot extension, but is pretty useful in the early game. |
When you have Flour already, it's time to bake it into Bread. The communal oven is the easiest choice for this as you just need to assign an open family to bake bread.
A more specialized and efficient Bakery can also be built in a Burgage, but this requires the Bakeries development. For now, using a communal oven is enough.
Bakery Extension - How to Build and Use
Start Your Ale Production
| Raw Material | → | Product |
|---|---|---|
| Barley | → | Malt |
| Malt | → | Ale |
Next, you'd want to start up your Ale production and use the Barley in your Storage. A steady supply of Ale is needed to maintain a Tavern, which is a requirement to upgrade Level 2 Burgage plots.
How to Make Ale (Step-by-Step)
① Build a Malthouse
| Building | Description |
|---|---|
 Malthouse Malthouse
|
Workers use Barley to produce Malt. The Malthouse needs to refuel to operate. |
Building the Malthouse will convert the raw, harvested Barley into Malt. The malt is then going to be processed in a Brewery.
② Upgrade Two Lv. 2 Burgage into a Brewery
| Building | Description |
|---|---|
 Brewery Extension Brewery Extension
|
A backyard extension that allows production of Ale from Malt. Converts all inhabitants into Artisans, locking them from being assigned to other jobs. |
Next, you'd want to expand a two Lv. 2 Burgage into breweries. This way you can produce Ale to fuel Taverns and provide Entertainment for your settlers.
Do note that converting a burgage into a Brewery will turn all residents into artisans and they won't be able to work in other buildings anymore. Make sure you have enough workers to compensate for the family taken away from the general workforce.
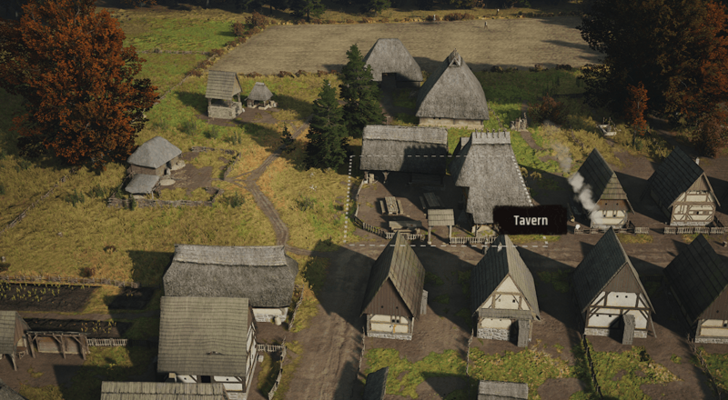
③ Build a Tavern for Your Citizens
| Building | Description |
|---|---|
 Tavern Tavern
|
Fulfills 1 level of Entertainment requirement for the Burgage Plots. Like many of your citizens, Taverns need Ale to function. It can also store 100 Ale. |
Lastly, a Tavern must be built to distribute the Ale to your citizens. The Tavern will only work if there is Ale, so make sure you have enough for your citizens.
Have All Lv. 1 Burgage Produce Vegetables and Eggs
| Building | Description |
|---|---|
|
Vegetable Garden
|
A backyard extension that allows production of vegetables. Requires plowing and harvesting labor. The yield depends on plot size. |
|
Chicken Coop
|
A backyard extension that allows a passive yield of Eggs. |
If you haven't yet, convert all your Level 1 Burgage plots to have Vegetable Garden and Chicken Coop extensions. This helps with maintaining food in your settlement by a lot. Don't worry, you can easily change set extensions again once they reach Level 2 Burgage.
Start Your Clothing Production
| Raw Material | → | Product |
|---|---|---|
| Wool | → | Yarn |
| Berries | → | Dyes |
|
Dyes + Yarn |
→ | Cloaks |
Next, you'd want to provide another type of Clothing so Level 2 Burgage plots can upgrade to Level 3. Since we have an abundance of Wool from the Sheep Farm, we opted to produce Cloaks.
① Build a Dyer's Workshop
| Building | Description |
|---|---|
 Dyer's Workshop Dyer's Workshop
|
Workers convert Berries into Dyes. Does not need Fuel to operate. |
First, we'll need to produce Dyes in a Dyer's Workshop using Berries. We took the Forest Management development earlier so you can have an abundance of Berries from sources.
Dyes: How to Get and How to Use
② Build a Weaver's Workshop for Yarn
| Building | Description |
|---|---|
 Weaver's Workshop Weaver's Workshop
|
Workers use Wool to produce Yarn, and Flax to produce Linen. Does not need to refuel every month. |
Next, build a Weaver's Workshop to process the Wool from your Sheep into Yarn. This is going to be your basic material for the new clothing product you're going to make.
Yarn: How to Get and How to Use
③ Upgrade a Lv. 2 Burgage into a Tailor's Workshop
| Building | Description |
|---|---|
 Tailor's Workshop Tailor's Workshop
|
A backyard extension that allows production of Clothes, Cloaks, and Gambesons from Linen, Yarns, and/or Dyes. Converts all inhabitants into Artisans, locking them from being assigned to other jobs. |
Lastly, upgrade a Level 2 Burgage into a Tailor's Workshop then set it to make Cloaks. The basic material for a Cloak is Yarn and Dye, something we should have in our storage.
Do note that converting a burgage into a Tailor's Workshop will turn all residents into artisans and they won't be able to work in other buildings anymore. Make sure you have enough workers to compensate for the family taken away from the general workforce.
How to Make Cloaks (Step-by-Step)
Build a Clay Furnace for Roof Tiles
| Building | Description |
|---|---|
|
Clay Furnace
|
Converts Clay to Roof Tiles. Must be refueled once per month. |
If you don't have yet, create a Clay Furnace to make Roof Tiles. We need it to upgrade the Wooden Church later.
Upgrade To a Small Stone Church
| Building | Description |
|---|---|
|
Wooden Church
|
Fulfils 1 level of Faith requirement for Burgage plots. Provides Hallowed Ground for Burial of the dead villagers and workers become Gravediggers. |
Next, upgrade your Wooden Church into a Small Stone Church to provide another point of Faith. This is required if you want to upgrade a Level 2 Burgage to Level 3.
Upgrade Burgages As Small Town Requirements
| Level | Requirements |
|---|---|
| Level 5 (Small Town) |
・Level 1+ Burgage Plots x10 ・Level 2+ Burgage Plots x7 ・Level 3 Burgage Plots x3 |
You now have enough resources to upgrade a few Level 2 Burgage plots into Level 3. In addition to Level 1 and Level 2 Burgage plot count requirements, you need three (3) Lv. 3 Burgage plots to get Small Town status. Do this, and your settlement is now a Small Town! Congratulations!
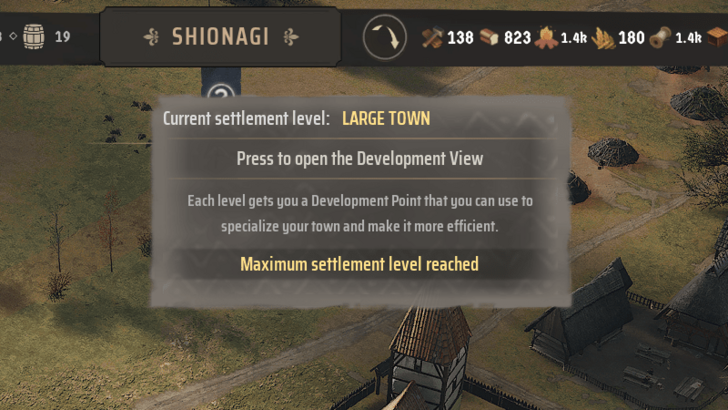
How to Increase Settlement Level
Build Order in the Mid-Late Game
(Small to Medium Town)
Since you now have the necessary infrastructure and setup to add more Lv. 3 Burgage Plot, the focus of this phase is going to be increasing basic supply, and more!
- Spend Your Fourth Development Point
- Increase Your Food Yields
- Start Your Gambeson Production
- Boost Ale Production
- Get a Total of 10 Lvl. 3 Burgage Plots
Spend Your Fourth Development Point
After reaching the Small Town status, you will be given one development point. Consider getting Basic Armormaking so you can focus on providing armor to your army.
Basic Armormaking Development Details
Increase Your Food Yields
Burgage Plot Lv. 3 will automatically unlock a new slot in the house so population increase is inevitable. First, make sure that your Food yield is enough to support your growing population.
Focus on Your Bread Production
| Raw Material | → | Product |
|---|---|---|
| Wheat | → | Grain |
| Grain | → | Flour |
| Flour | → | Bread |
The only thing you can upgrade at this point is your Bread production. There are a few things that you can do from making more Fields to increase production of Wheat to adding more family working in the Communal Oven. Just make sure that your Food yield is not approaching zero.
Start Your Gambeson Production
| Raw Material | → | Product |
|---|---|---|
| Flax | → | Linen |
| Linen | → | Gambesons |
Relying heavily on Cloaks to provide clothing to your growing population is going to be a bit hard in the latter stages of the game as Berry and Wool production won't be able to sustain a bigger population. It is going to need support from another clothing option.
So, create a bunch of new Fields that will grow Flax so you can focus on creating Linen for Gambesons.
① Build a Weaver's Workshop for Linen
| Building | Description |
|---|---|
|
Weaver's Workshop
|
Workers use Wool to produce Yarn, and Flax to produce Linen. Does not need to refuel every month. |
Build a Weaver's Workshop that will process Flax into Linen. This is going to be your basic material for the new clothing product you're going to make.
Linen: How to Get and How to Use
② Use a Tailor's Workshop
| Building | Description |
|---|---|
|
Tailor's Workshop
|
A backyard extension that allows production of Clothes, Cloaks, and Gambesons from Linen, Yarns, and/or Dyes. Converts all inhabitants into Artisans, locking them from being assigned to other jobs. |
Upgrade a Lv. 2 Burgage plot into a Tailor's Workshop then set it to make Gambesons. If you have an existing Tailor's Workshop, you can opt to reuse it but make sure it's not part of the Cloaks production.
Gambesons: How to Get and How to Use
Boost Ale Production
| Raw Material | → | Product |
|---|---|---|
| Barley | → | Malt |
| Malt | → | Ale |
Together with your increasing population, the need for Ale is going to skyrocket. Make sure to increase your production of Ale by creating more Barley fields and adding more Breweries.
Barley: How to Get and How to Use
Improve Your Army
| Building | Description |
|---|---|
 Armorer's Workshop Armorer's Workshop
|
A backyard extension that allows production of Helmets, Mail Armor, and Plate Armor from Iron Slabs. Needs some additional development research to for Mail and Plate armors. |
With the late game getting closer and closer, you might want to improve on your army's size and capability. Considering you took Basic Armormaking, aim to equip them with Helmets to bolster their defenses even more.
Get a Total of 10 Lvl. 3 Burgage Plots
| Level | Requirements |
|---|---|
| Level 6 (Medium Town) |
・Level 1 (or higher) Burgage Plots x10 ・Level 2 (or higher) Burgage Plots x10 ・Level 3 (or higher) Burgage Plots x10 |
Finally, to get to Medium Town, you have to upgrade a total of 10 Lv. 2 Burgage Plots to Lv. 3. As we have been saying, only do this when you are sure that your provisions can handle it else you risk going bankrupt.
Build Order in the Endgame (Medium Town and Beyond)
And just like that, we are now in the final stretch of upgrading your town to the pinnacle of settlements: the Large Town.
For the final phase of the game, our prioritization will be quite similar to Small to Large Town but focused more on building a massive army in preparation for the final battle against other Barons.
- Spend Your 5th Development Point
- Reinforce Your Basic Resources
- Upgrade a Bunch of Burgage Plots to Lv. 3
- Construct More Equipment-related Buildings
- Form a Massive Army
- Fulfill Large Town Requirements
- Spend Your Final Development Point
- Challenge The Enemy and Take Victory!
Spend Your 5th Development Point
For the fifth development point, we suggest getting the Advanced Armormaking development. This development enables the Armorer's Workshop to produce Mail Armor which is a really valuable armor for your citizens residing in Burgage Lv. 3 plots.
We are going to focus on creating a massive army in this phase of the game so having the option of giving your troops extra defenses will help a lot.
Advanced Armormaking Development Details
Reinforce Your Basic Resources
Since we are going to be setting up a massive army for the final battle, we suggest reinforcing your settlements' basic resource production capabilities.
Claim Other Regions For More Resource
If there are open regions that you can conquer, you should always do so. Since we are aiming to provide equipment for a massive army, we suggest claiming a region with a rich deposit of Iron so you can plop a Deep Mine on it.
You can go ahead and make that region a dedicated weapon and armor making region then transport all items into your main settlement. This guarantees a steady stream of equipment to arm your massive army.
Build More Farms
Similar to above, conquer other regions and dedicate an extensive farming production system in that area. This allows you to have massive field groups that can produce a substantial amount of Wheat, Barley, Flax, or Rye.
Upgrade a Bunch of Burgage Plots to Level 3
Continue upgrading your Lv. 2 Burgage Plots to Level 3 so you can equip the Mail Armor you're going to make after unlocking Advanced Armormaking.
Make sure your food and fuel reserves can handle the boom in population though, as Level 3 plots will open up another family spot. This could quickly decimate your food and fuel reserves if you're not careful enough.
How to Upgrade Your Burgage Plot and Levels
Construct More Equipment-related Buildings
Considering we are focusing on creating a massive army, we should be able to provide an equally massive quantity of equipment as well. Ramp up your Iron production by expanding to another region and adding more artisans that can create armor and weapons for your growing amy.
Form a Massive and Diverse Army
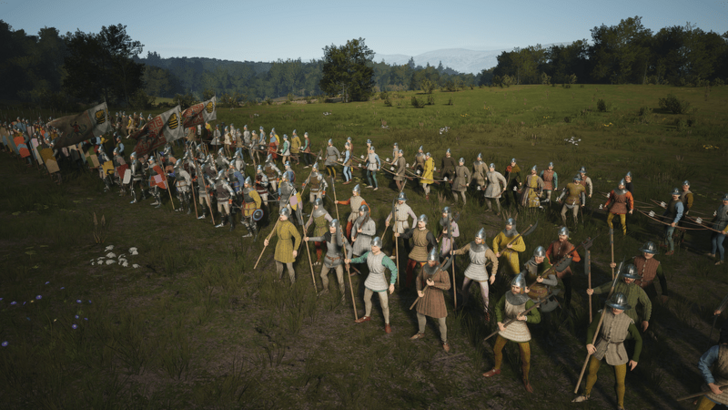
Finally, the end goal of this phase is to build a massive army that can rival the enemy Baron on the map. You can only have up to a total of 6 troops and 1 Retinue platoon per region in the current version of Manor Lords.
We suggest going for the following count for a more comfortable battle experience:
Step 1: Setup a Spear-Archer Militia With the 6 Slots
| Unit Type | Platoon Count |
|---|---|
| Spear Militia | x3 |
| Archer Militia | x3 |
With the six militia slots you have, start making a company of Spear and Archer Militia with the 6 slots you are provided. This should provide a well-balanced mix between ranged and melee units when facing enemies on the battlefield.
Step 2: Add More Retinue as You Acquire More Regions
| Unit Type | Platoon Count |
|---|---|
| Retinue | x6 (you will need to expand) |
Whenever you expand to a region, you can build additional Manors and Garrison Towers per region to get additional Retinues. This will provide a great boost to your army's capabilities in battle.
All Recruits and Best Unit Types
Optional: Hire Mercenaries
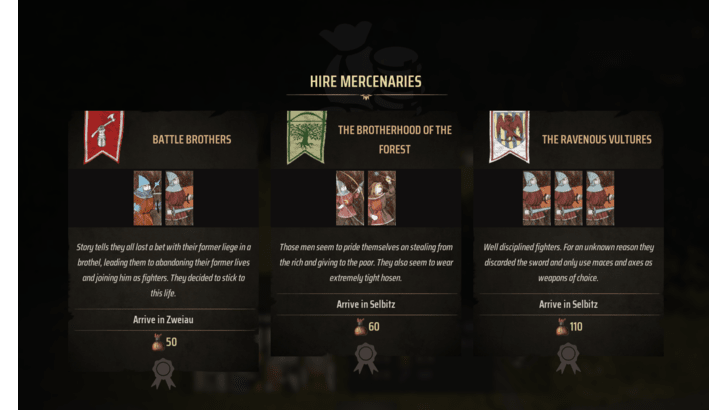
Hiring mercenaries does not consume militia slots. Use this to your advantage and hire multiple of them to add more firepower.
Fulfill Large Town Requirements
| Level | Requirements |
|---|---|
| Level 7 (Large Town) |
・Lv. 1+ Burgage Plots x30 ・Lv. 2+ Burgage Plots x20 ・Lv. 3 Burgage Plots x15 |
At this point, you may have already expanded your population and have enough Lv. 3 Burgage plots to get the Large Village status. Congratulations on reaching this point, but the battle is not yet won!
Spend Your Final Development Point
For the final development point, we suggest getting Master Armormaking. This enables you to create the Plate Mail which will increase your Retinue's defenses even more. This makes sure you'll survive the upcoming battle against the Baron!
Master Armormaking Development Details
Challenge The Enemy and Take Victory!

Finally, challenge the Baron to a fight and claim all territories in the map. This will be a long and arduous battle, but with enough patience and preparation, you should emerge victorious!
Manor Lords Related Guides

Beginner's Guide: Tips and Tricks
Manor Lords Tips and Tricks
City Building Tips and Tricks
Combat Tips and Tricks
Comment
Author

Build Order and What to Build First
Please participate in our site
improvement survey
03/2026
improvement survey
03/2026
Would you assist in
improving Game8's site?
improving Game8's site?

×
We are listening to our users' valuable opinions and discussing how to act on them.
The information collected through this survey will be used for the purpose of improving our services. In addition, the information will only be disclosed a part of a statistic in a format that will not allow identification of personal information.
Begin Survey
Not Now
×
Please rate each item regarding Game8.co's Advertisements.
Amount of Ads
Very Dissatisfied
Somewhat Dissatisfied
Fine
Somewhat Satisfied
Highly Satisfied
Placement of Ads
Timing of Ad Display
Ad Loading Speed
Safeness of Ads
Content of Ads
×
Please rate each item regarding Game8.co's Quality of Articles.
Amount of information
Very Dissatisfied
Somewhat Dissatisfied
Fine
Somewhat Satisfied
Highly Satisfied
Frequency of updates
Speed of new information
Accuracy of articles
Understandibility of articles
Readability of sentences
×
Please rate each item regarding Game8.co's Usability of the Site.
Ease of finding information
Very Dissatisfied
Somewhat Dissatisfied
Fine
Somewhat Satisfied
Highly Satisfied
Loading Speed
Use of Color
Font Size
Visibility of Images
Easy to Understand Layout
×
Please rate each item regarding Game8.co's Message Boards, Comments.
Ease of Writing
Very Dissatisfied
Somewhat Dissatisfied
Fine
Somewhat Satisfied
Highly Satisfied
Readability
Ease in Finding Information
Comment Quality
Comment Quantity
Admin Response
×
Please rate each item regarding Game8.co's Site's new design.
Please rate our site's new design
Very Dissatisfied
Somewhat Dissatisfied
Fine
Somewhat Satisfied
Highly Satisfied
Do you think that the website's design change makes the site easier to use?
Has the new design made it easier for you to find information on the site?
Has the new design improved the overall visual appeal of the site?
How would you rate your overall satisfaction with the new design of the site?
×
How likely are you to recommend Game8 to someone you know?
Very Unlikely
0
1
2
3
4
5
6
7
8
9
10
Very Likely
If you have other opinions regarding potential improvement to the website, please share them with us. We would appreciate your honest opinion.
Note: This is a free response section, so you can proceed without entering anything.
Note: Please be sure not to enter any kind of personal information into your response.
Note: Please be sure not to enter any kind of personal information into your response.
×
Thank You
×
Thank you for participating in our survey! Your answers will help us to improve the quality of our website and services.
We hope you continue to make use of Game8.
We hope you continue to make use of Game8.
Close
Rankings
- We could not find the message board you were looking for.
Gaming News


Popular Games

Genshin Impact Walkthrough & Guides Wiki
Honkai: Star Rail Walkthrough & Guides Wiki
Umamusume: Pretty Derby Walkthrough & Guides Wiki
Pokemon Pokopia Walkthrough & Guides Wiki
Resident Evil Requiem (RE9) Walkthrough & Guides Wiki
Monster Hunter Wilds Walkthrough & Guides Wiki
Wuthering Waves Walkthrough & Guides Wiki
Arknights: Endfield Walkthrough & Guides Wiki
Pokemon FireRed and LeafGreen (FRLG) Walkthrough & Guides Wiki
Pokemon TCG Pocket (PTCGP) Strategies & Guides Wiki


Recommended Games
Diablo 4: Vessel of Hatred Walkthrough & Guides Wiki
Fire Emblem Heroes (FEH) Walkthrough & Guides Wiki
Yu-Gi-Oh! Master Duel Walkthrough & Guides Wiki
Super Smash Bros. Ultimate Walkthrough & Guides Wiki
Pokemon Brilliant Diamond and Shining Pearl (BDSP) Walkthrough & Guides Wiki
Elden Ring Shadow of the Erdtree Walkthrough & Guides Wiki
Monster Hunter World Walkthrough & Guides Wiki
The Legend of Zelda: Tears of the Kingdom Walkthrough & Guides Wiki
Persona 3 Reload Walkthrough & Guides Wiki
Cyberpunk 2077: Ultimate Edition Walkthrough & Guides Wiki


All rights reserved
© Slavic Magic and Hooded Horse Inc. Games are the property of their respective owners.
The copyrights of videos of games used in our content and other intellectual property rights belong to the provider of the game.
The contents we provide on this site were created personally by members of the Game8 editorial department.
We refuse the right to reuse or repost content taken without our permission such as data or images to other sites.