This survey will take about 1 minute.
Your answers will help us to improve our website.
Dynasty Warriors: Origins
Best Tactics to Use
★ Chapters: One | Two | Three | Four | Five
★ True Endings: Shu | Wei | Wu
★ Save Sun Jian | Sun Ce | Dian Wei | Guo Jia
★ Points of No Return | Post-Game Content
★ How to Get Ultimate Weapons
★ How to Do a Battle Art Chain
The best tactics in Dynasty Warriors: Origins are the Chariot Charge, Catapult Barrage, Mounted Charge, Battle Roar, and Spear Wall. Find out what the best tactics are in this guide!
| All Tactics Guides | ||
|---|---|---|
| List of All Tactics | Dramatic Success Guide | Best Tactics to Use |
List of Contents
Best Tactics to Use in Dynasty Warriors: Origins
1. Chariot Charge
Chariot Charge is a powerful tactic that can breach the enemy defense line and deplete general and/or officer fortitude when it hits. It deals a decent amount of damage in a large area, allowing guards to mow down enemy forces and turn the tides of battle.
Chariot Charge is the best tactic overall, as it is effective in many scenarios. It can be used against large forces, capturing enemy bases, and even when facing difficult bosses such as Lu Bu.
How to Use Chariot Charge and Basic Info
2. Catapult Barrage
Catapult Barrage deals the highest damage out of all the tactics, without the requirement of using it from a high ground to acheive dramatic success.
While devastating, its nuke-like damage is heavily restricted by its cooldown, at a staggering 600 seconds or 10 minutes per use. This translates to roughly 1-2 uses even on the hardest missions, requiring the tactic to be used sparingly.
When used, however, it can easily dispatch large forces, enemy officers, and significantly expedite the capturing of bases, creating nothing short of a miracle even in the toughest battles.
How to Use Catapult Barrage and Basic Info
3. Mounted Charge
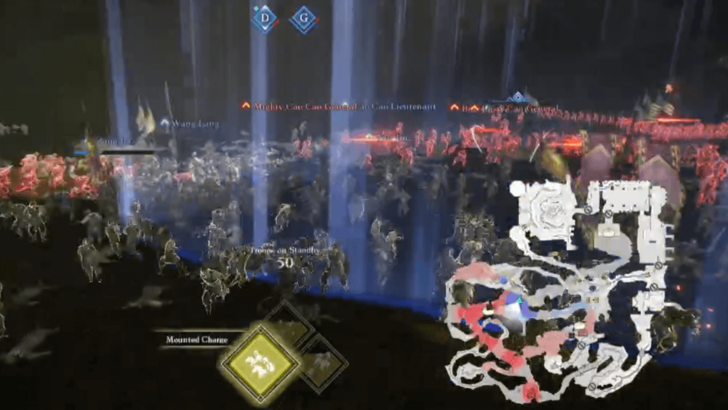
Mounted Charge ranks third as it is a slightly weaker Chariot Charge and isn't a miracle worker like the Catapult Barrage. It has a slightly higher cooldown than Chariot Charge, and is required to attack from a distance to achieve dramatic success with this tactic.
It makes up for it by being a relatively easy to access tactic, obtainable after increasing guards for the fifth time. This makes it a reliable tactic to have for story missions, carrying players through the game before Chariot Charge is obtained.
How to Use Mounted Charge and Basic Info
4. Battle Roar
Battle Roar reduces enemy fortitude in the surrounding area. This tactic boasts the lowest cooldown out of all the tactics that can achieve dramatic success unconditionally.
Use this tactic to setup assaults and execute enemy officers quicker. When used wisely, this tactic can be used to hasten base captures and expedite area captures singlehandedly.
How to Use Battle Roar and Basic Info
5. Spear Wall
Spear Wall halts enemy charges by creating a defensive line of spears to protect Wanderer and nearby allies. While niche, it proves its usefulness against difficult battles where enemy generals often execute tactics to rush Wanderer.
Bring this tactic when expecting to fight a large force in the mission. Battles against large forces are often chaotic, and using Spear Wall will create a small haven for players to breathe and reassess the situation while halting any enemy charging towards Wanderer.
How to Use Spear Wall and Basic Info
Dynasty Warriors: Origins Related Guides
Dynasty Warriors: Origins Wiki Front
Guides by Category
| Dynasty Warriors: Origins Categories | |
|---|---|
 Tips and Tricks Tips and Tricks |
 Weapons Weapons |
 Walkthrough Walkthrough |
 Faction Endings Faction Endings |
 Challenges Challenges |
 Characters Characters |
 Horses Horses |
 Clothing Clothing |
 Interactive Map Interactive Map |
 Bosses Bosses |
 Accessories Accessories |
 Battle Arts Battle Arts |
 Tactics Tactics |
 Gems Gems |
 Skills Skills |
 Items Items |
All Recommended Guides
Comment
Author

Best Tactics to Use
Please participate in our site
improvement survey
03/2026
improvement survey
03/2026
Would you assist in
improving Game8's site?
improving Game8's site?

×
We are listening to our users' valuable opinions and discussing how to act on them.
The information collected through this survey will be used for the purpose of improving our services. In addition, the information will only be disclosed a part of a statistic in a format that will not allow identification of personal information.
Begin Survey
Not Now
×
Please rate each item regarding Game8.co's Advertisements.
Amount of Ads
Very Dissatisfied
Somewhat Dissatisfied
Fine
Somewhat Satisfied
Highly Satisfied
Placement of Ads
Timing of Ad Display
Ad Loading Speed
Safeness of Ads
Content of Ads
×
Please rate each item regarding Game8.co's Quality of Articles.
Amount of information
Very Dissatisfied
Somewhat Dissatisfied
Fine
Somewhat Satisfied
Highly Satisfied
Frequency of updates
Speed of new information
Accuracy of articles
Understandibility of articles
Readability of sentences
×
Please rate each item regarding Game8.co's Usability of the Site.
Ease of finding information
Very Dissatisfied
Somewhat Dissatisfied
Fine
Somewhat Satisfied
Highly Satisfied
Loading Speed
Use of Color
Font Size
Visibility of Images
Easy to Understand Layout
×
Please rate each item regarding Game8.co's Message Boards, Comments.
Ease of Writing
Very Dissatisfied
Somewhat Dissatisfied
Fine
Somewhat Satisfied
Highly Satisfied
Readability
Ease in Finding Information
Comment Quality
Comment Quantity
Admin Response
×
Please rate each item regarding Game8.co's Site's new design.
Please rate our site's new design
Very Dissatisfied
Somewhat Dissatisfied
Fine
Somewhat Satisfied
Highly Satisfied
Do you think that the website's design change makes the site easier to use?
Has the new design made it easier for you to find information on the site?
Has the new design improved the overall visual appeal of the site?
How would you rate your overall satisfaction with the new design of the site?
×
How likely are you to recommend Game8 to someone you know?
Very Unlikely
0
1
2
3
4
5
6
7
8
9
10
Very Likely
If you have other opinions regarding potential improvement to the website, please share them with us. We would appreciate your honest opinion.
Note: This is a free response section, so you can proceed without entering anything.
Note: Please be sure not to enter any kind of personal information into your response.
Note: Please be sure not to enter any kind of personal information into your response.
×
Thank You
×
Thank you for participating in our survey! Your answers will help us to improve the quality of our website and services.
We hope you continue to make use of Game8.
We hope you continue to make use of Game8.
Close
Rankings
- We could not find the message board you were looking for.
Gaming News


![Everwind Review [Early Access] | The Shaky First Step to A Very Long Journey](https://img.game8.co/4440226/ab079b1153298a042633dd1ef51e878e.png/thumb)

![Monster Hunter Stories 3 Review [First Impressions] | Simply Rejuvenating](https://img.game8.co/4438641/2a31b7702bd70e78ec8efd24661dacda.jpeg/thumb)
Popular Games

Genshin Impact Walkthrough & Guides Wiki
Honkai: Star Rail Walkthrough & Guides Wiki
Umamusume: Pretty Derby Walkthrough & Guides Wiki
Pokemon Pokopia Walkthrough & Guides Wiki
Resident Evil Requiem (RE9) Walkthrough & Guides Wiki
Monster Hunter Wilds Walkthrough & Guides Wiki
Wuthering Waves Walkthrough & Guides Wiki
Arknights: Endfield Walkthrough & Guides Wiki
Pokemon FireRed and LeafGreen (FRLG) Walkthrough & Guides Wiki
Pokemon TCG Pocket (PTCGP) Strategies & Guides Wiki


Recommended Games
Diablo 4: Vessel of Hatred Walkthrough & Guides Wiki
Fire Emblem Heroes (FEH) Walkthrough & Guides Wiki
Yu-Gi-Oh! Master Duel Walkthrough & Guides Wiki
Super Smash Bros. Ultimate Walkthrough & Guides Wiki
Pokemon Brilliant Diamond and Shining Pearl (BDSP) Walkthrough & Guides Wiki
Elden Ring Shadow of the Erdtree Walkthrough & Guides Wiki
Monster Hunter World Walkthrough & Guides Wiki
The Legend of Zelda: Tears of the Kingdom Walkthrough & Guides Wiki
Persona 3 Reload Walkthrough & Guides Wiki
Cyberpunk 2077: Ultimate Edition Walkthrough & Guides Wiki


All rights reserved
©KOEI TECMO GAMES CO., LTD. All rights reserved.
The copyrights of videos of games used in our content and other intellectual property rights belong to the provider of the game.
The contents we provide on this site were created personally by members of the Game8 editorial department.
We refuse the right to reuse or repost content taken without our permission such as data or images to other sites.