Jabul Ruins Walkthrough
▲ 100% the game with our Interactive Map!
▲ Zelda amiibo give Ingredients & Outfits.
▲ Best Dungeon Order and Best Echoes.
▲ Heart Pieces | Might Crystals | Tri Power
▲ Best Smoothies | All 69 Recipes
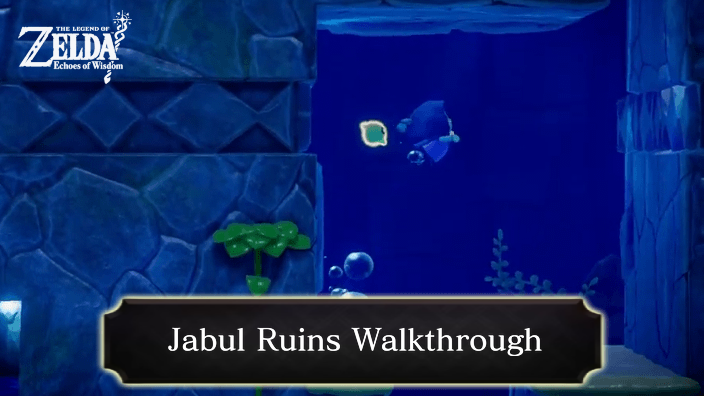
Jabul Ruins is a dungeon in The Legend of Zelda: Echoes of Wisdom (EoW) located at Zora Village. Read on for a complete walkthrough guide on this dungeon, how to get to Jabul Ruins, puzzle solutions, and more!
| ◀︎ Previous Quest | Next Quest ▶︎︎ |
|---|---|
| The Mysterious Rifts | Still Missing |
| Searching for Everyone Questline | |
| Searching for Everyone ┣ A Rift in the Gerudo Desert ┗ The Jabul Waters Rift ┣ Chaos at River Zora Village ┣ Rampage in Zora Cove ┗ ▶︎︎★ Jabul Ruins |
|
Jabul Ruins Preparation
Best Echoes For Jabul Ruins
| Echo | Usage |
|---|---|
 Water Block Water Block
|
・Very useful for traversing the rift efficiently. |
 Bombfish Bombfish
|
・Best Echo to utilize for rushing enemies and bosses underwater. |
 Chompfin Chompfin
|
・Another useful echo for attacking underwater enemies. |
 Boomerang Boarblin Boomerang Boarblin
|
・Useful for hitting ranged targets. ・Can be useful in solving puzzles that require hitting ranged targets. |
 Guay Guay
|
・Can hit enemies from above. ・Can be useful in solving puzzles that require hitting targets from afar. |
 Boulder Boulder
|
・Useful for blocking environmental hazards. ・Useful for pressing switches or buttons underwater. |
Best Smoothies for Jabul Ruins
| Smoothie | Usage |
|---|---|
 Mixed Bubble Smoothie Mixed Bubble Smoothie
|
・Heals for a maximum of 5 hearts and gives additional 1 minute Dive Time Up. |
 Rapid Smoothie Rapid Smoothie
|
・Heals for a maximum of 5 hearts and gives additional 1 minute Swim Speed Up. |
Jabul Ruins Location
Located at Zora Village
Jabul Ruins is located at Zora Village, just northward of Crossflows Plaza. The rift is unlocked as you progress through the main quests, The Jabul Waters Rift and Searching for Everyone.
The Jabul Waters Rift Walkthrough
How to Get to Jabul Ruins
| # | Step by Step Objectives |
|---|---|
| 1 | 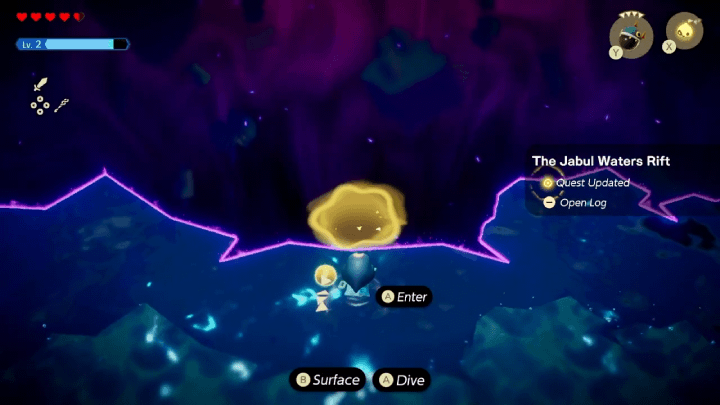 After defeating Jabu-Jabu, a cutscene will trigger and Tri will create an opening, allowing you to enter Stilled Jabul Waters Rift. ▶︎︎ Stilled Jabul Waters Rift Walkthrough |
| 2 | 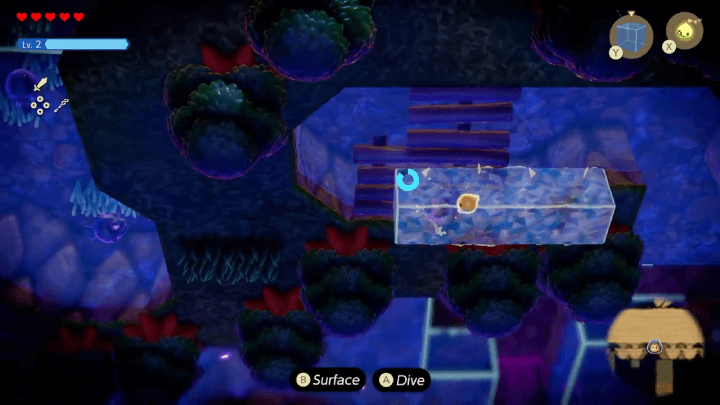 Progress and make your way to the top while defeating enemies along the way. Make sure to get and utilize the Water Block echo to traverse the rift efficiently. Upon reaching the top, the entrance to Jabul Ruins can be found. |
Jabul Ruins Walkthrough
|
|
Fall From the First Room
| # | Step by Step Objectives |
|---|---|
| 1 |
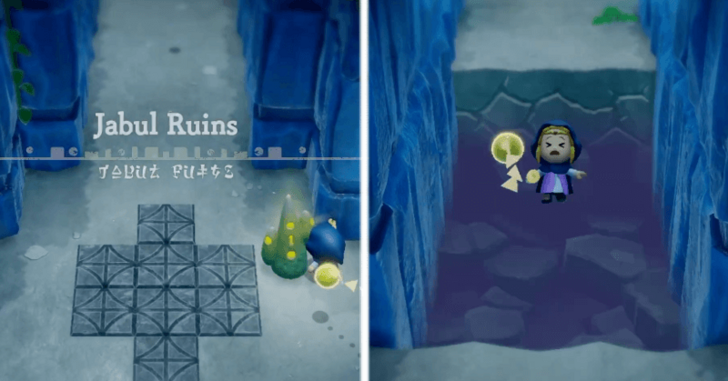 Immediately activate the waypoint after entering the first room. Proceed onwards to trigger a cutscene of the corridor shattering, causing Zelda to fall. |
| 2 | 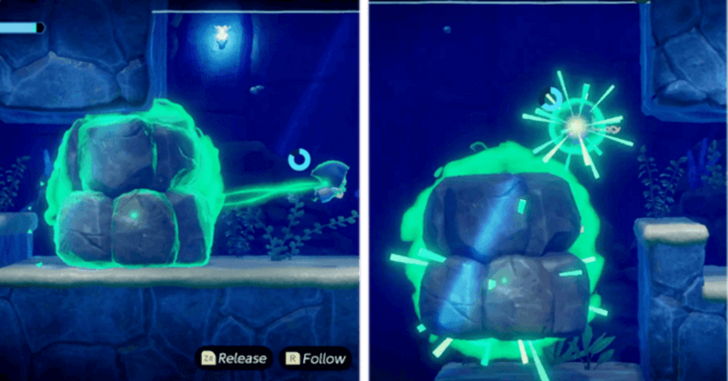 Head leftward and remove the boulder with Bind. Continue on and remove the second boulder. Recover dive timer in an air slot near the ceiling before continuing onwards. |
| 3 | 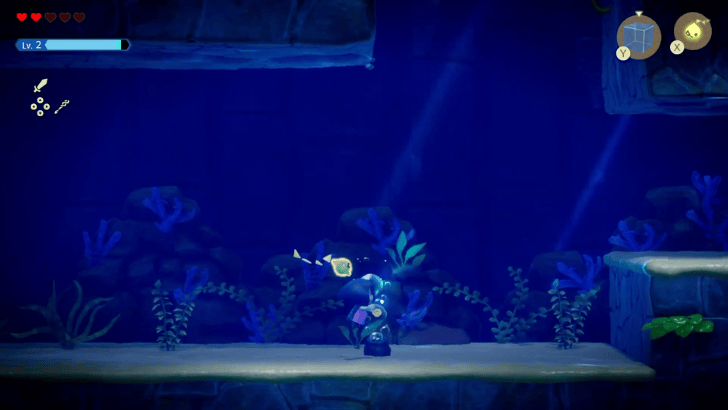 Recover dive timer using the nearby air vent. Ensure that the dive timer is maxed before continuing on to an escape sequence. |
Escape the Whirlpool
| # | Step by Step Objectives |
|---|---|
| 1 | 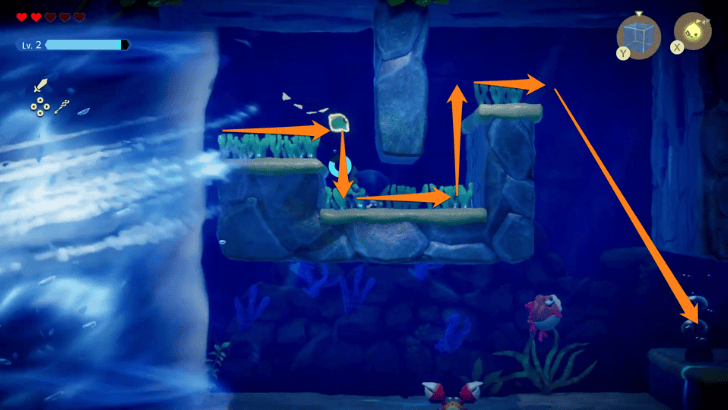 Use the top route on the first area to avoid the whirlpool. Watch out for the Tangler and Sand Crab present before the air vent. |
| 2 |  Bind the upper Box on the bottom route to push it away. |
| 3 | 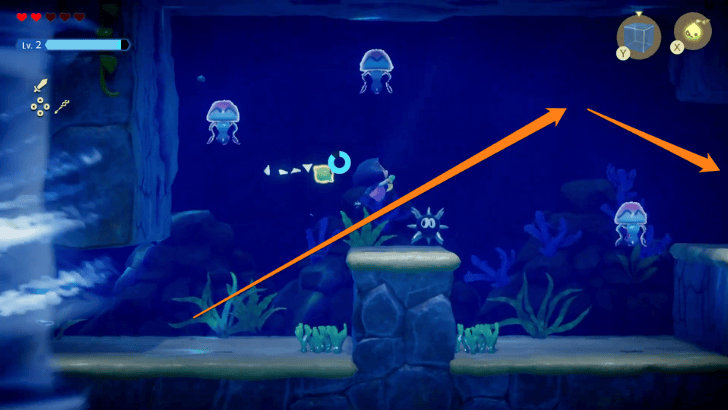 Avoid the Biri by maneuvering outside their electrical field. Note the Sea Urchin on the nearby platform and make haste when the Biri's electrical field is down. |
| 4 | 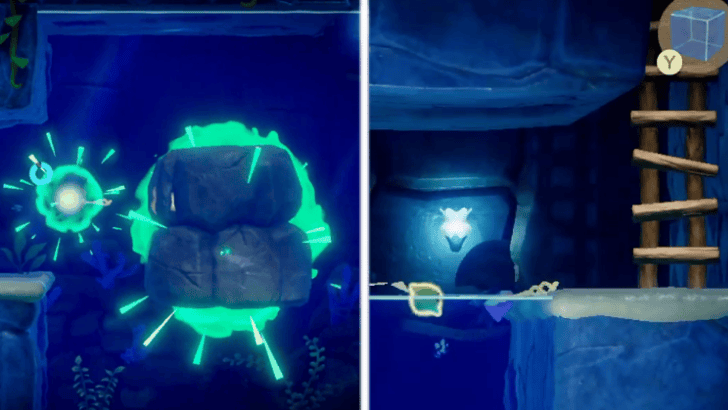 Bind to the boulder and continue swimming forward to move it out of the way. Swim upwards and climb the ladder to head to the next location. |
Press the Red Switch
| # | Step by Step Objectives |
|---|---|
| 1 | 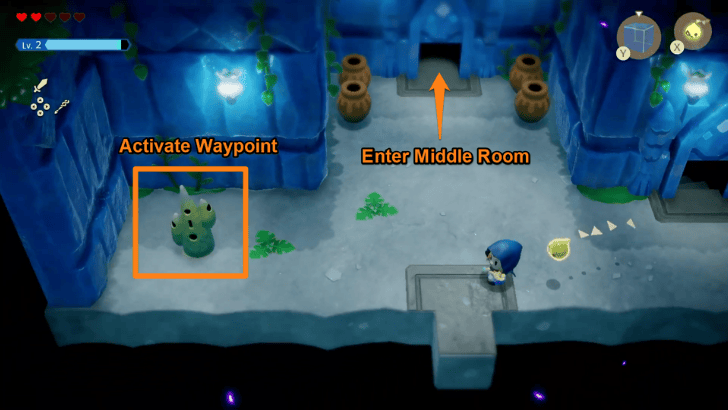 Pass the Octorok, Sand Crab, and Tangler and climb the stairs at the end of the corridor. Activate the waypoint on the left end of the area and enter the middle room. |
| 2 | 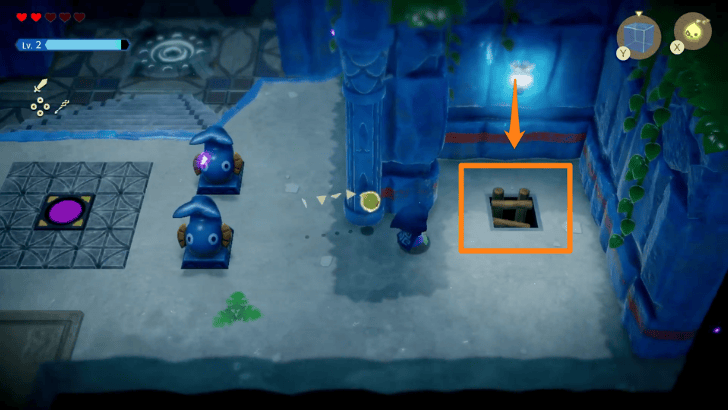 Push the purple button at the center. Head to the eastern end of the area and climb down the ladder. |
| 3 | 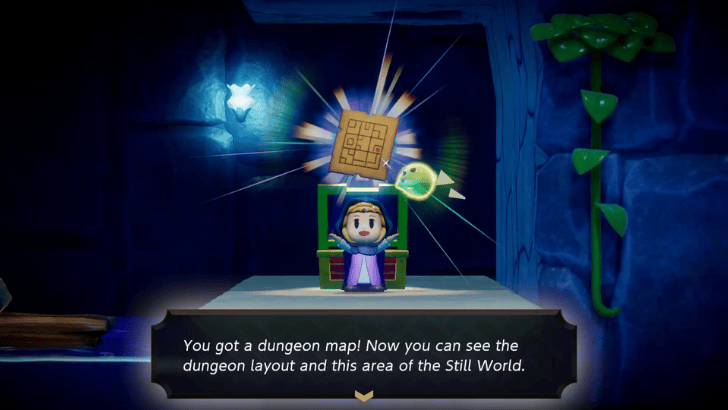 Head to the end of the area to open a treasure chest containing the Dungeon Map. Watch out for the Bombfish and Needlefly along the way. |
| 4 | 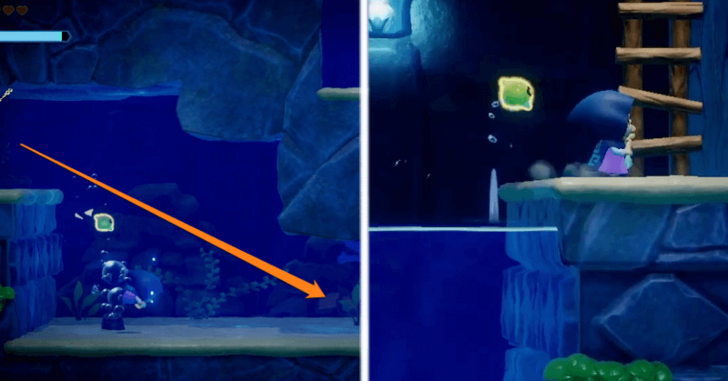 After obtaining the map, dive and head to the area further to the right. Avoid or defeat the Bombfish along the way and climb up the ladder to proceed to the next location. |
| 5 | 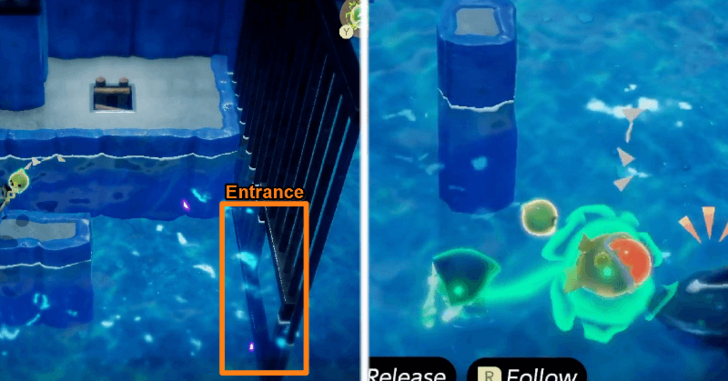 After ascending from the ladder, dive to the opening below the gate to reach the right area. Defeat the shark mobs with Bombfish and acquire Chompfin, a powerful Echo for underwater combat. |
| 6 | 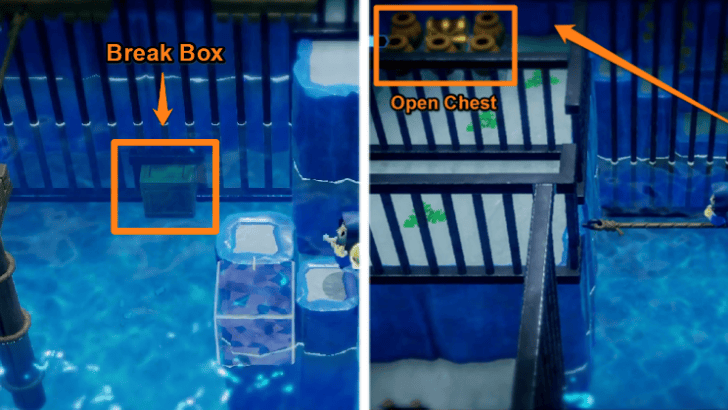 Break the submerged box with a Bombfish and enter the opening. Head left and climb the platforms to open the treasure chest containing 50 Rupees. |
| 7 |
Return to the previous area and use the Water Block Echo to climb the platforms to reach the wooden pillar. Traverse the left rope and climb up the stairs to reach the next location. |
| 8 | 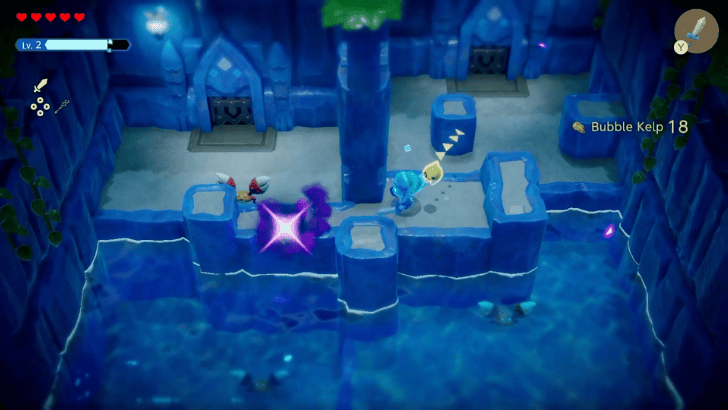 The next location is locked until all 5 Sand Crabs have been dispatched. There are 3 Sand Crabs on the ground that can be defeated with Swordfighter Form or by placing a Bombfish near them, and the Sand Crabs underwater can be defeated with Chompfin. Enter the left gate after defeating all enemies. |
| 9 |  Press the Red Switch to complete this section of the ruins. Enter the door on the ground beside the switch to proceed to the next area. |
| 10 | 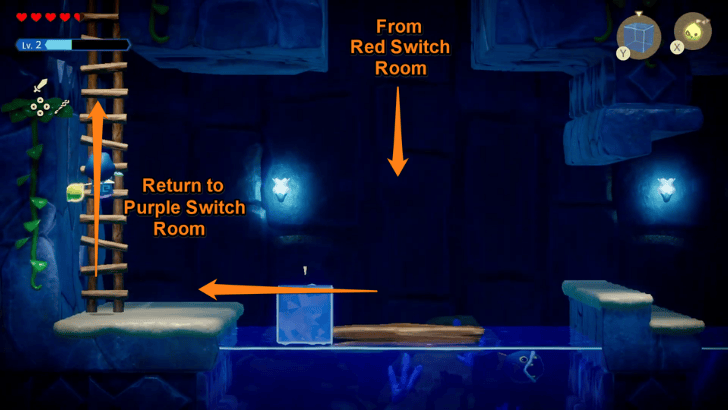 Jumping down the floor door leads back to the area where the Dungeon Map was secured. Climb up the ladder on the left to return to the room with the purple switch. |
Press the Blue Switch
| # | Step by Step Objectives |
|---|---|
| 1 | 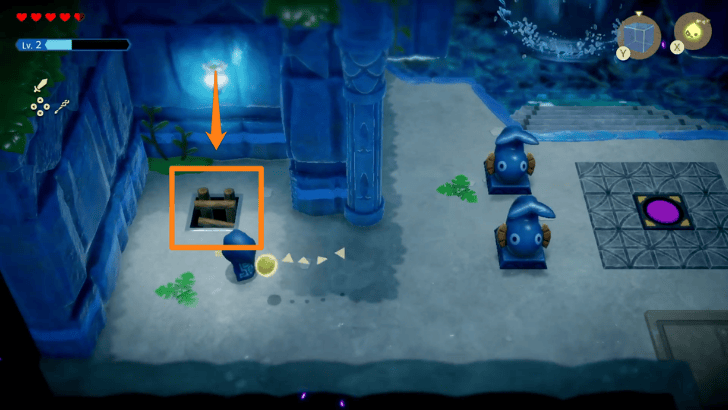 After arriving at the room with the purple switch, head left and climb down the ladder. |
| 2 | 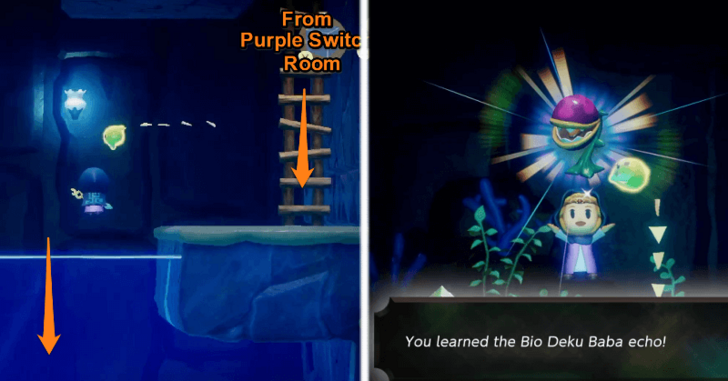 Dive underwater and proceed onwards. Watch out for the nearby Tangler Lv.2 mobs and a Bio Deku Baba. Defeat the Bio Deku Baba by pulling its head with Bind or feeding it with a Bombfish to obtain its Echo. |
| 3 | 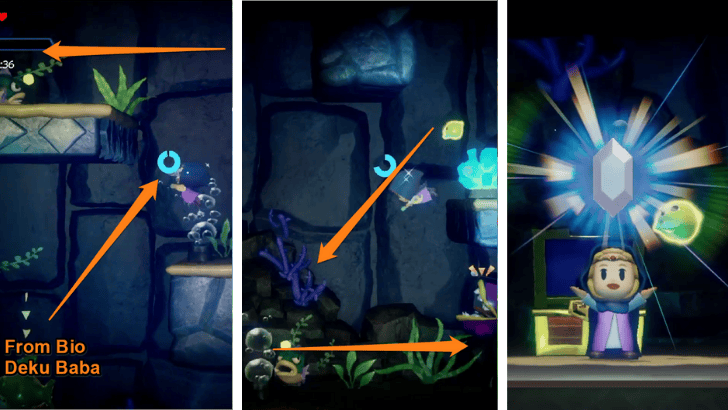 Swim upwards and follow the path. Watch out for more Tangler Lv.2 and Bio Deku Baba along the way. After reaching the floor, defeat the Bio Deku Baba and open the chest behind it containing 100 Rupees. |
| 4 | 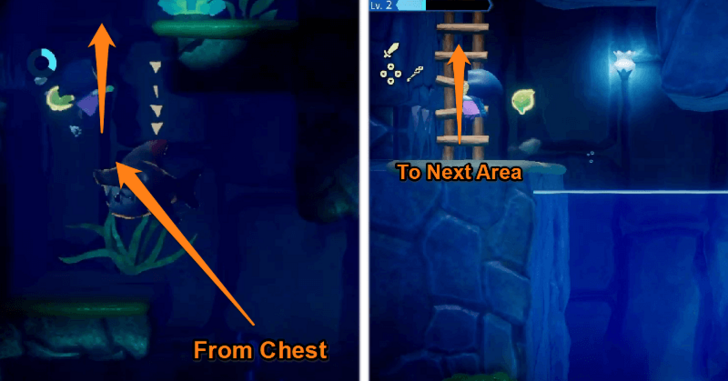 From the treasure chest, head left and swim upwards to reach the surface. Clmb up the ladder to proceed to the next area. |
| 5 | 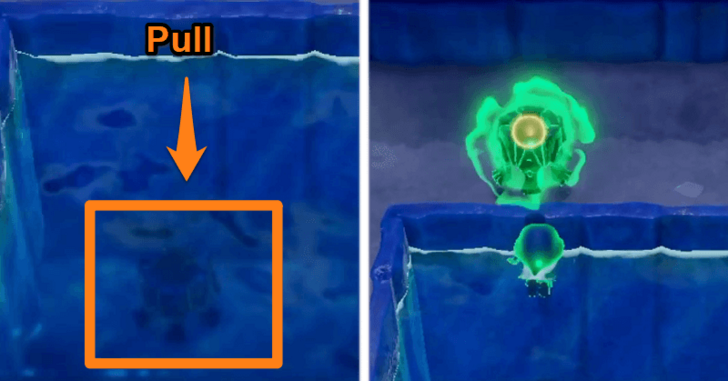 After entering the area, dive into the nearby pool and use Bind on the submerged bonfire. Resurface with the bonfire in tow. |
| 6 | 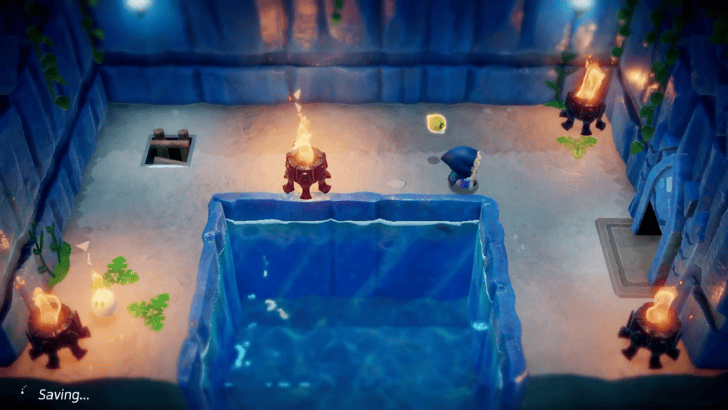 Light all 4 bonfires in the room to unlock the gate to the next area. Use fire Echoes such as Ignizol to light the bonfires. |
| 7 | 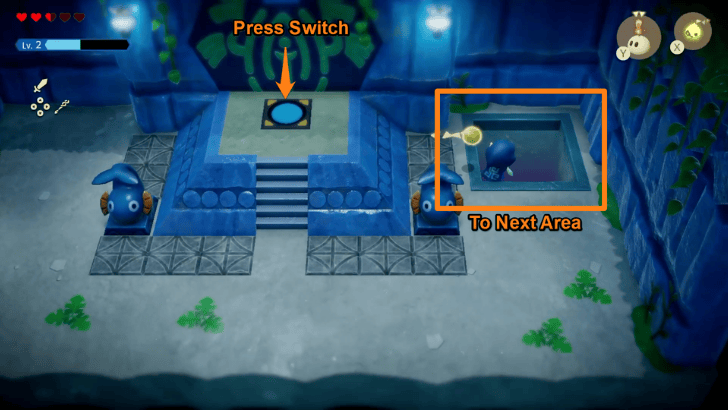 Press the Blue Switch to complete this section of the ruins. Enter the door on the ground beside the switch to proceed to the next area. |
| 8 | 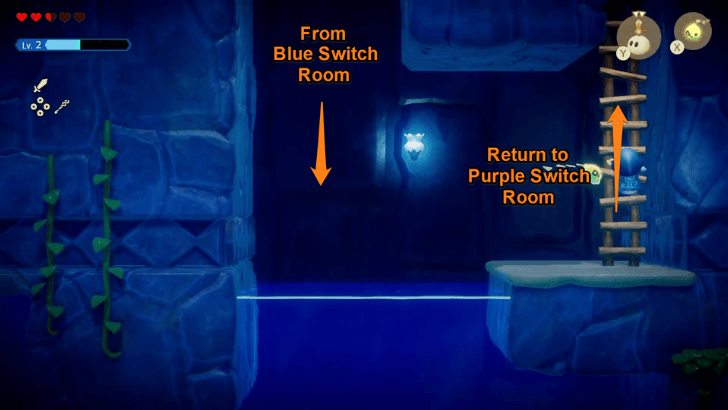 Jumping down the floor door leads you back to the first area. Climb up the ladder on the right to return to the room with the purple switch. |
Acquire the Big Key
| # | Step by Step Objectives |
|---|---|
| 1 | 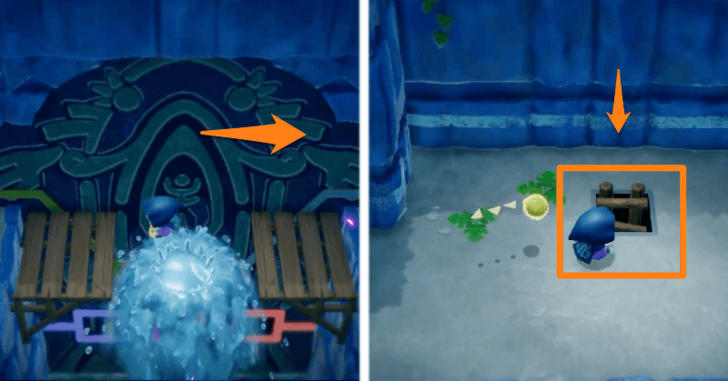 Upon arriving at the room with the purple switch, ride the fountain to reach the 2nd floor and head right. The fountain will only reach the 2nd floor if both the red and blue switches are activated. Cimb down the ladder on the right to proceed. |
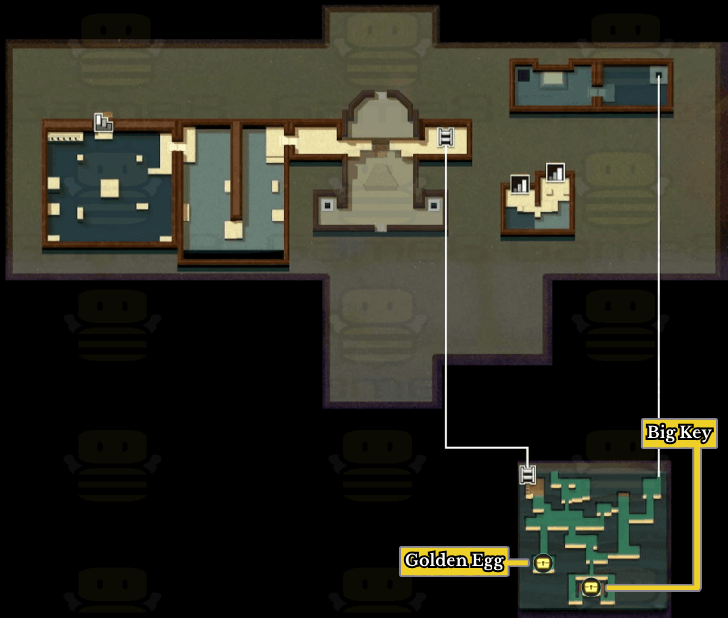
| 2 | 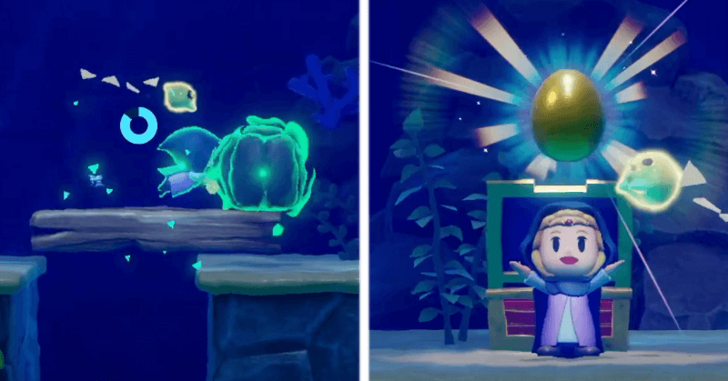 Upon entering the area, remove the 1st boulder on top of a wooden beam using Bind and dive towards the area. Open the treasure chest that contains 1 Golden Egg and return to the previous section. |
| 3 | 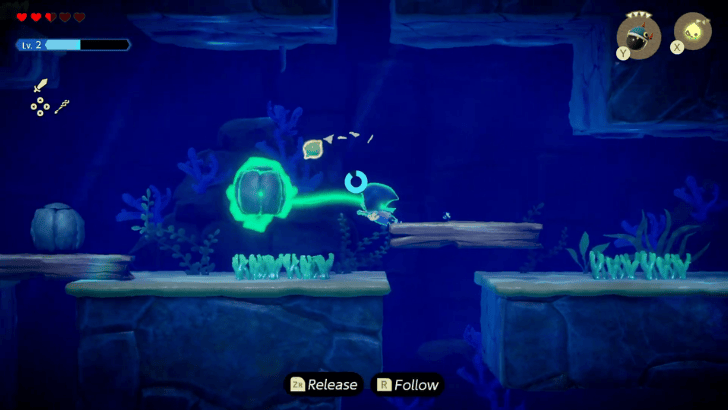 Remove the 2nd boulder on top of a wooden beam with Bind and dive towards the section that opens up. |
| 4 | 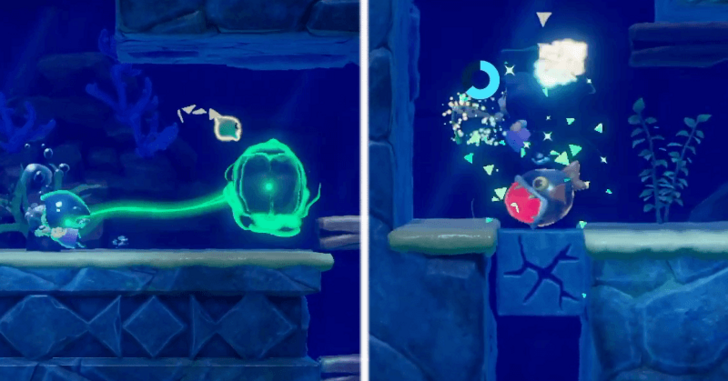 Another Boulder will block the path on top of a wooden beam. Use Bind to move the boulder and wooden beam. A cracked rock will block the next section, hence, summon the Bombfish to remove the rock and proceed. |
| 5 |
Continue diving and head towards the chest's location. Open the chest to acquire the Big Key, an item required to open the boss room. Return to the previous section afterwards and head right. |
| 6 | 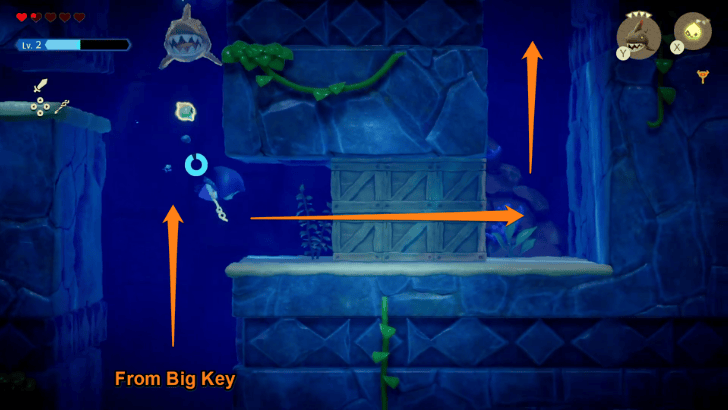 Watch out for the Bombfish and Biri and swim upwards. Remove the boxes with Bombfish or Swordfighter Form to proceed and swim upwards to enter the next area. |
| 7 | 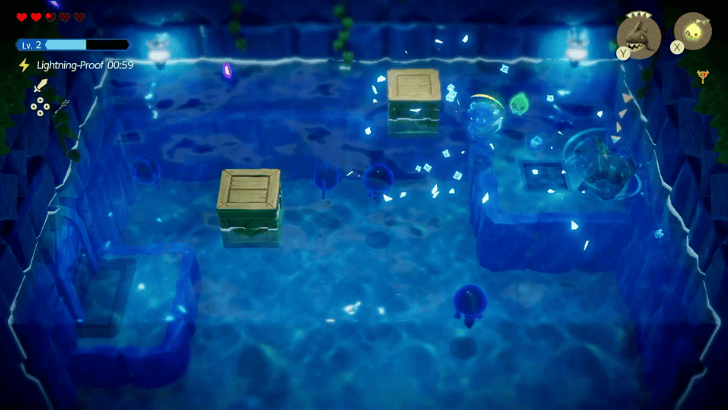 The next area is locked until all monsters in the floor have been wiped out. Use Swordfighter Form and/or Chompfin to quickly dispatch the 5 Rift Tanglers and 2 Rift Biris. Enter the left gate to continue. |
| 8 | 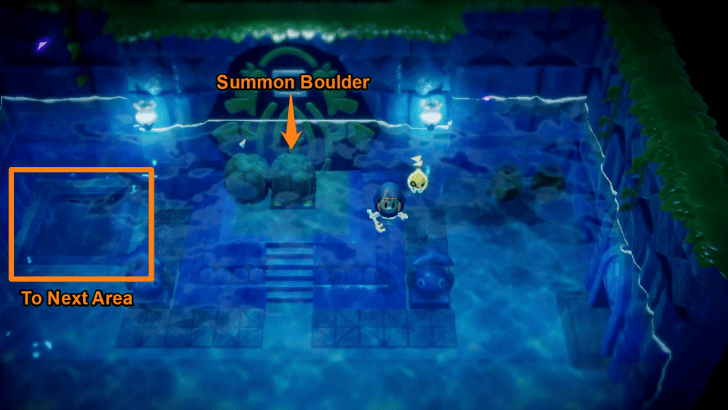 Defeat the 2 Bio Deku Baba with Swordfighter Form or pull their heads with Bind to safely access the switch. Summon a Boulder above the Green Switch to activate it. Dive towards the floor door beside the switch to proceed. |
| 9 | 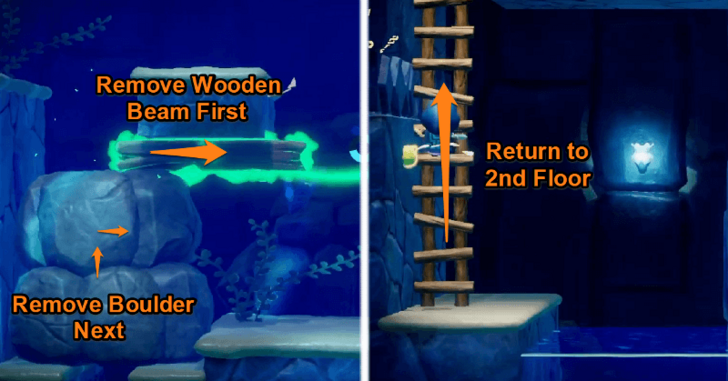 The floor door will return you to the first area. Remove the wooden beam first and the boulder second to proceed, then head left. Climb up the ladder to return to the room with the purple switch. |
Press the Yellow Switch
| # | Step by Step Objectives |
|---|---|
| 1 | 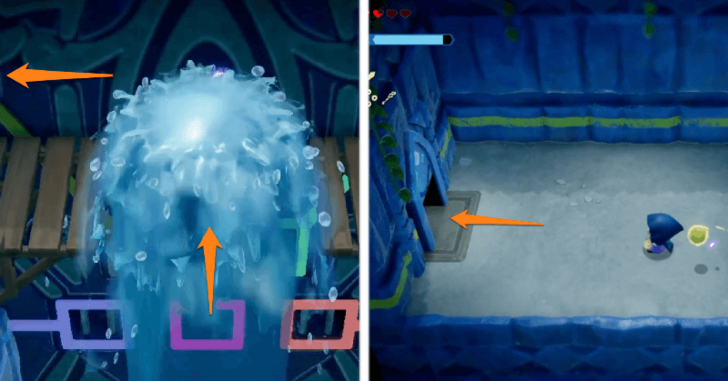 Ride the fountain to reach the second floor and head left. Enter the doorway towards the next area. |
| 2 | 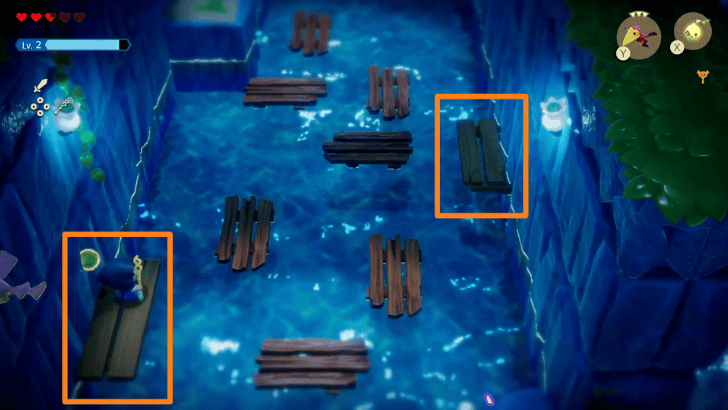 Cross the ravine using the wooden boards. Utilize the fixed platforms attached on the wall for safety and/or planning your path. Use flying Echoes such as the Crow Echoes or Tektite Echoes to defeat the 3 Octoroks and a Tektite. |
| 3 | 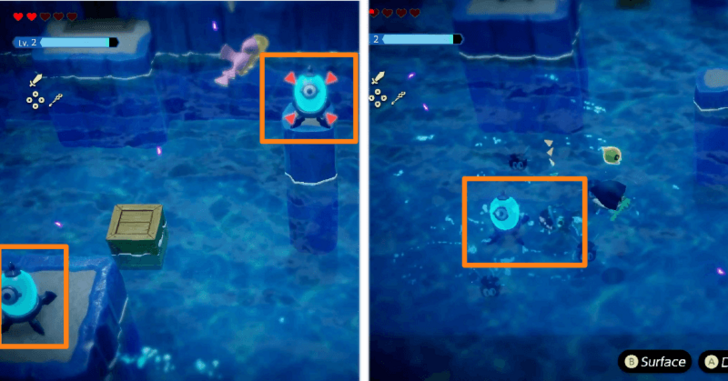 Summon a flying Echo such as the Guay or Crow and lock on the Eye Statues to hit and deactivate them. Use the Bombfish to hit the Eye Statue underwater and eliminate the surrounding Sea Urchins. |
| 4 | 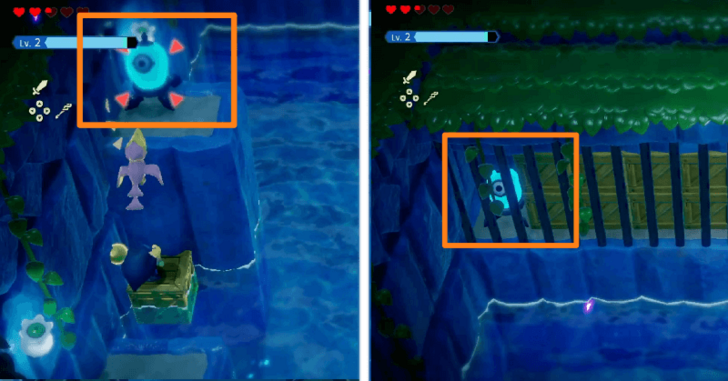 Use a flying Echo to hit the Eye Statue on the high platform at the far left side of the room. Remove the boxes with Swordfighter Form and hit the remaining Eye Statue behind the railing. |
| 5 | 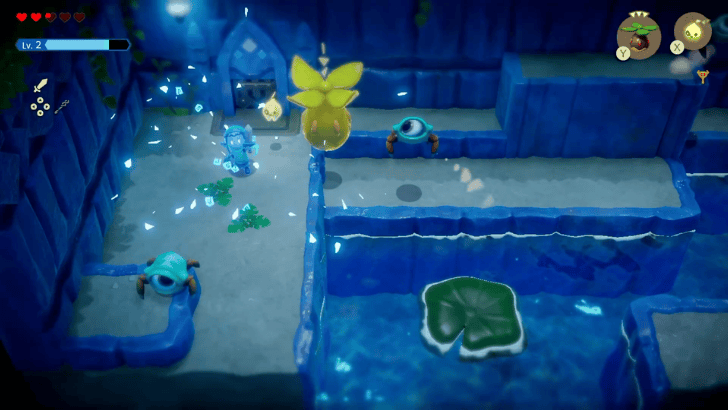 The next area is locked until all 4 Tektites have been defeated. Enter Swordfighter Form or summon the Peahat Echo or Crow Echoes to eliminate them with ease. Exit through the right gate to proceed. |
| 6 |  Press the Yellow Switch to complete this section of the ruins. Enter the door on the ground beside the switch to proceed to the next area. |
| 7 | 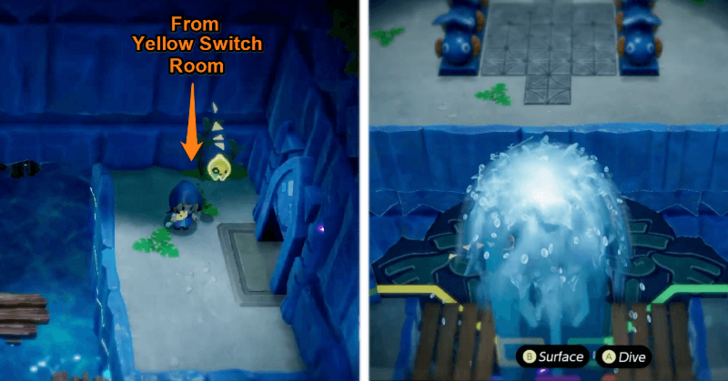 The floor door will return you to the ravine. Exit on the nearest door and ride the fountain to head to the 3rd level. |
Defeat Vocavor
| # | Step by Step Objectives |
|---|---|
| 1 | 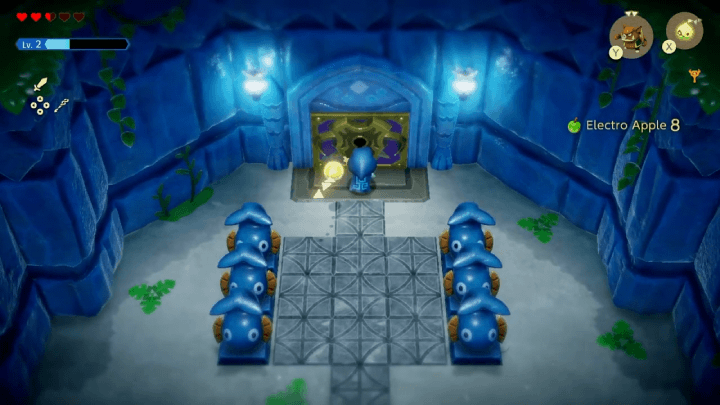 Ride the fountain at the purple switch room to reach the 3rd level, where a path to the dungeon boss is available. Remember to fully heal before challenging the boss. |
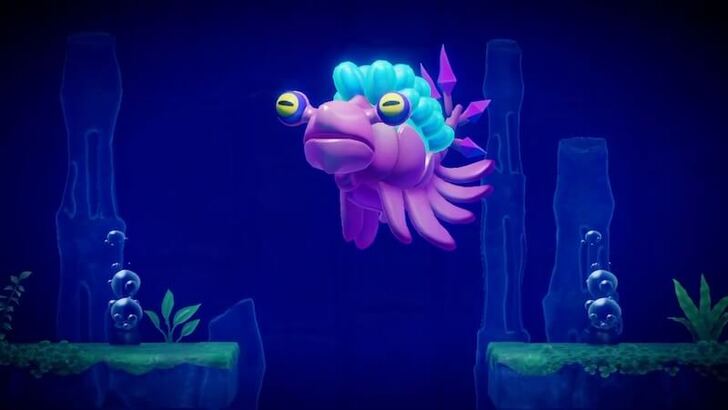
| 2 | 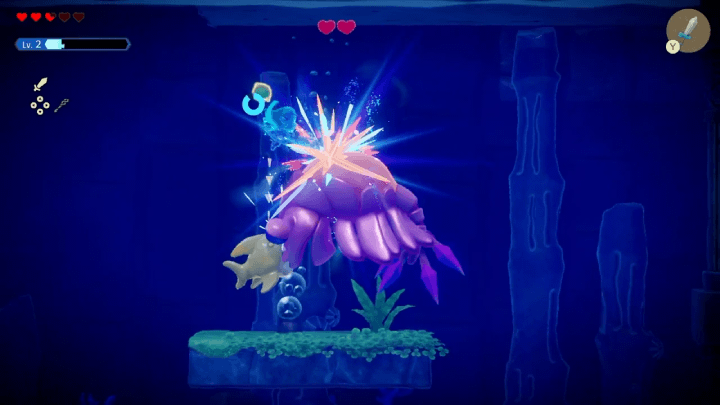 Unlock the door with the Big Key and fight Vocavor. Use Swordfighter Form or Chompfin Echo to attack its blue back side to expose its weakpoint. During the boss's second phase, use two Tektite Echoes to attack its back after it summons whirlpools. ▶︎ How to Beat Vocavor |
| 3 | 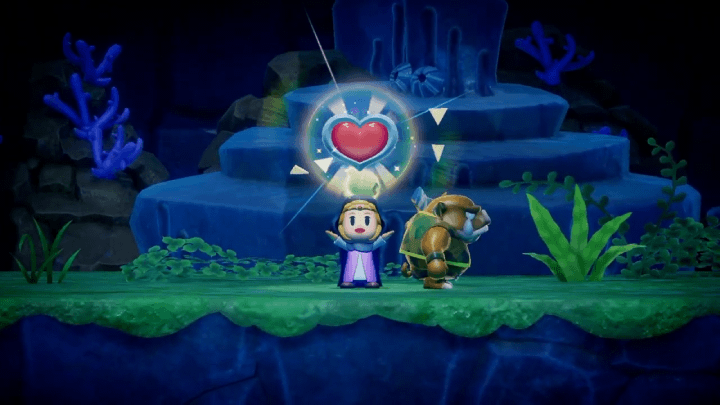 After the boss fight, a cutscene will trigger along with Tri gaining experience. Pick up the Heart Container to trigger another cutscene and conclude the The Jabul Waters Rift main quest. |
| ◀︎ Previous Quest | Next Quest ▶︎ |
|---|---|
| The Mysterious Rifts | Still Missing |
| Searching for Everyone Questline | |
| Searching for Everyone ┣ A Rift in the Gerudo Desert ┗ The Jabul Waters Rift ┣ Chaos at River Zora Village ┣ Rampage in Zora Cove ┗ ▶︎★ Jabul Ruins |
|
Jabul Ruins Boss
Vocavor
|
|
Jabul Ruins Map
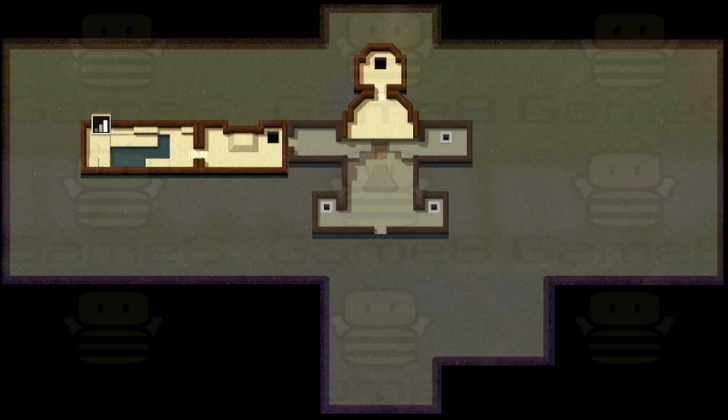
3F Map
| Jabul Ruins 3F Map |
|---|
 |
2F Map
| Jabul Ruins 2F Map |
|---|
 |
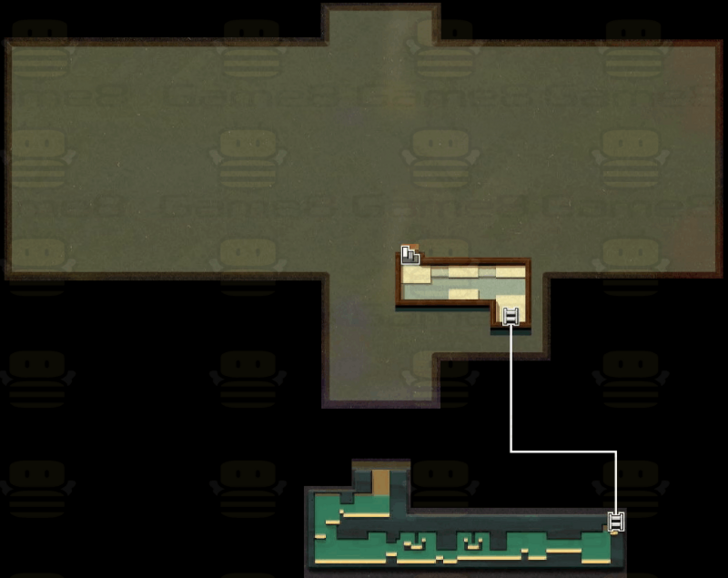
1F Map and Tresures List
| Jabul Ruins 1F Map |
|---|
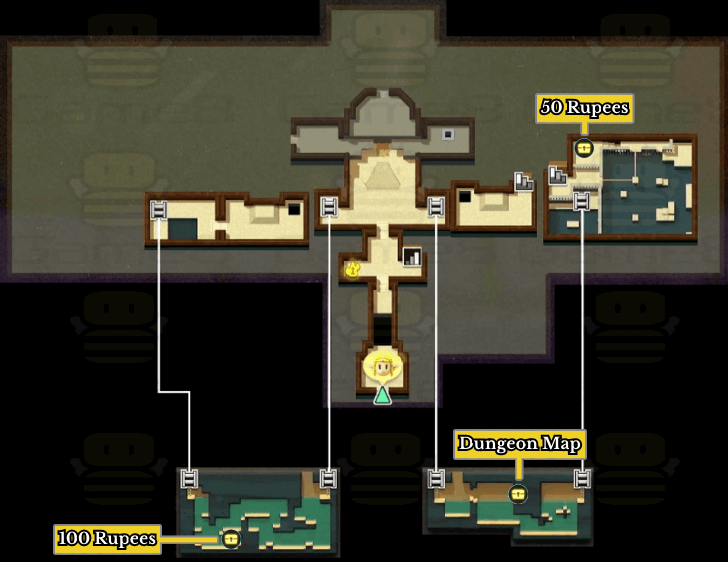 Treasures List:
・ 50 Rupees ・ Dungeon Map ・ 100 Rupees |
B1 Map
| Jabul Ruins B1 Map |
|---|
 |
New Echoes Learned in Jabul Ruins
List of Jabul Ruins Echoes
The list above shows the following echoes you can acquire when progressing the Jabul Ruins Main Quest.
Echoes List: All 127 Echo Locations
The Legend of Zelda: Echoes of Wisdom (EoW) Related Guides

| Complete Walkthrough | All Dungeons |
| Best Dungeon Order | |
Story Walkthrough Chart
Guides marked with a ★ are Dungeon Guides
Author
The Legend of Zelda: Echoes of Wisdom Walkthrough & Guides Wiki
Jabul Ruins Walkthrough
improvement survey
03/2026
improving Game8's site?

Your answers will help us to improve our website.
Note: Please be sure not to enter any kind of personal information into your response.

We hope you continue to make use of Game8.
Rankings
- We could not find the message board you were looking for.
Gaming News
Popular Games

Genshin Impact Walkthrough & Guides Wiki

Honkai: Star Rail Walkthrough & Guides Wiki

Umamusume: Pretty Derby Walkthrough & Guides Wiki

Pokemon Pokopia Walkthrough & Guides Wiki

Resident Evil Requiem (RE9) Walkthrough & Guides Wiki

Monster Hunter Wilds Walkthrough & Guides Wiki

Wuthering Waves Walkthrough & Guides Wiki

Arknights: Endfield Walkthrough & Guides Wiki

Pokemon FireRed and LeafGreen (FRLG) Walkthrough & Guides Wiki

Pokemon TCG Pocket (PTCGP) Strategies & Guides Wiki
Recommended Games

Diablo 4: Vessel of Hatred Walkthrough & Guides Wiki

Fire Emblem Heroes (FEH) Walkthrough & Guides Wiki

Yu-Gi-Oh! Master Duel Walkthrough & Guides Wiki

Super Smash Bros. Ultimate Walkthrough & Guides Wiki

Pokemon Brilliant Diamond and Shining Pearl (BDSP) Walkthrough & Guides Wiki

Elden Ring Shadow of the Erdtree Walkthrough & Guides Wiki

Monster Hunter World Walkthrough & Guides Wiki

The Legend of Zelda: Tears of the Kingdom Walkthrough & Guides Wiki

Persona 3 Reload Walkthrough & Guides Wiki

Cyberpunk 2077: Ultimate Edition Walkthrough & Guides Wiki
All rights reserved
© Nintendo. The Legend of Zelda and Nintendo Switch are trademarks of Nintendo.
The copyrights of videos of games used in our content and other intellectual property rights belong to the provider of the game.
The contents we provide on this site were created personally by members of the Game8 editorial department.
We refuse the right to reuse or repost content taken without our permission such as data or images to other sites.


How do I get the key?