Hyrule Castle Dungeon Walkthrough
▲ 100% the game with our Interactive Map!
▲ Zelda amiibo give Ingredients & Outfits.
▲ Best Dungeon Order and Best Echoes.
▲ Heart Pieces | Might Crystals | Tri Power
▲ Best Smoothies | All 69 Recipes
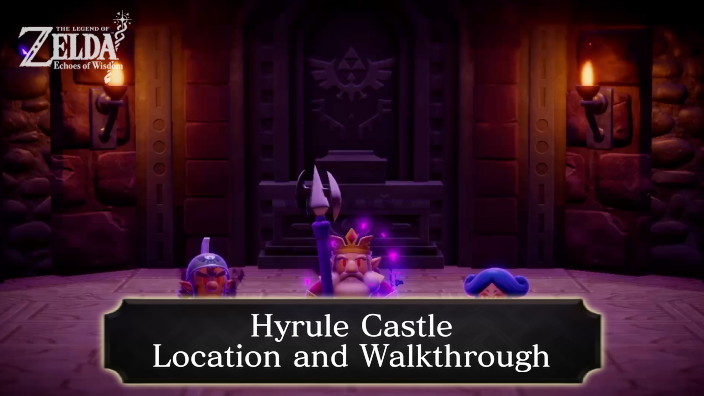
Hyrule Castle is a dungeon in The Legend of Zelda: Echoes of Wisdom (EoW) located in Hyrule Castle Town. Read on for a complete walkthrough guide on this dungeon, how to get to Hyrule Castle, puzzle solutions, and more!
| ◀︎ Previous Quest | Next Quest ▶︎︎ |
|---|---|
| Searching for Everyone | Lands of the Goddesses |
| Still Missing Questline | |
|
Still Missing ┗ ▶︎︎ ★ Hyrule Castle |
|
Hyrule Castle Dungeon Preparation
Best Echoes for Hyrule Castle Dungeon
| Echo | Usage |
|---|---|
 Old Bed Old Bed
|
・Recovers HP, and can be used as Steps when stacked on top of each other |
 Boomerang Boarblin Boomerang Boarblin
|
・Can help with defeating enemies, minibosses, and the Ganon boss |
 Flying Tile Flying Tile
|
・Used to progress through mazes and various areas with ease. |
 Ignizol Ignizol
|
・Used to light Braziers to unlock certain areas. |
 Bombfish Bombfish
|
・Can break cracked walls for hidden Treasure Chests ・Can be used against Ball-and-Chain Trooper Miniboss |
 Strandtula Strandtula
|
・Can help navigate the Underground Path |
Best Smoothies for Hyrule Castle Dungeon
| Smoothies | Benefit | Smoothies that Restore Hearts | You may need to have some Smoothies that restore hearts for this dungeon. The Mazes, miniboss, and boss can reduce your HP significantly, so it is best to have recovery smoothies prepared in case of emergencies. |
|---|
Hyrule Castle Dungeon Location
Hyrule Castle Town
Hyrule Castle Dungeon can be found within Hyrule Castle Town. The dungeon becomes accessible during the events of the main quest Still Missing.
How to Get to Hyrule Castle
| # | Step by Step Objectives |
|---|---|
| 1 |
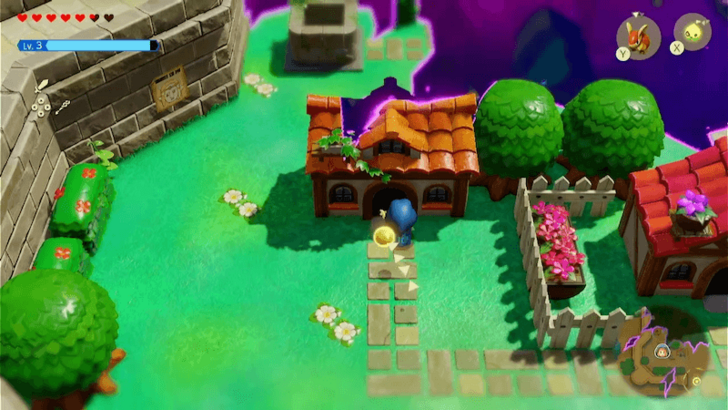 Enter the last house on the left side of town. Minister Lefte will give you the hint that the castle’s underground entrance is located at the bottom of a well near the house. |
| 2 |
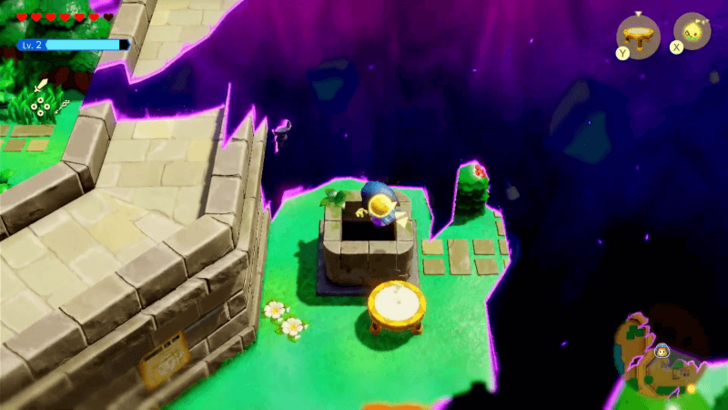 After speaking with Minister Lefte, head to the well above the house. Place a Trampoline Echo to jump up and descend into the well. |
| 3 |
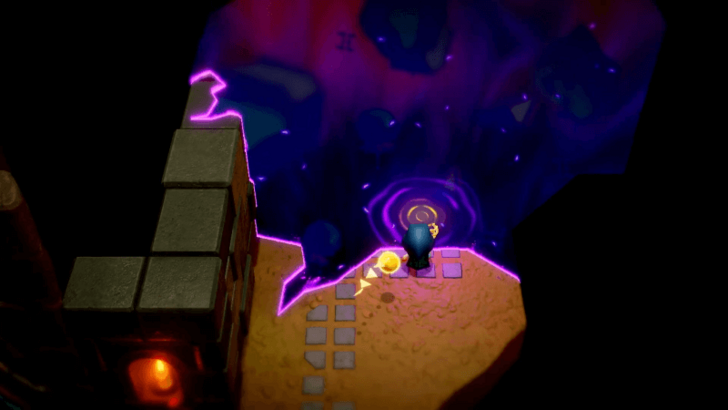 Once inside the well, move to the right and enter the portal that leads to the Stilled Hyrule Castle Town rift. ▶︎ Stilled Hyrule Castle Town Walkthrough |
| 4 | 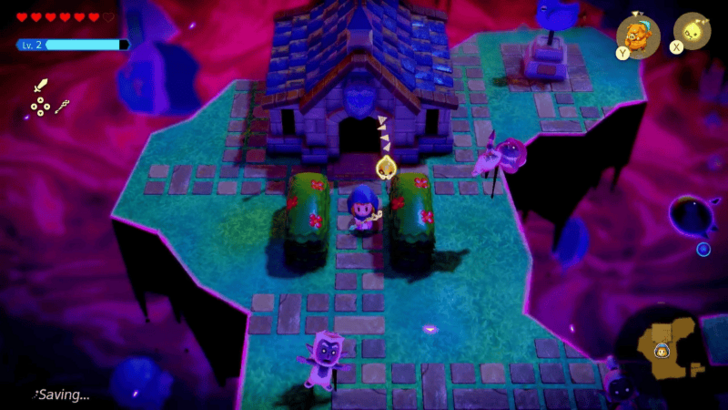 Head north towards the stairs, then take a turn south to exit the building. From the building, head right and make your way north through the cluster of houses. Be ready to fight Rift Enemies along the way, as they may block your path. |
| 5 | 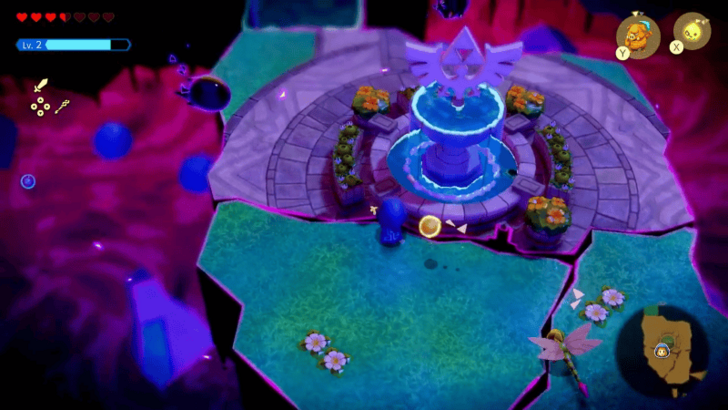 Continue pushing through the castle debris until you arrive at the remnants of an old fountain. |
| 6 | Head northeast and use the Water Blocks to swim upwards, allowing you to reach the entrance of Hyrule Castle. |
Hyrule Castle Dungeon Walkthrough
|
|
Find the King of Hyrule
| # | Step by Step Objectives |
|---|---|
| 1 |
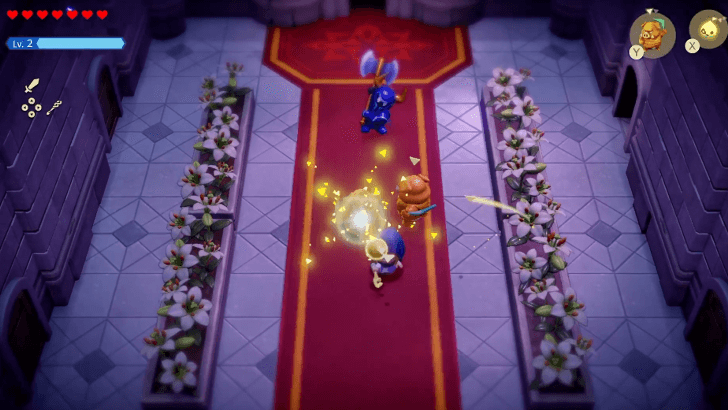 After entering the castle and activating the Waypoint, head up the stairs and through the corridor. Defeat the Darknut Lv. 2 waiting for you, and be sure to obtain its Echo afterward. To take down the Darknut Lv. 2, use any monster Echo to distract it and switch to Swordfighter Form to unleash a barrage of attacks from behind. |
| 2 |
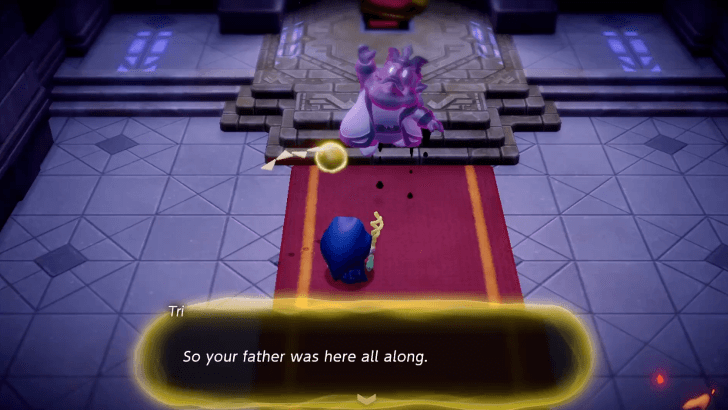 Continue north to find the King of Hyrule frozen in place, which will trigger a dialogue from Tri, prompting the urgency to rescue those trapped within Hyrule Castle. |
| 3 |
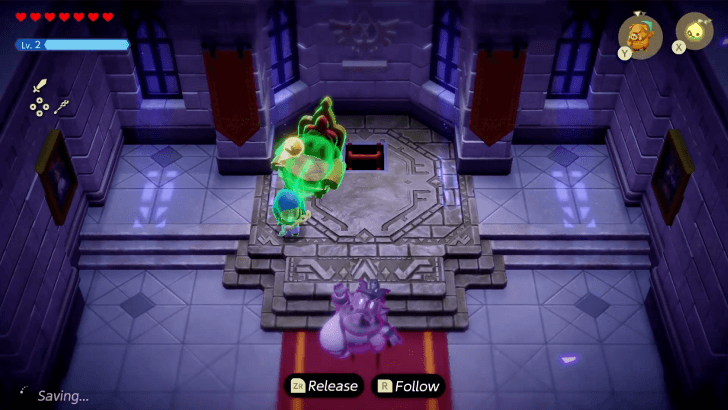 Use the Bind ability on the throne to move it aside, revealing a hidden path to the castle's underground. |
| 4 |
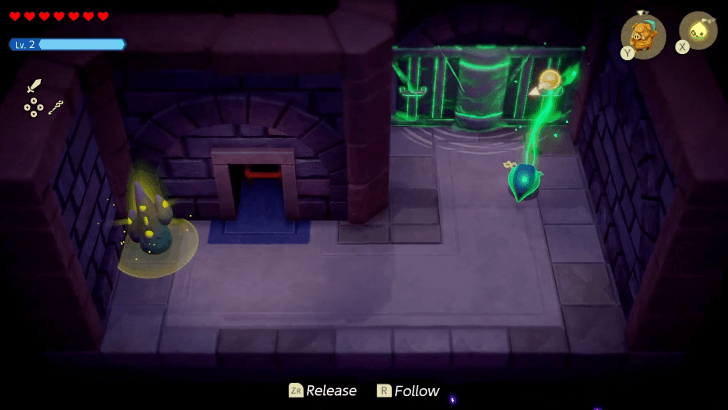 After descending the ladders, activate the nearby Waypoint, then use Bind again to pull open the wall. |
Navigate Hyrule Castle B1
| # | Step by Step Objectives |
|---|---|
| 1 |
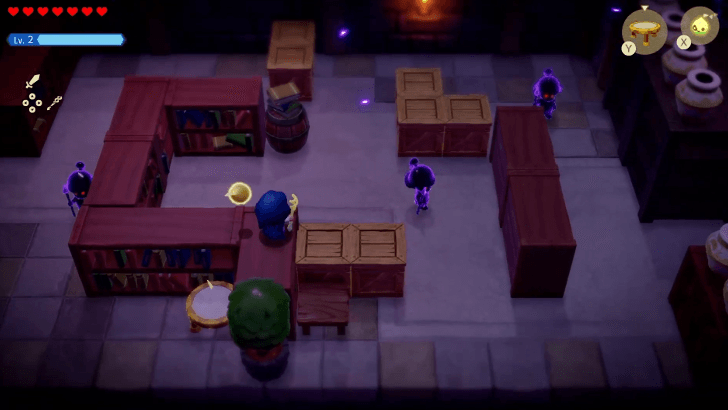 In the next area, you’ll need to sneak past Patrolling Guards. If you’re caught, you’ll be sent to a room where you must defeat Rift enemies to escape. You can either avoid the Guards by staying out of their line of sight, or quickly progressing through the area by using the shelves! Stacking Old Beds as steps to reach the top of the shelves is an effective strategy, since most guards cannot reach you from below. Once on the shelves, summon a Flying Tile Echo to quickly navigate through the maze. |
| 2 |
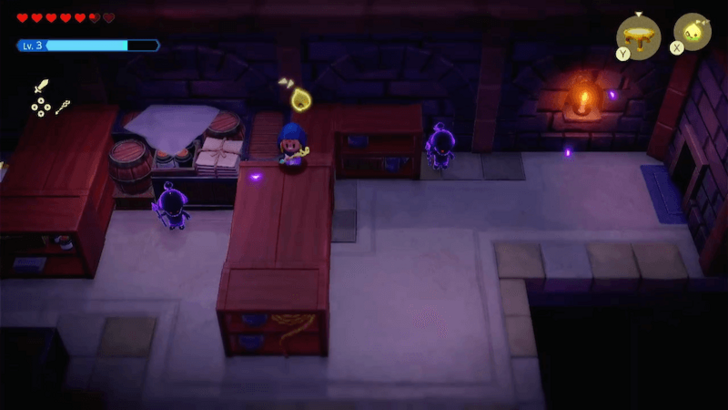 Near the end, distract the Guard blocking the entrance by throwing pots to lure it away from its post. |
| 3 |
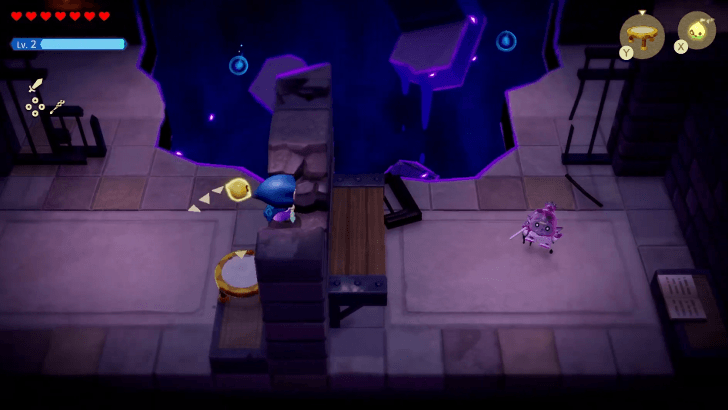 After sneaking past, there will be a short corridor you need to pass through. Use the Trampoline Echo to scale the shelves, and make your way to the end, where a Waypoint and a ladder towards B2 await. |
Navigate Hyrule Castle B2
| # | Step by Step Objectives |
|---|---|
| 1 |
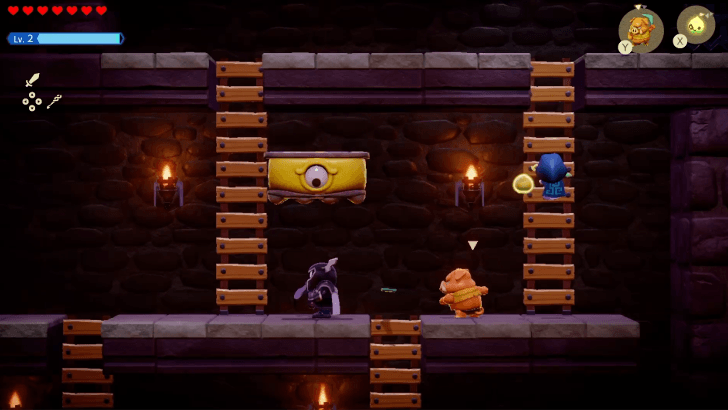 After descending the ladder, you'll find that both doors on either side will be locked. To unlock them, you must defeat the Darknut Lv. 2s in the area. Once they’re defeated, proceed to the next area on the right. |
| 2 |
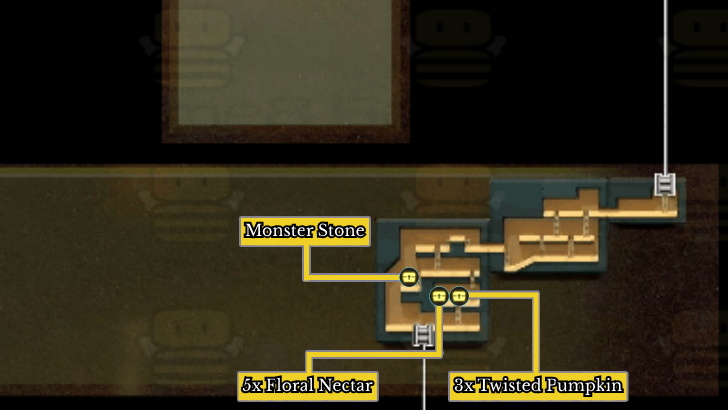
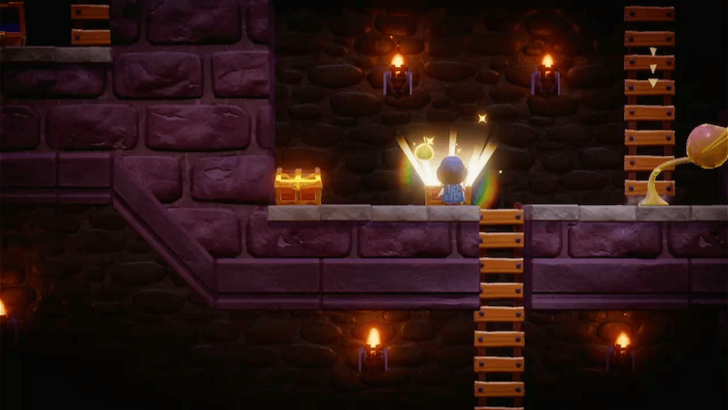 Continue climbing down the ladders to reach B2. There are three Treasure Chests here: the Chest on the left contains a Monster Stone, while the two on the right hold 5 Floral Nectars and 3 Twisted Pumpkins. Be sure to collect all the items from the Treasure Chests before heading further down into Hyrule Castle B2. |
| 3 |
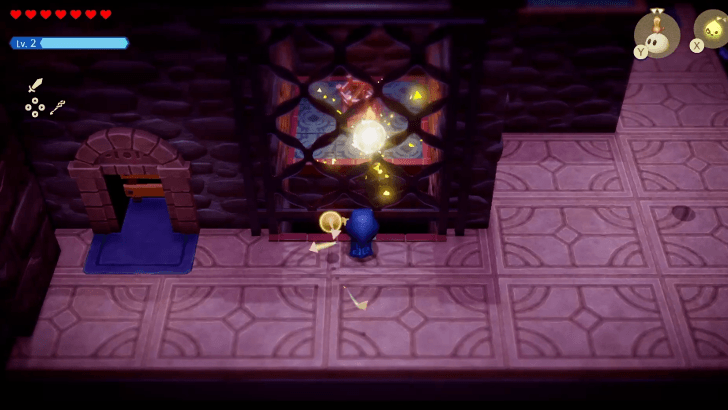 Summon an Ignizol Echo to light the Four Braziers found on this floor. The first one can be found right beside the door, and can be ignited by simply shooting an Ignizol towards it. The second and third Braziers can be lit by climbing the ladder and lighting the one at the top with an Ignizol, and again holding Y to send it towards the torch across the gap. |
| 4 |
The fourth and last Brazier can be ignited by sending an Ignizol to the platform past the gate, then using Bind on it to drag it towards it. |
| 5 |
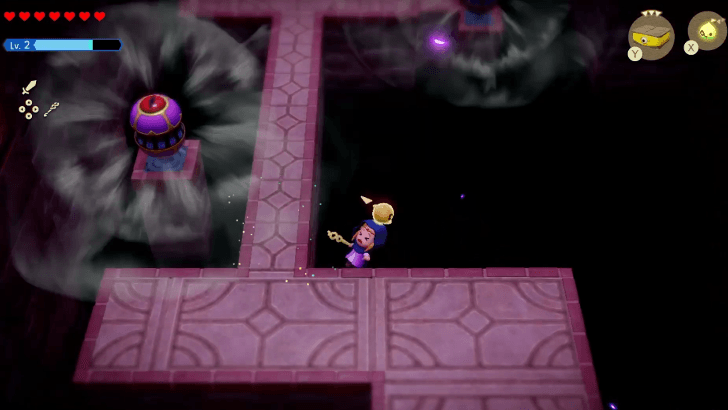 Upon entering the next room, activate Swordfighter Form and shoot the Gustmaster with arrows. Attack it when it closes in, allowing you to safely cross the ledge. You can collect its Echo after defeating it. |
| 6 |
To reach the high ground, you can either summon a Platboom Echo to lift you to the top, or simply jump on top of the Gustmaster while its open to fly you upward. |
| 7 |
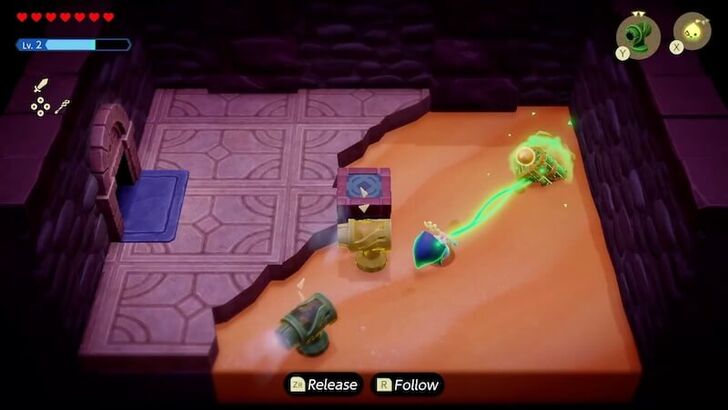 Once you're at the top and in the area with Ignizols, head into the room on the east side. Summon Wind Cannon Echoes to clear away the sand dunes, then use Bind to pull the Treasure Chest from the ground and claim the Dungeon Map. |
| 8 |
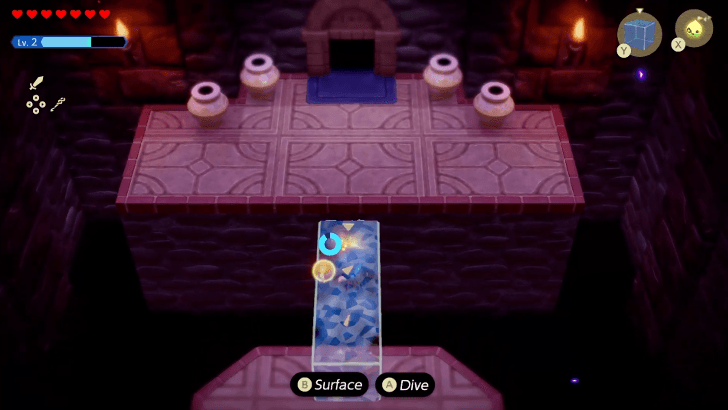 Make your way across the gap, which can be done easily by using a Flying Tile Echo or stacking Water Block Echoes next to each other. This will lead you to a room with a Waypoint, and the locked boss room. |
Get the Small Key
| # | Step by Step Objectives |
|---|---|
| 1 |
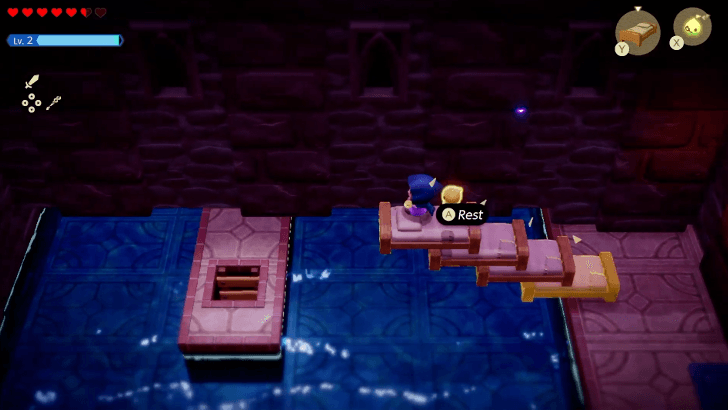 From the Waypoint, enter the room to the west. Defeat the enemies, then stack Old Bed Echoes to cross the water and descend the ladder in the center of the room. |
| 2 |
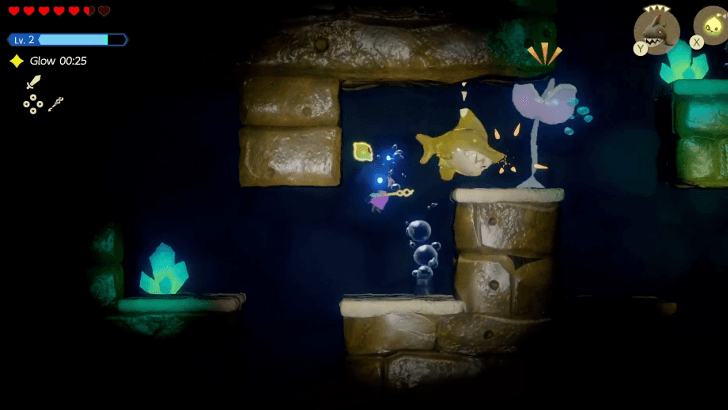 After descending the ladder, you'll enter a Water Maze where you must navigate while managing your oxygen and avoiding enemies. Replenish oxygen using bubbles. Follow the Dungeon Map to the exit in the northeast. The Treasure Chest in the center holds 20 Rupees, and the Treasure Chest in the southeast contains 100 Rupees. |
| 3 |
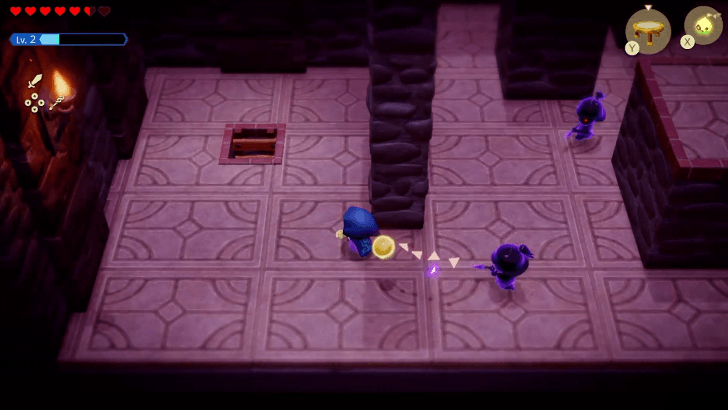 After exiting the maze, you’ll enter an area with Patrolling Guards, similar to those in B1. If you’re caught, you’ll also be sent to a combat room. With no shelves to hide on, you’ll need to throw pots to distract the Guards and make your way to the right side of the room. |
| 4 |
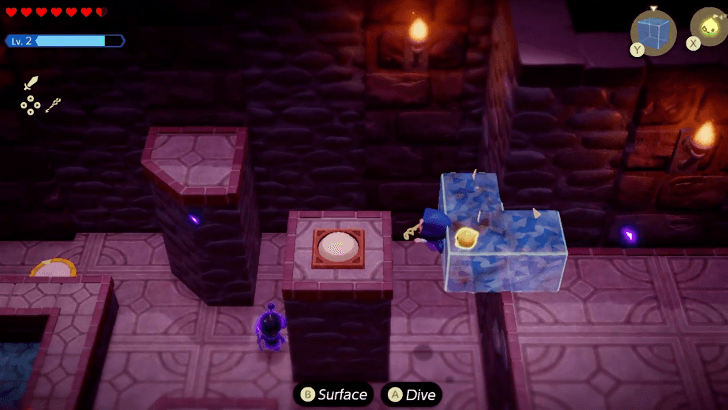 You need to step on the button located atop of one of the pillars to reveal the Treasure Chest in the middle of the room. To reach the button, stack Old Bed Echoes or Water Blocks from the east side of the room to reach the button across the gap. Take the Small Key from the Treasure Chest before leaving the area. |
| 5 |
 Return to the room with the locked boss room by following the path to the right or warping using the Waypoint. |
Get the Big Key
| # | Step by Step Objectives |
|---|---|
| 1 |
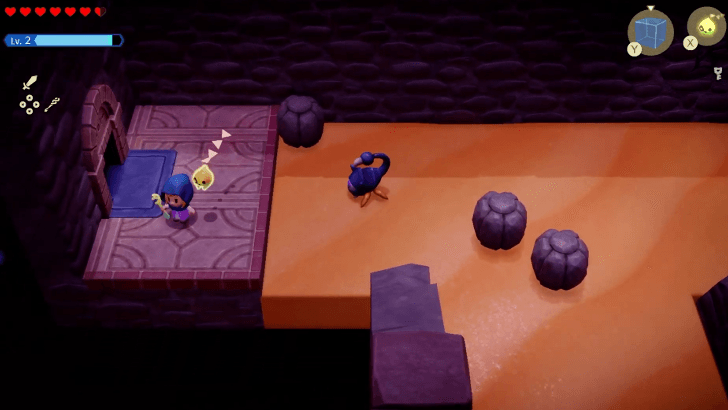 Head east where you'll enter a room with Arurodas in a sand pit. |
| 2 |
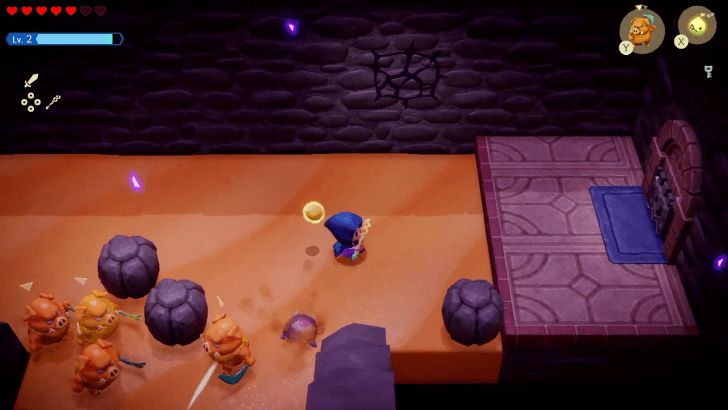 Summon a Bombfish Echo, hold it overhead, and stand by the cracked wall near the stone door. Blowing it up reveals a Treasure Chest containing 50 Rupees. |
| 3 |
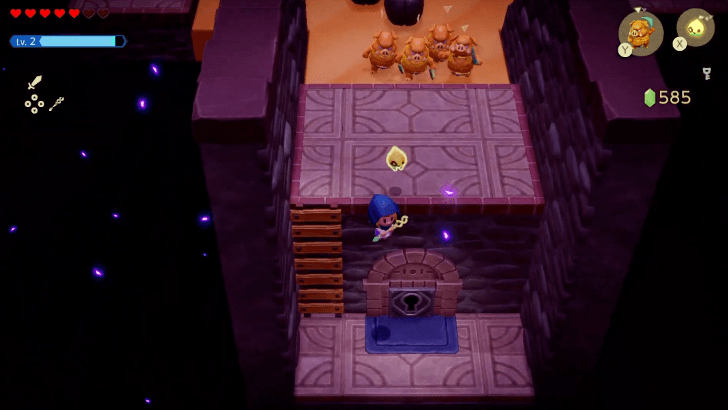 Head south from the sand pit, and make your way down the ladder to find a locked door. Use the previously obtained Small Key to open it, and head to the next area. |
| 4 |
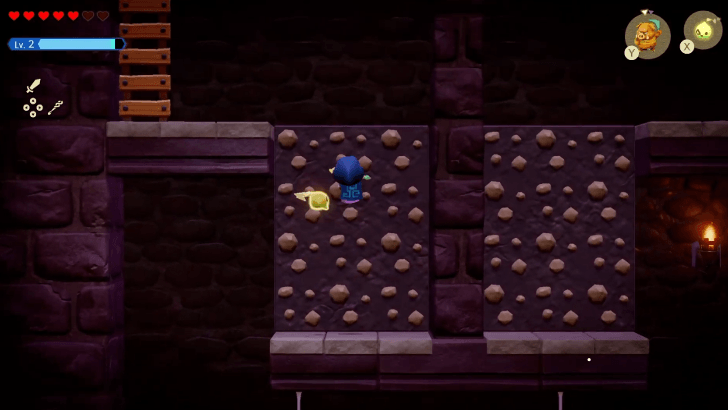 Navigate the underground path by climbing walls and stacking object Echoes to cross gaps. You can also use the Gustmaster's gusts when it's open to push you across. After climbing out of the area, you will find a room with two pots. |
| 5 |
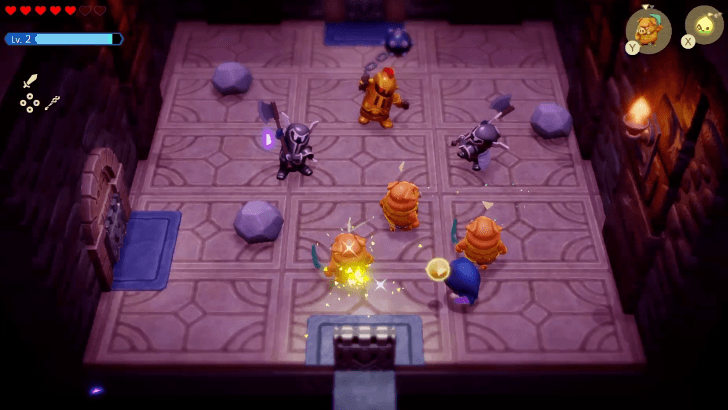 Head north to face two Darknuts and a Ball-and-Chain Trooper. You can brute force the fight by summoning Bombfishes and throwing it at them or conjure Boomerang Boarblins to hit multiple enemies at once. Use Bind to pull the miniboss's ball-and-chain flail, giving your Echoes an opening to attack. After defeating them, you'll get the Ball-and-Chain Trooper Echo and gain access to the Treasure Room. ▶︎ How to Beat Ball-and-Chain Trooper |
| 6 |
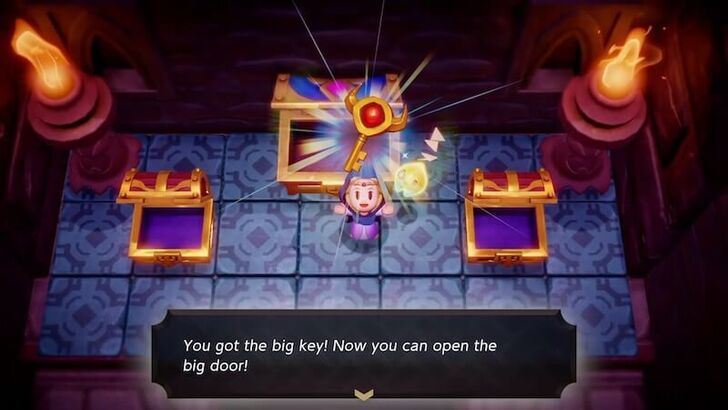 Enter the Treasure Room and collect the Big Key from the Treasure Chest in the middle. The left Chest contains a Frog Ring, and the right Chest holds a Golden Egg. |
Defeat Ganon
| # | Step by Step Objectives |
|---|---|
| 1 |
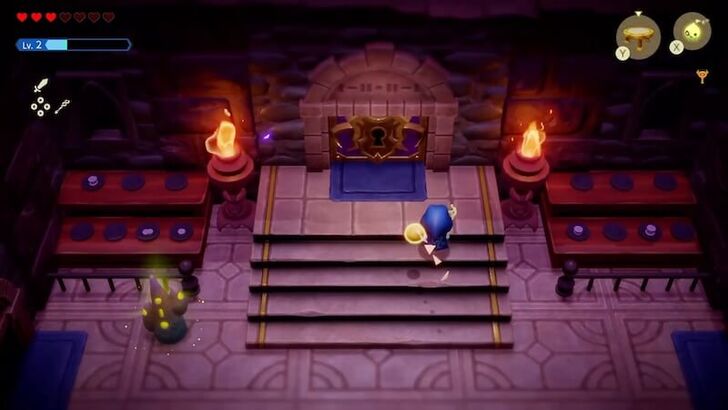 Warp back to the the locked room using the Waypoint. From here, make your final preparations, such as resting and changing equipment before facing the Boss! When you're ready, use the Big Key on the lock and face Ganon. |
| 2 |
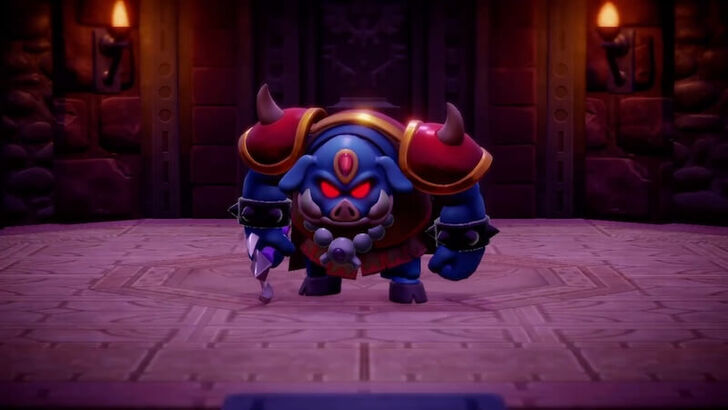
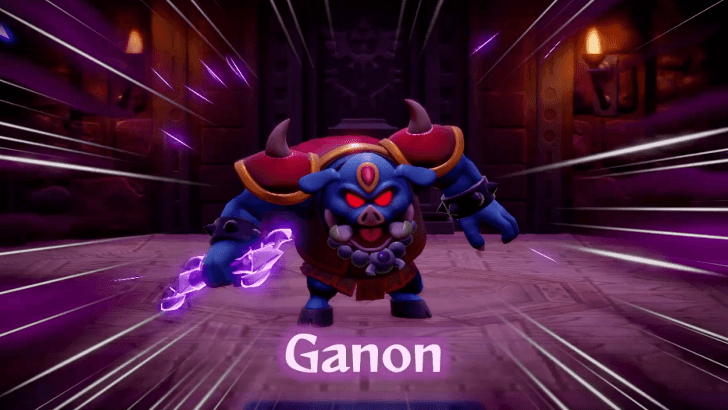 Compared to Link's fight against Ganon during the prologue, this encounter will be much tougher. Ganon has three phases: throwing his staff in Phase 1, conjuring fireballs in Phase 2, and summoning explosive orange orbs in Phase 3. Check our guide below for detailed tips on how to beat him. ▶︎ How to Beat Ganon |
| 3 |
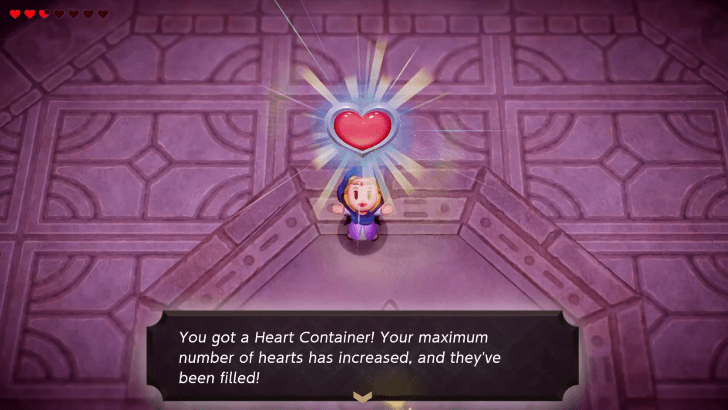 After beating Ganon, a cutscene will ensue, showing that Hyrule Castle is now saved, along with an increase in Tri's Power. Pick up the Heart Container from the center of the room. |
| 4 |
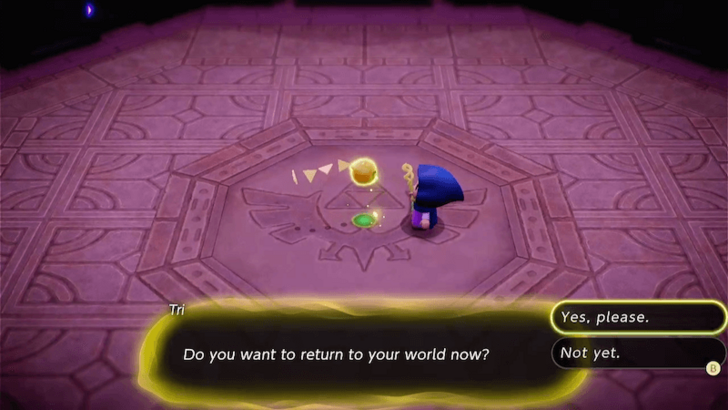 Exit through the yellow portal and watch the cutscene that follows. |
| ◀︎ Previous Quest | Next Quest ▶︎ |
|---|---|
| Searching for Everyone | Lands of the Goddesses |
| Still Missing Questline | |
|
Still Missing ┗ ▶︎ ★ Hyrule Castle |
|
Hyrule Castle Dungeon Bosses
Ball-and-Chain Trooper
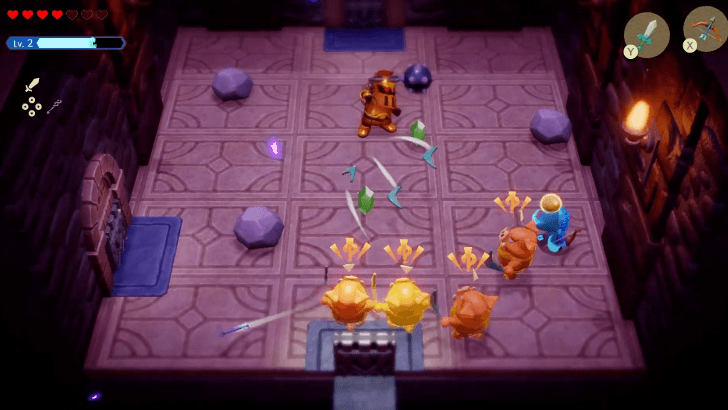
The Ball-and-Chain Trooper swings its weapon while moving, making close-range attacks difficult. Use Bombfish Echoes to defeat both the Trooper and the two Darknuts from a distance. Boomerang Boarblins can also be useful to hit the Darknuts and cover more ground during the fight. Use Bind to pull the Ball-and-Chain Trooper's flail, giving your Attack Echoes an opening to strike.
How to Beat Ball-and-Chain Trooper
Ganon
|
|
Hyrule Castle Dungeon Map
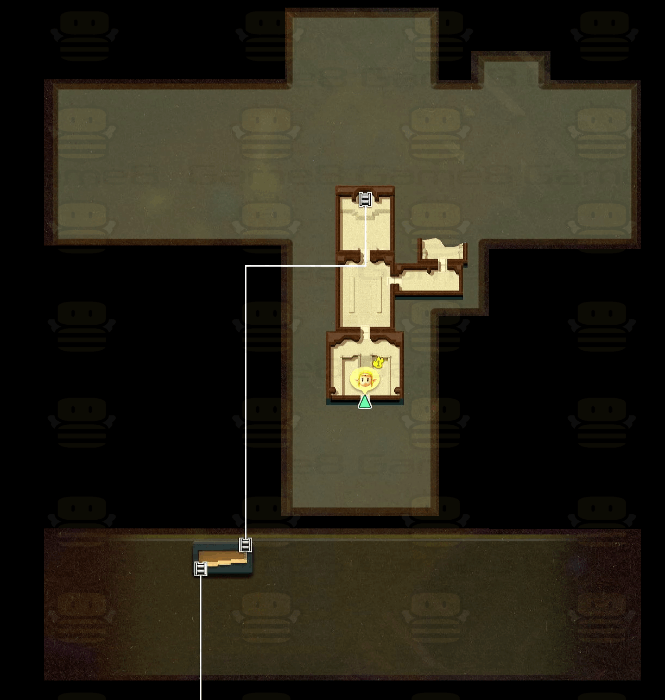
Hyrule Castle Dungeon Map 1F
| Hyrule Castle Map 1F |
|---|
 |
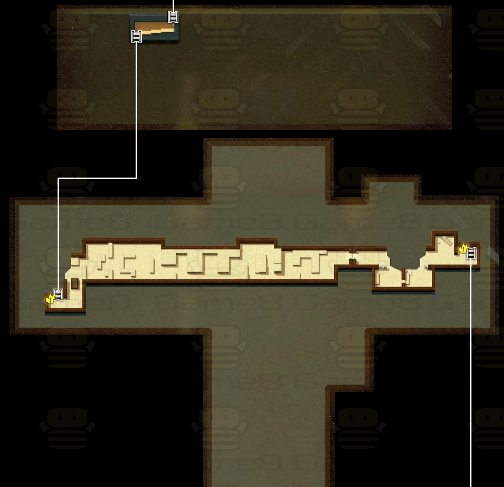
Hyrule Castle Dungeon Map B1 and Treasures List
| Hyrule Castle Map B1 |
|---|
  |
Hyrule Castle Dungeon Map B2 and Treasures List
| Hyrule Castle Map B2 |
|---|
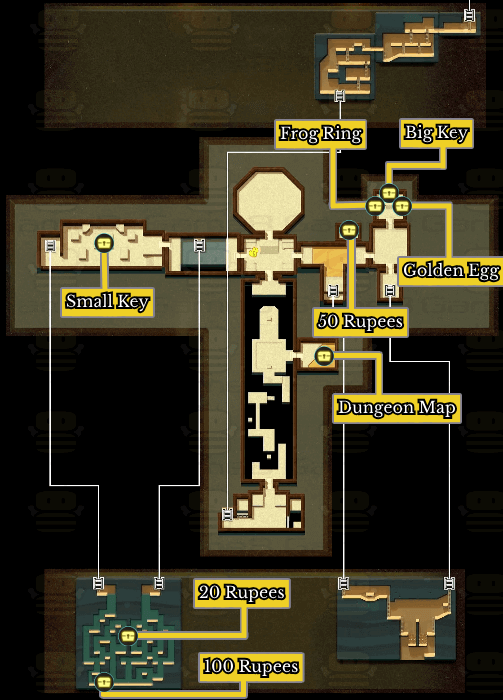
Treasures List:
• Frog Ring • Dungeon Map • Big Key • Small Key • Golden Egg • 100 Rupees • 50 Rupees • 20 Rupees |
New Echoes Learned in Hyrule Castle Dungeon
List of Hyrule Castle Dungeon Echoes
The list above shows the following echoes you can acquire when progressing the Hyrule Castle Main Quest.
Echoes List: All 127 Echo Locations
The Legend of Zelda: Echoes of Wisdom (EoW) Related Guides

| Complete Walkthrough | All Dungeons |
| Best Dungeon Order | |
Story Walkthrough Chart
Guides marked with a ★ are Dungeon Guides
Comment
Author
The Legend of Zelda: Echoes of Wisdom Walkthrough & Guides Wiki
Hyrule Castle Dungeon Walkthrough
improvement survey
03/2026
improving Game8's site?

Your answers will help us to improve our website.
Note: Please be sure not to enter any kind of personal information into your response.

We hope you continue to make use of Game8.
Rankings
- We could not find the message board you were looking for.
Gaming News
Popular Games

Genshin Impact Walkthrough & Guides Wiki

Resident Evil Requiem (RE9) Walkthrough & Guides Wiki

Honkai: Star Rail Walkthrough & Guides Wiki

Monster Hunter Wilds Walkthrough & Guides Wiki

Umamusume: Pretty Derby Walkthrough & Guides Wiki

Pokemon TCG Pocket (PTCGP) Strategies & Guides Wiki

Arknights: Endfield Walkthrough & Guides Wiki

Wuthering Waves Walkthrough & Guides Wiki

Zenless Zone Zero Walkthrough & Guides Wiki

Digimon Story: Time Stranger Walkthrough & Guides Wiki
Recommended Games

Fire Emblem Heroes (FEH) Walkthrough & Guides Wiki

Yu-Gi-Oh! Master Duel Walkthrough & Guides Wiki

Super Smash Bros. Ultimate Walkthrough & Guides Wiki

Diablo 4: Vessel of Hatred Walkthrough & Guides Wiki

Pokemon Brilliant Diamond and Shining Pearl (BDSP) Walkthrough & Guides Wiki

Elden Ring Shadow of the Erdtree Walkthrough & Guides Wiki

Monster Hunter World Walkthrough & Guides Wiki

The Legend of Zelda: Tears of the Kingdom Walkthrough & Guides Wiki

Persona 3 Reload Walkthrough & Guides Wiki

Cyberpunk 2077: Ultimate Edition Walkthrough & Guides Wiki
All rights reserved
© Nintendo. The Legend of Zelda and Nintendo Switch are trademarks of Nintendo.
The copyrights of videos of games used in our content and other intellectual property rights belong to the provider of the game.
The contents we provide on this site were created personally by members of the Game8 editorial department.
We refuse the right to reuse or repost content taken without our permission such as data or images to other sites.


![Resident Evil Village Review [Switch 2] | Almost Flawless Port](https://img.game8.co/4432790/e1859f64830960ce4248d898f8cd38d9.jpeg/thumb)


