This survey will take about 1 minute.
Your answers will help us to improve our website.
Zelda: Echoes of Wisdom (EoW)
List of Caves
▲ 100% the game with our Interactive Map!
▲ Zelda amiibo give Ingredients & Outfits.
▲ Best Dungeon Order and Best Echoes.
▲ Heart Pieces | Might Crystals | Tri Power
▲ Best Smoothies | All 69 Recipes
A list of all Caves in The Legend of Zelda: Echoes of Wisdom (EoW). See the cave interactive map, cave locations, and a walkthrough for each cave.
List of Contents
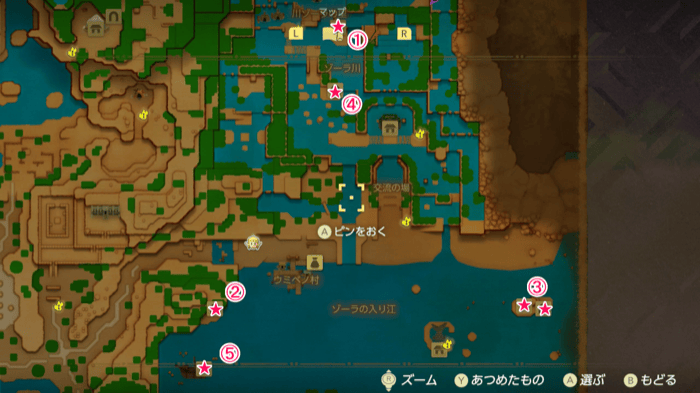
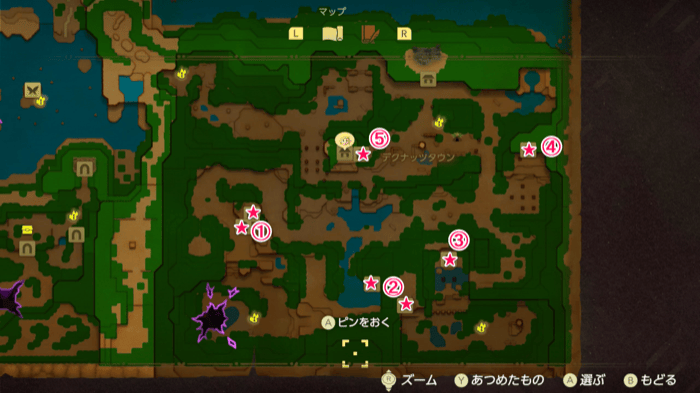
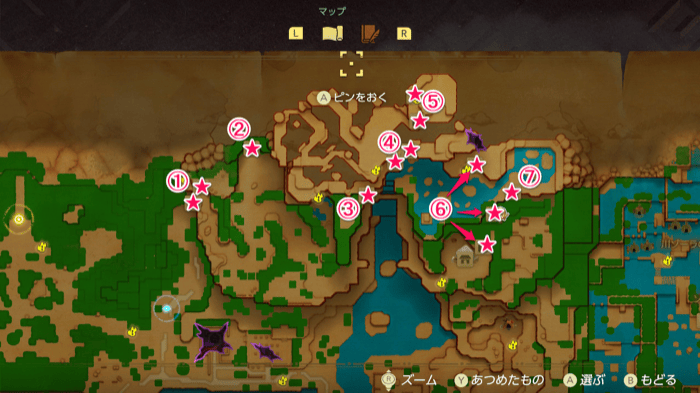
Caves Interactive Map
Caves Location and Walkthrough
| Jump to a Section | ||
|---|---|---|
| Suthorn Forest | Hyrule Field | Gerudo Desert |
| Jabul Waters | Faron Wetlands | Eldin Volcano |
| Mount Hebra | - | - |
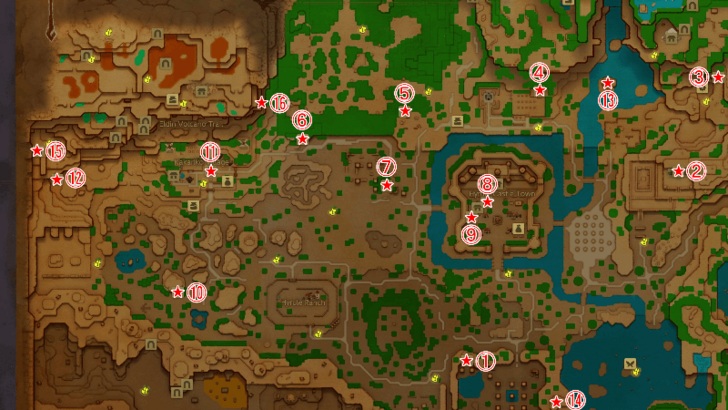
Suthorn Forest Caves

| Suthorn Forest Caves | ||
|---|---|---|
| Cave 1 | Cave 2 | Cave 3 |
| Cave 4 | Cave 5 | Cave 6 |
| Cave 7 | Cave 8 | |
Cave 1
| How to Complete | |
|---|---|
| 1 | This is the cave that connects from Hyrule Castle's underground waterway. Learn the Rock echo once you wash up at the beach and head south to reach the exit.
▶︎ The Mysterious Rifts Quest Walkthrough |
▲ Back to Suthorn Forest Caves ▲
Cave 2 - Beach Cave
| How to Complete | |
|---|---|
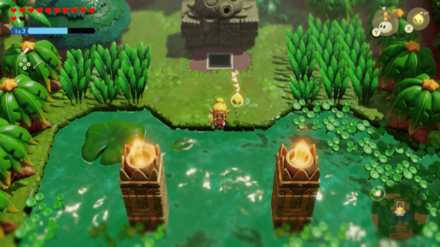
| 1 |
Use the Sea Urchin Echo to break the wooden boxes to reach the Piece of Heart. |
▲ Back to Suthorn Forest Caves ▲
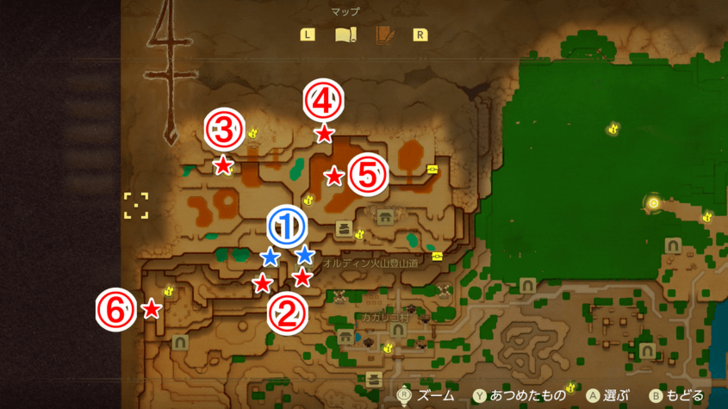
Cave 3 - Bottom of the Well
| How to Complete | |
|---|---|
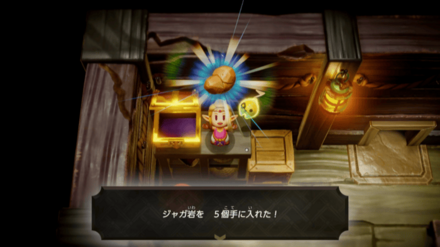
| 1 | Get the 5 Floral Nectar from the treasure chest. |
▲ Back to Suthorn Forest Caves ▲
Cave 4
| How to Complete | |
|---|---|
| 1 | Learn the Ignizol Echo and move forward. |
| 2 | Get the Fairy Bottle in the treasure chest at the back. |
▲ Back to Suthorn Forest Caves ▲
Cave 5
| How to Complete | |
|---|---|
| 1 | Learn the Caromadillo Echo and move forward. |
| 2 |
Use the Caromadillo Echo to break the wooden boxes. |
| 3 | Climb the rock wall and go all the way to the end to get a Piece of Heart. |
▲ Back to Suthorn Forest Caves ▲
Cave 6
| How to Complete | |
|---|---|
| 1 | Use the rocks or Ignizol Echo to defeat the Peahat and learn its echo.
▶︎ You'll have to visit this cave to complete Finding the Flying Plant Side Quest |
▲ Back to Suthorn Forest Caves ▲
Cave 7 - Suthorn Ruins
| How to Complete | |
|---|---|
| 1 | This cave appears as part of The Mysterious Rifts main quest.
▶︎ The Mysterious Rifts Quest Walkthrough |
▲ Back to Suthorn Forest Caves ▲
Cave 8 - Suthorn Ruins
| How to Complete | |
|---|---|
| 1 | Use Bind to pull the treasure chest from the ground. Open it to obtain a Golden Egg. |
▲ Back to Suthorn Forest Caves ▲
Hyrule Field Caves
| Hyrule Field Caves | ||
|---|---|---|
| Cave 1 | Cave 2 | Cave 3 |
| Cave 4 | Cave 5 | Cave 6 |
| Cave 7 | Cave 8 | Cave 9 |
| Cave 10 | Cave 11 | Cave 12 |
| Cave 13 | Cave 14 | Cave 15 |
| Cave 16 | ||
Cave 1
| How to Complete | |
|---|---|
| 1 |
Reverse Bond to a Crawltula to climb the tall ledge. Open the treasure chest to get 70 Rupees. |
▲ Back to Hyrule Field Caves ▲
Cave 2 - Eastern Temple
| How to Complete | |
|---|---|
| 1 | Accept the Let's Play a Game side quest to enter the cave. Defeat the boss to get a Heart Piece.
▶︎ Let's Play a Game Quest Walkthrough |
▲ Back to Hyrule Field Caves ▲
Cave 3
| How to Complete | |
|---|---|
| 1 |
Use Bind to move the boulder to the side. Summon a Caromadillo Echo for it to step on the pressure plate to lower the gates. Open the treasure chest to get the Might Crystal. |
▲ Back to Hyrule Field Caves ▲
Cave 4
| How to Complete | |
|---|---|
| 1 | Light the torches on both sides to enter the basement. |
| 2 | Learn the Ghini Echo. |
| 3 |
Summon the Ghini Echo and lock on to the blue eye switch for it to activate the switch. |
| 4 | Learn the Ghini Lv. 2 on the next room and get the Golden Egg from the treasure chest. |
▲ Back to Hyrule Field Caves ▲
Cave 5
| How to Complete | |
|---|---|
| 1 |
This cave is part of a side quest called Impa's Gift
▶︎ Impa's Gift Quest Walkthrough |
▲ Back to Hyrule Field Caves ▲
Cave 6
| How to Complete | |
|---|---|
| 1 | Learn the Spiked Roller and press the switch. |
| 2 |
Use the Holmill Echo to dig a hole in the ground and jump down to it. Pick up the Piece of Heart. |
▲ Back to Hyrule Field Caves ▲
Cave 7
| How to Complete | |
|---|---|
| 1 | Get the Might Crystal near the entrance. |
| 2 |
 If you go to the water on the left and continue on, you will find a treasure chest that contains a Golden Egg. |
| 3 | Follow the waterway on the right to reach the first cave in Suthorn Forest. |
▲ Back to Hyrule Field Caves ▲
Cave 8
| How to Complete | |
|---|---|
| 1 | Reverse bond the cuckoo clock to reveal the entrance. |
| 2 | Pick up the 2 Might Crystals from the treasure chest. |
▲ Back to Hyrule Field Caves ▲
Cave 9
| How to Complete | |
|---|---|
| 1 | This is the cave that you will explore as part of the Still Missing main quest.
▶︎ Still Missing Walkthrough |
▲ Back to Hyrule Field Caves ▲
Cave 10
| How to Complete | |
|---|---|
| 1 | Throw a Meat Echo to attract the enemy's attention. Open the treasure chest to get 3 Might Crystals. |
▲ Back to Hyrule Field Caves ▲
Cave 11
| How to Complete | |
|---|---|
| 1 | Open the treasure chest to get 3 Refreshing Grapes. |
▲ Back to Hyrule Field Caves ▲
Cave 12
| How to Complete | |
|---|---|
| 1 |
Target the boulder near the Piece of Heart and use bind. Push the second boulder to create a path that leads to the Piece of Heart. |
▲ Back to Hyrule Field Caves ▲
Cave 13
| How to Complete | |
|---|---|
| 1 |
Use a Platboom Echo to reach the treasure chest that contains 3 Floral Nectar. |
▲ Back to Hyrule Field Caves ▲
Cave 14
| How to Complete | |
|---|---|
| 1 | Use a Bombfish Echo to destroy the rocks at the entrance. Open the treasure chest to get 10 Fresh Milk. |
▲ Back to Hyrule Field Caves ▲
Cave 15
| How to Complete | |
|---|---|
| 1 | Use a Bombfish Echo to destroy the rocks at the entrance. Open the treasure chest to get a Fairy Flower. |
▲ Back to Hyrule Field Caves ▲
Cave 16
| How to Complete | |
|---|---|
| 1 | Use a Bombfish Echo to destroy the rocks at the entrance. Open the treasure chest to get 6 Monster Fangs. |
▲ Back to Hyrule Field Caves ▲
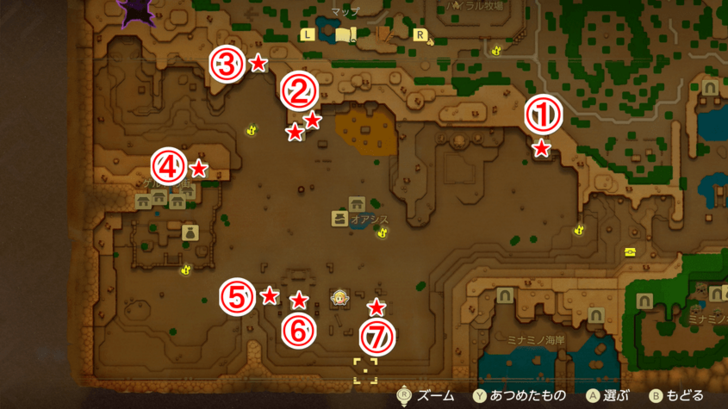
Gerudo Desert Caves
| Gerudo Desert Caves | ||
|---|---|---|
| Cave 1 | Cave 2 | Cave 3 |
| Cave 4 | Cave 5 | Cave 6 |
| Cave 7 | Cave 8 | |
Cave 1
| How to Complete | |
|---|---|
| 1 | Defeat the Caromadillo Lv. 2 and open the treasure chest that contains 10 Chilly Cactus at the back. |
▲ Back to Gerudo Desert Caves ▲
Cave 2
| How to Complete | |
|---|---|
| 1 |
Learn the Beetle Mound Echo inside the cave. Head straight to the exit at the back. Find the treasure chest that contains a Might Crystal.
▶︎You'll have to revisit this cave as part of the Beetle Ballyhoo Side Quest |
▲ Back to Gerudo Desert Caves ▲
Cave 3 - Ancestor's Cave of Rest
| How to Complete | |
|---|---|
| 1 | Go the left side and learn the Holmill Echo and use it to go to the lower level. |
| 2 |
 Summon the Holmill Echo on the sand on the far left and enter the hole to reach a treasure chest that contains a Golden Egg. |
▲ Back to Gerudo Desert Caves ▲
Cave 4
| How to Complete | |
|---|---|
| 1 |
Defeat the Platboom in the area by binding with it and using an Echo such as the Peahat to attack it. |
| 2 | Use the Sea Urchin Echo to destroy the stacked wooden boxes. |
| 3 |
Use Bind on the large rock and move to the left side. Move to the right side to reach the Piece of Heart. |
▲ Back to Gerudo Desert Caves ▲
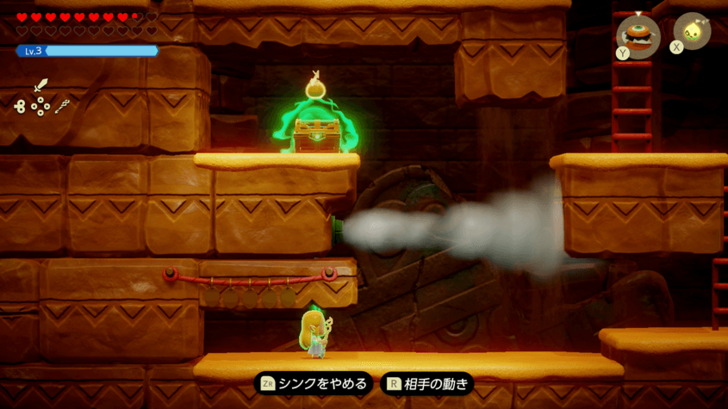
Cave 5 - Cryptic Cavern
| How to Complete | |
|---|---|
| 1 |
 Place Boulder Echoes in front of the Wind Cannon to block the winds. Learn the Wind Cannon Echo. |
| 2 | Activate the light blue statue at the top of the back room. This causes a treasure chest to appear that contains a Small Key. |
| 3 | Return to the room with the Wind Cannons and use the Small Key to open the door and climb down the ladder. |
| 4 | Defeat the Pathblade using the Sea Urchin Echo. |
| 5 | Break the Gerudo Pot for a fairy to appear. If you have a Bottle, you can put it inside to get a Fairy Bottle. |
| 6 |
 Use Bind on the treasure chest to make it fall to the ground. Open it to get 20 Rupees. |
| 7 |
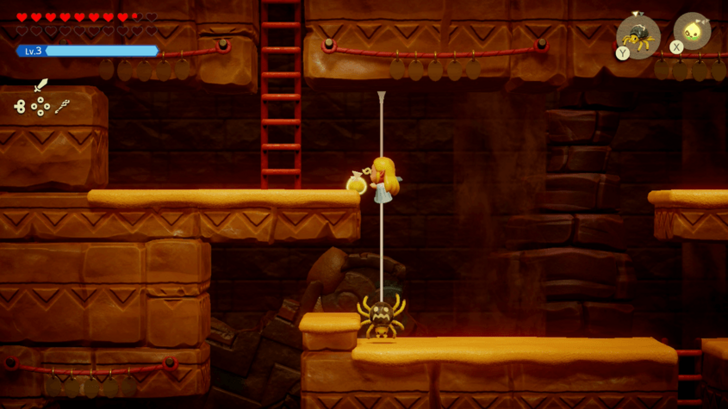 Continue to the right area. If you have a Strandtula Echo, you can use it to easily reach the red ladder. |
| 8 |
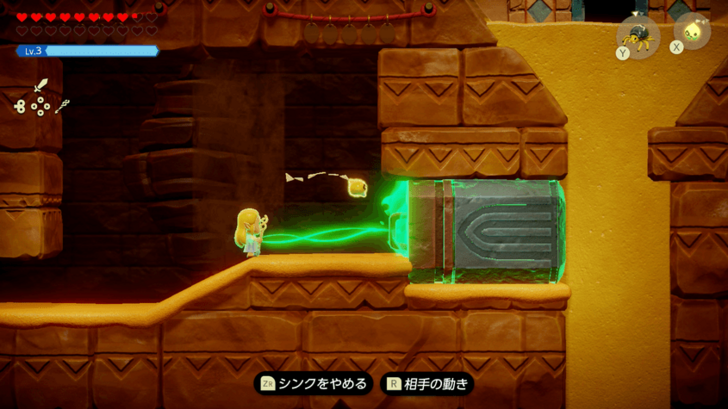 Go further to the right and use Bind to pull the block to make the sand fall, allowing you to exit the cave. |
▲ Back to Gerudo Desert Caves ▲
Cave 6 - Gerudo Sanctum
| How to Complete | |
|---|---|
| 1 |
Gerudo Sanctum is a cave that you will visit as part of the main story.
▶︎ A Rift in the Gerudo Desert Walkthrough |
▲ Back to Gerudo Desert Caves ▲
Cave 7
| How to Complete | |
|---|---|
| 1 | Place Boulder Echoes or other similar objects to stop the wind as you move forward. |
| 2 | Use the Wind Cannon to blow away the sand mounds. |
| 3 | Open the treasure chest in the hidden passage on the left. Open another treasure chest that contains 2 Might Crystals on the right side of the area. |
▲ Back to Gerudo Desert Caves ▲
Cave 8
| How to Complete | |
|---|---|
| 1 | Move to the next room and avoid the two Flying Tiles. |
| 2 | Defeat the two enemies in the next room. Use the Flying Tile to reach the stairs on the right side. Go up the stairs and use the Flying Tile to activate the blue eye switch. Open the treasure chest to get 100 Rupees. |
▲ Back to Gerudo Desert Caves ▲
Jabul Waters Caves
| Jabul Waters Caves | ||
|---|---|---|
| Cave 1 | Cave 2 | Cave 3 |
| Cave 4 | Cave 5 | |
Cave 1
| How to Complete | |
|---|---|
| 1 | Use Bind to solve the puzzles in this room. Proceed to the farthest room to get 100 Rupees. |
| 2 |
Use Bind on the Wooden Box and wait for it to move towards the pressure plate. |
| 3 |
Use Bind on the Wooden Box. Jump each time before it passes through the staircase to reach the pressure plate. |
| 4 |
Bind on the Wooden Box as soon as it moves towards the top-left corner of the area. Move around to place the Wooden Box on the pressure plate. |
▲ Back to Jabul Waters Caves ▲
Cave 2
| How to Complete | |
|---|---|
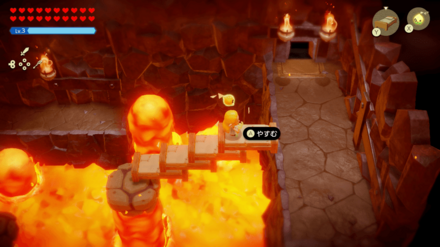
| 1 |
Defeat the Ignizol first in the area. Use a Water Block to extinguish all the flames on the torches to unlock the door. Pick up the Piece of Heart inside. |
▲ Back to Jabul Waters Caves ▲
Cave 3
| How to Complete | |
|---|---|
| 1 |
This is a cave that you will explore as part of the main story.
▶ The Jabul Waters Rift Walkthrough |
▲ Back to Jabul Waters Caves ▲
Cave 4
| How to Complete | |
|---|---|
| 1 |
Use the Chompfin Echo to defeat enemies. |
| 2 | Use the Bombfish Echo to break down the wall and move forward. |
| 3 |
Use an Old Bed Echo and a Bombfish Echo to reach the treasure chest that contains a Golden Egg. |
▲ Back to Jabul Waters Caves ▲
Cave 5 - Wrecked Ship
| How to Complete | |
|---|---|
| 1 |
Use Bind to pull the wooden opening at the right side of the ship. |
| 2 |
Move the Wooden Box and Sea Urchins to go further to the next room. |
| 3 |
Pick up the Rocktato from the treasure chest. |
| 4 |
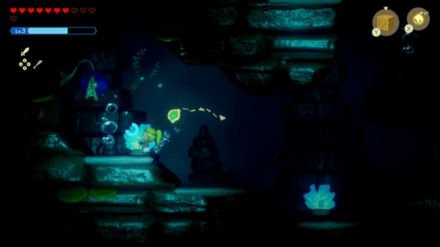
Use Tangler Lv. 2 to brighten up the surroundings and move forward. |
| 5 |
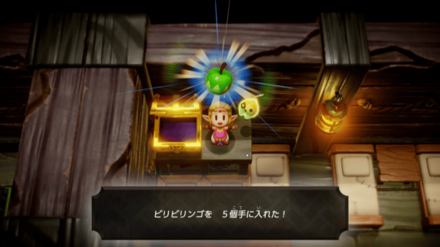
Go further in to pick up the Electro Apple inside a treasure chest. |
| 6 |
Use a Wooden Box to move to the next room. |
| 7 |
Use the stone statue or a Wooden Box to press the button on the top left. |
| 8 |
Use an Elemental Wizzrobe to defeat the boss. Pick up the Heart Piece and Rupees it drops. |
▲ Back to Jabul Waters Caves ▲
Faron Wetlands Caves
| Faron Wetlands Caves | ||
|---|---|---|
| Cave 1 | Cave 2 | Cave 3 |
| Cave 4 | Cave 5 | |
Cave 1
| How to Complete | |
|---|---|
| 1 |
Flip the Armos around using Bind and move to the left to pick up the Heart Piece. |
| 2 |
Defeat the Lizalfos Lv. 3 to get the 50 Rupees inside the treasure chest. |
▲ Back to Faron Wetlands Caves ▲
Cave 2
| How to Complete | |
|---|---|
| 1 |
Find the Piece of Heart on the high ledge south of the room. |
| 2 |
Solve the bonfire puzzle on the northern room to get 50 Rupees. |
▲ Back to Faron Wetlands Caves ▲
Cave 3
| How to Complete | |
|---|---|
| 1 |
 Light the two unlit torches to enter the cave. |
| 2 | Open the treasure chest to get a Monster Stone at the back. |
▲ Back to Faron Wetlands Caves ▲
Cave 4
| How to Complete | |
|---|---|
| 1 | Defeat the Darknut and open the treasure chest to get the Spin Brace. |
▲ Back to Faron Wetlands Caves ▲
Cave 5
| How to Complete | |
|---|---|
| 1 |
Use the Platboom to reach the high platform with a wooden ladder at the top. |
| 2 |
Use the Platboom to reach the Heart Piece at the top of the statues. |
▲ Back to Faron Wetlands Caves ▲
Eldin Volcano Caves
| Suthorn Forest Caves | ||
|---|---|---|
| Cave 1 | Cave 2 | Cave 3 |
| Cave 4 | Cave 5 | Cave 6 |
Cave 1
| How to Complete | |
|---|---|
| 1 |
Use a Flying Echo like the Ghirro to ride the geysers to reach the treasure chest at the top. |
▲ Back to Eldin Volcano Caves ▲
Cave 2
| How to Complete | |
|---|---|
| 1 | Destroy the Beetle Mound to prevent the beetles from appearing. |
▲ Back to Eldin Volcano Caves ▲
Cave 3 - Rock-Roast Quarry
| How to Complete | |
|---|---|
| 1 |
This is the cave that you will visit as part of the main story.
▶︎ The Rift on Eldin Volcano Walkthrough |
▲ Back to Eldin Volcano Caves ▲
Cave 4 - Summit Cave
| How to Complete | |
|---|---|
| 1 |
Unlock the cave by starting The Mountainous Mystery side quest.
▶︎ A Mountainous Mystery Quest Walkthrough |
| 2 |
 Use Lava Rock or Old Bed to create a staircase leading to the next room. |
| 3 | Open the treasure chest that contains 50 Rupees. |
| 4 |
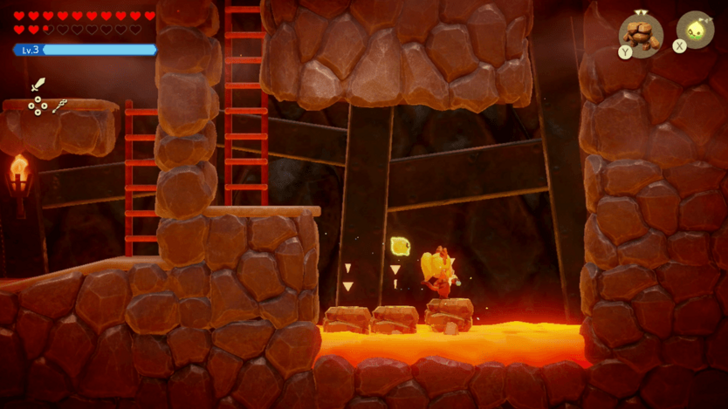
Use the Tweelus Echo to cross the magma to proceed to the red ladder. |
▲ Back to Eldin Volcano Caves ▲
Cave 5 - Lizalfos Burrow
| How to Complete | |
|---|---|
| 1 |
This is a cave that you will visit as part of the main story.
▶︎ Lizalfos Burrow Walkthrough |
▲ Back to Eldin Volcano Caves ▲
Cave 6
| How to Complete | |
|---|---|
| 1 | Destroy the entrance using a Bombfish. |
| 2 | Open the treasure chest to get a Fairy Flower. |
▲ Back to Eldin Volcano Caves ▲
Mount Hebra Caves
| Suthorn Forest Caves | ||
|---|---|---|
| Cave 1 | Cave 2 | Cave 3 |
| Cave 4 | Cave 5 | Cave 6 |
| Cave 7 | ||
Cave 1
| How to Complete | |
|---|---|
| 1 |
Use a Bombfish Echo to destroy the rock at the entrance. |
| 2 | Use a Bombfish Echo to break the rocks and move forward. |
Cave 2
| How to Complete | |
|---|---|
| 1 |
Use the Ignizol Echo to melt the ice at the entrance, allowing you to enter the cave. |
| 2 | Use the Ignizol Echo to melt the ice and move forward. |
| 3 |
Use Bind to create an ice platform and move forward. |
| 4 | Get the 3 Floral Nectar and a Golden Egg from the treasure chest. |
Cave 3
| How to Complete | |
|---|---|
| 1 | Defeat all the enemies in the area in order for a treasure chest to appear. |
| 2 | Open the treasure chest to get Ice Spikes. |
Cave 4
| How to Complete | |
|---|---|
| 1 |
This is a cave that you will visit as part of main story.
▶ Rift on Holy Mount Lanayru Walkthrough |
| 2 |
Use the Ghirro Echo or any flying Echo to move forward. |
| 3 |
Use Ignizol Echo to melt the ice blocks to uncover a treasure chest that contains Monster Guts. |
| 4 |
Use the Boulder Echo to block the cold wind coming from the right side. |
Cave 5
| How to Complete | |
|---|---|
| 1 |
This is a cave that you will visit as part of the main story.
▶ Rift on Holy Mount Lanayru Walkthrough |
| 2 |
Break the Snowballs using a Boulder Echo to move to the next area. |
Cave 6
| How to Complete | |
|---|---|
| 1 |
This is a cave that you will visit as part of the main story.
▶ Rift on Holy Mount Lanayru Walkthrough |
| 2 |
Take the shortcut through the hole on the ground. |
| 3 |
Break the Snowballs using a Boulder Echo to move to the next area. |
| 4 | Melt the ice using Ignizol Echo to move forward. |
Cave 7
| How to Complete | |
|---|---|
| 1 | Defeat the Sword Moblin Lv. 3 in order for a treasure chest to appear. Open the treasure chest to get the Energy Belt. |
The Legend of Zelda: Echoes of Wisdom (EoW) Related Guides
All Location Guides
| All Regions | |
|---|---|
| Hyrule Field | Suthorn Prairie |
| Hebra | Eldin |
| Jabul Waters | Faron Wetlands |
| Gerudo | - |
| All Locations | |
| Hyrule Castle | Kakariko Village |
| All Caves | - |
Comment
1  Anonymous over 1 year
There are two Caves missing. One Northwest in the Gerudo Desert and one south east of the Goron City.
Author
Please participate in our site
improvement survey
03/2026
improvement survey
03/2026
Would you assist in
improving Game8's site?
improving Game8's site?

×
We are listening to our users' valuable opinions and discussing how to act on them.
The information collected through this survey will be used for the purpose of improving our services. In addition, the information will only be disclosed a part of a statistic in a format that will not allow identification of personal information.
Begin Survey
Not Now
×
Please rate each item regarding Game8.co's Advertisements.
Amount of Ads
Very Dissatisfied
Somewhat Dissatisfied
Fine
Somewhat Satisfied
Highly Satisfied
Placement of Ads
Timing of Ad Display
Ad Loading Speed
Safeness of Ads
Content of Ads
×
Please rate each item regarding Game8.co's Quality of Articles.
Amount of information
Very Dissatisfied
Somewhat Dissatisfied
Fine
Somewhat Satisfied
Highly Satisfied
Frequency of updates
Speed of new information
Accuracy of articles
Understandibility of articles
Readability of sentences
×
Please rate each item regarding Game8.co's Usability of the Site.
Ease of finding information
Very Dissatisfied
Somewhat Dissatisfied
Fine
Somewhat Satisfied
Highly Satisfied
Loading Speed
Use of Color
Font Size
Visibility of Images
Easy to Understand Layout
×
Please rate each item regarding Game8.co's Message Boards, Comments.
Ease of Writing
Very Dissatisfied
Somewhat Dissatisfied
Fine
Somewhat Satisfied
Highly Satisfied
Readability
Ease in Finding Information
Comment Quality
Comment Quantity
Admin Response
×
Please rate each item regarding Game8.co's Site's new design.
Please rate our site's new design
Very Dissatisfied
Somewhat Dissatisfied
Fine
Somewhat Satisfied
Highly Satisfied
Do you think that the website's design change makes the site easier to use?
Has the new design made it easier for you to find information on the site?
Has the new design improved the overall visual appeal of the site?
How would you rate your overall satisfaction with the new design of the site?
×
How likely are you to recommend Game8 to someone you know?
Very Unlikely
0
1
2
3
4
5
6
7
8
9
10
Very Likely
If you have other opinions regarding potential improvement to the website, please share them with us. We would appreciate your honest opinion.
Note: This is a free response section, so you can proceed without entering anything.
Note: Please be sure not to enter any kind of personal information into your response.
Note: Please be sure not to enter any kind of personal information into your response.
×
Thank You
×
Thank you for participating in our survey! Your answers will help us to improve the quality of our website and services.
We hope you continue to make use of Game8.
We hope you continue to make use of Game8.
Close
Rankings
- We could not find the message board you were looking for.
Gaming News


![Everwind Review [Early Access] | The Shaky First Step to A Very Long Journey](https://img.game8.co/4440226/ab079b1153298a042633dd1ef51e878e.png/thumb)

![Monster Hunter Stories 3 Review [First Impressions] | Simply Rejuvenating](https://img.game8.co/4438641/2a31b7702bd70e78ec8efd24661dacda.jpeg/thumb)
Popular Games

Genshin Impact Walkthrough & Guides Wiki
Honkai: Star Rail Walkthrough & Guides Wiki
Umamusume: Pretty Derby Walkthrough & Guides Wiki
Pokemon Pokopia Walkthrough & Guides Wiki
Resident Evil Requiem (RE9) Walkthrough & Guides Wiki
Monster Hunter Wilds Walkthrough & Guides Wiki
Wuthering Waves Walkthrough & Guides Wiki
Arknights: Endfield Walkthrough & Guides Wiki
Pokemon FireRed and LeafGreen (FRLG) Walkthrough & Guides Wiki
Pokemon TCG Pocket (PTCGP) Strategies & Guides Wiki


Recommended Games
Diablo 4: Vessel of Hatred Walkthrough & Guides Wiki
Fire Emblem Heroes (FEH) Walkthrough & Guides Wiki
Yu-Gi-Oh! Master Duel Walkthrough & Guides Wiki
Super Smash Bros. Ultimate Walkthrough & Guides Wiki
Pokemon Brilliant Diamond and Shining Pearl (BDSP) Walkthrough & Guides Wiki
Elden Ring Shadow of the Erdtree Walkthrough & Guides Wiki
Monster Hunter World Walkthrough & Guides Wiki
The Legend of Zelda: Tears of the Kingdom Walkthrough & Guides Wiki
Persona 3 Reload Walkthrough & Guides Wiki
Cyberpunk 2077: Ultimate Edition Walkthrough & Guides Wiki


All rights reserved
© Nintendo. The Legend of Zelda and Nintendo Switch are trademarks of Nintendo.
The copyrights of videos of games used in our content and other intellectual property rights belong to the provider of the game.
The contents we provide on this site were created personally by members of the Game8 editorial department.
We refuse the right to reuse or repost content taken without our permission such as data or images to other sites.
Have the caves that you were referencing to been added since posting your comment or are they still missing?