Echoes List: All 127 Echo Locations
▲ 100% the game with our Interactive Map!
▲ Zelda amiibo give Ingredients & Outfits.
▲ Best Dungeon Order and Best Echoes.
▲ Heart Pieces | Might Crystals | Tri Power
▲ Best Smoothies | All 69 Recipes
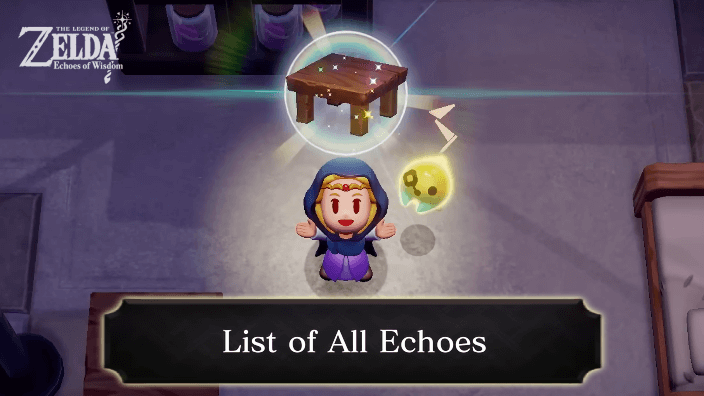
There are 127 echoes in The Legend of Zelda: Echoes of Wisdom (EoW), which are used for combat, traversal, and solving puzzles. This list shows all echoes, as well as how to obtain them!
| All Echo Guides | |
|---|---|
| List of All Echoes | Best Echoes |
Echoes List
| All Useable Echoes | |
|---|---|
| Objects | Enemies |
Objects
| No. | Echo | Tri-Power Cost | How to Get |
|---|---|---|---|
| 1 | 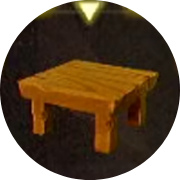 Table Table
|
1 TP (▼) | Hyrule Castle Underground This is the first echo you learn, find it inside the Prison Cell. |
2 | 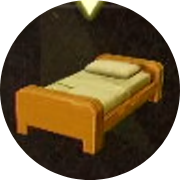 Old Bed Old Bed
|
1 TP (▼) | Hyrule Castle Underground Found at the same room where you found the Decorative Shrub echo. |
3 | 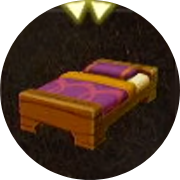 Soft Bed Soft Bed
|
2 TP (▼) | Oasis Found in the house located in the Oasis. |
4 |  Zelda's Bed Zelda's Bed
|
3 TP (▼) | Zelda's Room Examine the bed in Zelda's Room. |
5 | 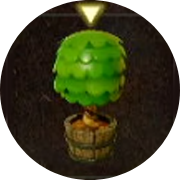 Decorative Shrub Decorative Shrub
|
1 TP (▼) | Hyrule Castle Underground Found at the room after talking to Impa during the prologue. |
6 | 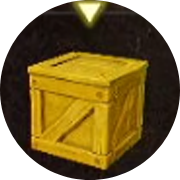 Wooden Box Wooden Box
|
1 TP (▼) | Hyrule Castle Underground Examine one of the wooden boxes once you get out of the cell during the prologue. |
7 |  Pot Pot
|
1 TP (▼) | Suthorn Village Found inside the first house on the right. |
8 | 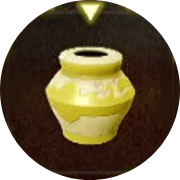 Hyrule Castle Pot Hyrule Castle Pot
|
1 TP (▼) | Hyrule Castle Underground Found on top of the shelf during the prologue in Hyrule Castle. |
9 | 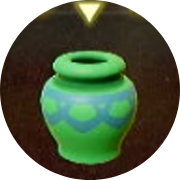 Gerudo Pot Gerudo Pot
|
1 TP (▼) | Desert Cave Examine the pot inside the cave near the Gerudo Desert. |
10 | 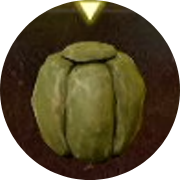 Boulder Boulder
|
1 TP (▼) | Royal-Family Shortcut Found blocking the main path in the Royal-Family Shortcut during the prologue. |
11 | 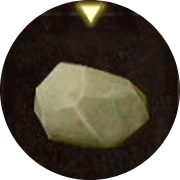 Rock Rock
|
1 TP (▼) | Suthorn Beach Found at Suthorn Beach. |
12 | 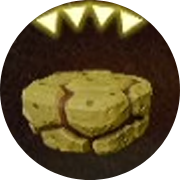 Lava Rock Lava Rock
|
4 TP (▼) | Eldin Volcano From the area where you got the Torch Slug echo, examine the rock floating atop the lava to get its echo. |
13 | 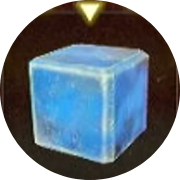 Ice Block Ice Block
|
1 TP (▼) | Hebra Mountain Cave Have Conde remove the snow blocking the entrance to the cave, then find the Ice Block echo inside. |
14 |  Snowball Snowball
|
2 TP (▼) | Holy Mountain Lanayru Venture deeper into the mountain until you encounter falling snowballs, you can then make echoes of these. |
15 | 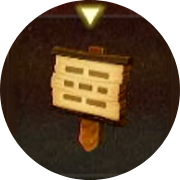 Sign Sign
|
1 TP (▼) | Suthorn Village Examine the sign on the exit of Suthern Village near the waypoint. |
16 |  Grilled Fish Grilled Fish
|
1 TP (▼) | Seesyde Village Start the Deliver the Grilled Fish! side quest in Seesyde Village to obtain the Grilled Fish Echo. |
17 |  Meat Meat
|
1 TP (▼) | Suthorn Village Meat can be found inside the first house on the left in Suthorn Forest. |
18 | 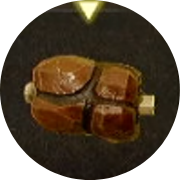 Rock Roast Rock Roast
|
1 TP (▼) | Rock Roast Quarry Head inside the quarry and you will find the Rock Roast as part of the main quest. |
19 |  Stuffed Toy Stuffed Toy
|
1 TP (▼) | Hyrule Cemetery Underground The Stuffed Toy Echo can be found in Hyrule Cemetery Underground. |
20 | 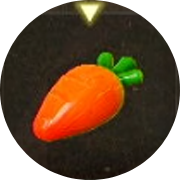 Carrot Carrot
|
1 TP (▼) | Hyrule Field Complete Impa's Gift sidequest and make an echo of the carrot afterwards. |
21 | 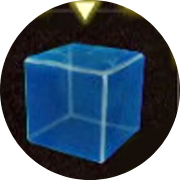 Water Block Water Block
|
1 TP (▼) | Stilled Jabul Waters After defeating Lord Jabu Jabu, enter the Still Jabul Waters rift and find the Water Block echo here. |
22 | 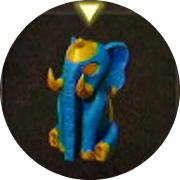 Elephant Statue Elephant Statue
|
1 TP (▼) | Gerudo Sanctum 2F After defeating the Link miniboss, continue moving forwards and eventually you will come across the Elephant Statue. |
23 |  Hawk Statue Hawk Statue
|
1 TP (▼) | Stilled Gerudo Sanctum Found atop a pillar where you have to bind a layer to reveal the other half of the ladder up its way. |
24 |  Cat Statue Cat Statue
|
1 TP (▼) | Gerudo Sanctum Head inside the sanctum from the Stilled Gerudo Sanctum area and find this statue inside. |
25 | 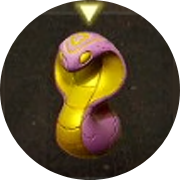 Snake Statue Snake Statue
|
1 TP (▼) | Gerudo Sanctum 2F After unlocking the main door in the first area, head inside and find the Snake Statues here. |
26 |  Ancient Orb Ancient Orb
|
1 TP (▼) | Eternal Forest Found beside the stone monument in the Eternal Forest. |
27 | 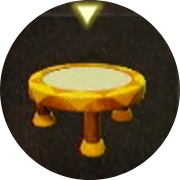 Trampoline Trampoline
|
1 TP (▼) | Suthorn Village Found next to the shop in Suthorn Village. |
28 |  Wind Cannon Wind Cannon
|
2 TP (▼) | Desert Cave Wind Cannons can be found in the second room in Cryptic Cavern. |
29 | 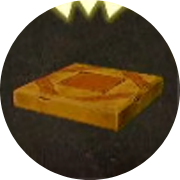 Flying Tile Flying Tile
|
3 TP (▼) | Gerudo Sanctum 2F After entering Gerudo Sanctum 2F, head left and encounter the flying tiles. |
30 | 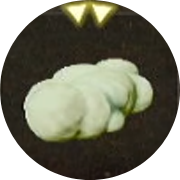 Cloud Cloud
|
2 TP (▼) | Stilled Hebra Mountains Rift Examine one of the clouds in the rift. |
31 | 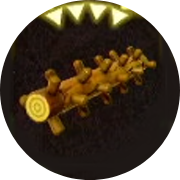 Spiked Roller Spiked Roller
|
4 TP (▼) | Northern Hyrule Field Found inside a cave north of Hyrule Field. |
32 | 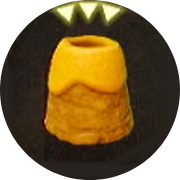 Beetle Mound Beetle Mound
|
3 TP (▼) | North Desert Cave Beetle Mounds are located inside a cave northeast of Gerudo Town. |
33 |  Firework Firework
|
2 TP (▼) | Goron City Finish the Side Quest, The Fireworks Artist, and get an echo of the fireworks afterward. |
34 | 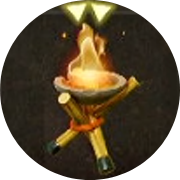 Brazier Brazier
|
2 TP (▼) | Suthorn Forest Examine the braziers at the entrance of the Peahat Cave. |
Enemies
| No. | Echo | Tri-Power Cost | How to Get |
|---|---|---|---|
| 35 |  Zol Zol
|
1 TP (▼) | Suthorn Beach Encounter Zol after exiting the shore area. |
36 |  Ignizol Ignizol
|
2 TP (▼) | Suthorn Forest Cave Ignizols can be found in a cave to the east of Suthorn Village. |
37 |  Hydrozol Hydrozol
|
2 TP (▼) | Faron Wetlands Can be found near the teleport waypoint at the entrance of Faron Wetlands. |
38 | 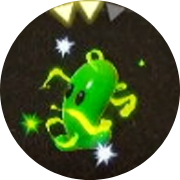 Buzz Blob Buzz Blob
|
3 TP (▼) | Faron Wetlands Found in the swamp area of the Faron Wetlands. |
39 |  Spear Moblin Spear Moblin
|
2 TP (▼) | Suthorn Forest From the cave where you encountered the Caromadillo west of Suthorn Forest, head left to find the Spear Moblin. |
40 |  Spear Moblin Lv. 2 Spear Moblin Lv. 2
|
4 TP (▼) | Eternal Forest Found at the bottom left section of the Eternal Forest. |
41 |  Sword Moblin Sword Moblin
|
2 TP (▼) | Eastern Hyrule Field The Sword Moblin is located at an enemy camp on the eastern edge of Hyrule Field. |
42 | 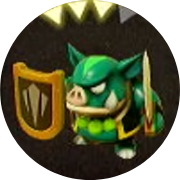 Sword Moblin Lv. 2 Sword Moblin Lv. 2
|
4 TP (▼) | Eternal Forest Found near the east entrance of the Eternal Forest. |
43 |  Sword Moblin Lv. 3 Sword Moblin Lv. 3
|
5 TP (▼) | Eternal Forest From the central waypoint, head towards the western end. A lone Sword Moblin Lv. 3 can be found near a buried treasure chest. |
44 |  Club Boarblin Club Boarblin
|
2 TP (▼) | Gerudo Desert From the Oasis, head north to encounter this enemy. |
45 |  Club Boarblin Lv. 2 Club Boarblin Lv. 2
|
4 TP (▼) | Gerudo Desert Can be found west of Ancestor's Cave of Rest |
46 |  Boomerang Boarblin Boomerang Boarblin
|
2 TP (▼) | Gerudo Desert Found in the area where you encounter the Club Boarblin. |
47 |  Boomerang Boarblin Lv. 2 Boomerang Boarblin Lv. 2
|
4 TP (▼) | Gerudo Desert Can be found west of Ancestor's Cave of Rest |
48 |  Lynel Lynel
|
6 TP (▼) | Eternal Forest Strictly follow the hoof tracks found in the Eternal Forest to spawn Lynel. Straying off the path restarts everything. |
49 | 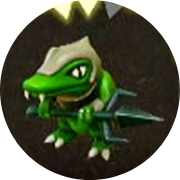 Lizalfos Lizalfos
|
3 TP (▼) | Eldin Volcano Lizalfos can be found roaming the area around Eldin Volcano. |
50 | 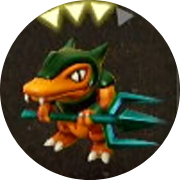 Lizalfos Lv. 2 Lizalfos Lv. 2
|
4 TP (▼) | Lizalfos Burrow Found in the deeper parts of Lizalfos Burrow. |
51 | 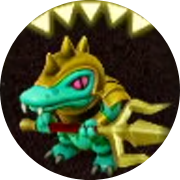 Lizalfos Lv. 3 Lizalfos Lv. 3
|
5 TP (▼) | Wetlands Cave Found inside the cave where you got the Armos echo. The cave can be found north of the Heart Lake waypoint. |
52 | 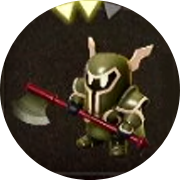 Darknut Darknut
|
3 TP (▼) | Suthorn Ruins 2F The Darknut echo is the first enemy you encounter after getting to 2F. |
53 |  Darknut Lv. 2 Darknut Lv. 2
|
4 TP (▼) | Hyrule Castle 1F Darknut Lv. 2 is the only enemy you encounter in the second room once you enter Hyrule Castle. |
54 |  Darknut Lv. 3 Darknut Lv. 3
|
5 TP (▼) | Eastern Wetlands Cave The Darknut Lv. 3 is found at the deeper portion of the cave located far east side of Scrubton. |
55 |  Armos Armos
|
2 TP (▼) | A Cave in Faron Wetlands The Armos can be found at the deeper portion of the cave located north of the Heart Lake waypoint. |
56 | 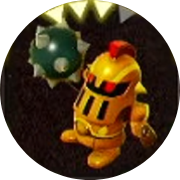 Ball-and-Chain Trooper Ball-and-Chain Trooper
|
4 TP (▼) | Hyrule Castle B2 After unlocking the door on the second to the right part of the map, head inside and go underground, work your way up to the other side and the enemy can be encountered here. |
57 | 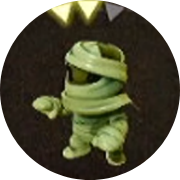 Gibdo Gibdo
|
3 TP (▼) | Cryptic Cavern Encounter the enemy to the right of the first area. |
58 | 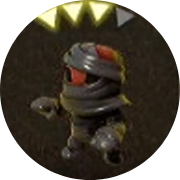 Gibdo Lv.2 Gibdo Lv.2
|
4 TP (▼) | Cryptic Cavern Found in the underground level of the cave, climb down a ladder to get here. |
59 |  ReDead ReDead
|
3 TP (▼) | Gerudo Desert ReDeads roam the Gerudo Desert, particularly found wandering below the Oasis. |
60 |  Fire Wizzrobe Fire Wizzrobe
|
5 TP (▼) | Eldin Temple 1F Fought as a miniboss in Eldin Temple 1F. |
61 |  Ice Wizzrobe Ice Wizzrobe
|
5 TP (▼) | Hebra Mountain From the entrance to Holy Mountain Lanayru, head right and encounter this floating enemy. |
62 |  Electric Wizzrobe Electric Wizzrobe
|
5 TP (▼) | Faron Wetlands After exiting the Heart Lake cave, head right and you will encounter Electric Wizzrobe on the nearby lake. |
63 | 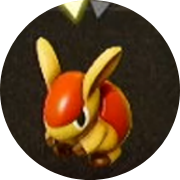 Caromadillo Caromadillo
|
2 TP (▼) | Suthorn Forest Cave A Caromadillo can be found inside a small cave on the west side of Suthorn Forest. |
64 | 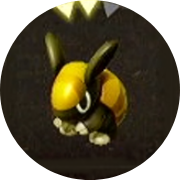 Caromadillo Lv. 2 Caromadillo Lv. 2
|
3 TP (▼) | Gerudo Sanctum 1F Find a ladder heading to the first floor and encounter Caromadillo Lv. 2 on the way. |
65 |  Rope Rope
|
1 TP (▼) | Suthorn Forest Ropes can be found lurking in grasses in Suthorn Forest. |
66 |  Tornando Tornando
|
2 TP (▼) | Desert Cave Head north from where you got the Aruroda echo. |
67 |  Ribbitune Ribbitune
|
2 TP (▼) | Eastern Hyrule Field Ribbitunes can be found in clusters northeast of the Hyrule Cemetery waypoint. |
68 |  Drippitune Drippitune
|
3 TP (▼) | Faron Wetlands You can encounter the Drippitune near the entrance of Faron Wetlands. |
69 |  Torch Slug Torch Slug
|
3 TP (▼) | Eldin Volcano Found in the lava area of the volcano near Goron City. |
70 | 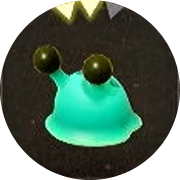 Freeze Slug Freeze Slug
|
3 TP (▼) | Lanayru Temple Found sticking around the walls of the temple. |
71 |  Holmill Holmill
|
3 TP (▼) | Ancestor's Cave of Rest Holmills can be found inside the Ancestor's Cave of Rest. Remove the boulder on the left side of the cave using Bind to enter the door leading to the Holmill Room. |
72 | 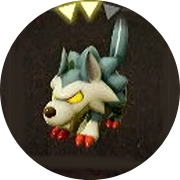 Wolfos Wolfos
|
3 TP (▼) | Hyrule Field The Wolfos can be found around Hyrule Field. You can also find the Guay echo at the same area. |
73 | 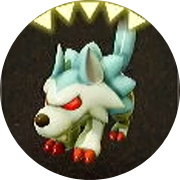 White Wolfos White Wolfos
|
5 TP (▼) | Lanayru Temple B4 The White Wolfos is found on the next room after the room where you have to step on two buttons at the same time in Lanayru Temple. |
74 |  Keese Keese
|
1 TP (▼) | Beach Cave This is the first enemy you encounter in the cave. |
75 |  Fire Keese Fire Keese
|
4 TP (▼) | Lizalfos Burrow The Fire Keese are some of the enemies inside the Lizalfos Burrow. |
76 | 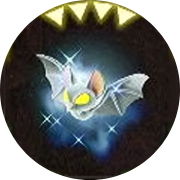 Ice Keese Ice Keese
|
4 TP (▼) | Hebra Mountain The Ice Keese are white bat enemies that can be found in Hebra Mountain. |
77 | 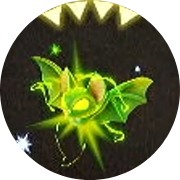 Electric Keese Electric Keese
|
4 TP (▼) | Stilled Faron Wetlands The Electric Keese are the flying electric enemies found inside the rift of Stilled Faron Wetlands. |
78 |  Mothula Mothula
|
3 TP (▼) | Gerudo Sanctum 2F After getting the Snake Statue echo, continue forward and you will encounter Mothulas. |
79 | 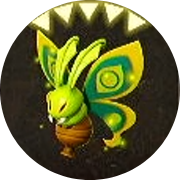 Mothula Lv. 2 Mothula Lv. 2
|
5 TP (▼) | Stilled Faron Wetlands Mothula Lv. 2 enemies are located to the left of the Faron Temple. |
80 | 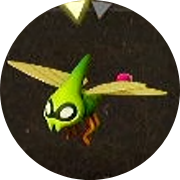 Needlefly Needlefly
|
5 TP (▼) | Zora River Many Needleflies can be found flying over the waters of Zora River. |
81 | 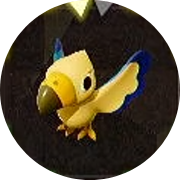 Albatrawl Albatrawl
|
2 TP (▼) | Crossflows Plaza From the Waypoint near Crossflows Plaza, head south and swim through the waters from the coast. You'll encounter Albatrawls here. |
82 | 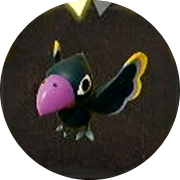 Crow Crow
|
2 TP (▼) | Suthorn Ruins Encounter this enemy from the area where you found Octorok. |
83 |  Beakon Beakon
|
3 TP (▼) | Faron Wetlands Beakons are located southeast of Faron Wetlands. |
84 |  Guay Guay
|
3 TP (▼) | Hyrule Field From Hyrule Ranch, head east and you will find this bird enemy roaming around. |
85 |  Octorok Octorok
|
1 TP (▼) | Suthorn Forest From the village, head north to encounter Octorok. |
86 |  Fire Octo Fire Octo
|
2 TP (▼) | Eldin Volcano Found swimming in the lavas of Eldin Volcano. |
87 | 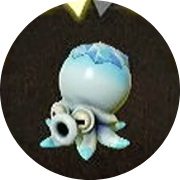 Ice Octo Ice Octo
|
2 TP (▼) | Hebra Mountain Found swimming in the icy waters of Hebra Mountain. |
88 | 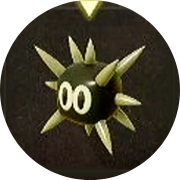 Sea Urchin Sea Urchin
|
1 TP (▼) | Suthorn Beach Examine one of the Sea Urchins blocking the path to the underground cave. |
89 | 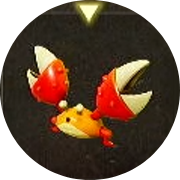 Sand Crab Sand Crab
|
1 TP (▼) | Eastern Hyrule Field You can encounter the Sand Crab on the way once you enter the Eastern Hyrule Field and go right to see a sandy area with the crabs roaming around. |
90 |  Biri Biri
|
2 TP (▼) | Stilled Upper Zora River Cave Inside the cave from the Stilled Upper Zora River. |
91 | 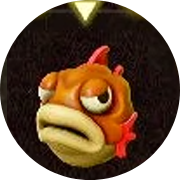 Tangler Tangler
|
1 TP (▼) | Lake Hylia Swimming on the waters of Lake Hylia. |
92 | 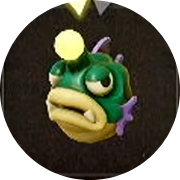 Tangler Lv. 2 Tangler Lv. 2
|
2 TP (▼) | Sea Zora Cove The Tangler Lv. 2 can be found in an underwater cave along the eastern edge of Zora Cove. |
93 | 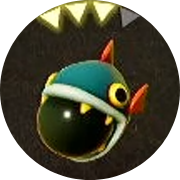 Bombfish Bombfish
|
4 TP (▼) | Lord Jabu Jabu's Den Found swimming in the waters inside Lord Jabu Jabu's Den. |
94 |  Chompfin Chompfin
|
4 TP (▼) | Jabul Ruins From the area with the water mechanism, head right and go down the ladder, head back up to explore the next area and find Chompfin enemies here. |
95 | 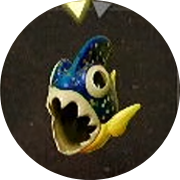 Piranha Piranha
|
2 TP (▼) | Faron Wetlands Found swimming in the swamps of Faron Wetlands |
96 |  Sand Piranha Sand Piranha
|
2 TP (▼) | Gerudo Desert Found roaming around Gerudo Desert. |
97 |  Deku Baba Deku Baba
|
2 TP (▼) | Suthorn Ruins 1F Deku Babas can be found in the room directly below the Waypoint on the first floor of the Suthorn Ruins. |
98 |  Bio Deku Baba Bio Deku Baba
|
3 TP (▼) | Jabul Ruins From the area with the water mechanism, head left and go down the ladder, Bio Deku Baba will be one of the enemies in this area. |
99 | 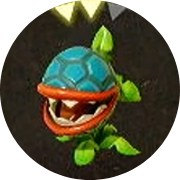 Deku Baba Lv. 2 Deku Baba Lv. 2
|
3 TP (▼) | Stilled Heart Lake The Deku Baba Lv. 2 can be found on path southeast of the Scrubton Smoothie Shop |
100 |  Peahat Peahat
|
3 TP (▼) | Peahat Cave This is the only enemy inside the cave. |
101 | 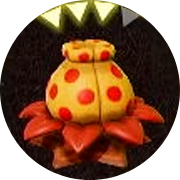 Giant Goponga Flower Giant Goponga Flower
|
4 TP (▼) | Faron Wetlands The Giant Goponga Flower can be located in the middle of a swamp in the wetlands. |
102 | 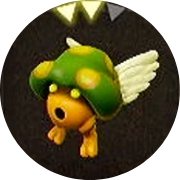 Zirro Zirro
|
3 TP (▼) | Stilled Goron City The Zirro is the first enemy you encounter inside the Stilled Goron City Rift. |
103 |  Ghirro Ghirro
|
2 TP (▼) | Eldin Volcano Cave Found in a cave west of Eldin Volcano Trail, you can reach this location by climbing higher up the volcanic terrain. |
104 |  Mini-Moldorm Mini-Moldorm
|
2 TP (▼) | Eldin Volcano Mini-Moldorms are one of the enemies in the Eldin Volcano's first area. |
105 | 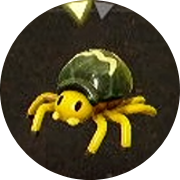 Strandtula Strandtula
|
2 TP (▼) | Suthorn Ruins 1F Encounter the enemy dangling on a rope inside the ruins. |
106 |  Crawltula Crawltula
|
3 TP (▼) | Suthorn Prairie Crawltulas are among the enemies found at Suthorn Prairie. |
107 | 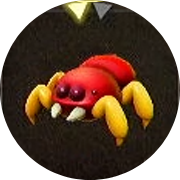 Baby Gohma Baby Gohma
|
2 TP (▼) | Faron Wetlands One of the main enemies in Faron Wetlands. |
108 | 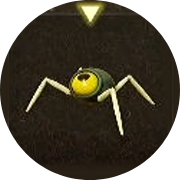 Beetle Beetle
|
1 TP (▼) | North Desert Cave Encounter Beetles inside the cave north of the Oasis. |
109 | 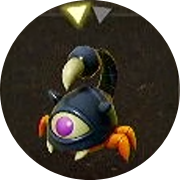 Aruroda Aruroda
|
2 TP (▼) | Desert Cave Encounter this enemy after entering the next area where you found the Wind Cannon echo. |
110 | 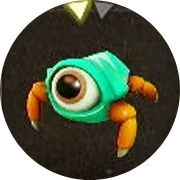 Tektite Tektite
|
2 TP (▼) | Seesyde Village Find this enemy hopping around the waters of the Seesyde Village. |
111 | 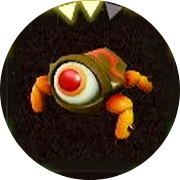 Tektite Lv. 2 Tektite Lv. 2
|
3 TP (▼) | Lanayru Temple B4 Found jumping across the waters of the room where you defrost the ice. |
112 | 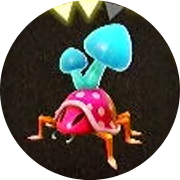 Hoarder Hoarder
|
3 TP (▼) | Faron Wetlands Appears as mushrooms in the Wetlands, examine one to encounter the monster. |
113 | 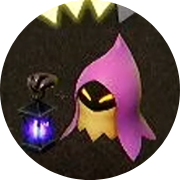 Poe Poe
|
4 TP (▼) | Gerudo Sanctum 1F After getting back to the 1F again albeit in a different area, take the path to the left and encounter Poe. |
114 | 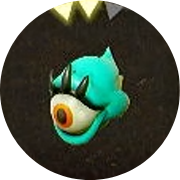 Moa Moa
|
3 TP (▼) | Hebra Mountain A floating eye enemy found outside Hebra Mountain on the way to the top. |
115 |  Goo Specter Goo Specter
|
3 TP (▼) | Stilled Faron Wetlands The Goo Specter can be found wandering inside the Stilled Faron Wetlands rift. |
116 |  Ghini Ghini
|
1 TP (▼) | Stilled Northern Sanctuary The Ghini can be found roaming inside the Stilled Northern Sanctuary rift. |
117 |  Ghini Lv. 2 Ghini Lv. 2
|
3 TP (▼) | Hyrule Cemetery Underground From the area where you found the Stuffed Toy Echo, head deeper inside and you will encounter this enemy. |
118 | 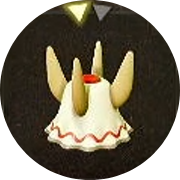 Leever Leever
|
2 TP (▼) | Hebra Mountain The Leever is one of the enemies scattered across Hebra Mountain. |
119 | 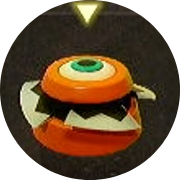 Pathblade Pathblade
|
1 TP (▼) | Cryptic Cavern Pathblades are located blocking your main path in Cryptic Cavern. |
120 | 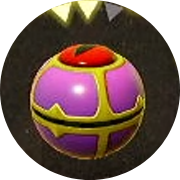 Gustmaster Gustmaster
|
3 TP (▼) | Hyrule Castle B2 After opening the door that requires you to light up 3 Braziers, Gustmasters will be inside the area. |
121 | 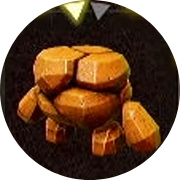 Tweelus Tweelus
|
2 TP (▼) | Eldin Volcano You can find a bunch of Tweelus to the Northeast of Goron City. |
122 | 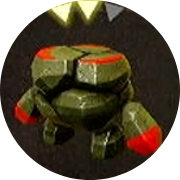 Temper Tweelus Temper Tweelus
|
3 TP (▼) | Holy Mountain Lanayru The Temper Tweelus can be encountered in the last area before exiting the dungeon. |
123 |  Freezard Freezard
|
3 TP (▼) | Holy Mountain Lanayru Encounter the Freezard inside the room with the icy floor and scattered ice blocks. |
124 | 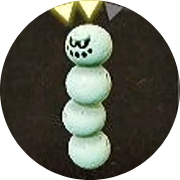 Snomaul Snomaul
|
3 TP (▼) | Hebra Mountain Snomaul can be encountered just after entering Hebra Mountain. |
125 |  Spark Spark
|
2 TP (▼) | Eastern Temple Found just after entering the temple. |
126 | 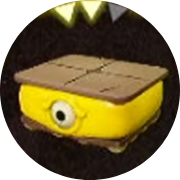 Platboom Platboom
|
3 TP (▼) | Gerudo Desert Caves These are the moving platforms inside the caves, defeat one and grab an echo of it. |
127 |  Beamos Beamos
|
3 TP (▼) | Eastern Wetlands Cave One of the enemies found inside the cave. |
What are Echoes?
Summonable Copies of Terrain, Objects, and Mobs
Echoes are imitations of terrain, objects, and mobs that can be summoned at will. Each echo preserves its original function and can be summoned to perform its feature, and/or be used as a platform.
Echoes Use Tri's Power
Each Echo costs a specific number of Tri's Power to summon it on the field. You can check its cost by referring to the number of gold inverted triangles (▼) it has on the top-right corner of the screen.
How to Get More Triangles and Increase Tri's Power
How to Unlock Echoes
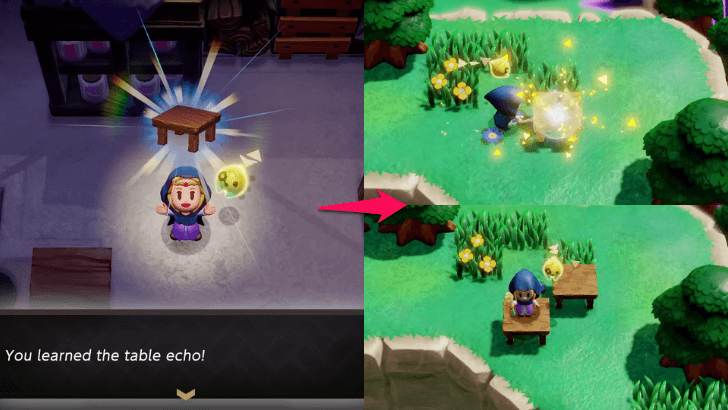
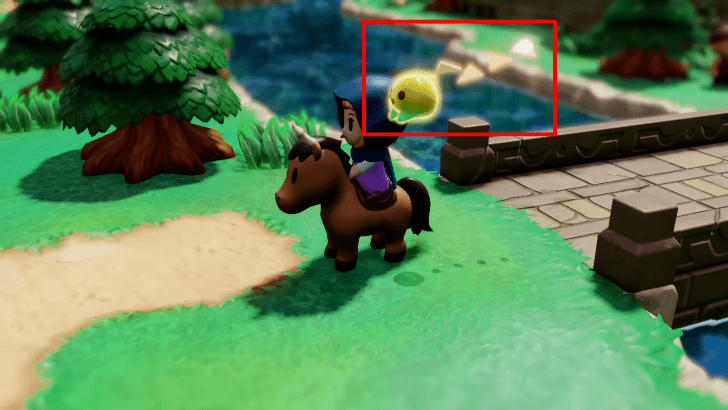
Find Objects, Terrain, or Mobs that Emit Gold Aura
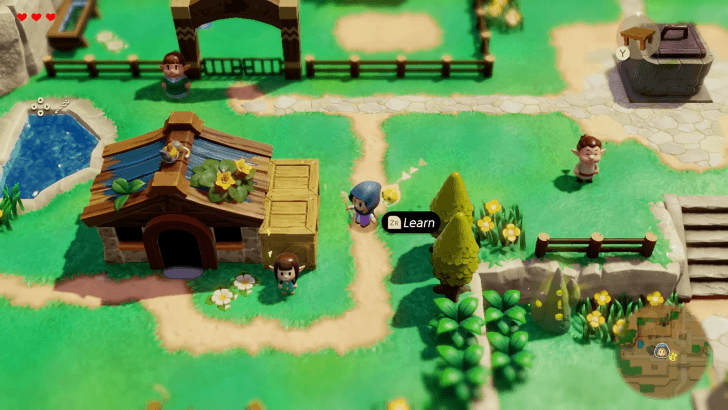
You can unlock new Echoes when you find objects or enemies that emit a golden aura with gold triangles.
Approach the object, terrain, or mob and press ZR when the Learn popup appears to learn its Echo.
How to Use Echoes
| How to Use Echoes |
|---|
|
|
Select an Echo with the Right D-Pad
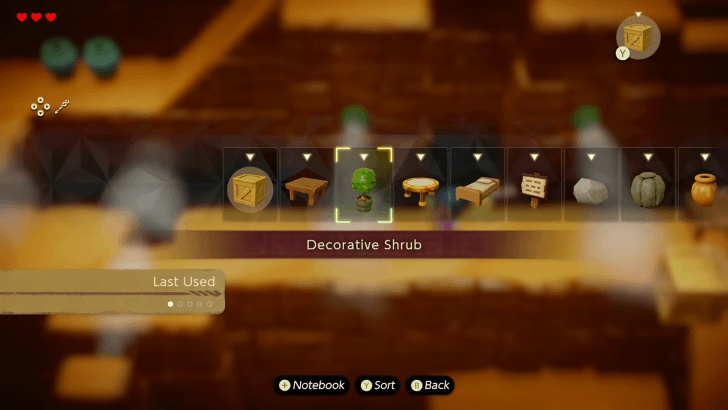
Your currently selected Echo will appear on the upper-right hand side of the screen. You can press and hold the Right D-Pad to bring up a slider menu where you can select the Echo you'd like to summon.
Alternatively, you can also open the Notebook menu to select the Echo from there.
Press Y to Summon an Echo
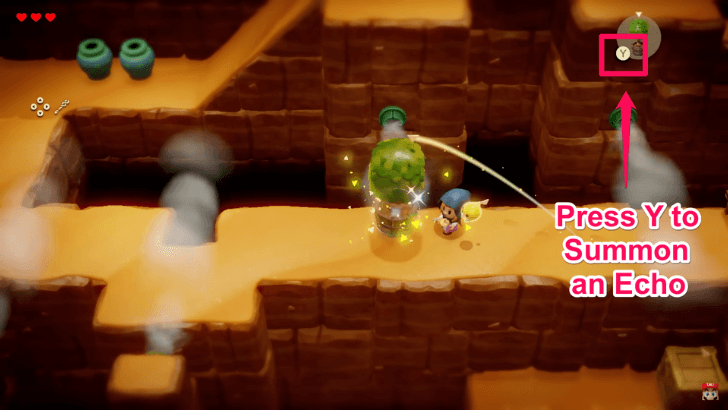
Pressing the Y button summons the selected echo. The Echo will appear in the direction Zelda is facing.
Limited Echoes Can Be Active at the Start
Observe the four triangles (▼) indicating increased Tri Power
At the start of the game, you will only have 3 Triangles worth of Tri Power that can be used to summon Echoes. Any Echoes summoned beyond that will despawn your oldest active Echo.
As you continue with your adventure, Tri can power up to increase the Tri-Power limit, allowing you to summon more powerful. and more numerous Echoes.
Press ZR Near an Echo to Erase It
If you want to remove an Echo from the field, approach it and press ZR erase it. Holding ZR erases all Echoes that you have summoned on the field.
Use Bind and Reverse Bond
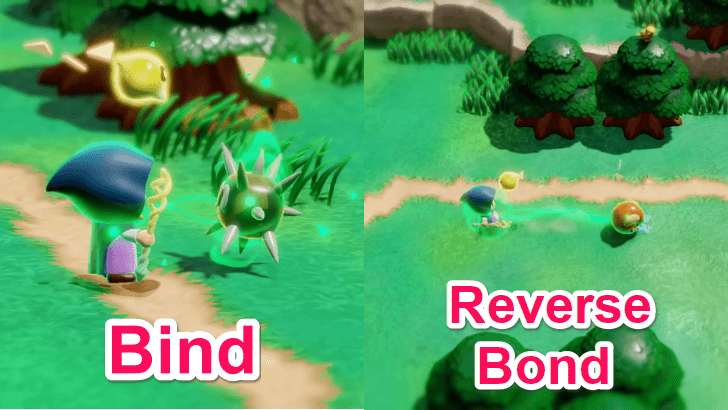
Zelda can bind to an Echo for repositioning, or reverse bond for her to follow its movement. Players can experiment on effective usage of echoes and bind to trivialize puzzles and quests they encounter in the game.
The Legend of Zelda: Echoes of Wisdom (EoW) Related Guides
Zelda: Echoes of Wisdom Walkthrough Wiki
| The Legend of Zelda: Echoes of Wisdom Guides | |
|---|---|
 Walkthrough Walkthrough |
 Dungeons Dungeons |
 Side Quests Side Quests |
 Tips & Tricks Tips & Tricks |
 Hyrule Map & Locations Hyrule Map & Locations |
 Rifts Rifts |
 Echoes Echoes |
 Automatons Automatons |
 Accessories Accessories |
 Clothing Clothing |
 Minigames Minigames |
 Bosses Bosses |
 Ingredients and Items Ingredients and Items |
 Smoothies Smoothies |
 Characters Characters |
 News and Game Info News and Game Info |
Author
The Legend of Zelda: Echoes of Wisdom Walkthrough & Guides Wiki
Echoes List: All 127 Echo Locations
Rankings
- We could not find the message board you were looking for.
Gaming News

![Death Stranding 2: On The Beach [PC] Review | A Port That Delivers](https://img.game8.co/4447392/15310a0c9aa1b6843bb713b2ea216930.jpeg/show)


Popular Games

Genshin Impact Walkthrough & Guides Wiki
Umamusume: Pretty Derby Walkthrough & Guides Wiki
Crimson Desert Walkthrough & Guides Wiki
Monster Hunter Stories 3: Twisted Reflection Walkthrough & Guides Wiki
Honkai: Star Rail Walkthrough & Guides Wiki
Pokemon Pokopia Walkthrough & Guides Wiki
The Seven Deadly Sins: Origin Walkthrough & Guides Wiki
Wuthering Waves Walkthrough & Guides Wiki
Zenless Zone Zero Walkthrough & Guides Wiki
Arknights: Endfield Walkthrough & Guides Wiki


Recommended Games
Fire Emblem Heroes (FEH) Walkthrough & Guides Wiki
Diablo 4: Vessel of Hatred Walkthrough & Guides Wiki
Cyberpunk 2077: Ultimate Edition Walkthrough & Guides Wiki
Yu-Gi-Oh! Master Duel Walkthrough & Guides Wiki
Super Smash Bros. Ultimate Walkthrough & Guides Wiki
Pokemon Brilliant Diamond and Shining Pearl (BDSP) Walkthrough & Guides Wiki
Elden Ring Shadow of the Erdtree Walkthrough & Guides Wiki
Monster Hunter World Walkthrough & Guides Wiki
The Legend of Zelda: Tears of the Kingdom Walkthrough & Guides Wiki
Persona 3 Reload Walkthrough & Guides Wiki


All rights reserved
© Nintendo. The Legend of Zelda and Nintendo Switch are trademarks of Nintendo.
The copyrights of videos of games used in our content and other intellectual property rights belong to the provider of the game.
The contents we provide on this site were created personally by members of the Game8 editorial department.
We refuse the right to reuse or repost content taken without our permission such as data or images to other sites.