Rift on Holy Mount Lanayru Walkthrough
▲ 100% the game with our Interactive Map!
▲ Zelda amiibo give Ingredients & Outfits.
▲ Best Dungeon Order and Best Echoes.
▲ Heart Pieces | Might Crystals | Tri Power
▲ Best Smoothies | All 69 Recipes

Rift on Holy Mount Lanayru is a Main Quest in The Legend of Zelda: Echoes of Wisdom (EoW). Read on for a walkthrough of Rift on Holy Mount Lanayru, its location and rewards, and tips and strategies on how to complete this Main Quest.
| ◀︎ Previous Quest | Next Quest ▶︎︎ |
|---|---|
| Still Missing | The Prime Energy and Null |
| Lands of the Goddesses Questline | |
| Lands of the Goddesses ┣ The Rift on Eldin Volcano ┣ A Rift in the Faron Wetlands ┗ ▶︎︎ Rift on Holy Mount Lanayru ┗ ★ Lanayru Temple |
|
List of Contents
Rift on Holy Mount Lanayru Walkthrough
| Rift on Holy Mount Lanayru Guide |
|---|
|
|
Get Through Hebra Mountain Passage
| Hebra Mountain Passage Walkthrough | |
|---|---|
| 1 | 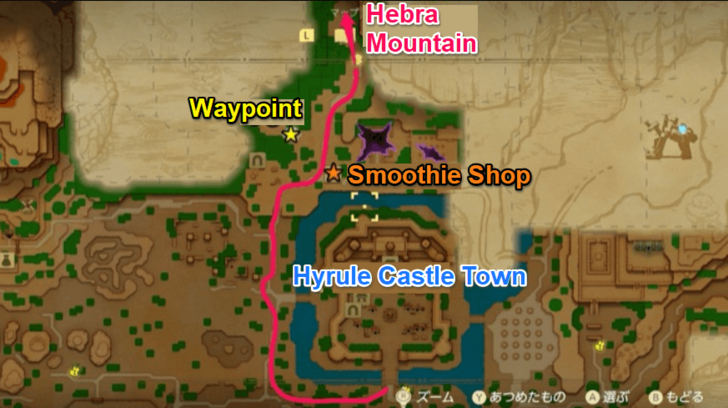 From Hyrule Castle Town, go north towards the quest marker. There is a Smoothie Shop you can pass by along the way. It's recommended to make Warm Smoothies using the Warm Pepper ingredient to help with the snowy areas of the Hebra region. ▶︎ List of All Smoothie Recipes |
| 2 |  At the end of the path, you'll find a blocked entrance leading to Hebra Mountain Passage. Unblock the entrance using a Bombfish or Zirro echo to break the cracked rock blocking the way. |
| 3 |  Head inside the passageway. There's a climbable wall overhead that you can reach using a Platboom, Water Blocks, or the Strandtula echo. Defeat the Keese with Peahat or Keese Echoes to prevent them from knocking you down. |
| 4 | Set down a Bombfish Echo and move it towards the breakable blocks using Bind. If you've unlocked the Sworfighter form's Bombs of Might, you can also make a bridge using Old Beds and place a Bomb beside the cracked blocks. |
| 5 |  Make a bridge using Old Beds or Water Blocks to cross the gap. Break the next set of cracked blocks by placing a Bombfish on the elevator platform once you see the up arrow on it light up. |
| 6 | 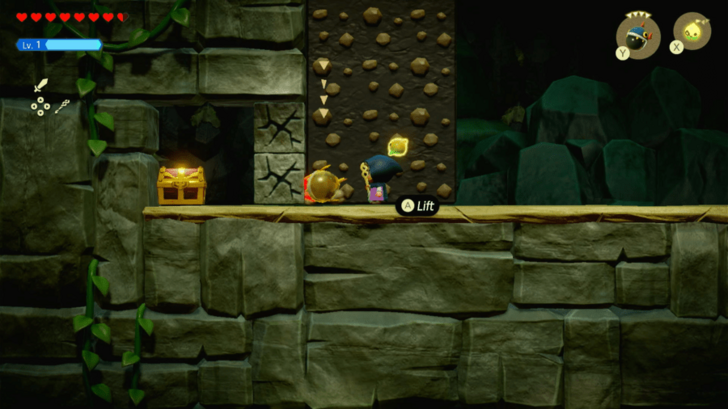 Climb onto the platform to go up. Ignore the second elevator platform for now, and keep going left. You'll find a chest containing nine warm peppers behind a set of breakable blocks. |
| 7 | Defeat the Peahat around the climbing wall with Torch Slug, or using Bind and allowing Spear Moblins to take it down. Climb the wall afterwards, and use Water Block Echoes to reach the nearby wall. ┗ Having the Frog Ring accessory equipped can reach the wall via jumping without use of Echoes. |
| 8 | 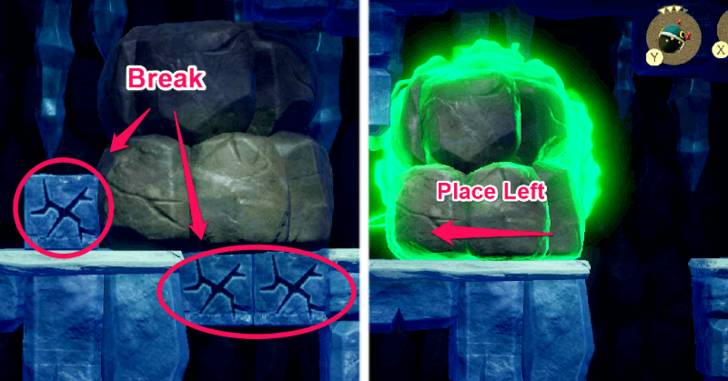 Break all the cracked blocks in this area using Bombfish echoes. Use Bind to push and pull the large boulder. Before you go back down, make sure that the boulder is on the left side of the gap you've opened up. |
| 9 | 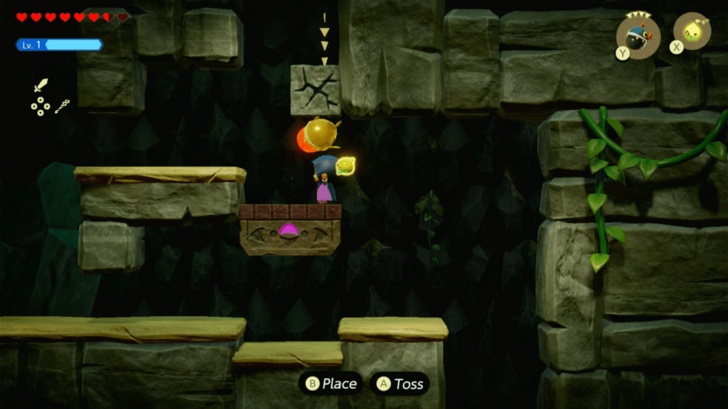 Go down, and jump onto the elevator platform. Summon a Bombfish, then pick it up to blow up the breakable blocks above. Ride the platform all the way to the top, then climb up the ladder to the right. |
| 10 | 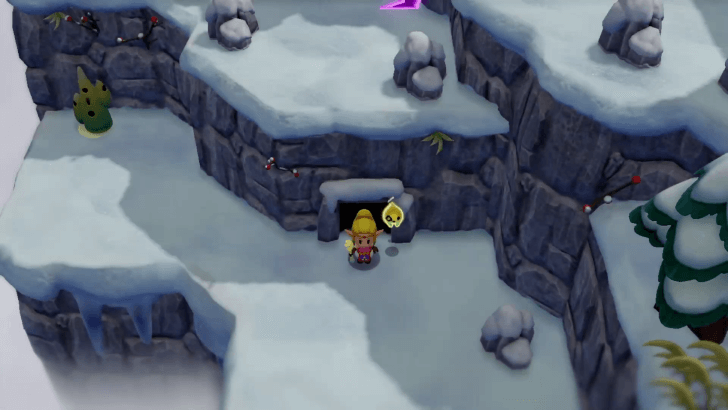 Exit the cave to arrive in Hebra Mountain which will trigger a short cutscene showing the rifts around the area. You'll also start the main quest, Rift on Holy Mount Lanayru. Be sure to activate the waypoint just to the left of the cave exit. |
Find Conde, the Abominable Snowman
| Finding Conde Walkthrough | |
|---|---|
| 1 | 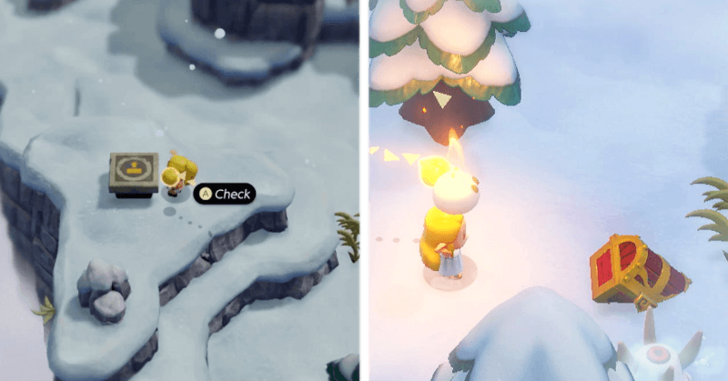 Explore until you find a Stamp Stand just ahead of the cave exit. The temperature significantly drops if you proceed further. Use Warm Smoothies or stay near warm Echoes like Ignizol or Brazier to prevent your health from dropping. Head further south to open a chest containing three Twisted Pumpkins. ▶︎ How to Survive the Cold |
| 2 | 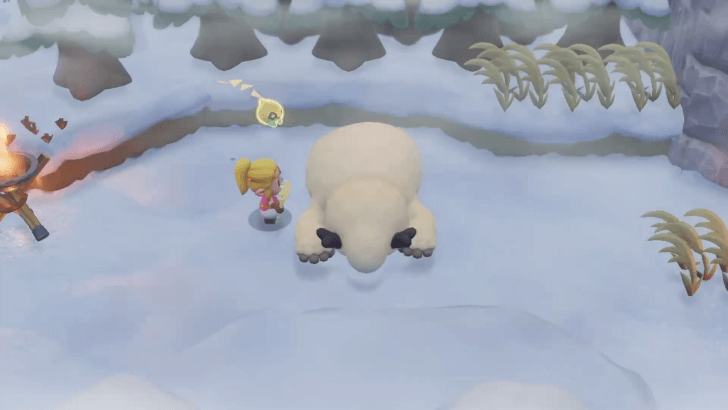 Follow the lit braziers along the path, defeating Snomaul, Leever, and Ice Keese, and learning their Echoes as you go, until you come across a huge creature lying in the snow. This is Conde. Talk to him, and he will lead you to his house for warmth. |
| 3 | 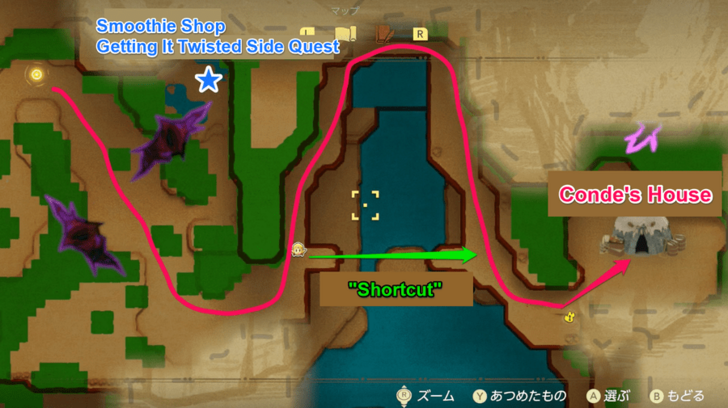 Stay close to Conde as you walk to help keep you warm, and watch out for enemies along the way. Conde will stop in front of a broken bridge, and speaking to him will trigger a cutscene cutscene that shortcuts into his house. ┗ There is a Business Scrub nearby that you can talk to, which starts the Getting It Twisted side quest. Complete it to unlock this Smoothie Shop. |
| 4 | 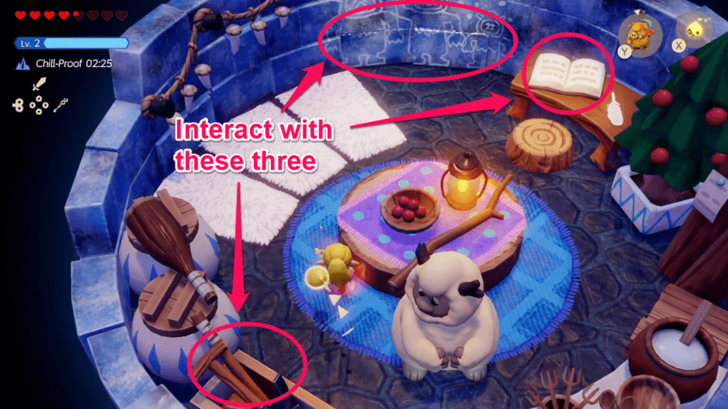 Follow Conde to his house, activating a waypoint along the way. Once you're inside, you won't be able to leave and progress the quest until you interact with the shovel near the doorway, the drawing on the wall, and Conde's diary on the table. |
| 5 |  Leave the house, and Conde will clear the snow blocking the entrance of a cave to the right. Enter this cave. |
| 6 | 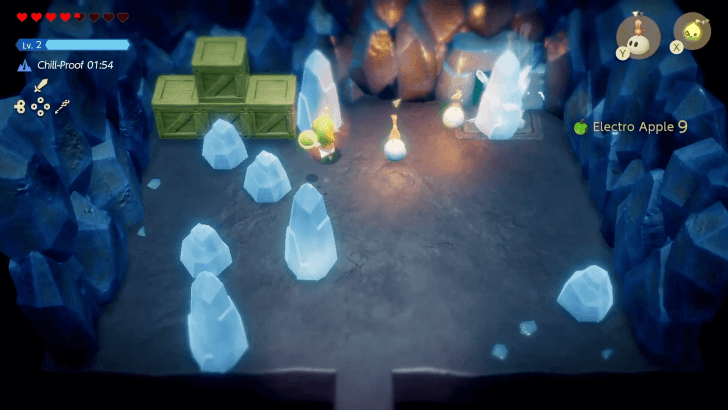 Use fire echoes such as the Ignizol or Brazier to melt the ice and burn the crates, which will reveal a passageway in the upper right. Ice formations that sparkle have items inside them. |
| 7 | 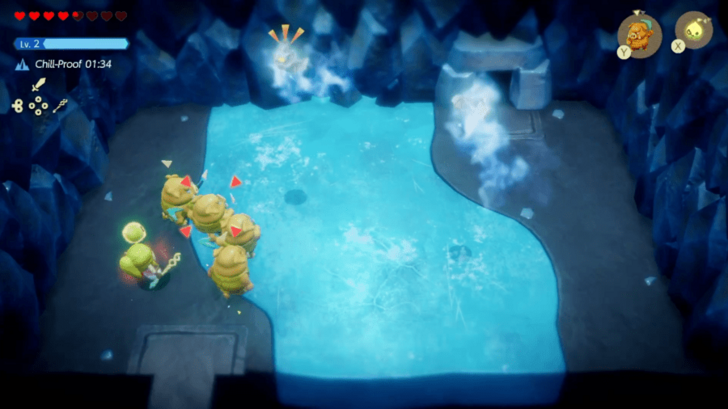 The next room contains two Ice Keese that you can fight using ranged attacks such as the Bow of Might, Spear Moblin Lv.2, and Boomerang Boarblin. If you haven't gotten this echo yet, it's a good idea to learn it now. |
| 8 | 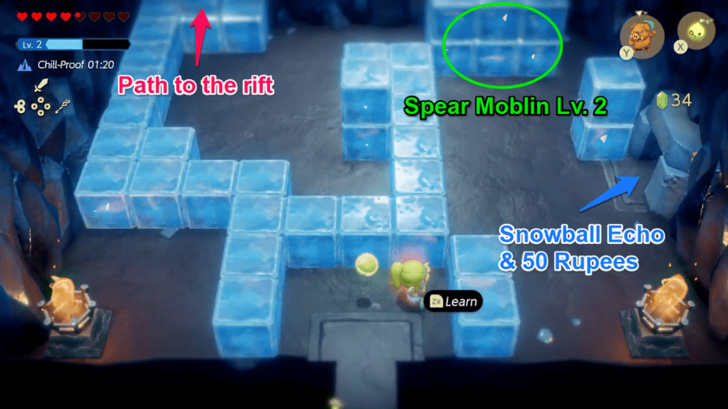 Go through the doorway to enter a room full of ice blocks. Melt the ice blocks on the upper left corner to uncover the passageway to the rift. Before proceeding to the rift, enter the right doorway first for a chest and a new Echo. ┗ The upper right cluster of ice blocks hides a Spear Moblin Lv. 2. |
| 9 | Head to the middle area and wait for a Snowball to pass by to learn the Snowball Echo. Return and head to the climbing wall and use Water Block Echoes to proceed towards the chest. |
| 10 |  Enter the upper left room to find Conde trying to fill the rift with snow. Talk to him, and he'll refuse to stop trying to get rid of the rift. Head to the left area for now, and use Ignizol or a Brazier to melt the ice. |
| 11 | 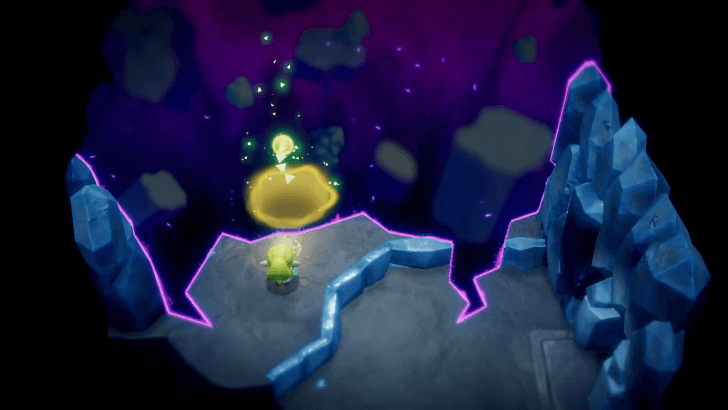 Enter the left opening you've uncovered to find a spot for Tri to open the rift entrance to Stilled Hebra Mountain Cave. ▶︎︎ Stilled Hebra Mountain Cave Rift Guide |
Go Through the Hebra Mountain Caves
| Get Through Hebra Mountain Walkthrough | |
|---|---|
| 1 | 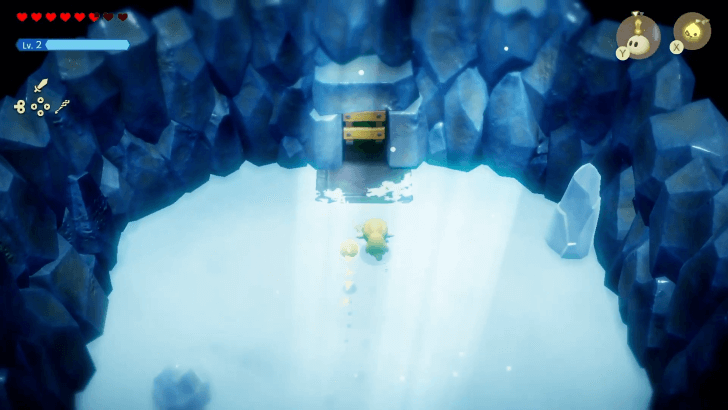 After mending the rift, head back to the room where you last saw Conde. A cutscene will start and he will leave shortly after rejoicing in his efforts to "expel the rift". With the rift gone, you'll find a passage with a ladder going up. |
| 2 | 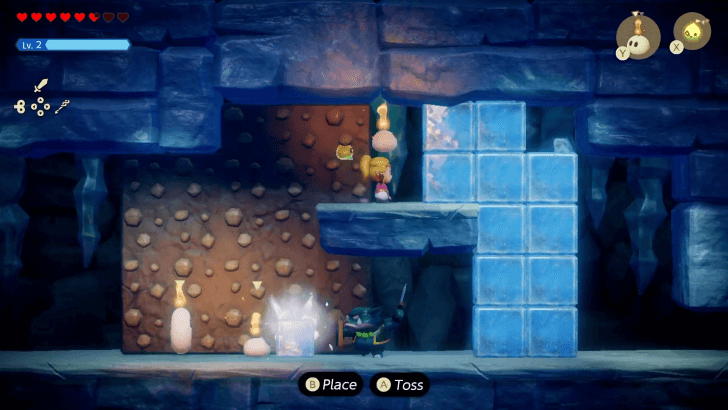 Climb up the ladder to a sidescrolling section. Use fire echoes such as the Ignizol or Brazier to melt the blocks of ice in the way. Use the climbing wall if you want to avoid confronting the Sword Moblin Lv. 2. |
| 3 | 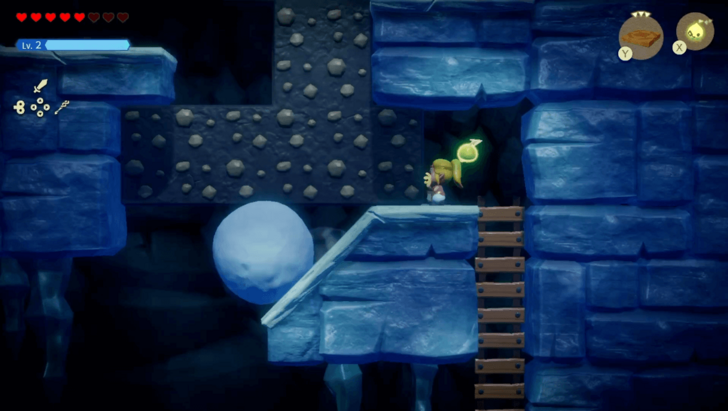 Scale the climbing wall, making sure to avoid the snowballs along the way. Head to the upper left area using the wall. |
| 4 | 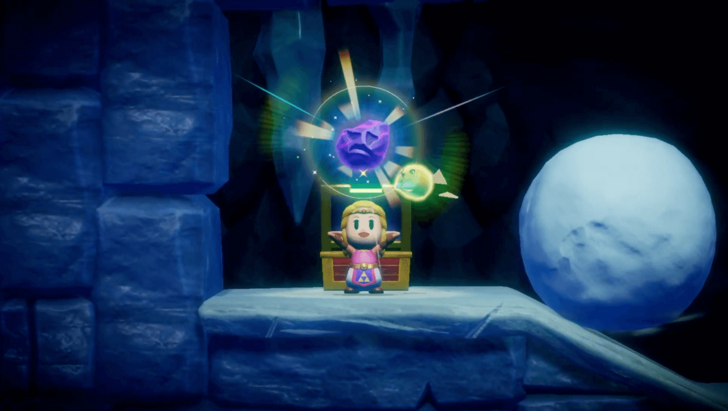 You can find a chest containing a Monster Stone in left side of the upper level, right next to where the snowballs fall from. |
| 5 | 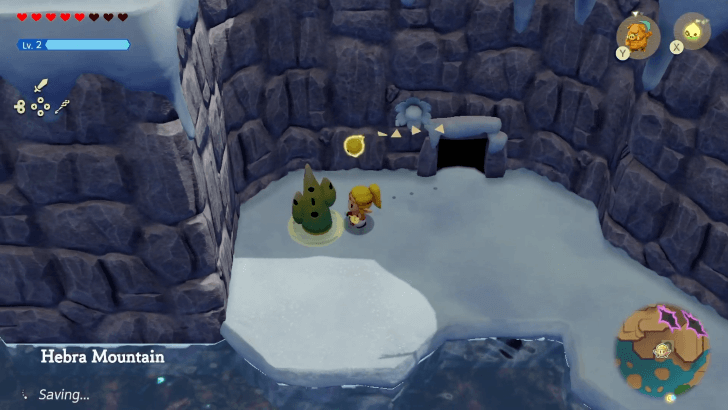 Defeat the Snomaul with Sword Moblin Lv. 2 and exit the cave through the ladder on the right side. You'll find yourself near a pond in the snowy landscape of Hebra Mountain. Be sure to activate the waypoint just outside the cave. ┗ The water here is freezing cold, so try to avoid swimming in it unless you use a Piping-Hot Potion or a Golden Piping-Hot Smoothie. |
| 6 | 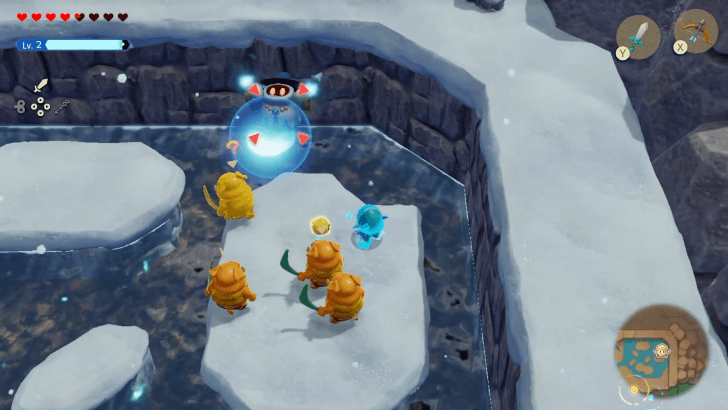 Head right from the cave exit, and build a bridge using Old Beds to reach the right section of the pond without touching the water. An Ice Wizzrobe will be floating around this area as well as a chest with 20 Rupees that you can fish out from the pond using Bind. Defeat the Ice Wizzrobe using a Fire Wizzrobe, Spear Moblin Lv.2, or Boomerang Boarblins. Utilize Lock On as the Ice Wizzrobe will be teleporting around the area. |
| 7 | After obtaining the Ice Wizzrobe echo, you can get a Heart Piece by scaling the wall on the left with the Water Block or Platboom Echoes. |
| 8 | Return to the previous area and eliminate nearby Ice Octo and Ice Keese with Spear Moblin Lv. 2. Head south to find a Heart Piece on top of a high platform; use Old Bed Echoes to climb and acquire the Heart Piece. |
| 9 | Head west to find a waterfall and glide using Meat and Albatrawl, or gain height with Platboom and glide with Crow towards the nearby cliff. Melt the icicle in the middle of the grass patch to obtain a Might Crystal. ▶ How to Glide |
| 10 | 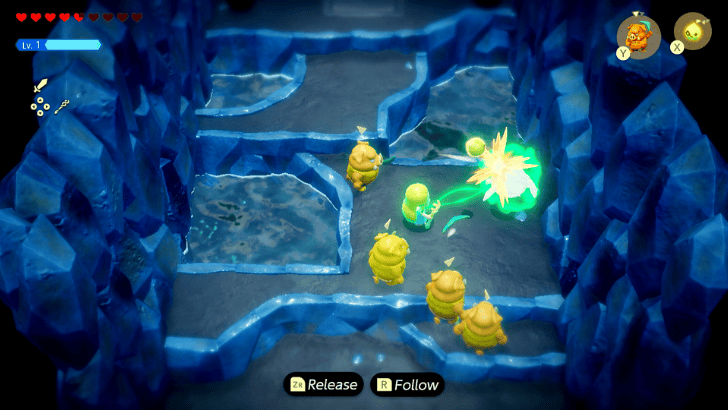 Continue northeast to find a cave with a Tektite Lv. 2 on the first area. Eliminate the monster with Bind and Boomerang Boarblins and learn its Echo and proceed. |
| 11 | 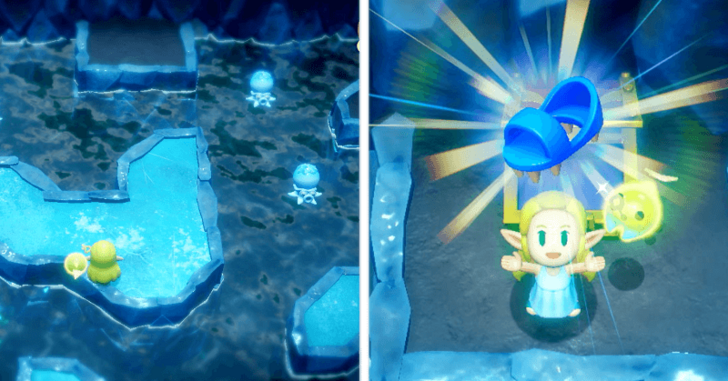 The next room will lock until all two Tektite Lv.2 and three Ice Octos have been defeated. Defeat the Tektites and slay the Ice Octos with Tektite Lv.2. A chest with the Ice Spikes accessory will appear after dispatching all enemies. |
| 12 | 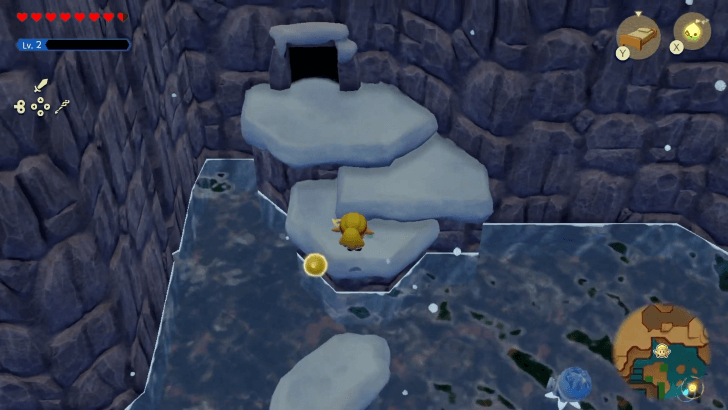 Fast travel back to the waypoint near the cave exit and return to the waterfall area. Head north and enter the doorway to a cave. |
| 13 | 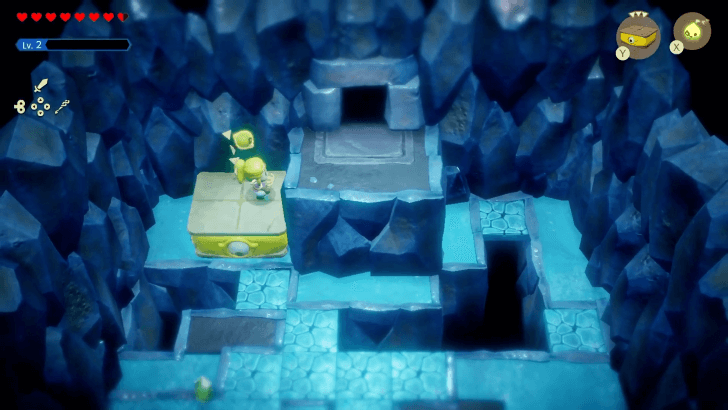 Enter the cave and navigate your way up this room using the Old Bed or the Flying Tile, and eliminate the Zirro with the Bow of Might or Ice Keese. The cracked floor will break if Zelda or a heavy echo stands on it for a few seconds. |
| 14 | Equip the Ice Spikes accessory to navigate the next room with ease. Block the gusts of wind using a Boulder or a Decorative Shrub and proceed. Near the end of the room, jump towards the Gustmaster when it opens in order to reach the topmost platform. You can also just ride a Flying Tile echo if timing the jump is difficult for you. |
| 15 | 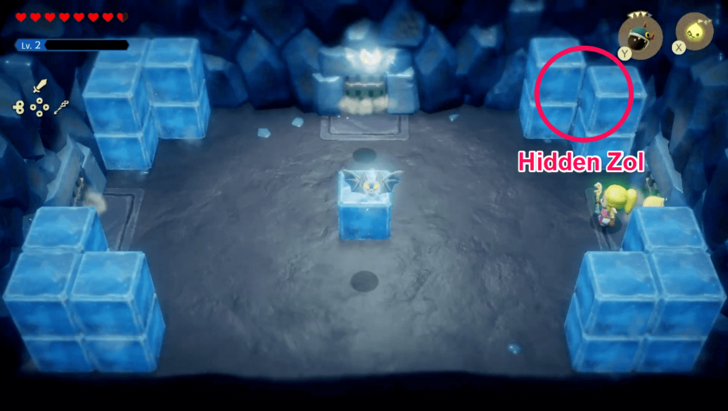 Go left into the next room, and defeat the two Ice Keese. Melt the ice blocks on the upper right to reveal a hidden Zol. Defeat it to unlock the doors. |
| 16 | 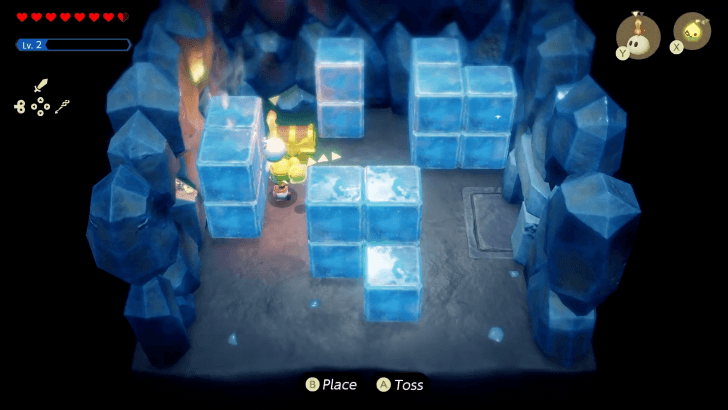 There is a chest you can get in the left room containing six Monster Guts. Melt the ice blocks in this room in order to reveal the chest. |
| 17 | 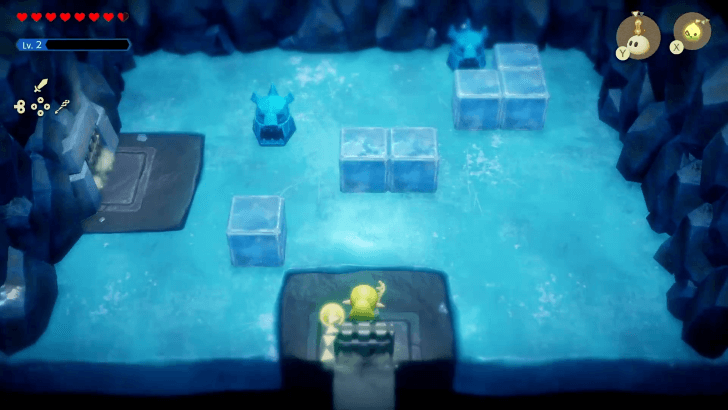 Head back to the previous room, and go to the room up north. Defeat the Freezards using a Fire Octo or the Bow of Might, or by placing a Brazier near them with Bind. Once defeated, learn the Freezard Echo and enter the left doorway. |
| 18 | 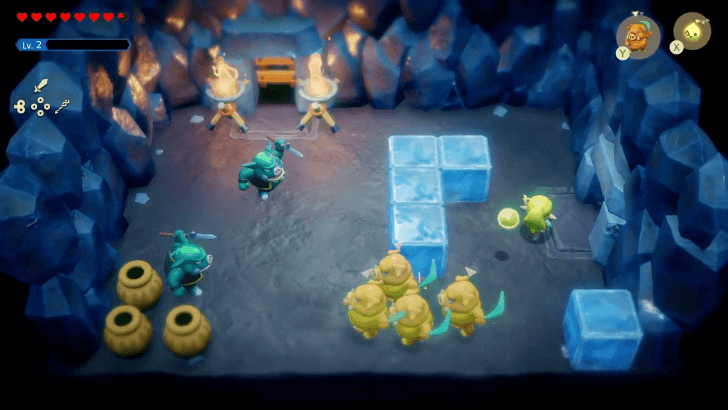 The next room will have one Sword Moblin Lv. 2, and after it are two Spear Moblin Lv.2. These fights are optional, and you may instead proceed to climbing the ladder up in the second room to enter the next section. |
| 19 | 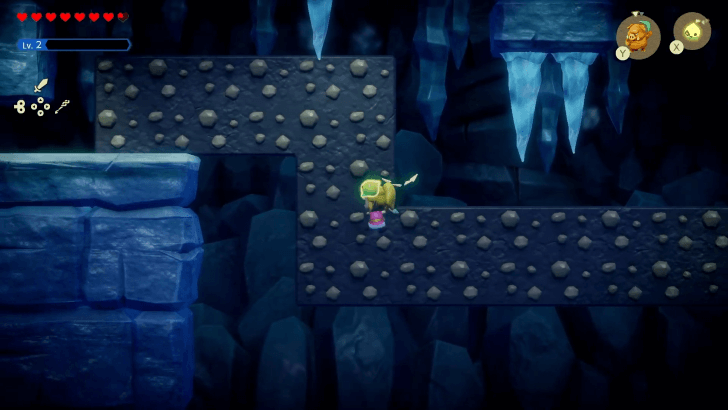 Climb the walls heading left, avoiding falling ice stalactites as you go. The next room will another climbing wall and three Ice Octos; ignore the monsters and continue towards the end of the sidescrolling section. |
| 20 | Near the end of the sidescrolling section, there will be gusts of icy wind blowing by the elevator platforms. For the first elevator, simply stay on the edge untouched by the icy wind—right side first, then quickly move left. Move back to the center of the platform to prevent it from getting stuck. |
| 21 | 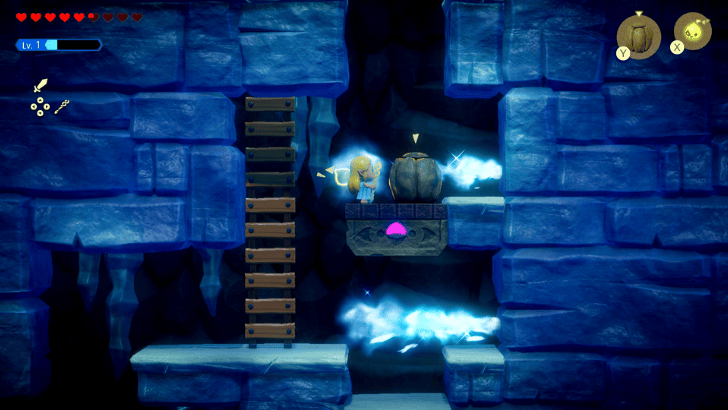 For the second elevator, summon a Boulder on the right side and head up. Climb the ladder on the left to exit the cave. |
Reach the Top of Hebra Mountain
| Reach the Peak Walkthrough | |
|---|---|
| 1 |  Once you're outside, head left. Defeat the Freezard by placing a Brazier nearby with Bind, and eliminate the Moa by launching ranged attacks such as from Spear Moblin Lv.2. Continue left while avoiding Snowballs as you go, until you see a climbing wall. |
| 2 | After ascending the wall, head north from the fork in the road. Summon a Boulder or a Snowball and use Bind from a distance to use it as a shield. Use Old Bed to platform towards the Heart Piece on an isolated platform. |
| 3 | 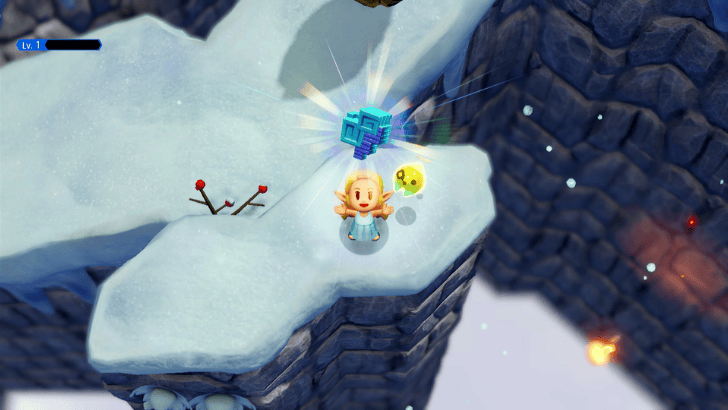 Return to the previous fork and head right. Climb the nearby platform on the way and melt the icicle to obtain a Might Crystal. |
| 4 | 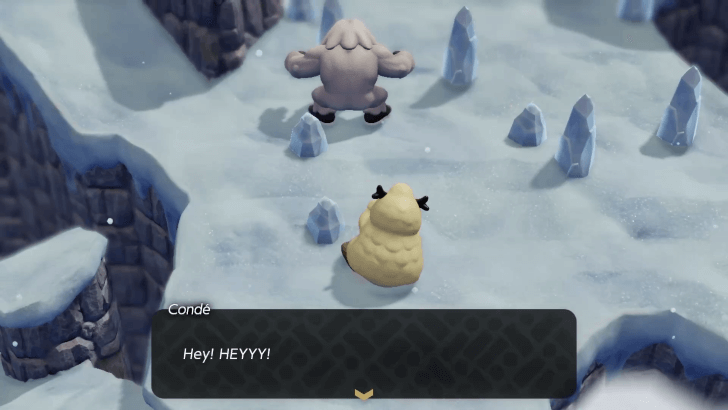 Continue forward to reach the top of Hebra Mountain. A cutscene with Conde and his brother will trigger, progressing the quest. Remember to activate the nearby waypoint. |
| 5 | 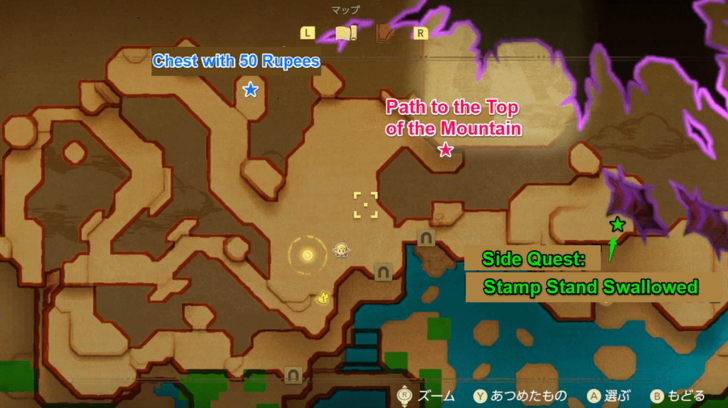 Before heading north through a cave to follow Conde, you can do some other things in this area. ┣ A buried treasure chest with 50 Rupees can be found along the northwest path. ┗ Head east to take on the Stamp Stand Swallowed side quest, and get this area's stamp once you complete it. |
| 6 | 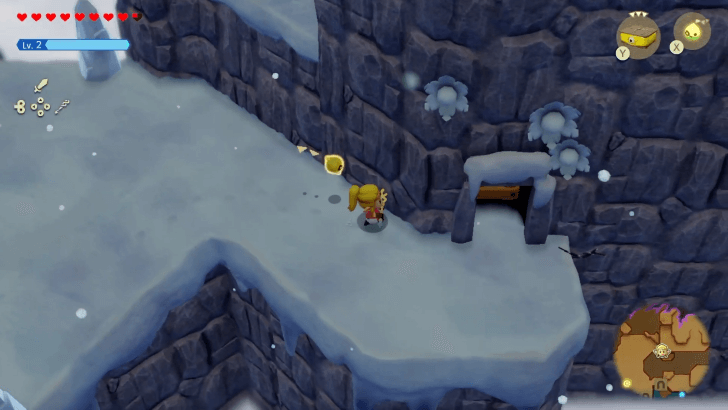 Once you're ready to proceed, head to the north of the icicle field, and enter the cave to the right with a ladder leading into another sidescrolling section. |
| 7 |  Climb the wall, then once a snowball rolls past you, jump down. Climb the ladder, and make a bridge out of Old Beds. Use Bind to push the Ice Octo onto the path of the snowballs to get it out of the way. |
| 8 |  Go up the ladder, then use the climbing walls in this section to stay out of the snowballs' way. Once you reach the last set of the climbing walls, use Bind on an incoming snowball to shield yourself from another snowball. |
| 9 | Before climbing up the ladder, you can get a chest containing four Monster Fangs in the upper left area where the snowballs fall. Use a Platboom echo to get up here, and again, Bind an incoming snowball to protect yourself. |
| 10 | 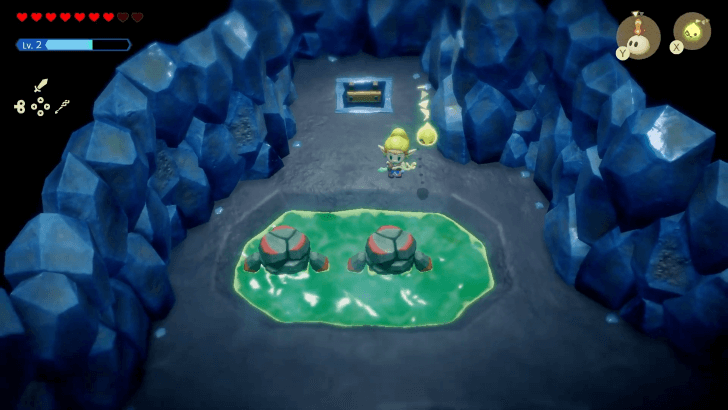 Climb the ladder at the end to find two Temper Tweelus bathing in a hot spring. Defeat them using Combat Echoes such as Darknut Lv.2 and acquire their Echoes. You can soak in the hot spring to heal up if needed. |
| 11 | 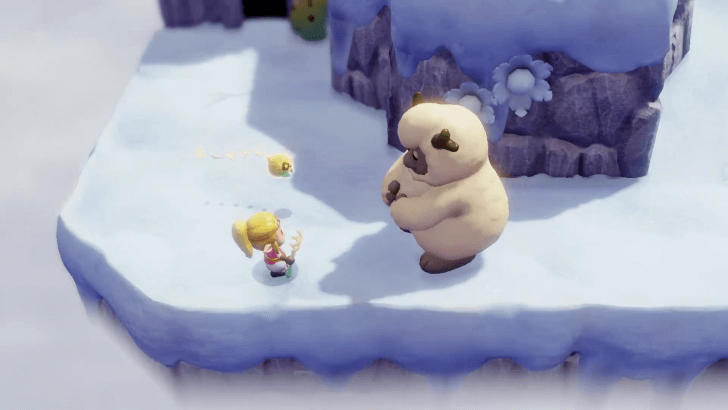 Head for the cave exit, and you'll find yourself at the top of Hebra Mountain. A cutscene will play with both Conde and his brother. Be sure to activate the waypoint next to the cave's exit. |
| 12 | 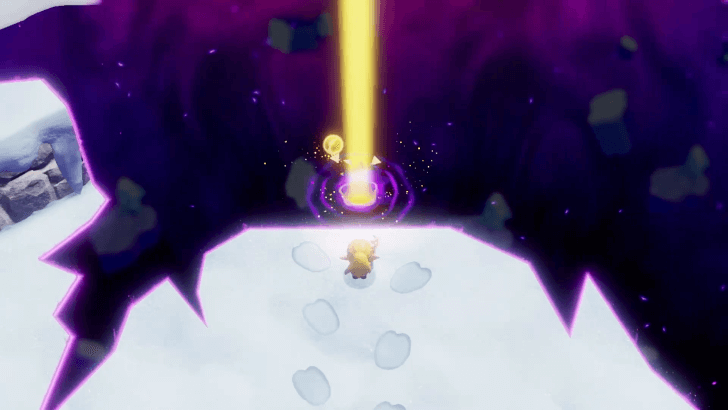 Conde will blame himself for his brother's disappearance and give up following him. Follow the big brother north to find and unlock the rift entrance to the Stilled Hebra Mountain. ▶︎︎ Stilled Hebra Mountain and Holy Mount Lanayru Rifts |
Complete the Lanayru Temple
| Complete the Lanayru Temple Walkthrough | |
|---|---|
| 1 | 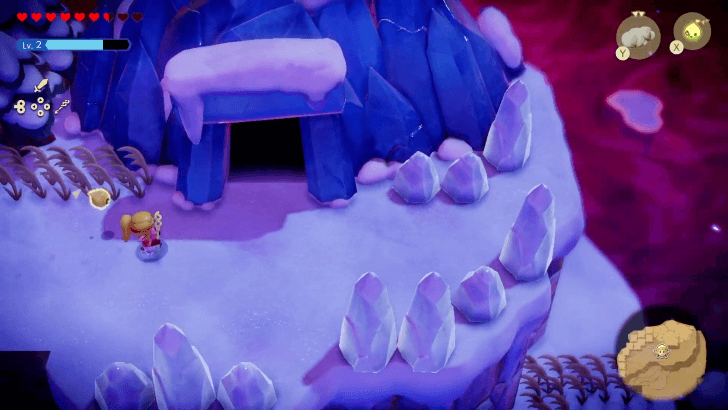 Once you reach the topmost platform on the Holy Mount Lanayru Rift, enter the building to reach the Lanayru Temple. ▶︎︎ Lanayru Temple Dungeon Walkthrough |
| ◀︎ Previous Quest | Next Quest ▶︎ |
|---|---|
| Still Missing | The Prime Energy and Null |
| Lands of the Goddesses Questline | |
| Lands of the Goddesses ┣ The Rift on Eldin Volcano ┣ A Rift in the Faron Wetlands ┗ ▶︎ Rift on Holy Mount Lanayru ┗ ★ Lanayru Temple |
|
The Legend of Zelda: Echoes of Wisdom (EoW) Related Guides

| Complete Walkthrough | All Dungeons |
| Best Dungeon Order | |
Story Walkthrough Chart
Guides marked with a ★ are Dungeon Guides
Comment
Author
The Legend of Zelda: Echoes of Wisdom Walkthrough & Guides Wiki
Rift on Holy Mount Lanayru Walkthrough
improvement survey
03/2026
improving Game8's site?

Your answers will help us to improve our website.
Note: Please be sure not to enter any kind of personal information into your response.

We hope you continue to make use of Game8.
Rankings
- We could not find the message board you were looking for.
Gaming News
Popular Games

Genshin Impact Walkthrough & Guides Wiki

Honkai: Star Rail Walkthrough & Guides Wiki

Umamusume: Pretty Derby Walkthrough & Guides Wiki

Pokemon Pokopia Walkthrough & Guides Wiki

Resident Evil Requiem (RE9) Walkthrough & Guides Wiki

Monster Hunter Wilds Walkthrough & Guides Wiki

Wuthering Waves Walkthrough & Guides Wiki

Arknights: Endfield Walkthrough & Guides Wiki

Pokemon FireRed and LeafGreen (FRLG) Walkthrough & Guides Wiki

Pokemon TCG Pocket (PTCGP) Strategies & Guides Wiki
Recommended Games

Diablo 4: Vessel of Hatred Walkthrough & Guides Wiki

Fire Emblem Heroes (FEH) Walkthrough & Guides Wiki

Yu-Gi-Oh! Master Duel Walkthrough & Guides Wiki

Super Smash Bros. Ultimate Walkthrough & Guides Wiki

Pokemon Brilliant Diamond and Shining Pearl (BDSP) Walkthrough & Guides Wiki

Elden Ring Shadow of the Erdtree Walkthrough & Guides Wiki

Monster Hunter World Walkthrough & Guides Wiki

The Legend of Zelda: Tears of the Kingdom Walkthrough & Guides Wiki

Persona 3 Reload Walkthrough & Guides Wiki

Cyberpunk 2077: Ultimate Edition Walkthrough & Guides Wiki
All rights reserved
© Nintendo. The Legend of Zelda and Nintendo Switch are trademarks of Nintendo.
The copyrights of videos of games used in our content and other intellectual property rights belong to the provider of the game.
The contents we provide on this site were created personally by members of the Game8 editorial department.
We refuse the right to reuse or repost content taken without our permission such as data or images to other sites.


![Everwind Review [Early Access] | The Shaky First Step to A Very Long Journey](https://img.game8.co/4440226/ab079b1153298a042633dd1ef51e878e.png/thumb)

![Monster Hunter Stories 3 Review [First Impressions] | Simply Rejuvenating](https://img.game8.co/4438641/2a31b7702bd70e78ec8efd24661dacda.jpeg/thumb)


