Lanayru Temple Walkthrough
▲ 100% the game with our Interactive Map!
▲ Zelda amiibo give Ingredients & Outfits.
▲ Best Dungeon Order and Best Echoes.
▲ Heart Pieces | Might Crystals | Tri Power
▲ Best Smoothies | All 69 Recipes
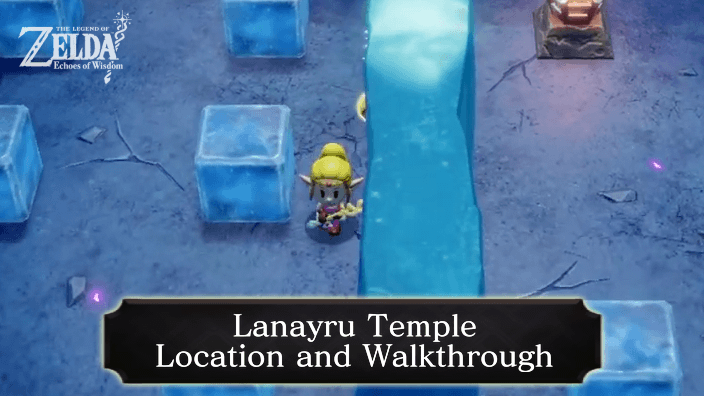
Lanayru Temple is a dungeon in The Legend of Zelda: Echoes of Wisdom (EoW) located on Holy Mount Lanayru. Read on for a complete walkthrough guide on this dungeon, how to get to Lanayru Temple, puzzle solutions, and more!
| ◀︎ Previous Quest | Next Quest ▶︎︎ |
|---|---|
| Still Missing | The Prime Energy and Null |
| Lands of the Goddesses Questline | |
| Lands of the Goddesses ┣ The Rift on Eldin Volcano ┣ A Rift in the Faron Wetlands ┗ Rift on Holy Mount Lanayru ┗ ▶︎★ Lanayru Temple |
|
Lanayru Temple Dungeon Preparation
Best Echoes for Lanayru Temple Dungeon
| Echo | Usage |
|---|---|
 Flying Tile Flying Tile
|
・For flying across gaps and reaching far platforms |
 Cloud Cloud
|
・For getting up and bridging gaps between platforms |
 Old Bed Old Bed
|
・For getting across gaps horizontally and vertically ・For building staircases and restoring hearts |
 Fire Wizzrobe Fire Wizzrobe
|
・For fighting enemies and the final boss of the dungeon |
 Ice Wizzrobe Ice Wizzrobe
|
・For fighting enemies and the final boss of the dungeon |
 Ignizol Ignizol
|
・For lighting torches |
 Armos Armos
|
・For activating pressure plates simultaneously |
 Pot Pot
|
・For blocking streams of ice and hot steam |
 Strandtula Strandtula
|
・For reaching places near the ceiling. |
 Old Bed Old Bed
|
・Can use as a staircase to reach high platforms ・Can be used to restore hearts |
 Platboom Platboom
|
・Can be used to ascend and reach high areas ・Can be used to crush enemies |
Best Smoothies for Lanayru Temple Dungeon
| Smoothies | Benefit |
|---|---|
| Smoothies that Restore Hearts | You may need to have a lot of Smoothies that restore hearts for this dungeon. There are many enemies you'll encounter and a lot of environmental damage may be incurred from the streams of ice and hot steam. |
Lanayru Temple Location
At the Top of Stilled Holy Mount Lanayru
Lanayru Temple is located at the top of Stilled Holy Mount Lanayru. The rift that leads to the area unlocks as you progress through the main quest, Rift on Holy Mount Lanayru. You'll have to jump across the clouds from Stilled Hebra Mountain to reach the dungeon.
Rift on Holy Mount Lanayru Walkthrough
How to Get to Lanayru Temple
| # | Step by Step Objectives |
|---|---|
| 1 | 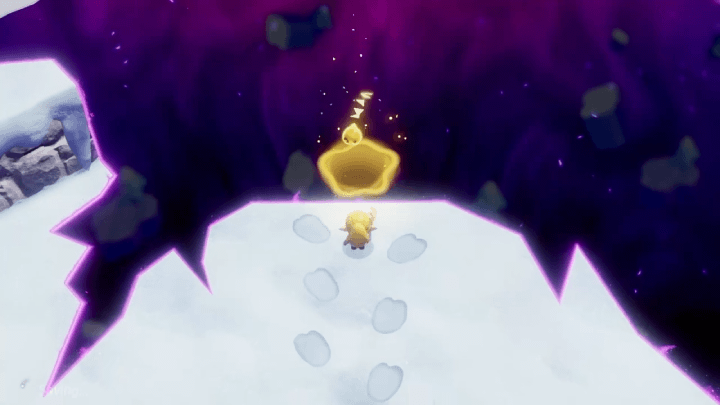 Entering the Rift on Holy Mount Lanayru takes you to Stilled Hebra Mountain. The rift unlocks as you progress through the main quest. ▶︎ Stilled Hebra Mountain and Holy Mount Lanayru Rifts Walkthrough |
| 2 | 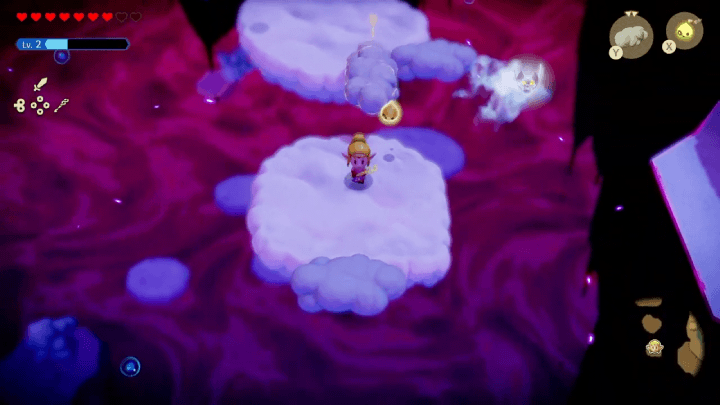 From the entrance, head to the northeastern part of the area jumping through the clouds to find a ladder leading down into a cavern section. Get through the section to reach Stilled Holy Mount Lanayru. |
| 3 | 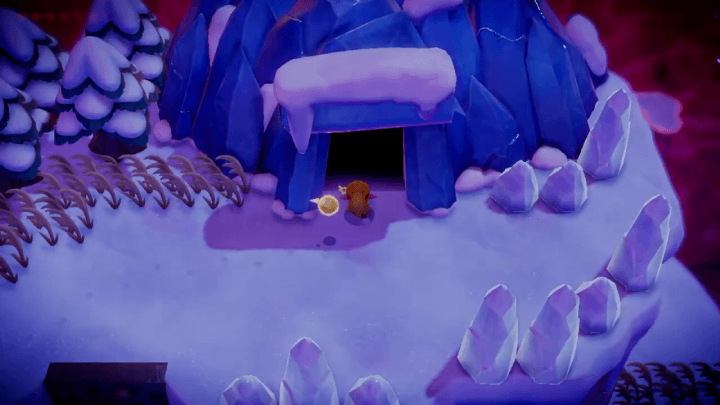 Get through the area and reach the top by jumping on the clouds and scaling cliffsides with your Echoes. You'll find the entrance to Lanayru Temple at the very top of the area. |
Lanayru Temple Walkthrough
| Lanayru Temple Objectives |
|---|
|
|
Obtain the Dungeon Map and Small Key
| # | Step by Step Objectives |
|---|---|
| 1 |  After the short conversation with Tri when you enter the temple, continue the traversing the corridor until you arrive at the at the waypoint. Activate the dungeon waypoint and proceed. |
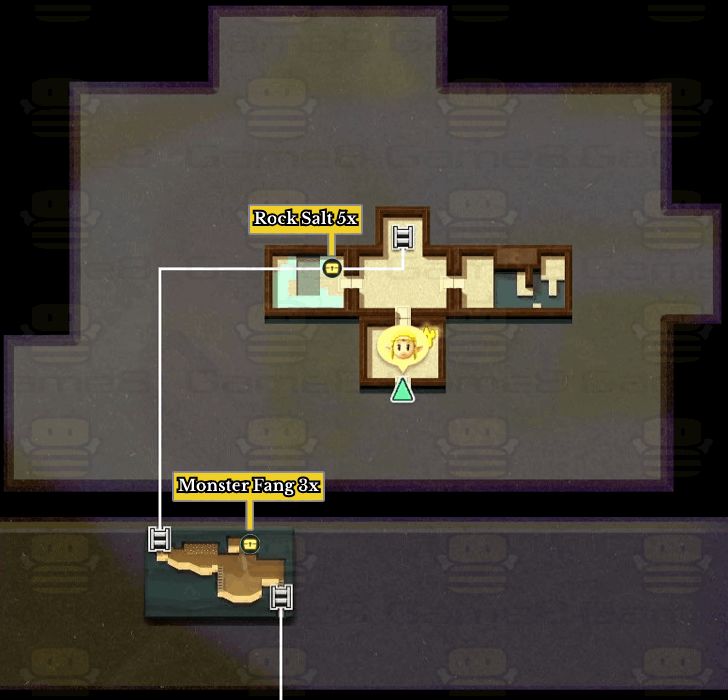
| 2 | 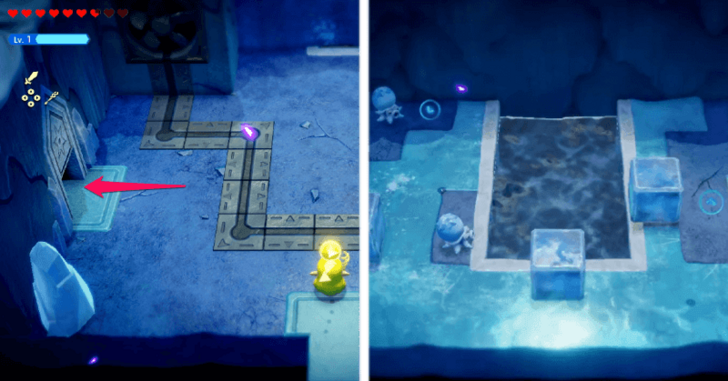 In the room past the waypoint, enter the left doorway. Defeat the two Ice Octos in the room to spawn a chest containing five Rock Salt. |
| 3 | 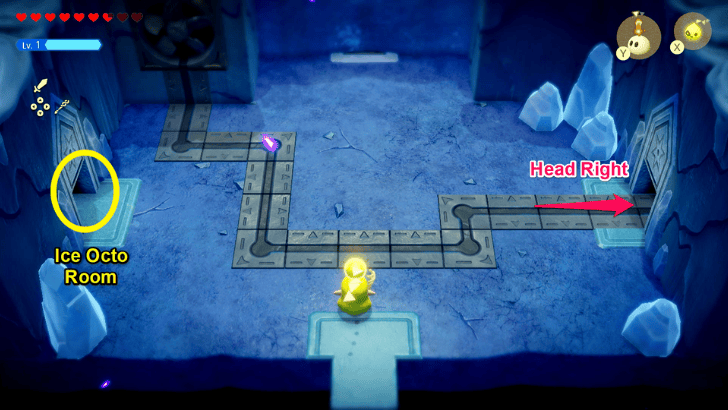 Head back to the central room and enter the room to the right. Here you'll find an empty pedestal and a flame sigil on the far corner of the room. Both of these are related to the mechanism found in the central room. |
| 4 | Return to the previous area and enter the right doorway. Create a path using Old Bed or Cloud Echoes towards the flame sigil on the far right. Transfer the sigil to the pedestal on the left to unlock the next area. |
| 5 | 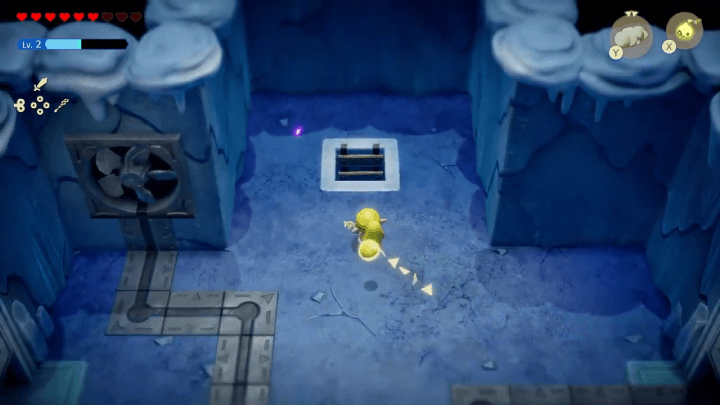 Get through the cavern section when you climb down the ladder in the previous room to reach floor B1. |
| 6 | 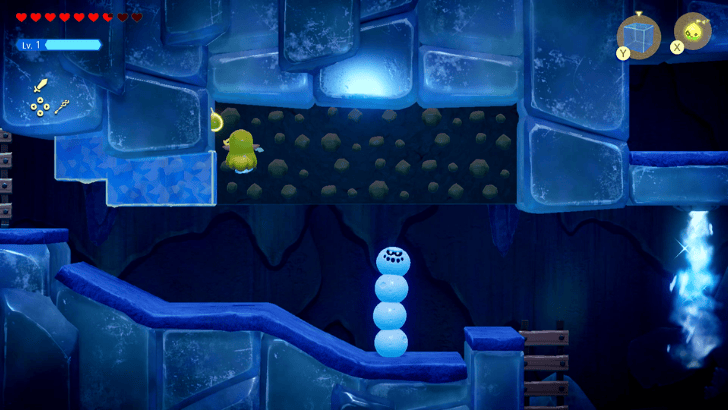 Upon descending the ladder, you may either avoid the Snomaul by reaching the climbing wall with Water Block or defeat it with flying Echoes such as Albatrawl or Crow. |
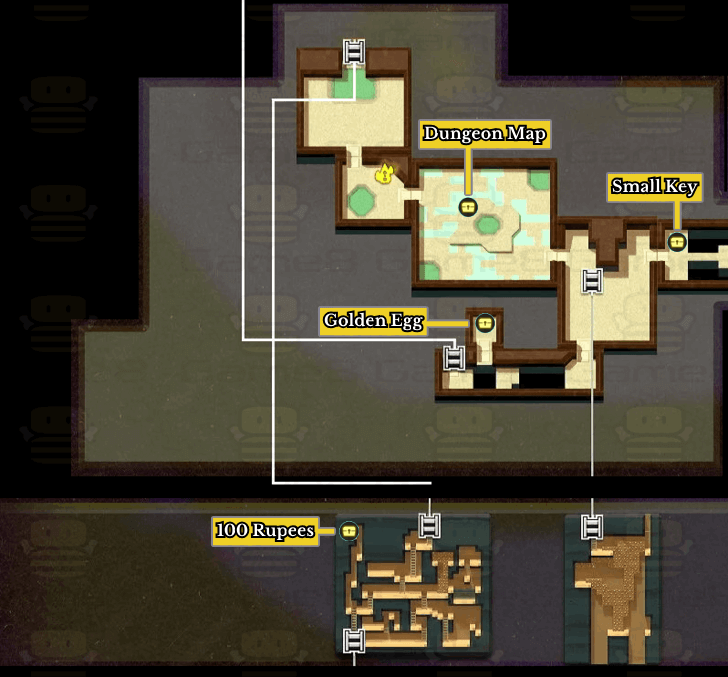
| 4 | Defeat the next Snomaul to reach the chest above without trouble. Use Strandtula to climb up the platform and open the chest containing three Monster Fangs. Exit the current area by descending the rightmost ladder. |
| 7 | 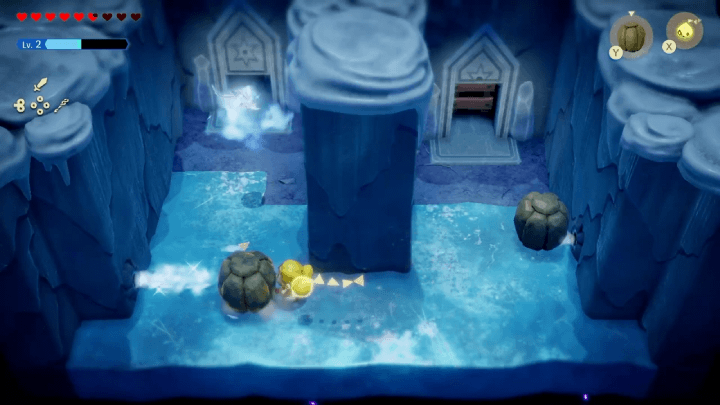 Block the ice vents with Boulders to proceed without danger. Watch out for the Ice Keese and proceed to the next room. |
| 8 | 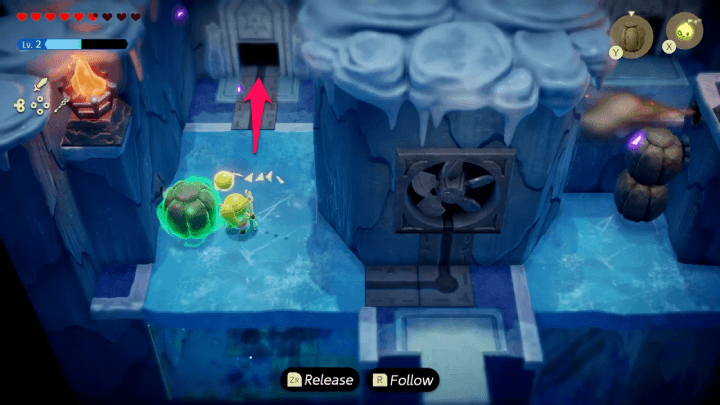 Block the left ice vent with the nearby Boulder using Bind. Enter the left passageway after. |
| 9 | Hold Y to summon a Boulder from beyond the railings and block the ice vent. Bind the flame sigil and transfer it to the left pedestal to activate the fan in the previous room. |
| 10 | 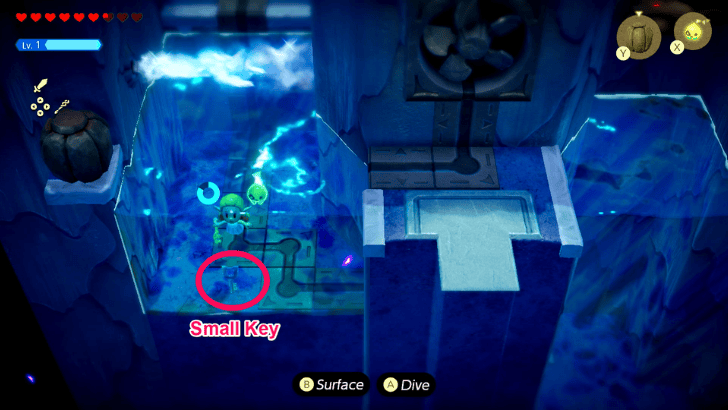 Return to the previous room to find that the icy floor has melted. Dive underwater to acquire the small key near the bottom left area of the room. |
| 11 | Return to the previous room and transfer the flame sigil. This time, let it pass through the ice vent to turn it into a frost sigil and freeze the previous room. |
| 12 |  Head towards the right side of the room. Place an additional boulder on top of the stack of boulders in the corner, and place it in front of the flame vent. Scale the wall to reach the top right room that opens with the small key. |
| 13 | The door will open, revealing a ladder to B2. Climb down the ladder and proceed through the cavern. Use Bind to catch falling icicles and shield yourself from ice streams while wall climbing. |
| 14 | Use the Cloud Echo to reach the top room and open the chest containing a Golden Egg. |
| 15 | Exit the room and head towards the far right side of the area using the Cloud or Strandtula Echoes. Enter the right passageway to proceed. |
| 16 | 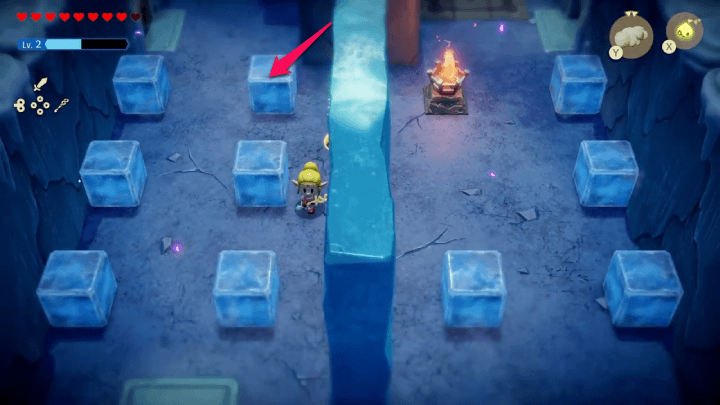 Push the top right Ice Block to reveal a ladder. Descend the ladder to the next area. |
| 17 | Upon entering the location, immediately eliminate the Freeze Slug with the Bow of Might, Moa, or a Spear Moblin Lv.2. Place a Strandtula near the top left area beneath the ladder, and head downwards. Bind the flame sigil and climb towards the Strandtula while avoiding the ice vents. Place the flame sigil on the top right pedestal and return to the previous area. |
| 18 | Once the ice wall melts, enter the room on the right. Push a block of ice toward the switch on the right, and as it passes over, step on the lower switch to trigger both at the same time, revealing a Chest with the Small Key. |
| 19 | 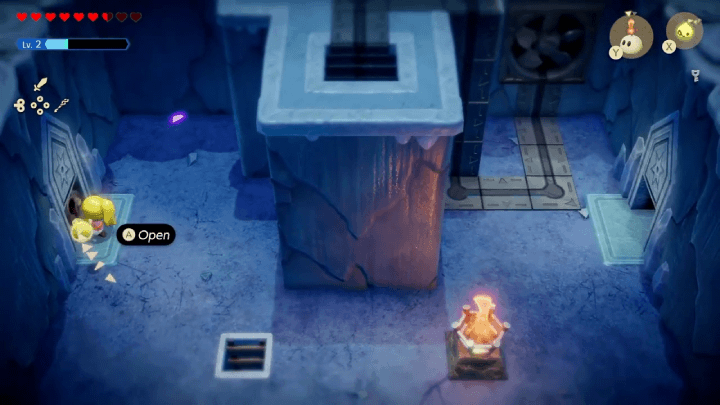 Use the small key to unlock the door on the left side of main room which leads into a room full of Temper Tweelus and streams of ice. |
| 20 | 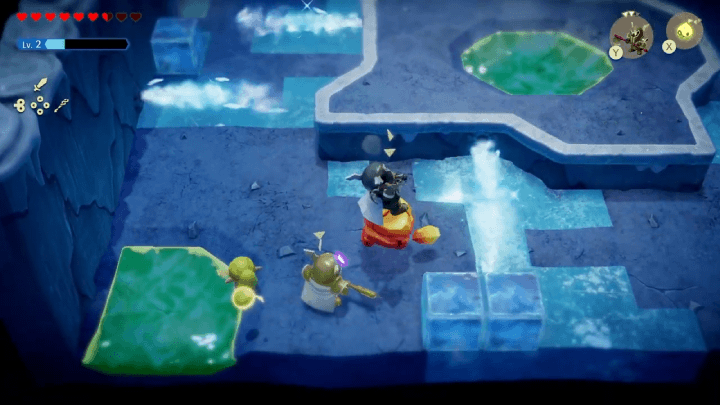 The room will be locked until all four Temper Tweelus in the room have been defeated. Use Combat Echoes such as Darknut Lv.2 to defeat them. A chest containing the Dungeon Map will appear once all enemies have been defeated. Use the hot springs to heal up if needed. |
Defeat Slime Eye Miniboss
| # | Step by Step Objectives |
|---|---|
| 1 |  In the room after obtaining the dungeon map, you'll find another waypoint in the top right corner of the room. Activate the waypoint and prepare for a boss battle in the following room. |
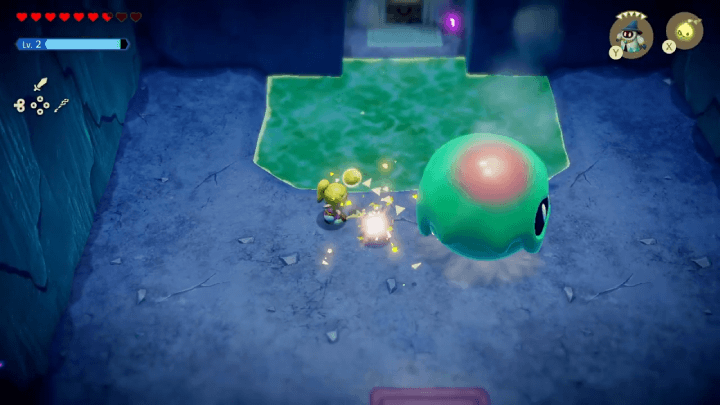
| 2 | 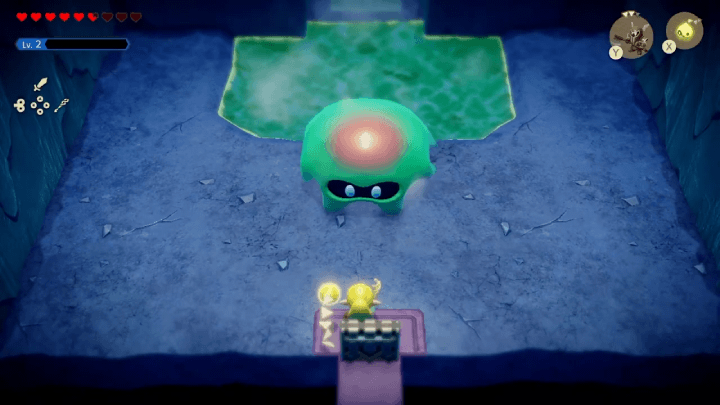 As you enter the next room, you'll find a large Slime Eye waiting for you in a hot spring. The boss will split into smaller versions as you damage it. Freeze the boss with Ice Wizzrobe or Ice Octo and launch a barrage of sword attacks with Swordfighter Form. ▶︎ How to Beat Slime Eye |
| 3 | 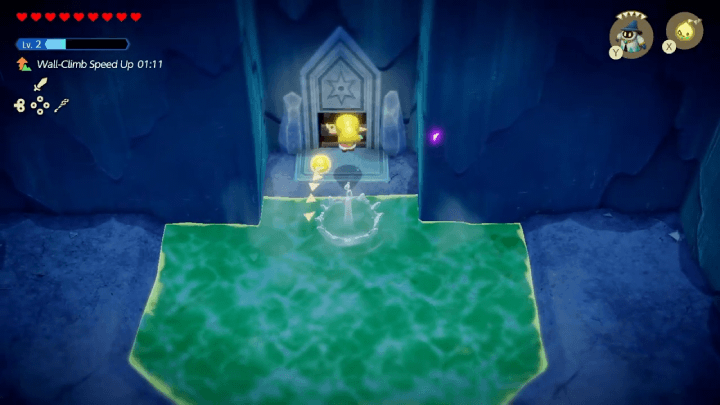 Defeating the Slime Eye will unlock the door behind the boss with a ladder allowing you to continue deeper into the dungeon. |
Obtain the Big Key
| # | Step by Step Objectives |
|---|---|
| 1 | 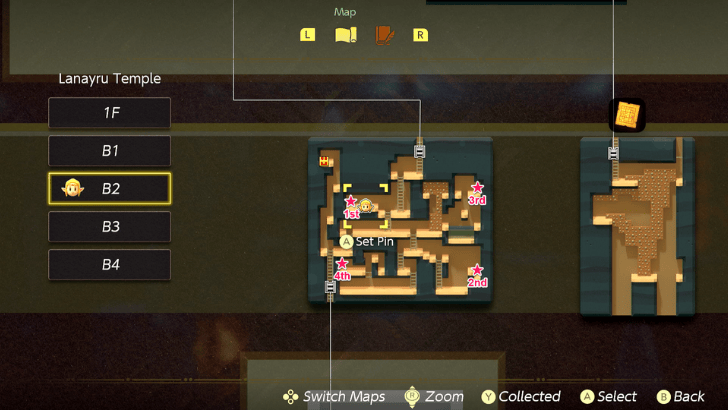 In order to proceed, you must light all 4 torches present in the area. Descend the ladder and light the first torch on the left. |
| 2 | For the second torch, throw an Ignizol by the ladder. Head upwards and scale the central platform with Strandtula, Water Block, or Old Bed. Head upwards with Water Block and light the third torch. Head southwest and defeat the Fire Keese. Hold Y to summon a Fire Keese beyond the bars, and either Bind or Lock On to bring the Fire Keese towards the fourth torch. |
| 3 | Before continuing to the next location, destroy the brazier near the exit and head upwards with a Strandtula. Open the chest containing 100 Rupees and exit the area. |
| 4 | 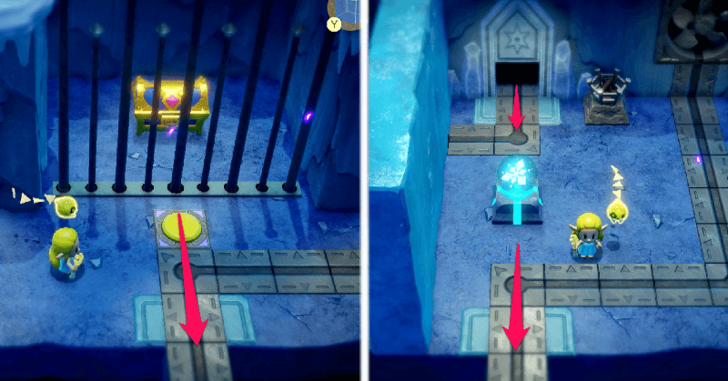 After exiting the torch room, continue down the corridor and enter the room in front of the chest. Ignore the current room and continue another room down. |
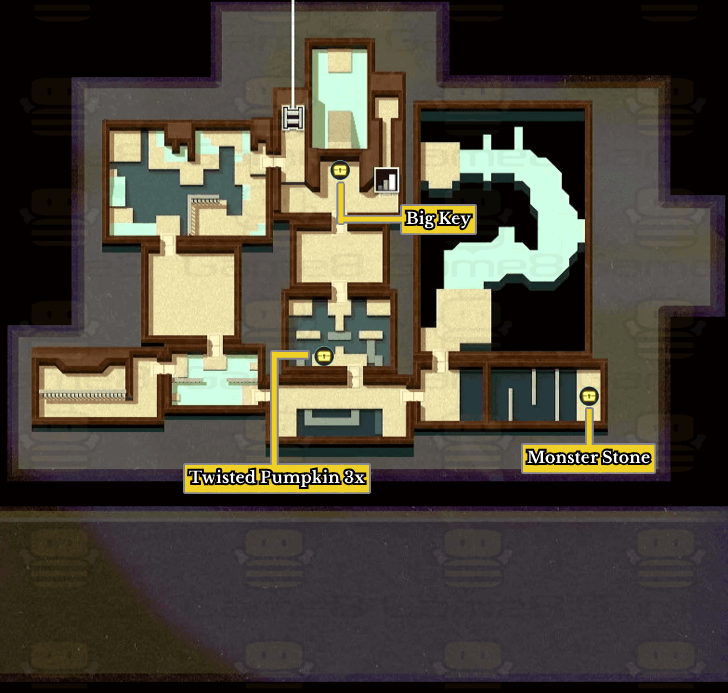
| 5 | 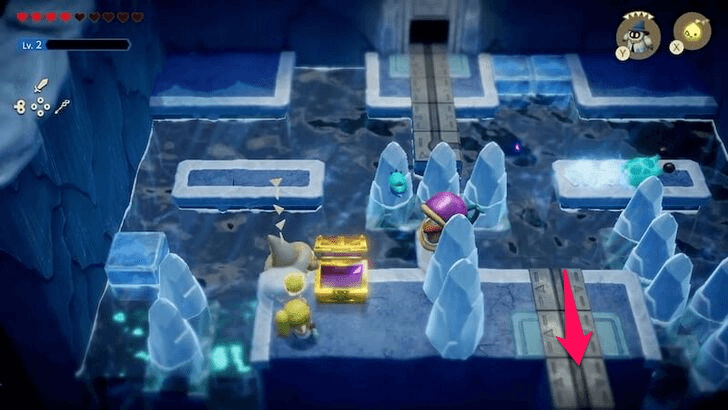 Continue towards the next room, either ignoring or defeating the Bio Deku Baba, 2 Freeze Slugs, and Moa along the way. Open the chest next to the doorway containing 3 Twisted Pumpkins and proceed. |
| 6 | Proceed two more rooms down to find the flame sigil. Transfer the flame sigil on the pedestal in the northwest area of the room. Either defeat the Ice Octo, Ice Keese, Temper Tweelus, and Freeze Slugs first before placing, or avoid them on the way. |
| 7 | 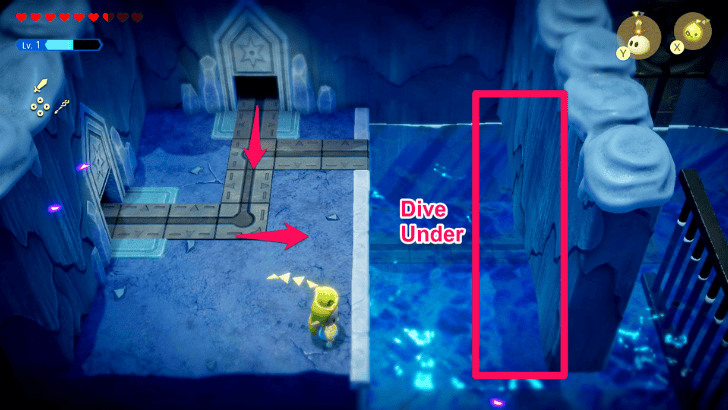 Return to the previous room and head towards the far right end of the area to open a chest containing a Monster Stone. Dive under the wall and jump over the last railing to reach it, and watch out for the Tektite Lv.2 on the way. |
| 8 | 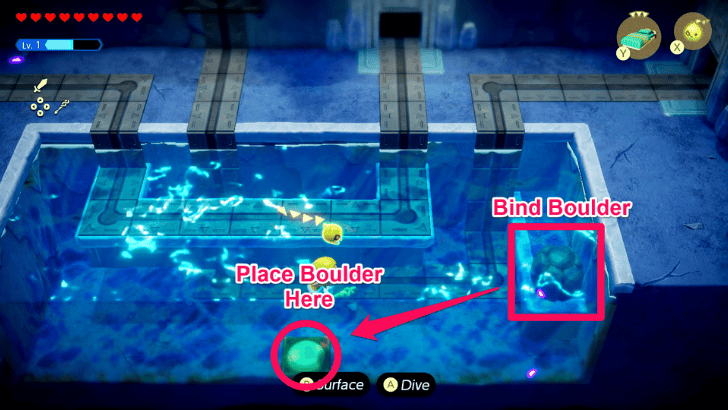 Head to the left passageway from the previous area to a room with multiple fan circuits. Place the nearby boulder on the switch via Bind to activate it. Enter the left passageway that opened to proceed. |
| 9 | 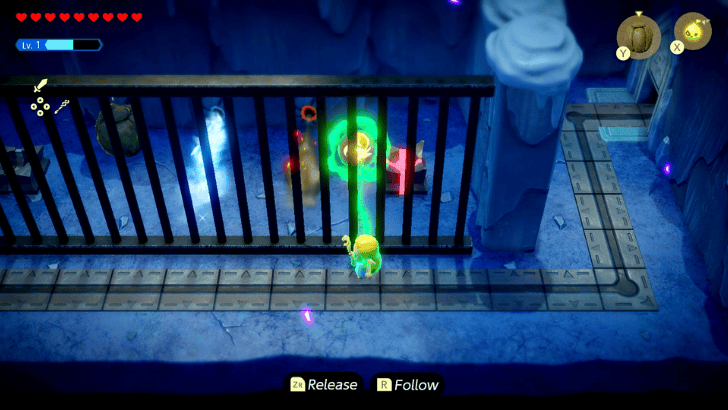 The next room will be a large watery area with with two switches on opposite corners. Ignore the room and head to the top right passage. Hold Y to summon a Boulder from beyond the gate, blocking the leftmost fire vent. Transfer the flame sigil to the pedestal, converting it to a frost sigil in the process. |
| 10 | Head back to the room on the right and activate both pressure plates to open the door above. Push a block of ice toward the left switch, then quickly jump over the bars to step on the upper switch and trigger both at once. ┗ Ensure to have the Frog Ring equipped to make the jump, or utilize a Trampoline. |
| 11 | 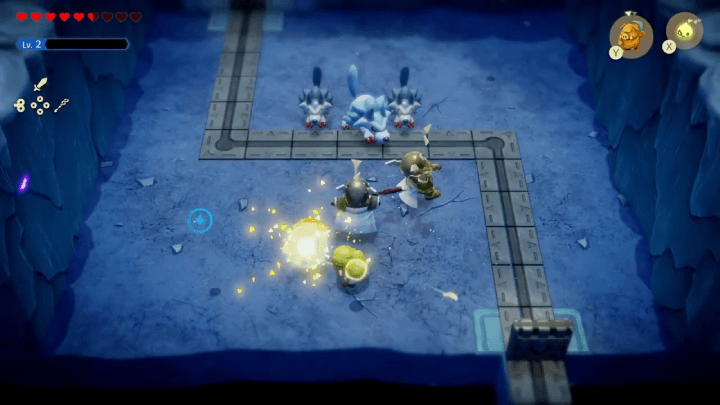 Head through the unlocked door and you'll face the White Wolfos and its pack. Focus on the White Wolfos, as it will keep summoning more wolves. Use durable combat Echoes like Darknut Lv. 2 or Club Boarblin Lv. 2 to defeat it. Once it's down, you can obtain the While Wolfos Echo and the door behind will be unlocked. |
| 12 | Bind to the flame sigil on the upper left side of the room, and make a bridge towards the pedestal on the bottom right with Old Bed on the first half of the room. For the second half, follow the path until you reach the pedestal and place the sigil. Be careful not to trigger the Freezards along the way. Press the switch above the right platform and enter the right doorway to return to the first area. |
| 13 |  Head down to the room in front of the chest and light the torch by the entrance. Bind the frost sigil and transform it to a flame sigil in the torch and place it on the pedestal. |
| 14 | 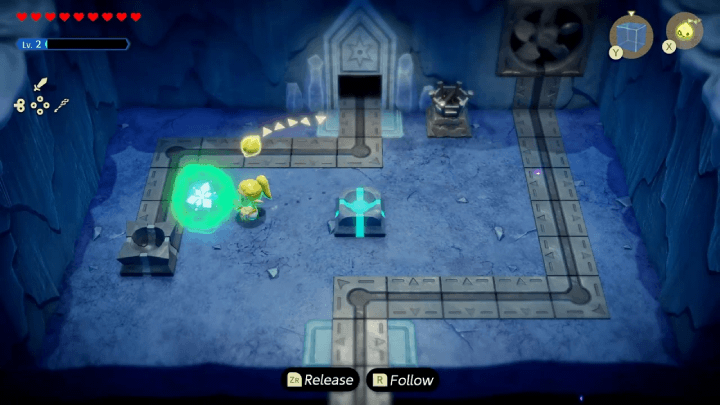 After melting the icicles, reactivate the fans using a frost sigil to freeze the floor in the first room. Return to the first room and stand on top of the button to release the snowball, unlocking the chest. |
| 15 | 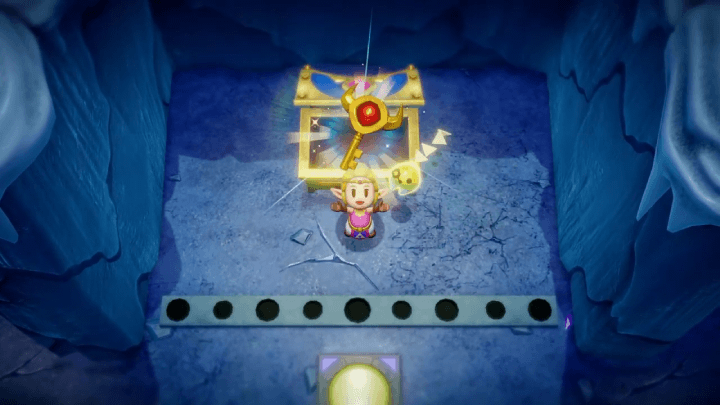 Open the big Chest in the main room to get the Big Key, which opens the door on floor B4. Take the staircase next to the Chest to reach B4. Above the staircase, stack Water Block Echoes to access a hidden path containing 50 Rupees. |
Defeat Skorchill, the Dungeon Boss
| # | Step by Step Objectives |
|---|---|
| 1 | 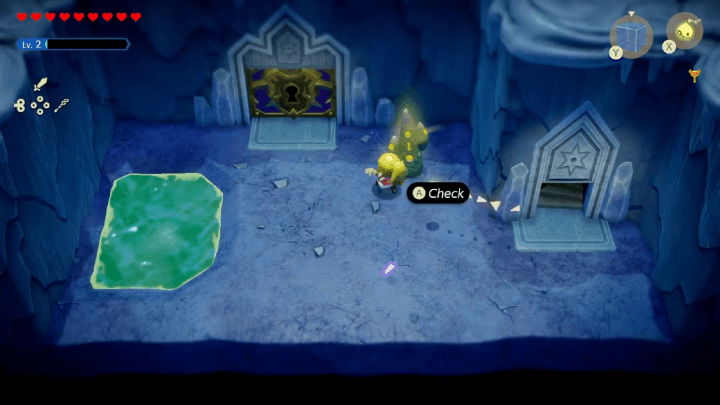 In the room just before the final boss, activate the waypoint and soak in the hot spring to restore your hearts to the full. Prepare to fight the final boss for the dungeon when you enter the big door. |
| 2 | 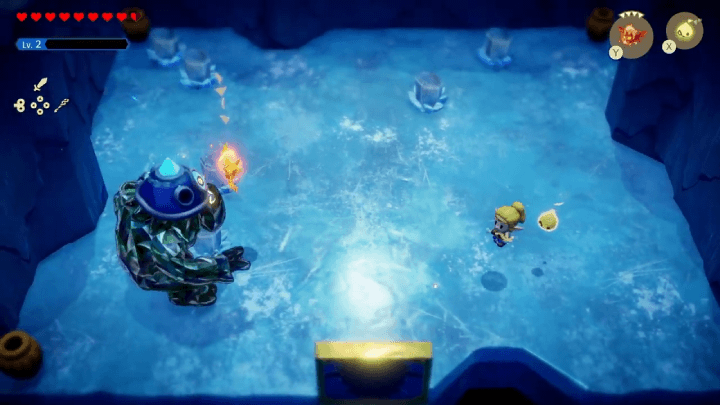 Skorchill is the final boss of the dungeon and will alternate between ice and fire helmets. Attack with Fire Keese or Fire Wizzrobe when its helmet is ice, and summon the Ice Keese or Ice Wizzrobe when its helmet is on fire. Enter Swordfighter Form when Skorchill's helmet is down to deal damage. ▶︎ How to Beat Skorchill |
| 3 | 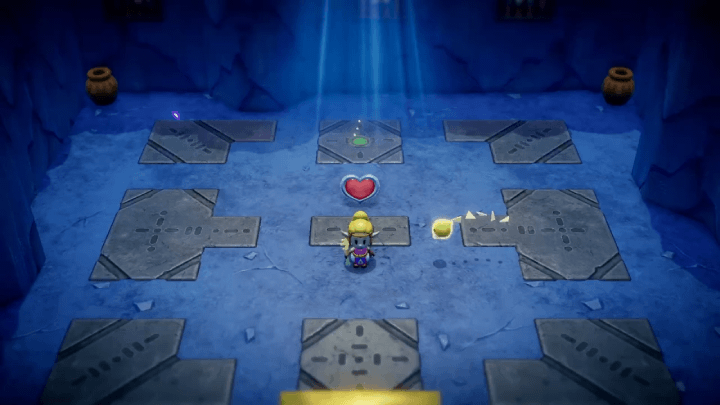 Defeating Skorchill will clear the dungeon and progress the Lands of the Goddesses main quest. Pickup the Heart Container and exit the rift. |
| ◀︎ Previous Quest | Next Quest ▶︎ |
|---|---|
| Still Missing | The Prime Energy and Null |
| Lands of the Goddesses Questline | |
| Lands of the Goddesses ┣ The Rift on Eldin Volcano ┣ A Rift in the Faron Wetlands ┗ Rift on Holy Mount Lanayru ┗ ▶︎★ Lanayru Temple |
|
Lanayru Temple Bosses
Slime Eye
|
|
Skorchill

|
|
Lanayru Temple Map
Lanayru Temple 1F Map and Treasures List
| Lanayru Temple 1F Map |
|---|
 |
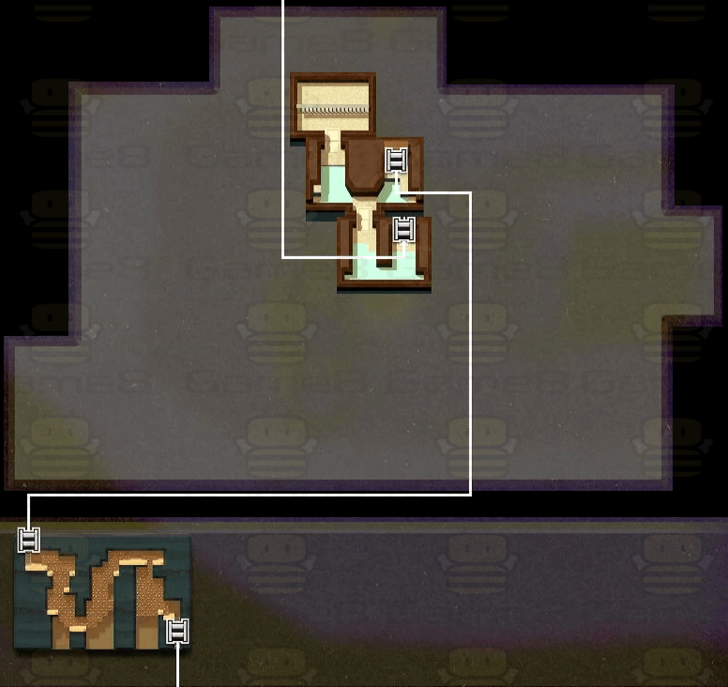
Lanayru Temple B1 Map
| Lanayru Temple B1 Map |
|---|
 |
Lanayru Temple B2 Map and Treasures List
| Lanayru Temple B2 Map |
|---|
 |
Lanayru Temple B3 Map and Treasures List
| Lanayru Temple B3 Map |
|---|
 |
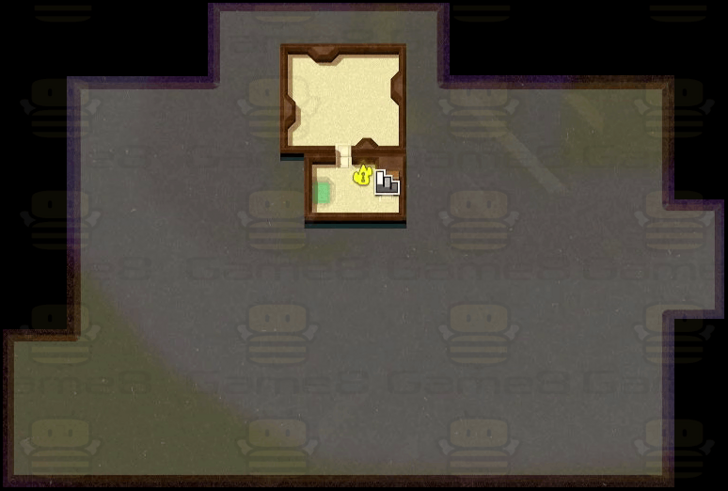
Lanayru Temple B4 Map
| Lanayru Temple B4 Map |
|---|
 |
New Echoes Learned in Lanayru Temple
List of Lanayru Temple Echoes
The list above shows the following Echoes you can acquire when progressing the Lanayru Temple Main Quest.
Echoes List: All 127 Echo Locations
The Legend of Zelda: Echoes of Wisdom (EoW) Related Guides

| Complete Walkthrough | All Dungeons |
| Best Dungeon Order | |
Story Walkthrough Chart
Guides marked with a ★ are Dungeon Guides
Author
The Legend of Zelda: Echoes of Wisdom Walkthrough & Guides Wiki
Lanayru Temple Walkthrough
improvement survey
03/2026
improving Game8's site?

Your answers will help us to improve our website.
Note: Please be sure not to enter any kind of personal information into your response.

We hope you continue to make use of Game8.
Rankings
- We could not find the message board you were looking for.
Gaming News
Popular Games

Genshin Impact Walkthrough & Guides Wiki

Honkai: Star Rail Walkthrough & Guides Wiki

Umamusume: Pretty Derby Walkthrough & Guides Wiki

Pokemon Pokopia Walkthrough & Guides Wiki

Resident Evil Requiem (RE9) Walkthrough & Guides Wiki

Monster Hunter Wilds Walkthrough & Guides Wiki

Wuthering Waves Walkthrough & Guides Wiki

Arknights: Endfield Walkthrough & Guides Wiki

Pokemon FireRed and LeafGreen (FRLG) Walkthrough & Guides Wiki

Pokemon TCG Pocket (PTCGP) Strategies & Guides Wiki
Recommended Games

Diablo 4: Vessel of Hatred Walkthrough & Guides Wiki

Fire Emblem Heroes (FEH) Walkthrough & Guides Wiki

Yu-Gi-Oh! Master Duel Walkthrough & Guides Wiki

Super Smash Bros. Ultimate Walkthrough & Guides Wiki

Pokemon Brilliant Diamond and Shining Pearl (BDSP) Walkthrough & Guides Wiki

Elden Ring Shadow of the Erdtree Walkthrough & Guides Wiki

Monster Hunter World Walkthrough & Guides Wiki

The Legend of Zelda: Tears of the Kingdom Walkthrough & Guides Wiki

Persona 3 Reload Walkthrough & Guides Wiki

Cyberpunk 2077: Ultimate Edition Walkthrough & Guides Wiki
All rights reserved
© Nintendo. The Legend of Zelda and Nintendo Switch are trademarks of Nintendo.
The copyrights of videos of games used in our content and other intellectual property rights belong to the provider of the game.
The contents we provide on this site were created personally by members of the Game8 editorial department.
We refuse the right to reuse or repost content taken without our permission such as data or images to other sites.


What happens if I already melted the ice and I can’t slide I ice block across the water and jump on the levels at the same time?