This survey will take about 1 minute.
Your answers will help us to improve our website.
Zelda: Echoes of Wisdom (EoW)
Eldin Temple Walkthrough
▲ 100% the game with our Interactive Map!
▲ Zelda amiibo give Ingredients & Outfits.
▲ Best Dungeon Order and Best Echoes.
▲ Heart Pieces | Might Crystals | Tri Power
▲ Best Smoothies | All 69 Recipes
Eldin Temple is a dungeon in The Legend of Zelda: Echoes of Wisdom (EoW) and is located in Eldin Volcano. Read on for a complete walkthrough guide on this dungeon, how to get to Eldin Temple, puzzle solutions, and more!
| ◀︎ Previous Quest | Next Quest ▶︎︎ |
|---|---|
| Still Missing | The Prime Energy and Null |
| Lands of the Goddesses Questline | |
| Lands of the Goddesses ┣ Rift on Holy Mount Lanayru ┣ A Rift in the Faron Wetlands ┗ The Rift on Eldin Volcano ┣ Rock-Roast Quarry ┣ Lizalfos Burrow ┗ ▶︎︎★ Eldin Temple |
|
Eldin Temple Dungeon Preparation
Best Echoes for Eldin Temple
| Echo | Usage |
|---|---|
 Bombfish Bombfish
|
・Can use this instead of relying on enemy bombs to break blocks |
 Keese Keese
|
・Use this to fly through certain areas with air vents |
 Lava Rock Lava Rock
|
・Can be placed on top of lava to use as a platform |
 Flying Tile Flying Tile
|
・Can be used to quickly cross to other platforms |
 Boomerang Boarblin Boomerang Boarblin
|
・Can help with defeating enemies, minibosses, and the dungeon boss |
 Lizalfos Lv. 3 Lizalfos Lv. 3
|
・Can help with defeating enemies, minibosses, and the dungeon boss |
 Platboom Platboom
|
・Can be used to ascend and reach high areas ・Can be used to crush enemies |
 Strandtula Strandtula
|
・Can be used to ascend and reach high areas by climbing its webbing |
Best Smoothies for Eldin Temple
| Smoothies | Benefit |
|---|---|
| Smoothies that Restore Energy | You will need to use Swordfighter Form in this dungeon, so it's a good idea to stock up on smoothies that can replenish your energy such as the Salted Milky Smoothie. |
| Smoothies that Restore Hearts | It's always a good idea to have some Smoothies that restore hearts for dungeons in case your health gets low. |
Eldin Temple Location
Eldin Volcano
The Eldin Temple dungeon is located in the Stilled Eldin Volcano as part of The Rift on Eldin Volcano main quest.
The Rift on Eldin Volcano Walkthrough
How to Get to Eldin Temple
| # | Step by Step Objectives |
|---|---|
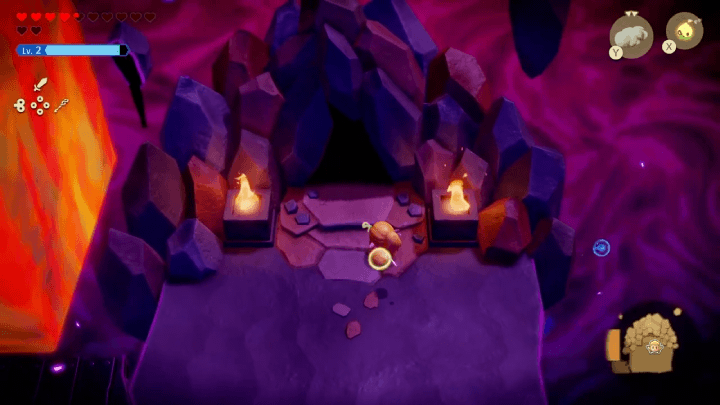
| 1 |
 You can access the Eldin Volcano Rift as you follow The Rift on Eldin Volcano quest. The Rift is located in the area blocked by a large boulder, which Darston breaks. |
| 2 |
 To reach Eldin Temple, you need to reach the end of the rift. Use the Flying Tile echo and the Lava Rock echo to easily cross lava and get to different platforms. ▶︎ Stilled Eldin Volcano Rift Walkthrough |
Eldin Temple Walkthrough
|
|
Get the First Small Key
| # | Step by Step Objectives |
|---|---|
| 1 |
 Upon entering the Eldin Temple dungeon, you can activate the Waypoint and heal at the hot spring in the corner if needed. Proceed to the northern room to continue. |
| 2 |
 Take the uppermost doorway, which will lead you to a room with four breakable blocks. |
| 3 |
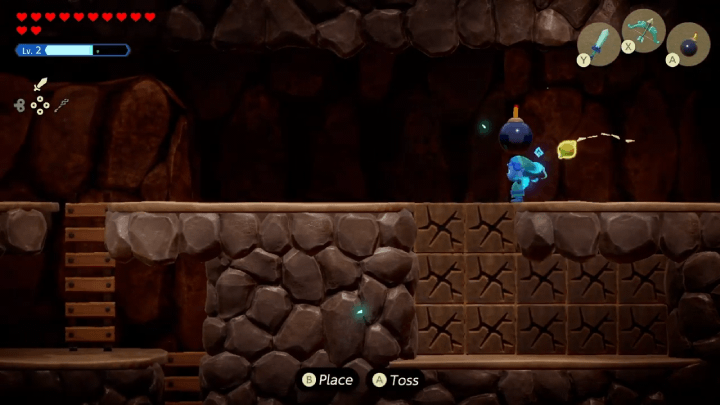
 Blow up the blocks on the upper right corner by using the bombs the enemies throw at you or by using a Bombfish, then use Bind to pull out a treasure Treasure Chest containing 8 Twisted Pumpkins. |
| 4 |
 Return to the previous room and head to the doorway on the right. Use Bind to grab the Lava Rock and place it on the lava geyser to cross. Then, move the rock to the rightmost geyser to create a makeshift elevator. |
| 5 |
In the next room, summon a Keese Echo and lift it over your head to glide over to the Treasure Chest in the far-right corner. Use the geyser for extra lift to reach the platform with the Treasure Chest containing the Small Key. |
Get the Dungeon Map
| # | Step by Step Objectives |
|---|---|
| 1 |
Return to the room with the four doorways by warping to the waypoint at the start and heading north. Use the small key to open the door on the left. |
| 2 |
This room has lava that rises and falls at fixed intervals. First, get the treasure chest containing a golden egg in the lower left corner of the room. Use Bind to pull it out and then head back up to high ground before opening it to avoid the lava. |
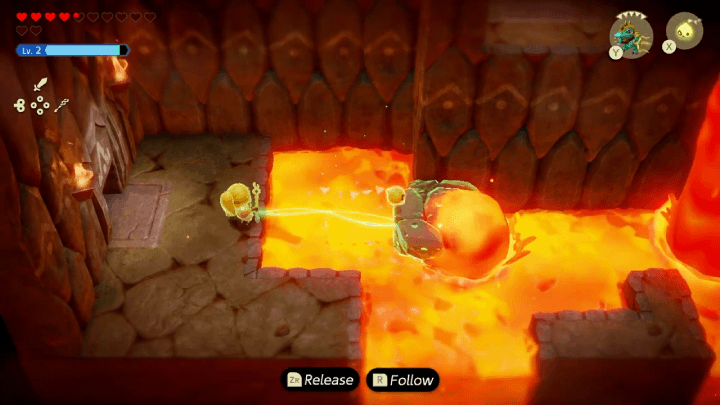
| 3 |
Head back up to the start of the room and wait for the lava to go down. Jump on top of the middle columns and bring out a Lava Rock echo to get up on the lower left platform. Use Bind on the real Lava Rock found on the right side of the room and drag it down to uncover a switch. |
| 4 |
As the lava goes down again, head to the switch and step on it to unlock the door found in the upper right corner. After stepping on the switch head to the upper right corner and summon a lava rock to get on top of when the lava comes back up to reach the unlocked door. |
| 5 |
In the next room, summon a Lava Rock echo on the lava pillars and jump on it to reach the next platform. You can hold Y to summon the echo at long range. |
| 6 |
Climb the wall and get to the next lava pillar, summon a Tweelus on it to use as a platform. When the lava pillar goes up, summon a Strandtula echo to reach the next platform into the next room. |
| 7 |
Head right and get to the top platforms while avoiding the hot steam geysers. Once you reach the top where you can see the chest behind the geysers, use Bind on the chest and drag it to you so you can safely obtain the Dungeon Map. Beware of the Fire Keese in the area, defeat them first before getting the chest. |
Get the Second Small Key
| # | Step by Step Objectives |
|---|---|
| 1 |
Go up the ladder on the right side of the room to reach the second floor. You can't proceed here yet without a key, but you can activate the waypoint here to make it easy to come back. |
| 2 |
Head back down the ladder and continue climbing downwards. Block the steam using a Boulder Echo to safely pass to the next area. |
| 3 |
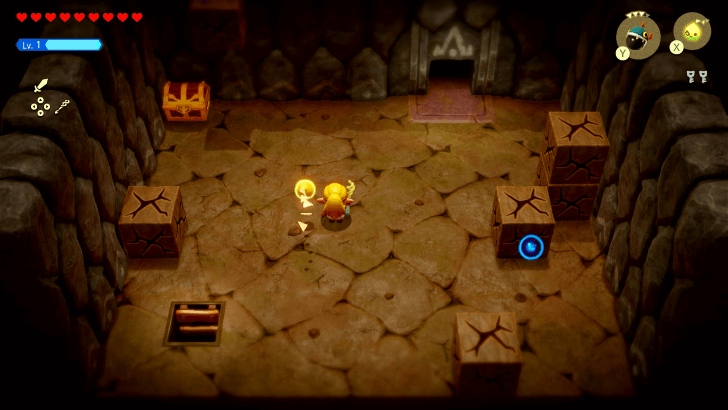
Head left where you will see a glowing blue switch on the wall. Target the switch and use a ranged Echo like a Keese or shoot it with your Bow while in Swordfighter Form to activate it. Head back up where you came from by using a Strandtula to climb up. |
| 4 |
Head to the right side of the room and summon a Lava Rock in the center to jump across to the other side of the room. Open the Treasure Chest to get the Small Key. |
Defeat Link
| # | Step by Step Objectives |
|---|---|
| 1 |
Quickly get back to the second floor by warping to the Waypoint, then prepare for a miniboss battle. Unlock the next room to start a battle with Link. |
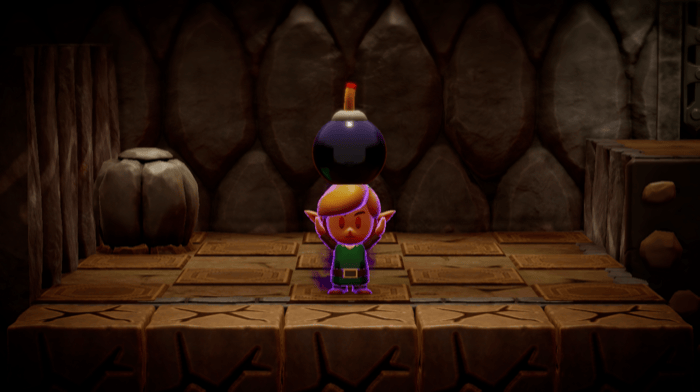
| 2 |
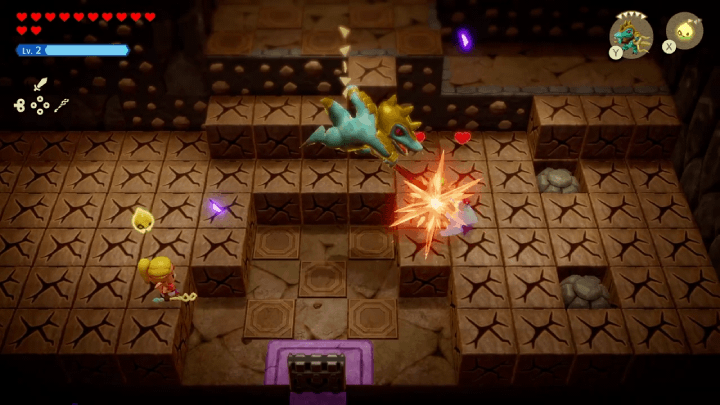 Link will be throwing bombs and Bombchus during the fight. You can use Bind to grab these explosives and send them back, or deploy your own Echoes to fight for you. ▶︎ How to Beat Dark Link (Bombs) |
| 3 |
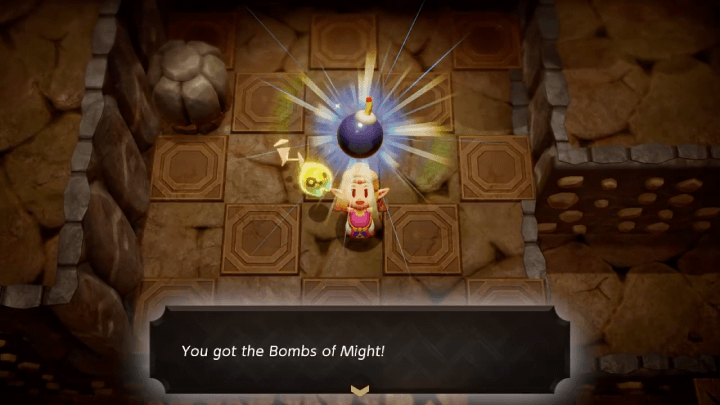 After defeating Link, he'll drop the Bombs of Might key item. This allows you to use bombs while in Swordfighter Form. |
Get the Third and Fourth Small Key
| # | Step by Step Objectives |
|---|---|
| 1 |
 After defeating Link, climb the ladder at the upper right corner to proceed to the next room. |
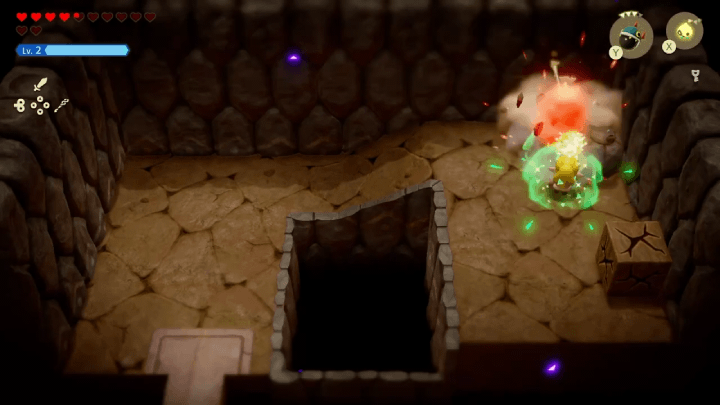
| 2 |
 Climb the ladder on the right, then ascend the next one past the enemy. Whack the Shadow Goo using your Swordfighter Form to pass through. |
| 3 |
 Use either Bombfish Echoes or your new Bombs of Might to destroy the breakable blocks on the left. This should uncover a Treasure Chest containing a small key. |
| 4 |
Head towards the right, and climb up the ladder. Use Bombfish Echoes or Bombs of Might and timing your throws to break the blocks in your way. Jump onto the right platform, defeat the Fire Keese, and climb up the rightmost ladder. |
| 5 |
 Defeat the enemies in the room, and use either a Bombfish Echo or your Bombs of Might to break the blocks on the upper left and upper right sections of the room. The upper left hides a Treasure Chest containing 100 Rupees, while the upper right hides the doorway to the next room. |
| 6 |
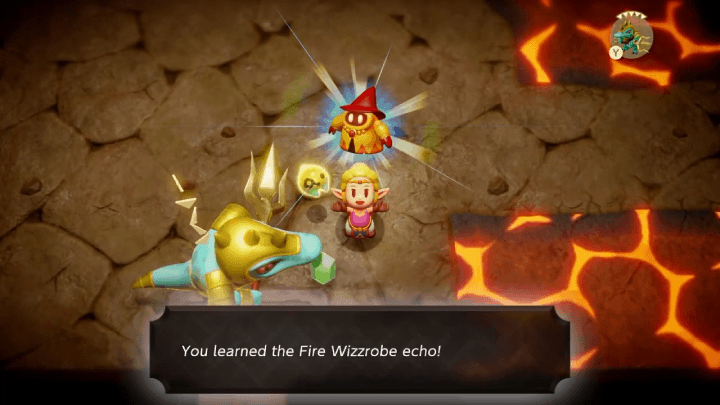 Enter the next room to fight a Fire Wizzrobe miniboss. Summon flying Echoes like a Ghini Lv. 2 or your Bow while in Swordfighter Form to fight this enemy. |
| 7 |
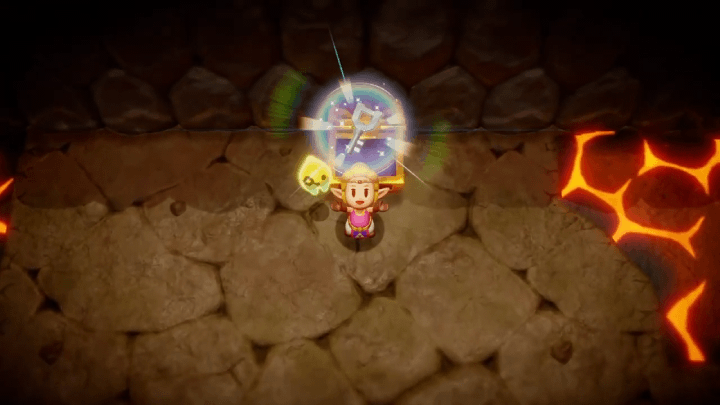 After defeating the Fire Wizzrobe, you can obtain its Echo as well as open a treasure Treasure Chest containing the fourth and final small key. |
Get the Big Key
| # | Step by Step Objectives |
|---|---|
| 1 |
Go back two rooms, and go left until you spot a lock in the lower left part of your screen. Unlock this then proceed to the area below. |
| 2 |
Go down the ladder near the middle of the room. Climb down all the ladders, then go down the climbing wall and to the right. Open the large Treasure Chest to get the Big Key, which unlocks the dungeon boss's door. |
| 3 |
After getting the boss key, the lava in this area will start to rise. Climb up the climbing wall and two ladders, then use a Flying Tile echo to quickly cross to the left side, as the third ladder breaks if you try to climb it. Go up using this climbing wall and return to the previous room. |
Head to the Boss Room
| # | Step by Step Objectives |
|---|---|
| 1 |
Climb another ladder up after escaping the lava in the room with the big key. Head back up and use a Strandtula echo to reach the locked door in the upper left corner. |
| 2 |
Summon a Ghirro echo and lift it overhead to glide through the geysers easily, making your way to the platform on the upper right. Then, summon a Lava Rock on top of the lava pillar to reach the next platform. |
| 3 |
On the next level, defeat the Fire Octo using any flying Echo, like an Ice Keese. Once it's down, use a Ghirro again to fly to the the platform with the boss. Activate the waypoint on the right. |
Defeat Volvagia
| # | Step by Step Objectives |
|---|---|
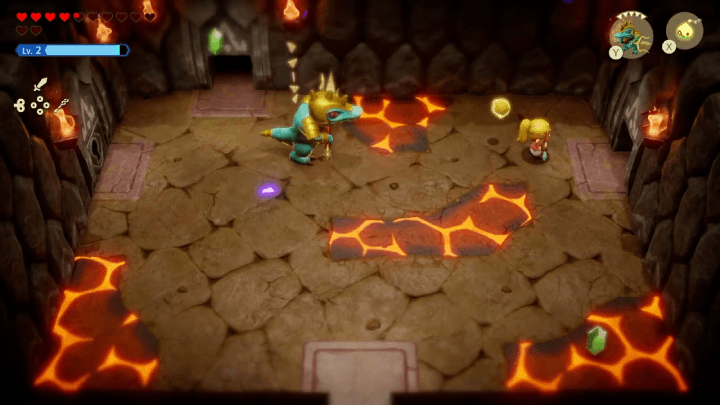
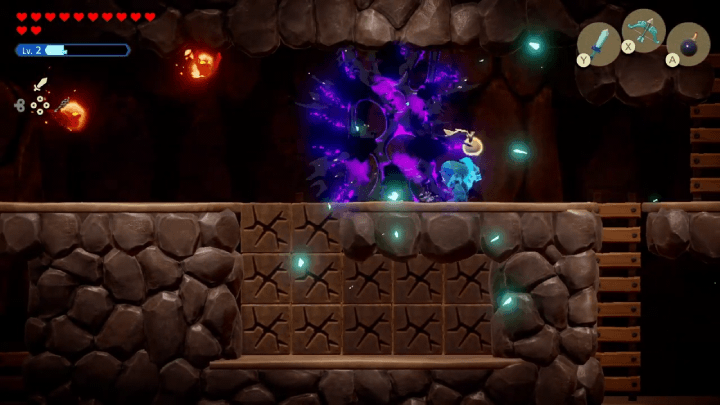
| 1 |
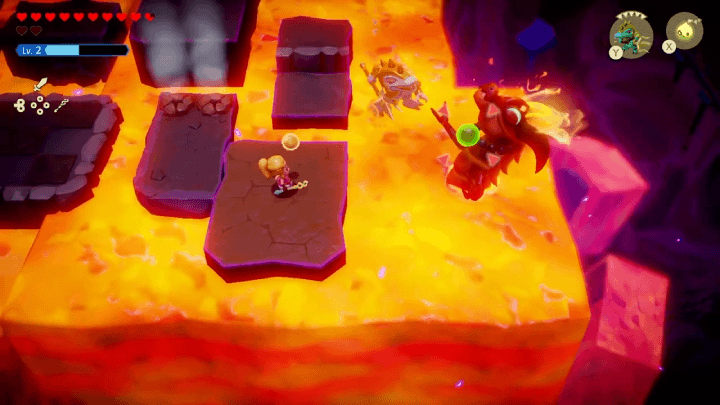 Once you're ready, open the door and jump down the hole to face Volvagia. The boss shoots fireballs and a big green orb. Use your ranged Echoes to damage Volvagia and be prepared to move, as the boss frequently jumps around the arena. ▶︎ How to Beat Volvagia |
| 2 |
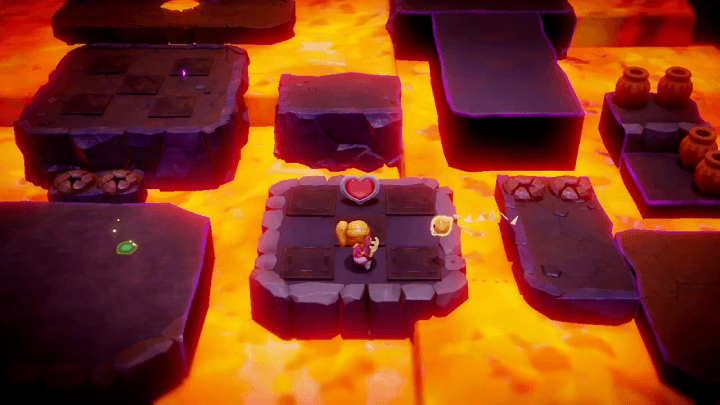 After beating the boss, Tri will level up, and you'll receive Din's Sanction during a cutscene. After this scene, pick up the heart container before leaving the dungeon. |
| ◀︎ Previous Quest | Next Quest ▶︎ |
|---|---|
| Still Missing | The Prime Energy and Null |
| Lands of the Goddesses Questline | |
| Lands of the Goddesses ┣ Rift on Holy Mount Lanayru ┣ A Rift in the Faron Wetlands ┗ The Rift on Eldin Volcano ┣ Rock-Roast Quarry ┣ Lizalfos Burrow ┗ ▶︎★ Eldin Temple |
|
Eldin Temple Bosses
Dark Link (Bomb)
|
|
Volvagia

|
|
Eldin Temple Map
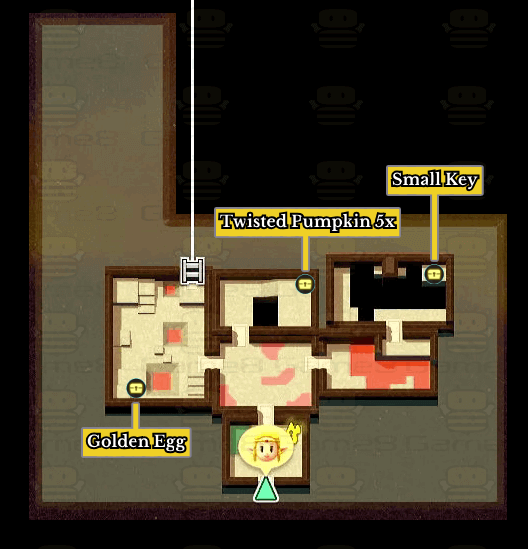
Eldin Temple 1F Map
| Eldin Temple 1F Map |
|---|
 |
Eldin Temple 2F Map
| Eldin Temple 2F Map |
|---|
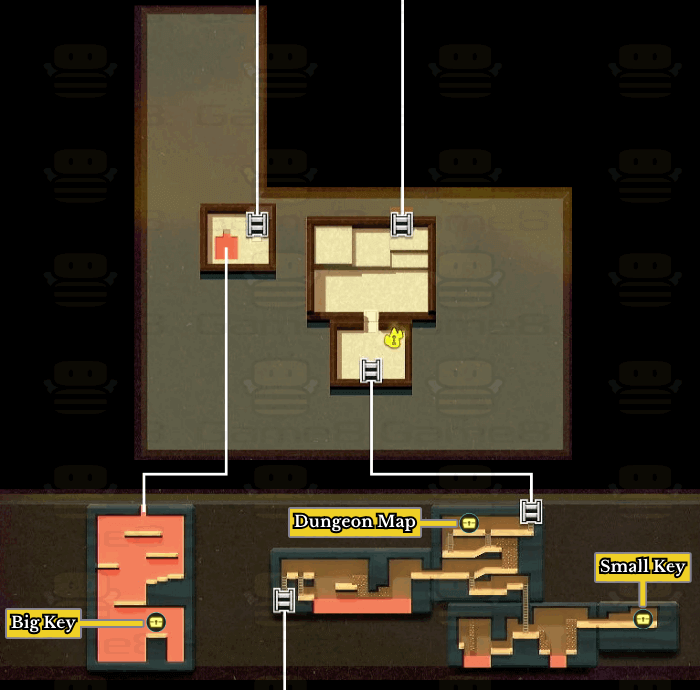 Treasures List:
・ Dungeon Map ・ Small Key ・ Big Key |
Eldin Temple 3F Map
| Eldin Temple 3F Map |
|---|
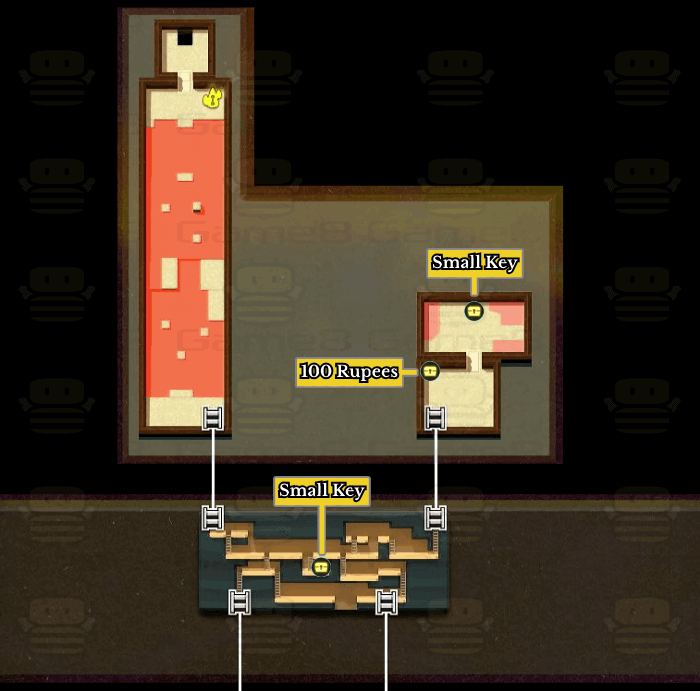 Treasures List: ・ Small Key ・ 100 Rupees ・ Small Key |
New Echoes Learned in Eldin Temple
List of Eldin Temple Echoes
The list above shows the following echoes you can acquire when progressing the Eldin Temple Dungeon.
Echoes List: All 127 Echo Locations
The Legend of Zelda: Echoes of Wisdom (EoW) Related Guides

| Complete Walkthrough | All Dungeons |
| Best Dungeon Order | |
Story Walkthrough Chart
Guides marked with a ★ are Dungeon Guides
Comment
Author
The Legend of Zelda: Echoes of Wisdom Walkthrough & Guides Wiki
Eldin Temple Walkthrough
Please participate in our site
improvement survey
03/2026
improvement survey
03/2026
Would you assist in
improving Game8's site?
improving Game8's site?

×
We are listening to our users' valuable opinions and discussing how to act on them.
The information collected through this survey will be used for the purpose of improving our services. In addition, the information will only be disclosed a part of a statistic in a format that will not allow identification of personal information.
Begin Survey
Not Now
×
Please rate each item regarding Game8.co's Advertisements.
Amount of Ads
Very Dissatisfied
Somewhat Dissatisfied
Fine
Somewhat Satisfied
Highly Satisfied
Placement of Ads
Timing of Ad Display
Ad Loading Speed
Safeness of Ads
Content of Ads
×
Please rate each item regarding Game8.co's Quality of Articles.
Amount of information
Very Dissatisfied
Somewhat Dissatisfied
Fine
Somewhat Satisfied
Highly Satisfied
Frequency of updates
Speed of new information
Accuracy of articles
Understandibility of articles
Readability of sentences
×
Please rate each item regarding Game8.co's Usability of the Site.
Ease of finding information
Very Dissatisfied
Somewhat Dissatisfied
Fine
Somewhat Satisfied
Highly Satisfied
Loading Speed
Use of Color
Font Size
Visibility of Images
Easy to Understand Layout
×
Please rate each item regarding Game8.co's Message Boards, Comments.
Ease of Writing
Very Dissatisfied
Somewhat Dissatisfied
Fine
Somewhat Satisfied
Highly Satisfied
Readability
Ease in Finding Information
Comment Quality
Comment Quantity
Admin Response
×
Please rate each item regarding Game8.co's Site's new design.
Please rate our site's new design
Very Dissatisfied
Somewhat Dissatisfied
Fine
Somewhat Satisfied
Highly Satisfied
Do you think that the website's design change makes the site easier to use?
Has the new design made it easier for you to find information on the site?
Has the new design improved the overall visual appeal of the site?
How would you rate your overall satisfaction with the new design of the site?
×
How likely are you to recommend Game8 to someone you know?
Very Unlikely
0
1
2
3
4
5
6
7
8
9
10
Very Likely
If you have other opinions regarding potential improvement to the website, please share them with us. We would appreciate your honest opinion.
Note: This is a free response section, so you can proceed without entering anything.
Note: Please be sure not to enter any kind of personal information into your response.
Note: Please be sure not to enter any kind of personal information into your response.
×
Thank You
×
Thank you for participating in our survey! Your answers will help us to improve the quality of our website and services.
We hope you continue to make use of Game8.
We hope you continue to make use of Game8.
Close
Rankings
- We could not find the message board you were looking for.
Gaming News


Popular Games

Genshin Impact Walkthrough & Guides Wiki
Honkai: Star Rail Walkthrough & Guides Wiki
Umamusume: Pretty Derby Walkthrough & Guides Wiki
Pokemon Pokopia Walkthrough & Guides Wiki
Resident Evil Requiem (RE9) Walkthrough & Guides Wiki
Monster Hunter Wilds Walkthrough & Guides Wiki
Wuthering Waves Walkthrough & Guides Wiki
Arknights: Endfield Walkthrough & Guides Wiki
Pokemon FireRed and LeafGreen (FRLG) Walkthrough & Guides Wiki
Pokemon TCG Pocket (PTCGP) Strategies & Guides Wiki


Recommended Games
Diablo 4: Vessel of Hatred Walkthrough & Guides Wiki
Fire Emblem Heroes (FEH) Walkthrough & Guides Wiki
Yu-Gi-Oh! Master Duel Walkthrough & Guides Wiki
Super Smash Bros. Ultimate Walkthrough & Guides Wiki
Pokemon Brilliant Diamond and Shining Pearl (BDSP) Walkthrough & Guides Wiki
Elden Ring Shadow of the Erdtree Walkthrough & Guides Wiki
Monster Hunter World Walkthrough & Guides Wiki
The Legend of Zelda: Tears of the Kingdom Walkthrough & Guides Wiki
Persona 3 Reload Walkthrough & Guides Wiki
Cyberpunk 2077: Ultimate Edition Walkthrough & Guides Wiki


All rights reserved
© Nintendo. The Legend of Zelda and Nintendo Switch are trademarks of Nintendo.
The copyrights of videos of games used in our content and other intellectual property rights belong to the provider of the game.
The contents we provide on this site were created personally by members of the Game8 editorial department.
We refuse the right to reuse or repost content taken without our permission such as data or images to other sites.