A Rift in the Faron Wetlands Walkthrough
▲ 100% the game with our Interactive Map!
▲ Zelda amiibo give Ingredients & Outfits.
▲ Best Dungeon Order and Best Echoes.
▲ Heart Pieces | Might Crystals | Tri Power
▲ Best Smoothies | All 69 Recipes
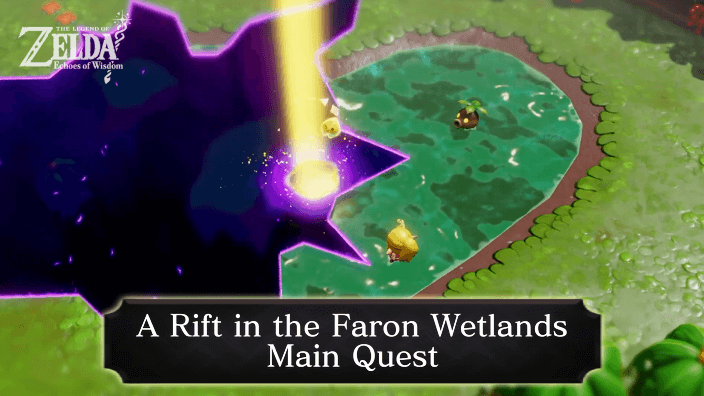
A Rift in the Faron Wetlands is a Main Quest in The Legend of Zelda: Echoes of Wisdom (EoW). Read on for a walkthrough of A Rift in the Faron Wetlands, its location and rewards, and tips and strategies on how to complete this Main Quest.
| ◀︎ Previous Quest | Next Quest ▶︎︎ |
|---|---|
| Still Missing | The Prime Energy and Null |
| Lands of the Goddesses Questline | |
| Lands of the Goddesses ┣ The Rift on Eldin Volcano ┣ Rift on Holy Mount Lanayru ┗ ▶︎ A Rift in the Faron Wetlands ┗ ★ Faron Temple |
|
List of Contents
A Rift in the Faron Wetlands Walkthrough
| A Rift in the Faron Wetlands Guide |
|---|
|
|
Reach the Sweet Spot
| Reach the Sweet Spot Objectives | ||
|---|---|---|
| 1 | 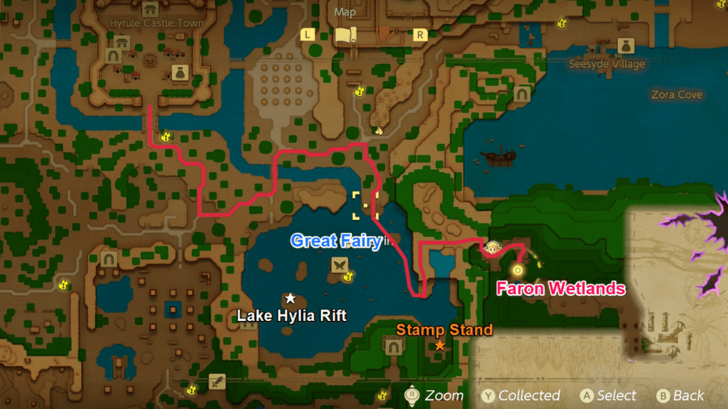 |
|
| Head to Faron Wetlands by travelling southeast from Hyrule Castle Town. There are some interesting things you can do along the way: ┣ You can pay a visit to the Great Fairy for accessory slot upgrades. ┣ A stamp can be obtained on the southeastern shore of Lake Hylia. ┣ You can mend the Lake Hylia rift for some might crystals. ┗ Alternatively, you can start from the Seesyde Village Waypoint, and follow the cliffs heading south if you want to do some of the Jabul Waters side quests before proceeding. |
||
| 2 | 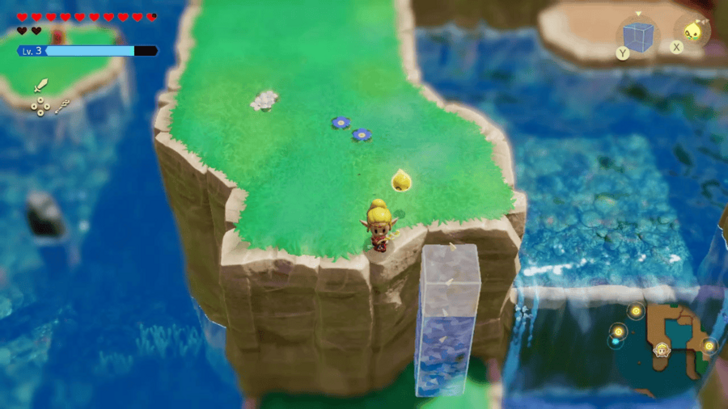 |
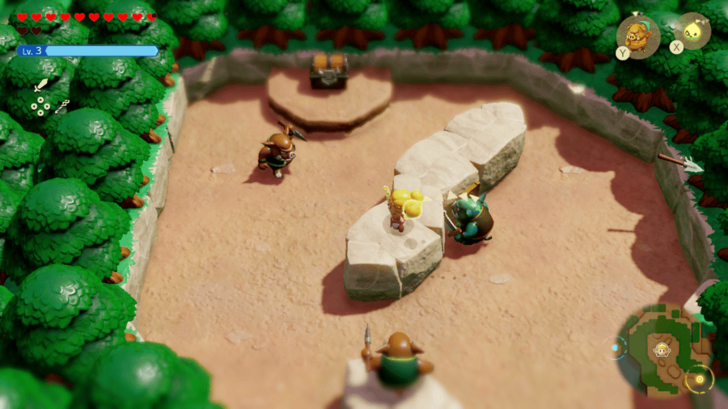 |
| If you're coming from Lake Hylia, scale the waterfall using Water Blocks or the Crawltula echo. A monster camp can be found at the top of the waterfall that you can clear to get a chest. | ||
| 3 | 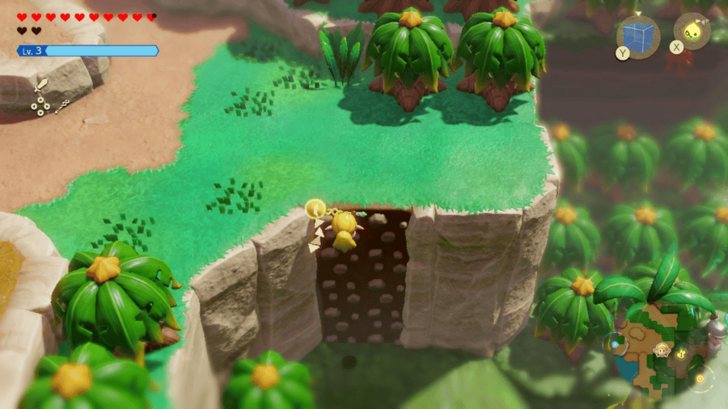 |
|
| Go back to the waterfall, then head right. Go down the climbing wall to enter the Faron Wetlands. | ||
| 4 | 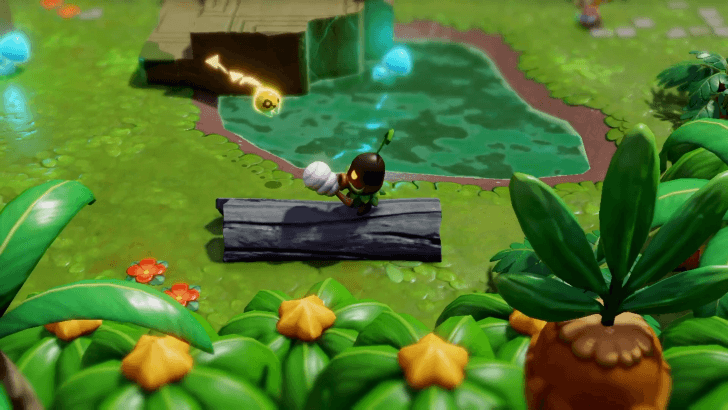 |
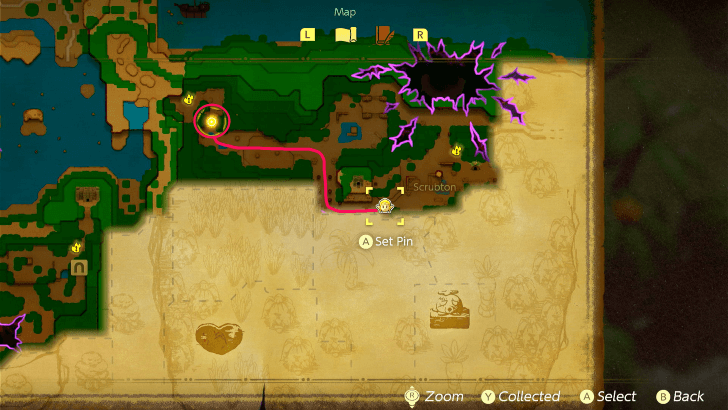 |
| Follow the path, then go down when you reach a fork in the road to reach Scrubton. You can obtain Drippitune and Hoarder echoes along the way. Once you arrive at Scrubton, a cutscene will play showing the Deku Scrubs eating "cotton candy" (cobwebs on a stick). ┣ You can take on The Rain-Making Monster side quest here in Scrubton. ┗ You can also make smoothies at the original Smoothie Shop found here. |
||
| 5 | 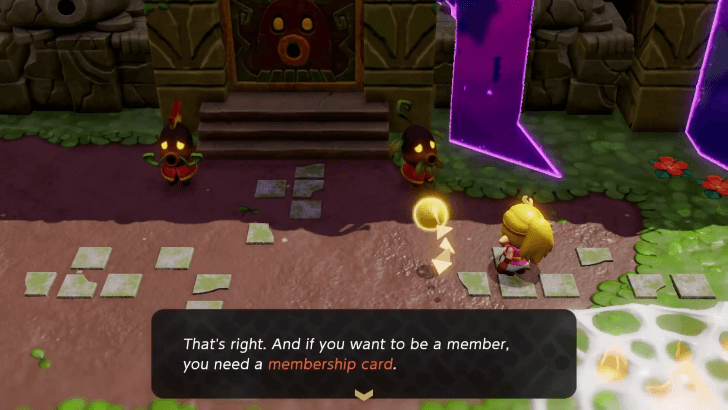 |
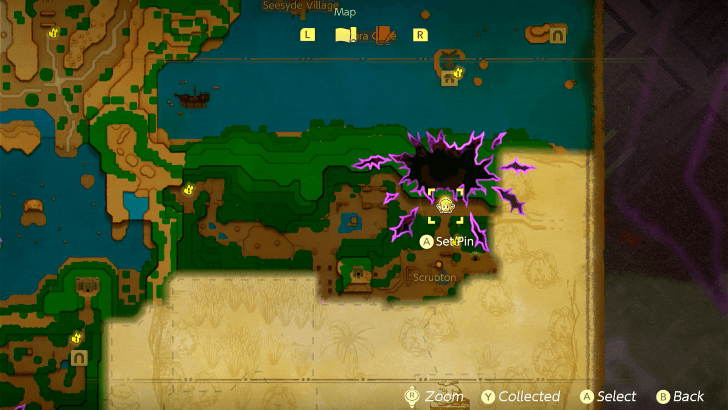 |
| From the place where you see the Deku Scrubs eating spider webs, go north to reach a large temple called The Sweet Spot. Make sure to activate the waypoint along the way. A cutscene activates once you get close to the building guarded by two Deku Scrubs. You will need a membership card to enter the building. |
||
Head Southwest to Reach Heart Lake (Optional)
| Head Southwest to Reach Heart Lake Objectives | ||
|---|---|---|
| 1 | 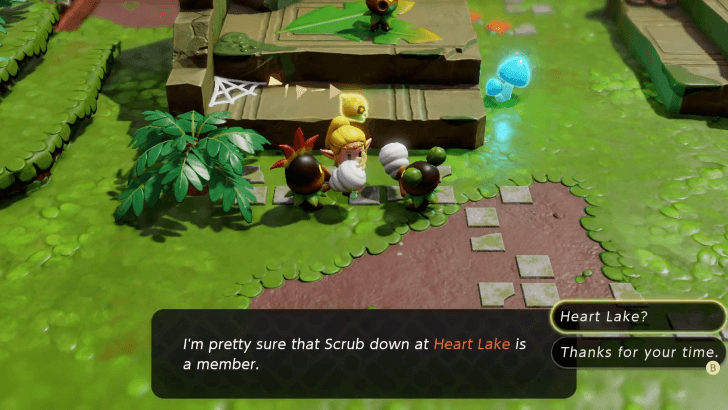 Head back south from The Sweet Spot to find two Deku Scrubs eating spider webs. Talk to this group and select Membership card? to get clues on where to go next. They will tell you that a Scrub at Heart Lake is a member. |
|
| 2 |  Head southwest from Scrubton and follow the path outlined on the image. Be sure to obtain the Buzz Blob echo around the waterfall area. From the waterfall, head west to continue following the path to the waypoint right before Heart Lake. ┣ You'll pass by two stamp stands if you follow this path. ┣ A Heart Piece can be found in a cave along the way. Use Water Blocks in the area with the Needleflies to reach the high platform of the Heart Piece. ┣ A Lizalfos Lv. 3 can also be found in this same cave. ┗ A Might Crystal can be found hidden in the middle of a circle of local plants northwest of the Heart Lake. |
|
| 3 | 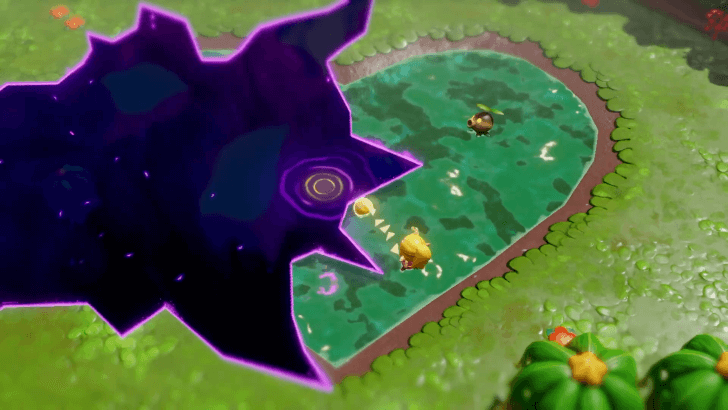 Head left from the waypoint to find the Heart Lake and activate a cutscene showing a Deku Scrub flailing in the water. Interact with the rift entrance to open it and enter the rift. ▶︎ Stilled Heart Lake Rift Walkthrough |
|
| 4 | 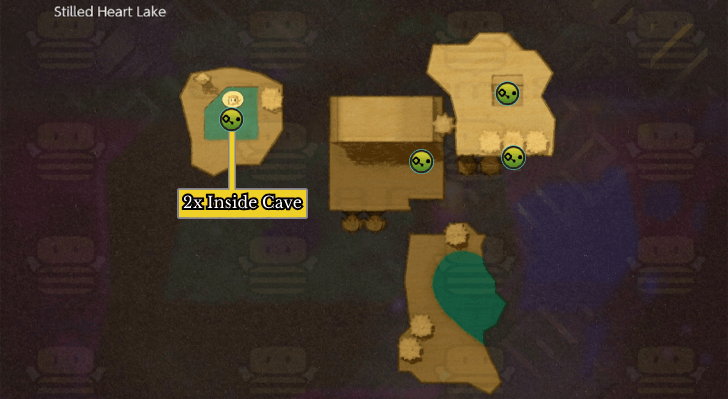 |
 |
| Use fire-producing echoes such as the Torch Slug or Ignizol to burn down spider webs and rescue the three groups of Tri's friends that aren't underwater. | ||
| 5 | Dive into the square hole in the upper right part of the map. Swim left to find more of Tri's friends trapped behind a destructible rock near a strong current. Summon a Bombfish echo, Bind it, and use it to destroy the rock. |
|
| 6 | To get into this narrow opening despite the current, press the R shoulder button repeatedly to spin in the water as you swim. If you have the Zora's Flippers accessory or a Rapid Smoothie, you can use either of those instead to swim faster without needing to spin. Once you've made it into the small alcove, interact with the dark blob to rescue Tri's friends. |
|
| 7 | 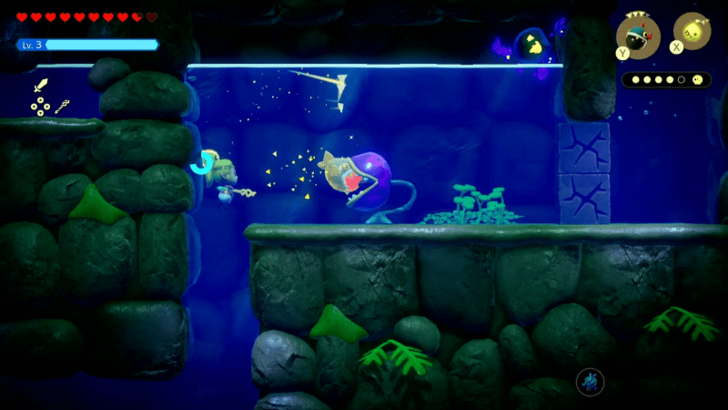 For the last set of Tri's friends, swim down, breathe in the bubbles, then go right toward the Bio Deku Baba. Feed it a Bombfish to defeat it, then rescue the final set of Tri's friends. |
|
| 8 | 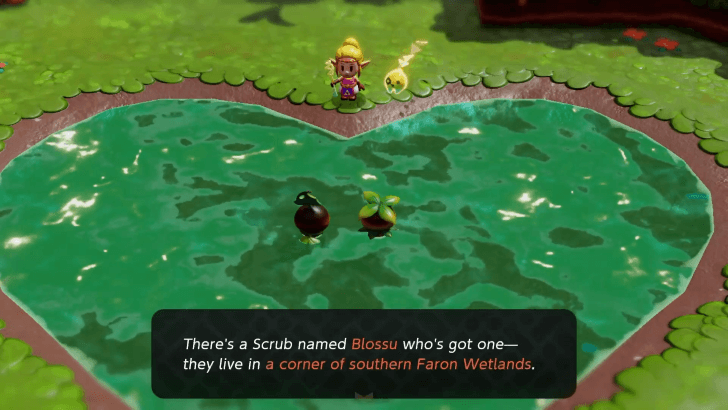 After mending the rift, you will return to Heart Lake. The two Deku Scrubs will then tell you to find Blossu at a corner of southern Faron Wetlands to get the membership card. |
|
| 9 | 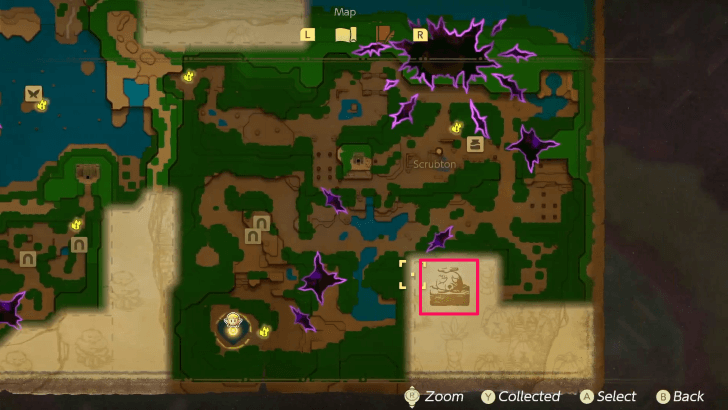 Open the Map to see an illustration of a Deku Scrub east of your current location. This is where you should go next to find Blossu. |
|
Stilled Heart Lake Rift Walkthrough
Find Blossu Southeast of Faron Wetlands
| Get the Membership Card from Blossu Objectives | |
|---|---|
| 1 | 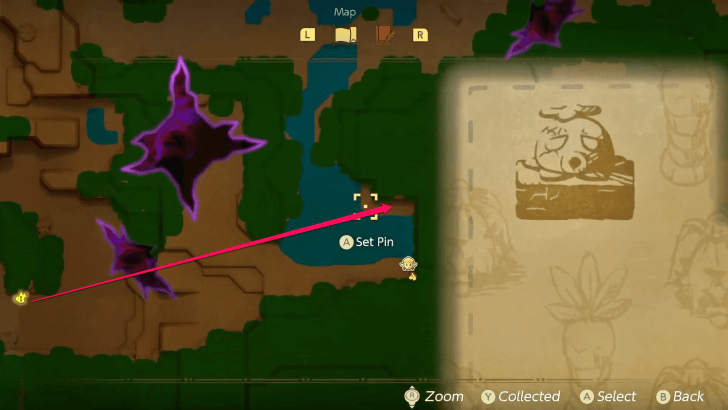 From the waypoint next to Heart Lake, head east towards a shallow pond with some Piranhas. You may also head directly south from Scrubton down the waterfall to reach this area. |
| 2 | 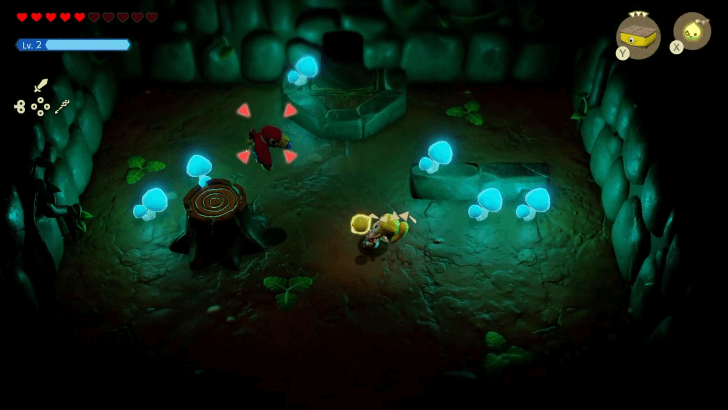 Enter the cave that you can find across the water. This cave is dark, and the some of the glowing mushrooms are actually hidden enemies. You can use fire-producing echoes like the Brazier if you need more light. Defeat the bird in the cave to obtain the Beakon echo, then proceed to the door north of the room. |
| 3 | Choose either the left or right path. With the Frog Ring equipped, jump the gap towards the stairs at the top part of this room. If you don't want to use this accessory, use an Old Bed or the Flying Tile echo to get across. |
| 4 | Head right and down the first vertical path you see to reach a Heart Piece. Jump or use an Old Bed echo to cross the gap and go up to the platform with the Heart Piece. |
| 5 | 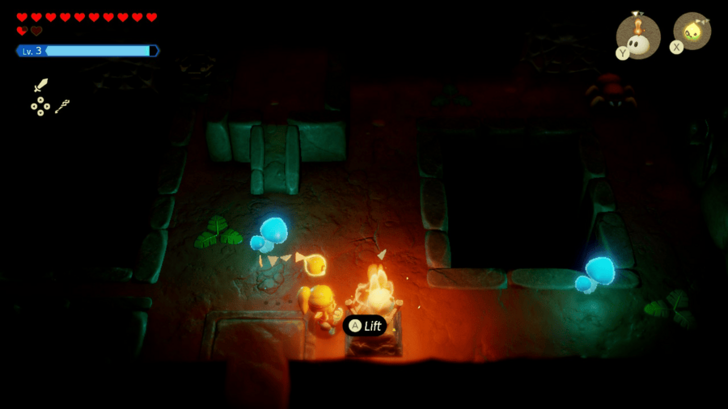 If you want a chest containing 50 Rupees, go back to the north side of the cave and enter the doorway along that wall. You'll need to light four torches in this room to spawn the chest. The first torch is right by the entrance. Light it using an Ignizol echo. |
| 6 | Move up towards the north wall of this room. The second torch can be found to the left of the platform. From here, you can light another torch by facing left and holding Y to send out an Ignizol at the distant torch. If the Baby Gohma enemy is attacking you as you do this, you can defeat it first. |
| 7 | 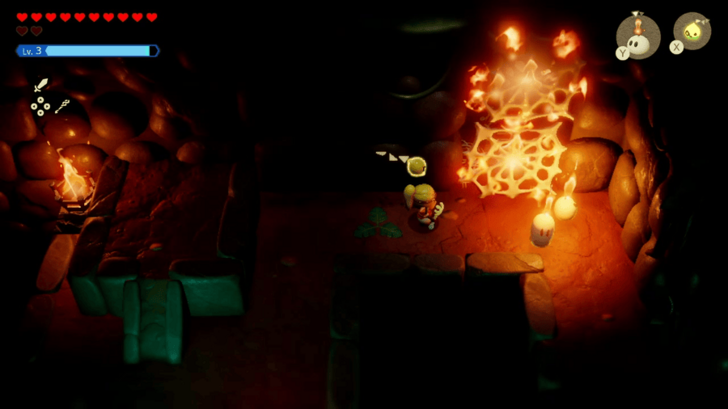 Hugging the north wall, go to the right side of the room. You should see two spider webs as well as a Baby Gohma blocking the last torch. Send out Ignizol echoes to burn the spider webs, the enemy, and torch. Get your 50 Rupees from the chest on the platform, and return to the previous room. |
| 8 | Back in the main cave, follow the path on the right, heading south towards the exit of the cave. |
| 9 | 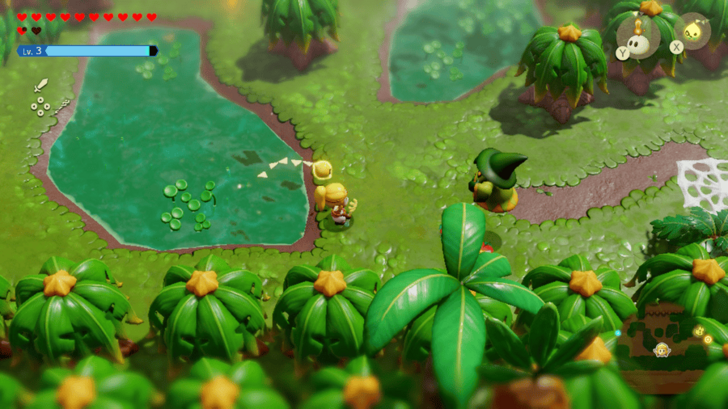 Follow the path heading east. Ignore the staircase to the north for now, and keep going right. An Electric Wizzrobe can be fought in this area. Defeat it to learn its echo. |
| 10 | 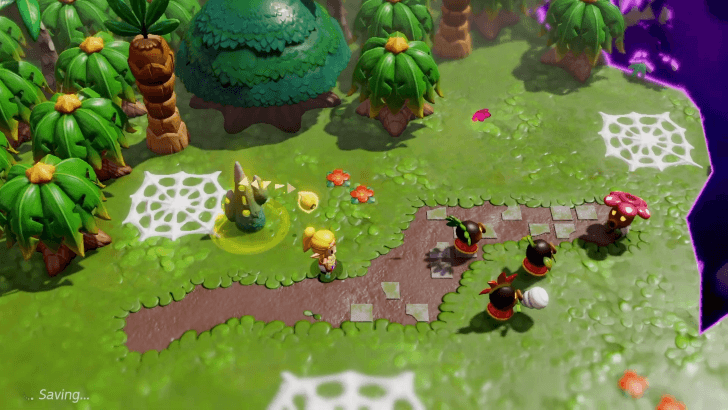 Continue right towards the waypoint. Approach the three Deku Scrubs next to the waypoint to activate a cutscene. |
| 11 | 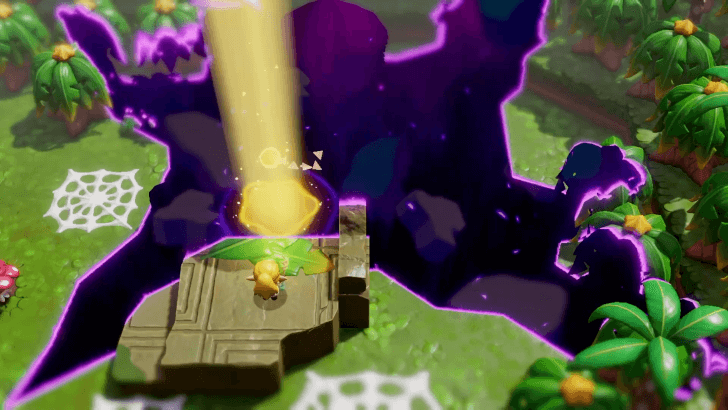 Interact with the rift opening and enter it to reach Stilled Blossu's House. ▶︎ Stilled Blossu's House Rift Walkthrough |
Rescue Tri's Friends at Stilled Blossu's House
| Rescue Tri's Friends at Stilled Blossu's House Objectives | |
|---|---|
| 1 |  Head north to the platform with a Giant Goponga Flower. Use a Torch Slug or any other fire echoes like the trusty Ignizol to defeat the enemies here and burn the spider web blocking a hole in the wall. Rescue the first set of Tri's friends inside. |
| 2 | 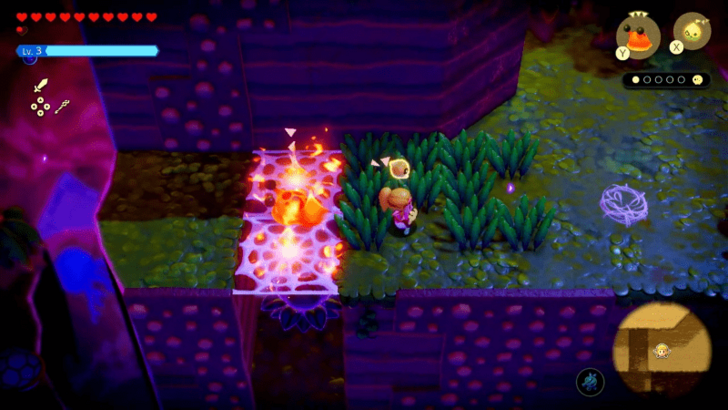 Climb the rock wall, defeat the Deku Baba Lv. 2 with a Torch Slug, then burn the web on the left. Drop down another flaming echo onto the rift Goponga Flower below to defeat it and rescue the second group of Tri's friends. |
| 3 | 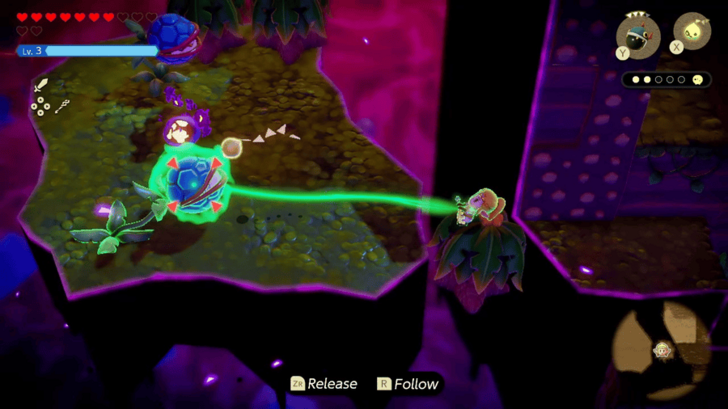 Head left to find three Deku Baba Lv. 2 surrounding the third group of Tri's friends. Use Bind to pull each of these creatures out, easily defeating them, then rescue the third group of Tri's friends. |
| 4 |  Climb up the two sets of climbing walls. Then climb down the ladder at the top. In the sidescroller section, descend the ladders to reach the bottom. |
| 5 | 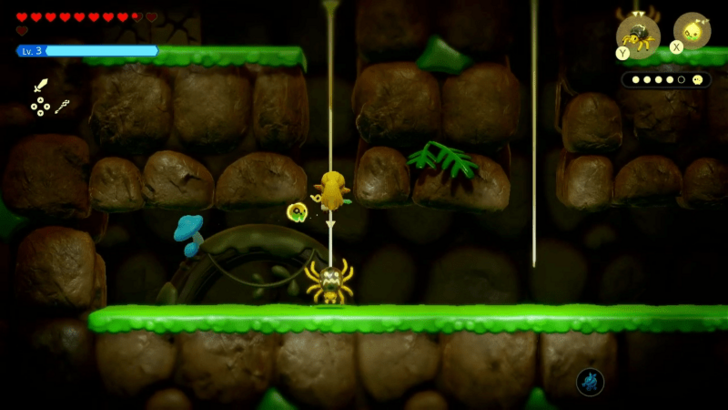 Go to the leftmost section, defeating enemies along the way. Use a Strandtula echo to climb up to a narrow passage with three destructible rocks. |
| 6 | 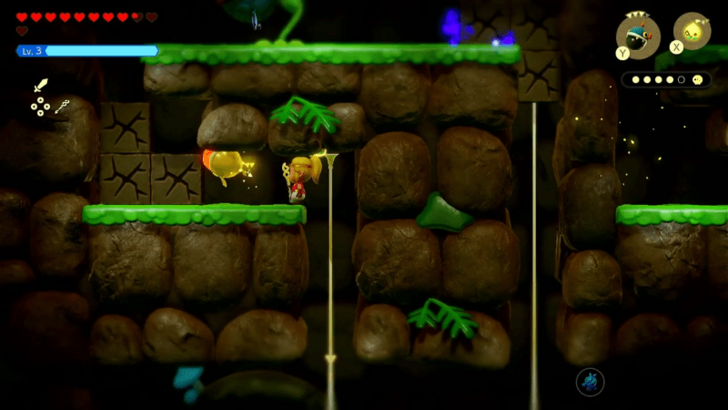 Summon a Bombfish echo to destroy the three destructible rocks. Then, place a Strandtula echo at the end to serve as your rope leading up. Defeat the Deku Baba Lv. 2 in the way by using another Bombfish. |
| 7 | 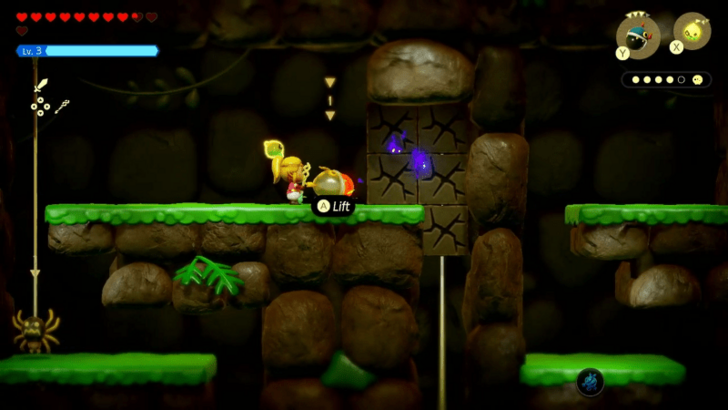 Use the Bombfish Echo to destroy the another set of destructible rocks to rescue the fourth group of Tri's friends. Bomb the remaining rocks, then exit back up the ladder. |
| 8 | 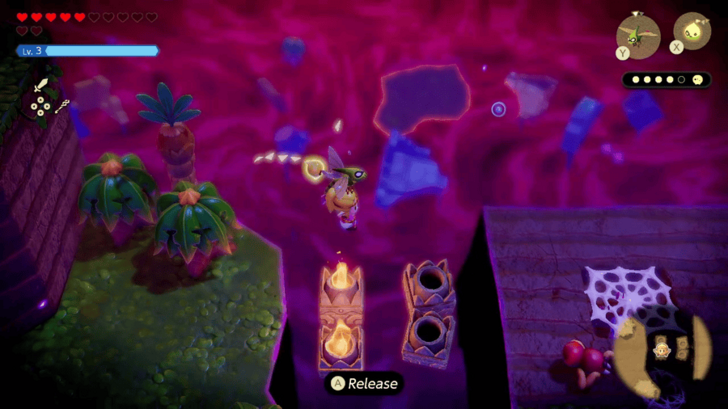 From this high platform, summon either a Needlefly, Mothula, Keese, or Peahat. Pick up your desired echo, then walk off the edge to glide to the rightmost platform. |
| 9 | 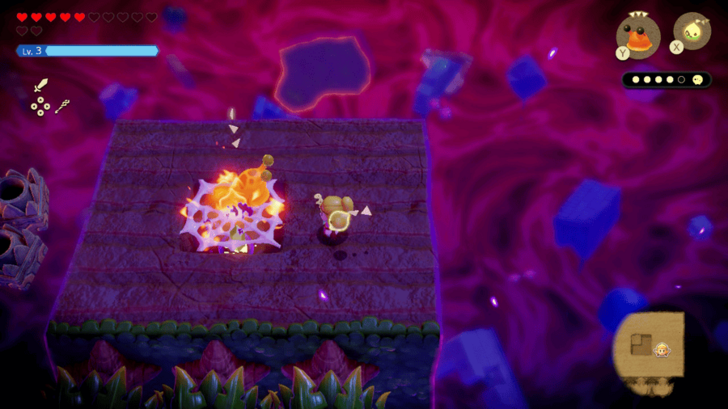 Burn the spider web blocking a hole in the ground, and rescue the final group of Tri's friends. This should mend the rift and return Blossu's house to the surface. |
Stilled Blossu's House Rift Walkthrough
Escape the Deku Scrub Lockup
| Escape the Deku Scrub Lockup Objectives | |
|---|---|
| 1 | 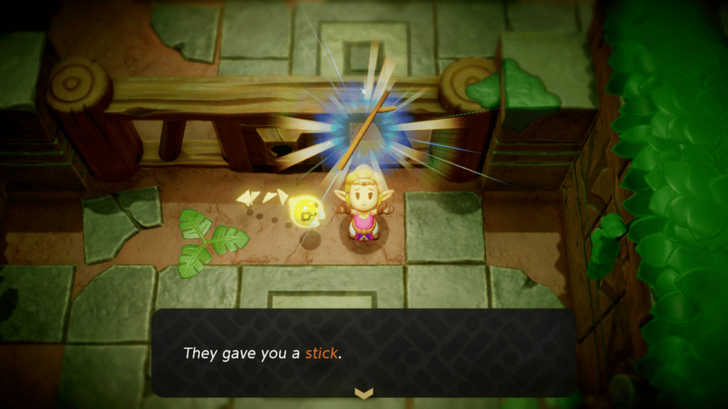 The Deku Scrubs with Blossu will find it offensive that you mended the rift, so they'll toss you into the lockup once you return to the surface. In this section of the game, you will not have access to your echoes, smoothies, or accessories . However, you will be able to use Bind with the stick you've been given. |
| 2 | 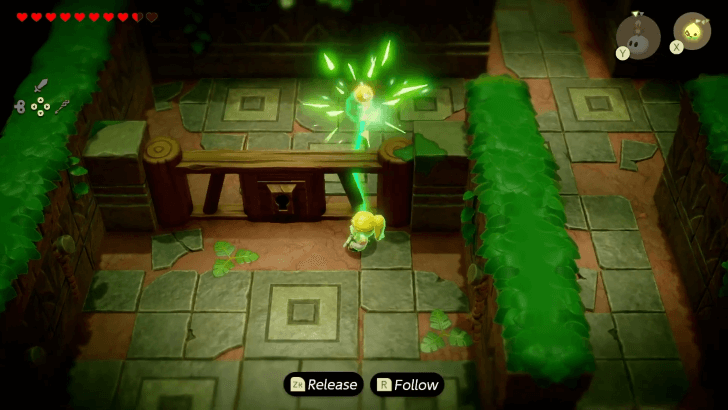 Use Bind on the key that the Deku Scrub dropped, and drag it into your cell. Interact with the lock to unlock the jail cell. |
| 3 | 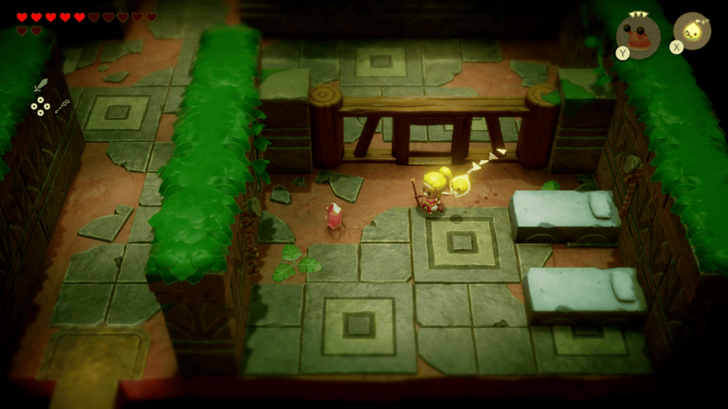 Unlock the cell on the right to get 20 Rupees. Then, go north. The doorway to the south leads outside, but the guards on duty there will throw you back into your cell after a funny exchange. |
| 4 | 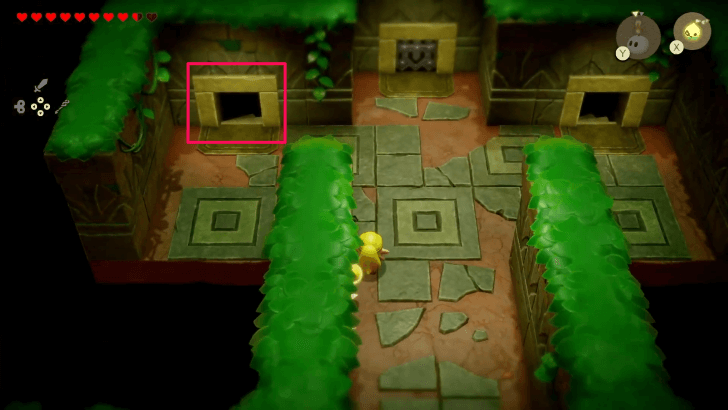 There's nothing you can do in the right passageway at the moment, so enter the left passageway and prepare to get through a stealth section. If the guards catch you, you'll be thrown back into your prison cell. |
| 5 | Going through the left passageway leads to a room with boxes and pots. Press B to jump into a pot along the way, and move left next to the boxes. From the pot, jump out onto the boxes, and make your way left. |
| 6 | Use ZL to target the pot on the wall, then Bind it. Push it off the wall and release it, so that it'll break and distract the guard. Quickly make your way through while he's distracted. You can go to the lower left to pick up 20 Rupees or just get to safety behind the box and low walls at the top. If you decide to get the Rupee, make sure to hide in the pot immediately. The guard will return before you can reach the top. Wait for him to face right before you make your way up. |
| 7 | The next Rupee is a bit riskier to get. If you're willing to ignore it, hop into a pot, and jump onto the gray platform. Make your way to the bottom of the room. Once no guard is facing south, make a beeline to the exit. Even if the guards spot you at this point, you'll still be able to make it safely into the next room. |
| ┗ | If you really want to get that Red Rupee, you can do the slow method of hiding inside a pot, moving towards the Rupee while in the pot, then stopping once a guard faces your way. A faster but less consistent method is to throw a pot south while staying hidden beside a box. If it shatters far enough, both guards will walk to investigate the sound. Run going left, picking up the Red Rupee along the way. |
| 8 | To get the Blue Rupee, hop into a pot at the left end of the room. If you already went to the next room, just go back through the doorway. While inside the pot, move right until you're beside the low gray platform. Then, jump up to the platform, up the higher platform, and get the Rupee. If the guards spot you, just enter the next room. |
| 9 |  In the next room, use Bind to move the potted plant to uncover a hidden door. |
| 10 | 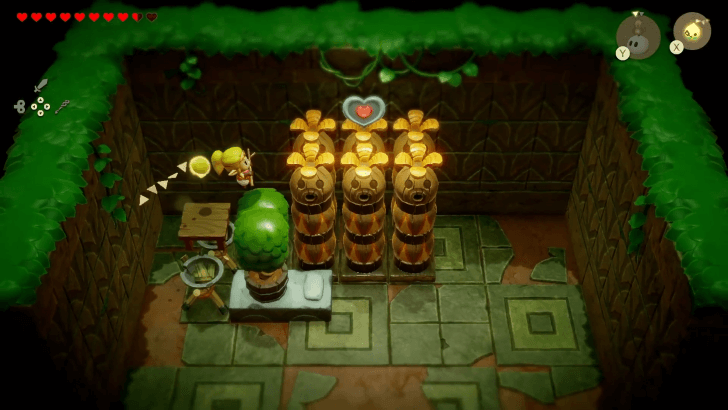 Enter the hidden door. Use Bind to move the objects and scale up the statues to reach the Piece of Heart at top. Arrange them in the following order starting from the lowest level:
|
| 11 | 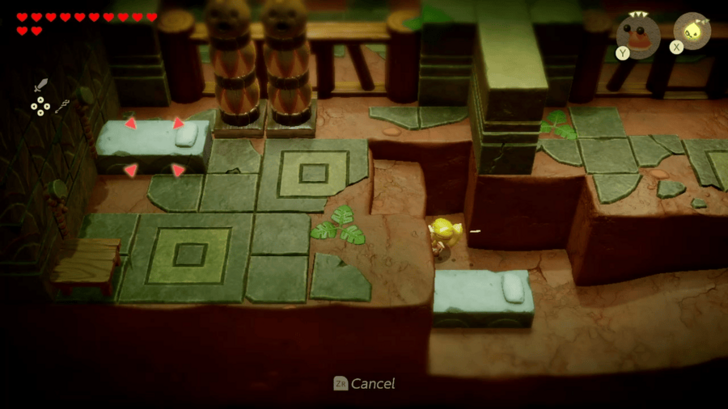 Go back to the previous room, and unlock the cell in front of you. Go down to the gap beside the bed, then hold ZL to target the bed on the upper platform. Use Bind to pull the higher bed onto the lower bed to make a staircase. |
| 12 | 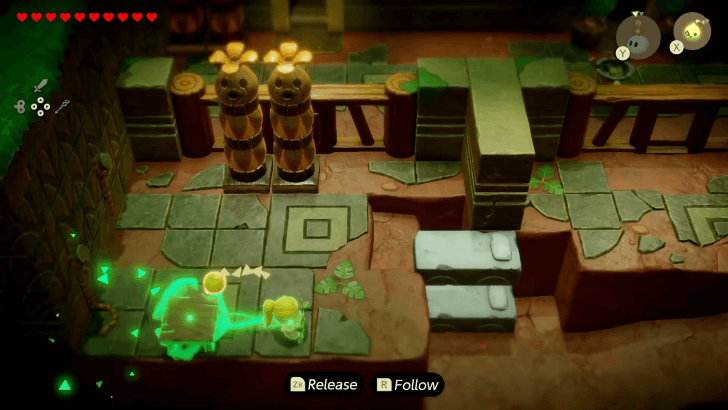 Go up the bed staircase you just made to grab the table from the lower left corner of the room. Drag this table out through the cell door on the right. |
| 13 |  Place the table next to the brazier. Jump onto the table, then the brazier, and onto the upper platform on the right. |
| 14 | 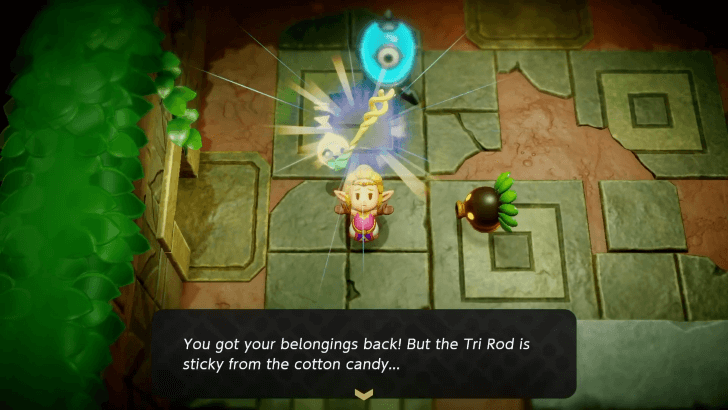 The Deku Scrub in this room will be eating "cotton candy" off of the Tri Rod, but will hand it over once they're done, allowing you to use your echoes and items once again. Spin using the R shoulder button to hit the switch and open the locked door. |
| 15 | 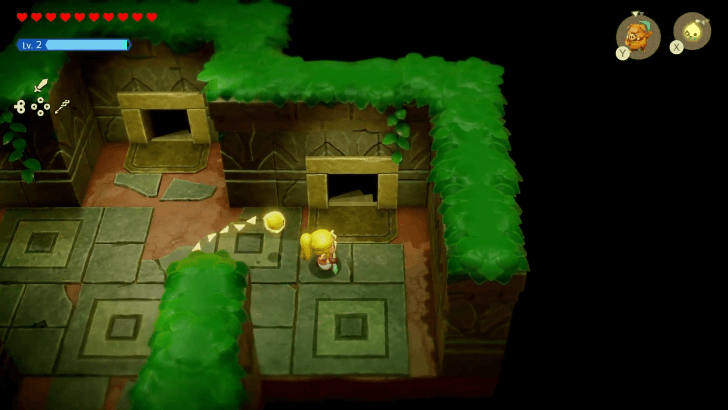 Exit through the newly opened passageway, then enter the passageway on the right. A cutscene will play showing that the Deku Scrubs are afraid of monsters. |
| 16 | Summon any monster echo to scare the Deku Scrubs and prevent them from chasing you. It may be best to use an echo that you can pick up such as the Zol, so that you can hold onto it while walking instead of having to resummon a monster every time. |
| 17 | 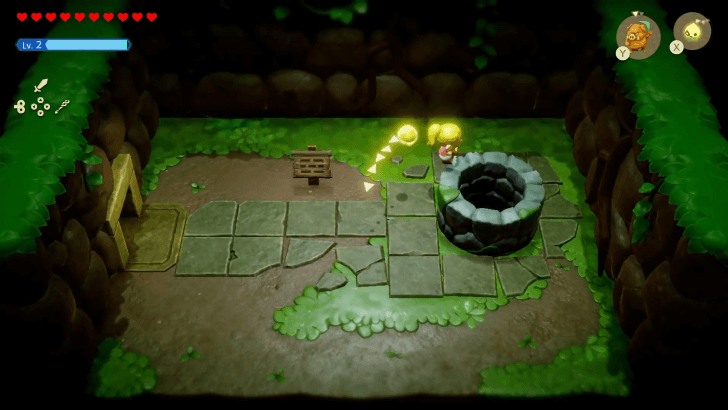 Follow the path with your monster echo until you reach the next room. Jump into the well to enter a sidescrolling area leading to a separate exit to escape the jail. |
| 18 | Bind the Boulder and drop it down to one of the crates to swim down. Use Bind to move one crate to emerge to the surface. Defeat the Hydrozol or let it fall into the water. |
| 19 | 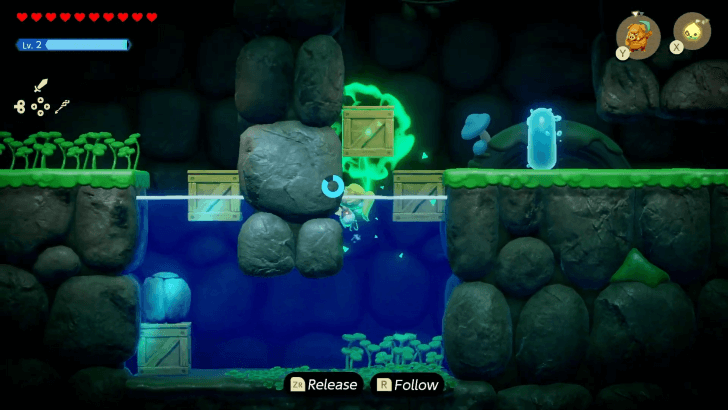 Use Bind on a crate, and jump to emerge to the surface. Defeat the Hydrozol here or let it fall into the water. |
| 20 | 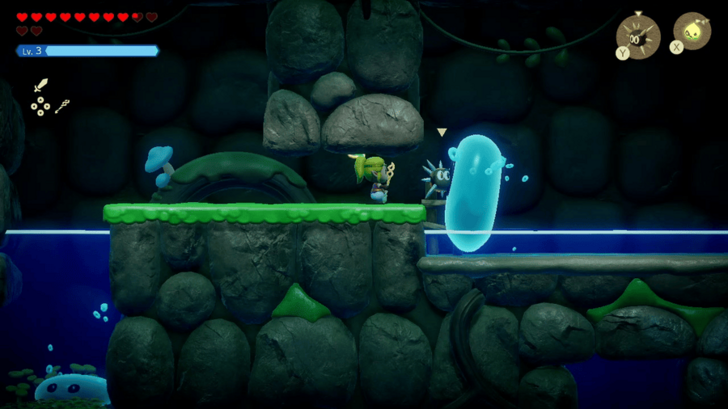 Proceed right. Another Hydrozol will appear in the shallow water. Use a Sea Urchin echo to easily defeat it. |
| 21 | 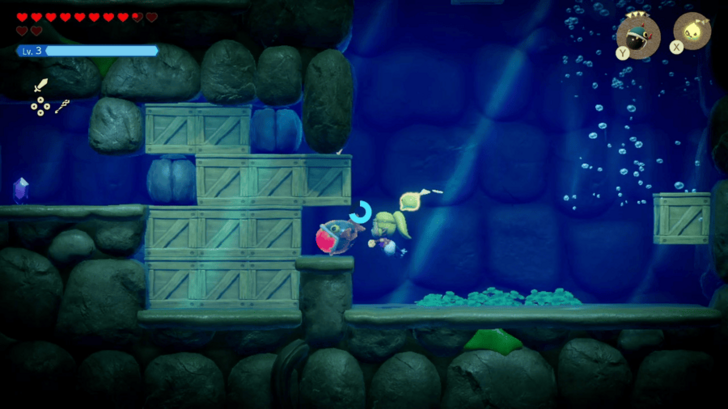 Swim down to the left if you want to get 50 Rupees. Blow up the crates using Bombfish to get the Purple Rupee. |
| 22 |  Go back to the surface. Use a Flying Tile echo or build a bridge using Old Beds to avoid the current and reach the right side. |
| 23 | 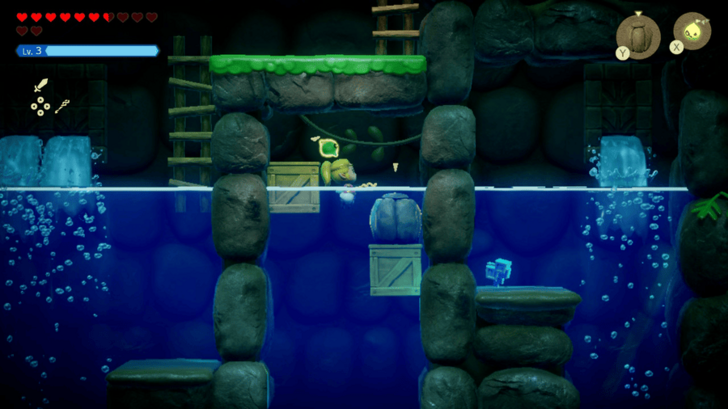 Avoid the Bio Deku Babas, and swim right towards the area with two grates. Place a Boulder echo on top of the crate on the right to make it sink. Swim to the right side of the sinking boulder and crate before it reaches the bottom. |
| 24 | Align yourself with the current, then remove the Boulder echo by holding ZR. Reverse-bind the crate, and let it float upwards so that you'll move up against the downward currents. Pick up the Might Crystal, then let the current take you back down. |
| 25 | Use the same method to get up on the left side. Weigh down the left crate with a Boulder, and reverse-bind onto the crate again to reach the ladder that leads to the exit. |
| 26 | 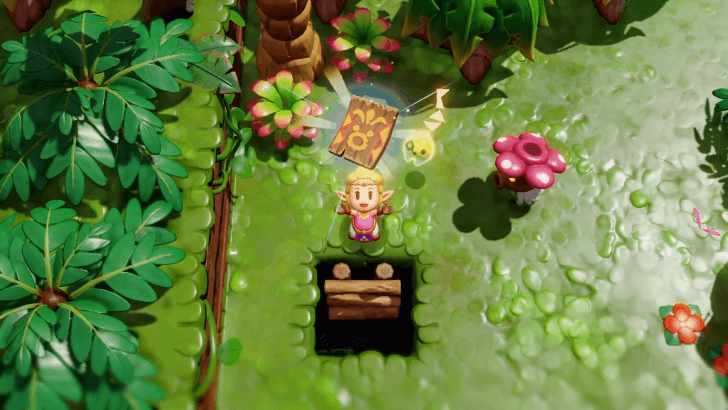 Once you emerge from the ladder, Blossu will speak to you and hand over The Sweet Spot Membership Card. With this, you can now enter the Sweet Spot and clear the dungeon. ▶︎ Faron Temple Dungeon Walkthrough |
| ◀︎ Previous Quest | Next Quest ▶︎ |
|---|---|
| Still Missing | The Prime Energy and Null |
| Lands of the Goddesses Questline | |
| Lands of the Goddesses ┣ The Rift on Eldin Volcano ┣ Rift on Holy Mount Lanayru ┗ ▶︎ A Rift in the Faron Wetlands ┗ ★ Faron Temple |
|
The Legend of Zelda: Echoes of Wisdom (EoW) Related Guides

| Complete Walkthrough | All Dungeons |
| Best Dungeon Order | |
Story Walkthrough Chart
Guides marked with a ★ are Dungeon Guides
Comment
Author
The Legend of Zelda: Echoes of Wisdom Walkthrough & Guides Wiki
A Rift in the Faron Wetlands Walkthrough
improvement survey
03/2026
improving Game8's site?

Your answers will help us to improve our website.
Note: Please be sure not to enter any kind of personal information into your response.

We hope you continue to make use of Game8.
Rankings
- We could not find the message board you were looking for.
Gaming News
Popular Games

Genshin Impact Walkthrough & Guides Wiki

Honkai: Star Rail Walkthrough & Guides Wiki

Umamusume: Pretty Derby Walkthrough & Guides Wiki

Pokemon Pokopia Walkthrough & Guides Wiki

Resident Evil Requiem (RE9) Walkthrough & Guides Wiki

Monster Hunter Wilds Walkthrough & Guides Wiki

Wuthering Waves Walkthrough & Guides Wiki

Arknights: Endfield Walkthrough & Guides Wiki

Pokemon FireRed and LeafGreen (FRLG) Walkthrough & Guides Wiki

Pokemon TCG Pocket (PTCGP) Strategies & Guides Wiki
Recommended Games

Diablo 4: Vessel of Hatred Walkthrough & Guides Wiki

Fire Emblem Heroes (FEH) Walkthrough & Guides Wiki

Yu-Gi-Oh! Master Duel Walkthrough & Guides Wiki

Super Smash Bros. Ultimate Walkthrough & Guides Wiki

Pokemon Brilliant Diamond and Shining Pearl (BDSP) Walkthrough & Guides Wiki

Elden Ring Shadow of the Erdtree Walkthrough & Guides Wiki

Monster Hunter World Walkthrough & Guides Wiki

The Legend of Zelda: Tears of the Kingdom Walkthrough & Guides Wiki

Persona 3 Reload Walkthrough & Guides Wiki

Cyberpunk 2077: Ultimate Edition Walkthrough & Guides Wiki
All rights reserved
© Nintendo. The Legend of Zelda and Nintendo Switch are trademarks of Nintendo.
The copyrights of videos of games used in our content and other intellectual property rights belong to the provider of the game.
The contents we provide on this site were created personally by members of the Game8 editorial department.
We refuse the right to reuse or repost content taken without our permission such as data or images to other sites.


