This survey will take about 1 minute.
Your answers will help us to improve our website.
Donkey Kong Bananza
Banandiumtone Puzzle Solution and Guide
☽ DK Island and Emerald Rush DLC out now!
☽ Learn how to solve Banandiumtone's Puzzles.
☽ All Collectibles: Banandium Gems and Fossils
☽ Learn How to Skip Layers Entirely!
☽ How to Beat the Final Boss
☽ Post-Game: Rehearsal Halls | Secret Ending

The Banandiumtone is a unique NPC on DK Island that has some cryptic puzzles for Donkey Kong to solve. Check out our guide to learn how to interpret the Banandiumtone glyphs and how to solve each of the Banandiumtone Puzzles.
List of Contents
Banandiumtone Symbols and Glyphs
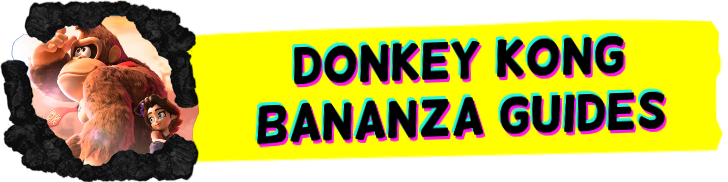
Banandiumtone Location
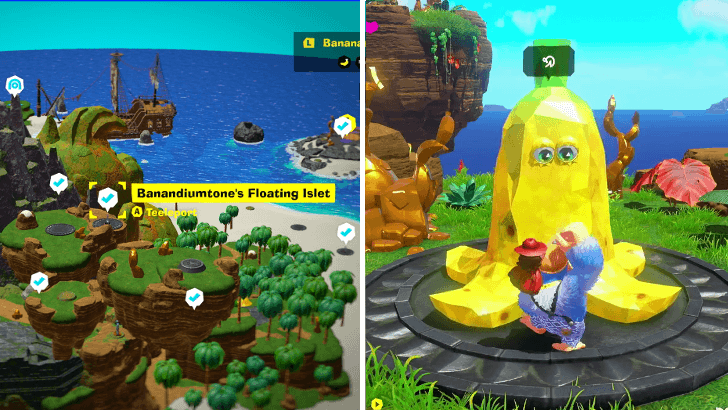
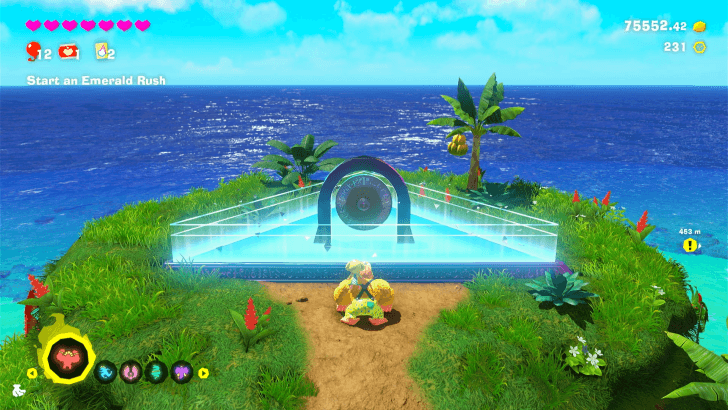
Banandiumtone is found near the Banandiumtone's Floating Islet Checkpoint on DK Island. When you first encounter them, you’ll see a single glyph above their head. This marks the start of an 8-step puzzle.
Each solved puzzle adds another glyph, with the rules required to solve the puzzle changing as you progress. Before diving into the solutions, let’s break down the core rules behind these glyph puzzles.
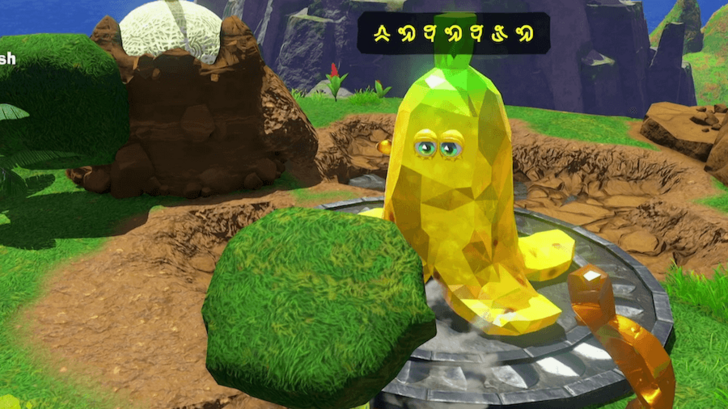
Labels for Banandiumtone's Glyphs and Symbols

Banandiumtone speaks in symbols we can’t easily type out. To make things simpler, we’ll assign each symbol a letter and use those letters throughout this guide.
The image above shows the letter we assign to each symbol. The letters are mostly arbitrary, but they’ll help us keep things clear as we go.
Understanding the Cycle of the Symbols
Depending on the active puzzle’s rules, interacting with Banandiumtone cycles through the symbols. The glyphs cycle in the same order we've shown above.
Starting with Symbol A, punching the Banandiumtone will display Symbol B, then N, O, W, K, Z, and finally back to A.
Symbols in the Correct Slot Turn Yellow
Getting all yellow means you've completed a puzzle!
As you progress, Banandiumtone’s puzzles add more symbols. Solving them means doing specific actions to cycle the correct symbols into the right slots. A slot is correct when its symbol turns yellow.
In most puzzles, the goal is to cycle to the Z symbol, though this isn’t always the case. When a puzzle is solved, Banandiumtone will spin and throw around Gold.
How to Solve the Banandiumtone Puzzles
Now that you know the rules, here’s how to solve each Banandiumtone puzzle.
| Banandiumtone Puzzle Solutions |
|---|
|
|
1 Glyph Puzzle
This first puzzle is simple and many players may solve it by accident. It’s mainly Banandiumtone showing you the cycle. You start with the A symbol, then move through B, N, O, W, K, and finally Z every time you hit Banandiumtone.
When the Z symbol appears, it turns yellow and unlocks the next puzzle.
2 Glyph Puzzle
The second puzzle shows two glyphs. The left glyph cycles when DK punches with his left hand, and the right glyph cycles with his right.
To control DK’s punches, use detached JoyCons. Swing the left JoyCon for a left punch, and the right JoyCon for a right punch. Use this to cycle both glyphs to Z.
3 Glyph Puzzle
The third puzzle shows three symbols. By default, interacting with Banandiumtone cycles the first symbol. Using a Hand Slap shifts control to the second symbol. Hand Slap again to cycle the third. One more Hand Slap returns you to the first.
To solve the puzzle, cycle the first symbol to Z. Hand Slap to control the second symbol and cycle it to a Z. Then finally, do it for the third symbol as well.
4 Glyph Puzzle
If the first puzzles felt odd, the fourth goes further. Here, four symbols cycle based on the direction DK faces when he punches.
Face north to cycle one slot. West cycles another. East a third. South the last. Turn each slot to Z to solve the puzzle.
5 Glyph Puzzle
No need to transform! Just select the correct form.
The fifth puzzle is arguably the toughest one to solve. The key to the solution is that the puzzle slots cycle depending on which Bananza form you have selected when you throw your punch.
- Having Kong Bananza selected cycles the 1st, 2nd, and 5th slots.
- Having Zebra Bananza selected cycles the 1st, 2nd, and 3rd slots.
- Having Ostrich Bananza selected cycles the 2nd, 3rd, and 4th slots.
- Having Snake Bananza selected cycles the 3rd, 4th, and 5th slots.
- Having Elephant Bananza selected cycles the 1st, 4th, and 5th slots.
You could use this knowledge to try setting all slots to the Z symbol by yourself, or you can use this handy tool we've prepared. Just input the letters corresponding to the symbols that appear above Banandiumtone's head, and press solve. We'll calculate the solution for you.
Banandiumtone 5th Puzzle Calculator
|
|
|
| Enter the Starting Combination | |
|---|---|
| Solution: | Waiting on Input |
6 Glyph Puzzle
The obscurity continues with the sixth puzzle. Each punch will cycle all of the slots of the puzzle. The secret behind this puzzle is that each slot is tied to one of the 6 Bonus levels on DK Island. These are the gold platforms you can punch to enter a quick gold-filled minigame.
Punch Banandiumtone until the Z symbol lands on certain slots, then lock those slots in by completing their associated Bonus Levels. Repeat until all slots display the Z symbol.
- To lock in Slot 1, complete the Bonus Level on top of the mountain
- To lock in Slot 2, complete the Bonus Level on the West Islet
- To lock in Slot 3, complete the Bonus Level near Banandiumtone
- To lock in Slot 4, complete the Bonus Level at the top of the waterfall near the Mountain Falls checkpoint
- To lock in Slot 5, complete the Bonus Level on K. Rool's Ship
- To lock in Slot 6, complete the Bonus Level directly under DK's House.
Reset Bonus Stages by Warping Away
If you accidentally locked in the wrong slot, you can reset the locks by warping to a new layer then coming back. This restores all Bonus levels, allowing you to do them again. This also unlocks all slots on Banandiumtone's puzzle, so punching them will affect all slots again.
How to Teeleport: Fast Travel Guide
7 Glyph Puzzle
We're almost at the end. For the seventh puzzle, the series of symbols displayed correspond to the last 7 button inputs you used to hit Banandiumtone with.
Try each of the moves below seven times and note which symbol appears yellow in each slot.
| Symbol | Controller Button | Possible Actions |
|---|---|---|
| ・Grab ・Tear Off Chunk |
||
| ・Spin Jump Skill ・Charge Jump with the Jump Burst Skill ・Down Punch (Inverted Controls) |
||
| ・Down Punch ・Dive Punch |
||
| ・Roll | ||
| ・Hand Slap | ||
| ・Up Punch | ||
| ・Punch ・Swing |
Spell BANANZA to Solve
To solve the puzzle, the symbols need to spell out BANANZA. The easiest way to achieve this is to use the Snake Bananza form, have the Jump Burst skill unlocked, and successfuly perform the following actions in order onto the Banandiumtone:
| Down Punch → Charge Jump → Roll → Charge Jump → Roll → Grab → Charge Jump |
If using the Spin Jump skill as your A action instead, it is recommended to hold a chunk while performing the action to increase your range. Be careful though, as you'll want to only hit Banandiumtone once while you're in midair. Multiple hits will input the A symbol twice.
Change Button Inputs in the Settings
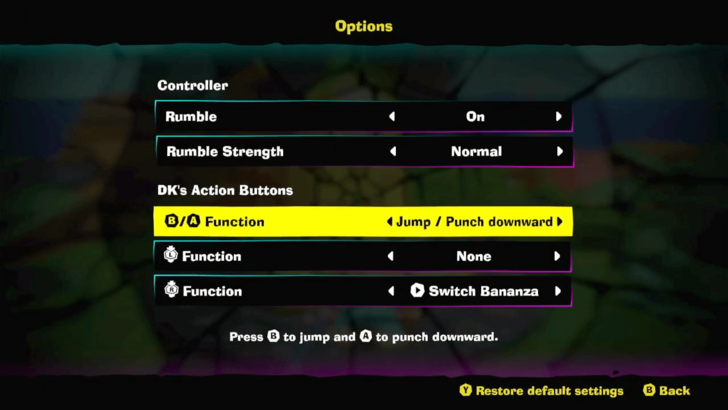
If you don't have either the Spin Jump or the Jump Burst skills unlocked, it may be difficult for you to make use of an A button action on Banandiumtone. To get around this, you can go to Options and swap the A and B button functions, allowing you to down punch with A. This will count as an A action and will not reset the puzzle.
Banandiumtone Puzzle 8
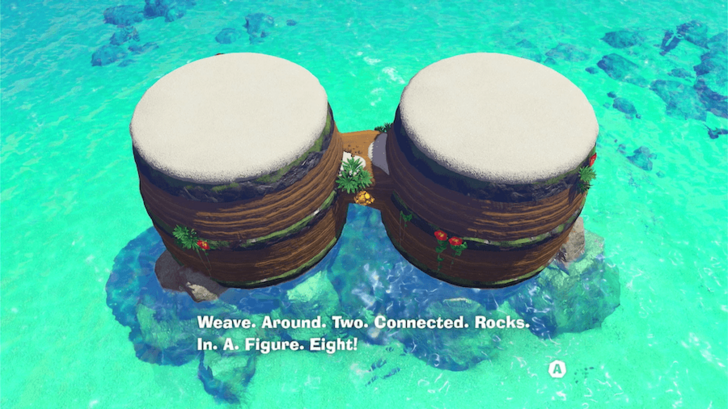
For the eighth and final puzzle, Banandiumtone will give you three words as hints on what you have to do. The full sentence they're trying to say is Weave Around Two Connected Rocks In A Figure Eight.
To solve this puzzle, you'll have to swim in a figure-eight motion around the island shaped like DK Bongos. Successfully doing so will trigger a prompt with the Banandiumtone saying the full sentence.
You will then be teleported back to Banandiumtone where they'll give you your final reward.
Banandiumtone Puzzle Reward
Quick-Change Tie
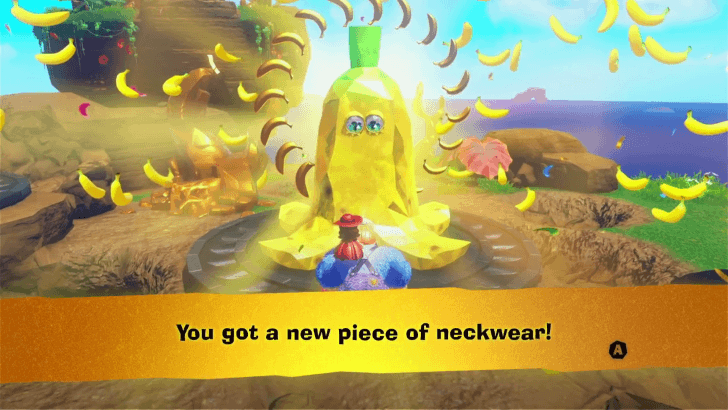
After completing all of Banandiumtone's Puzzles, you'll receive the Quick-Change Tie. Equipping this tie at a closet doesn't actually equip a new tie onto DK. Instead, it randomizes the outfits for both DK and Pauline.
Donkey Kong Bananza Related Guides
Guides by Category
| List of Categories | |
|---|---|
 Walkthrough Walkthrough |
 Layers Layers |
 Banandium Gems Banandium Gems |
 How-To Guides How-To Guides |
 Challenge Ruins Challenge Ruins |
 Bananza Forms Bananza Forms |
 Outfits Outfits |
 Bosses Bosses |
 Fossils Fossils |
 Post-Game Post-Game |
 Music Discs Music Discs |
 Items Items |
 Terrain Types Terrain Types |
 Skills Skills |
 Message Boards Message Boards |
 Latest News Latest News |
Recommended Guides
| Top Guides and Articles | |
|---|---|
 Best Skills to Upgrade Best Skills to Upgrade |
 How to Get the Secret Ending How to Get the Secret Ending |
 List of Characters List of Characters |
 Easter Eggs and References Easter Eggs and References |
 Missables and One-Time Events Missables and One-Time Events |
 Best Outfits Best Outfits |
 Completion Reward Completion Reward |
 DLC Guide DLC Guide |
| Banandiumtone Puzzle Guide (DLC) |
 List of Emerald Perks (DLC) List of Emerald Perks (DLC) |
 Emerald Rush Guide (DLC) Emerald Rush Guide (DLC) |
- |
| Location Guides | |
 All Style Shop Locations All Style Shop Locations |
 All Stuff Shop Locations All Stuff Shop Locations |
 Bonus Stage Locations Bonus Stage Locations |
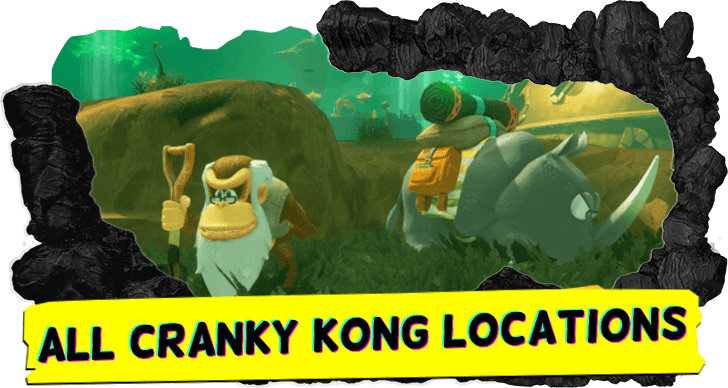 All 17 Cranky Kong Locations All 17 Cranky Kong Locations
|
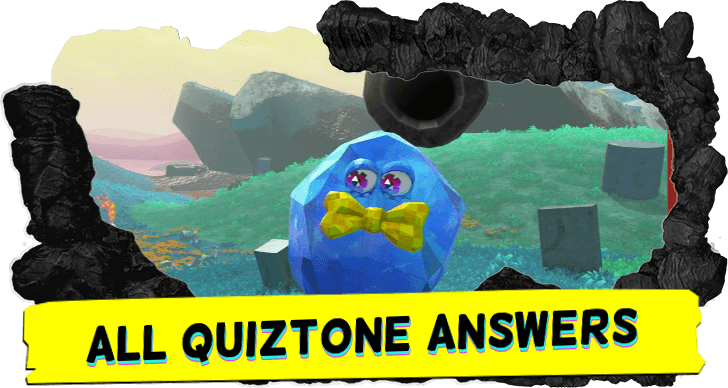 All Quiztone Answers and Locations All Quiztone Answers and Locations |
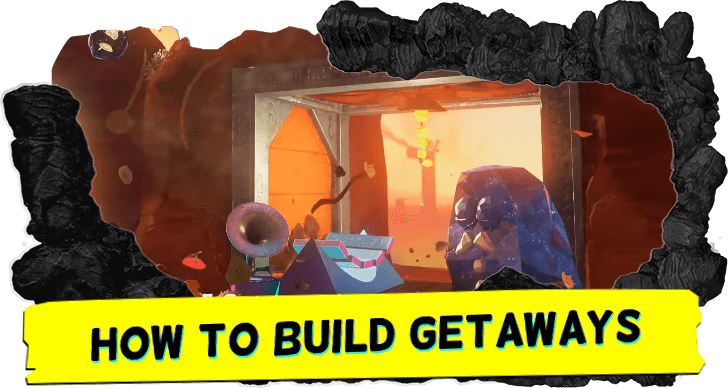 All Getaway Locations All Getaway Locations |
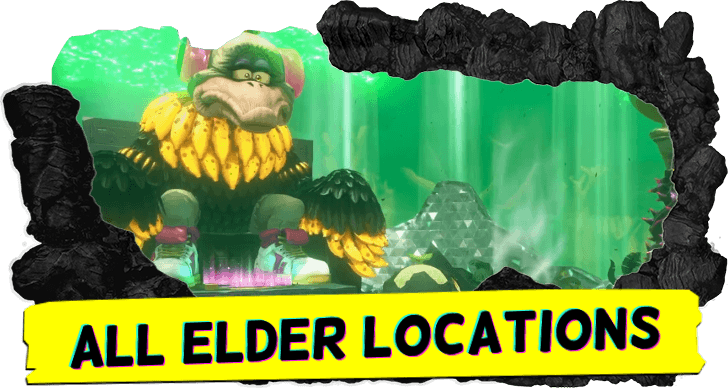 All Elder Locations All Elder Locations |
- |
| Collectible Guides | |
 Collectibles List Collectibles List |
 Checkpoints Checkpoints |
 Void Stakes Void Stakes |
 Squawk Statues Squawk Statues |
Comment
2  Anonymous 7 months
For some reason, when ever I roll into the bananduimtone, it just, changes the first B with an A, this is on part 7 of the puzzle btw
Author
Banandiumtone Puzzle Solution and Guide
Please participate in our site
improvement survey
04/2026
improvement survey
04/2026
Would you assist in
improving Game8's site?
improving Game8's site?

×
We are listening to our users' valuable opinions and discussing how to act on them.
The information collected through this survey will be used for the purpose of improving our services. In addition, the information will only be disclosed a part of a statistic in a format that will not allow identification of personal information.
Begin Survey
Not Now
×
Please rate each item regarding Game8.co's Advertisements.
Amount of Ads
Very Dissatisfied
Somewhat Dissatisfied
Fine
Somewhat Satisfied
Highly Satisfied
Placement of Ads
Timing of Ad Display
Ad Loading Speed
Safeness of Ads
Content of Ads
×
Please rate each item regarding Game8.co's Quality of Articles.
Amount of information
Very Dissatisfied
Somewhat Dissatisfied
Fine
Somewhat Satisfied
Highly Satisfied
Frequency of updates
Speed of new information
Accuracy of articles
Understandibility of articles
Readability of sentences
×
Please rate each item regarding Game8.co's Usability of the Site.
Ease of finding information
Very Dissatisfied
Somewhat Dissatisfied
Fine
Somewhat Satisfied
Highly Satisfied
Loading Speed
Use of Color
Font Size
Visibility of Images
Easy to Understand Layout
×
Please rate each item regarding Game8.co's Message Boards, Comments.
Ease of Writing
Very Dissatisfied
Somewhat Dissatisfied
Fine
Somewhat Satisfied
Highly Satisfied
Readability
Ease in Finding Information
Comment Quality
Comment Quantity
Admin Response
×
Please rate each item regarding Game8.co's Site's new design.
Please rate our site's new design
Very Dissatisfied
Somewhat Dissatisfied
Fine
Somewhat Satisfied
Highly Satisfied
Do you think that the website's design change makes the site easier to use?
Has the new design made it easier for you to find information on the site?
Has the new design improved the overall visual appeal of the site?
How would you rate your overall satisfaction with the new design of the site?
×
How likely are you to recommend Game8 to someone you know?
Very Unlikely
0
1
2
3
4
5
6
7
8
9
10
Very Likely
If you have other opinions regarding potential improvement to the website, please share them with us. We would appreciate your honest opinion.
Note: This is a free response section, so you can proceed without entering anything.
Note: Please be sure not to enter any kind of personal information into your response.
Note: Please be sure not to enter any kind of personal information into your response.
×
Thank You
×
Thank you for participating in our survey! Your answers will help us to improve the quality of our website and services.
We hope you continue to make use of Game8.
We hope you continue to make use of Game8.
Close
Rankings
Gaming News

![Forza Horizon 6 Review [Preview] | Beautiful Roads With a Whole Lot of Oversteer](https://img.game8.co/4460981/a7254c24945c43fbdf6ad9bea52b5ce9.png/show)


![Forza Horizon 6 Review [Preview] | Beautiful Roads With a Whole Lot of Oversteer](https://img.game8.co/4460981/a7254c24945c43fbdf6ad9bea52b5ce9.png/thumb)
Popular Games

Genshin Impact Walkthrough & Guides Wiki
Crimson Desert Walkthrough & Guides Wiki
Umamusume: Pretty Derby Walkthrough & Guides Wiki
Honkai: Star Rail Walkthrough & Guides Wiki
Monster Hunter Stories 3: Twisted Reflection Walkthrough & Guides Wiki
Wuthering Waves Walkthrough & Guides Wiki
The Seven Deadly Sins: Origin Walkthrough & Guides Wiki
Pokemon TCG Pocket (PTCGP) Strategies & Guides Wiki
Pokemon Pokopia Walkthrough & Guides Wiki
Zenless Zone Zero Walkthrough & Guides Wiki


Recommended Games
Monster Hunter World Walkthrough & Guides Wiki
Fire Emblem Heroes (FEH) Walkthrough & Guides Wiki
Pokemon Brilliant Diamond and Shining Pearl (BDSP) Walkthrough & Guides Wiki
Super Smash Bros. Ultimate Walkthrough & Guides Wiki
Diablo 4: Vessel of Hatred Walkthrough & Guides Wiki
Cyberpunk 2077: Ultimate Edition Walkthrough & Guides Wiki
Yu-Gi-Oh! Master Duel Walkthrough & Guides Wiki
Elden Ring Shadow of the Erdtree Walkthrough & Guides Wiki
The Legend of Zelda: Tears of the Kingdom Walkthrough & Guides Wiki
Persona 3 Reload Walkthrough & Guides Wiki


All rights reserved
© Nintendo. Games are property of their respective owners. Nintendo of America Inc.
The copyrights of videos of games used in our content and other intellectual property rights belong to the provider of the game.
The contents we provide on this site were created personally by members of the Game8 editorial department.
We refuse the right to reuse or repost content taken without our permission such as data or images to other sites.
It's always the right-most symbol that changes after you interact with the Banandiumtone. So after you roll into it, the right-most symbol should turn into the N symbol.