Lagoon Layer Walkthrough
☽ DK Island and Emerald Rush DLC out now!
☽ Learn how to solve Banandiumtone's Puzzles.
☽ All Collectibles: Banandium Gems and Fossils
☽ Learn How to Skip Layers Entirely!
☽ How to Beat the Final Boss
☽ Post-Game: Rehearsal Halls | Secret Ending
This is a walkthrough guide for Lagoon Layer (SL 100-102) in Donkey Kong Bananza. Read on for a complete step-by-step on how to complete the layer and progress the story.
| Lagoon Layer Guides | |
|---|---|
| Walkthrough | Collectibles |
| Previous and Next Layer | |
| ◀︎ Ingot Isle | Hilltop Layer ► |
List of Contents
Lagoon Layer Walkthrough
Ape Cape Sublayer 100
| Step-by-Step Guide | |
|---|---|
| 1 | 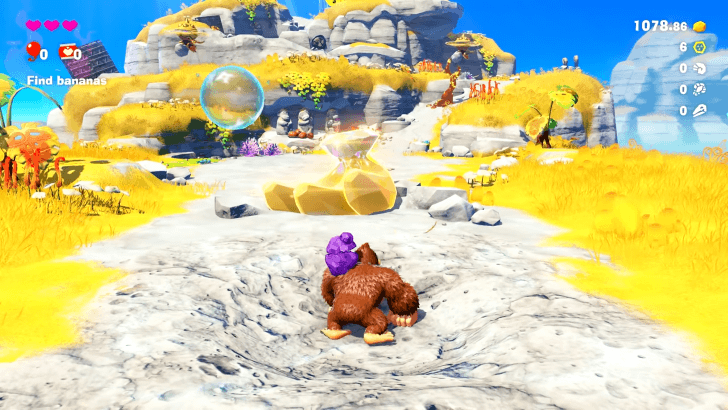 Punch the Banandium Gems in front of you. You may be able to earn a Skill Point, which can be used to upgrade or unlock skills. Access the Skill menu by pressing up on the keypad. ▶︎ Skills List and Best Skills to Upgrade First |
| 2 | 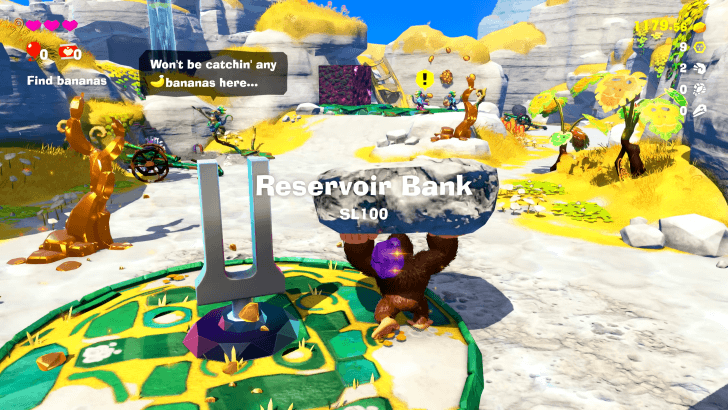 Follow the path forward until you reach the Reservoir Bank area. Salvager Monkeys you encounter along the way can help you find where to go. |
| * | 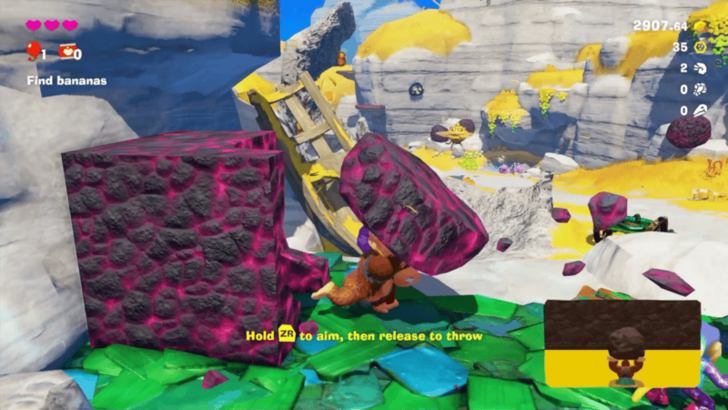 At the Reservoir Bank, you will see a sparking, black and magenta cube next to a pair of monkeys. This is a Boom Rock—an explosive material. Tear off a chunk to get a Boom Bomb, which you can throw to destroy extra sturdy terrain. The cube will regenerate whenever you tear off a chunk, so feel free to test the Boom Bomb out before moving on. |
| 3 | 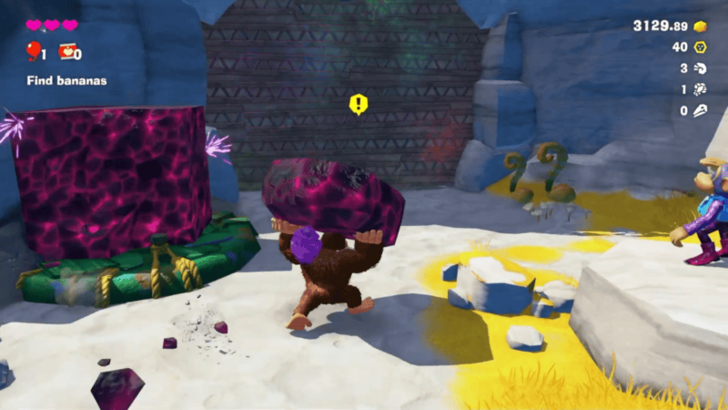 Keep following the path until you're faced with a large concrete wall and a Boom Rock cube in front of it. Tear off a chunk from the Boom Rock, and throw it onto the concrete wall to open up a tunnel. ▶︎ How to Break Concrete |
| * | 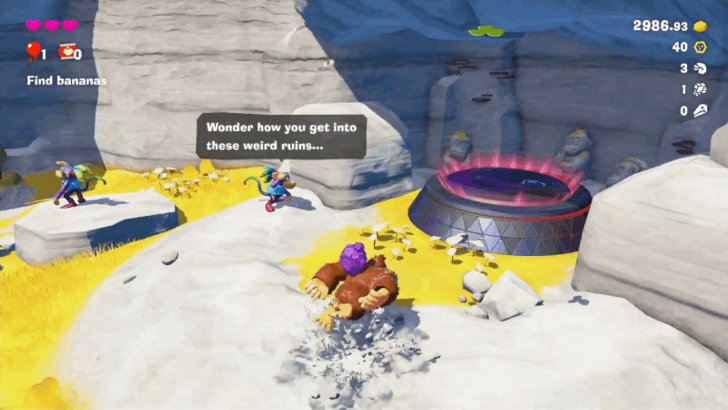 A battle challenge is available in this area. On the right side of the path, there is a glowing panel with a banana engraved on it. Punch down the platform to start the Lagoon Layer Battle Challenge 1. ▶︎ Crockoid x 3 Puzzle Guide |
| 4 | 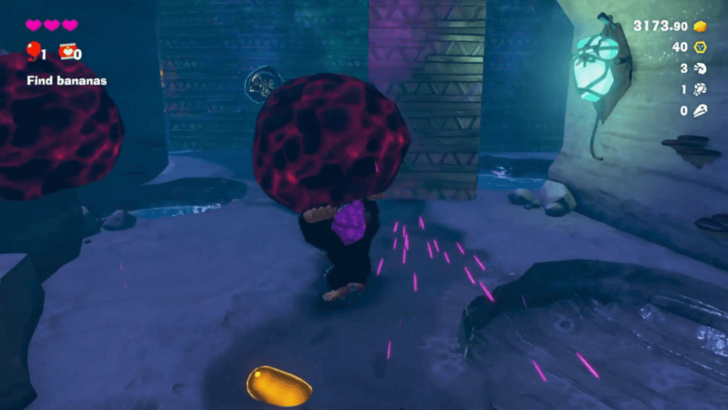 Tear off a chunk from the Boom Rock and throw it at the rotating wall inside the tunnel. A fossil is attached to one of the wall, and can be obtained by destroying it. |
| 5 |  Go through the opening you made, and continue through the passageway. Pass through the small waterfall to exit the tunnel. A monkey can be found near this exit, and he'll tell you about the Void Stake blocking the water flow. |
| 6 | 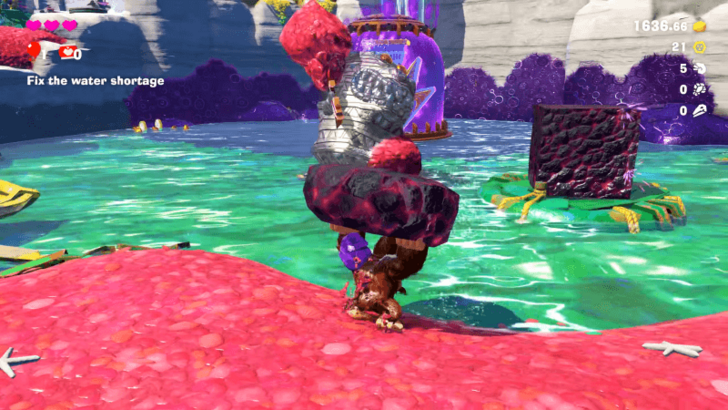 Go to the Void Stake, defeating enemies along the way. A Crockoid with a concrete shell guards the stake. Tear off a piece of the Boom Rock nearby, and throw it at the Crockoid to destroy its outer shell. Once it's vulnerable, punch it to defeat it. |
| 7 | 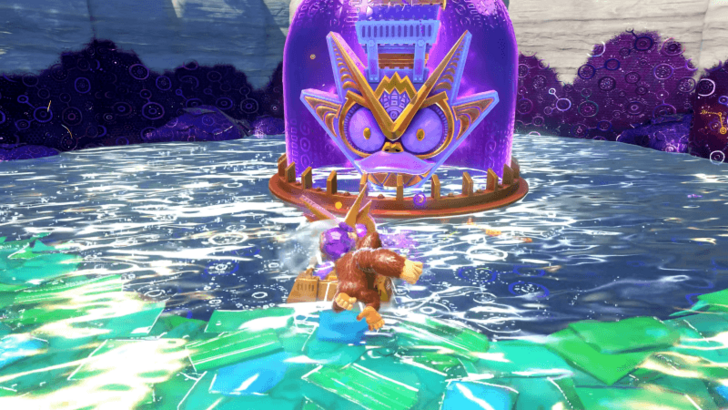 Defeating the Crockoid will release the key and place it in the slot in front of the Void Stake. Punch the key to destroy the container protecting the stake. |
| 8 | 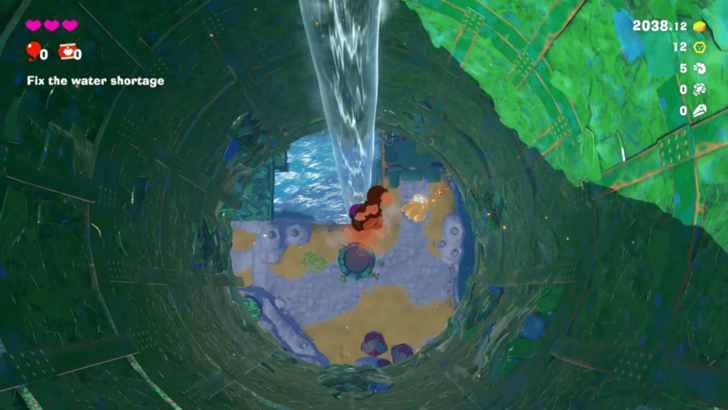 Punch the Void Stake to open up the path to Sublayer 101. Once you're ready, jump down the opening. |
Lagoon Sublayer 101
| Step-by-Step Guide | |
|---|---|
| 1 | 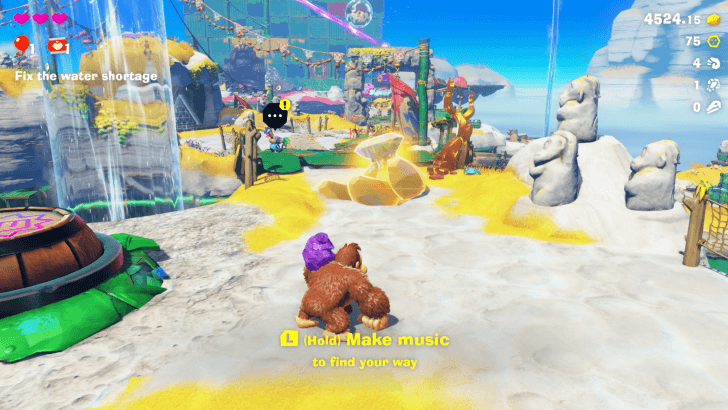 Punch the Banandium Gems dropped by the Void Stake before proceeding. |
| 2 | 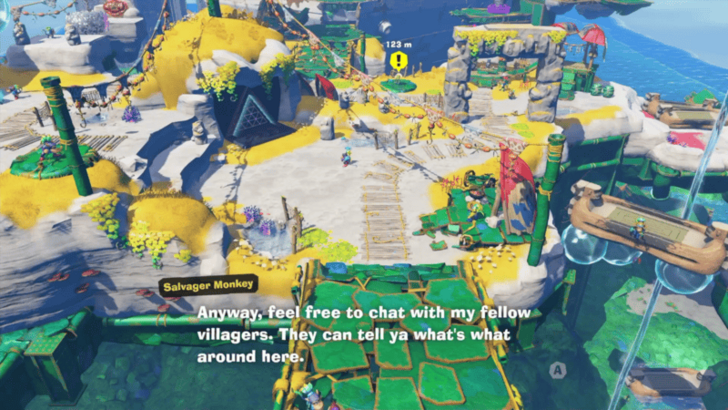 Follow the pathway. Along this path, you can find the panel to the Lagoon Layer Challenge Course 2 and a shop selling clothes. |
| 3 | 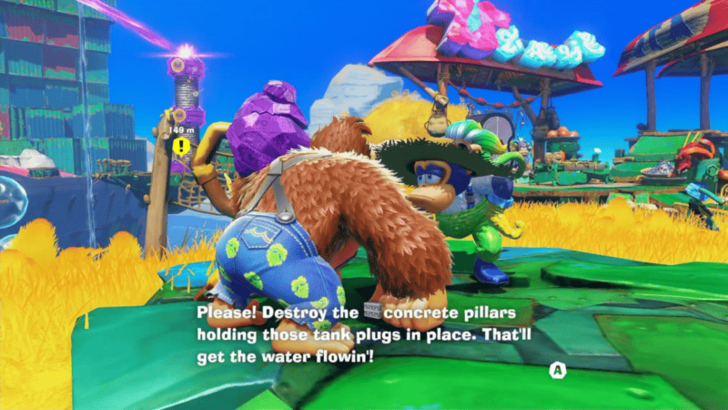 Talk to the monkey near the shop, and he'll tell you about the concrete pillars that are plugging up the water storage tank. |
| 4 | 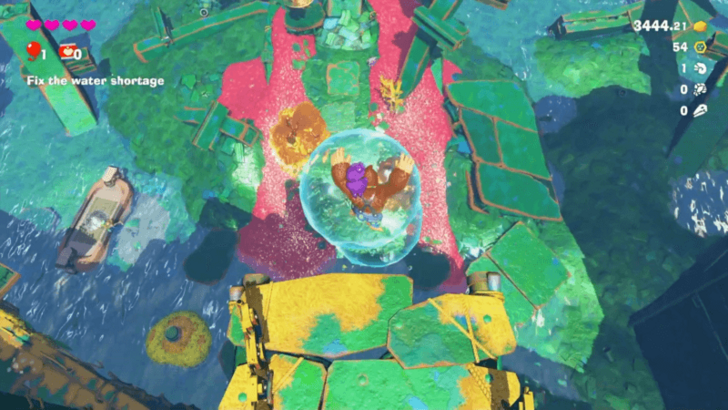 Jump off the platform which has gold trapped in bubbles. |
| 5 | 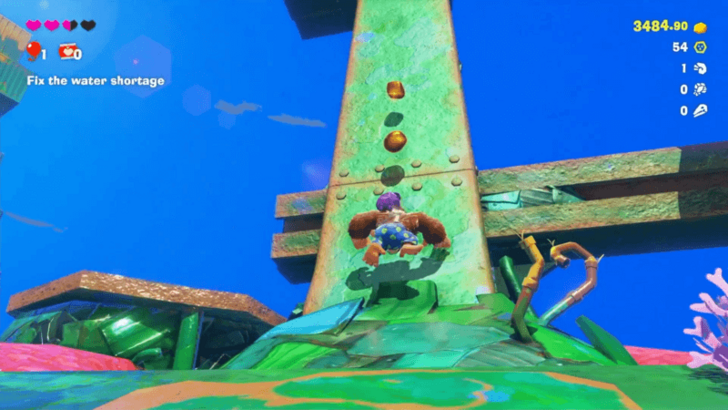 Throw chunks at the enemies before climbing up the metal beam. Follow the gold pieces towards the first concrete pillar. |
| 6 | 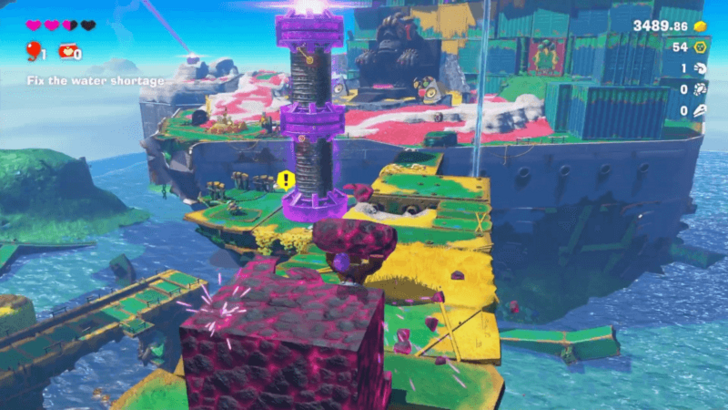 At the top of the beam, you will find a block of Boom Rock. Tear off a chunk of Boom Rock, and throw it at the concrete pillar to destroy it. This should raise the water level, allowing you to reach new areas. |
| 7 | 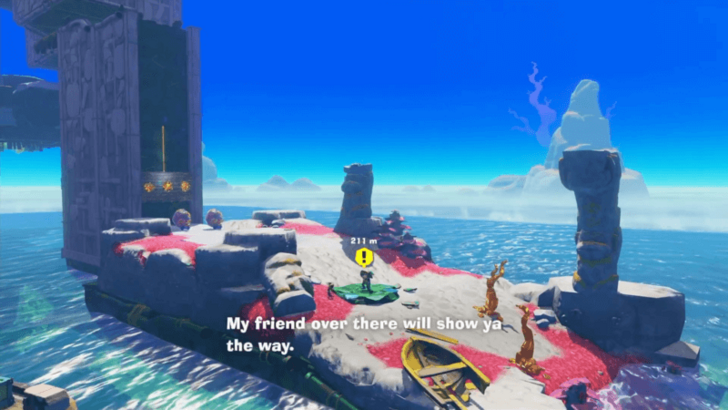 Talk to the monkey nearby, and he'll direct you to another monkey who can help you reach the next concrete pillar. Jump down to the water, and head to that monkey on the island. |
| 8 | Defeat the enemies near the monkey, and they'll drop Boom Rocks. Pick one up, and throw it at the moving concrete wall to help clear your way. Then, start climbing up the metal. |
| 9 | 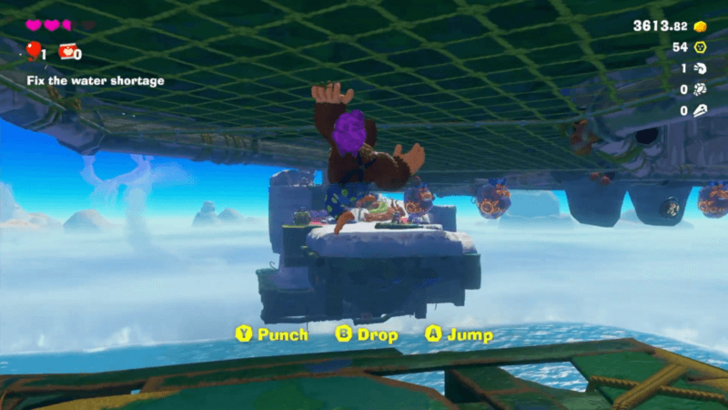 Jump up towards the overhang in order to grab the mesh, and traverse through this inverted pathway. Punch the enemies along the way before they can attack you. |
| 10 | 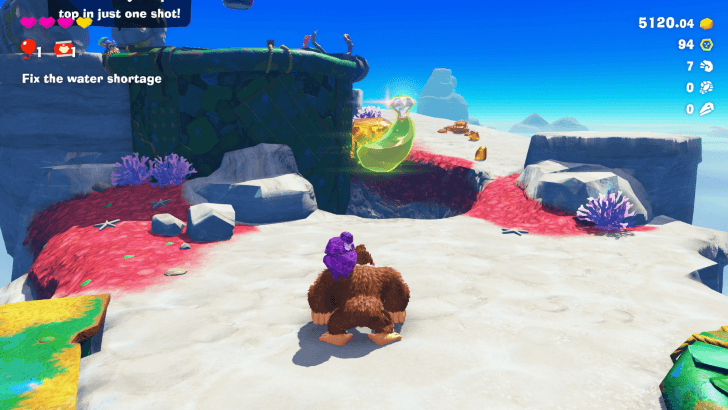 At the end of the mesh path, drop down and continue on foot. |
| 11 | 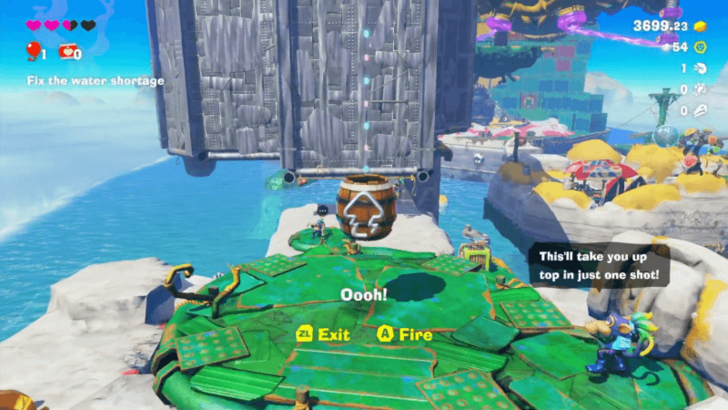 Jump into the Barrel Cannon at the end of the path and you will be launched back to Sublayer 100. |
Lagoon Sublayer 100 Part 2
| Step-by-Step Guide | |
|---|---|
| 1 | 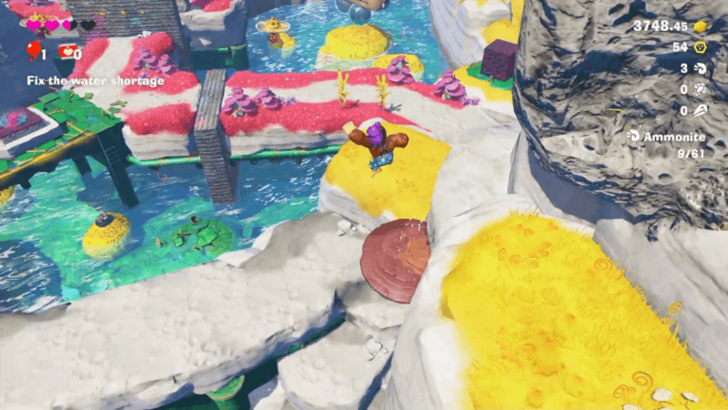 Swim forward and follow the path. A block of Boom Rock can be found along the way to help you get through the moving concrete walls. However, you can also go around them. |
| 2 | 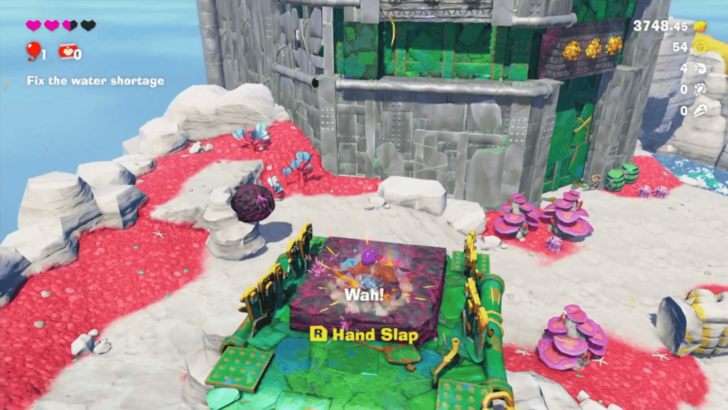 Head to the slab of Boom Rock with a symbol of hands on it that's on a metal platform. Press the R shoulder button to perform a Hand Slap, which will raise this Boom Rock platform. |
| 3 | Tear off a chunk of the Boom Rock, and aim them at the concrete walls to clear the pathway. |
| 4 | 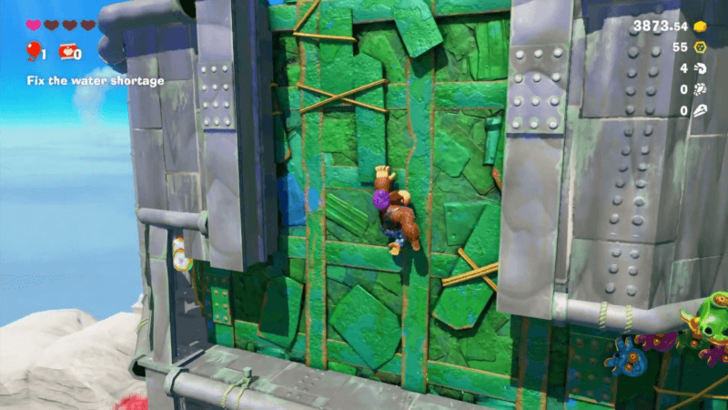 Climb up the green metal path. Enemies will be lying in wait as you climb, so try to avoid them or use Hand Slap to get rid of them. |
| 5 | 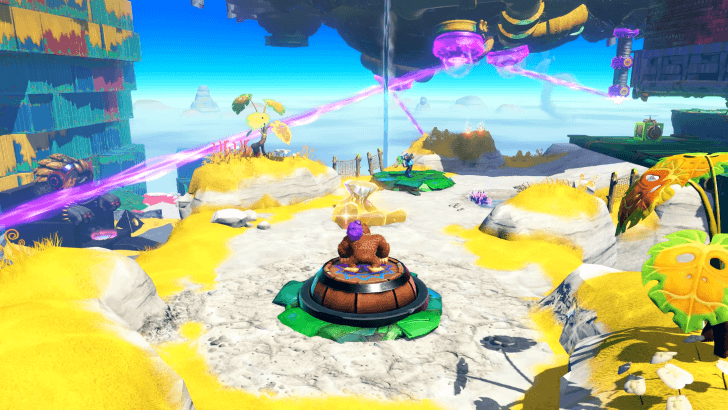 Punch the Void Stake at the top of the path to open up the way leading back to Sublayer 101. Jump down the hole to proceed to Orangu-Hang Highway. |
Orangu-Hang Highway Sublayer 101
| Step-by-Step Guide | |
|---|---|
| 1 | Talk to the monkey near where you landed. He will point you to the next pillar you have to destroy. |
| * | 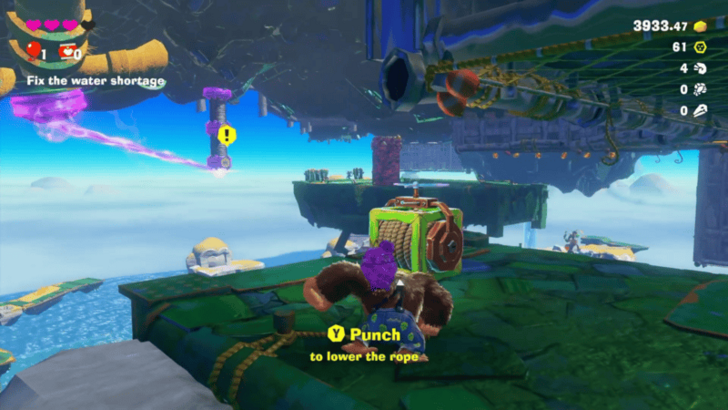 Punch the rope before jumping onto the inverted mesh pathway. This will allow you to climb back up in case you fall. |
| 2 | Once you're ready, jump to grab onto the mesh, and make your way across. Be wary of the enemy will be lurking in the overhang. |
| 3 | 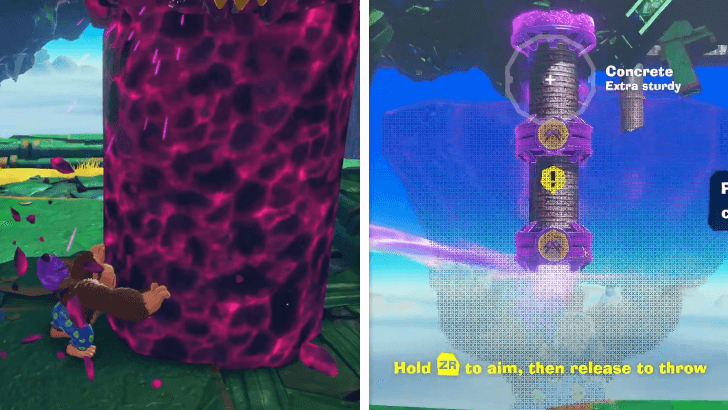 Drop down at the end of Orangu-Hang Highway. There will be an enemy on a tall slab of Boom Rock. You can avoid this enemy, and just tear off a chunk of Boom Rock once it surfaces, or you can defeat it by going on top of it and using Dive Punch. |
| 4 | Throw the Boom Bomb towards the concrete pillar hanging in the distance to raise the water level. |
Kong Elder's Court Sublayer 101
| Step-by-Step Guide | |
|---|---|
| 1 | 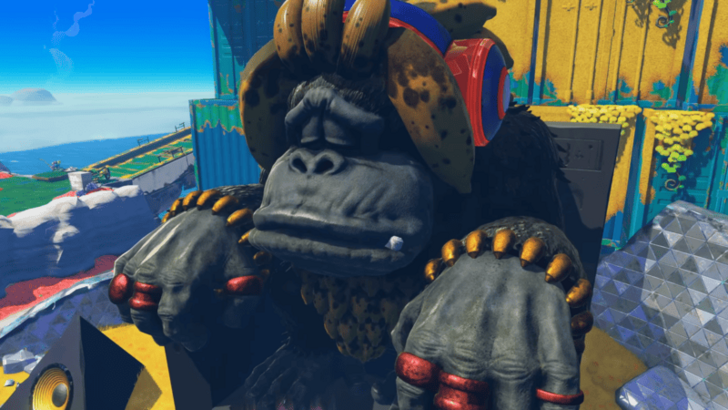 Jump down to the lower platform, and cross the bridge towards the Kong Elder. To talk to the elder, head to the platform with the microphone, and press A. |
| 2 | You will be asked to obtain the Ancient Record for the Kong Elder. However, the water level isn't high enough for you to reach it. |
| 3 | Head towards end of the path overlooking the Ancient Record to find the final concrete pillar. |
| 4 | 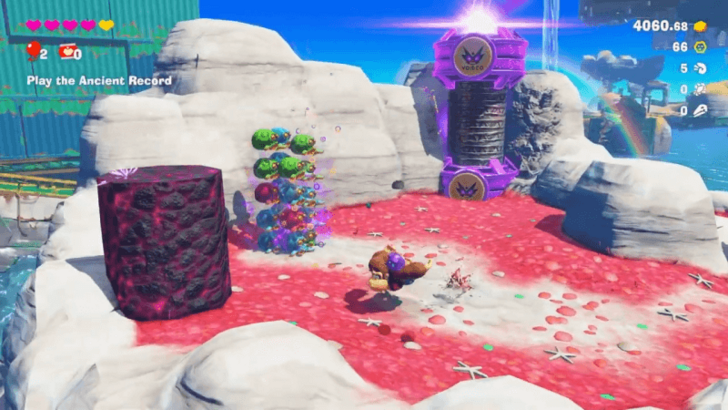 Two of the Boom Rocks near the concrete pillar are actually enemies in disguise. Defeat them, then tear off a chunk from the real Boom Rock and throw it at the concrete pillar. |
| 4 | 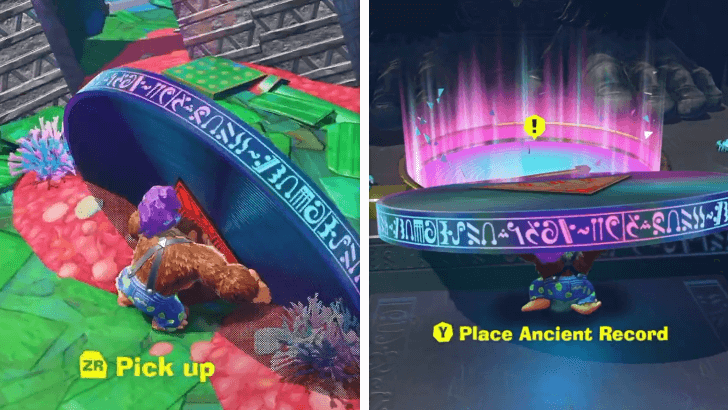 The bridge towards the Ancient Record should now be restored. Cross this bridge and pick up the Ancient Record using ZR, then place it by the feet of the Kong Elder. |
| 5 |  Both DK and the Odd Rock will be transported onto a performance space with an audience. Hold the L and R shoulder buttons to make a drumbeat, which will release Pauline from the Odd Rock. After Pauline freaks out, you will be prompted to make another drumbeat. DK will then transform into the Kong Bananza form. ▶︎ How to Drum Chest |
| 6 | 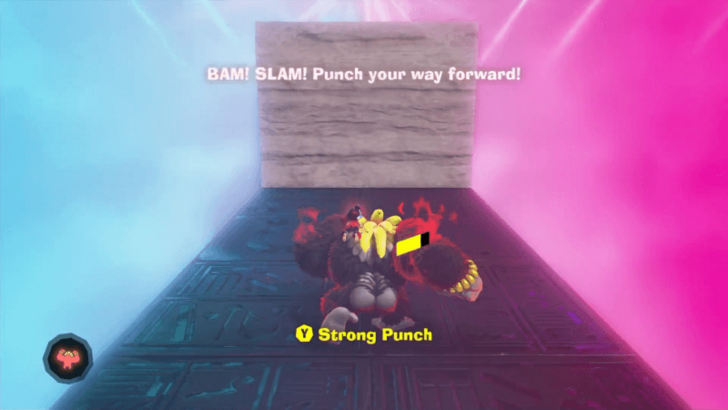 Complete the Kong Bananza tutorial by using Strong Punch (Y) and Charge Punch (hold Y) when prompted, and collecting gold to gain more Bananergy. |
| 7 | 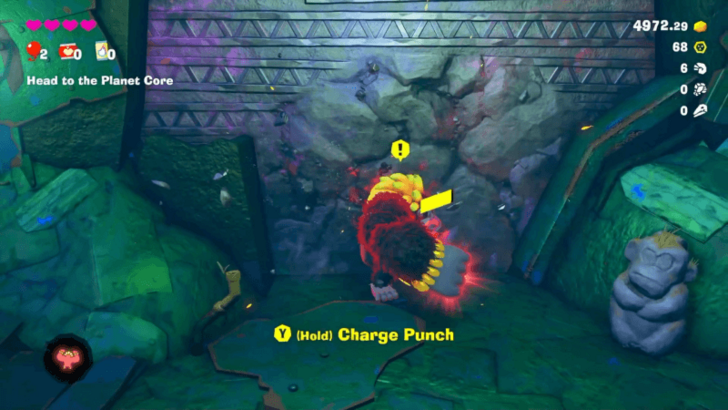 Proceed to the shipping container to the right of the Elder. Hold L and R to use your Kong Bananza form. Hold the Y buton while transformed to use Charge Punch on the concrete wall to break it. |
| 8 | Use the Kong Bananza transformation as you go through the passageway. Punch any enemies in your way, and use Charge Punch to break any concrete walls blocking the route. |
| 9 | 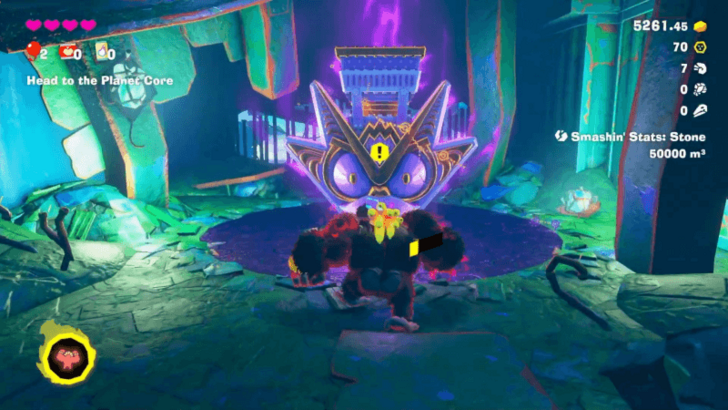 At the end of the corridor is another Void Stake. Punch the Void Stake to open the way to Sublayer 102. Once you're ready to proceed, jump down onto the platform below. |
Lagoon Sublayer 102
| Step-by-Step Guide | |
|---|---|
| 1 | 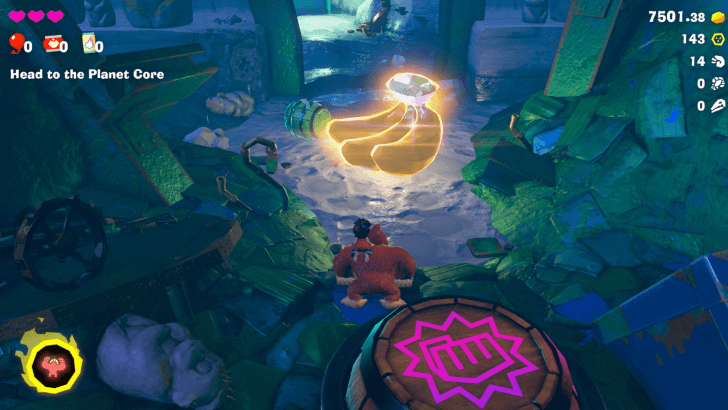 Punch the Banandium Gem to collect them before proceeding onward. The Lagoon Layer Challenge Course 3 is available along the way if you want to complete it. ▶︎ Kong Bananza: Pop Party Puzzle Guide |
| 2 | 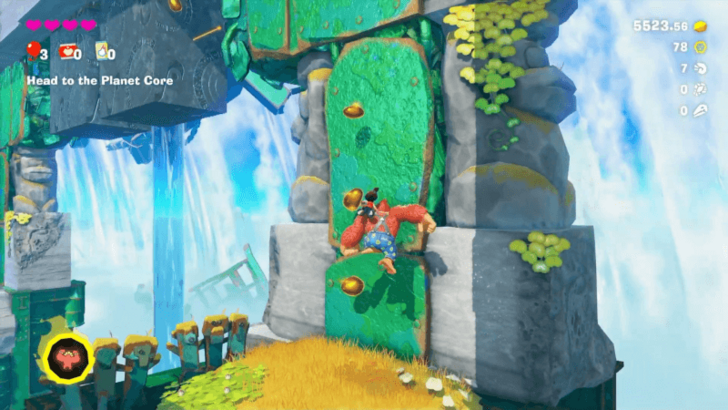 You will eventually reach a dead end once you exit the underground area. However, you can get across by climbing up the metal wall on your right. |
| 3 | 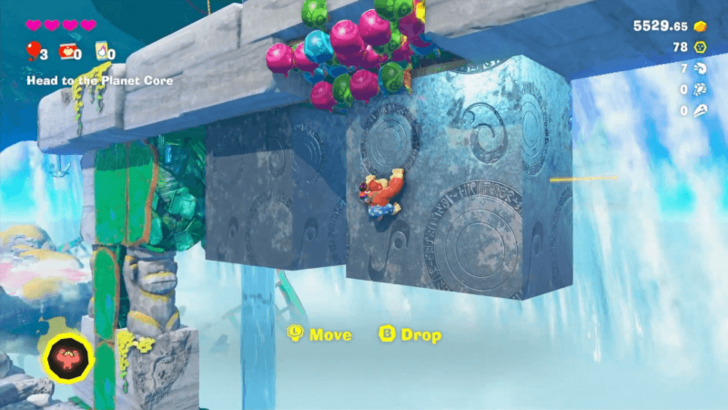 Climb onto the moving blocks to get across. Once you're halfway across, enemies will suddenly spawn. Use Hand Slap to shake them off, then quickly make your way to safety on other side. |
| 4 | More disguised enemies will try to ambush you along the path. Either avoid them or fight them. Keep going along the path until you reach a cutscene. |
| 5 | 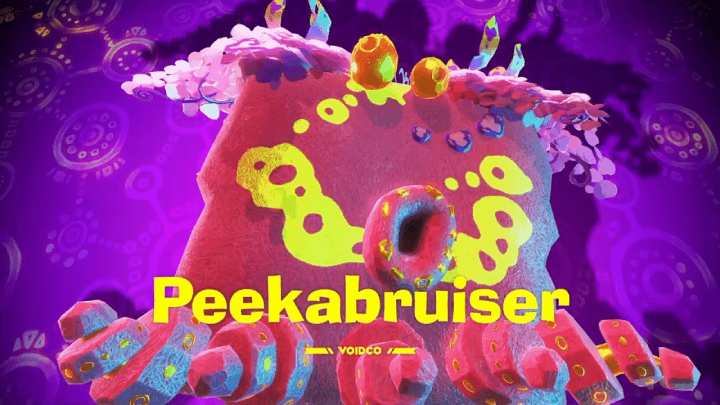 Defeat Peekabruiser. Use your Kong Bananza power to smash through the hordes of enemies. If you run out, you can also use the surrounding terrain to swing chunks. Hit Peekabruiser's core when it is exposed to prevent it from regenerating its body. ▶︎ How to Beat Peekabruiser |
| 6 | 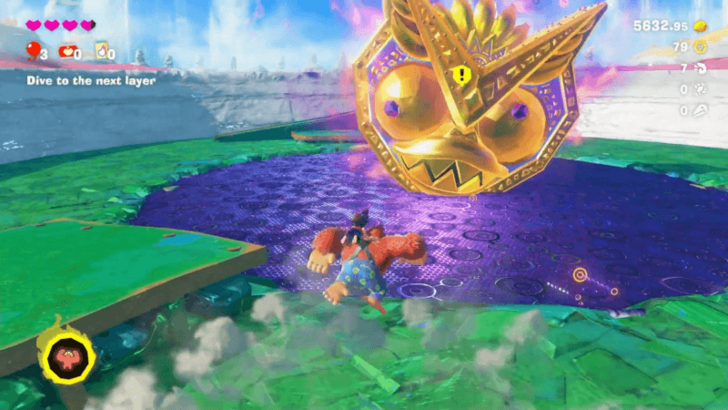 Punch the Void Stake left behind by Peekabruiser to open the way to the next layer. Before jumping down, you may want to purchase items from the shop that appears nearby, change clothes using the wardrobe, or use the Eelevator to return to a checkpoint in the Lagoon Layer. Once you're ready to proceed, jump down to the next layer. ▶︎ Hilltop Layer Walkthrough |
Lagoon Layer Boss
Peekabruiser

Peekabruiser is the boss found at the end of the Lagoon Layer. It's best to use the Kong Bananza form to fight it when it has armor or octopus enemies protecting it.
Donkey Kong Bananza Related Guides
All Walkthrough Guides
| # | Layer |
|---|---|
| SL1 | Ingot Isle |
| SL100 | Lagoon Layer |
| SL200 | Hilltop Layer |
| SL300 | Canyon Layer |
| SL400 | The Divide |
| SL500 | Freezer Layer |
| SL600 | Forest Layer |
| SL700 | The Junction |
| SL800 | Resort Layer |
| SL900 | Tempest Layer |
| SL1000 | Landfill Layer |
| SL1100 | Racing Layer |
| SL1200 | Radiance Layer |
| SL1300 | Groove Layer |
| SL1400 | Feast Layer |
| SL1500 | Forbidden Layer |
| SL1600 | Planet Core |
Comment
Author
Lagoon Layer Walkthrough
improvement survey
04/2026
improving Game8's site?

Your answers will help us to improve our website.
Note: Please be sure not to enter any kind of personal information into your response.

We hope you continue to make use of Game8.
Rankings
- We could not find the message board you were looking for.
Gaming News
Popular Games

Genshin Impact Walkthrough & Guides Wiki

Crimson Desert Walkthrough & Guides Wiki

Umamusume: Pretty Derby Walkthrough & Guides Wiki

Honkai: Star Rail Walkthrough & Guides Wiki

Monster Hunter Stories 3: Twisted Reflection Walkthrough & Guides Wiki

Wuthering Waves Walkthrough & Guides Wiki

The Seven Deadly Sins: Origin Walkthrough & Guides Wiki

Pokemon TCG Pocket (PTCGP) Strategies & Guides Wiki

Pokemon Pokopia Walkthrough & Guides Wiki

Zenless Zone Zero Walkthrough & Guides Wiki
Recommended Games

Monster Hunter World Walkthrough & Guides Wiki

Fire Emblem Heroes (FEH) Walkthrough & Guides Wiki

Pokemon Brilliant Diamond and Shining Pearl (BDSP) Walkthrough & Guides Wiki

Super Smash Bros. Ultimate Walkthrough & Guides Wiki

Diablo 4: Vessel of Hatred Walkthrough & Guides Wiki

Cyberpunk 2077: Ultimate Edition Walkthrough & Guides Wiki

Yu-Gi-Oh! Master Duel Walkthrough & Guides Wiki

Elden Ring Shadow of the Erdtree Walkthrough & Guides Wiki

The Legend of Zelda: Tears of the Kingdom Walkthrough & Guides Wiki

Persona 3 Reload Walkthrough & Guides Wiki
All rights reserved
© Nintendo. Games are property of their respective owners. Nintendo of America Inc.
The copyrights of videos of games used in our content and other intellectual property rights belong to the provider of the game.
The contents we provide on this site were created personally by members of the Game8 editorial department.
We refuse the right to reuse or repost content taken without our permission such as data or images to other sites.


![Forza Horizon 6 Review [Preview] | Beautiful Roads With a Whole Lot of Oversteer](https://img.game8.co/4460981/a7254c24945c43fbdf6ad9bea52b5ce9.png/show)


![Forza Horizon 6 Review [Preview] | Beautiful Roads With a Whole Lot of Oversteer](https://img.game8.co/4460981/a7254c24945c43fbdf6ad9bea52b5ce9.png/thumb)


