Kong Bananza: Pop Party Puzzle Guide
☽ DK Island and Emerald Rush DLC out now!
☽ Learn how to solve Banandiumtone's Puzzles.
☽ All Collectibles: Banandium Gems and Fossils
☽ Learn How to Skip Layers Entirely!
☽ How to Beat the Final Boss
☽ Post-Game: Rehearsal Halls | Secret Ending
Kong Bananza: Pop Party is a Challenge Ruin in the Lagoon Layer in Donkey Kong Bananza. See the walkthrough, puzzle solution, and location of the Challenge Course here!
List of Contents
Kong Bananza: Pop Party Puzzle Solution
- Pop the First Balloon
- Pop the Second Balloon from the Crockoid
- Pop the Third Balloon from the Crockoid
- Pop the Fourth Balloon from the Crockoid
- Find the Fifth Balloon Near the Spinning Wall
Pop the First Balloon
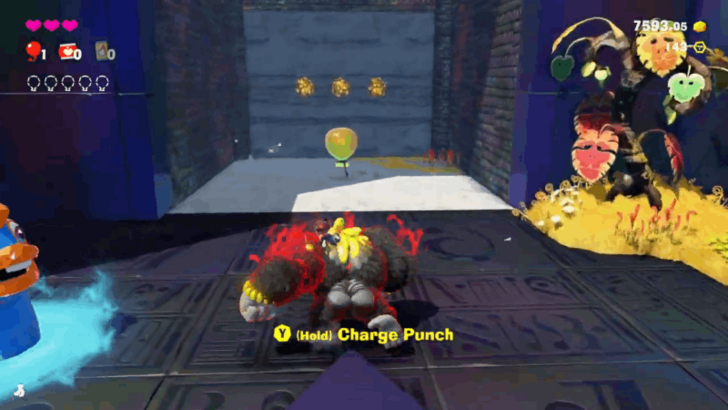
Upon entering the Challenge Ruin, pop the first balloon at the entrance of the concrete maze.
Pop the Second Balloon from the Crockoid
Head to the left side of the concrete maze and use Charged Punches to break the walls. Find the Crockoid with the balloon and defeat it.
Pop the Third Balloon from the Crockoid
Go to the right size of the concrete maze and defeat the Crockoid that has the third balloon.
Pop the Fourth Balloon from the Crockoid
Continue heading to the right side of the concrete maze and find the Crockoid with the fourth balloon.
Find the Fifth Balloon Near the Spinning Wall
You can find the fifth balloon hidden behind the spinning concrete wall on the left side of the maze. Destroy the spinning concrete wall and pop the fifth balloon.
After popping all five balloons, a Banandium Gem (Pop and Destroy) will appear near the entrance. Collect it to complete the challenge.
Video Guide
| 1 | |
|---|---|
| 2 | |
| 3 |
How to Get Hung from the Ceiling Banandium Gem
Climb the Monkey Bars on the Right Side of the Maze
Destroy most of the concrete maze and head to the right side. Look up to see if there are monkey bars leading to a Banandium Gem.
Climb the unbreakable wall to reach the monkey bars. Make your way to the Banandium Gem (Hung from the Ceiling) and punch it multiple times to collect it.
How to Get Atop the Concrete Roof Banandium Gem
Climb on Top of the Concrete Maze
Destroy the concrete maze inside until you can reach the exit on the opposite side. Climb up the structure and reach the top to find the Banandium Gem (Atop the Concrete Roof) on the elevated platform.
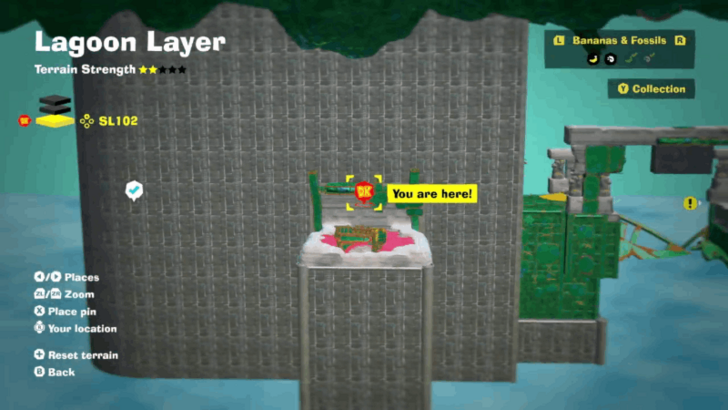
Kong Bananza: Pop Party Location
Lagoon Layer
| Overworld View | Map Location |
|---|---|
 |
 |
|
Location: Lagoon Layer (SL 100)
Challenge No.: Lagoon Layer Challenge Course 3 |
|
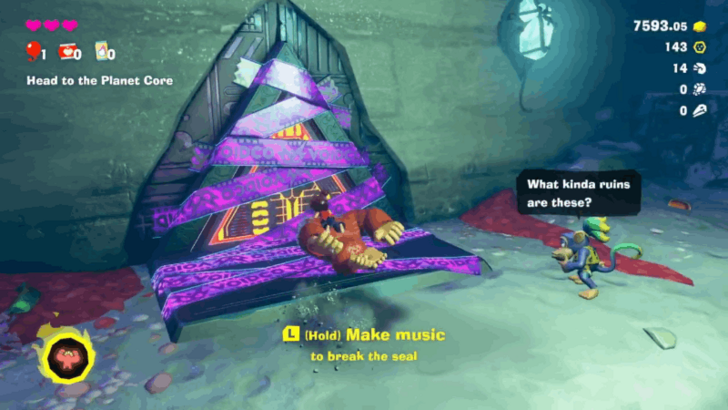
To open the door to the Challeng Ruins, break the seal by making music. Next, transform into Kong Bananza to break the door.
Lagoon Layer (SL 100-102) Collectibles Map
Donkey Kong Bananza Related Guides
All Challenge Ruins
Comment
Author
Kong Bananza: Pop Party Puzzle Guide
Rankings
- We could not find the message board you were looking for.
Gaming News


Popular Games

Genshin Impact Walkthrough & Guides Wiki
Umamusume: Pretty Derby Walkthrough & Guides Wiki
Crimson Desert Walkthrough & Guides Wiki
Monster Hunter Stories 3: Twisted Reflection Walkthrough & Guides Wiki
Honkai: Star Rail Walkthrough & Guides Wiki
Pokemon Pokopia Walkthrough & Guides Wiki
The Seven Deadly Sins: Origin Walkthrough & Guides Wiki
Wuthering Waves Walkthrough & Guides Wiki
Zenless Zone Zero Walkthrough & Guides Wiki
Arknights: Endfield Walkthrough & Guides Wiki


Recommended Games
Fire Emblem Heroes (FEH) Walkthrough & Guides Wiki
Diablo 4: Vessel of Hatred Walkthrough & Guides Wiki
Cyberpunk 2077: Ultimate Edition Walkthrough & Guides Wiki
Yu-Gi-Oh! Master Duel Walkthrough & Guides Wiki
Super Smash Bros. Ultimate Walkthrough & Guides Wiki
Pokemon Brilliant Diamond and Shining Pearl (BDSP) Walkthrough & Guides Wiki
Elden Ring Shadow of the Erdtree Walkthrough & Guides Wiki
Monster Hunter World Walkthrough & Guides Wiki
The Legend of Zelda: Tears of the Kingdom Walkthrough & Guides Wiki
Persona 3 Reload Walkthrough & Guides Wiki


All rights reserved
© Nintendo. Games are property of their respective owners. Nintendo of America Inc.
The copyrights of videos of games used in our content and other intellectual property rights belong to the provider of the game.
The contents we provide on this site were created personally by members of the Game8 editorial department.
We refuse the right to reuse or repost content taken without our permission such as data or images to other sites.