Resort Layer Banana and Fossil Locations (SL 800)
☽ DK Island and Emerald Rush DLC out now!
☽ Learn how to solve Banandiumtone's Puzzles.
☽ All Collectibles: Banandium Gems and Fossils
☽ Learn How to Skip Layers Entirely!
☽ How to Beat the Final Boss
☽ Post-Game: Rehearsal Halls | Secret Ending
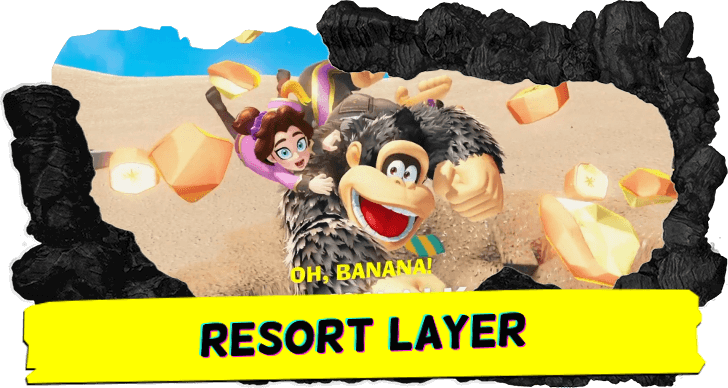
Resort Layer is the ninth layer in Donkey Kong Bananza. Check out where to find the locations of all Resort Layer Bananas, fossils, and other collectibles in this level!
| Resort Layer Guides | |
|---|---|
| Walkthrough | Collectibles |
List of Contents
Resort Layer Collectibles Overview
List of Collectibles
| Banandium Gems | Total: 42 |
|---|---|
| Fossils | Total: 30
|
| Checkpoints | Total: 5 |
| Challenges | Total: 6 |
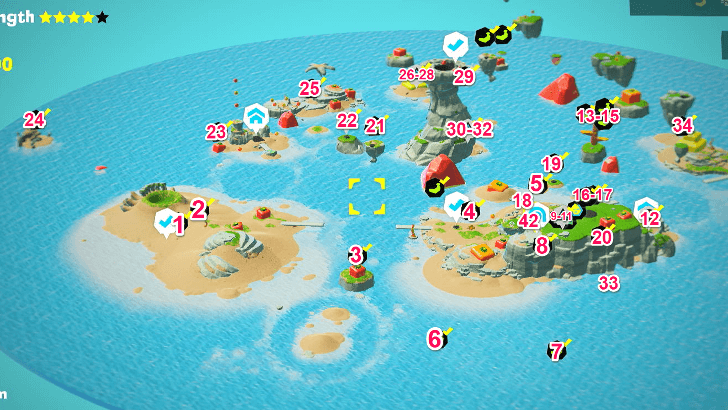
There are 42 bananas and 30 fossils available in Resort Layer.
Resort Layer Bananas
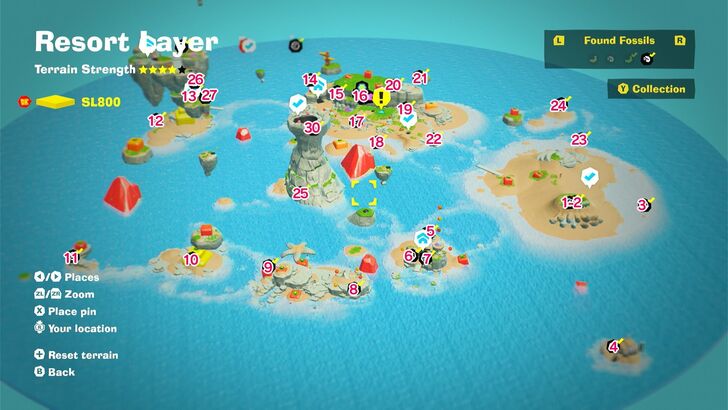
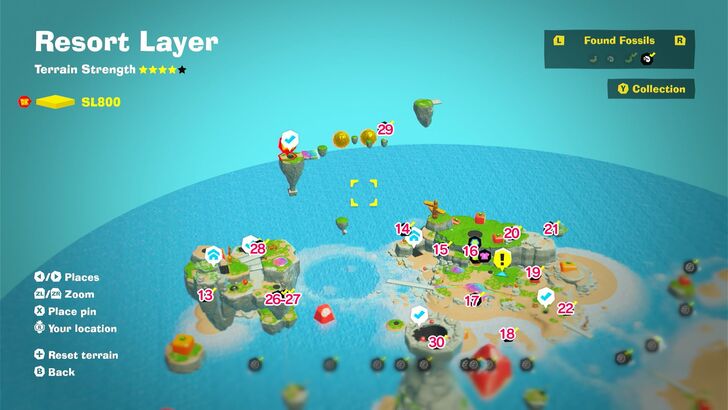
Banandium Gems Map Overview
SL 800 Banana Locations
| Overworld View | Map Location | |
|---|---|---|
| 01 |
 |
 |
|
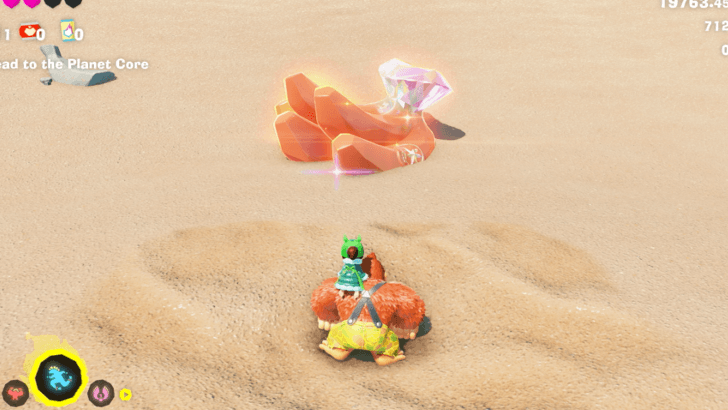
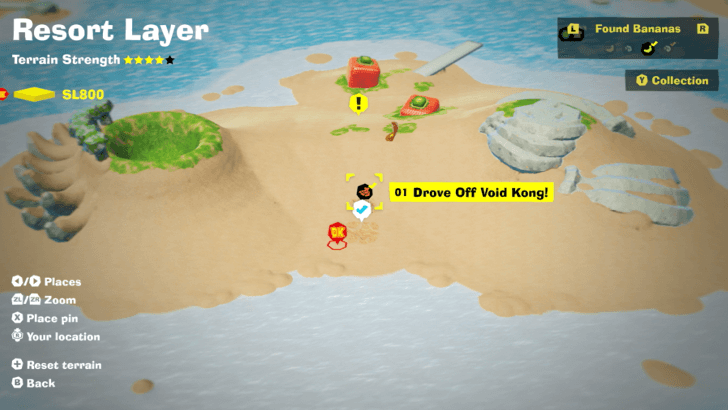
Found with story progression. |
||
| 02 |
 |
|
|
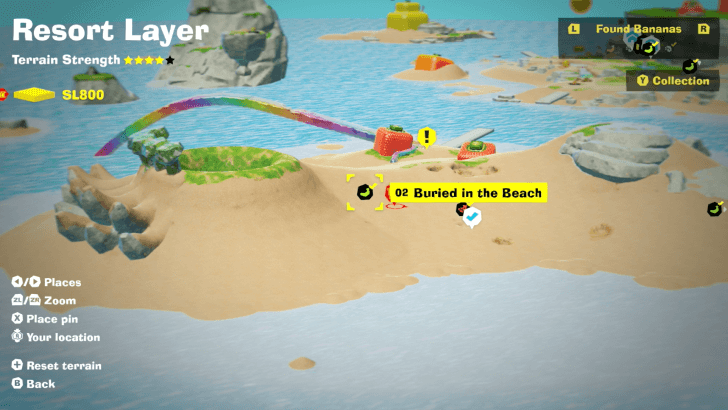
Dig down in the beach near the entrance to Resort Layer. |
||
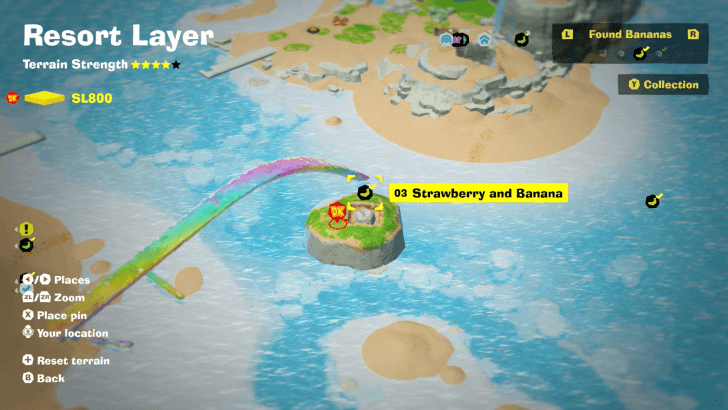
| 03 |
 |
|
|
Break the giant strawberry to find a Banandium Gem inside. |
||
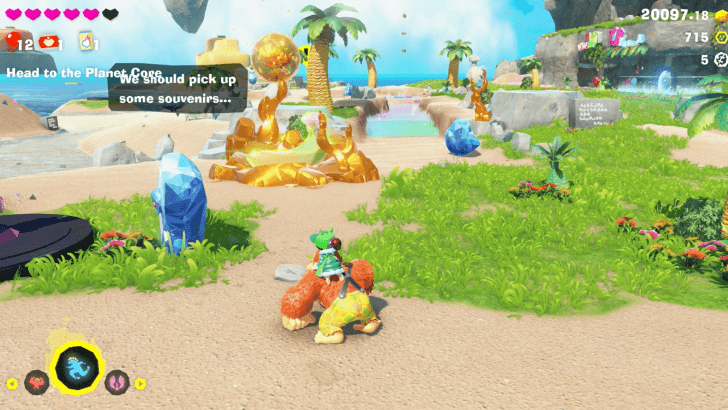
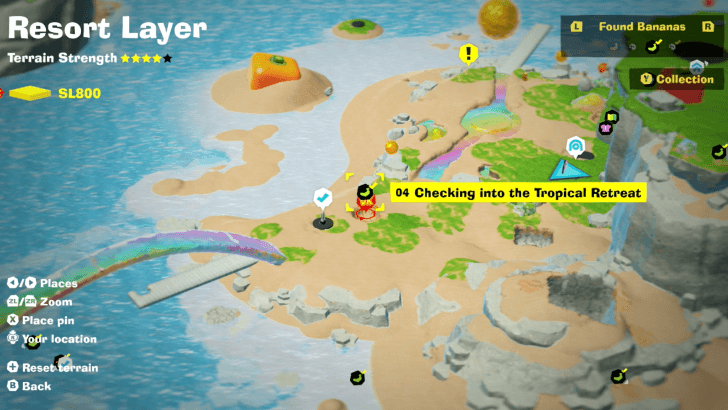
| 04 |
 |
 |
|
Found at the entrance to the Tropical Resort town on the main island. |
||
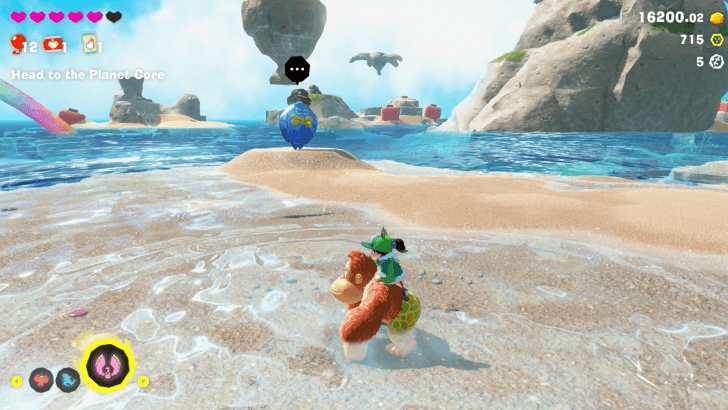
| 05 |
 |
 |
|
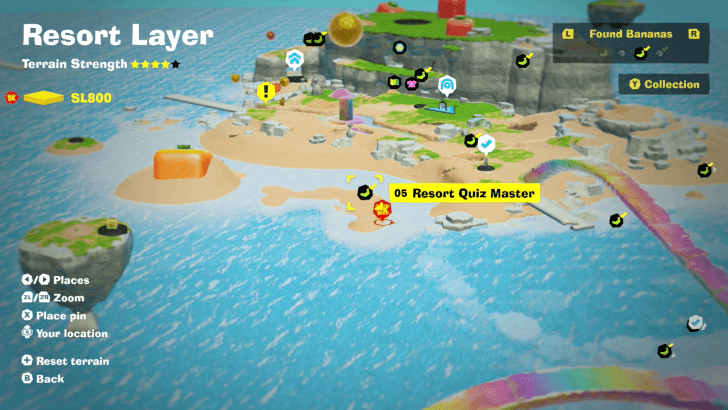
Find Quiztone near the Tropical Resort town and answer his 3 questions correctly to get a Banandium Gem. Choose sunglasses, juice bar, and coconuts. |
||
| 06 |
 |
|
|
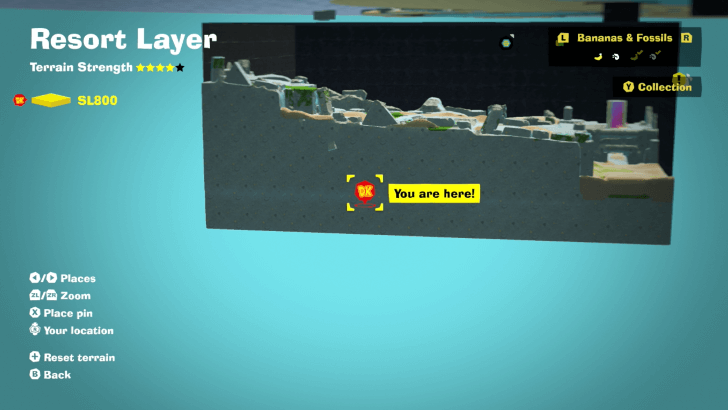
Find the underground area filled with Tones and go near them to make them change into arrows. Follow the arrows to find the Banandium Gem at the end. |
||
| 07 |
 |
|
|
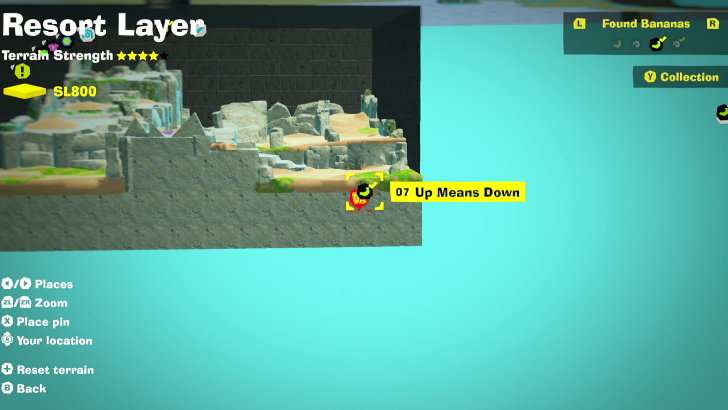
Destroy the big Orange near the Tropical Retreat, then go down the hole. Head right and go down, use sonar near the stone stairs to locate the Gem, then start digging. |
||
| 08 |
 |
|
|
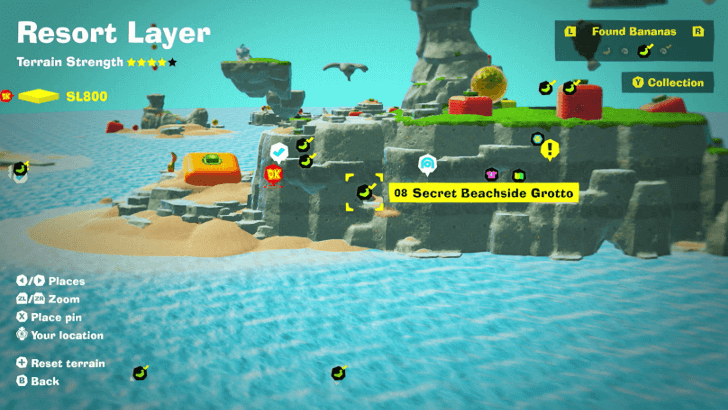
Starting from the Tropical Retreat checkpoint, head right towards the mountain wall just behind the large Strawberry. Once near the wall, use Kong Bananza form to punch your way straight until you hit the Gem. |
||
| 09 |
 |
|
|
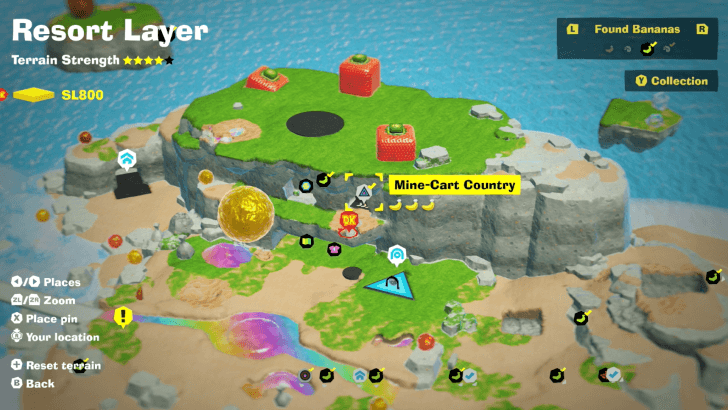
Found inside Mine-Cart Country Challenge Course 1. When you reach a gap in the track with gold leading downwards, fall down into the gap instead of jumping over to find the Gem in a secret area. |
||
| 10 |
 |
 |
|
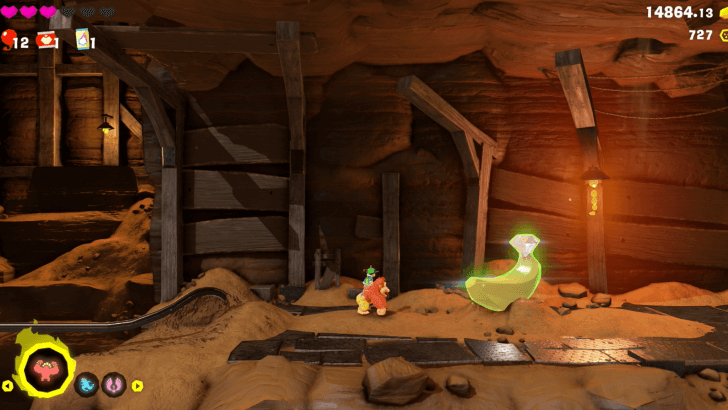
Found inside Mine-Cart Country Challenge Course 1. It is found along the course. |
||
| 11 |
 |
 |
|
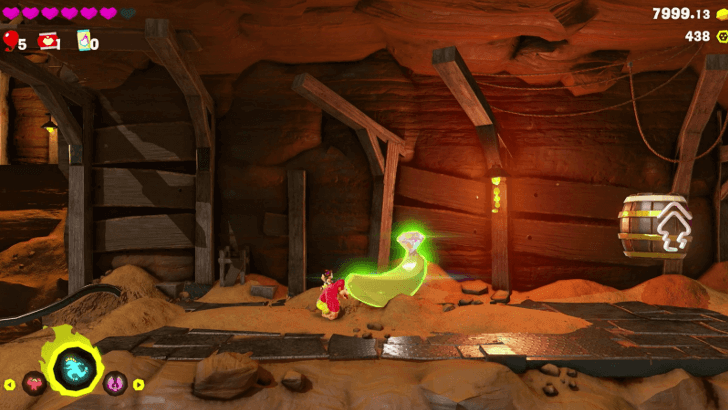
Found at the end of the Mine-Cart Country Challenge Course 1. |
||
| 12 |
 |
 |
|
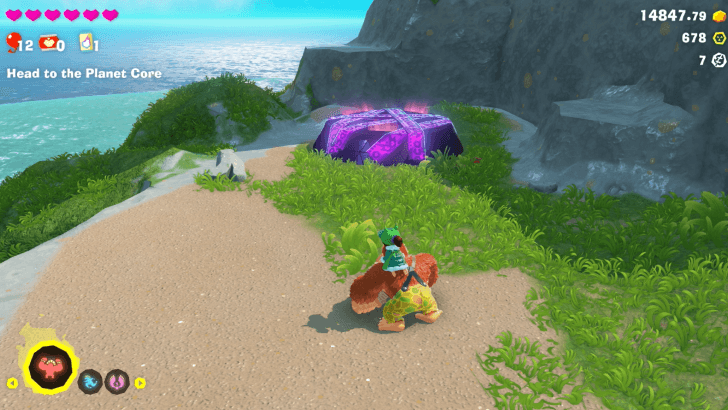
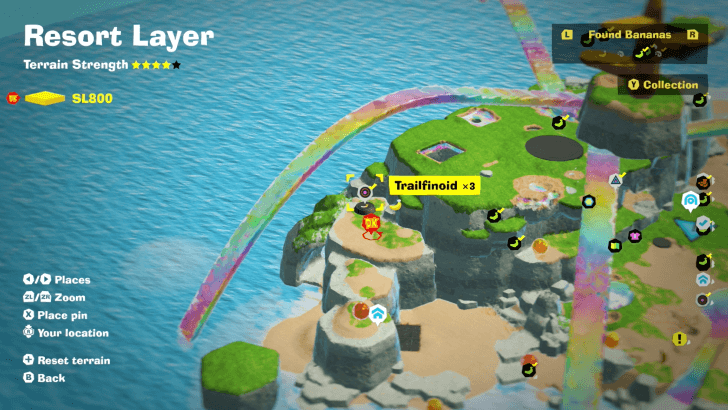
Enter the manhole and defeat three Trailfinoids. |
||
| 13 |
 |
 |
|
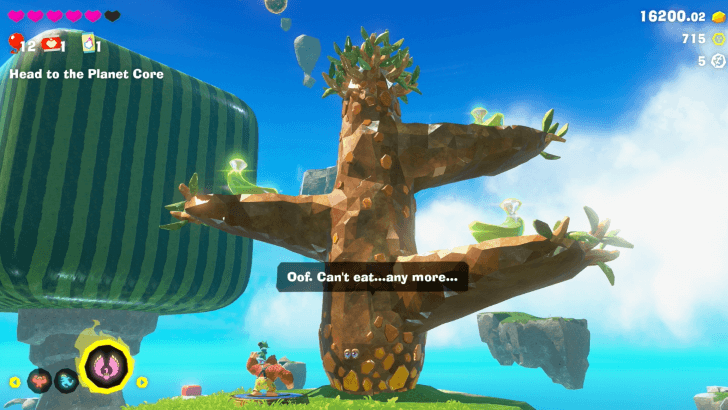
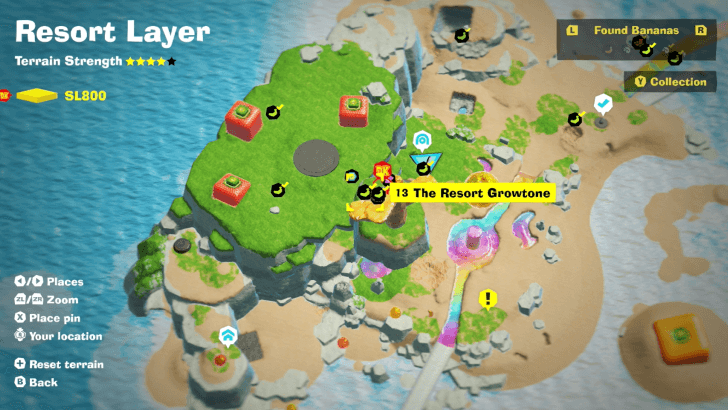
Use Liftoff Ore to float up into the sky and reach the island with the Growtone. Feel it 400 gold to get the first Banandium Gem. |
||
| 14 |
 |
 |
|
Use Liftoff Ore to float up into the sky and reach the island with the Growtone. Feel it 1700 gold to get the first Banandium Gem. |
||
| 15 |
 |
 |
|
Use Liftoff Ore to float up into the sky and reach the island with the Growtone. Feel it 1900 gold to get the first Banandium Gem. |
||
| 16 |
 |
|
|
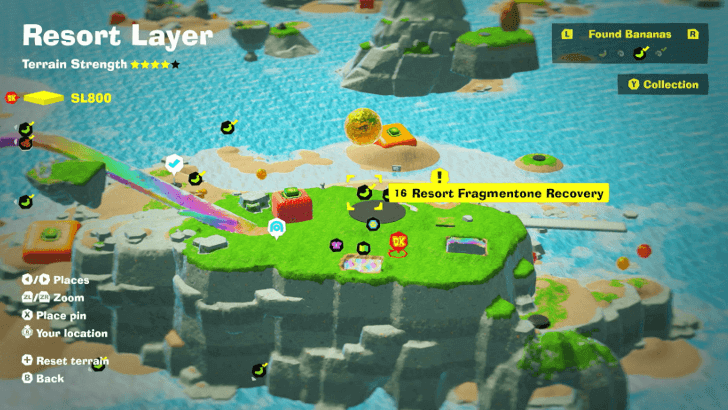
Collect a fragment found near the Fragmentone. Destroy the nearby terrain to find them. |
||
| 17 |
 |
|
|
Collect all three fragments found near the Fragmentone. Destroy the nearby terrain to find them. |
||
| 18 |
 |
 |
|
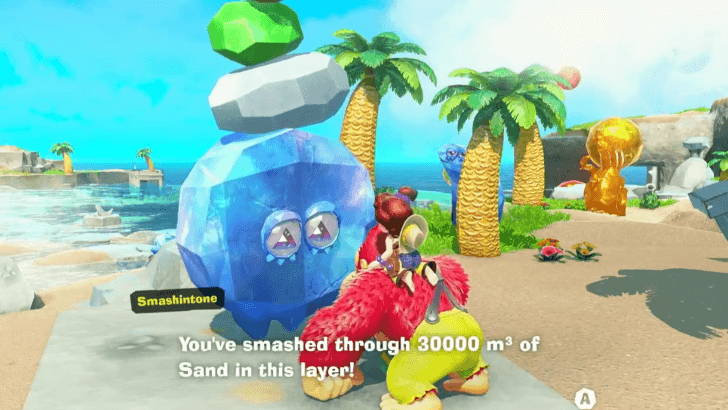
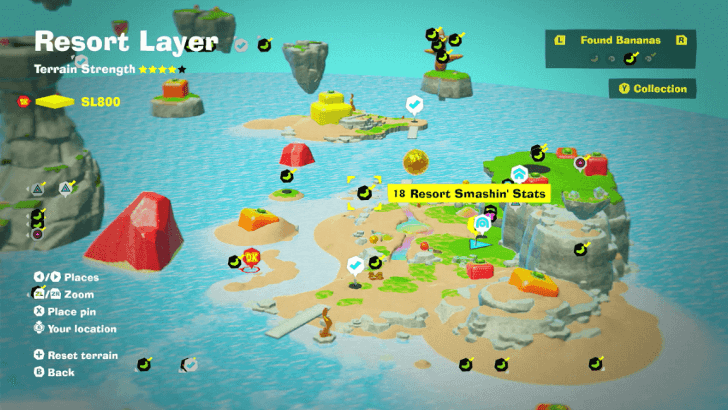
Smash 30,000 m3 of sand in the layer. Afterwards, talk to the Smashintone in the Tropical Retreat to receive the Gem. |
||
| 19 |
 |
 |
|
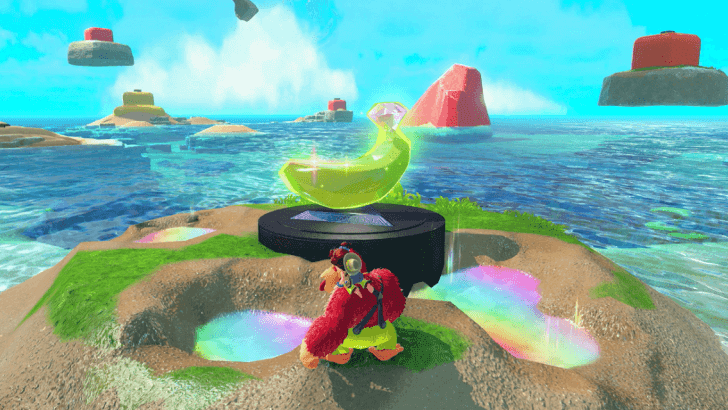
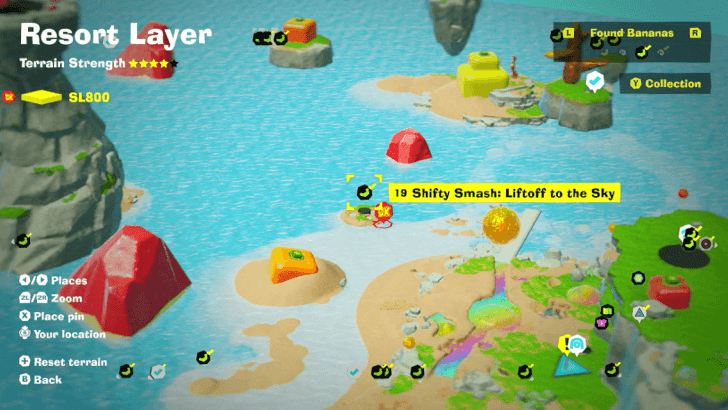
Activate the Shifty Smash Challenge. The simplest way to complete it is to just throw chunks of rocks at each of the floating cubes to destroy them. |
||
| 20 |
 |
 |
|
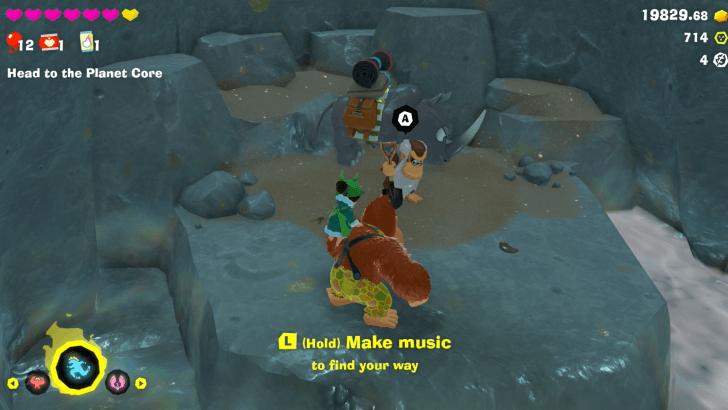
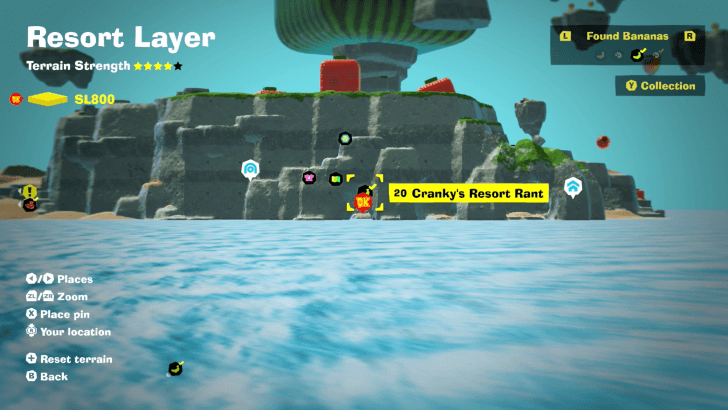
Swim to the back of the main island to find Cranky in a cave. Talk to him to get a Banandium Gem. |
||
| 21 |
 |
 |
|
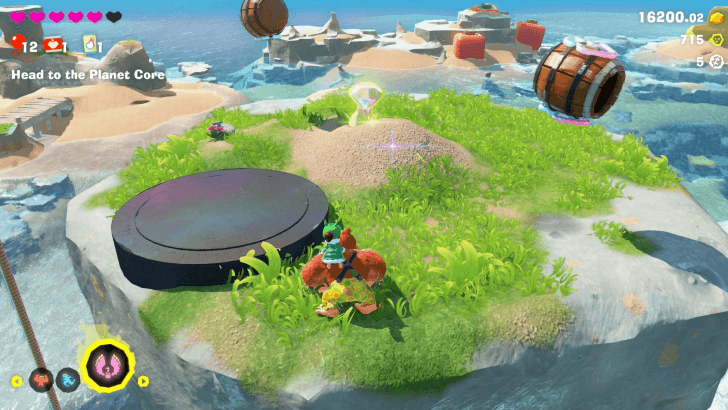
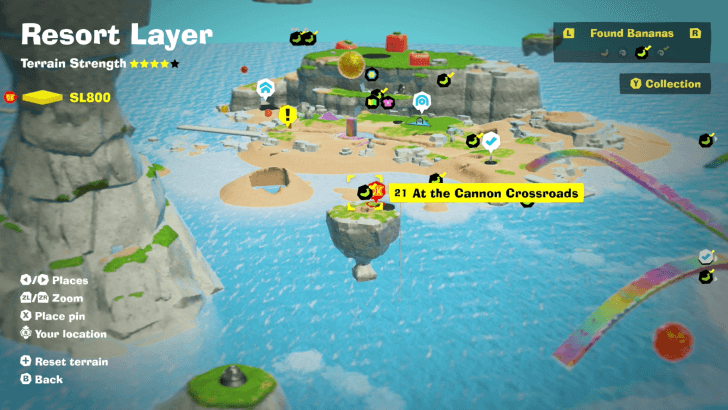
From the Tropical Resort town, find a barrel cannon pointing towards the ocean and use it to launch to a platform in the sky. The Banandium Gem is buried in the ground on the platform. |
||
| 22 |
 |
 |
|
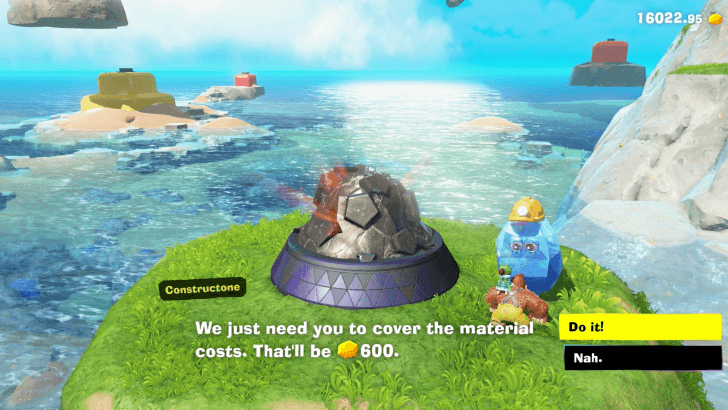
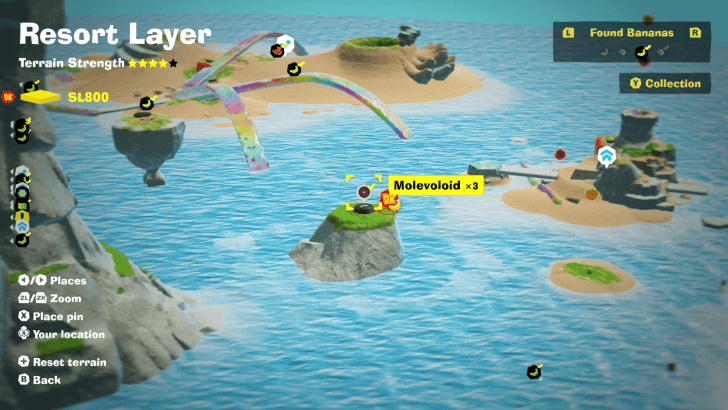
Pay 600 gold, enter the manhole, and defeat three Molevoloids. |
||
| 23 |
 |
 |
|
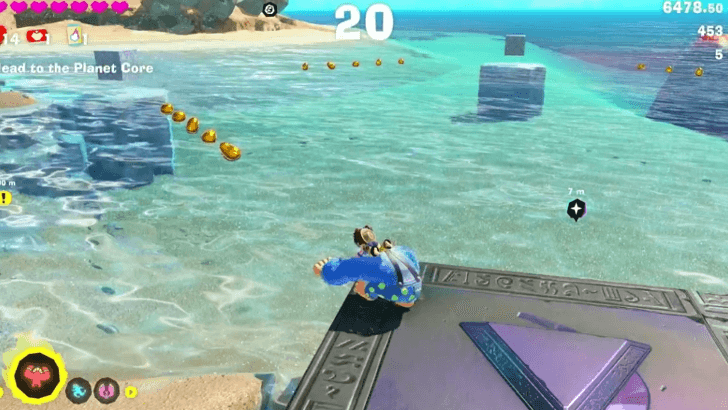
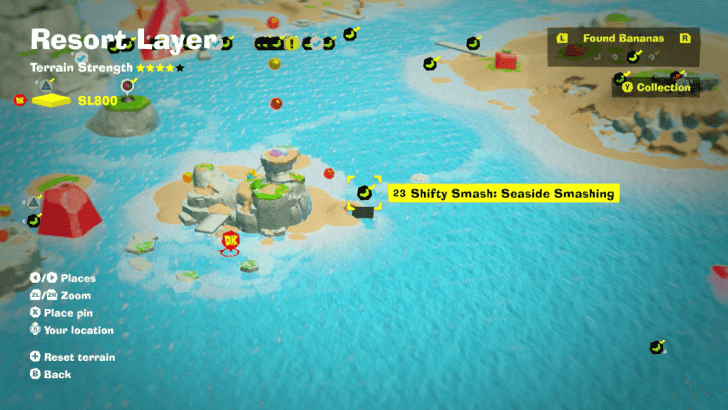
Destroy the large strawberry and activate the Shifty Smash Challenge. You just need to destroy all three cubes within the time limit to obtain the Gem. |
||
| 24 |
 |
|
|
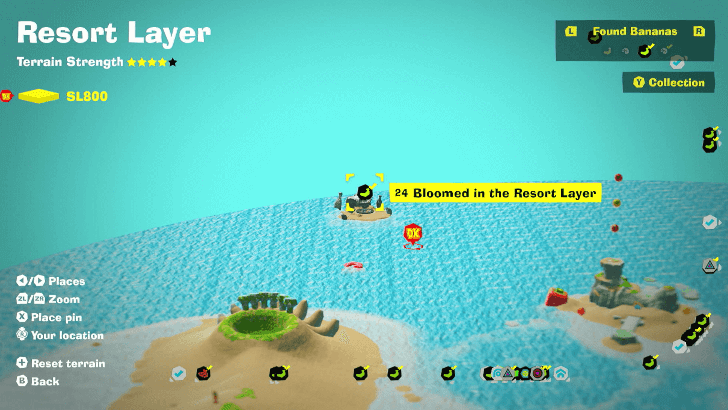
Go to the small island near the edge of the map to find a Bloomingtone under a stone structure. Use Kong Bananza to make a hole for the light to reach it. Talk to the Bloomingtone to get a Gem. |
||
| 25 |
 |
|
|
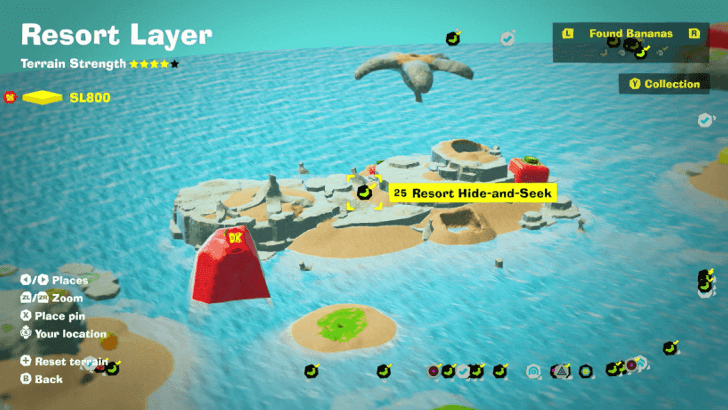
Talk to the Seekertone in the island for the mini-game. Find all four Seekertones hiding within the area to get the gem. |
||
| 26 |
 |
|
|
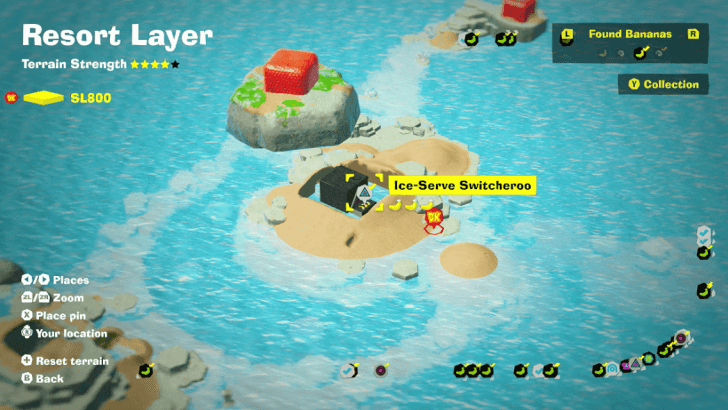
Found inside Ice-Serve Switcheroo Challenge Course 3. Carve a path to guide the ice to the square bowl and fill it up. |
||
| 27 |
 |
|
|
Found inside Ice-Serve Switcheroo Challenge Course 3. Carve a path to guide the ice to the square bowl and fill it up. |
||
| 28 |
 |
|
|
Found inside Ice-Serve Switcheroo Challenge Course 3. After the second course, don't jump in the Barrel Cannon yet. Instead, head straight further for the third course that's hidden behind a wall. Destroy it to proceed. |
||
| 29 |
 |
|
|
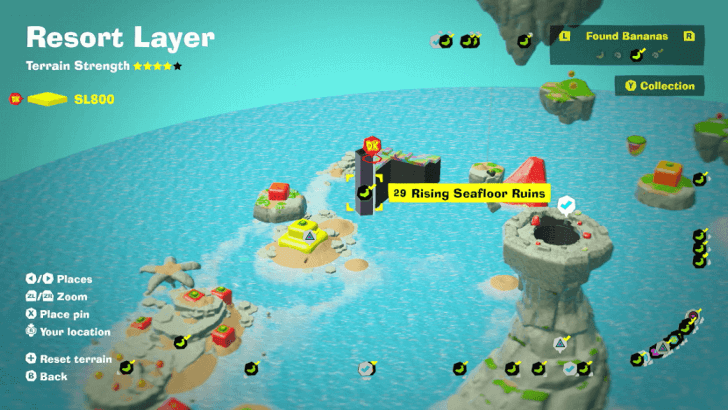
Destroy the large Strawberry to reveal a blue object and hit it until the ruins is fully raised. Follow the rainbow-colored terrain and once you reach the end, grab a piece of the terrain to fly upwards and land on the space where the Gem is located. |
||
| 30 |
 |
 |
|
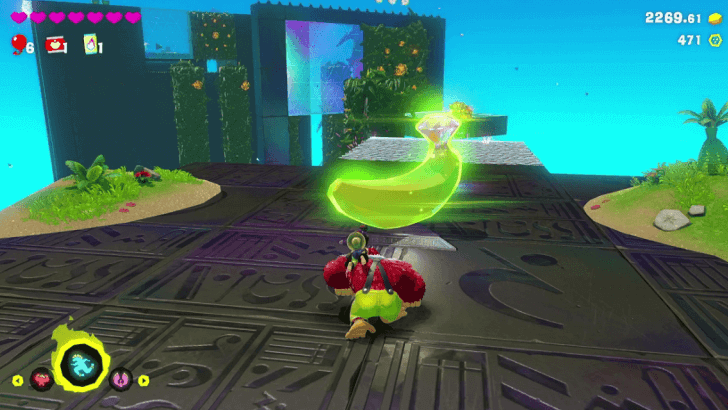
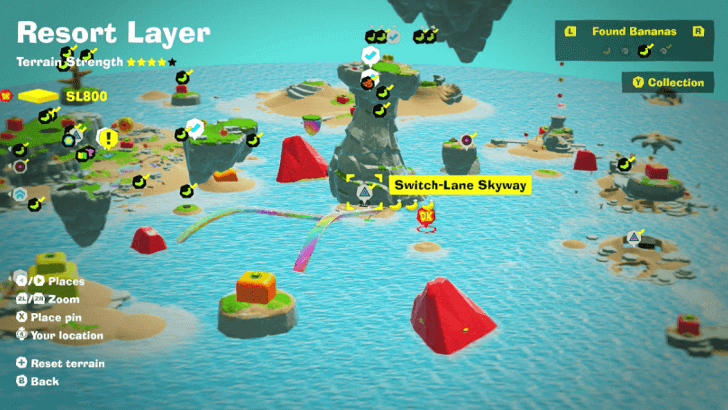
Found inside Switch-Lane Skyway Challenge Course 2. It is located along the course. |
||
| 31 |
 |
 |
|
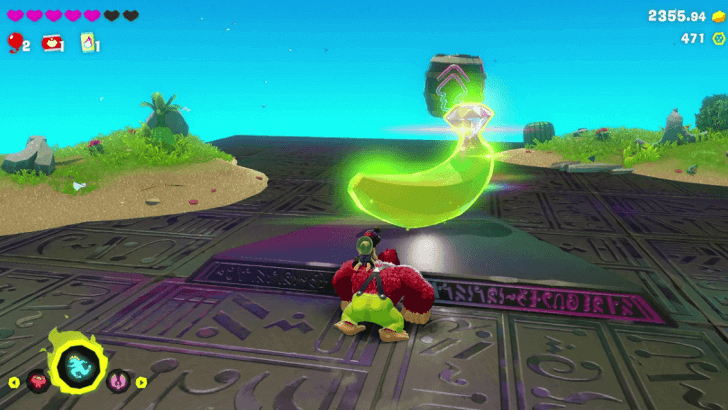
Found inside Switch-Lane Skyway Challenge Course 2. It is located along the course. |
||
| 32 |
 |
|
|
Found inside Switch-Lane Skyway. Before jumping on the Barrel Cannon at the end of the course, go towards the south edge of the platform, transform into Ostrich Bananza Form, and slowly descend and go to the opening under the platform where the third Gem is. |
||
| 33 |
 |
 |
|
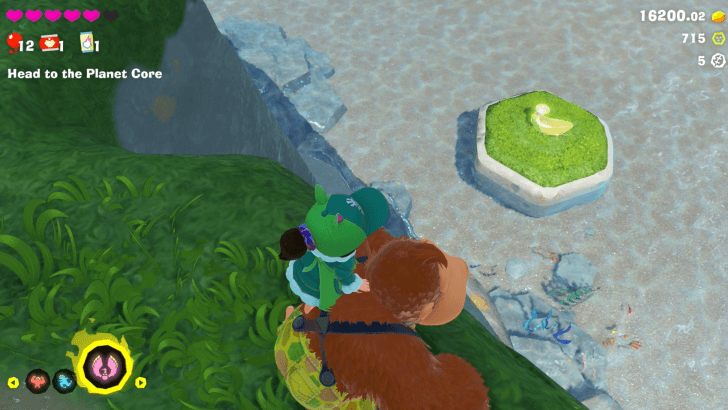
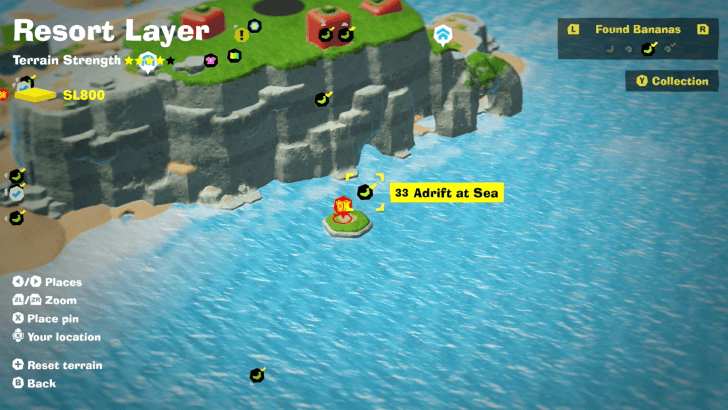
On an platform floating in the ocean behind the main resort island. |
||
| 34 |
 |
|
|
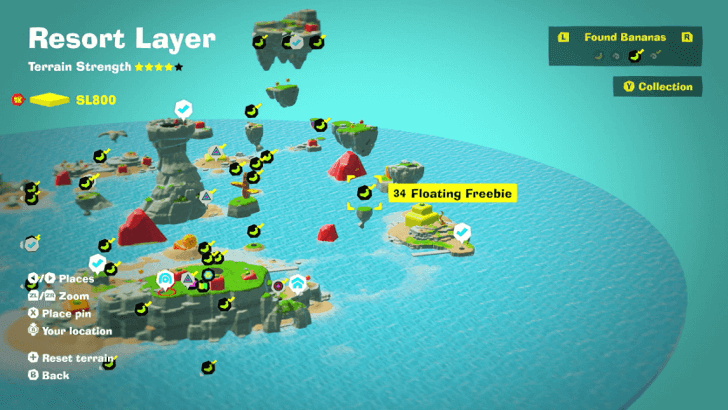
Starting from the Tropical Retreat checkpoint, go to the bridge that's on the other end with an enemy on it. Just punch the enemy there to create a bridge, then go to its center and grab a piece of it to fly upwards. Drop down to the small floating rock where the Gem is located. |
||
| 35 |
 |
 |
|
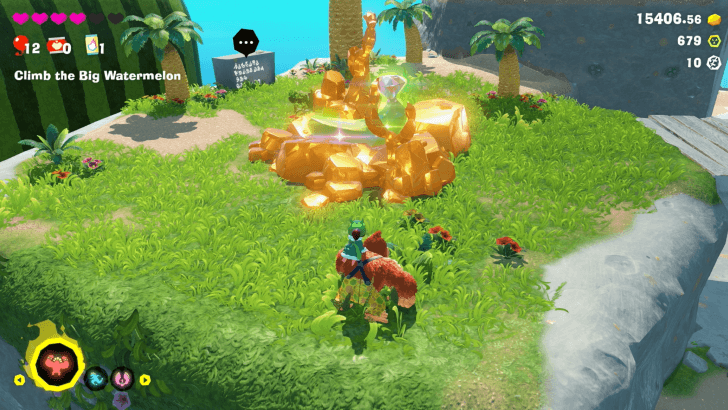
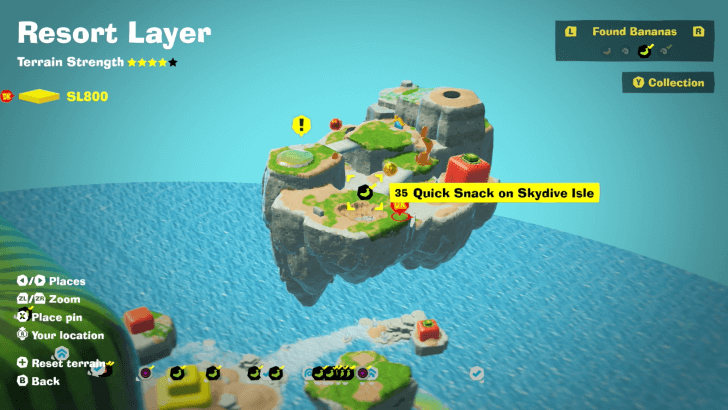
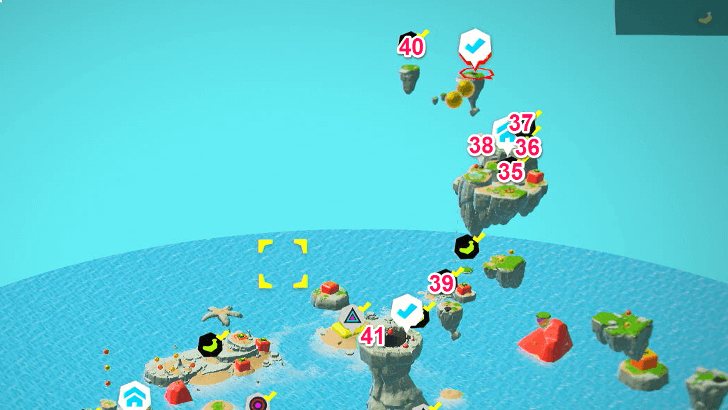
Use Liftoff Ore to float up and reach the Gem. Found on the main route to progress the story. |
||
| 36 |
 |
 |
|
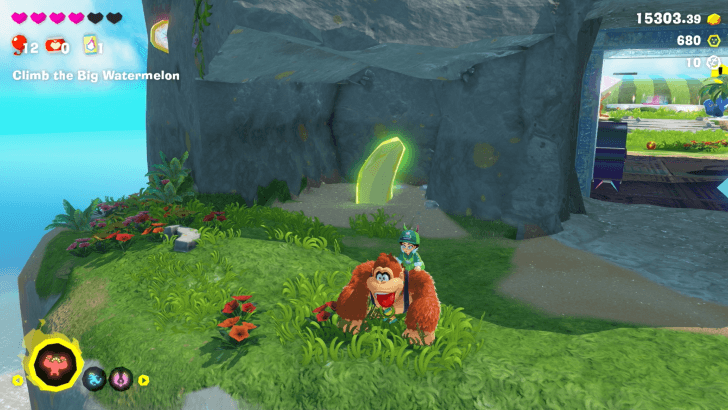
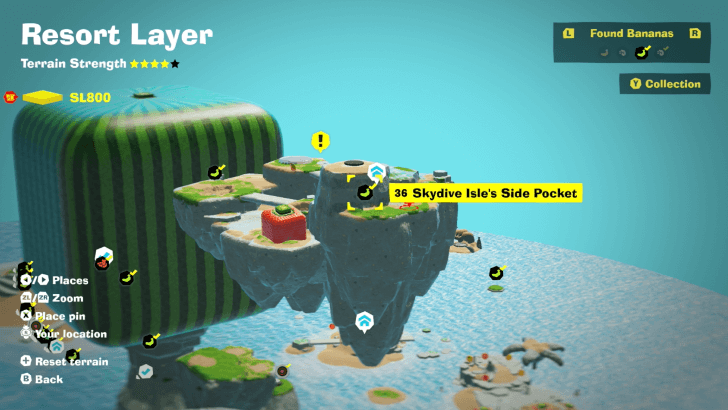
Found on the opposite end of the Skydive Isle Getaway, hidden in a corner. |
||
| 37 |
 |
|
|
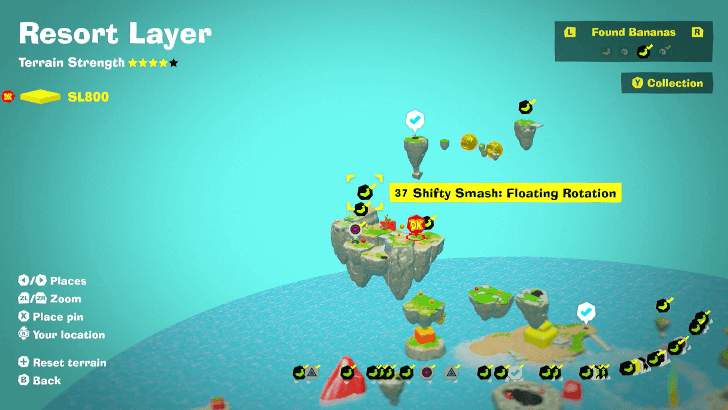
Starting from the Blast-Off Boardwalk checkpoint, drop down to the large floating island below it, then go to its highest peak to start the Shifty Smash Challenge. Use Ostrich Bananza to float towards the moving platforms and destroy both cubes. |
||
| 38 |
 |
|
|
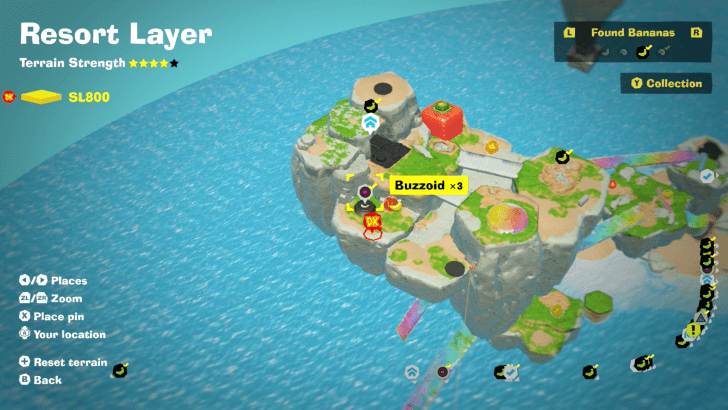
Enter the manhole and defeat three Buzzoids. Grab a piece of the colorful terrain, then throw it at the enemy while you're flying. It's best to do this in each lane to eliminate the corresponding enemy. |
||
| 39 |
 |
|
|
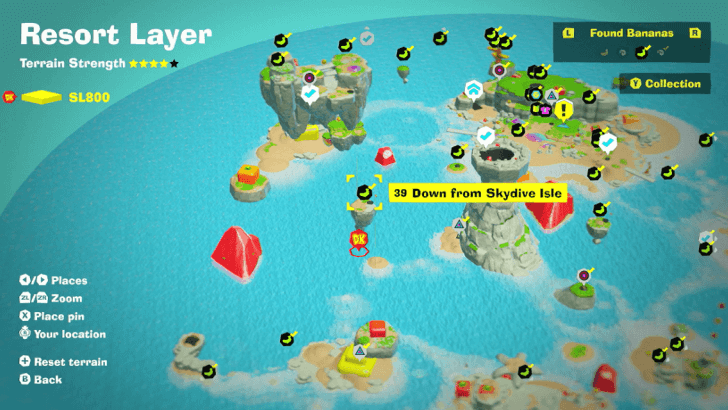
Starting from the Blast-Off Boardwalk checkpoint, go down to the large floating island directly below it. Then, find the rope contraption and slide down to another small floating island where the Gem is located. |
||
| 40 |
 |
 |
|
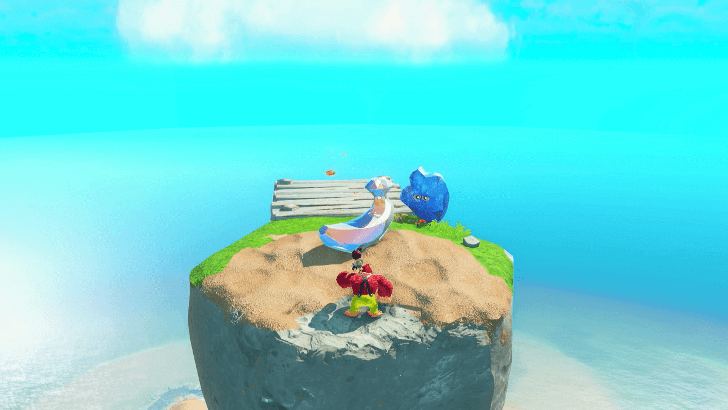
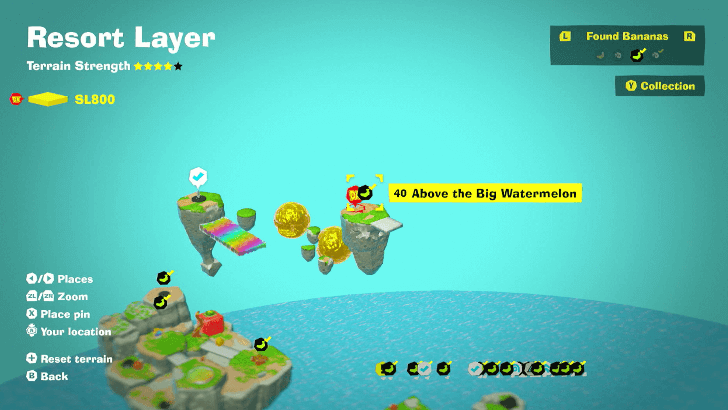
Starting from the Blast-Off Boardwalk, hop on to the rainbow-colored terrain and follow the path that it'll create. Once the path ends, grab a piece of the terrain to fly upwards, then jump towards the small piece of rock where the gem is located. |
||
| 41 |
 |
 |
|
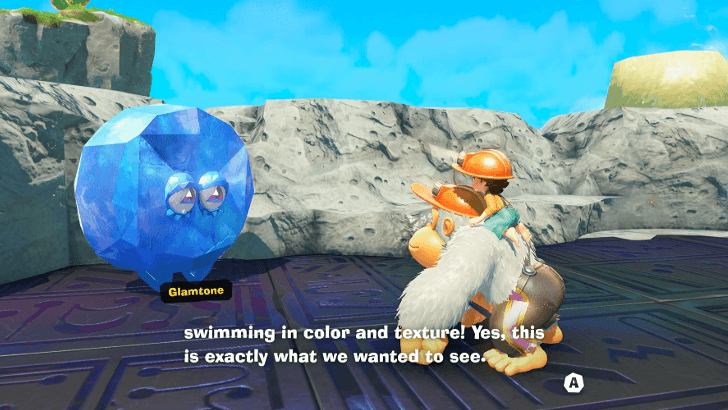
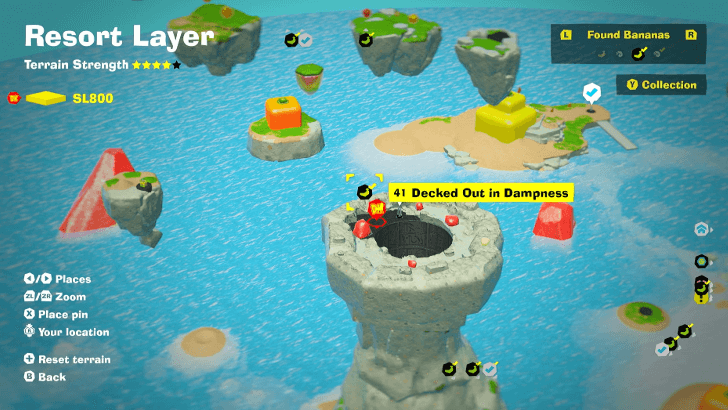
Solve the Glamtone's outfit puzzle by equipping the Soggy Cravat neckwear on DK. The outfit can be purchased from the Planet Core Style Shop. |
||
| 42 |
 |
 |
|
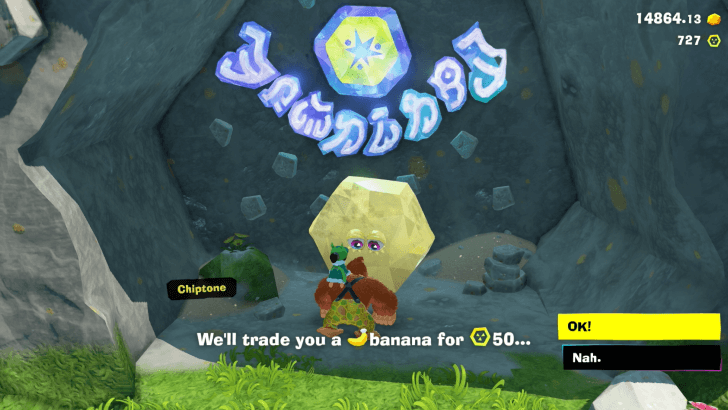
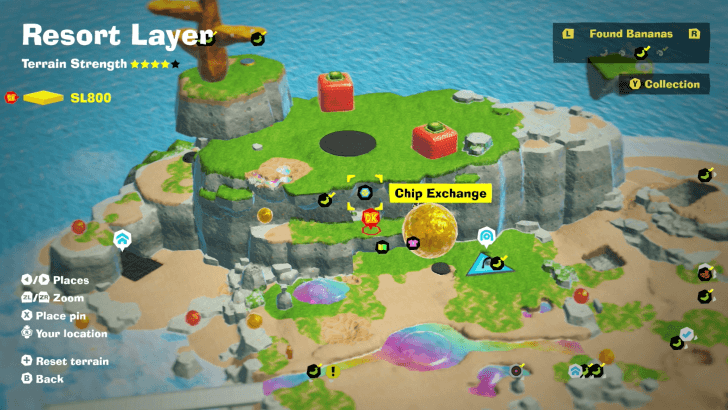
Buy with Banandium Chips to get a Gem. The price will vary depending on how many you have purchased from other layers. You only need to exchange once for the collectible to count. |
||
Banandium Gems List and Locations
Resort Layer Fossils
SL 800 Fossil Locations
| Overworld View | Map Location | |
|---|---|---|
 |
 |
|
|
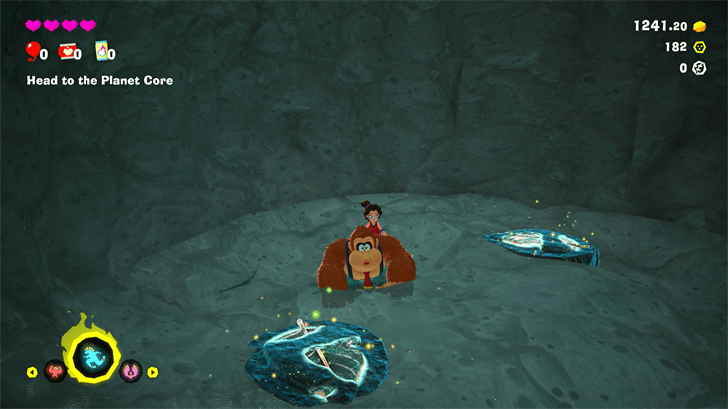
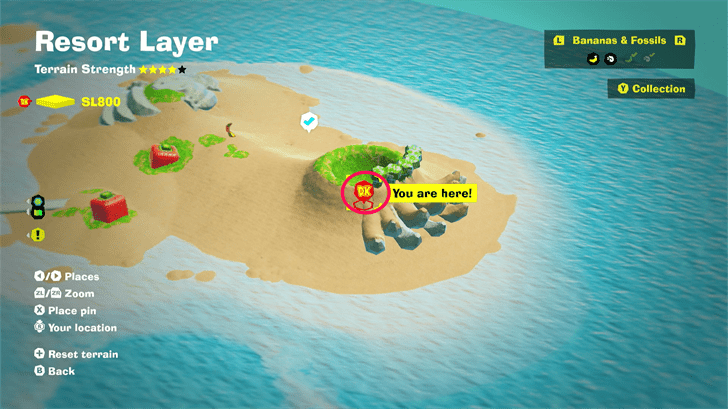
Dig down from the crater adjacent to the giant banana sand formation. |
||
 |
 |
|
|
Dig down from the crater adjacent to the giant banana sand formation. |
||
 |
 |
|
|
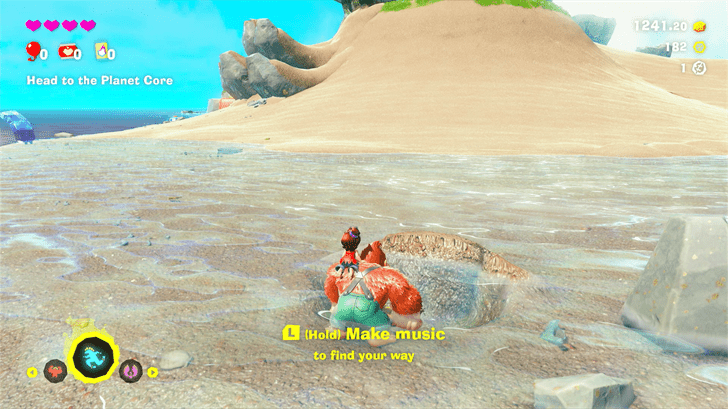
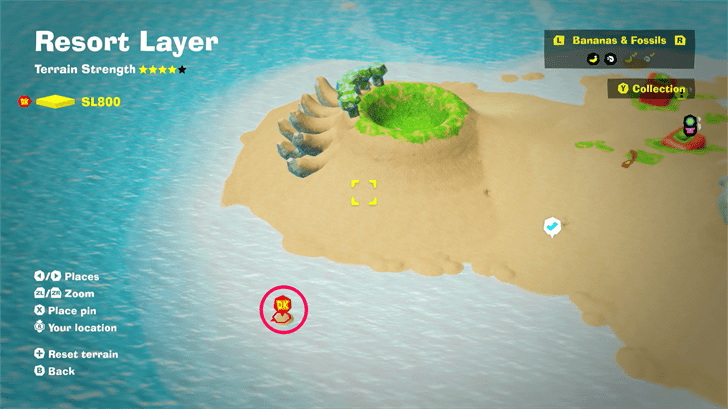
Under a small sand formation the the water east of the giant banana crater. |
||
 |
 |
|
|
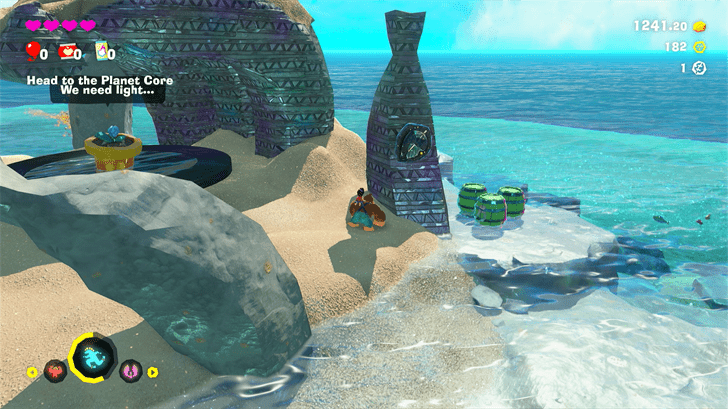
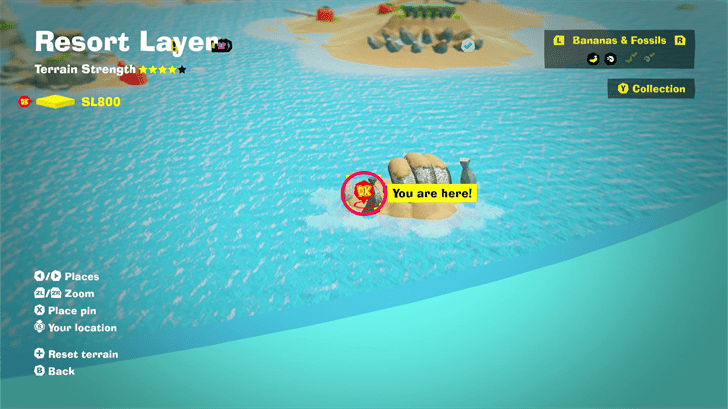
The side of a concrete pillar on a remote island south of the banana crater. |
||
 |
 |
|
|
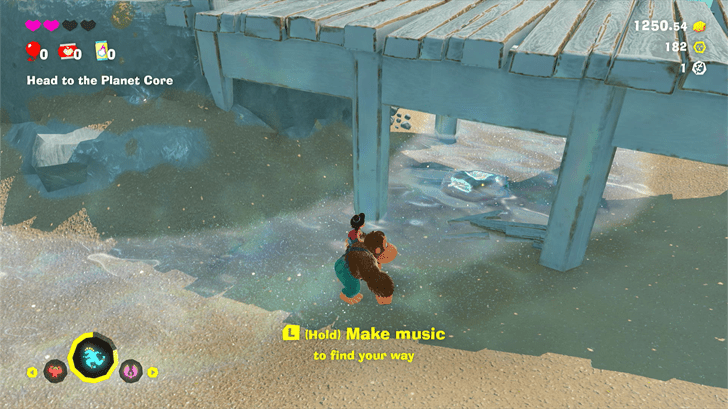
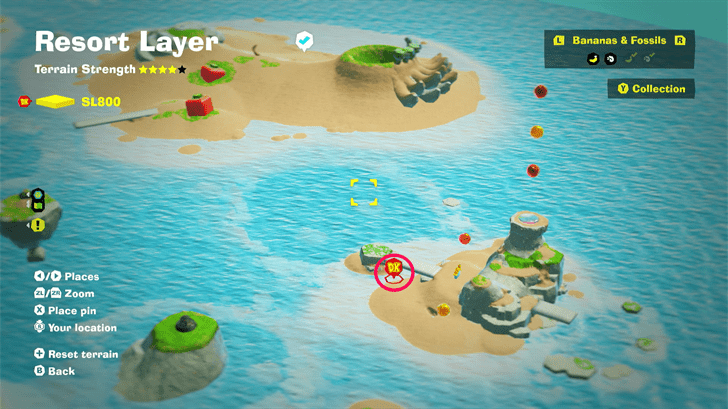
Under the bridge on an island west of the banana crater. |
||
 |
 |
|
|
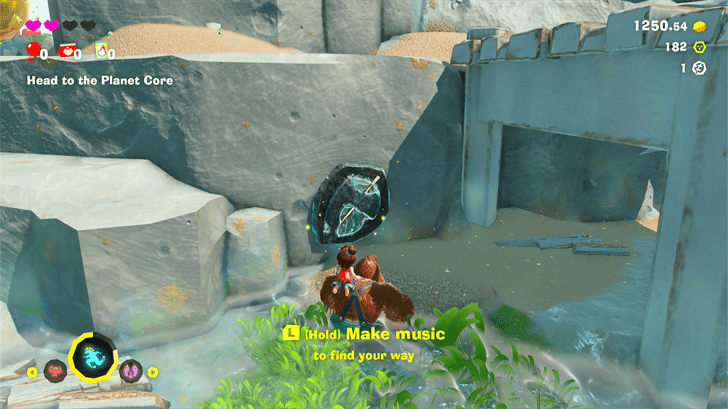
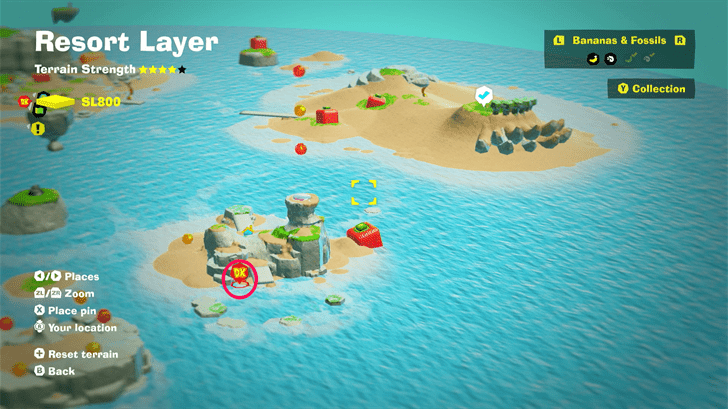
Near the bottom of the pier on the island with the strawberry block. |
||
 |
 |
|
|
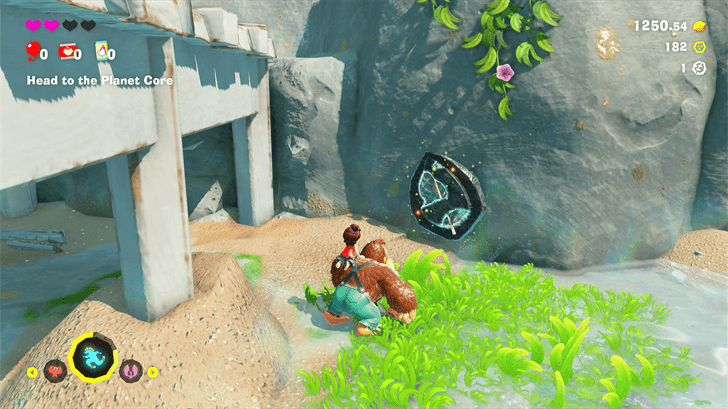
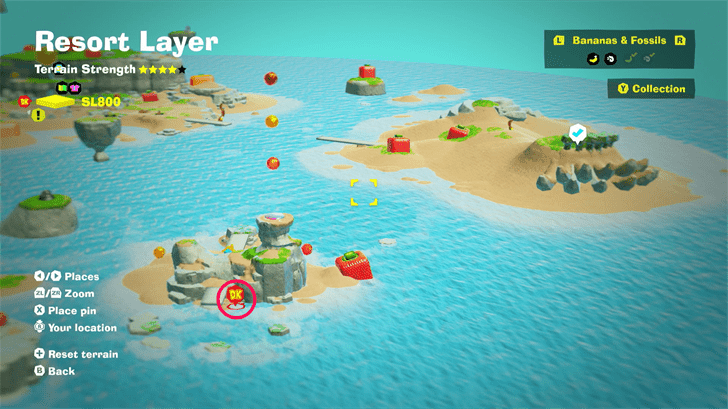
Near the bottom of the pier on the island with the strawberry block. |
||
 |
 |
|
|
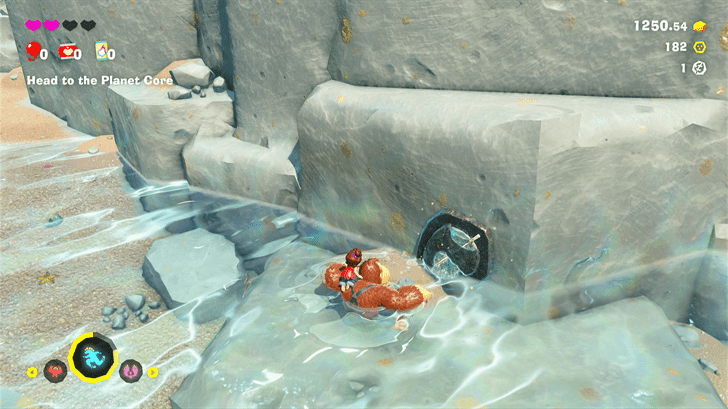
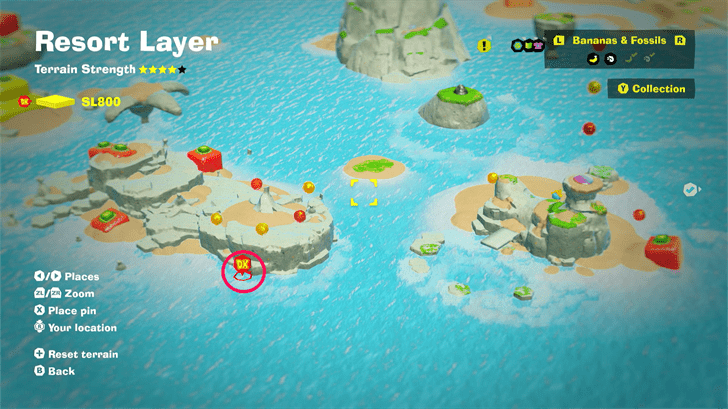
The side of the cliff on the island with the four strawberry blocks. |
||
 |
 |
|
|
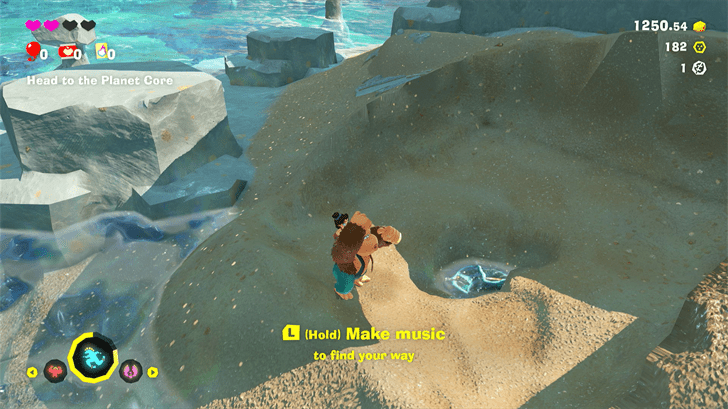
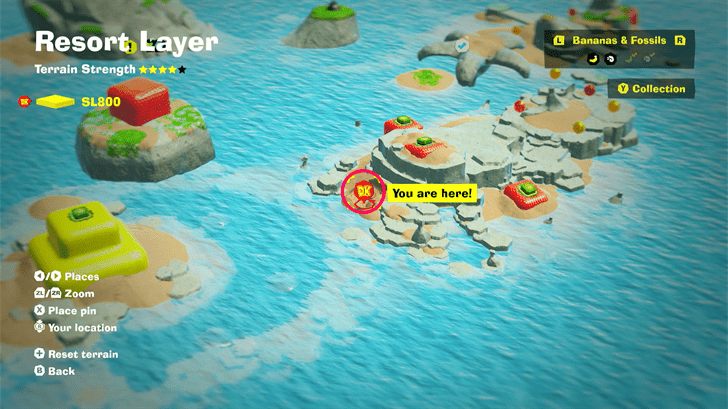
Dig down the strawberry block with a Dive Punch |
||
 |
 |
|
|
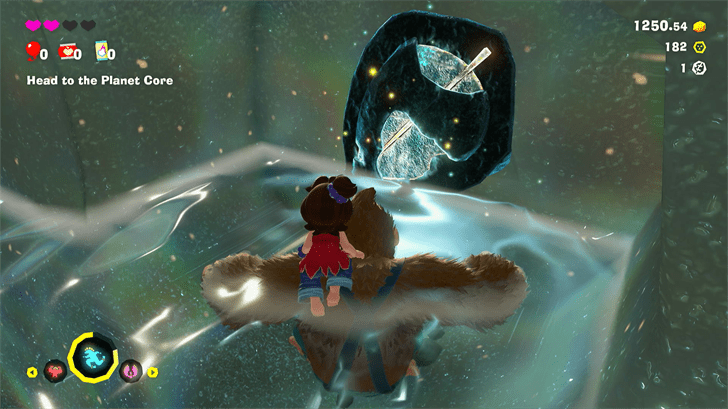
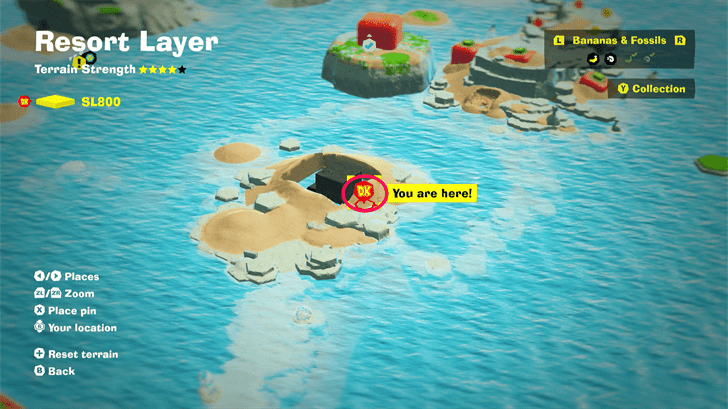
Break the giant pear on the island west of the one with the four Strawberry Blocks with a Dive Punch. |
||
 |
 |
|
|
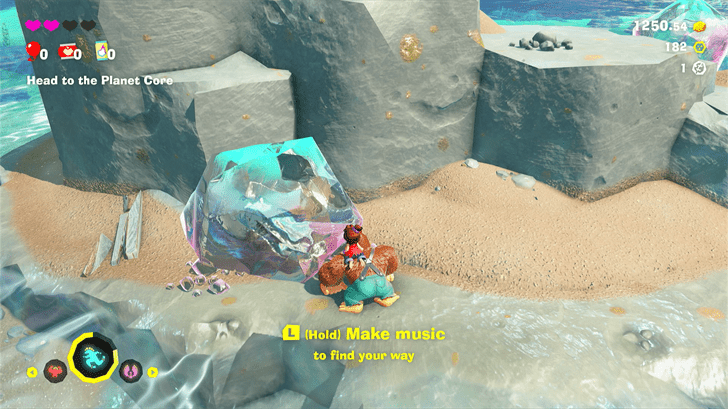
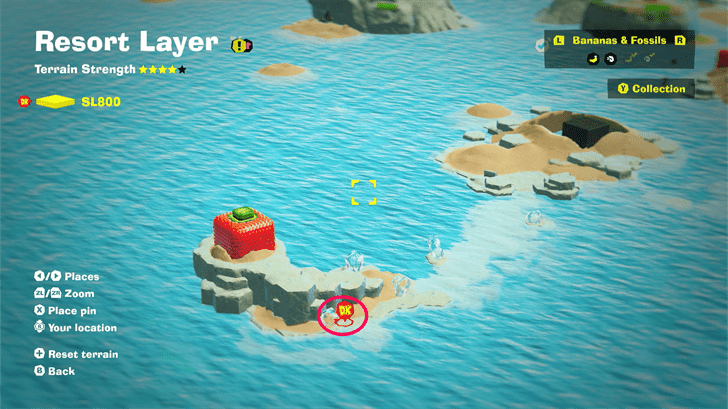
Inside the crystal at the island west of the one with the Giant Pear. |
||
 |
 |
|
|
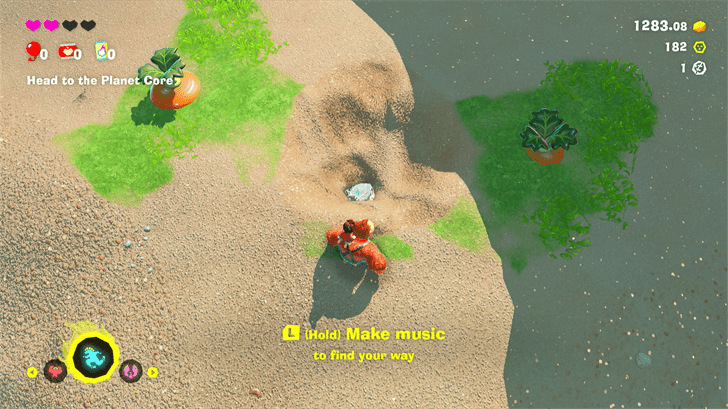
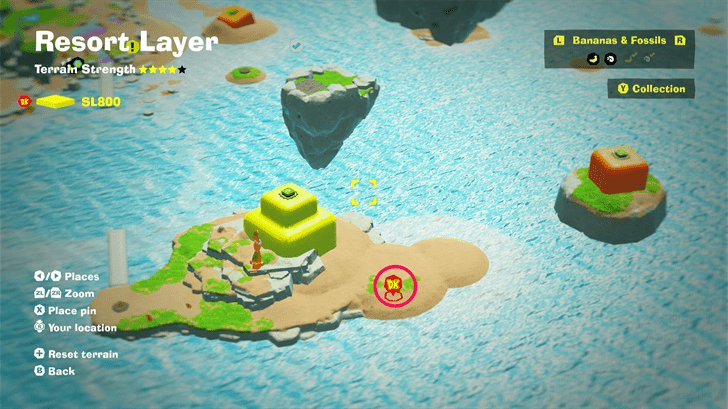
Pull out the carrot in the middle on the Tropical Retreat Outskirts. |
||
 |
 |
|
|
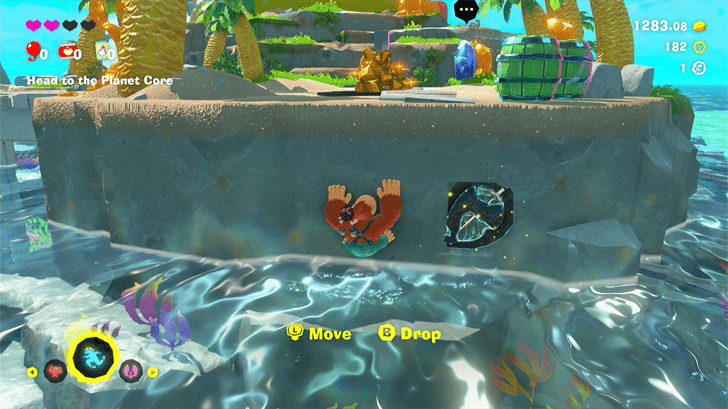
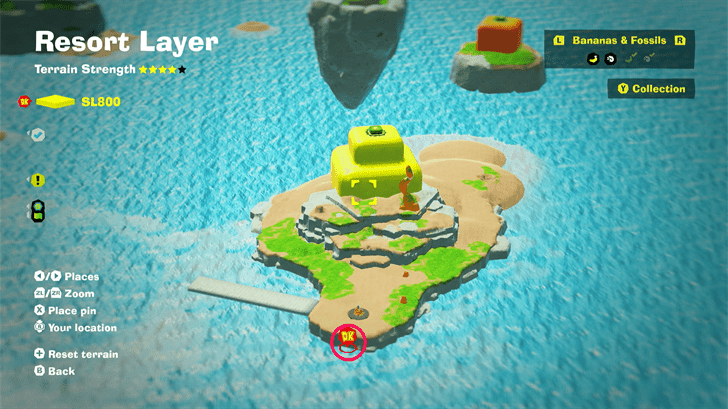
On the side of a cliff near the Tropical Retreat Outskirts checkpoint. |
||
 |
 |
|
|
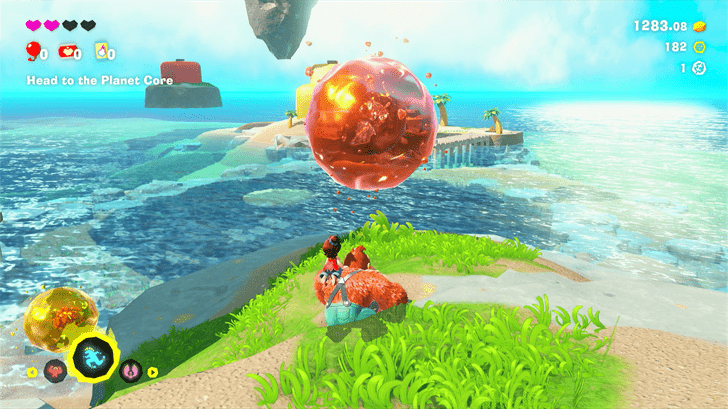
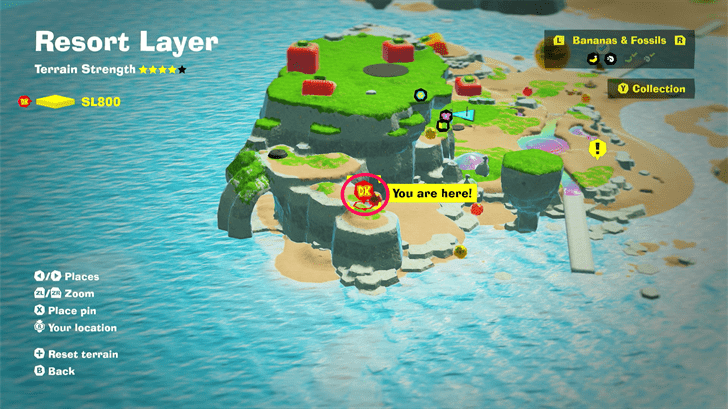
Inside the red water bubble on the island with the Warp Gong. |
||
 |
 |
|
|
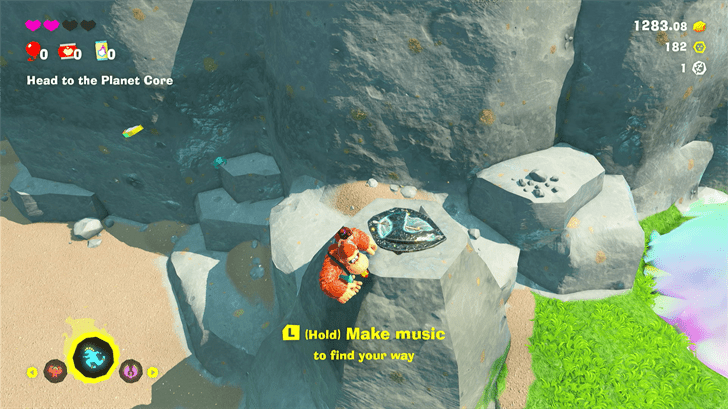
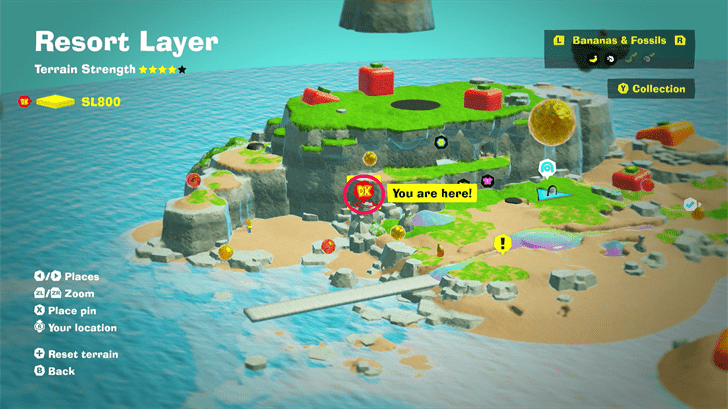
On the rock on the island with the Warp Gong. |
||
 |
 |
|
|
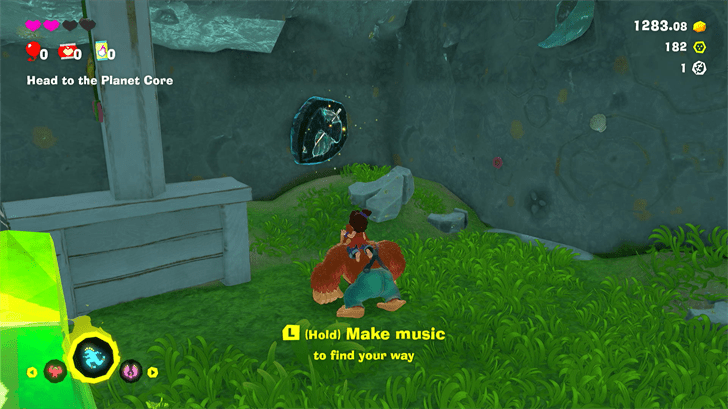
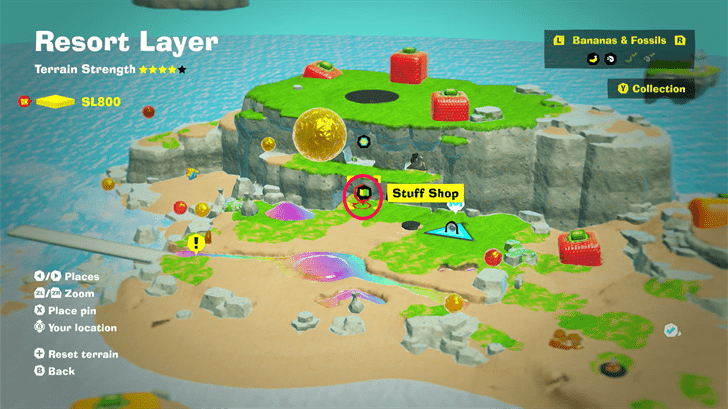
Inside the shop on the island with the Warp Gong. |
||
 |
 |
|
|
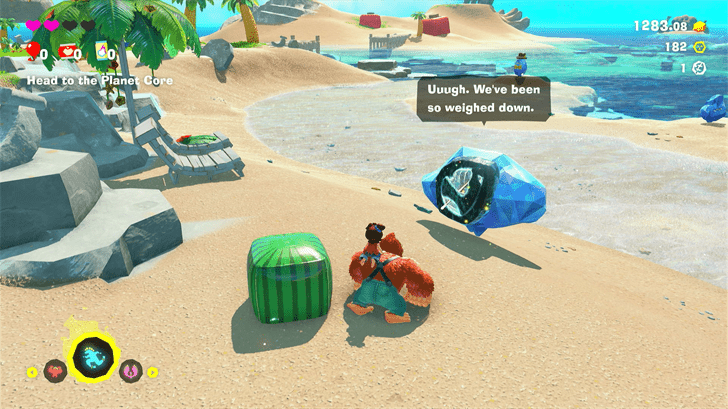
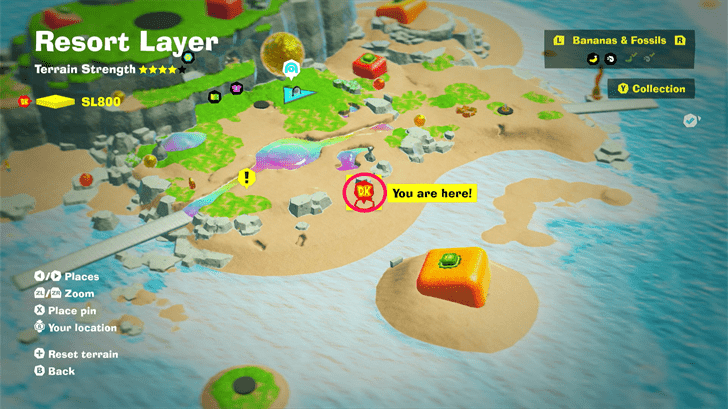
On the back of a Fractone |
||
 |
 |
|
|
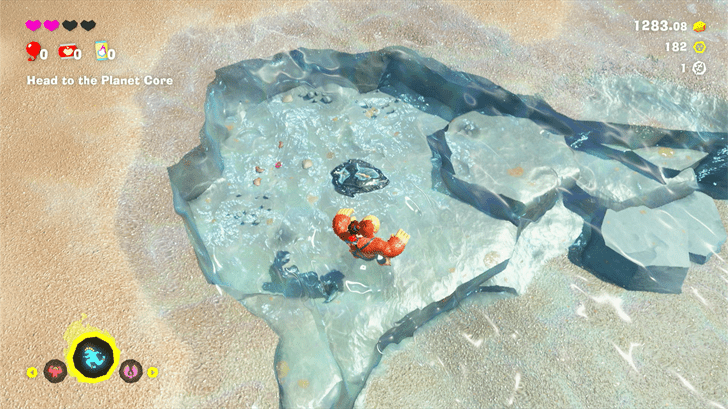
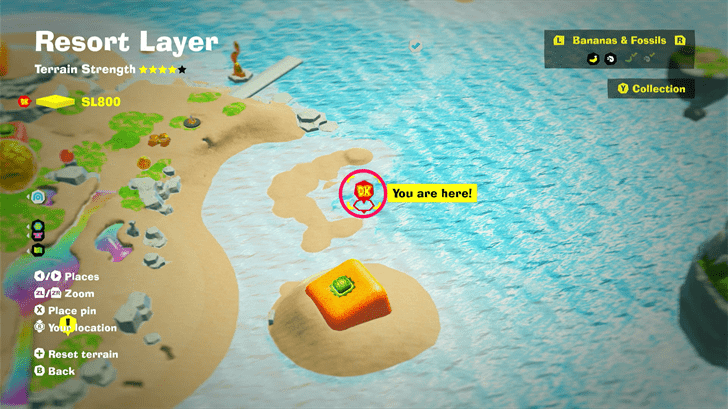
In the water on a rock next to a giant Carrot Block. |
||
 |
 |
|
|
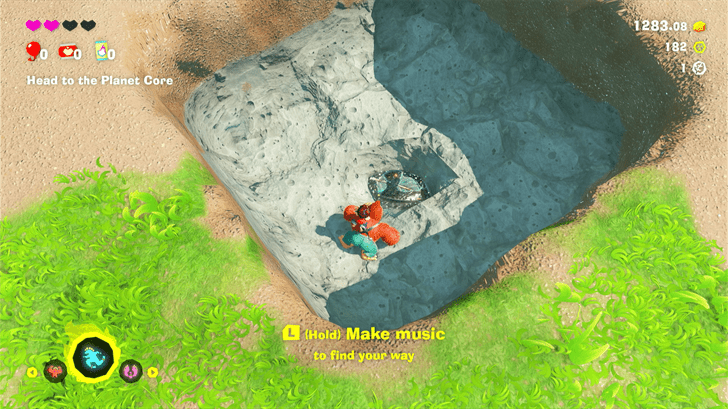
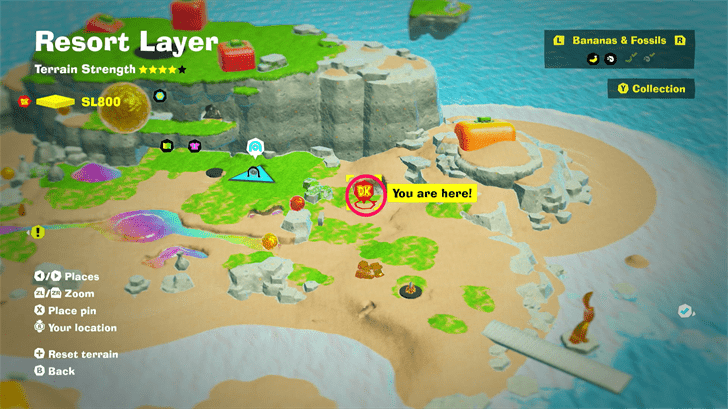
Break the giant Strawberry Block next to the Warp Gong. |
||
 |
 |
|
|
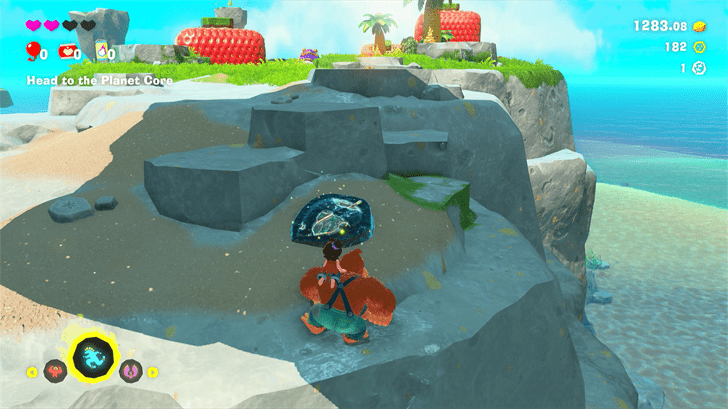
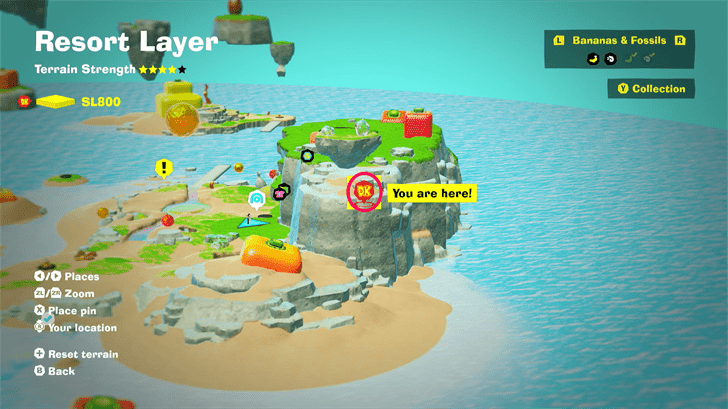
On the Cliff above the Warp Gong. |
||
 |
 |
|
|
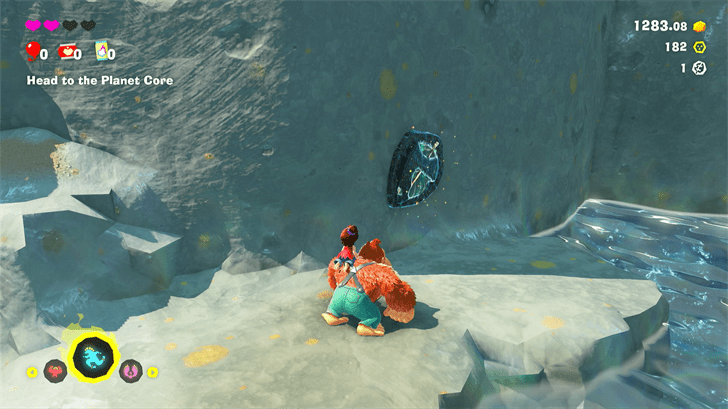
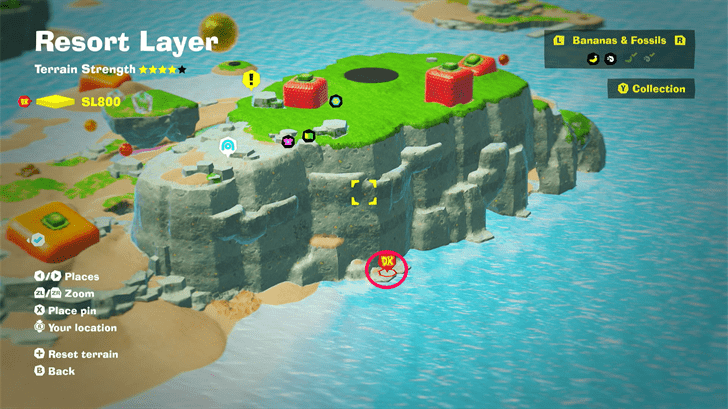
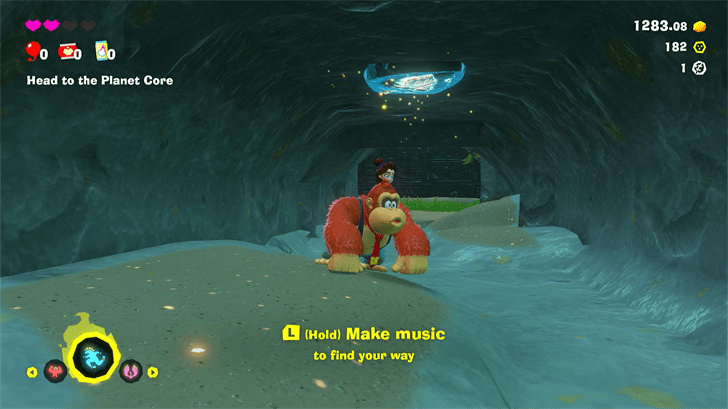
Under the Cliff on the same island as the Warp Gong. |
||
 |
 |
|
|
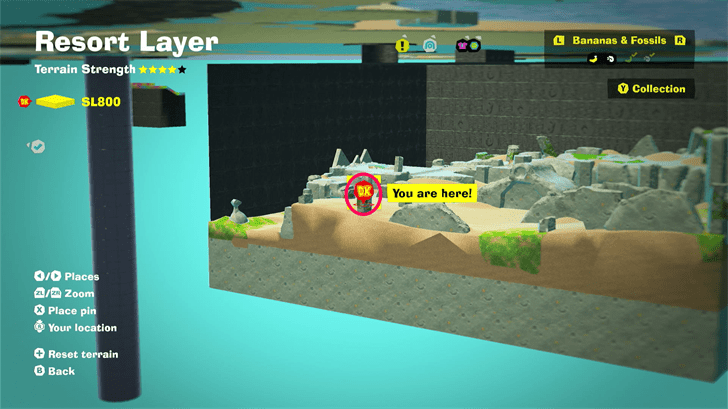
Use a dive punch to get down the orange cube, then go to the back of the cave below. |
||
 |
 |
|
|
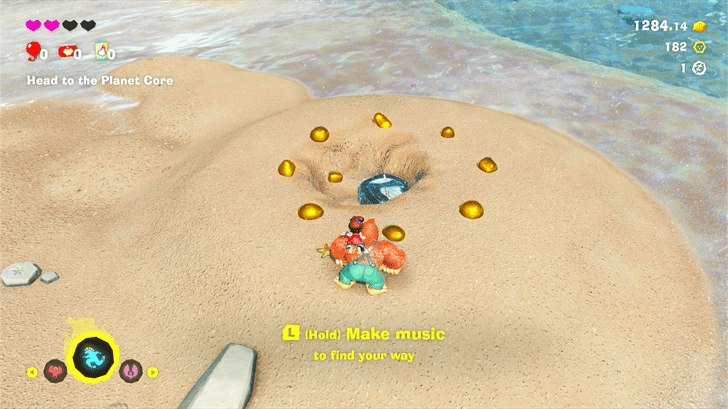
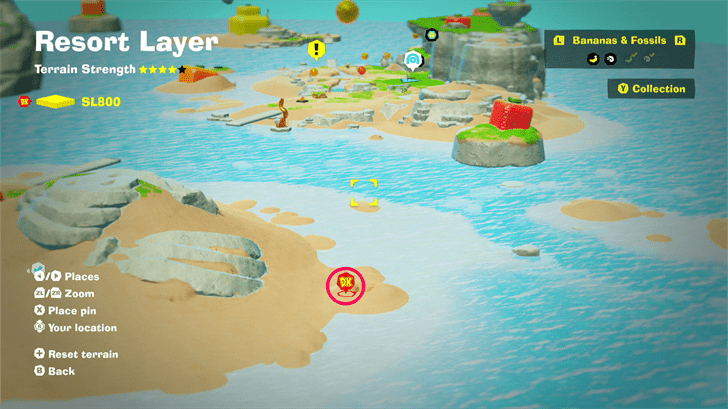
Dig down into the center of the ring of gold. |
||
 |
 |
|
|
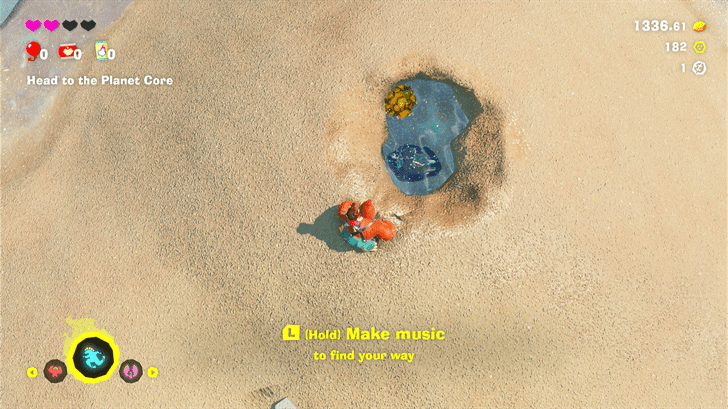
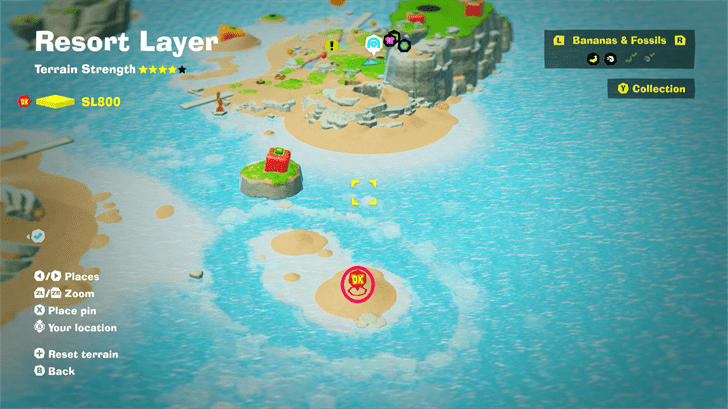
Pulling out the radish from the top of a sand formation west of the Warp Gong. |
||
 |
 |
|
|
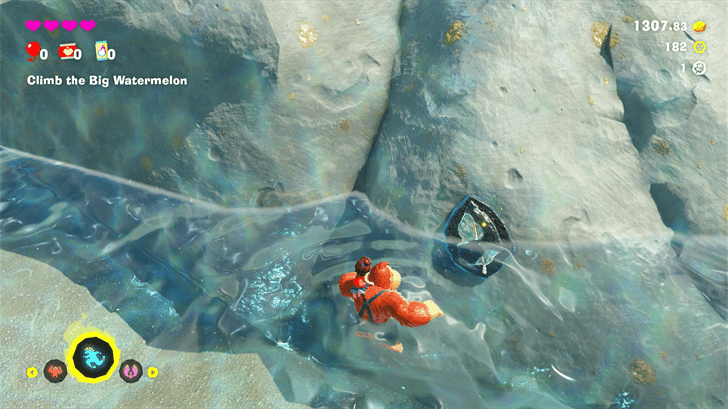
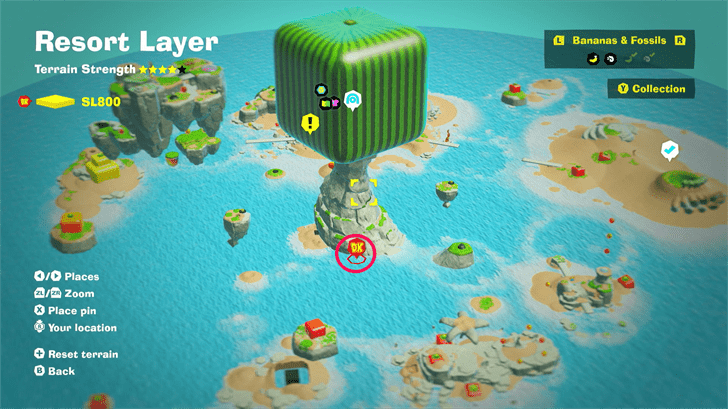
At the base of the Giant Watermelon |
||
 |
 |
|
|
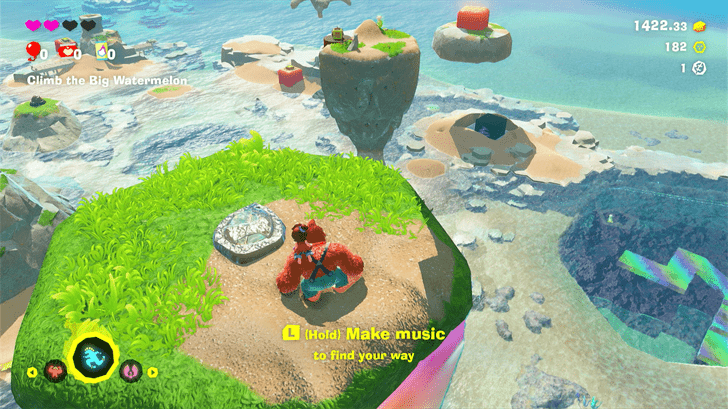
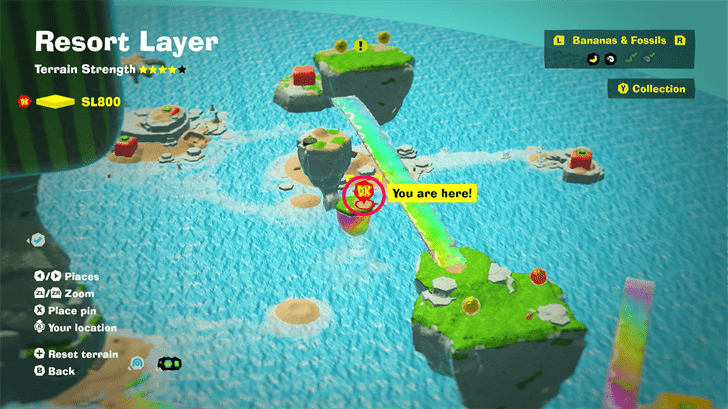
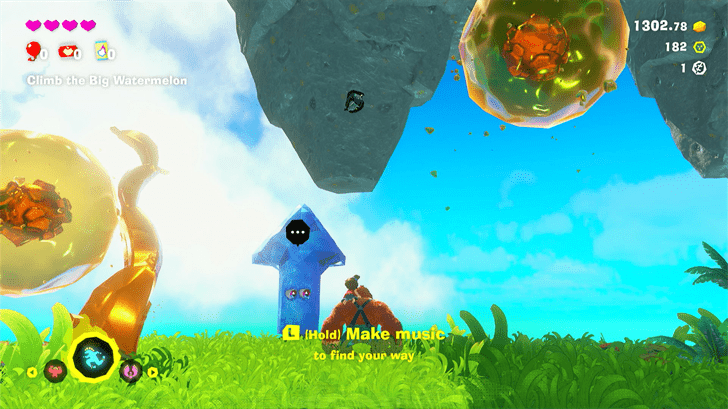
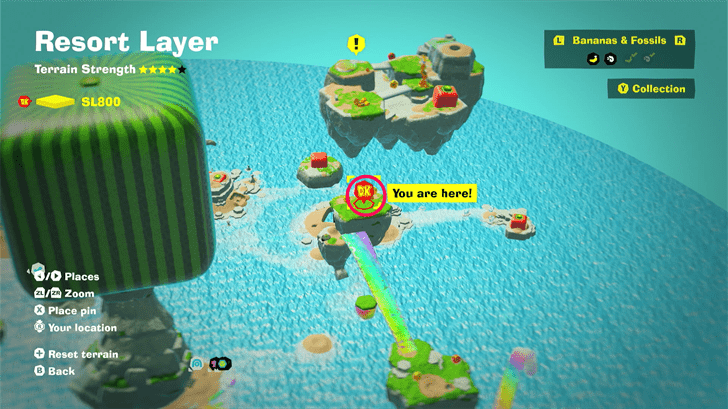
On one of the floating islands |
||
 |
 |
|
|
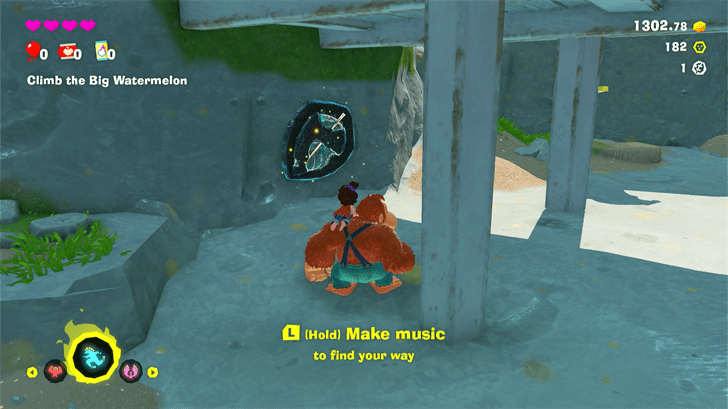
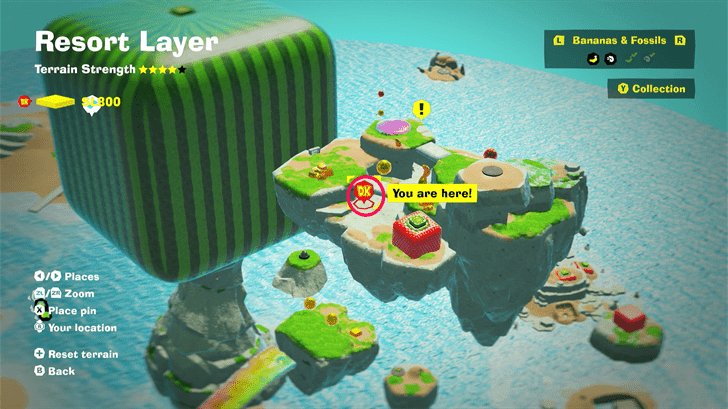
The bottom of the Skydive Isle. Throw stuff at it to get it. |
||
 |
 |
|
|
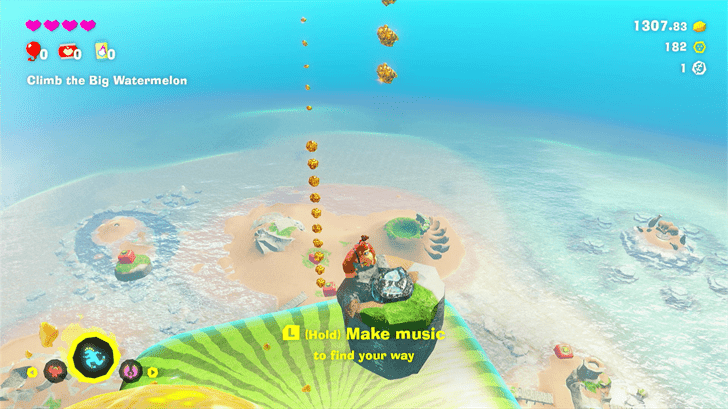
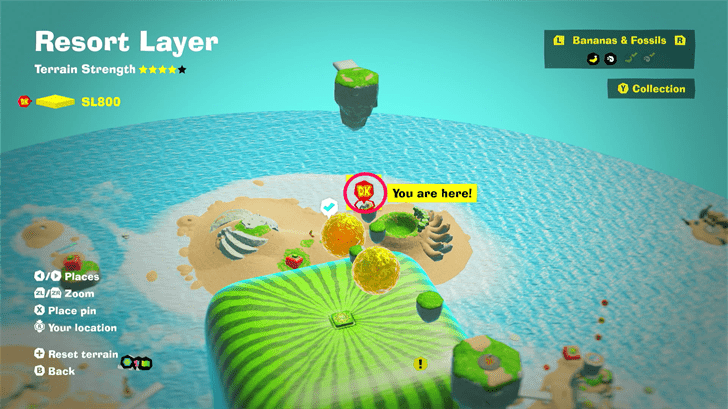
Under the bridge on Skydive Isle |
||
 |
 |
|
|
On a floating island near one of the checkpoints. |
||
 |
 |
|
|
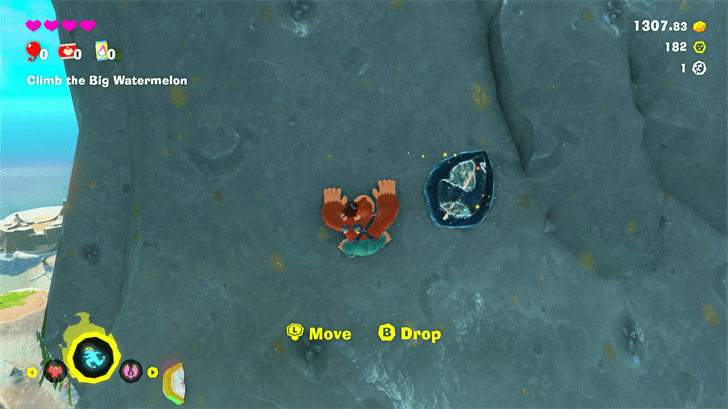
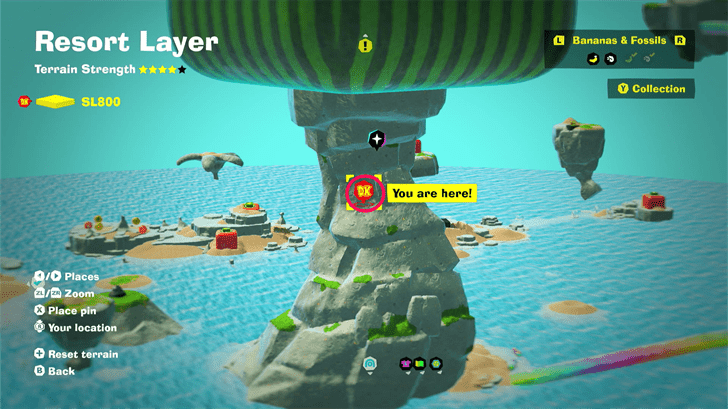
On the rock formation holding the Giant Watermelon. |
||
Resort Layer Checkpoints
All Checkpoint Locations
| Overworld View | Map Location | |
|---|---|---|
 |
 |
|
|
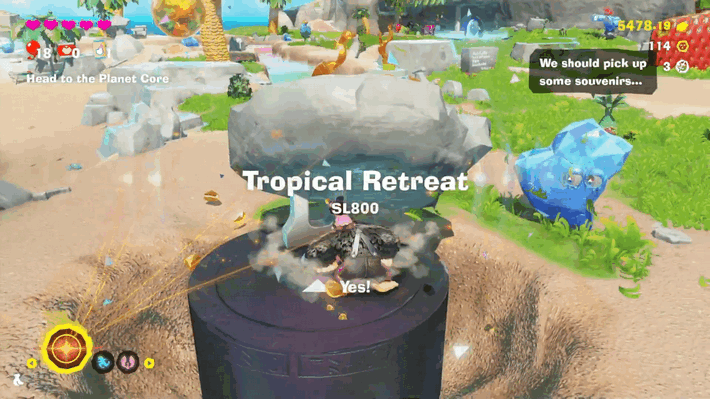
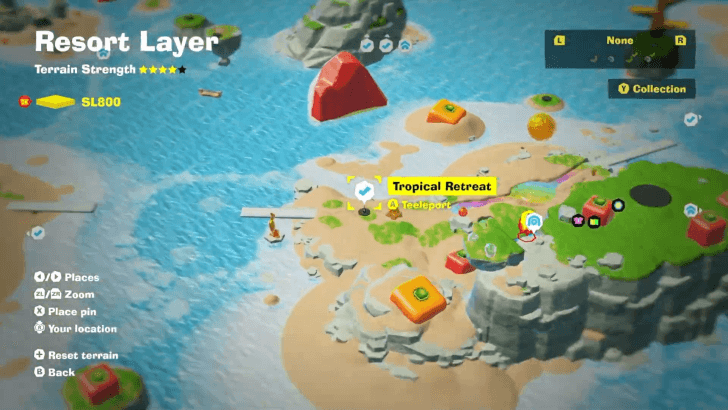
Tropical Retreat Checkpoint (SL 800)
Found at the beach of the Tropical Retreat. |
||
 |
 |
|
|
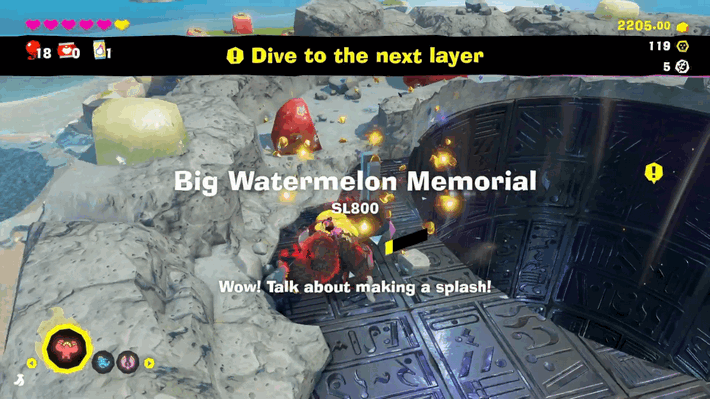
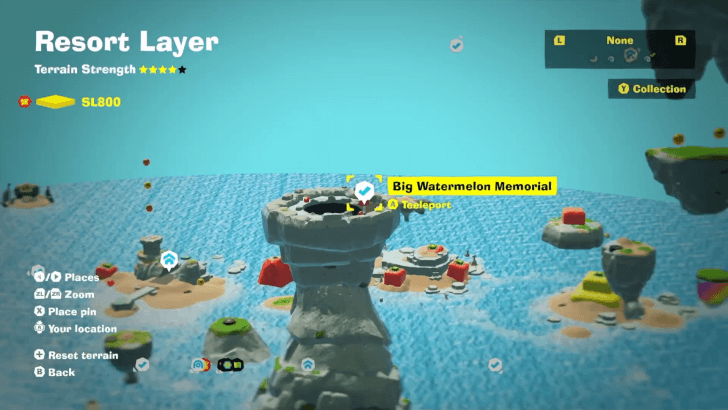
Big Watermelon Memorial Checkpoint (SL 800)
This marks the location of where the big watermelon used to be after you destroy it. |
||
 |
 |
|
|
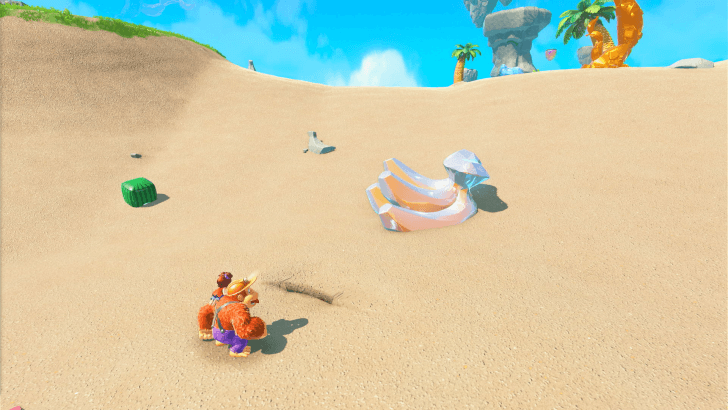
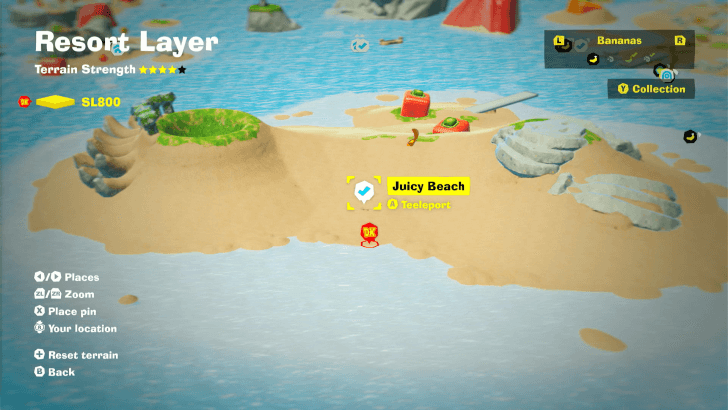
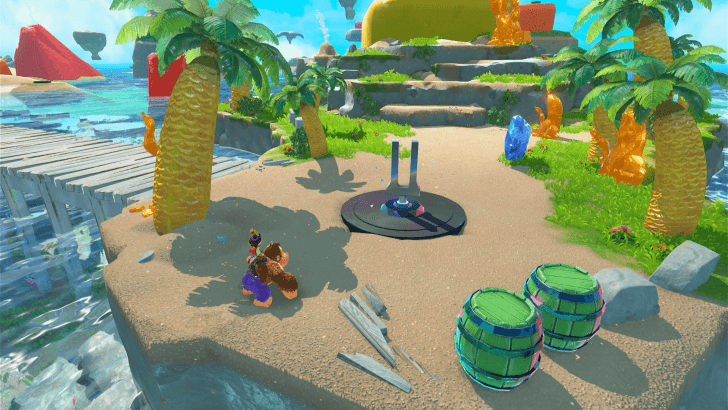
Juicy Beach Checkpoint (SL 800)
This is where you land in the Resort Layer when coming from The Junction. |
||
 |
 |
|
|
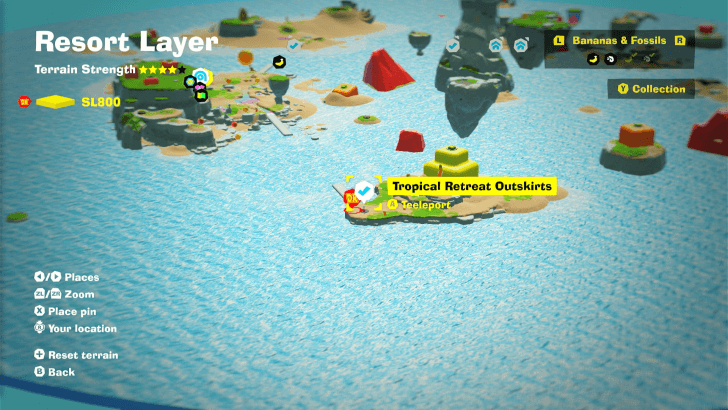
Tropical Retreat Outskirts Checkpoint (SL 800)
Located near the floating islands leading to the Skydive Isle. |
||
 |
 |
|
|
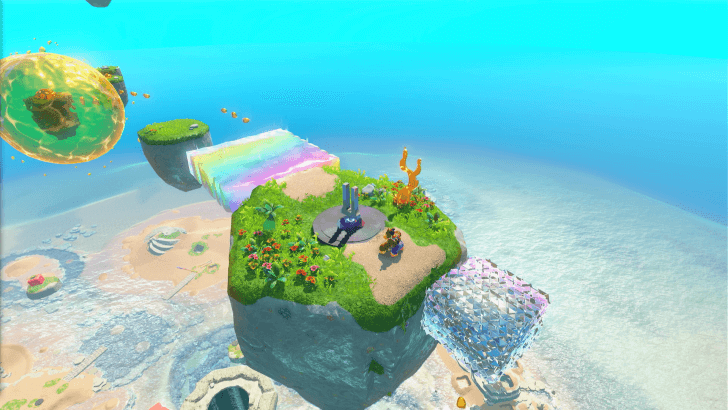
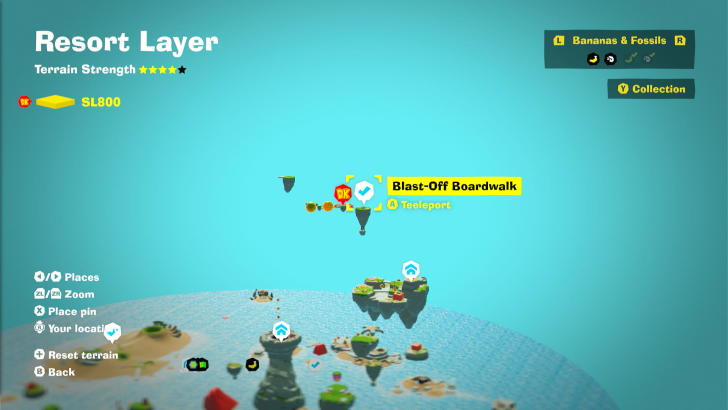
Blast-Off Boardwalk (SL 800)
Found on a floating platform in the sky, above the watermelon. |
||
Resort Layer Challenges
All Challenge Locations
| Layer | Overworld View | Map Location |
|---|---|---|
| SL 800 |
 |
 |
|
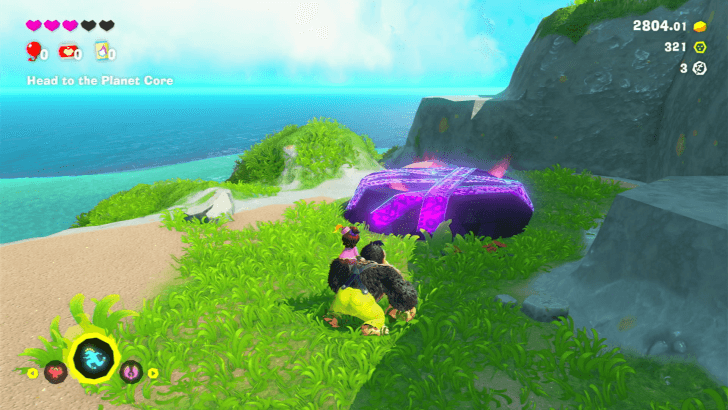
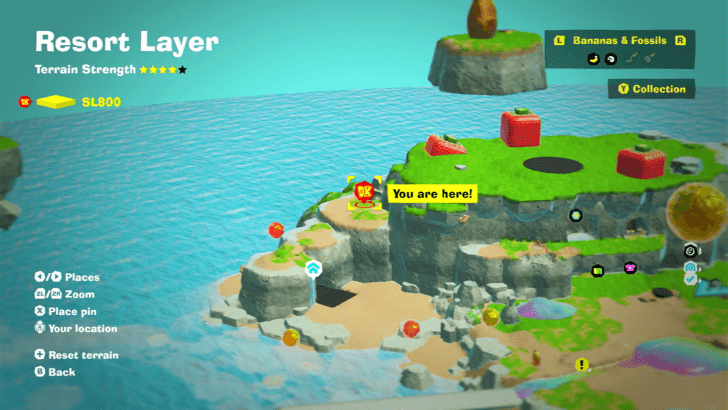
Trailfinoid x3 Resort Layer Battle Challenge 1 On a level below the plateau with large Strawberry blocks just past the Tropical Retreat Getaway. |
||
| SL 800 |
 |
 |
|
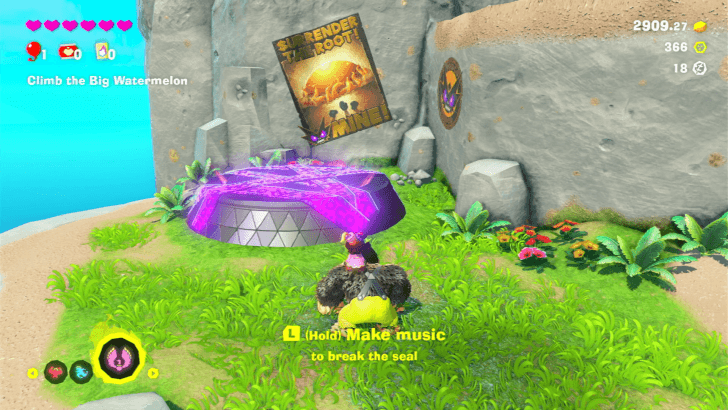
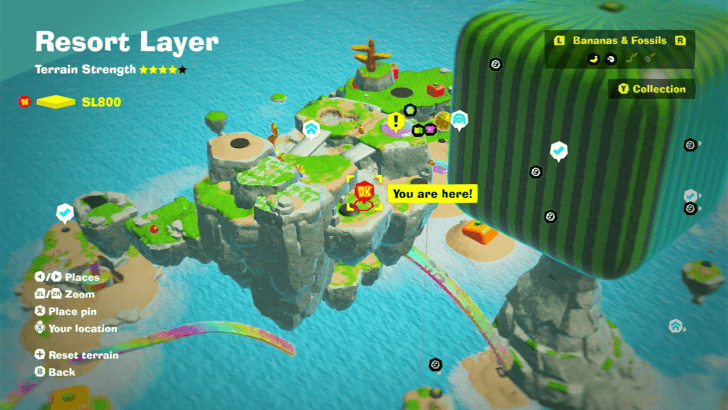
Buzzoid x 3 Resort Layer Battle Challenge 2 On a floating island next to the giant Watermelon, and right next to Skydive Isle Getaway. |
||
| SL 800 |
 |
 |
|
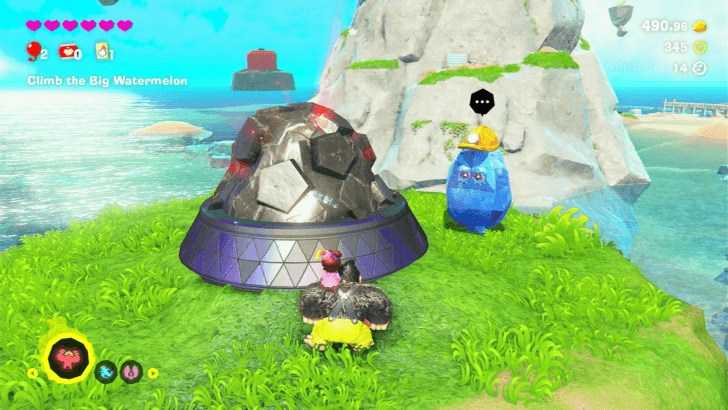
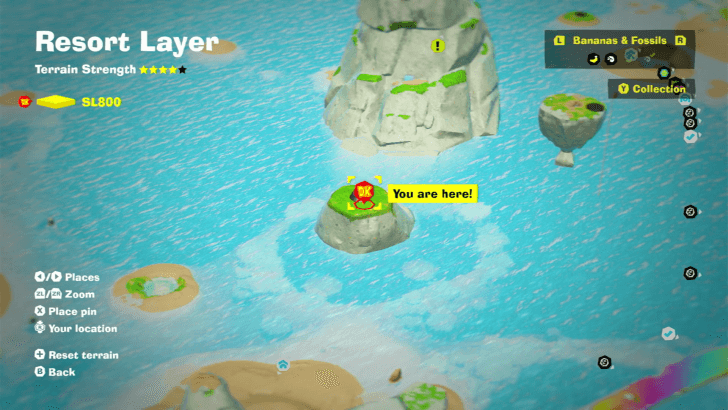
Molevoloid x3 Resort Layer Battle Challenge 3 Slightly northwest of the Fruitbowl Archipelago Getaway. Speak to the Constructone and pay 600 gold to get access to the challenge ruin. |
||
| SL 800 |
 |
 |
|
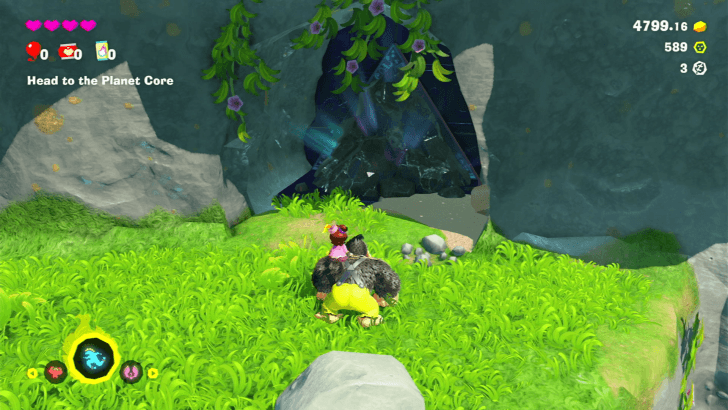
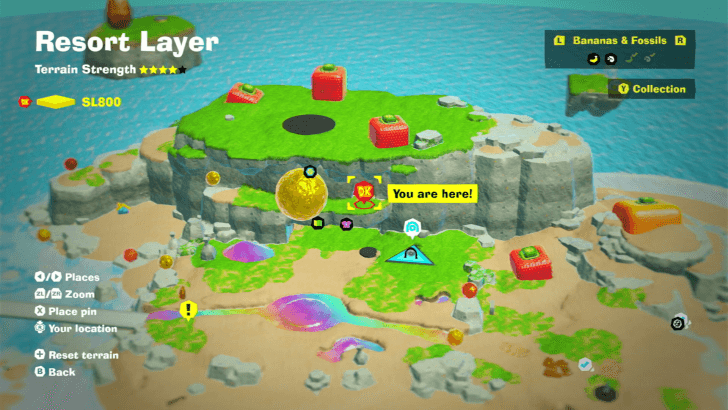
Mine-Cart Country Resort Layer Challenge Course 1 In a small alcove above the Style Shop in Tropical Retreat. Speak to the Constructone and pay 1000 Gold to remove the debris blocking the entrance. |
||
| SL 800 |
 |
 |
|
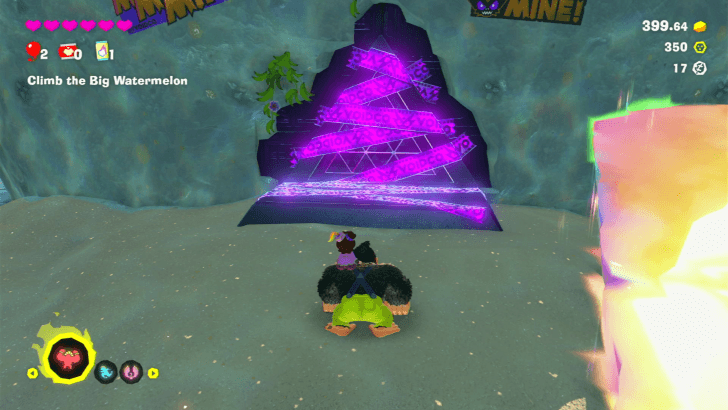
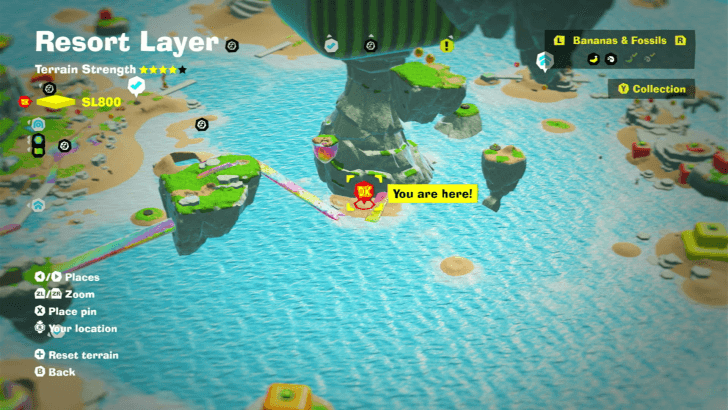
Switch-Lane Skyway Resort Layer Challenge Course 2 Located at the base of the large Watermelon west of Tropical Retreat. |
||
| SL 800 |
 |
 |
|
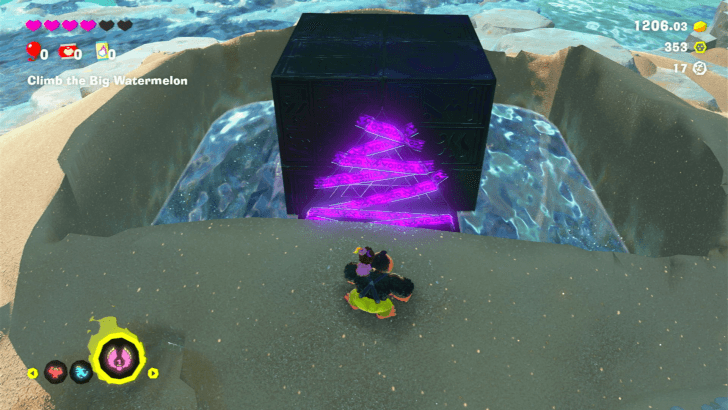
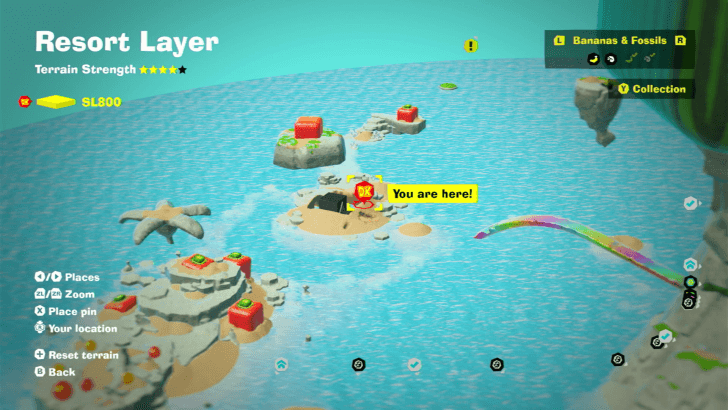
Ice-Serve Switcheroo Resort Layer Challenge Course 3 Located under the large fruit that you need to destroy from the top with a dive punch just north of Fruitbowl Archipelago Getaway. |
||
Bonus Stage Location
| Layer | Overworld View | Map Location |
|---|---|---|
| SL 800 |
 |
|
|
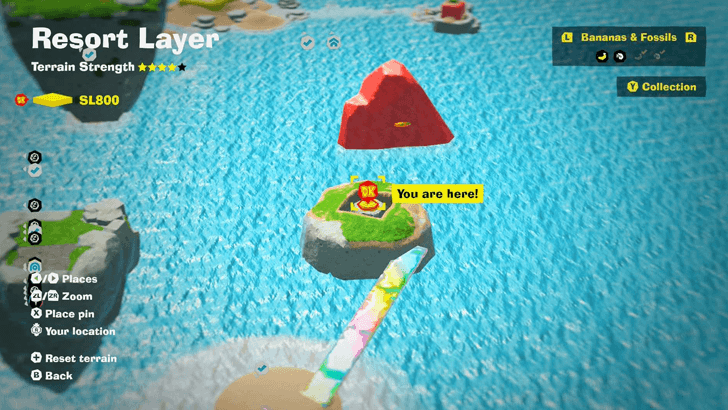
Surfing for Gold
Found in the Tropical Retreat Outskirts. Defeat the sharks at the beach to make a path towards the floating island. Dive punch the button to reveal the Bonus Stage. |
||
Resort Layer Shops
Resort Layer Style Shop
Style Shop Locations
| Layer | Overworld View | Map Location |
|---|---|---|
| SL 800 |
 |
 |
|
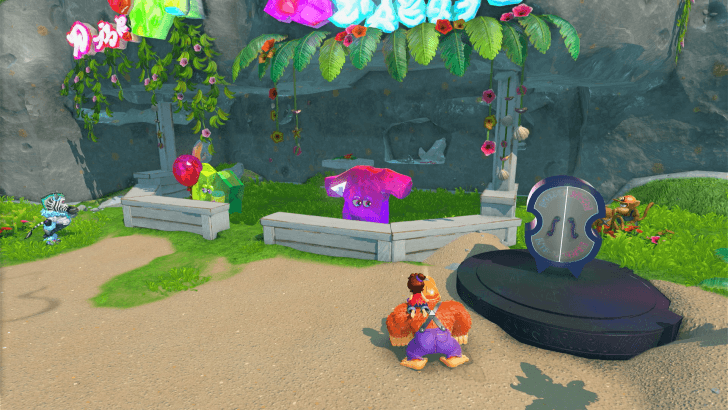
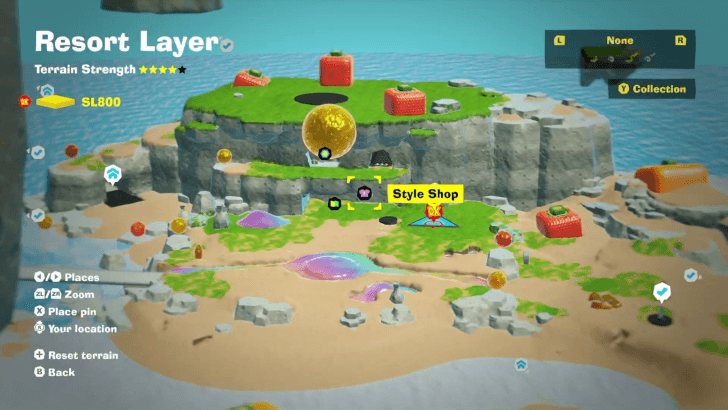
Tropical Retreat Style Shop
Found beside the Stuff Shop at the Tropical Retreat. |
||
Available Outfits
| Name | Type | Cost | Effect | |||||||
|---|---|---|---|---|---|---|---|---|---|---|
|
|
Fur Color |
|
Sparkly and shiny, like a flower petal catching the light of dawn. | |||||||
|
|
Fur Color |
|
Radical and energizing, like a ride on a gnarly wave. | |||||||
|
|
Fur Color |
|
Rich and lively, like your absolute-favorite fruit. | |||||||
|
|
Fur Color |
|
Tasty and exotic, like the fruit of a coastal cactus. | |||||||
Stuff Shop Locations
| Layer | Overworld View | Map Location |
|---|---|---|
| SL 800 |
 |
 |
|
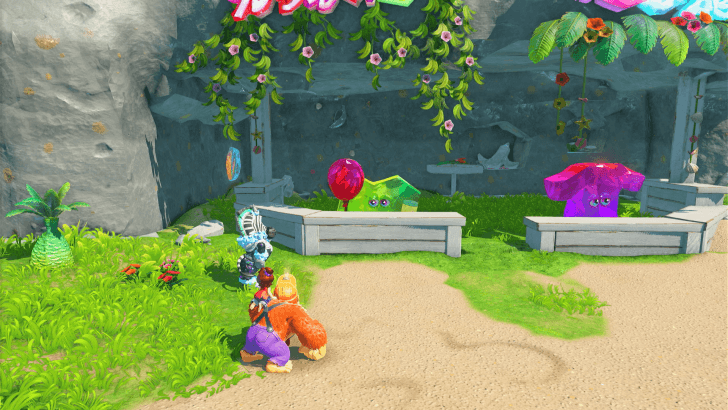
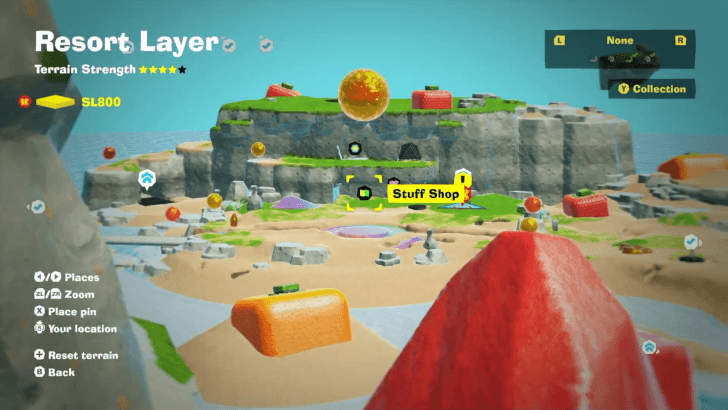
Tropical Retreat Stuff Shop
Found beside the Style Shop at the Tropical Retreat. |
||
Chip Exchange Location
| Layer | Overworld View | Map Location |
|---|---|---|
| SL 800 |
 |
 |
|
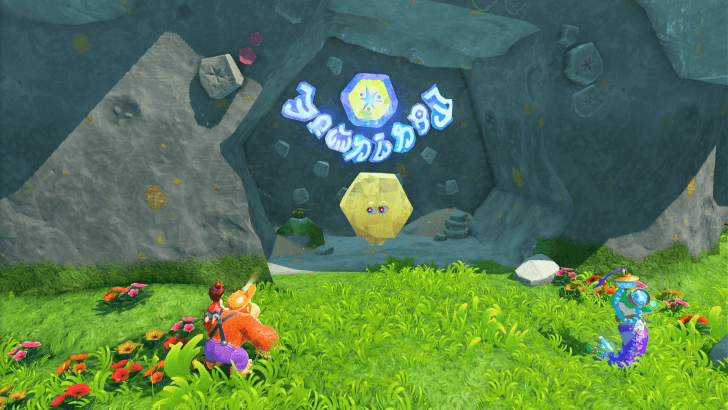
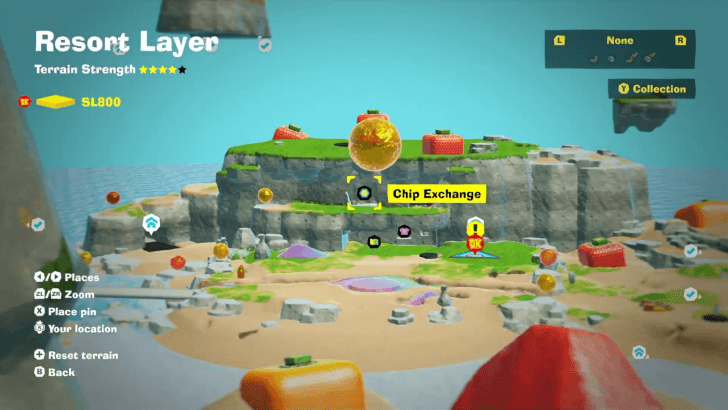
Tropical Retreat Chip Exchange
Found in a nook above the Stuff Shop at the Tropical Retreat. |
||
Resort Layer Void Stakes
Void Stake Locations
| Layer | Overworld View | Map Location |
|---|---|---|
| SL 800 |
 |
 |
|
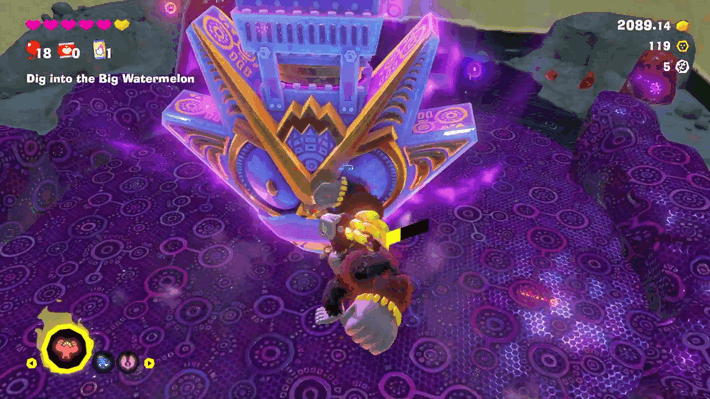
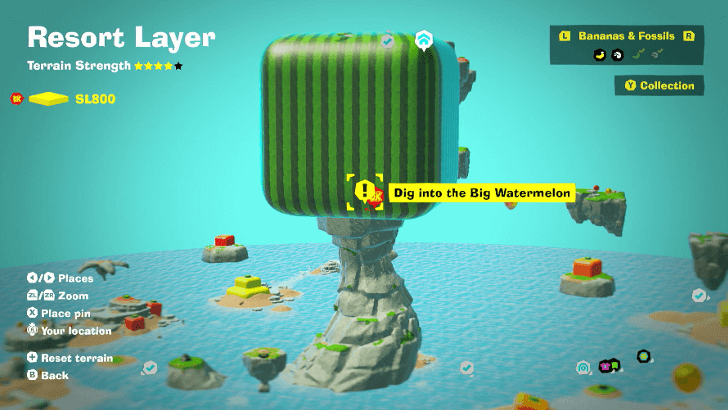
Big Watermelon Memorial Void Stake
Revealed after digging into the Big Watermelon |
||
Cranky Kong Location
Seaside Cave
| Map / Overworld Image | Video Directions |
|---|---|
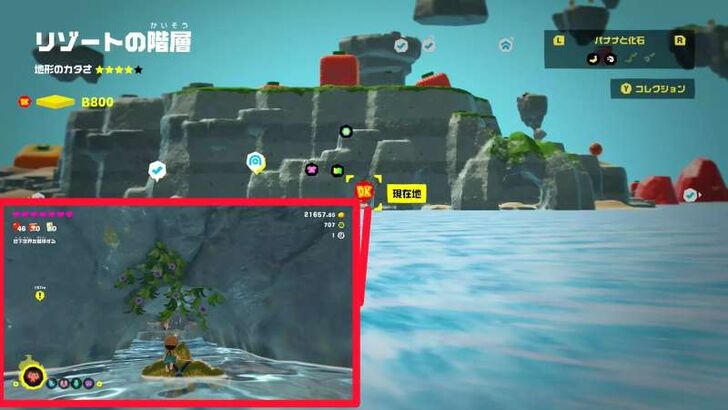 |
Behind the stores on the right side of the Layer, drop into the ocean past the plateau with three breakable strawberries. Look for a small seaweed-covered cave under the rock.
Resort Layer Getaways
All Getaway Locations
| Map Location | Overworld Image |
|---|---|
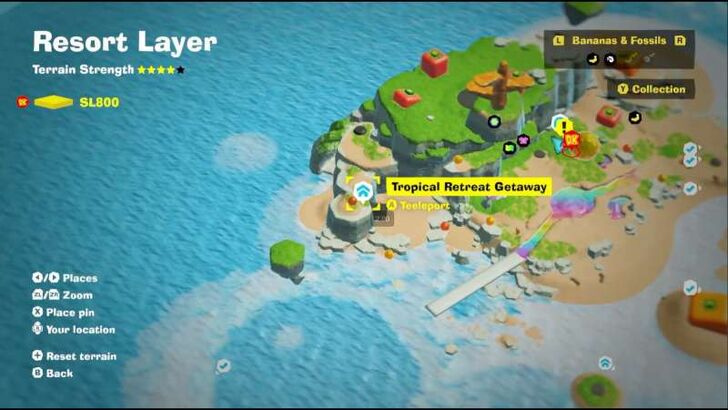 Resort Layer (SL 800) |
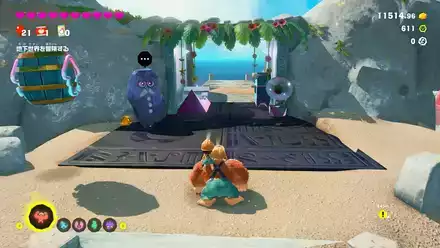
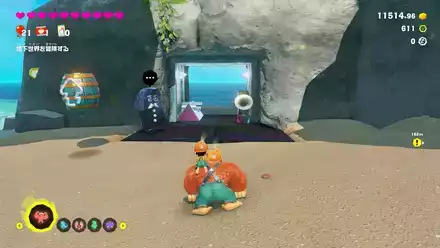 Tropical Retreat Getaway |
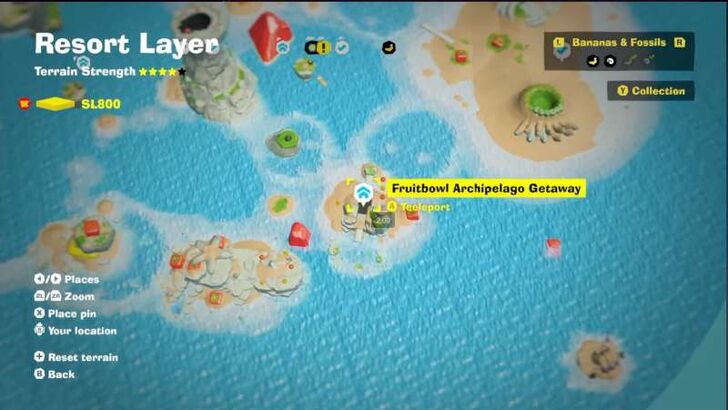 Resort Layer (SL 800) |
 Fruitbowl Archipelago Getaway |
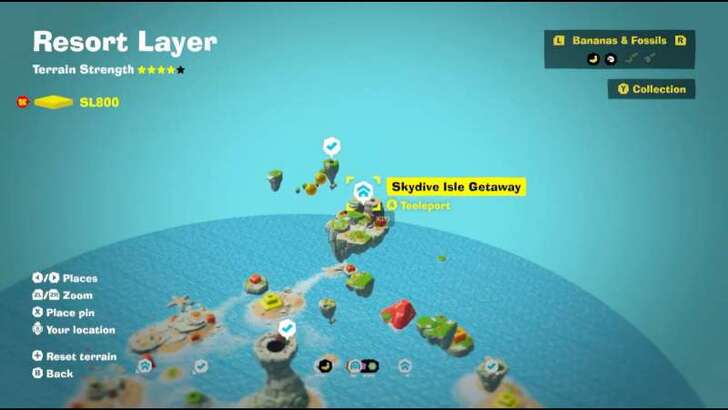 Resort Layer (SL 800) |
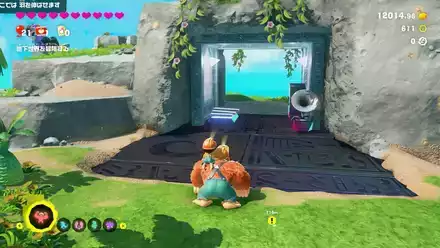 Skydive Isle Getaway |
Getaway Guide: All Getaway Locations
Donkey Kong Bananza Related Guides
All Layers
Comment
Author
Resort Layer Banana and Fossil Locations (SL 800)
improvement survey
04/2026
improving Game8's site?

Your answers will help us to improve our website.
Note: Please be sure not to enter any kind of personal information into your response.

We hope you continue to make use of Game8.
Rankings
Gaming News
Popular Games

Genshin Impact Walkthrough & Guides Wiki

Crimson Desert Walkthrough & Guides Wiki

Umamusume: Pretty Derby Walkthrough & Guides Wiki

Honkai: Star Rail Walkthrough & Guides Wiki

Monster Hunter Stories 3: Twisted Reflection Walkthrough & Guides Wiki

Wuthering Waves Walkthrough & Guides Wiki

The Seven Deadly Sins: Origin Walkthrough & Guides Wiki

Pokemon TCG Pocket (PTCGP) Strategies & Guides Wiki

Pokemon Pokopia Walkthrough & Guides Wiki

Zenless Zone Zero Walkthrough & Guides Wiki
Recommended Games

Monster Hunter World Walkthrough & Guides Wiki

Fire Emblem Heroes (FEH) Walkthrough & Guides Wiki

Pokemon Brilliant Diamond and Shining Pearl (BDSP) Walkthrough & Guides Wiki

Super Smash Bros. Ultimate Walkthrough & Guides Wiki

Diablo 4: Vessel of Hatred Walkthrough & Guides Wiki

Cyberpunk 2077: Ultimate Edition Walkthrough & Guides Wiki

Yu-Gi-Oh! Master Duel Walkthrough & Guides Wiki

Elden Ring Shadow of the Erdtree Walkthrough & Guides Wiki

The Legend of Zelda: Tears of the Kingdom Walkthrough & Guides Wiki

Persona 3 Reload Walkthrough & Guides Wiki
All rights reserved
© Nintendo. Games are property of their respective owners. Nintendo of America Inc.
The copyrights of videos of games used in our content and other intellectual property rights belong to the provider of the game.
The contents we provide on this site were created personally by members of the Game8 editorial department.
We refuse the right to reuse or repost content taken without our permission such as data or images to other sites.

 Ingot Isle
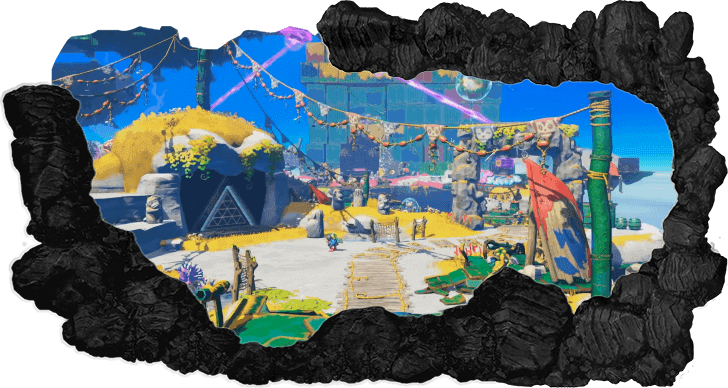 Lagoon Layer
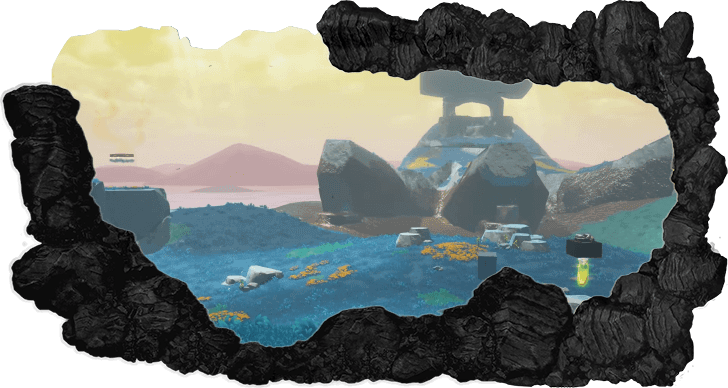 Hilltop Layer
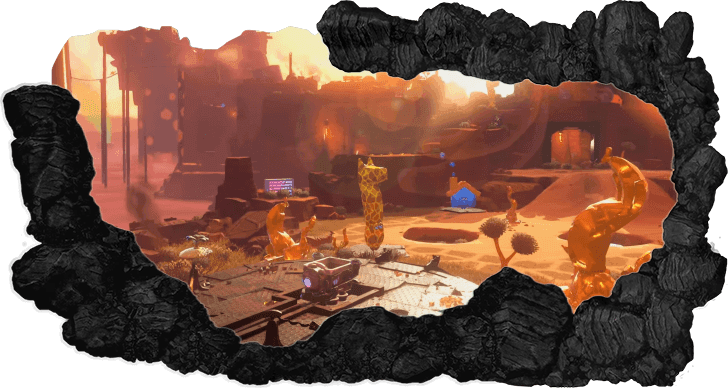 Canyon Layer
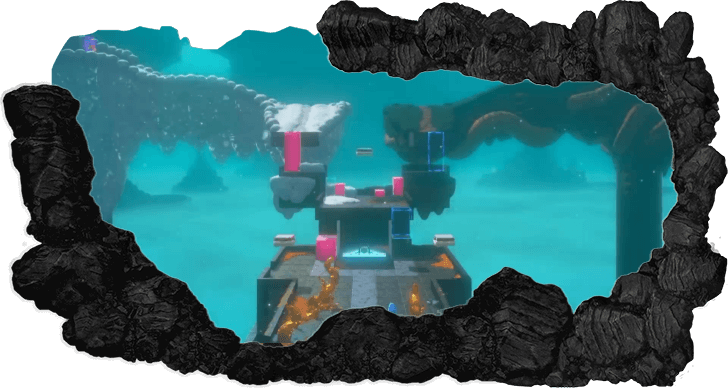 The Divide
 Freezer Layer
 Forest Layer
 The Junction
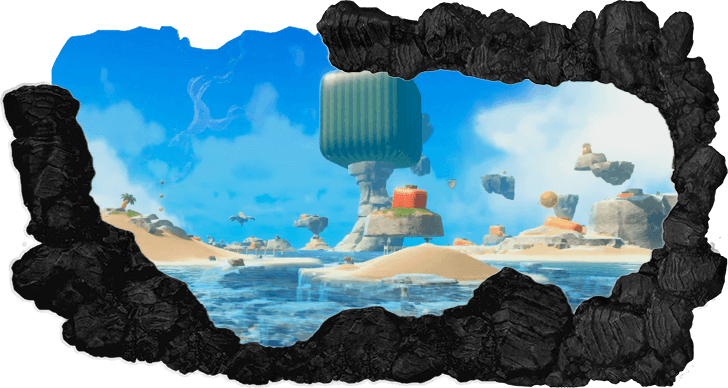 Resort Layer
 Tempest Layer
 Landfill Layer
 Racing Layer
 Radiance Layer
 Groove Layer
 Feast Layer
 Forbidden Layer
 Planet Core
 DK Island


![Forza Horizon 6 Review [Preview] | Beautiful Roads With a Whole Lot of Oversteer](https://img.game8.co/4460981/a7254c24945c43fbdf6ad9bea52b5ce9.png/thumb)


