
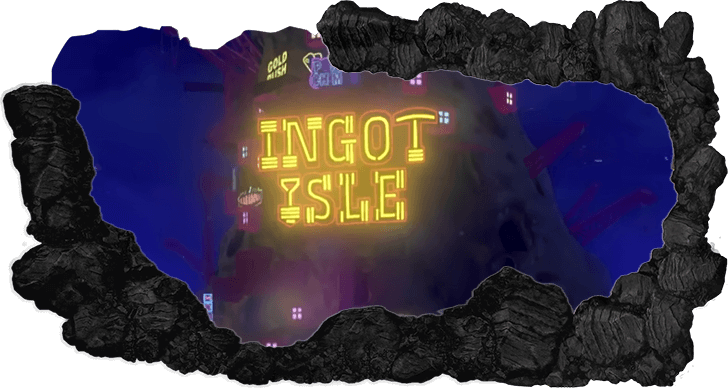
 Ingot Isle
 Lagoon Layer
 Hilltop Layer
 Canyon Layer
 The Divide
 Freezer Layer
 Forest Layer
 The Junction
 Resort Layer
 Tempest Layer
 Landfill Layer
 Racing Layer
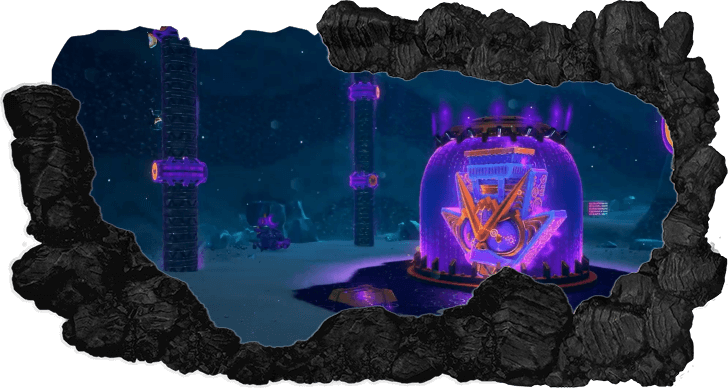 Radiance Layer
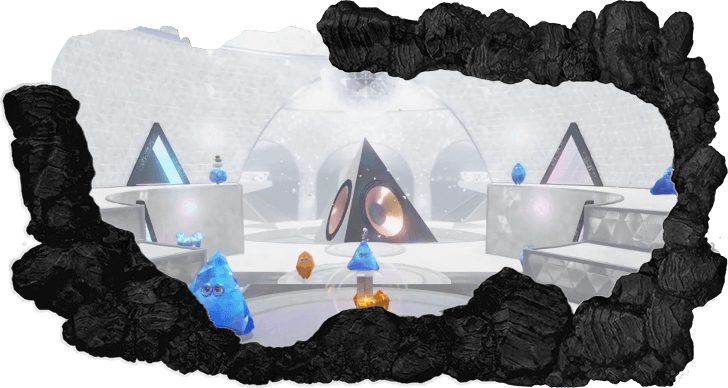 Groove Layer
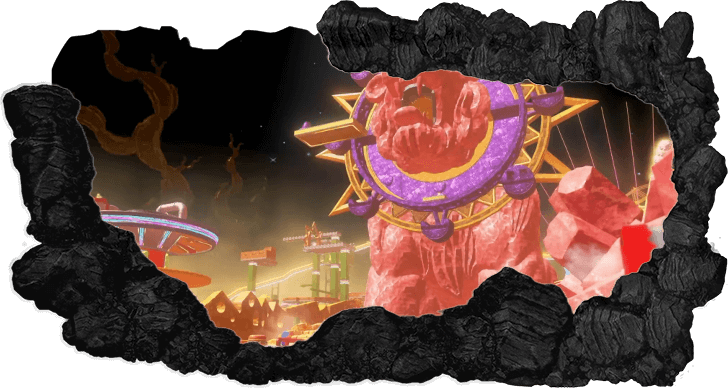 Feast Layer
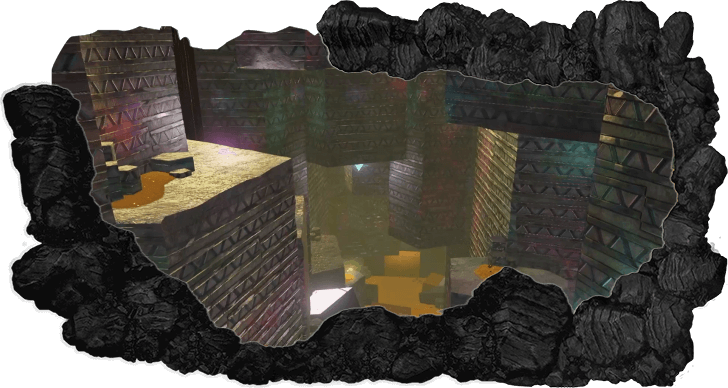 Forbidden Layer
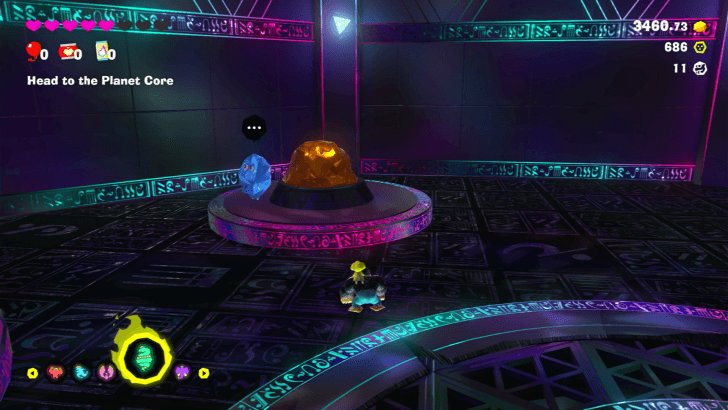
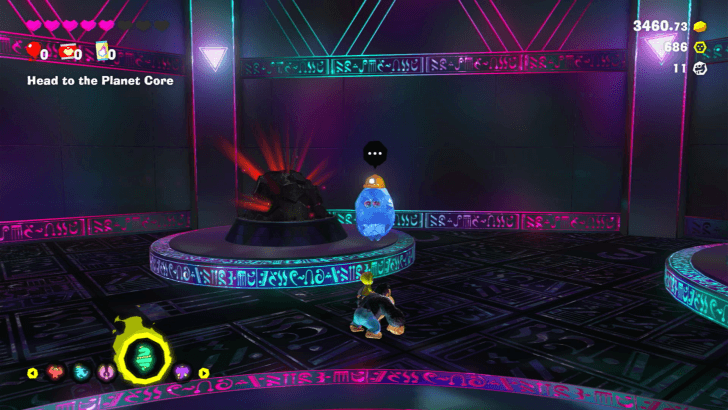
 Planet Core
 DK Island
This survey will take about 1 minute.
Your answers will help us to improve our website.
Donkey Kong Bananza
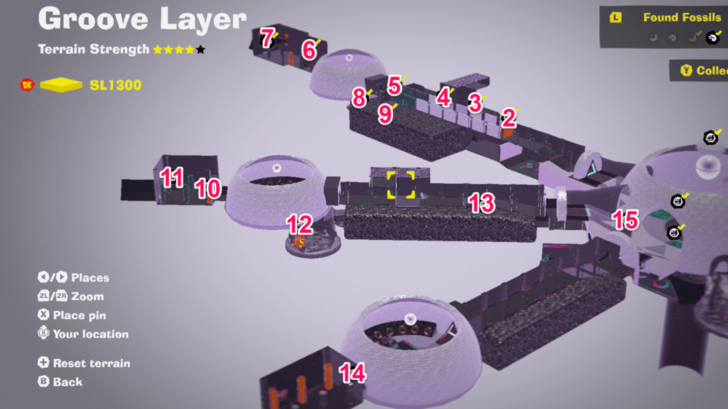
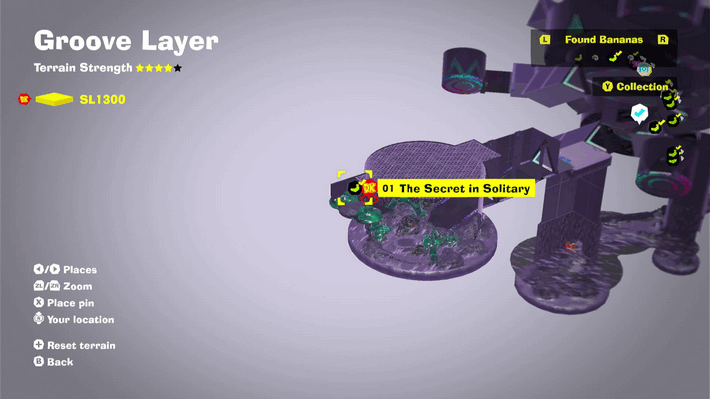
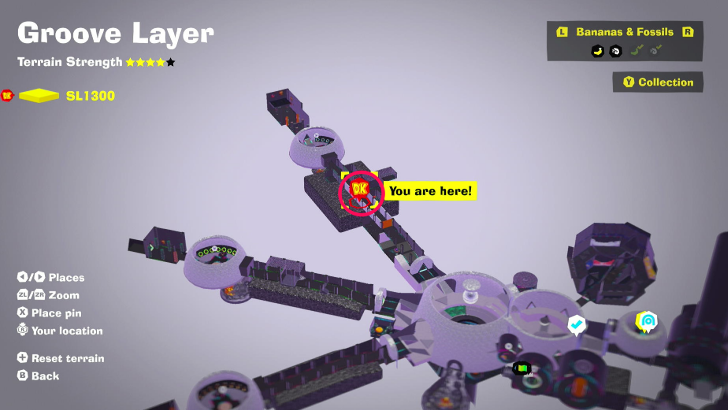
Groove Layer Banana and Fossil Locations (SL 1300)
☽ DK Island and Emerald Rush DLC out now!
☽ Learn how to solve Banandiumtone's Puzzles.
☽ All Collectibles: Banandium Gems and Fossils
☽ Learn How to Skip Layers Entirely!
☽ How to Beat the Final Boss
☽ Post-Game: Rehearsal Halls | Secret Ending
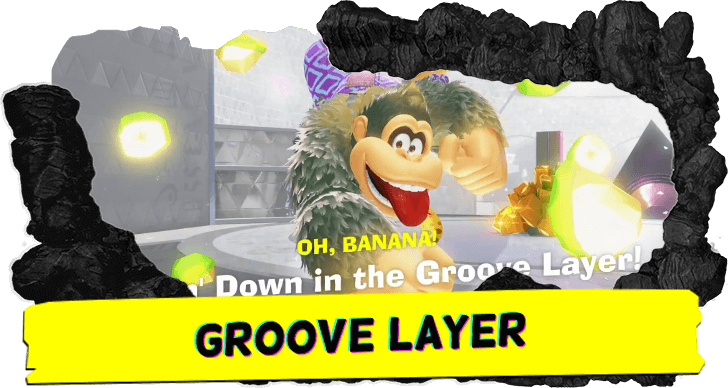
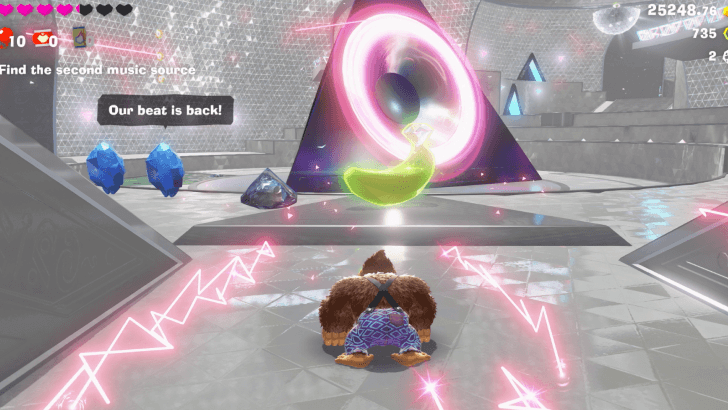
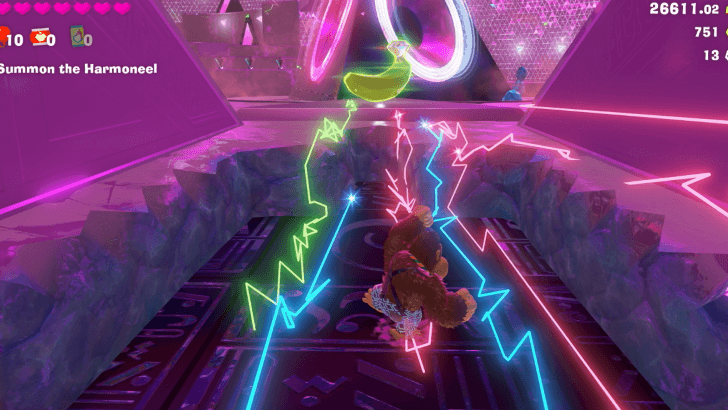
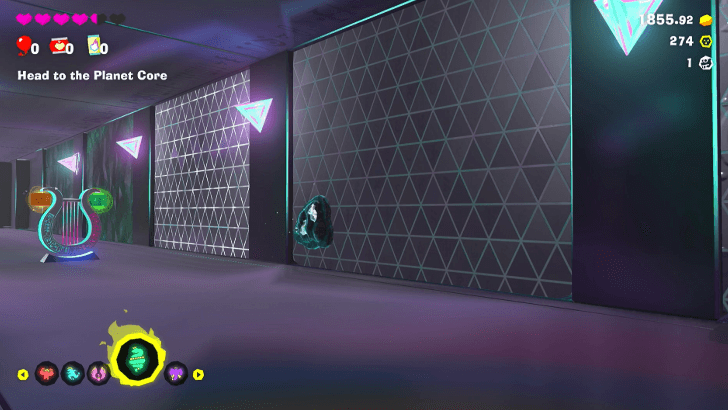
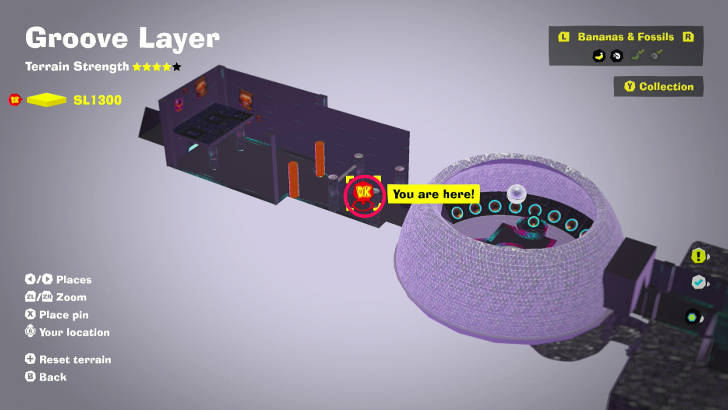
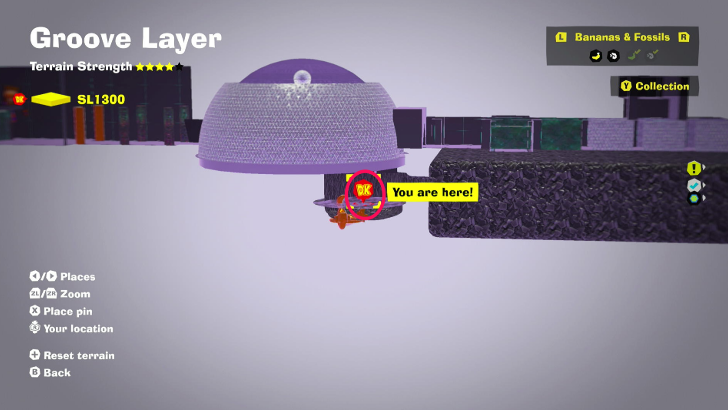
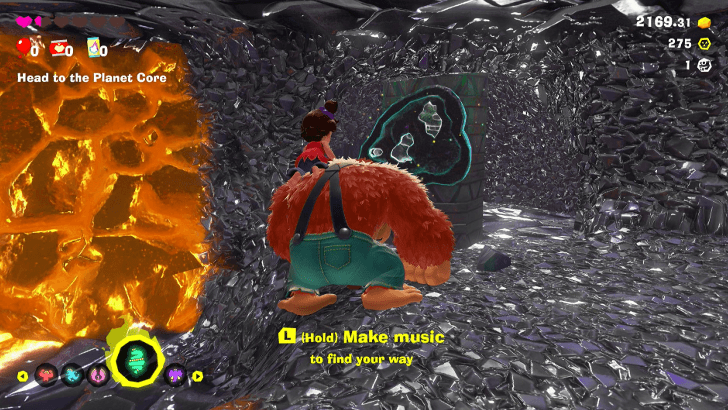
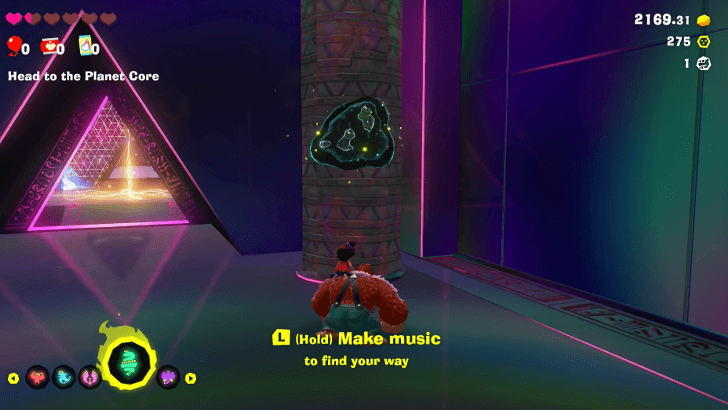
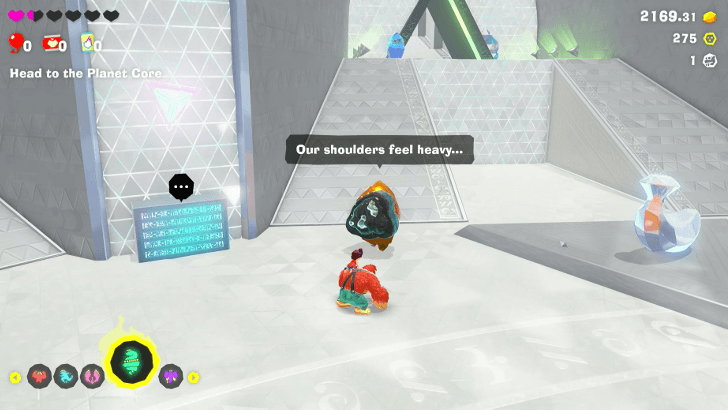
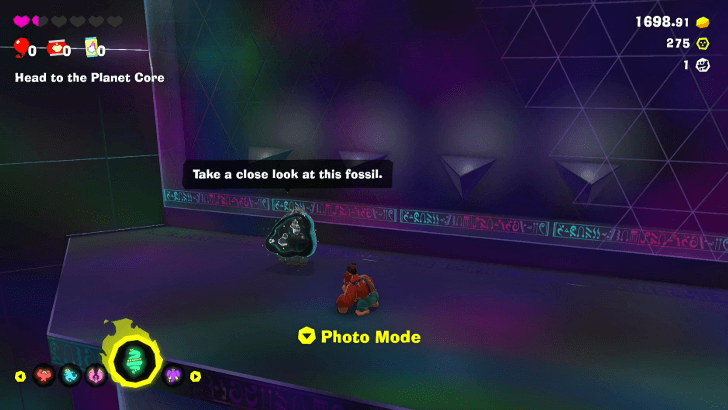
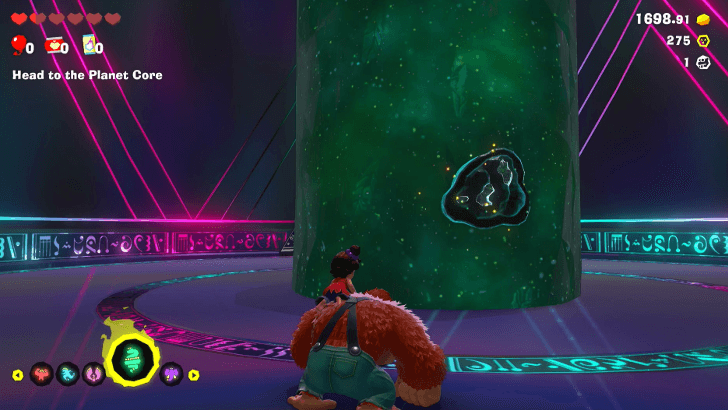
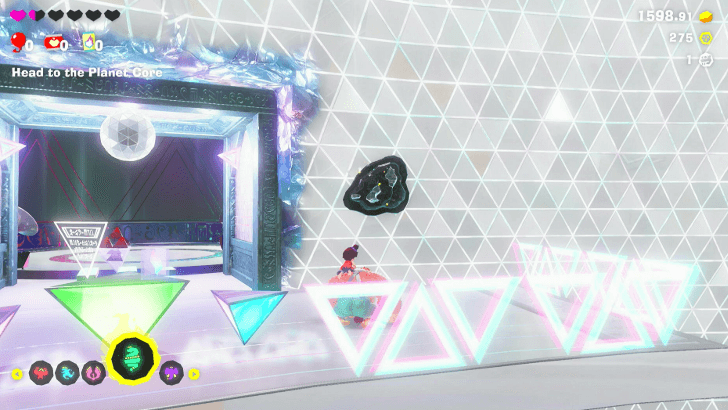
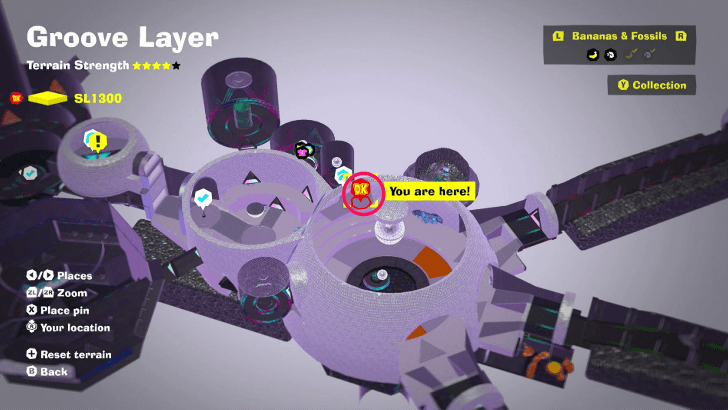
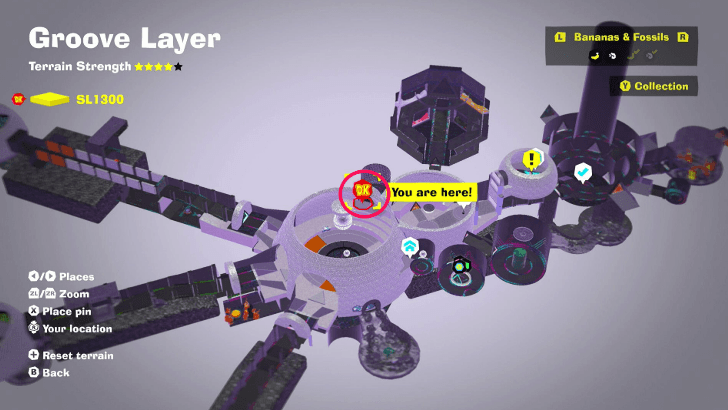
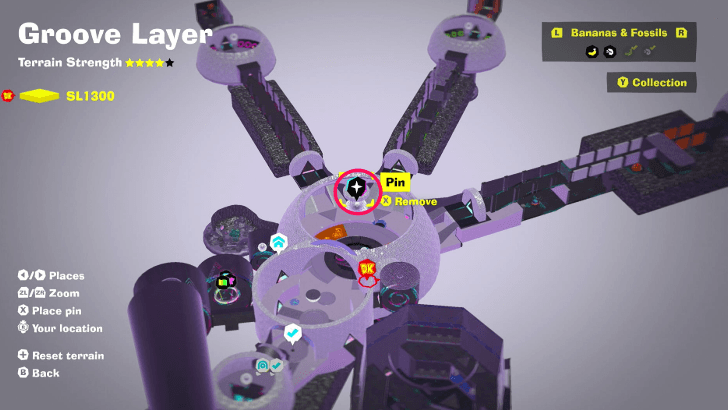
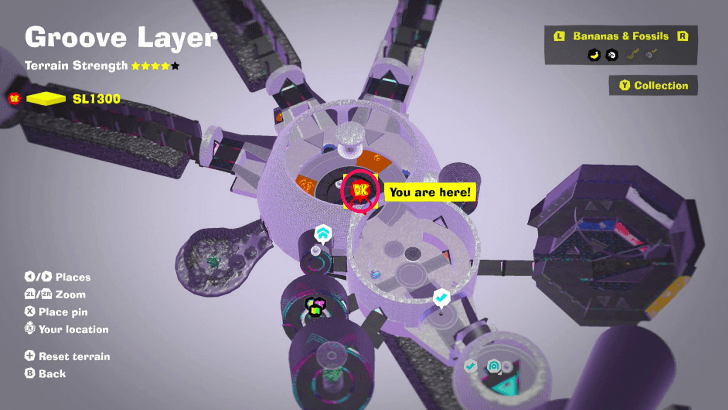
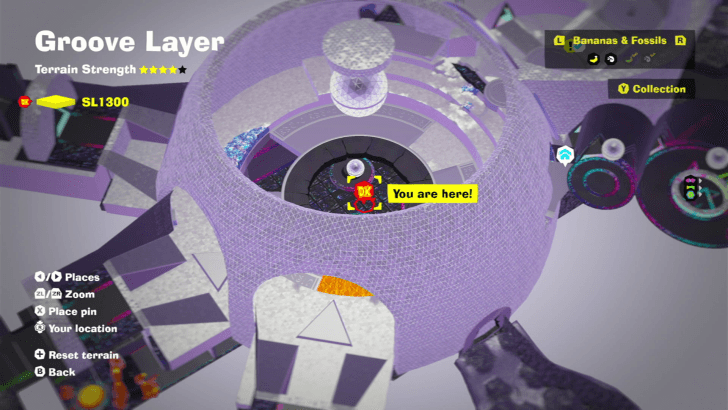
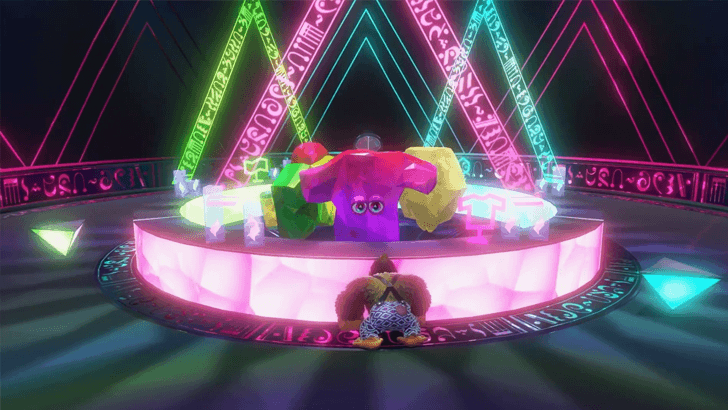
Groove Layer is the fourteenth layer in Donkey Kong Bananza. Check out where to find the locations of all Groove Layer Bananas, fossils, and other collectibles in this level!
| Groove Layer Guides | |
|---|---|
| Walkthrough | Collectibles |
List of Contents
Groove Layer Collectibles Overview
List of Collectibles
| Banandium Gems | Total: 30 |
|---|---|
| Fossils | Total: 30
|
| Checkpoints | Total: 2 |
| Challenges | Total: 3 |
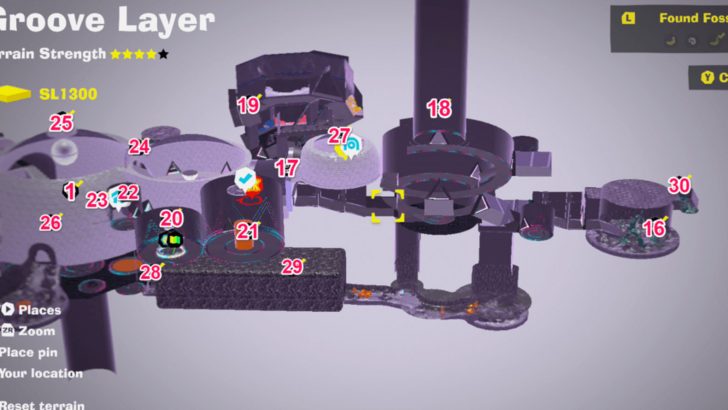
There are 30 bananas and 30 fossils available in Groove Layer.
Groove Layer Bananas
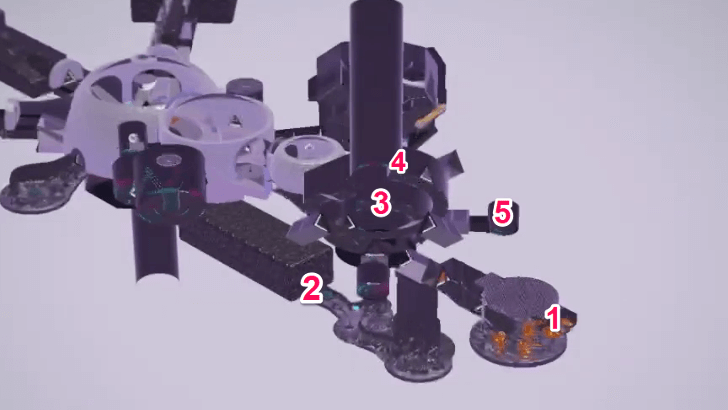
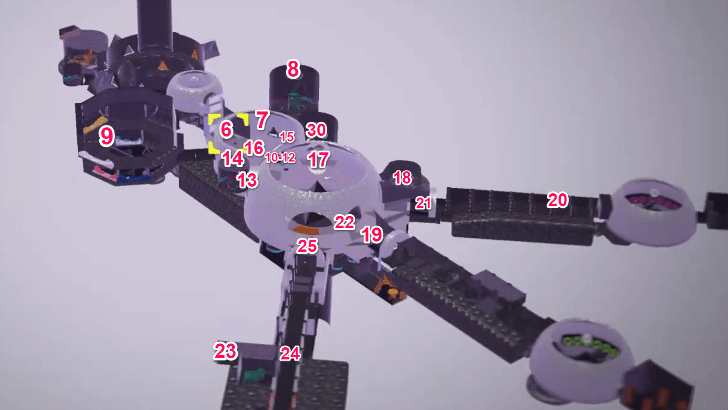
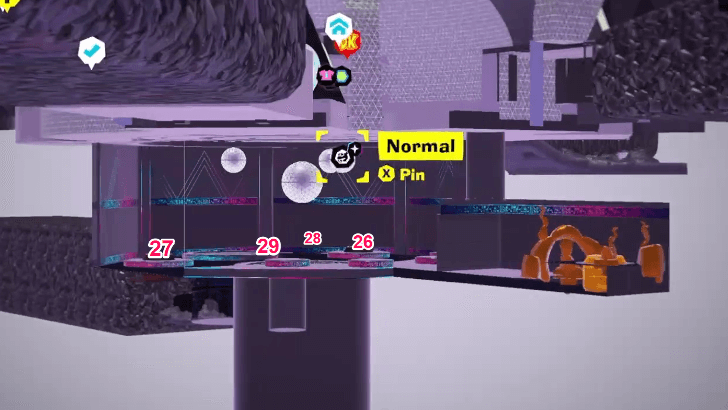
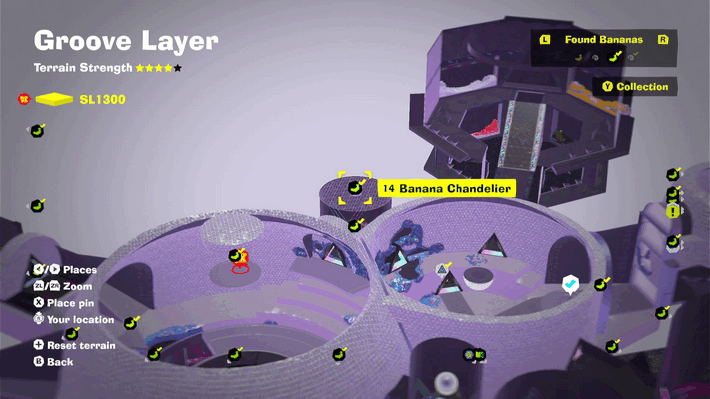
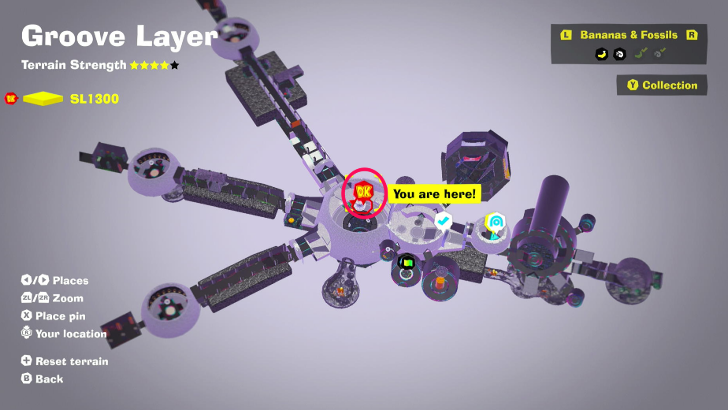
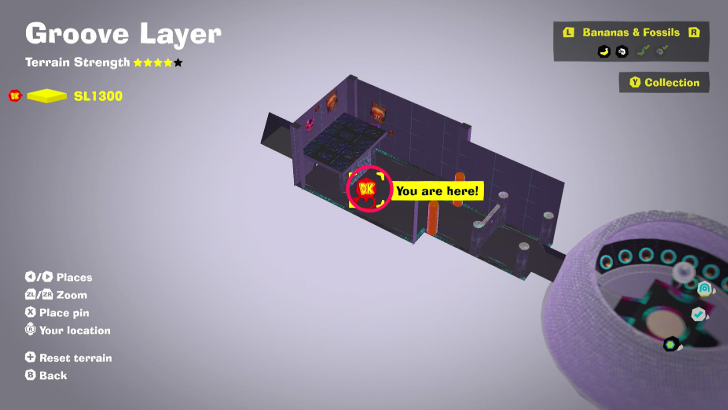
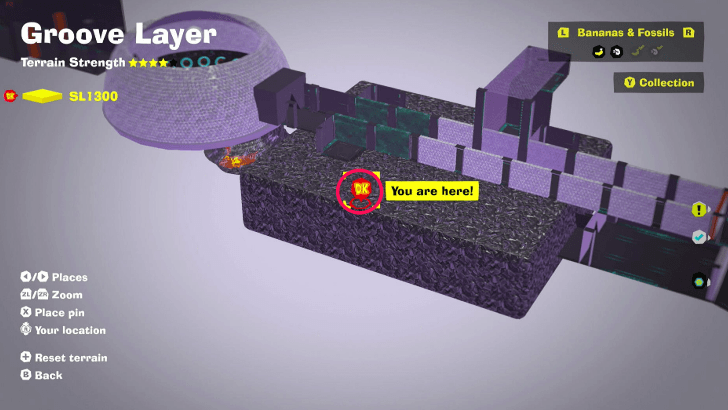
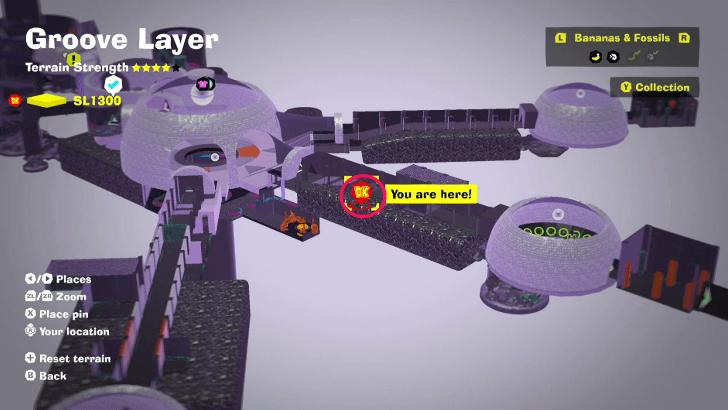
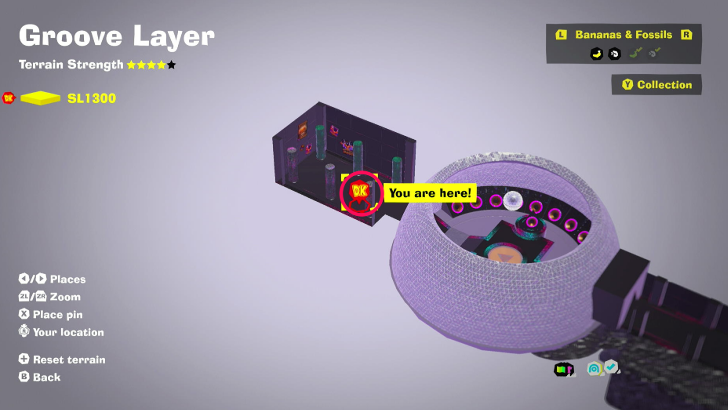
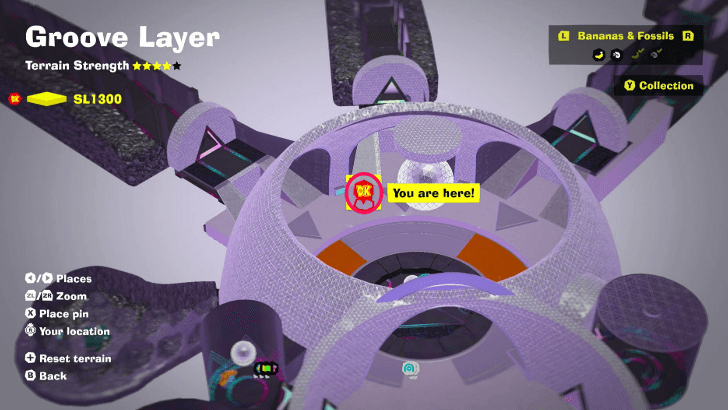
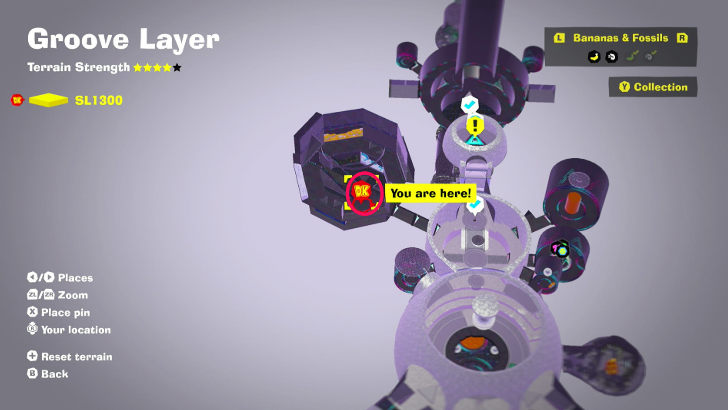
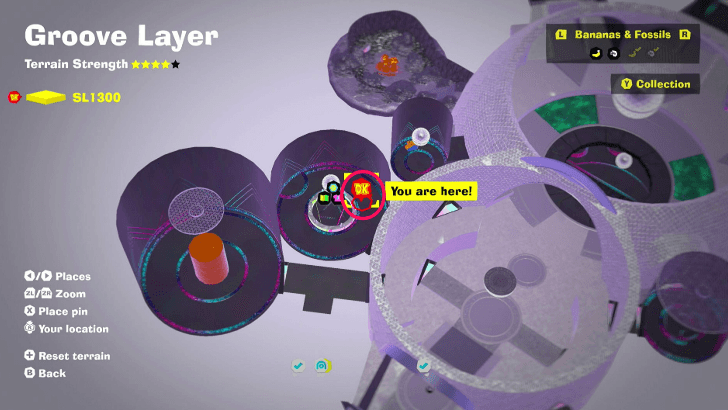
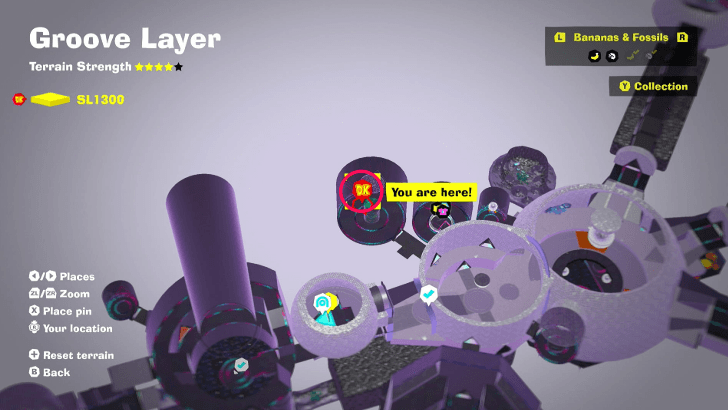
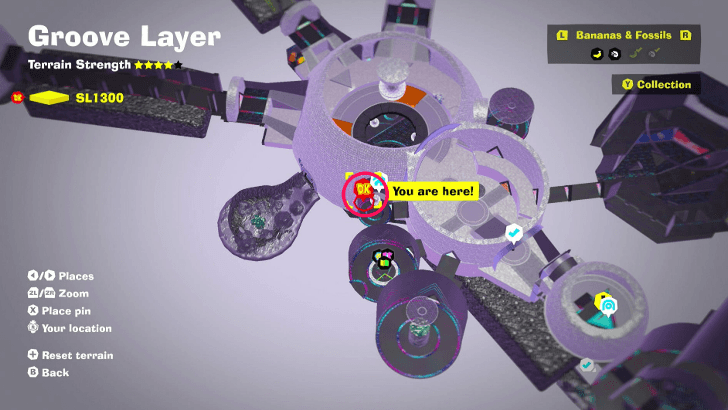
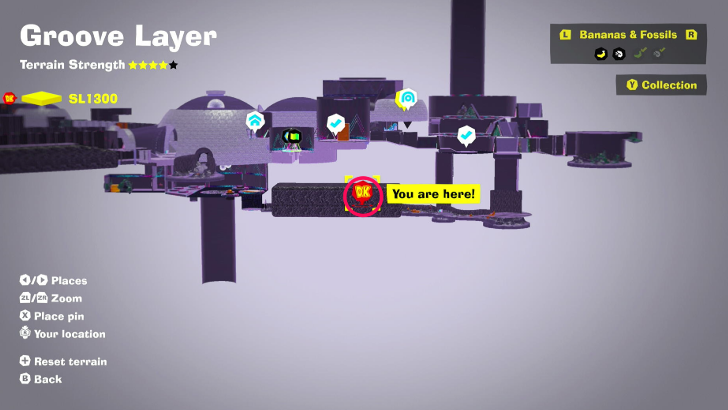
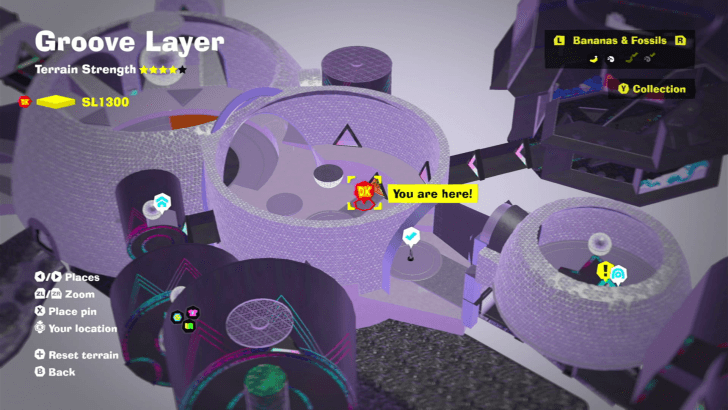
Banandium Gems Map Overview
First Section
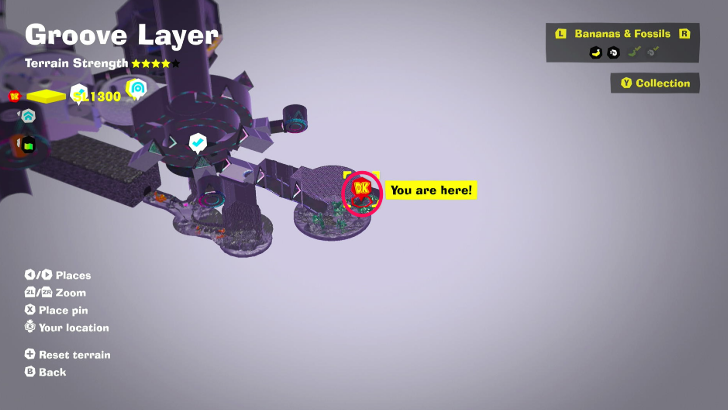
Second Section
Third Section
SL 1300 Banana Locations
| Overworld View | Map Location | |
|---|---|---|
| 01 |
 |
|
|
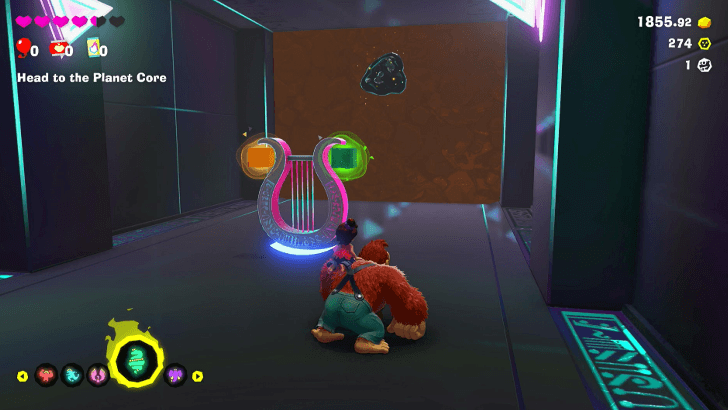
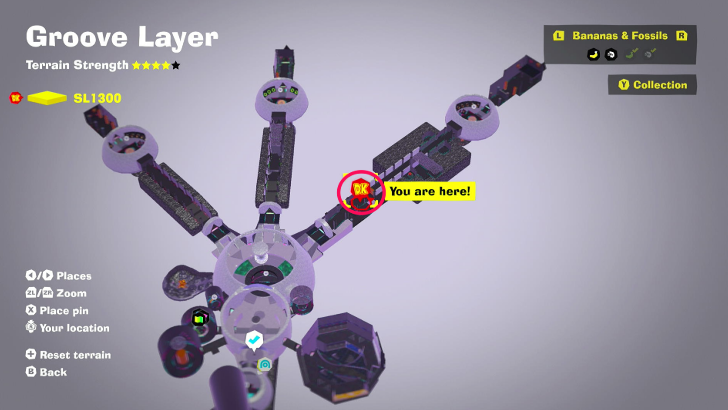
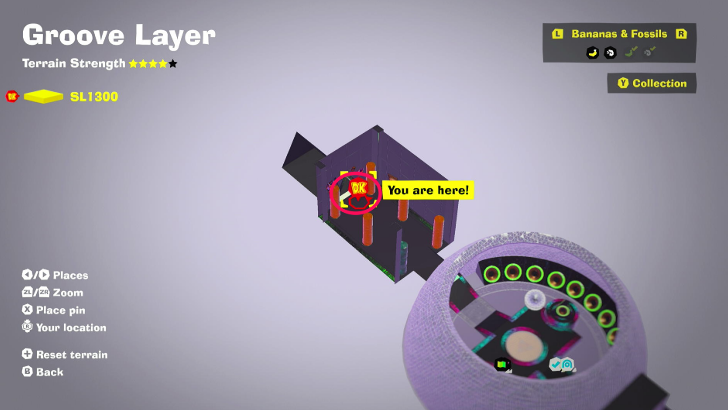
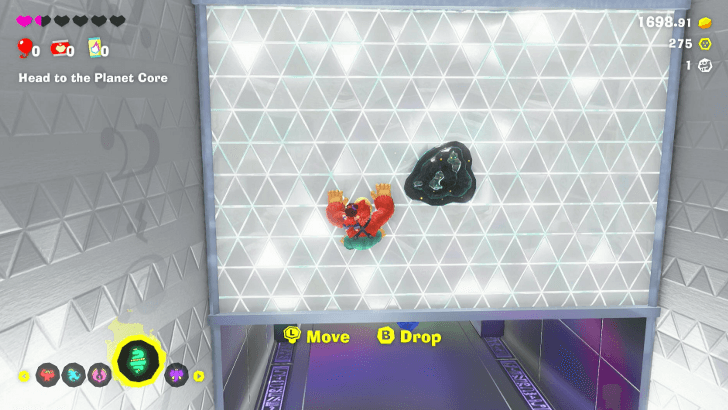
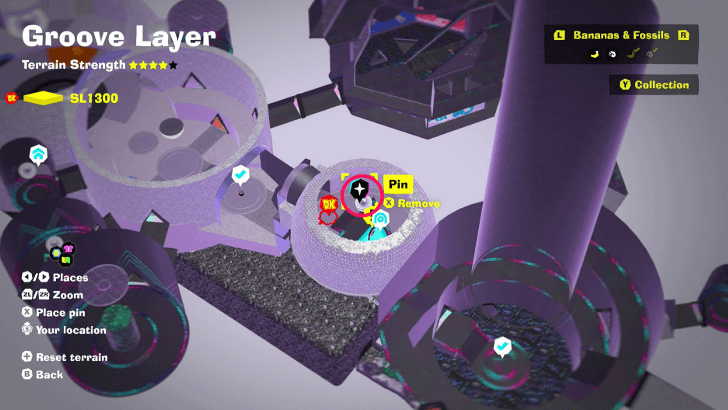
Construct a Swap Harp for the Jail cells, then change rubber into gold to break the cell. Break the concrete afterwards, then change gold into rubber again. Jump on the rubber veins to reach the top, either by climbing on the ceiling, or by using Bananza Powers. |
||
| 02 |
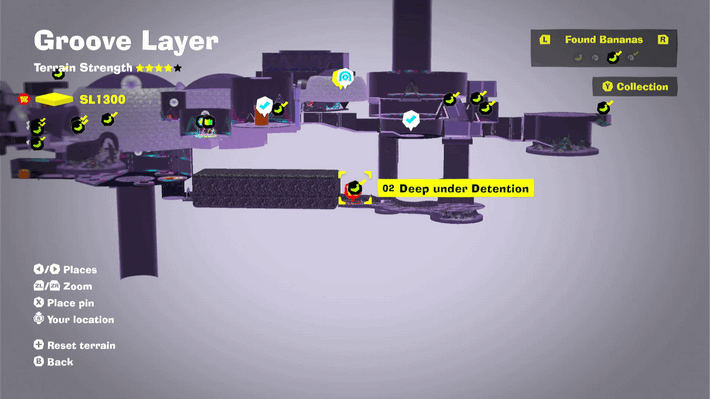 |
|
|
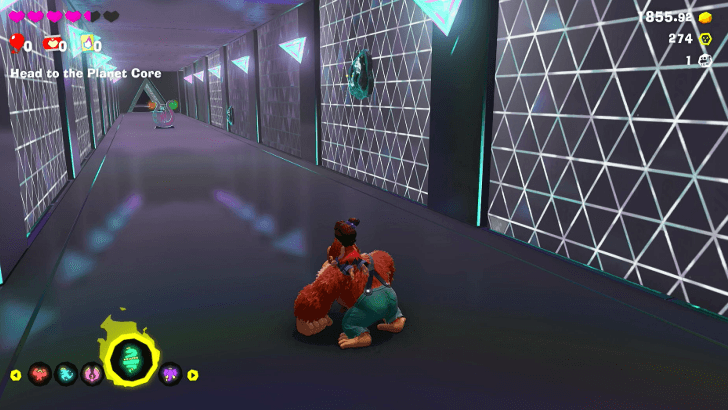
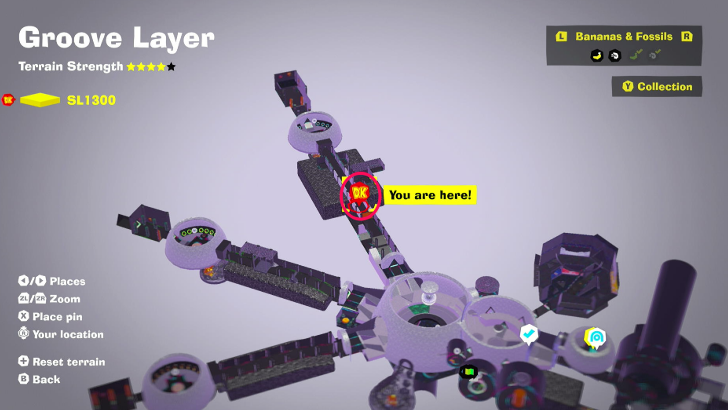
Construct a Swap Harp for the Disco Room, then change the floor under the Barrel Cannon to gold, then dig underground. From the secret area, continue digging towards under the Prison to find the Banandium Gem. |
||
| 03 |
 |
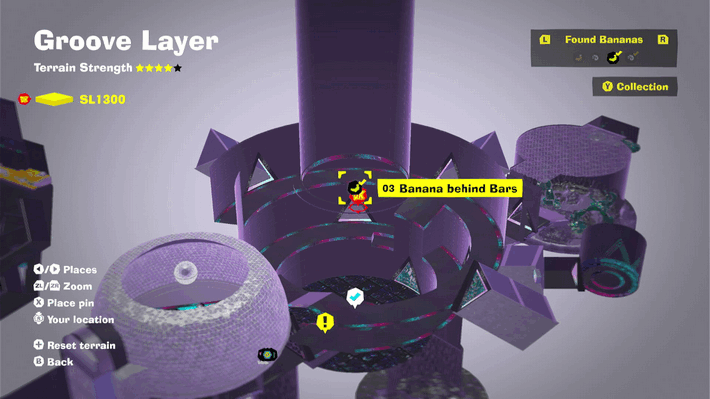 |
|
Throw a gold chunk at the jail cell on the second layer of the prison. |
||
| 04 |
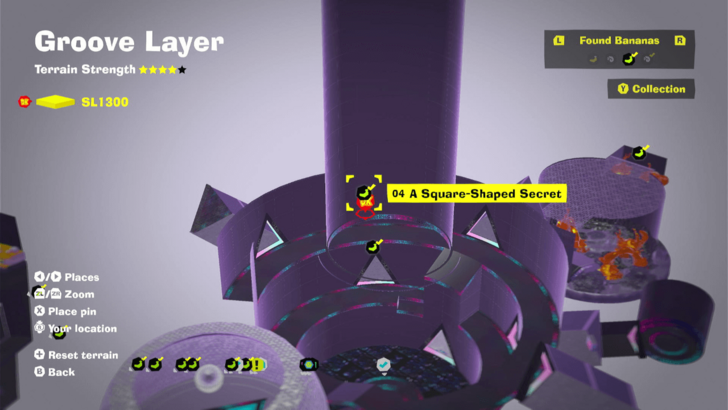 |
|
|
Use the Swap Harp to change the cube Fractone into gold, then destroy it to reveal the secret room with the Gem. |
||
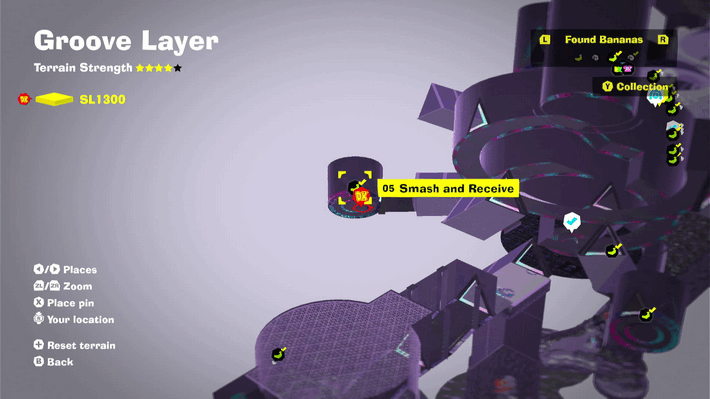
| 05 |
 |
 |
|
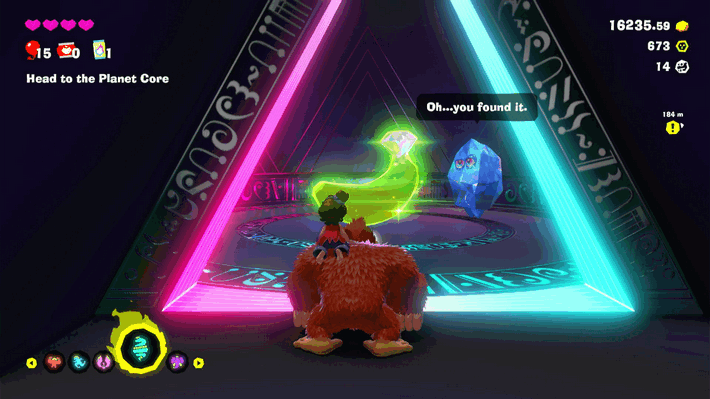
Behind the "Smash and you shall receive" stone tablet in the prison. |
||
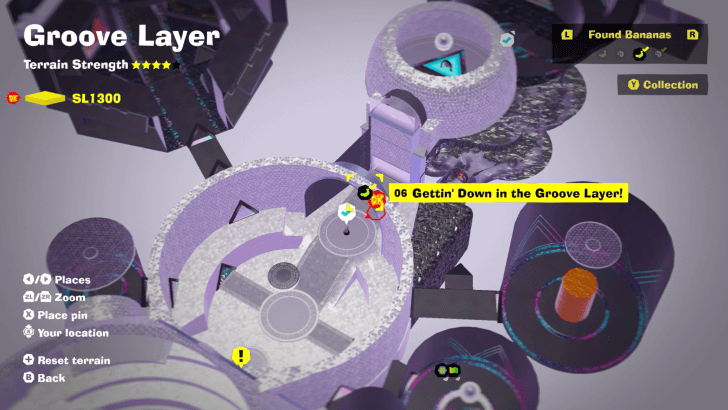
| 06 |
 |
 |
|
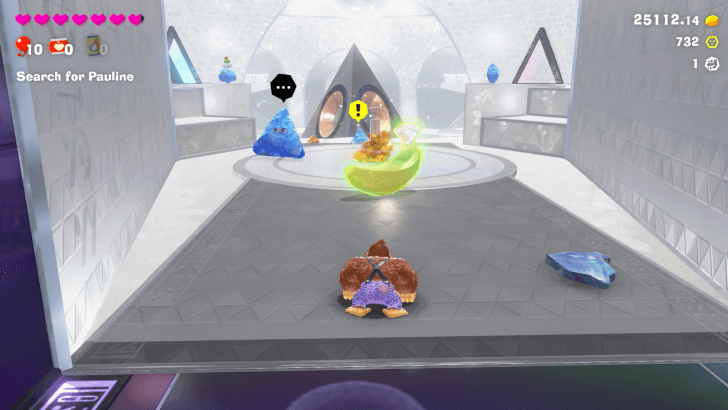
Found with story progression. |
||
| 07 |
 |
|
|
Perform a double jump into a mid-air roll then punch forward to reach the Disco Ball. |
||
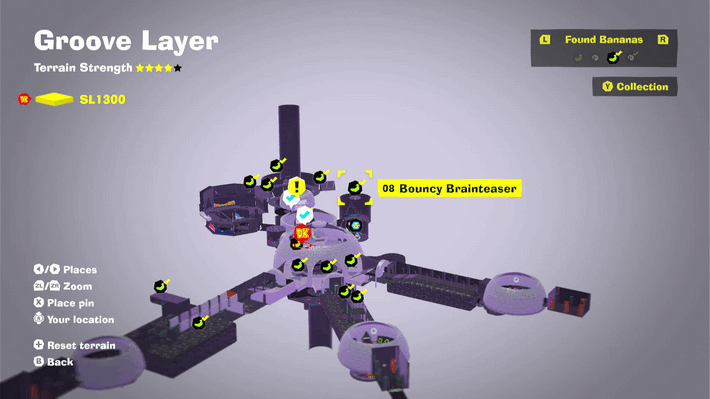
| 08 |
 |
|
|
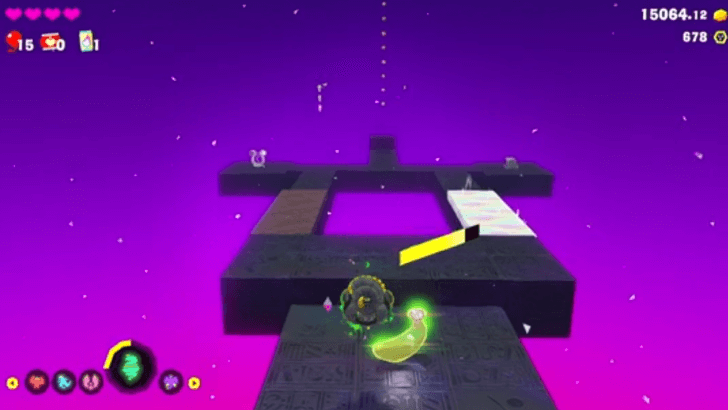
Convert the rubber pole into gold, climb to the top of it and use Snake Bananza to break the Banandium Gem. |
||
| 09 |
 |
 |
|
Get all 696 Fossils in the game and spend all of it to buy all clothing items. |
||
| 10 |
 |
 |
|
Found inside Quest for the Top Challenge Course 1. It is found in the middle of the course. |
||
| 11 |
 |
|
|
Found at the end of Quest for the Top Challenge Course 1. |
||
| 12 |
|
|
|
Found inside Quest for the Top Challenge Course 1. Store Liftoff Ore using Elephant Bananza, then take it out behind the barrel cannon to reach the disco ball. |
||
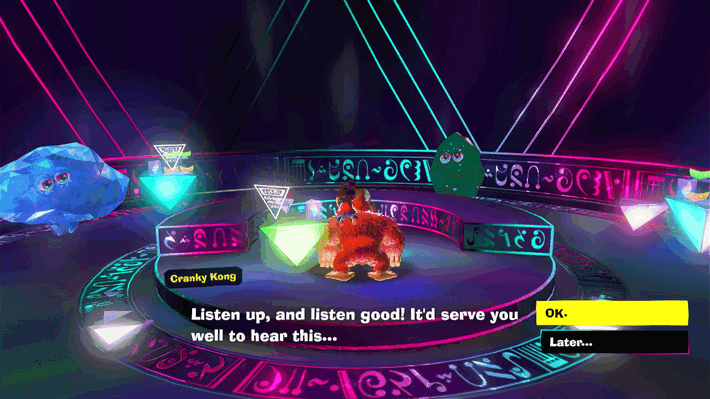
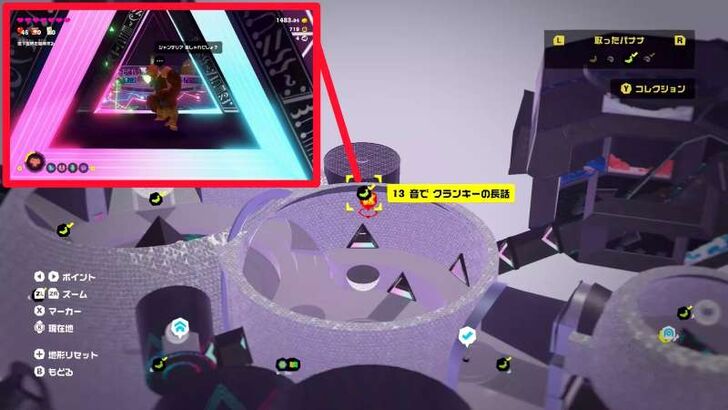
| 13 |
 |
 |
|
Talk to Cranky inside the VIP Room. Break the Fractone before it becomes metal to access the room. |
||
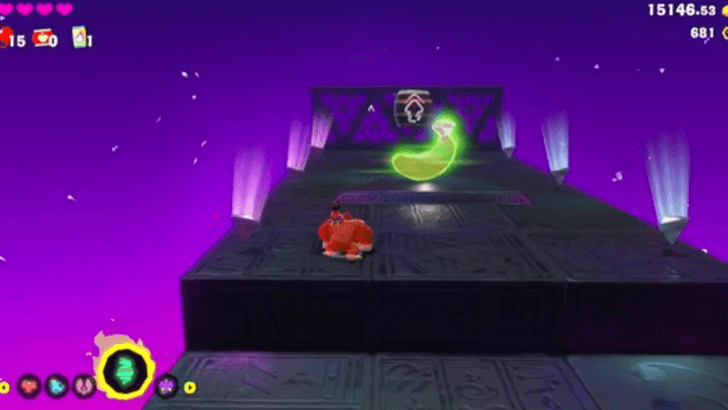
| 14 |
 |
|
|
Dive Jump into the rubber Fractone to reach the ceiling, then break the hanging Gem. |
||
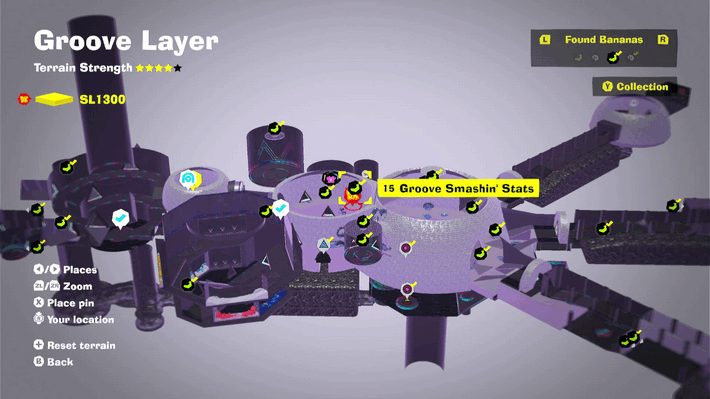
| 15 |
 |
 |
|
Destroy 3000 m3 of Concrete in the Groove Layer. |
||
| 16 |
 |
|
|
After clearing the game, talk to Grumpy Kong and pay 20000 gold to fix the speaker. Find four disco balls nearby, then speak to the pyramid Fractone in front of the speaker to get the Gem. |
||
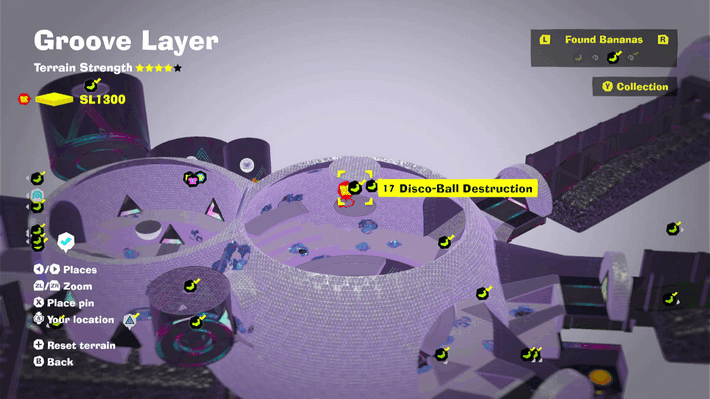
| 17 |
 |
|
|
After freeing the Fractone from the prison, talk to the brother inside the VIP room to get the Gem from the Disco Ball. |
||
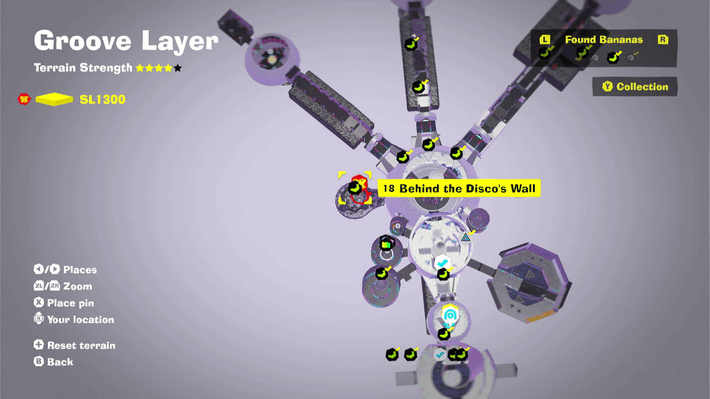
| 18 |
 |
|
|
Break the wall to the side of the Disco Hall, into the hidden underground area. Gem can be taken without changing rubber to gold. |
||
| 19 |
 |
 |
|
Found with story progression. |
||
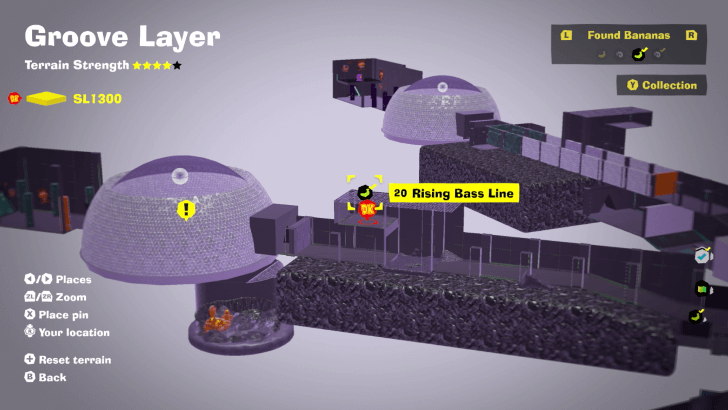
| 20 |
 |
|
|
In the tunnel leading to the bass room, use the rubber floor to bounce up to a higher floor and reach it. |
||
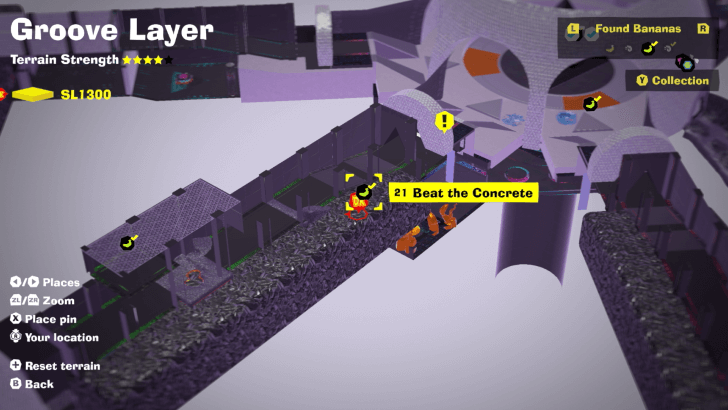
| 21 |
 |
|
|
In the passageway with spinning concrete blocks, throw a chunk of Gold at the second concrete block to reveal a Banandium Gem. |
||
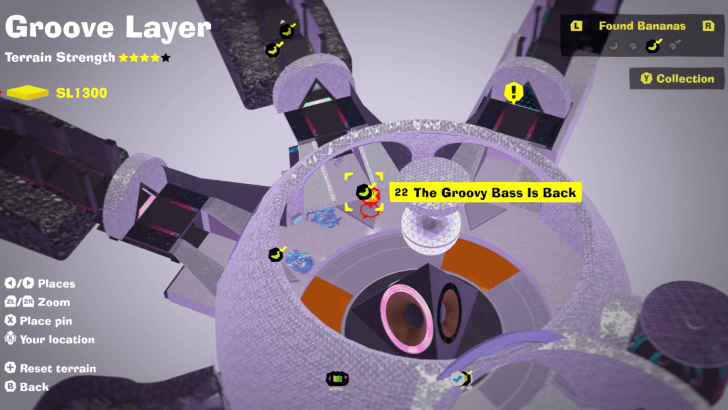
| 22 |
 |
 |
|
Found with story progression. |
||
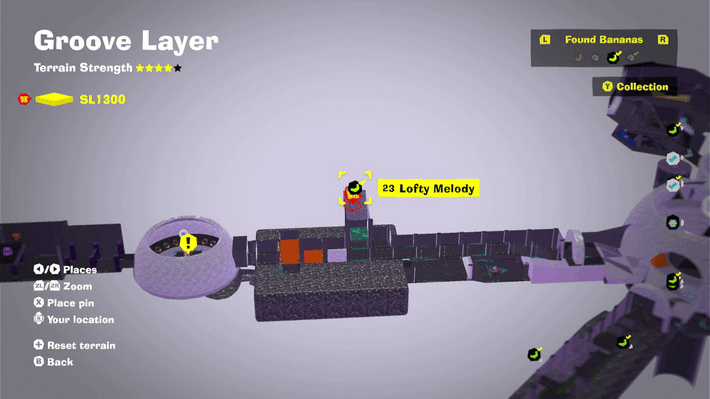
| 23 |
 |
|
|
Use the Swap Harp to change the gold to rubber, then hold A to jump higher and reach the Banandium Gem. |
||
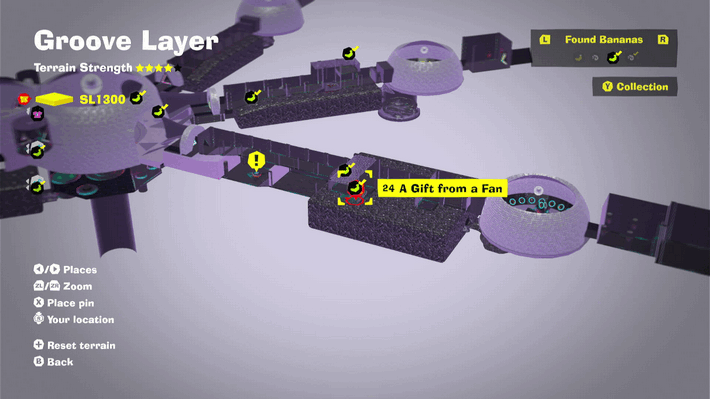
| 24 |
 |
 |
|
While digging a tunnel from the Melody track, dig underground under the last Fractone pointing you in the correct direction. |
||
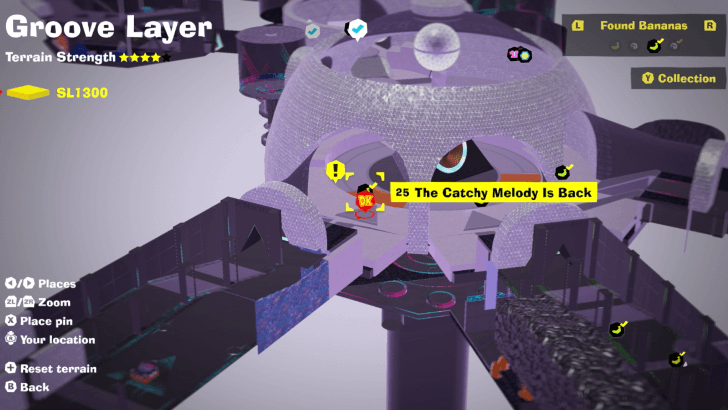
| 25 |
 |
 |
|
Found with story progression. |
||
| 26 |
 |
|
|
Clear Battle Challenge 1 found under the Disco Hall. Challenge is initially blocked by rubber, use the Swap Harp to change rubber to gold. |
||
| 27 |
 |
|
|
Complete Battle Challenge 2 found under the Disco Hall. Obstruction removed by paying gold to the Construction Fractone. |
||
| 28 |
 |
 |
|
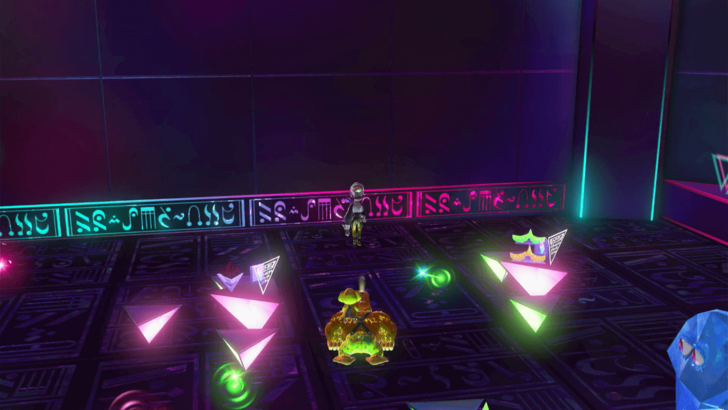
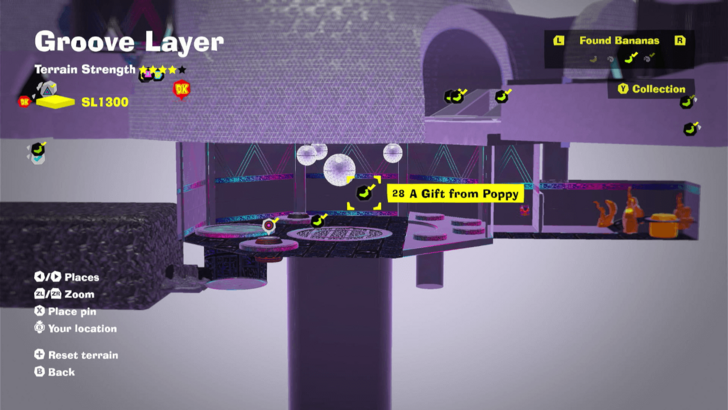
After rebuilding the Speaker, speak to Poppy Kong in the corner of the room. |
||
| 29 |
 |
 |
|
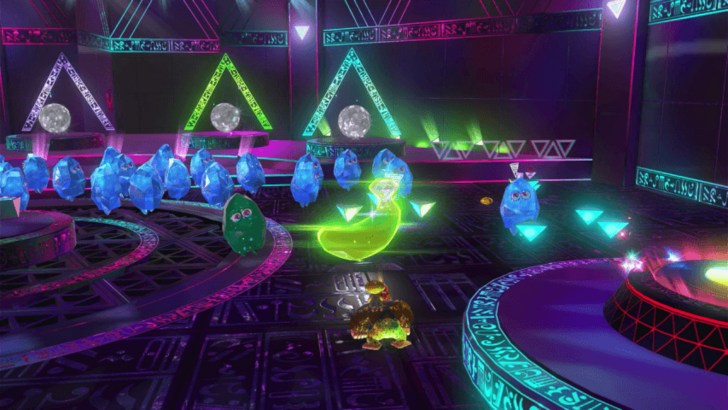
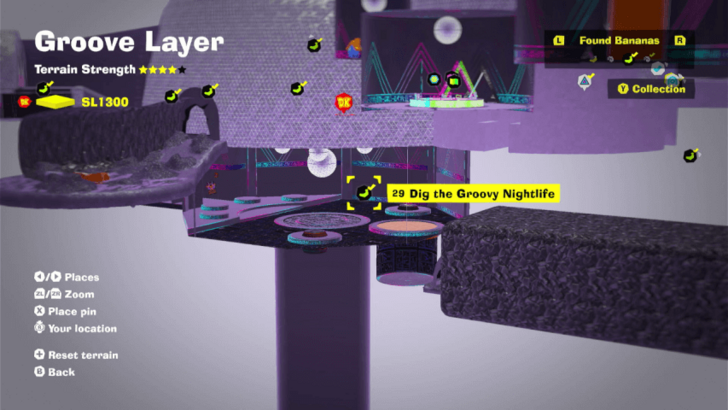
After rebuilding the Speaker, speak to the rubber Fractone and find his four friends. |
||
| 30 |
 |
 |
|
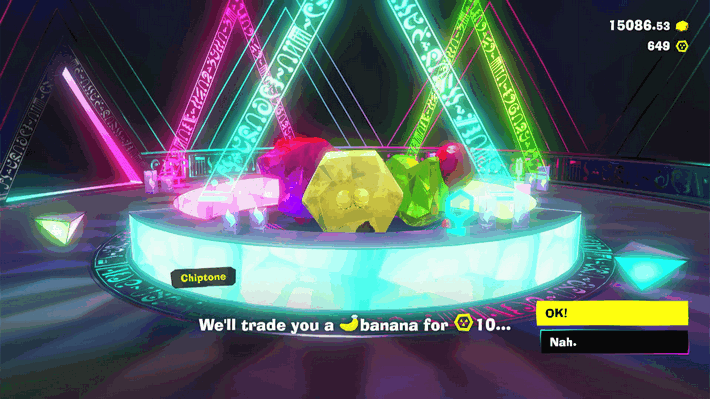
Found beside the other shops. Buy with Banandium Chips to get a Gem. The price will vary depending on how many you have purchased from other layers. You only need to exchange once for the collectible to count. |
||
Banandium Gems List and Locations
Groove Layer Fossils
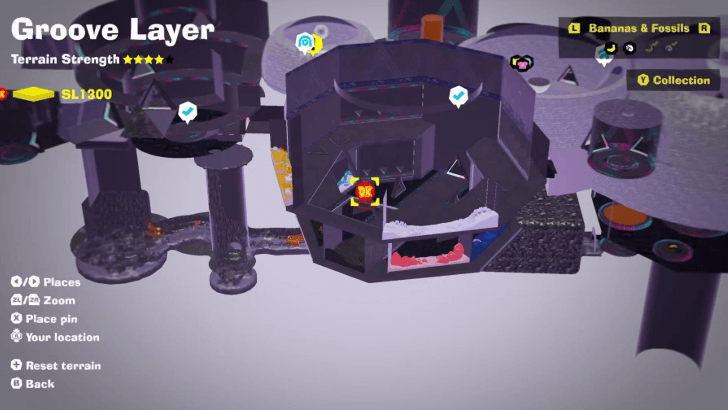
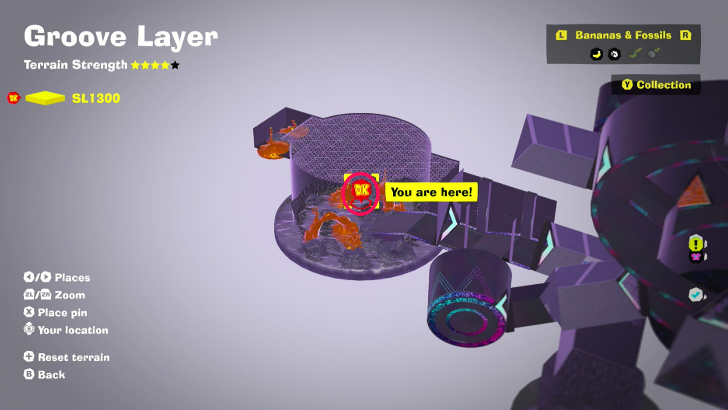
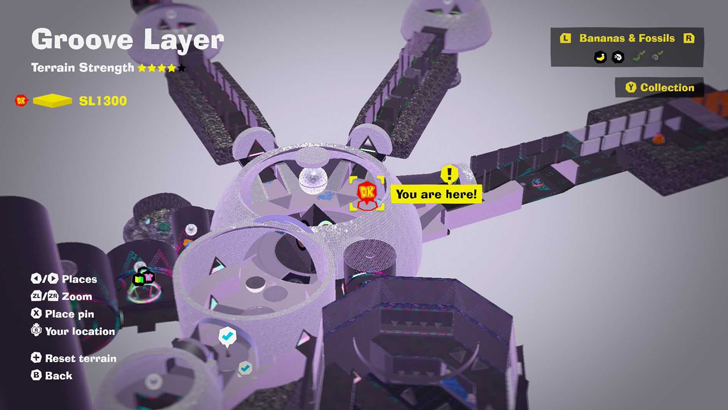
Fossils Map Overview
Jail and Disco Halls
Three Routes
SL 1300 Fossil Locations
| Overworld View | Map Location | |
|---|---|---|
 |
 |
|
|
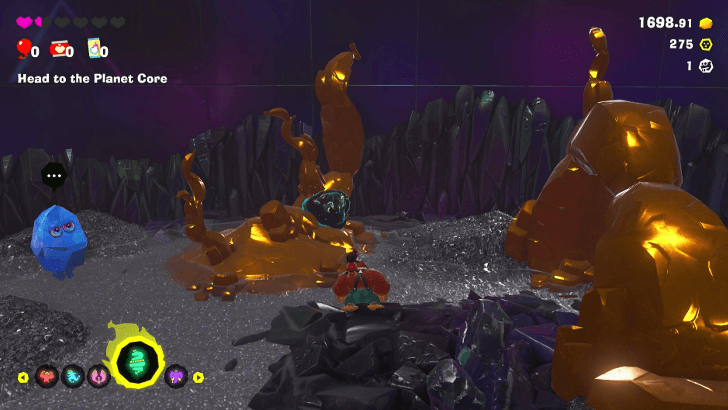
Buried in rubber, just near where the giant monster appeared. |
||
 |
 |
|
|
Found on the rightmost Record corridor. |
||
 |
 |
|
|
Found on the rightmost Record corridor, embedded on the right wall. |
||
 |
 |
|
|
Found on the rightmost Record corridor, embedded on the right wall. |
||
 |
 |
|
|
Found on the rightmost Record corridor, embedded on the left wall. |
||
 |
 |
|
|
Found on the rightmost Record corridor, once you've entered the room at the end. |
||
 |
 |
|
|
Found on the rightmost Record corridor, once you've entered the room at the end. Embedded in a pillar. |
||
 |
 |
|
|
Found on the rightmost Record corridor, located on the underground route. |
||
 |
 |
|
|
Found on the rightmost Record corridor, located on the underground route. Dig through the right. |
||
 |
 |
|
|
Found on the central Record corridor, once you've entered the room at the end. Embedded in a pillar. |
||
 |
 |
|
|
Found on the central Record corridor, once you've entered the room at the end. Embedded in a pillar. |
||
 |
 |
|
|
Found on the central Record corridor, located on the underground route. |
||
 |
 |
|
|
Found on the central Record corridor, located on the underground route. Dig through the right. |
||
 |
 |
|
|
Found on the leftmost Record corridor, once you've entered the room at the end. |
||
 |
 |
|
|
Found at the back of a Fractone, just outside the entrance of the central Record corridor. |
||
 |
 |
|
|
Found on a jail cell just ahead of the Jail Hall Teeleport Point. |
||
 |
 |
|
|
Found on a wall near the Disco Hall Teeleport Point. |
||
 |
 |
|
|
Found on a jail cell near the Jail Hall Teeleport Point. |
||
 |
 |
|
|
Found on the back of a Fractone just inside the Fossil Museum. |
||
 |
 |
|
|
Found on the disco ball inside the Style Shop. |
||
 |
 |
|
|
Found on the left room from the Disco Hall Teeloport Point. |
||
 |
 |
|
|
Found on a Disco Ball inside a room near the Disco Hall Teeleport Point. |
||
 |
 |
|
|
Found on a wall near the Disco Hall Teeleport Point. |
||
 |
 |
|
|
Found on a wall near the entrance of the VIP Room terrace. |
||
 |
 |
|
|
Found on the ceiling above the Disco Hall. To reach it, you must first open the door to Cranky Kong's room by throwing a sturdy chunk at the Fractone that can shift into an unbreakable metal on the second floor. Once inside the secret room, talk to the Fractone next to the other door to unlock a barrel cannon outside. |
||
 |
 |
|
|
Found on a Disco Ball at the open area below the Disco Hall. |
||
 |
 |
|
|
Found on a Disco Ball near the Disco Hall Teeleport Point. |
||
 |
 |
|
|
Found on the underground below the Disco Hall. |
||
 |
 |
|
|
Found on the underground below the Disco Hall. Dig through the center. |
||
 |
 |
|
|
Found at the end of the area from the Hail Hall Teeleport Point. Reach the room located above this area. |
||
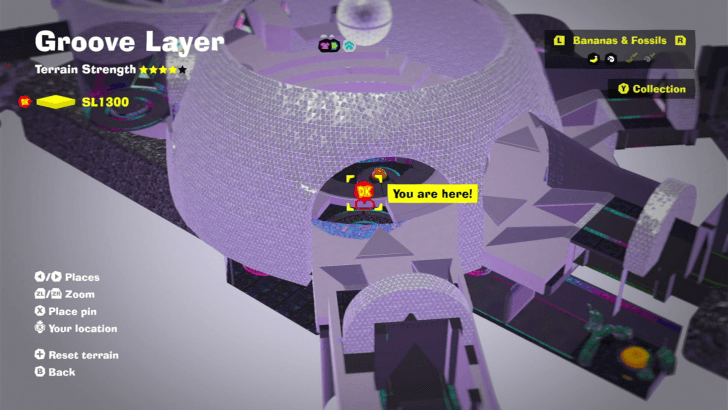
Groove Layer Checkpoints
All Checkpoint Locations
| Overworld View | Map Location | |
|---|---|---|
 |
 |
|
|
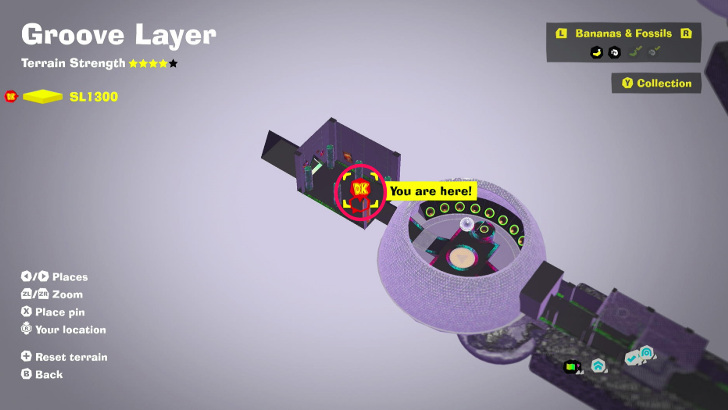
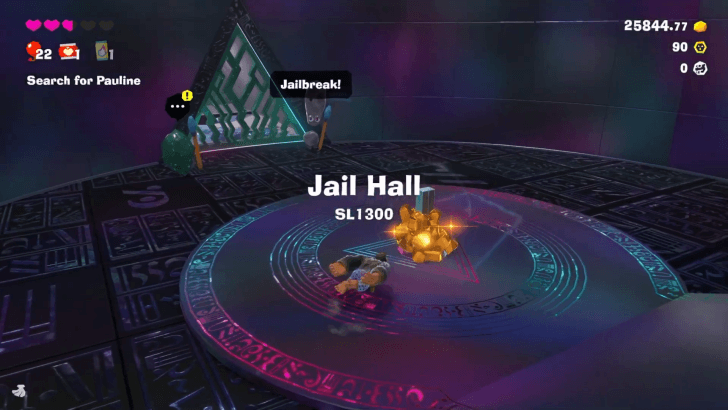
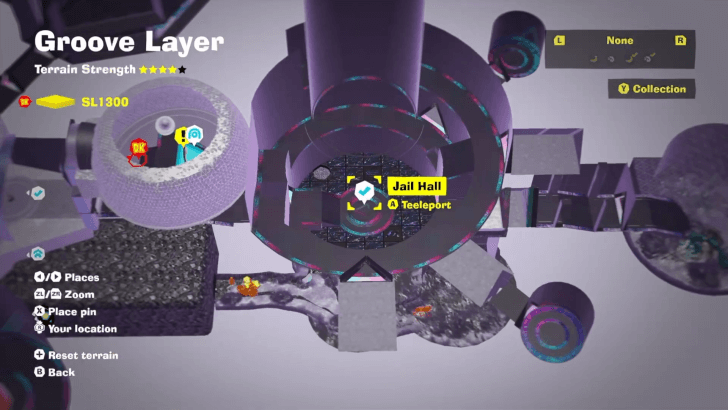
Jail Hall Checkpoint (SL 1300)
Found outside the jail cell you start in. |
||
 |
 |
|
|
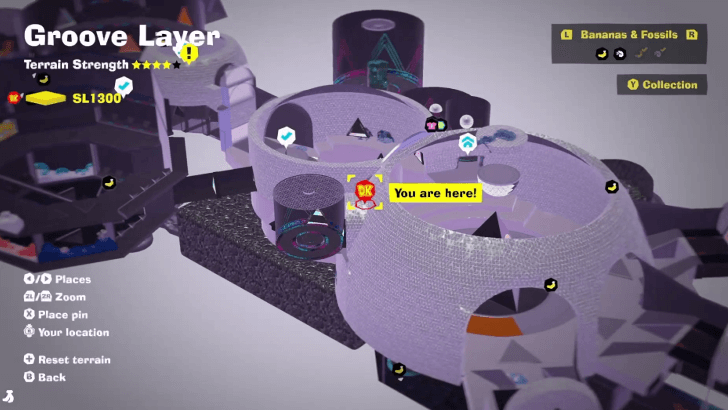
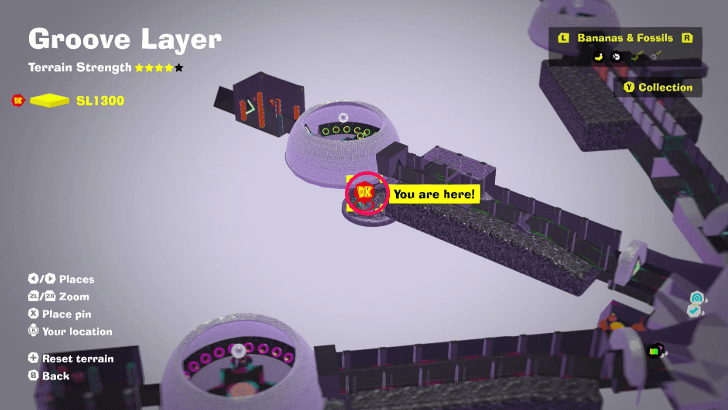
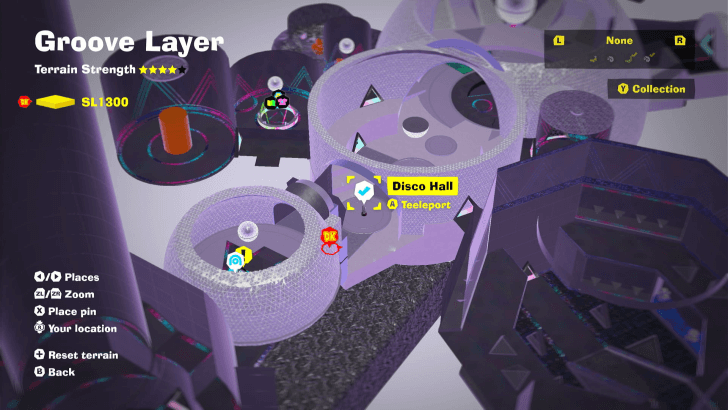
Disco Hall Checkpoint (SL 1300)
Located in the central area of the Groove Layer. |
||
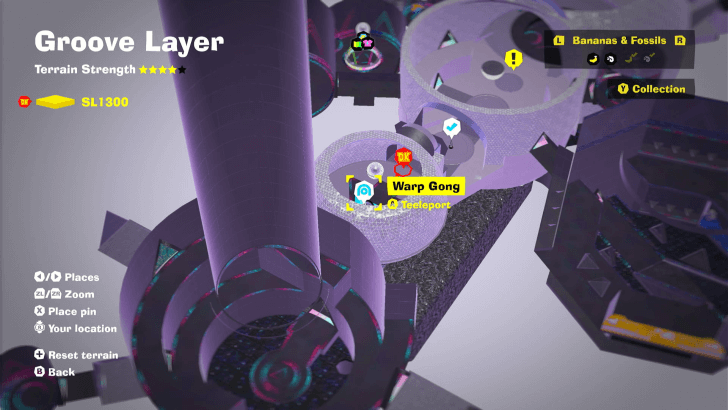
Warp Gong Location
| Layer | Overworld View | Map Location |
|---|---|---|
| SL 1300 |
 |
 |
|
Disco Hall Warp Gong
Found in a room above the Disco Hall checkpoint. |
||
How to Teeleport: Fast Travel Guide
Groove Layer Challenges
All Challenge Locations
| Layer | Overworld View | Map Location |
|---|---|---|
| SL 1300 |
 |
 |
|
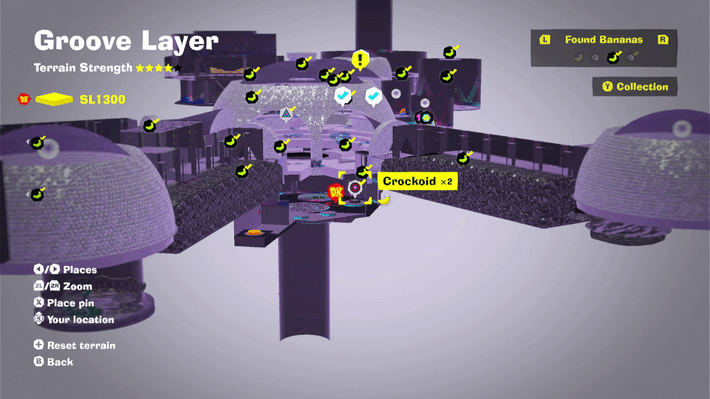
Crockoid x2 Groove Layer Battle Challenge 1 On the lower level of the Disco Hall. The ruins are covered in debris that you need to change to gold with the harp on the top layer. |
||
| SL 1300 |
 |
 |
|
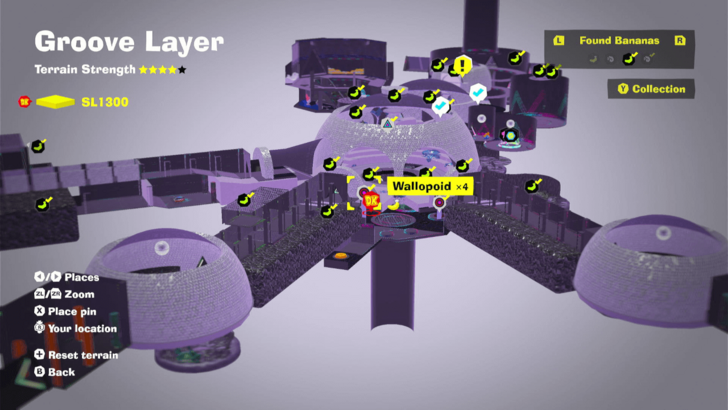
Wallopoid x4 Groove Layer Battle Challenge 2 On the lower level of the Disco Hall. The ruins are covered in debris that you need to change to gold with the harp on the top layer. Pay the Constructone 600 gold to clear the debris to the challenge ruins. |
||
| SL 1300 |
 |
 |
|
Quest for the Top Groove Layer Challenge Course 1 Right next to the Disco Hall check point. You'll need to pay the Constructone 500 gold to construct a harp to change the terrain of the railing blocking the challenge ruin entrance. |
||
Bonus Stage Location
| Layer | Overworld View | Map Location |
|---|---|---|
| SL 1300 |
 |
|
|
Bombing for Gold
Found behind a wall at the Disco Hall. Use a Swap Harp to change rubber into gold and go to the lower level. |
||
Groove Layer Shops
Groove Layer Style Shop
Style Shop Location
| Layer | Overworld View | Map Location |
|---|---|---|
| SL 1300 |
 |
 |
|
Disco Hall Style Shop
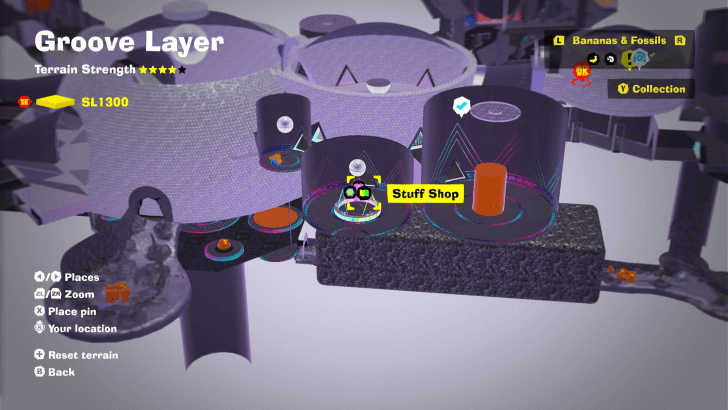
The Stuff Shop, Style Shop, and Chip Exchange can be found together in a room at Disco Hall. |
||
Available Outfits
| Name | Type | Cost | Effect | |||||||
|---|---|---|---|---|---|---|---|---|---|---|
|
|
Fur Color |
|
Chipper and pleasing, like a friendly, fun-loving Fractone! | |||||||
|
|
Fur Color |
|
Bright and delightful, like a bouquet of freshly bloomed flowers. | |||||||
|
|
Fur Color |
|
Stark and clean, as if the color has been fully drained. | |||||||
|
|
Fur Color |
|
Sparkly and shiny, like a disco ball over a dance floor. | |||||||
Stuff Shop Location
| Layer | Overworld View | Map Location |
|---|---|---|
| SL 1300 |
 |
 |
|
Disco Hall Stuff Shop
The Stuff Shop, Style Shop, and Chip Exchange can be found together in a room at Disco Hall. |
||
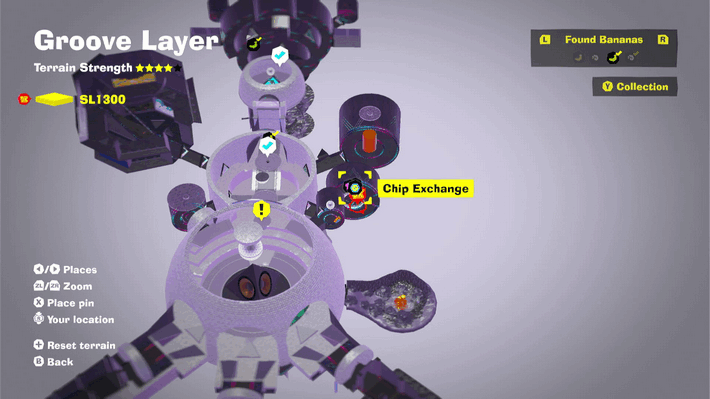
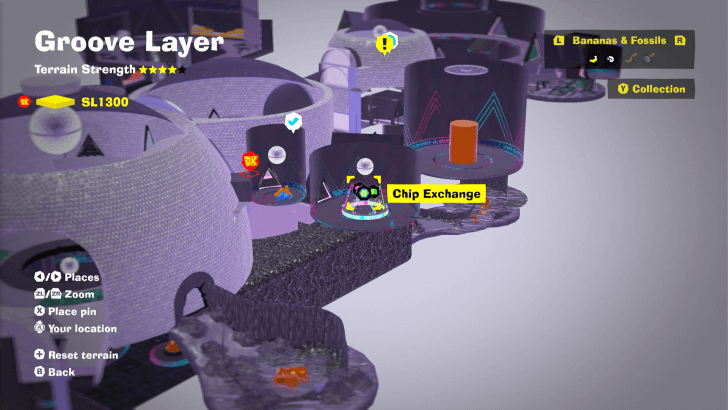
Chip Exchange Location
| Layer | Overworld View | Map Location |
|---|---|---|
| SL 1300 |
 |
 |
|
Disco Hall Chip Exchange
The Stuff Shop, Style Shop, and Chip Exchange can be found together in a room at Disco Hall. |
||
Cranky Kong Location
Room in Groove Hall
| Map / Overworld Image | Video Directions |
|---|---|
 |
In the center room, upper right, a Fractone blocks a door by turning to stone. Open it to find Cranky inside.
Groove Layer Getaways
All Getaway Locations
| Map Location | Overworld Image |
|---|---|
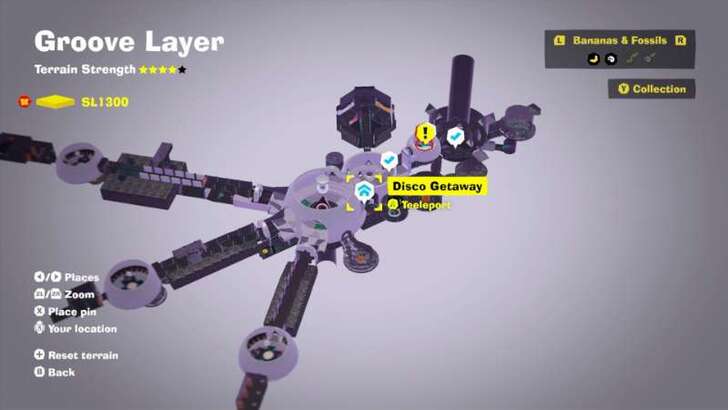 Groove Layer (SL 1300) |
 Disco Getaway |
Getaway Guide: All Getaway Locations
Donkey Kong Bananza Related Guides
All Layers
Comment
Author

Groove Layer Banana and Fossil Locations (SL 1300)
Please participate in our site
improvement survey
04/2026
improvement survey
04/2026
Would you assist in
improving Game8's site?
improving Game8's site?

×
We are listening to our users' valuable opinions and discussing how to act on them.
The information collected through this survey will be used for the purpose of improving our services. In addition, the information will only be disclosed a part of a statistic in a format that will not allow identification of personal information.
Begin Survey
Not Now
×
Please rate each item regarding Game8.co's Advertisements.
Amount of Ads
Very Dissatisfied
Somewhat Dissatisfied
Fine
Somewhat Satisfied
Highly Satisfied
Placement of Ads
Timing of Ad Display
Ad Loading Speed
Safeness of Ads
Content of Ads
×
Please rate each item regarding Game8.co's Quality of Articles.
Amount of information
Very Dissatisfied
Somewhat Dissatisfied
Fine
Somewhat Satisfied
Highly Satisfied
Frequency of updates
Speed of new information
Accuracy of articles
Understandibility of articles
Readability of sentences
×
Please rate each item regarding Game8.co's Usability of the Site.
Ease of finding information
Very Dissatisfied
Somewhat Dissatisfied
Fine
Somewhat Satisfied
Highly Satisfied
Loading Speed
Use of Color
Font Size
Visibility of Images
Easy to Understand Layout
×
Please rate each item regarding Game8.co's Message Boards, Comments.
Ease of Writing
Very Dissatisfied
Somewhat Dissatisfied
Fine
Somewhat Satisfied
Highly Satisfied
Readability
Ease in Finding Information
Comment Quality
Comment Quantity
Admin Response
×
Please rate each item regarding Game8.co's Site's new design.
Please rate our site's new design
Very Dissatisfied
Somewhat Dissatisfied
Fine
Somewhat Satisfied
Highly Satisfied
Do you think that the website's design change makes the site easier to use?
Has the new design made it easier for you to find information on the site?
Has the new design improved the overall visual appeal of the site?
How would you rate your overall satisfaction with the new design of the site?
×
How likely are you to recommend Game8 to someone you know?
Very Unlikely
0
1
2
3
4
5
6
7
8
9
10
Very Likely
If you have other opinions regarding potential improvement to the website, please share them with us. We would appreciate your honest opinion.
Note: This is a free response section, so you can proceed without entering anything.
Note: Please be sure not to enter any kind of personal information into your response.
Note: Please be sure not to enter any kind of personal information into your response.
×
Thank You
×
Thank you for participating in our survey! Your answers will help us to improve the quality of our website and services.
We hope you continue to make use of Game8.
We hope you continue to make use of Game8.
Close
Rankings
- We could not find the message board you were looking for.
Gaming News

![Forza Horizon 6 Review [Preview] | Beautiful Roads With a Whole Lot of Oversteer](https://img.game8.co/4460981/a7254c24945c43fbdf6ad9bea52b5ce9.png/show)


![Forza Horizon 6 Review [Preview] | Beautiful Roads With a Whole Lot of Oversteer](https://img.game8.co/4460981/a7254c24945c43fbdf6ad9bea52b5ce9.png/thumb)
Popular Games

Genshin Impact Walkthrough & Guides Wiki
Crimson Desert Walkthrough & Guides Wiki
Umamusume: Pretty Derby Walkthrough & Guides Wiki
Honkai: Star Rail Walkthrough & Guides Wiki
Monster Hunter Stories 3: Twisted Reflection Walkthrough & Guides Wiki
Wuthering Waves Walkthrough & Guides Wiki
The Seven Deadly Sins: Origin Walkthrough & Guides Wiki
Pokemon TCG Pocket (PTCGP) Strategies & Guides Wiki
Pokemon Pokopia Walkthrough & Guides Wiki
Zenless Zone Zero Walkthrough & Guides Wiki


Recommended Games
Monster Hunter World Walkthrough & Guides Wiki
Fire Emblem Heroes (FEH) Walkthrough & Guides Wiki
Pokemon Brilliant Diamond and Shining Pearl (BDSP) Walkthrough & Guides Wiki
Super Smash Bros. Ultimate Walkthrough & Guides Wiki
Diablo 4: Vessel of Hatred Walkthrough & Guides Wiki
Cyberpunk 2077: Ultimate Edition Walkthrough & Guides Wiki
Yu-Gi-Oh! Master Duel Walkthrough & Guides Wiki
Elden Ring Shadow of the Erdtree Walkthrough & Guides Wiki
The Legend of Zelda: Tears of the Kingdom Walkthrough & Guides Wiki
Persona 3 Reload Walkthrough & Guides Wiki


All rights reserved
© Nintendo. Games are property of their respective owners. Nintendo of America Inc.
The copyrights of videos of games used in our content and other intellectual property rights belong to the provider of the game.
The contents we provide on this site were created personally by members of the Game8 editorial department.
We refuse the right to reuse or repost content taken without our permission such as data or images to other sites.