

 Ingot Isle
 Lagoon Layer
 Hilltop Layer
 Canyon Layer
 The Divide
 Freezer Layer
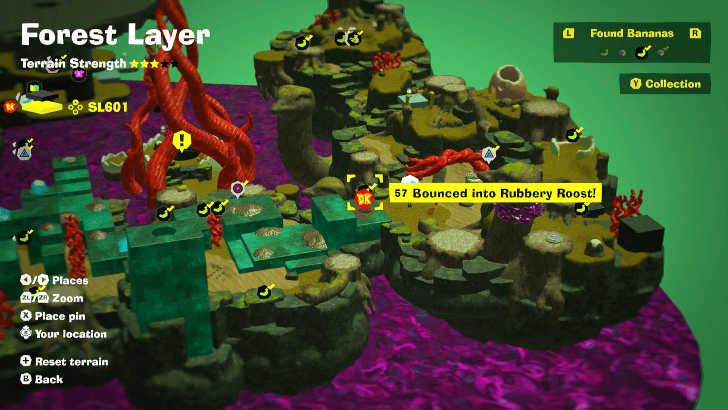
 Forest Layer
 The Junction
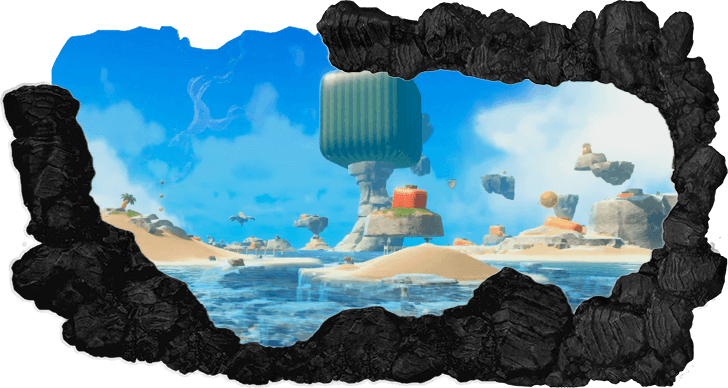 Resort Layer
 Tempest Layer
 Landfill Layer
 Racing Layer
 Radiance Layer
 Groove Layer
 Feast Layer
 Forbidden Layer
 Planet Core
 DK Island
This survey will take about 1 minute.
Your answers will help us to improve our website.
Donkey Kong Bananza
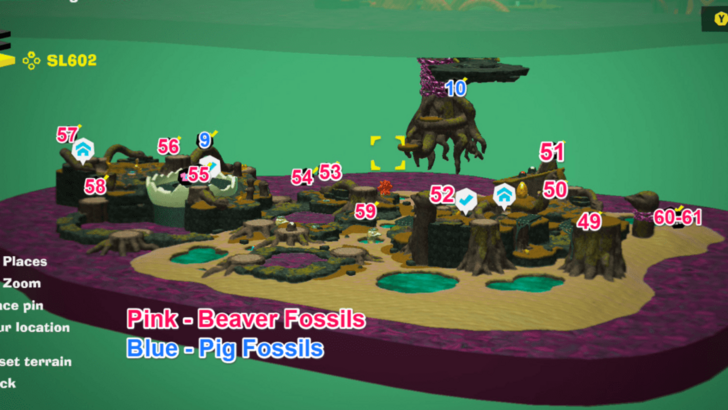
Forest Layer Banana and Fossil Locations (SL 600-602)
☽ DK Island and Emerald Rush DLC out now!
☽ Learn how to solve Banandiumtone's Puzzles.
☽ All Collectibles: Banandium Gems and Fossils
☽ Learn How to Skip Layers Entirely!
☽ How to Beat the Final Boss
☽ Post-Game: Rehearsal Halls | Secret Ending
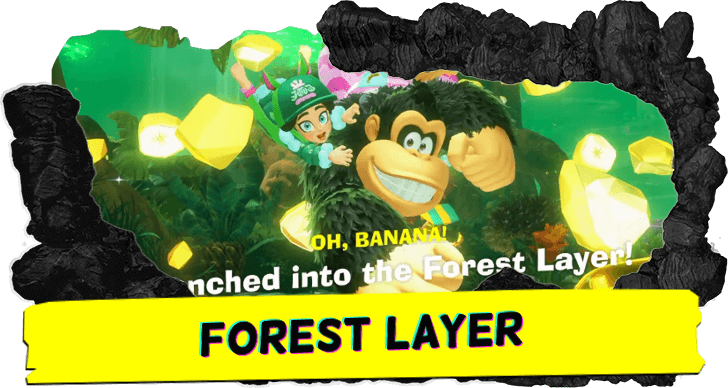
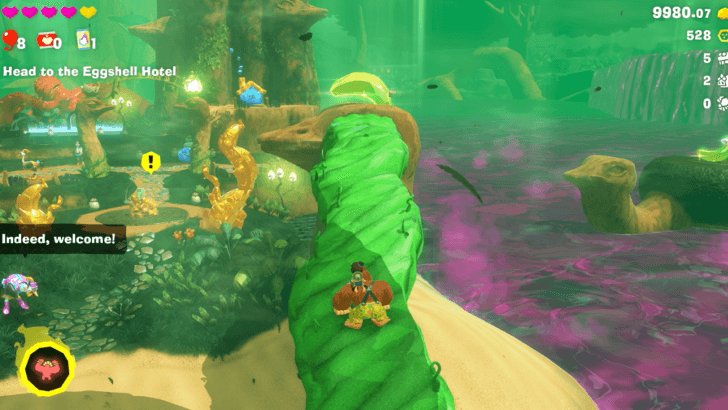
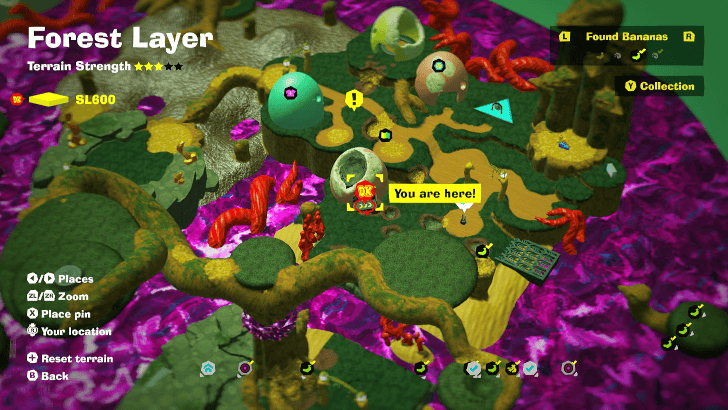
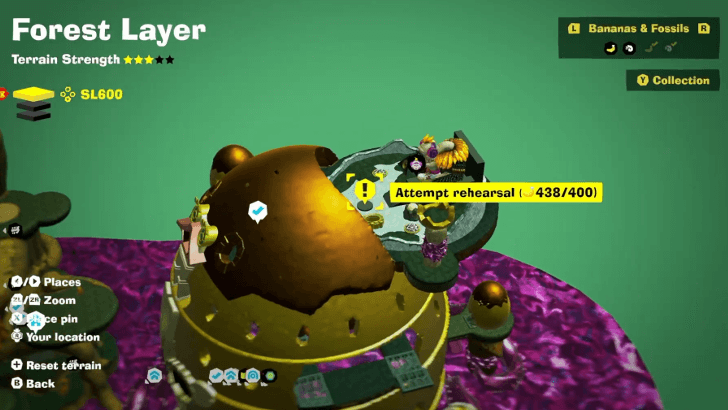
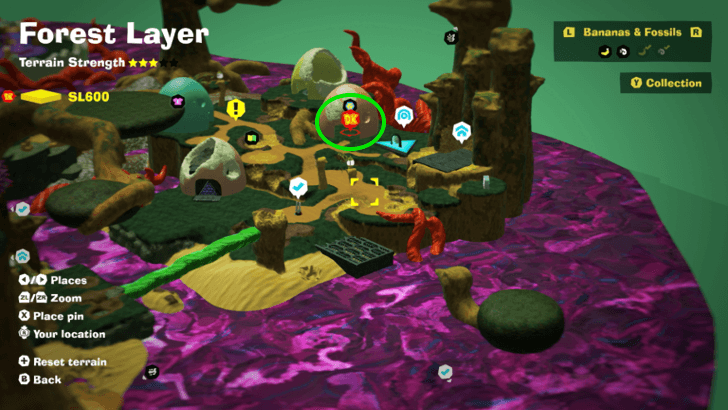
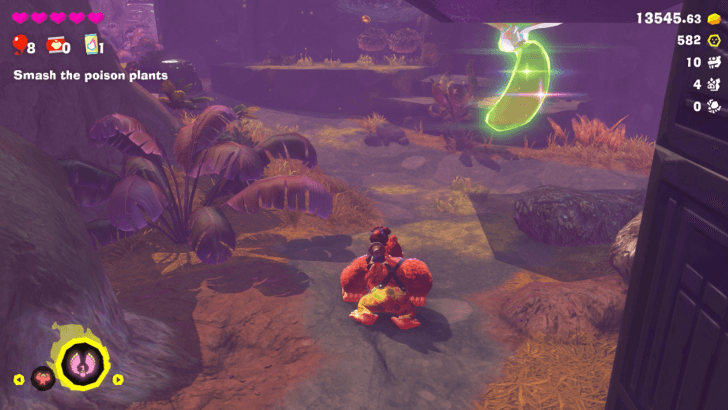
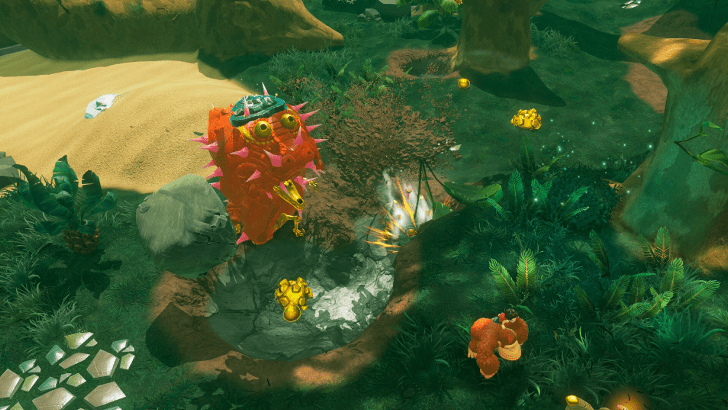
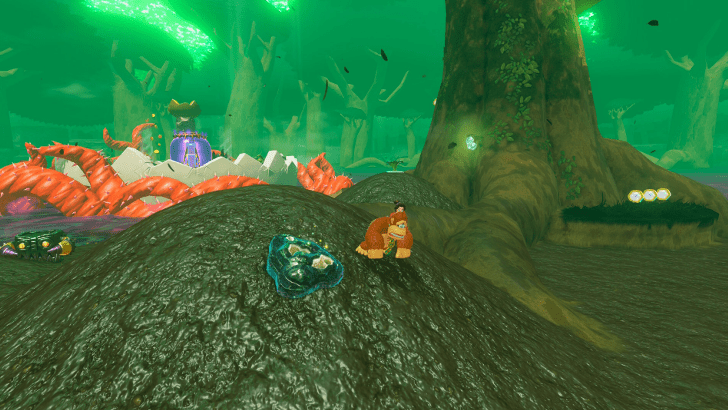
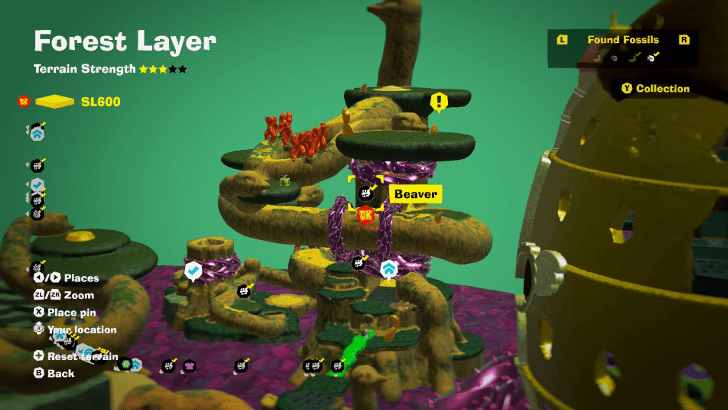
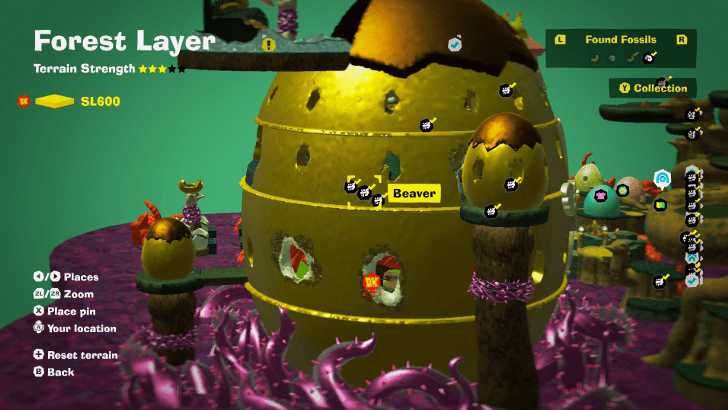
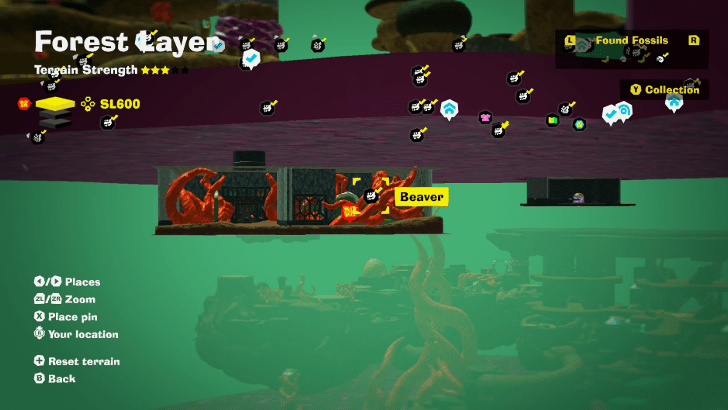
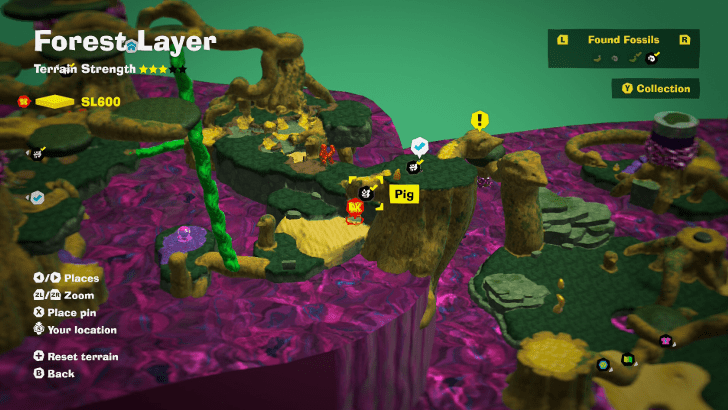
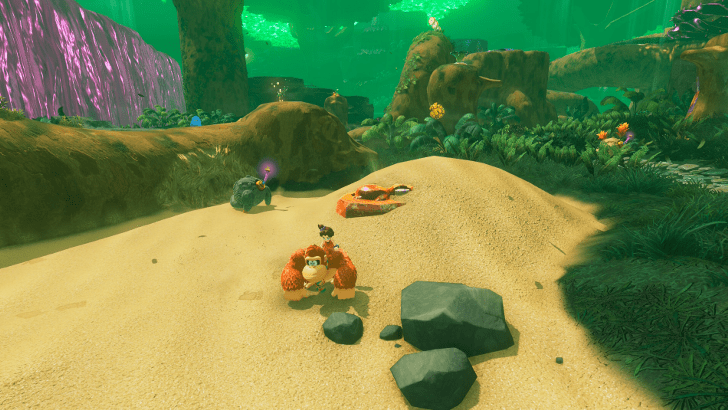
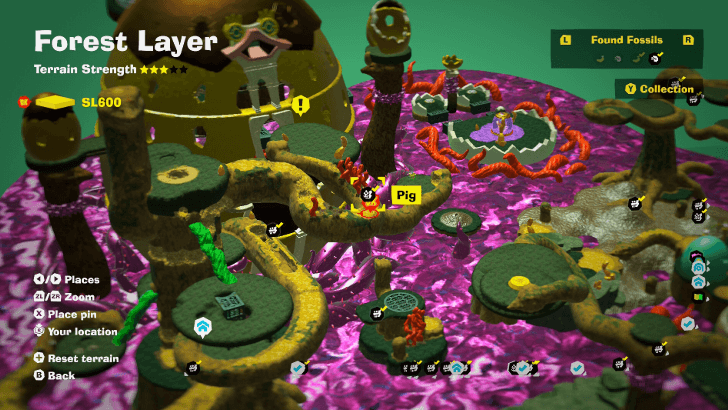
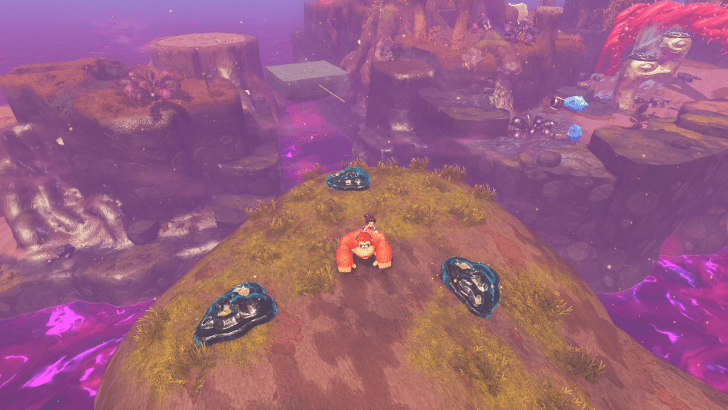
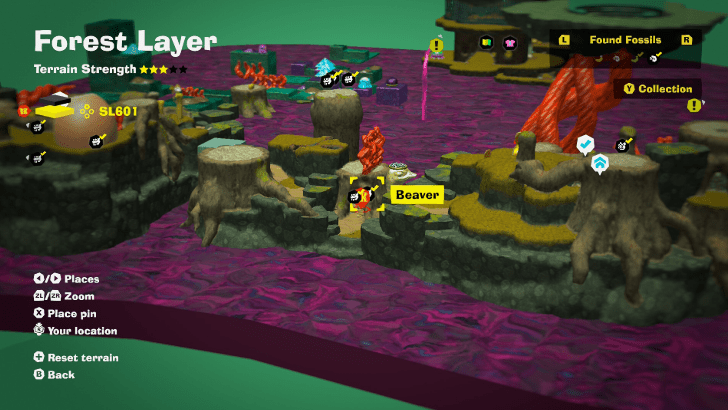
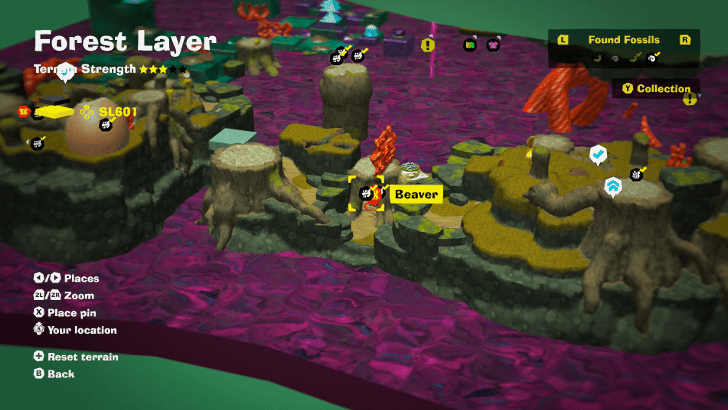
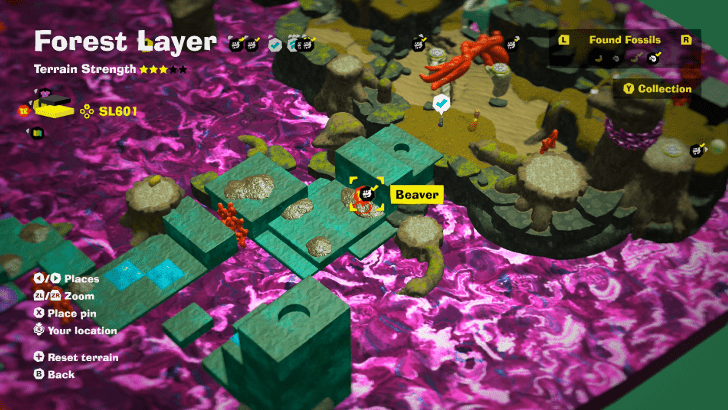
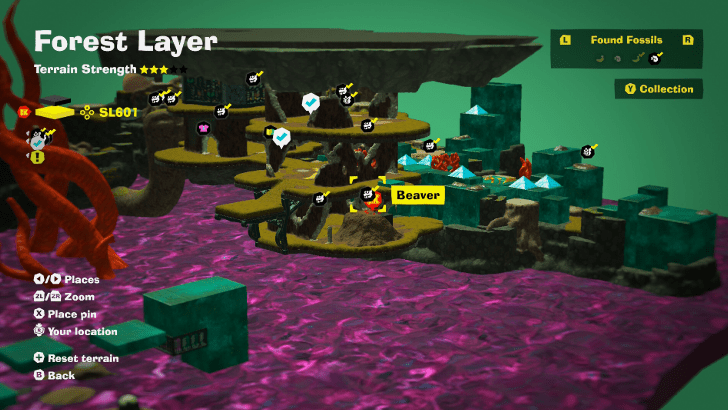
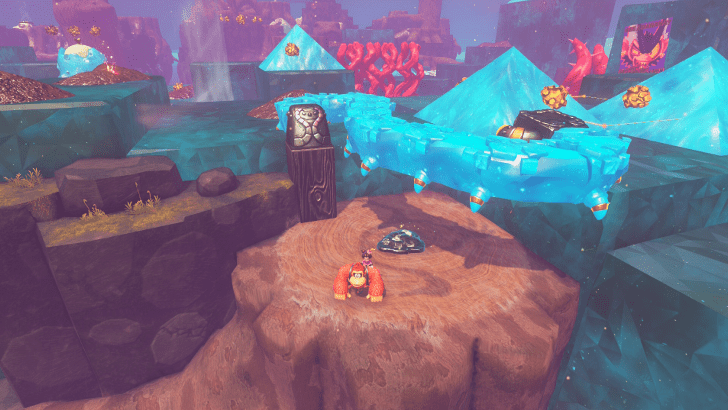
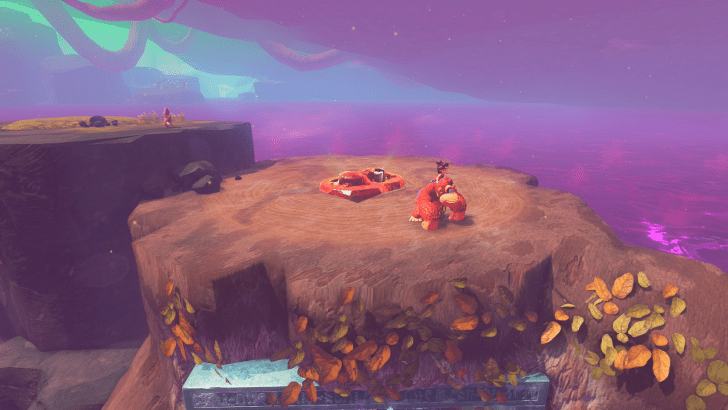
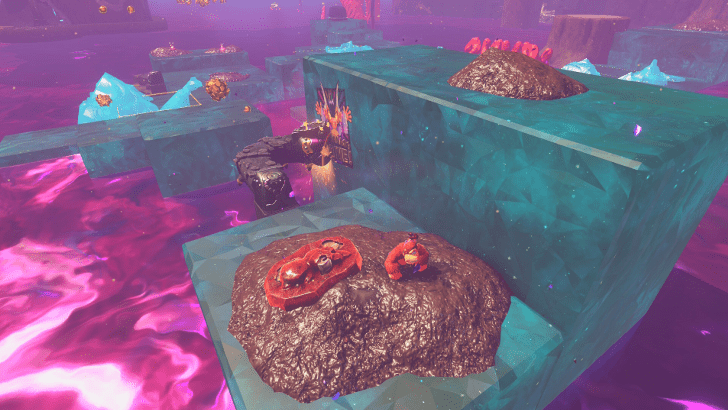
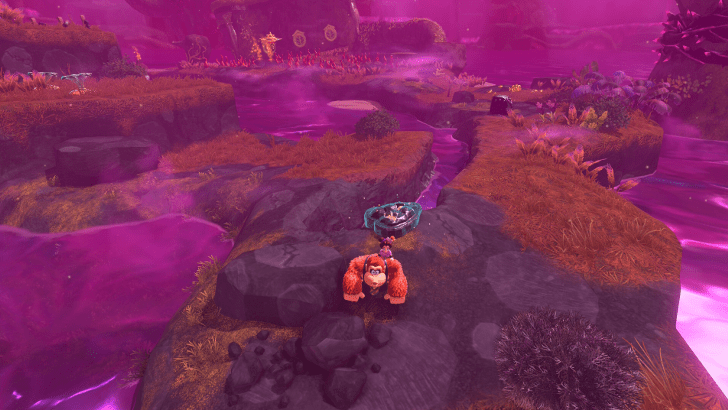
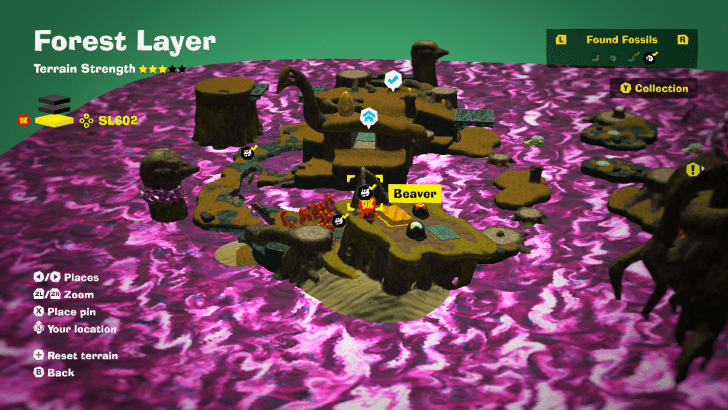
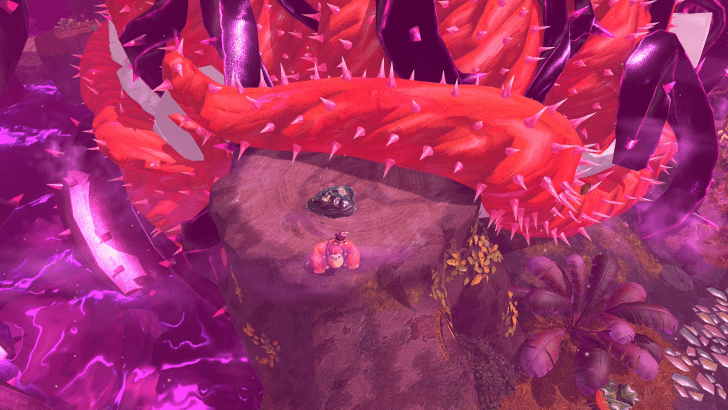
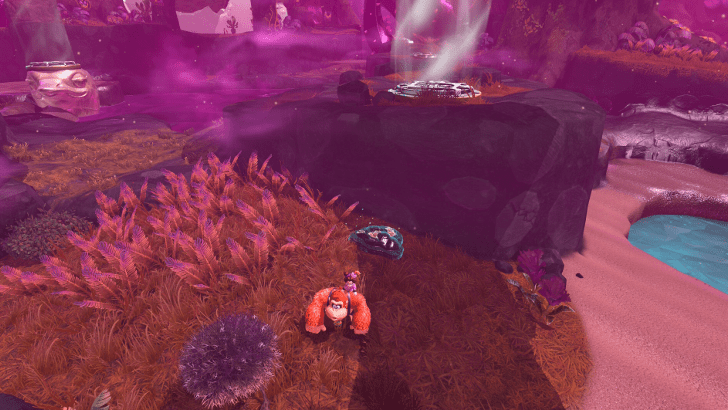
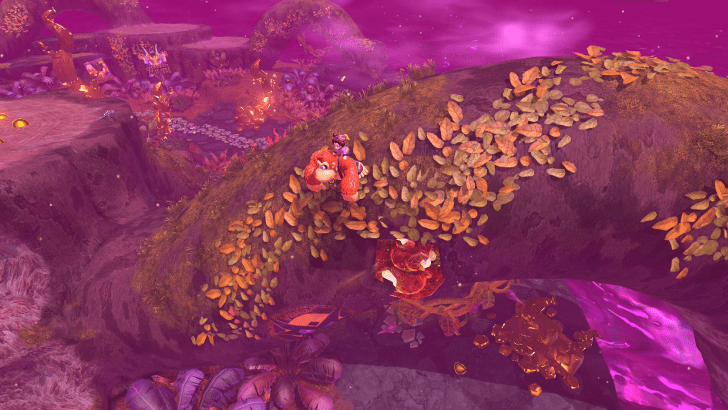
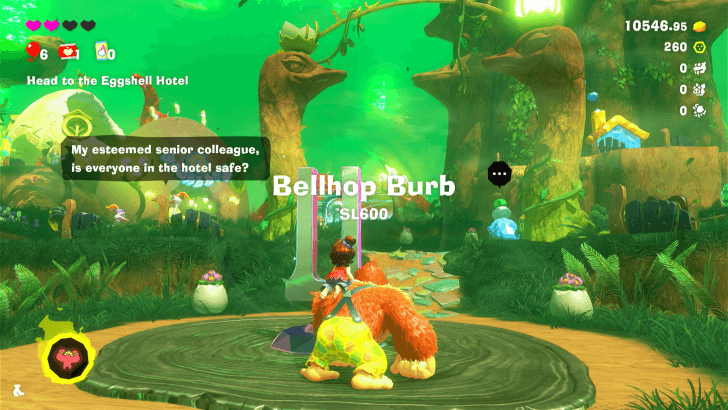
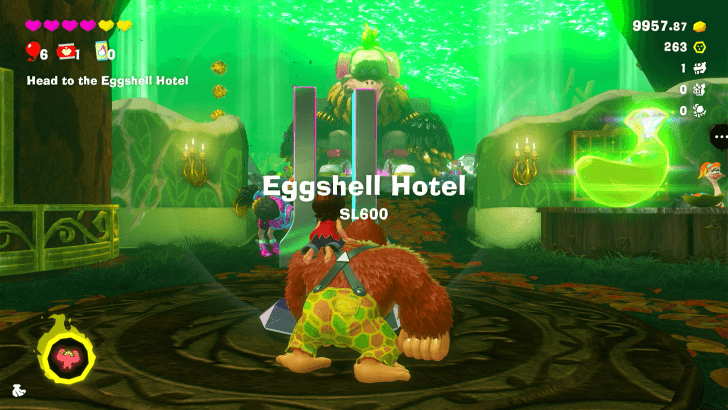
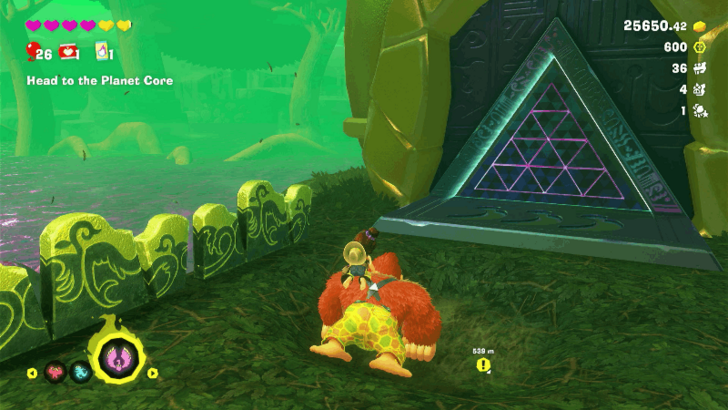
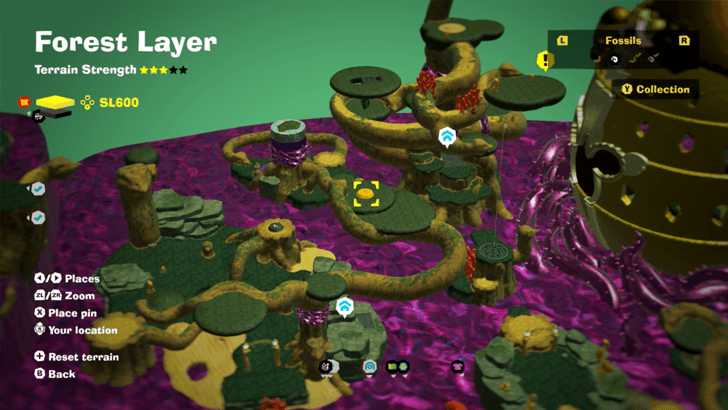
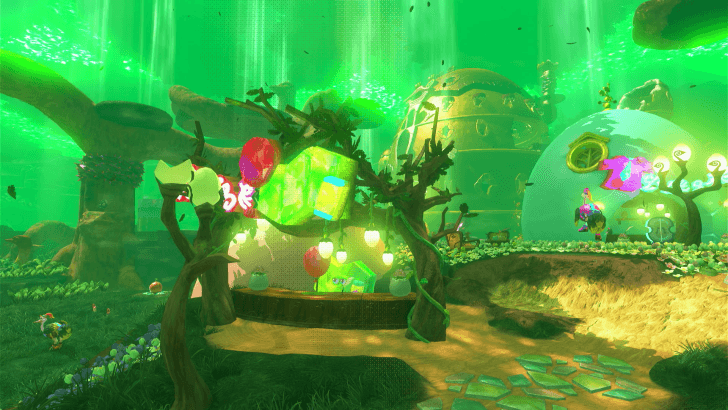
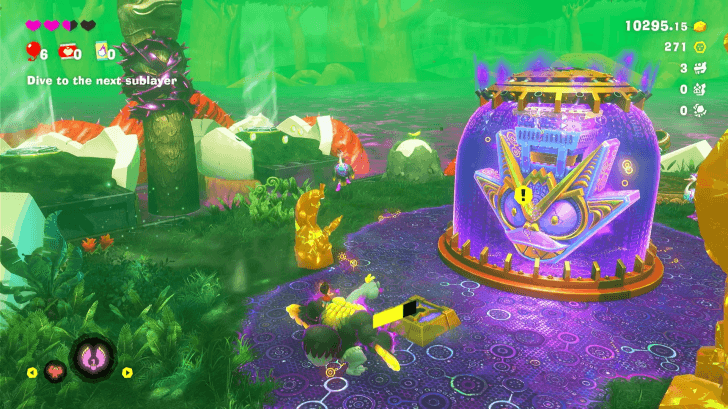
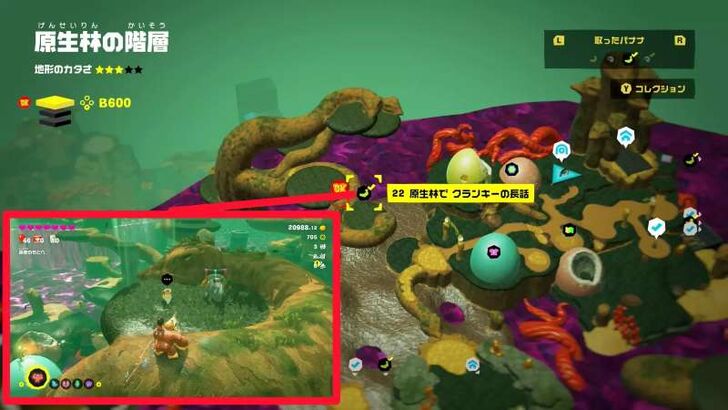
Forest Layer is the seventh layer in Donkey Kong Bananza. Check out where to find the locations of all Forest Layer Bananas, fossils, and other collectibles in this level!
| Forest Layer Guides | |
|---|---|
| Walkthrough | Collectibles |
List of Contents
Forest Layer Collectibles Overview
List of Collectibles
| Banandium Gems | Total: 83
・SL 600: 48 ・SL 601: 24 ・SL 602: 11 |
|---|---|
| Fossils | Total: 72
|
| Checkpoints | Total: 10 |
| Challenges | Total: 11 |
There are 83 bananas and 72 fossils available in Forest Layer.
Forest Layer Bananas
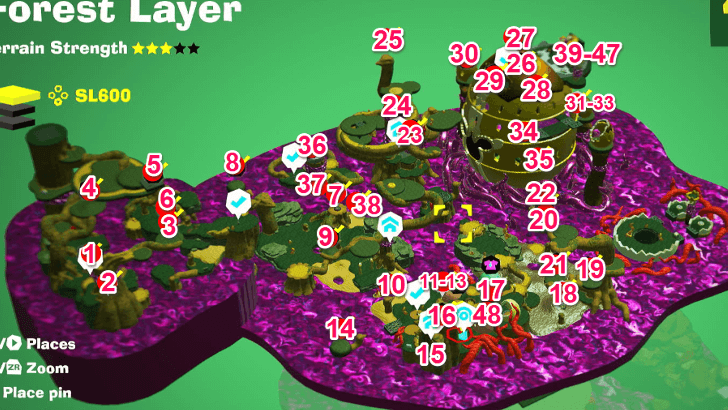
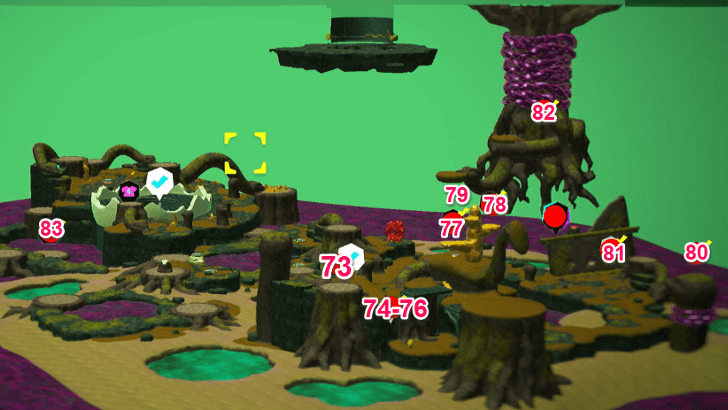
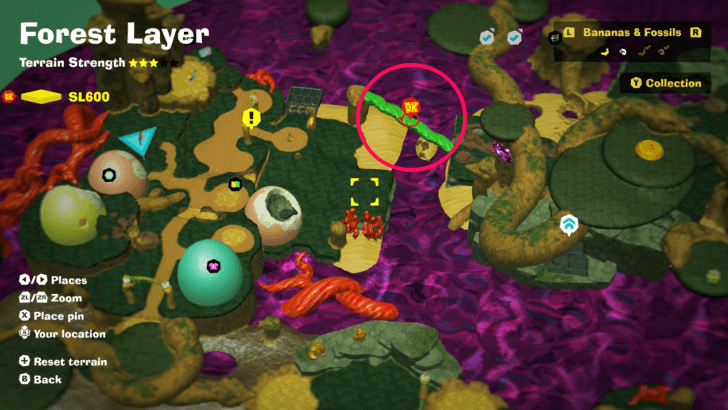
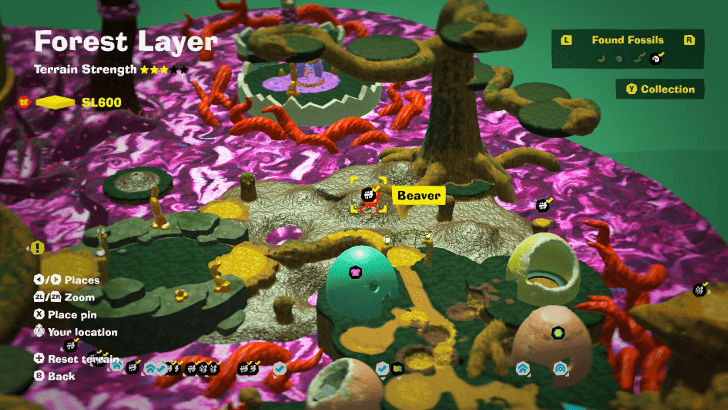
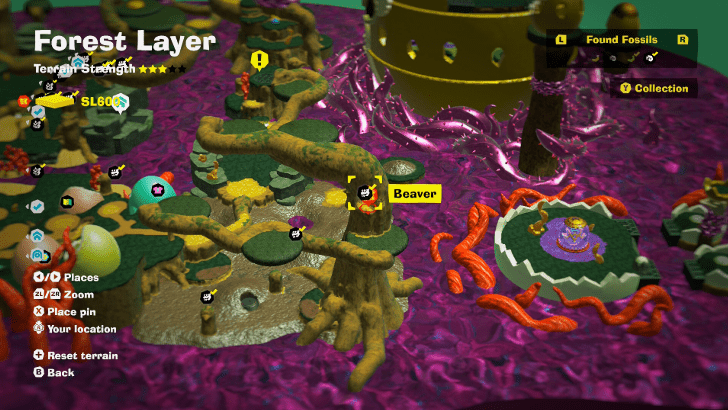
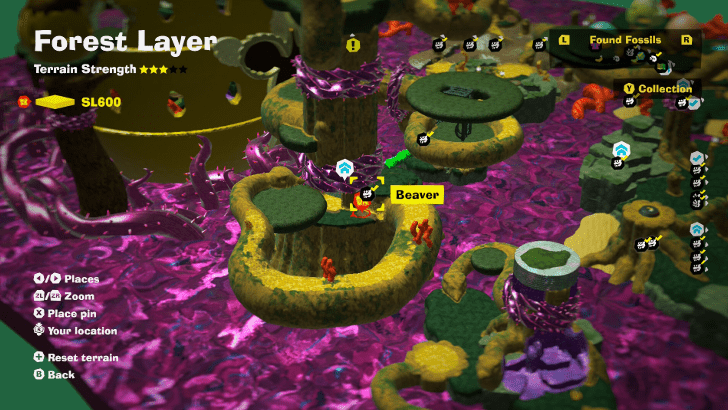
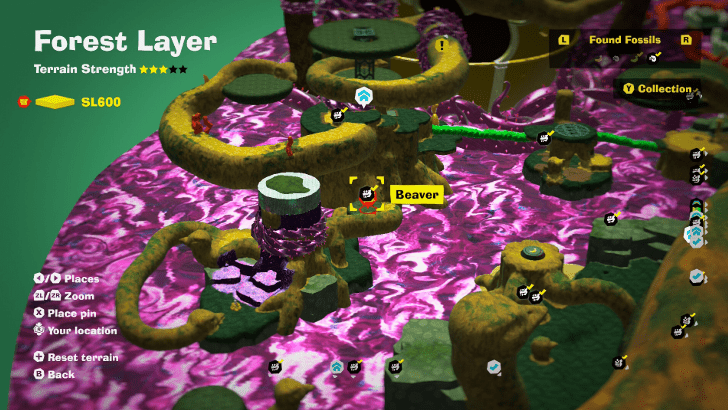
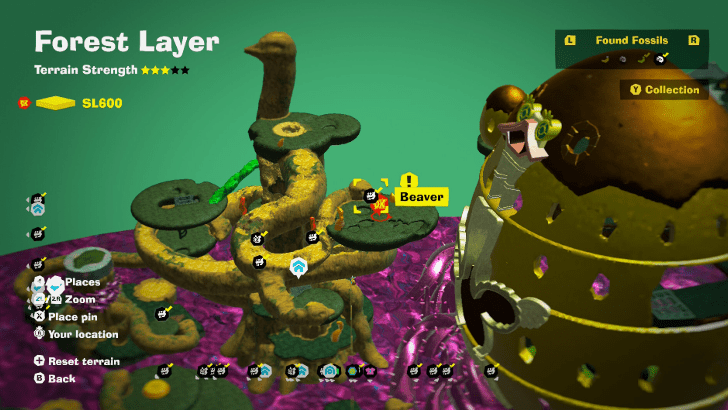
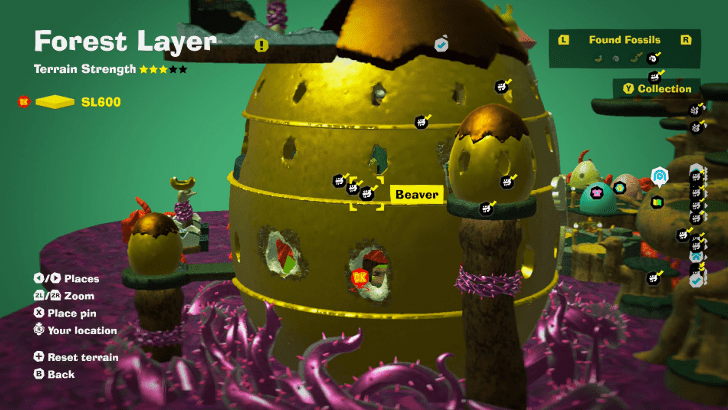
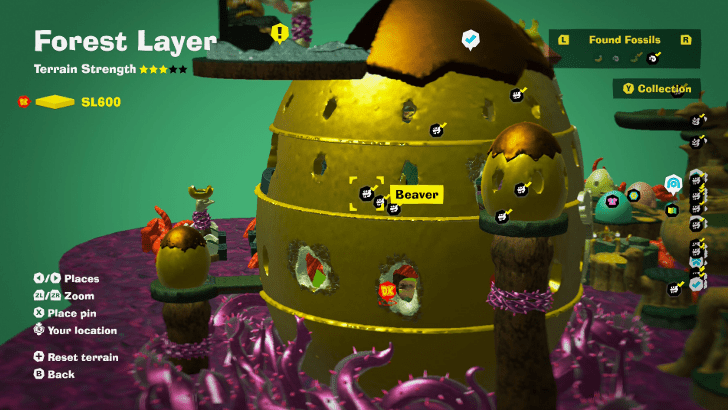
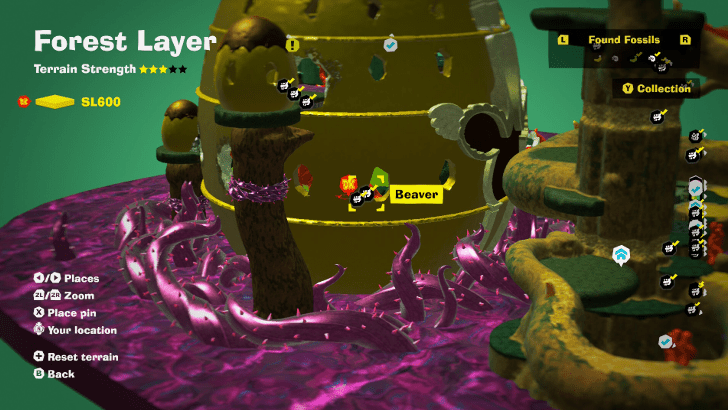
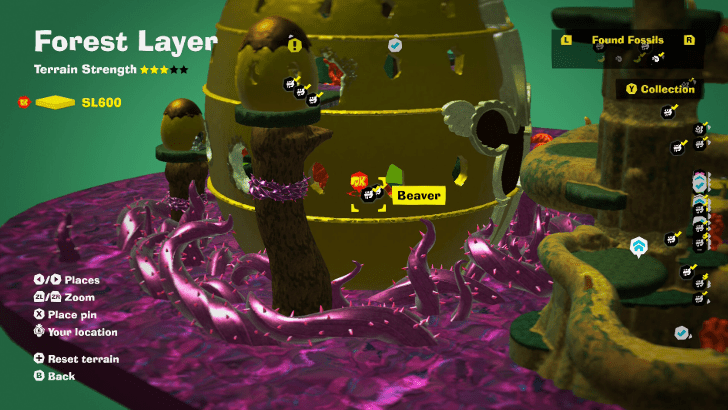
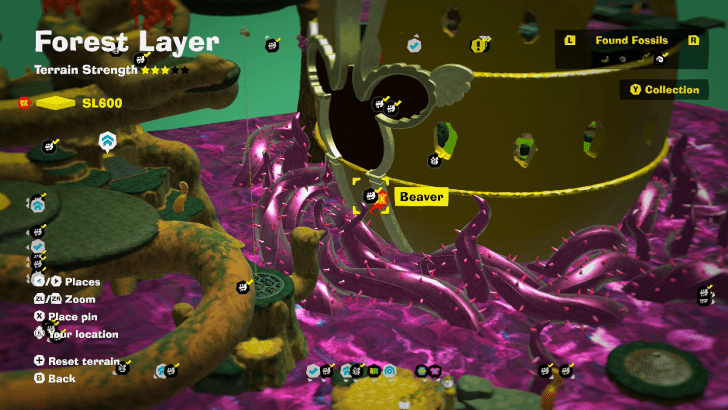
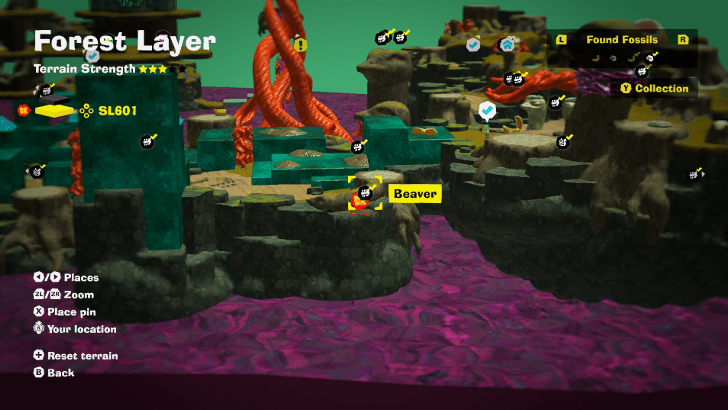
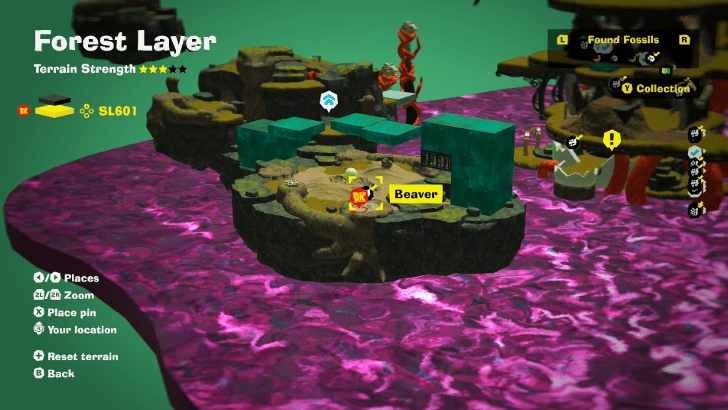
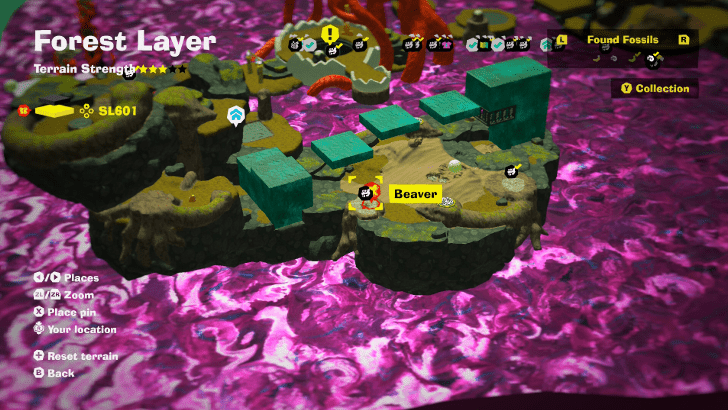
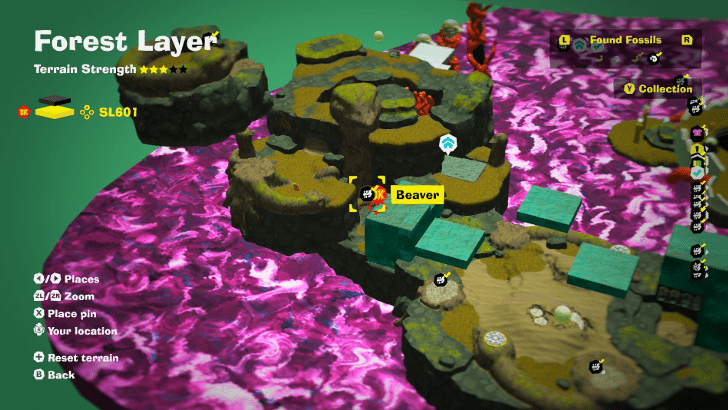
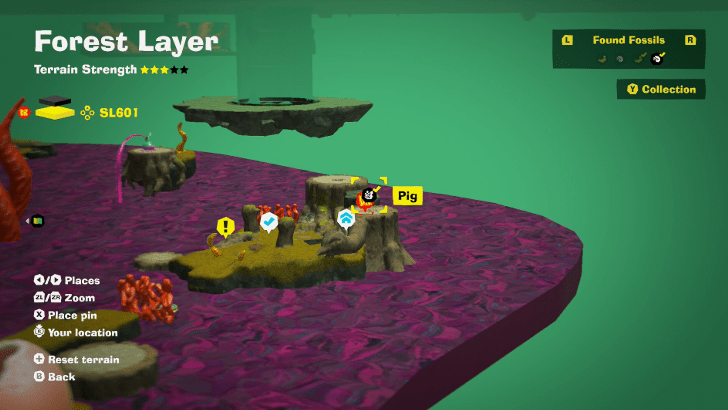
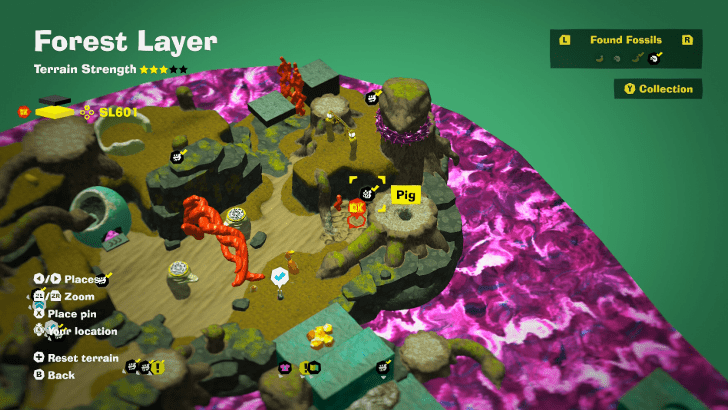
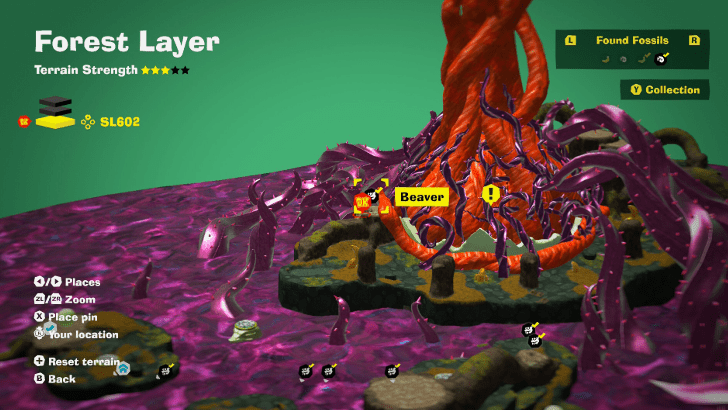
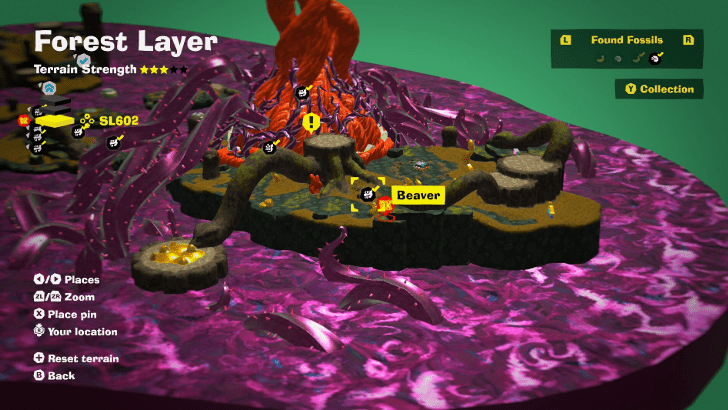
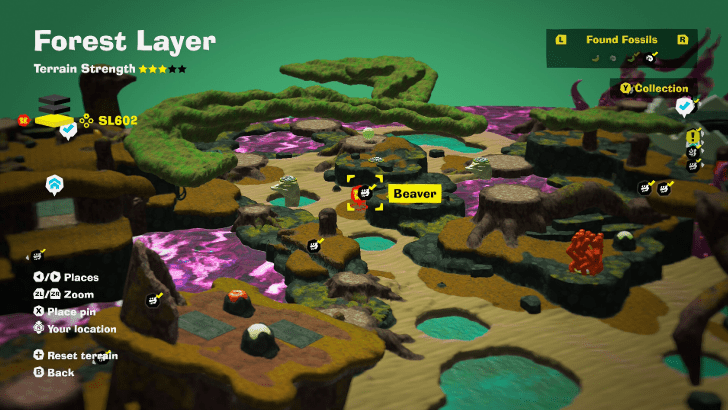
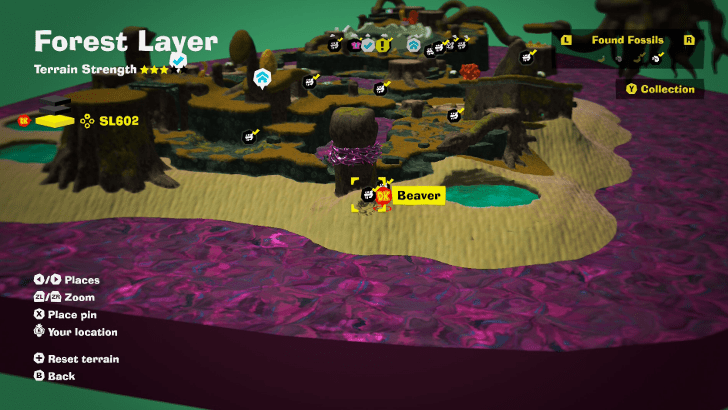
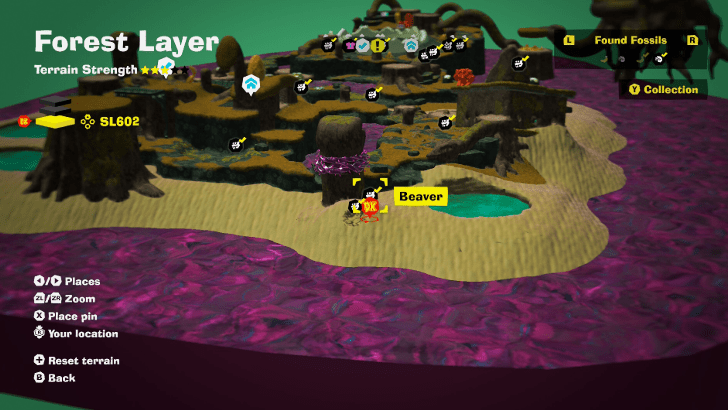
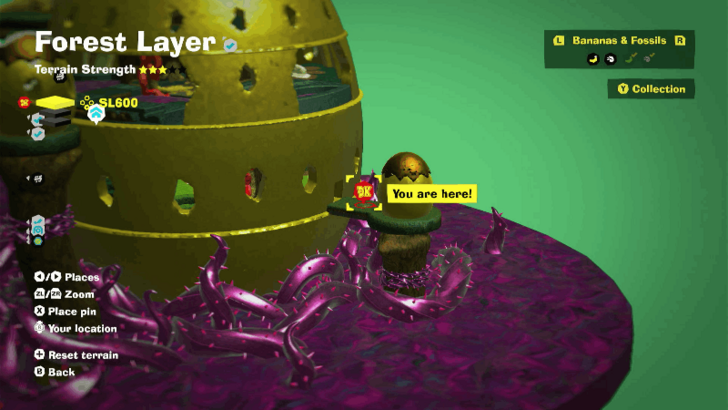
Banandium Gems Map Overview
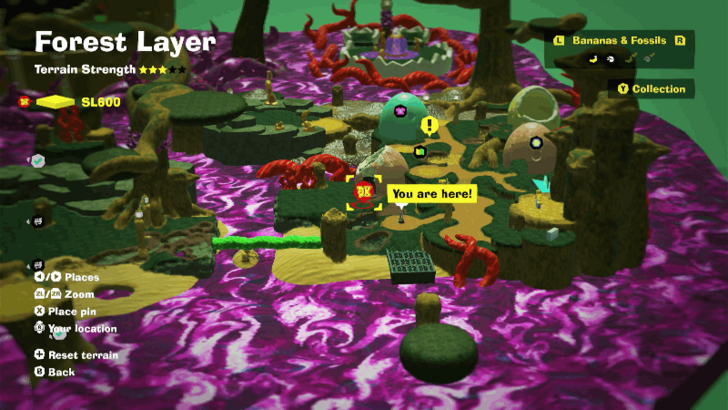
SL 600
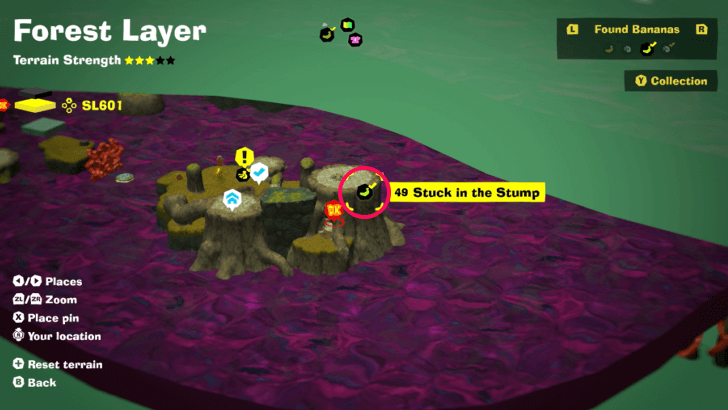
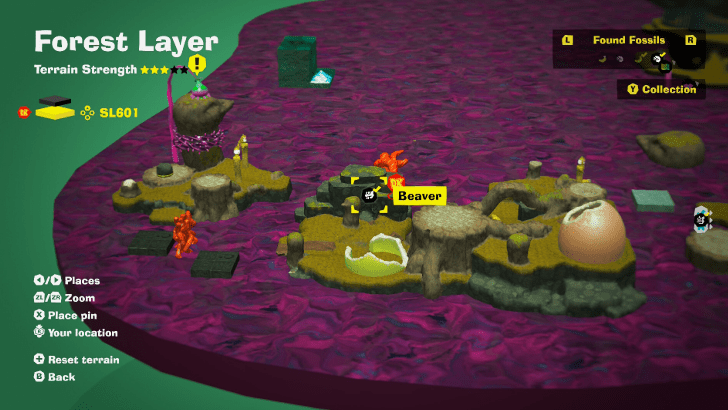
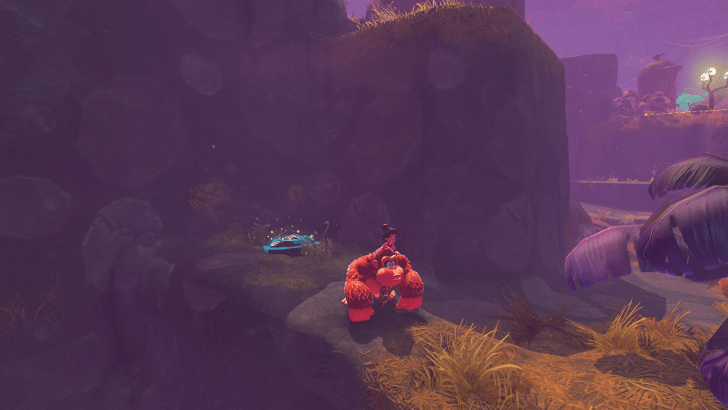
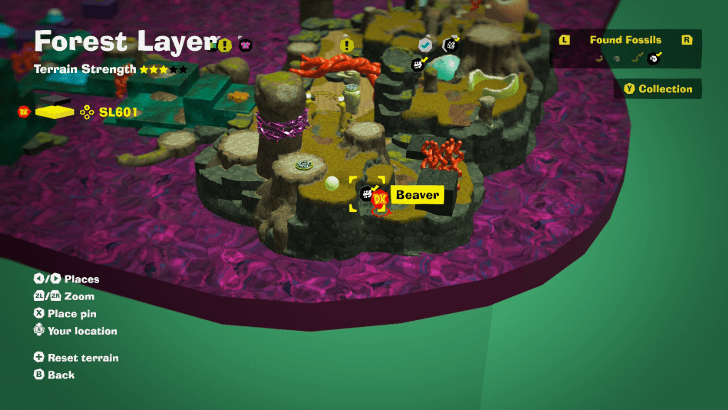
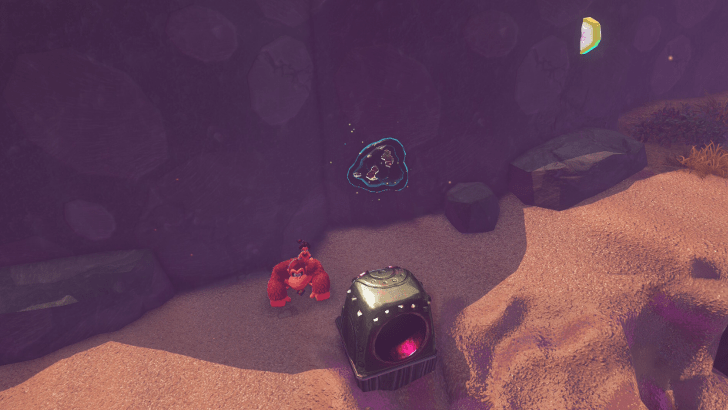
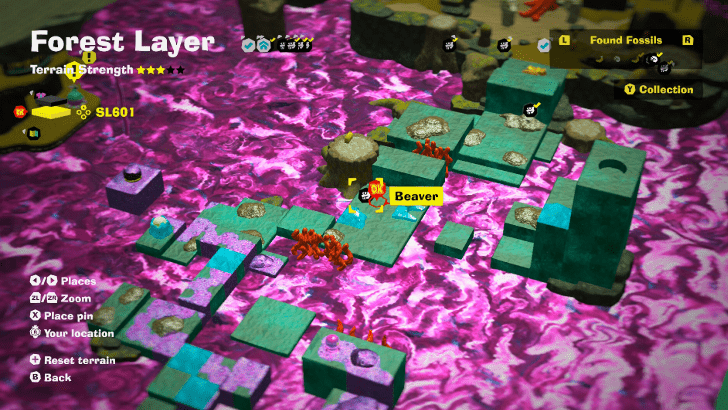
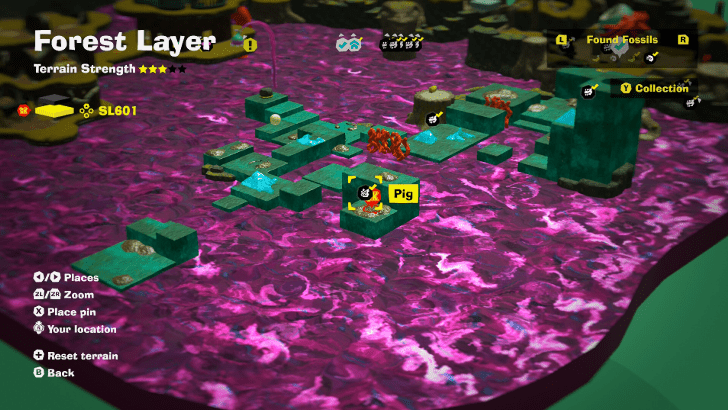
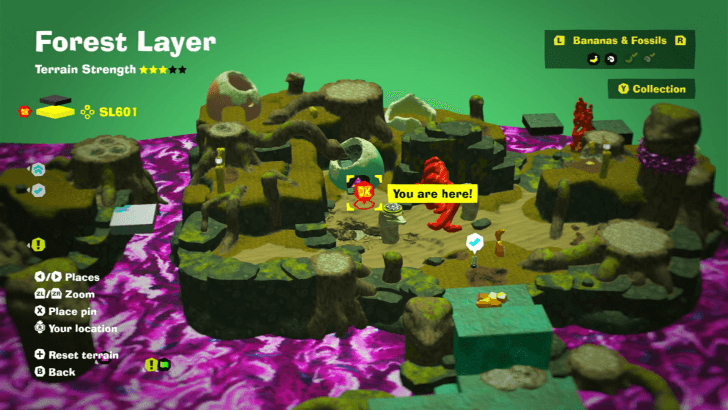
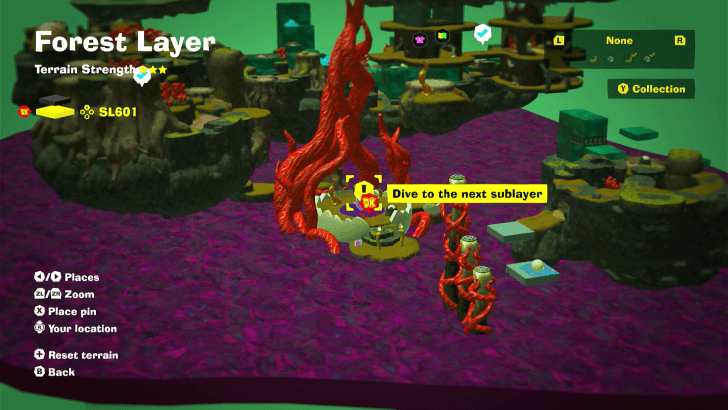
SL 601
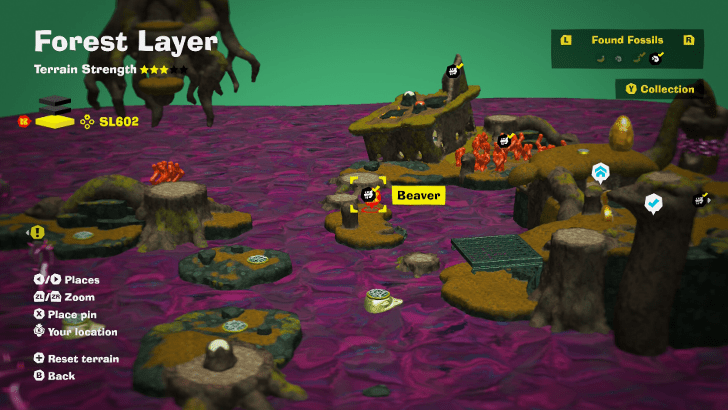
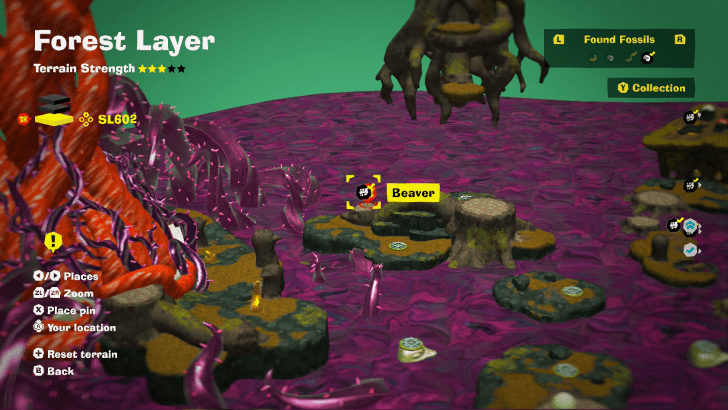
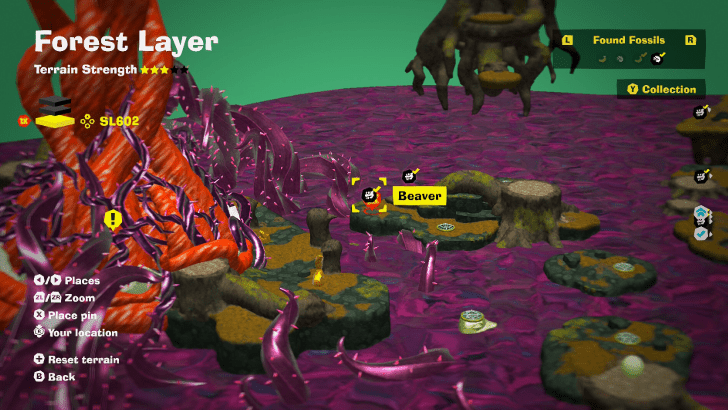
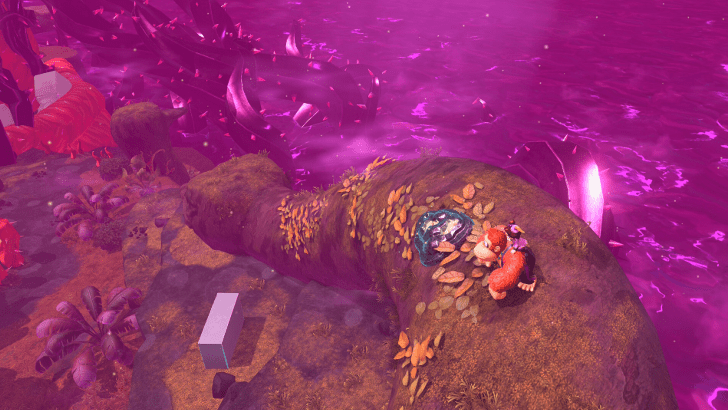
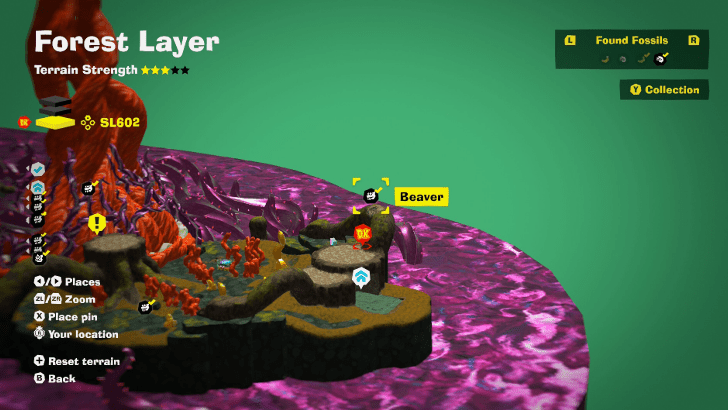
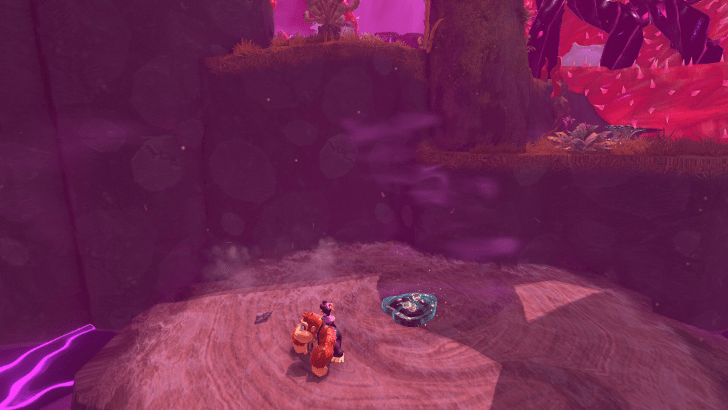
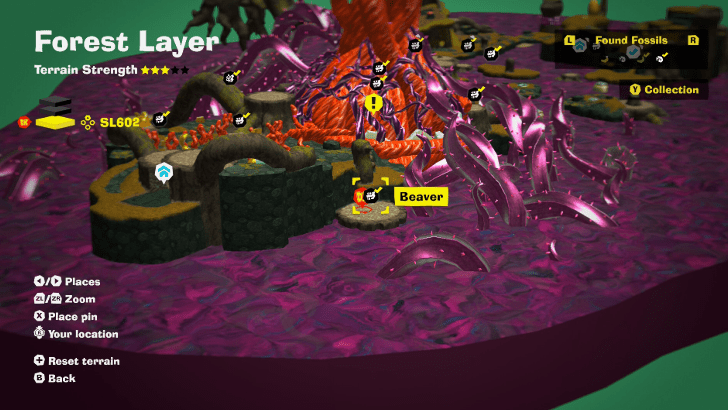
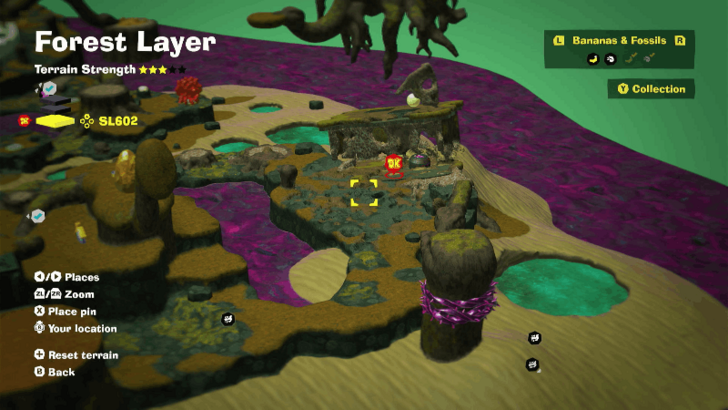
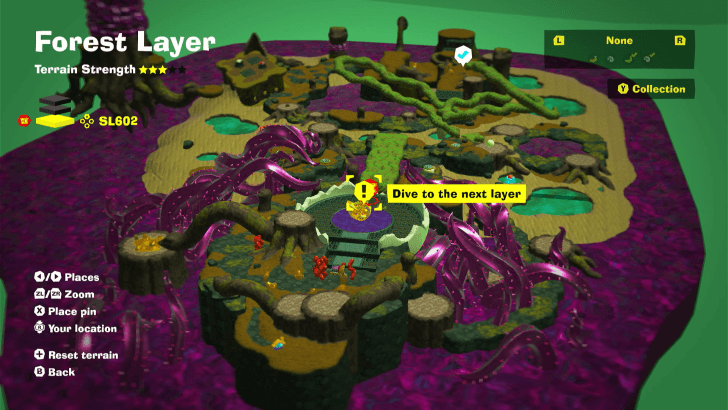
SL 602
SL 600 Banana Locations
| Overworld View | Map Location | |
|---|---|---|
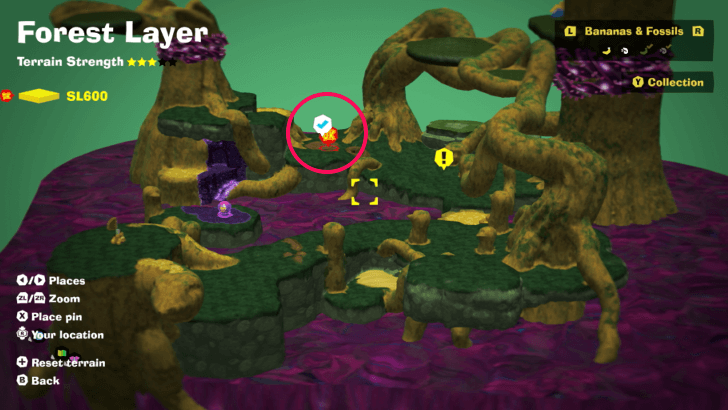
| 01 |
 |
 |
|
Found with story progression. |
||
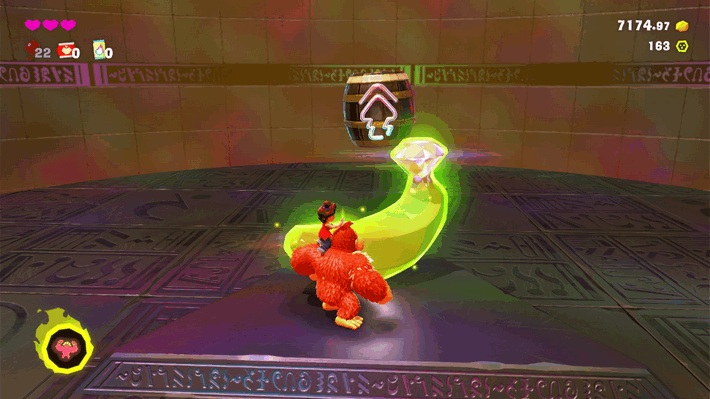
| 02 |
 |
 |
|
Clear Void by destroying the Void container from the other side. Enter the manhole and defeat the enemies to get a Gem. |
||
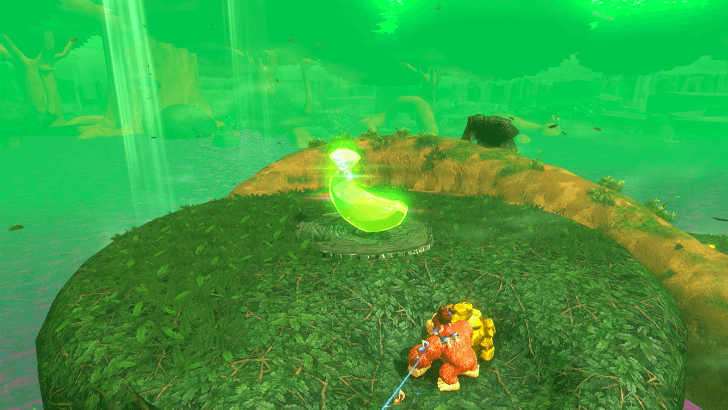
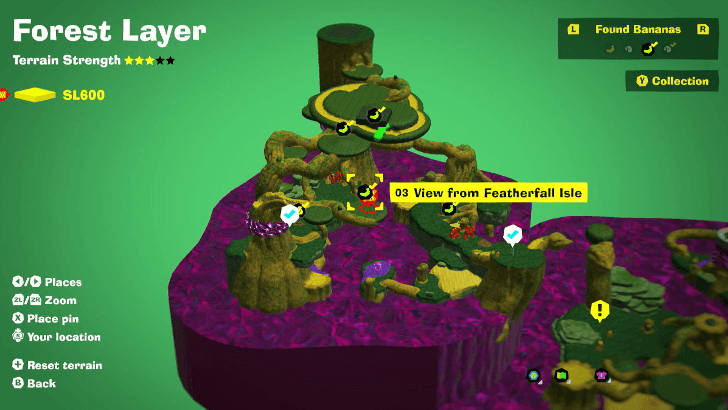
| 03 |
 |
 |
|
Can be found directly below Banandium Gem 06. |
||
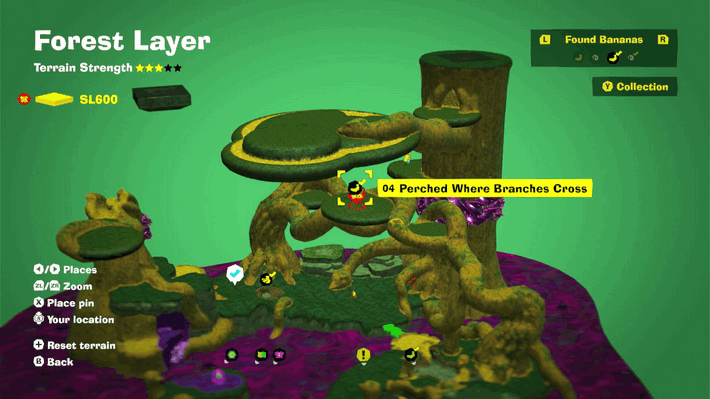
| 04 |
 |
 |
|
Found on the the tree above Gem 1. |
||
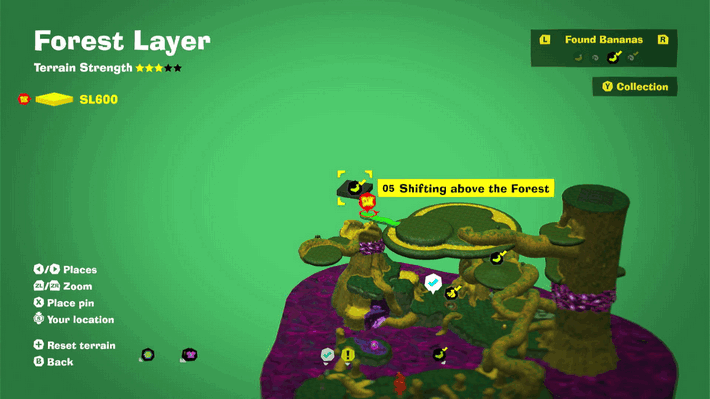
| 05 |
 |
|
|
Throw a wood block at the grey cube, then throw the bridge seed at the wooden platform to make a grass bridge to reach the Gem. |
||
| 06 |
 |
 |
|
Dig down to find a Banandium Gem in a hidden cave. |
||
| 07 |
 |
 |
|
Enter the manhole and defeat two Buzzoids. |
||
| 08 |
 |
|
|
Carry one of the seeds which creates a vine bridge and throw it at the ostrich's beak to create a bridge across. Go across to reach the Banandium Gem. |
||
| 09 |
 |
|
|
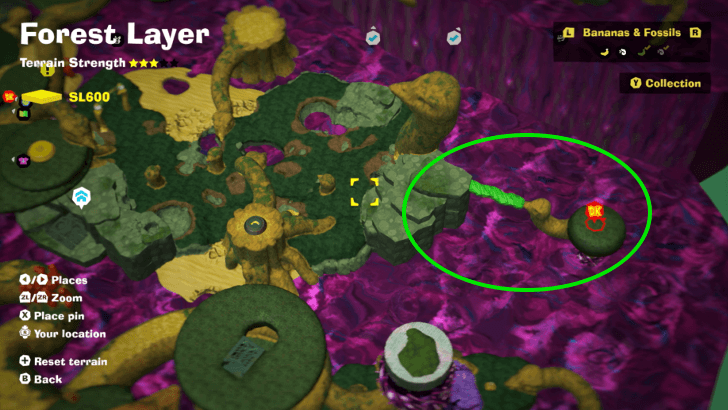
Throw a vine seed towards the top of the tree, then climb until you reach one of the leaf platforms. Gem can be found under the leaves. |
||
| 10 |
 |
 |
|
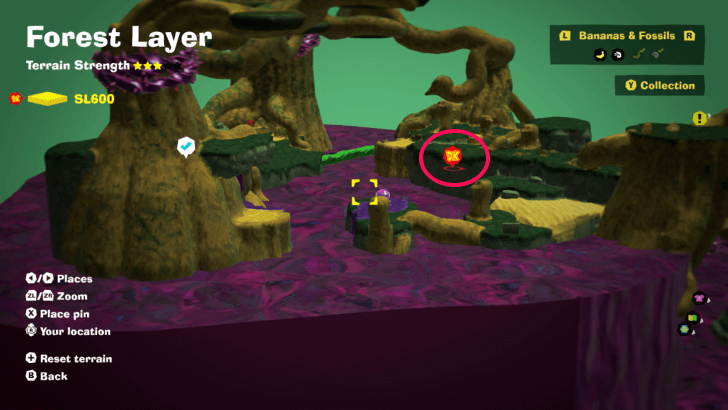
Found on top of the wooden ostrich's head. |
||
| 11 |
 |
 |
|
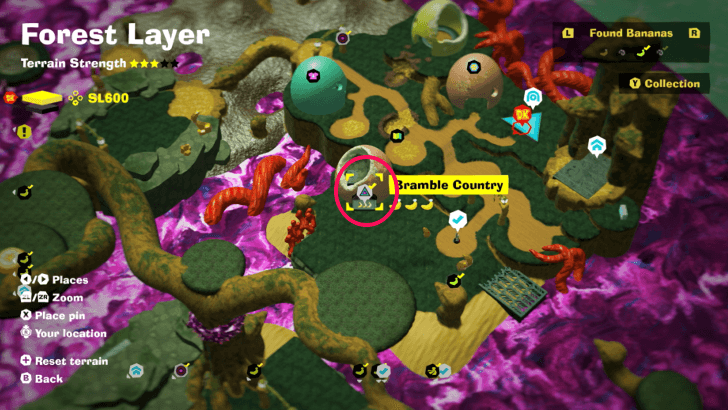
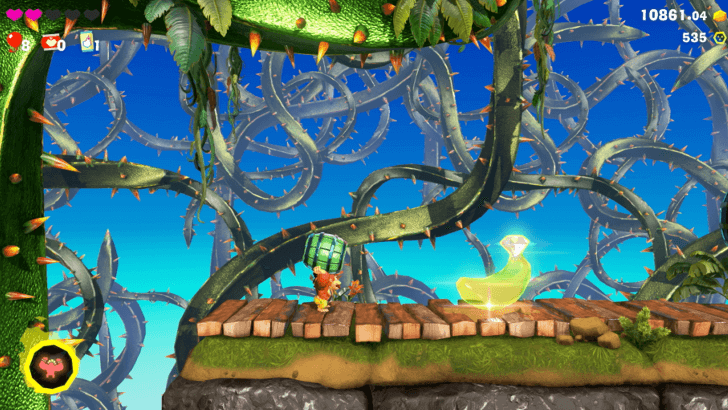
Found inside Bramble Country Challenge Course 1. It is located along the course. |
||
| 12 |
|
|
|
Found inside Bramble Country Challenge Course 1. At the second rotating barrels, drop once you are above the out of place barrel. This will launch you towards a secret area at the back of the course. |
||
| 13 |
 |
|
|
Found at the end of Bramble Country Challenge Course 1. |
||
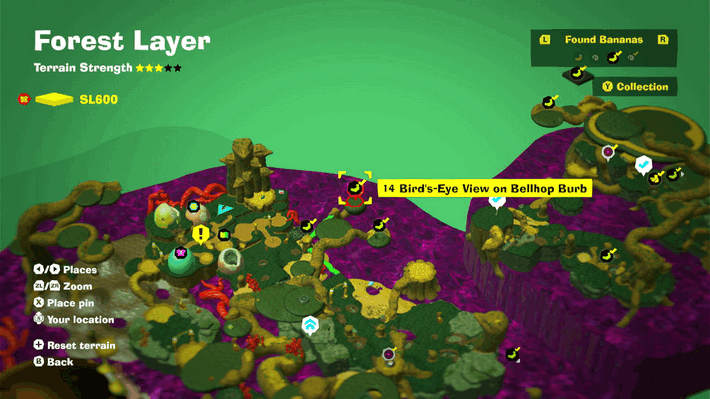
| 14 |
 |
|
|
Take the vine bridge seed nearby and toss it towards the ostrich head. |
||
| 15 |
 |
 |
|
Break 30,000 m3 of red thorns in the Forest Layer, then talk to the Fractone in front of the hotel. Head to the underground area near the SL 600 checkpoint to destroy thorns. |
||
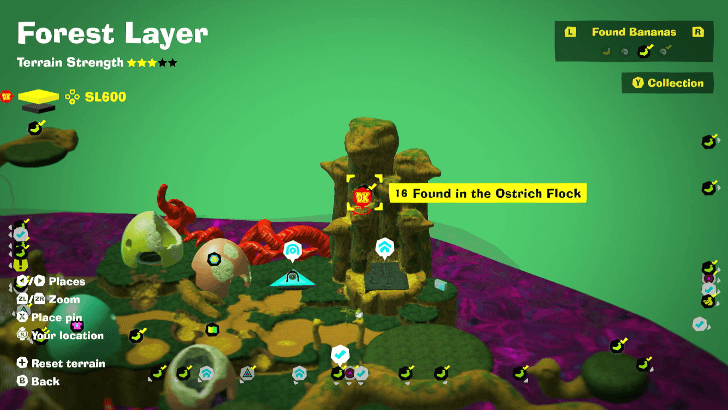
| 16 |
 |
 |
|
Can be found inside the wooden Ostrich structure in Bellhop Burb. |
||
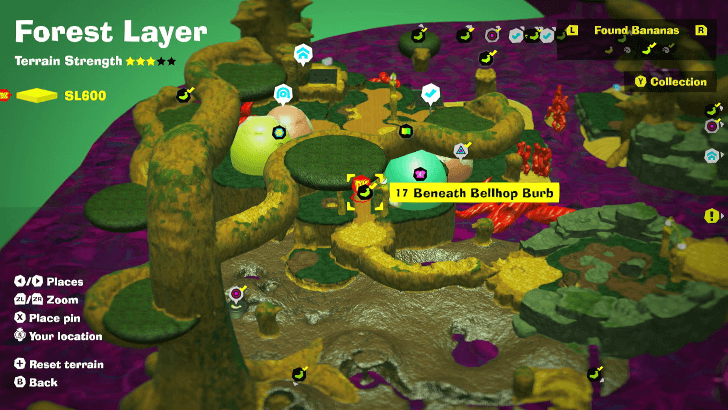
| 17 |
 |
 |
|
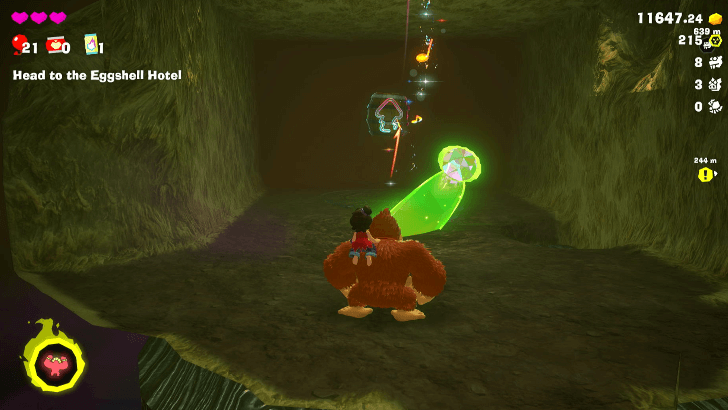
Found by digging underneath the center of Bellhop Burb. |
||
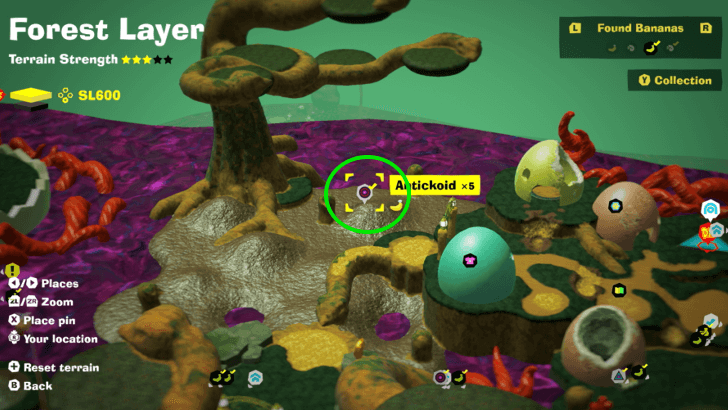
| 18 |
 |
 |
|
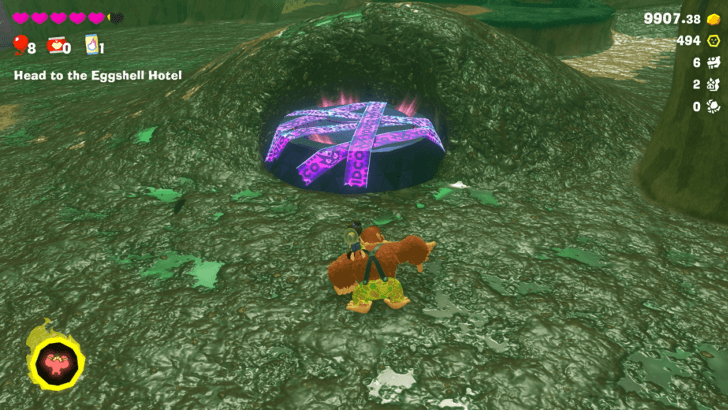
Enter the manhole and defeat five Antickoids. |
||
| 19 |
 |
 |
|
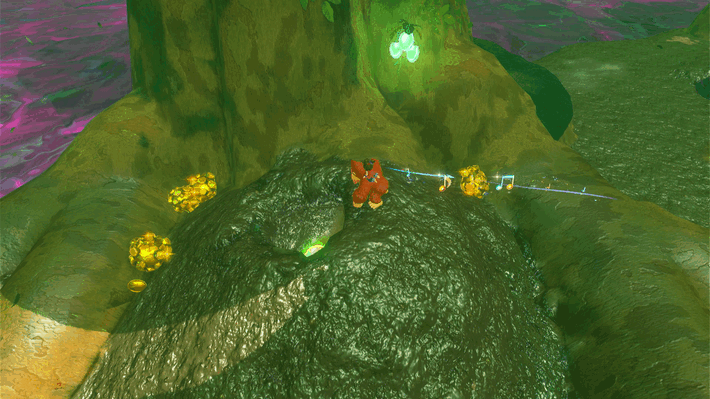
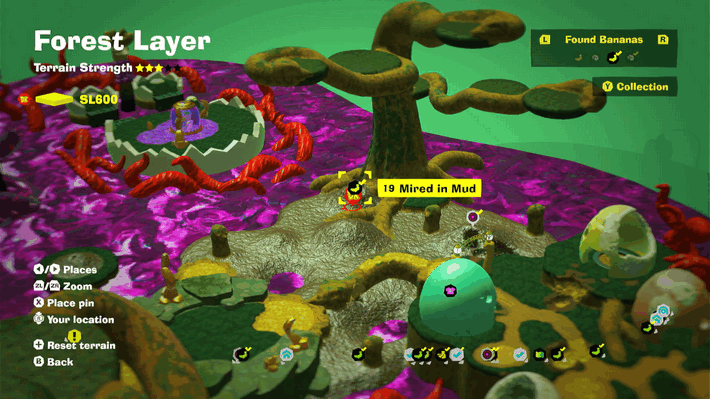
Found under a Dirt Mound by the tree base beside Battle Challenge 3. |
||
| 20 |
 |
 |
|
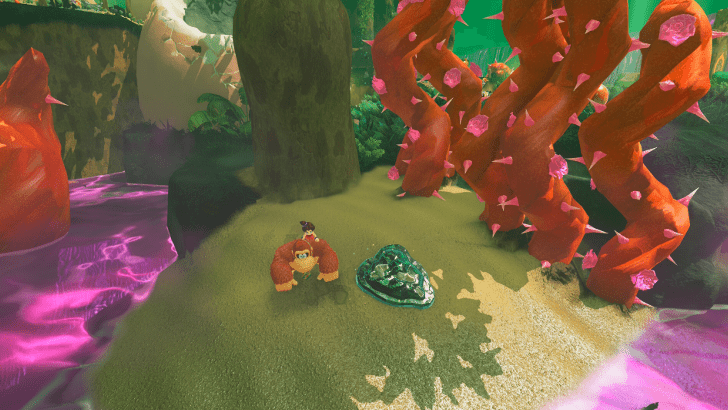
Found on a small island surrounded by poison. Use the chomping snakes as a bridge to reach the island. |
||
| 21 |
 |
 |
|
Found at the top of the Tree above Battle Challenge 3. Use the Vine Seed to reach the target faster. |
||
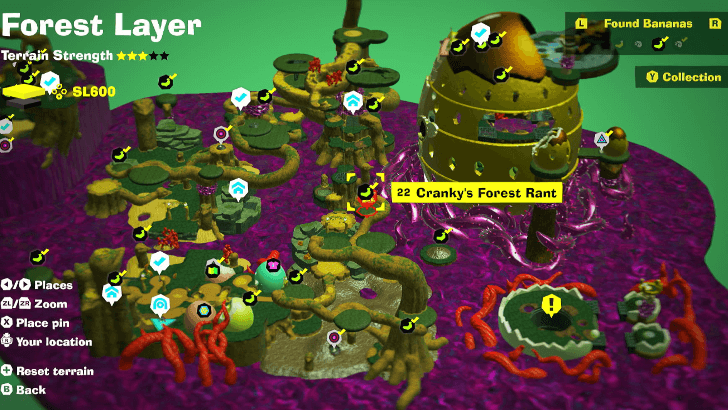
| 22 |
 |
 |
|
Obtained by finding Cranky Kong on top of the tree past Bellhop Burb. |
||
| 23 |
 |
 |
|
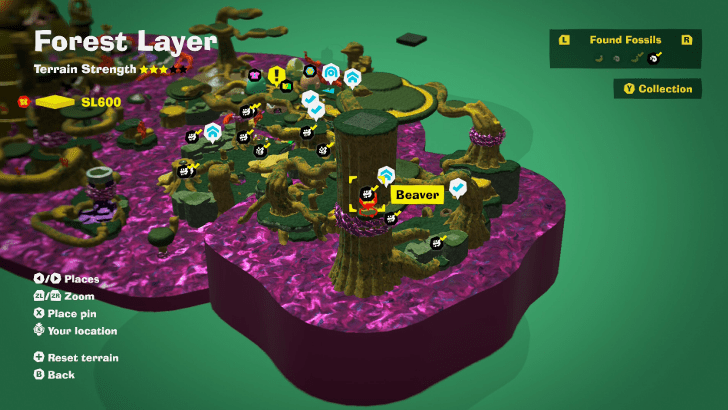
Found behind the Big Tree in the middle of the map. |
||
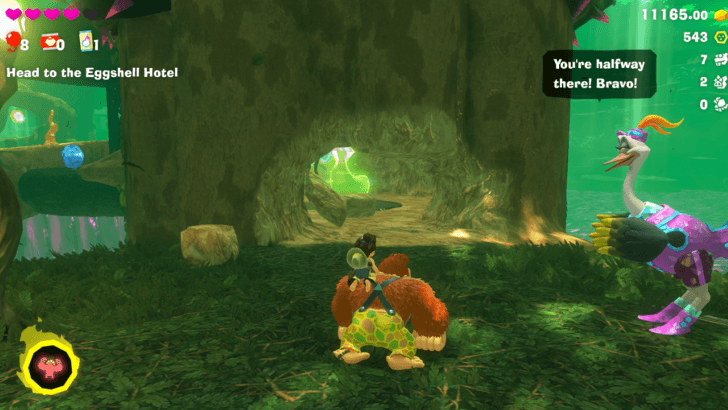
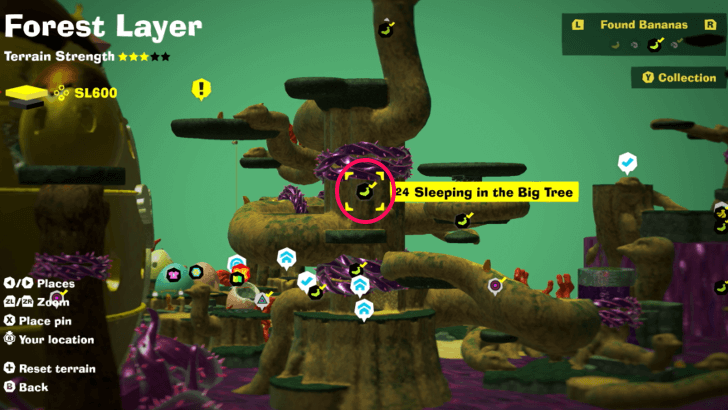
| 24 |
 |
 |
|
Break through the wall to reach the Banandium Gem. |
||
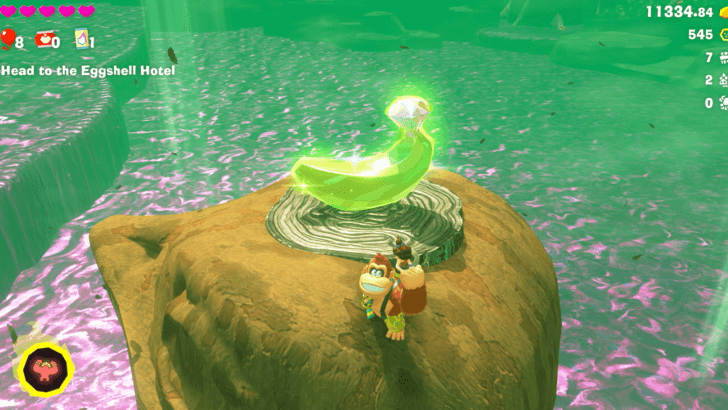
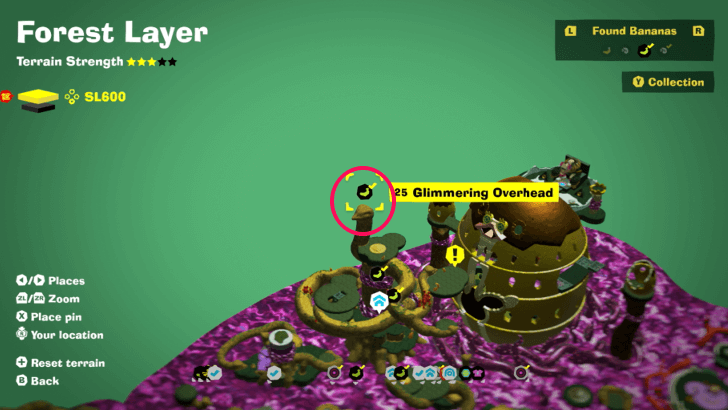
| 25 |
 |
 |
|
Climb the ostrich head at the top of the Big Tree to reach the Banandium Gem. |
||
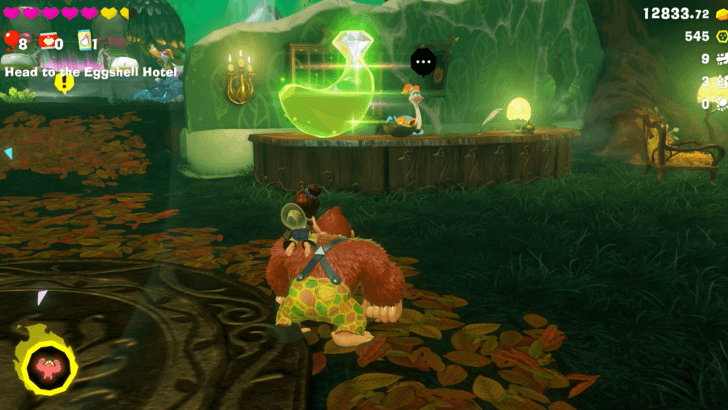
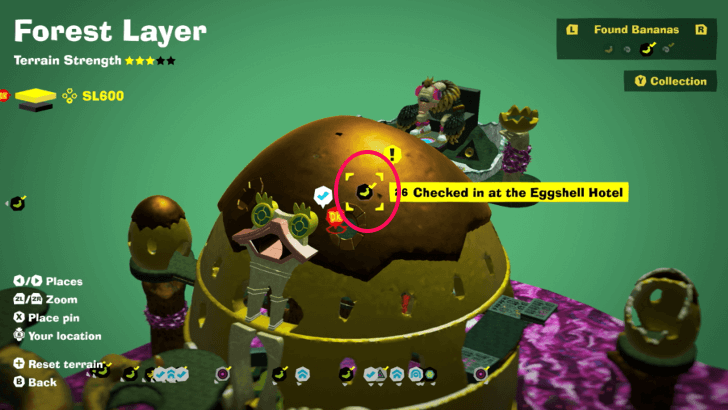
| 26 |
 |
 |
|
Found with story progression. |
||
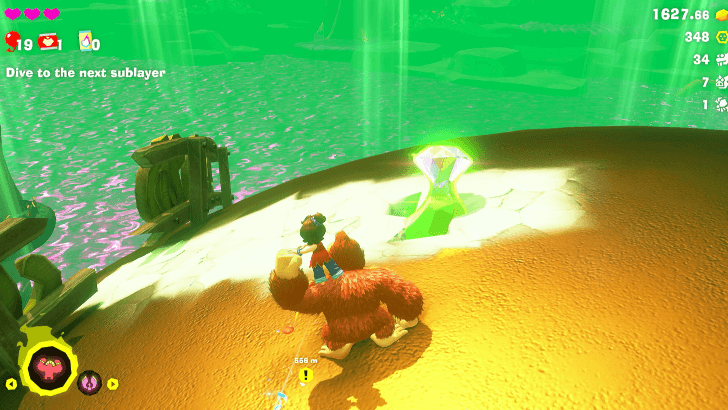
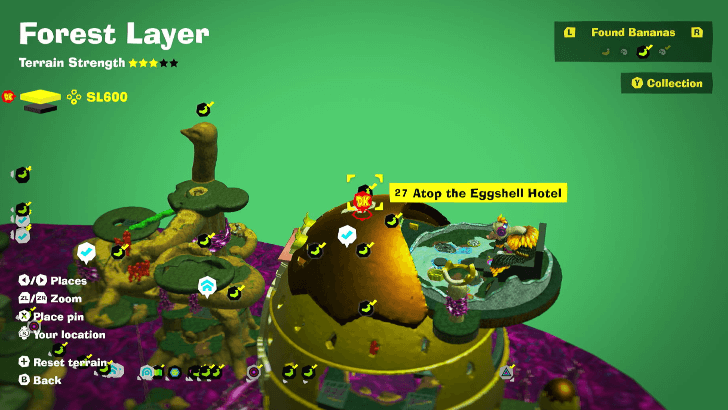
| 27 |
 |
 |
|
Climb towards the roof of Eggshell Hotel through one of the windows. The Gem is found near the top. |
||
| 28 |
 |
 |
|
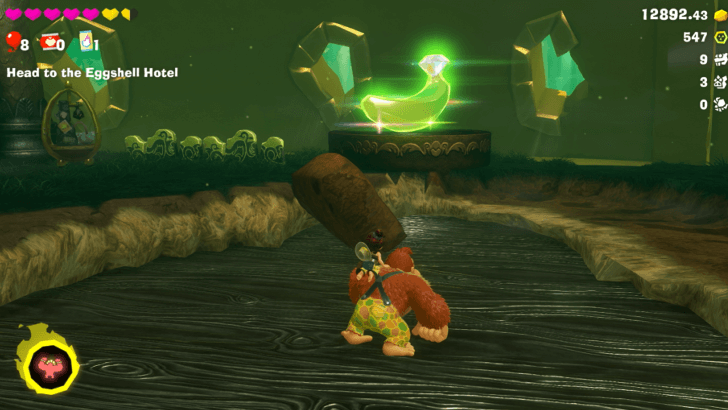
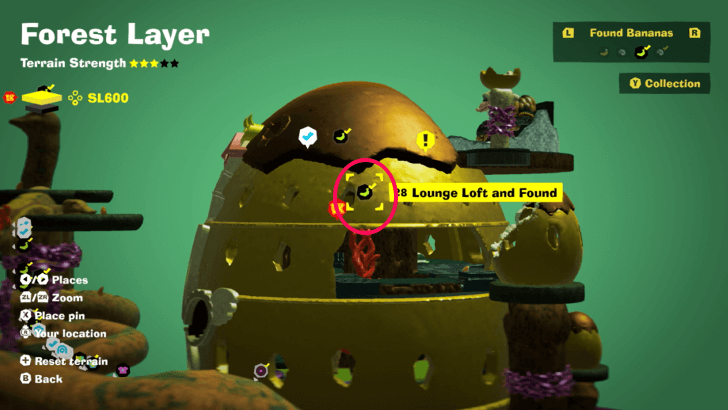
Upon entering the Eggshell Hotel, jump down one floor and find a Thorny Crockoid through the door. Defeat it to find the Banandium Gem. |
||
| 29 |
 |
|
|
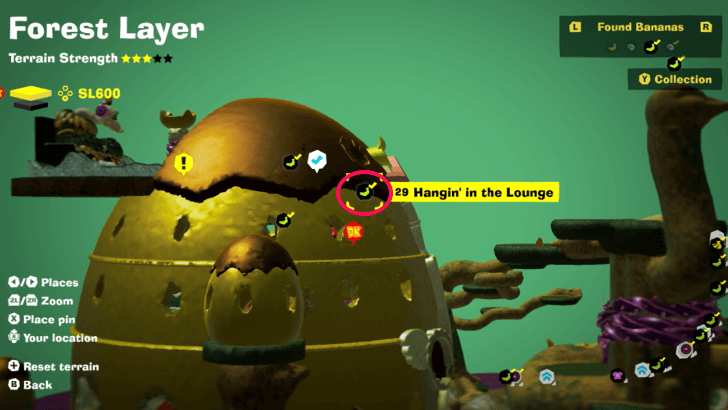
Throw a vine seed beside the Gem, then break it by attacking mid-air or by grabbing onto the Banandium. |
||
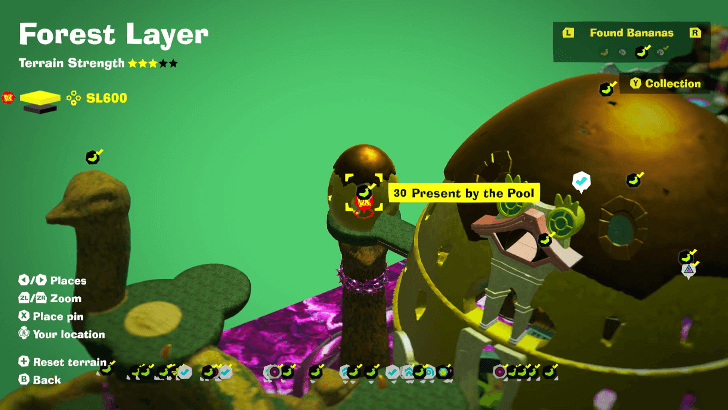
| 30 |
 |
 |
|
Found past the enemy by the hotel extension on the second level. |
||
| 31 |
 |
|
|
Found inside All-You-Can-Eat Tower Challenge Course 2. Double jump on top of the snake enemy, and make it to the secret room before it reaches itself again. |
||
| 32 |
 |
|
|
Found inside All-You-Can-Eat Tower Challenge Course 2. It can be found in the middle of the course. |
||
| 33 |
 |
|
|
Found at the end of the All-You-Can-Eat Tower Challenge Course 2. |
||
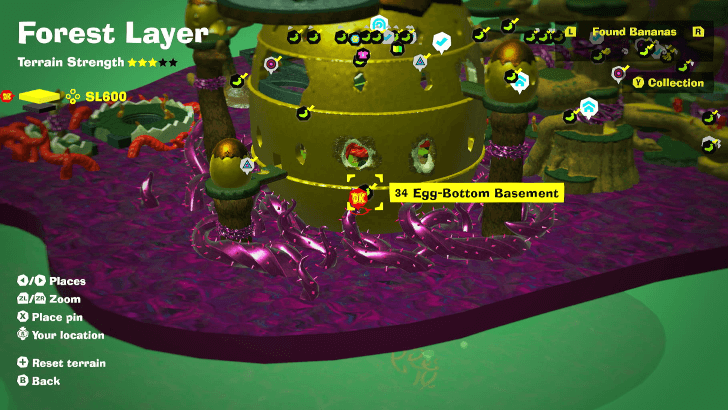
| 34 |
 |
|
|
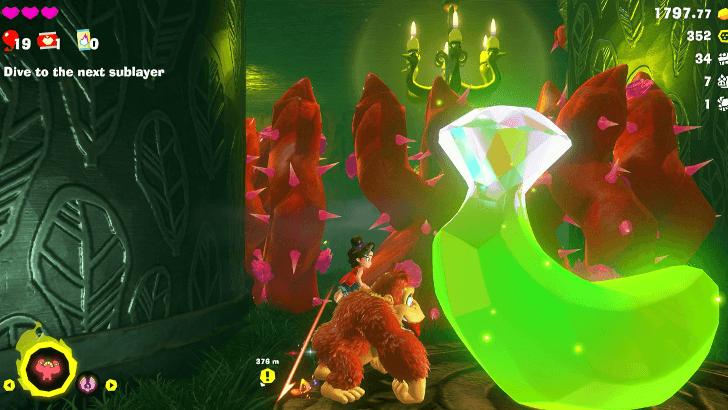
Guarded by a Concrete armored enemy under the Hotel Garden. |
||
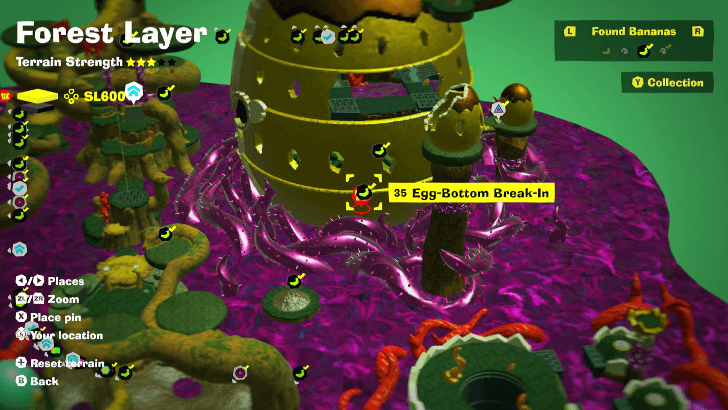
| 35 |
 |
 |
|
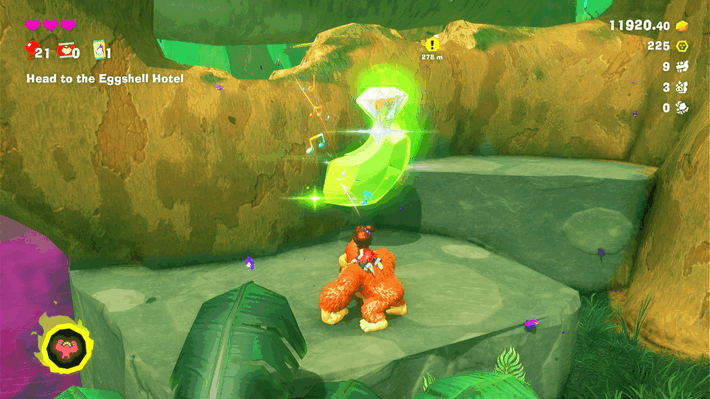
Climb the wall to the side of the red thorns to reach the Gem. |
||
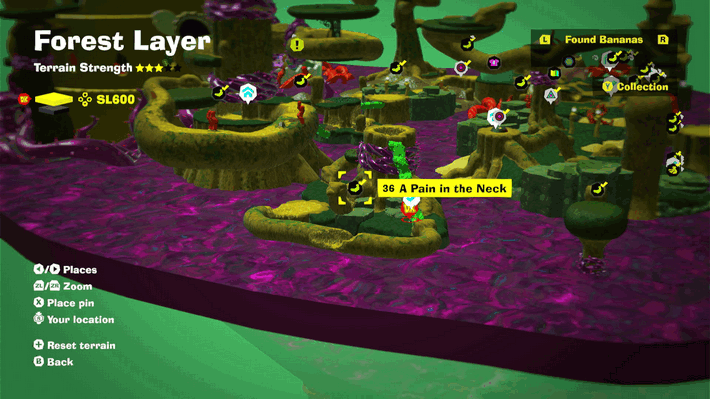
| 36 |
 |
 |
|
Can be found in Thorn Hollow after clearing the Void. |
||
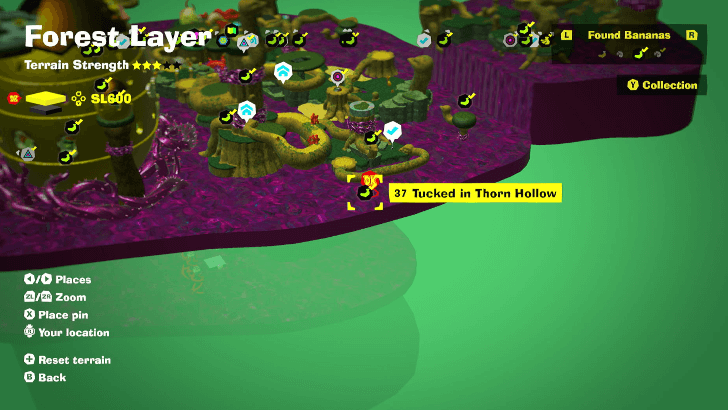
| 37 |
 |
|
|
Found under Thorn Hollow, past the large red thorns. |
||
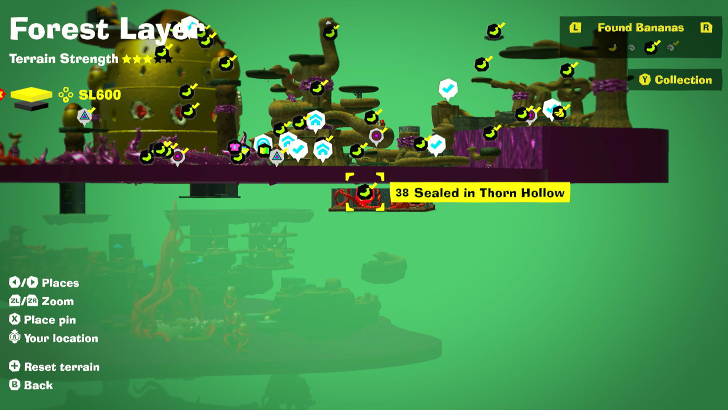
| 38 |
 |
|
|
Found past the large red thorn maze under Thorn Hollow. |
||
| 39 |
 |
 |
|
A Gem from the Ostrich Elder's Rehearsal Hall. It can be found along the course. |
||
| 40 |
|
|
|
A Gem from the Ostrich Elder's Rehearsal Hall. It can be found along the course. |
||
| 41 |
 |
|
|
A Gem from the Ostrich Elder's Rehearsal Hall. It can be found along the course. |
||
| 42 |
 |
|
|
A Gem from the Ostrich Elder's Rehearsal Hall. It can be found along the course. |
||
| 43 |
 |
|
|
A Gem from the Ostrich Elder's Rehearsal Hall. It can be found along the course. |
||
| 44 |
 |
|
|
A Gem from the Ostrich Elder's Rehearsal Hall. It can be found along the course. |
||
| 45 |
 |
|
|
A Gem from the Ostrich Elder's Rehearsal Hall. It can be found along the course. |
||
| 46 |
|
|
|
A Gem from the Ostrich Elder's Rehearsal Hall. Detonate the center mine in the lava pool to open the hole leading to the crevice with the Banandium Gem. |
||
| 47 |
 |
|
|
A Gem from the Ostrich Elder's Rehearsal Hall. It can be found along the course. |
||
| 48 |
 |
 |
|
Buy with Banandium Chips to get a Gem. The price will vary depending on how many you have purchased from other layers. You only need to exchange once for the collectible to count. |
||
SL 601 Banana Locations
| Overworld View | Map Location | |
|---|---|---|
| 49 |
 |
 |
|
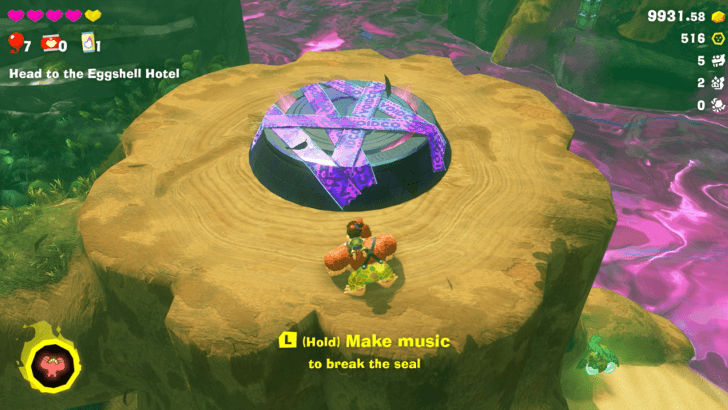
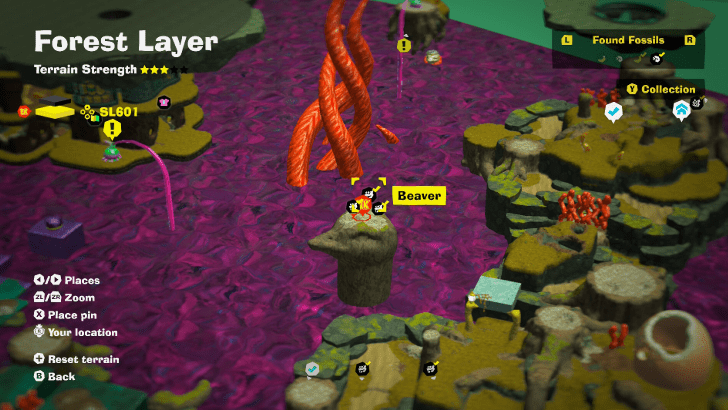
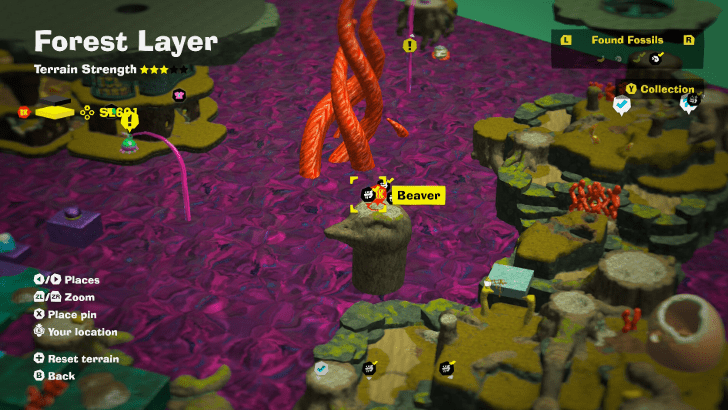
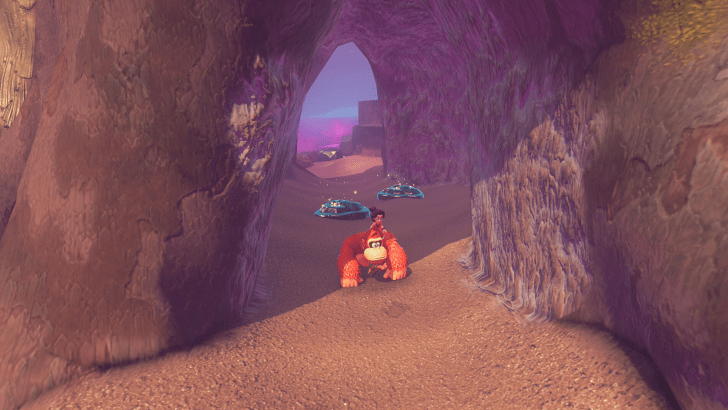
Dig down from the top of the stump to find a Banandium Gem inside. |
||
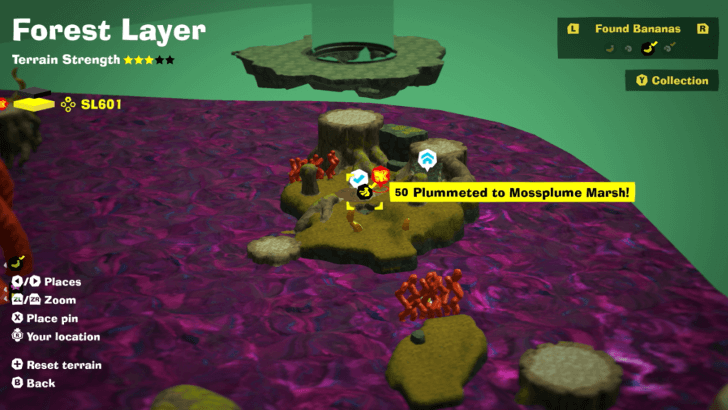
| 50 |
 |
 |
|
Found with story progression. |
||
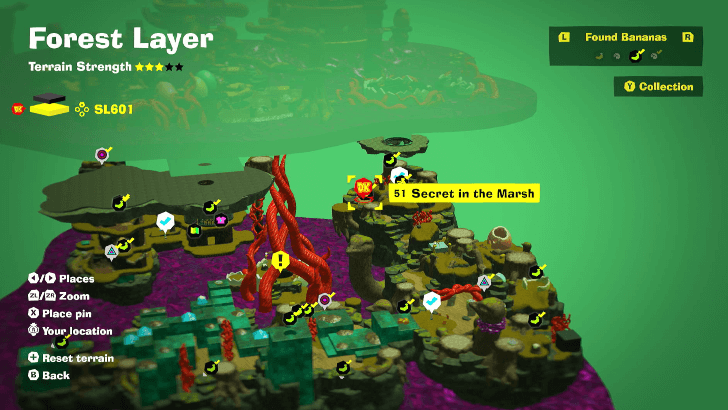
| 51 |
 |
 |
|
Can be found by digging the dirt in Mossplume Marsh. |
||
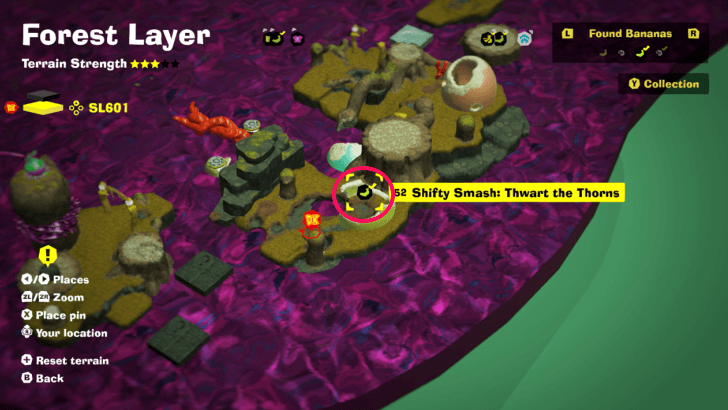
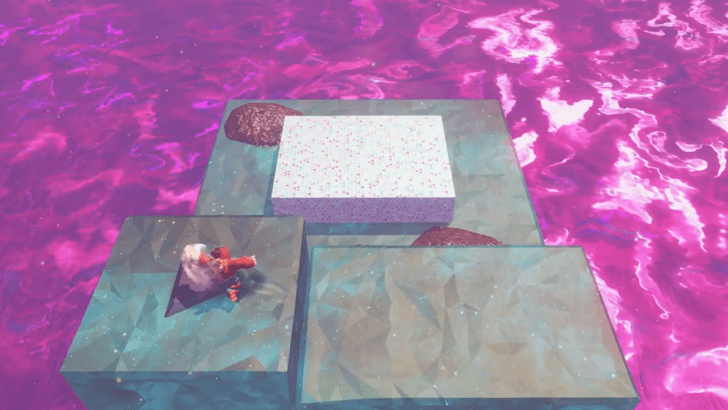
| 52 |
 |
|
|
Activate the Shifty Smash Challenge to make a white floor appear on top of the far platform across the poison lake. Quickly make your way to the platform behind the red vines. Use Ostrich Bananza to glide and reach it faster. |
||
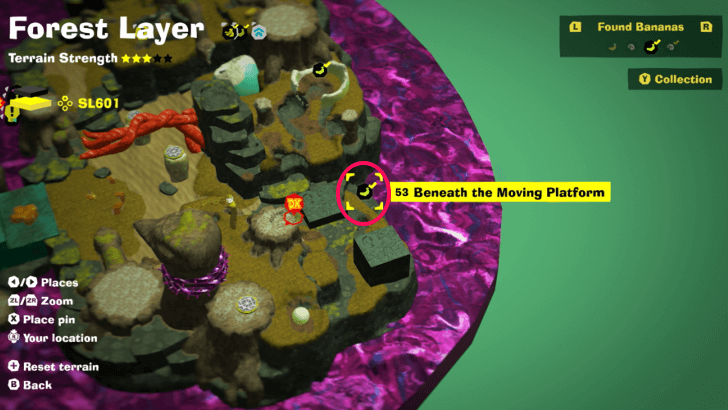
| 53 |
 |
 |
|
Progress the story until the poison lake has been lowered for the first time. You'll be able to reach the Banandium Gem normally from below. |
||
| 54 |
 |
 |
|
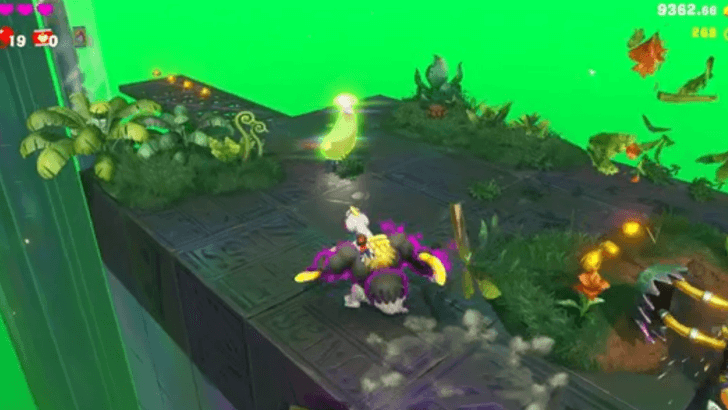
Found inside Ostrich Bananza Flighty Feast Challenge Course 3. It is found at the start of the course. |
||
| 55 |
|
|
|
Found inside Ostrich Bananza Flighty Feast Challenge Course 3. It is found by riding the air current before the end of the course. |
||
| 56 |
 |
|
|
Found at the end of the Ostrich Bananza Flighty Feast Challenge Course 3. |
||
| 57 |
 |
 |
|
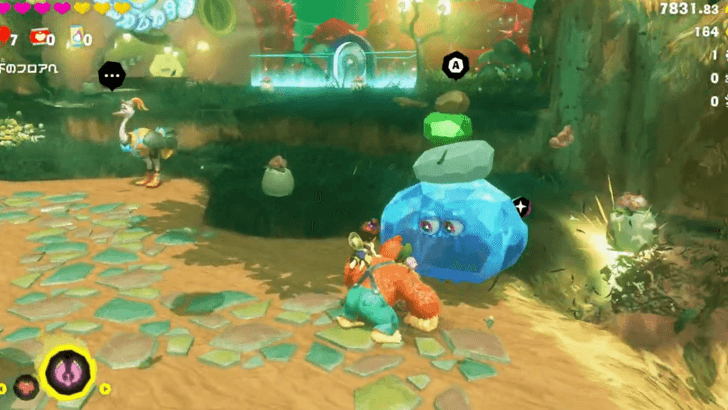
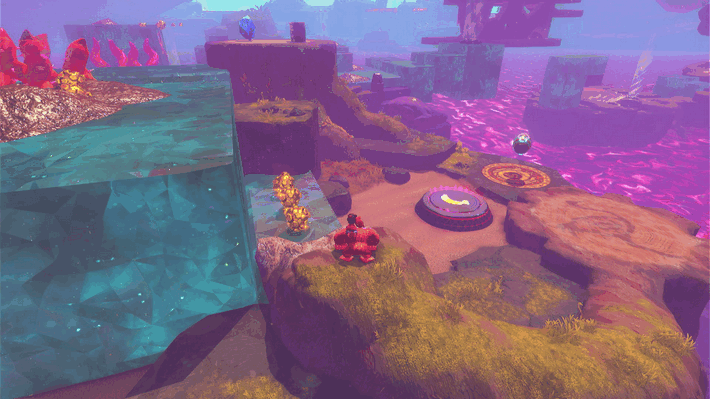
Found on top of a blue crystal platform. |
||
| 58 |
 |
 |
|
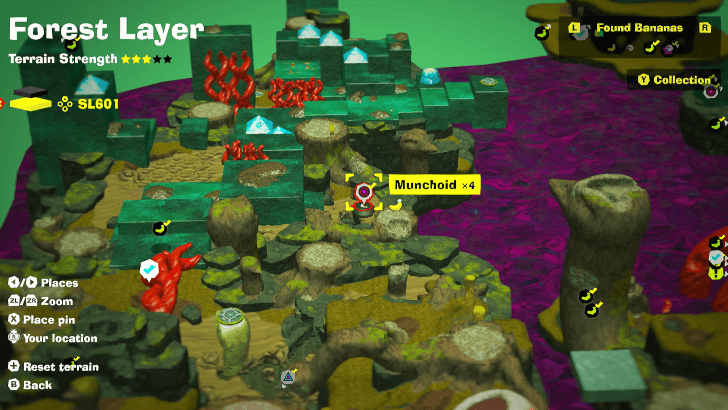
Enter the manhole and defeat four Munchoids. |
||
| 59 |
 |
 |
|
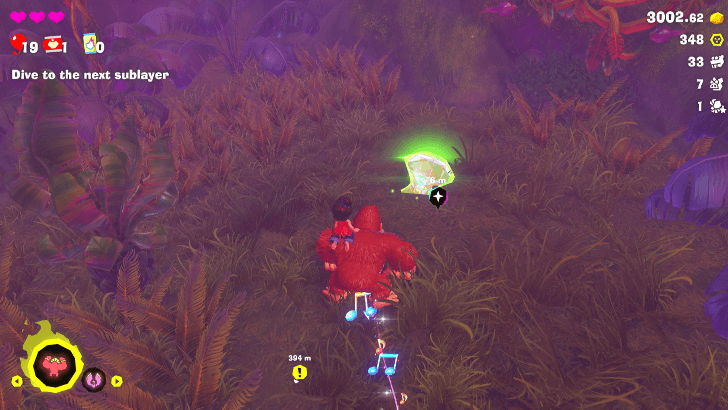
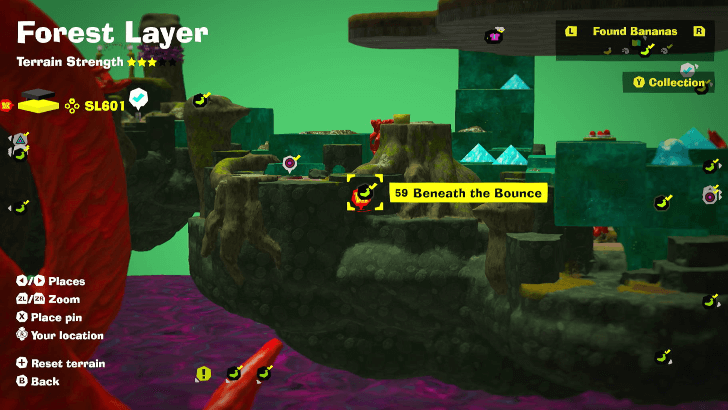
Hidden under dirt. Can be obtained after clearing all three Void Seeds. |
||
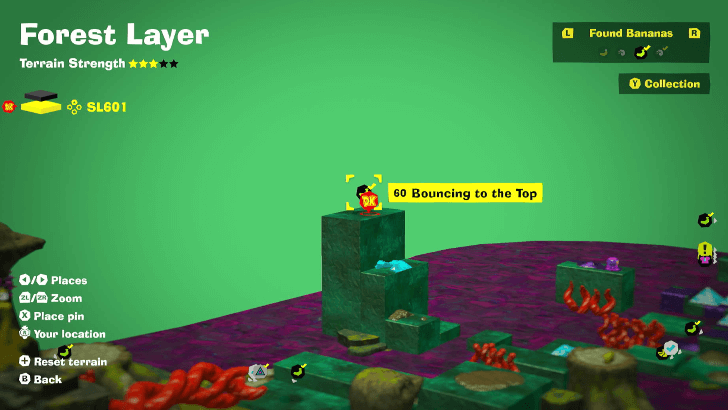
| 60 |
 |
 |
|
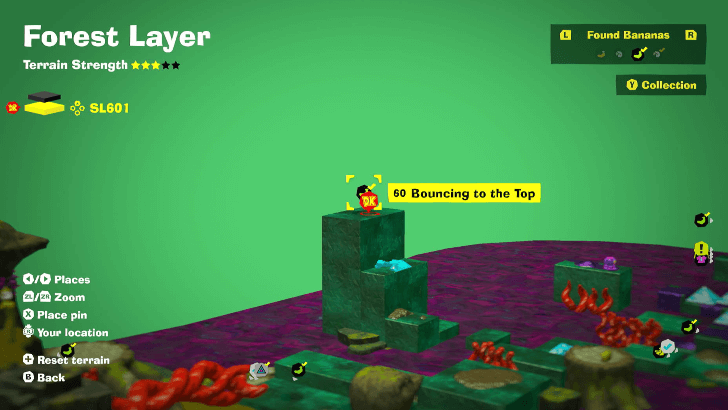
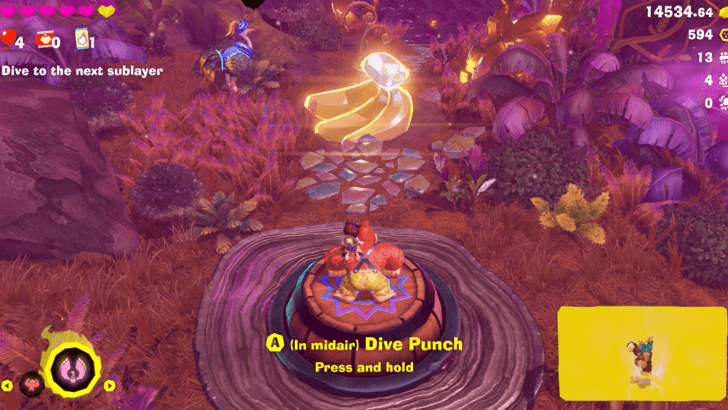
Can be found at the topmost layer of the bouncing platforms. Can be reached by performing a Dive Jump, and then holding A afterwards. |
||
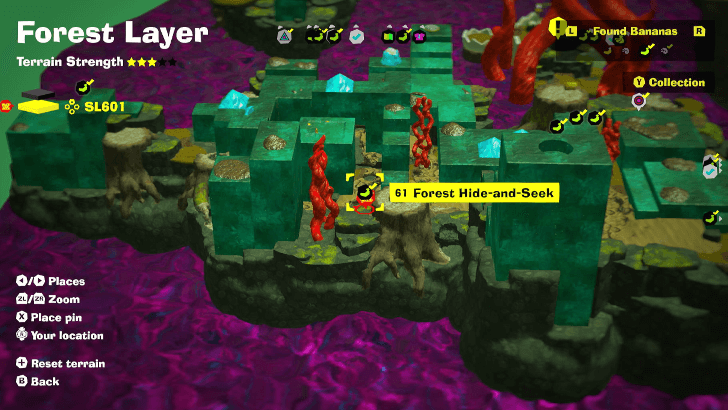
| 61 |
 |
|
|
Find all Fractones nearby. |
||
| 62 |
 |
 |
|
Hit the Shifty Smash Challenge and break the concrete block to get a Gem. |
||
| 63 |
 |
|
|
Found by digging inside the staff only house in Bellhop Burb. Break the Void Stake to find the Banandium Gem. |
||
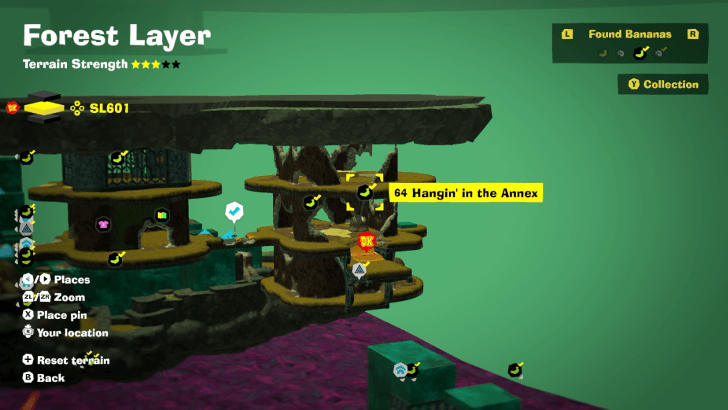
| 64 |
 |
|
|
Hold A when bouncing on the platform behind the Banandium Melon in the Hotel Annex, then climb your way towards the Gem. |
||
| 65 |
 |
 |
|
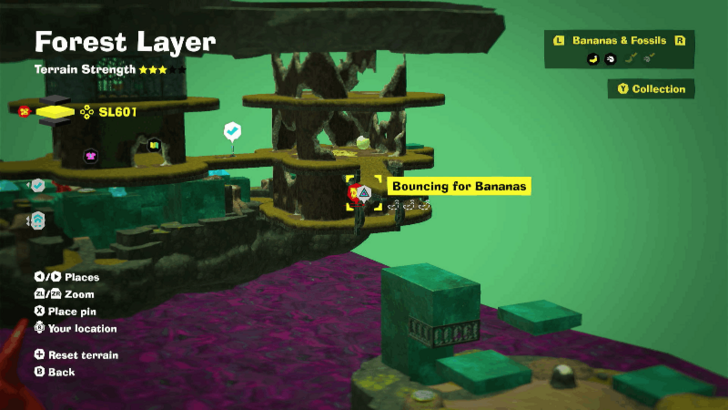
Found inside Bouncing for Bananas Challenge Course 4. It is located along the course. |
||
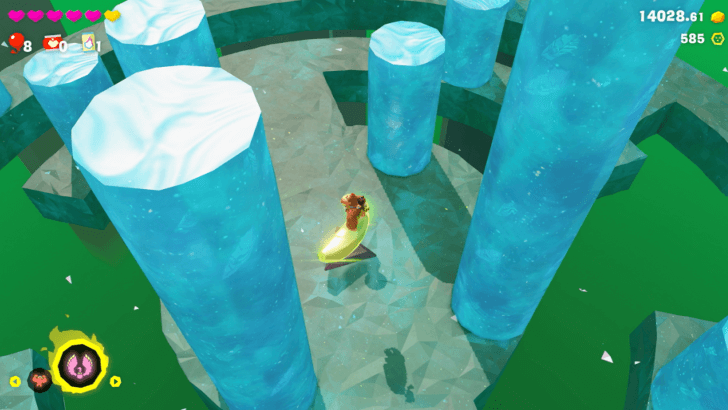
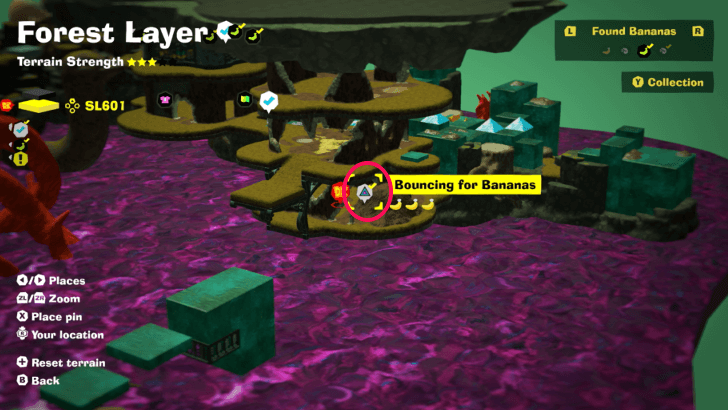
| 66 |
|
|
|
From the location of Bouncy Ballet, punch the ground to bounce up high enough to reach the second-highest of the four rotating pillars. From there, jump to the highest pillar and break the Banandium Gem. |
||
| 67 |
 |
|
|
Found at the end of Bouncing for Bananas Challenge Course 4. |
||
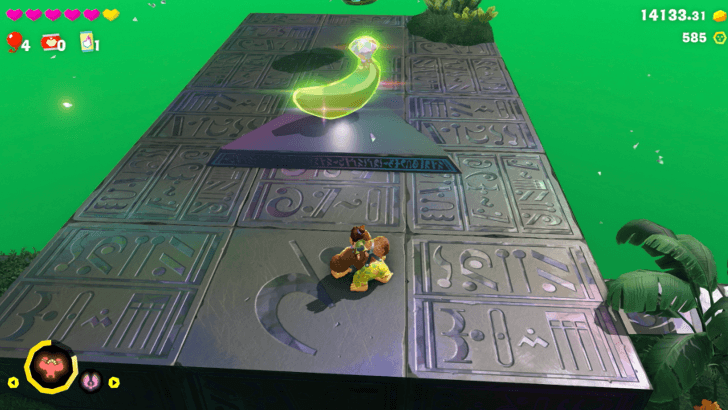
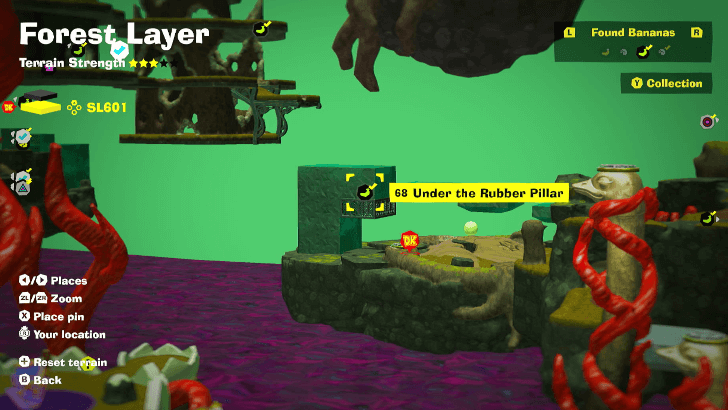
| 68 |
 |
|
|
Take a piece of rubber from the NPC, then throw it at the silver cube to make a rubber platform. Hold A to reach the Gem, then attack when near it. |
||
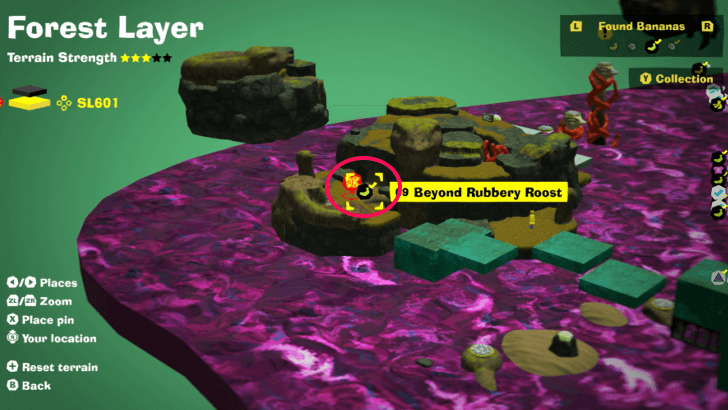
| 69 |
 |
 |
|
Found with story progression. |
||
| 70 |
 |
|
|
Enter the manhole and defeat three Crockoids with Kong Bananza. |
||
| 71 |
 |
|
|
Bring the first piece to the Fractone. |
||
| 72 |
|
|
|
Bring the last two pieces to the Fractone by throwing the vine seed towards the enemy. Bring the two fragments towards the seed spawner, then make a bridge again towards the Fractone. |
||
SL 602 Banana Locations
| Overworld View | Map Location | |
|---|---|---|
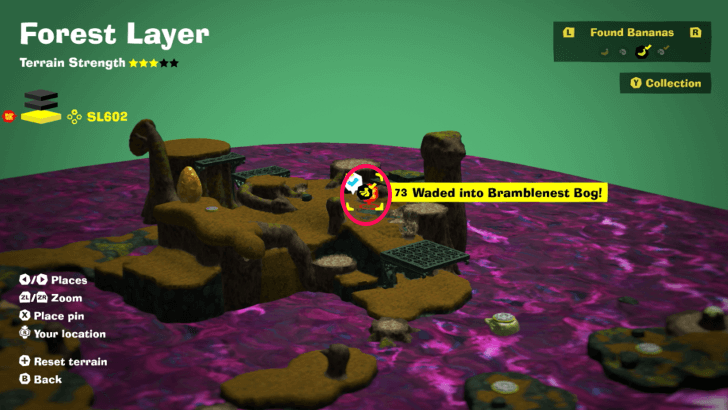
| 73 |
 |
 |
|
Found with story progression. |
||
| 74 |
 |
|
|
Found inside Pit Seeds Challenge Course 5. Throw the Vine seed towards the platform above the starting area. Use Kong Bananza to break the metal wall. |
||
| 75 |
 |
|
|
Found at the end of Pit Seeds Challenge Course 5. |
||
| 76 |
|
|
|
Found inside Pit Seeds Challenge Course 5. Throw the vine seed near the metallic wall, then jump onto the banana. Break the Gem by attacking the it mid-air, or by grabbing onto it first. |
||
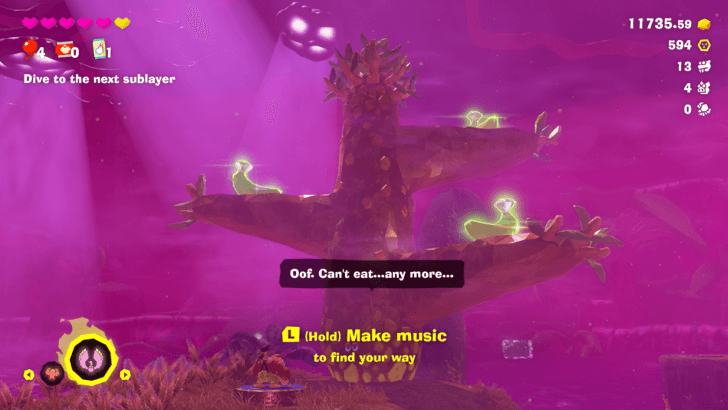
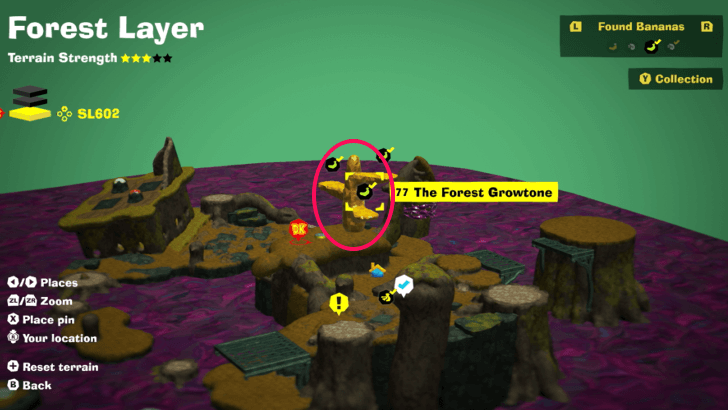
| 77 |
 |
 |
|
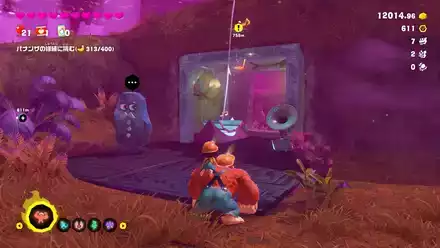
Give 400 gold to the Forest Growtone. |
||
| 78 |
|
|
|
Give 1100 gold to the Forest Growtone. |
||
| 79 |
|
|
|
Give 1500 gold to the Forest Growtone. |
||
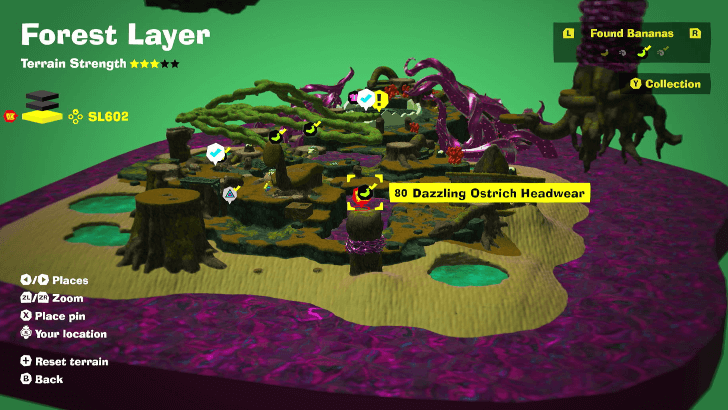
| 80 |
 |
|
|
Found by throwing dirt at the floating silver cubes to go across. |
||
| 81 |
 |
 |
|
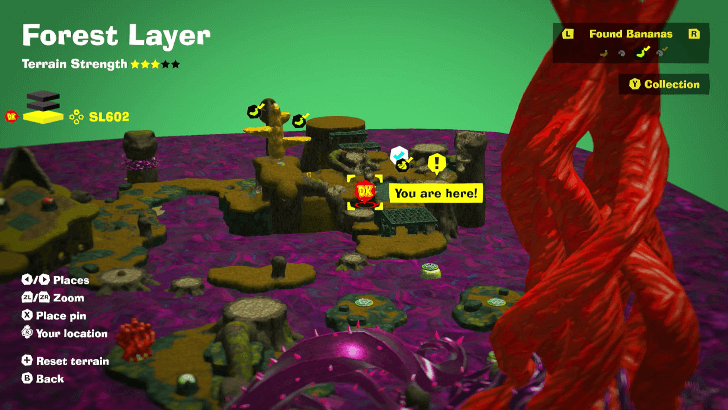
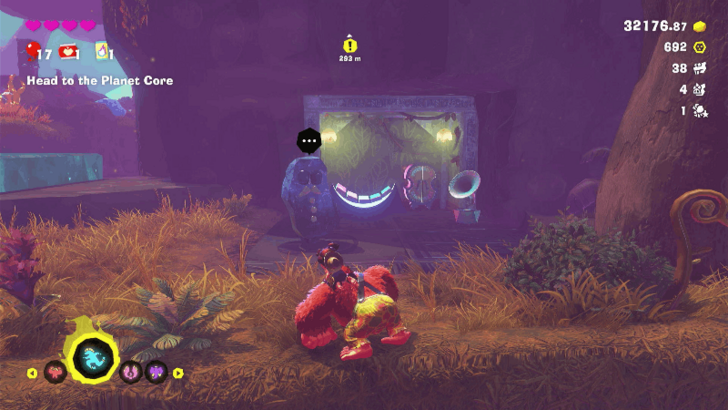
Enter the manhole found inside the abandoned structure near Bramblenest Bog. Defeat four Munchoids to get the Gem. |
||
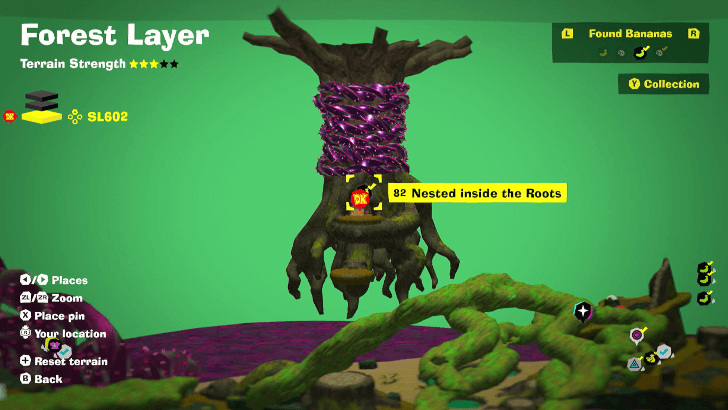
| 82 |
 |
|
|
Clear the red vines from the updraft, then make your way through the floating rocks. Break the wall to find the Gem inside. |
||
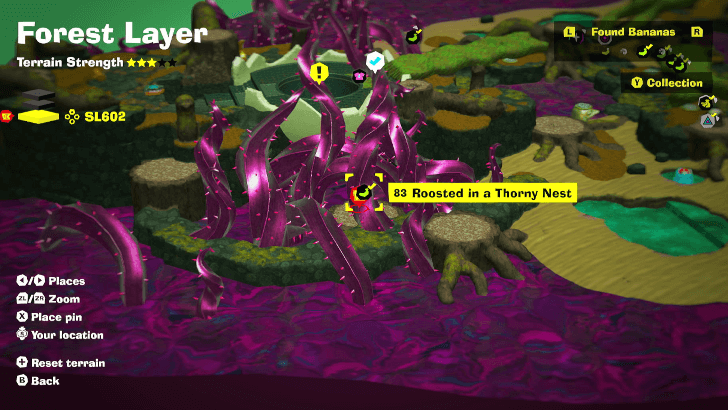
| 83 |
 |
 |
|
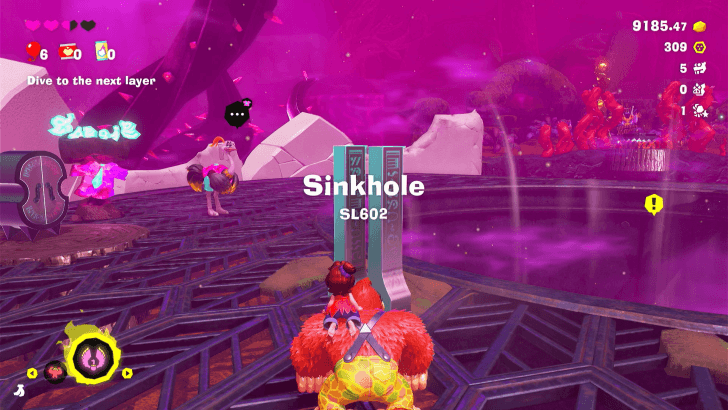
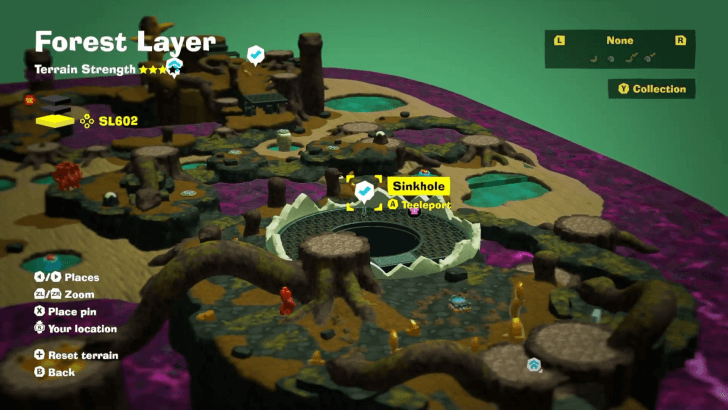
Found on a small platform beside the Sinkhole. |
||
Banandium Gems List and Locations
Forest Layer Fossils
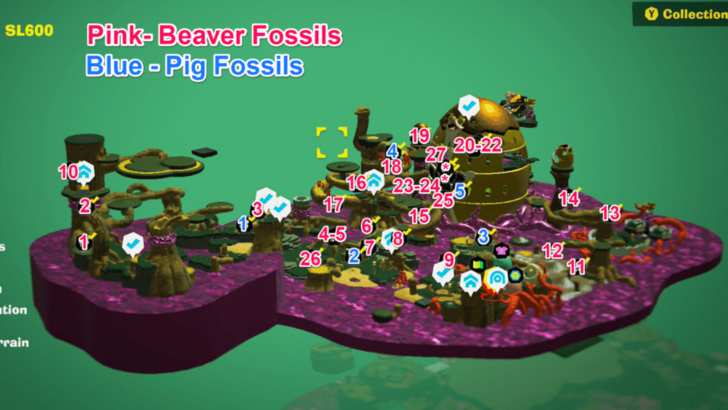
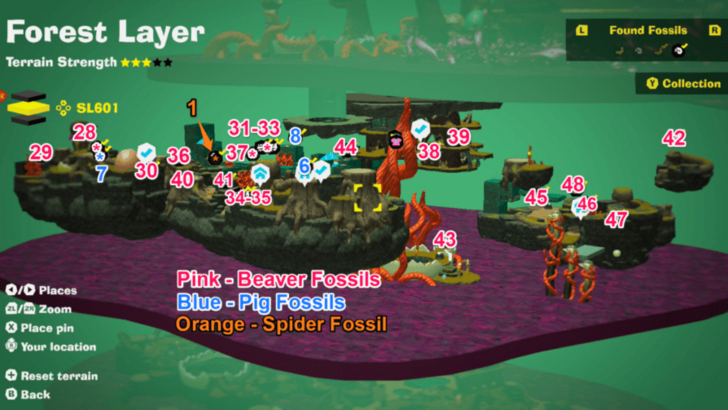
Fossils Map Overview
SL 600
SL 601
SL 602
SL 600 Fossil Locations
| Overworld View | Map Location | |
|---|---|---|
 |
 |
|
|
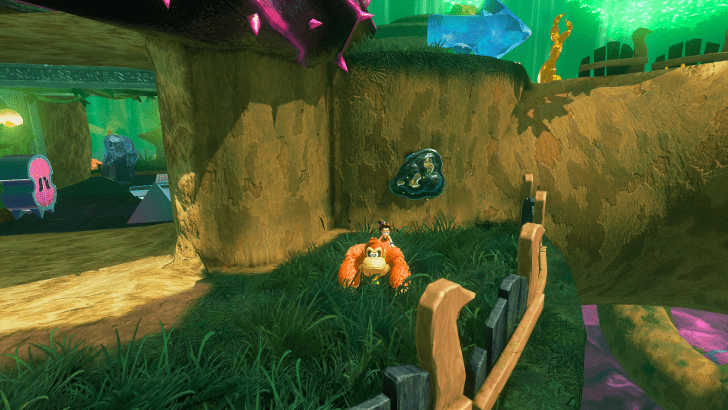
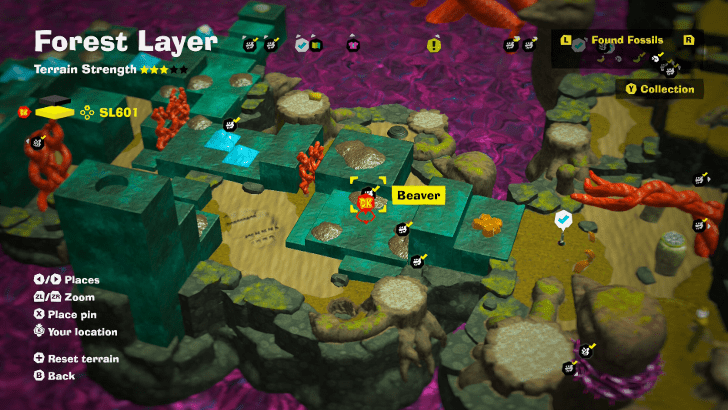
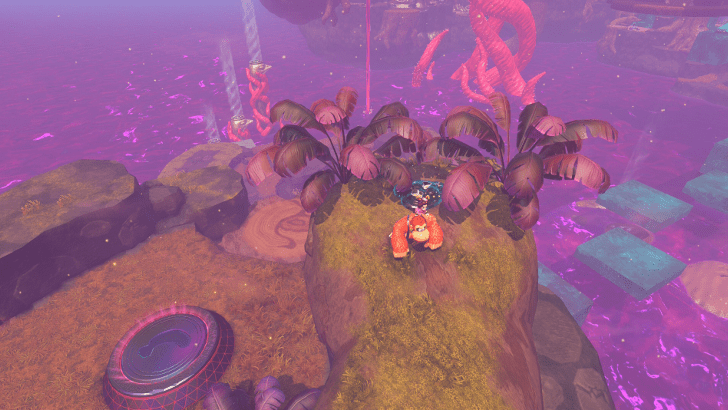
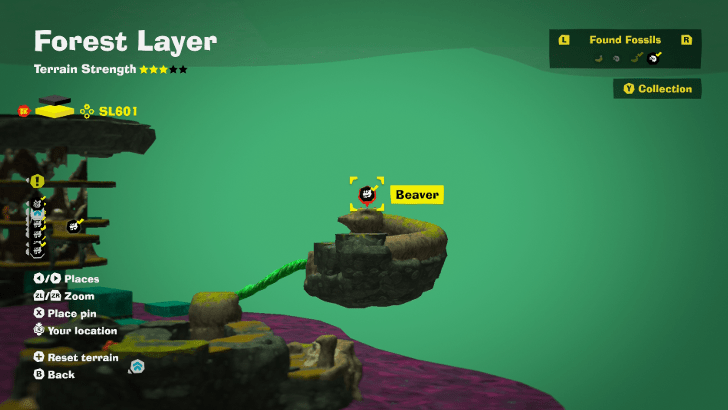
From the Beaky Thicket Checkpoint, turn left at the giant root and find the Fossil embedded on one of the walls at the edge of the map. |
||
 |
 |
|
|
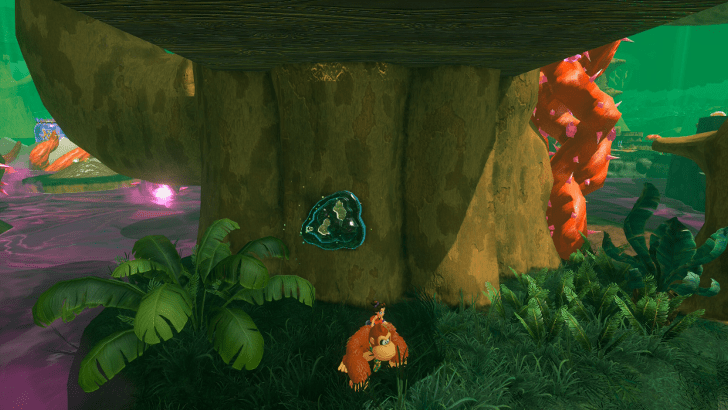
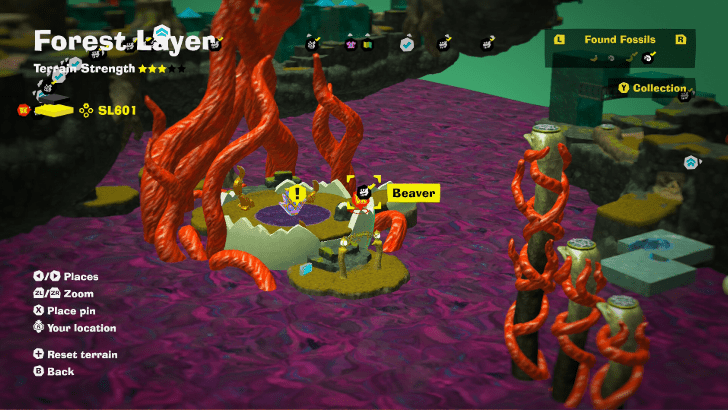
Found near the base of the trunk of the giant tree across the Beaky Thicket Checkpoint. |
||
 |
 |
|
|
Found below Beak-Leap Checkpoint, near the spawn point of a crawler enemy. |
||
 |
 |
|
|
Found inside the trunk where the Forest Layer Battle Challenge 2 is placed. |
||
|
|
 |
|
|
Found inside the trunk where the Forest Layer Battle Challenge 2 is placed. |
||
 |
 |
|
|
Found near the Architectone on the second isle of SL 600 |
||
 |
 |
|
|
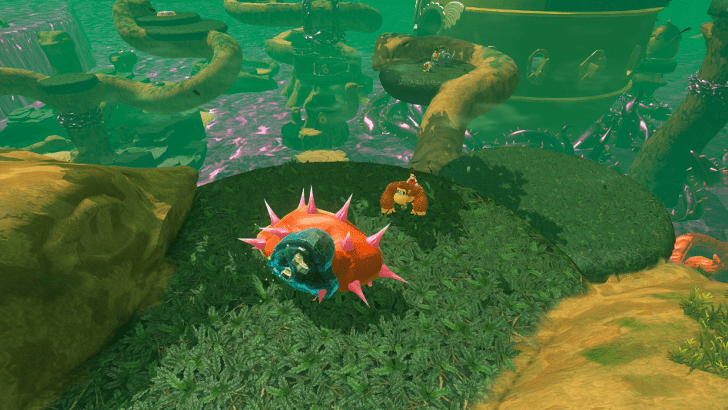
Obtained by defeating the spiked enemy near the Rockshade Getaway. You can defeat this enemy by punching the pig enemies at it. |
||
 |
 |
|
|
Found on the tree trunk near Rockshade Getaway. The Fossil is right above the ostrich head wooden figure. |
||
 |
 |
|
|
Behind the red thorns near the Challenge Ruin in Bellhop Burb. |
||
 |
 |
|
|
Right around the Treetop Getaway, embedded on the tree trunk. |
||
 |
 |
|
|
At the top of the ostrich head located on the muddy area past Bellhop Burb. |
||
 |
 |
|
|
On a mud mound after exiting Bellhop Burb. |
||
 |
 |
|
|
Near the top of the giant tree found on the muddy area past Bellhop Burb |
||
 |
 |
|
|
Go to the top of the giant tree on the muddy area and find the spiky Fractone. Grab a chunk of dirt and smack the Fractone to get the Fossil on its back. |
||
 |
 |
|
|
Just before you climb the giant tree that leads to Eggshell Hotel, look for an ostrich figure with red thorny vines and find the Fossil on its side. |
||
 |
 |
|
|
Found on the big tree that leads to Eggshell Hotel. This Fossil is just at the back of the Big Tree Getaway, if you purchased it. |
||
 |
 |
|
|
Found on a platform at the isle next to the big tree that leads to the Eggshell Hotel. |
||
 |
 |
|
|
Found between two vines wrapped around the branch about halfway to the top of the big tree. You can get this Fossil by burrowing inside the branch and punching the Fossil from below. |
||
 |
 |
|
|
Defeat the spiky enemy on the platform right before you enter Eggshell Hotel to obtain this Fossil. |
||
 |
 |
|
|
Embedded on the interior wall of the Eggshell Hotel Garden. The three Fossils on the wall can only be obtained after breaking the seal nearby. |
||
|
|
 |
|
|
Embedded on the interior wall of the Eggshell Hotel Garden. The three Fossils on the wall can only be obtained after breaking the seal nearby. |
||
|
|
 |
|
|
Embedded on the interior wall of the Eggshell Hotel Garden. The three Fossils on the wall can only be obtained after breaking the seal nearby. |
||
 |
 |
|
|
Buried under the Eggshell Hotel Garden. Look for the circular hedge at the corner of the room and start digging to find two Fossils. |
||
|
|
 |
|
|
Buried under the Eggshell Hotel Garden. Look for the circular hedge at the corner of the room and start digging to find two Fossils. |
||
 |
 |
|
|
In the Eggshell Hotel Basement, go around the front side of the hotel to find this Fossil. |
||
 |
 |
|
|
Enter the tree stump in front of the Thorn Hollow Checkpoint and drop down the hole inside. Circle around this underground area while destroying the brambles with chunks until you find this Fossil stuck on a bramble. |
||
 |
 |
|
|
Found on the wall of the Eggshell Hotel Garden, right behind the pedestal where you found one piece of the disc. |
||
 |
 |
|
|
Found beneath the ground where Beak-Leap Checkpoint stands. |
||
 |
 |
|
|
Buried in the sand near the arch that leads to Eggshell Hotel. |
||
 |
 |
|
|
At the top of the ostrich heads at Bellhop Burb. |
||
 |
 |
|
|
Found at the top of the big tree next to Eggshell Hotel, right where the last branch splits. |
||
 |
 |
|
|
Dig all the way to the basement of Eggshell Hotel, just below the garden area, and search for a sand platform just outside a wall to find this Fossil. |
||
SL 601 Fossil Locations
| Overworld View | Map Location | |
|---|---|---|
 |
 |
|
|
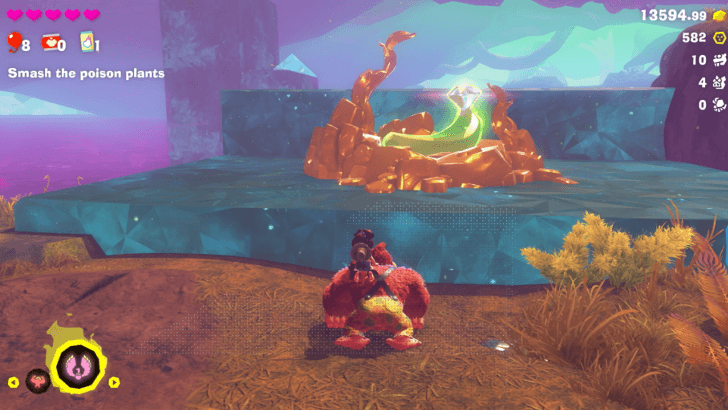
Found on one of the isles that you will pass through as you reach the first poison plant. |
||
 |
 |
|
|
After destroying the first poison plant and lower the poisoned water level, go to the corner of the isle where the poison plant was and look for this Fossil at the edge. |
||
 |
 |
|
|
After lowering the poisoned water level at least once, you can find this Fossil in front of the Challenge Ruin in the second isle of Mossplume Marsh. |
||
 |
 |
|
|
After lowering the poisoned water level at least once, go to the other end of where the poison plant was and use the Ostrich Bananza Form to reach the giant ostrich head figure. On its head, you will find three Fossils. |
||
|
|
 |
|
|
After lowering the poisoned water level at least once, go to the other end of where the poison plant was and use the Ostrich Bananza Form to reach the giant ostrich head figure. On its head, you will find three Fossils. |
||
|
|
 |
|
|
After lowering the poisoned water level at least once, go to the other end of where the poison plant was and use the Ostrich Bananza Form to reach the giant ostrich head figure. On its head, you will find three Fossils. |
||
 |
 |
|
|
After lowering the poisoned water level at least once, go back to the first isle of Mossplume Marsh and look for the stump in the middle with thorns growing on top of it. There are two Fossils inside its hollow body. |
||
|
|
 |
|
|
After lowering the poisoned water level at least once, go back to the first isle of Mossplume Marsh and look for the stump in the middle with thorns growing on top of it. There are two Fossils inside its hollow body. |
||
 |
 |
|
|
Found on the mud early into the Rubbery Roost area. |
||
 |
 |
|
|
Stuck on a blue crystallized rubber about halfway through Rubbery Roost. |
||
 |
 |
|
|
Go to the second tower in Eggshell Hotel Annex and dig at the center to reach the lower level. You will find this Fossil embedded on a wall. |
||
 |
 |
|
|
Go to the second tower in Eggshell Hotel Annex and dig at the center to reach the lower level. Climb the platform at the back of the Challenge Ruin to find this Fossil |
||
 |
 |
|
|
After lowering the poison water level a second time, go back to Rubbery Roost and burrow under the first isle to find an underground room. On the wall nearest to the Checkpoint is a Fossil. |
||
 |
 |
|
|
After lowering the poison water level a second time, go back to Rubbery Roost and burrow under the first isle to find an underground room. You can find this Fossil at the roots, near the barrel cannon. |
||
 |
 |
|
|
Cross the rubber blocks past the Eggshell Hotel Annex to reach the Lower Marsh area. Go to the top of the ostrich head here and throw the fruit that you see at the floating platform to create a bridge. At the top of this floating platform is a Fossil. |
||
 |
 |
|
|
Found at the sinkhole where the Void Stake was. This is accessible only after smashing all three poison plants. |
||
 |
 |
|
|
After destroying all poison plants, return to Rubbery Roost and go to the area where the second poison plant was. You'll spot the Fossil below, just behind a crawler enemy. |
||
 |
 |
|
|
Go back to the rubber field past the Eggshell Hotel Annex after destroying the poison plants and look for the Fossil on the stump near the Banandium Gem. |
||
 |
 |
|
|
Go back to the rubber field past the Eggshell Hotel Annex after destroying the poison plants and look for the Fossil on the stump just before the Lower Marsh Getaway. |
||
 |
 |
|
|
Fast travel to the Lower Marsh Getaway after destroying the poison plants and check the gap on its side to find a Fossil. |
||
 |
 |
|
|
Found directly above the Lower Marsh Getaway. |
||
 |
 |
|
|
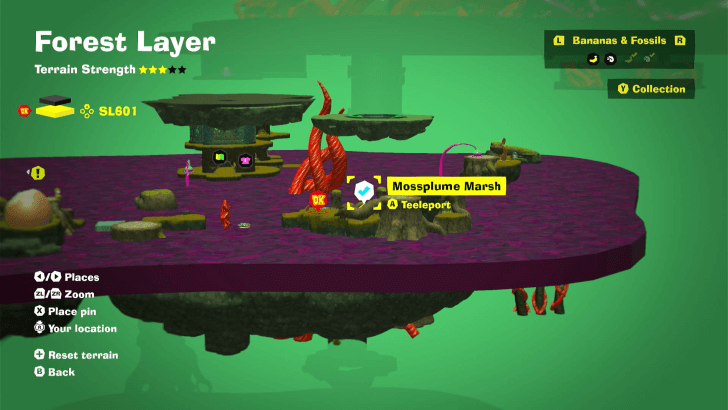
Found on the stump where the Mossplume Marsh Getaway is built. If you haven't unlocked the Getaway yet, you can use the Mossplume Marsh Checkpoint to fast travel to this isle. |
||
 |
 |
|
|
Buried in mud at the base of the giant ostrich head where the first poison plant was. |
||
 |
 |
|
|
Destroy the seal in Rubbery Roost to uncover this Fossil near it. |
||
 |
 |
|
|
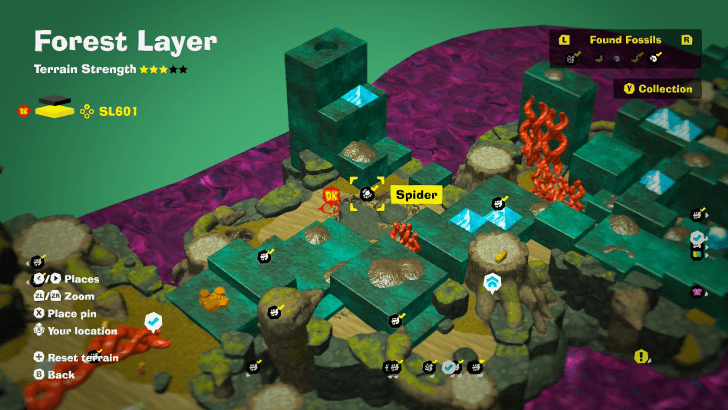
After lowering the poison water level a second time, go back to Rubbery Roost to find the Spider Fossil at the center. You must use an explosive block by pulling one of the surrounding turnips to break it. |
||
SL 602 Fossil Locations
| Overworld View | Map Location | |
|---|---|---|
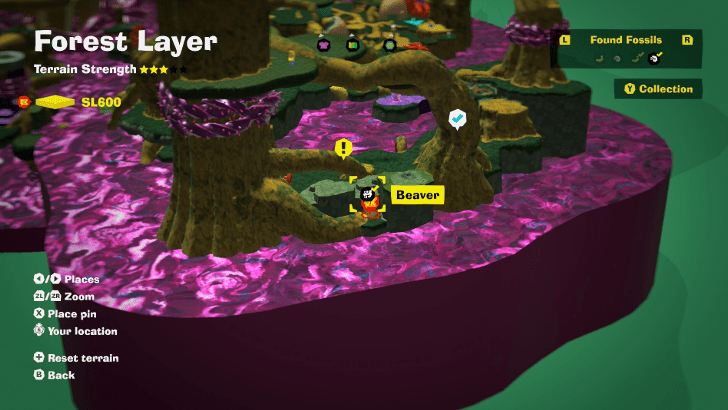
 |
 |
|
|
Found along the narrow path below the Bramblenest Bog Getaway |
||
 |
 |
|
|
Found in the middle of the bramble-filled isle. |
||
 |
 |
|
|
Go to the isle on the other end of Bramblenest Bog and look for a platform with two giant fruits. You'll find the Fossil in the corner, embedded on a wall. |
||
 |
 |
|
|
Found on the small isle in the middle of Bramblenest Bog. |
||
 |
 |
|
|
Found on the ostrich head on the isle with two updrafts. |
||
 |
 |
|
|
Found at the edge of the isle with two updrafts. |
||
 |
 |
|
|
Found on a stump right after entering Broodbud Isle. |
||
 |
 |
|
|
Stuck on the back of a spiky enemy in Broodbud Isle. |
||
 |
 |
|
|
Found on the ostrich neck at the edge of Broodbud Isle, near the area's Getaway. |
||
 |
 |
|
|
Near the end of Broodbud Isle is a stump hidden below a cliff. Drop down to it to get the Fossil. |
||
 |
 |
|
|
After defeating Abracajabya, go to the center of SL 602 and find this Fossil near an updraft. |
||
 |
 |
|
|
After defeating Abracajabya, return to Bramblenest Bog to find two Fossils near the rubber patch. |
||
|
|
 |
|
|
After defeating Abracajabya, return to Bramblenest Bog to find two Fossils near the rubber patch. |
||
 |
 |
|
|
Stuck on the neck of an ostrich figure in Broodbud Isle. |
||
 |
 |
|
|
Found at the back of the giant hanging tree trunk. You'll have to clear the brambles blocking the updraft below so you can use its gust with the Ostrich Bananza Form and reach the tree trunk. |
||
Forest Layer Checkpoints
All Checkpoint Locations
| Overworld View | Map Location | |
|---|---|---|
 |
 |
|
|
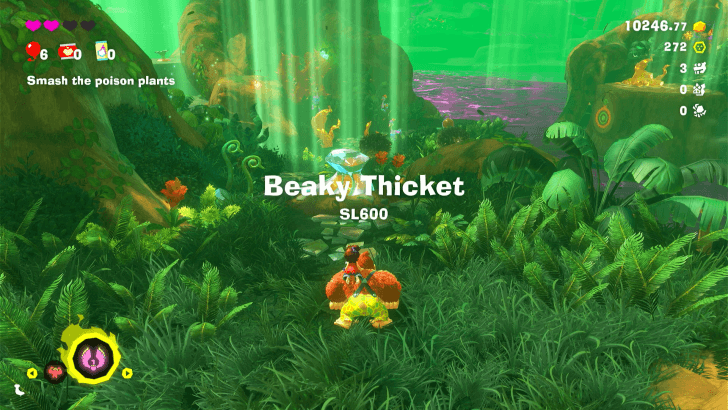
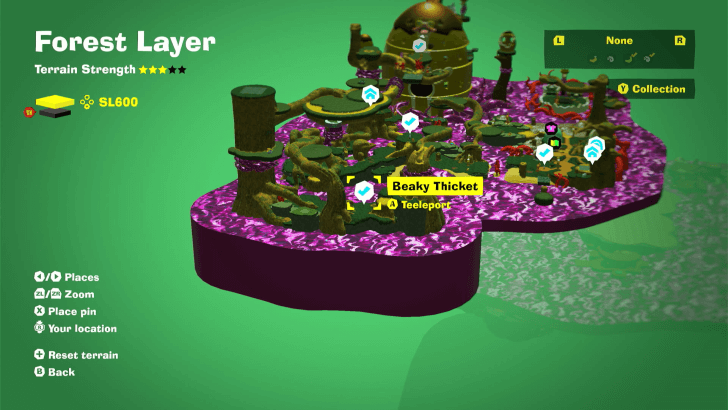
Beaky Thicket Checkpoint (SL 600)
This is the starting point fo the Forest Layer. |
||
 |
 |
|
|
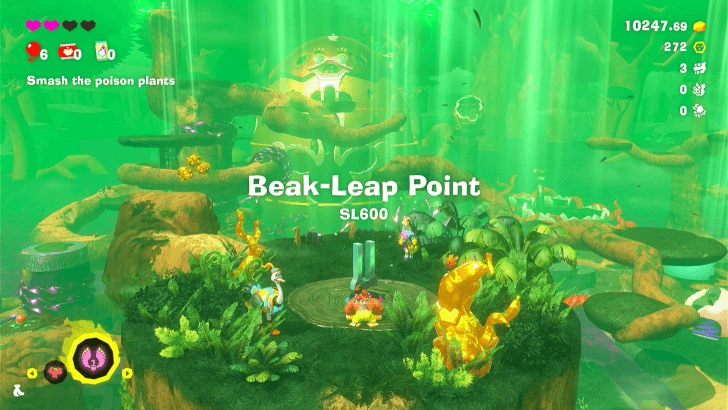
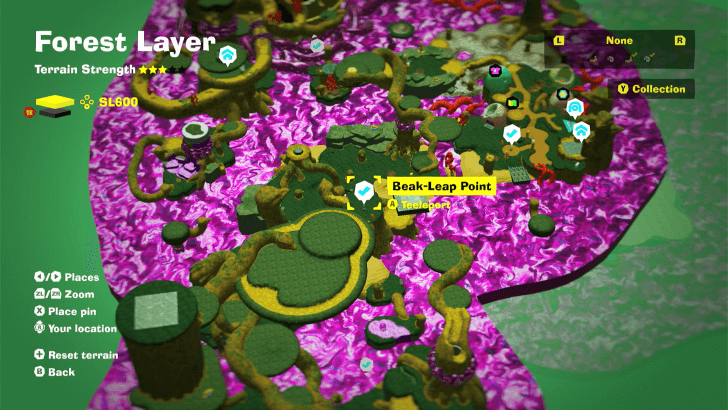
Beak-Leap Point Checkpoint (SL 600)
From the starting point of the layer, you can get here by crossing a seed-made bridge and following the path past some red thorns. |
||
 |
 |
|
|
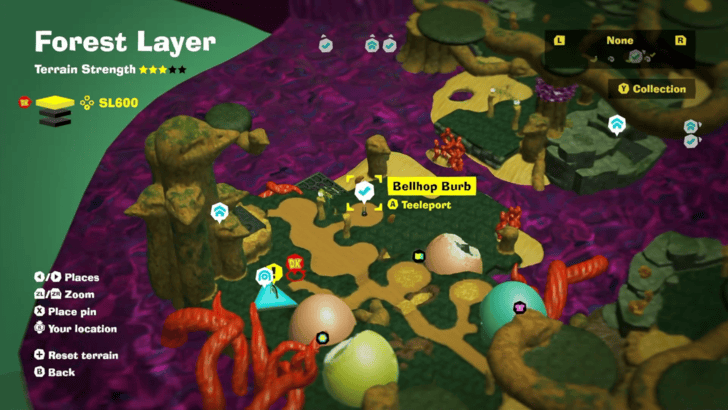
Bellhop Burb Checkpoint (SL 600)
Upon dropping down from Beak-Leap Point, head right. Throw a seed to cross, and you should end up in Bellhop Burb. |
||
 |
 |
|
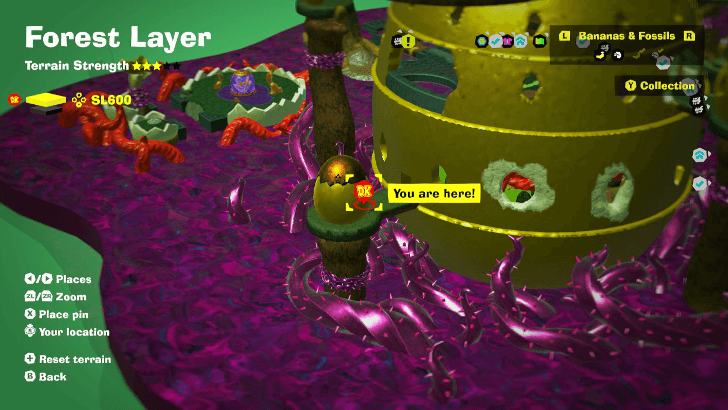
|
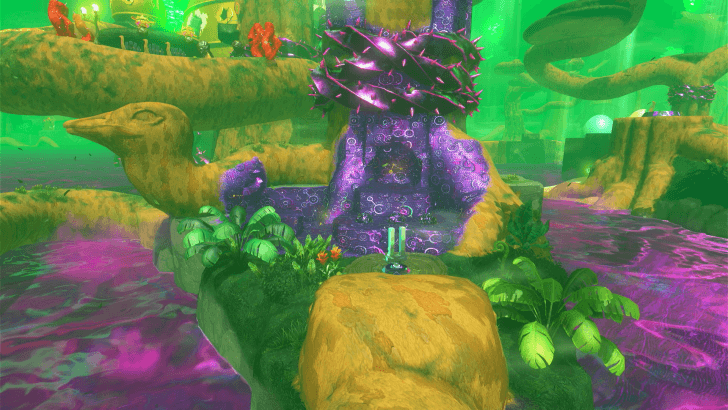
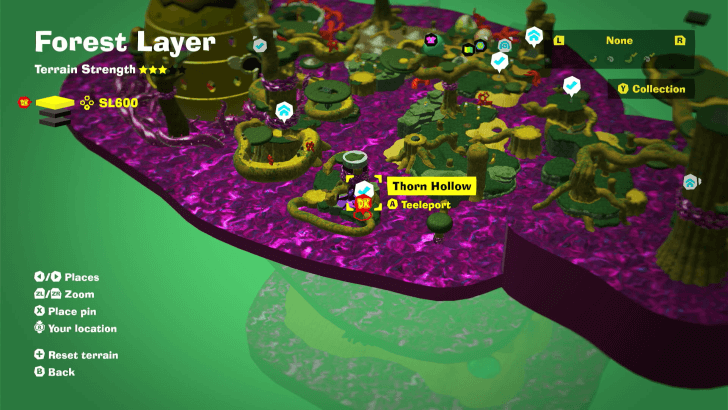
Thorn Hollow Checkpoint (SL 600)
Found on an island with a large tree stump with purple thorns wrapped around it. It is located near the big tree. |
||
 |
 |
|
|
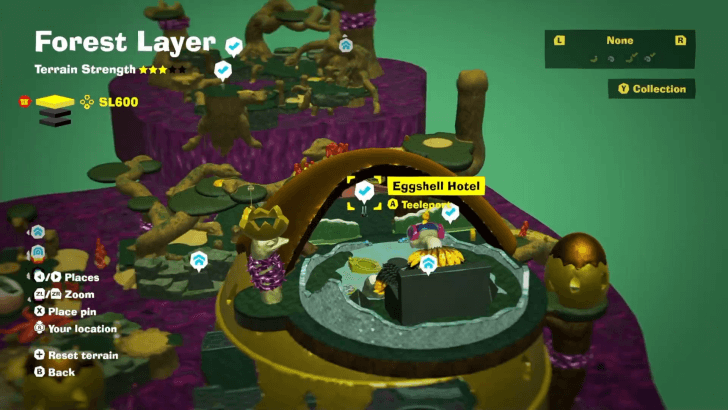
Eggshell Hotel Checkpoint (SL 600)
Climb up the big tree, and use the Barrel Cannon to enter Eggshell Hotel. The checkpoint is found right at the entrance. |
||
 |
 |
|
|
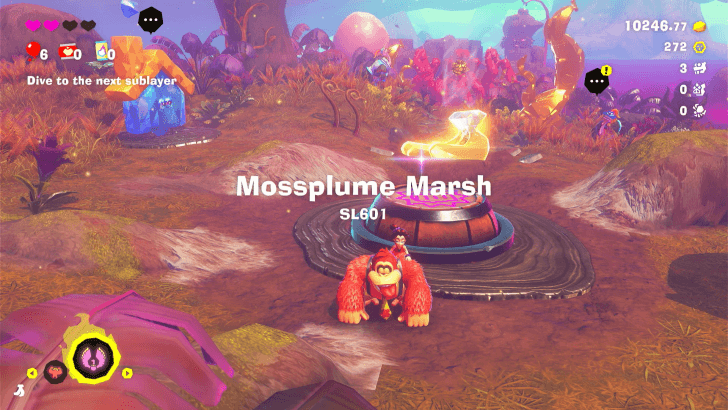
Mossplume Marsh Checkpoint (SL 601)
This is where you land upon diving down the Void Stake hole from SL 600. |
||
 |
 |
|
|
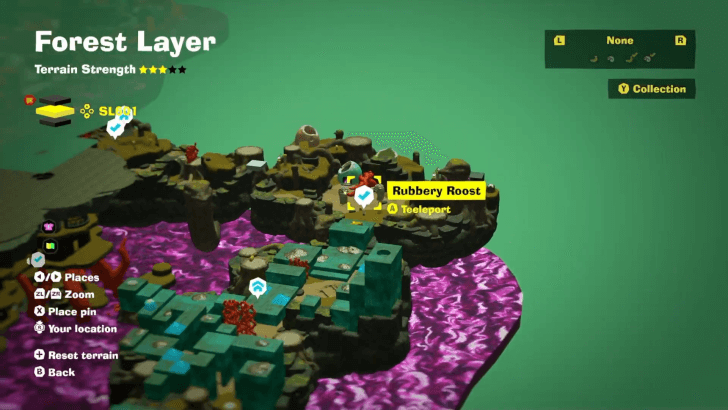
Rubbery Roost Checkpoint (SL 601)
Found at the entrance of the rubber platform area of SL 601. |
||
 |
 |
|
|
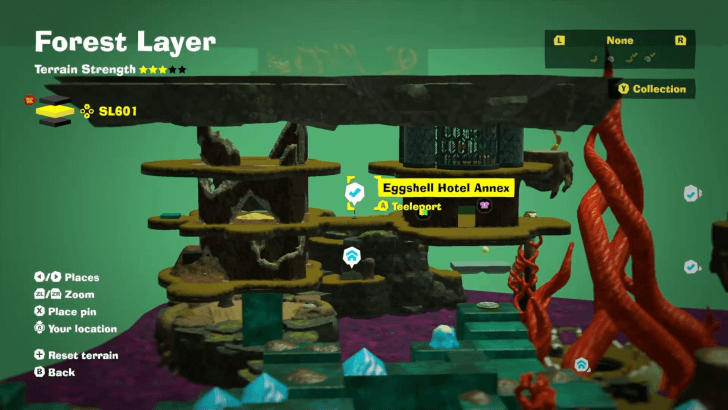
Eggshell Hotel Annex Checkpoint (SL 601)
Found on the bridge past the Eggshell Hotel Annex shops. |
||
 |
 |
|
|
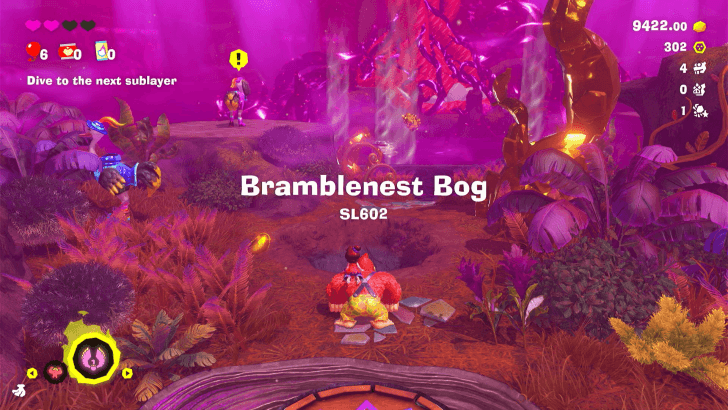
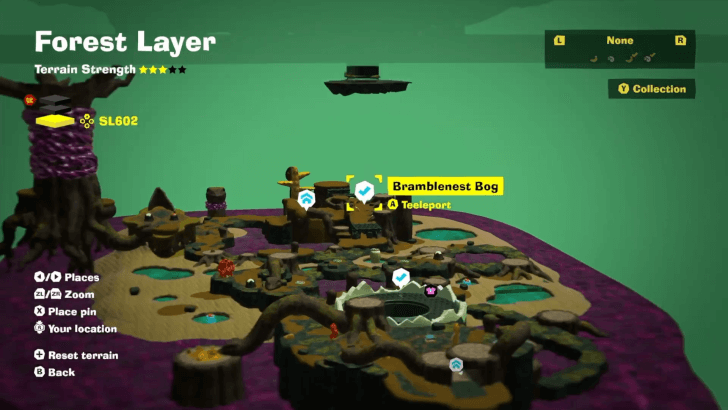
Bramblenest Bog Checkpoint (SL 602)
This is where you land upon diving from the hole left by the Void Stake in Sublayer 601. |
||
 |
 |
|
|
Sinkhole SL602 Checkpoint (SL 602)
Appears after destroying the Void Stake left by Abracajabya. |
||
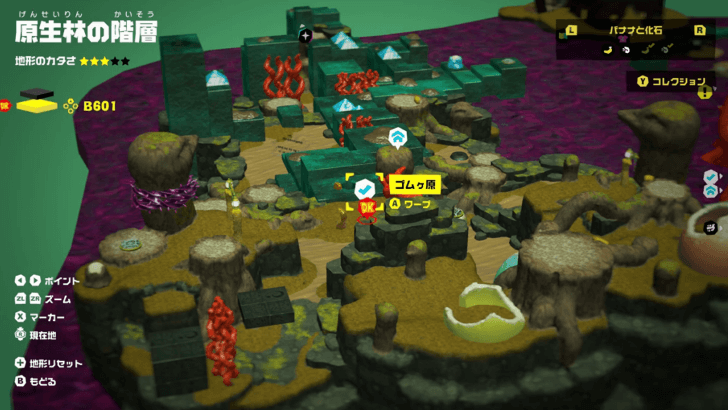
Warp Gong Location
| Layer | Overworld View | Map Location |
|---|---|---|
| SL 600 |
 |
 |
|
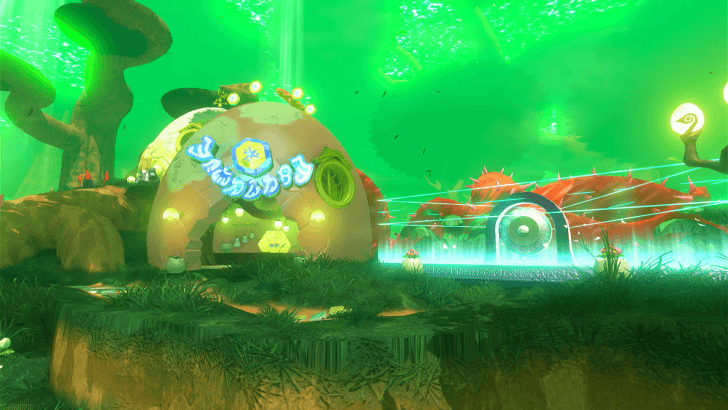
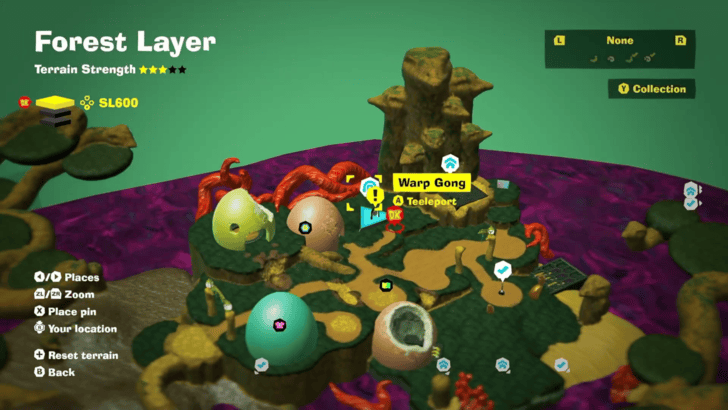
Bellhop Burb Warp Gong
Found beside the Chip Exchange at Bellhop Burb. |
||
How to Teeleport: Fast Travel Guide
Forest Layer Challenges
All Challenge Locations
| Layer | Overworld View | Map Location |
|---|---|---|
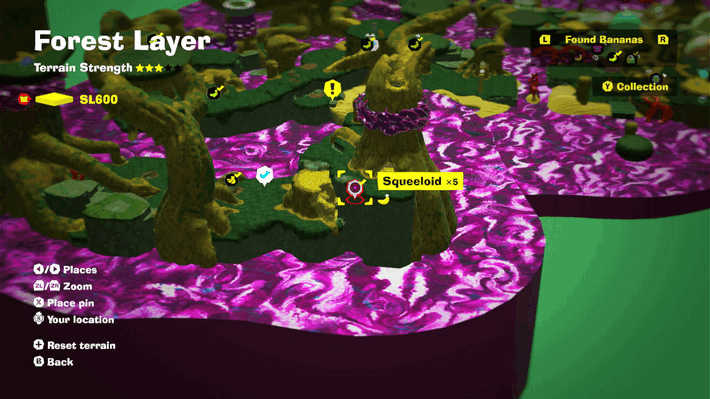
| SL 600 |
 |
 |
|
Squeeloid x5 Forest Layer Battle Challenge 1 Inside the large tree south of Beaky Thicket. You'll need to clear the void to access the challenge ruin. |
||
| SL 600 |
 |
 |
|
Buzzoid x2 Forest Layer Battle Challenge 2 On top of an ostrich-shaped tree stump slightly northwest of Beak-Leap Point. |
||
| SL 600 |
 |
 |
|
Antickoid x5 Forest Layer Battle Challenge 3 Next to a muddy mound just past Bellhop Burb. |
||
| SL 601 |
 |
 |
|
Munchoid x 4 Forest Layer Battle Challenge 4 Located slightly southwest of the Rubbery Roost checkpoint. You need to lower the poison water level twice to access the challenge ruin. |
||
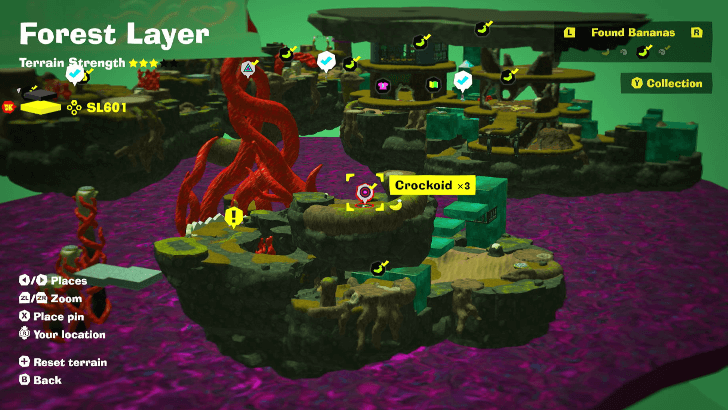
| SL 601 |
 |
 |
|
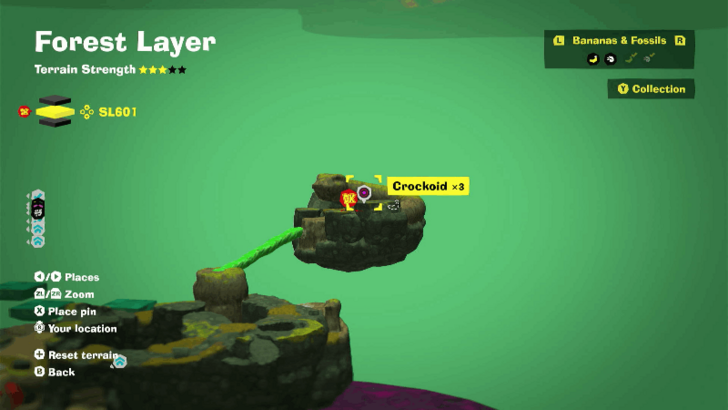
Crockoid x3 Forest Layer Battle Challenge 5 On the topmost floating platform at the Lower Marsh area. |
||
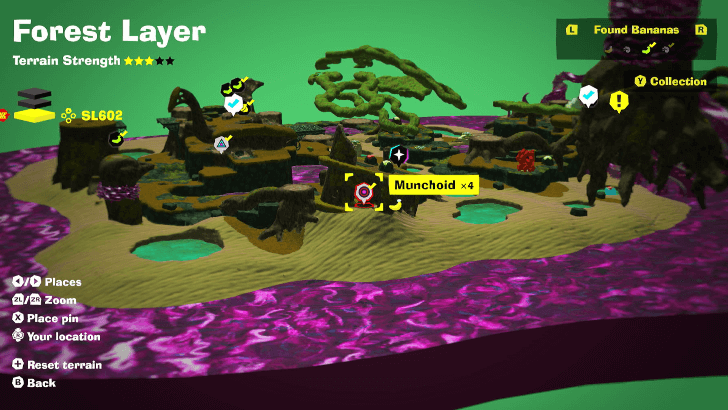
| SL 602 |
 |
 |
|
Munchoid x4 Forest Layer Battle Challenge 6 Inside the fallen structure east of the Bramblenest Bog (SL602). |
||
| SL 600 |
 |
 |
|
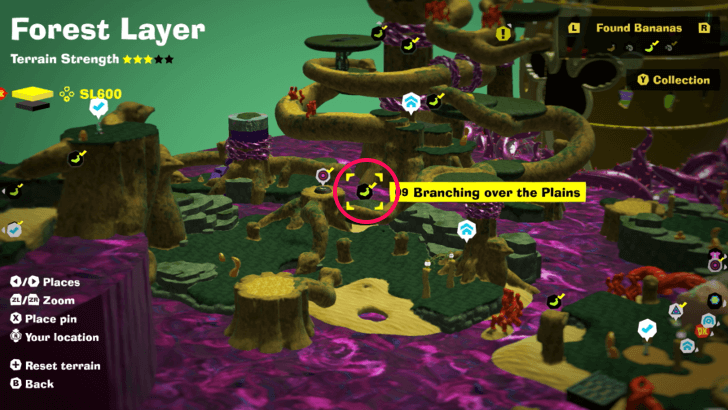
Bramble Country Forest Layer Challenge Course 1 Located west of the Bellhop Burb teeleport point. |
||
| SL 600 |
 |
 |
|
All-You-Can-Eat-Tower Forest Layer Challenge Course 2 Outside of the Egghell Hotel's garden area. |
||
| SL 601 |
 |
 |
|
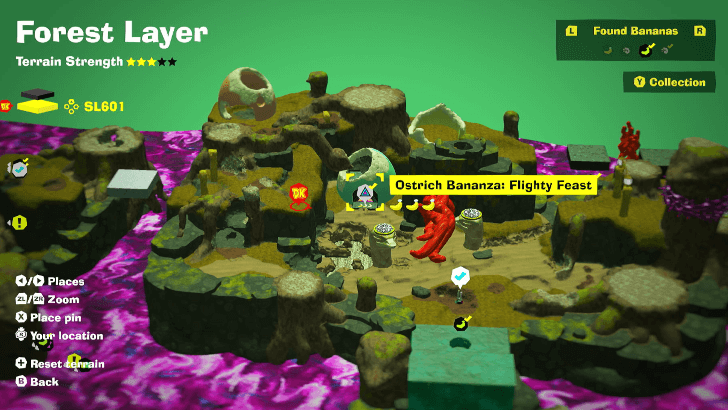
Ostrich Bananza: Flighty Feast Forest Layer Challenge Course 3 Inside an egg house in Rubbery Roost. You'll need to lower the poison water level to access the area. |
||
| SL 601 |
 |
 |
|
Bouncing for Bananas Forest Layer Challenge Course 4 On the lower floor of the Eggshell Hotel Annex. |
||
| SL 602 |
 |
 |
|
Pit Seeds Forest Layer Challenge Course 5 In a cave directly under the Bramblenest Bog area. |
||
Bonus Stage Location
| Layer | Overworld View | Map Location |
|---|---|---|
| SL 600 |
 |
|
|
Bouncing for Gold
From the Rockshade Getaway, launch yourself up using the barrel to get to the Bonus Stage. |
||
Forest Layer Shops
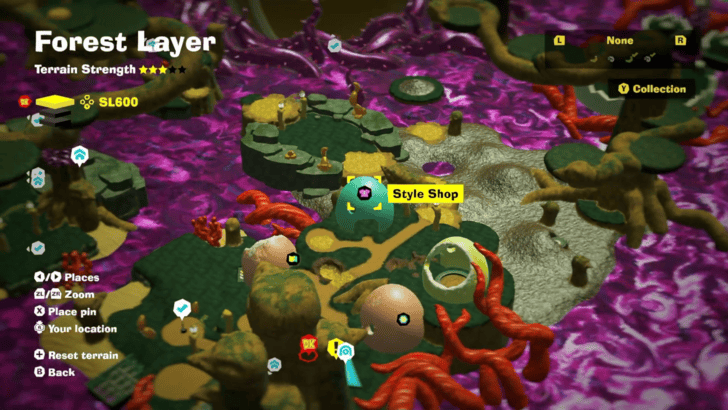
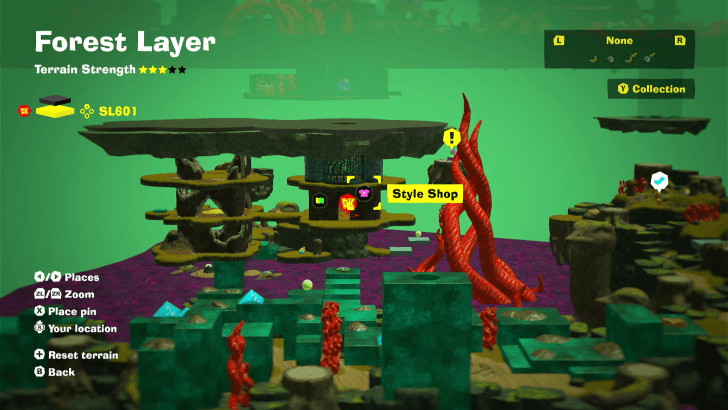
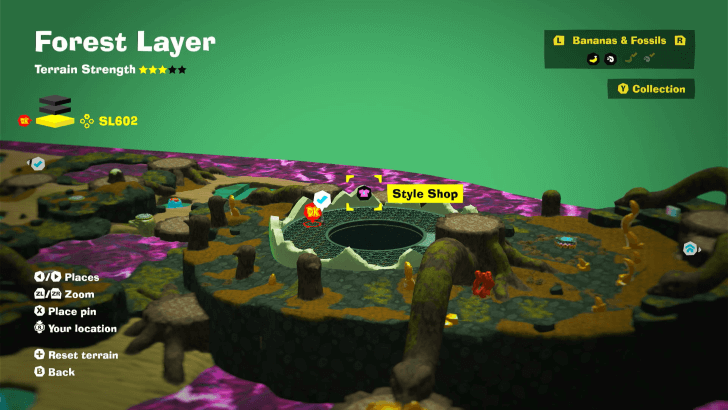
Forest Layer Style Shop
Style Shop Locations
| Layer | Overworld View | Map Location |
|---|---|---|
| SL 600 |
 |
 |
|
Bellhop Burb Style Shop
Found near the Stuff Shop in Bellhop Burb. |
||
| SL 601 |
 |
 |
|
Eggshell Hotel Annex Style Shop
Found in front of the entrance of the Eggshell Hotel Annex. |
||
| SL 602 |
 |
 |
|
Forest Layer Sinkhole Style Shop
Found near the Sinkhole after defeating Abracajabya. |
||
Available Outfits
| Name | Type | Cost | Effect | |||||||
|---|---|---|---|---|---|---|---|---|---|---|
|
|
Neckwear |
|
Restores your Bananergy as you defeat enemies. | |||||||
|
|
Fur Color |
|
Complex yet sweet, like a juicy grape plucked fresh from the vine. | |||||||
|
|
Fur Color |
|
Earthy and understated, like an olive plucked fresh from its branch. | |||||||
|
|
Britches |
|
Reduces damage from poison water by 10 percent. | |||||||
|
|
Britches |
|
Reduces damage from poison water by 20 percent. | |||||||
|
|
Pauline Outfits |
|
Extends your Ostrich Bananza time by 40 percent. | |||||||
|
|
Pauline Outfits |
|
Extends your Ostrich Bananza time by 40 percent. | |||||||
|
|
Pauline Outfits |
|
Extends your Ostrich Bananza time by 40 percent. | |||||||
Stuff Shop Locations
| Layer | Overworld View | Map Location |
|---|---|---|
| SL 600 |
 |
 |
|
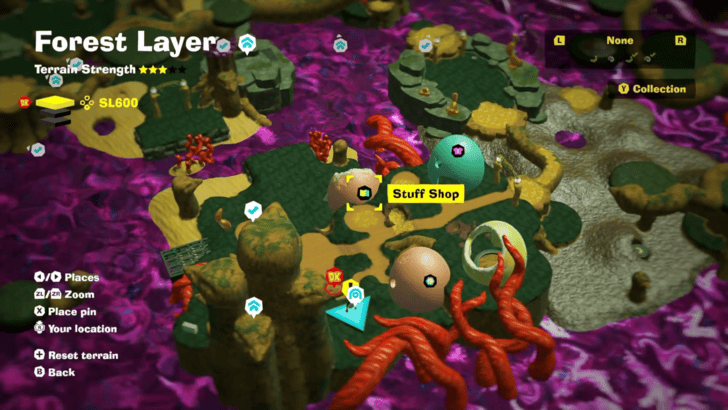
Bellhop Burb Stuff Shop
Located across from the Bellhop Burb Chip Exchange. |
||
| SL 601 |
 |
 |
|
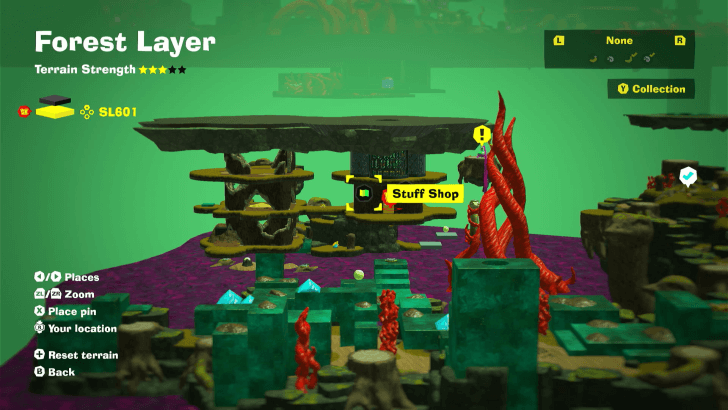
Eggshell Hotel Annex Stuff Shop
Found in front of the entrance of the Eggshell Hotel Annex. |
||
Chip Exchange Location
| Layer | Overworld View | Map Location |
|---|---|---|
| SL 600 |
|
 |
|
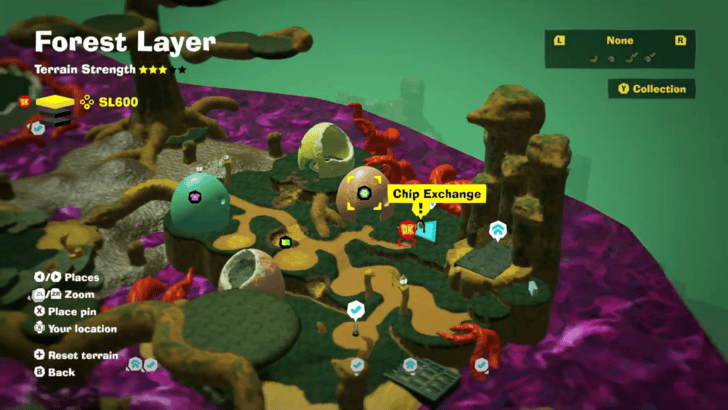
Bellhop Burb Chip Exchange
The Forest Layer Chip Exchange is located beside the Warp Gong at Bellhop Burb. |
||
Forest Layer Void Stakes
Void Stake Locations
| Layer | Overworld View | Map Location |
|---|---|---|
| SL 600 |
 |
 |
|
Forest Sublayer 600 Void Stake
After getting the Ostrich Bananza power, ride an updraft near the island by the Eggshell Hotel to get the key to the Void Stake. |
||
| SL 600 |
 |
 |
|
Bellhop Burb Void Stake
Dig in the cracked yellow egg house, past the ostrich Fractone saying it's staff only. Defeat the concrete Crockoid to get the key to this Void Stake. |
||
| SL 601 |
 |
 |
|
Forest Sublayer 601 Void Stake
Destroy the three poison plants on SL 601 to reveal this Void Stake. It is located below Mossplume Marsh. |
||
| SL 602 |
 |
 |
|
Abracajabya Void Stake
Defeat Abracajabya to reveal this Void Stake. |
||
Cranky Kong Location
Ostrich Village in SL 600
| Map / Overworld Image | Video Directions |
|---|---|
 |
As you leave the ostrich village toward Eggshell Hotel, look right across the mud to spot a large tree. Climb it and follow the branch pointing toward the hotel.
Forest Layer Getaways
All Getaway Locations
| Map Location | Overworld Image |
|---|---|
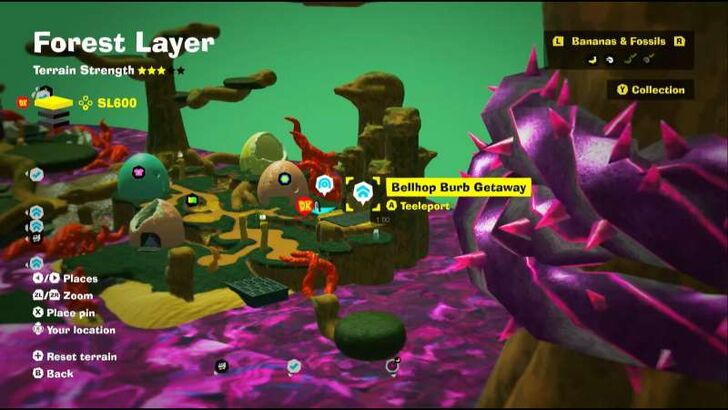 Forest Layer (SL 600) |
 Bellhop Burb Getaway |
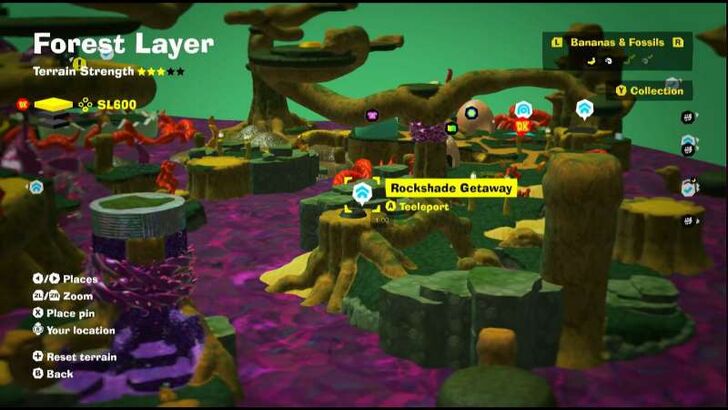 Forest Layer (SL 600) |
 Rockshade Getaway |
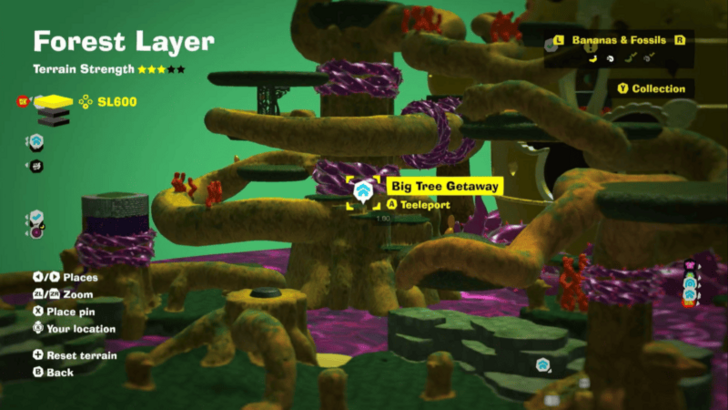 Forest Layer (SL 600) |
 Big Tree Getaway |
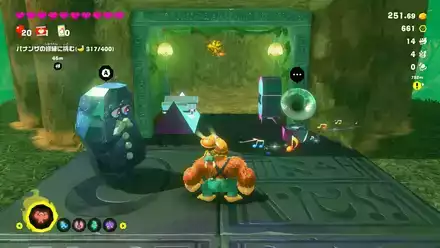
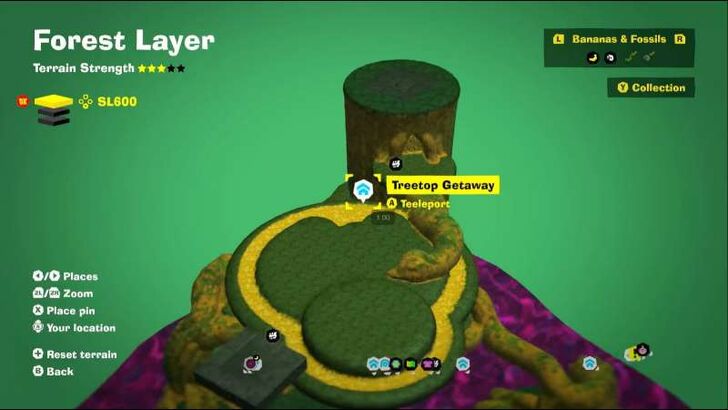 Forest Layer (SL 600) |
 Treetop Getaway |
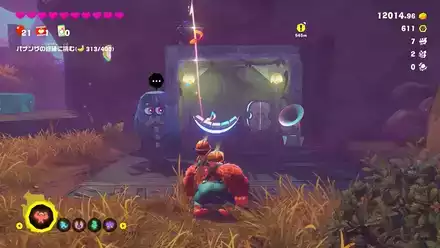
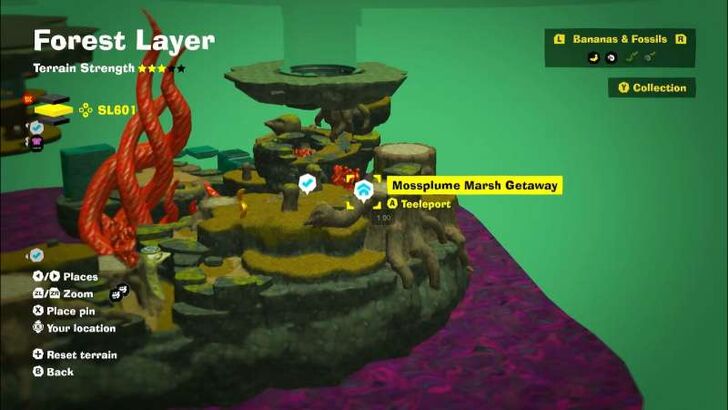 Forest Layer (SL 601) |
 Mossplume Marsh Getaway |
 Forest Layer (SL 601) |
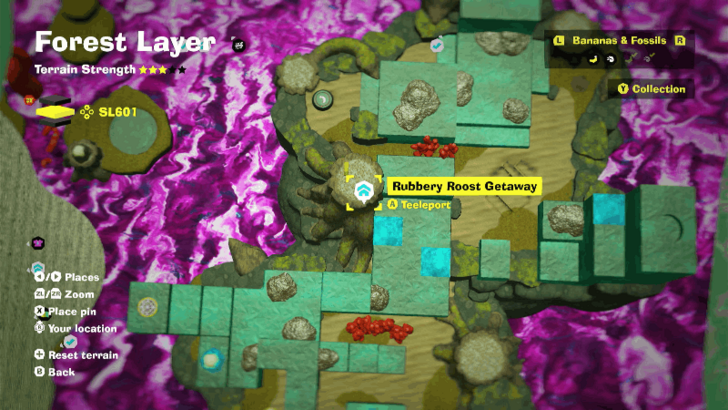
 Rubbery Roost Getaway |
 Forest Layer (SL 601) |
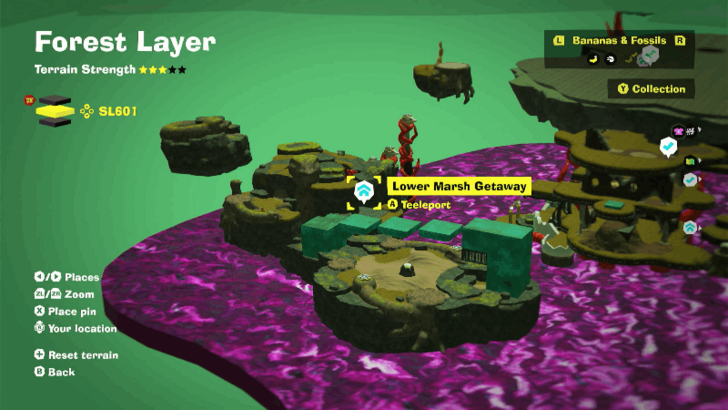
 Lower Marsh Getaway |
 Forest Layer (SL 602) |
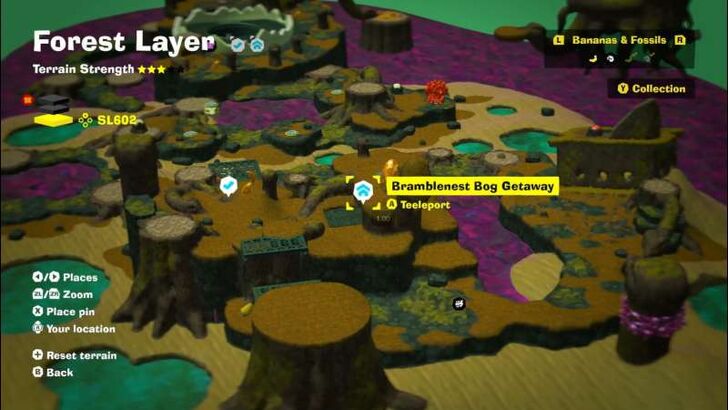
 Bramblenest Bog Getaway |
 Forest Layer (SL 602) |
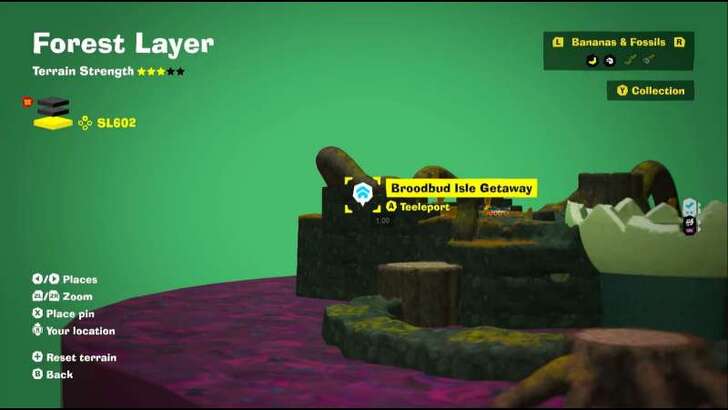
 Broodbud Isle Getaway |
Getaway Guide: All Getaway Locations
Donkey Kong Bananza Related Guides
All Layers
Comment
Author

Forest Layer Banana and Fossil Locations (SL 600-602)
Please participate in our site
improvement survey
04/2026
improvement survey
04/2026
Would you assist in
improving Game8's site?
improving Game8's site?

×
We are listening to our users' valuable opinions and discussing how to act on them.
The information collected through this survey will be used for the purpose of improving our services. In addition, the information will only be disclosed a part of a statistic in a format that will not allow identification of personal information.
Begin Survey
Not Now
×
Please rate each item regarding Game8.co's Advertisements.
Amount of Ads
Very Dissatisfied
Somewhat Dissatisfied
Fine
Somewhat Satisfied
Highly Satisfied
Placement of Ads
Timing of Ad Display
Ad Loading Speed
Safeness of Ads
Content of Ads
×
Please rate each item regarding Game8.co's Quality of Articles.
Amount of information
Very Dissatisfied
Somewhat Dissatisfied
Fine
Somewhat Satisfied
Highly Satisfied
Frequency of updates
Speed of new information
Accuracy of articles
Understandibility of articles
Readability of sentences
×
Please rate each item regarding Game8.co's Usability of the Site.
Ease of finding information
Very Dissatisfied
Somewhat Dissatisfied
Fine
Somewhat Satisfied
Highly Satisfied
Loading Speed
Use of Color
Font Size
Visibility of Images
Easy to Understand Layout
×
Please rate each item regarding Game8.co's Message Boards, Comments.
Ease of Writing
Very Dissatisfied
Somewhat Dissatisfied
Fine
Somewhat Satisfied
Highly Satisfied
Readability
Ease in Finding Information
Comment Quality
Comment Quantity
Admin Response
×
Please rate each item regarding Game8.co's Site's new design.
Please rate our site's new design
Very Dissatisfied
Somewhat Dissatisfied
Fine
Somewhat Satisfied
Highly Satisfied
Do you think that the website's design change makes the site easier to use?
Has the new design made it easier for you to find information on the site?
Has the new design improved the overall visual appeal of the site?
How would you rate your overall satisfaction with the new design of the site?
×
How likely are you to recommend Game8 to someone you know?
Very Unlikely
0
1
2
3
4
5
6
7
8
9
10
Very Likely
If you have other opinions regarding potential improvement to the website, please share them with us. We would appreciate your honest opinion.
Note: This is a free response section, so you can proceed without entering anything.
Note: Please be sure not to enter any kind of personal information into your response.
Note: Please be sure not to enter any kind of personal information into your response.
×
Thank You
×
Thank you for participating in our survey! Your answers will help us to improve the quality of our website and services.
We hope you continue to make use of Game8.
We hope you continue to make use of Game8.
Close
Rankings
Gaming News


![Forza Horizon 6 Review [Preview] | Beautiful Roads With a Whole Lot of Oversteer](https://img.game8.co/4460981/a7254c24945c43fbdf6ad9bea52b5ce9.png/thumb)
Popular Games

Genshin Impact Walkthrough & Guides Wiki
Crimson Desert Walkthrough & Guides Wiki
Umamusume: Pretty Derby Walkthrough & Guides Wiki
Honkai: Star Rail Walkthrough & Guides Wiki
Monster Hunter Stories 3: Twisted Reflection Walkthrough & Guides Wiki
Wuthering Waves Walkthrough & Guides Wiki
The Seven Deadly Sins: Origin Walkthrough & Guides Wiki
Pokemon TCG Pocket (PTCGP) Strategies & Guides Wiki
Pokemon Pokopia Walkthrough & Guides Wiki
Zenless Zone Zero Walkthrough & Guides Wiki


Recommended Games
Monster Hunter World Walkthrough & Guides Wiki
Fire Emblem Heroes (FEH) Walkthrough & Guides Wiki
Pokemon Brilliant Diamond and Shining Pearl (BDSP) Walkthrough & Guides Wiki
Super Smash Bros. Ultimate Walkthrough & Guides Wiki
Diablo 4: Vessel of Hatred Walkthrough & Guides Wiki
Cyberpunk 2077: Ultimate Edition Walkthrough & Guides Wiki
Yu-Gi-Oh! Master Duel Walkthrough & Guides Wiki
Elden Ring Shadow of the Erdtree Walkthrough & Guides Wiki
The Legend of Zelda: Tears of the Kingdom Walkthrough & Guides Wiki
Persona 3 Reload Walkthrough & Guides Wiki


All rights reserved
© Nintendo. Games are property of their respective owners. Nintendo of America Inc.
The copyrights of videos of games used in our content and other intellectual property rights belong to the provider of the game.
The contents we provide on this site were created personally by members of the Game8 editorial department.
We refuse the right to reuse or repost content taken without our permission such as data or images to other sites.