Freezer Layer Banana and Fossil Locations (SL 500-503)
☽ DK Island and Emerald Rush DLC out now!
☽ Learn how to solve Banandiumtone's Puzzles.
☽ All Collectibles: Banandium Gems and Fossils
☽ Learn How to Skip Layers Entirely!
☽ How to Beat the Final Boss
☽ Post-Game: Rehearsal Halls | Secret Ending
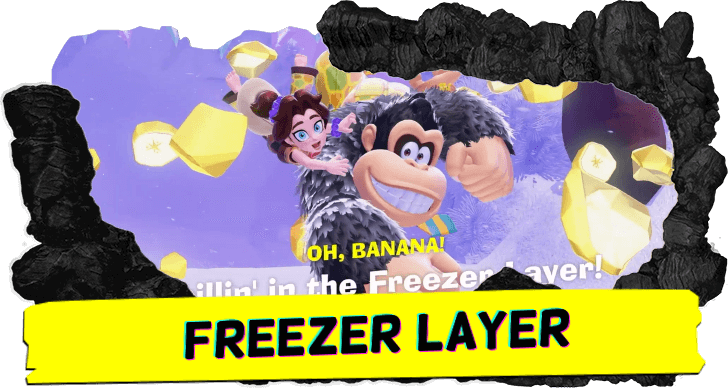
Freezer Layer is the sixth layer in Donkey Kong Bananza. Check out where to find the locations of all Freezer Layer Bananas, fossils, and other collectibles in this level!
| Freezer Layer Guides | |
|---|---|
| Walkthrough | Collectibles |
List of Contents
Freezer Layer Collectibles Overview
List of Collectibles
| Banandium Gems | Total: 87
・SL 500: 39 ・SL 501: 36 ・SL 502: 11 ・SL 503: 1 |
|---|---|
| Fossils | Total: 72
|
| Checkpoints | Total: 12 |
| Challenges | Total: 11 |
There are 87 bananas and 72 fossils available in Freezer Layer.
Freezer Layer Bananas
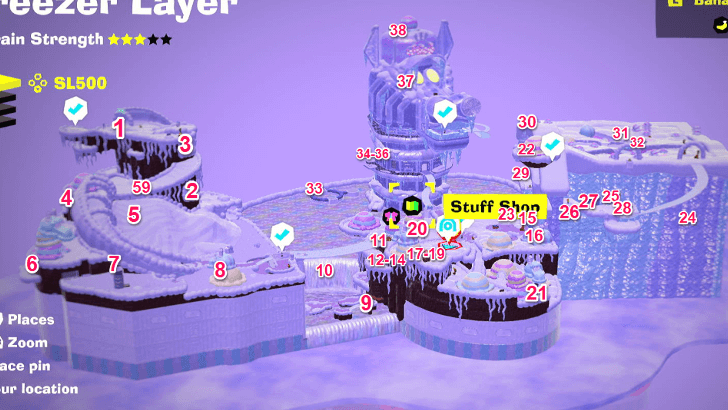
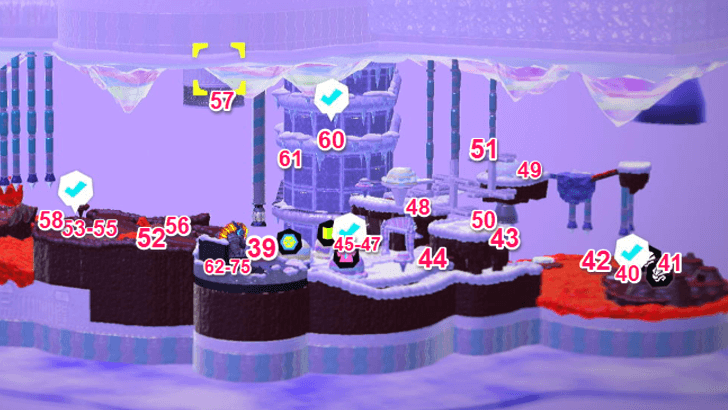
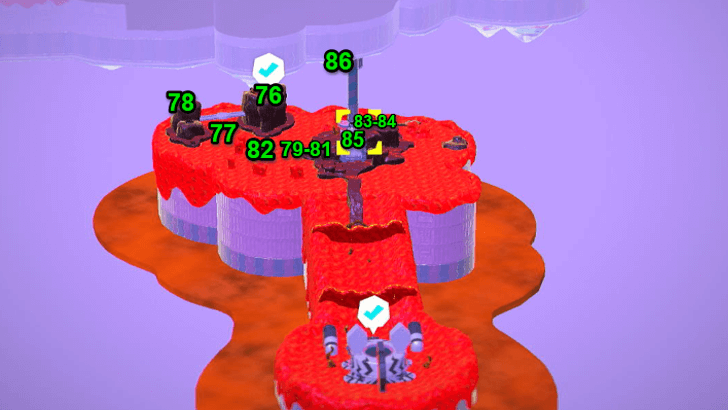
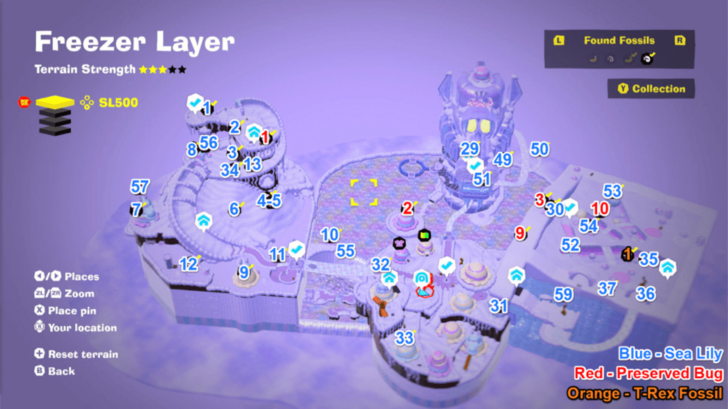
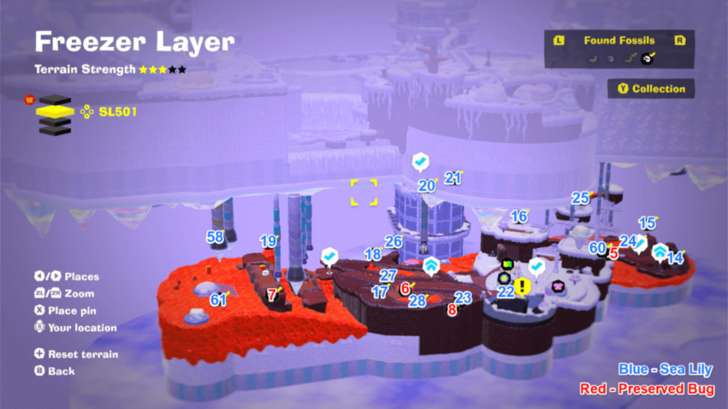
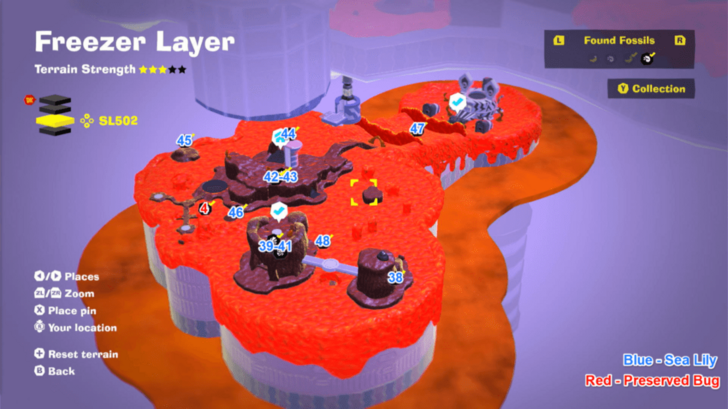
Banandium Gems Map Overview
SL 500 Banana Locations
| Overworld View | Map Location | |
|---|---|---|
| 01 |
 |
 |
|
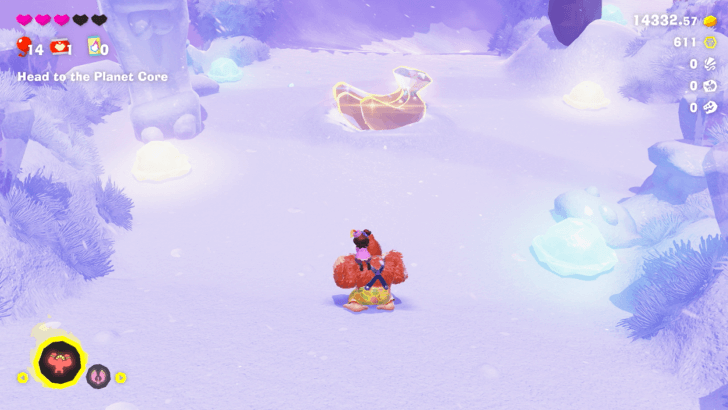
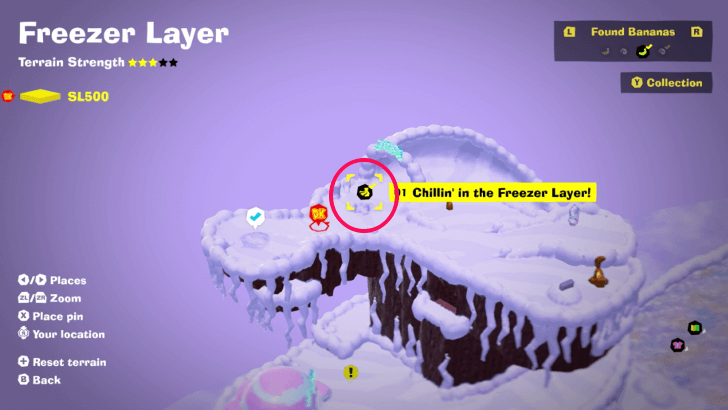
Found with story progression. |
||
| 02 |
 |
 |
|
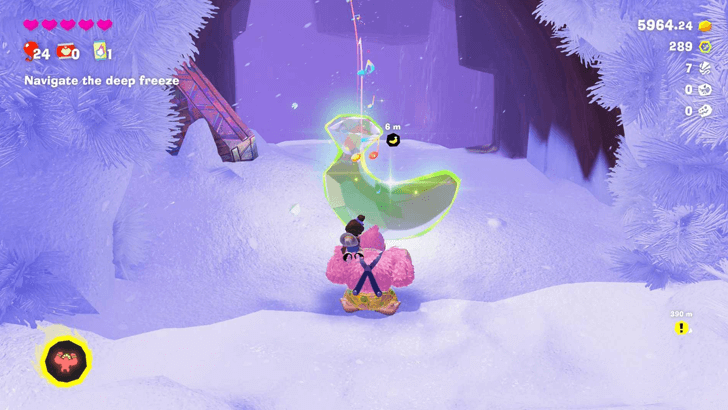
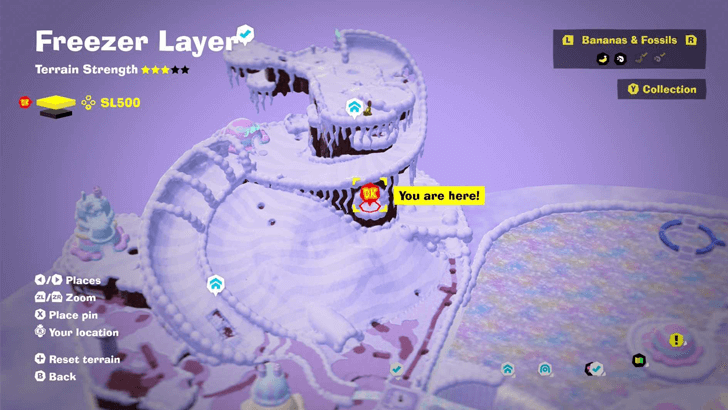
Found at an opening below the slide at Cold-Colt Crest. Can be reached directly from the Crumbly Bridge checkpoint. |
||
| 03 |
 |
 |
|
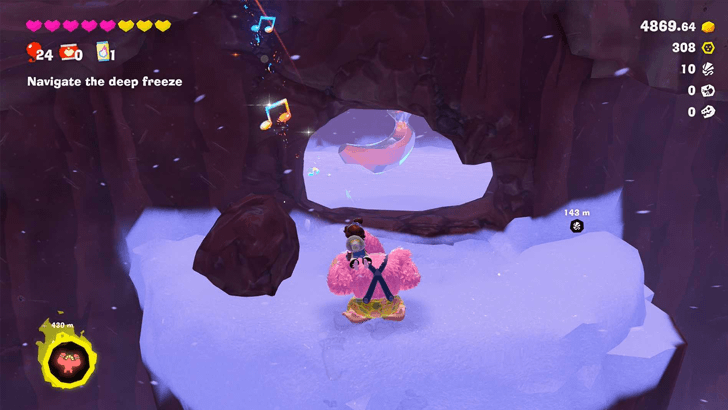
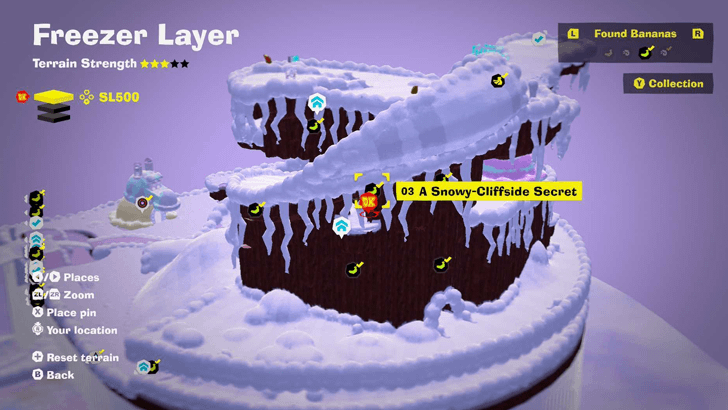
From the Cold-Colt Crest checkpoint, go down the slide. After turning right, dig down to drop on the ledge below. Break the wall to find the Gem. |
||
| 04 |
 |
 |
|
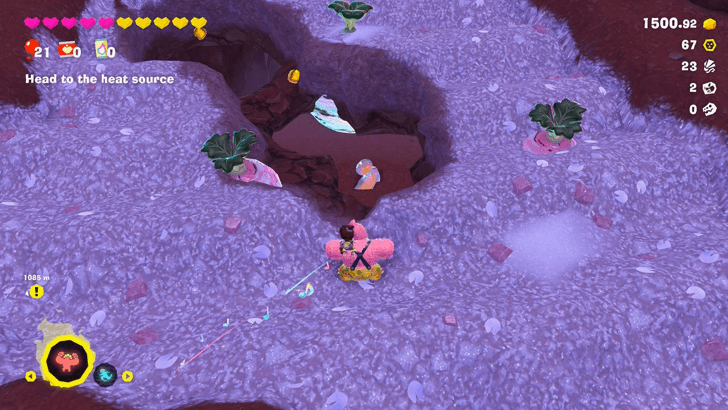
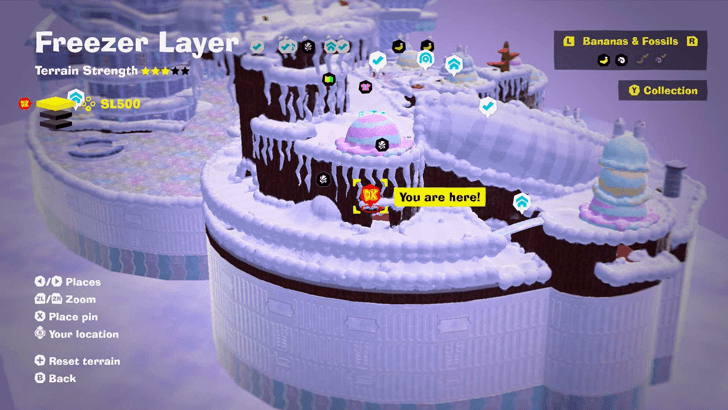
From the Cliff-Edge Scoop Hut, cross the ice bridge and turn right at the cave. The Gem is found under the turnip crops. |
||
| 05 |
 |
 |
|
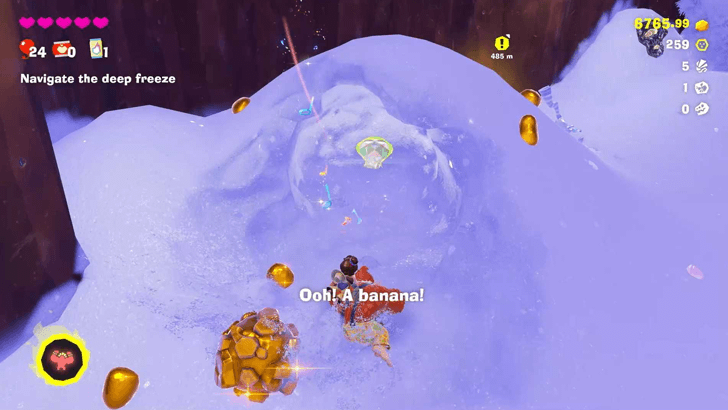
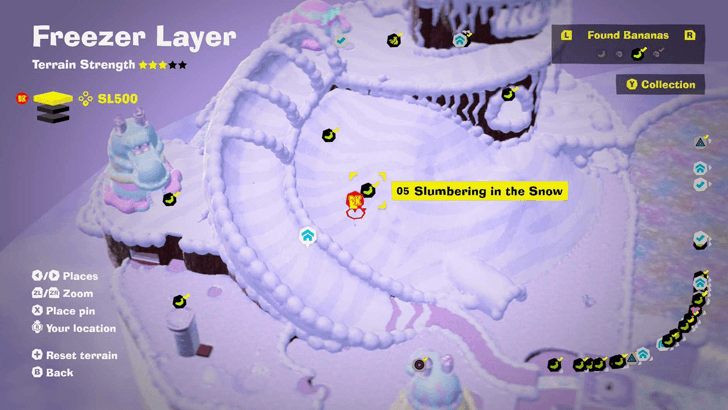
Buried under a pile of snow right across the Cold-Colt Crest Cave Getaway. |
||
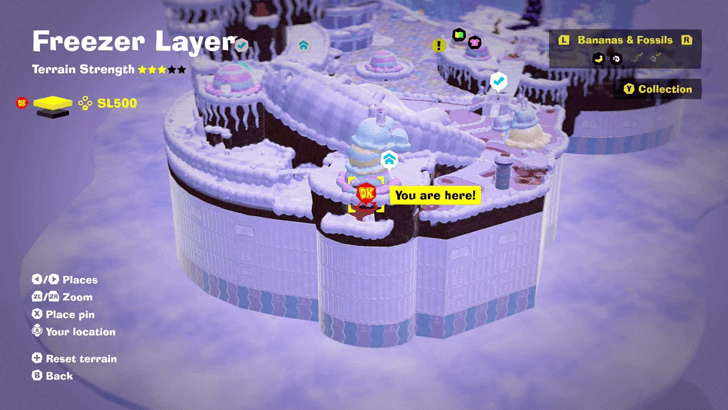
| 06 |
 |
 |
|
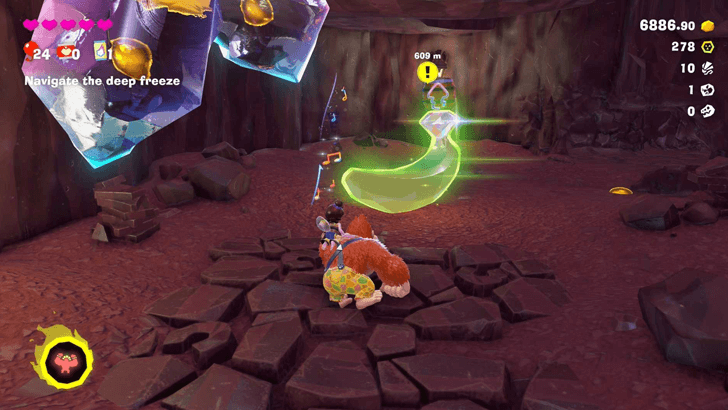
Found in a cave below the Scoop Hut near the cliff. |
||
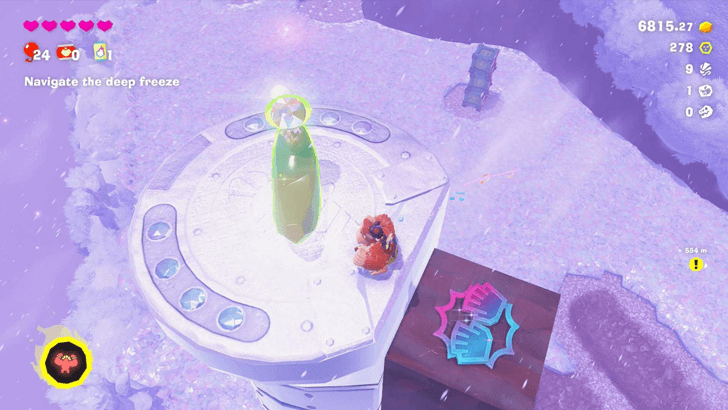
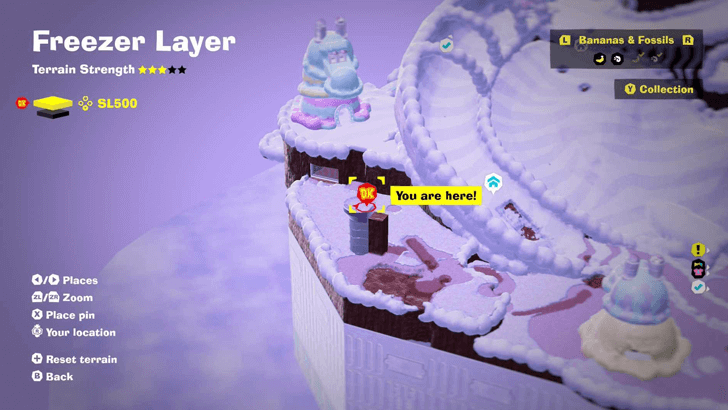
| 07 |
 |
 |
|
Hand slap the platform to get to the top of the pillar. |
||
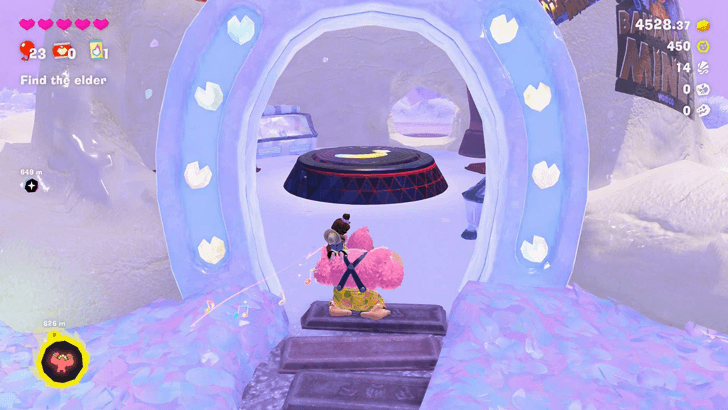
| 08 |
 |
 |
|
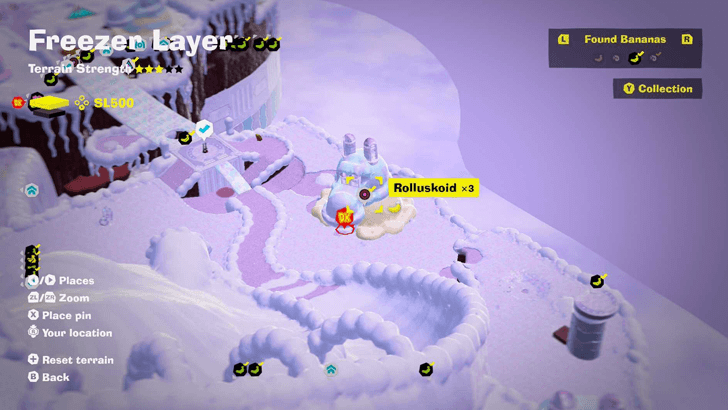
Enter the manhole inside the igloo and defeat all enemies. |
||
| 09 |
 |
|
|
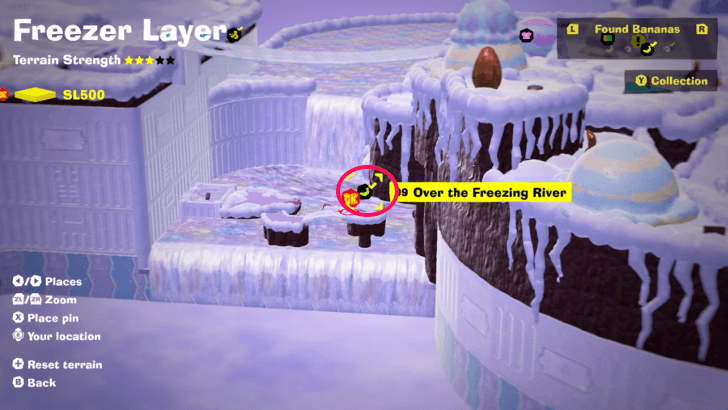
Use the Zebra Bananza to cross the icy bridge to reach the Banandium Gem. Alternatively, you can smash your way down onto the platform from the overhanging cavern above. |
||
| 10 |
 |
 |
|
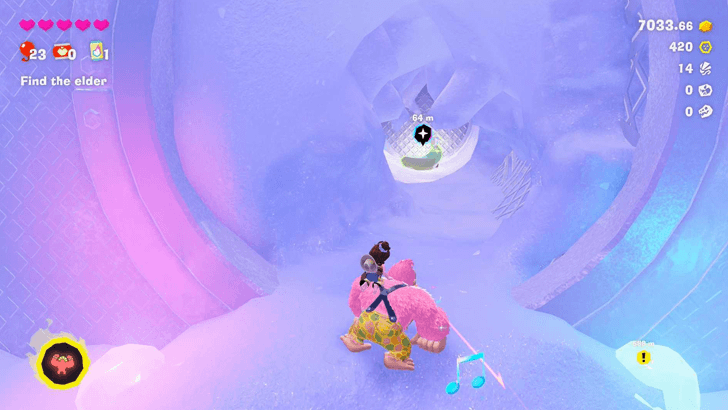
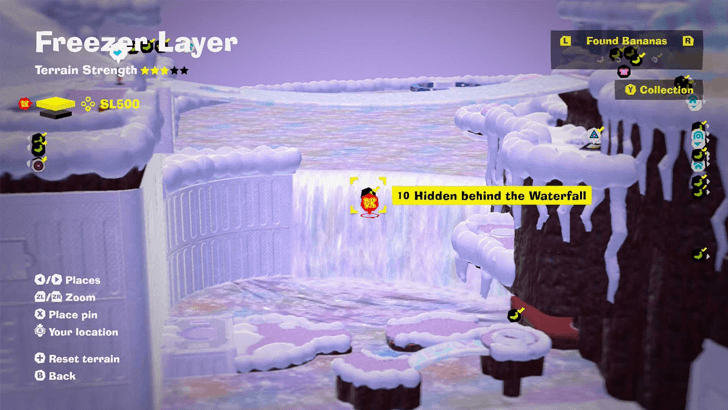
Found in a sewer pipe behind the waterfall. |
||
| 11 |
 |
 |
|
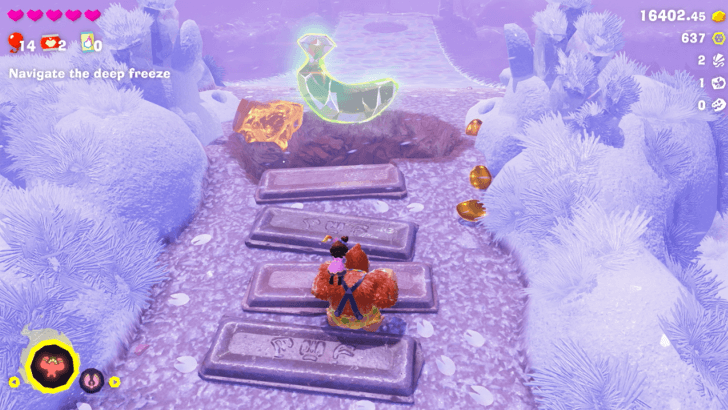
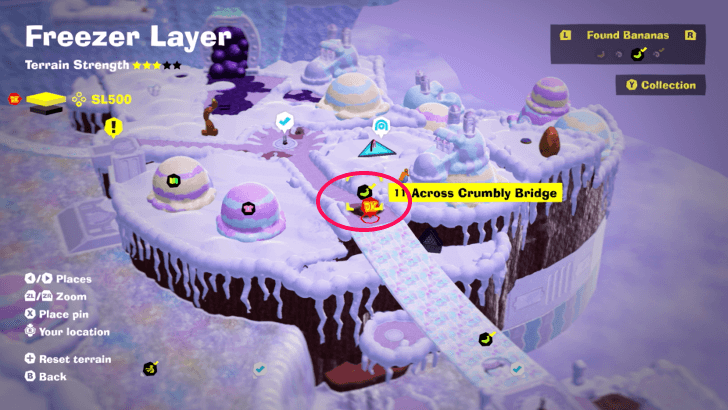
Found near the entrance of the Crumbly Bridge town. |
||
| 12 |
 |
 |
|
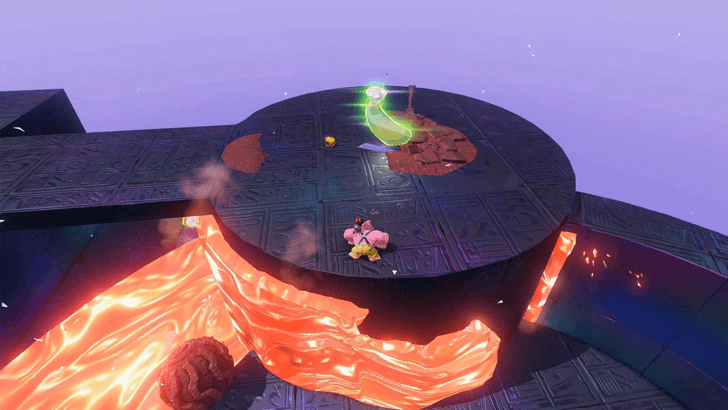
Found inside Red-Hot Rotations Challenge Course 1. It is found near the exit. |
||
| 13 |
 |
 |
|
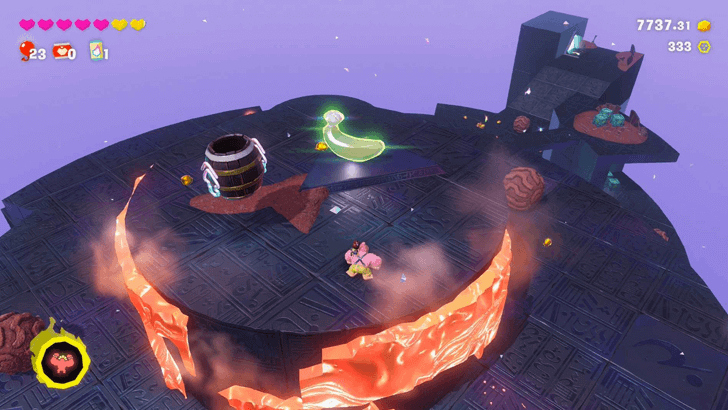
Found at the end of the Red-Hot Rotations Challenge Course 1. |
||
| 14 |
 |
|
|
Found inside Red-Hot Rotations Challenge Course 1. Drop down the ledge, scale the wall along with the lava. |
||
| 15 |
 |
 |
|
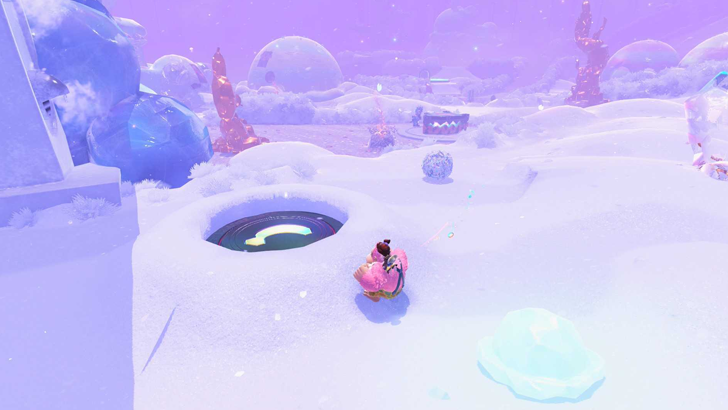
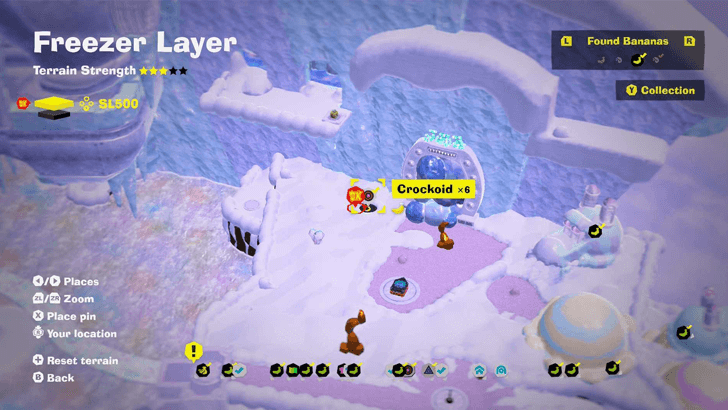
Enter the manhole near Snowy Crossroads and defeat six Crockoids. |
||
| 16 |
 |
 |
|
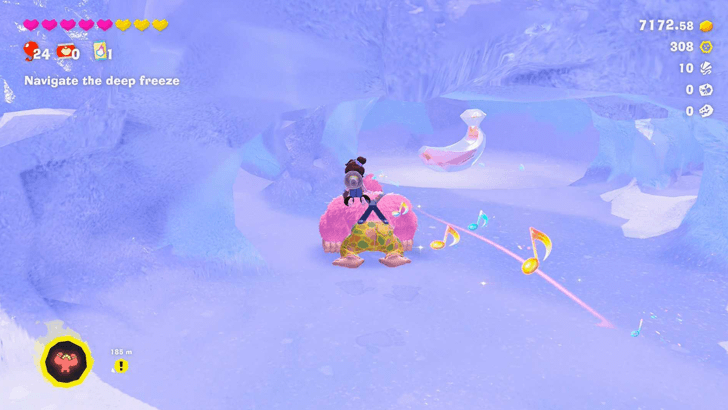
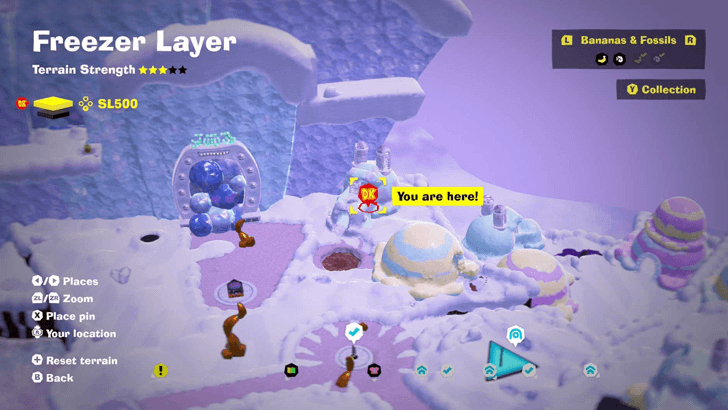
Found inside a structure made of snow. |
||
| 17 |
 |
 |
|
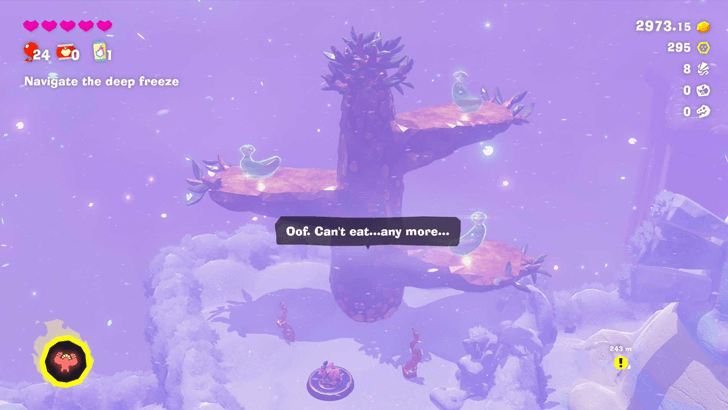
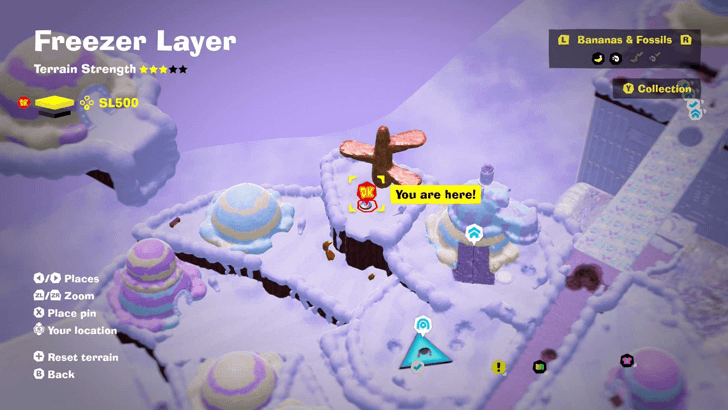
Offer gold at the Growtone just beside the Crumbly Bridge Getaway. |
||
| 18 |
 |
 |
|
Offer gold at the Growtone just beside the Crumbly Bridge Getaway. |
||
| 19 |
 |
 |
|
Offer gold at the Growtone just beside the Crumbly Bridge Getaway. |
||
| 20 |
 |
|
|
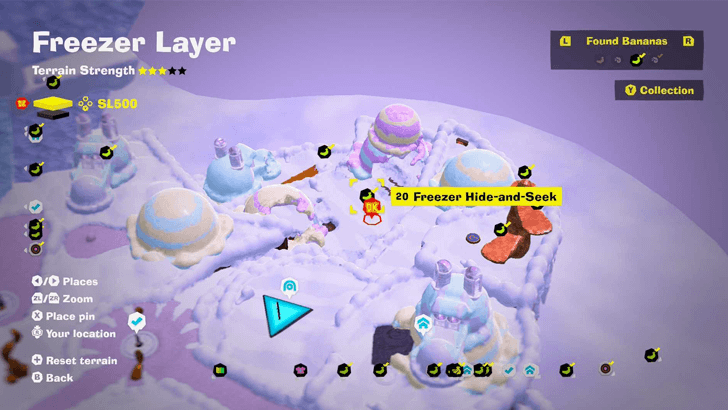
Find all Seekertone pieces to get a Gem. |
||
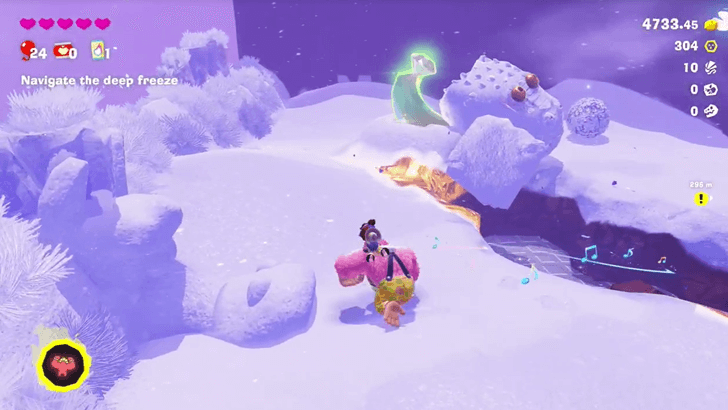
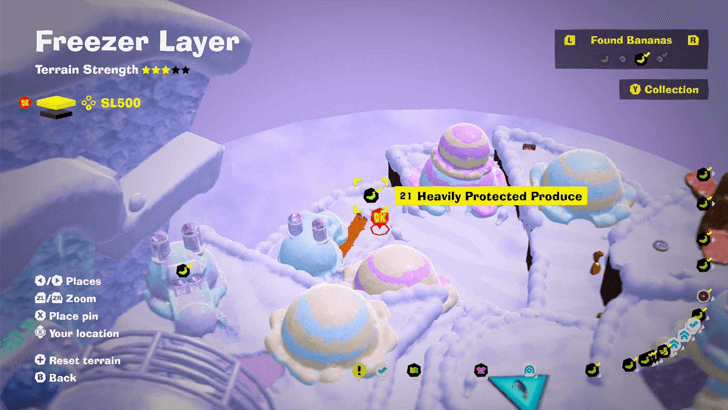
| 21 |
 |
 |
|
Clear the Void Terrain. |
||
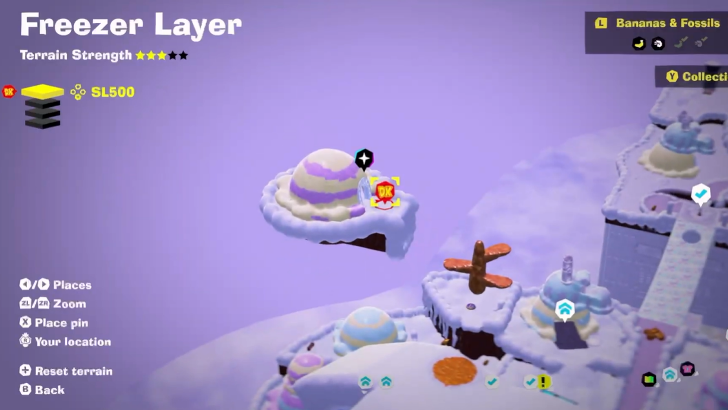
| 22 |
 |
|
|
From the Cooling Tower Top Floor, Use the Ostrich Bananza Form to fly towards the snow wall. Afterwards, use the Snake Form to double jump, then transform into Ostrich mid-air and fly towards the Scoop Hut. |
||
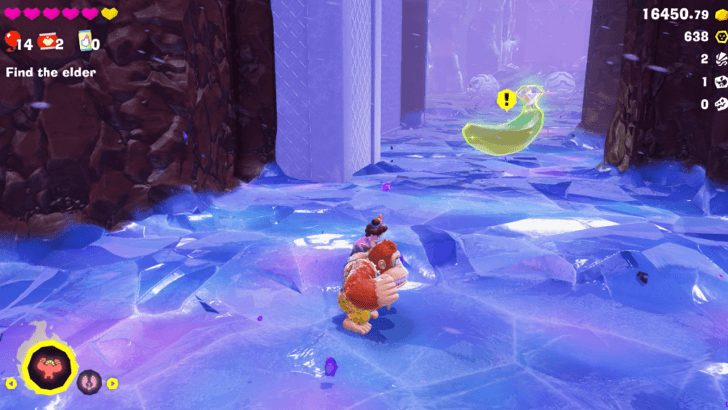
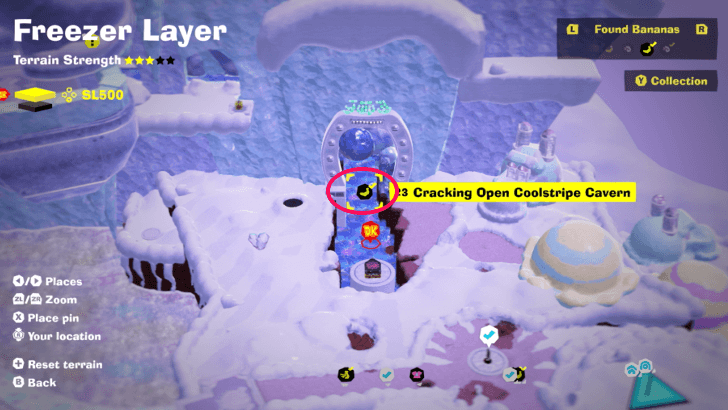
| 23 |
 |
 |
|
Found with story progression. |
||
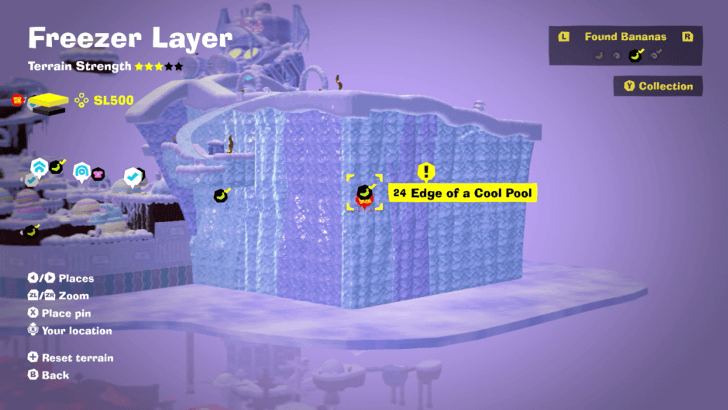
| 24 |
 |
|
|
In Coolstripe Cavern, use the Hand Slap pad to make platforms appear. Cross them to reach the Banandium Gem. |
||
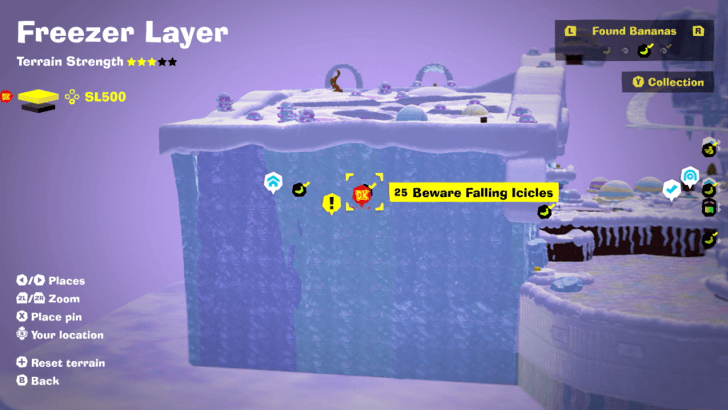
| 25 |
 |
|
|
On a pillar in Coolstripe Cavern. |
||
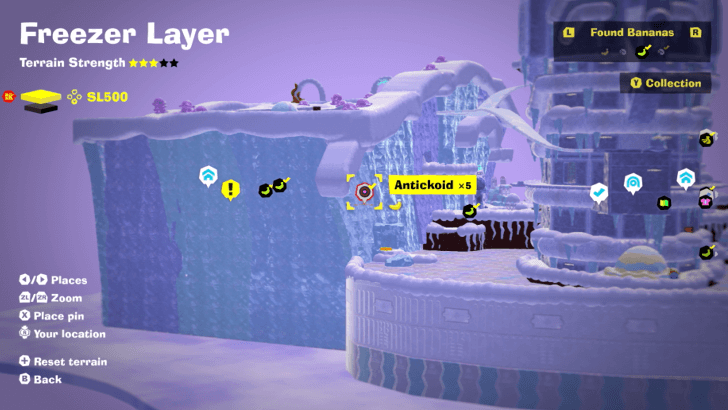
| 26 |
 |
|
|
Enter the manhole found in a cave off to the side in Coolstripe Cavern and defeat five Antickoids with Zebra or Ostrich Bananza. |
||
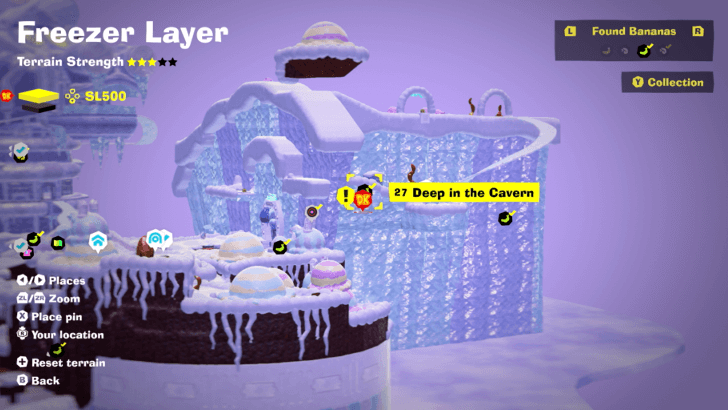
| 27 |
 |
|
|
Near the Coolstripe Cavern exit. |
||
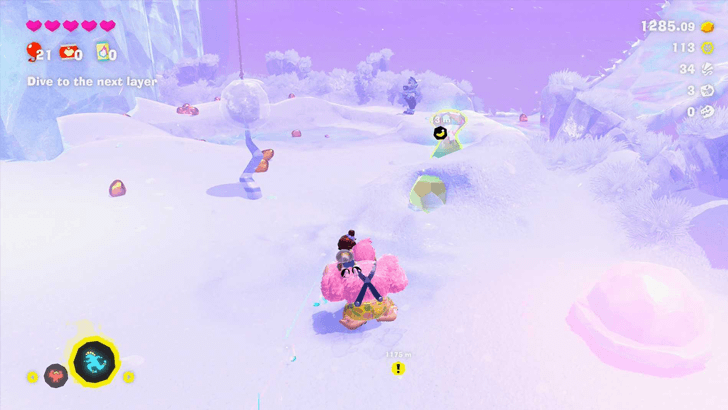
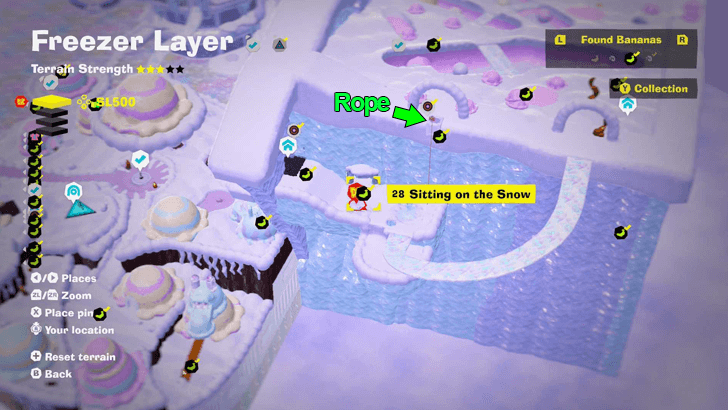
| 28 |
 |
 |
|
Buried under a pile of snow just in front of the Coolstripe Cavern Ledge Getaway. Launch yourself to the top of the structure using the barrel next to Gem #32, then drop down using the rope. |
||
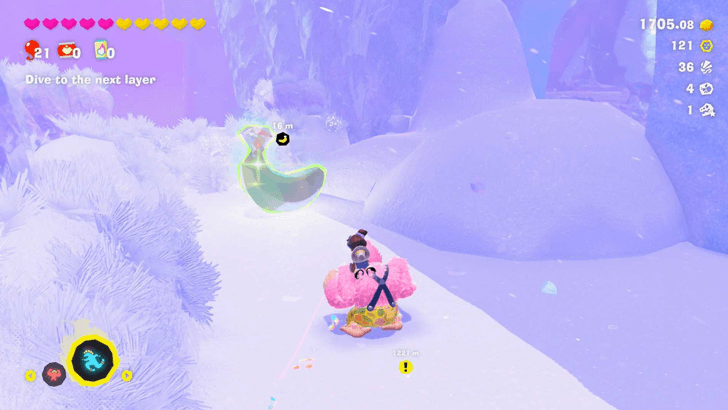
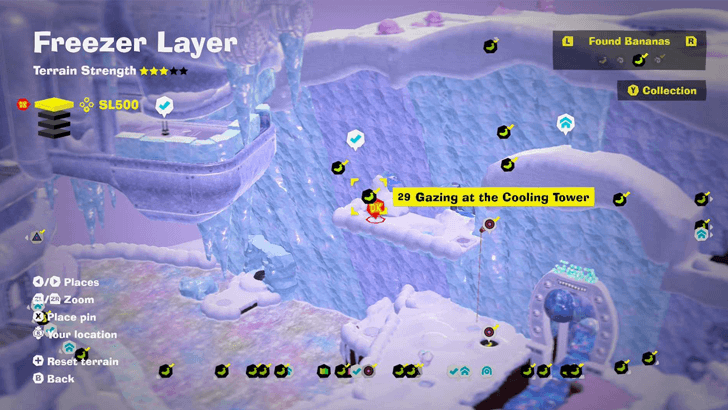
| 29 |
 |
 |
|
From the Coolstripe Cavern Exit checkpoint, backtrack a few steps and destroy the pile of snow to the right. You can also simply drop down to the ledge from the top of the caverns. |
||
| 30 |
 |
 |
|
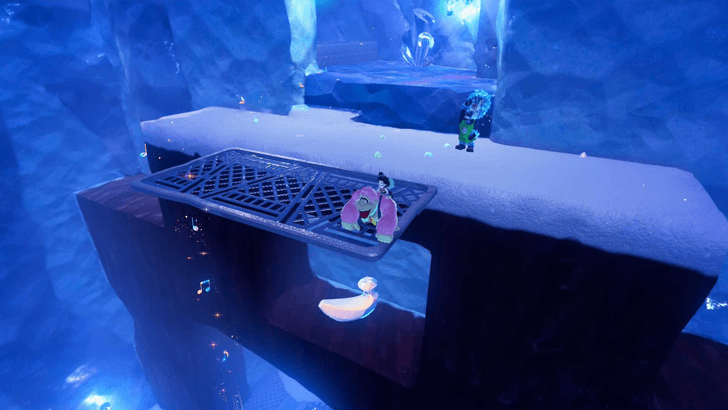
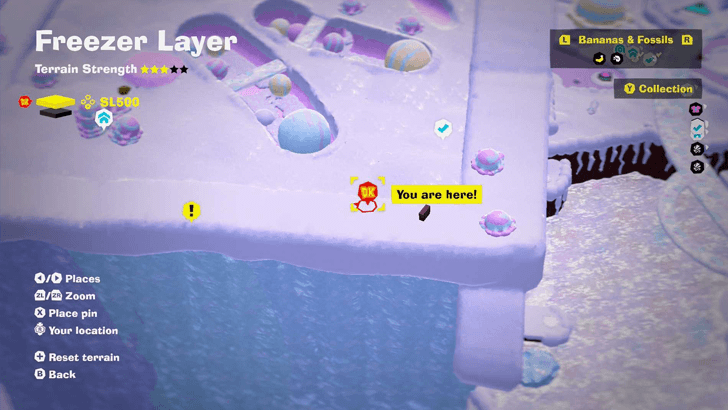
Found in a cubby just after the Coolstripe Cavern Exit checkpoint. |
||
| 31 |
 |
|
|
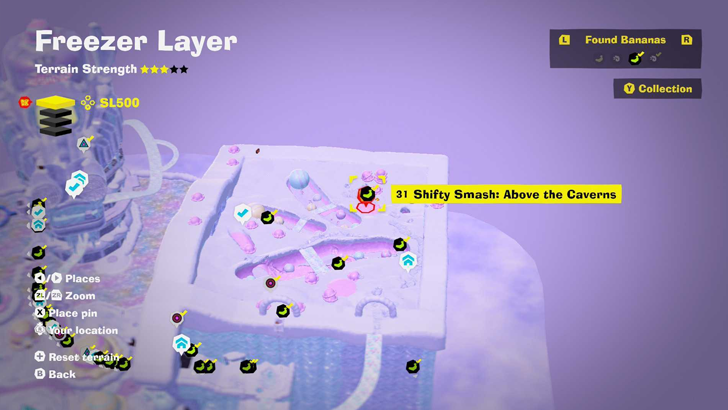
Activate the Shifty Smash Challenge, then smash the blocks while in Zebra Bananza. |
||
| 32 |
 |
 |
|
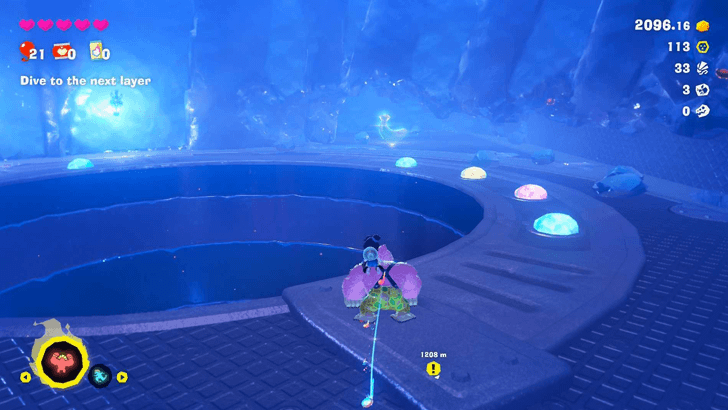
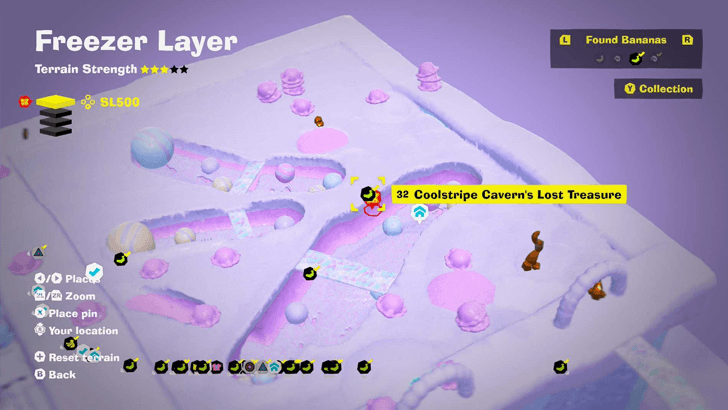
Located behind the wall near the hole that leads to Chocolava Lake. Nearest checkpoint is Coolstripe Cavern Exit. |
||
| 33 |
 |
|
|
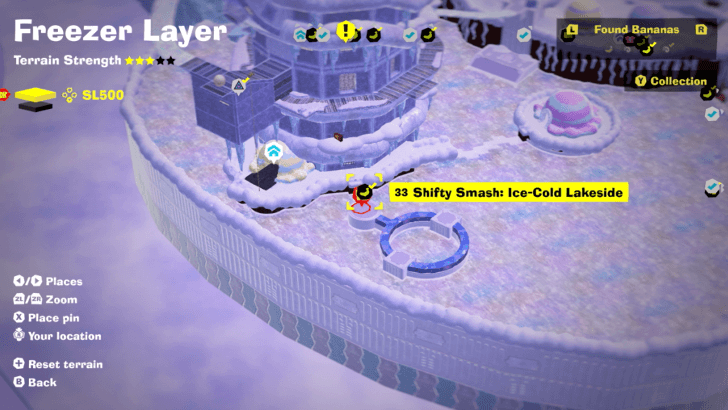
Activate the Shifty Smash Challenge and skate around the platform to destroy the concrete with Dive Punches. Destroy the two blocks to get a Banandium Gem. |
||
| 34 |
 |
|
|
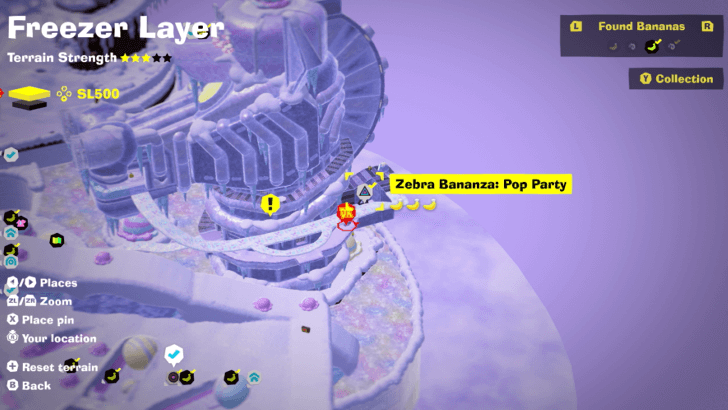
Found inside Zebra Bananza Pop Party Challenge Course 2. From the entrance, fall down to the area below and turn around. Run around the back edge of the platform to find it on the opposite wall. |
||
| 35 |
 |
|
|
Found inside Zebra Bananza Pop Party Challenge Course 2. Pop all 5 balloons to get a Banandium Gem. |
||
| 36 |
 |
|
|
Found inside Zebra Bananza Pop Party Challenge Course 2. From the area one floor below the entrance, fall down one more time to find a hidden platform with the Banandium Gem. |
||
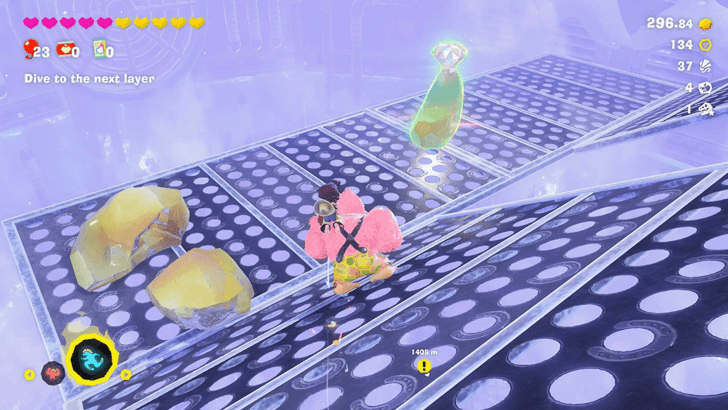
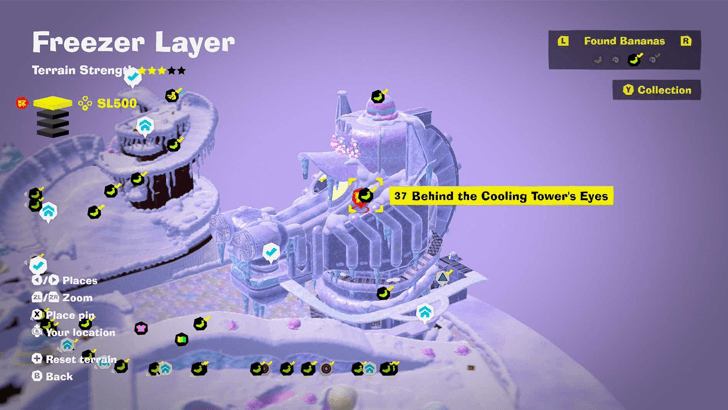
| 37 |
 |
 |
|
From the Cooling Tower Top Floor checkpoint, head forward and exit through the opening on the left. Scale the cooling tower and smash the eyes of the Cooling Tower to reach the Gem. |
||
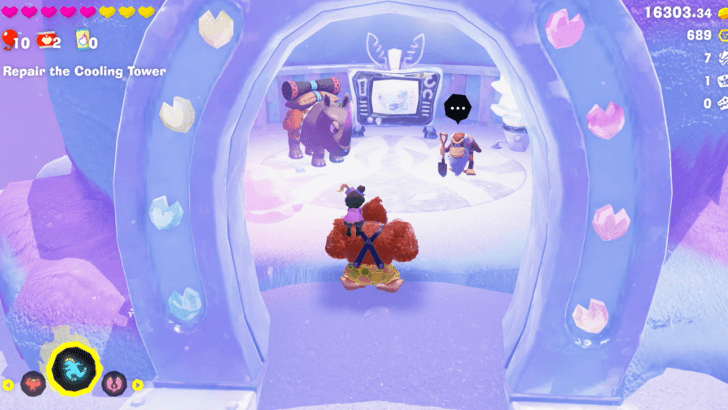
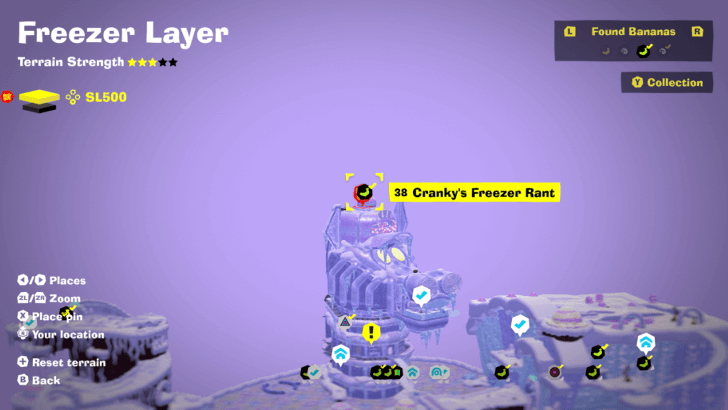
| 38 |
 |
 |
|
Go to the top of the zebra statue's head to find Cranky. Talk to him to get a Banandium Gem. |
||
SL 501 Banana Locations
| Overworld View | Map Location | |
|---|---|---|
| 39 |
 |
 |
|
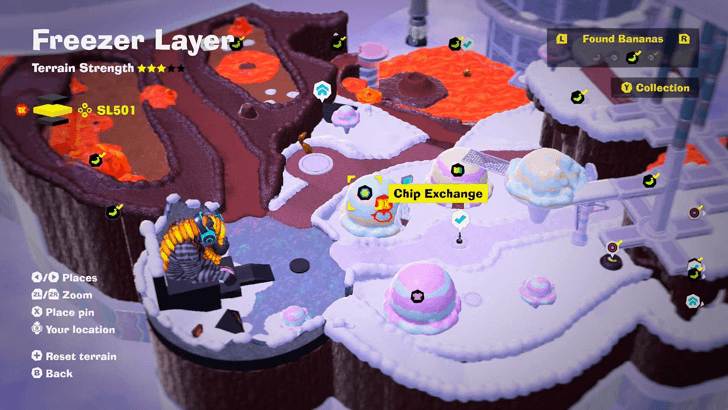
Buy with Banandium Chips to get a Gem. The price will vary depending on how many you have purchased from other layers. You only need to exchange once for the collectible to count. |
||
| 40 |
 |
 |
|
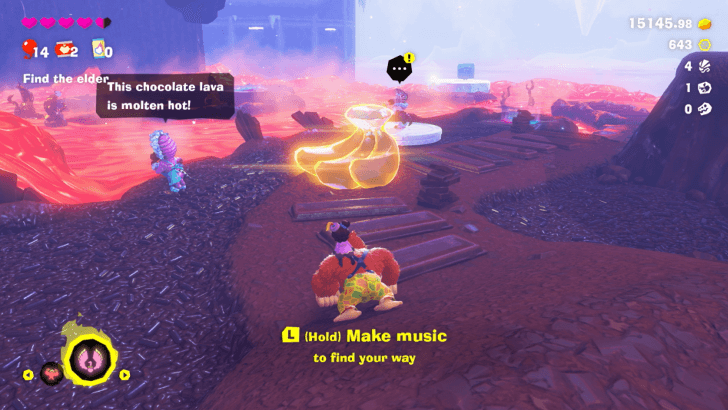
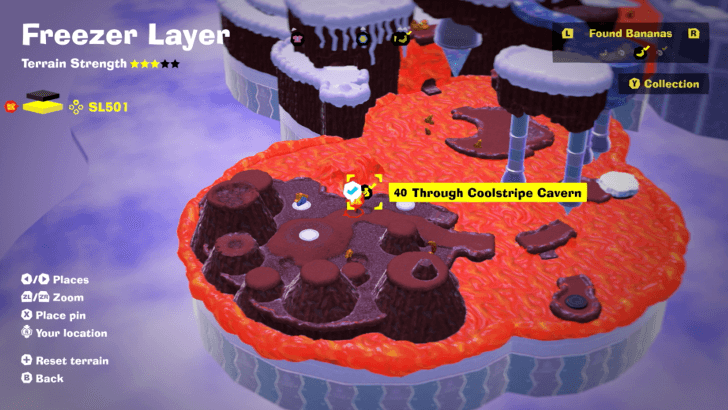
Found with story progression. |
||
| 41 |
 |
 |
|
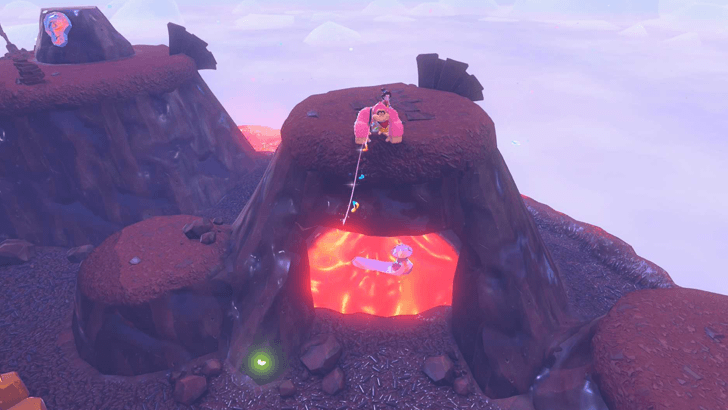
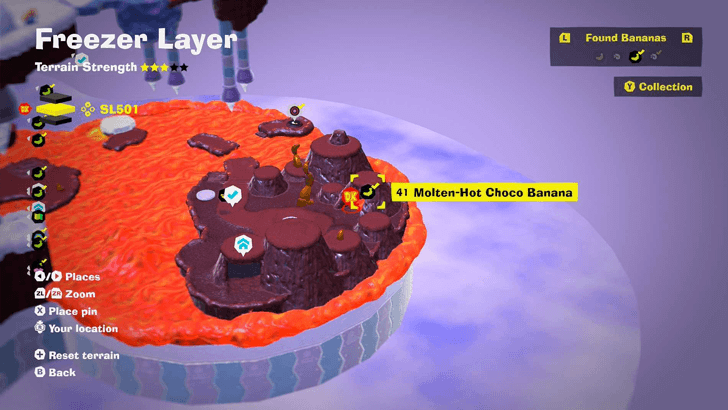
Submerged in lava near the Chocolava Lake Getaway. Get on top of the hill and dig down to reach the Gem. |
||
| 42 |
 |
 |
|
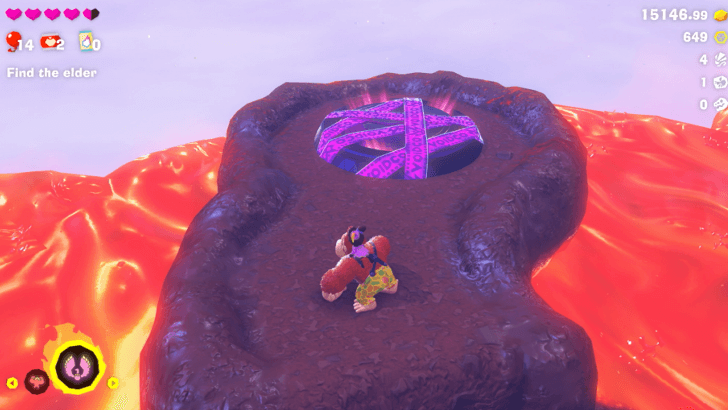
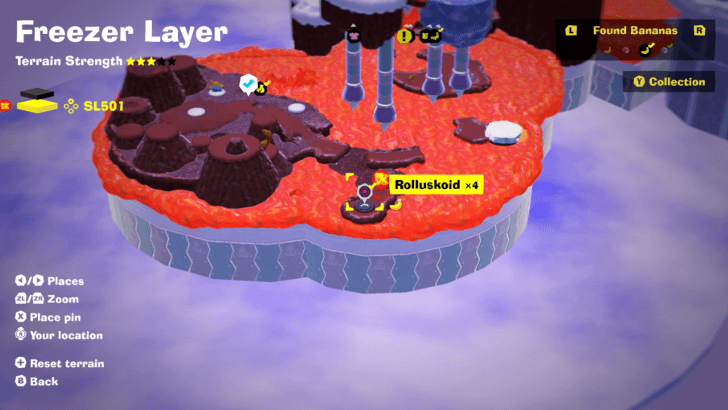
Enter the manhole at the end of the path and defeat four Rolluskoids. |
||
| 43 |
 |
 |
|
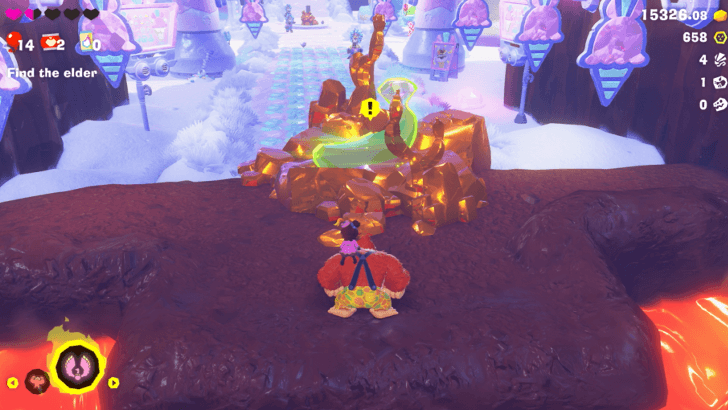
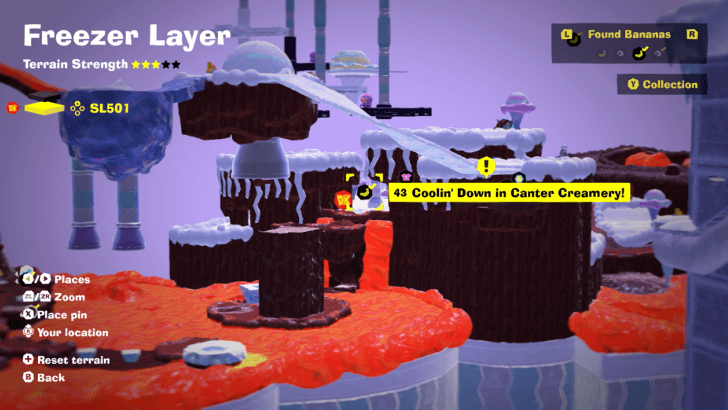
Found with story progression. |
||
| 44 |
 |
 |
|
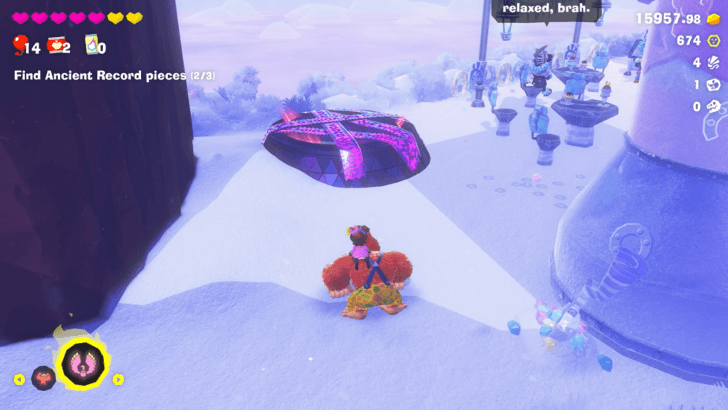
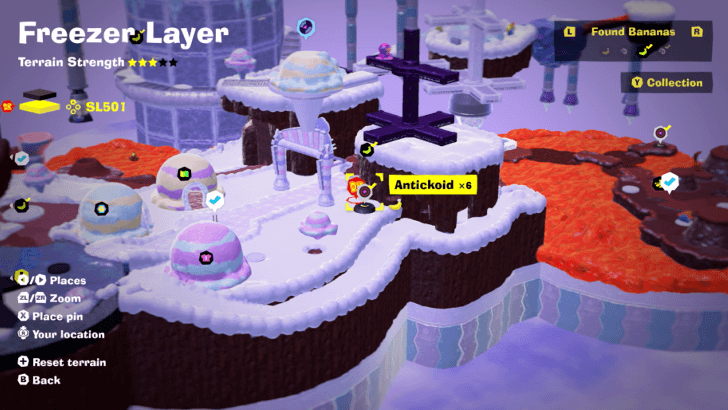
Enter the manhole next to the arch and defeat six Antickoids. |
||
| 45 |
 |
 |
|
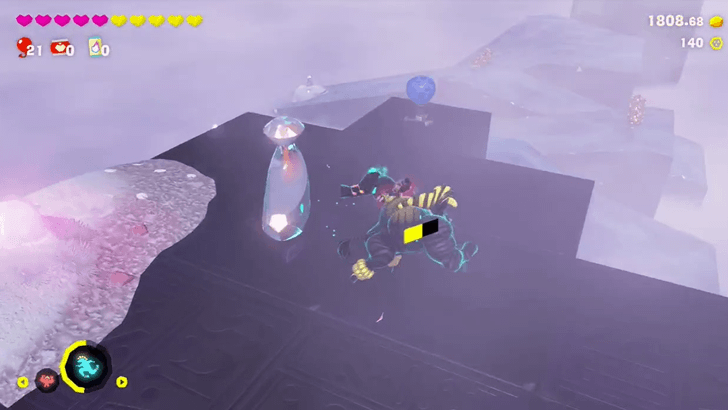
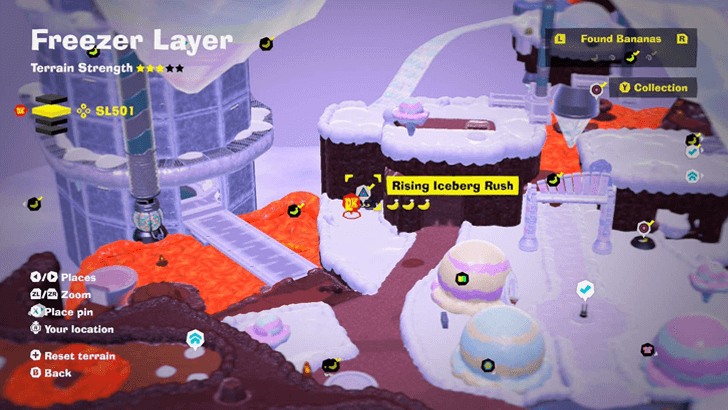
Found inside Rising Iceberg Rush Challenge Course 3. It is found along the course. |
||
| 46 |
 |
 |
|
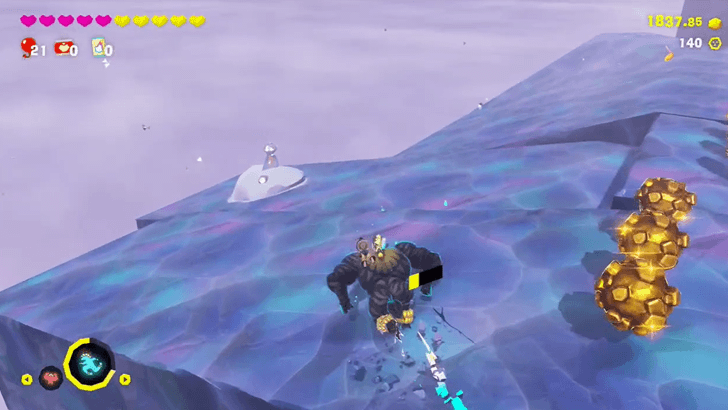
Found inside Rising Iceberg Rush Challenge Course 3. It is found along the course. |
||
| 47 |
 |
 |
|
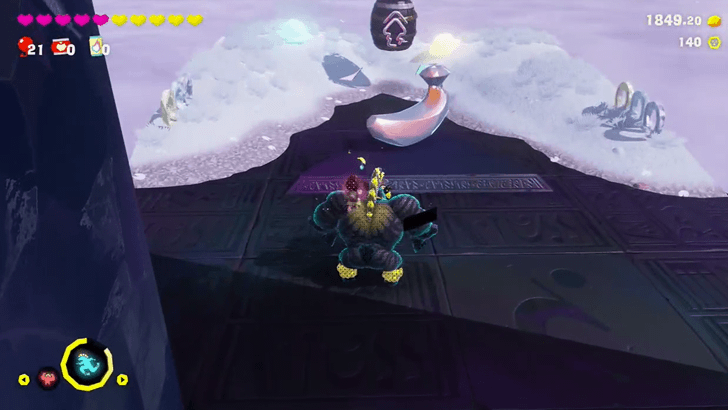
Found at the end of Rising Iceberg Rush Challenge Course 3. |
||
| 48 |
 |
 |
|
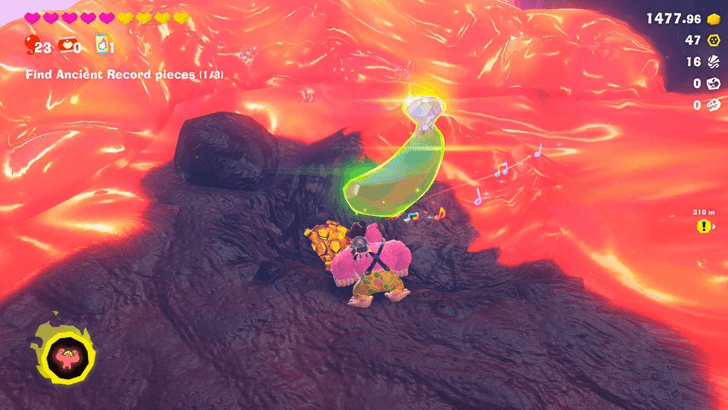
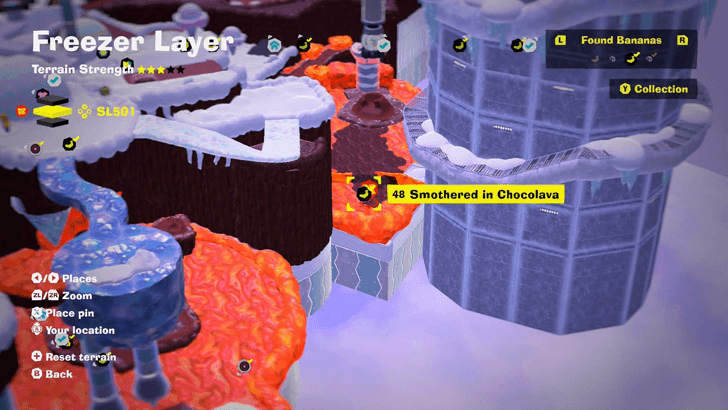
Carve a path for the cubes to trickle down and solidify the lava to reach the Gem. |
||
| 49 |
 |
 |
|
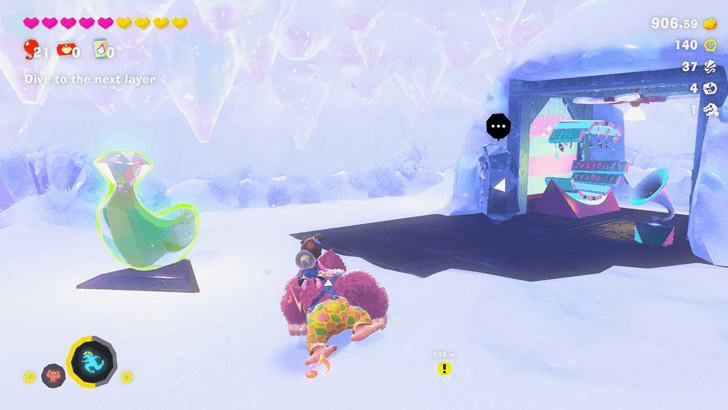
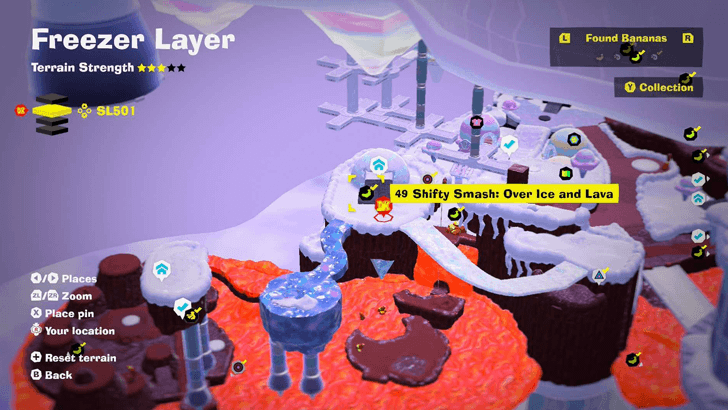
Complete the Shifty Smash Challenge right in front of the Floating Chocolava Lake Getaway. Use Zebra Bananza to cross the bridge and reach the Getaway. |
||
| 50 |
 |
 |
|
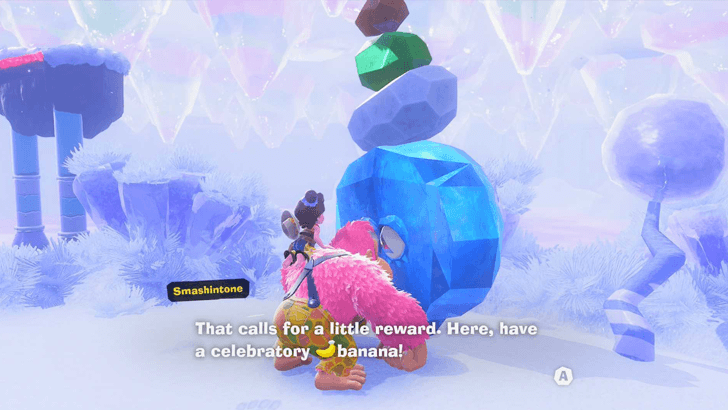
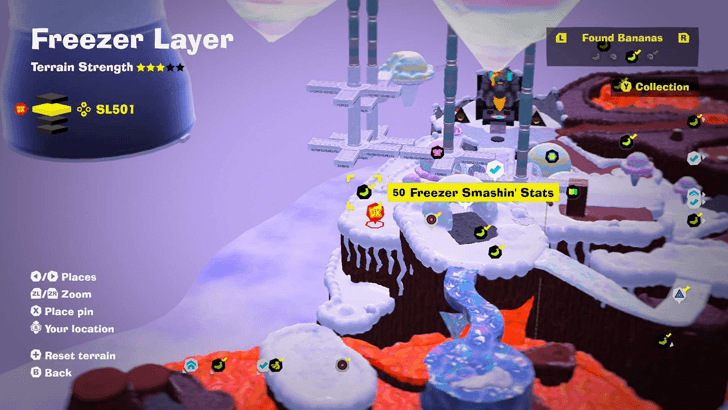
Talk to Smashintone after smashing 20,000 m3 of snow in the Freezer Layer. |
||
| 51 |
 |
|
|
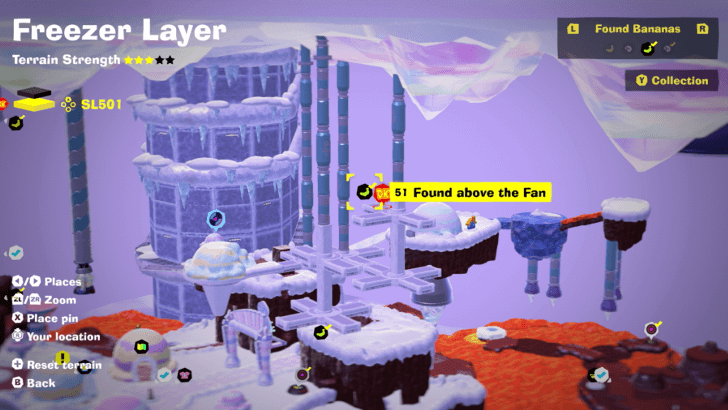
When climbing the fans to obtain a piece of the Ancient Record, continue climbing up to find a Banandium Gem at the top of one of the fans. |
||
| 52 |
 |
 |
|
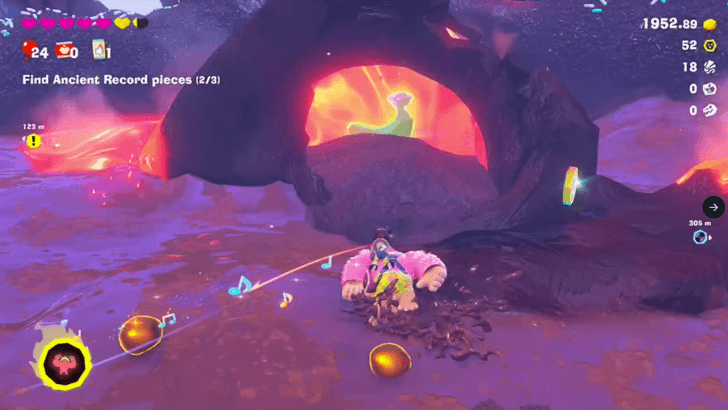
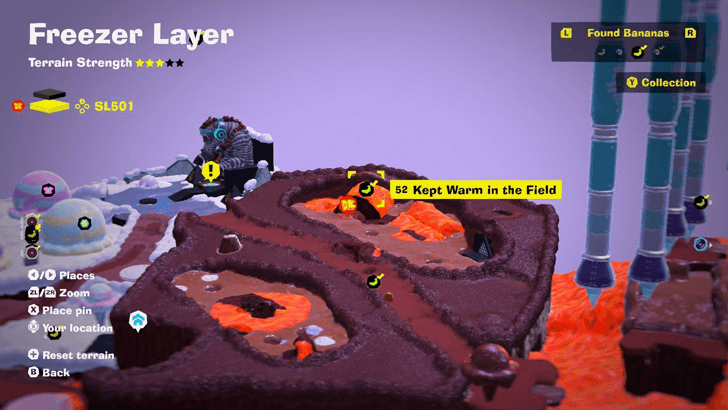
Found inside a rotating rock. |
||
| 53 |
 |
 |
|
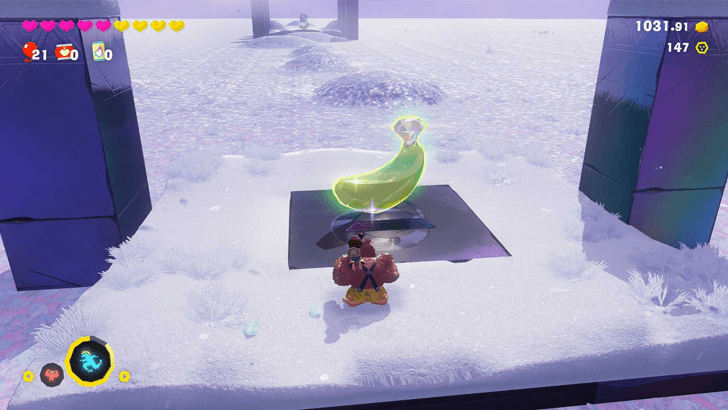
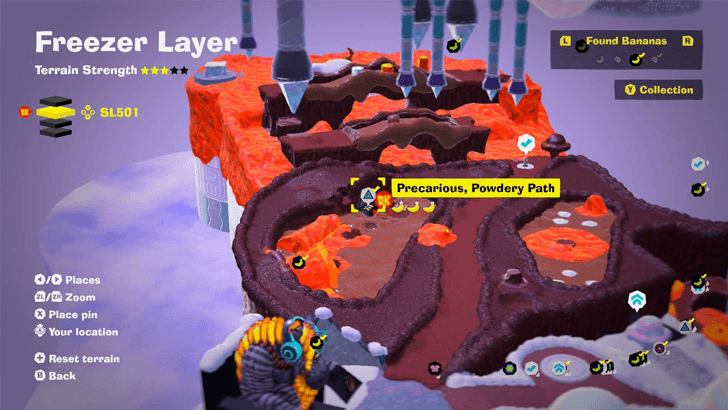
Found inside Precarious, Powdery Path Challenge Course 4. It is found along the course. |
||
| 54 |
 |
 |
|
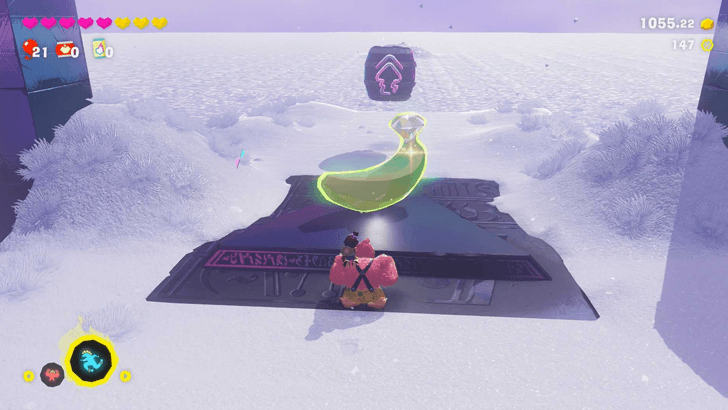
Found inside Precarious, Powdery Path Challenge Course 4. It is found along the course. |
||
| 55 |
 |
 |
|
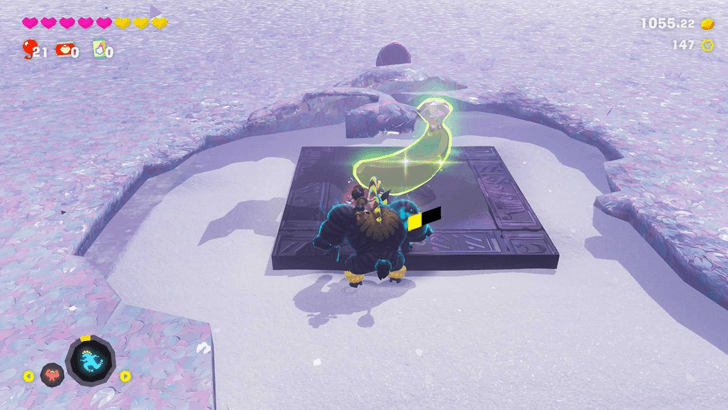
Found at the end of Precarious, Powdery Path Challenge Course 4. |
||
| 56 |
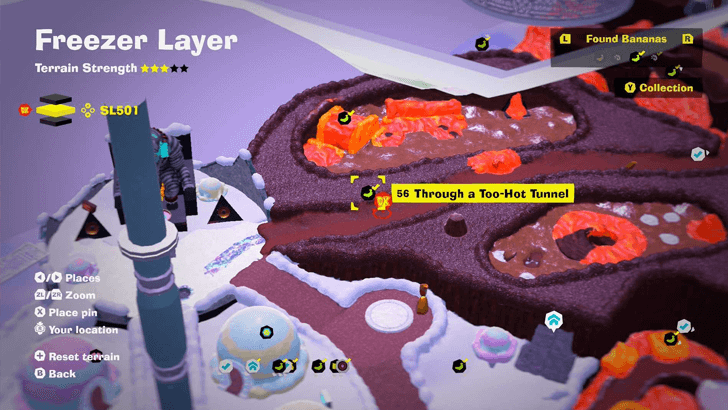 |
|
|
Toss an ice cube at the lava to clear a path to the turnip at the center. Pull the turnip and drop down. Pull chunks of ice and slide them through the tunnel to cross safely. |
||
| 57 |
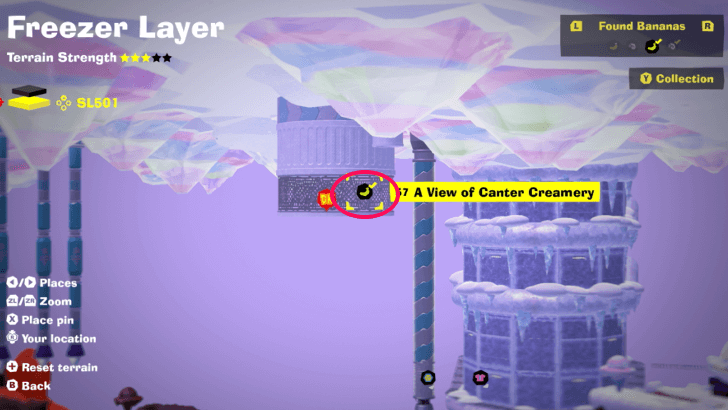 |
|
|
In the cavern below town, go through a manhole of Void Kong's face to descend and reach the Banandium Gem. |
||
| 58 |
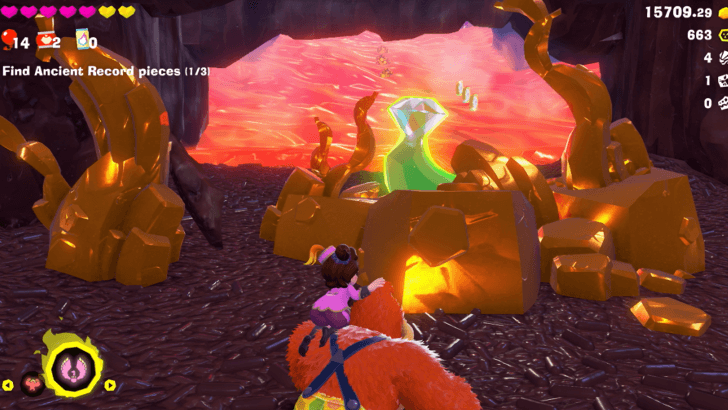 |
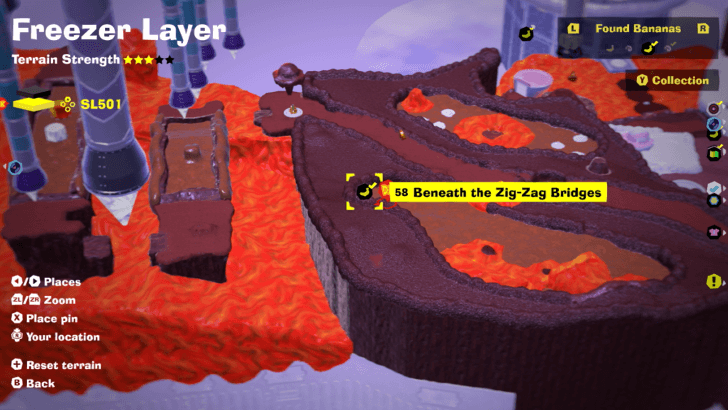 |
|
From the Zig-Zag Bridges area near the Zebra Elder, dig down to find a Banandium Gem in a hidden cave. |
||
| 59 |
 |
 |
|
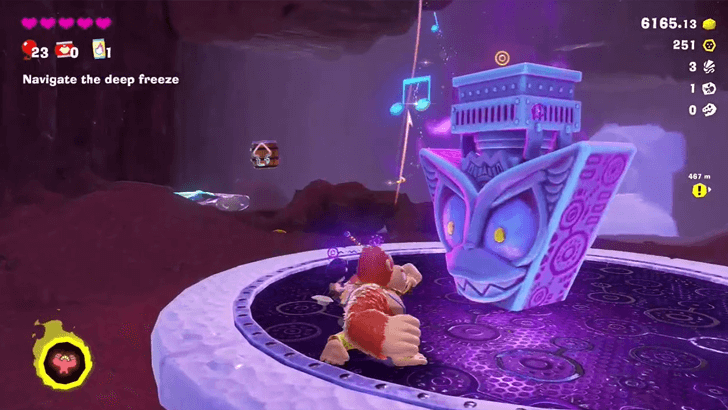
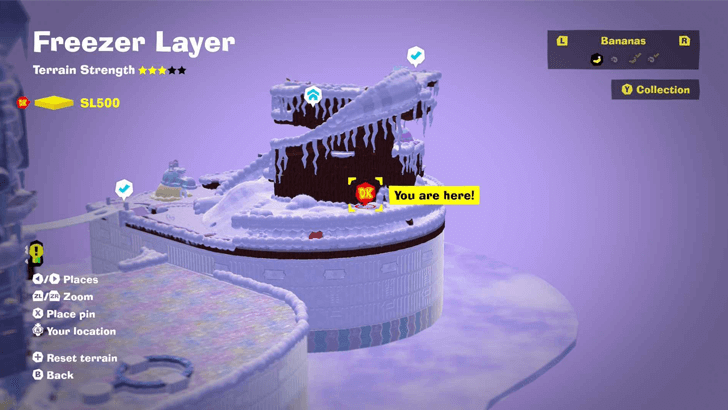
Found below the stake in the cave below the Cold-Colt Crest Hill Getaway. |
||
| 60 |
 |
 |
|
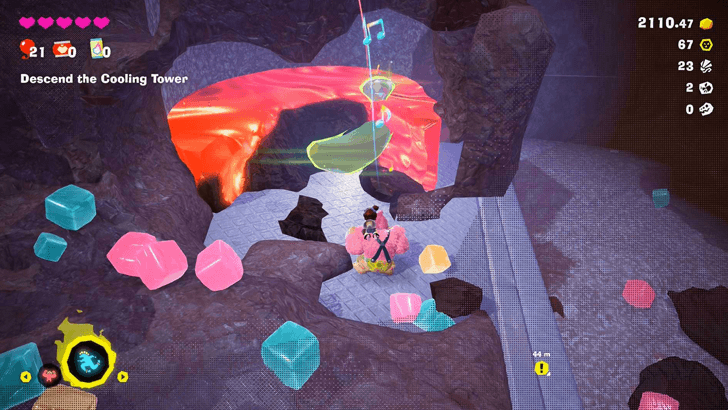
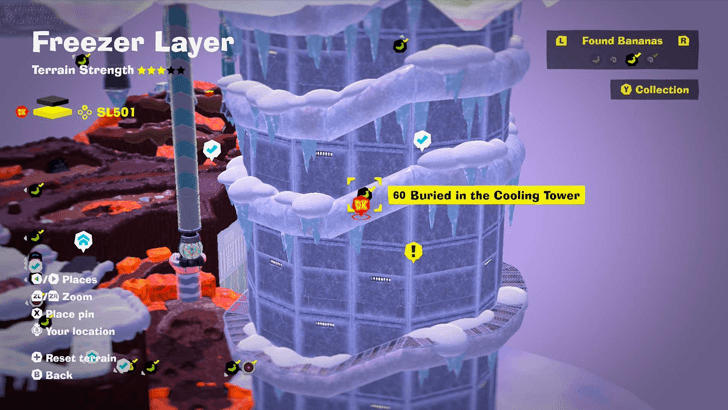
Dig a path for the cubes to trickle down and solidify the lava. |
||
| 61 |
 |
|
|
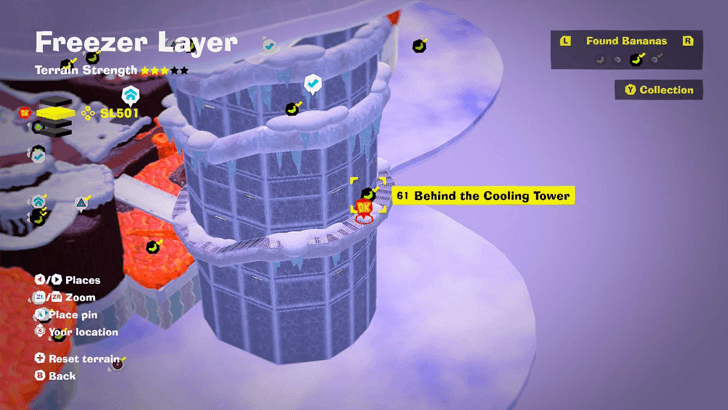
Found on the catwalk of the Cooling Tower. From the cliff closest to the Cooling Tower, roll, jump, then roll again to reach the catwalk. |
||
| 62 |
 |
 |
|
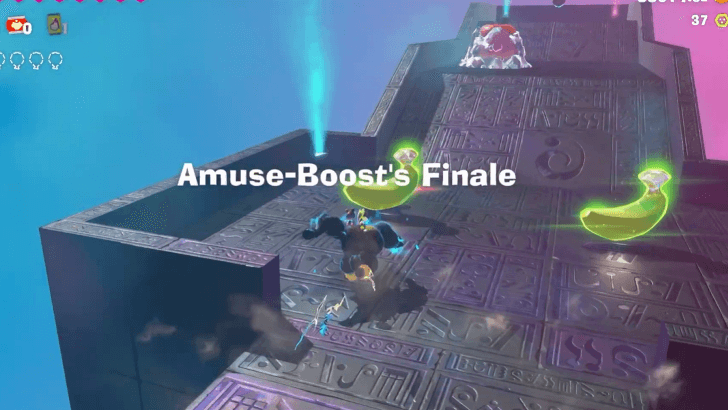
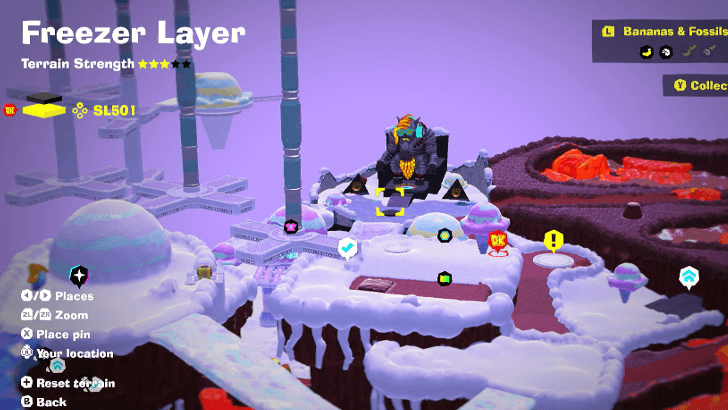
Complete the Amuse Boost obstacle course in the Zebra Elder's Rehearsal Hall. |
||
| 63 |
 |
 |
|
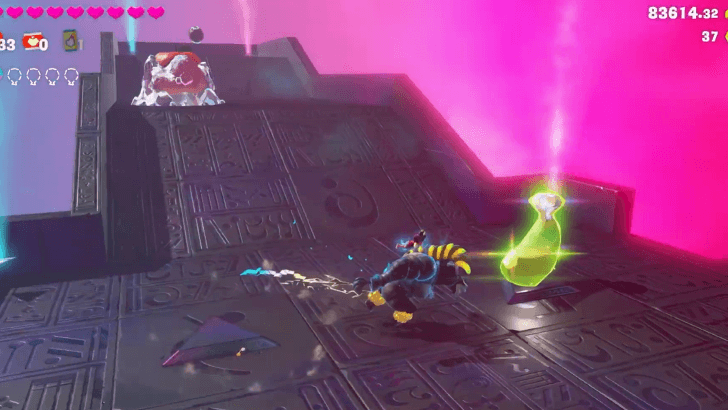
Complete the Amuse Boost obstacle course with at least 20 seconds remaining in the Zebra Elder's Rehearsal Hall. |
||
| 64 |
 |
 |
|
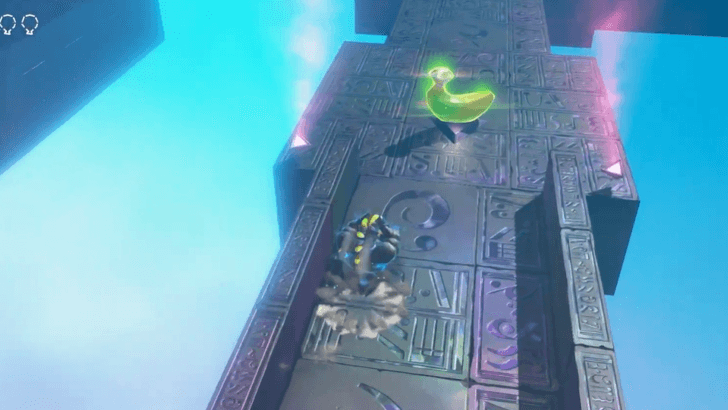
Complete the Shifty Smash challenge after the Amuse Boost obstacle course in the Zebra Elder's Rehearsal Hall. |
||
| 65 |
 |
 |
|
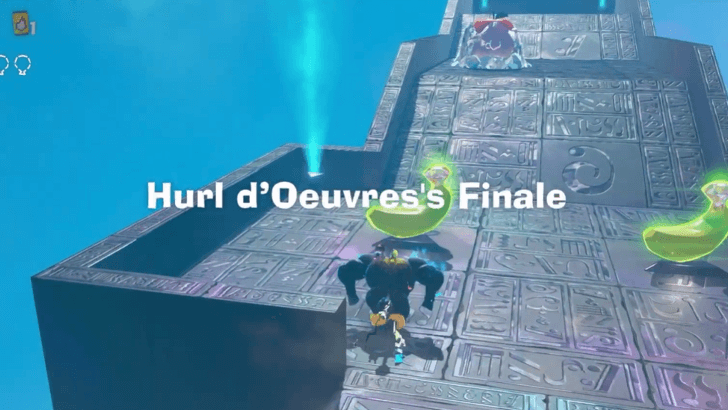
Complete the Hurl d'Oeuvres obstacle course in the Zebra Elder's Rehearsal Hall. |
||
| 66 |
 |
 |
|
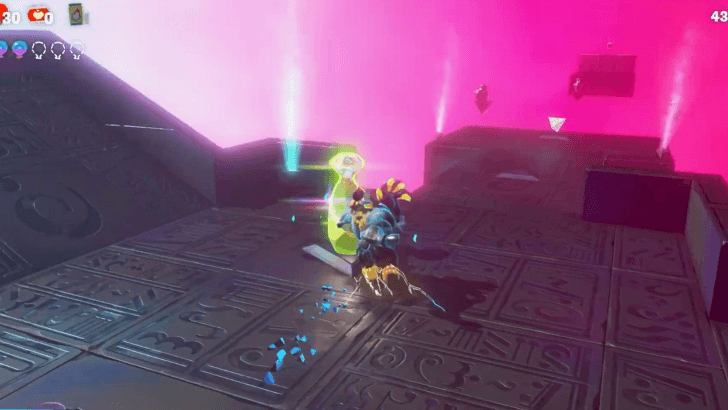
Complete the Hurl d'Oeuvres obstacle course with at least 20 seconds remaining in the Zebra Elder's Rehearsal Hall. |
||
| 67 |
 |
 |
|
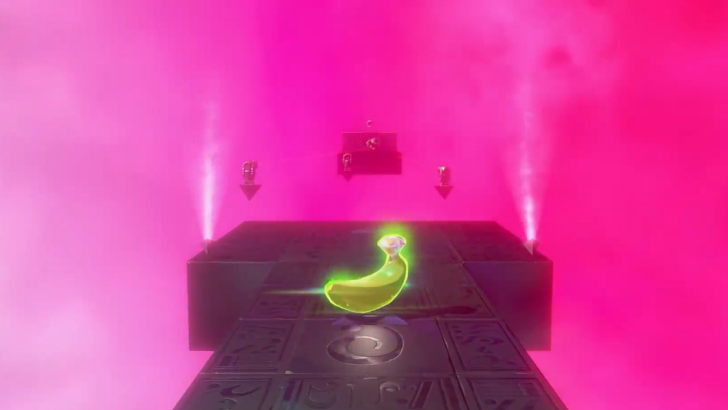
Complete the Shifty Smash challenge after the Hurl d'Oeuvres obstacle course in the Zebra Elder's Rehearsal Hall. |
||
| 68 |
 |
 |
|
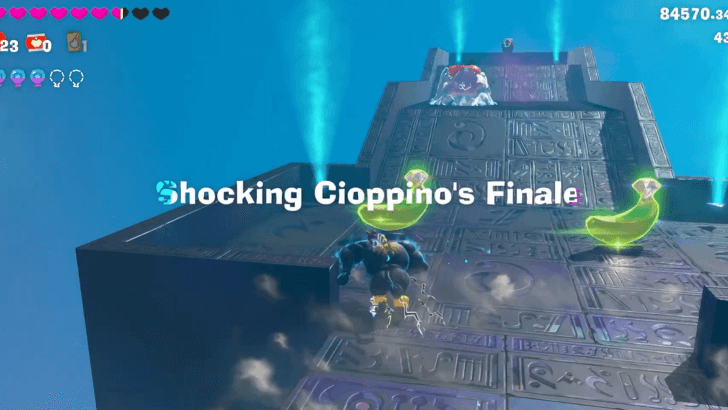
Complete the Shocking Cioppino obstacle course in the Zebra Elder's Rehearsal Hall. |
||
| 69 |
 |
 |
|
Complete the Shocking Cioppino obstacle course with at least 20 seconds remaining in the Zebra Elder's Rehearsal Hall. |
||
| 70 |
 |
 |
|
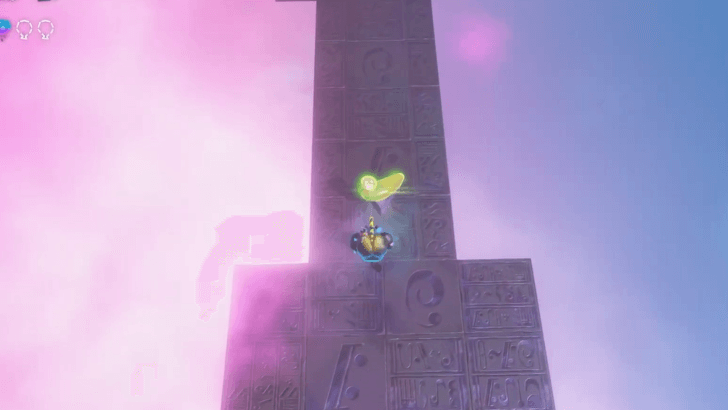
Complete the Shifty Smash challenge after the Shocking Cioppino obstacle course in the Zebra Elder's Rehearsal Hall. |
||
| 71 |
 |
 |
|
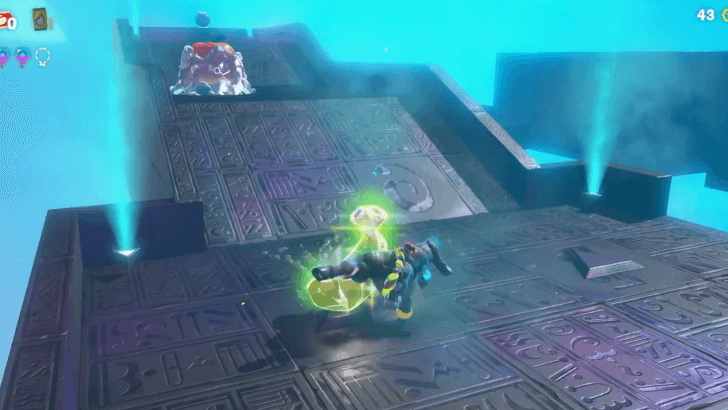
Complete the Switcheroo Entree obstacle course in the Zebra Elder's Rehearsal Hall. |
||
| 72 |
 |
 |
|
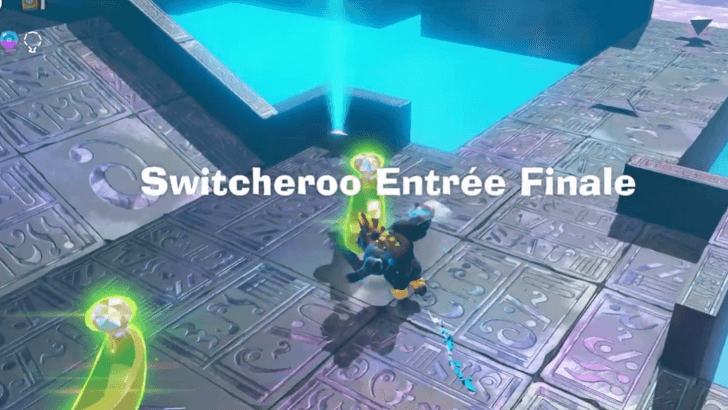
Complete the Switcheroo Entree obstacle course with at least 20 seconds remaining in the Zebra Elder's Rehearsal Hall. |
||
| 73 |
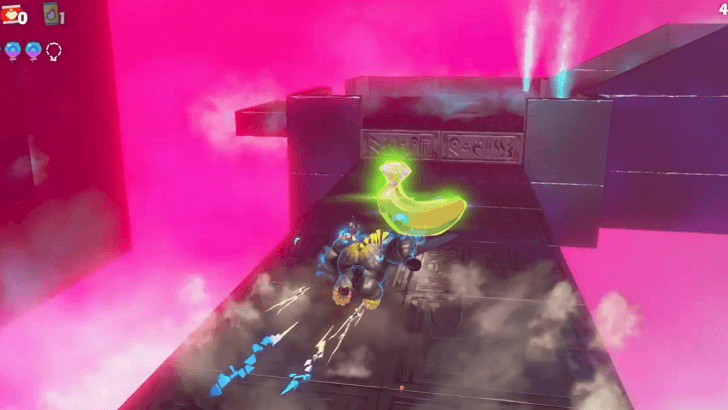 |
 |
|
Complete the Shifty Smash challenge after the Switcheroo Entree obstacle course in the Zebra Elder's Rehearsal Hall. |
||
| 74 |
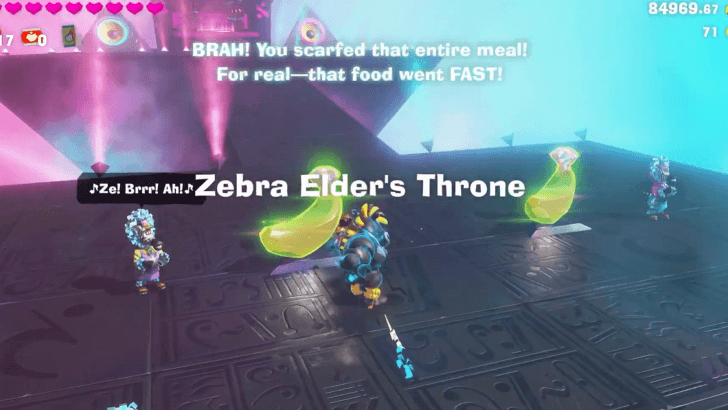 |
 |
|
Complete the Dangerous Desserts obstacle course in the Zebra Elder's Rehearsal Hall. |
||
| 75 |
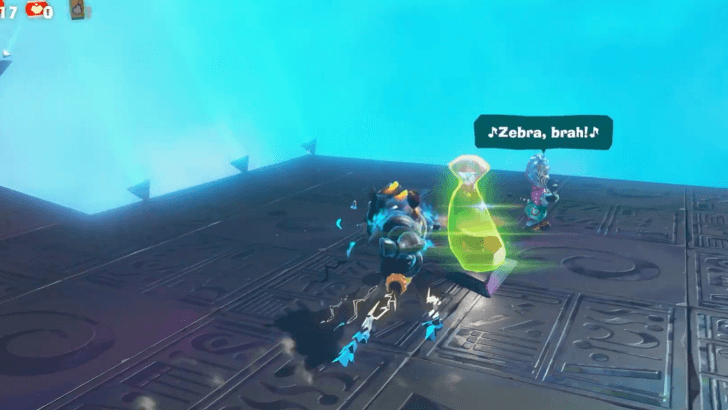 |
 |
|
Complete the Dangerous Desserts obstacle course with at least 20 seconds remaining in the Zebra Elder's Rehearsal Hall. |
||
SL 502 Banana Locations
| Overworld View | Map Location | |
|---|---|---|
| 76 |
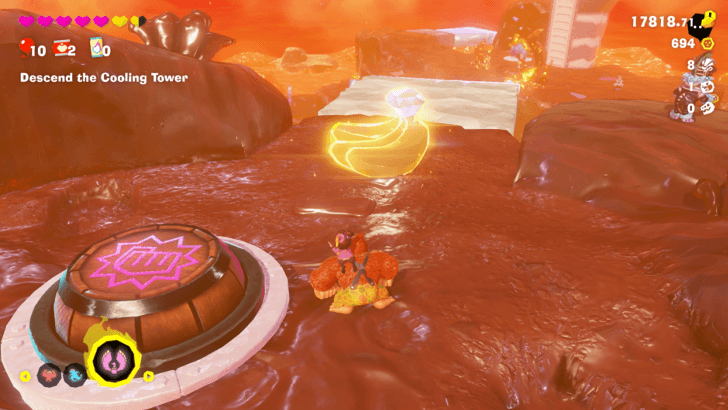 |
 |
|
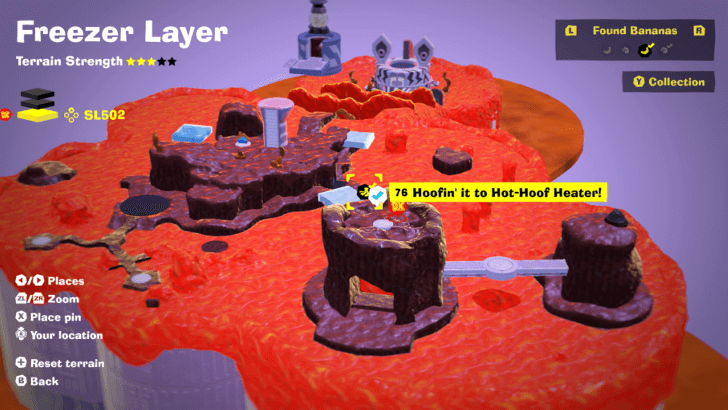
Found with story progression. |
||
| 77 |
 |
 |
|
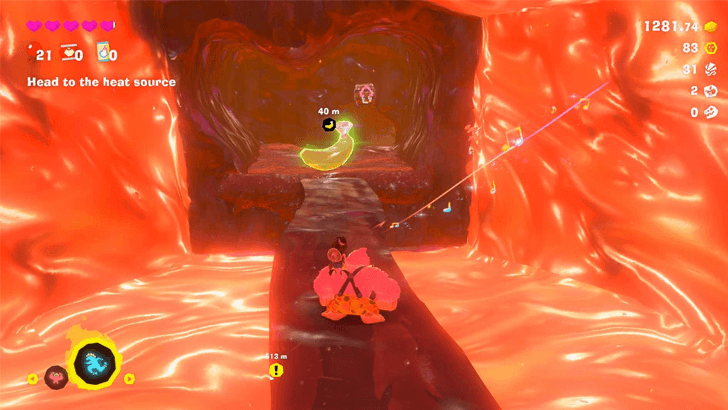
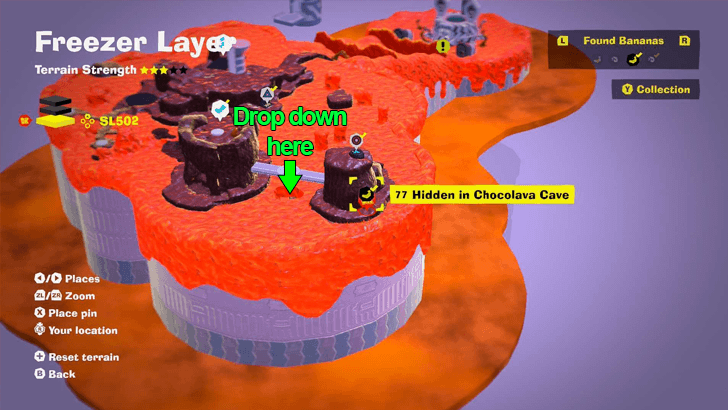
Drop down the hole under the bridge near the Hot-Hoof Heater checkpoint. Cross the rotating bridges to reach the Gem. |
||
| 78 |
 |
 |
|
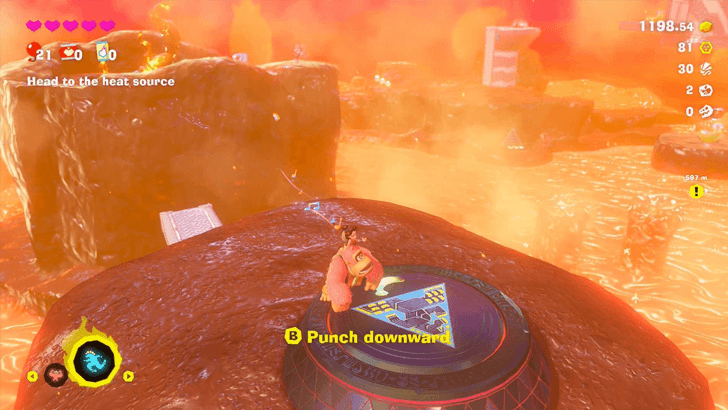
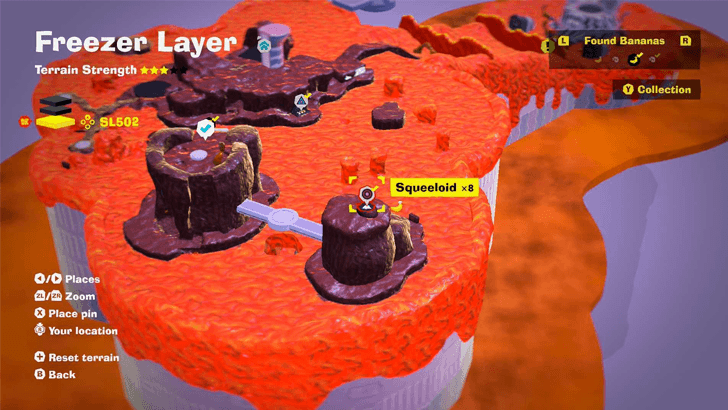
Pay 600 gold to the Constructone and enter the manhole. Defeat eight Squeeloids to get the Gem. |
||
| 79 |
 |
|
|
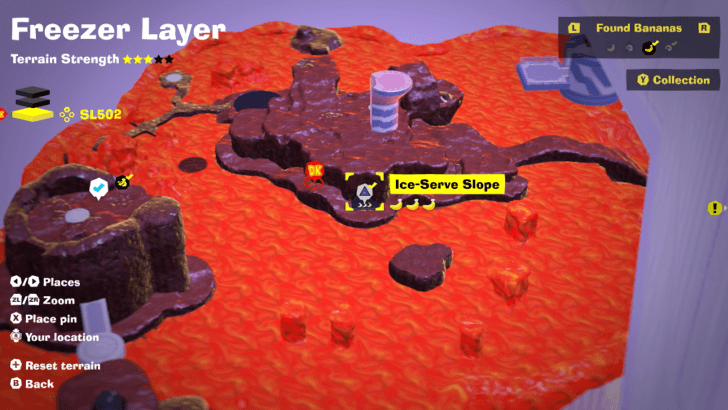
Found inside Ice-Serve Slope Challenge Course 5. Smash the snow and concrete to create a path for the ice cream to flow through. Fill up the basket at the end to make the Banandium Gem appear. |
||
| 80 |
 |
|
|
Found inside Ice-Serve Slope Challenge Course 5. Find a large pile of snow in the middle of the course and smash it to find a hidden second basket. Change the path to make the ice cream flow into it; the Banandium Gem will appear when the basket is full. You can pick up snow and drop it in front of you with R to block the path you previously created. |
||
| 81 |
 |
|
|
Found inside Ice-Serve Slope Challenge Course 5. The Banandium Gem is in a hidden area off the back end of the course. Look for a climbable wall along the back wall and climb around from the side to find it. |
||
| 82 |
 |
 |
|
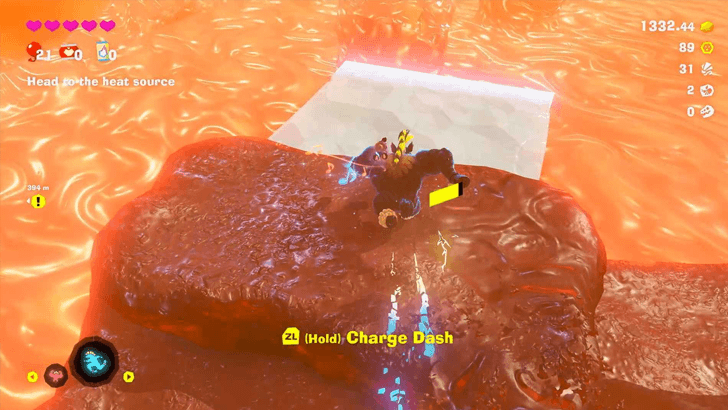
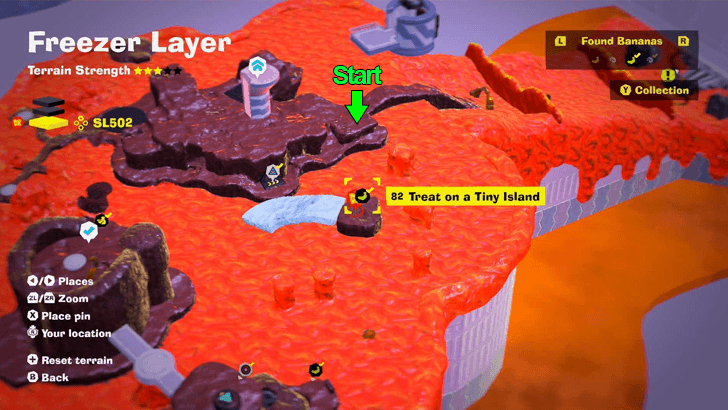
Use Zebra Bananza and follow the ice path leading to the Gem. |
||
| 83 |
 |
 |
|
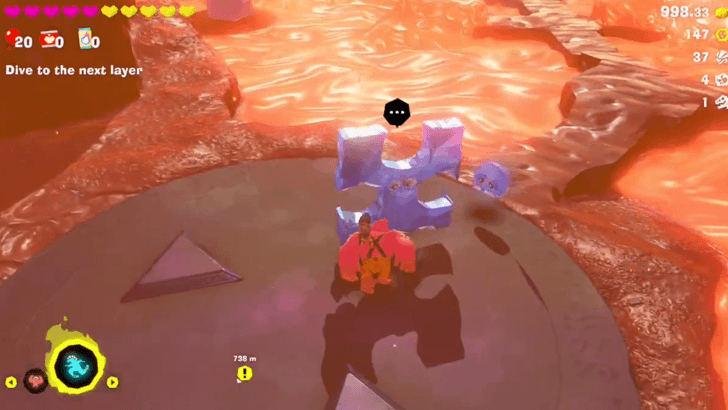
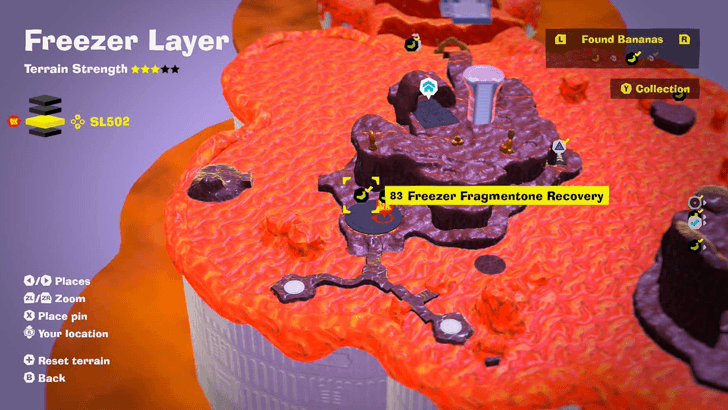
Escort the Fragmentone on the right to safety. |
||
| 84 |
 |
|
|
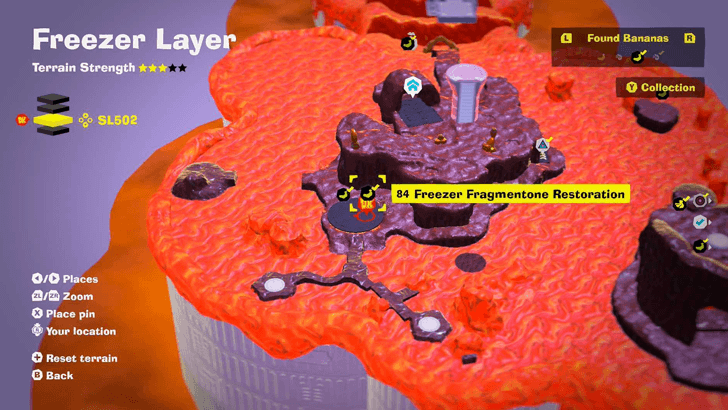
Escort the two Fragmentones on the left to safety. |
||
| 85 |
 |
 |
|
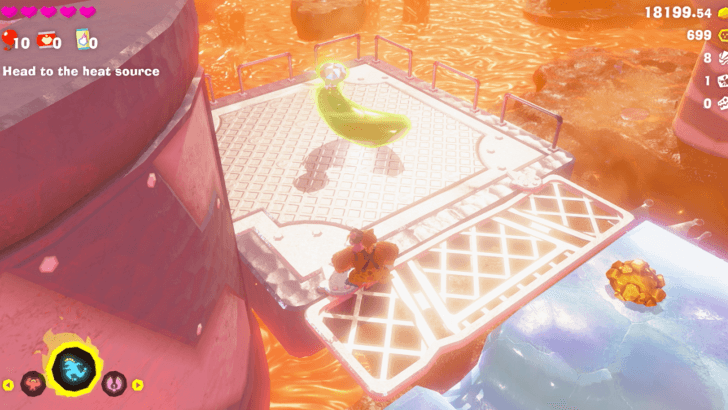
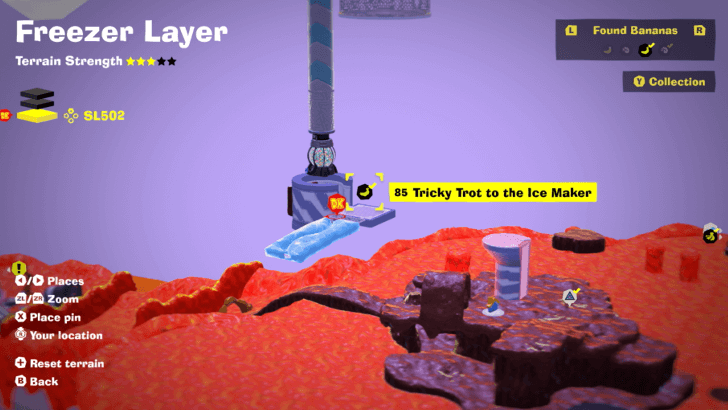
Found with story progression. |
||
| 86 |
 |
|
|
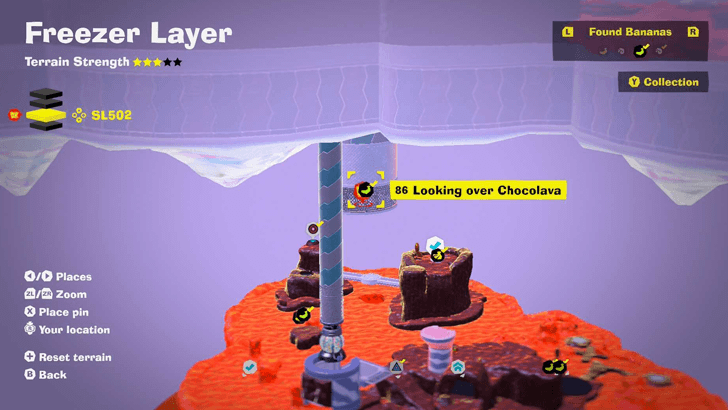
Follow the tunnel in Canter Creamery and destroy the Void Stake at the end, then drop down. |
||
SL 503 Banana Locations
| Overworld View | Map Location | |
|---|---|---|
| 87 |
 |
|
|
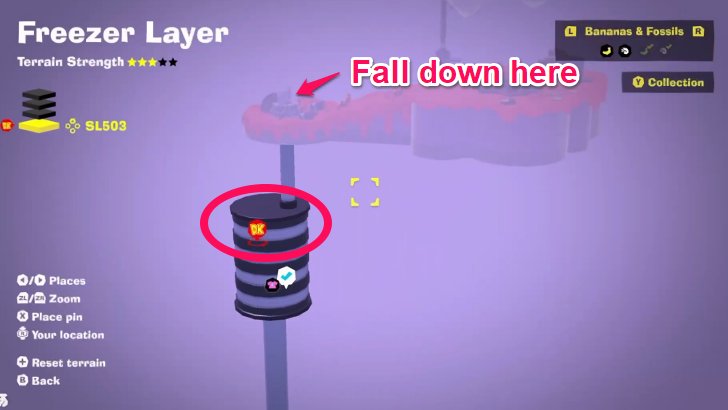
Fall down the pipe and use Ostrich Bananza to reach the Gem. |
||
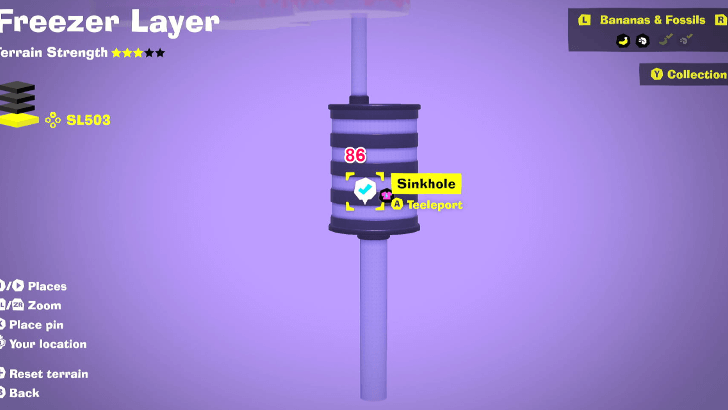
There is one Banandium Gem that can be found in SL 503. However, this area is only accessible in the post game.
Banandium Gems List and Locations
Freezer Layer Fossils
Fossils Map Overview
SL 500 Fossil Locations
| Overworld View | Map Location | |
|---|---|---|
 |
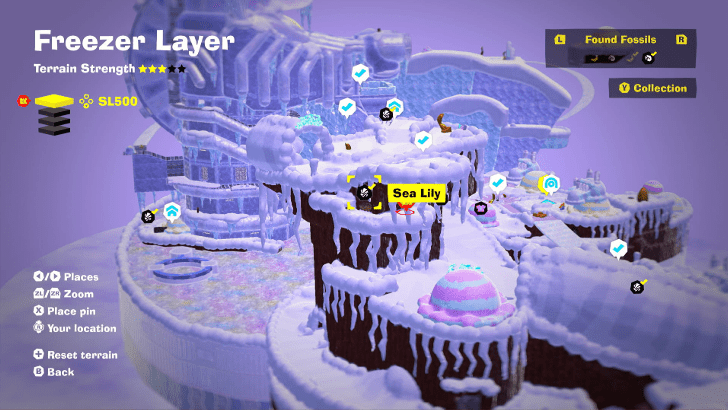 |
|
|
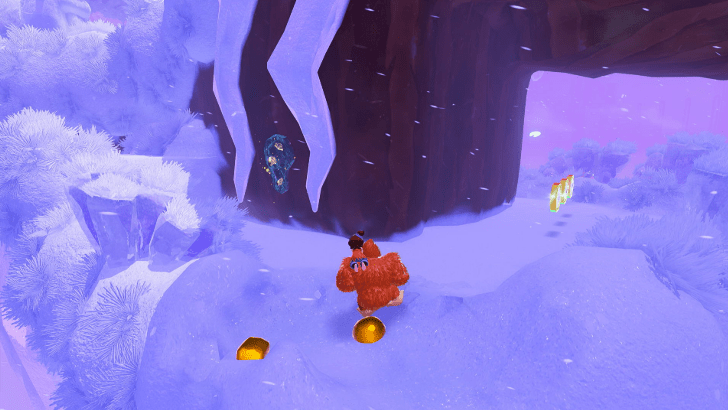
Located below the Cold-Colt Crest |
||
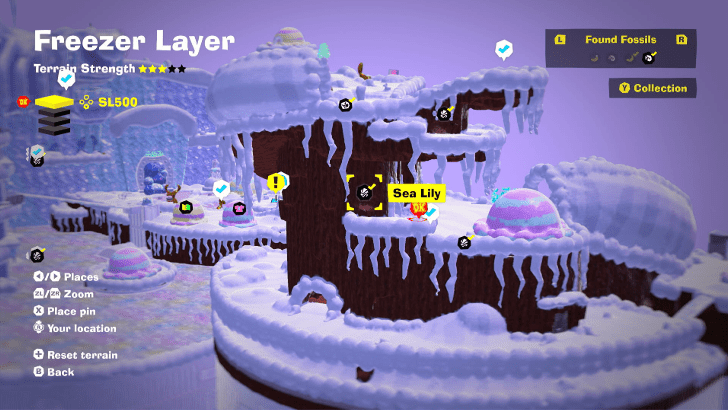
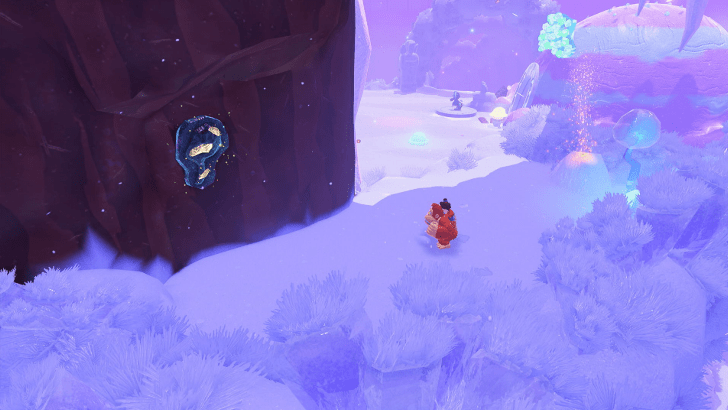 |
 |
|
|
Located below the Cold-Colt Crest, Right next to the Ice Cream Igloo |
||
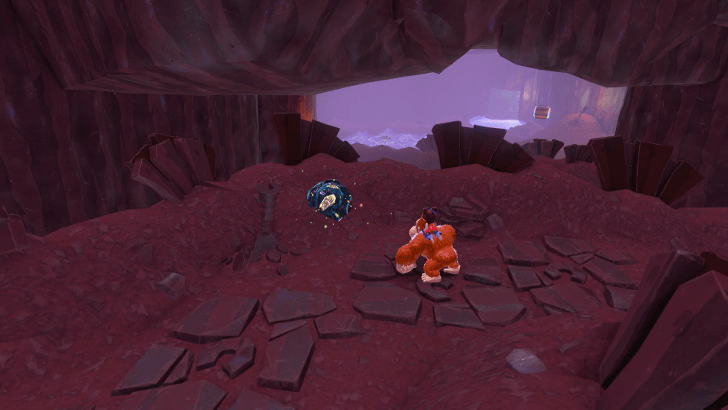 |
 |
|
|
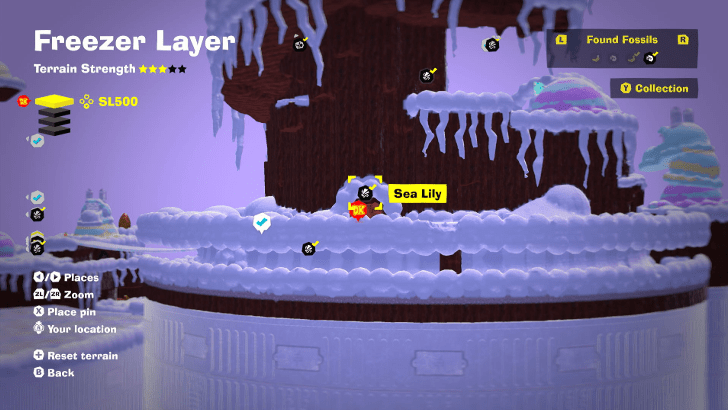
Located below the Cold-Colt Crest, It will be seen inside an entrance to a cave |
||
 |
||
|
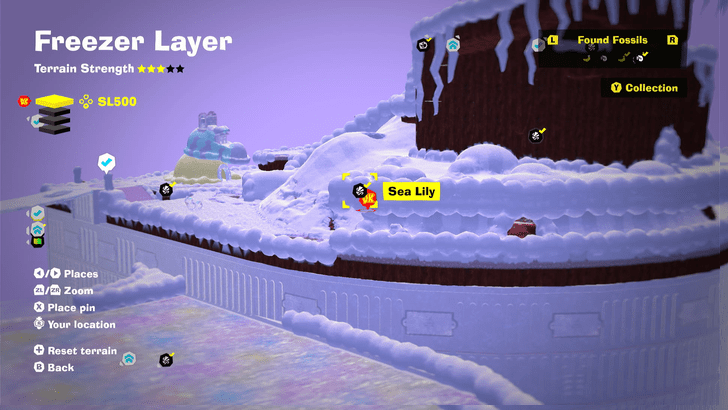
Inside a cave at Cold-Colt Crest, Follow the Gold Ores |
||
 |
||
|
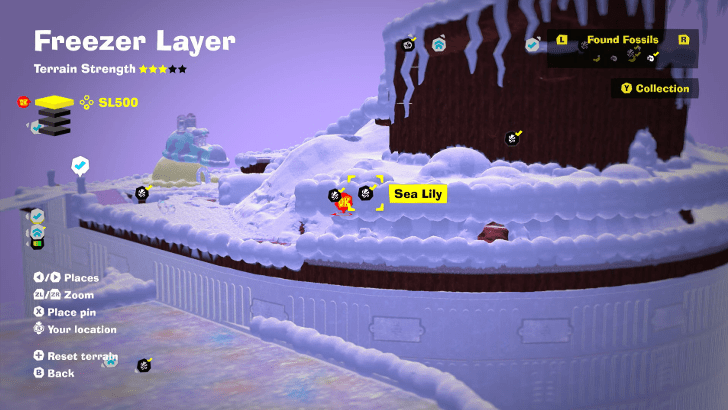
Inside a cave at Cold-Colt Crest, Follow the Gold Ores |
||
 |
 |
|
|
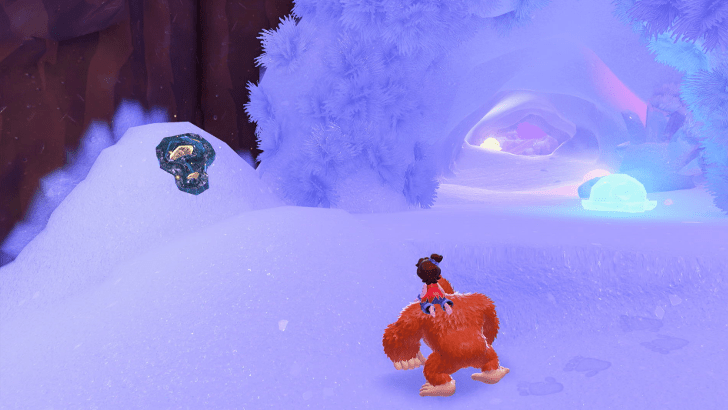
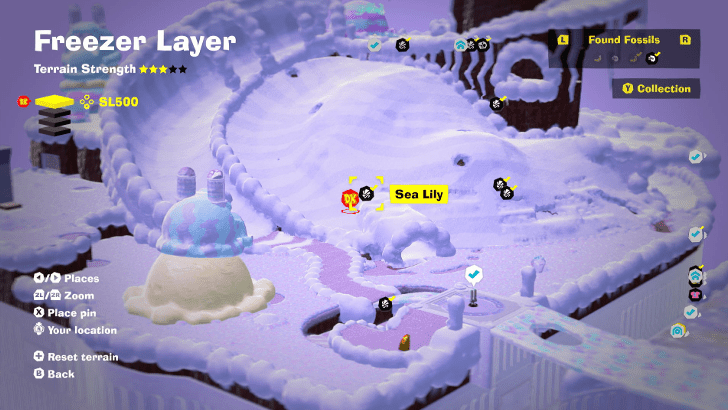
Located at a cave near Crumbly Bridge |
||
 |
 |
|
|
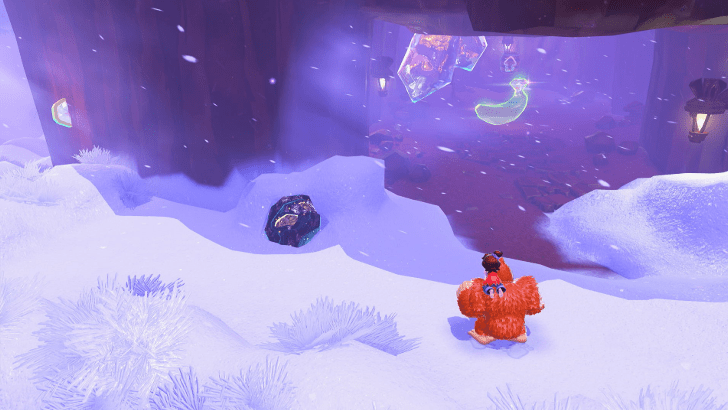
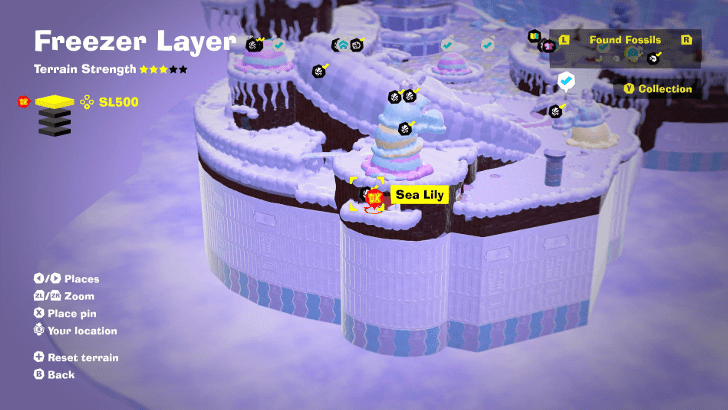
Located below an Ice Cream Igloo Zebra |
||
 |
 |
|
|
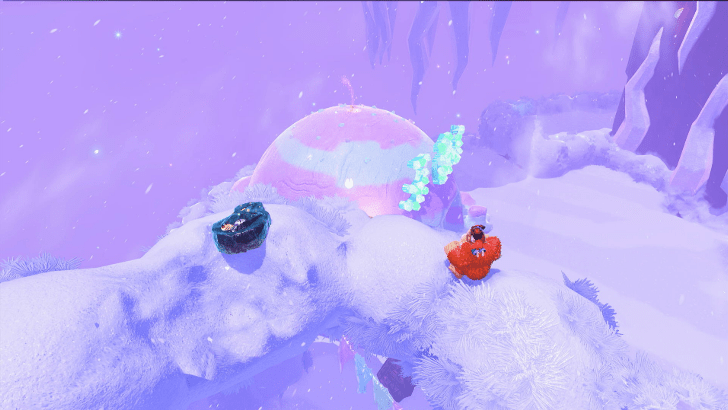
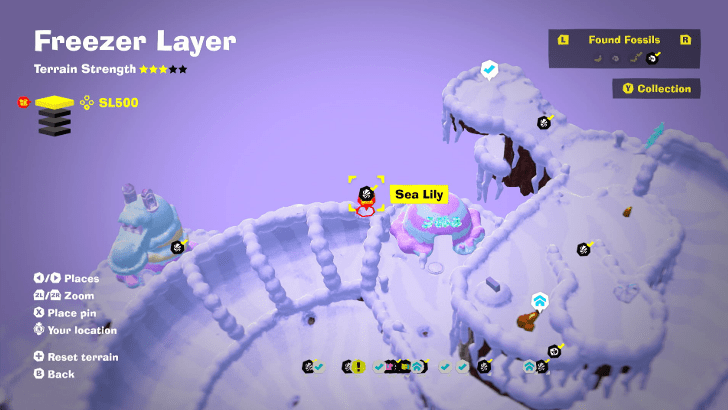
Located below the Cold-Colt Crest, Above the slide next to the Ice Cream Igloo |
||
 |
 |
|
|
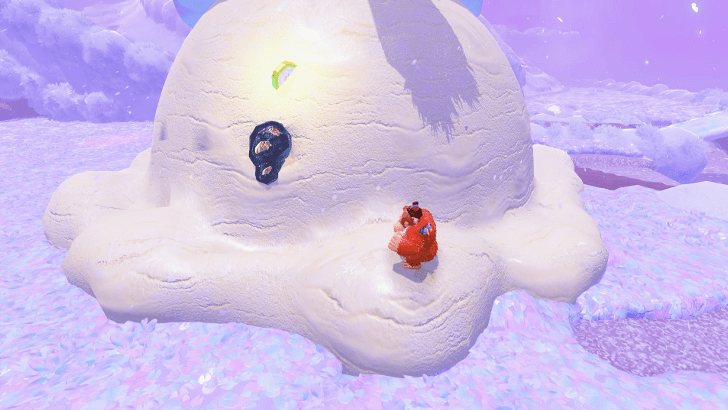
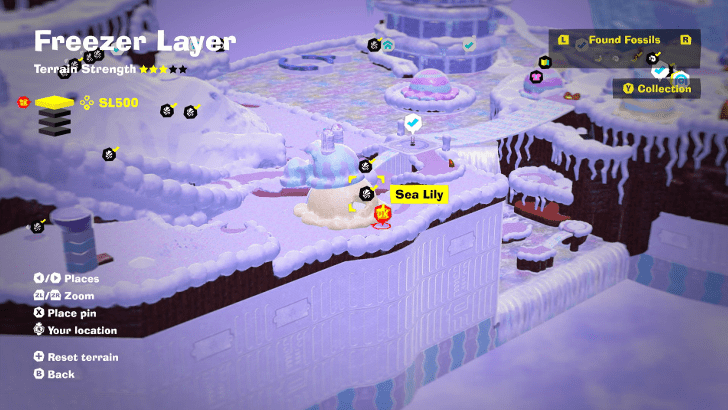
Located near Crumbly Bridge behind an Ice Cream Igloo |
||
 |
 |
|
|
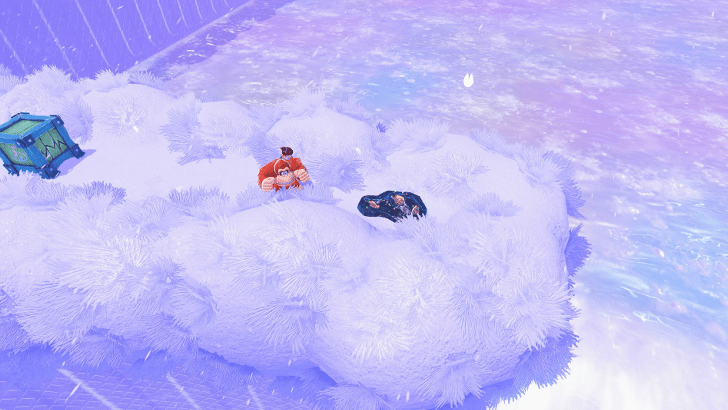
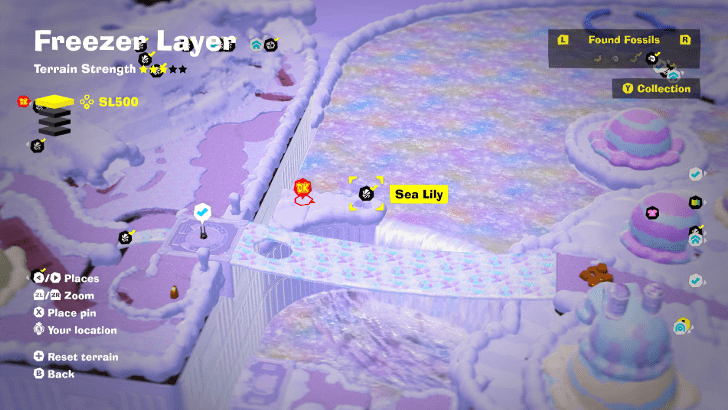
Located near Crumbly Bridge above the waterfall |
||
 |
 |
|
|
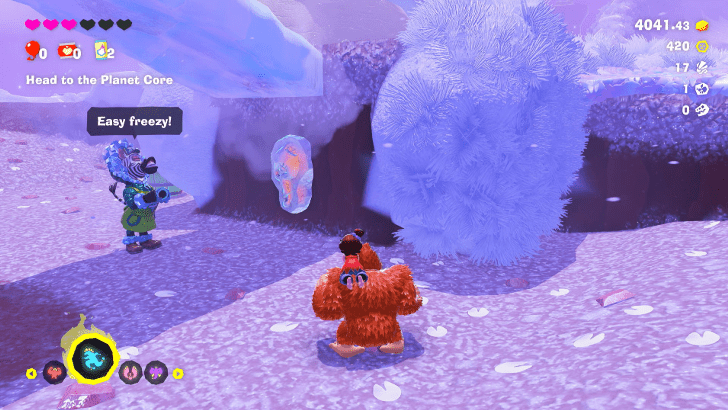
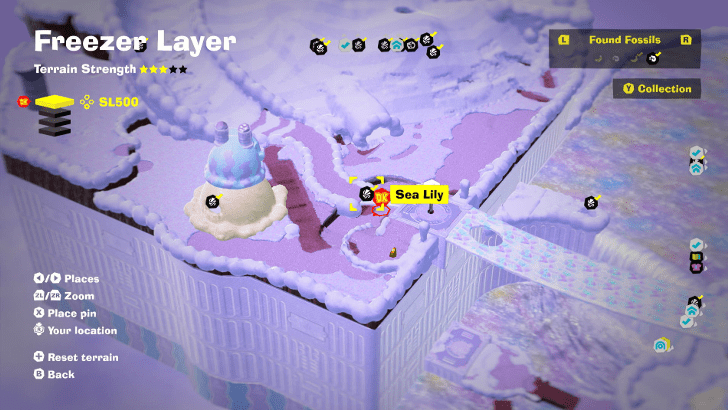
Under the Crumbly Bridge |
||
 |
 |
|
|
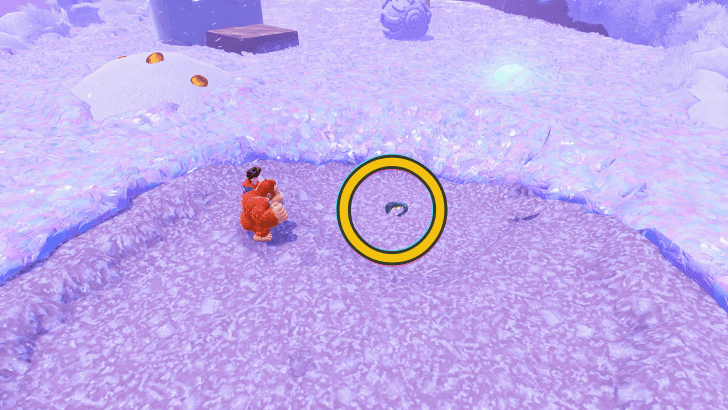
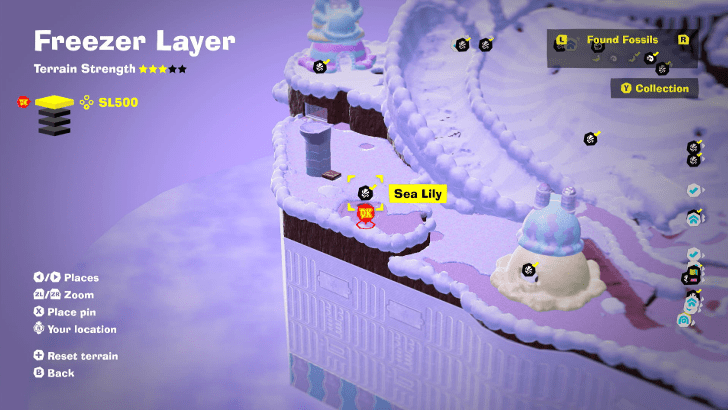
Between two Zebra Igloos |
||
 |
 |
|
|
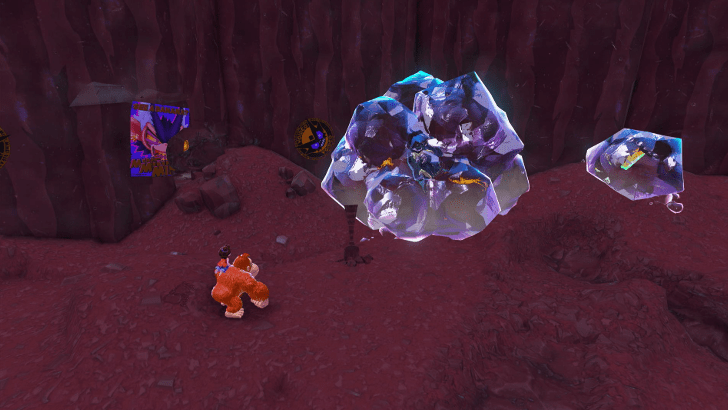
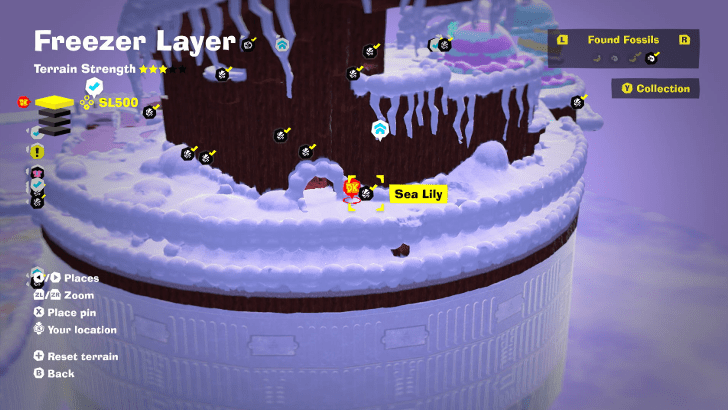
Below Cold-Colt Crest inside a cave. The fossil is inside the crystal |
||
 |
 |
|
|
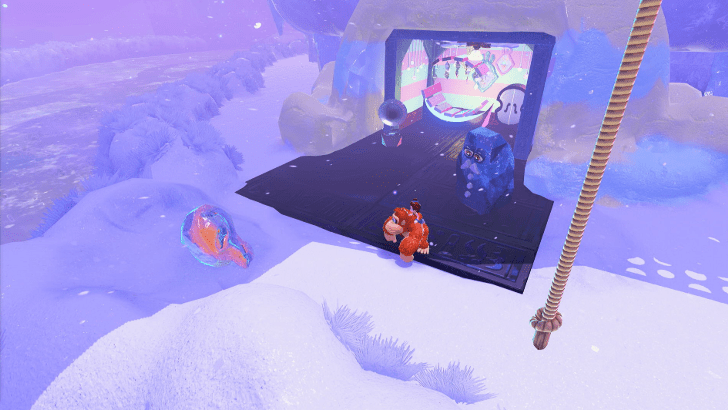
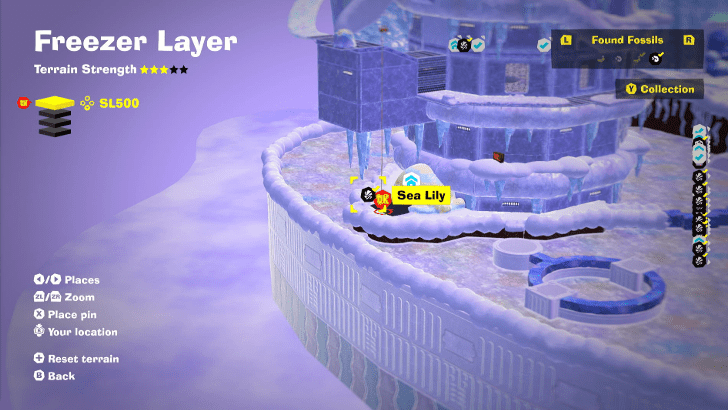
Located at the Cooling Tower Getaway |
||
 |
 |
|
|
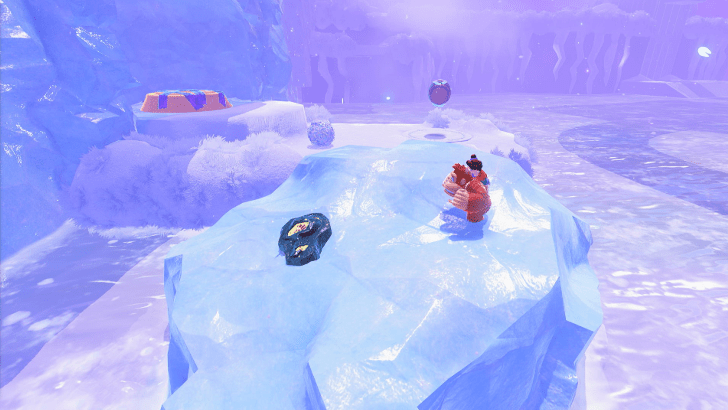
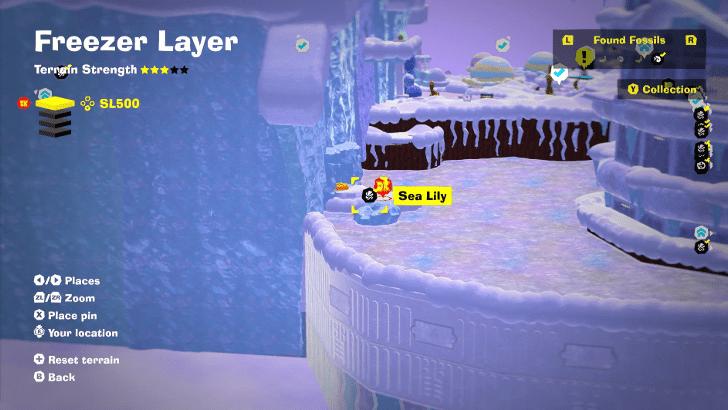
Located right next to the Cooling Tower, near a Bonus Stage |
||
 |
 |
|
|
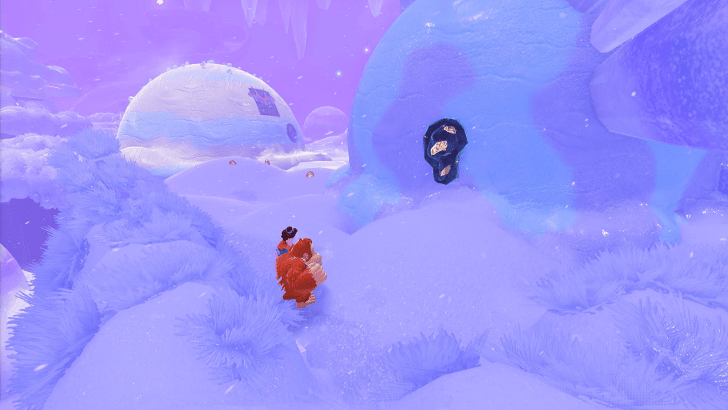
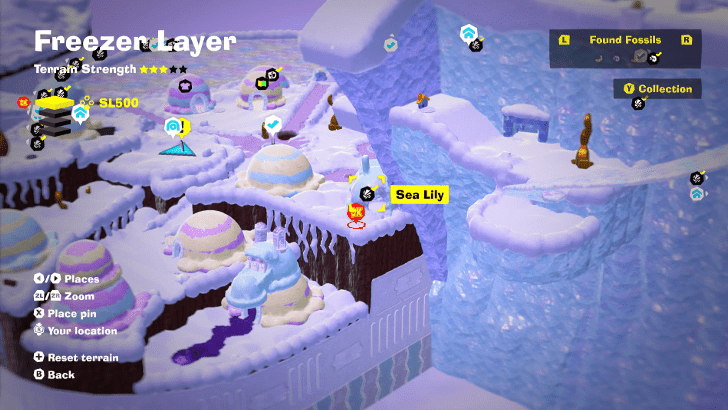
Located behind a Zebra Igloo, right next to the closed off entrance of Coolstripe Cavern |
||
 |
 |
|
|
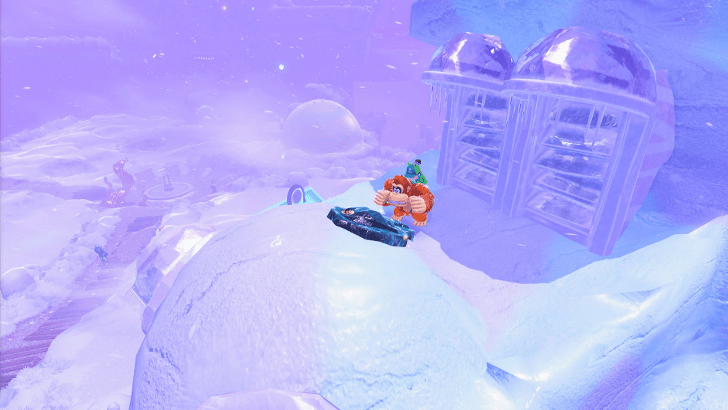
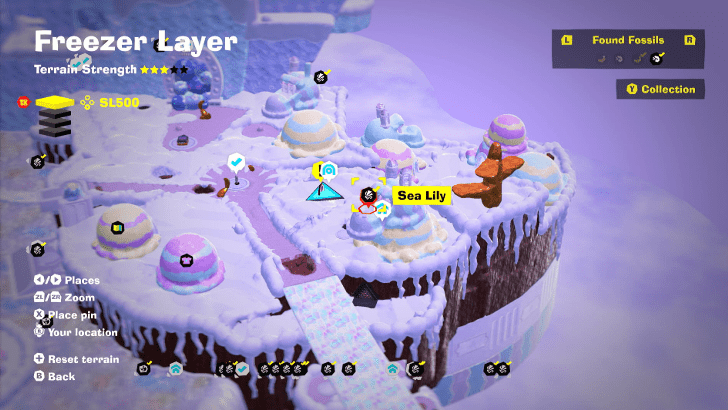
Located on top of the nose of a Zebra Igloo. near the Warp Gong at Snowy Crossroads |
||
 |
||
|
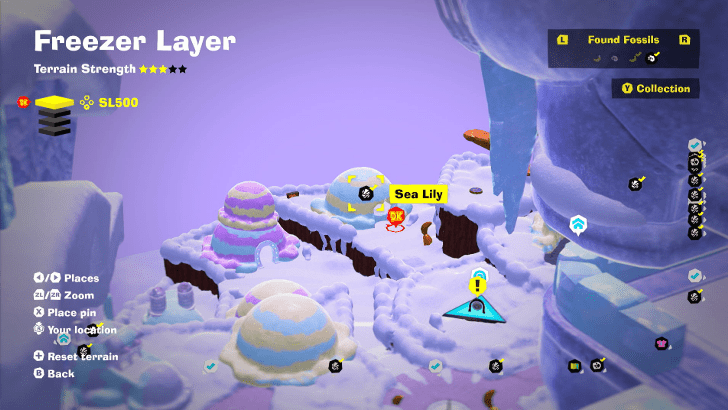
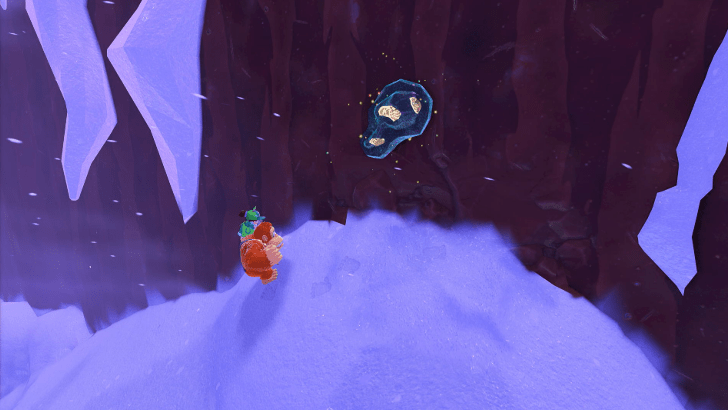
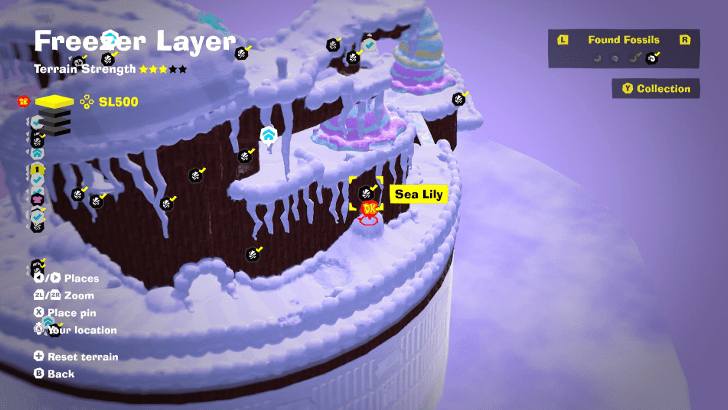
Located inside an Igloo. Punch the Igloo in order get inside |
||
 |
 |
|
|
Located below Cold-Colt Crest, It is on the wall right next to the cave entrance |
||
 |
 |
|
|
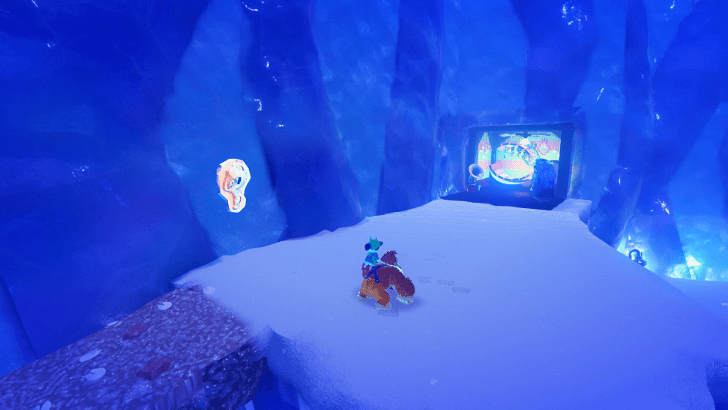
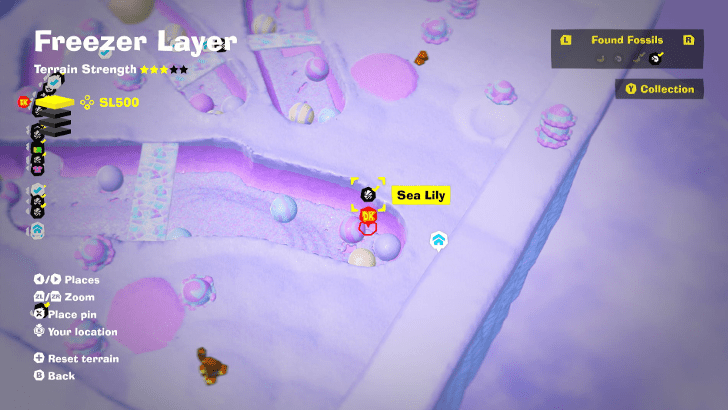
Located right next to the Coolstripe Cavern Pool Getaway |
||
 |
 |
|
|
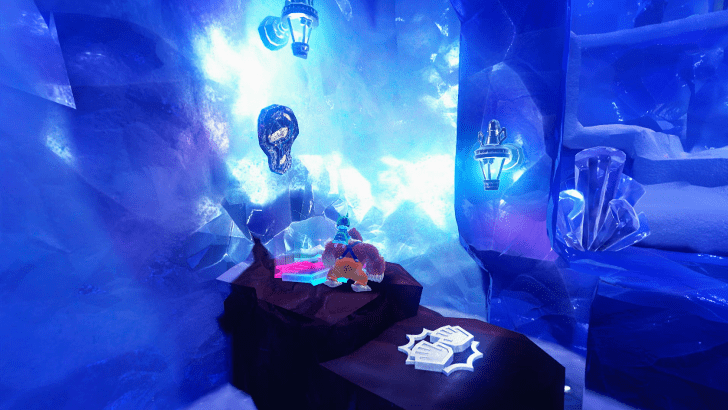
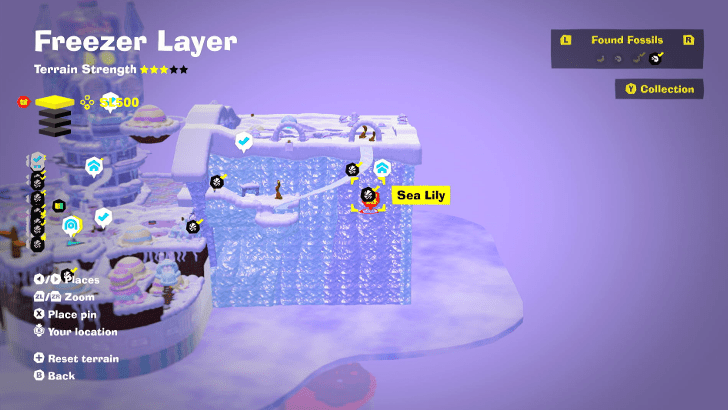
Located inside the Coolstripe Cavern |
||
 |
 |
|
|
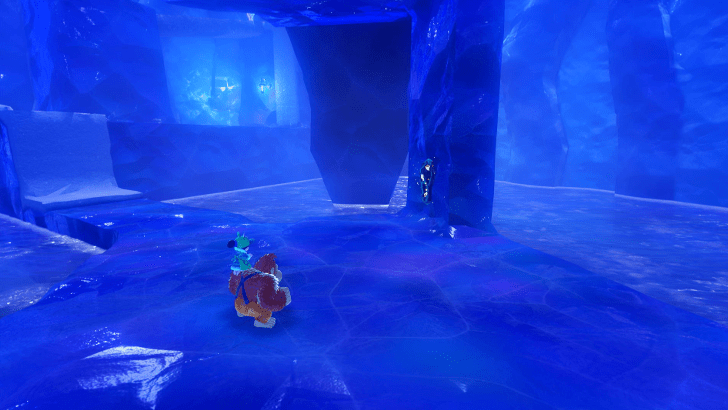
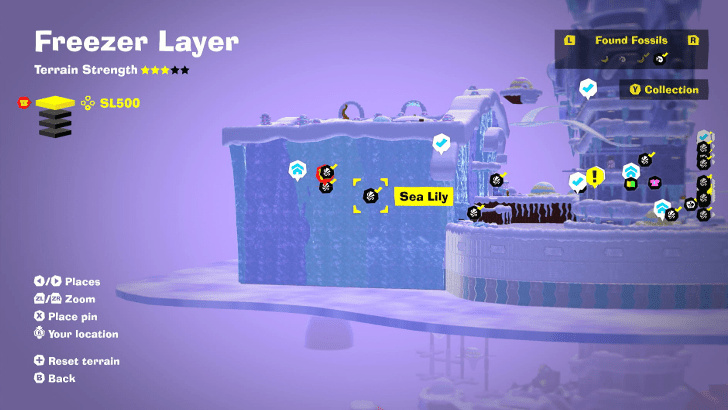
Located inside the Coolstripe Cavern below the Coolstripe Cavern Pool Getaway |
||
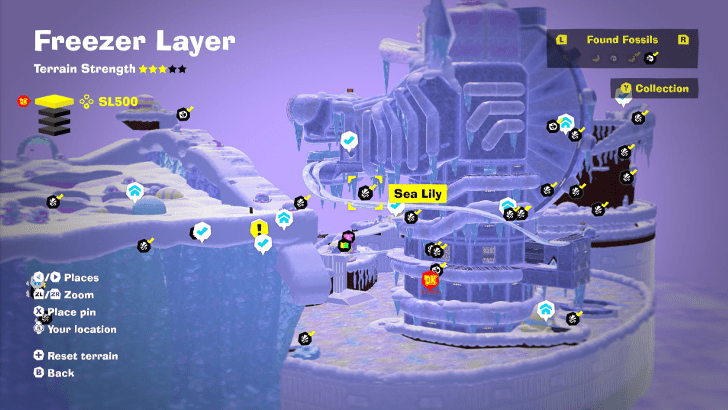
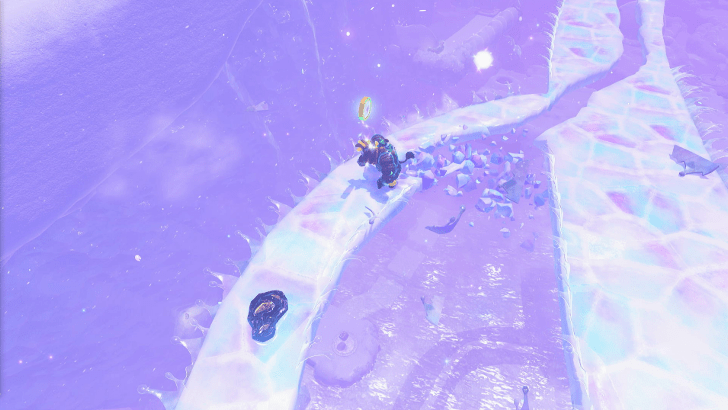 |
 |
|
|
Located at the bridge on Cooling Tower Top Floor |
||
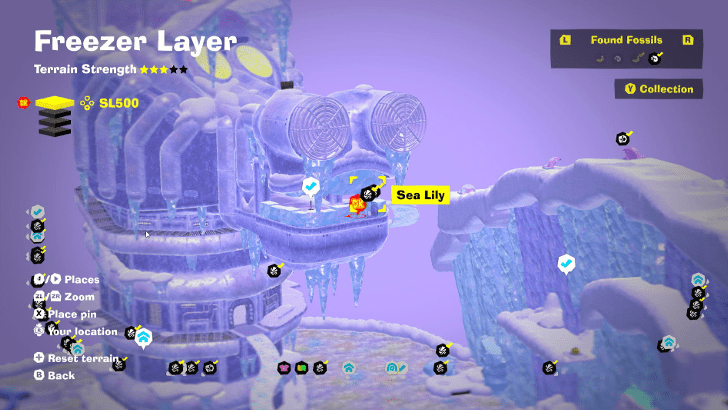
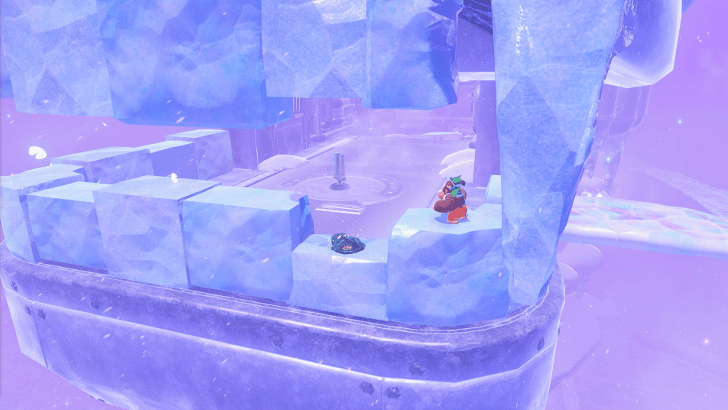 |
 |
|
|
Located right beside to The Cooling Tower Top Floor |
||
 |
 |
|
|
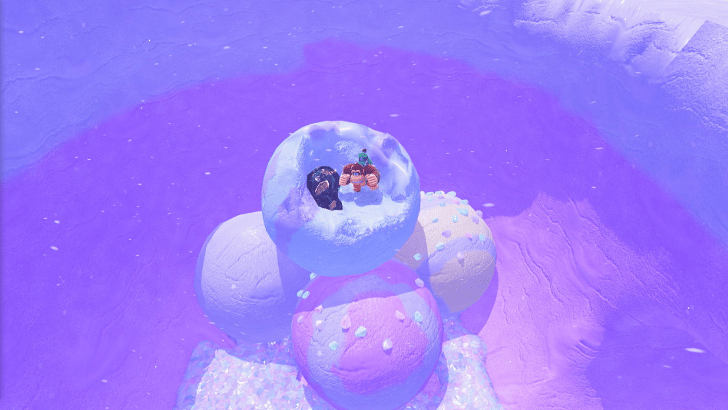
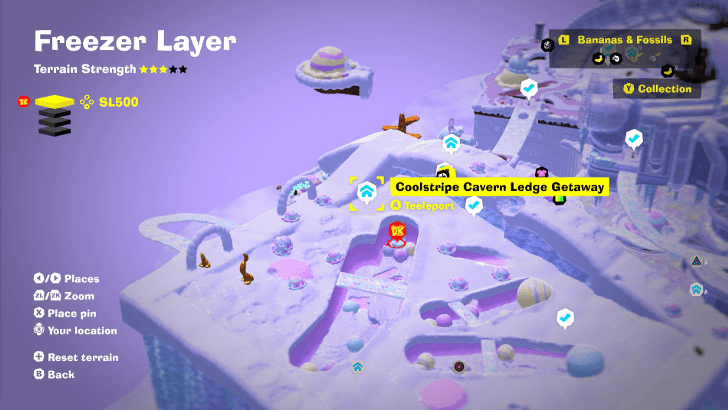
Located inside of an Ice cream near Coolstripe Cavern Ledge Getaway |
||
 |
 |
|
|
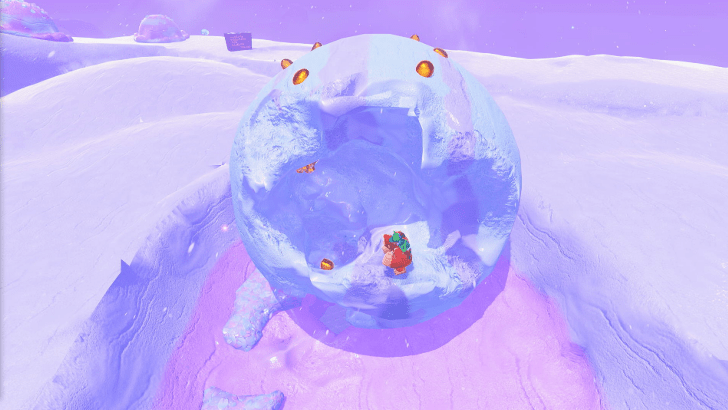
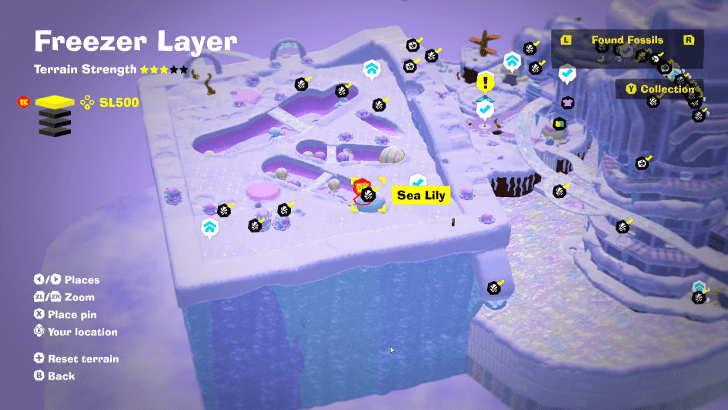
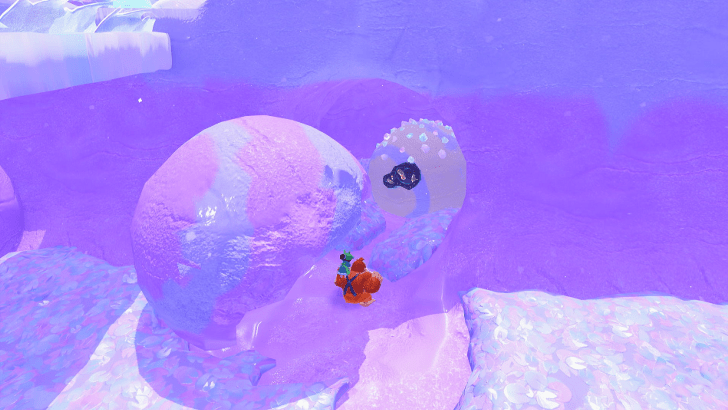
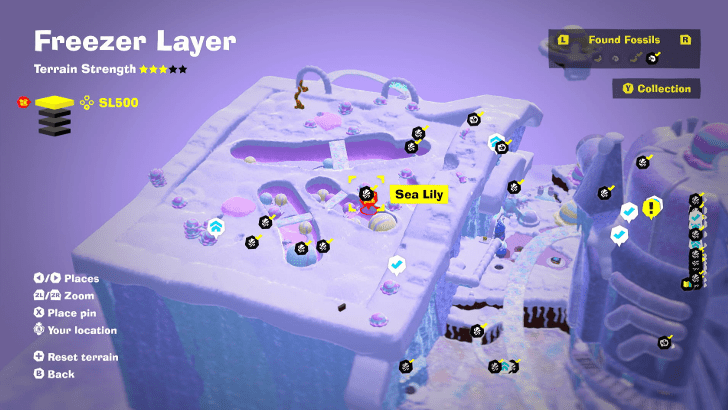
Located inside of a big ice cream near the Coolstripe Cavern Ledge Getaway |
||
 |
 |
|
|
Located Inside of a small cave near The Coolstripe Cavern Ledge Getaway |
||
 |
 |
|
|
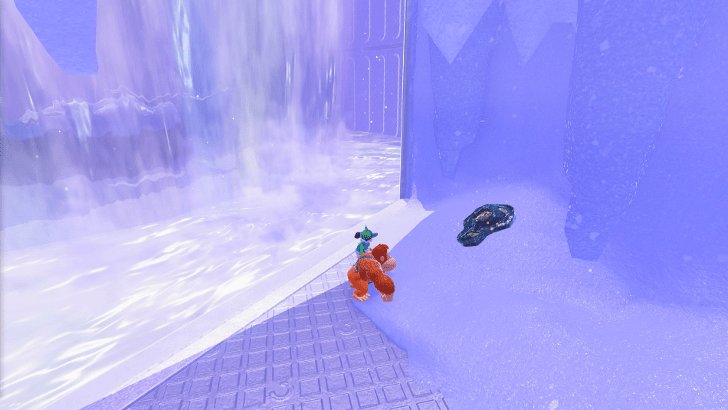
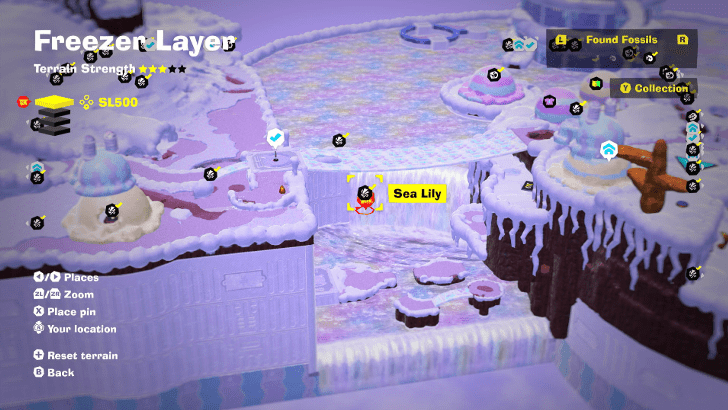
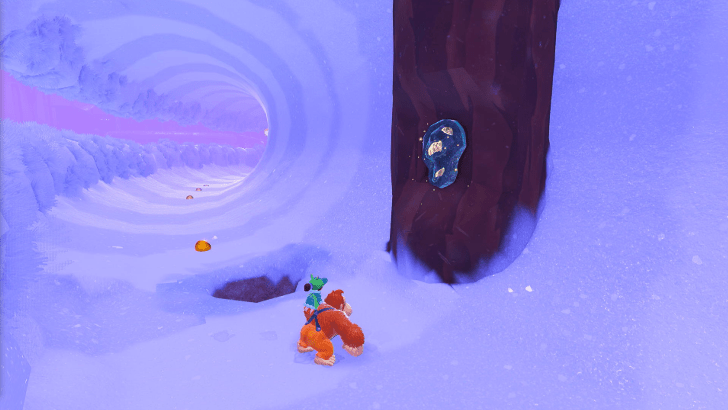
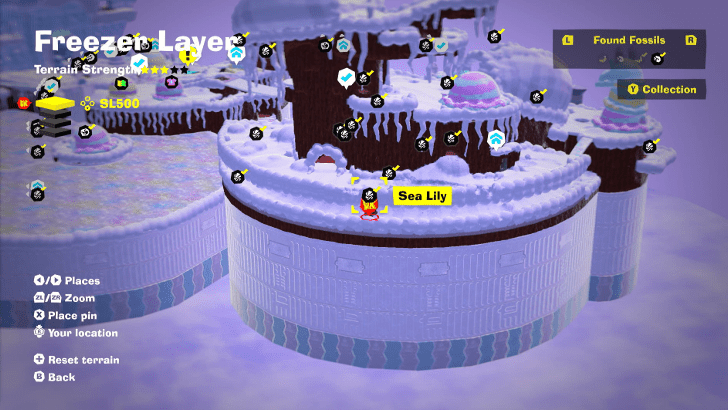
Located in the waterfall near Crumbly Bridge |
||
 |
 |
|
|
Located below Cold-Colt Crest |
||
 |
 |
|
|
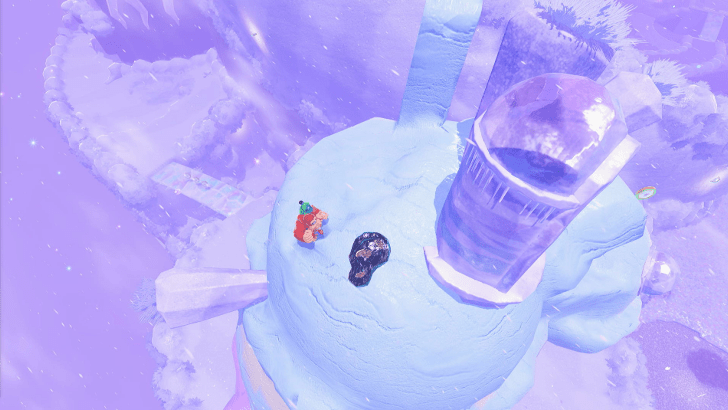
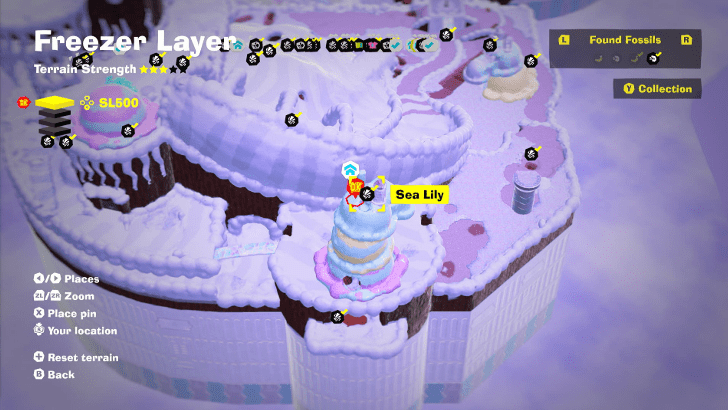
Located on top of a Big Igloo near Cold-Colt Crest Cave Getaway |
||
 |
 |
|
|
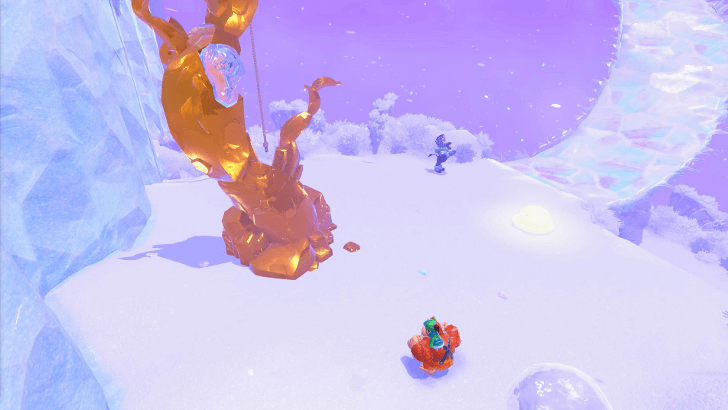
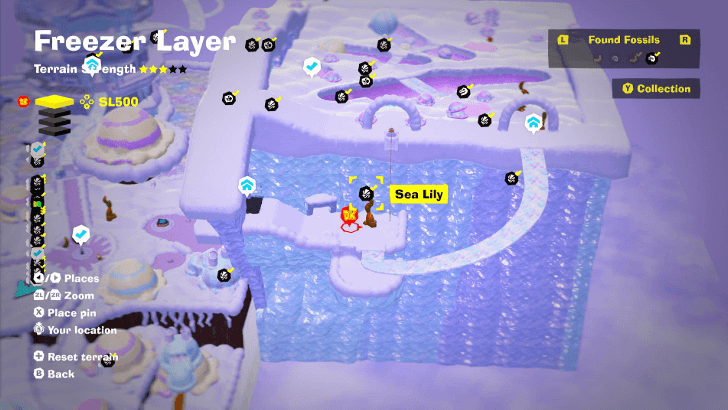
Located at Coolstripe Cavern Ledge |
||
 |
 |
|
|
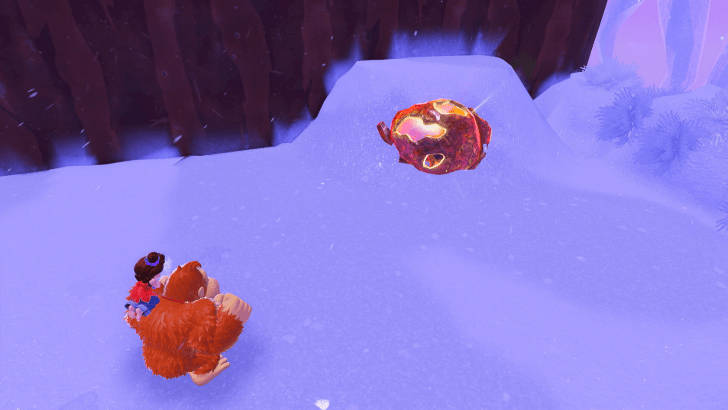
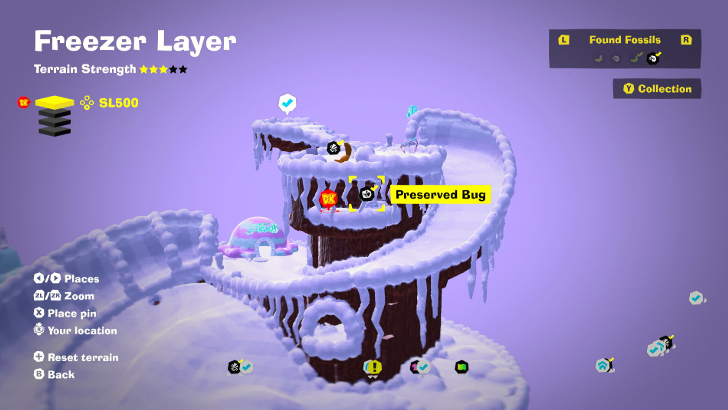
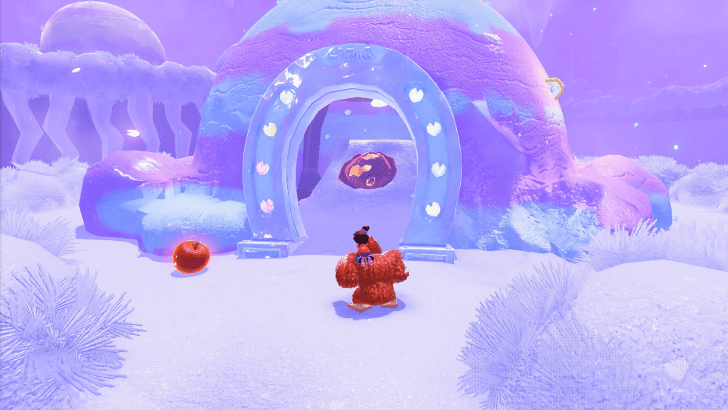
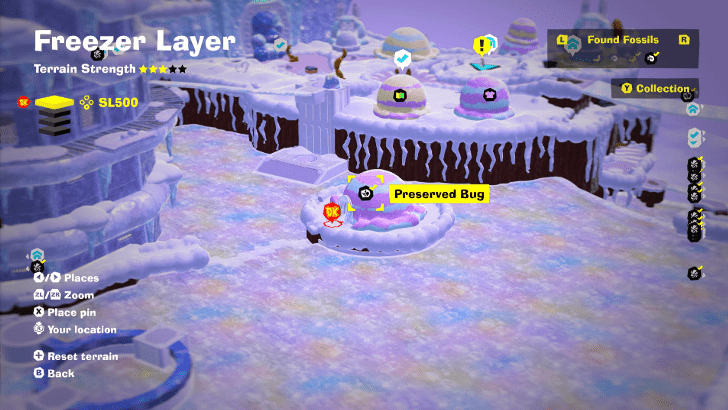
Located below the Cold-Colt Crest |
||
 |
 |
|
|
Located inside the Ice Cream Igloo island near the waterfall |
||
 |
 |
|
|
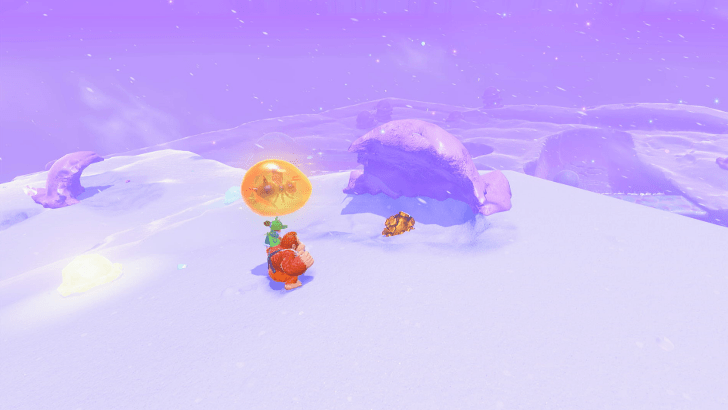
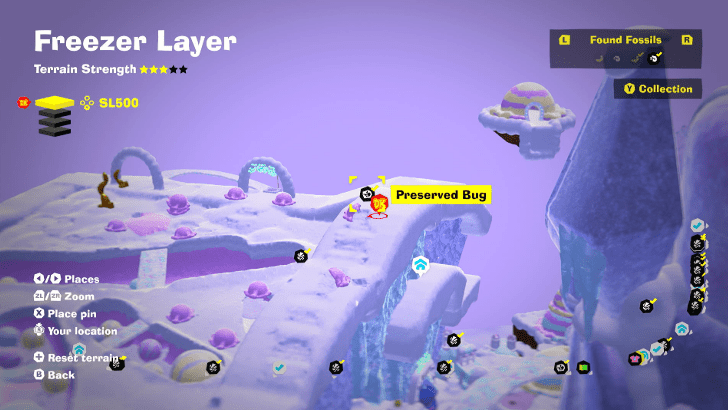
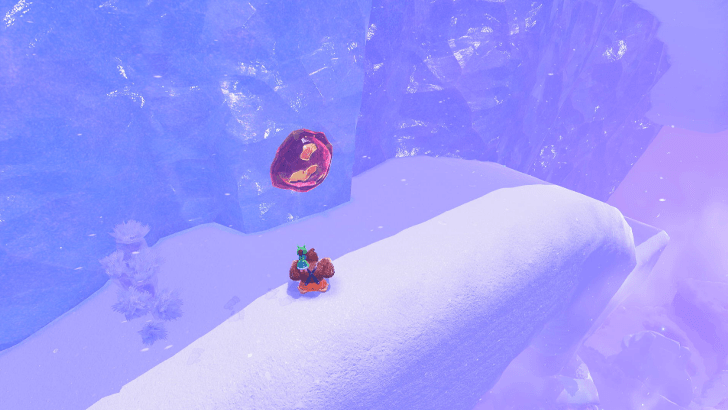
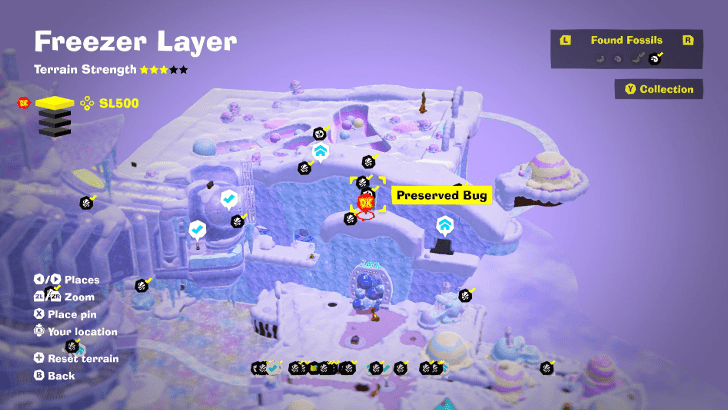
Can be found on top of the Coolstripe Cavern |
||
 |
 |
|
|
Located near the Coolstrip Cavern Ledge Getaway |
||
 |
 |
|
|
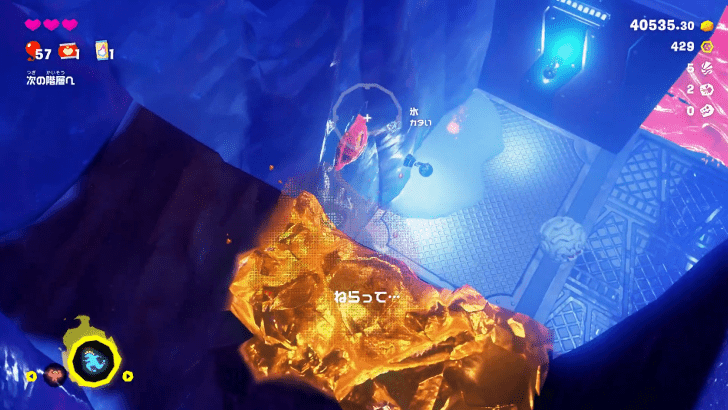
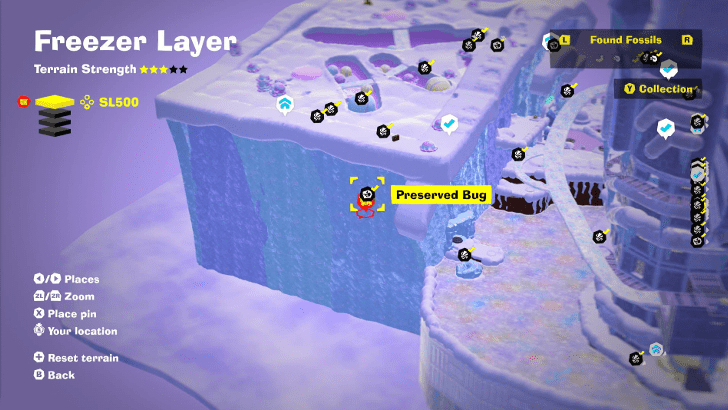
Located Inside The Coolstripe Cavern |
||
 |
 |
|
|
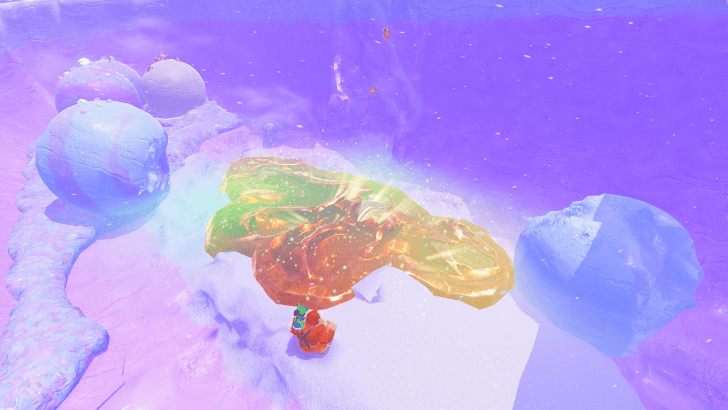
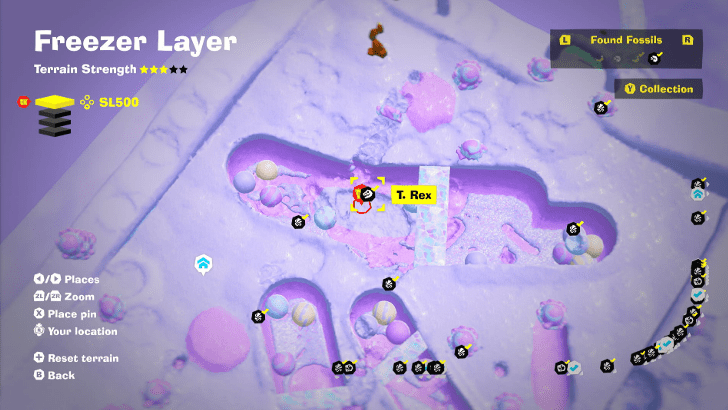
Located on top of the Coolstripe Cavern. Clear out the snow in order to get the Fossil. |
||
SL 501 Fossil Locations
| Overworld View | Map Location | |
|---|---|---|
 |
 |
|
|
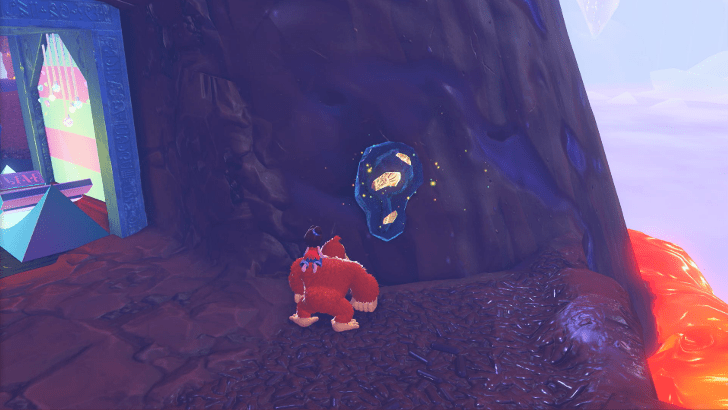
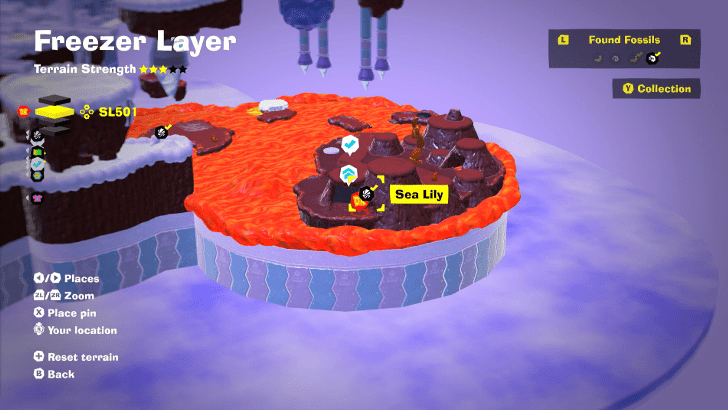
Found at Chocolava Lake Getaway |
||
 |
 |
|
|
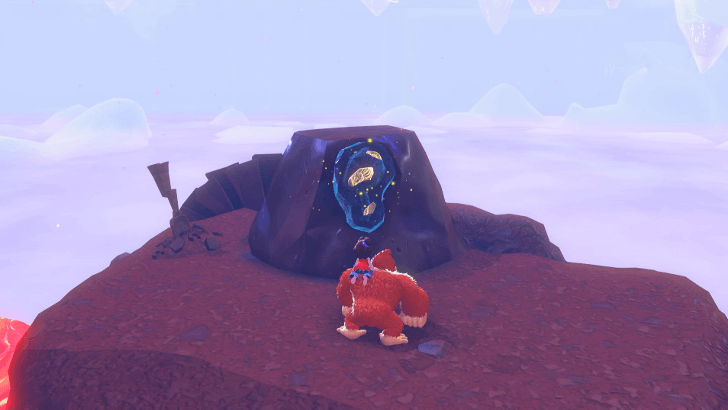
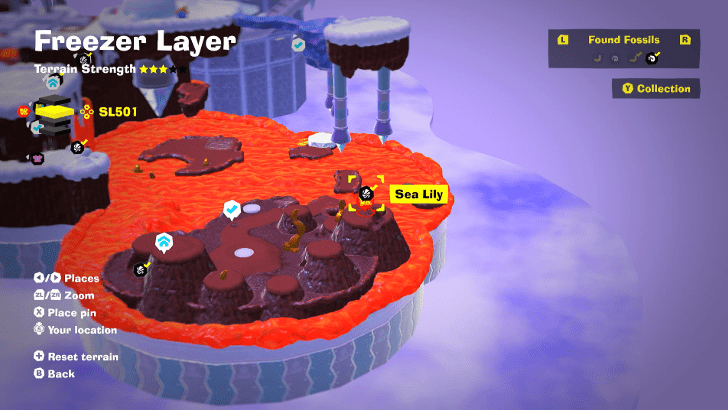
Near the Chocolava Lake Getaway. It's on top of a hill |
||
 |
 |
|
|
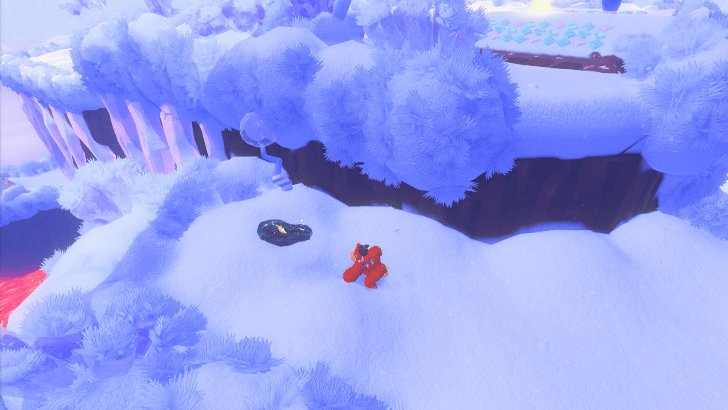
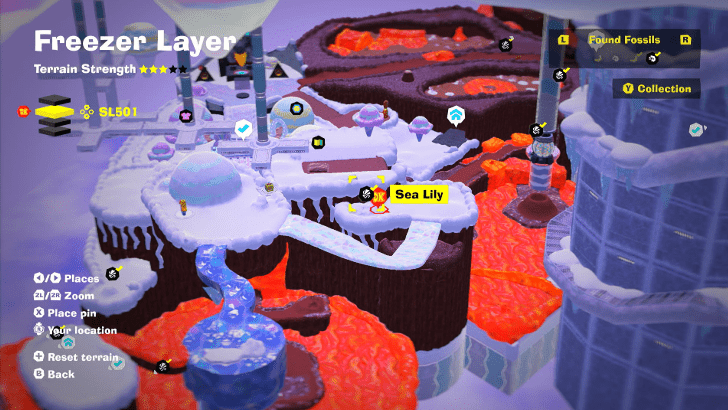
Near the Stuff Shop |
||
 |
 |
|
|
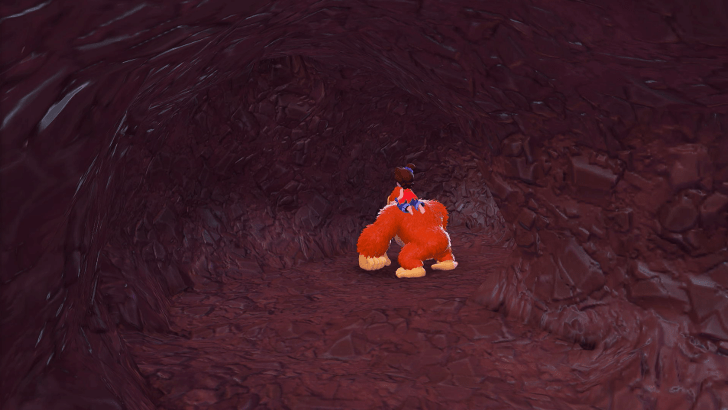
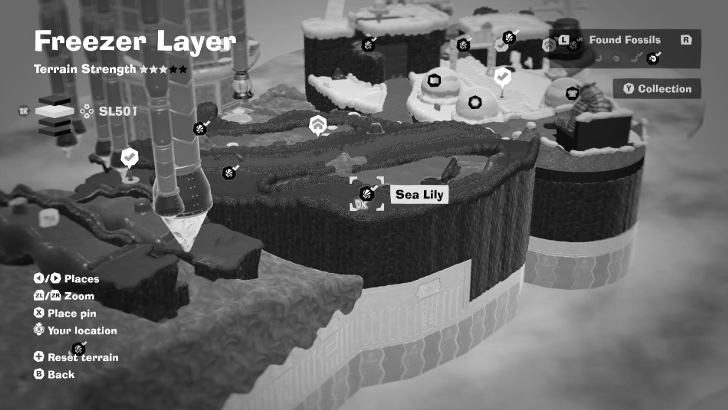
Underground near the Canter Creamery Getaway |
||
 |
 |
|
|
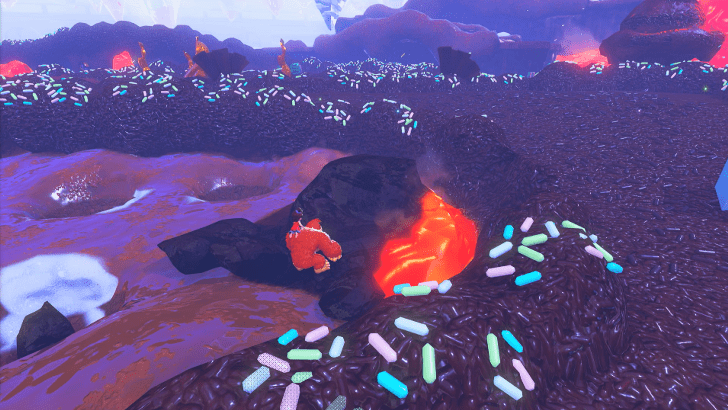
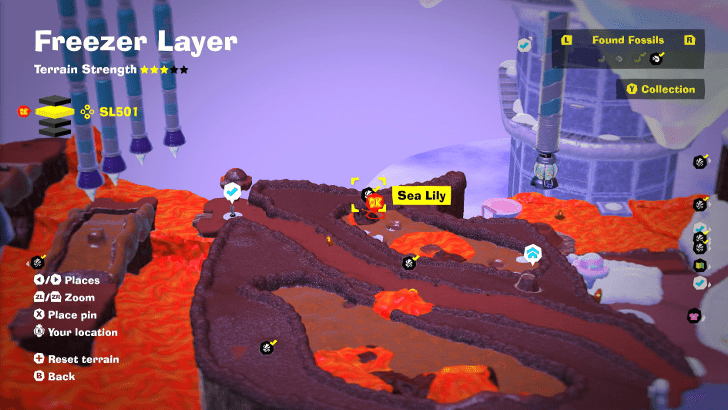
Near the Canter Creamery Getaway beside some sprinkles. |
||
 |
 |
|
|
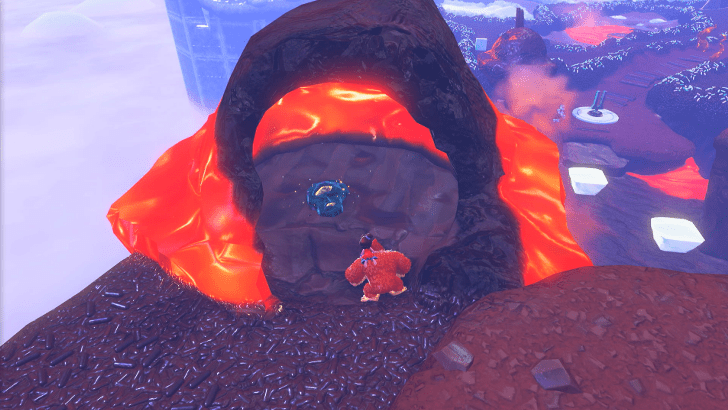
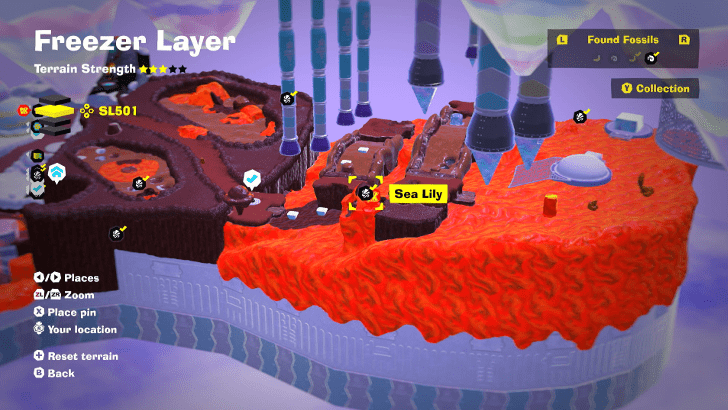
Near the Zig-Zag Bridges next to a river of lava |
||
 |
 |
|
|
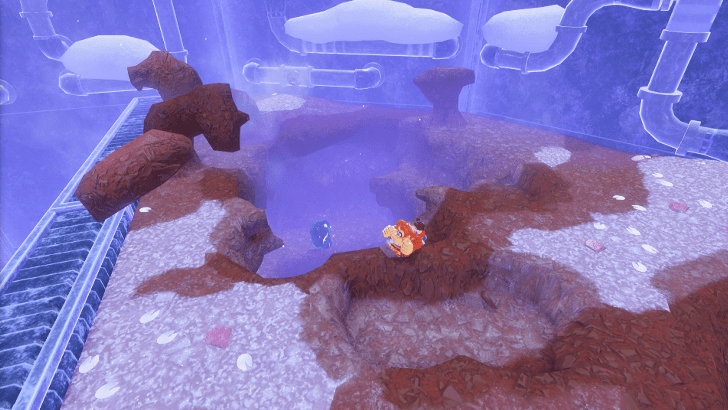
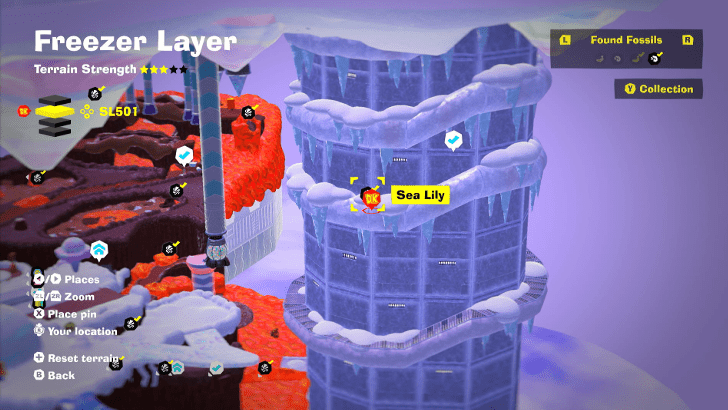
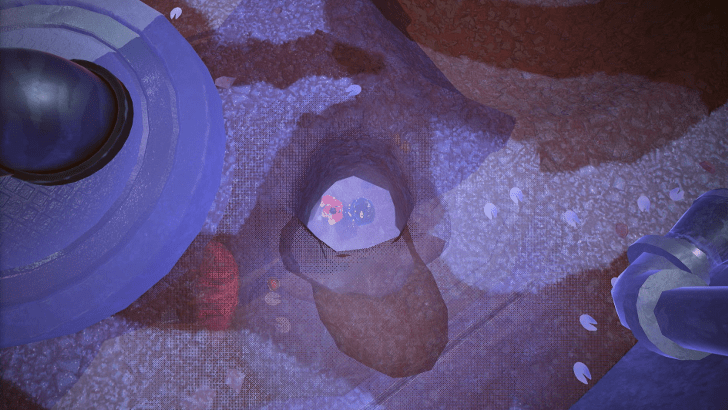
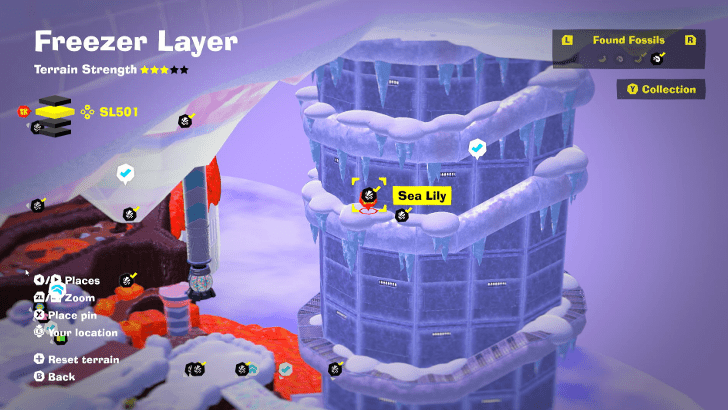
Near the Cooling Tower Interior |
||
 |
 |
|
|
Located near the Cooling Tower Interior |
||
 |
 |
|
|
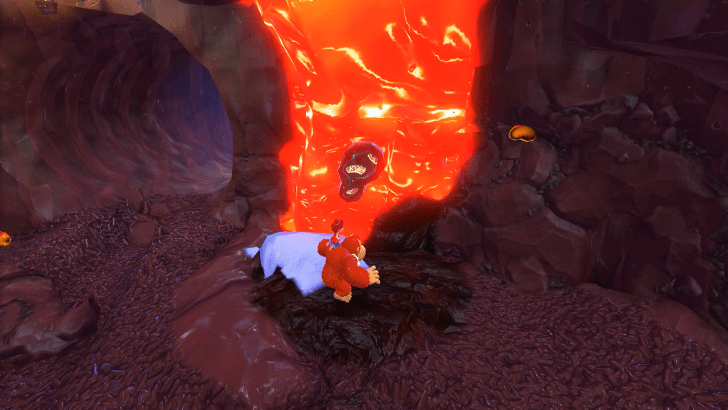
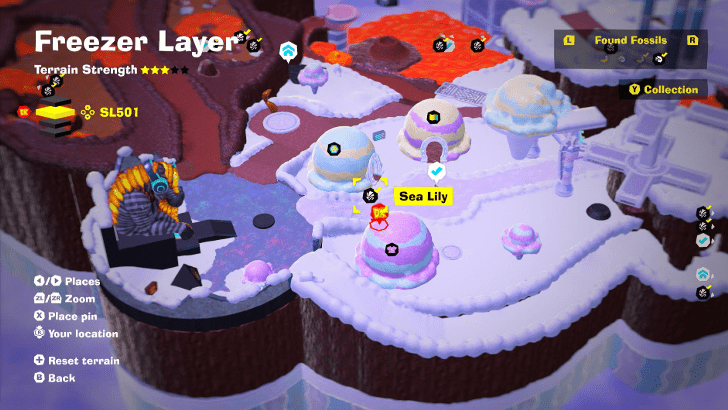
Buried in lava below the Chip Exchange Area |
||
 |
 |
|
|
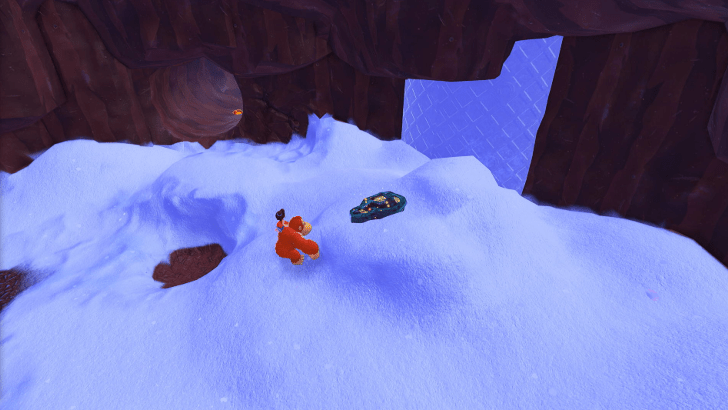
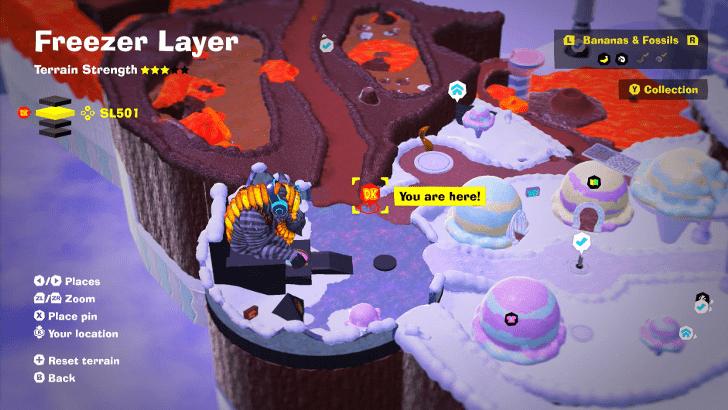
On top of snow below the Chip Exchange Area |
||
 |
 |
|
|
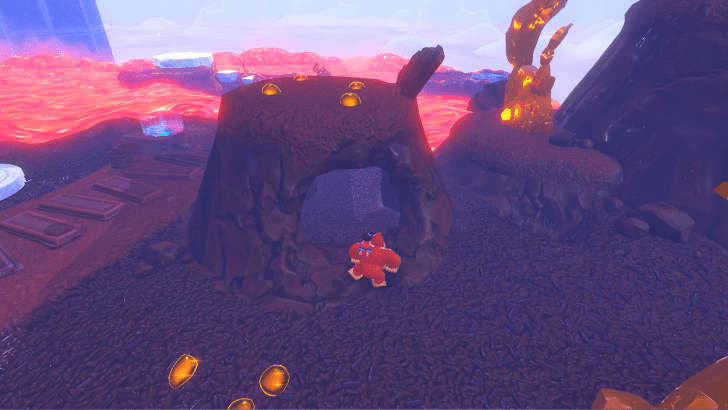
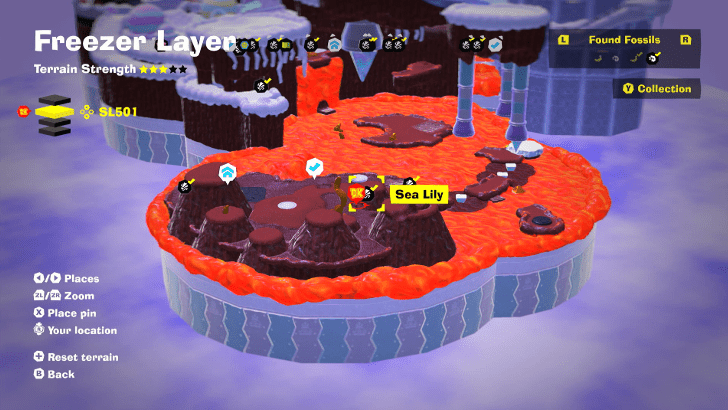
Inside a small mound near the Chocolava Lava |
||
 |
 |
|
|
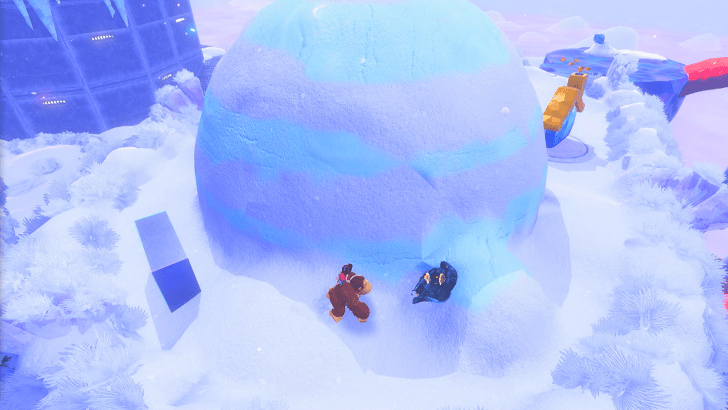
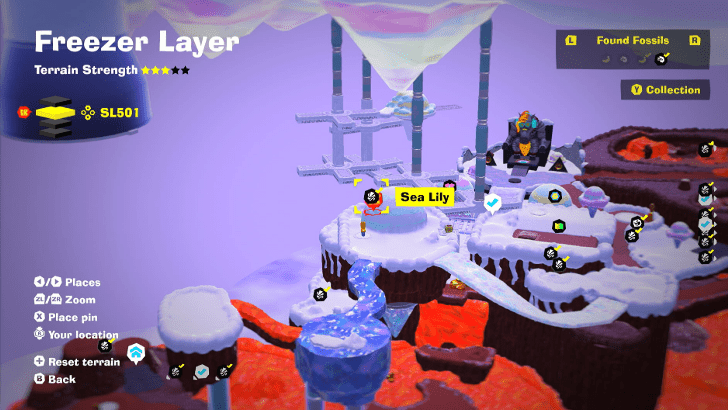
Inside a small mound of Ice Cream |
||
 |
 |
|
|
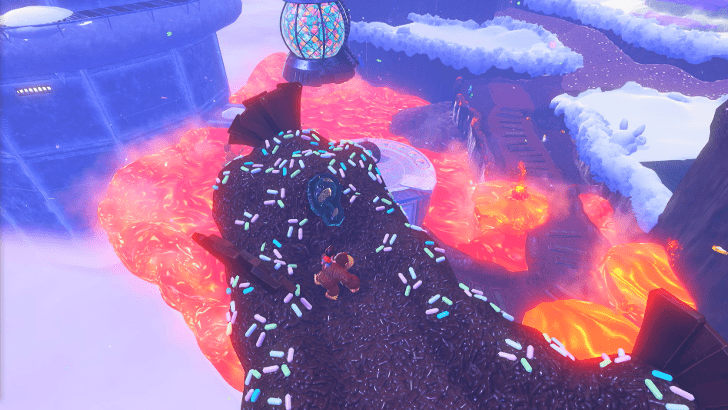
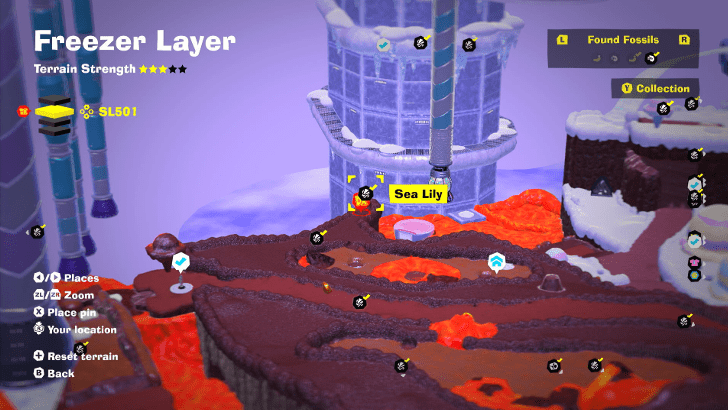
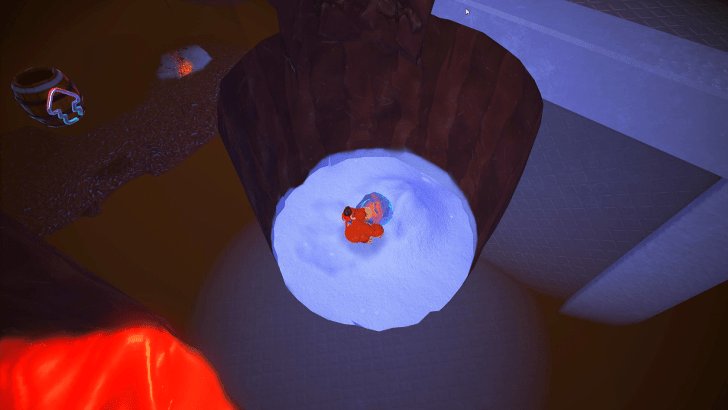
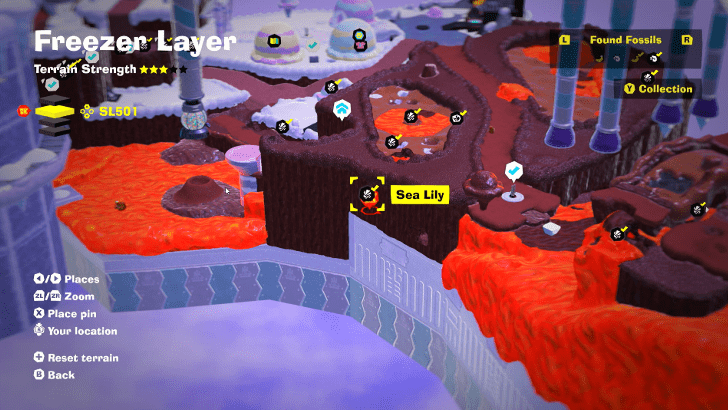
Edge of a cliff near the Canter Creamery Getaway |
||
 |
 |
|
|
Dig below the Canter Creamery Getaway |
||
 |
 |
|
|
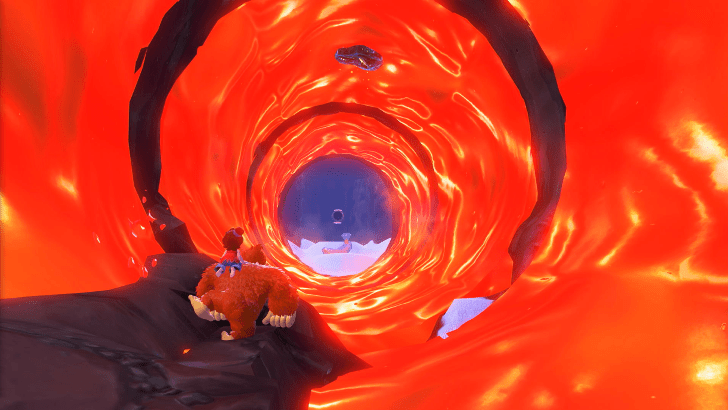
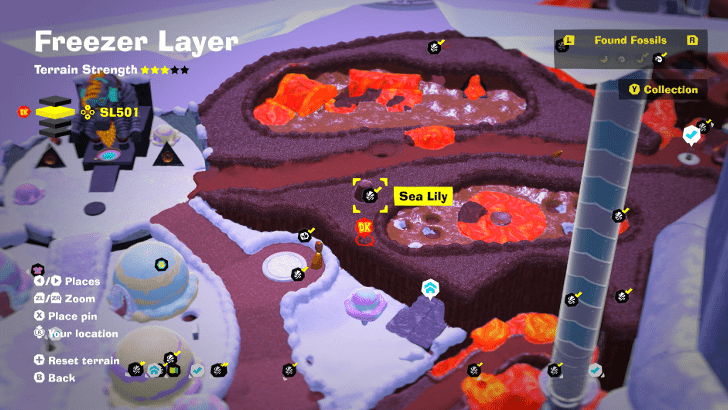
In a Lava Tunnel below the Canter Creamery Getaway |
||
 |
 |
|
|
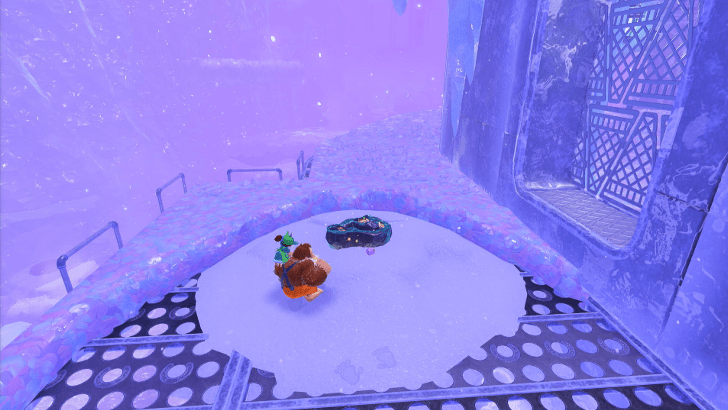
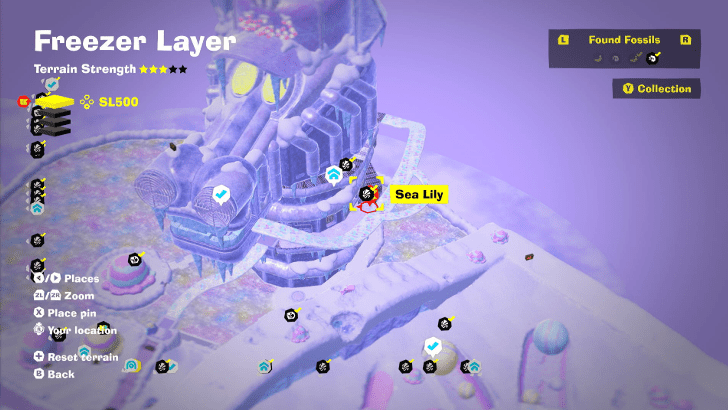
Located below The Cooling Tower Top Floor |
||
 |
 |
|
|
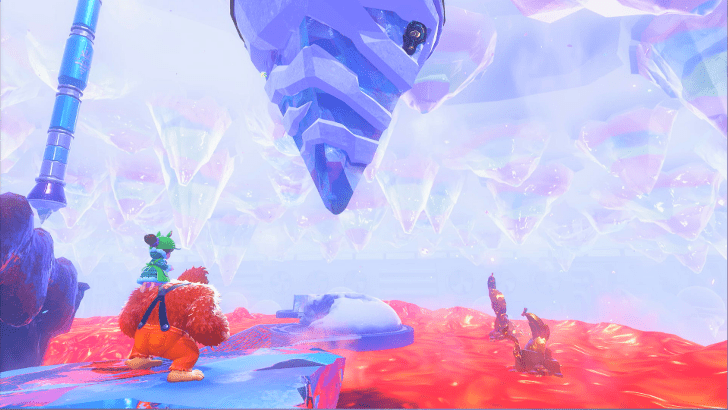
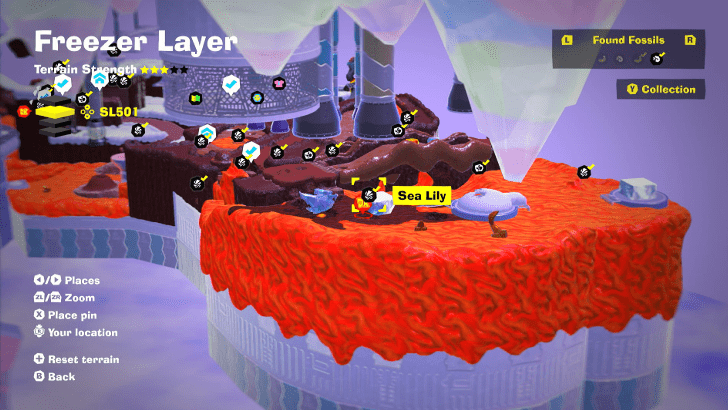
Located near Zig-Zag Bridges |
||
 |
 |
|
|
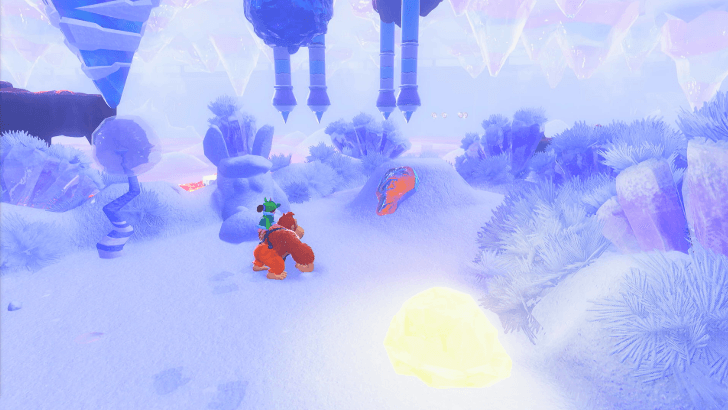
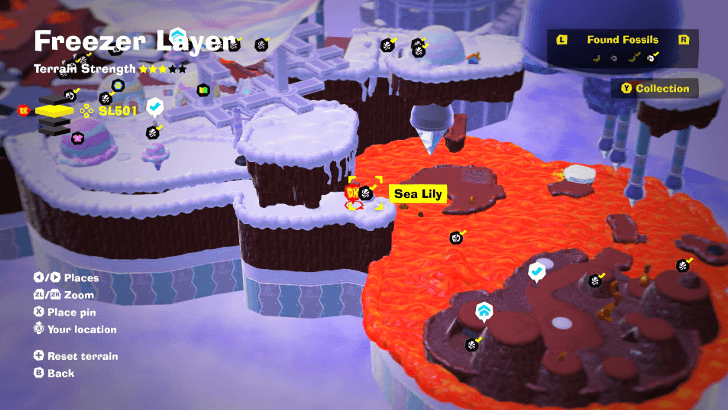
Located near Canter Creamery, right next to Chocolava Lake |
||
 |
 |
|
|
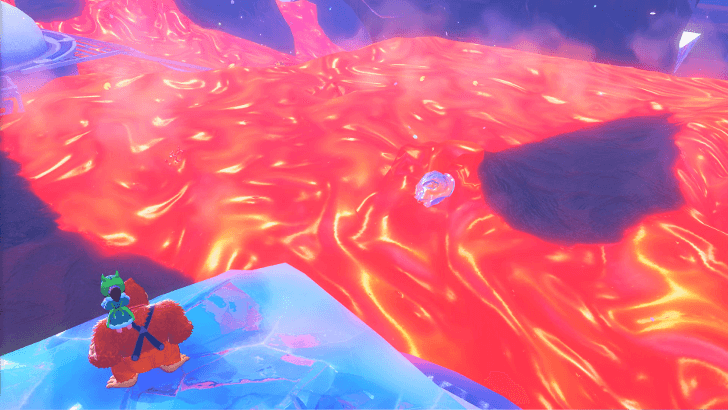
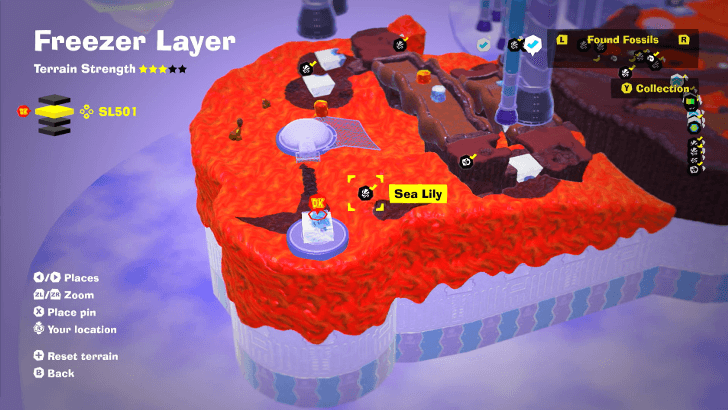
Located near Zig-Zag Bridges, found beside a huge ice cube |
||
 |
 |
|
|
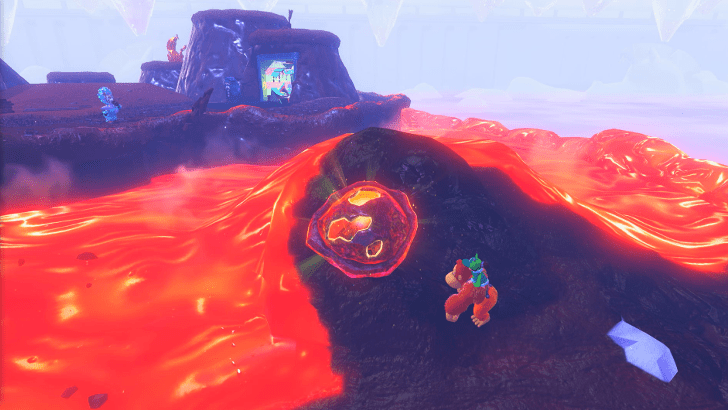
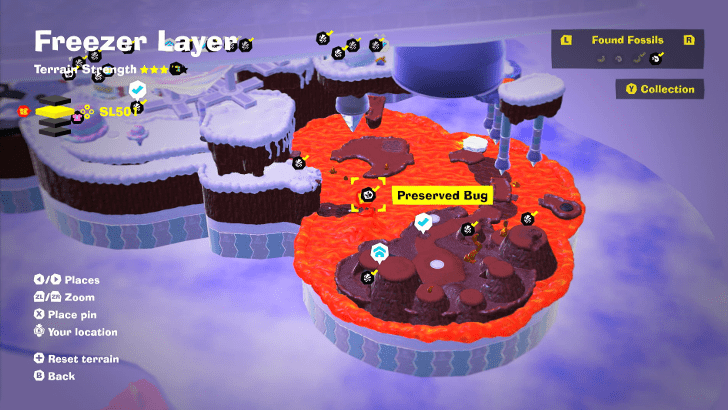
Near Chocolava Lake |
||
 |
 |
|
|
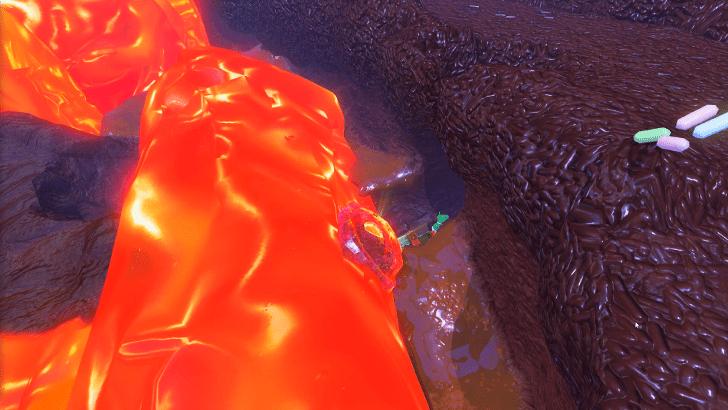
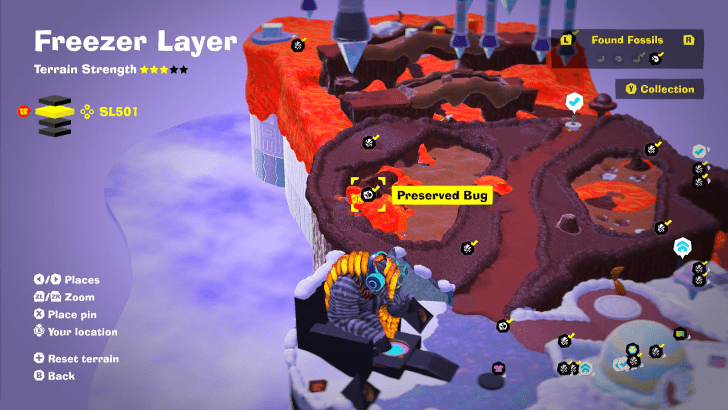
Near Zig-Zag Bridges |
||
 |
 |
|
|
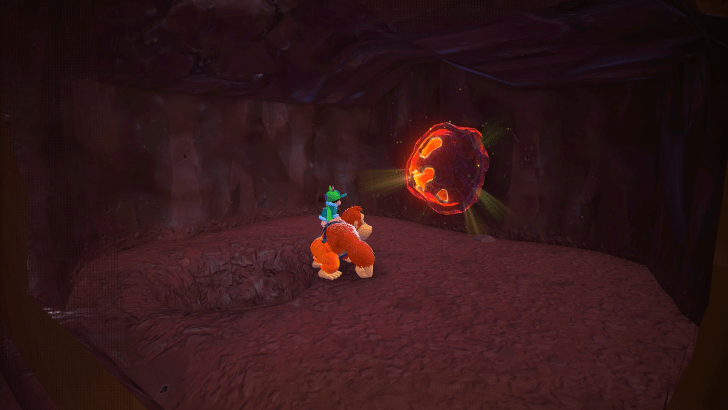
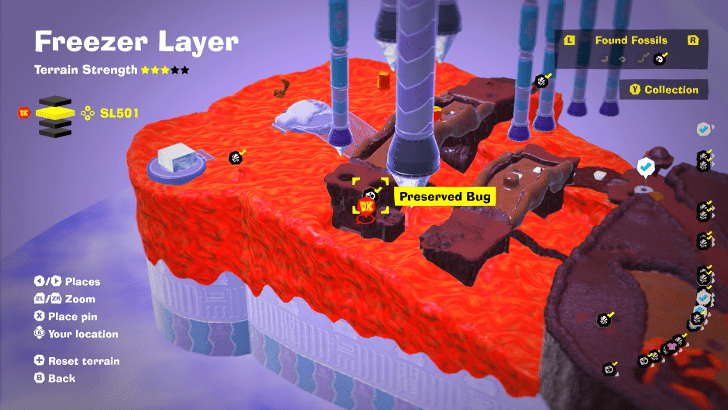
Underground near Zig-Zag Bridges |
||
 |
 |
|
|
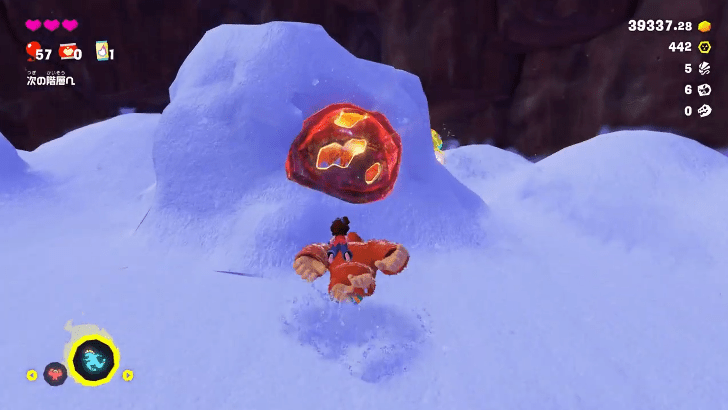
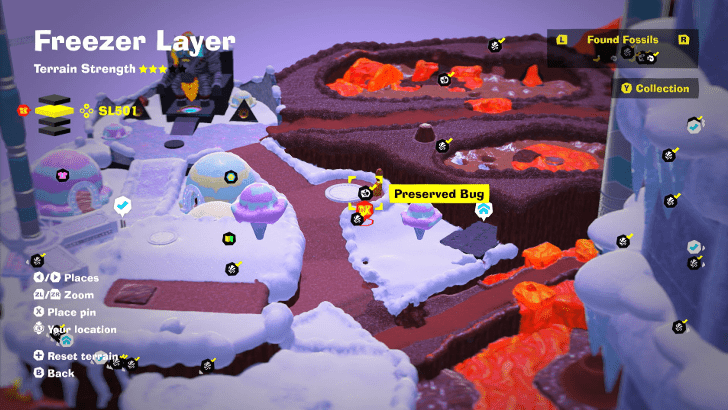
Near below the Canter Creamery |
||
SL 502 Fossil Locations
| Overworld View | Map Location | |
|---|---|---|
 |
 |
|
|
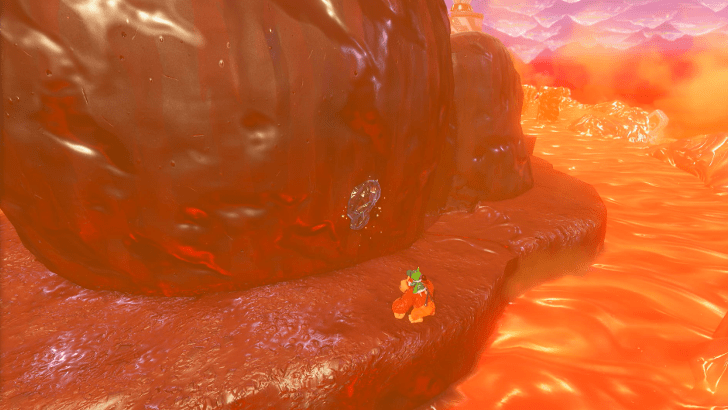
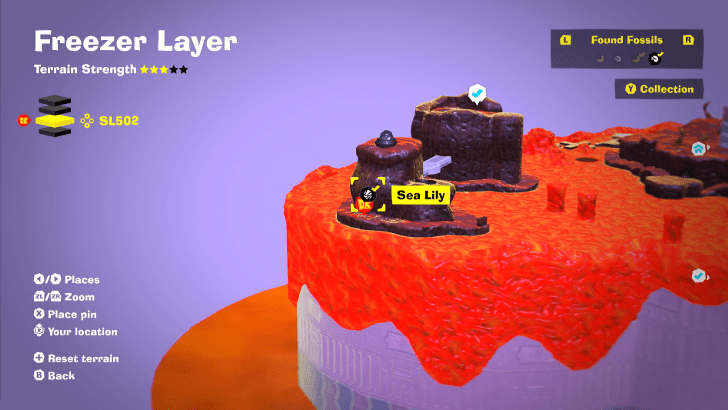
Located behind a hill at Hot-Hoof Heater |
||
 |
 |
|
|
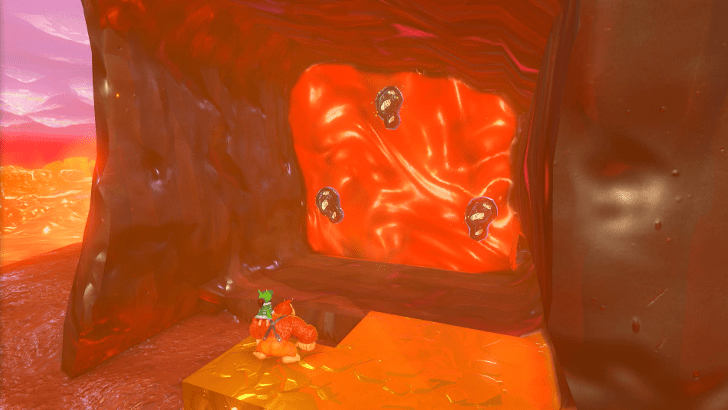
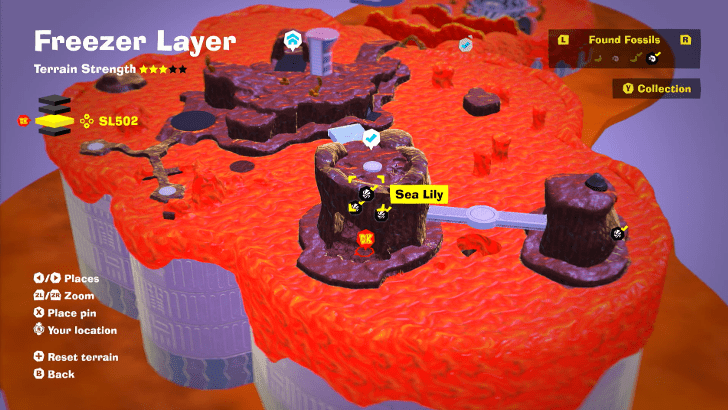
Located below Hot-Hoof Heater |
||
 |
 |
|
|
Located below Hot-Hoof Heater |
||
 |
 |
|
|
Located below Hot-Hoof Heater |
||
 |
 |
|
|
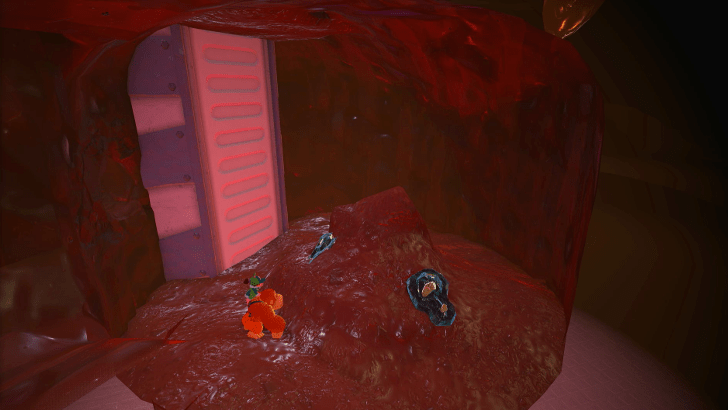
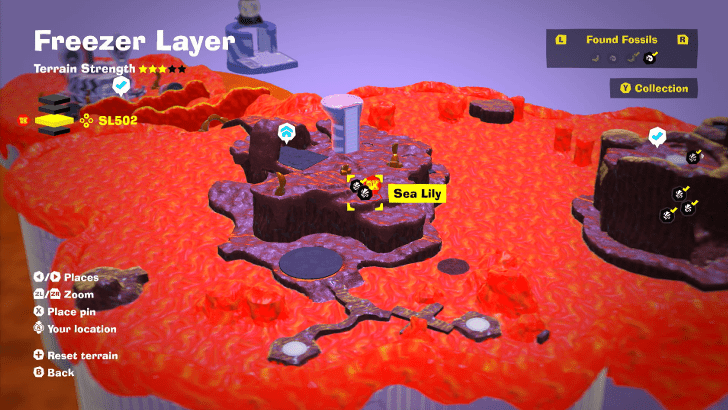
Located below the Hot-Hoof Heater Getaway |
||
 |
 |
|
|
Located below the Hot-Hoof Heater Getaway |
||
 |
 |
|
|
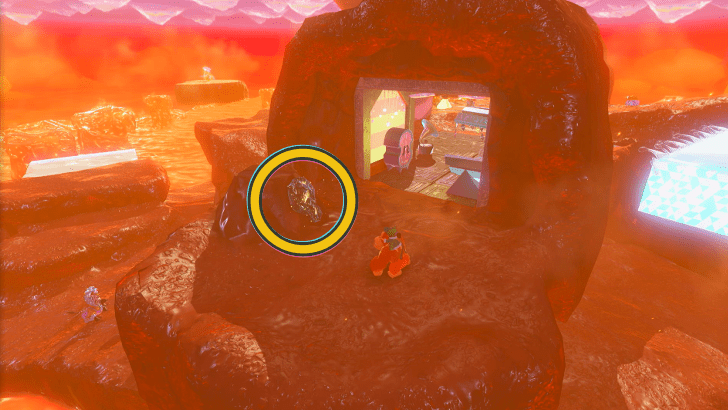
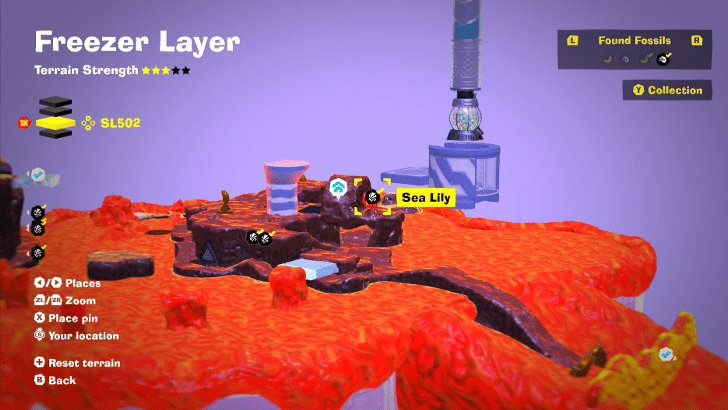
Located near the Hot-Hoof Heater Getaway |
||
 |
 |
|
|
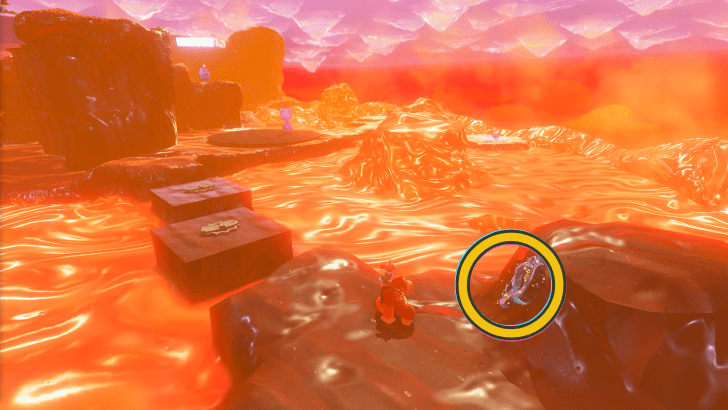
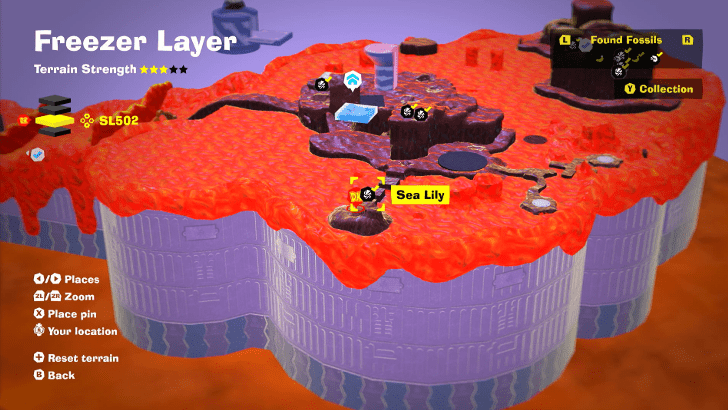
Located on a small islet near the Hot-Hoof Heater Getaway |
||
 |
 |
|
|
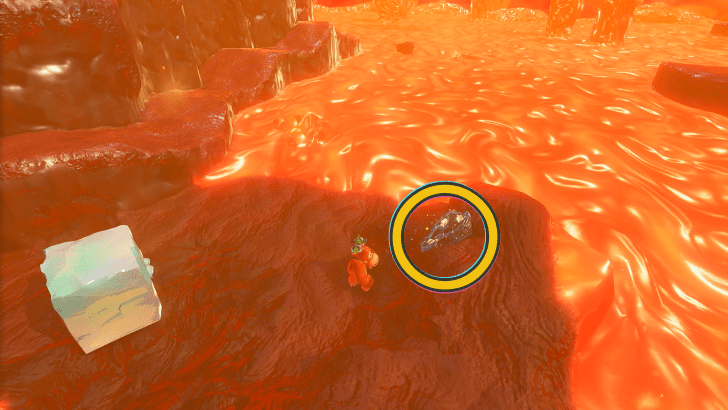
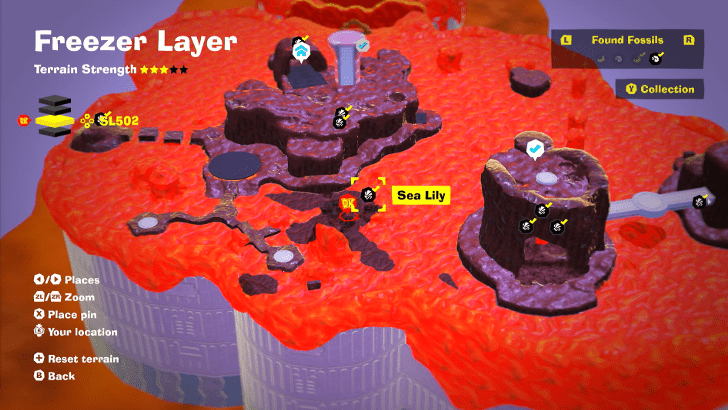
Located near the Hot-Hoof Heater Getaway |
||
 |
 |
|
|
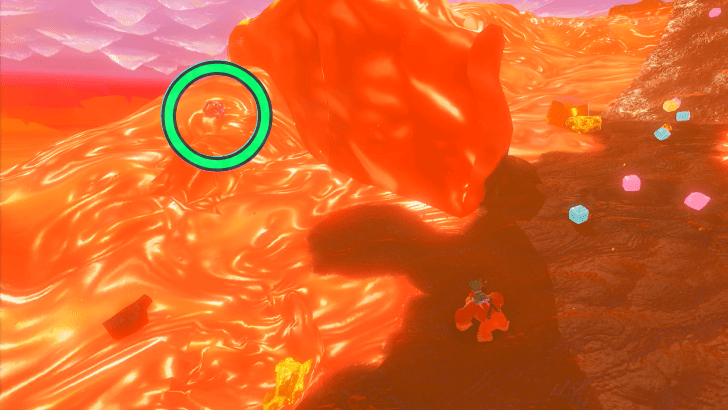
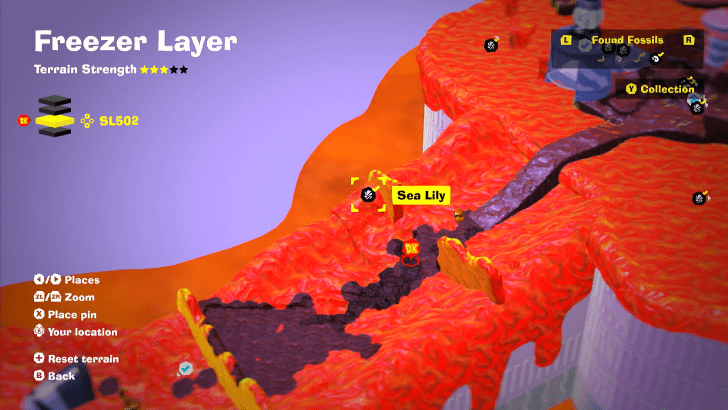
Located between Hot-Hoof Heater Getaway and Compressor |
||
 |
 |
|
|
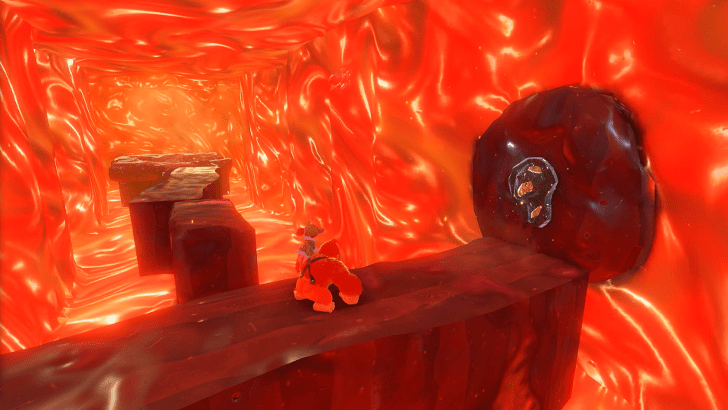
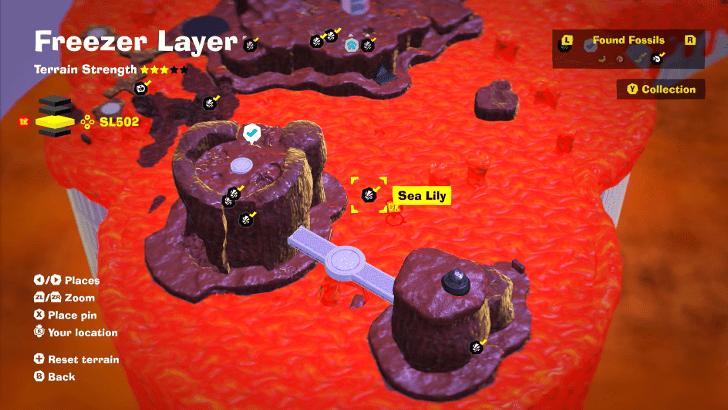
Located below the bridge near Hot-Hoof Heater |
||
 |
 |
|
|
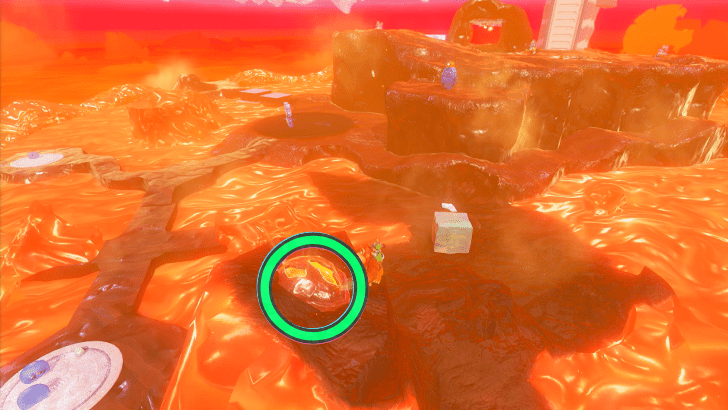
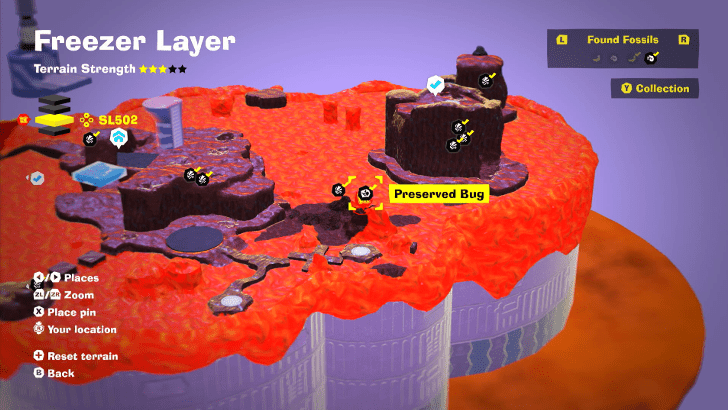
Located near the Hot-Hoof Heater Getaway |
||
Freezer Layer Checkpoints
All Checkpoint Locations
| Overworld View | Map Location | |
|---|---|---|
 |
 |
|
|
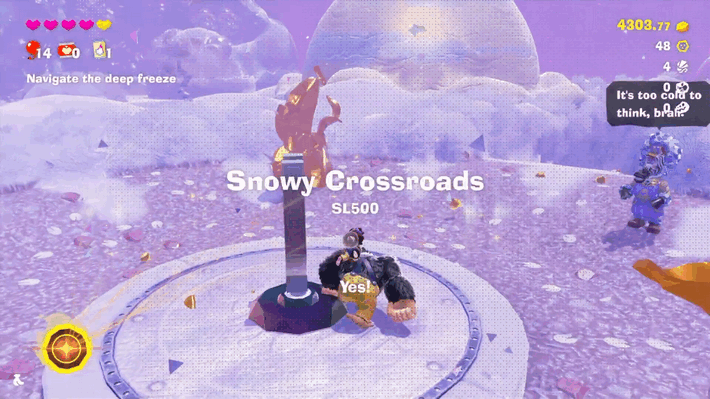
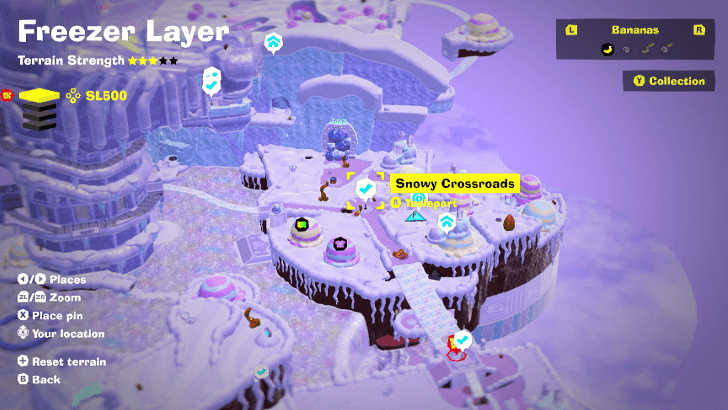
Snowy Crossroads Checkpoint (SL 500)
Go through the cavern under the Crumbly Bridge. It will lead to the Snowy Crossroads checkpoint. |
||
 |
 |
|
|
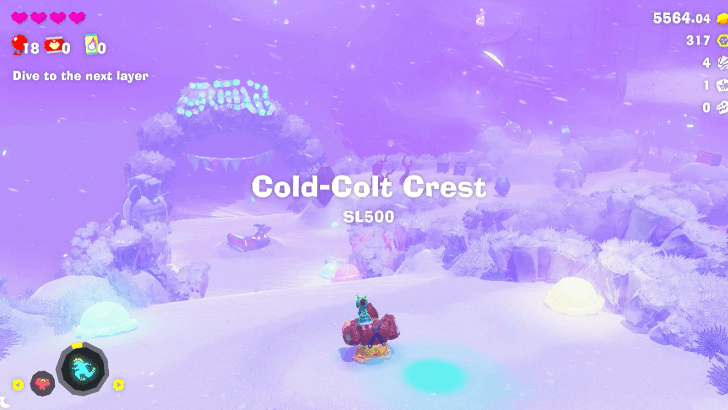
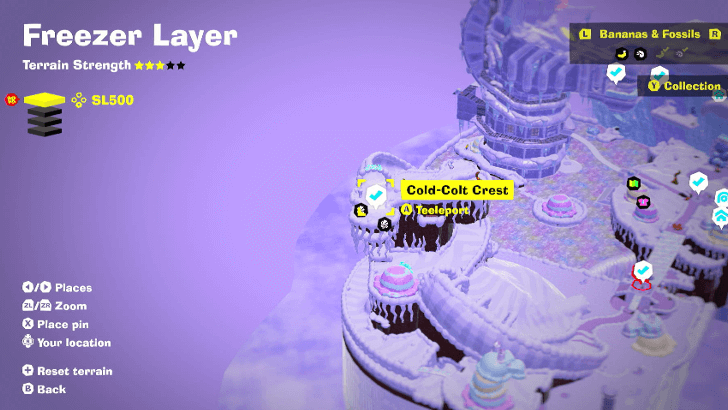
Cold-Colt Crest Checkpoint (SL 500)
This is where you will arrive after dropping down from The Divide. |
||
 |
 |
|
|
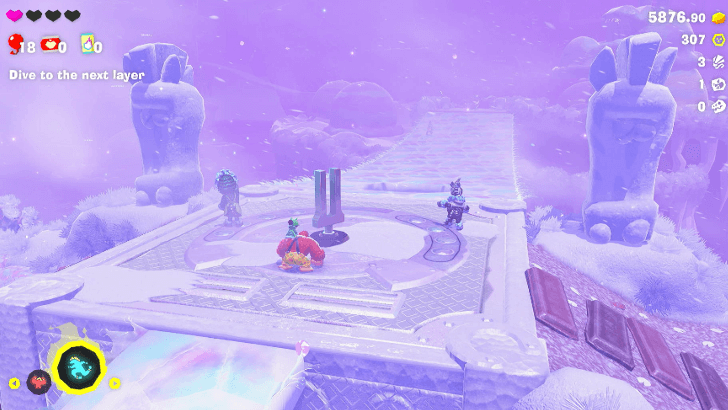
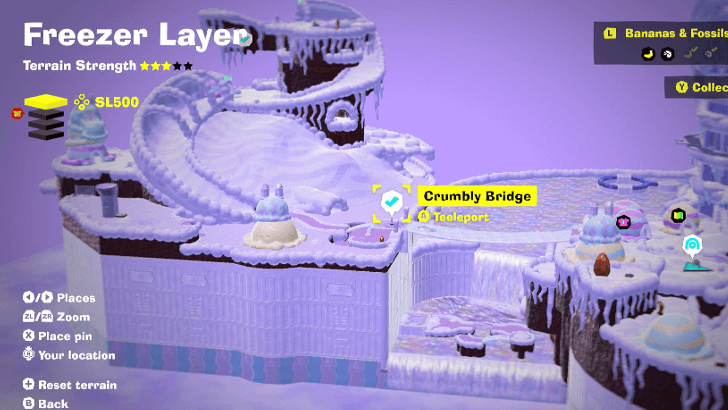
Crumbly Bridge Checkpoint (SL 500)
Turf surf to the ground from Cold-Colt Crest. The checkpoint will be located at the end. |
||
 |
 |
|
|
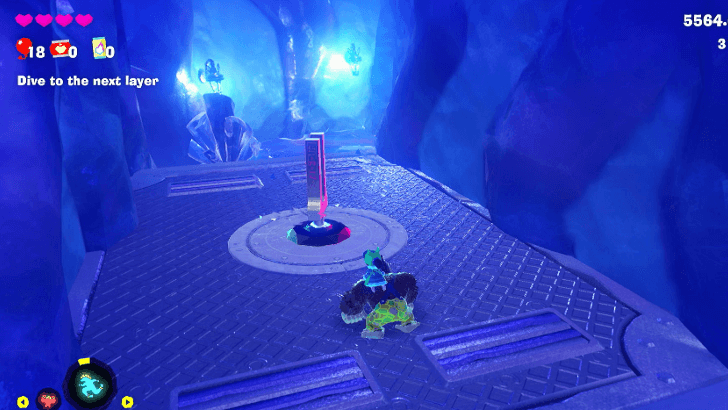
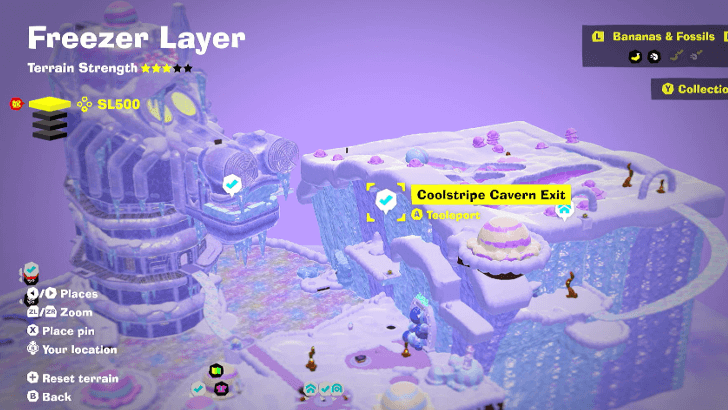
Coolstripe Cavern Exit Checkpoint (SL 500)
At the end of Coolstripe Cavern. |
||
 |
 |
|
|
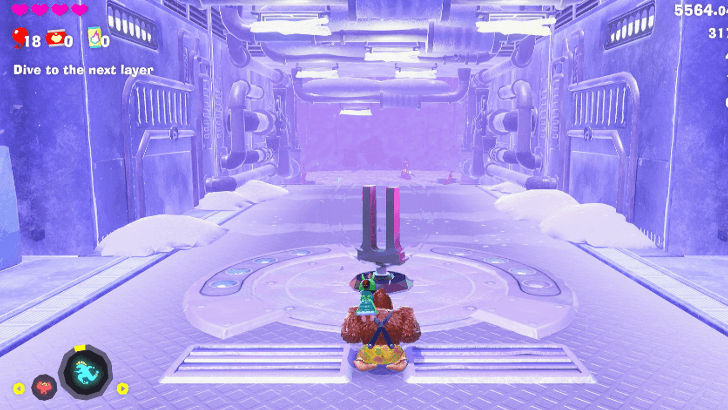
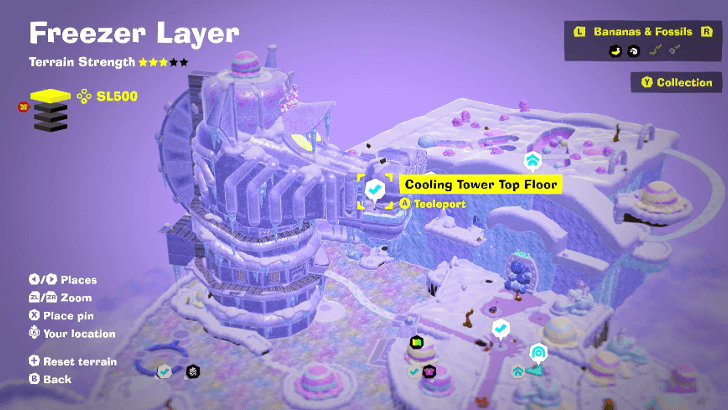
Cooling Tower Top Floor Checkpoint (SL 500)
Use the Zebra Bananza Form to go up the ice bridge that leads to the top of the Cooling Tower. |
||
 |
 |
|
|
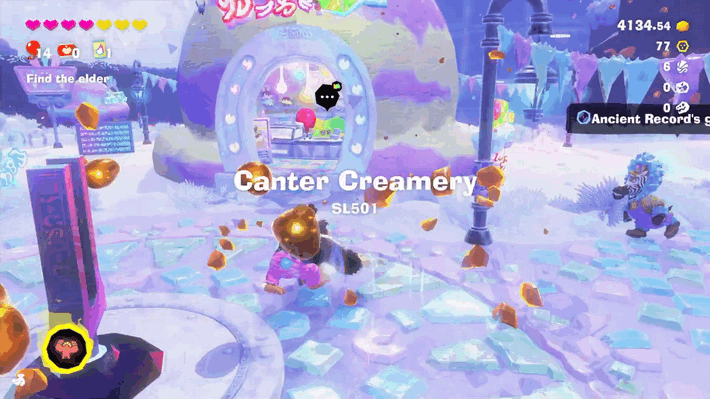
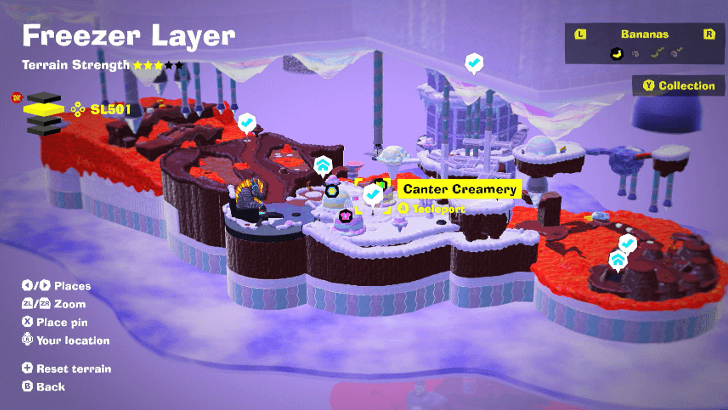
Canter Creamery Checkpoint (SL 501)
Use the icicles and the ice blocks to build a bridge across Chocolava Lake to get to the Canter Creamery checkpoint. |
||
 |
 |
|
|
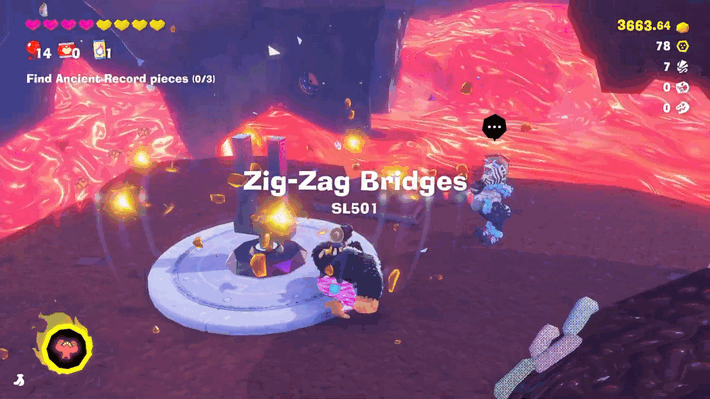
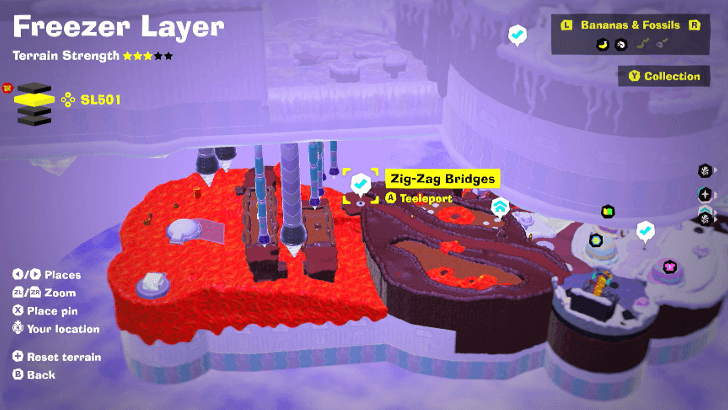
Zig-Zag Bridges Checkpoint (SL 501)
Go through the dirt and chocolate sprinkled path to the right of the Zebra Elder. At the end of the path is the Zig-Zag Bridges checkpoint. |
||
 |
 |
|
|
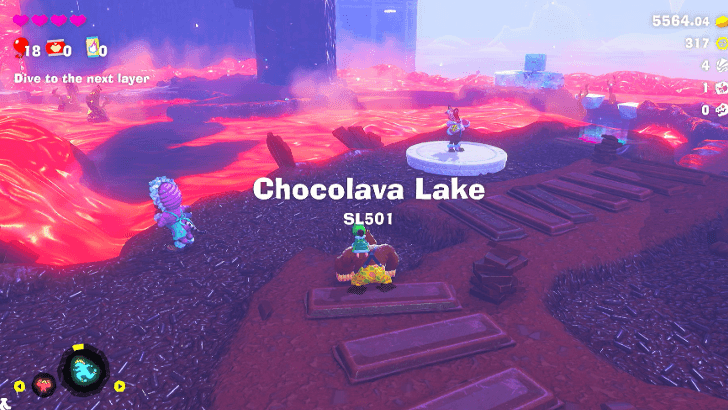
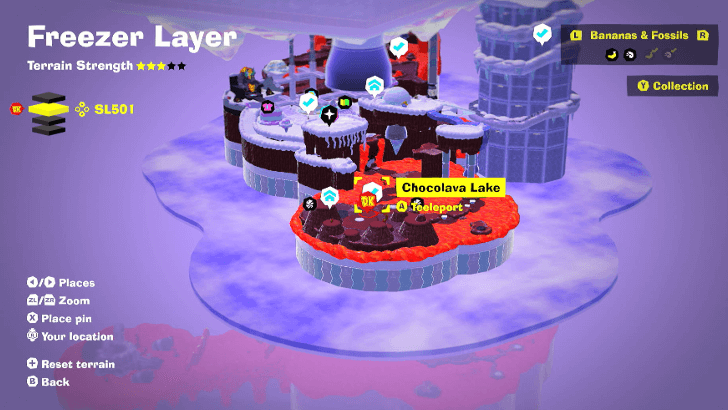
Chocolava Lake Checkpoint (SL 501)
This is where you will arrive after dropping down from Coolstripe Cavern. |
||
 |
 |
|
|
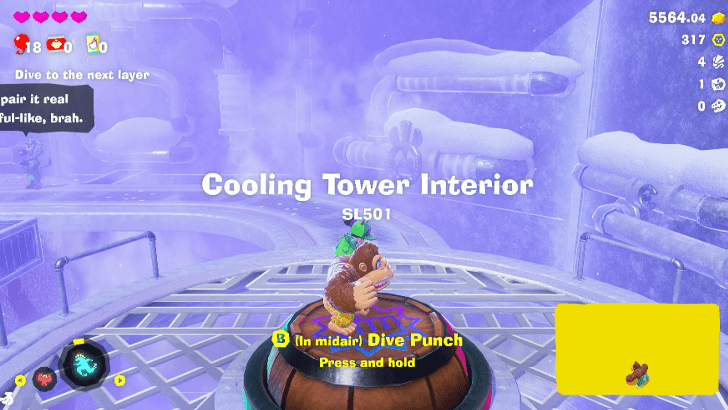
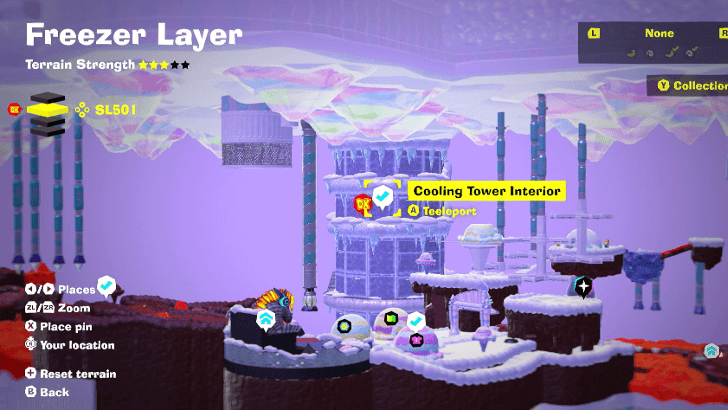
Cooling Tower Interior Checkpoint (SL 501)
This is where you will drop down to after defeating Poppy Kong. |
||
 |
 |
|
|
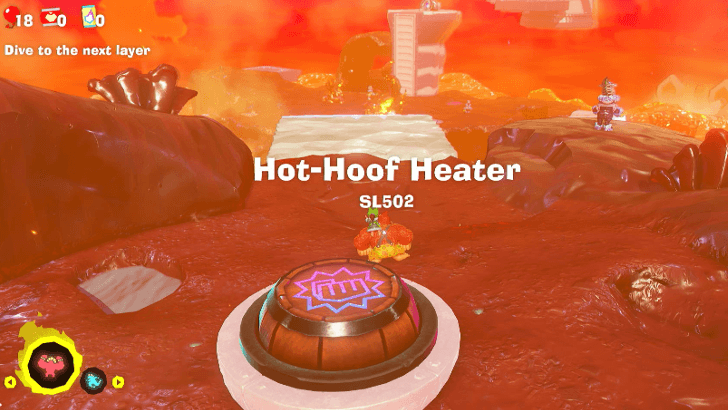
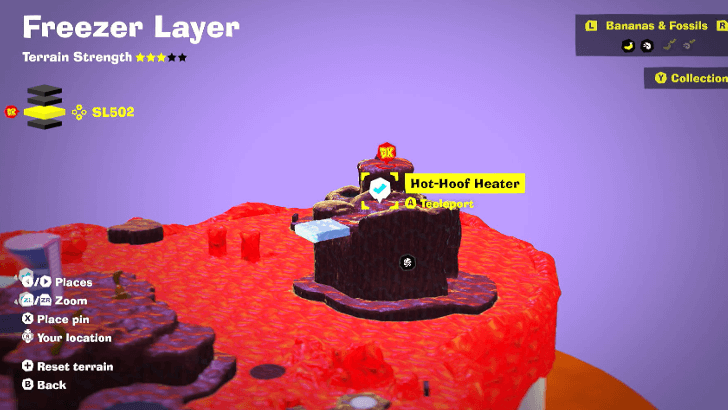
Hot-Hoof Heater Checkpoint (SL 502)
This is where you will arrive after dropping down from the Cooling Tower. |
||
 |
 |
|
|
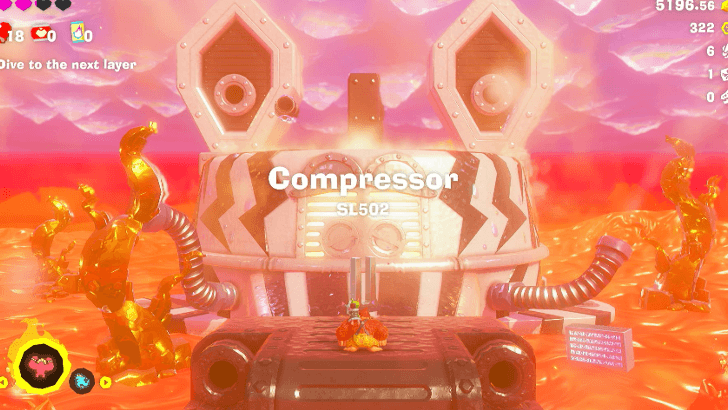
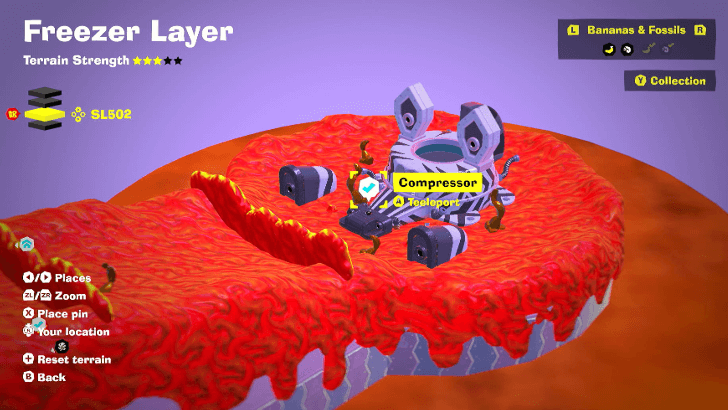
Compressor Checkpoint (SL 502)
Found at the end of the Hot-Hoof Heater. You will need to activate an ice machine to cross the lava and reach the checkpoint. |
||
 |
 |
|
|
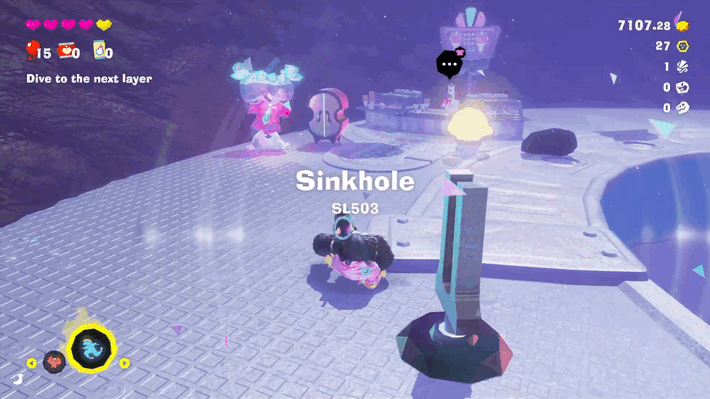
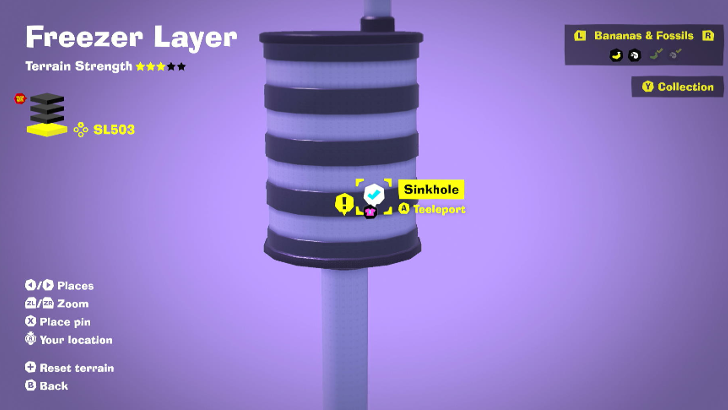
Sinkhole SL503 Checkpoint (SL 503)
Revealed after defeating Inflammonite. |
||
Warp Gong Location
| Layer | Overworld View | Map Location |
|---|---|---|
| SL 500 |
 |
 |
|
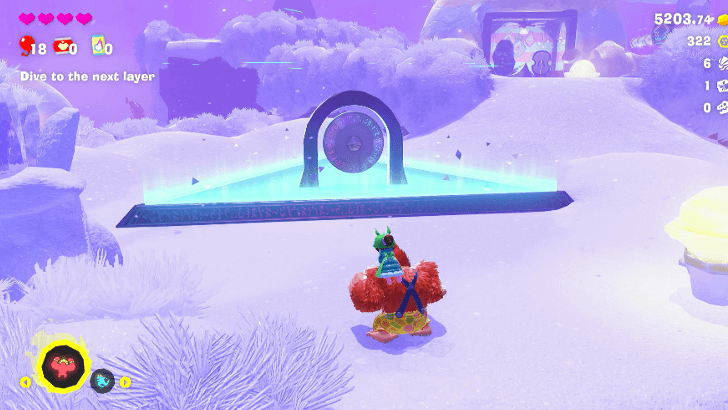
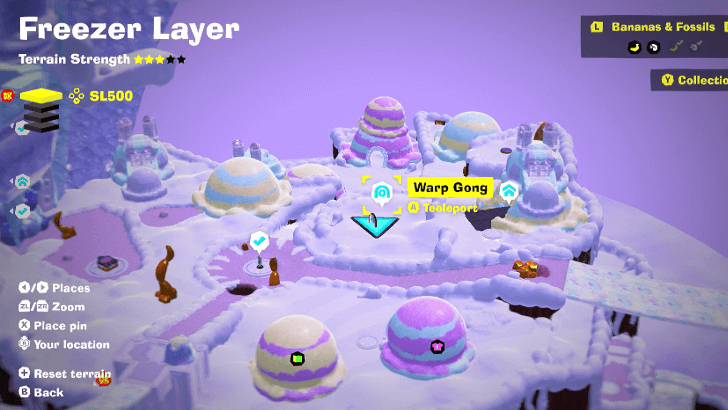
Snowy Crossroads Warp Gong
To the right of the Snowy Crossroads checkpoint. |
||
How to Teeleport: Fast Travel Guide
Freezer Layer Challenges
All Challenge Locations
| Layer | Overworld View | Map Location |
|---|---|---|
| SL 500 |
 |
 |
|
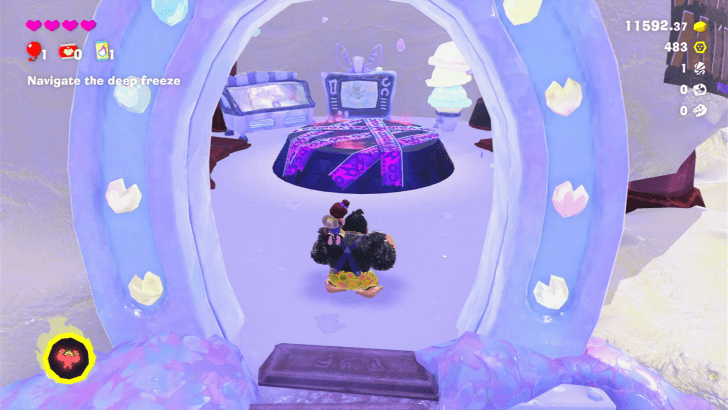
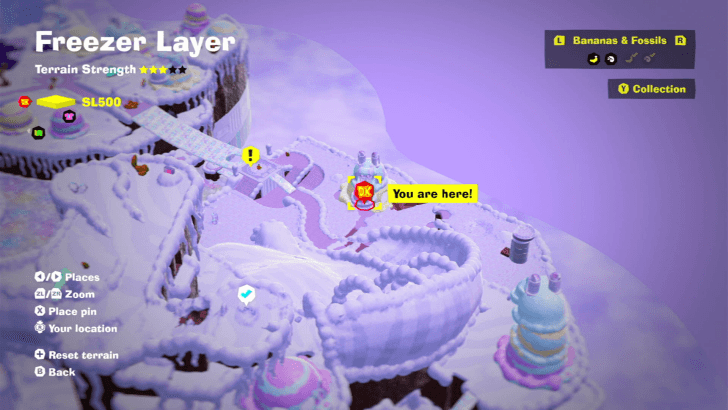
Rolluskoid x3 Freezer Layer Battle Challenge 1 Inside a house past the slide from Cold-Colt Crest. |
||
| SL 500 |
 |
 |
|
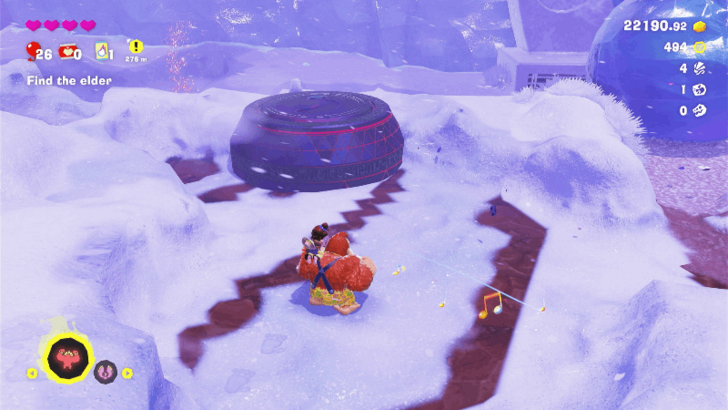
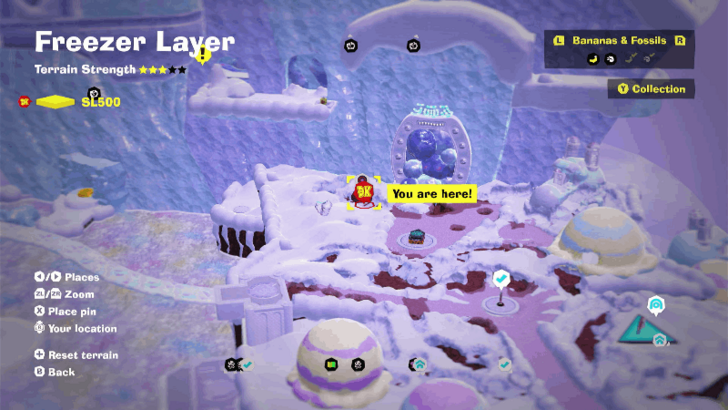
Crockoid x 6 Freezer Layer Battle Challenge 2 Buried partially in snow northeast of the Snowy Crossroads teeleport point. |
||
| SL 500 |
 |
 |
|
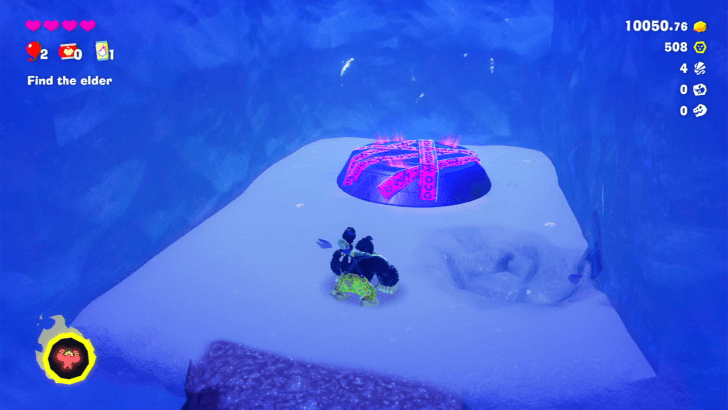
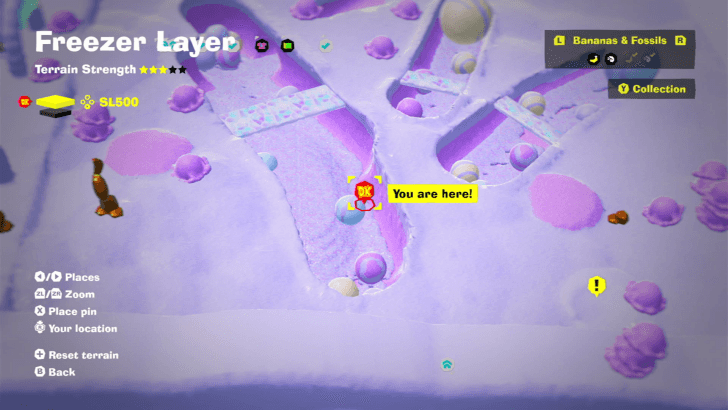
Antickoid x5 Freezer Layer Battle Challenge 3 Inside a small alcove just past the Coolstripe Cavern Pool Getaway. |
||
| SL 501 |
 |
 |
|
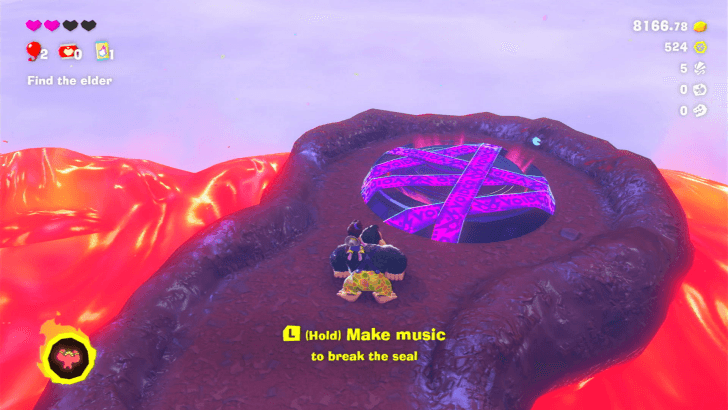
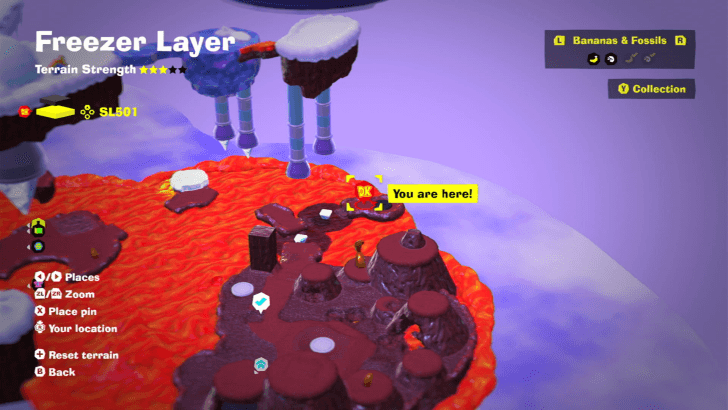
Rolluskoid x4 Freezer Layer Battle Challenge 4 In a small platform north of the starting area of Chocolava Lake. |
||
| SL 501 |
 |
 |
|
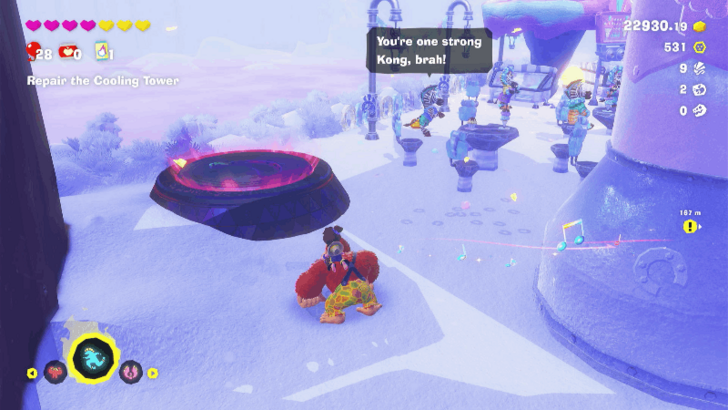
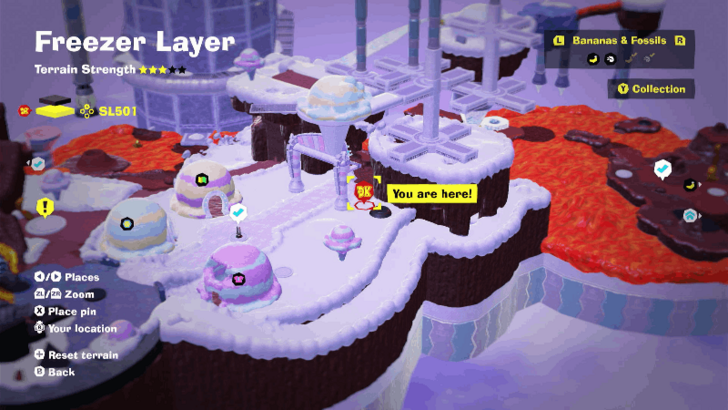
Antickoid x6 Freezer Layer Battle Challenge 5 Located southwest of the Canter Creamery teeleport point. |
||
| SL502 |
 |
 |
|
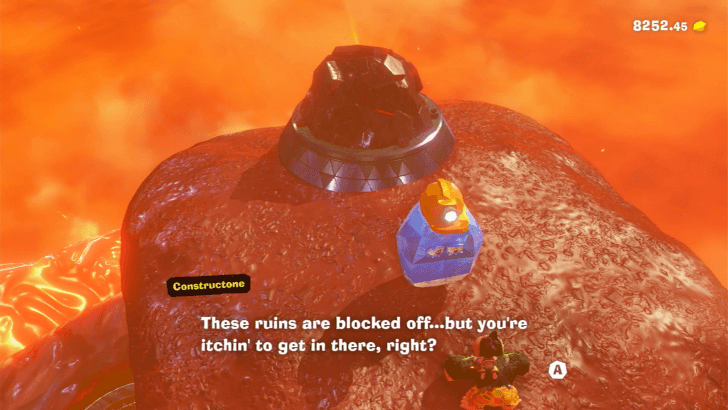
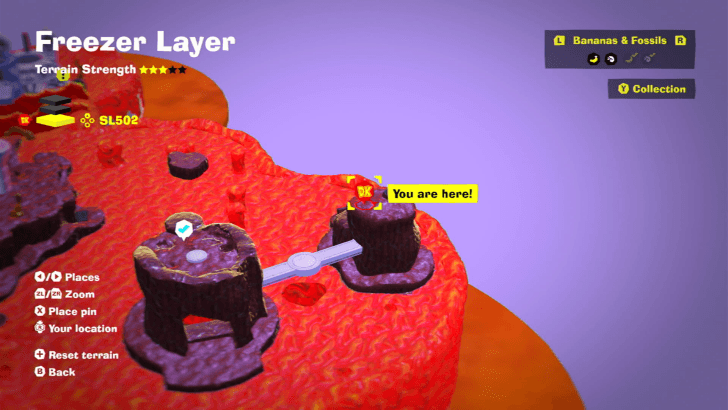
Squeeloid x8 Freezer Layer Battle Challenge 6 Located on the path to the right near the starting area of Hot-Hoof Heater. You need to pay the Constructone 600 Gold to clear the debris. |
||
| SL 500 |
 |
 |
|
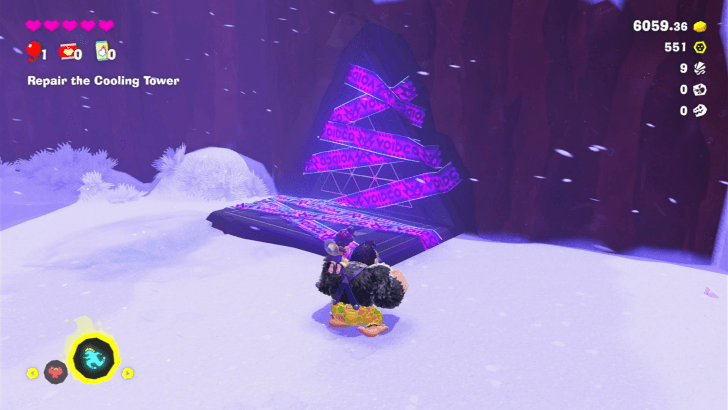
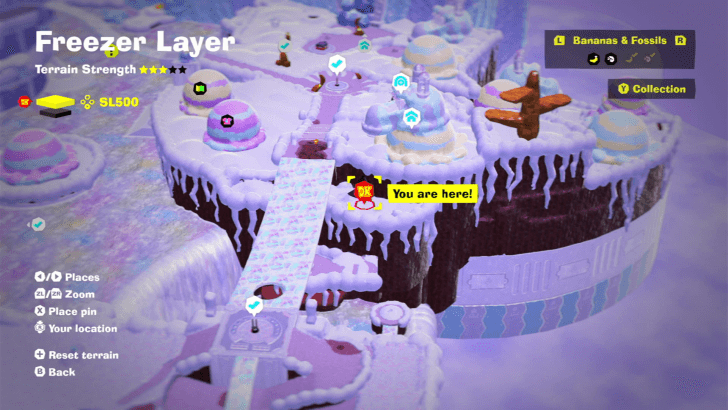
Red-Hot Rotations Freezer Layer Challenge Course 1 On a ledge under the bridge leading to Cantery Creamery. |
||
| SL 500 |
 |
 |
|
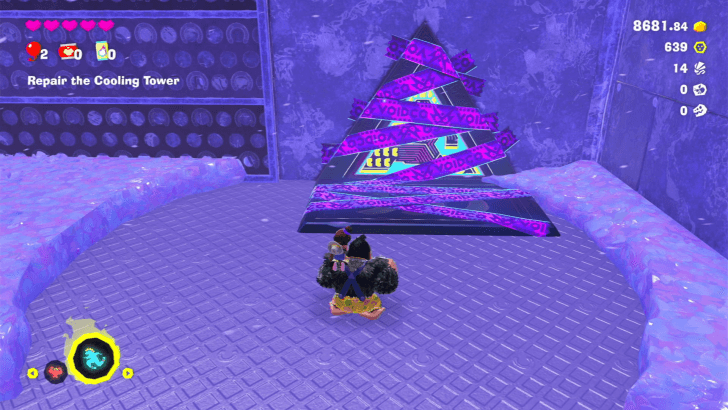
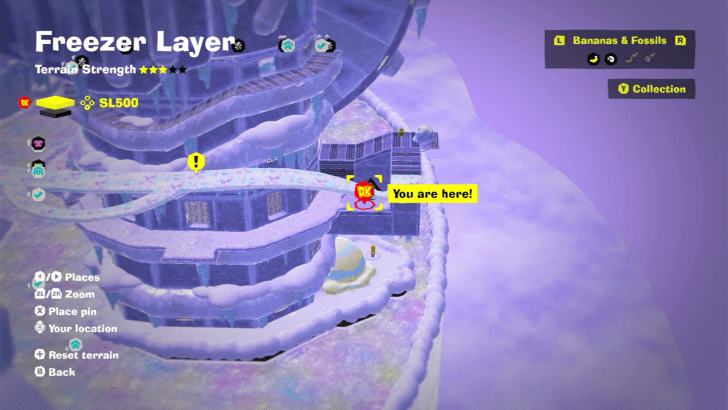
Zebra Bananza: Pop Party Freezer Layer Challenge Course 2 Follow the path right from the ice bridge connecting to the Cooling Tower. You need to be in your Zebra Bananza form to open the challenge ruin. |
||
| SL 500 |
 |
 |
|
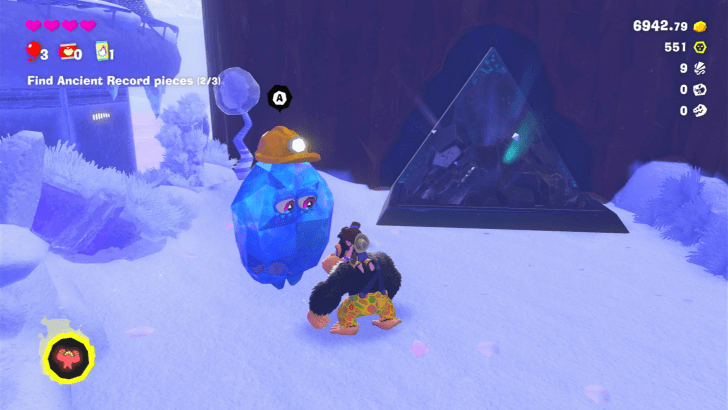
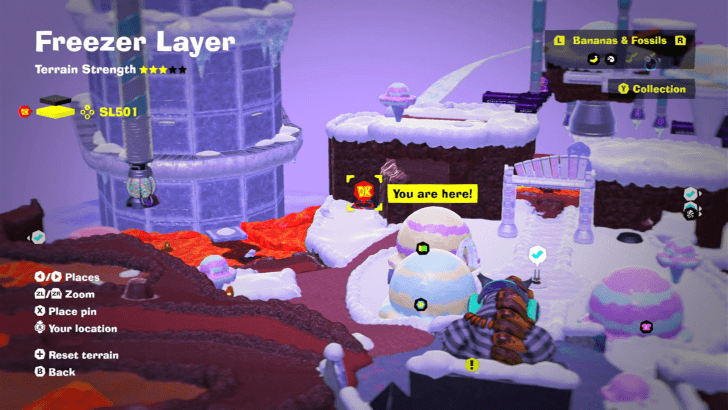
Rising Iceberg Rush Freezer Layer Challenge Course 3 Located slightly southeast of Canter Creamery. Speak with the nearby Constructone and pay it 1000 Gold to clear the rubble to enter the ruins. |
||
| SL 500 |
 |
 |
|
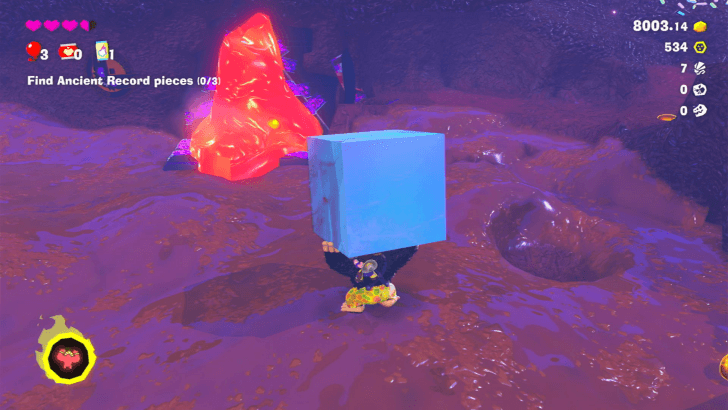
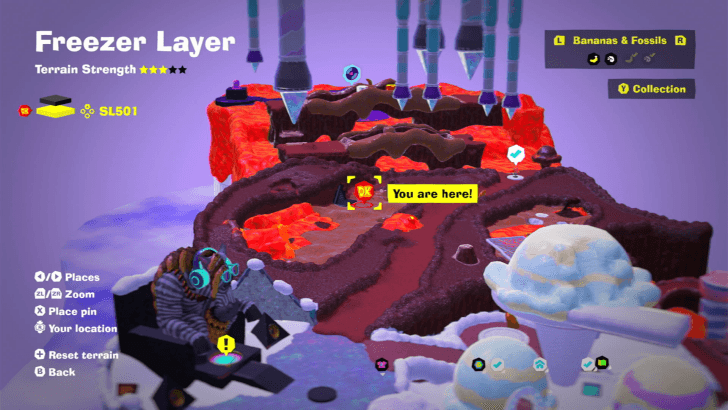
Precarious, Powdery Path Freezer Layer Challenge Course 4 In an alcove north of the Zebra Elder. The entrance is blocked by lava that you'll need to clear with an ice block. |
||
| SL502 |
 |
 |
|
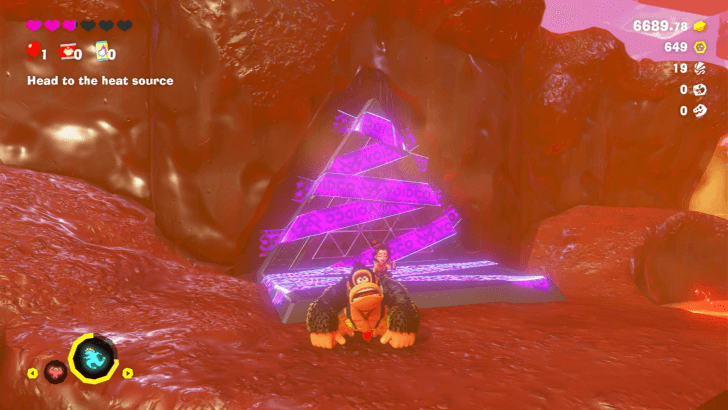
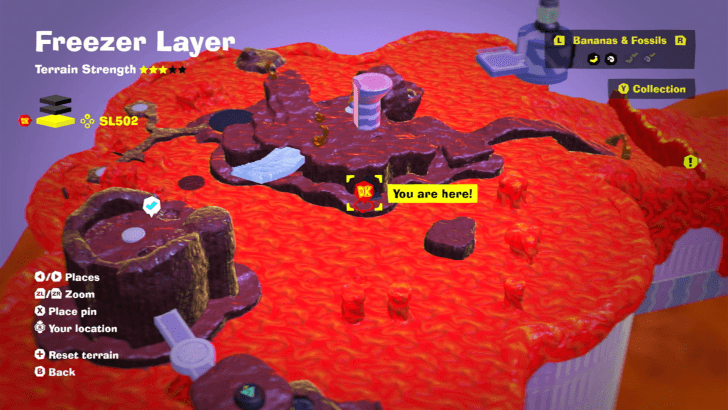
Ice-Serve Slope Freezer Layer Challenge Course 5 Located just past the ice bridge near the starting area of Hot-Hoof Heater. The challenge ruins are on a ledge at the bottom. |
||
Bonus Stage Location
| Layer | Overworld View | Map Location |
|---|---|---|
| SL 501 |
 |
|
|
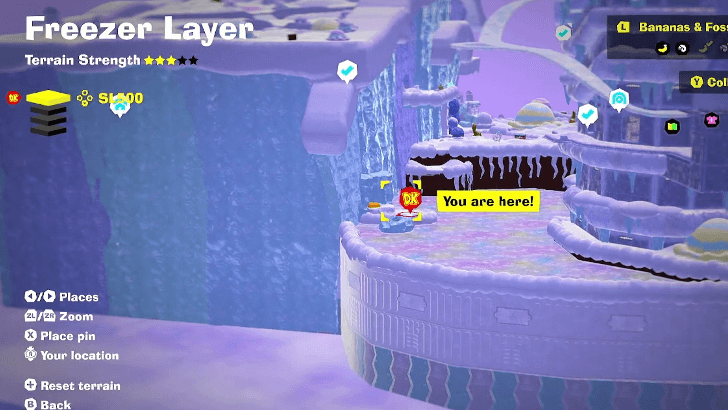
Bombing for Gold
In the Snowy Crossroads, find the blue balloon on a ledge by the water. Punch the balloon to raise the bridge then get across to the Bonus Stage. |
||
Freezer Layer Shops
Freezer Layer Style Shop
Style Shop Locations
| Layer | Overworld View | Map Location |
|---|---|---|
| SL 500 |
 |
 |
|
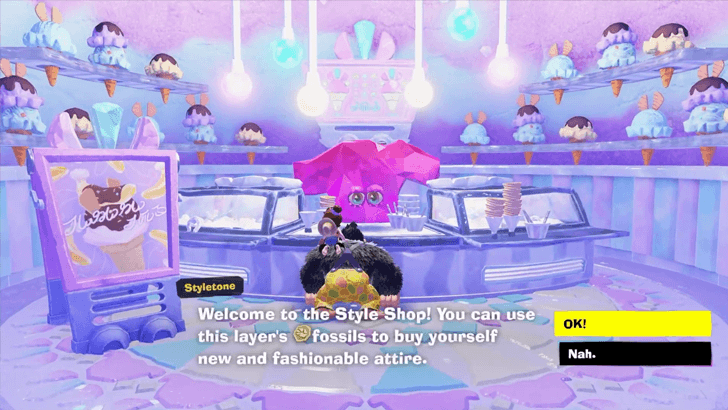
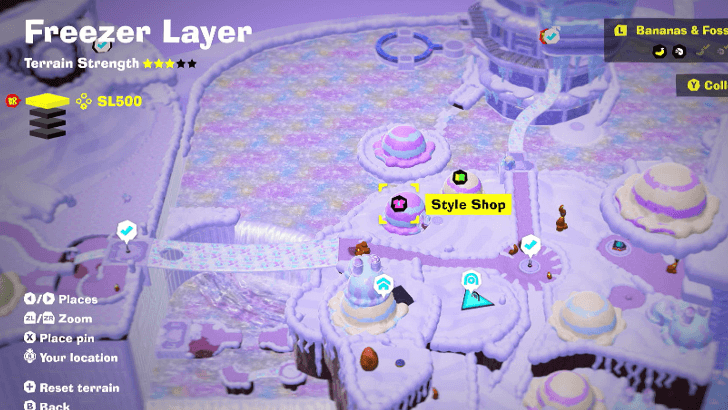
Snowy Crossroads Style Shop
This Style Shop is located to the lower left of the Snowy Crossroads checkpoint. It is right next to the Stuff Shop. |
||
| SL 501 |
 |
 |
|
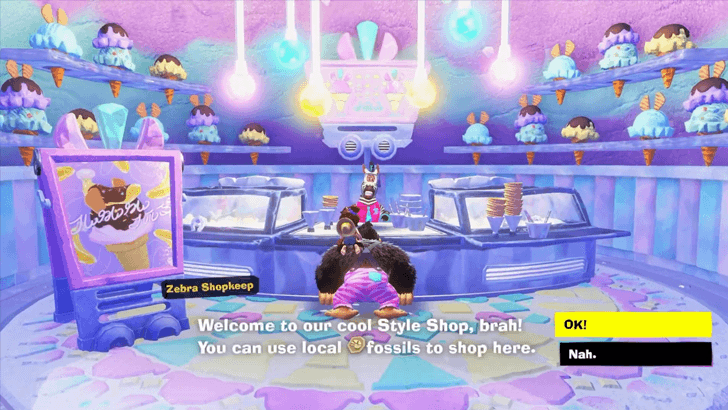
Canter Creamery Style Shop
This Style Shop is located to the left of the Canter Creamery checkpoint. |
||
| SL 503 |
 |
 |
|
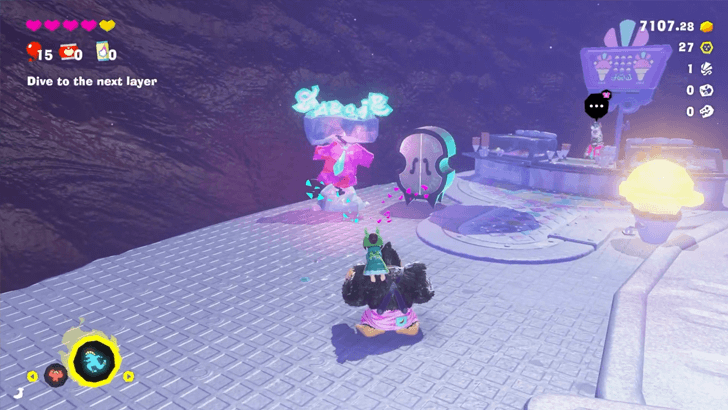
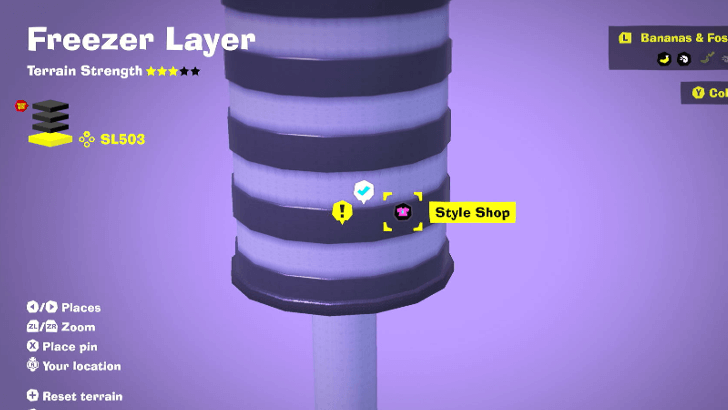
Freezer Layer Sinkhole Style Shop
Found near the Sinkhole after defeating Inflammonite. |
||
Available Outfits
| Name | Type | Cost | Effect | |||||||
|---|---|---|---|---|---|---|---|---|---|---|
|
|
Neckwear |
|
Restores your Bananergy as you destroy terrain. | |||||||
|
|
Britches |
|
Reduces damage from ice water by 10 percent. | |||||||
|
|
Britches |
|
Reduces damage from ice water by 20 percent. | |||||||
|
|
Pauline Outfits |
|
Extends your Zebra Bananza time by 40 percent. | |||||||
|
|
Pauline Outfits |
|
Extends your Zebra Bananza time by 40 percent. | |||||||
|
|
Pauline Outfits |
|
Extends your Zebra Bananza time by 40 percent. | |||||||
|
|
Fur Color |
|
Sweet enough to melt in your mouth. | |||||||
|
|
Fur Color |
|
Tart enough yo make your face pucker. | |||||||
Stuff Shop Locations
| Layer | Overworld View | Map Location |
|---|---|---|
| SL 500 |
 |
 |
|
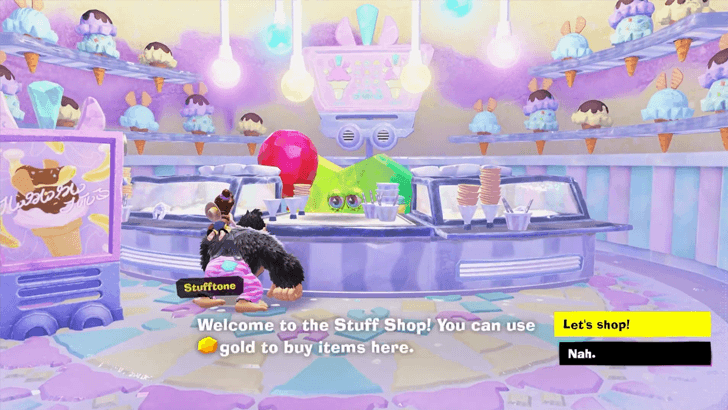
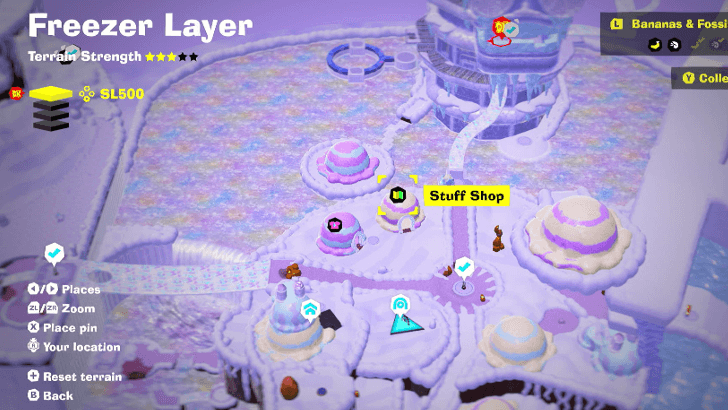
Snowy Crossroads Stuff Shop
This Stuff Shop is located to the left of the Snowy Crossroads checkpoint. It is right next to the Style Shop. |
||
| SL 501 |
 |
 |
|
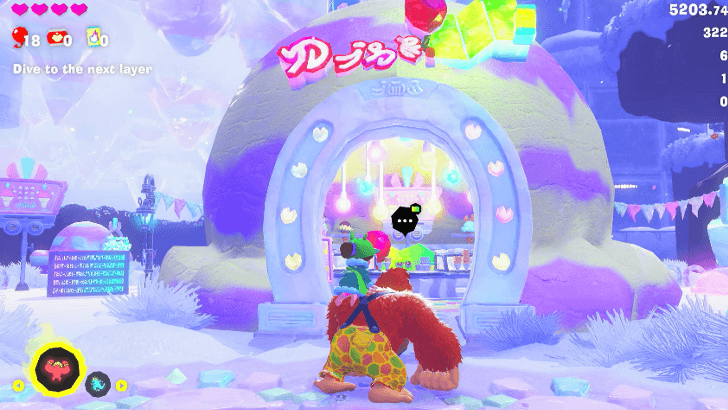
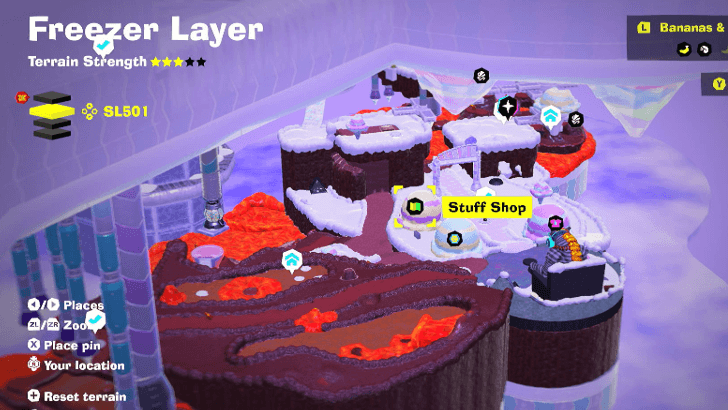
Canter Creamery Stuff Shop
This Stuff Shop is located to the right of the Canter Creamery checkpoint. |
||
Chip Exchange Location
| Layer | Overworld View | Map Location |
|---|---|---|
| SL501 |
 |
 |
|
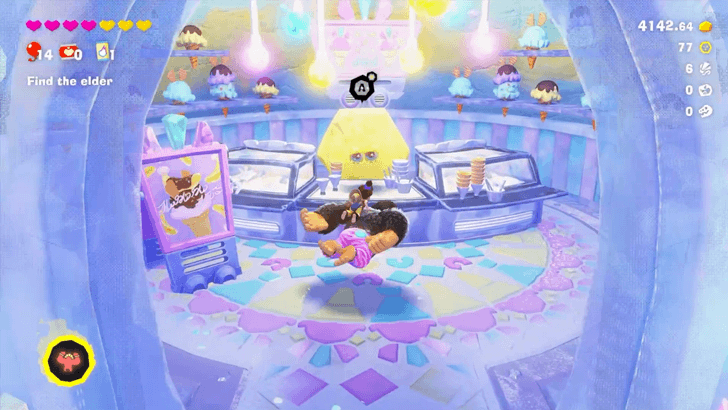
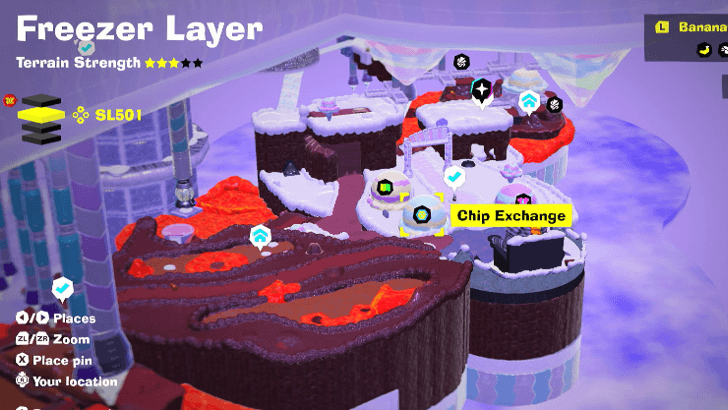
Canter Creamery Chip Exchange
The Chip Exchange is located in front of the Canter Creamery checkpoint. |
||
Freezer Layer Void Stakes
Void Stake Locations
| Layer | Overworld View | Map Location |
|---|---|---|
| SL 500 |
 |
 |
|
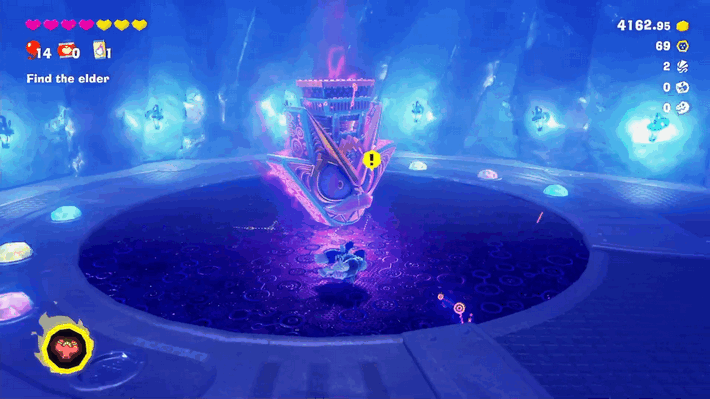
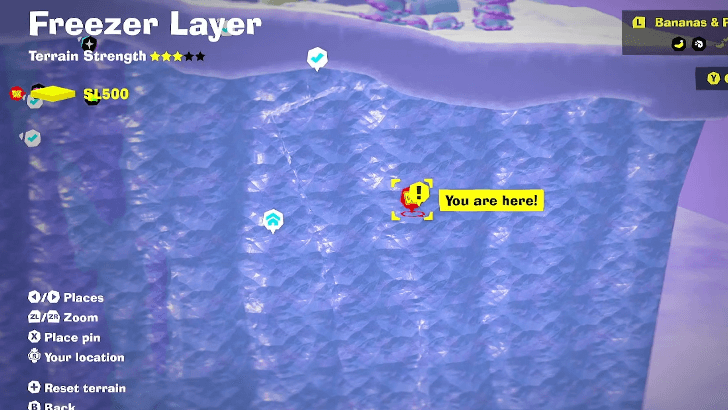
Coolstripe Cavern Void Stake
At the end of Coolstripe Cavern, atop the lava wall. |
||
| SL 500 |
 |
 |
|
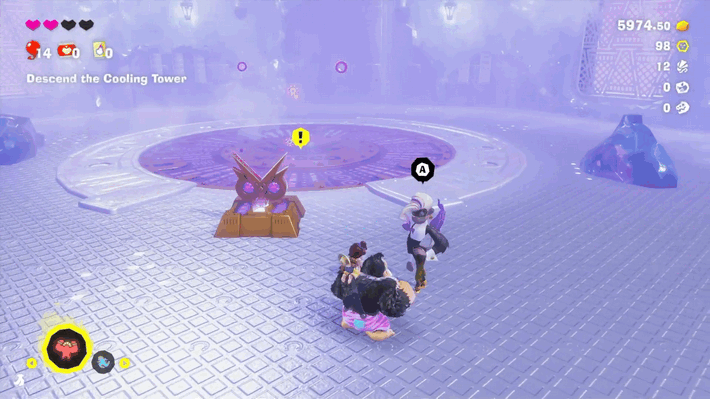
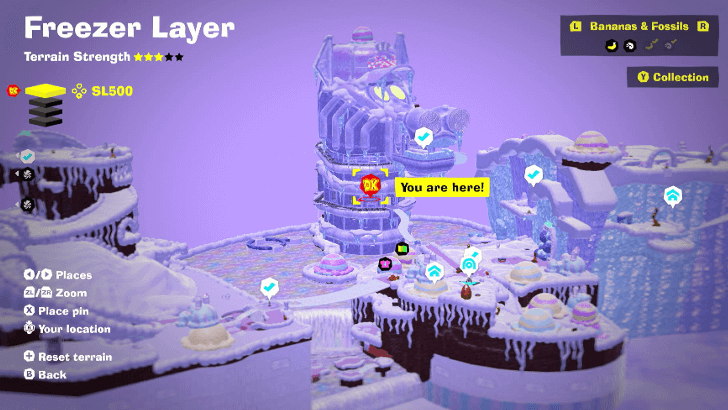
Cooling Tower Interior Void Stake
Key to the Void Tunnel is given after defeating Poppy Kong |
||
| SL 500 |
 |
 |
|
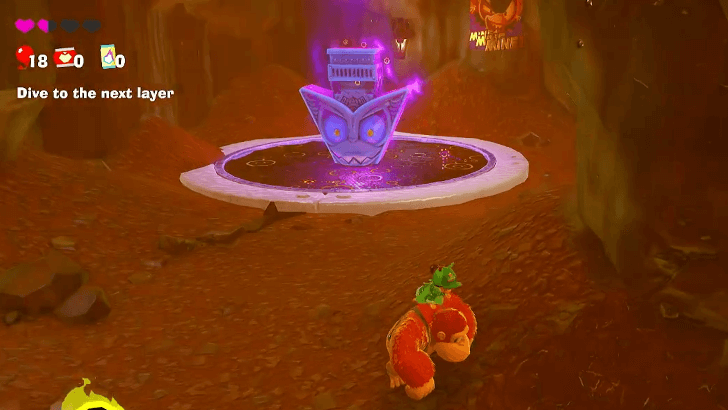
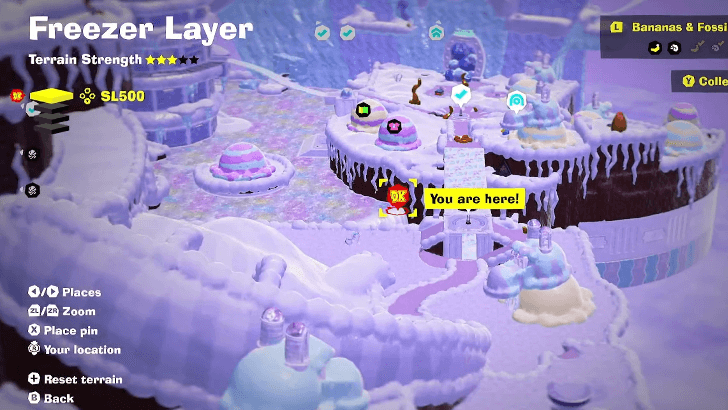
Snowy Crossroads Void Stake
Hidden behind a wall to the left of the cavern entrance on the way to Snowy Crossroads. |
||
| SL 501 |
 |
 |
|
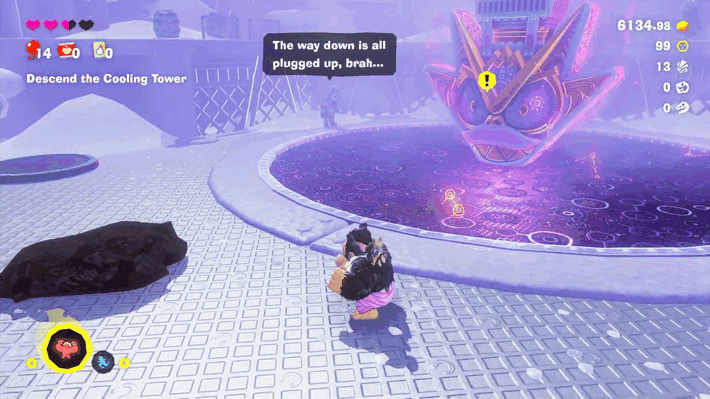
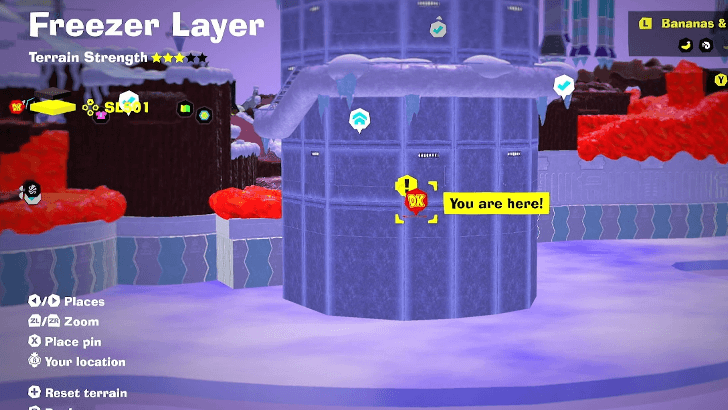
Cooling Tower Exit Void Stake
Dig a path to guide the ice cubes to the lava inside the Cooling Tower. Afterwards, punch down the center of the pit to find the Void Stake. |
||
| SL 503 |
 |
 |
|
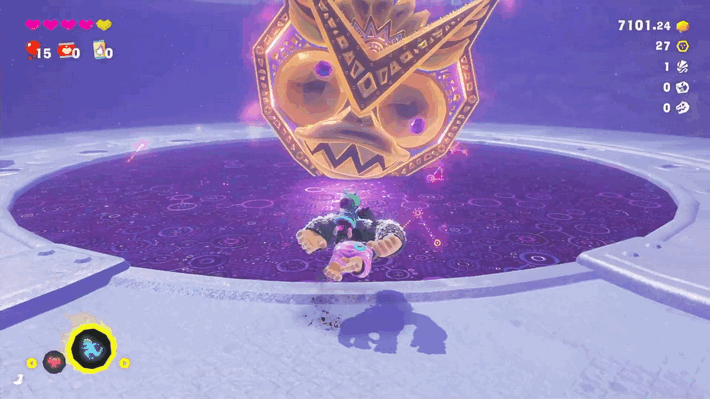
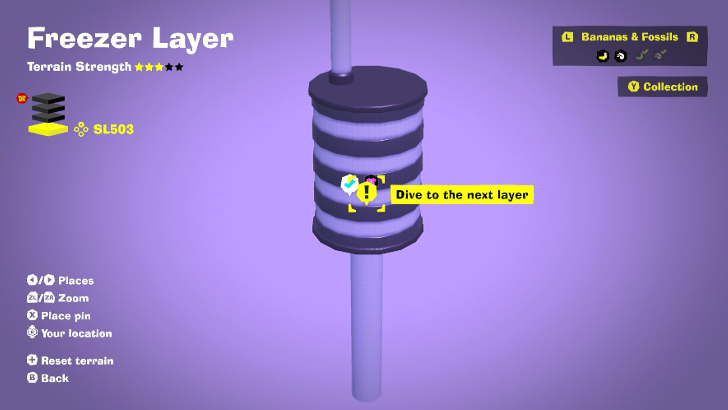
Sinkhole SL503 Void Stake
Revealed after defeating Inflammonite |
||
Cranky Kong Location
Top of the Tower in SL 500
| Map / Overworld Image | Video Directions |
|---|---|
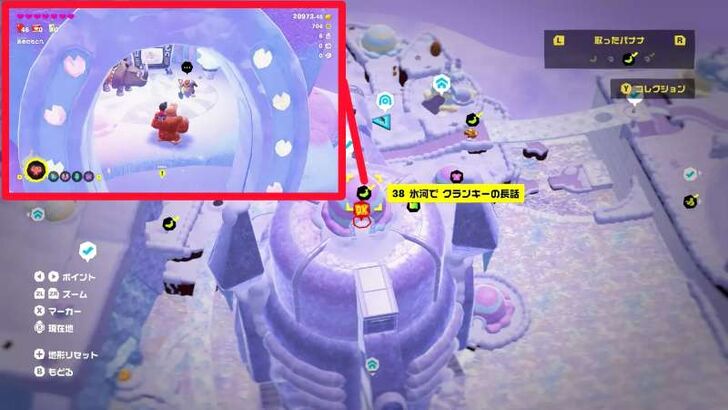 |
From the top Cooling Tower checkpoint, exit through the left iced window, then immediately turn right and climb the wall behind the tower.
Freezer Layer Getaways
All Getaway Locations
| Map Location | Overworld Image |
|---|---|
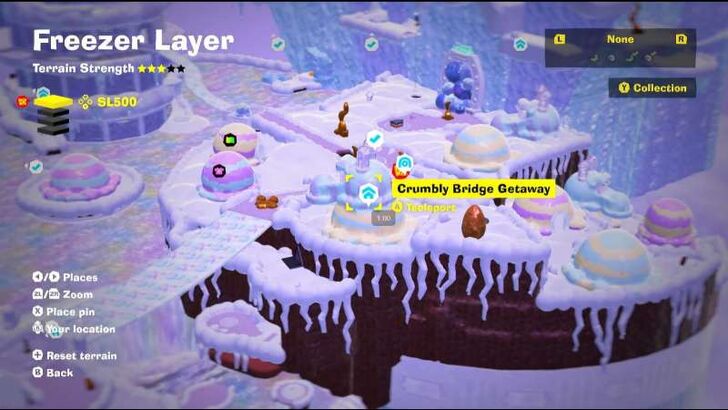 Freezer Layer (SL 500) |
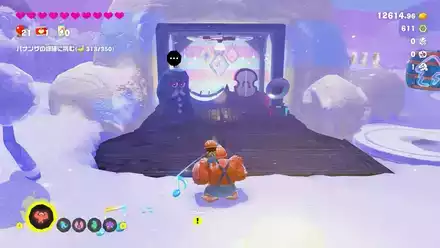 Crumbly Bridge Getaway |
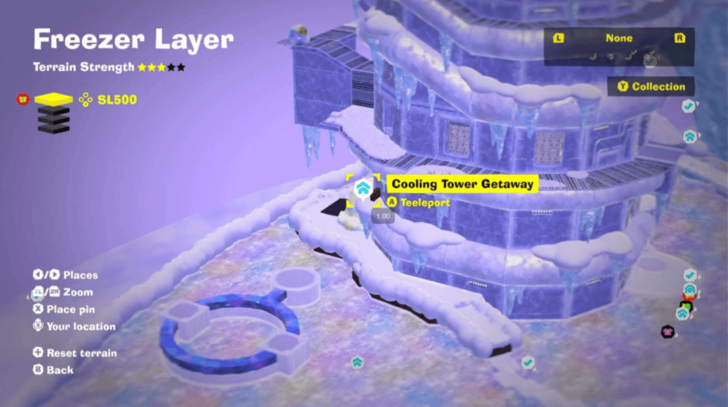 Freezer Layer (SL 500) |
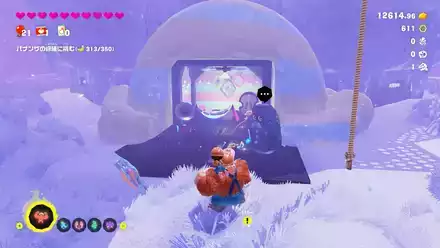 Cooling Tower Getaway |
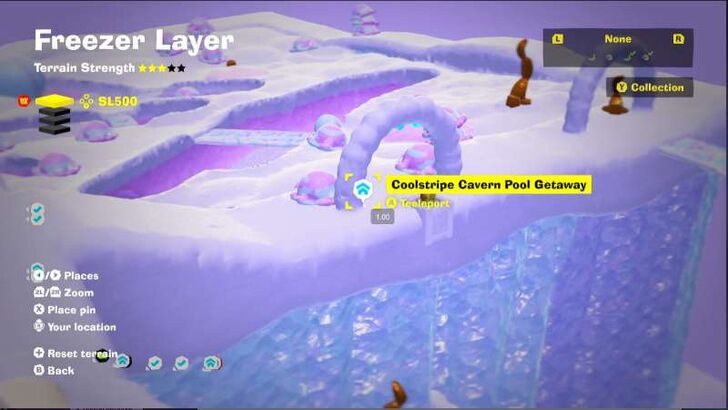 Freezer Layer (SL 500) |
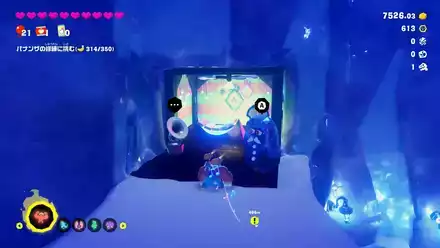 Coolstripe Cavern Pool Getaway |
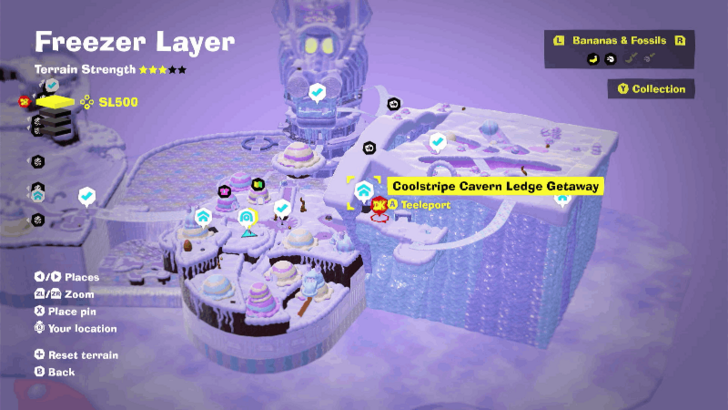 Freezer Layer (SL 500) |
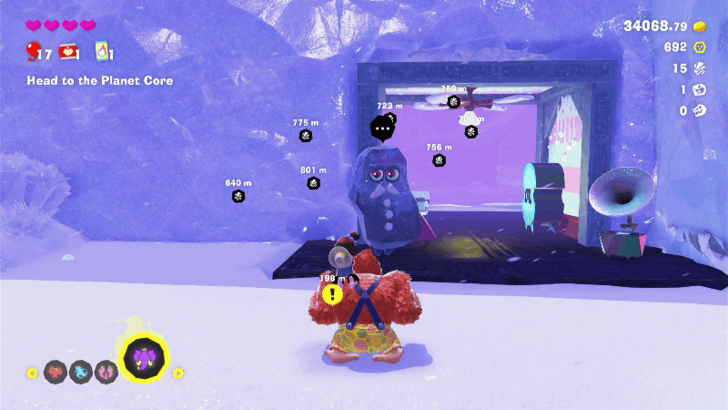 Coolstripe Cavern Ledge Getaway |
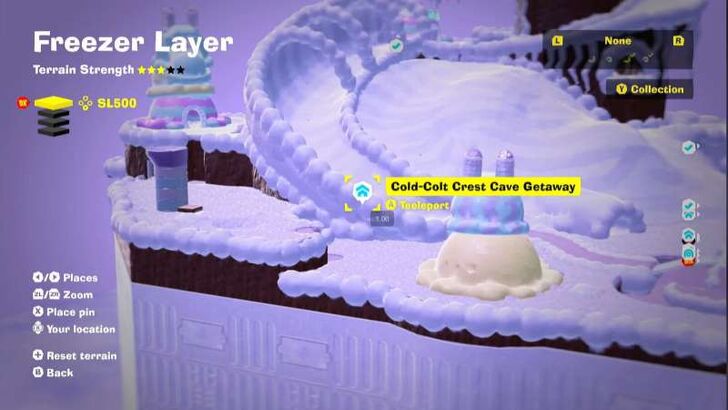 Freezer Layer (SL 500) |
 Cold-Colt Crest Cave Getaway |
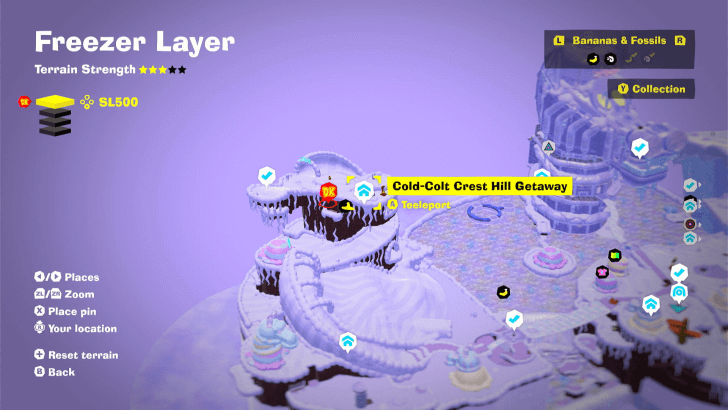 Freezer Layer (SL 500) |
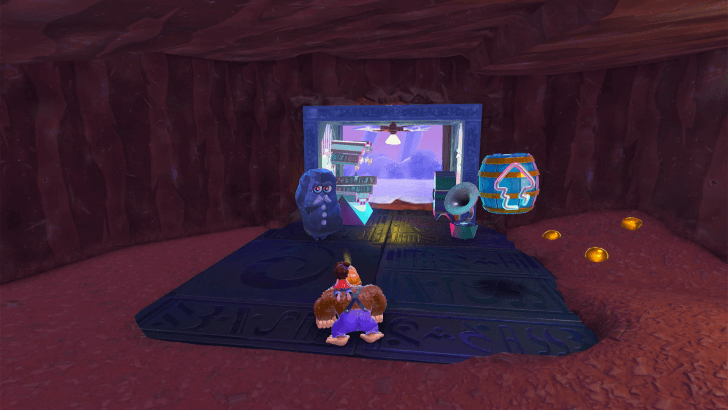 Cold-Colt Crest Hill Getaway |
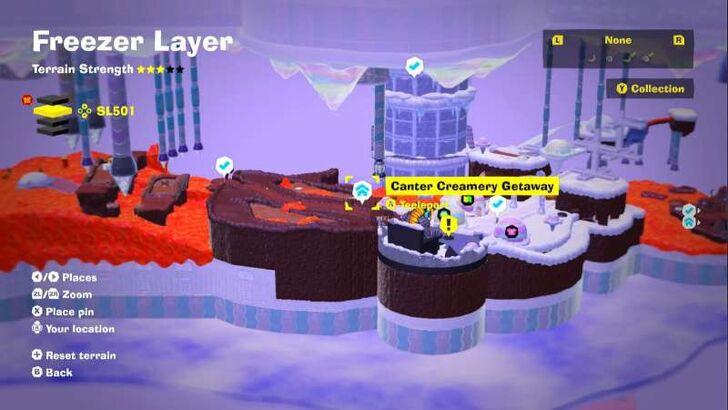 Freezer Layer (SL 501) |
 Canter Creamery Getaway |
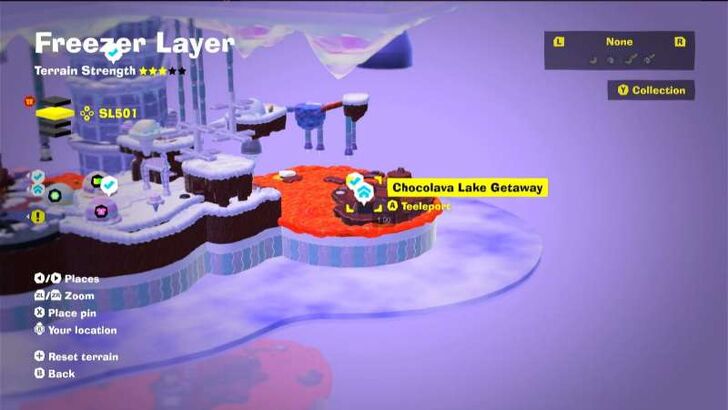 Freezer Layer (SL 501) |
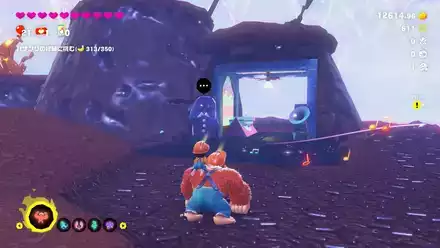 Chocolava Lake Getaway |
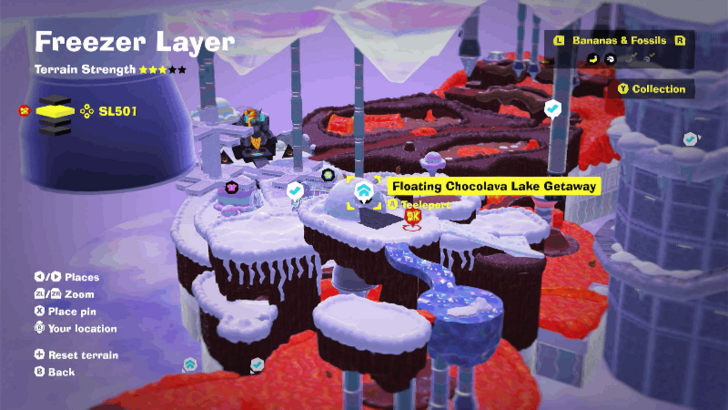 Freezer Layer (SL 501) |
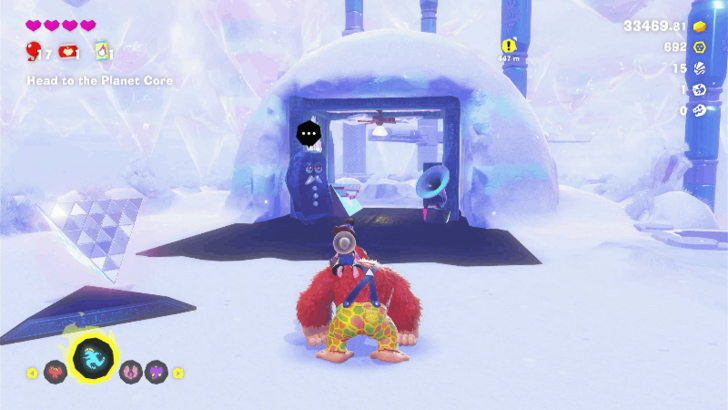 Floating Chocolava Lake Getaway |
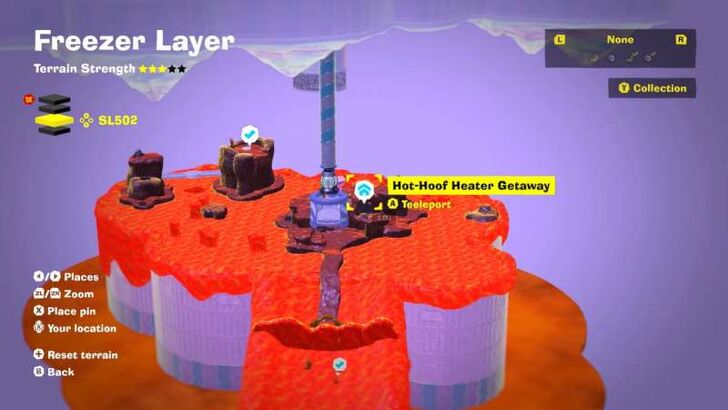 Freezer Layer (SL 502) |
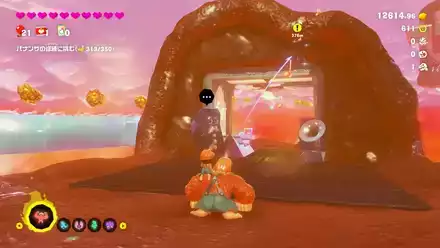 Hot-Hoof Heater Getaway |
Getaway Guide: All Getaway Locations
Donkey Kong Bananza Related Guides
All Layers
Author
Freezer Layer Banana and Fossil Locations (SL 500-503)
improvement survey
04/2026
improving Game8's site?

Your answers will help us to improve our website.
Note: Please be sure not to enter any kind of personal information into your response.

We hope you continue to make use of Game8.
Rankings
- We could not find the message board you were looking for.
Gaming News
Popular Games

Genshin Impact Walkthrough & Guides Wiki

Crimson Desert Walkthrough & Guides Wiki

Umamusume: Pretty Derby Walkthrough & Guides Wiki

Honkai: Star Rail Walkthrough & Guides Wiki

Monster Hunter Stories 3: Twisted Reflection Walkthrough & Guides Wiki

Wuthering Waves Walkthrough & Guides Wiki

The Seven Deadly Sins: Origin Walkthrough & Guides Wiki

Pokemon TCG Pocket (PTCGP) Strategies & Guides Wiki

Pokemon Pokopia Walkthrough & Guides Wiki

Zenless Zone Zero Walkthrough & Guides Wiki
Recommended Games

Monster Hunter World Walkthrough & Guides Wiki

Fire Emblem Heroes (FEH) Walkthrough & Guides Wiki

Pokemon Brilliant Diamond and Shining Pearl (BDSP) Walkthrough & Guides Wiki

Super Smash Bros. Ultimate Walkthrough & Guides Wiki

Diablo 4: Vessel of Hatred Walkthrough & Guides Wiki

Cyberpunk 2077: Ultimate Edition Walkthrough & Guides Wiki

Yu-Gi-Oh! Master Duel Walkthrough & Guides Wiki

Elden Ring Shadow of the Erdtree Walkthrough & Guides Wiki

The Legend of Zelda: Tears of the Kingdom Walkthrough & Guides Wiki

Persona 3 Reload Walkthrough & Guides Wiki
All rights reserved
© Nintendo. Games are property of their respective owners. Nintendo of America Inc.
The copyrights of videos of games used in our content and other intellectual property rights belong to the provider of the game.
The contents we provide on this site were created personally by members of the Game8 editorial department.
We refuse the right to reuse or repost content taken without our permission such as data or images to other sites.

 Ingot Isle
 Lagoon Layer
 Hilltop Layer
 Canyon Layer
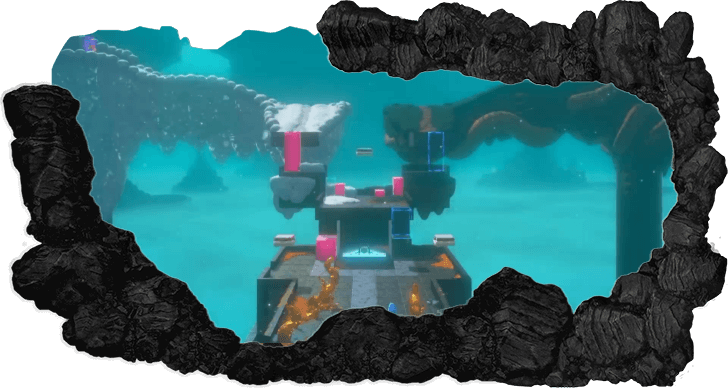 The Divide
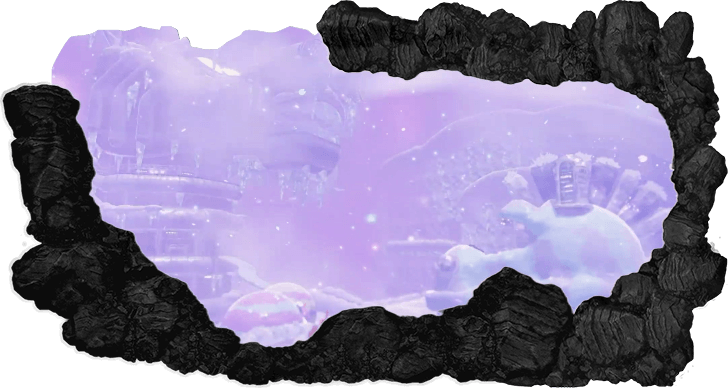 Freezer Layer
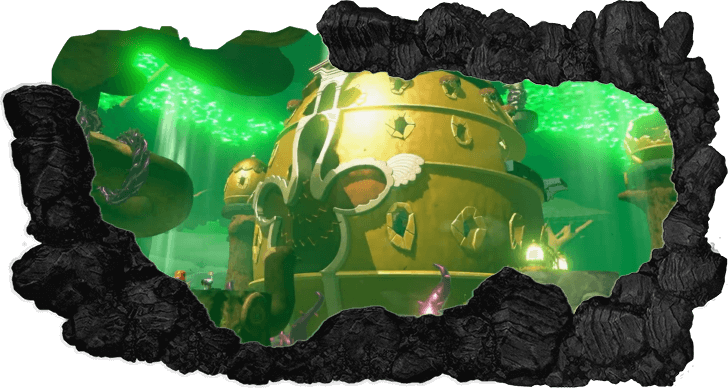 Forest Layer
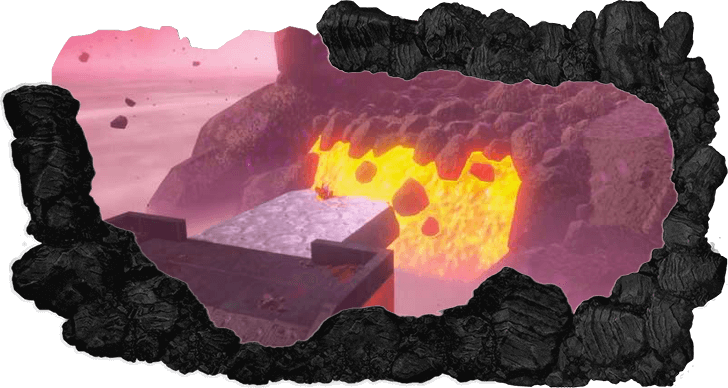 The Junction
 Resort Layer
 Tempest Layer
 Landfill Layer
 Racing Layer
 Radiance Layer
 Groove Layer
 Feast Layer
 Forbidden Layer
 Planet Core
 DK Island


![Forza Horizon 6 Review [Preview] | Beautiful Roads With a Whole Lot of Oversteer](https://img.game8.co/4460981/a7254c24945c43fbdf6ad9bea52b5ce9.png/show)


![Forza Horizon 6 Review [Preview] | Beautiful Roads With a Whole Lot of Oversteer](https://img.game8.co/4460981/a7254c24945c43fbdf6ad9bea52b5ce9.png/thumb)


For #22, you can throw snow at the platform until you build a giant ramp.