Snake Elder's Rehearsal Hall Guide
☽ DK Island and Emerald Rush DLC out now!
☽ Learn how to solve Banandiumtone's Puzzles.
☽ All Collectibles: Banandium Gems and Fossils
☽ Learn How to Skip Layers Entirely!
☽ How to Beat the Final Boss
☽ Post-Game: Rehearsal Halls | Secret Ending

Complete Snake Elder's Rehearsal Hall by getting all Banandium Gems and Balloons in Donkey Kong Bananza. Learn how to get all 9 Banandium Gems, how to get all 5 balloons, and the location of Snake Elder's Rehearsal Hall here!
Snake Elder's Rehearsal Hall Location
Speak to the Snake Elder in Radiance Layer
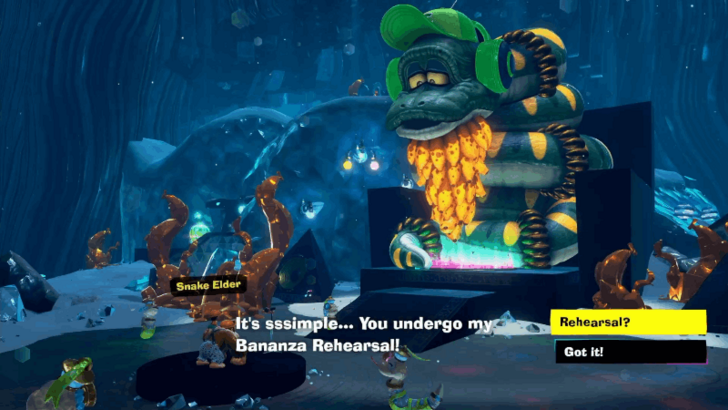
Speak to the Snake Elder in Radiance Layer after completing the main story and he will transport you to the Rehearsal Hall.
Requires 500 Banandium Gems to Unlock
| Bananza Rehearsal | Required Banandium Gems |
|---|---|
| Snake Elder | 600 Banandium Gems |
You'll need to collect a total of 600 Banandium Gems to attempt the Bananza Rehearsal from the Snake Elder.
Snake Elder's Rehearsal Hall Banana Locations
- Banandium Gem #1
- Banandium Gem #2
- Banandium Gem #3
- Banandium Gem #4
- Banandium Gem #5
- Banandium Gem #6
- Banandium Gem #7
- Banandium Gem #8
- Banandium Gem #9
Banandium Gem #1
The first Banandium Gem (Ran the First Scale!) can be found at the end of the First Scale area.
Use Charge Jumps to destroy the pink terrain to create the light blue terrain as platforms. Jump and use the terrain generating enemy as a platform to reach to the top to collect the Banandium Gem.
Banandium Gem #2
The second Banandium Gem (Summited the Snaking Path) can be found at the detour path left of the apple at the end of the First Scale area. Enter the barrel to take you to the puzzle area.
Walk on the dirt terrain and wait for it to slither towards the top. Use Charge Jumps to jump through the top and repeat this step until you reach a wire mesh ceiling that contains the Banandium Gem.
Banandium Gem #3
The third Banandium Gem (Ran the Second Scale!) can be found at the end of the Second Scale area.
Pick up the Boom Rocks from the enemies and throw it towards the moving concrete wall to create a hole leading to the next area. If the concrete wall moves too fast, use Glare to slow it down.
Banandium Gem #4
The fourth Banandium Gem (Floated Aloft with Laser Precision) can be found at the detour path left of the apple at the end of the Second Scale area. Enter the barrel to take you to the puzzle area.
Use Glare to slow down time and pick up the rainbow terrain to float up to the air while avoiding the purple laser obstacle. Use Charge Jump to reach the wire mesh ceiling that contains the Banandium Gem.
Banandium Gem #5
The fifth Banandium Gem (Ran the Third Scale!) can be found at the end of the Third Scale area.
Climb the black terrain and punch the blue button to make the platform above move. Use Glare to slow down the speed of the platform so you can jump on it to reach the top.
Banandium Gem #6
The sixth Banandium Gem (Snaked by without Going Boom) can be found at the detour path left of the apple at the end of the Third Scale area. Enter the barrel to take you to the puzzle area.
Use Glare to slow down time and jump to the top of the dirt terrain to reach the wire mesh ceiling that has the Banandium Gem.
Banandium Gem #7
The seventh Banandium Gem (Ran the Fourth Scale!) can be found at the end of the Fourth Scale area.
Climb the wall and use Charge Jumps to pass through the moving dirt block. For the second wall, use Glare to slow down the movement of the moving block, allowing you to avoid the electric terrain.
Banandium Gem #8
The eight Banandium Gem (Sink like a Crock) is located at the detour path left of the apple at the end of the Fourth Scale area. Enter the barrel to take you to the puzzle area.
Perform a Charge Jump and Dive Jump towards the gray terrain where the three enemies are to create a hole that leads to shallow water. Create holes large enough so that the three enemies fall into the water to solve the puzzle.
Banandium Gem #9
The ninth and last Banandium Gem (Ran the Final Scale!) can be found at the Snake Elder's Throne.
Use a combination of Charge Jumps and Glare to climb on to the falling walls to reach the top of the platform.
Snake Elder's Rehearsal Hall Balloon Locations
Balloon # 1
The first Balloon can be found at a hidden corner in the First Scale.
Destroy the pink Switcheroo Goo to create a light blue Switcheroo Goo that leads to a hidden corner on the left. Go to this hidden corner to pick up the Balloon.
Balloon #2
The second Balloon can be found on a rightmost wall in the Second Scale.
Pick up a Boom Rock and throw it on the concrete wall on the right side. Enter the hole to find a Balloon inside and a barrel that leads you straight to the top of the tower.
Balloon #3
The third Balloon can be found the rightmost corner in the Third Scale.
At the near end of the tower, punch the blue balloon to move the platform all the way to the right to find the balloon at the top.
Jump on top of the moving platform and use Charge Jump to reach the balloon. You may need to use Glare to prevent the moving platform from going back to the left side.
Balloon #4
The fourth Balloon can be found in a hidden corner in the Fourth Scale.
Reach the top of the Fourth Scale and slide down near the right corner to reach the corner that contains the Balloon.
Balloon #5
The fifth and last Balloon can be found in the air at the Final Scale.
Once you pass through the first section of the tower, look behind to find the balloon floating in the air at the right side. Perform a Charge Jump and jump towards the balloon to reach it.
Snake Elder's Rehearsal Hall Rewards
9 Banandium Gems
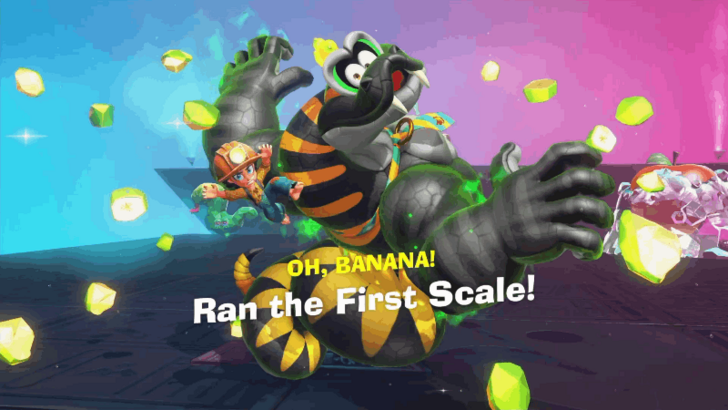
Completing the Snake Elder's Bananza Rehearsal will reward a total of 9 Banandium Gems, which you can use to unlock new skills.
All Banana Locations (Banandium Gems)
Unlock the Golden Jump Skill
| Skill | Description | Skill Points Required |
|---|---|---|
| Jump Bursts and Meteor Punches will change the surrounding terrain into pure gold. | 5 |
Completing the Snake Elder's Bananza Rehearsal also unlocks the Golden Jump golden skill.
These skills will initially appear as "???" and you need to master all of the Bananza skills above it before you can learn it!
Skills List and Best Skills to Upgrade First
Donkey Kong Bananza Related Guides

All Post-Game Guides
| Fossil Museum Guide | All Post-Game Outfits |
| How to Get Replica Ancient Records | Boss Rush Mode |
| Battle Rush Mode | - |
All Bananza Rehearsal Halls
Post-Game Outfits
 Mining Helmet Mining Helmet |
 Gold-Mining Gear Gold-Mining Gear |
 Invisibility Tie Invisibility Tie |
 Diva Dress Diva Dress |
||
Comment
Balloon 4 is actually balloon 5, you get the barrel one last
Author
Snake Elder's Rehearsal Hall Guide
improvement survey
04/2026
improving Game8's site?

Your answers will help us to improve our website.
Note: Please be sure not to enter any kind of personal information into your response.

We hope you continue to make use of Game8.
Rankings
- We could not find the message board you were looking for.
Gaming News
Popular Games

Genshin Impact Walkthrough & Guides Wiki

Crimson Desert Walkthrough & Guides Wiki

Umamusume: Pretty Derby Walkthrough & Guides Wiki

Honkai: Star Rail Walkthrough & Guides Wiki

Monster Hunter Stories 3: Twisted Reflection Walkthrough & Guides Wiki

Wuthering Waves Walkthrough & Guides Wiki

The Seven Deadly Sins: Origin Walkthrough & Guides Wiki

Pokemon TCG Pocket (PTCGP) Strategies & Guides Wiki

Pokemon Pokopia Walkthrough & Guides Wiki

Zenless Zone Zero Walkthrough & Guides Wiki
Recommended Games

Monster Hunter World Walkthrough & Guides Wiki

Fire Emblem Heroes (FEH) Walkthrough & Guides Wiki

Pokemon Brilliant Diamond and Shining Pearl (BDSP) Walkthrough & Guides Wiki

Super Smash Bros. Ultimate Walkthrough & Guides Wiki

Diablo 4: Vessel of Hatred Walkthrough & Guides Wiki

Cyberpunk 2077: Ultimate Edition Walkthrough & Guides Wiki

Yu-Gi-Oh! Master Duel Walkthrough & Guides Wiki

Elden Ring Shadow of the Erdtree Walkthrough & Guides Wiki

The Legend of Zelda: Tears of the Kingdom Walkthrough & Guides Wiki

Persona 3 Reload Walkthrough & Guides Wiki
All rights reserved
© Nintendo. Games are property of their respective owners. Nintendo of America Inc.
The copyrights of videos of games used in our content and other intellectual property rights belong to the provider of the game.
The contents we provide on this site were created personally by members of the Game8 editorial department.
We refuse the right to reuse or repost content taken without our permission such as data or images to other sites.


![Forza Horizon 6 Review [Preview] | Beautiful Roads With a Whole Lot of Oversteer](https://img.game8.co/4460981/a7254c24945c43fbdf6ad9bea52b5ce9.png/thumb)


woops that last comment was mine but can't edit: that comment was meant for the windpipe page. feel free to delete