Lagoon Layer Banana and Fossil Locations (SL 100-102)
☽ DK Island and Emerald Rush DLC out now!
☽ Learn how to solve Banandiumtone's Puzzles.
☽ All Collectibles: Banandium Gems and Fossils
☽ Learn How to Skip Layers Entirely!
☽ How to Beat the Final Boss
☽ Post-Game: Rehearsal Halls | Secret Ending
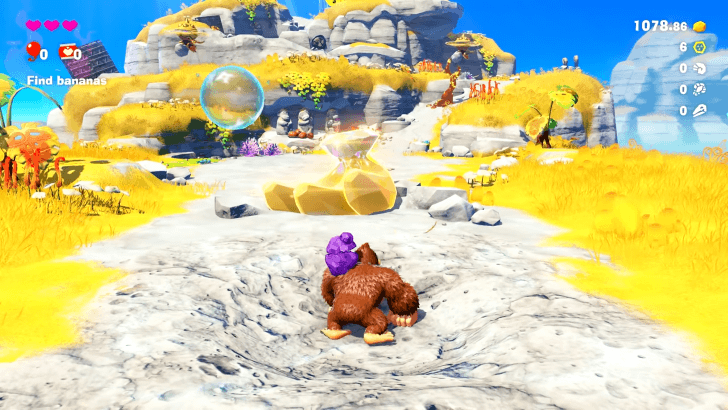
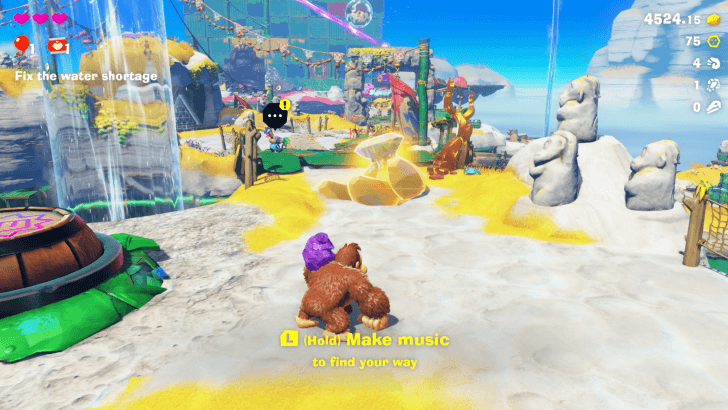
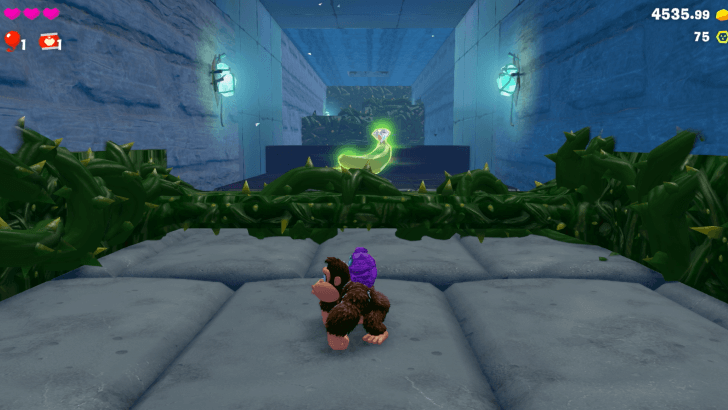
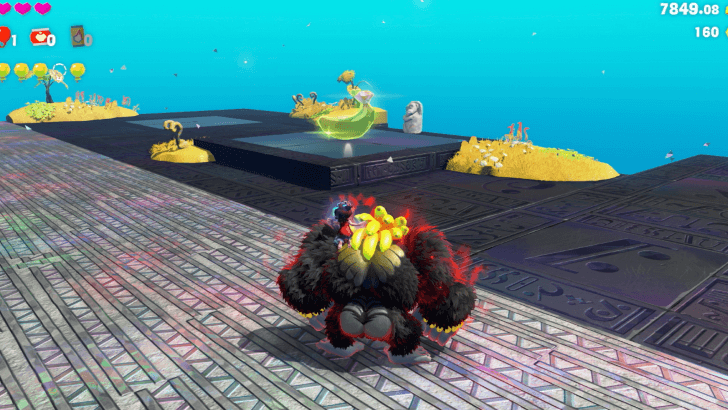
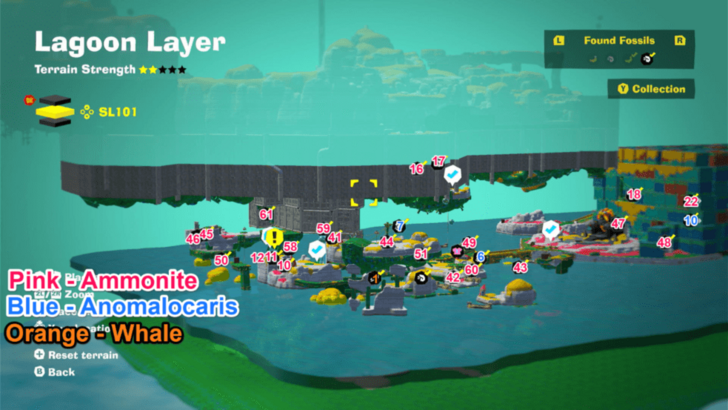
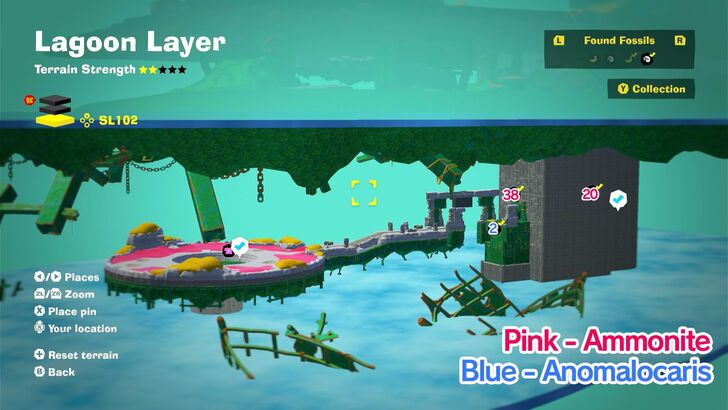
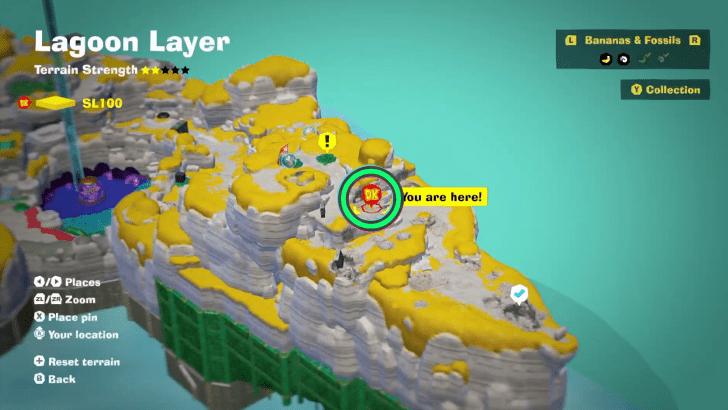
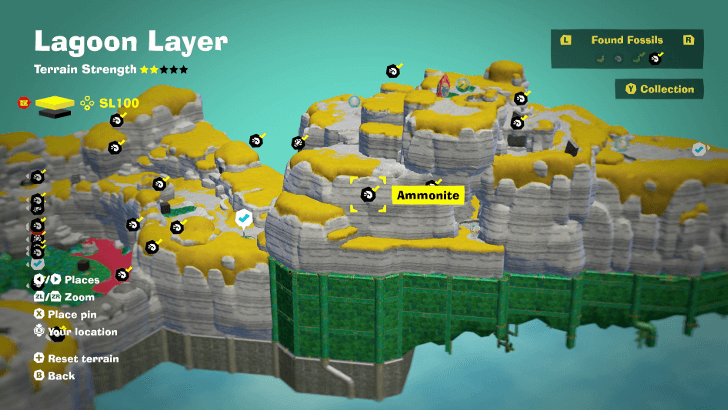
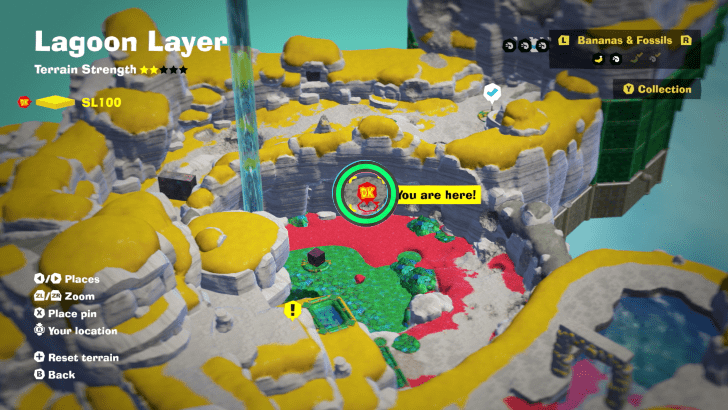
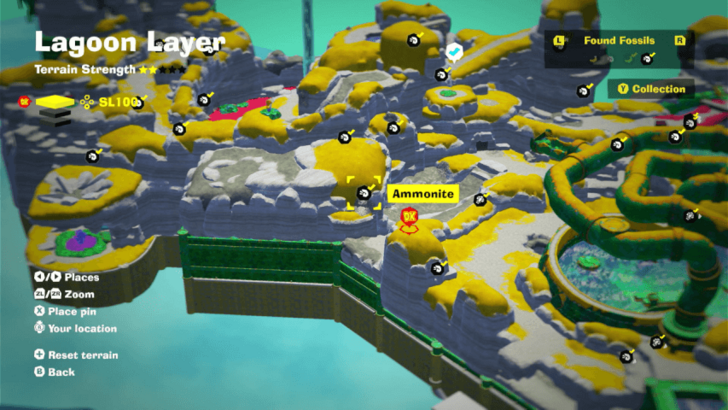
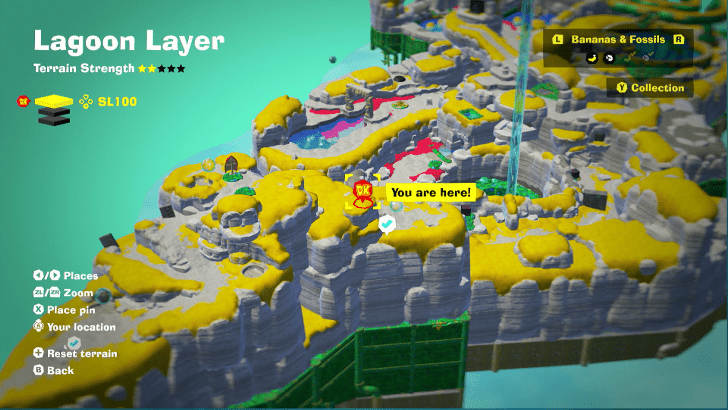
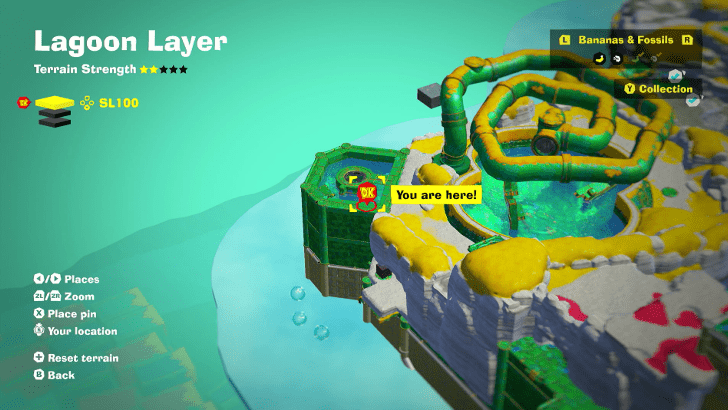
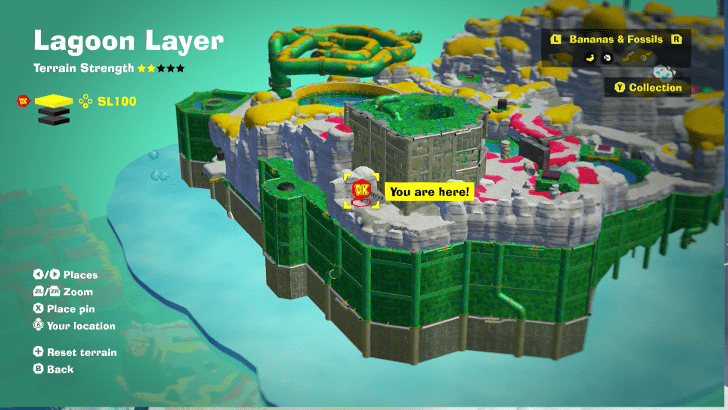
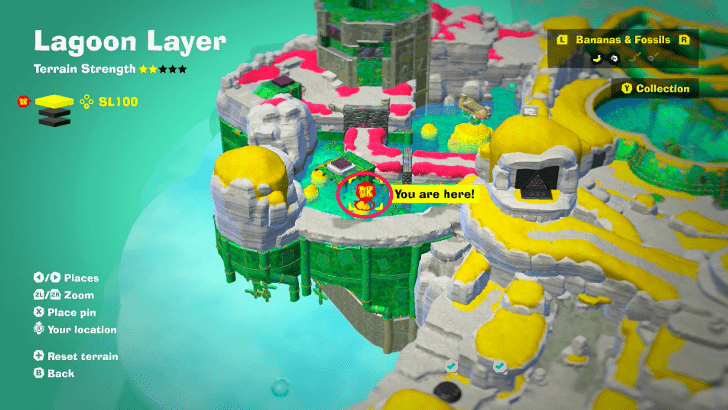
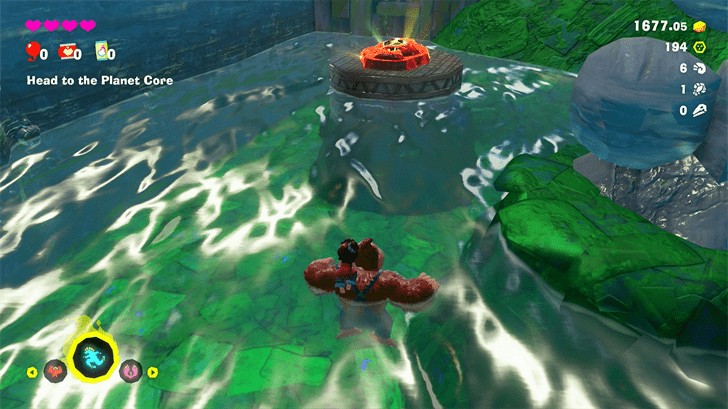
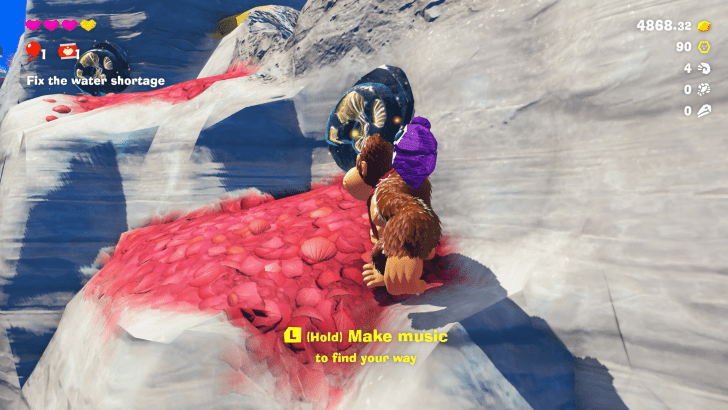
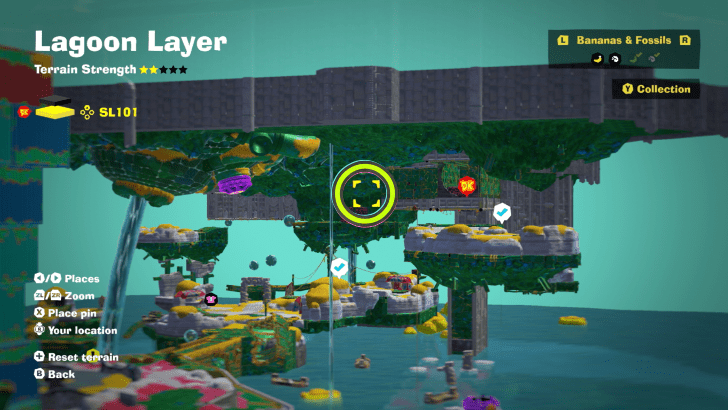
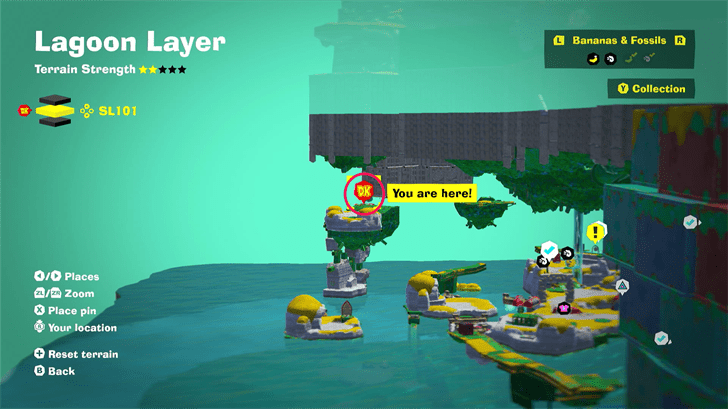
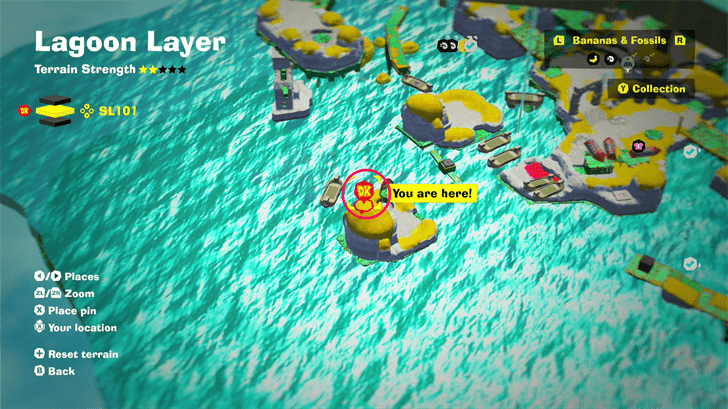
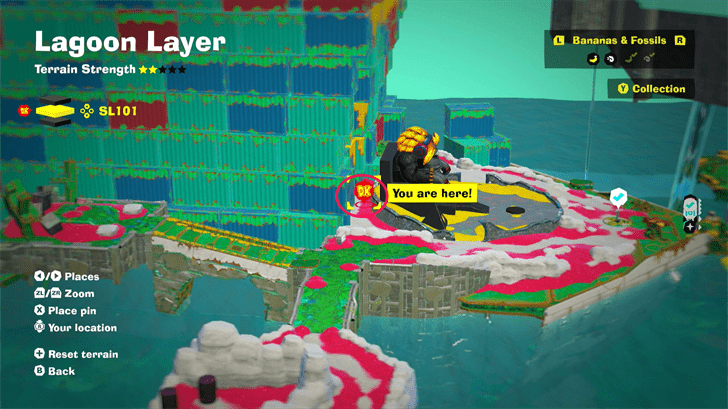
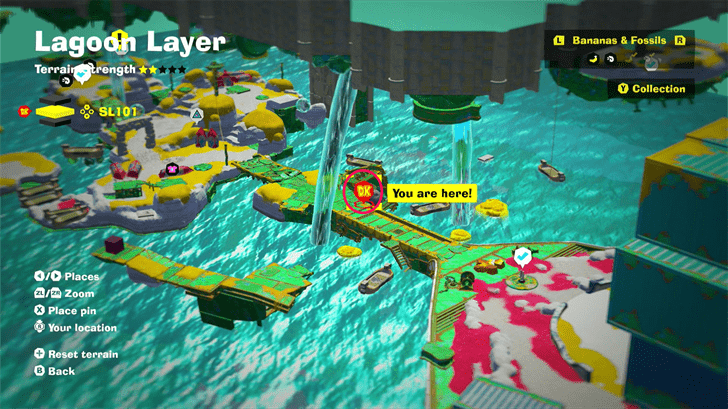
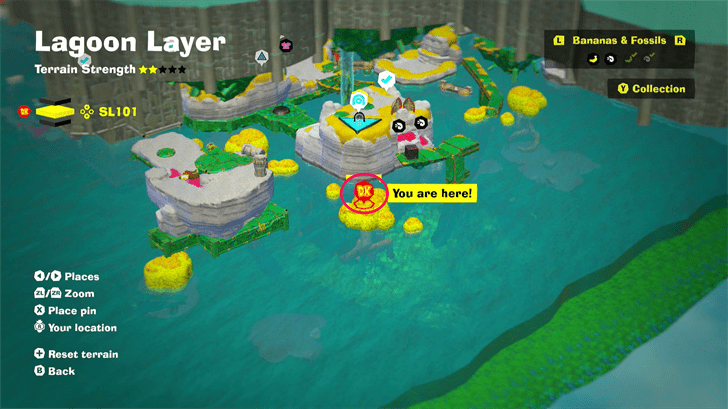
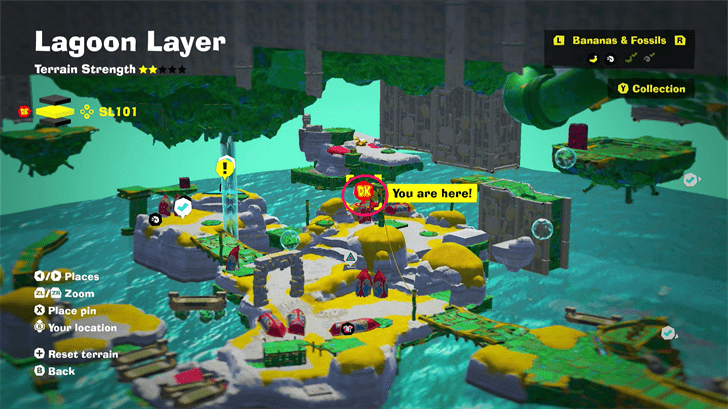
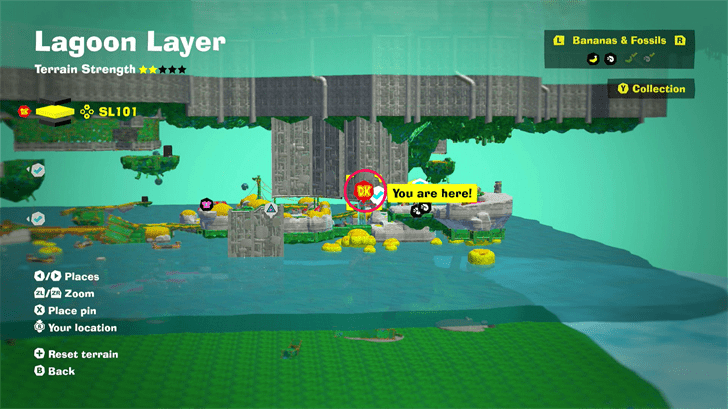
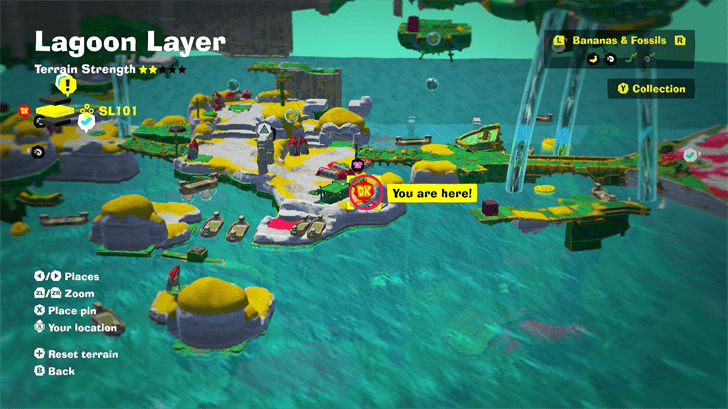
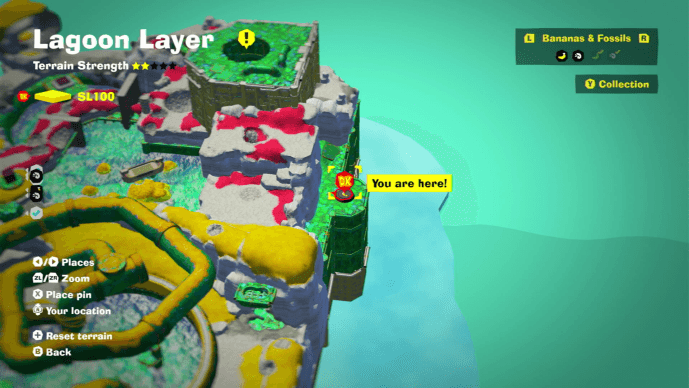
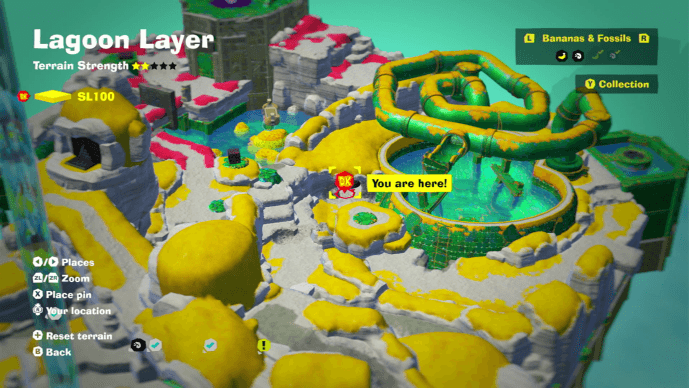
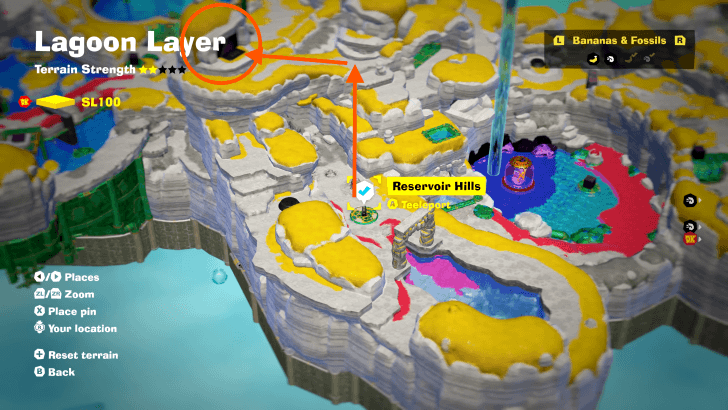
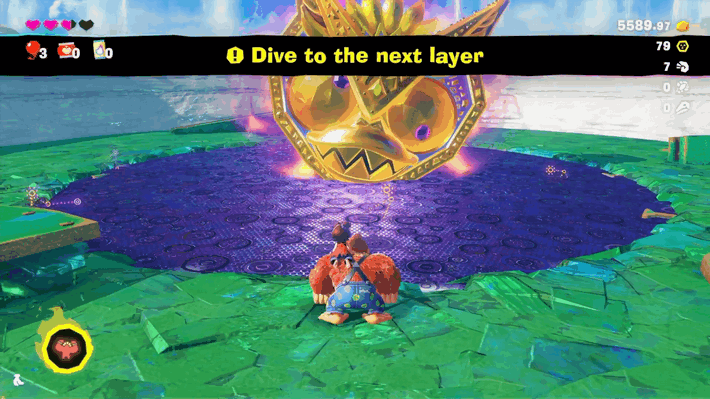
Lagoon Layer is the second layer in Donkey Kong Bananza. Check out where to find the locations of all Lagoon Layer Bananas, fossils, and other collectibles in this level!
| Lagoon Layer Guides | |
|---|---|
| Walkthrough | Collectibles |
List of Contents
Lagoon Layer Collectibles Overview
List of Collectibles
| Banandium Gems | Total: 56
・SL 100: 25 ・SL 101: 25 ・SL 102: 6 |
|---|---|
| Fossils | Total: 72
|
| Checkpoints | Total: 8 |
| Challenges | Total: 8 |
There are 56 bananas and 72 fossils available in Lagoon Layer.
Lagoon Layer Bananas
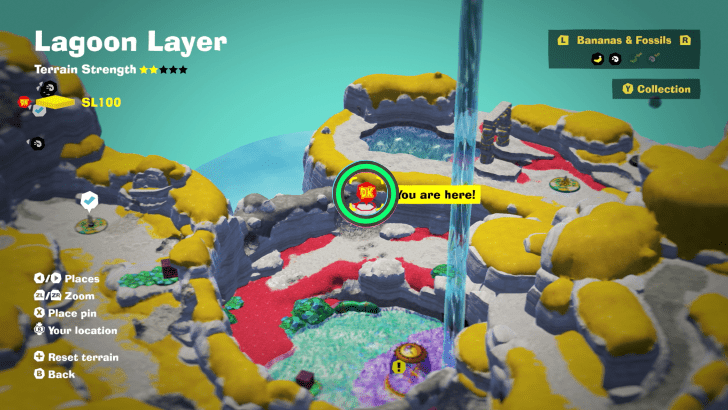
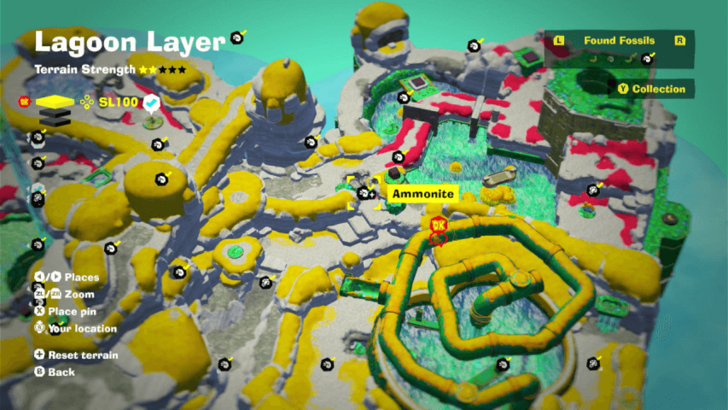
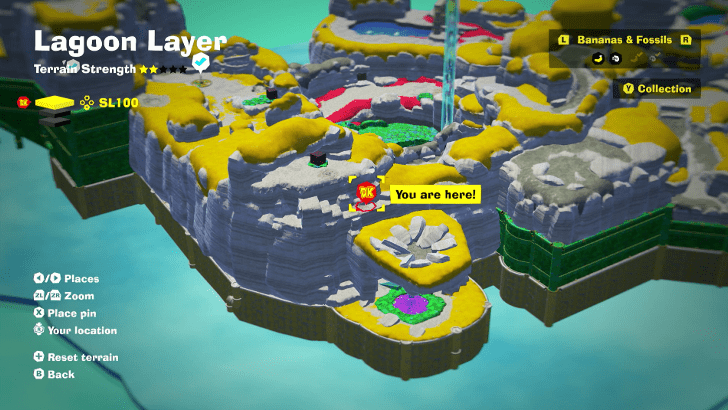
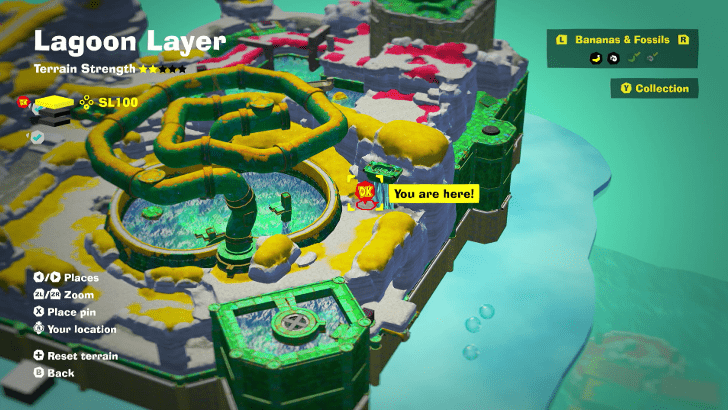
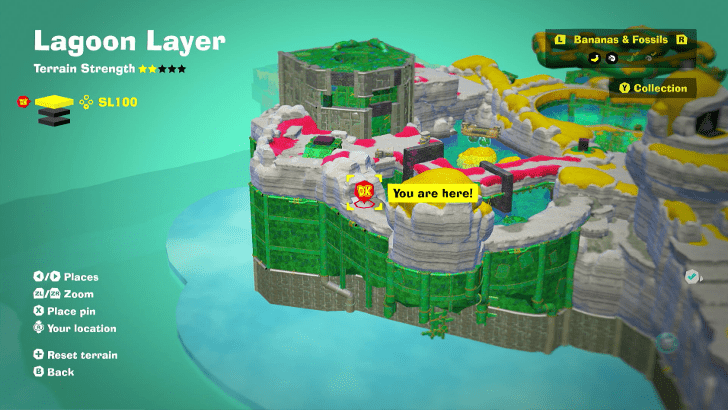
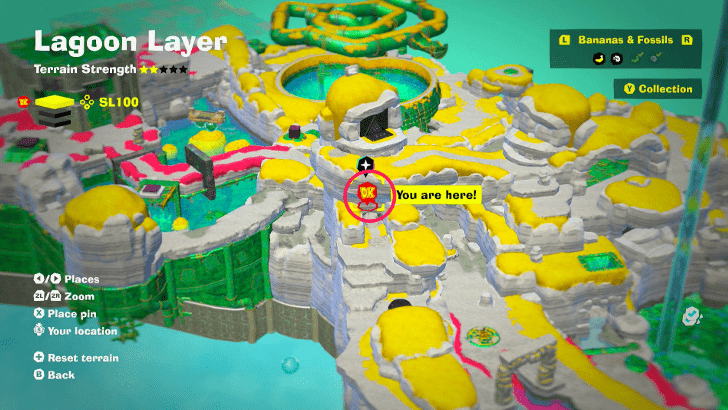
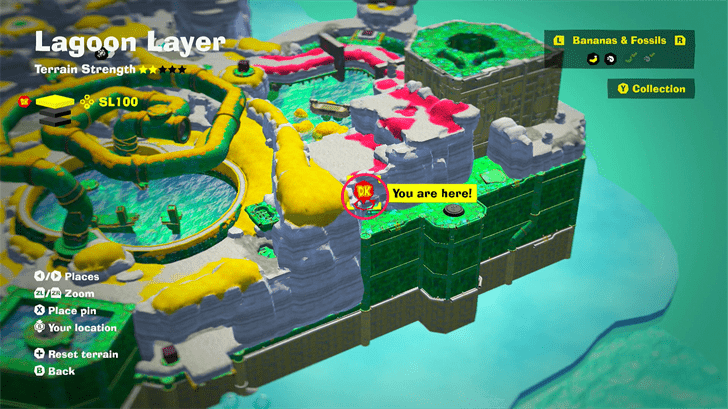
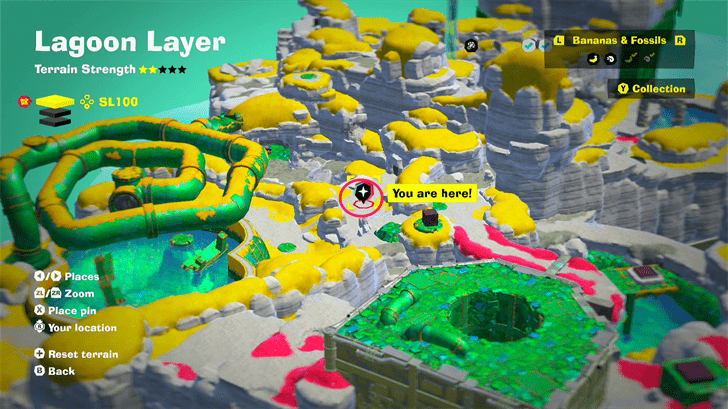
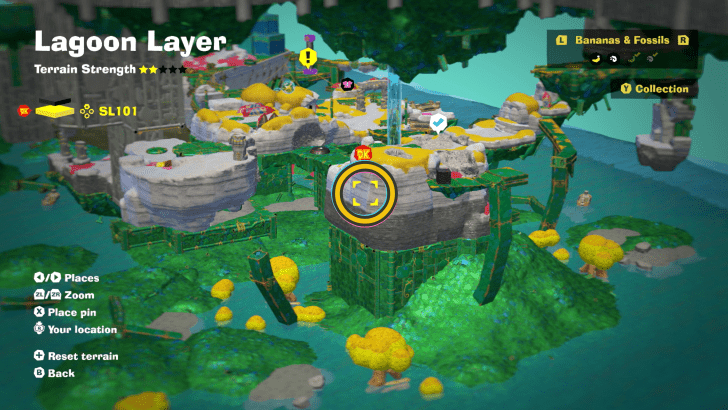
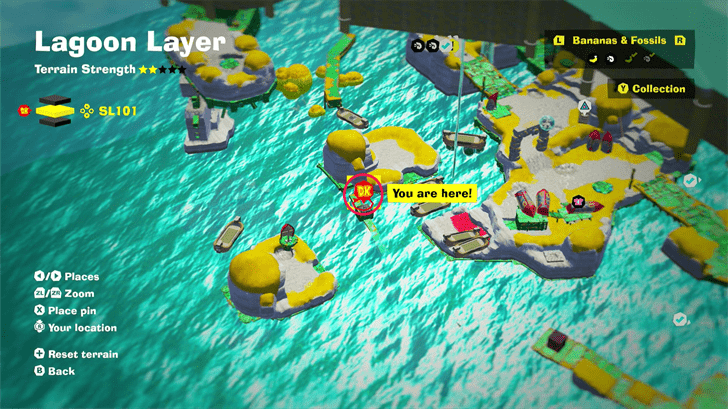
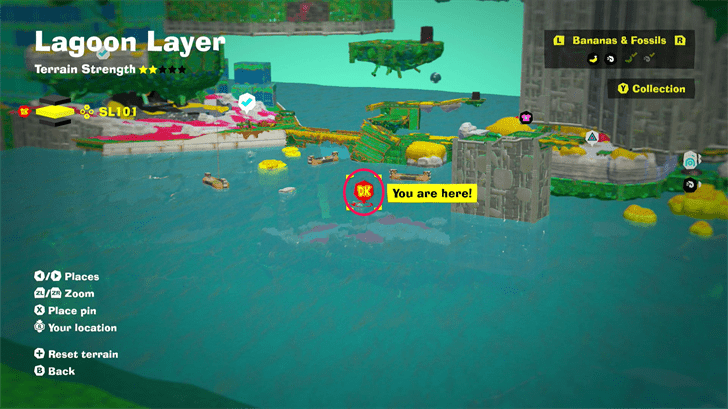
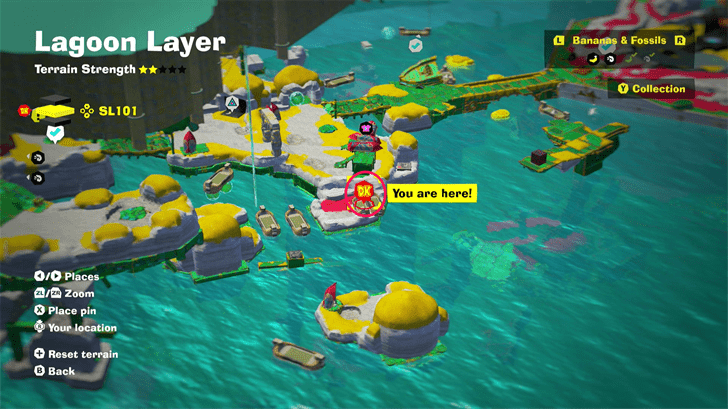
Banandium Gems Map Overview
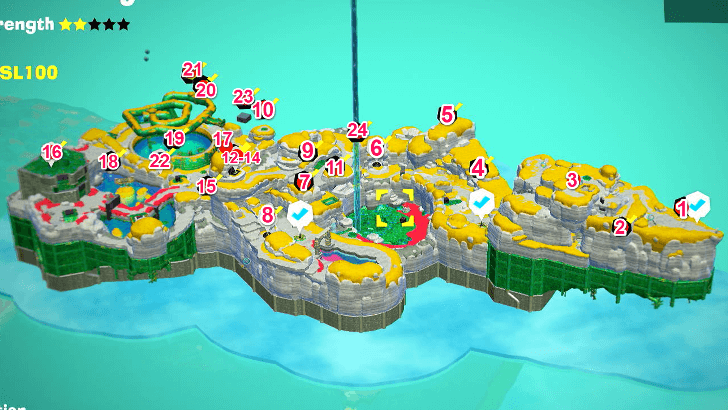
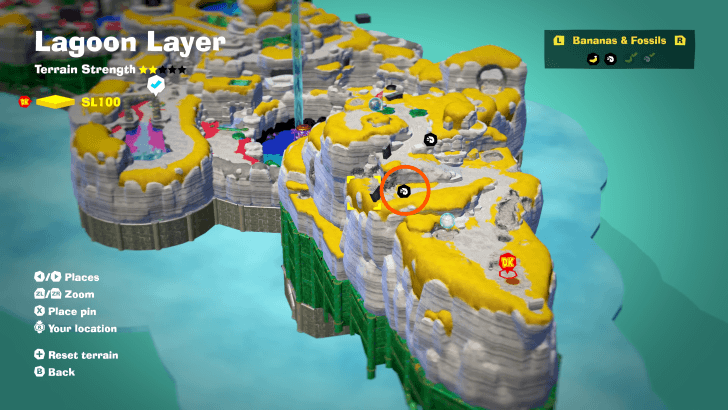
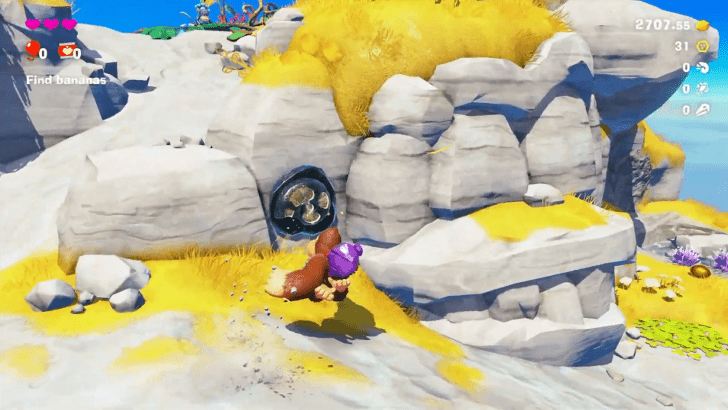
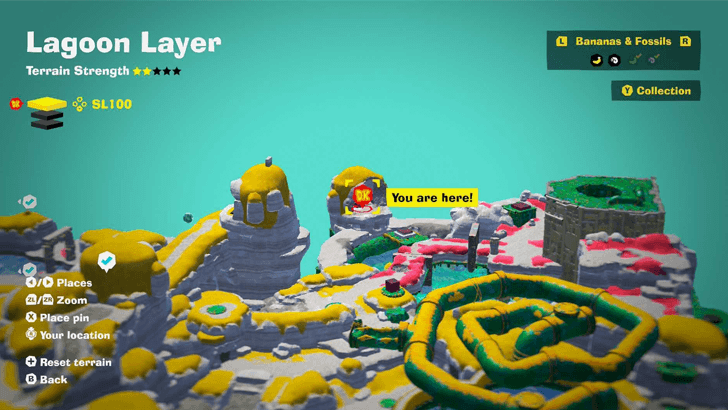
SL 100 Banana Locations
| Overworld View | Map Location | |
|---|---|---|
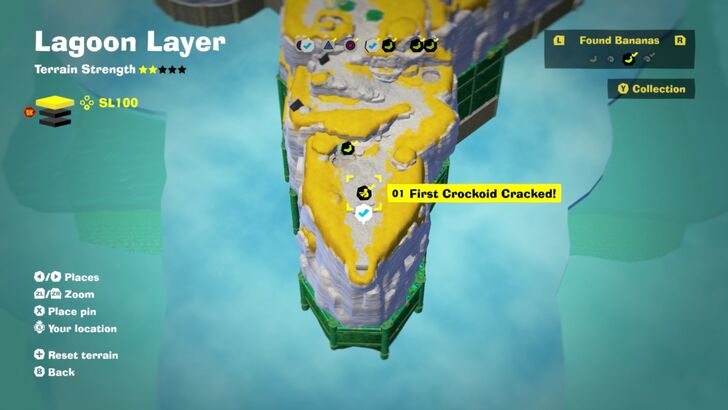
| 01 |
 |
 |
|
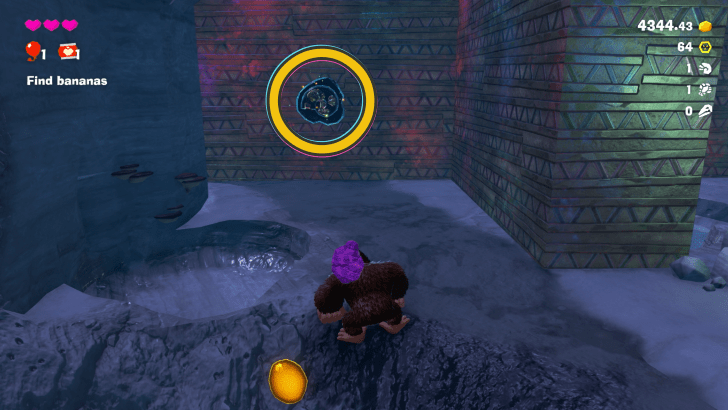
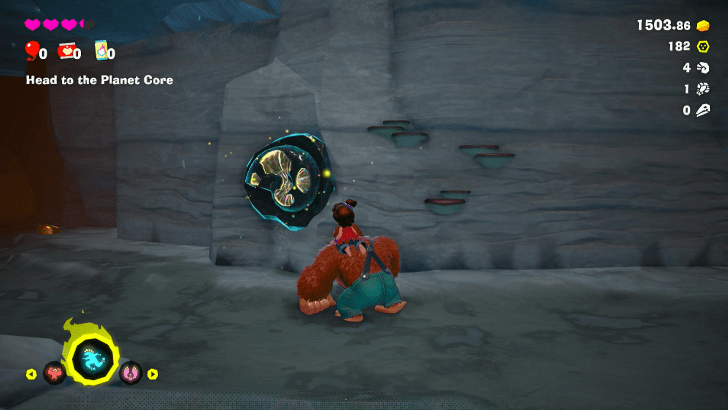
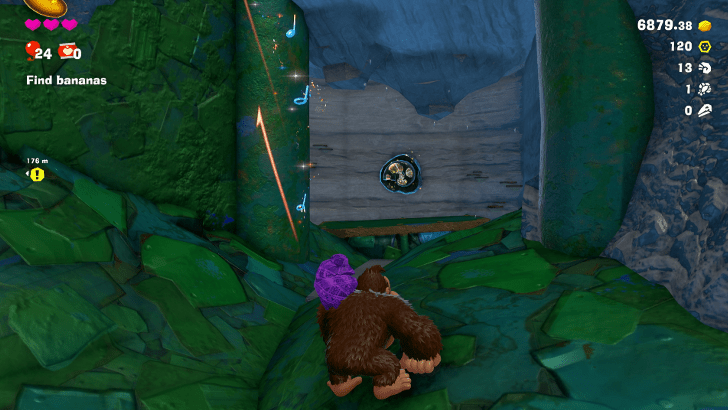
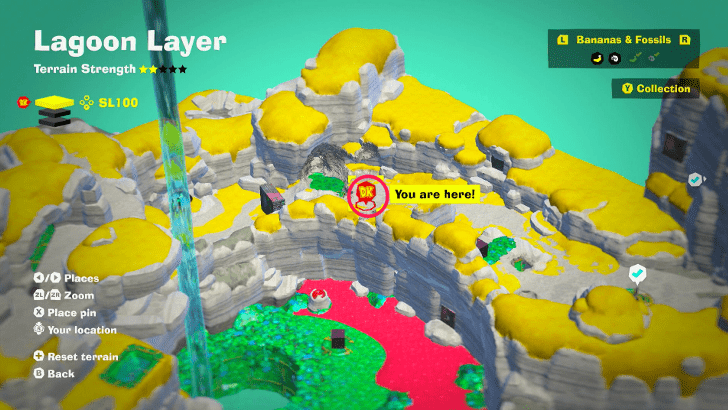
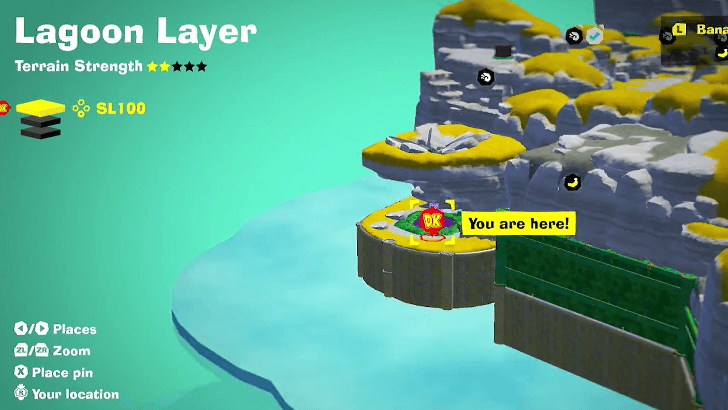
At the start of the Lagoon Layer. |
||
| 02 |
 |
|
|
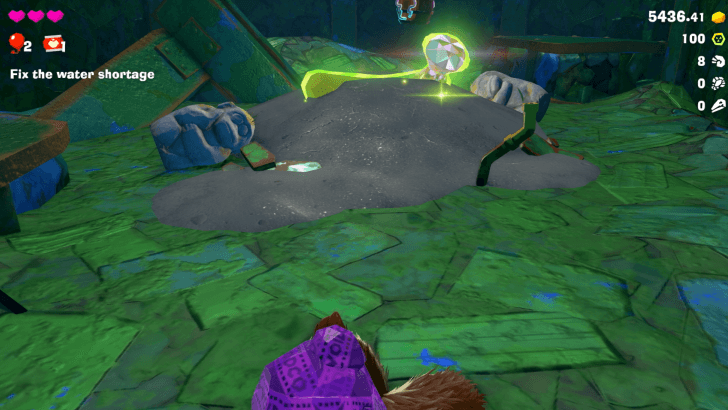
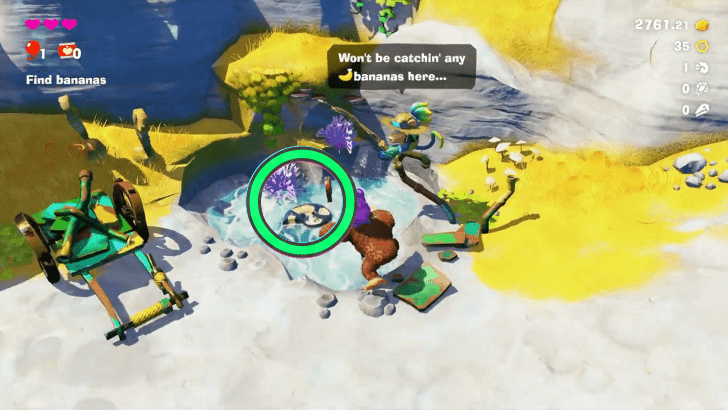
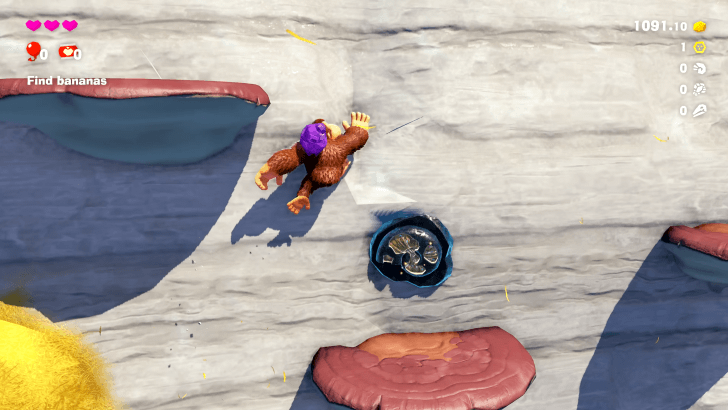
Dig beneath the puddle right at the start of Lagoon Layer. This Banandium Gem is slightly buried so you can tap R to detect it with Hand Slaps. |
||
| 03 |
 |
|
|
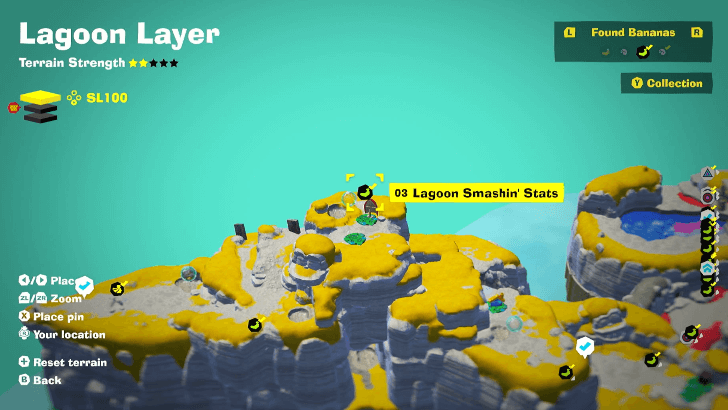
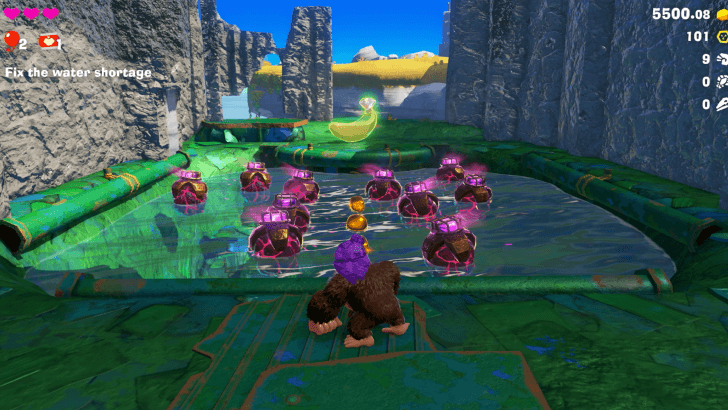
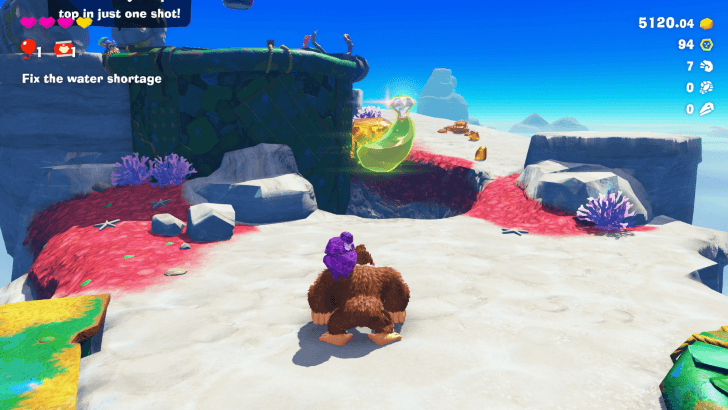
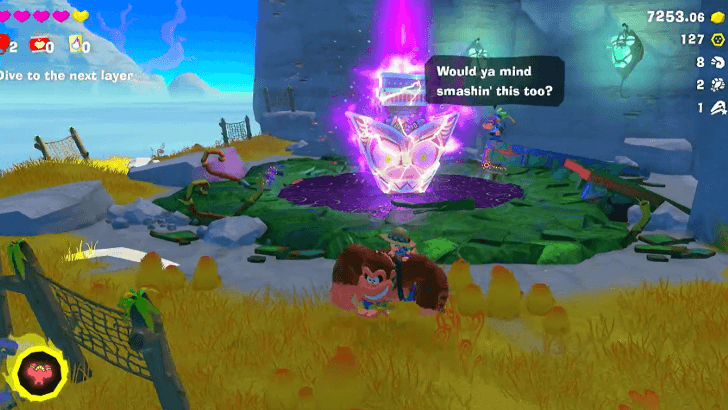
Smashintone's reward for destroying 5000 m3 of water terrain in the layer. |
||
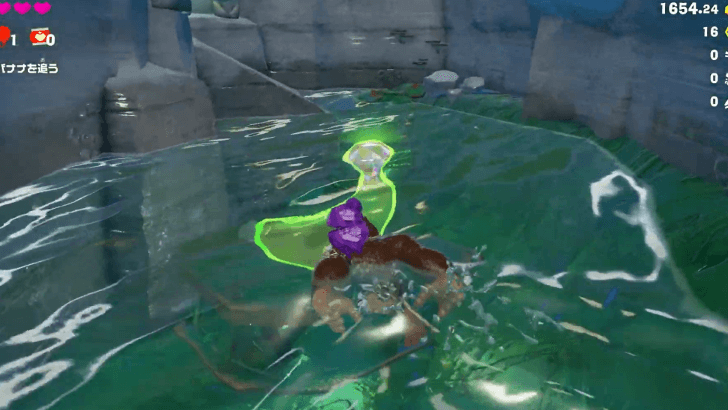
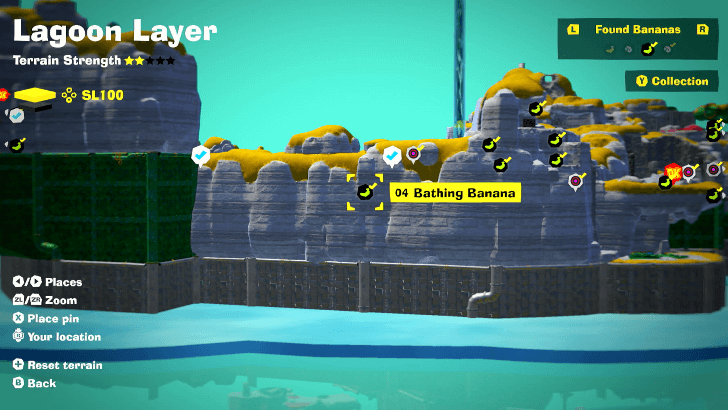
| 04 |
 |
 |
|
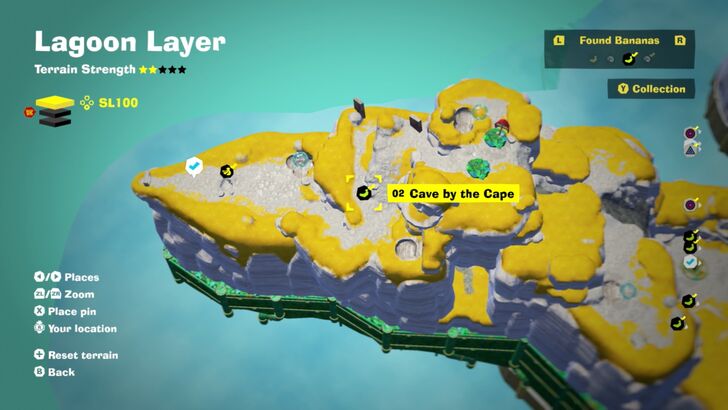
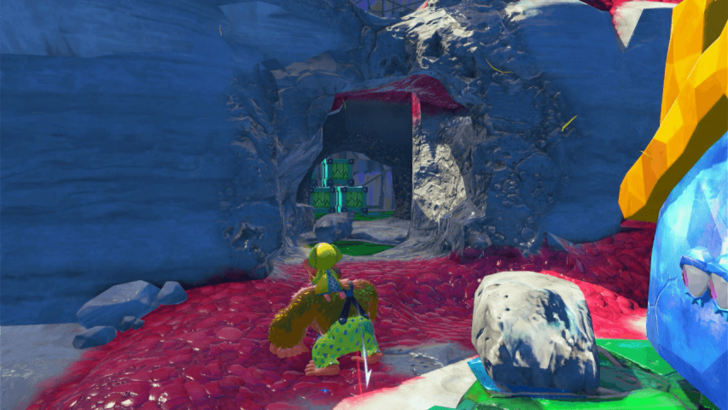
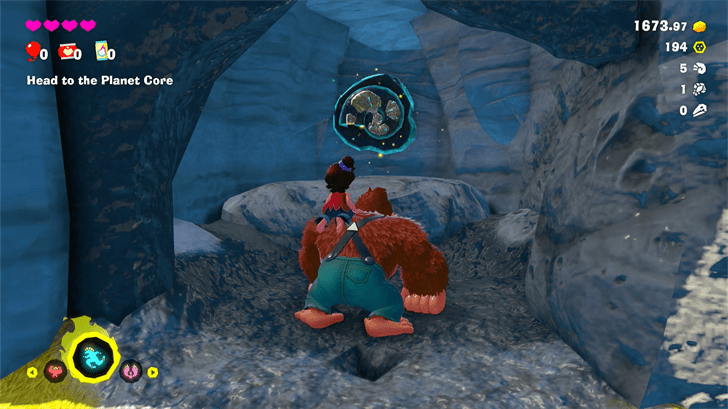
Found inside a cave found to the right of the checkpoint. |
||
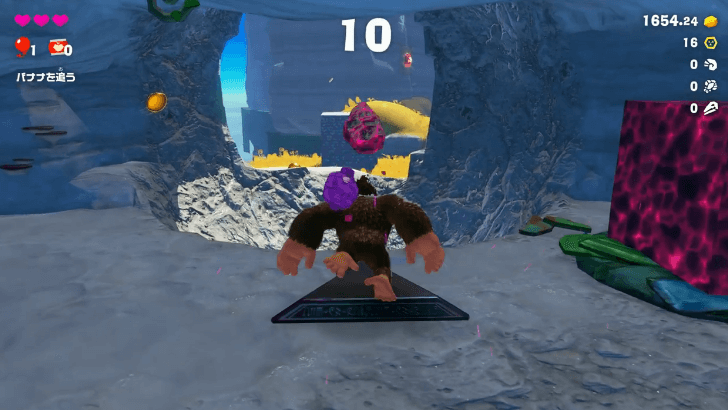
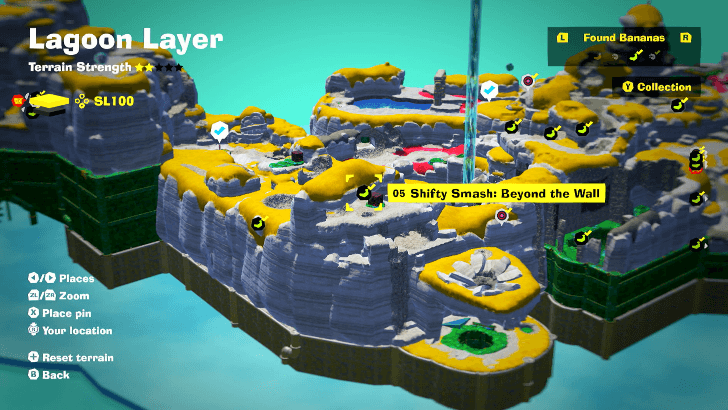
| 05 |
 |
 |
|
Hit the Shifty Smash Challenge to make a block appear behind the hill. Use the Boom Stone to create a hole and use another to destroy the block to get a Banandium Gem. |
||
| 06 |
 |
 |
|
Enter the manhole and defeat the enemies. |
||
| 07 |
 |
 |
|
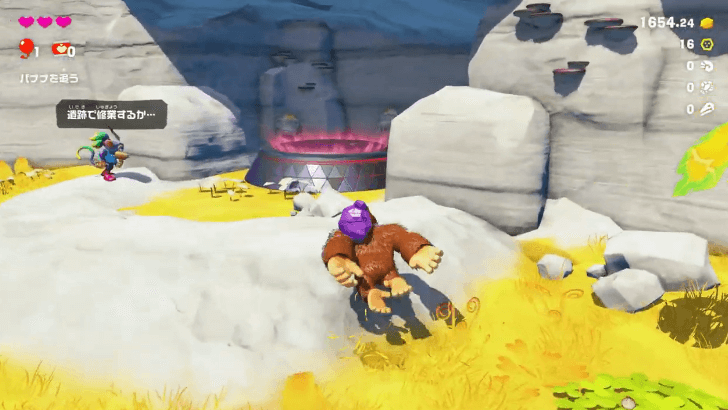
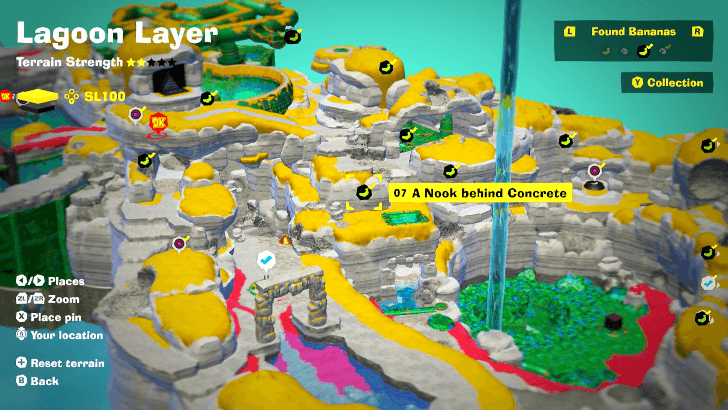
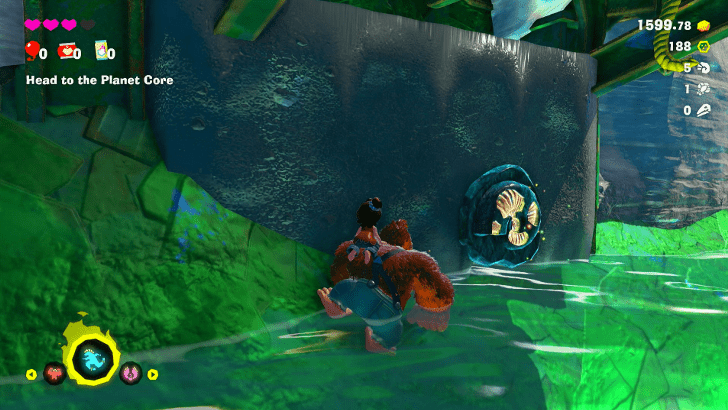
Hidden in a nook behind a concrete wall with a gold fountain near the spinning concrete wall. Tap R to discern its location with Hand Slaps. |
||
| 08 |
 |
 |
|
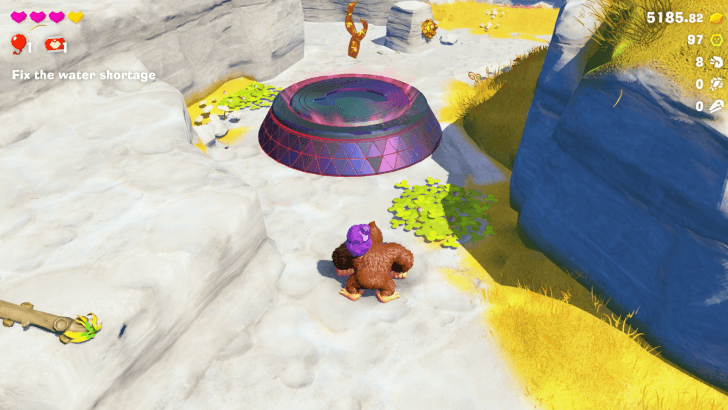
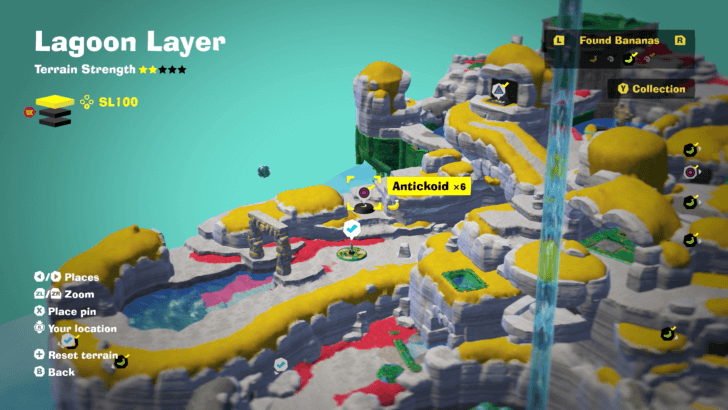
Enter the manhole near Reservoir Hills and defeat six Antickoids. |
||
| 09 |
 |
 |
|
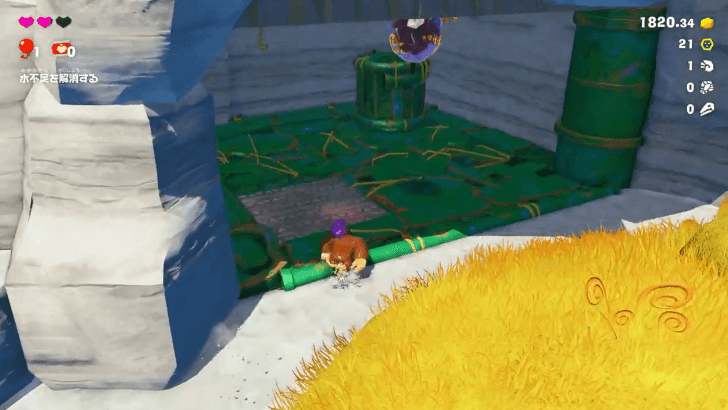
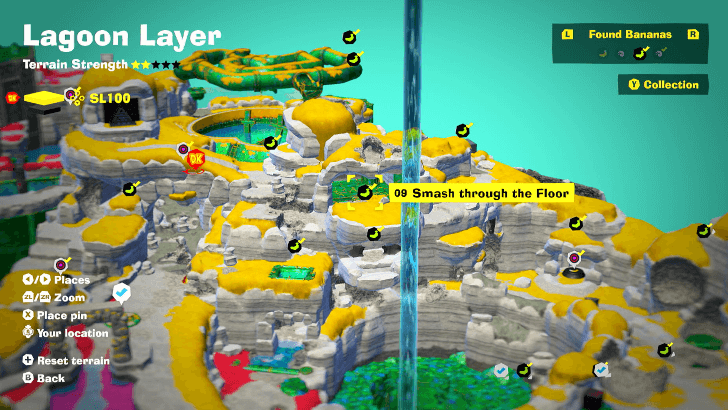
Wait for the enemy to hang above the concrete and hit it to make it drop the Boom Stone. Doing so will give you access to the area below where you can find a Banandium Gem. |
||
| 10 |
 |
 |
|
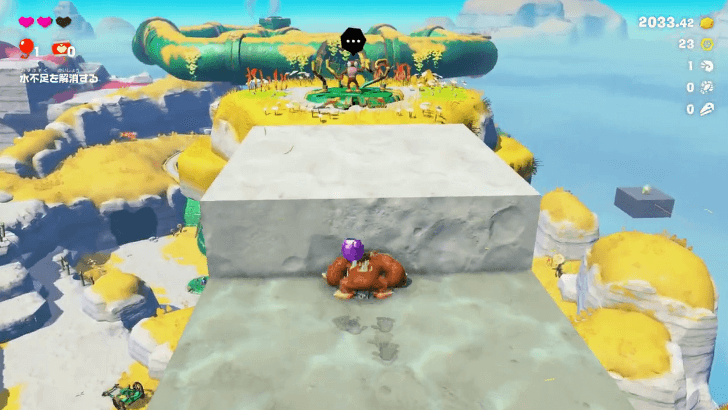
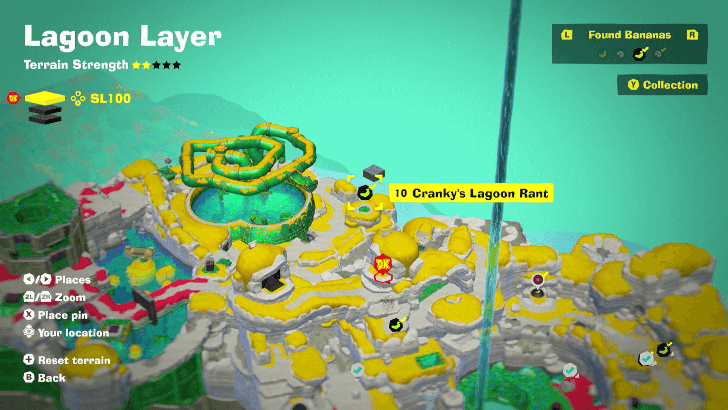
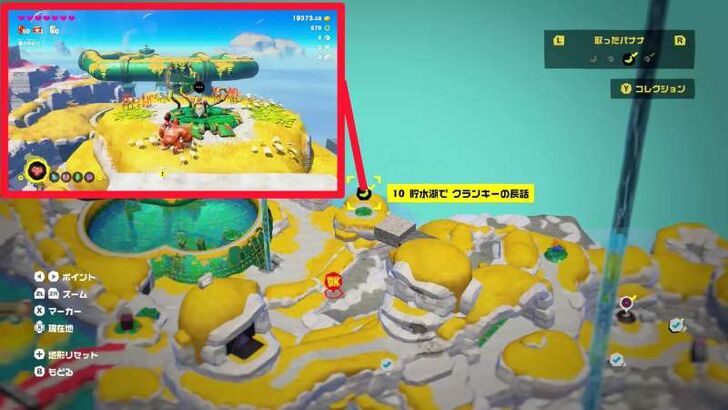
Listen to Cranky's rant to get a Banandium Gem. He can be found on the floating rock next to the spiraling pipes. |
||
| 11 |
 |
 |
|
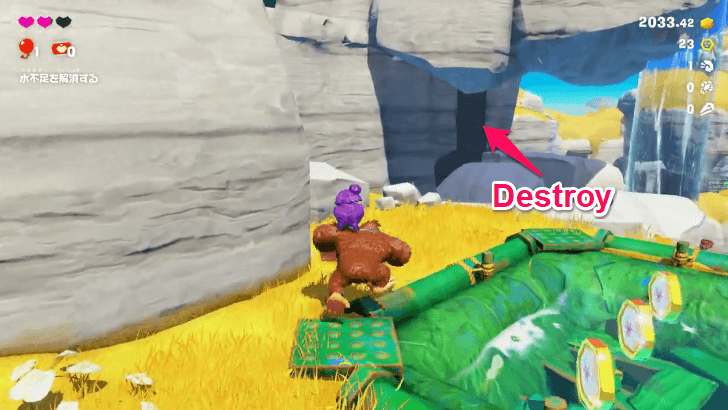
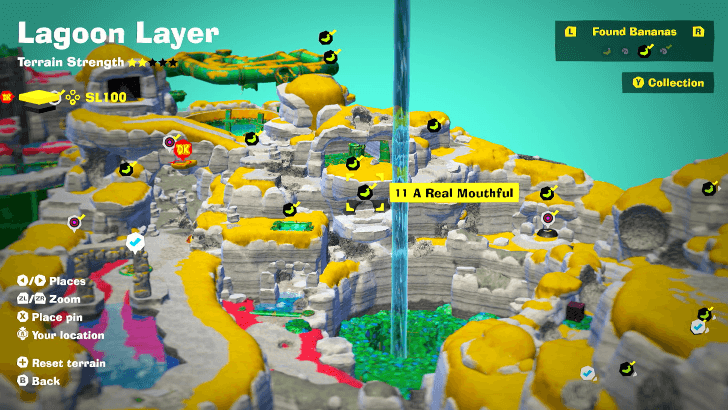
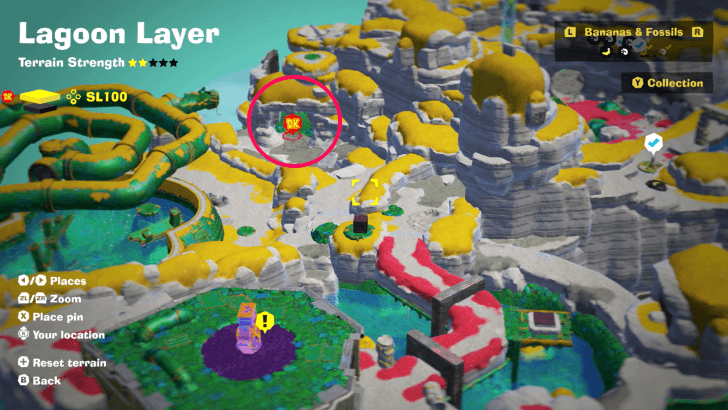
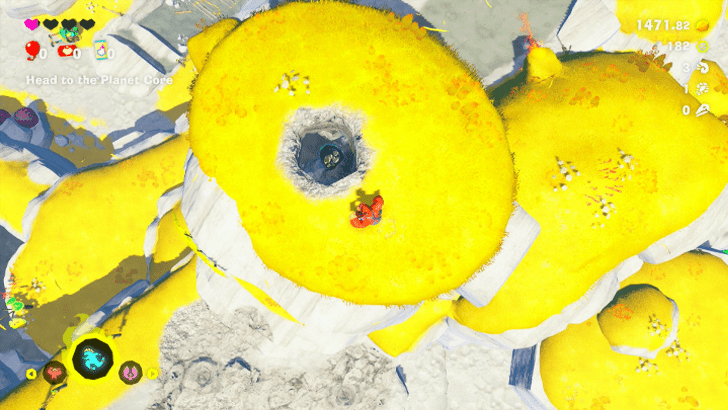
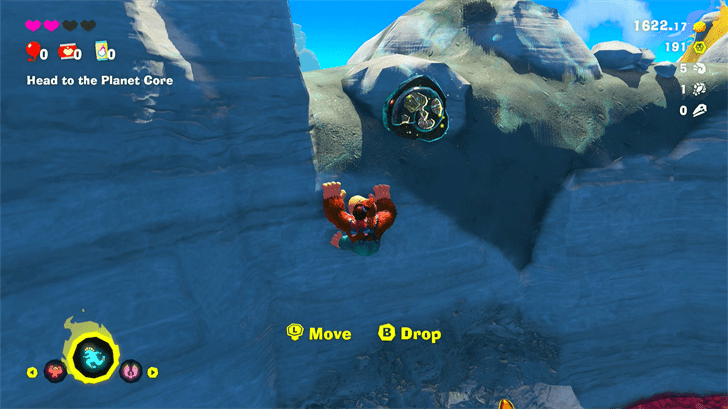
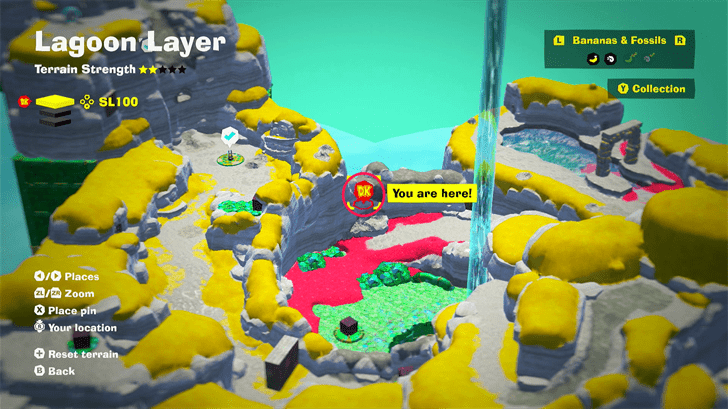
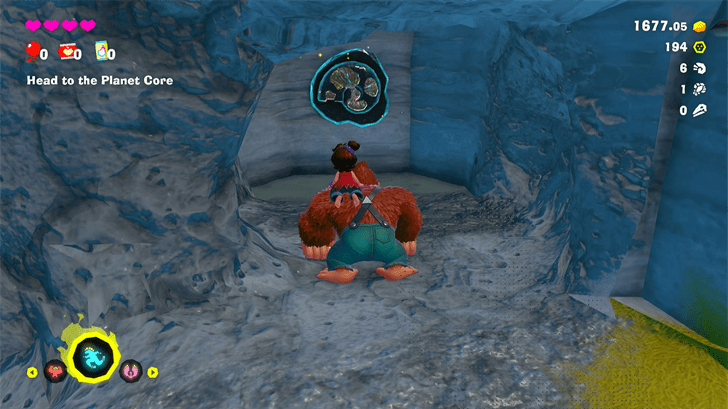
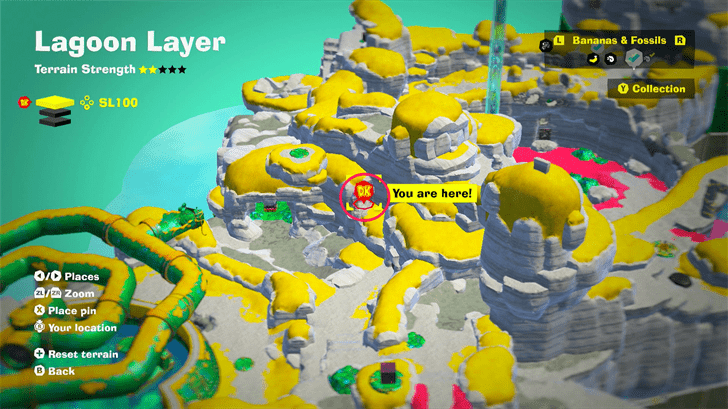
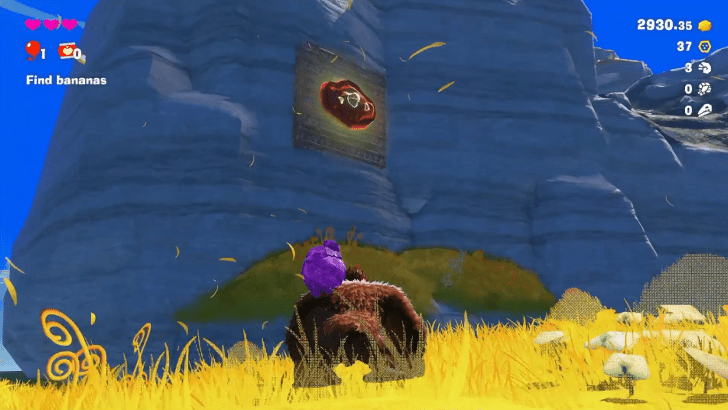
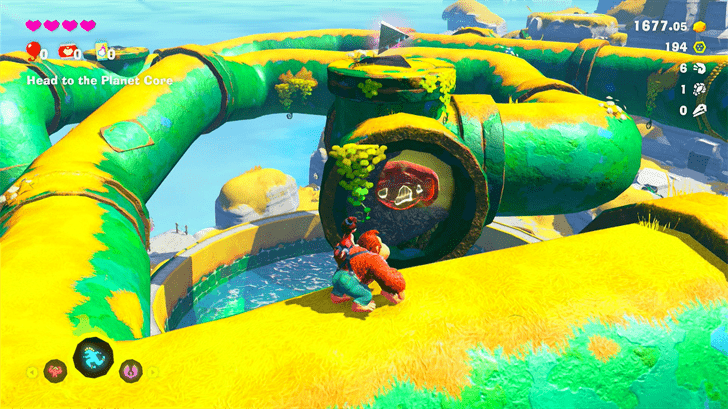
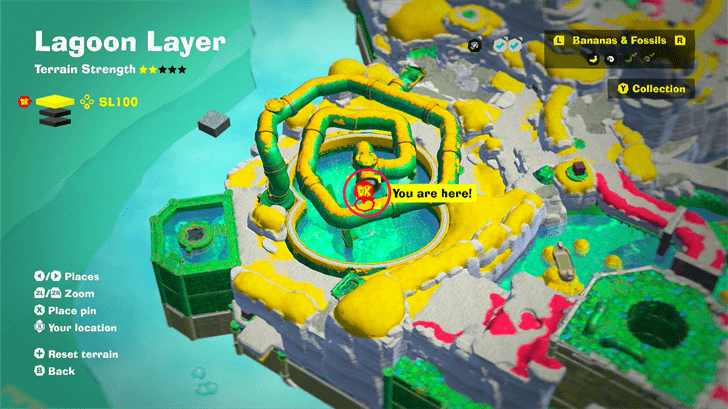
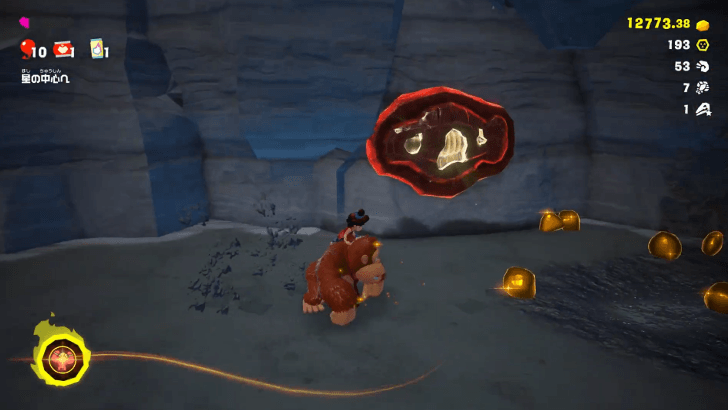
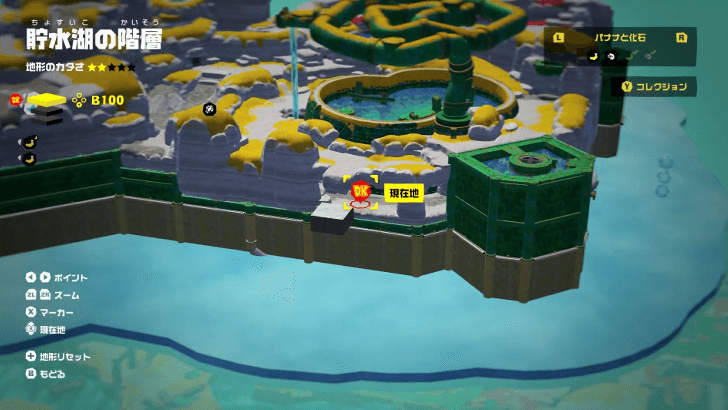
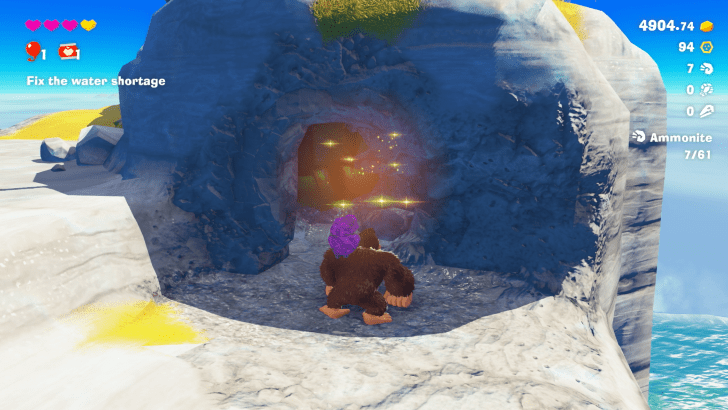
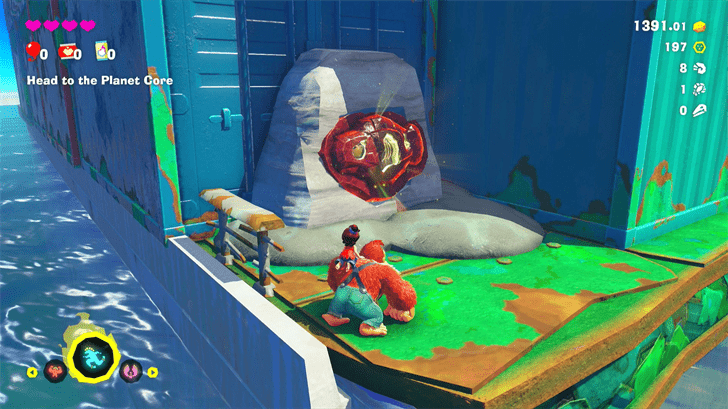
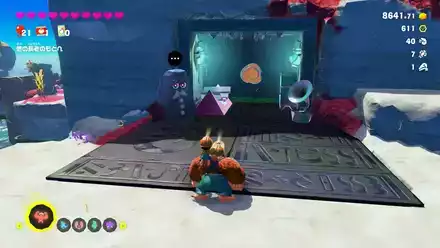
Found inside the mouth of the Donkey Kong-shaped rock formation. |
||
| 12 |
 |
 |
|
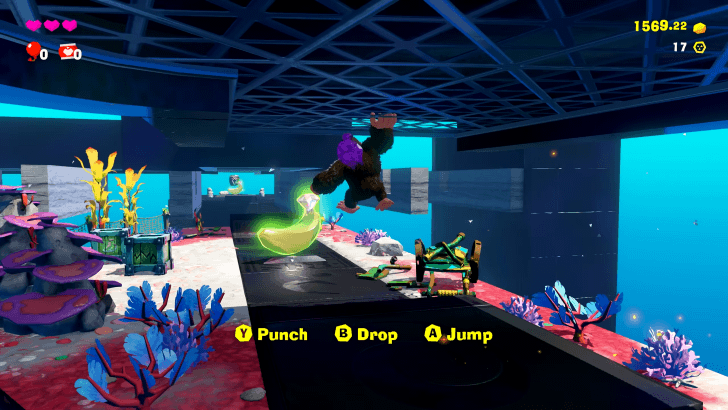
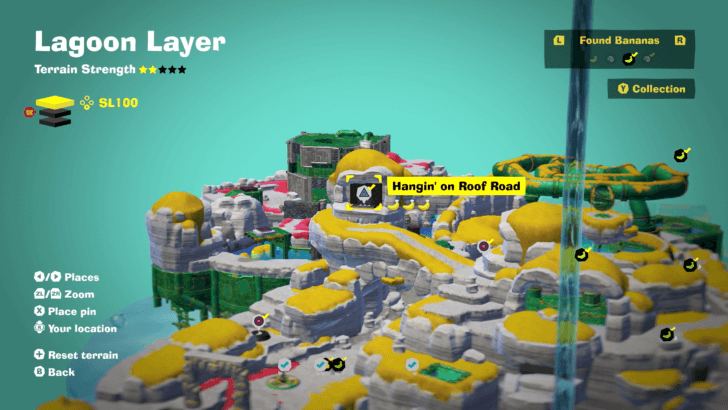
Found as part of Hangin' on Roof Road Challenge Course 1 after crossing the first set of obstacles. |
||
| 13 |
|
|
|
Found in Hangin' on Roof Road Challenge Course 1. In the final section where the walls approach from the left, turn left and punch through the oncoming walls to progress along the narrow mesh on the far end. At the end, drop off to the right and punch through the wall to find it. |
||
| 14 |
 |
|
|
Found at the end of Hangin' on Roof Road Challenge Course 1. |
||
| 15 |
 |
|
|
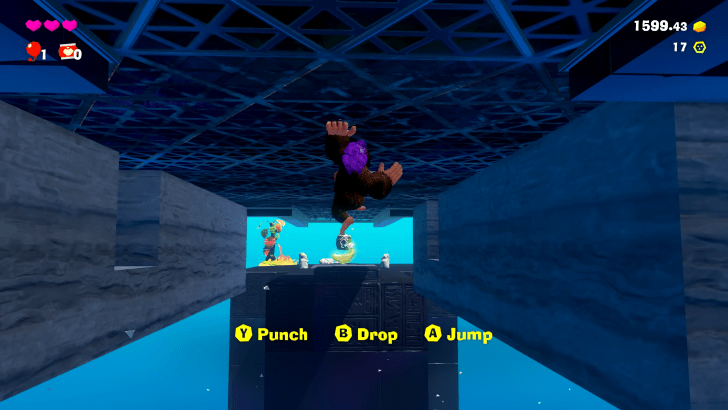
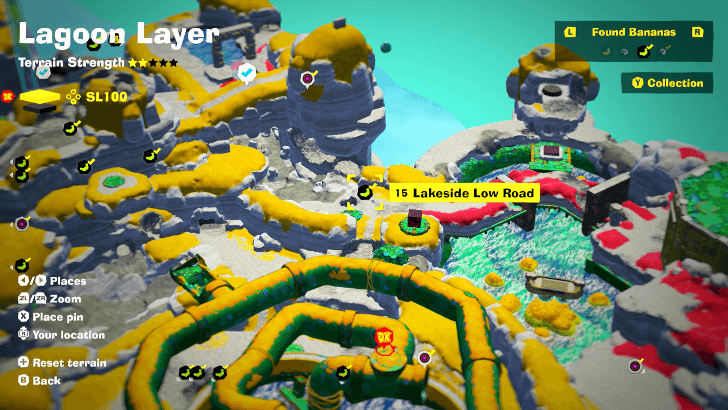
Found behind a dirt wall. |
||
| 16 |
 |
 |
|
Enter the manhole near the water tank and defeat the enemies. |
||
| 17 |
 |
|
|
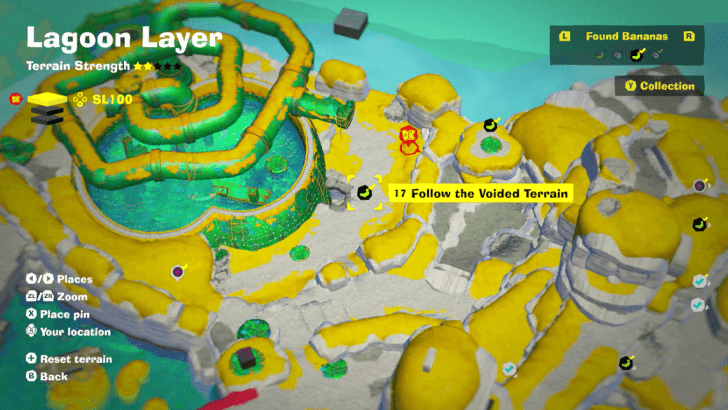
Underneath the reservoir, follow the purple path underground and destroy the Void lightbulb. This will free the Banandium Gem found outside. |
||
| 18 |
 |
|
|
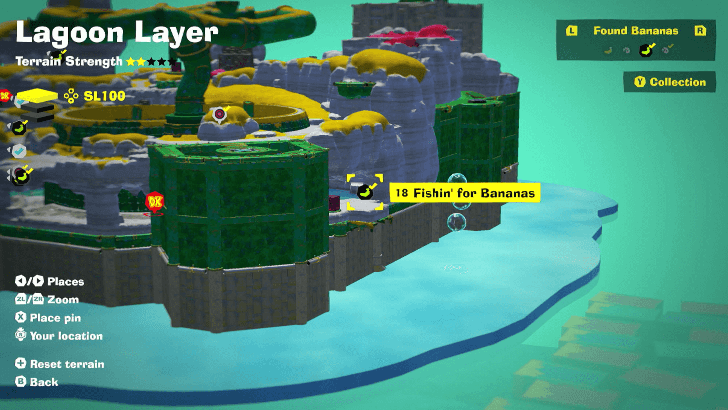
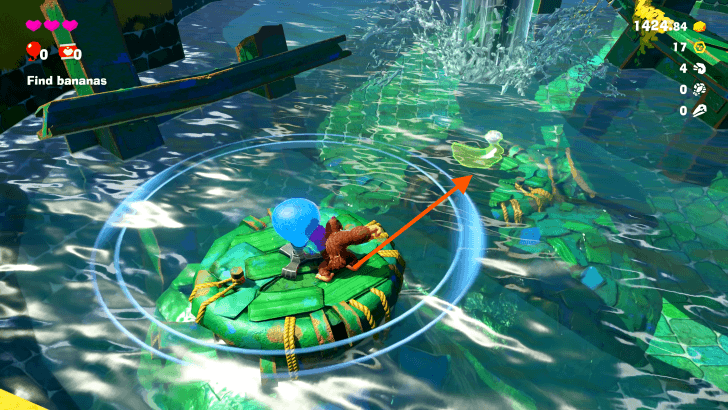
Underneath the reservoir, dig around to find monkeys fishing. Use Dive Punch to get the Banandium Gem. |
||
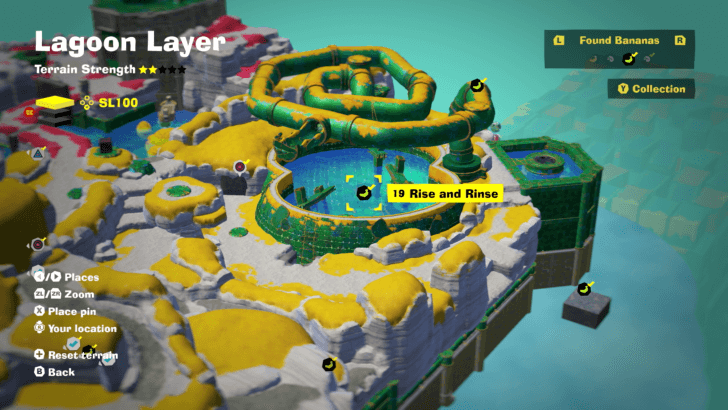
| 19 |
 |
 |
|
In the large water reservoir, jump and punch down three times until you can reach the Banandium Gem. |
||
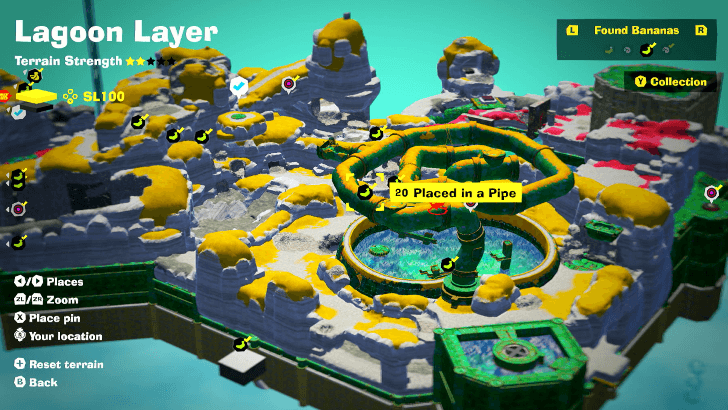
| 20 |
 |
|
|
While on top of the spiraling pipes, jump down the half-slice pipe and follow the path to the Banandium Gem. |
||
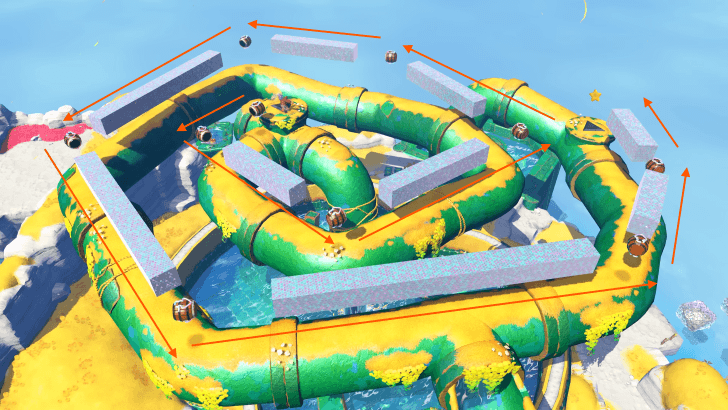
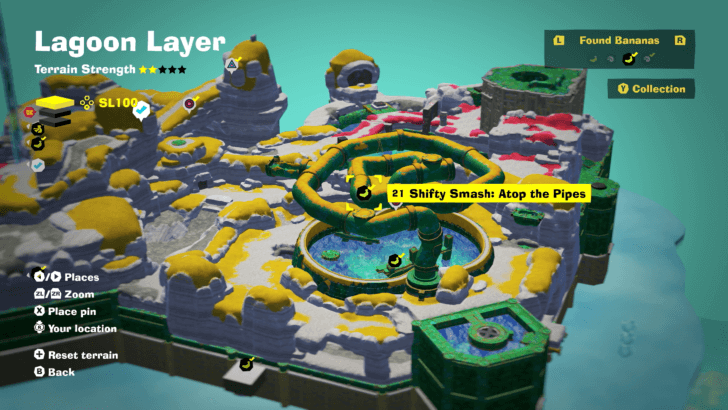
| 21 |
 |
 |
|
Activate the Shifty Smash Challenge on top of a spiral of pipes above one of the reservoirs. Earn this Banandium Gem by smashing through all of the terrain that appears with the help of the Barrel Cannons in under 20 seconds. |
||
| 22 |
 |
 |
|
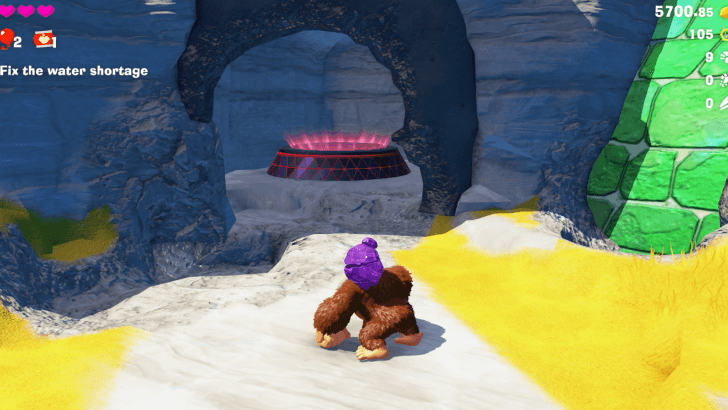
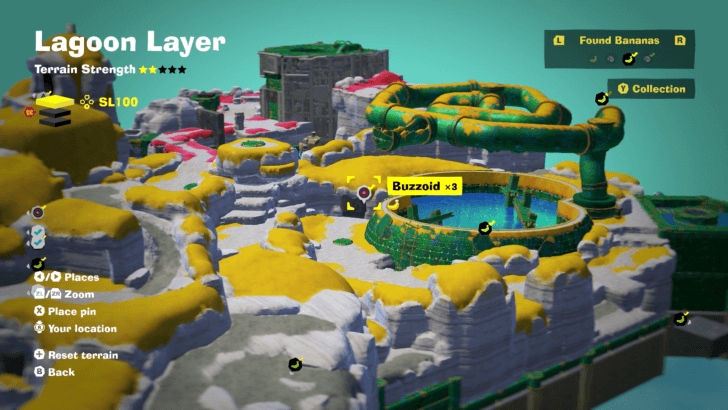
Enter the manhole and defeat three Buzzoids. |
||
| 23 |
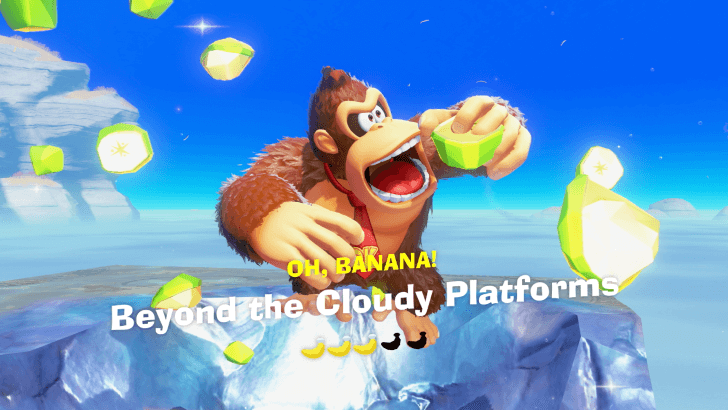 |
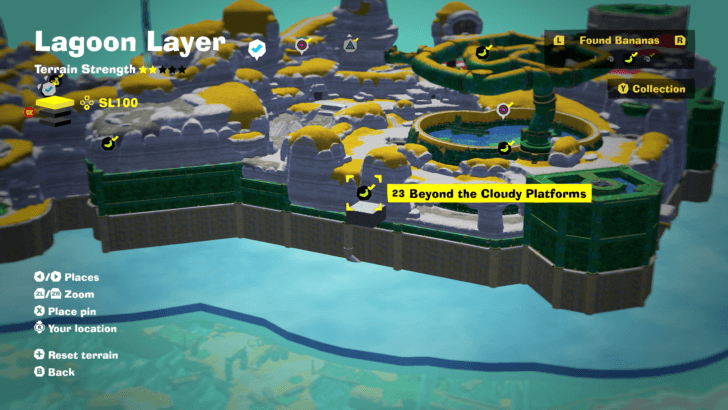 |
|
Throw rocks at the cloudy platforms to fill them in with material you can stand on. Cross and get the Banandium Gem before they disappear again. |
||
| 24 |
 |
 |
|
Found across a pool filled with Boom Rock bombs. Cross the pool from the sides or throw a chunk at the bombs to clear the area and reach the Banandium Gem. |
||
| 25 |
 |
 |
|
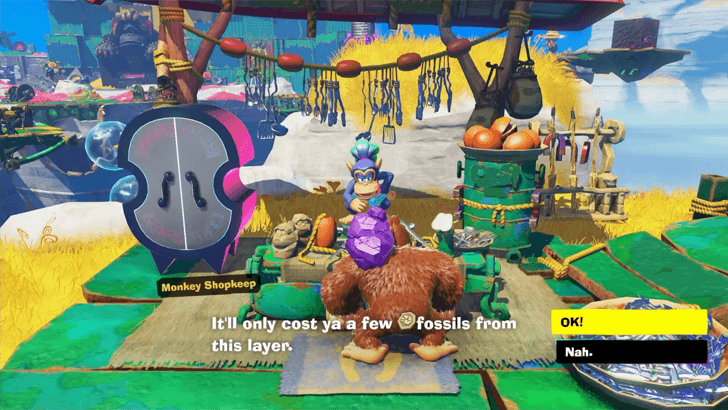
Buy with Banandium Chips to get a Gem. The price will vary depending on how many you have purchased from other layers. You only need to exchange once for the collectible to count. |
||
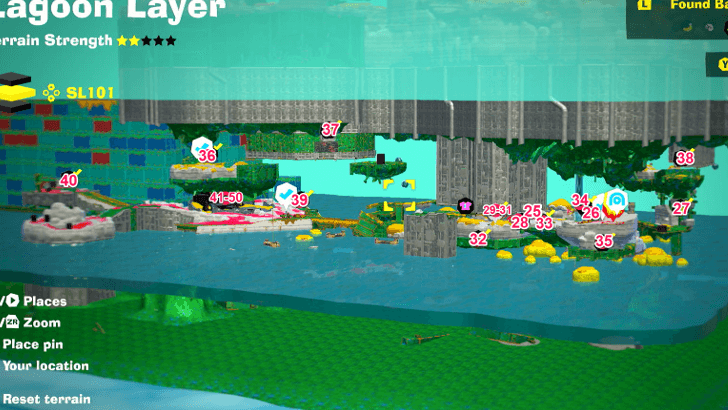
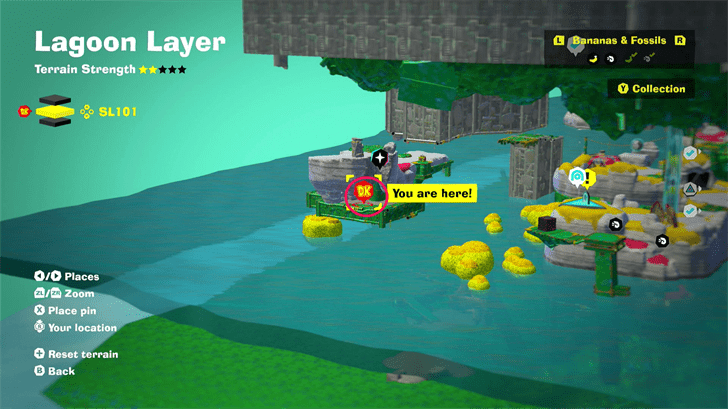
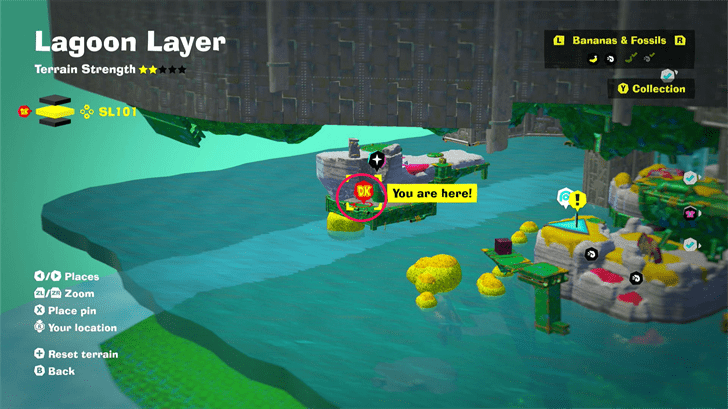
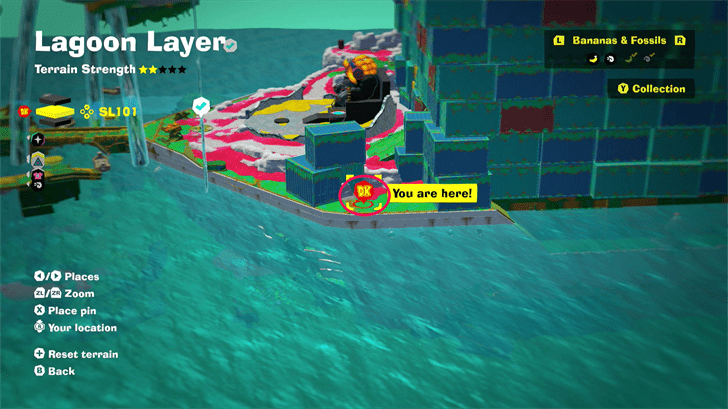
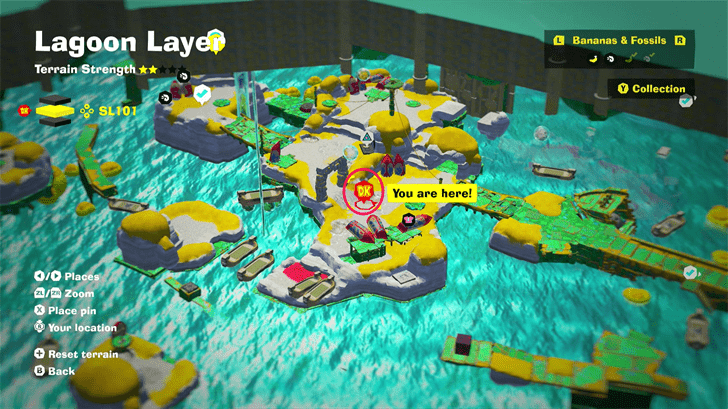
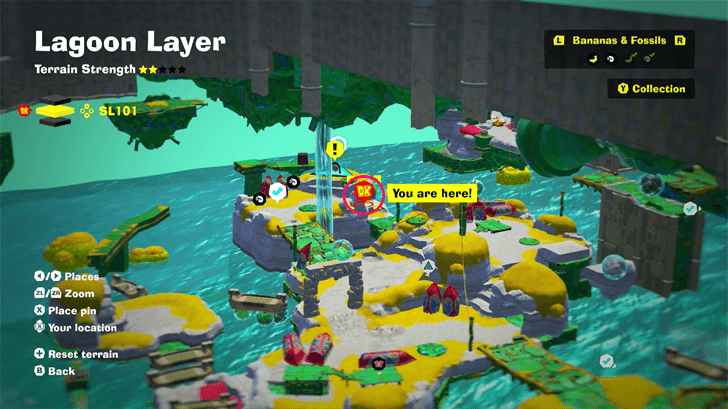
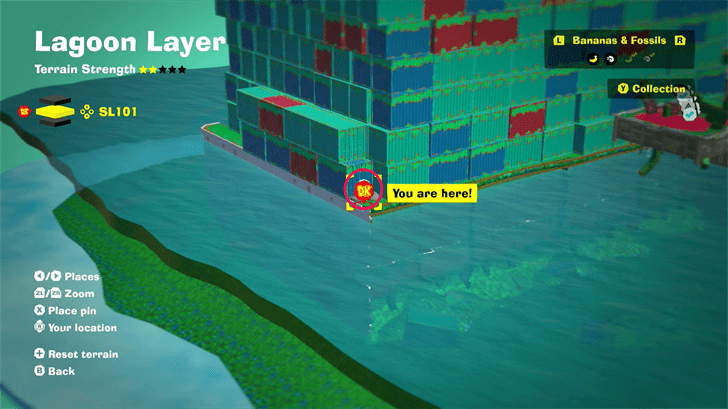
SL 101 Banana Locations
| Overworld View | Map Location | |
|---|---|---|
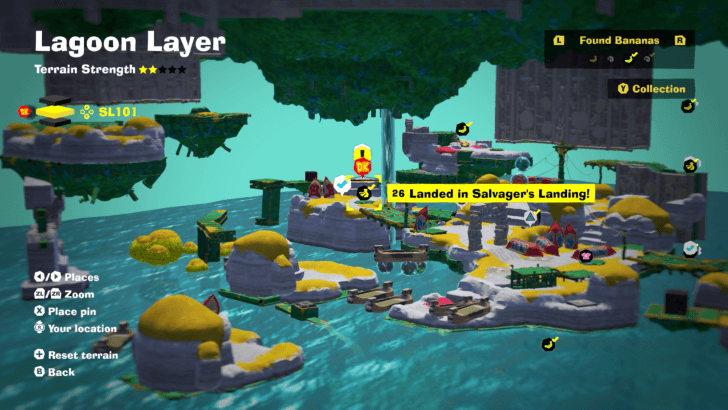
| 26 |
 |
 |
|
Found at the top of the hill near a bridge in Salvager's Landing. |
||
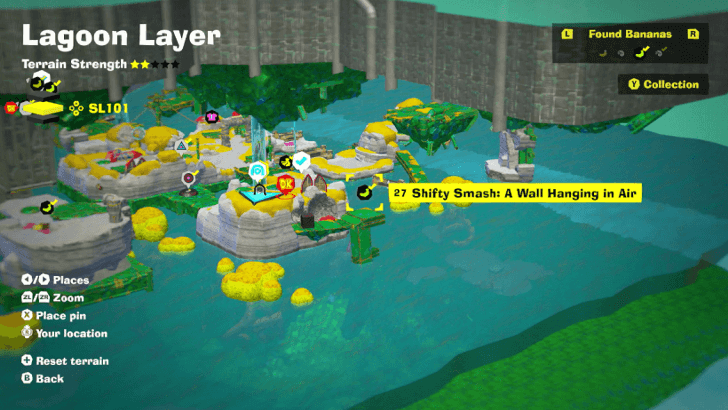
| 27 |
 |
|
|
Starting from the Warp Gong on Salvager's Landing, hop on to the green platform close to it and activate the Shifty Smash Challenge. You just need to grab Boom Rocks and throw it at the wall until it's destroyed to get the Gem. |
||
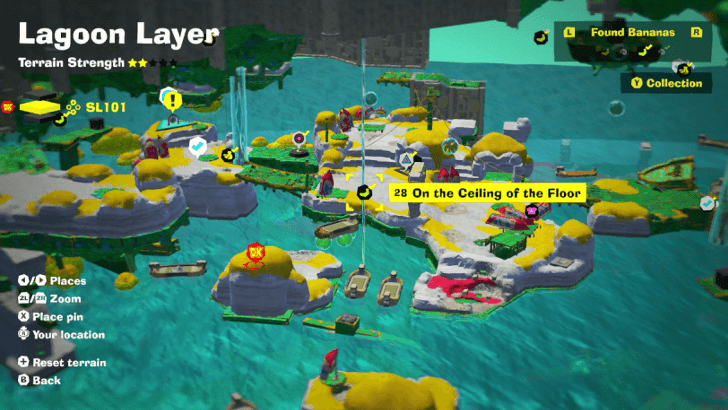
| 28 |
 |
|
|
After raising the water level three times in SL 101, swim under the rocky platform and punch upwards to get the Banandium Gem. |
||
| 29 |
 |
 |
|
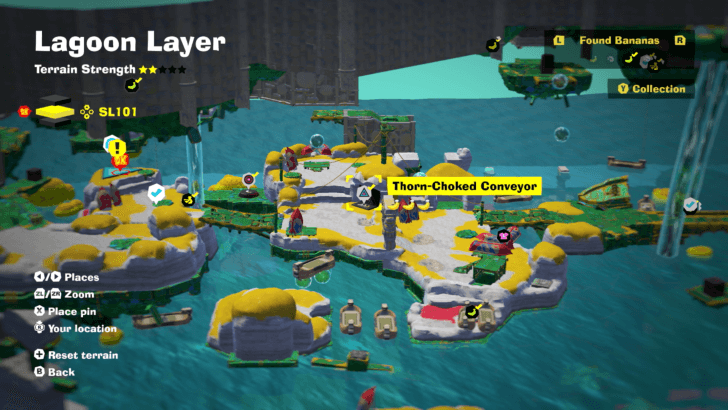
Found inside Thorn-Choked Conveyor Challenge Course. Cross the thorny vines on the ground to reach it. |
||
| 30 |
 |
|
|
Found inside Thorn-Choked Conveyor Challenge Course. Found inside a small room with plants. |
||
| 31 |
 |
|
|
Found at the end of Thorn-Choked Conveyor Challenge Course. |
||
| 32 |
 |
 |
|
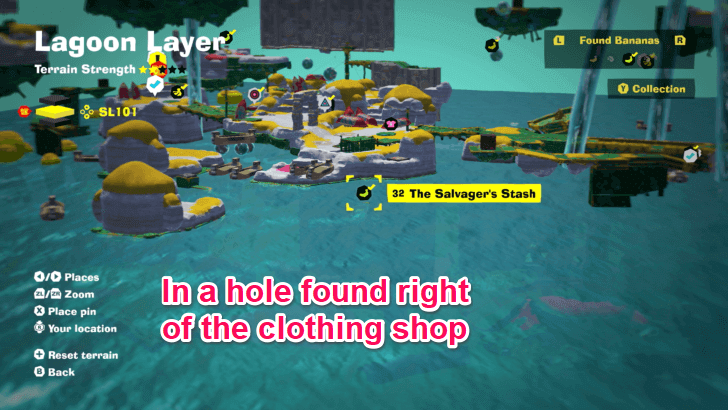
To the right of the clothing shop is a small hut. Look to the side to find an opening with a hole you can fall down into. The Banandium Gem is inside. |
||
| 33 |
 |
 |
|
Enter the manhole near Salvager's Landing and defeat two Crockoids. |
||
| 34 |
 |
 |
|
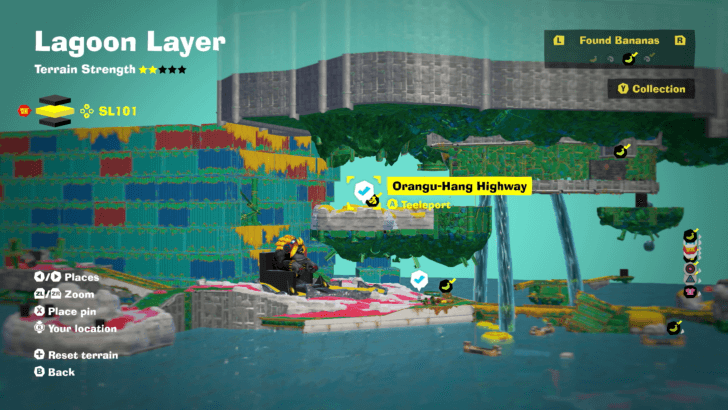
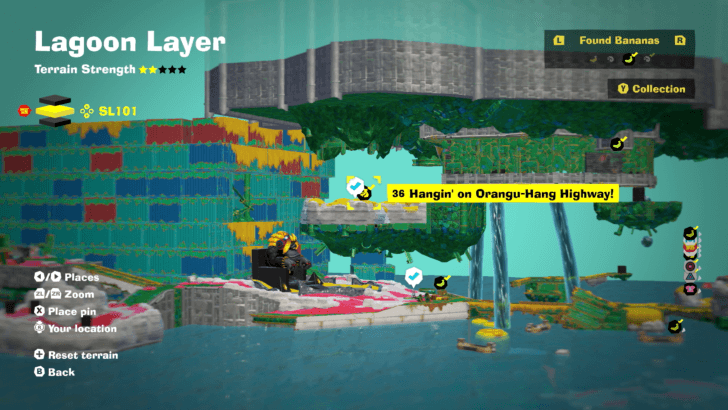
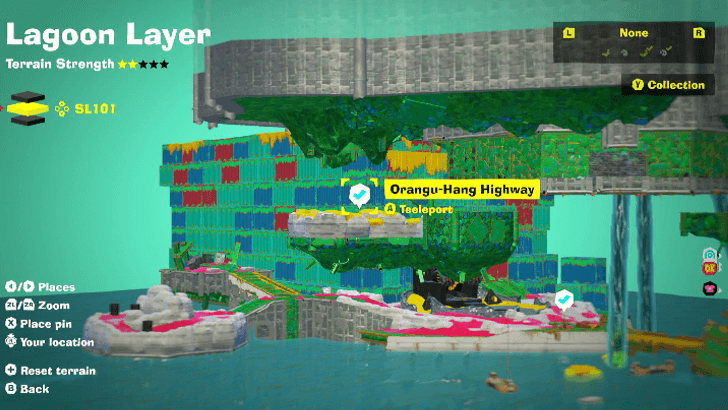
Found at the end of Orangu-Hang Highway. |
||
| 35 |
 |
 |
|
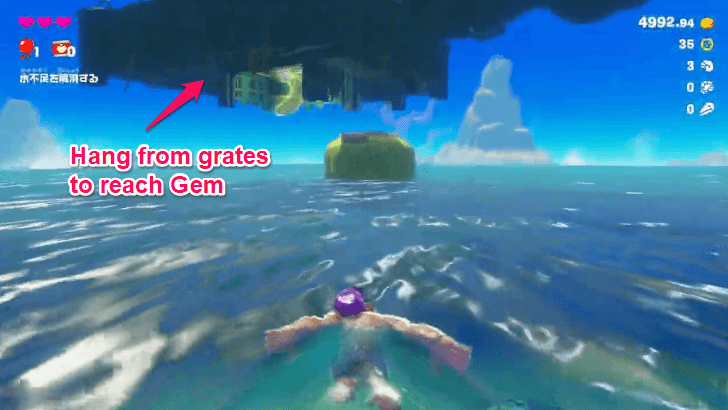
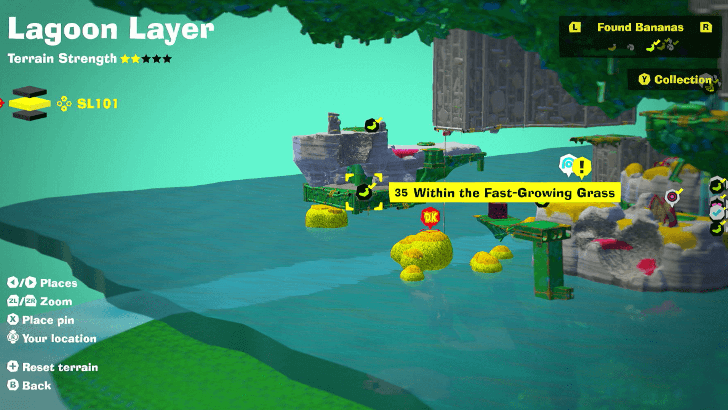
After raising the water level three times in SL 101, swim towards the green shrub and hang from the grates under the walkway to reach the Banandium Gem. |
||
| 36 |
 |
|
|
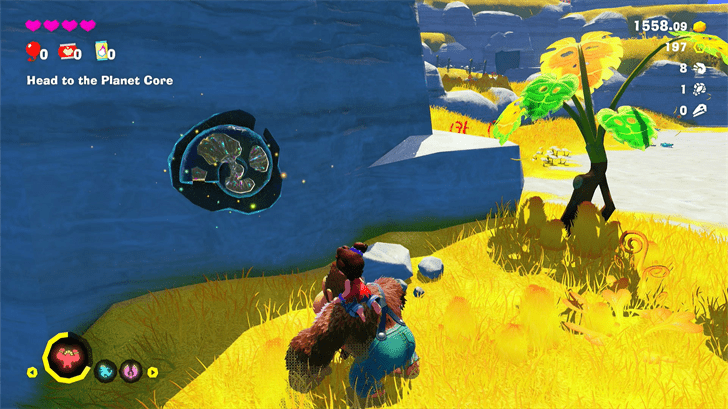
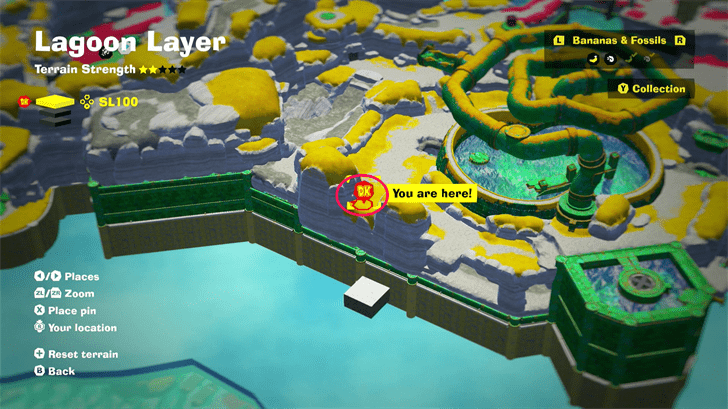
From SL 100, climb up the large green reservoir and destroy the large Void Stake on top. You can clear the concrete on the path from a nearby Boomrock source. When the Void Stake is cleared, dive down into SL 101 to get these gems. |
||
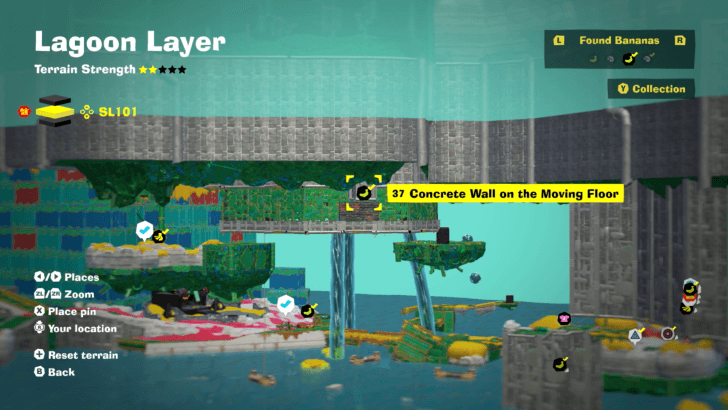
| 37 |
 |
|
|
In the section where you throw the Boom Rock at the concrete pillar, turn back and look up to find an Ammonite Fossil on the wall above. Throw the Boom Rock at it to break it, then take out the enemy on top of the Boom Rock with a jump and down punch. Roll and jump off the top of the Boom Rock pillar to get up onto the wall, and inside find another concrete wall you can break. Throw a Boom Rock at the wall to find this Banandium Gem on the other side. |
||
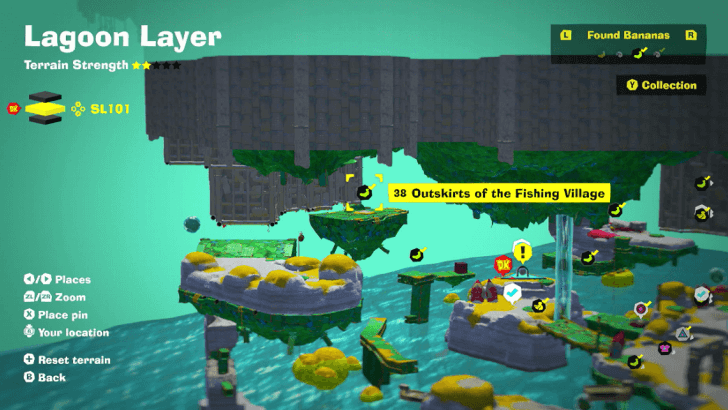
| 38 |
 |
|
|
Hang from the nets and navigate through the moving buildings to reach the Banandium Gem. |
||
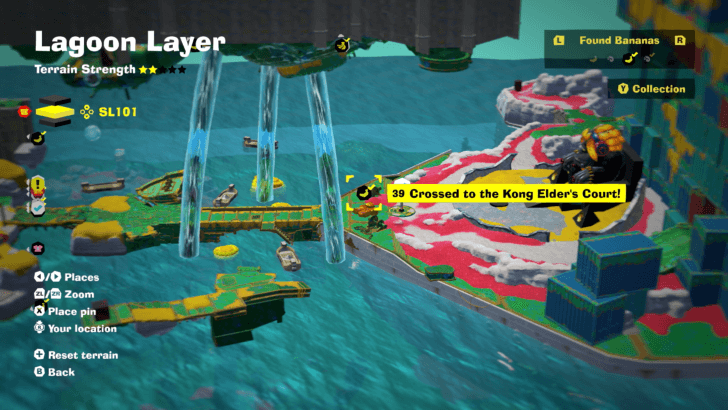
| 39 |
 |
 |
|
Found with story progression. |
||
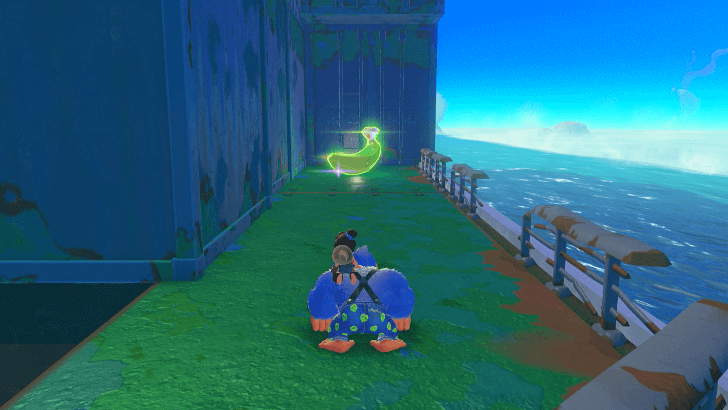
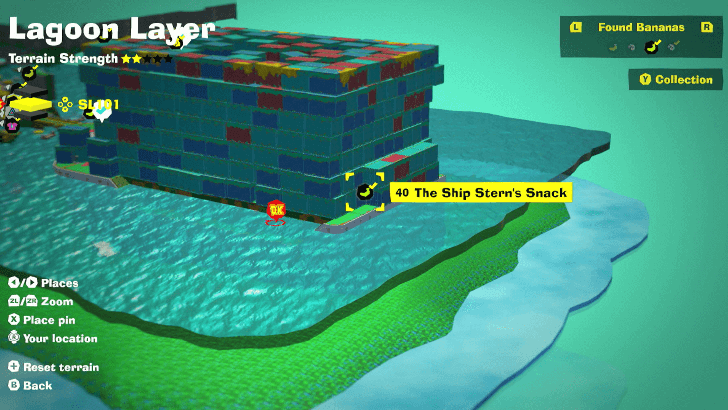
| 40 |
 |
 |
|
Found behind the ship. |
||
| 41 |
 |
 |
|
During the Kong Elder's Rehearsal, defeat the spiked-concrete Crockoid sitting on top of the concrete platform. |
||
| 42 |
|
|
|
During the Kong Elder's Rehearsal, punch the blue button so that the moving platforms where the Crockoids are standing on are pushed all the way to the opposite side, then quickly jump on the explosive pad and Dive Punch once the platforms are all aligned at the middle. |
||
| 43 |
|
|
|
During the Kong Elder's Rehearsal, bait the centipede enemies close to DK then punch the bombs to blow them up. |
||
| 44 |
|
|
|
During the Kong Elder's Rehearsal, tear off a chunk of the ground and throw it at the floating platform to bring it down on the centipede's body. |
||
| 45 |
|
|
|
During the Kong Elder's Rehearsal, wait for the platform turns into concrete, then bait the enemy into hopping on you then move away so that they gradually destroy the platform they are standing on. |
||
| 46 |
 |
|
|
During the Kong Elder's Rehearsal, bait the two hopping enemies into the middle area so that the walls will slam down on them. |
||
| 47 |
 |
|
|
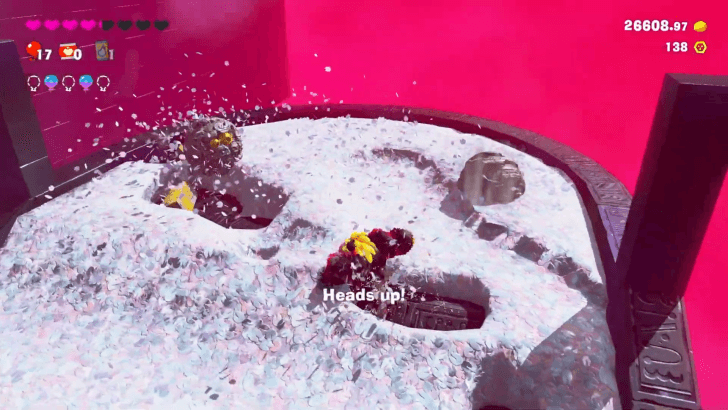
During the Kong Elder's Rehearsal, defeat the two circular enemies in the right area behind the yellow wall. You'll need to use your Charge Punch to destroy their outer shells to reveal the gold enemy inside. |
||
| 48 |
 |
|
|
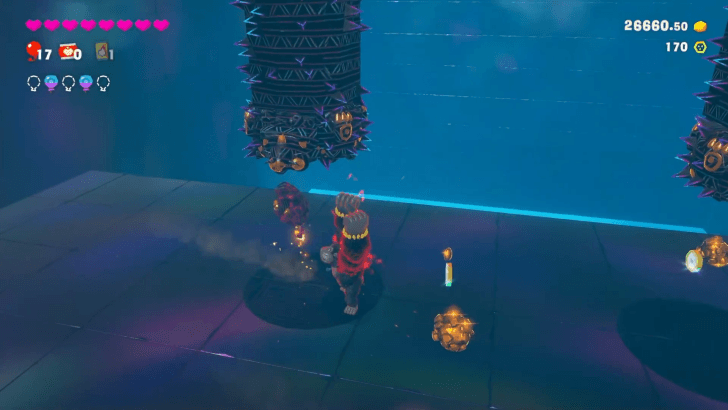
During the Kong Elder's Rehearsal, stand under the enemy and punch up using the X Button just as the rolling bomb enemies approach you. |
||
| 49 |
 |
|
|
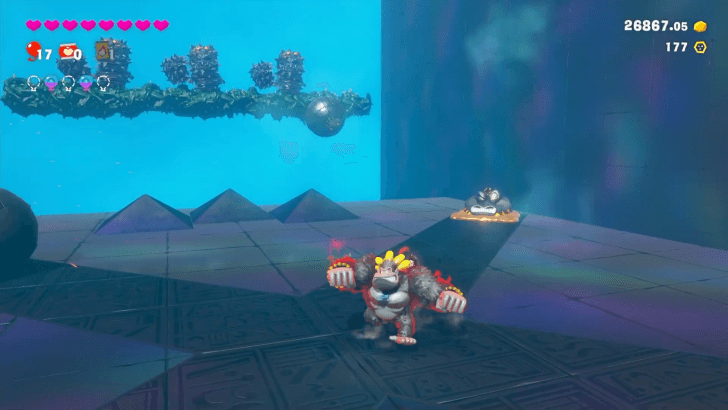
During the Kong Elder's Rehearsal, carefully line up and punch a steel ball so that shoots up and destroys the concrete platform that the enemies are standing on. |
||
| 50 |
 |
|
|
Reward for completing the Kong Elder's Rehearsal |
||
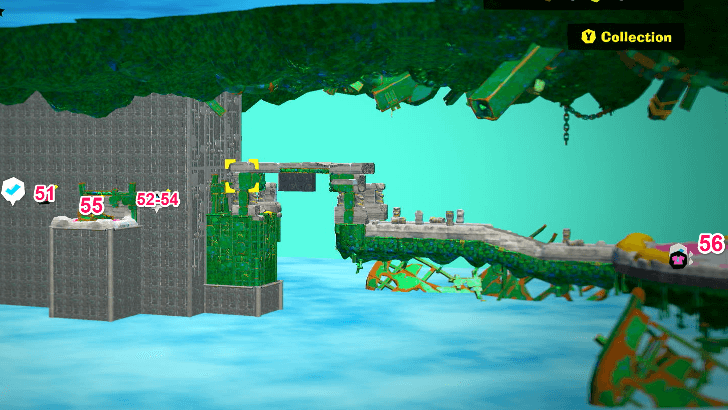
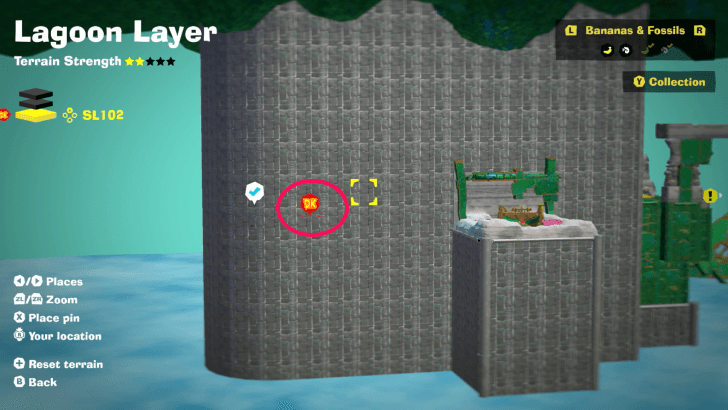
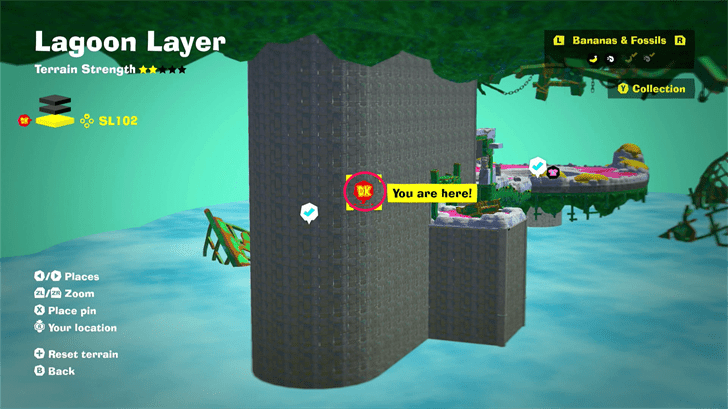
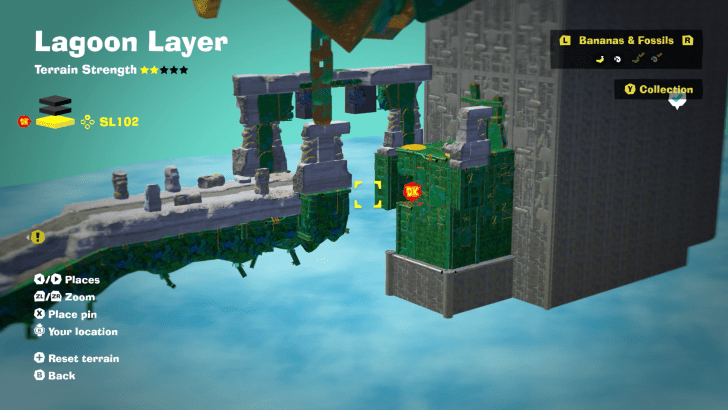
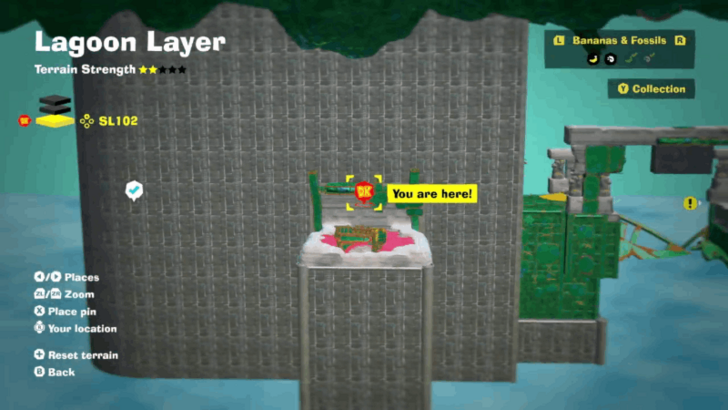
SL 102 Banana Locations
| Overworld View | Map Location | |
|---|---|---|
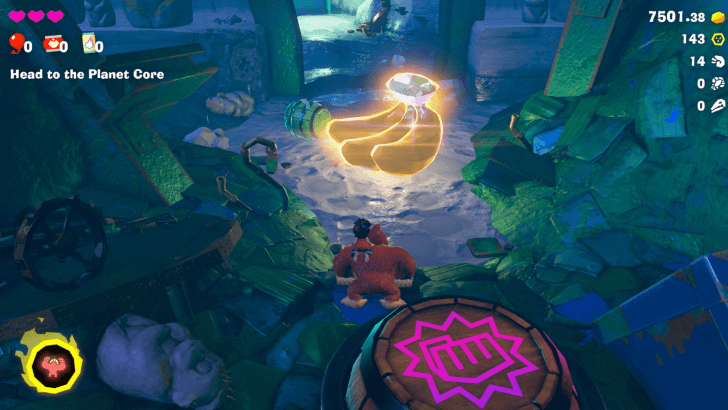
| 51 |
 |
 |
|
Found with story progression. |
||
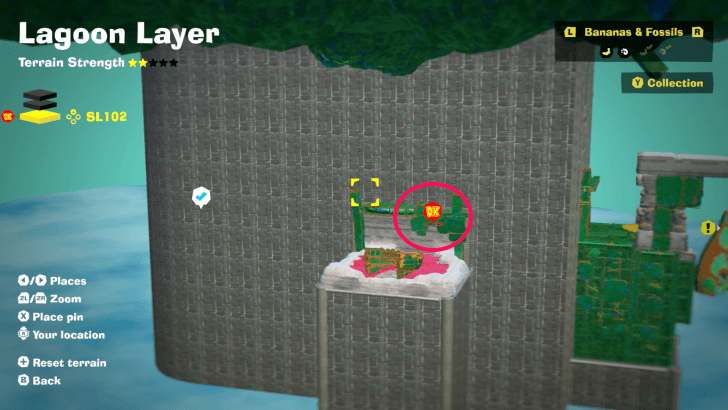
| 52 |
 |
|
|
Found inside Kong Bananza Pop Party Challenge Course 3. Pop all five balloons. One of the balloons is found blow the spinning platform inside the building; break through the floor to find it. |
||
| 53 |
 |
|
|
Found at the end of Kong Bananza Pop Party Challenge Course 3. |
||
| 54 |
 |
|
|
Found inside Kong Bananza Pop Party Challenge Course 3. Found at th ceiling inside a building, |
||
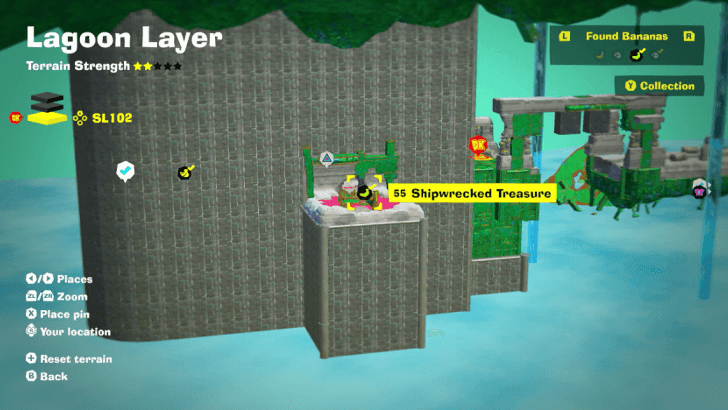
| 55 |
 |
|
|
Found behind a stone wall inside the shipwreck. |
||
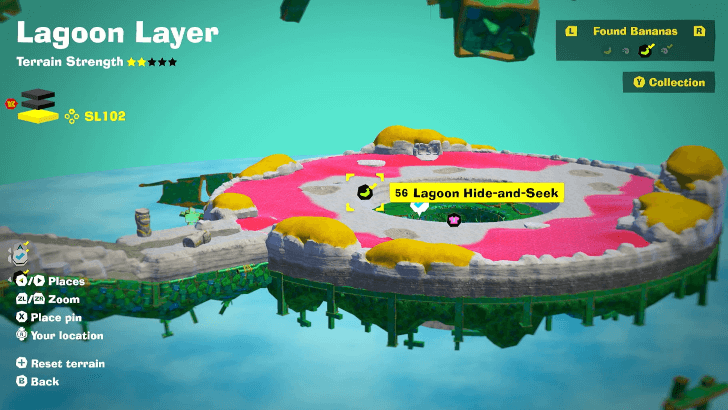
| 56 |
 |
|
|
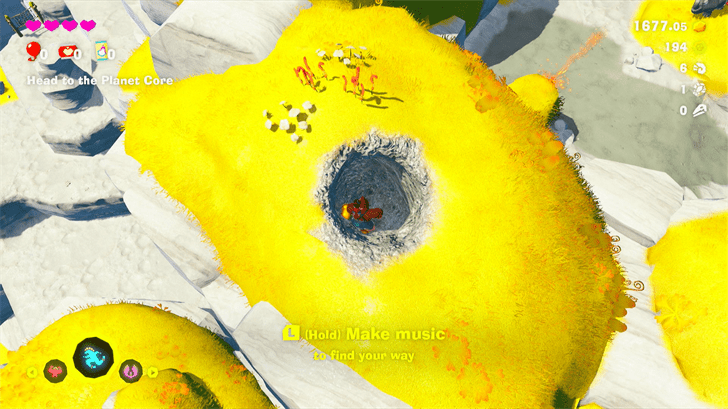
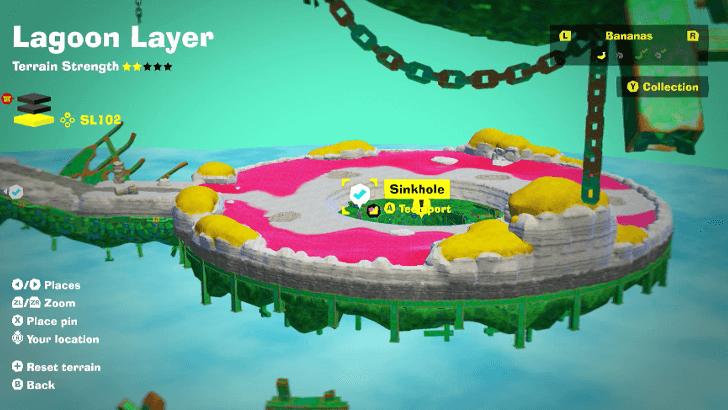
Find all four Fractones hiding around the Sinkhole. It is recommended to to use the Elephant Bananza to find them quickly. |
||
Banandium Gems List and Locations
Lagoon Layer Fossils
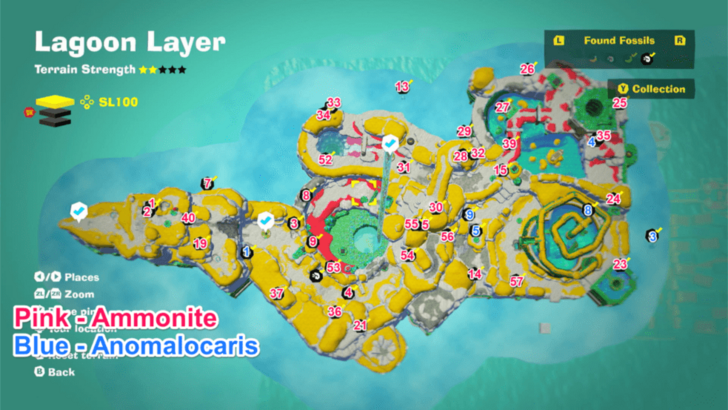
SL 100 Fossil Locations
| Overworld View | Map Location | |
|---|---|---|
 |
||
|
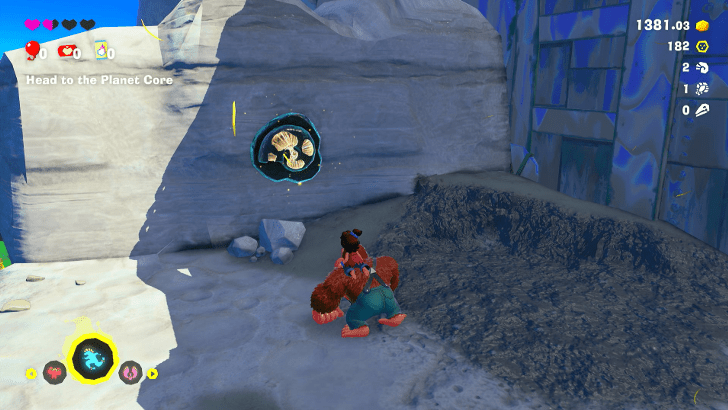
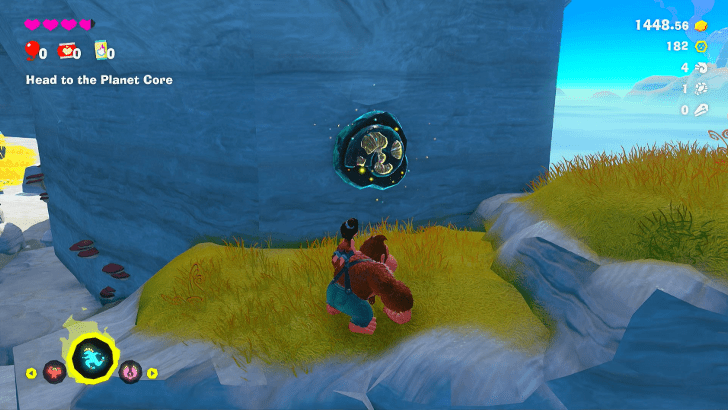
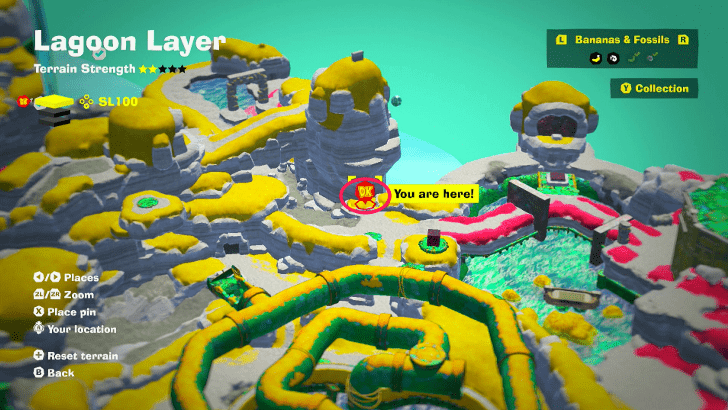
Hidden behind a gray slate wall in a cave along the western ledge as you climb up the first hill in the Lagoon Layer. |
||
 |
 |
|
|
Partially exposed and can be found on the way up the first hill in the Lagoon Layer. |
||
 |
 |
|
|
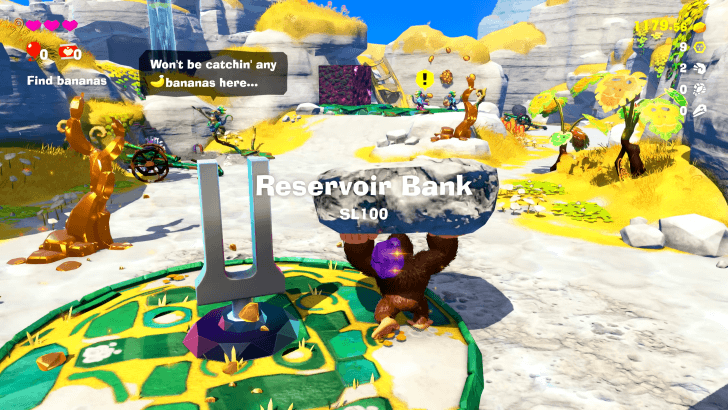
In the puddle next to the magnet-fishing Salvager Monkey saying Won't be catchin any bananas here. |
||
 |
 |
|
|
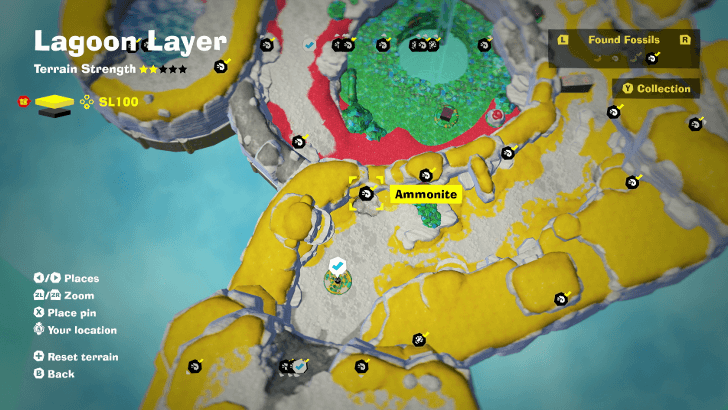
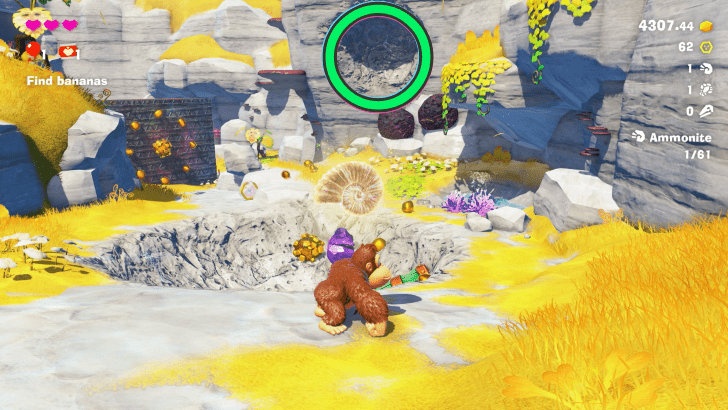
Partially exposed and visible on the side of a wall high above the ground. Throw a Boomrock at it to destroy the wall and collect the Ammonite that falls. |
||
 |
 |
|
|
Embedded in a rotating concrete wall as you follow the path beyond the Reservoir Bank. Throw a Boomrock to dislodge this Ammonite. |
||
 |
||
|
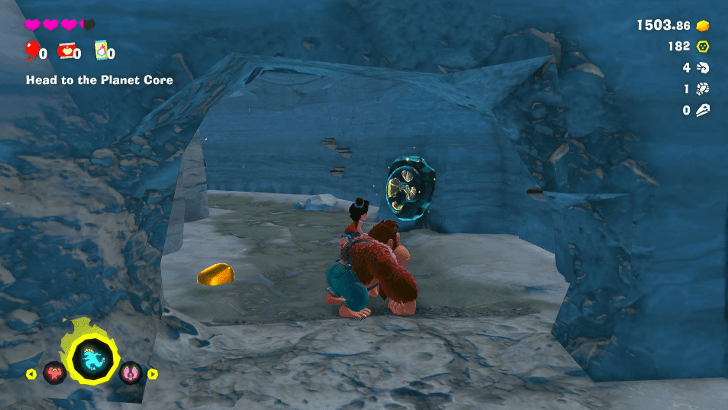
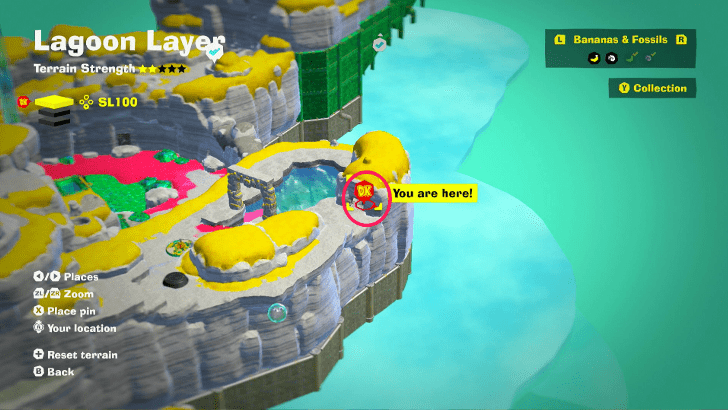
Hidden behind a gray slate wall, there is a long cave filled with Peekaboopoid enemies. The Ammonite can be found at the deepest point of the cave. |
||
 |
 |
|
|
Partially exposed along the western walls near the southern-most point of Lagoon Layer. It will be among some mushroom growths. |
||
 |
 |
|
|
Inside a little cave in the mountainside near the lake with an arch. You can dig for it. |
||
 |
 |
|
|
Stuck on a concrete slab on a mountainside near the red and green area. |
||
 |
 |
|
|
Throw Boom Rock at it to reach it. |
||
 |
 |
|
|
Cliff Side |
||
 |
 |
|
|
Dig down where there is a divot in the ground above to find a hidden room. |
||
 |
 |
|
|
A little north from the starting point, near the cliff |
||
 |
 |
|
|
The side of the cliff below the boulder |
||
 |
 |
|
|
Can be obtained if you do a a dive punch underwater. |
||
 |
 |
|
|
Behind the waterfall |
||
 |
 |
|
|
Near the cliff on the north side of the map |
||
 |
 |
|
|
Deep in the rock cavity |
||
 |
 |
|
|
On top of plants near water |
||
 |
 |
|
|
Beyond the wall where the gold bars are buried |
||
 |
 |
|
|
Near the Ruins Challenge |
||
 |
 |
|
|
Southeast of the Ruins Challenge, dig down the highest point of the hill. |
||
 |
 |
|
|
Destroy the wall near the "Reservoir Hills" warp point. |
||
 |
 |
|
|
From the warp point "Reservoir Hills" to the north of the map, located at the base of the Monkey Head rock formation with the shrine. |
||
 |
 |
|
|
Break the wall, should be right next to another Ammonite Fossil. |
||
 |
 |
|
|
Break the wall, should be right next to another Ammonite Fossil. |
||
 |
 |
|
|
Punch through the wall just behind the Architone, and you'll find the fossil. |
||
 |
 |
|
|
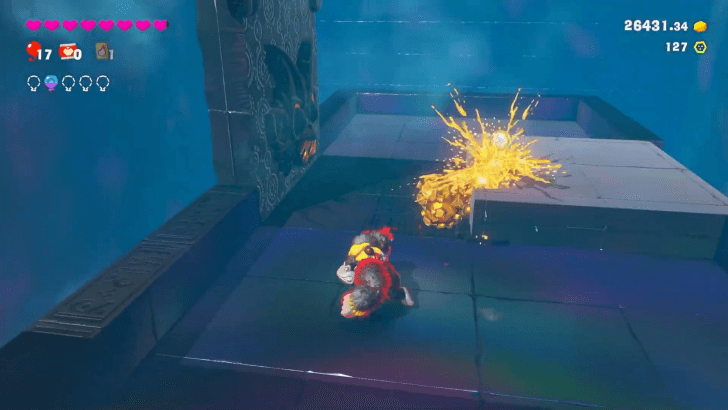
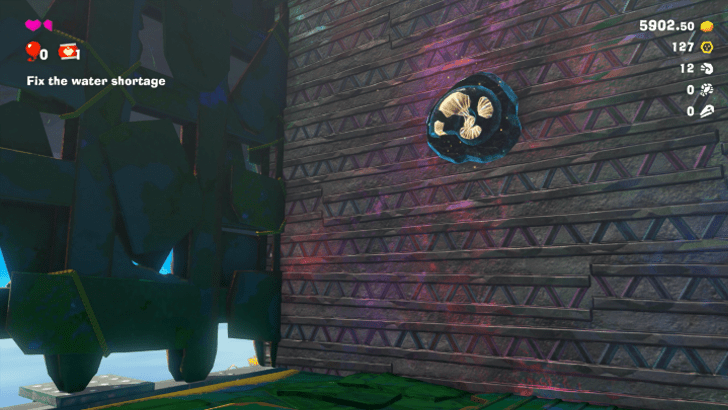
Behind a concrete wall under a sparkling deposit. |
||
 |
 |
|
|
Behind a rock |
||
 |
 |
|
|
Under the bridge |
||
 |
 |
|
|
The dig a hole halfway up the cliff and keep digging until you reach it. |
||
 |
 |
|
|
On the side of the wall near the Reservoir Bank warp point. |
||
 |
 |
|
|
Dig down to where there are three boulders beyond the concrete wall. |
||
 |
 |
|
|
Beyond the wall on the side of the cliff |
||
 |
 |
|
|
The end of a hole dug from the top to the bottom of a rocky mountain |
||
 |
 |
|
|
Beyond the broken wall halfway up the cliff |
||
 |
 |
|
|
On the side of the big rock |
||
 |
 |
|
|
Embedded on the cliffside near the Reservoir Bank Checkpoint. |
||
 |
 |
|
|
Look for bubbles at the edge of the area with the large pipe and throw an explosive chunk at the Fossil to get it. |
||
 |
 |
|
|
Enter the flooded cave near the large pipe through an opening at the edge of the map to immediately find this Fossil. |
||
 |
 |
|
|
Beneath the floating rock near Reservoir Hills. Throw chunks at the prismatic blocks to reach the platform and dig from the top to reach the Fossil. |
||
 |
 |
|
|
Climb to the top of the large pipe and destroy the clay wall blocking the opening to find the Fossil. |
||
 |
 |
|
|
Enter the cave beneath the large pipe area and follow the trail until you find a seal. Break the seal to reveal the Fossil on the wall. |
||
SL 101 Fossil Locations
| Overworld View | Map Location | |
|---|---|---|
 |
 |
|
|
From the checkpoint, head right towards green platforms with a steel crate on them. Drop down the lower red cliff, should be near another Ammonite fossil. |
||
 |
 |
|
|
From the checkpoint, head right towards green platforms with a steel crate on them. Drop down the higher red cliff, should be near another Ammonite fossil. |
||
 |
 |
|
|
From the checkpoint, head southwest towards a small plateau. Dig up the plateau to reveal the fossil. |
||
 |
 |
|
|
From the warp point "Ceiling Road", break the concrete wall and proceed forward. |
||
 |
 |
|
|
On the wall at the far end of the passageway containing Concrete Wall on the Moving Floor. |
||
 |
 |
|
|
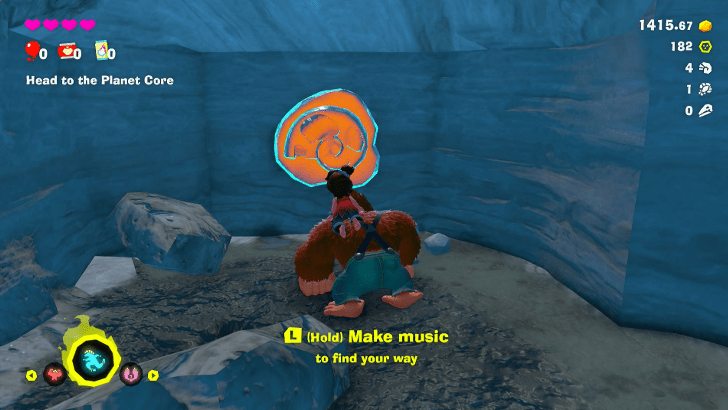
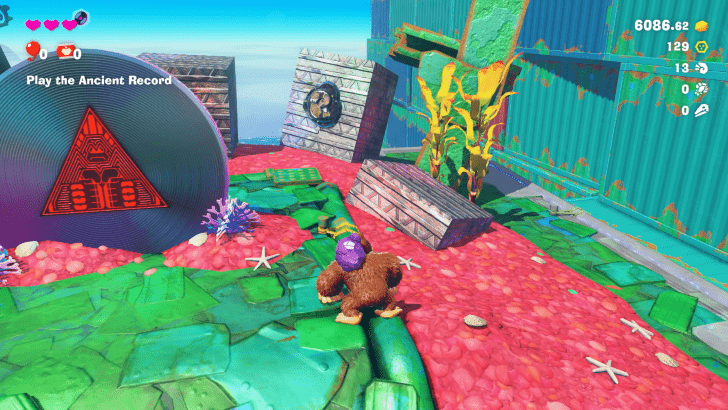
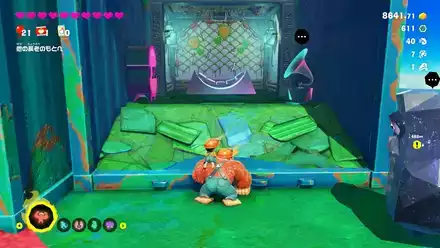
On the platform with the giant record. After unlocking the Kong Bananza, you can return here and break it with your Charge Punch. |
||
 |
||
|
From the warp point "Elder Square", go through the giant container |
||
 |
||
|
Beyond the wire fence on the outskirts of the village |
||
 |
 |
|
|
On top of a pylon near the Junk Fishing Village |
||
 |
 |
|
|
On top of a big rock |
||
 |
 |
|
|
On top of the stone pillar |
||
 |
 |
|
|
Near the area below the barrels after passing through the wire mesh |
||
 |
 |
|
|
Near the area below the barrels after passing through the wire mesh |
||
 |
 |
|
|
Behind the Elder |
||
 |
 |
|
|
Back of the container |
||
 |
 |
|
|
Just before crossing the bridge |
||
 |
 |
|
|
Digging up grass near the Junk Fishing Village warp point. |
||
 |
 |
|
|
Inside the Junk Fishing Village |
||
 |
 |
|
|
Near the Junk Fishing Village warp point. |
||
 |
 |
|
|
The side of a rock hidden by two boats |
||
 |
 |
|
|
Under the Two Boats |
||
 |
 |
|
|
Grabbing the net, we move forward |
||
 |
 |
|
|
In Salvager's Landing, go to the area with the Lil Eelevator and throw a chunk at the prismatic block to create a bridge to the Fossil. |
||
 |
 |
|
|
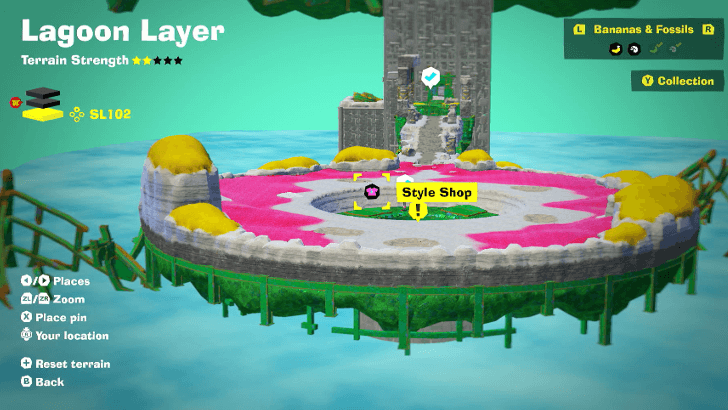
Located behind the Style Shop in Salvager's Landing. |
||
 |
 |
|
|
Go to the back of the containers at the Elder Court to find the Fossil. |
||
 |
 |
|
|
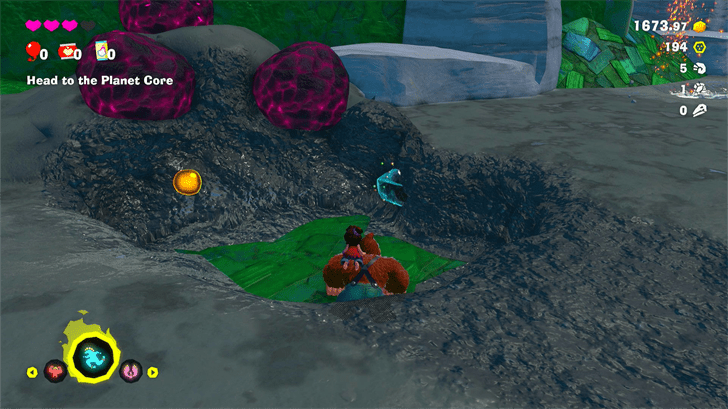
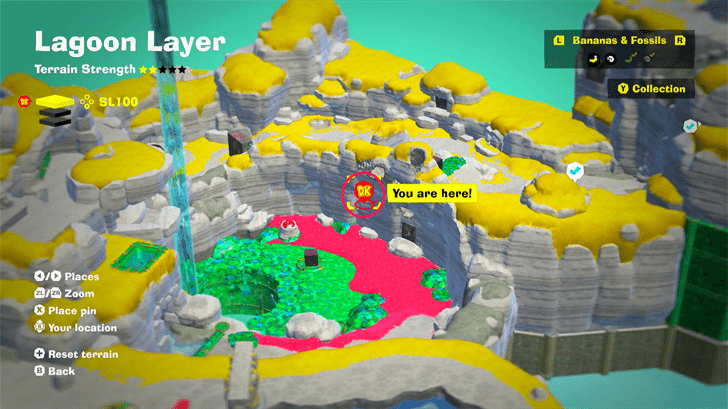
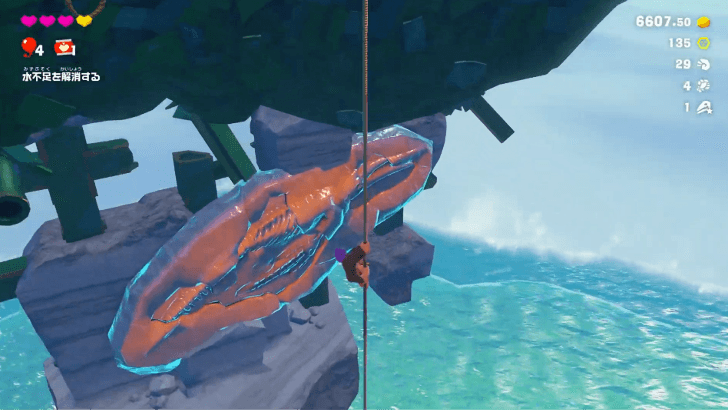
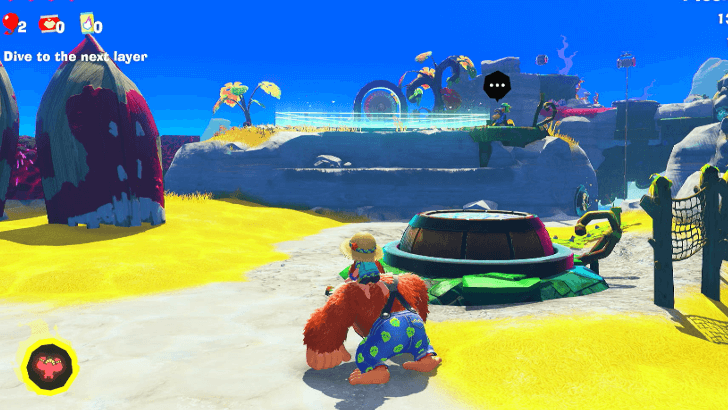
Look for a crater at the outskirts of SL 100 and perform a plunging punch at the center to reach SL 101. Ahead will be a rope mechanism that will take you to where the Whale Fossil is. |
||
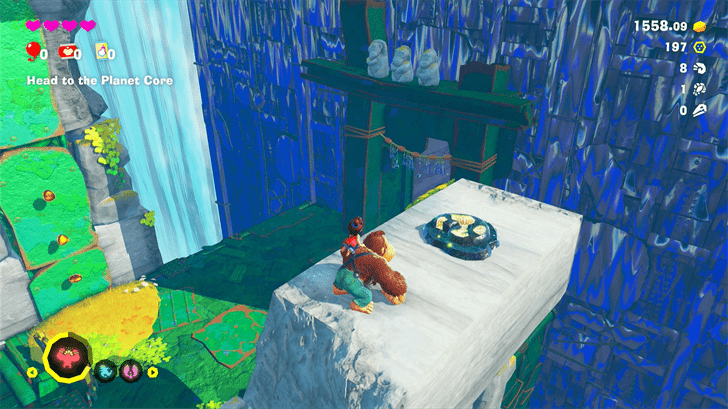
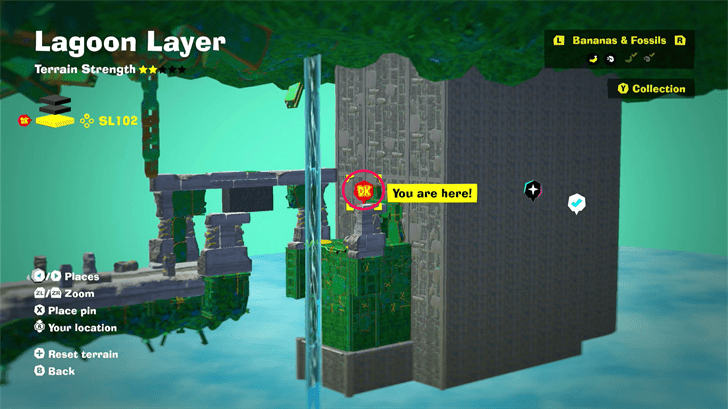
SL 102 Fossil Locations
| Overworld View | Map Location | |
|---|---|---|
 |
 |
|
|
Near where you arrived on B102 |
||
 |
 |
|
|
On top of the stone pillar at SL 102 |
||
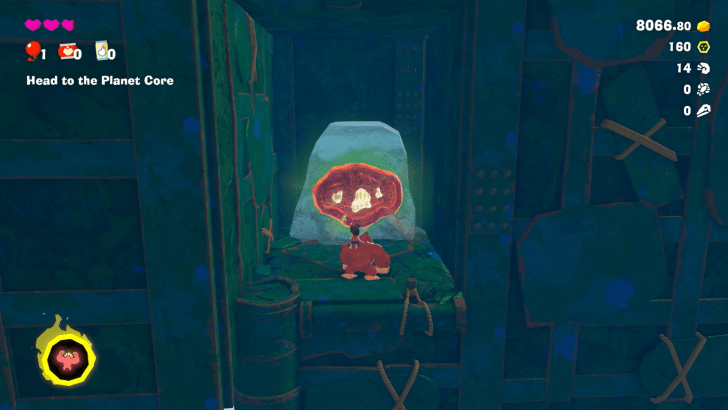 |
 |
|
|
From the edge of the cliff, jump off and move back towards the wall to land inside a hidden cave. Use Kong Bananza's Charge Punch to break open the fossil. |
||
Lagoon Layer Checkpoints
All Checkpoint Locations
| Overworld View | Map Location | |
|---|---|---|
 |
 |
|
|
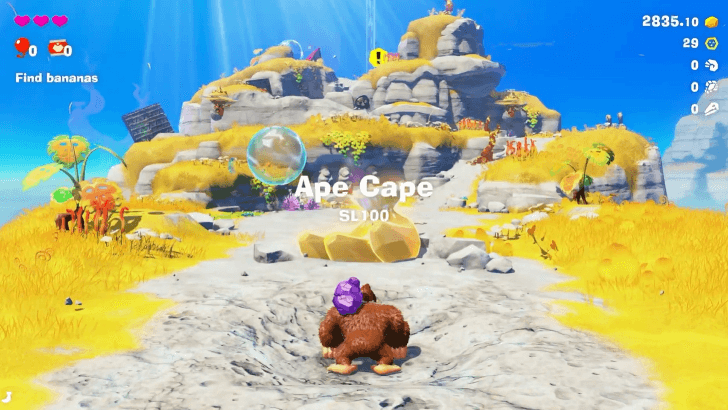
Ape Cape Checkpoint (SL 100)
Drop down from the Ingot Isle Sinkhole. This is where you will land. |
||
 |
 |
|
|
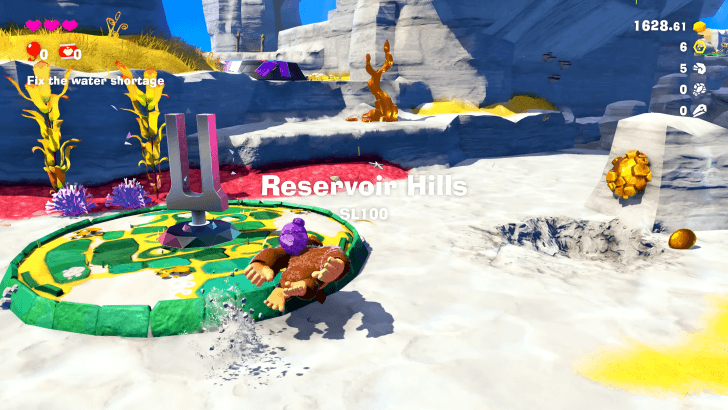
Reservoir Hills Checkpoint (SL 100)
After destroying the first concrete tower, talk to the monkey on the island. Climb the metal tower next to him, then cross through the mesh. Jump into the Barrel Cannon at the end and it will take you to the Reservoir Bank Checkpoint. |
||
 |
 |
|
|
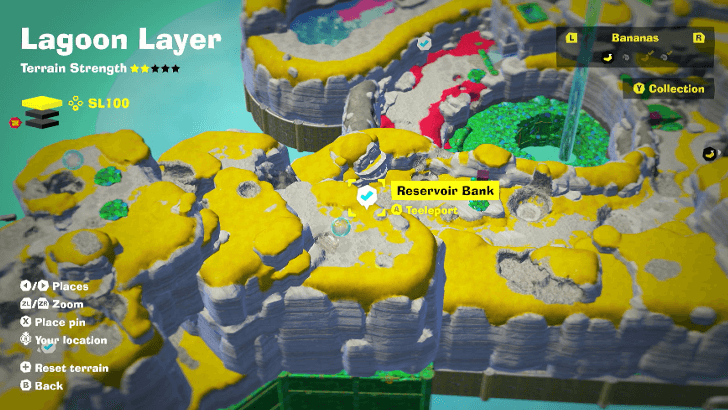
Reservoir Bank Checkpoint (SL 100)
On the other side of the hill from Ape Cape, near where some Salvager Monkeys are busy. |
||
 |
 |
|
|
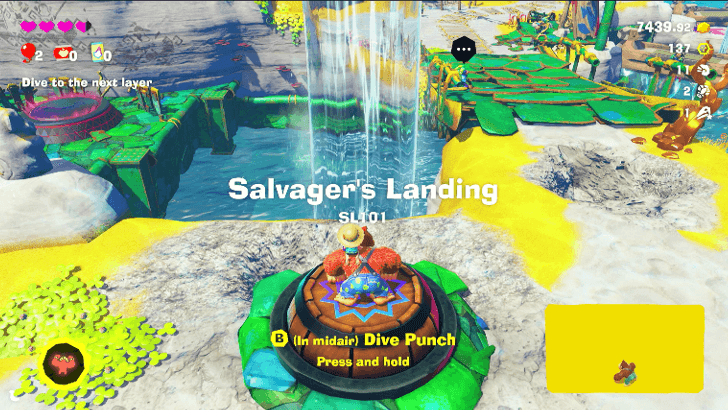
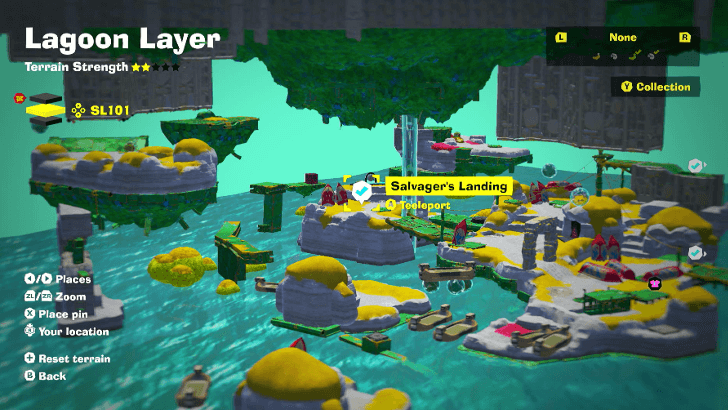
Salvager's Landing Checkpoint (SL 101)
Jump down after destroying the Reservoir Void Stake. |
||
 |
 |
|
|
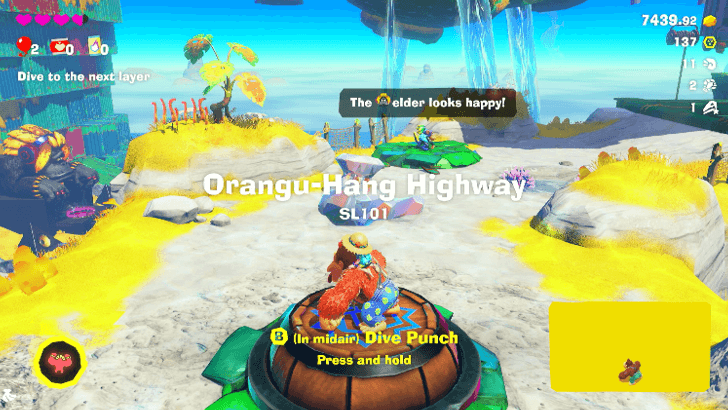
Orangu-Hang Highway Checkpoint (SL 101)
Jump down after destroying the Water Tank Hill Void Stake. |
||
 |
 |
|
|
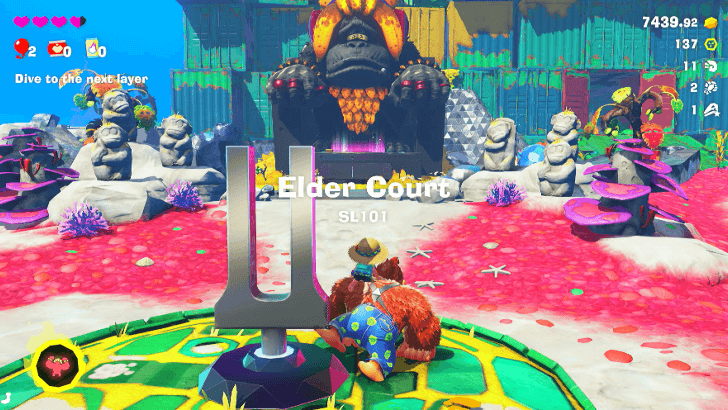
Elder Court Checkpoint (SL 101)
After destroying the concrete tower by Orangu-Hang Highway, drop down on the bridge to the Elder Court. |
||
 |
 |
|
|
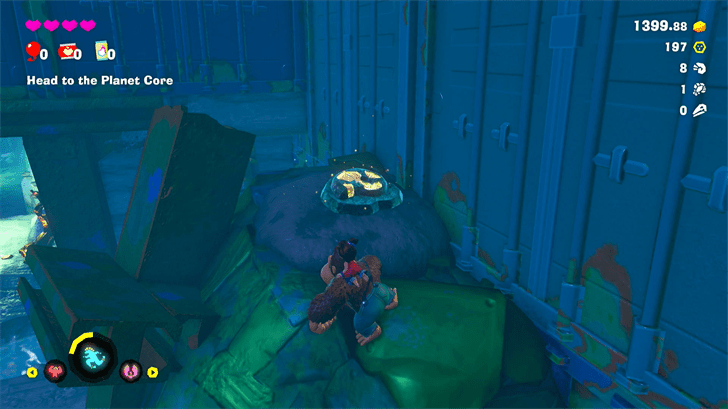
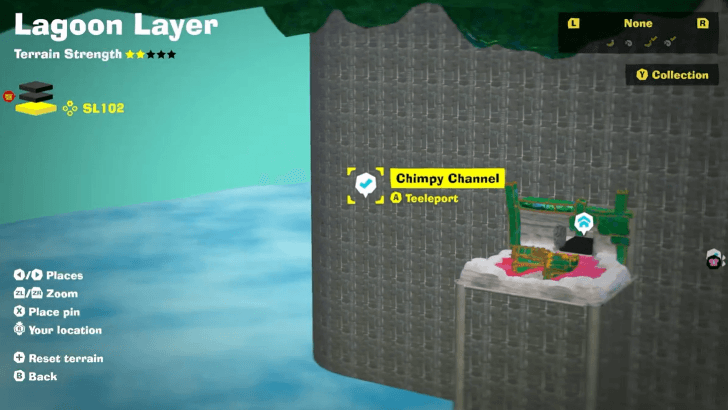
Chimpy Channel Checkpoint (SL 102)
Destroy the Void Stake inside the shipping bin behind the Elder Court. This is where you will land. |
||
 |
 |
|
|
Sinkhole SL102 Checkpoint (SL 102)
Revealed after defeating Peekabruiser and destroying the Void Stake |
||
Warp Gong Location
| Layer | Overworld View | Map Location |
|---|---|---|
| SL 101 |
 |
 |
|
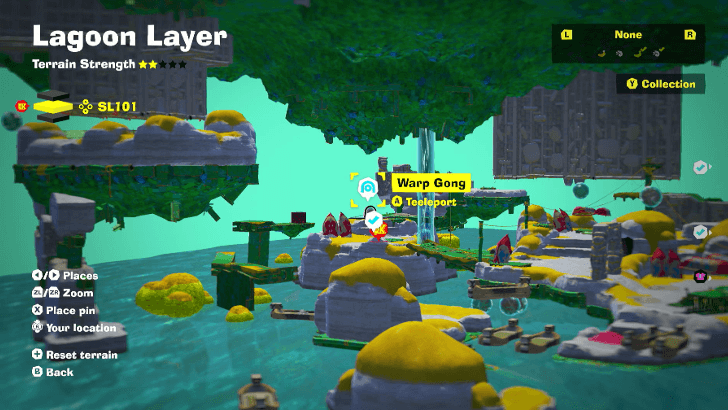
Salvager's Landing Warp Gong
Found behind the Salvager's Landing entrance. |
||
How to Teeleport: Fast Travel Guide
Lagoon Layer Challenges
All Challenge Locations
| Layer | Overworld View | Map Location |
|---|---|---|
| SL 100 |
 |
 |
|
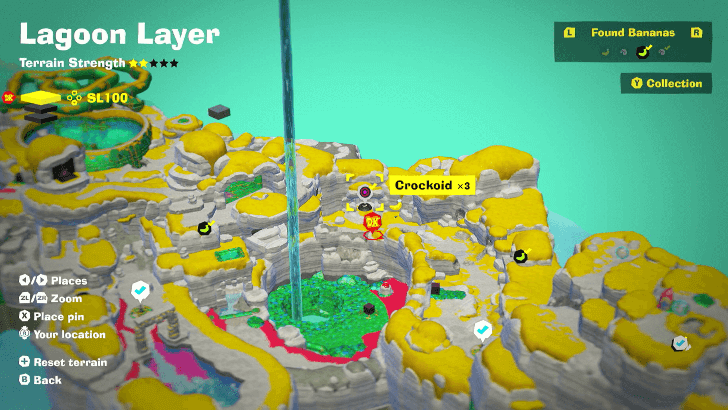
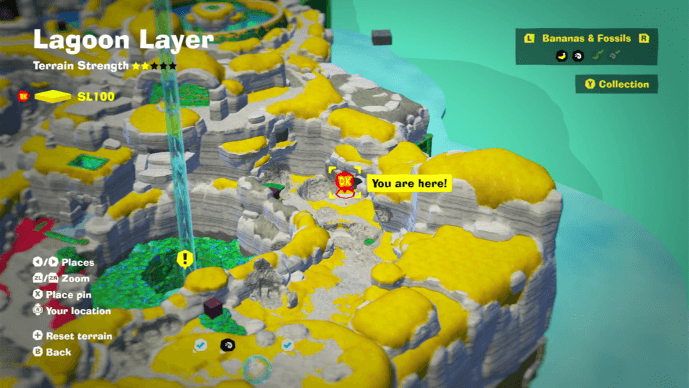
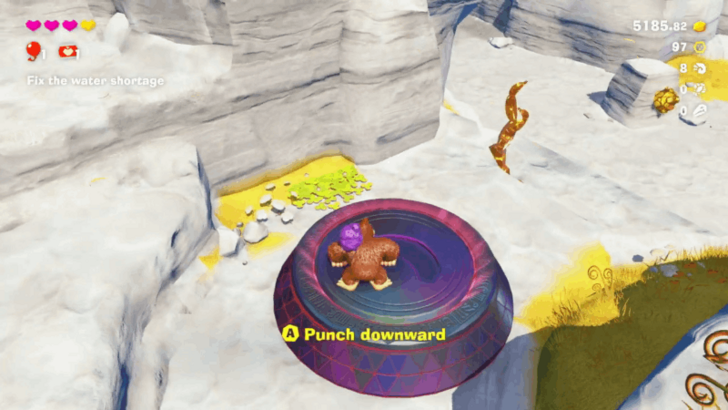
Crockoid x3 Lagoon Layer Battle Challenge 1 Found near the large spinning concrete structure. Punch downward to enter the Challenge Ruin. |
||
| SL 100 |
 |
 |
|
Antickoid x6 Lagoon Layer Battle Challenge 2 |
||
| SL100 |
 |
 |
|
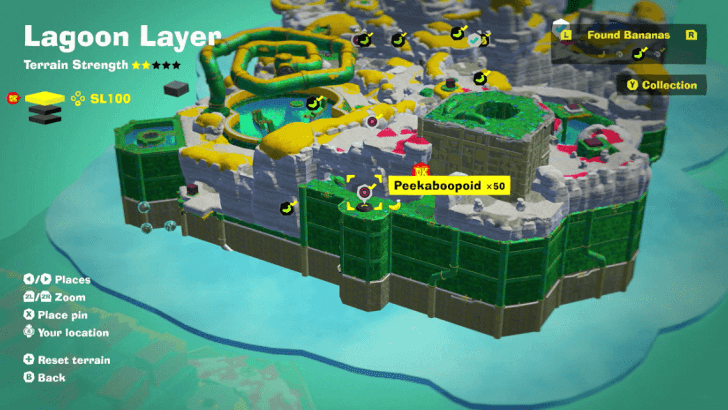
Peekaboopoid x50 Lagoon Layer Battle Challenge 3 Located on a ledge east of the large reservoir. You will have to clear the Void Seals to access this course. |
||
| SL100 |
 |
 |
|
Buzzoid x3 Lagoon Layer Battle Challenge 4 Found behind the rock wall near the large water basin. You will have to clear the Void Seals to access this course. |
||
| SL 101 |
 |
 |
|
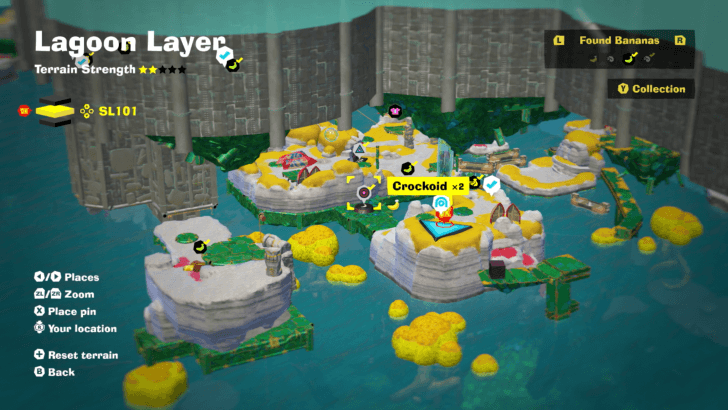
Crockoid x2 Lagoon Layer Battle Challenge 5 Found in Salvager's Landing a few steps north from where you land from the top. Punch downward to access the ruins. |
||
| SL 100 |
 |
 |
|
Hangin' on Roof Road Lagoon Layer Challenge Course 1 Found by the large stone face sculpture. You will have to clear the Void Seals to access this course. |
||
| SL 101 |
 |
 |
|
Thorn-Choked Conveyor Lagoon Layer Challenge Course 2 Found in Salvager's Landing north from where you land from the top. Punch the wall to access the ruins. |
||
| SL 100 |
 |
 |
|
Kong Bananza: Pop Party Lagoon Layer Challenge Course 3 |
||
Bonus Stage Location
| Layer | Overworld View | Map Location |
|---|---|---|
| SL 100 |
 |
|
|
Smashing for Gold
In Reservoir Hills, hand slap the boom rock platform to raise it. Pull a chunk of boom rock and toss it at the concrete wall. |
||
Lagoon Layer Shops
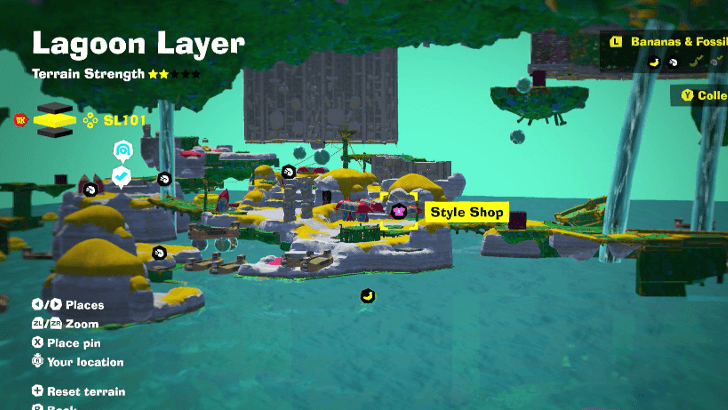
Lagoon Layer Style Shop
Style Shop Locations
| Layer | Overworld View | Map Location |
|---|---|---|
| SL 101 |
 |
 |
|
Salvager's Landing Style Shop
Found in the fishing village near Salvager's Landing. |
||
| SL 102 |
 |
 |
|
Lagoon Layer Sinkhole Style Shop
Appears by the sinkhole after defeating Peekabruiser. |
||
Available Outfits
| Name | Type | Cost | Effect | |||||||
|---|---|---|---|---|---|---|---|---|---|---|
|
|
Neckwear |
|
Increases the chance a treasure chest will appear as you destroy terrain by 10 percent. | |||||||
|
|
Fur Color |
|
Vibrant as a tree full of leaves in early summer. | |||||||
|
|
Fur Color |
|
Cool and calming, like a dip in a tranquil lagoon. | |||||||
|
|
Britches |
|
Increases your swimming speed by 10 percent. | |||||||
|
|
Britches |
|
Increases your swimming speed by 15 percent. | |||||||
|
|
Pauline Outfits |
|
Expands your sonar range during a Bananza by 20 percent. | |||||||
|
|
Pauline Outfits |
|
Expands your sonar range during a Bananza by 20 percent. | |||||||
|
|
Pauline Outfits |
|
Expands your sonar range during a Bananza by 20 percent. | |||||||
Stuff Shop Location
| Layer | Overworld View | Map Location |
|---|---|---|
| SL 101 |
 |
 |
|
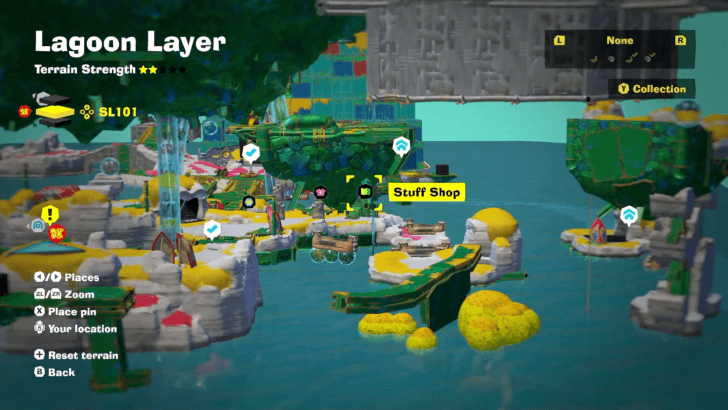
Salvager's Landing Stuff Shop
Post Game Only Found near the Style Shop at the village in Salvager's Landing. |
||
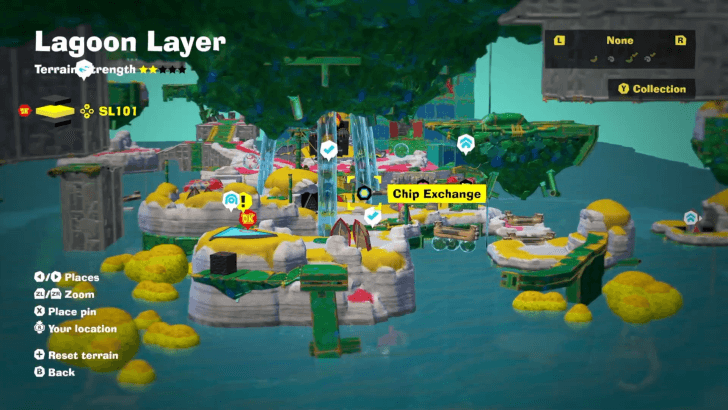
Chip Exchange Location
| Layer | Overworld View | Map Location |
|---|---|---|
| SL 101 |
 |
 |
|
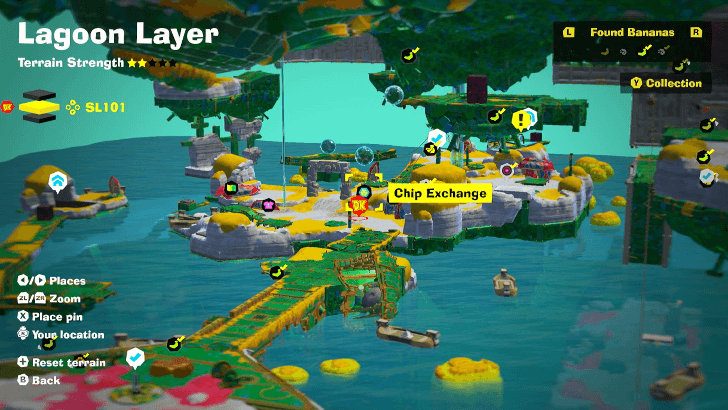
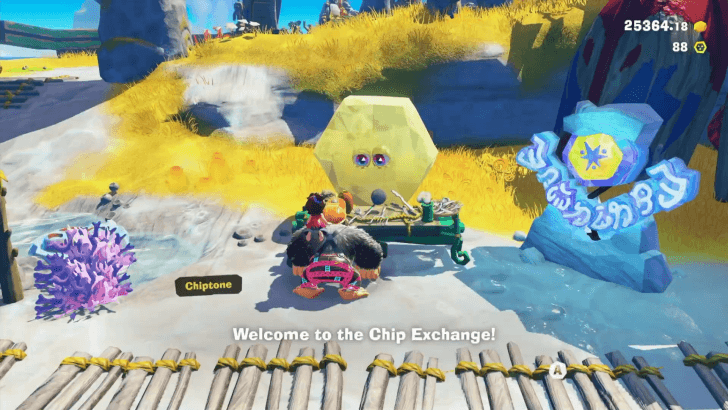
Salvager's Landing Chip Exchange
Post Game Only Found near the Style Shop at the village in Salvager's Landing. |
||
Lagoon Layer Void Stakes
Void Stake Locations
| Layer | Overworld View | Map Location |
|---|---|---|
| SL 100 |
 |
 |
|
Sublayer 100 Void Stake
Defeat the enemy to obtain the Key which unlocks the Void Stake |
||
| SL 100 |
 |
 |
|
Orangu-Hang Highway Void Stake
Climb the green structure and destroy the Void Stake at the top to unlock the passage |
||
| SL 100 |
 |
 |
|
Reservoir Bank Void Stake
Climb up the rightside of the path by Reservoir Bank. Look for a hill with a rock formation forming a circle. Down Punch on the middle to get to the Void Stake. |
||
| SL 101 |
 |
 |
|
Sublayer 101 Void Stake
Found at the end of the shipping crate to the right of the Elder. Use Charge Punch to break concrete walls along the way. |
||
| SL 102 |
 |
 |
|
Sinkhole SL102 Void Stake
Revealed after defeating Peekabruiser |
||
Cranky Kong Location
Near the Large Pipe in SL 100
| Map / Overworld Image | Video Directions |
|---|---|
 |
In SL100, head to the highest central peak near the green pipe cluster.
Lagoon Layer Getaways
All Getaway Locations
| Map Location | Overworld Image |
|---|---|
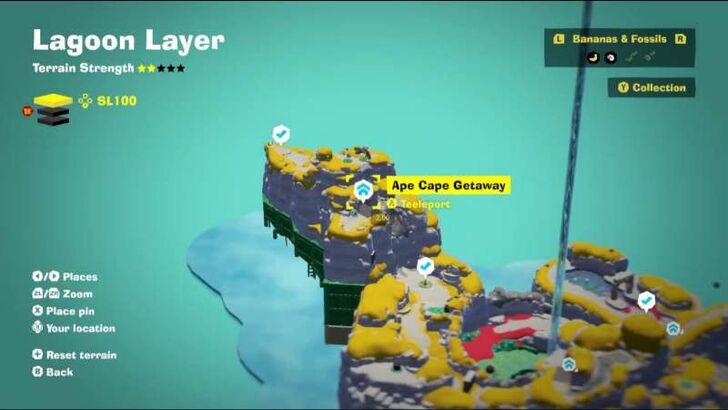 Lagoon Layer (SL 100) |
 Ape Cape Getaway Post Game Only |
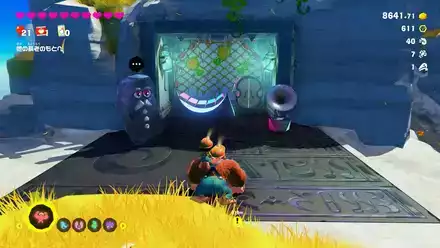
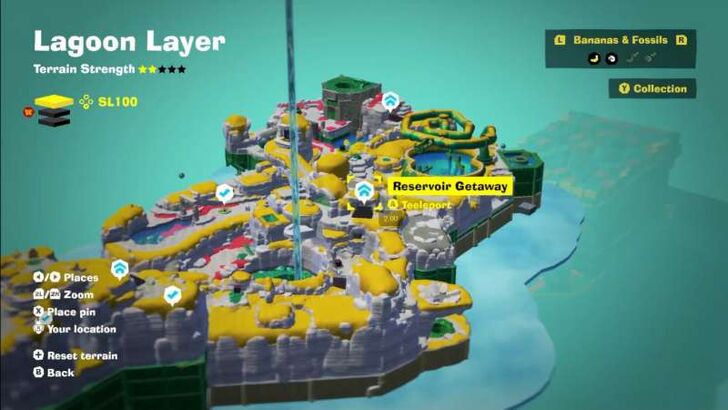 Lagoon Layer (SL 100) |
 Reservoir Getaway Post Game Only |
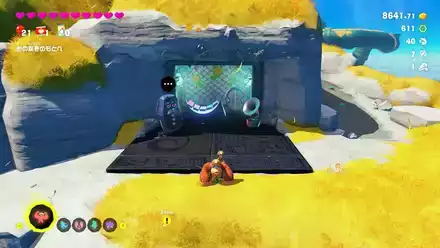
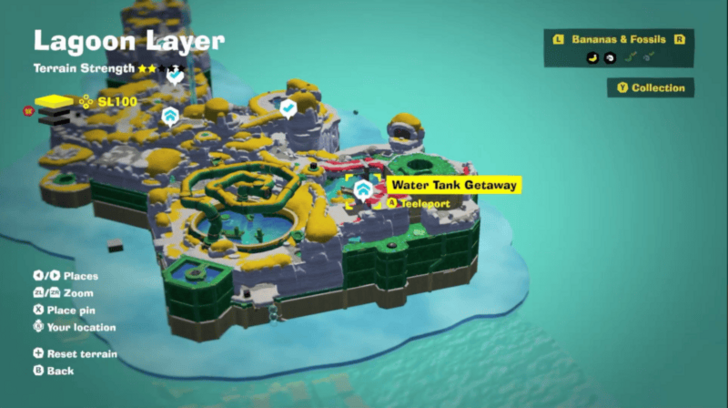 Lagoon Layer (SL 100) |
 Water Tank Getaway Post Game Only |
 Lagoon Layer (SL 100) |
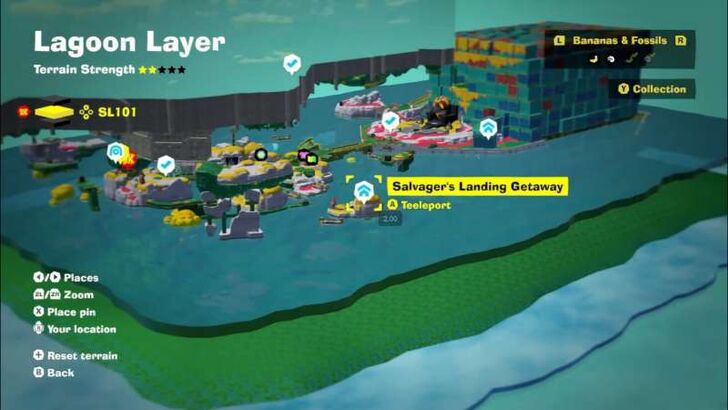
 Salvager's Landing Getaway Post Game Only |
 Lagoon Layer (SL 100) |
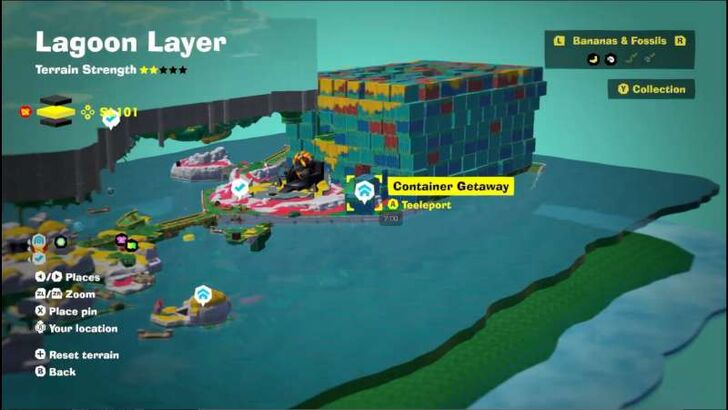
 Container Getaway Post Game Only |
 Lagoon Layer (SL 100) |
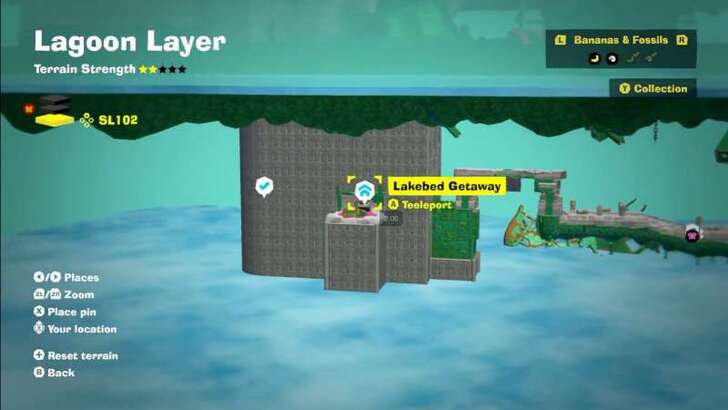
 Lakebed Getaway Post Game Only |
Getaway Guide: All Getaway Locations
Donkey Kong Bananza Related Guides
All Layers
 Ingot Isle
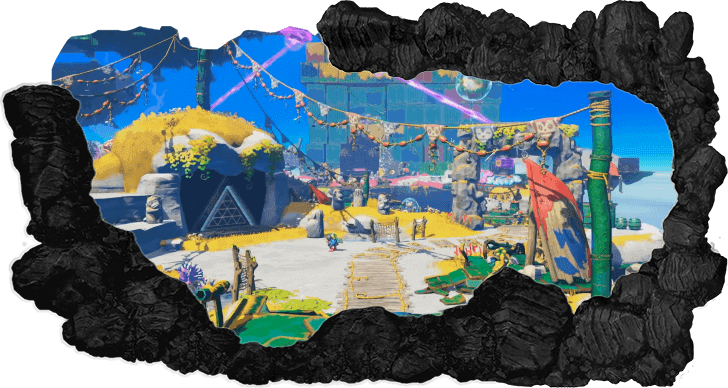 Lagoon Layer
 Hilltop Layer
 Canyon Layer
 The Divide
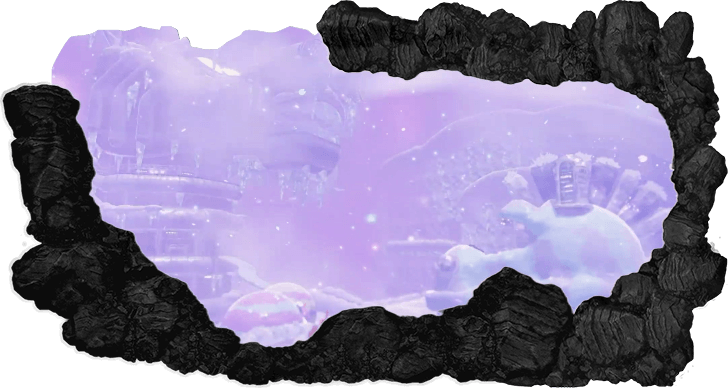 Freezer Layer
 Forest Layer
 The Junction
 Resort Layer
 Tempest Layer
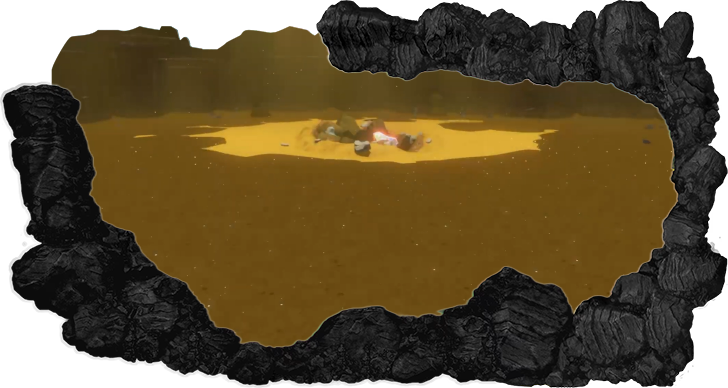 Landfill Layer
 Racing Layer
 Radiance Layer
 Groove Layer
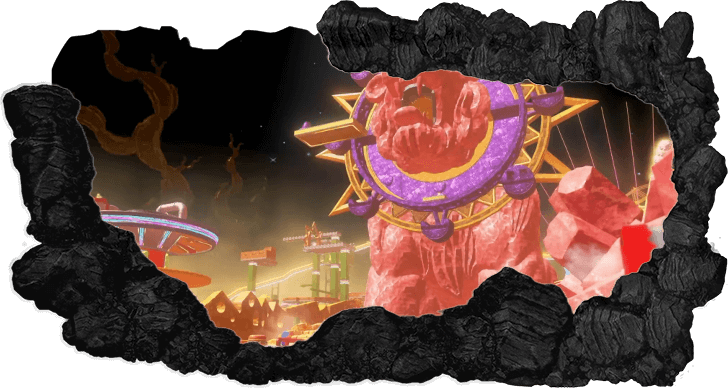 Feast Layer
 Forbidden Layer
 Planet Core
 DK Island
Comment
Author

Lagoon Layer Banana and Fossil Locations (SL 100-102)
Rankings
- We could not find the message board you were looking for.
Gaming News


Popular Games

Genshin Impact Walkthrough & Guides Wiki
Umamusume: Pretty Derby Walkthrough & Guides Wiki
Crimson Desert Walkthrough & Guides Wiki
Monster Hunter Stories 3: Twisted Reflection Walkthrough & Guides Wiki
Honkai: Star Rail Walkthrough & Guides Wiki
Pokemon Pokopia Walkthrough & Guides Wiki
The Seven Deadly Sins: Origin Walkthrough & Guides Wiki
Wuthering Waves Walkthrough & Guides Wiki
Zenless Zone Zero Walkthrough & Guides Wiki
Arknights: Endfield Walkthrough & Guides Wiki


Recommended Games
Fire Emblem Heroes (FEH) Walkthrough & Guides Wiki
Diablo 4: Vessel of Hatred Walkthrough & Guides Wiki
Cyberpunk 2077: Ultimate Edition Walkthrough & Guides Wiki
Yu-Gi-Oh! Master Duel Walkthrough & Guides Wiki
Super Smash Bros. Ultimate Walkthrough & Guides Wiki
Pokemon Brilliant Diamond and Shining Pearl (BDSP) Walkthrough & Guides Wiki
Elden Ring Shadow of the Erdtree Walkthrough & Guides Wiki
Monster Hunter World Walkthrough & Guides Wiki
The Legend of Zelda: Tears of the Kingdom Walkthrough & Guides Wiki
Persona 3 Reload Walkthrough & Guides Wiki


All rights reserved
© Nintendo. Games are property of their respective owners. Nintendo of America Inc.
The copyrights of videos of games used in our content and other intellectual property rights belong to the provider of the game.
The contents we provide on this site were created personally by members of the Game8 editorial department.
We refuse the right to reuse or repost content taken without our permission such as data or images to other sites.