
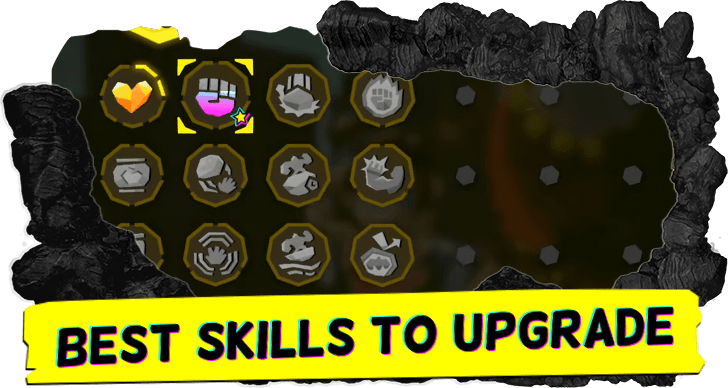
 Best Skills to Upgrade
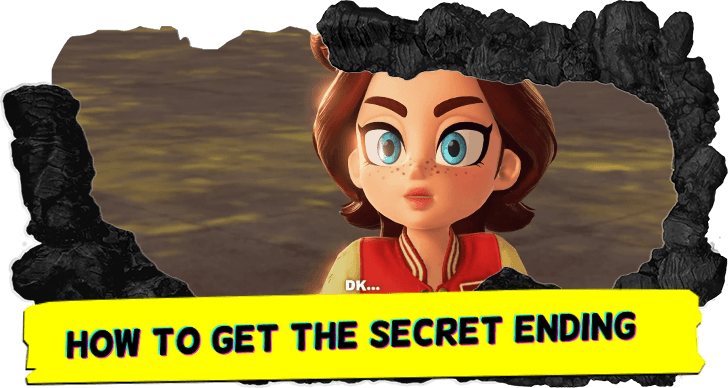 How to Get the Secret Ending
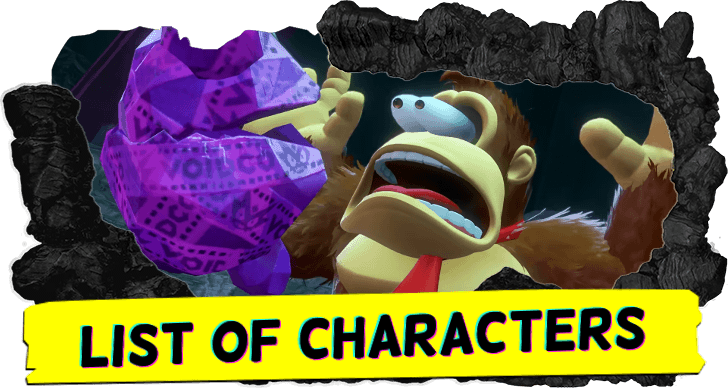 List of Characters
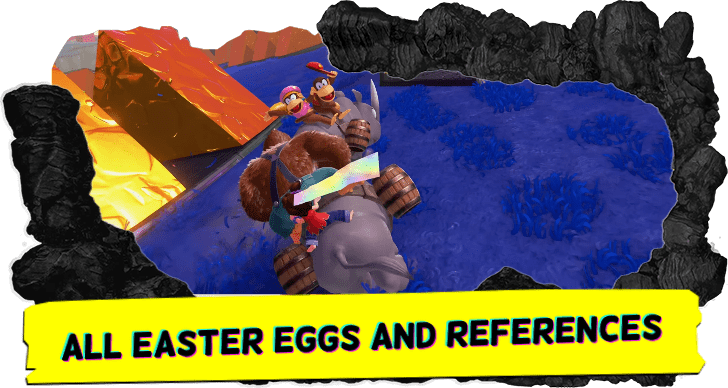 Easter Eggs and References
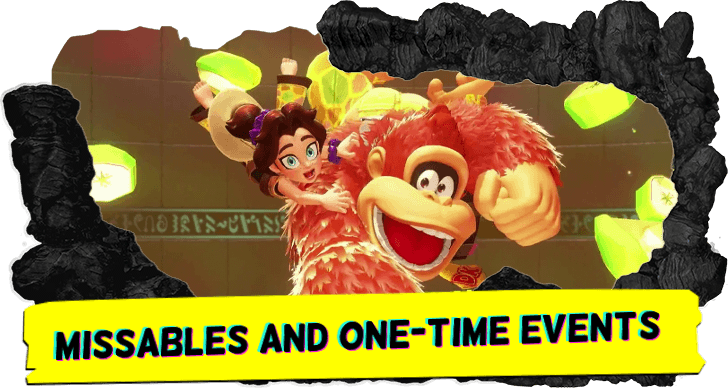 Missables and One-Time Events
 Best Outfits
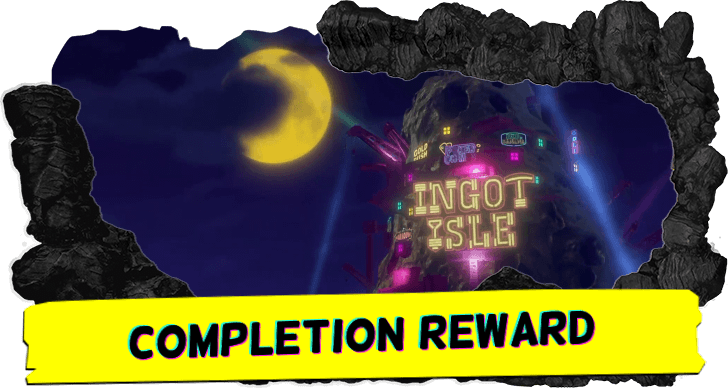 Completion Reward
 DLC Guide
 Banandiumtone Puzzle Guide (DLC)
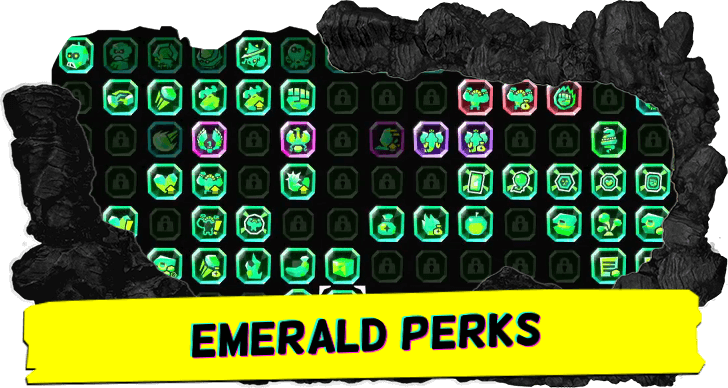 List of Emerald Perks (DLC)
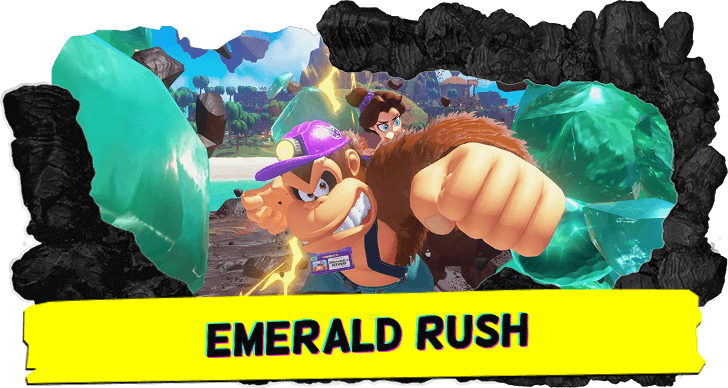 Emerald Rush Guide (DLC)
 All Style Shop Locations
 All Stuff Shop Locations
 Bonus Stage Locations
 All 17 Cranky Kong Locations
 All Quiztone Answers and Locations
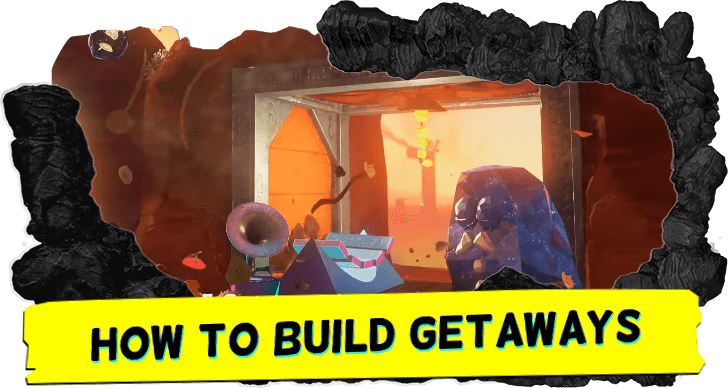 All Getaway Locations
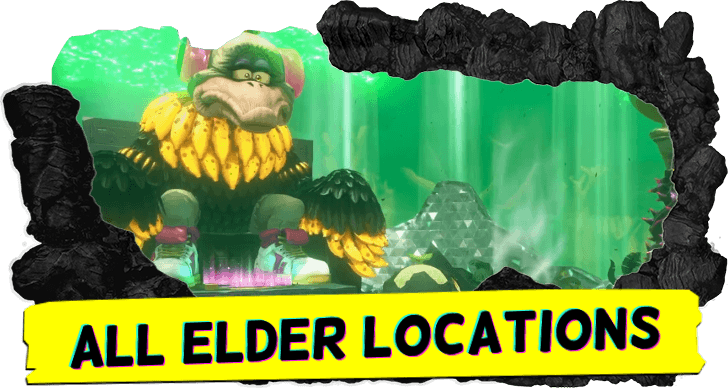 All Elder Locations
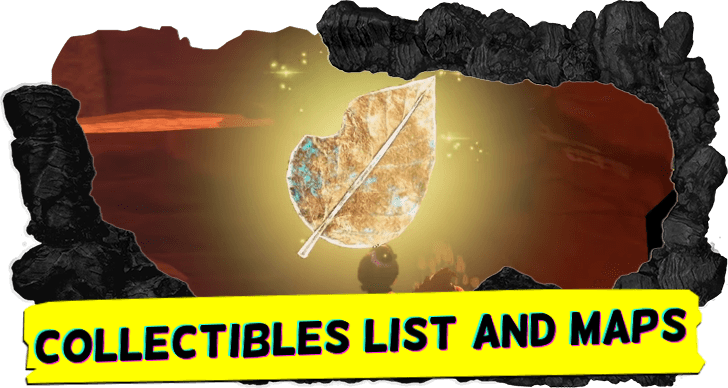 Collectibles List
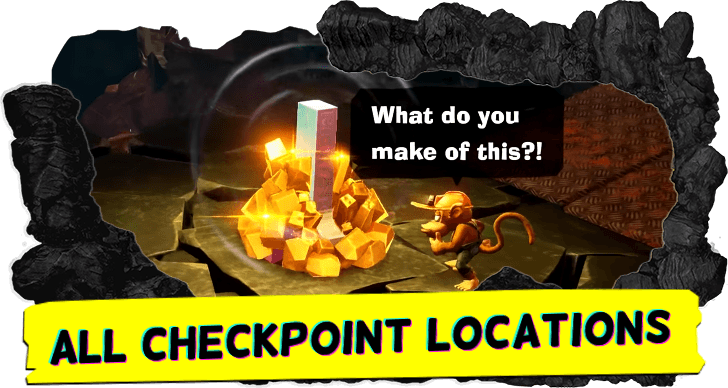 Checkpoints
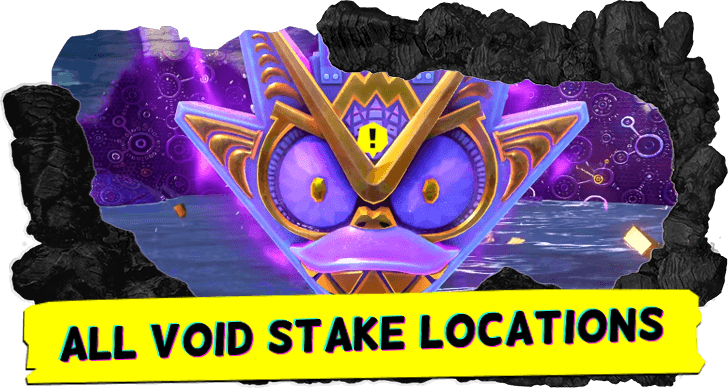 Void Stakes
 Squawk Statues
This survey will take about 1 minute.
Your answers will help us to improve our website.
Donkey Kong Bananza
100% Walkthrough Guide
☽ DK Island and Emerald Rush DLC out now!
☽ Learn how to solve Banandiumtone's Puzzles.
☽ All Collectibles: Banandium Gems and Fossils
☽ Learn How to Skip Layers Entirely!
☽ How to Beat the Final Boss
☽ Post-Game: Rehearsal Halls | Secret Ending
This is a 100% Walkthrough Guide for Donkey Kong Bananza. Read on to learn how to clear all levels and achieve 100% in the game!
List of All Levels
All Level Guides
| All Walkthrough Guides | ||
|---|---|---|
| ⓪ | Ingot Isle | |
| ① | Lagoon Layer | |
| ② | Hilltop Layer | |
| ③ | Canyon Layer | |
| ④ | The Divide | |
| ⑤ | Forest Layer | Freezer Layer |
| ⑥ | The Junction | |
| ⑦ | Resort Layer | |
| ⑧ | Tempest Layer | |
| ⑨ | Landfill Layer | |
| ⑩ | Racing Layer | |
| ⑪ | Radiance Layer | |
| ⑫ | Groove Layer | |
| ⑬ | Feast Layer | |
| ⑭ | Forbidden Layer | |
| ⑮ | Planet Core | |
In Donkey Kong Bananza, you will need to destroy the Void Stakes found in each layer in order to progress the main story of the game. Each layer has its own unique landscape and level design which offer a variety of fun and exciting challenges for the player.
100% Walkthrough Guide
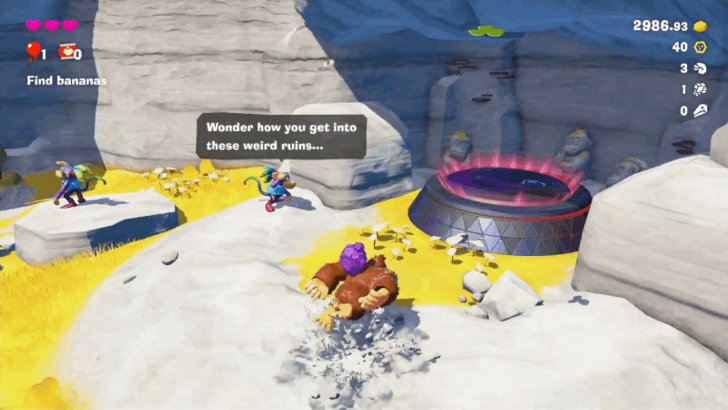
Ingot Isle
Ingot Isle Tutorial
| Step-by-Step Guide | |
|---|---|
| 1 | 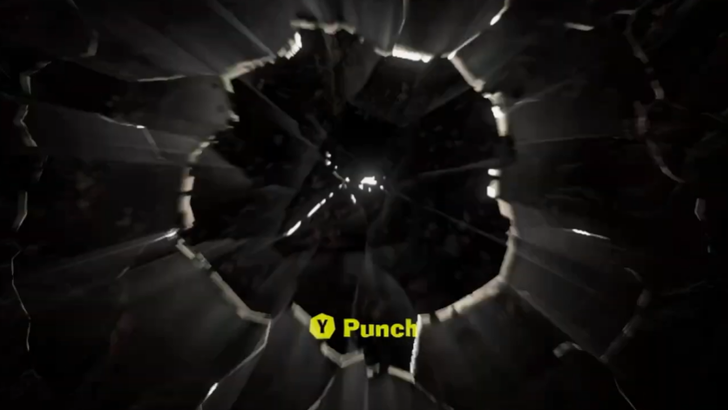 Press Y to punch through the wall. |
| * | Y is the default button for Punching. Punch through dirt and terrain to uncover gold and collectibles hidden in the walls.
▶︎ Controls and Movement |
| 2 | 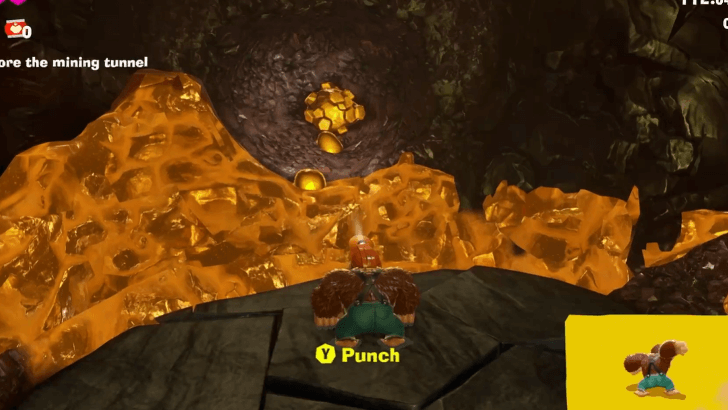 Punch the Banandium Gem to consume it, and punch the wall beyond to progress. |
| 3 |  In the next area, you will learn that you can Jump with A. When you are ready to continue, proceed through the tunnel. |
| 4 | 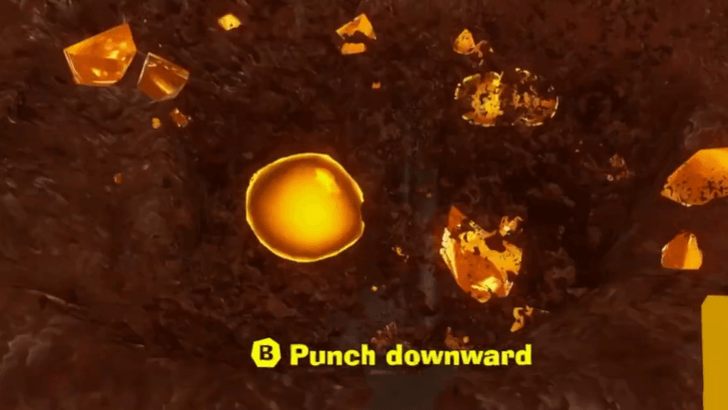 Collect the Banandium Gem at the end of the mining belt then punch the ground below. Continue punching downwards until you fall to an opening. |
| 5 | 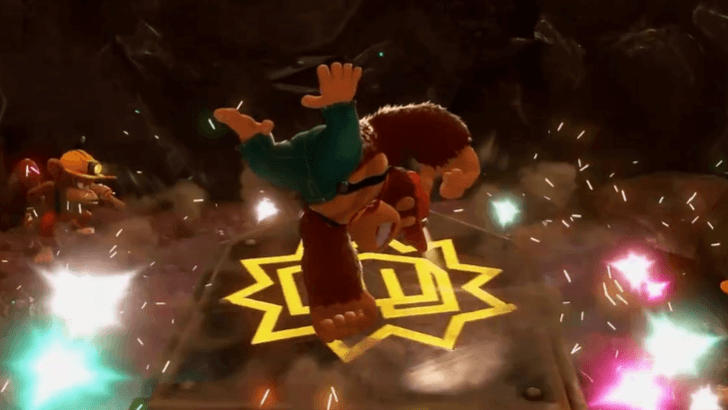 Climb onto the pressure plate device and perform a Dive Punch. To Dive Punch, jump with A then press B while mid-air. This will cause the wall in front to collapse. |
| 6 | Use R to perform a Hand Slap and collect all the fallen gold. You can also use R to momentarily reveal hidden items within a terrain. Take note that gold may disappear if you don't pick it up after a period of time. |
| 7 | 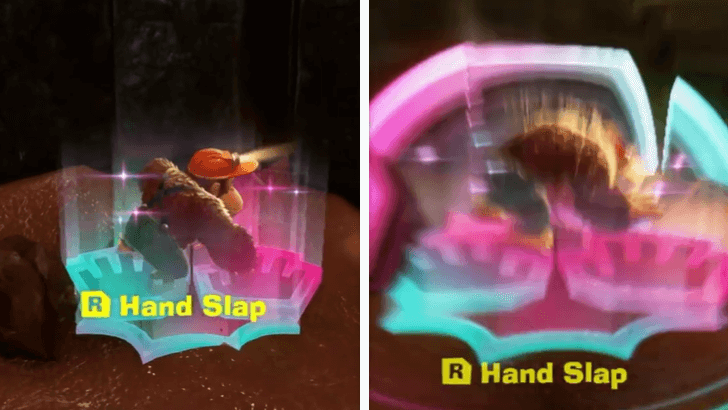 Perform a Hand Slap near the colorful handprints on the ground. This will cause platforms to rise, and allow you to reach a Checkpoint. Checkpoints are activated by punching them. ▶︎ All Checkpoint Locations |
| 8 | 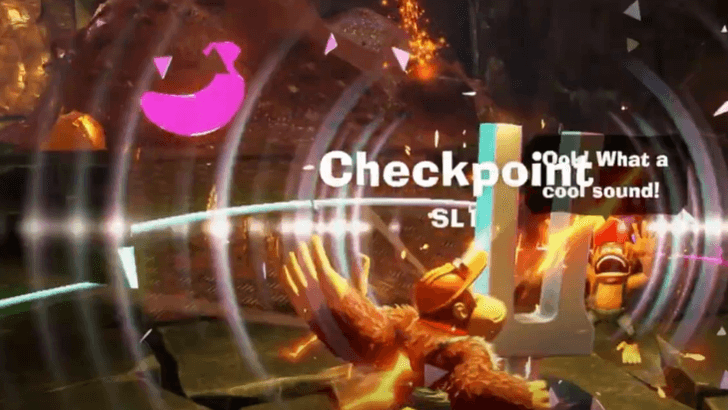 Use the Hand Slap to find the Banandium Gem hidden in a pile of mud. Punching checkpoints will also reveal hidden items. |
| 9 | 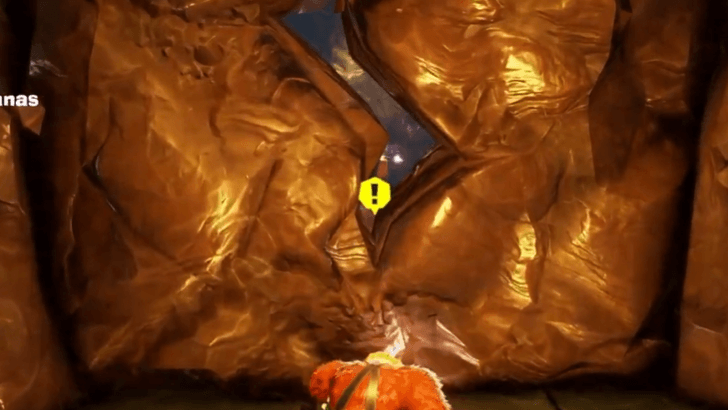 Break the wall to access the next area. Perform a Dive Punch on the pressure plate across the mining belt to continue ahead. |
| 10 |  Defeat the monsters in the cave by punching them. You can also pick up the debris they drop by pressing ZR and launching them to cause explosive damage. ▶︎ How to Throw Chunks |
| 11 |  Go up the gold tunnel until you reach the Banandium Gem at the top. |
Ingot Isle Cave-In Tutorial
| Step-by-Step Guide | |
|---|---|
| 1 | 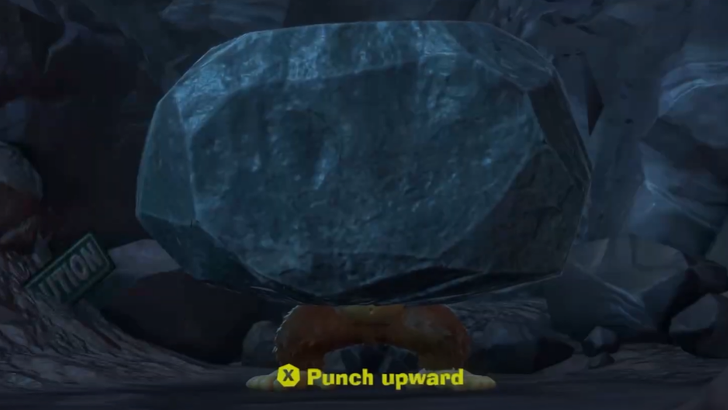 Press X to punch upwards. |
| 2 |  Go forward and punch through the dirt. Use the gold pieces and speech bubbles from the trapped monkeys to guide your way out. |
| 3 |  Punch the cracked wall several times to break it. Talk to the monkey here before dropping down. |
| * | Feel free to explore this area. Pay attention to the dialogue boxes of the monkeys, since they may lead you to Banandium Chips or gold. Turnips are also available in this area, which you can pull out for gold. Crates can be destroyed to give you gold or items such as Balloons. |
| 4 |  When you're ready, go into the Barrel Cannon on the platform surrounded by monkeys. Press A to launch yourself upwards. |
| 5 | 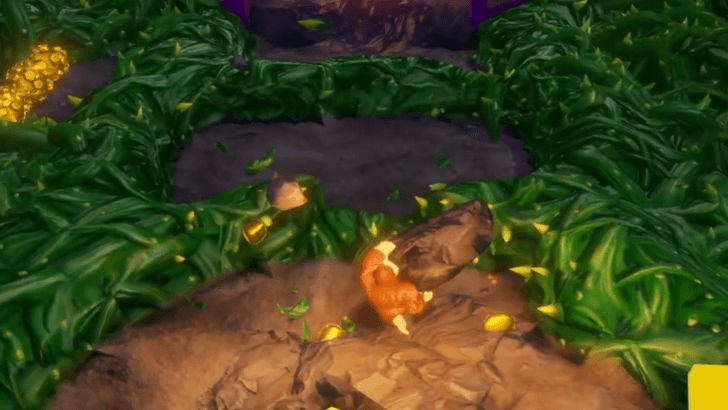 Press ZR to tear off a chunk of rock then swing it at the thorns blocking your way. Head up using the Barrel Cannon once the path is cleared. ▶︎ How to Tear Off Chunks |
| 6 | Talk to the monkey in front of the purple-covered Barrel Cannon. Then, go to the right through the tunnel to investigate what landed in the crater. Keep in mind that you will not be able to break any Voided terrain. |
| 7 | 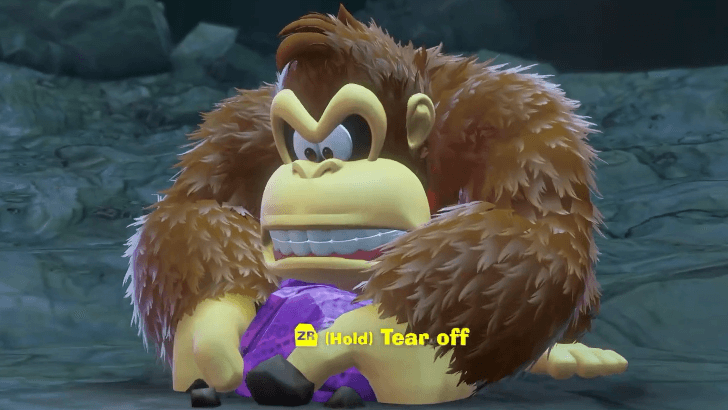 Drop down and hold down ZR to free the talking rock. |
| 8 | 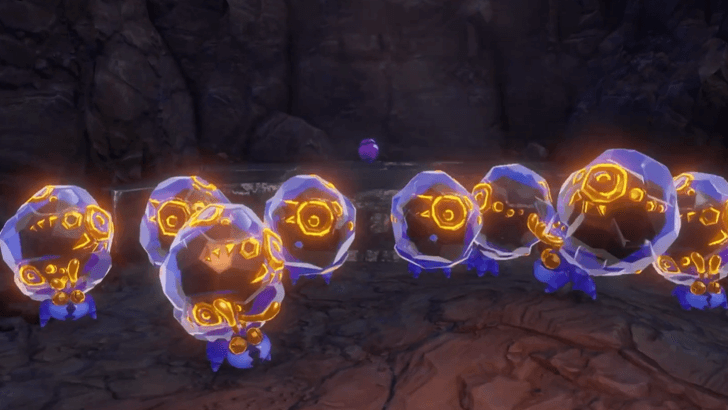 Follow the talking rock into a tunnel. Tear off a chunk of terrain, and hit the monsters trapping it in the back to quickly defeat them. |
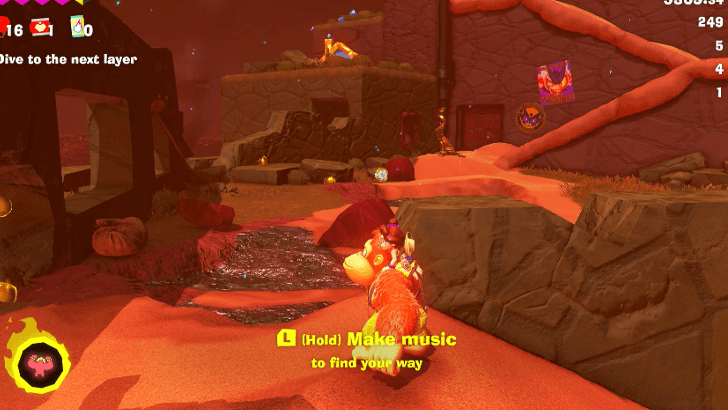
| 9 | 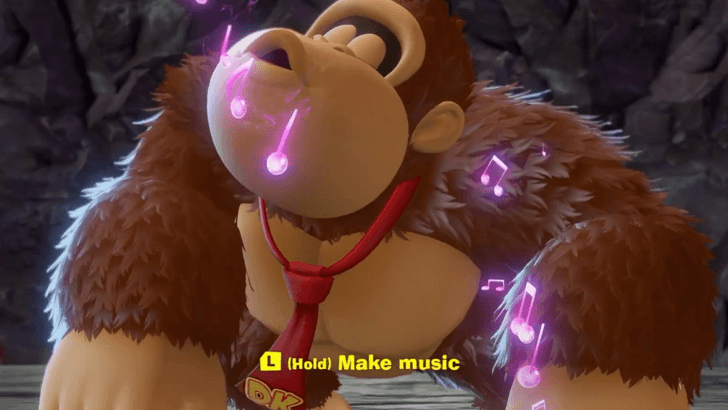 Hold the L shoulder button to make music and calm the talking rock. ▶︎ How to Whistle and Make Music |
| * | Whenever you get lost, hold L to create a musical trail to guide you to your next objective. |
| 10 | 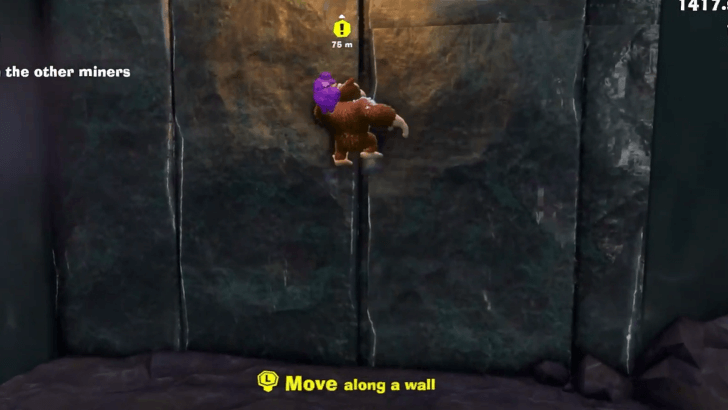 Exit the cave and head straight ahead. Climb up the wall using the Left stick. |
| 11 | 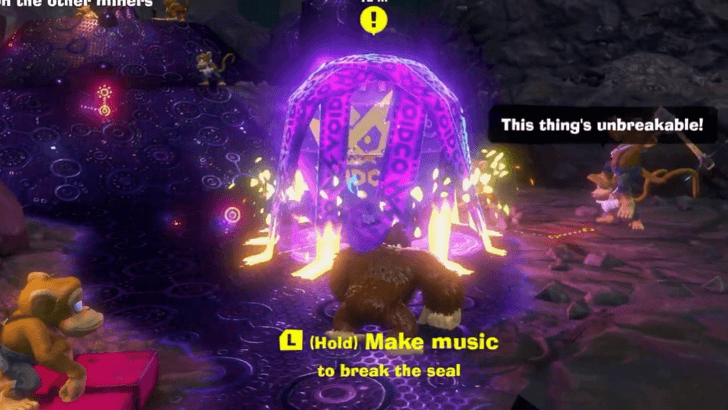 Hold down L to break the seal on the mysterious gizmo. Once the seal is broken, punch the gizmo to break it and restore the terrain. |
| 12 | 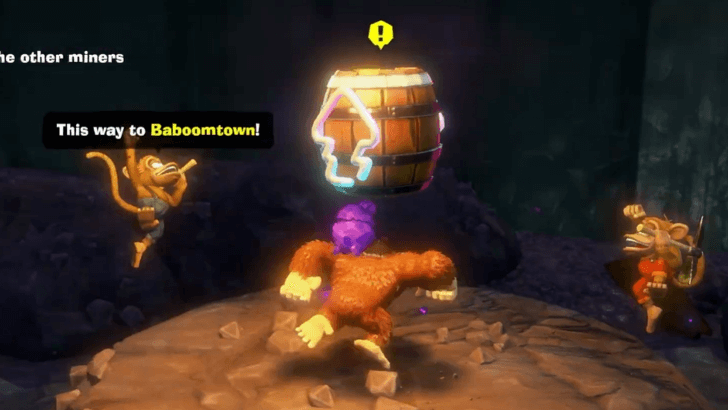 Jump into the Barrel Cannon to reach the Baboomtown Entrance. |
| 13 | 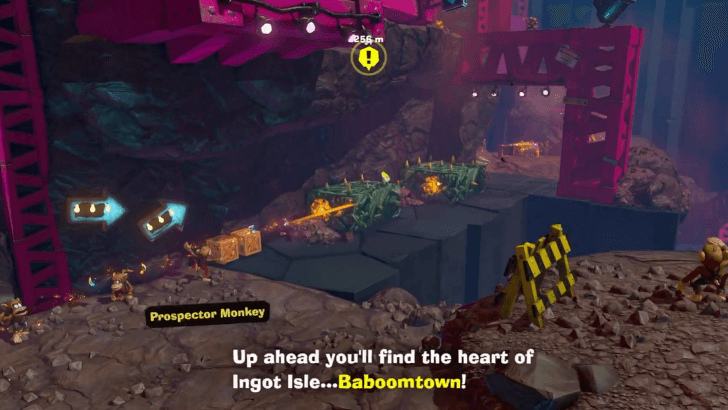 Make your way to Baboomtown Square by going through the path on the right. Tear off a chunk of terrain, and hit the thorny moving blocks in your way. |
| 14 | There will be enemies on the path that burrow in the ground. Defeat them by using Dive Punch when they're underground or by throwing a chunk of terrain at them when they're above ground. |
| 15 | 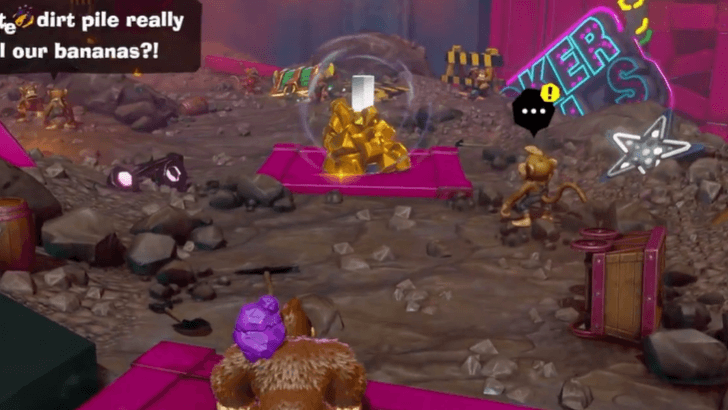 Talk to the monkey with a yellow exclamation point near the Baboomtown Square checkpoint. |
| * | 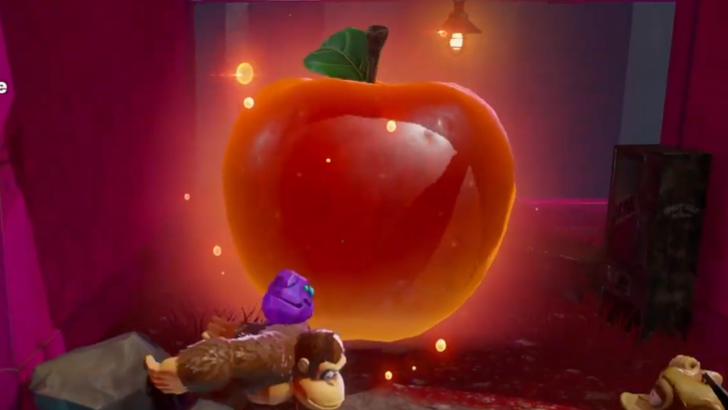 If you need healing, go to the right of the checkpoint to find a large apple. Eating apples restores health. ▶︎ How to Heal and Increase Max Health |
| 16 | 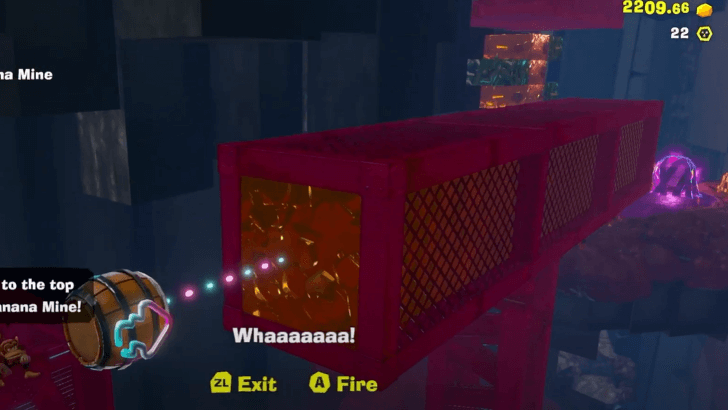 Ride the Barrel Cannon ahead to reach the Banana Mine Climb. Destroy the Terravoider gizmo found here, then use another Barrel Cannon to go up. Make sure to only fire when the gold sections are aligned in the middle. |
| 17 | Tear off a chunk of terrain, and use it as a weapon to clear the thorns and the Molevoloid enemies. Head to the top of the Banana Mine. |
| * | 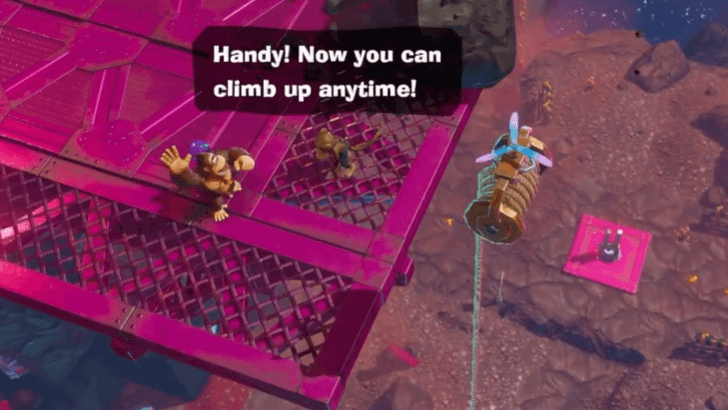 A rope is available along the way, which you can activate to create a shortcut in case you fall to the bottom. |
| 18 | 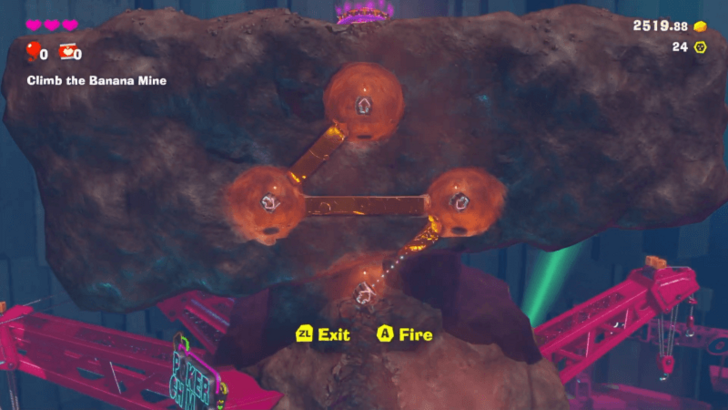 Jump into the Barrel Cannon and launch yourself up. For the second Barrel Cannon, wait until it points diagonally to the right before pressing A. Make sure to only fire the Barrel Cannons when they point in the direction you need to go. |
| 19 | 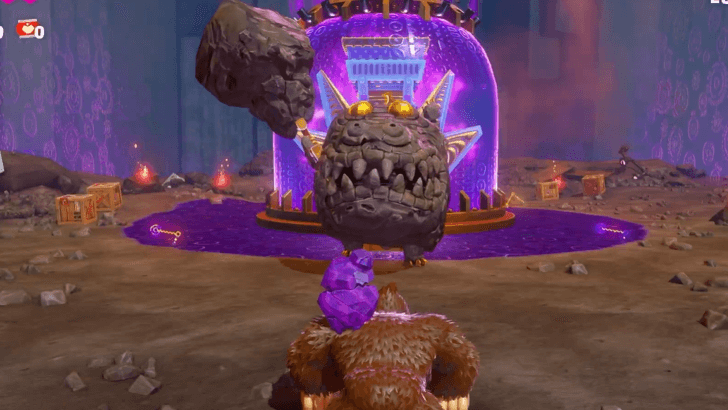 Defeat the Rock Monster guarding the Void Stake by destroying its rock armor then punching the gold creature underneath. |
| 20 | 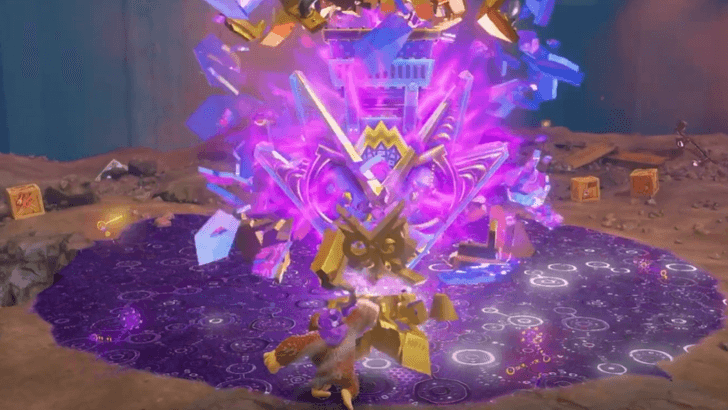 After its defeat, you will obtain a Void Key which is used to break the seal. Punch the Void Key then destroy the Void Stake. |
| 21 |  Dive into the hole to go to the next layer. |
Lagoon Layer
Ape Cape Sublayer 100
| Step-by-Step Guide | |
|---|---|
| 1 | 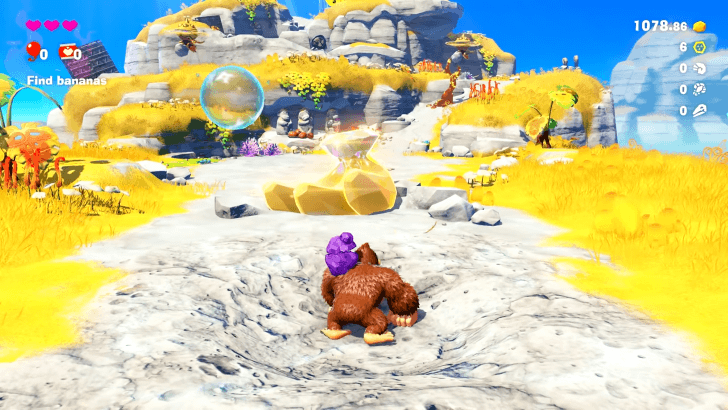 Punch the Banandium Gems in front of you. You may be able to earn a Skill Point, which can be used to upgrade or unlock skills. Access the Skill menu by pressing up on the keypad. ▶︎ Skills List and Best Skills to Upgrade First |
| 2 | 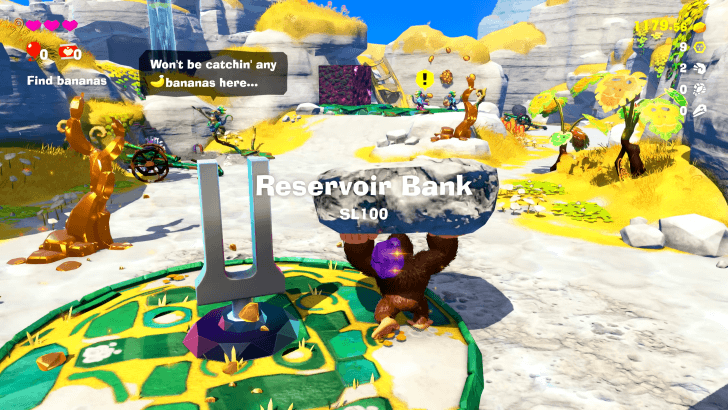 Follow the path forward until you reach the Reservoir Bank area. Salvager Monkeys you encounter along the way can help you find where to go. |
| * | 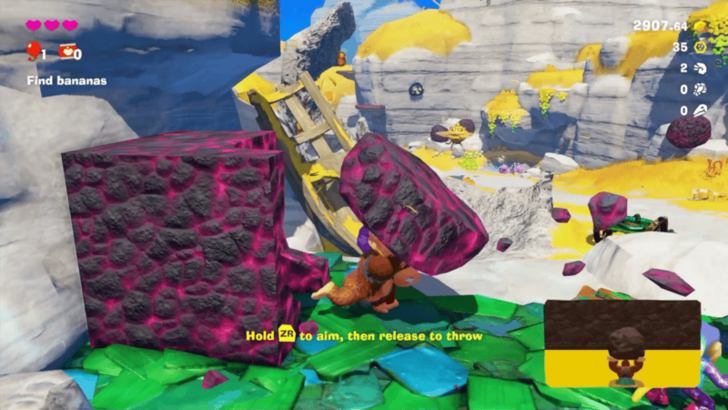 At the Reservoir Bank, you will see a sparking, black and magenta cube next to a pair of monkeys. This is a Boom Rock—an explosive material. Tear off a chunk to get a Boom Bomb, which you can throw to destroy extra sturdy terrain. The cube will regenerate whenever you tear off a chunk, so feel free to test the Boom Bomb out before moving on. |
| 3 | 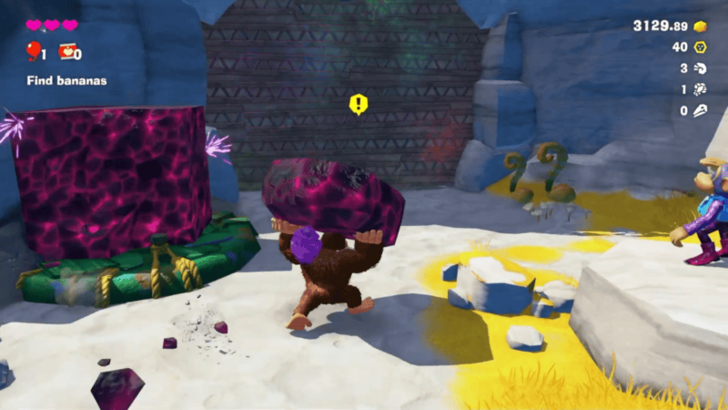 Keep following the path until you're faced with a large concrete wall and a Boom Rock cube in front of it. Tear off a chunk from the Boom Rock, and throw it onto the concrete wall to open up a tunnel. ▶︎ How to Break Concrete |
| * |  A battle challenge is available in this area. On the right side of the path, there is a glowing panel with a banana engraved on it. Punch down the platform to start the Lagoon Layer Battle Challenge 1. ▶︎ Crockoid x 3 Puzzle Guide |
| 4 |  Tear off a chunk from the Boom Rock and throw it at the rotating wall inside the tunnel. A fossil is attached to one of the wall, and can be obtained by destroying it. |
| 5 |  Go through the opening you made, and continue through the passageway. Pass through the small waterfall to exit the tunnel. A monkey can be found near this exit, and he'll tell you about the Void Stake blocking the water flow. |
| 6 |  Go to the Void Stake, defeating enemies along the way. A Crockoid with a concrete shell guards the stake. Tear off a piece of the Boom Rock nearby, and throw it at the Crockoid to destroy its outer shell. Once it's vulnerable, punch it to defeat it. |
| 7 |  Defeating the Crockoid will release the key and place it in the slot in front of the Void Stake. Punch the key to destroy the container protecting the stake. |
| 8 |  Punch the Void Stake to open up the path to Sublayer 101. Once you're ready, jump down the opening. |
Lagoon Sublayer 101
| Step-by-Step Guide | |
|---|---|
| 1 | 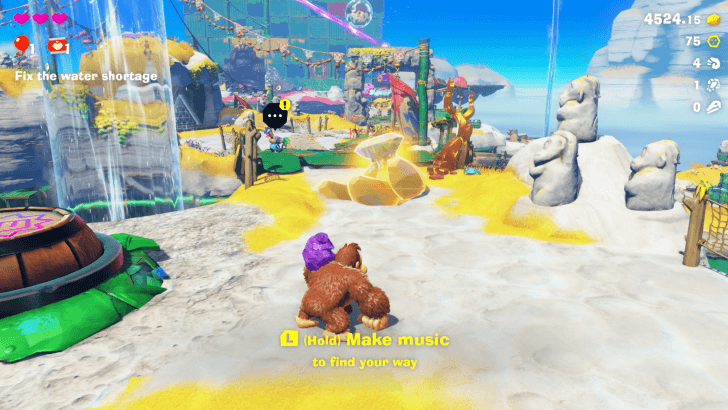 Punch the Banandium Gems dropped by the Void Stake before proceeding. |
| 2 | 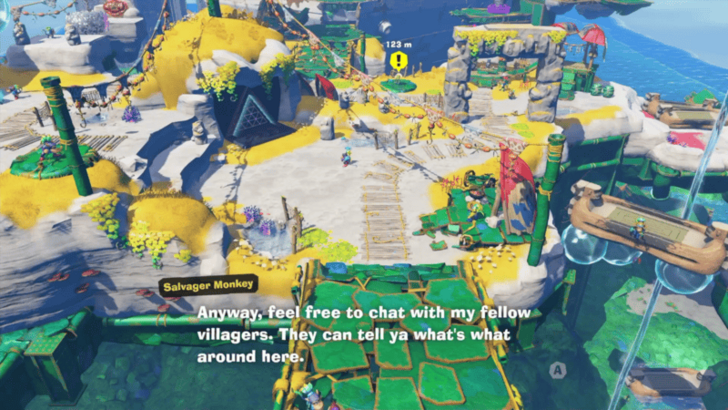 Follow the pathway. Along this path, you can find the panel to the Lagoon Layer Challenge Course 2 and a shop selling clothes. |
| 3 | 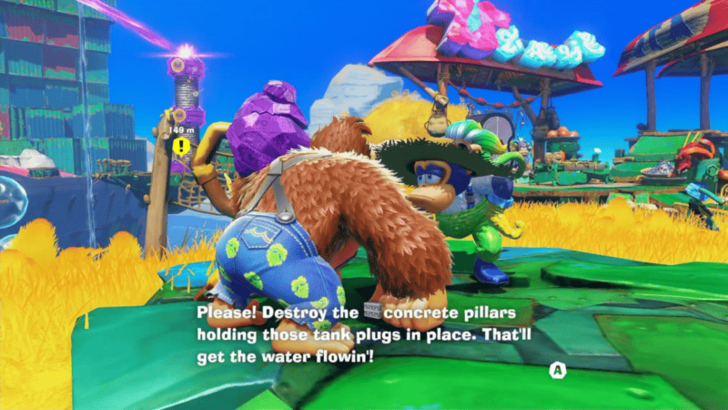 Talk to the monkey near the shop, and he'll tell you about the concrete pillars that are plugging up the water storage tank. |
| 4 | 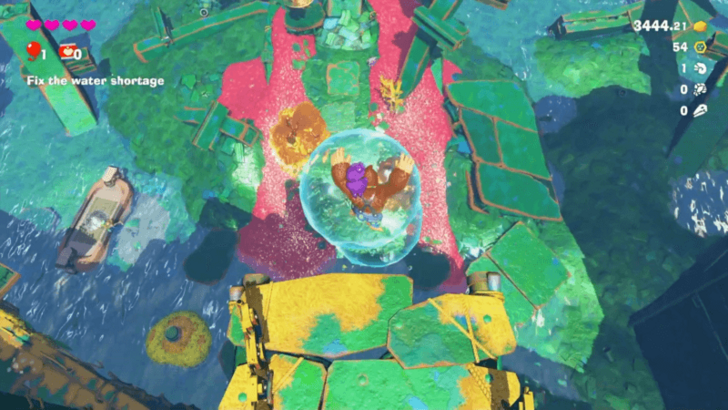 Jump off the platform which has gold trapped in bubbles. |
| 5 | 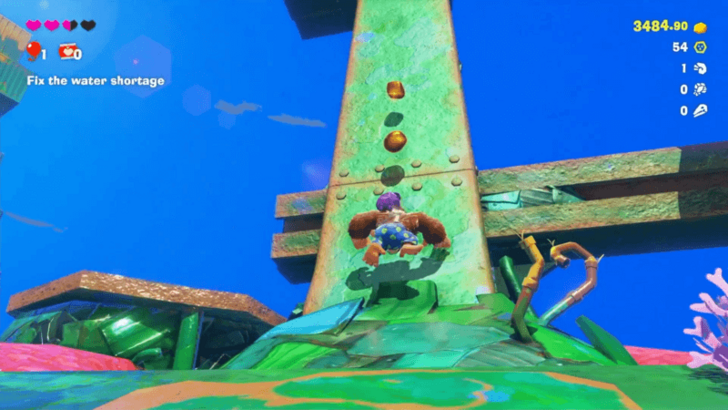 Throw chunks at the enemies before climbing up the metal beam. Follow the gold pieces towards the first concrete pillar. |
| 6 | 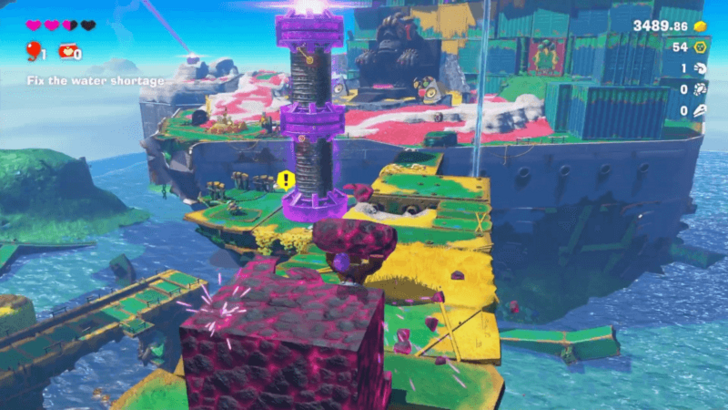 At the top of the beam, you will find a block of Boom Rock. Tear off a chunk of Boom Rock, and throw it at the concrete pillar to destroy it. This should raise the water level, allowing you to reach new areas. |
| 7 |  Talk to the monkey nearby, and he'll direct you to another monkey who can help you reach the next concrete pillar. Jump down to the water, and head to that monkey on the island. |
| 8 | Defeat the enemies near the monkey, and they'll drop Boom Rocks. Pick one up, and throw it at the moving concrete wall to help clear your way. Then, start climbing up the metal. |
| 9 | 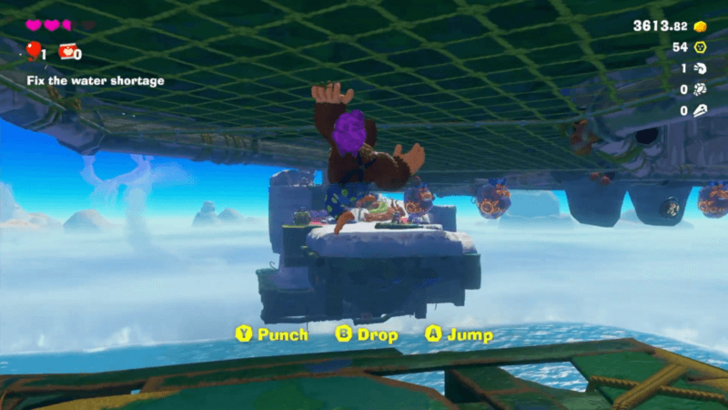 Jump up towards the overhang in order to grab the mesh, and traverse through this inverted pathway. Punch the enemies along the way before they can attack you. |
| 10 | 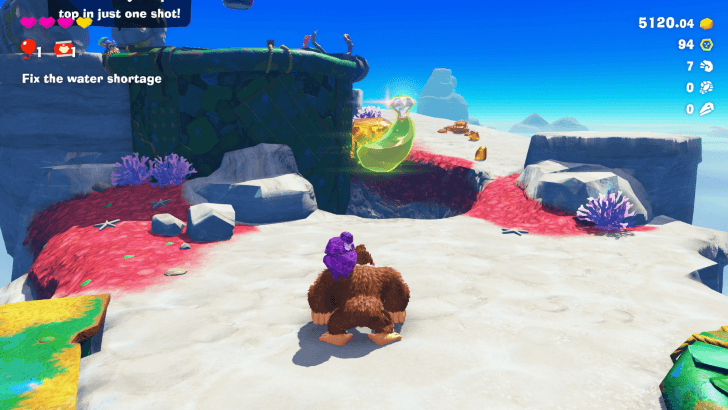 At the end of the mesh path, drop down and continue on foot. |
| 11 |  Jump into the Barrel Cannon at the end of the path and you will be launched back to Sublayer 100. |
Lagoon Sublayer 100 Part 2
| Step-by-Step Guide | |
|---|---|
| 1 |  Swim forward and follow the path. A block of Boom Rock can be found along the way to help you get through the moving concrete walls. However, you can also go around them. |
| 2 | 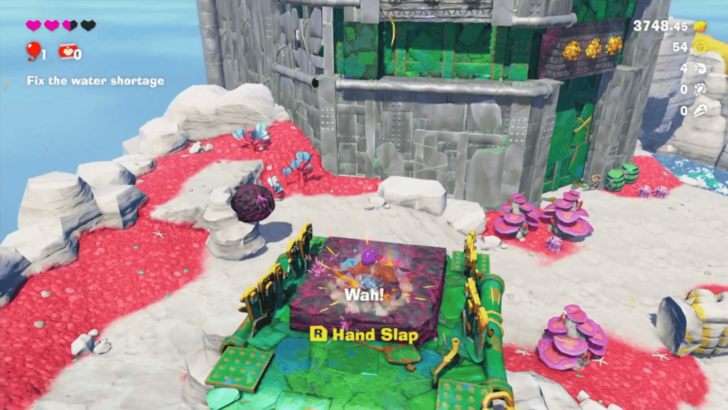 Head to the slab of Boom Rock with a symbol of hands on it that's on a metal platform. Press the R shoulder button to perform a Hand Slap, which will raise this Boom Rock platform. |
| 3 | Tear off a chunk of the Boom Rock, and aim them at the concrete walls to clear the pathway. |
| 4 | 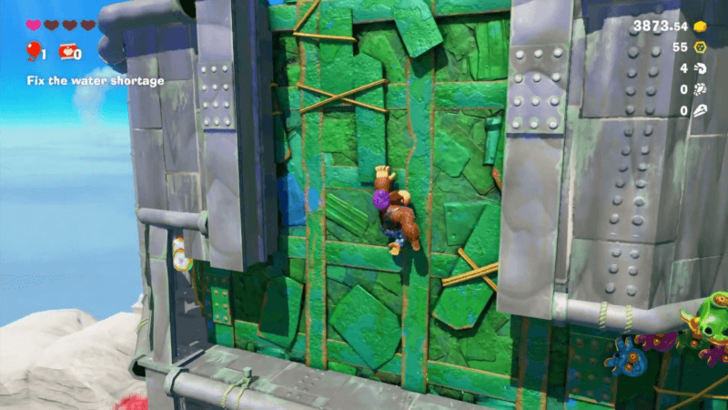 Climb up the green metal path. Enemies will be lying in wait as you climb, so try to avoid them or use Hand Slap to get rid of them. |
| 5 |  Punch the Void Stake at the top of the path to open up the way leading back to Sublayer 101. Jump down the hole to proceed to Orangu-Hang Highway. |
Orangu-Hang Highway Sublayer 101
| Step-by-Step Guide | |
|---|---|
| 1 | Talk to the monkey near where you landed. He will point you to the next pillar you have to destroy. |
| * |  Punch the rope before jumping onto the inverted mesh pathway. This will allow you to climb back up in case you fall. |
| 2 | Once you're ready, jump to grab onto the mesh, and make your way across. Be wary of the enemy will be lurking in the overhang. |
| 3 | 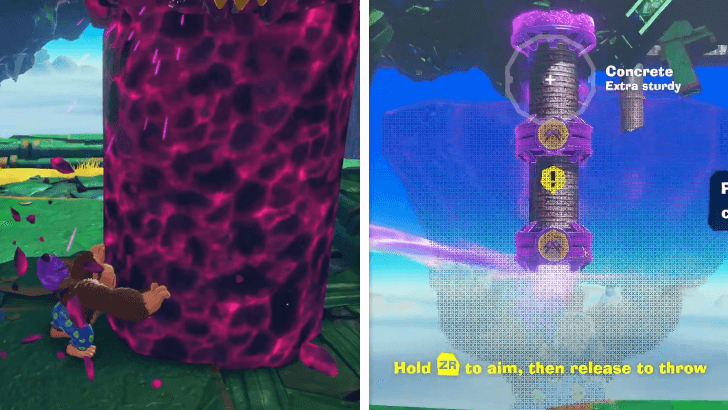 Drop down at the end of Orangu-Hang Highway. There will be an enemy on a tall slab of Boom Rock. You can avoid this enemy, and just tear off a chunk of Boom Rock once it surfaces, or you can defeat it by going on top of it and using Dive Punch. |
| 4 | Throw the Boom Bomb towards the concrete pillar hanging in the distance to raise the water level. |
Kong Elder's Court Sublayer 101
| Step-by-Step Guide | |
|---|---|
| 1 |  Jump down to the lower platform, and cross the bridge towards the Kong Elder. To talk to the elder, head to the platform with the microphone, and press A. |
| 2 | You will be asked to obtain the Ancient Record for the Kong Elder. However, the water level isn't high enough for you to reach it. |
| 3 | Head towards end of the path overlooking the Ancient Record to find the final concrete pillar. |
| 4 | 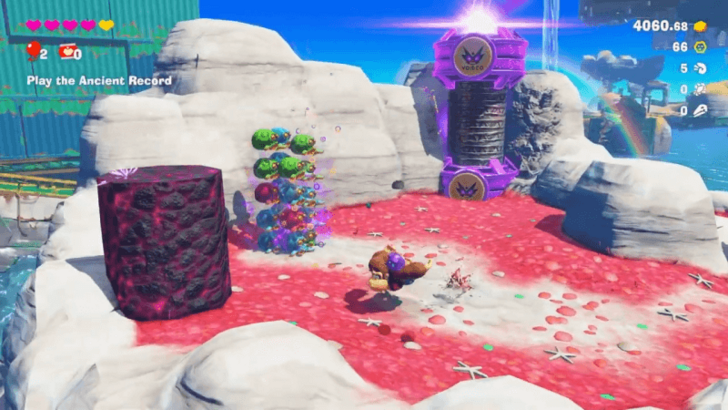 Two of the Boom Rocks near the concrete pillar are actually enemies in disguise. Defeat them, then tear off a chunk from the real Boom Rock and throw it at the concrete pillar. |
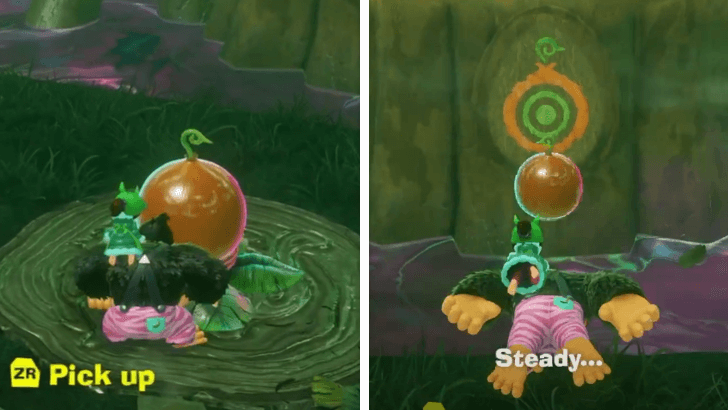
| 4 |  The bridge towards the Ancient Record should now be restored. Cross this bridge and pick up the Ancient Record using ZR, then place it by the feet of the Kong Elder. |
| 5 |  Both DK and the Odd Rock will be transported onto a performance space with an audience. Hold the L and R shoulder buttons to make a drumbeat, which will release Pauline from the Odd Rock. After Pauline freaks out, you will be prompted to make another drumbeat. DK will then transform into the Kong Bananza form. ▶︎ How to Drum Chest |
| 6 | 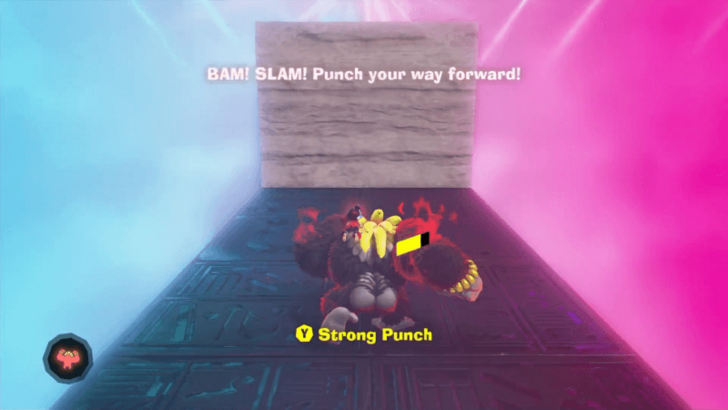 Complete the Kong Bananza tutorial by using Strong Punch (Y) and Charge Punch (hold Y) when prompted, and collecting gold to gain more Bananergy. |
| 7 | 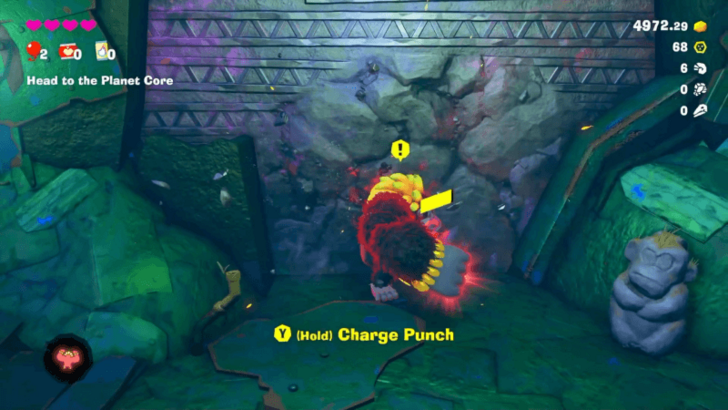 Proceed to the shipping container to the right of the Elder. Hold L and R to use your Kong Bananza form. Hold the Y buton while transformed to use Charge Punch on the concrete wall to break it. |
| 8 | Use the Kong Bananza transformation as you go through the passageway. Punch any enemies in your way, and use Charge Punch to break any concrete walls blocking the route. |
| 9 | 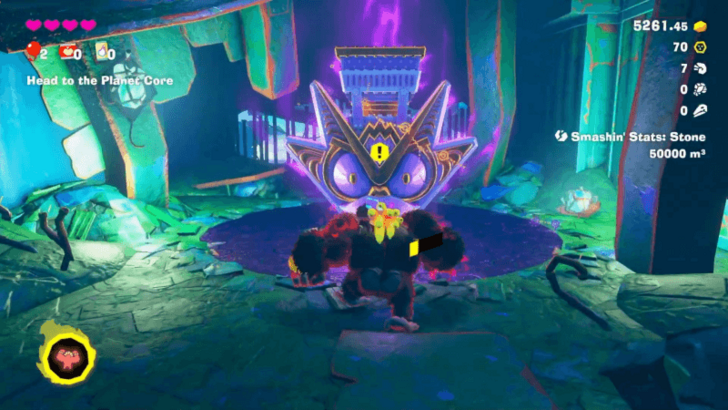 At the end of the corridor is another Void Stake. Punch the Void Stake to open the way to Sublayer 102. Once you're ready to proceed, jump down onto the platform below. |
Lagoon Sublayer 102
| Step-by-Step Guide | |
|---|---|
| 1 | 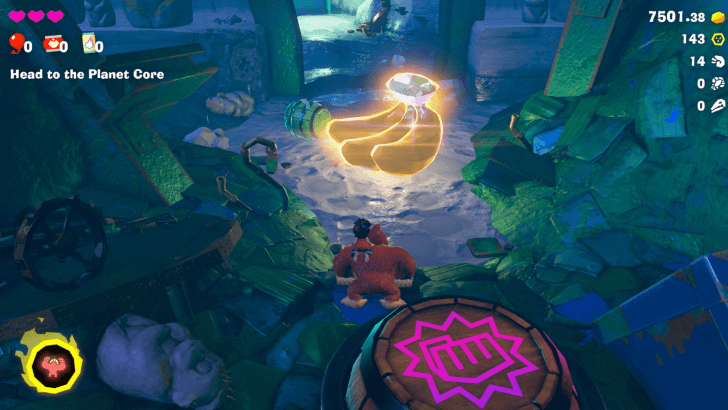 Punch the Banandium Gem to collect them before proceeding onward. The Lagoon Layer Challenge Course 3 is available along the way if you want to complete it. ▶︎ Kong Bananza: Pop Party Puzzle Guide |
| 2 | 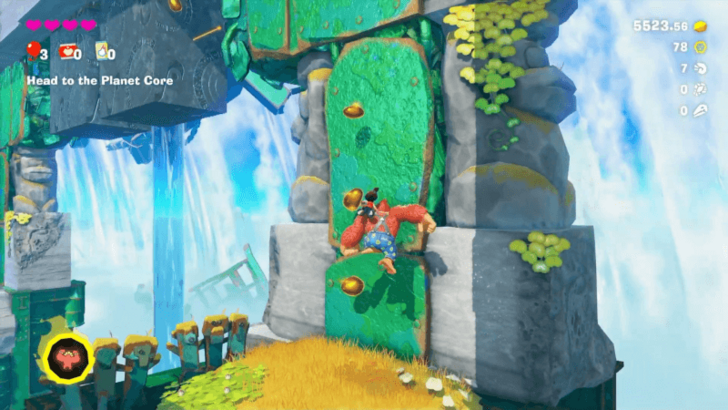 You will eventually reach a dead end once you exit the underground area. However, you can get across by climbing up the metal wall on your right. |
| 3 |  Climb onto the moving blocks to get across. Once you're halfway across, enemies will suddenly spawn. Use Hand Slap to shake them off, then quickly make your way to safety on other side. |
| 4 | More disguised enemies will try to ambush you along the path. Either avoid them or fight them. Keep going along the path until you reach a cutscene. |
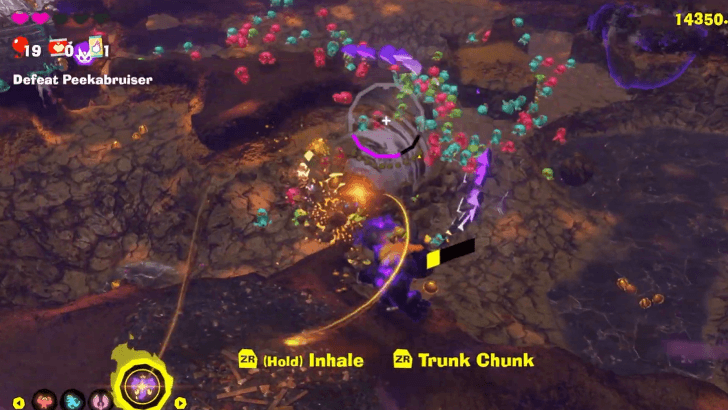
| 5 | 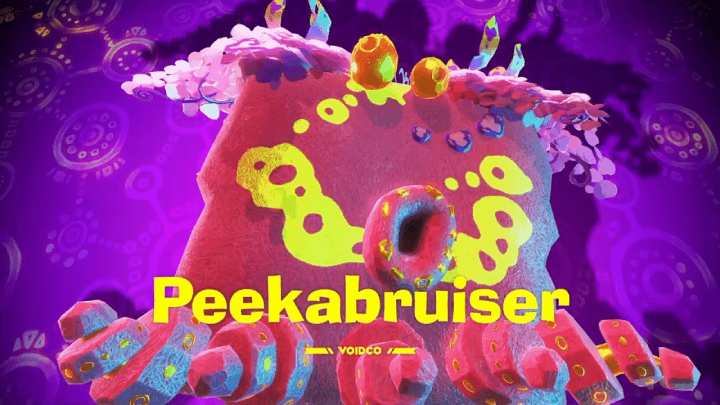 Defeat Peekabruiser. Use your Kong Bananza power to smash through the hordes of enemies. If you run out, you can also use the surrounding terrain to swing chunks. Hit Peekabruiser's core when it is exposed to prevent it from regenerating its body. ▶︎ How to Beat Peekabruiser |
| 6 | 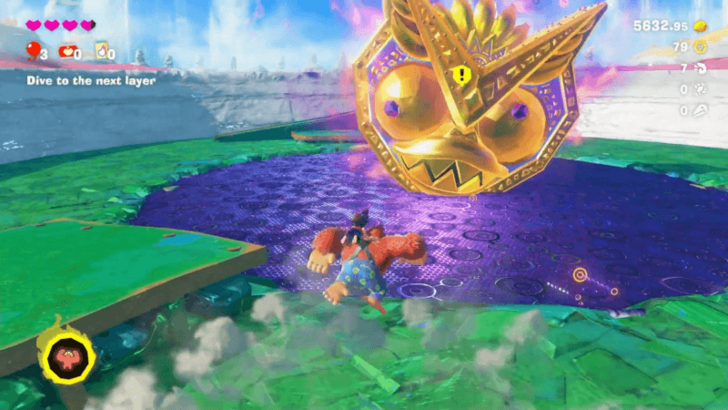 Punch the Void Stake left behind by Peekabruiser to open the way to the next layer. Before jumping down, you may want to purchase items from the shop that appears nearby, change clothes using the wardrobe, or use the Eelevator to return to a checkpoint in the Lagoon Layer. Once you're ready to proceed, jump down to the next layer. |
Hilltop Layer
Surf Hills Sublayer 200
| Step-by-Step Guide | |
|---|---|
| 1 | 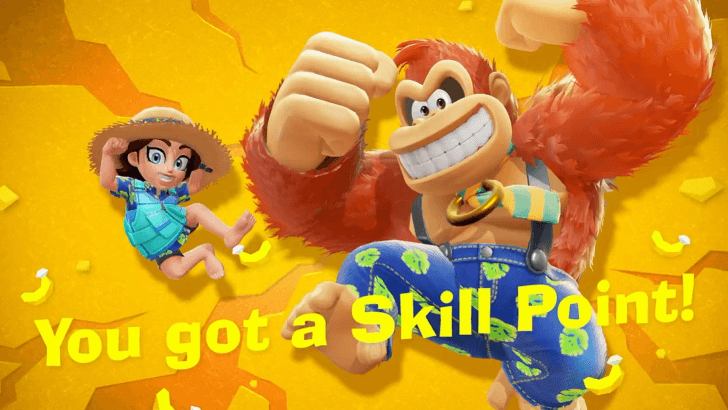 Pick up the Banandium Gem to gain a Skill Point. This will unlock more Skills. ▶︎ Best Skills to Upgrade First |
| 2 | 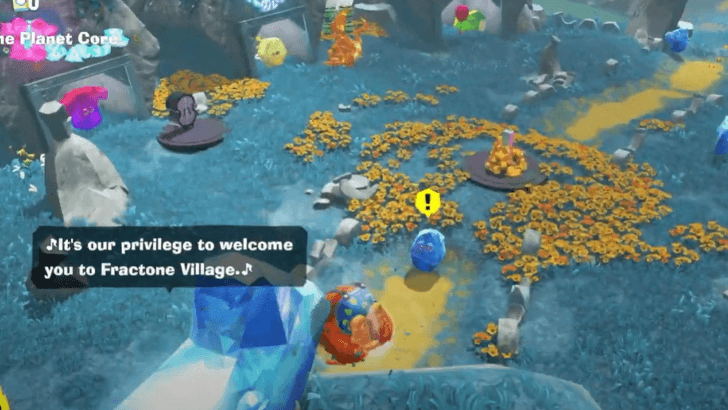 Follow the blue rock creature. This is a Fractone. Talk to the Fractone with a yellow exclamation point at Fractone Village. |
| * | Fractone Village contains a Style Shop, a Chip Exchange, and a Stuff Shop. You can shop to your heart's (and wallet's) content before proceeding. But watch your gold! You will need at least 2999 Gold later on to progress in this layer. ▶︎ How to Farm Gold |
| 3 | 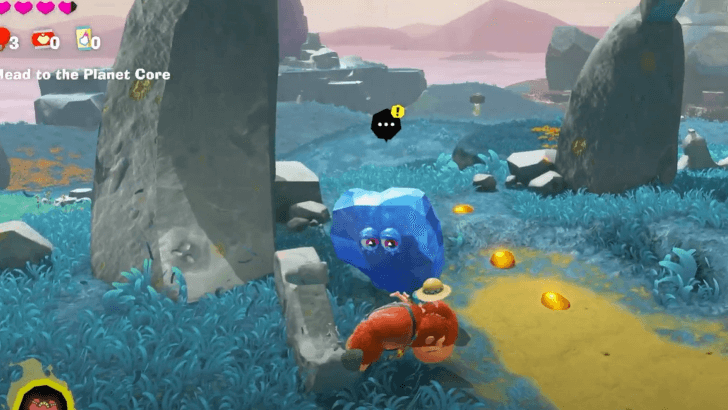 Talk to the Fractone near the exit of Fractone Village. |
| 4 |  Head to the Construction Site at the other end of the island. You may opt to roll or turf surf to get there faster. ▶︎ How to Roll ▶︎ How to Turf Surf |
| 5 |  Talk to the Fractone in front of the sinkhole. |
| 6 | 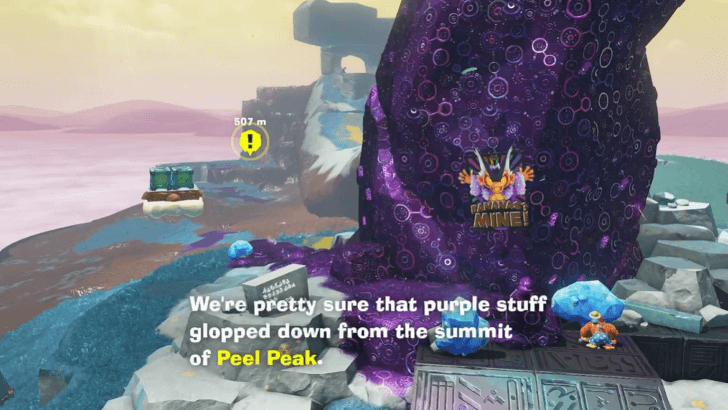 Head toward the muddy slope area (Peel Peek) past the sinkhole. Muddy terrain will slow down your movement , so Turf Surf to get across. |
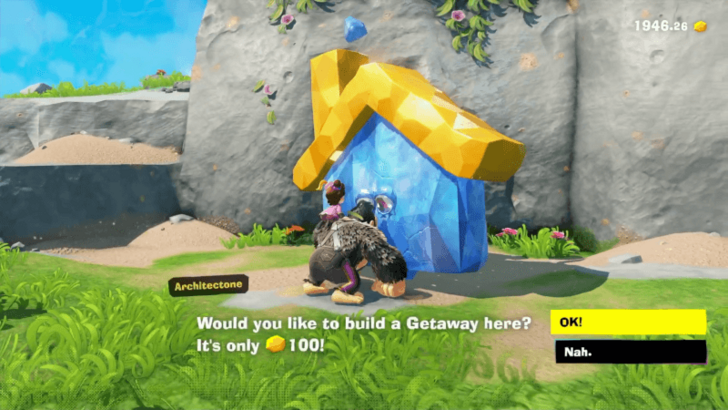
| * | 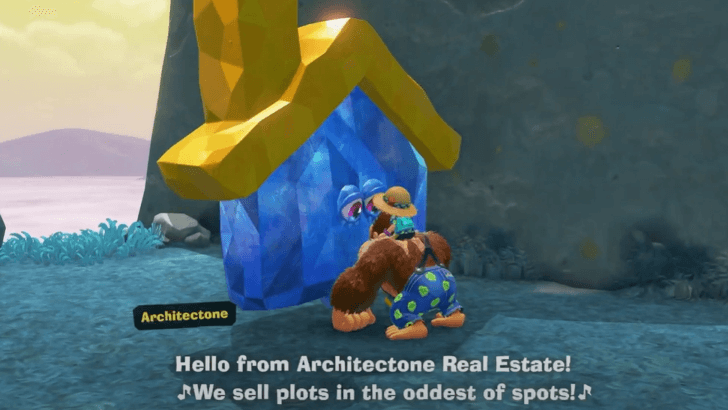 Talk to the Architectone by Peel Peek to create a Getaway Base for 100 Gold. In a Getaway, you can use the bed to heal and gain bonus hearts, or use the closet to change outfits. ▶︎ Getaway Guide |
| 7 | 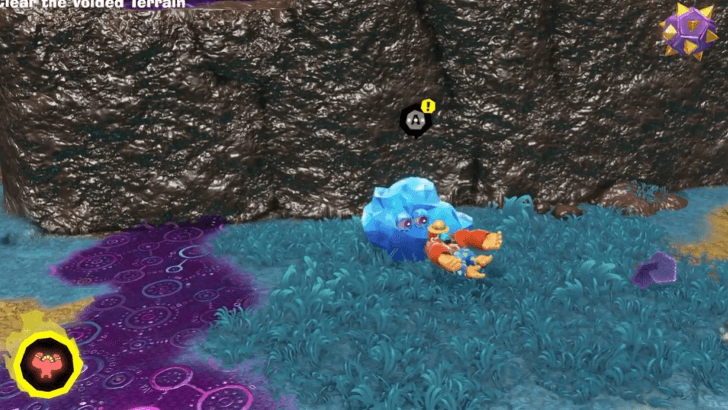 Climb up the slope and talk to the Fractone by the void path. It will teach you how to Chunk Jump. This is done by pressing A while holding a chunk, then A again while you're in mid-air. ▶︎ How to Chunk Jump |
| 8 | 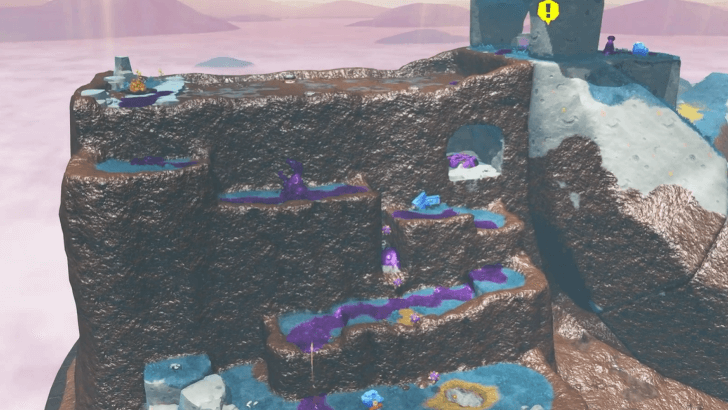 Chunk Jump to get to the top of the Peel Peak. |
| 9 | 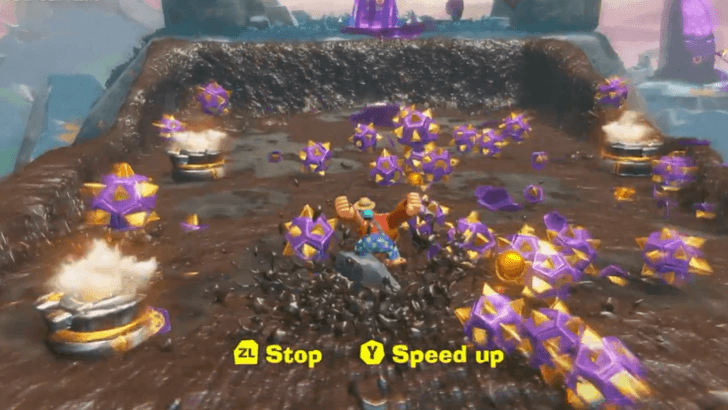 Turf Surf to barrel down the spiked enemies. Make sure to take a chunk from a hard surface since soft chunks may dissolve easily. |
| 10 | 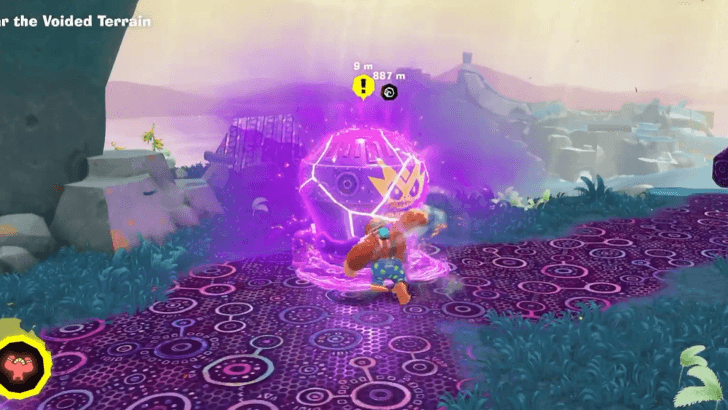 Destroy the Terravoider device. ▶︎ How to Clear Voided Terrain |
| 11 |  Talk to the Fractone with the yellow exclamation point, then Turf Surf back to the banana formation of the Construction Site. |
| 12 | 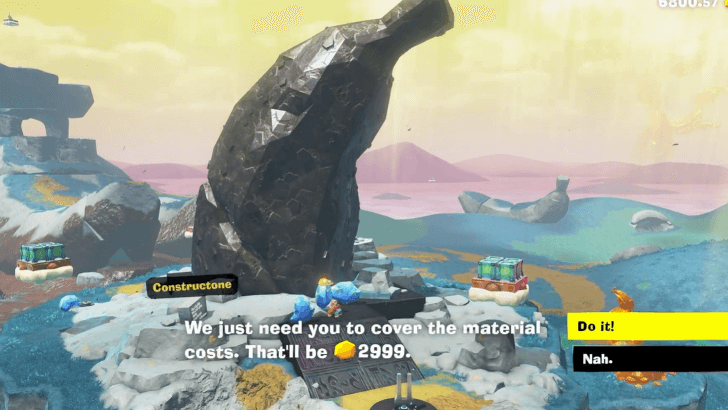 Talk to the Fractone at the Construction Site. The voided terrain is gone, but the sinkhole is still clogged. It will take 2999 Gold to demolish. |
| 13 |  Jump down the sinkhole once it's cleared. |
| 14 | 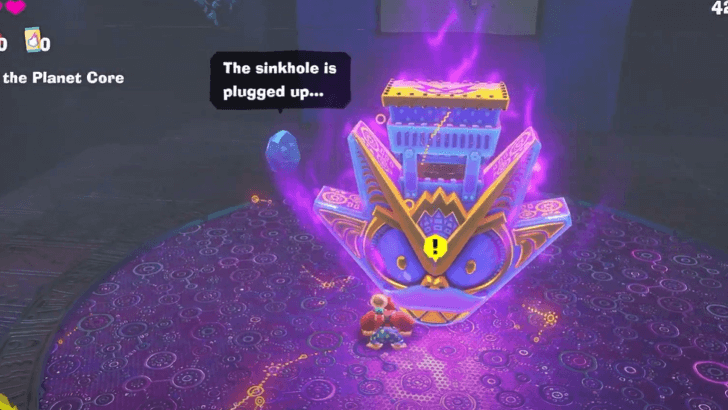 Turf surf through the Undertone Canal and destroy the Void Stake at the end. |
| 15 | 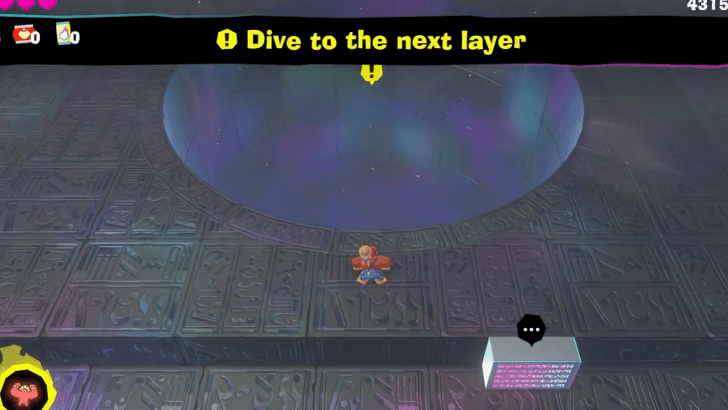 Dive into the hole to go to the next layer. |
Canyon Layer
Canyon Sublayer 300
| Step-by-Step Guide | |
|---|---|
| 1 |  After landing in the Canyon Layer, head straight and punch through the walls ahead until you spot two NPCs near a mine cart. Talk to the one with the exclamation mark. |
| 2 |  Ride the cart to Longneck Plateau. Before moving on, you can set up a Getaway nearby by speaking to Architectone. |
| 3 | 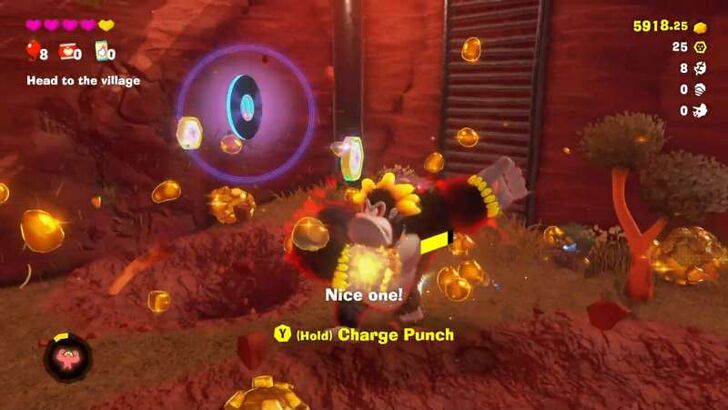 Continue forward, battling enemies along the way. When you defeat enemies, there is a chance they will drop a Music Disc which you can play via the record player in your Getaway. Keep going until you arrive at Longneck Plateau Village. |
| * |  In the village, you can buy Outfits, Items, or trade Banandium Chips for Banandium Gems by speaking with the shopkeepers. It’s a good idea to stock up on consumables, as enemies become more frequent ahead. The Stuff Shop also starts offering Rare Fossil Maps and Extra-Rare Fossil Maps. |
| 4 | 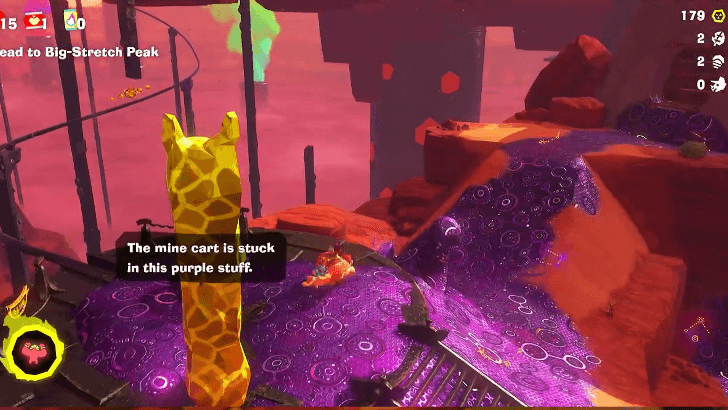 From the village, look for a trail of Void Terrain. Track down the source and destroy it to clear the mine cart. |
| 5 |  Ride the mine cart to Big-Stretch Peak. |
| 6 | 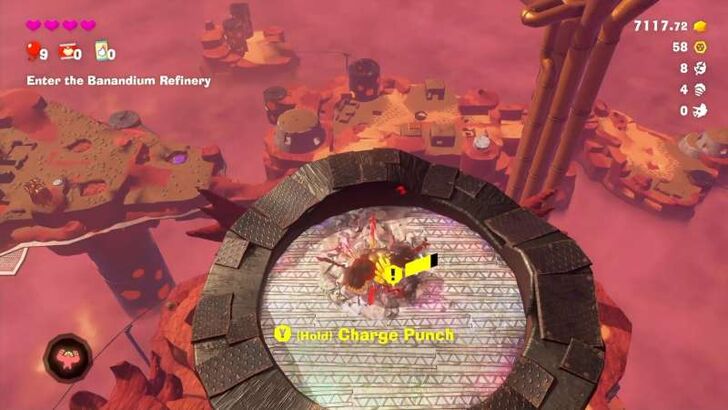 Climb to the top of the Banandium Refinery, the tall tower in the center of the area. Use the Kong Bananza Form to smash through the roof and drop inside. Be warned that dropping down will lead to a boss fight. ▶︎ How to Use Kong Bananza Form |
| 7 |  Defeat Grumpy Kong. Destroy the base of the monster's body then punch Grumpy Kong when he's within reach. Use the Kong Bananza Form to make quick work of this boss fight. ▶︎ How to Beat Grumpy Kong |
| 8 | 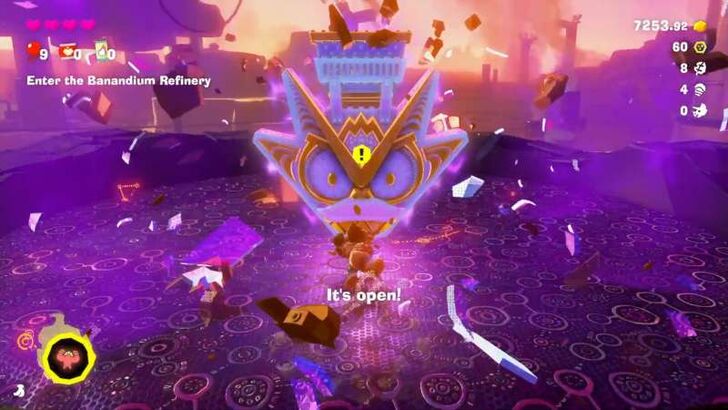 After defeating Grumpy Kong, destroy the nearby Void Stake. You’ll then drop into the Banandium Refinery. ▶︎ All Void Stake Locations |
Banandium Refinery Sublayer 301
| Step-by-Step Guide | |
|---|---|
| 1 | 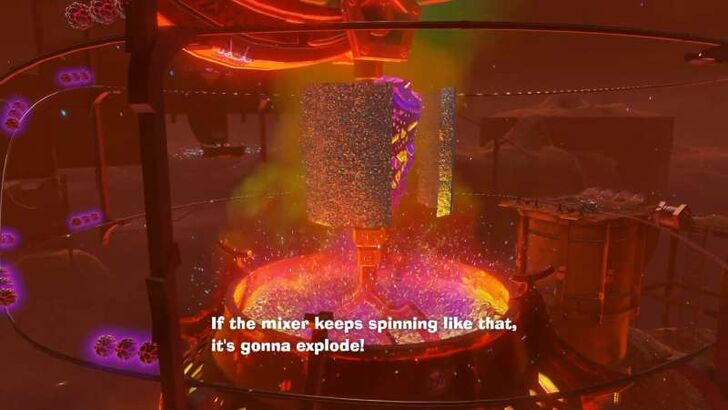 Talk to the nearby NPC. He’ll ask for your help in defeating the Mad Mixer located at the center of the area. |
| 2 | 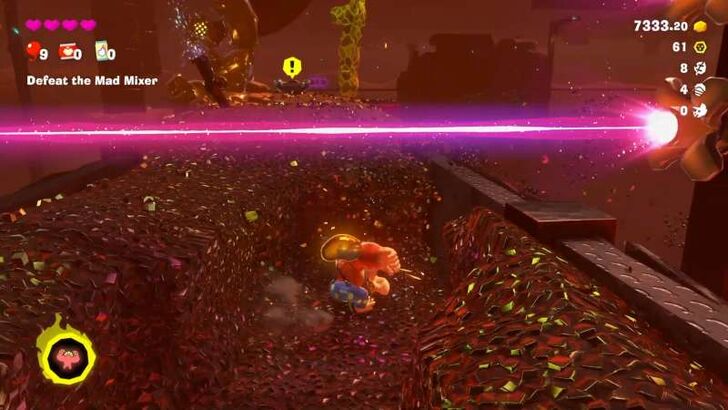 Head up until you reach another mine cart that leads to the Banandium Refinery Offices. Avoid the lasers by jumping over them or digging below to bypass them entirely. |
| * |  While riding the cart, throw boom rocks at the Triceratops Fossil stuck to the canyon wall as you pass by. It will take at least 3 hits before it is destroyed. |
| 3 | 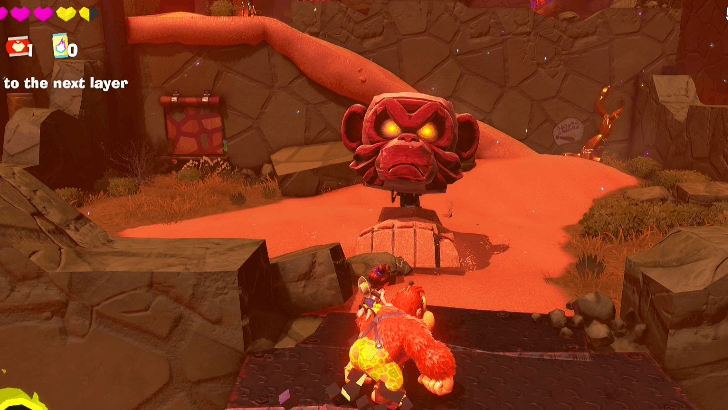 When you arrive at the Banandium Refinery Offices, you will encounter stomping enemies. Defeat them by destroying their base or throwing soft chunks at their eyes before hitting them. |
| * |  After going up the first slope, climb the small house to the left to find Architectone. You can use it to set up a Getaway and rest. Your Getaways now also grant access to the Stuff Shop and Style Shop, so it’s a good time to stock up before moving on. |
| 4 |  Continue up the slopes until you reach the end of the offices where you will find a mine cart towards the right. Ride it to reach the Banandium Refinery Staff Dorms. |
| 5 |  After getting to the dorms, you will need to clear out the Voided Path blocking your way. Follow the trail and destroy the source behind a wall of lasers. Afterward, another cart will be waiting that takes you straight to the Banandium Refinery Mixer. |
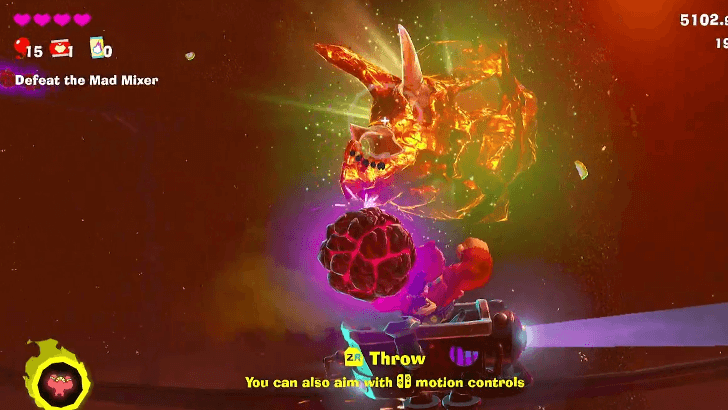
| 6 | 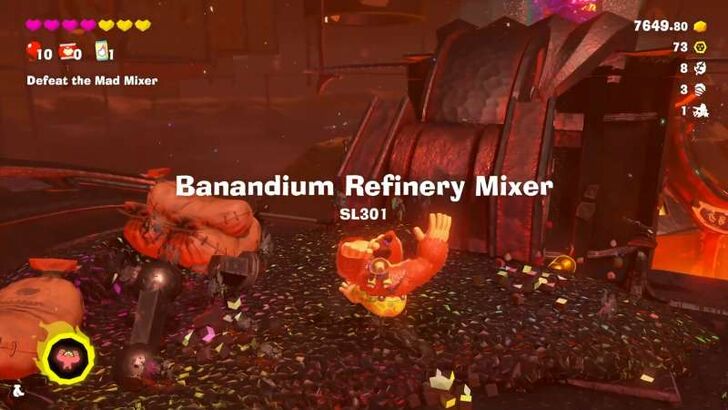 Ride the cart to the Banandium Refinery Mixer. Head straight ahead to trigger the Mad Mixer boss battle. |
| 7 |  Defeat the Mad Mixer. Throw boom rocks at the walls protecting the boss. Once you get a clear view, aim directly at Mad Mixer. |
| 8 |  Once Mad Mixer is defeated, climb up the Banandium Refinery Mixer and return to the surface of the Canyon Layer. |
Canyon Sublayer 300 Part 2
| Step-by-Step Guide | |
|---|---|
| 1 | 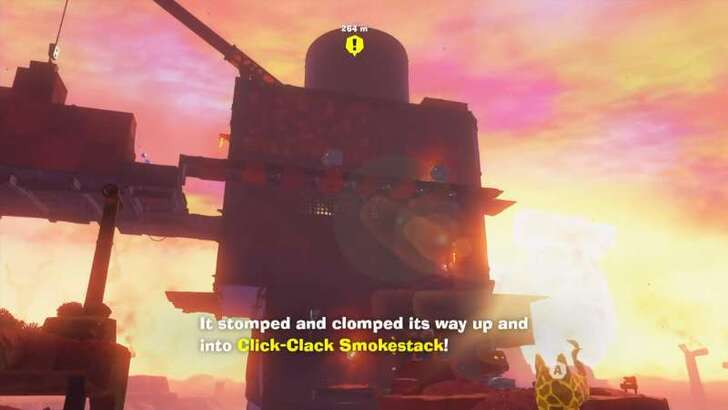 After reaching the surface, head straight and talk to a nearby NPC. They will point you toward your next destination, the Click-Clack Smokestack. |
| 2 | 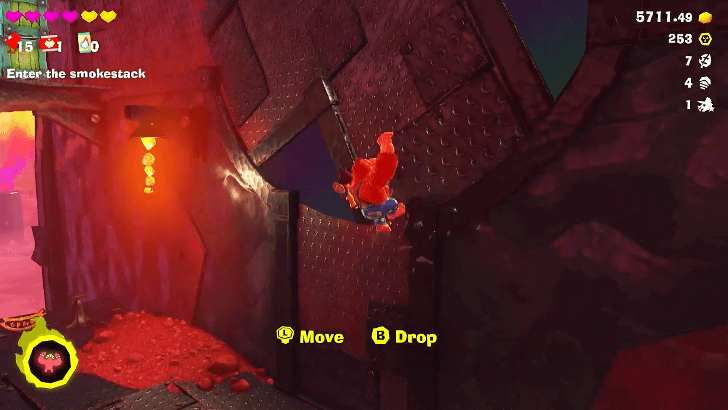 Climb towards the Click-Clack Smokestack. As you climb up, you will be met with rotating platforms that you need to time carefully or else you will slide back down to the ground. |
| 3 | 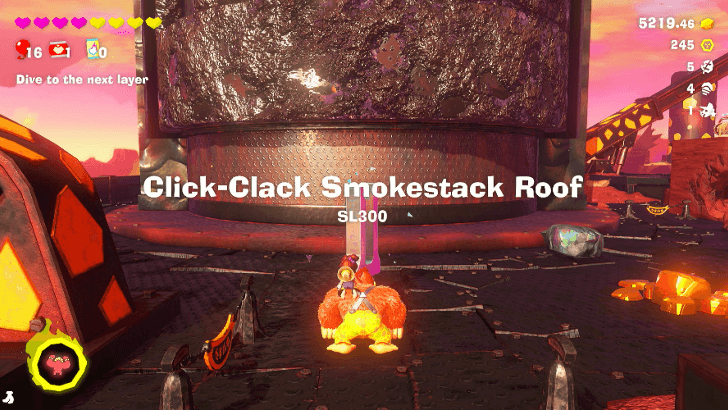 When you reach the Click-Clack Smokestack Roof, you will need to climb up the Smokestack to destroy the Void Stake on top. |
| * | 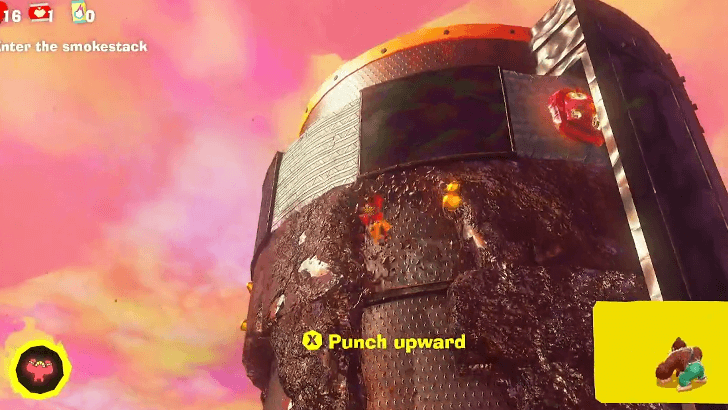 As you climb, punch upward on the dirt walls blocking your way. When you are near the top, use the Kong Bananza Form to destroy the concrete block. |
| 4 | 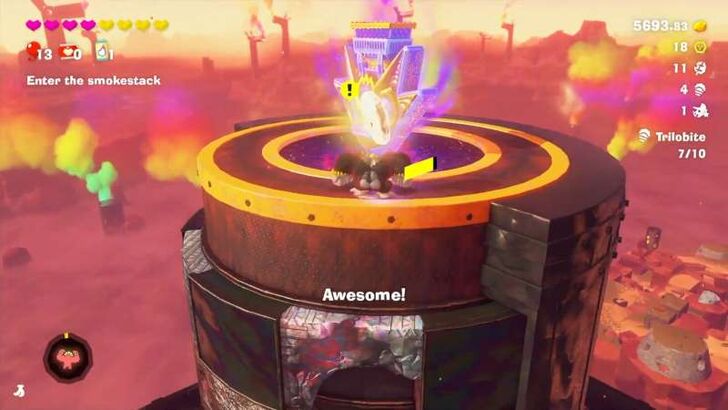 Destroy the Void Stake on the roof, then jump through the hole to enter the Click-Clack Smokestack Depths. |
Click-Clack Smokestack Depths Sublayer 301
| Step-by-Step Guide | |
|---|---|
| 1 | 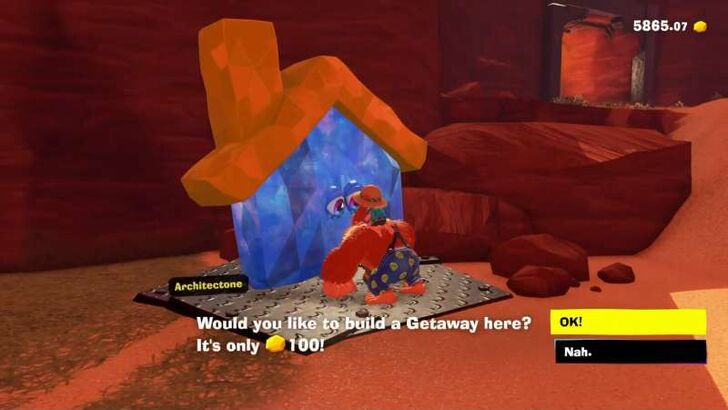 After landing inside, speak to the nearby Architectone to set up a Getaway and rest. You’ll want to be prepared, as another boss fight is coming up. |
| 2 |  Head to the center of the area and jump in. You’ll face Stompenclomper, the final boss of this layer. Be warned as it enters a second phase once its HP drops to half. ▶︎ How to Beat Stompenclomper |
| 3 | After defeating Stompenclomper, you can dive into the next layer and officially finish this one. |
The Divide
The Divide Entrance and Center of the Divide
| Step-by-Step Guide | |
|---|---|
| 1 | 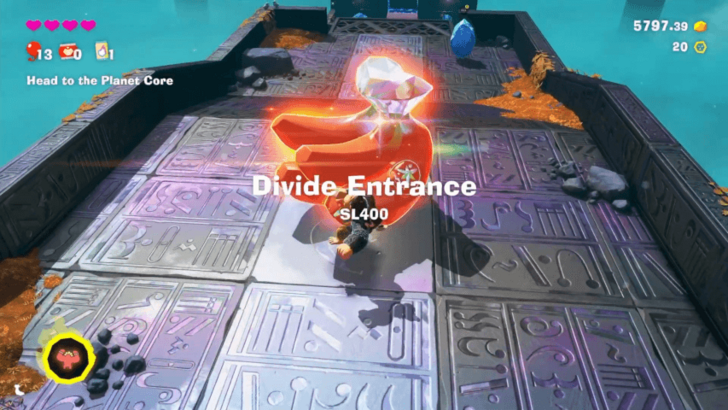 Collect the Orange Banandium Gem once the mission starts before moving forward and talking to the blue NPC at the end of the path. |
| 2 | 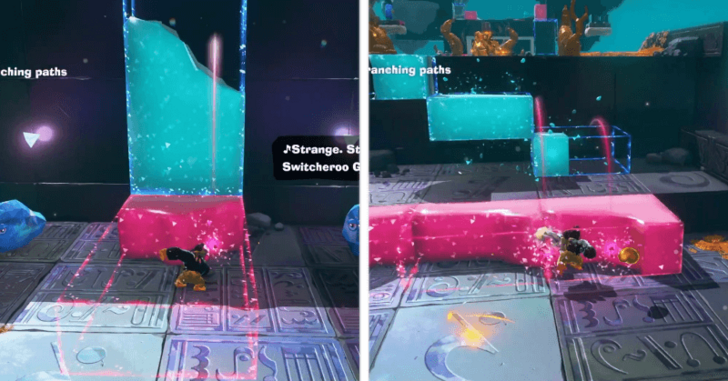 Hit the pink block in the middle of the path until the space within the blue light is filled, then climb it. Do the same thing once you reach the top. |
| 3 | 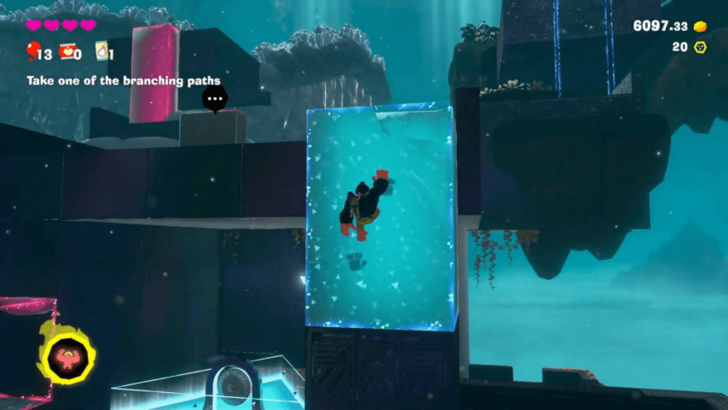 Once you reach the Center of the Divide, collect all the gold there first before proceeding. Afterwards, hit the pink block again to create a wall DK can climb on and reach the top. |
| 4 |  Here, you'll have to decide which path to take; the Freezer Path (Left path) or the Forest Path (Right path). Move all the blocks to whichever path you want to take. ▶︎ Should You Go Left or Right at the Divide? |
| ! | Although the Freezer Path is easier, and you'll get the Zebra Bananza Form there, we do recommend taking the Forest Path first since the Ostrich Bananza Form that you get there is more useful overall. |
| 5 |  Once you reach either paths, just follow it and break the Void Stake at the end of the path. Afterwards, jump into the hole to proceed to the next layer. ▶︎ Forest Layer ▶︎ Freezer Layer |
Forest Layer
Forest Sublayer 600
| Step-by-Step Guide | |
|---|---|
| 1 |  Collect the Banandium Gems in front of you, then talk to the ostrich with a yellow exclamation point. |
| 2 | 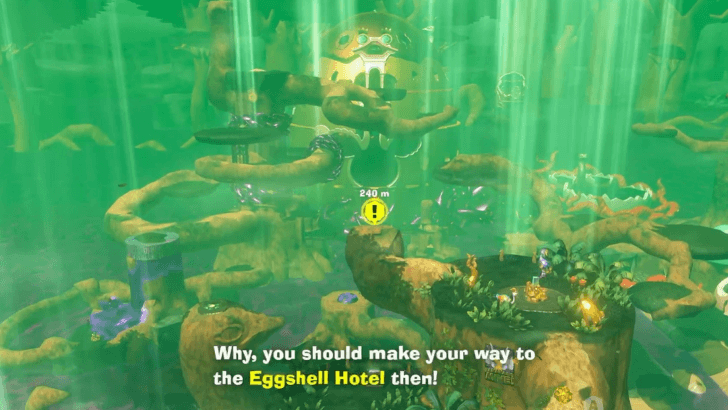 Head towards the direction of the Eggshell Hotel. |
| * |  To create a bridge, pick up a seed and throw it at a wooden surface. Keep in mind that seeds can be thrown at any wood and not just those painted with a target. ▶︎ How to Throw |
| 3 | 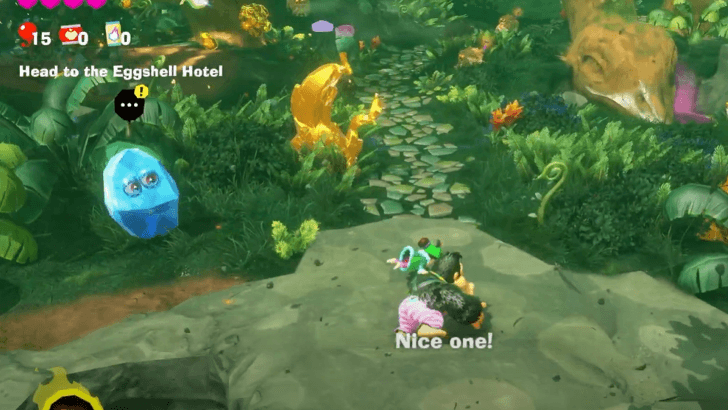 Talk to the Fractone after dropping down from the large ostrich head to help get your bearings. |
| 4 | 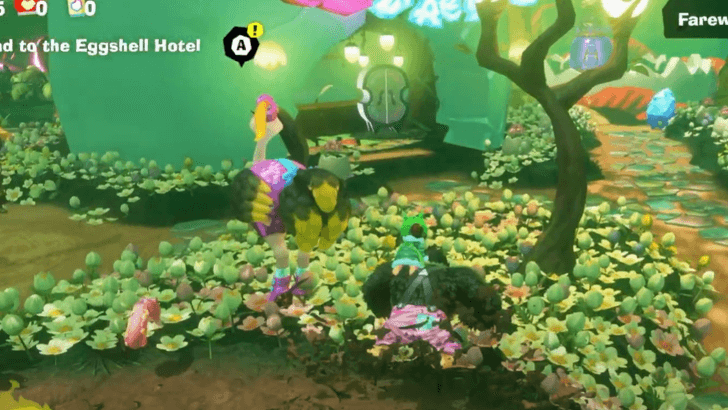 Once you're in Bellhop Burb, you can shop or build a Getaway before proceeding. Talk to the ostrich with a yellow exclamation point near the Style Shop when you're ready. |
| 5 | 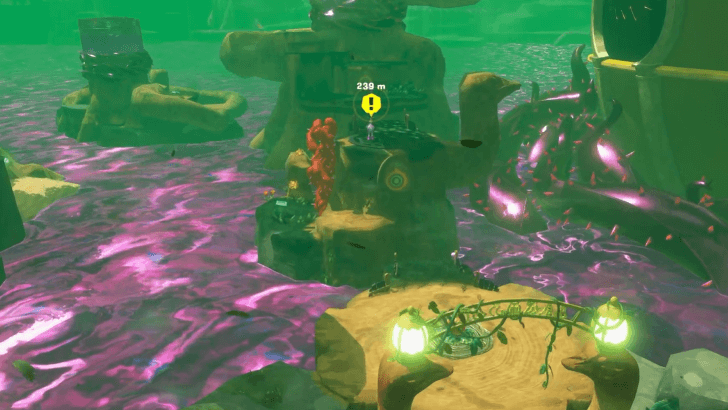 Follow the tree root. Defeat or avoid the Crockoids to reach the tree stump with a seed on it. Throw the seed onto the target, then talk to the ostrich on the wooden platform. |
| 6 | 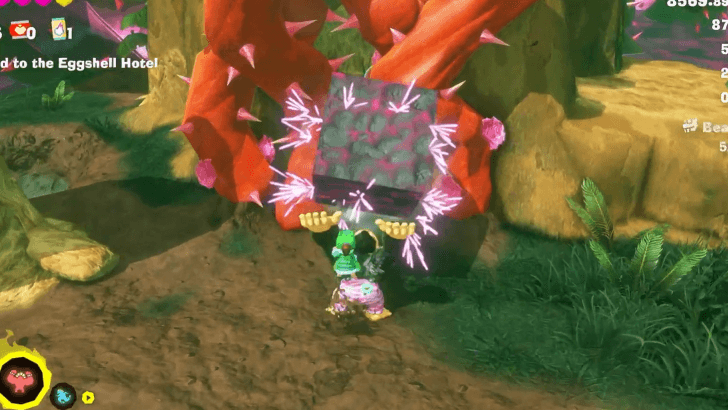 To get the next seed, destroy the red thorns on the left side of your current platform using a chunk of terrain. |
| * | You cannot use the seed from the previous platform to make a bridge on the next platform. Only one bridge per seed source can be active at a time. |
| 7 | 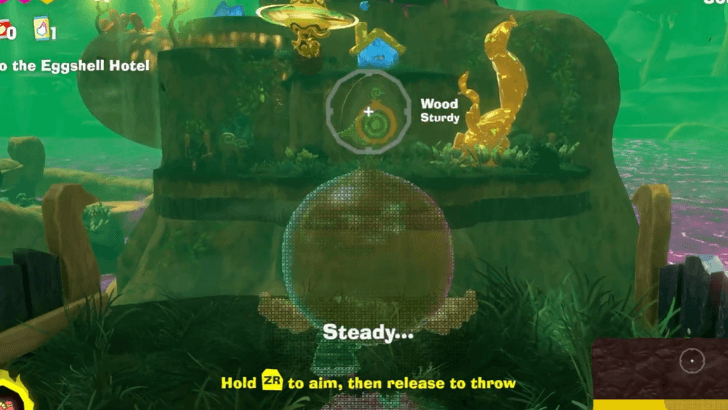 Get the seed hidden inside the tree stump and throw it at the target to form a bridge. |
| 8 | 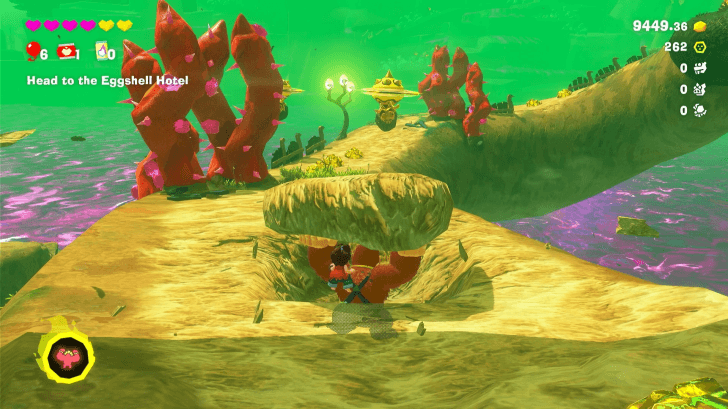 Make your way up the big tree. There will be flying enemies and thorns along the way. Get rid of them by hitting them with terrain chunks. |
| 9 | 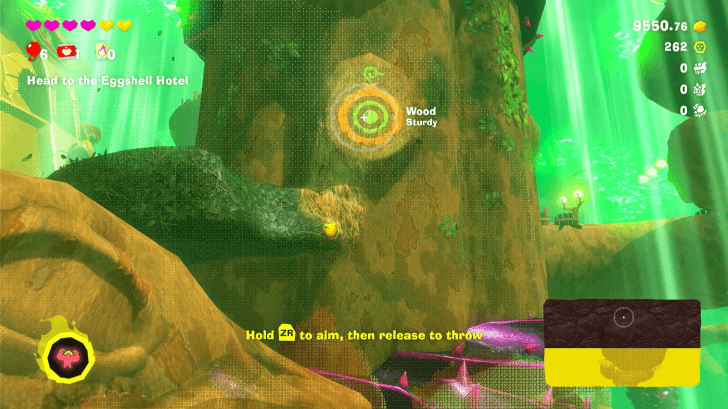 Construct a bridge to the main tree trunk by throwing a seed at the target. |
| 10 | 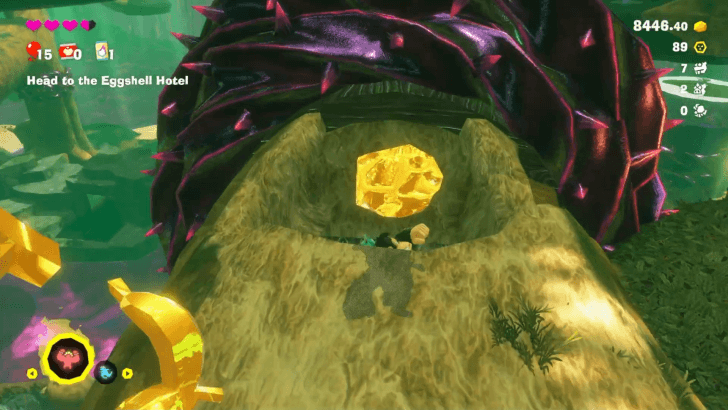 The next platform is plagued by purple thorns. Get past these by punching down on the gold piece embedded in the branch wrapped with purple thorns. You should end up in a hollowed out pathway. Punch your way forward to get past the thorns. |
| 11 | 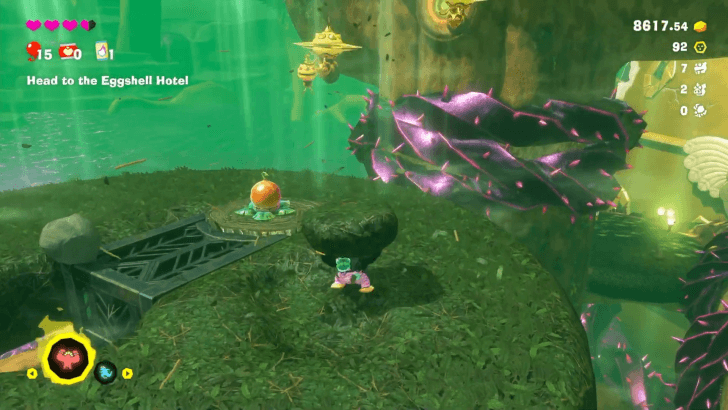 Climb up the metal support bracket. Enemies await you above. Avoid their attacks and take them down by throwing chunks at them. |
| 12 | Once they're defeated, make another bridge using the seed. |
| * |  You can ask the Constructone at the top of the big tree to remove the purple thorns for 500 Gold. This can make it easier for you to climb back up if you end up at the bottom again. |
| * |  Bring down the rope near the Barrel Cannon to create a shortcut if you should fall to the bottom. |
| 13 |  Take the Barrel Cannon to get inside Eggshell Hotel. |
Eggshell Hotel Sublayer 600
| Step-by-Step Guide | |
|---|---|
| 1 | 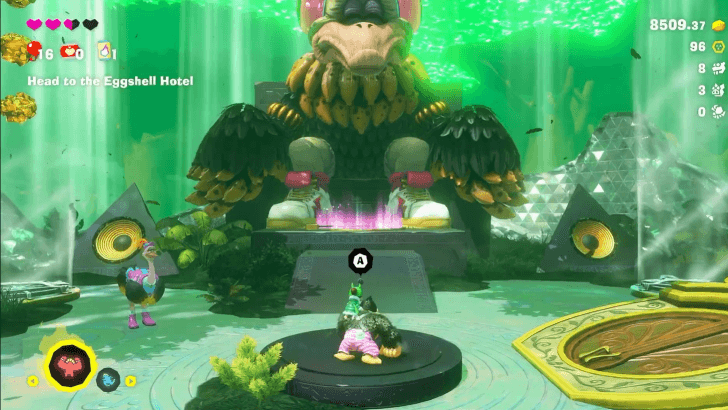 Stand on the platform and talk to the Ostrich Elder. |
| 2 | 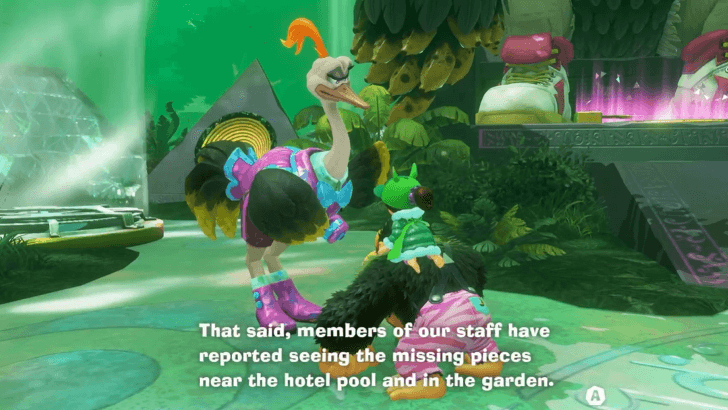 To get the locations the Ancient Record pieces, talk to the staff beside the Ostrich Elder. The two pieces are in the hotel pool and the garden. |
| 3 | 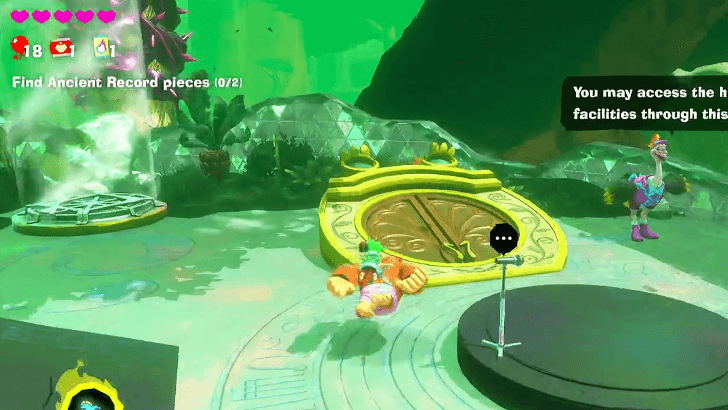 Down punch on the nearby door to get to the Eggshell Hotel Pool. |
| * | A room can be found to the right from where you fell, which is free for you to use. This room contains a treasure chest, a bed for you to rest in, and a wardrobe where you can change clothes. |
| 4 | 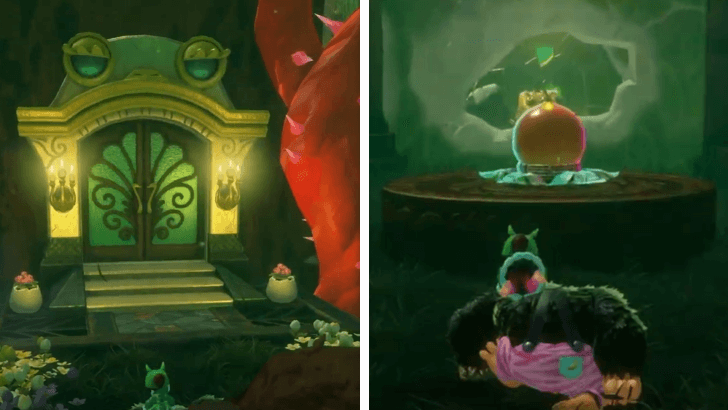 To get a seed to reach the record piece, follow the left path to a door next to some red thorns. Break the door to get the seed inside. |
| * |  If you want to get the Banandium Gem straight ahead from the seed, pick up the seed and throw it at the wooden Crockoid to make a bridge. This also prevents the Crockoid from attacking you. |
| 5 |  Pick up the seed, and throw it at the target near the Ancient Record piece. Return this piece to the Ostrich Elder. |
| 6 | 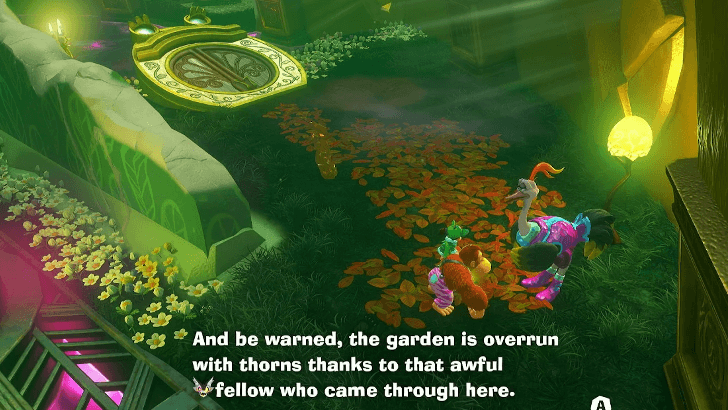 Go back down to the Eggshell Hotel Pool, then take the path behind the Barrel Cannon. Down punch the door to reach the Eggshell Hotel Garden. |
| * | Watch out for the red thorns in this area! Swing terrain chunks at them to clear the way. |
| 7 |  The Ancient Record piece in the garden is covered in Void. Follow the void trail until it reaches a wall. |
| 8 | 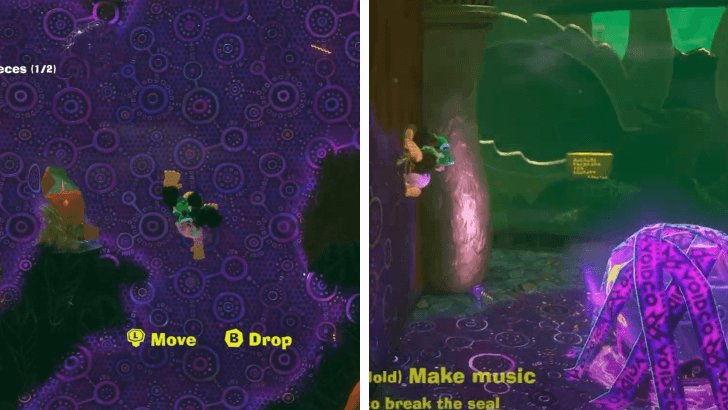 Climb the wall to get to the Terravoider device, and destroy it. There will be thorny Munchoid enemies along the way. Try to avoid them, or swing terrain chunks at their bodies to defeat them. |
| 9 | 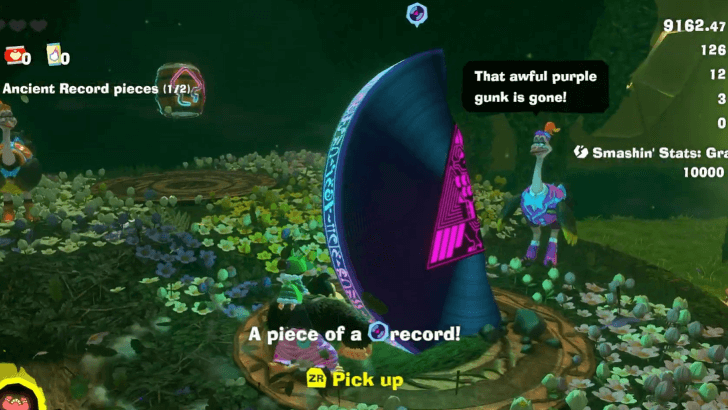 Pick up the Ancient Record piece, and use the Barrel Cannon to return to the Ostrich Elder. Place the record piece beside the first one to combine them. |
| 10 | 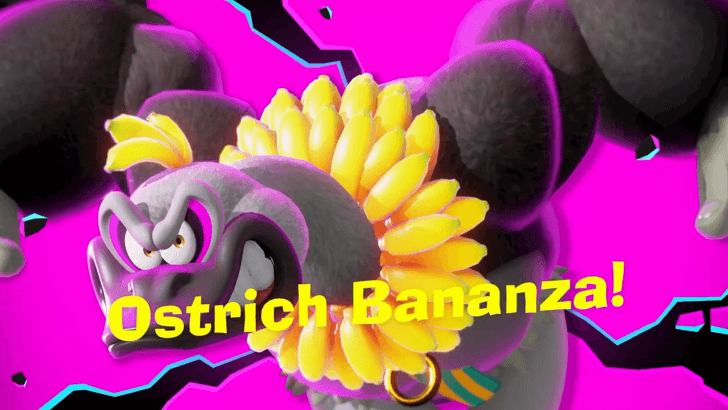 After completing the Ancient Record, you will receive the Ostrich Bananza Form. ▶︎ All Bananza Forms and Transformations |
| * | The Ostrich Bananza form gives you the ability to flutter, allowing you to stay in the air longer. To flutter, hold down ZL while in mid-air. ▶︎ How to Use Ostrich Bananza Form |
| 11 | 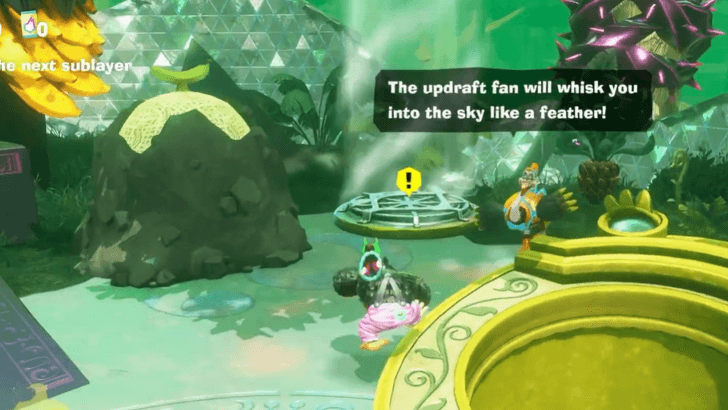 Ride the updraft fan to the left of the elder using the Ostrich Bananza form. |
| 12 |  Take the Barrel Cannons to get to the Void Stake. |
| 13 |  Talk to the pink ostrich beside the stake to find the key. |
| 14 | 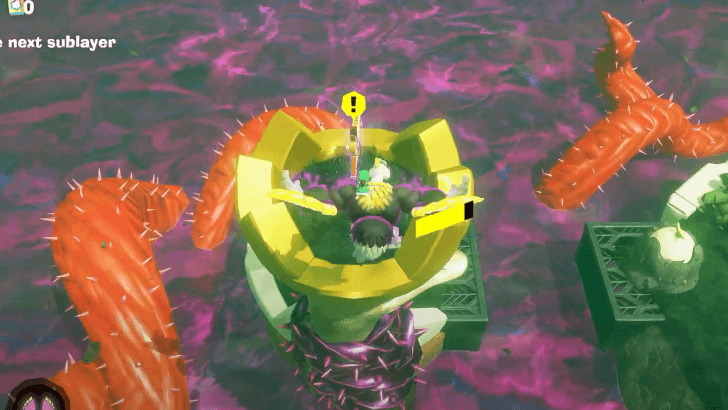 Use the Ostrich Bananza form to ride the updrafts and get the Void Key. |
| 15 |  Break the seal, and destroy the Void Stake. This will open the way to the next sublayer. |
Forest Sublayer 601
| Step-by-Step Guide | |
|---|---|
| 1 |  Get your Mossplume Marsh bananas, then talk to the blue ostrich right up ahead. You will be given the objective to smash the poison plants. |
| 2 |  Head towards the first poison plant to the north. Use your Ostrich Bananza form to ride the updrafts and get across the red thorns. Land on the island where the poison plant is. |
| * | It is recommended to unlock the Glide skill for the Ostrich Bananza form so that you can reach further platforms. ▶︎ List of All Skills |
| * | If you run out of time for your Bananza transformation, you can refill your Bananergy Gauge by collecting gold or punching melons. ▶︎ How to Increase Bananergy |
| 3 | 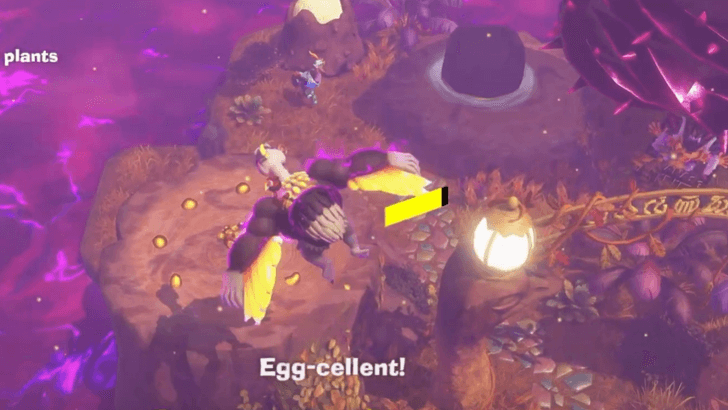 Talk to the blue ostrich on the island with the poison plant, and they'll say that the rock is blocking the updraft fan. |
| 4 |  Destroy the rock blocking the updraft fan, and ride this in your Ostrich Bananza form to reach the poison plant. |
| 5 | 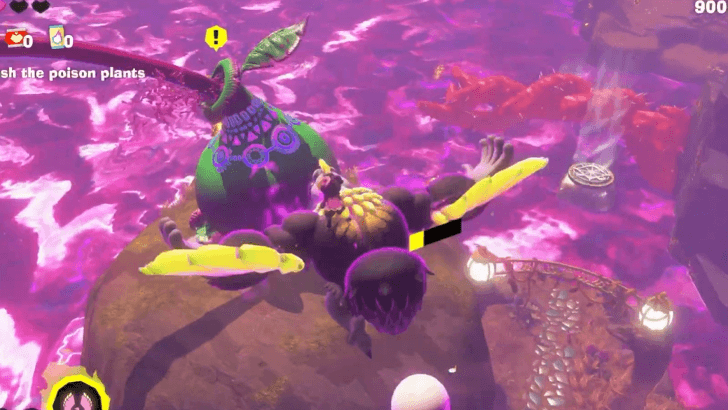 Ride the updraft to the top, and destroy the poison plant. This will reveal the path to the next plant. |
| 6 |  Glide towards the second poison plant, and land on the green rubber platforms. |
| 7 |  Follow the Voided Terrain at the end of the platforms to find the Terravoider. Use the Muchoid enemy as a bridge to reach the separated platform. Destroy the Terravoider to remove the Voided Terrain blocking the updraft fan. |
| 8 | Flutter to the updraft fan, then Dive Punch it to remove the rock blocking it. Try not to bounce on the rubber platform as you hit the rock, since you may be accidentally knocked down into the toxic pool below. |
| 9 | 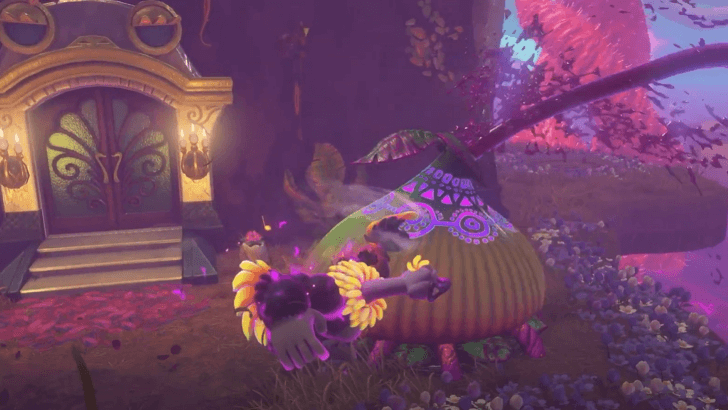 Ride the updraft to go up to the poison plant, and punch it until you destroy it. |
| 10 |  Go through the door or the opening on the side to enter the Eggshell Hotel Annex. You can shop or rest here first if you'd like. Once you're ready, go through the doorway opposite the Style Shop and follow the path to a jumping off point. |
| 11 |  Activate your Ostrich Bananza form, then flutter off. Travel to the large landmass, then make your way to the updraft fans on the right. |
| 12 | 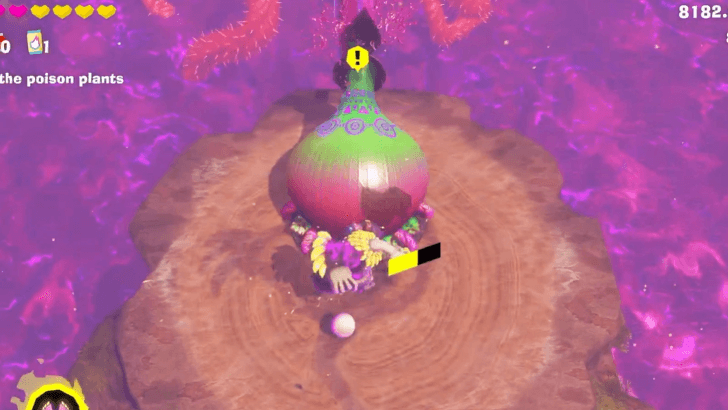 Use the updrafts to fly to the third poison plant, and destroy it. |
| 13 | 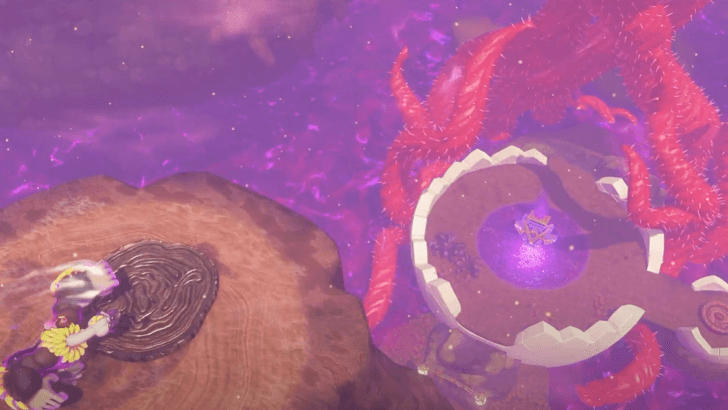 Jump down and destroy the Void Stake. |
| 14 | 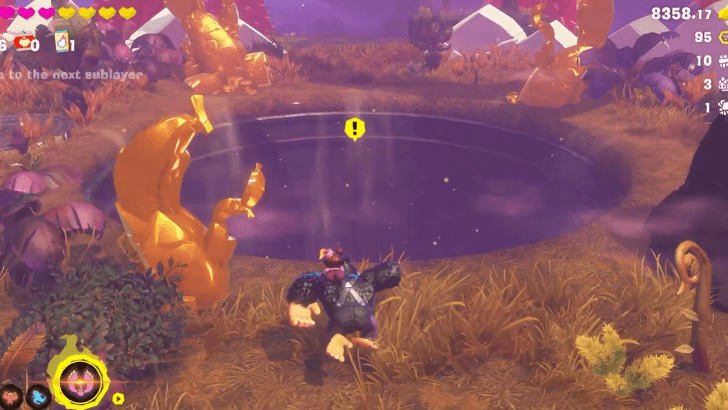 Drop down the hole to proceed to the next sublayer. |
Forest Sublayer 602
| Step-by-Step Guide | |
|---|---|
| 1 |  Talk to the pink ostrich right up ahead. |
| 2 | 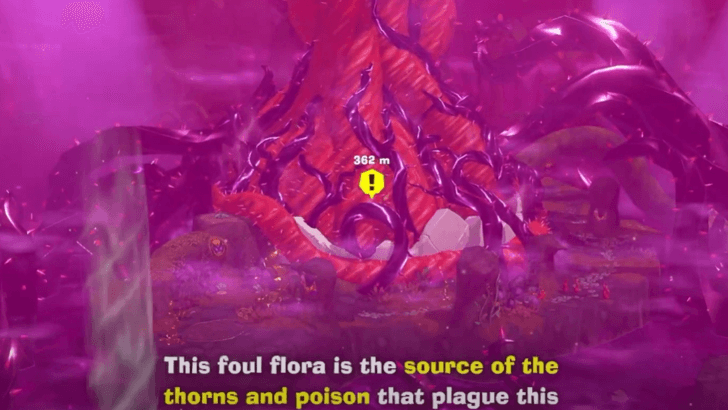 Head to the foul flora on Broodbud Isle, and land on the uncorrupted ground near it. Tear off a chunk of terrain to use against the enemies you'll encounter along the way. |
| 3 | 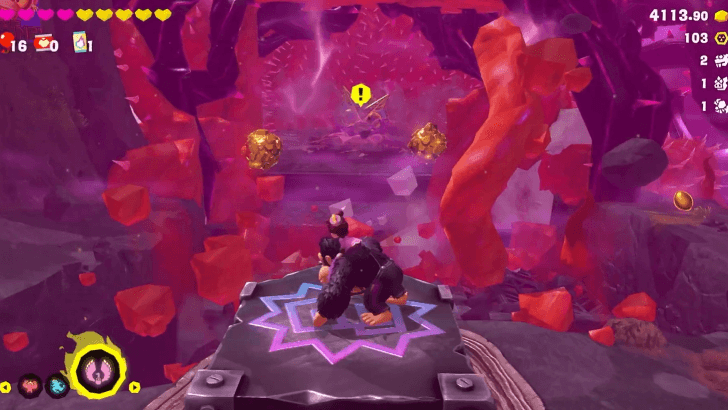 Follow the path around the island to find the pressure plate. Clear off the thorns by swinging a chunk of terrain, and then use Dive Punch on the plate to reveal the Void Stake. |
| 4 | 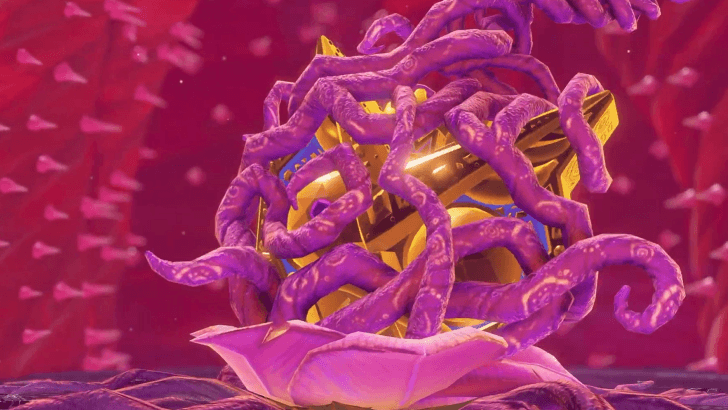 Punch the Void Stake. Be warned that this will trigger a boss fight. |
| * |  If you pass through the wooden arch behind the pressure plate, there is a Getaway that you can use to rest before the fight. |
| 5 | 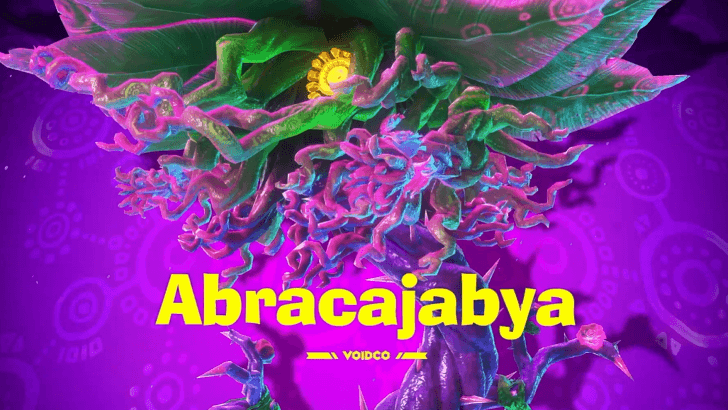 Defeat Abracajabya. You will need to bait out its vines and use them to reach its head. When you get to the top, attack the Void Stake to damage its health. ▶︎ How to Beat Abracajabya |
| 6 |  Destroy the Void Stake after defeating Abracajabya. |
| 7 | 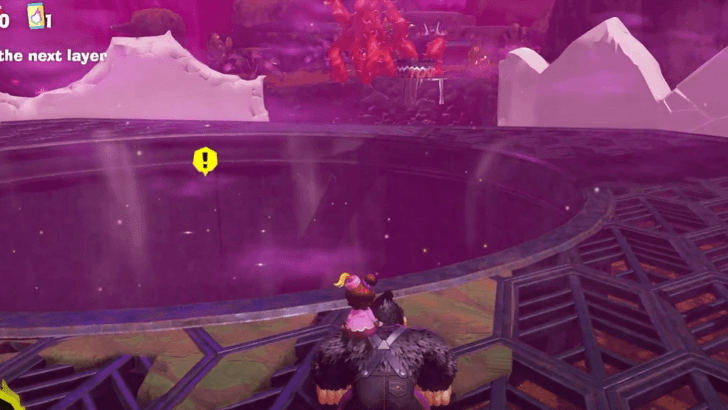 Jump down to proceed to the next layer. ▶︎ The Junction Walkthrough (Forest Path) |
Freezer Layer
Freezer Sublayer 500
| Step-by-Step Guide | |
|---|---|
| 1 |  Collect the Banandium Gem near the starting point. |
| 2 | 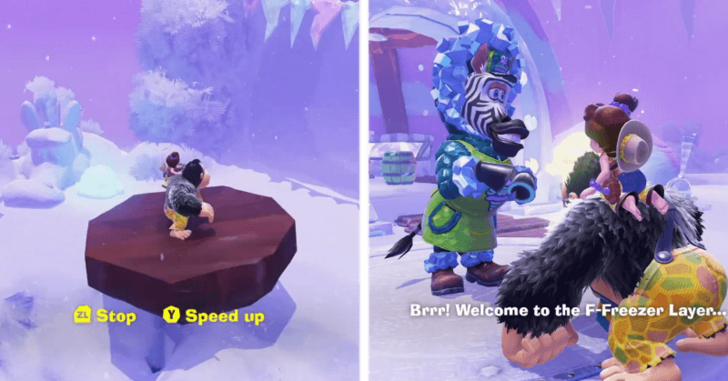 Pick up the large brown rock rooted on the ground, then use it to Turf Surf down the path. Afterwards, talk to the Zebra wearing a green shirt at the bottom of the path. |
| 3 | 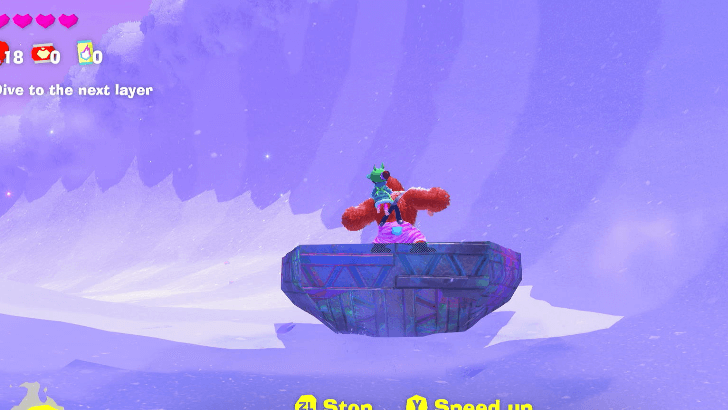 Pick up the large metal platform next to the Zebra, and use it continue turf surfing down the path. |
| 4 | 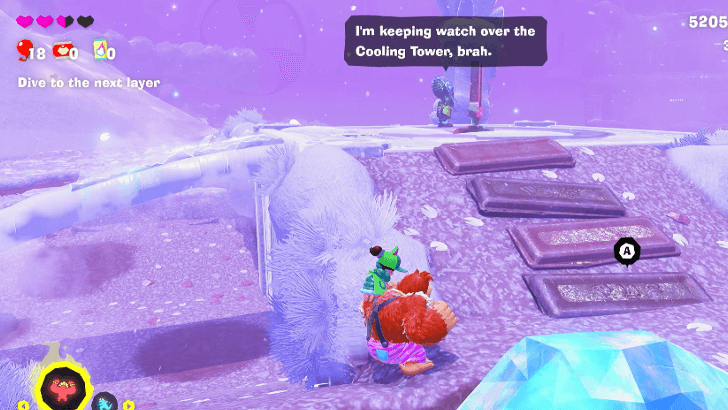 Stop in front of the small ice bridge. You will not be able to cross it unless you have the Zebra Bananza Form. Instead, go up the side and talk to the Zebra at the top. |
| 5 |  Go underneath the bridge and follow the path that leads to a cave. Make sure to either Turf Surf, Chunk Jump, or roll in midair to cross the gaps, since jumping alone isn't enough to avoid the ice water. |
| 6 | 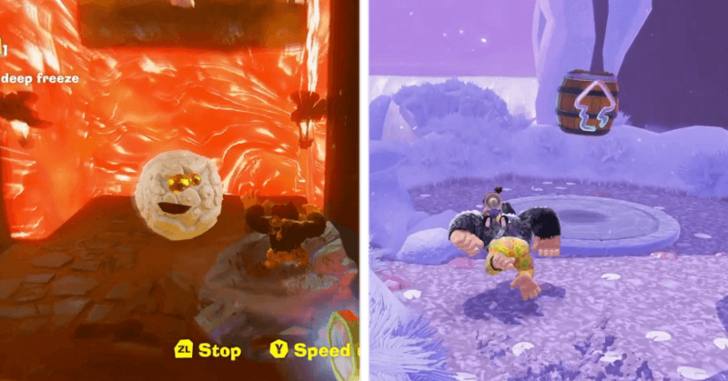 Head deeper into the cave until you reach a wall of lava guarded by a round enemy. Defeat it and punch its core towards the lava wall to clear a path for you to climb. Once on top of the wall, follow the path to the outside and use the Barrel Cannon to get to the Snowy Crossroads. |
| 7 | 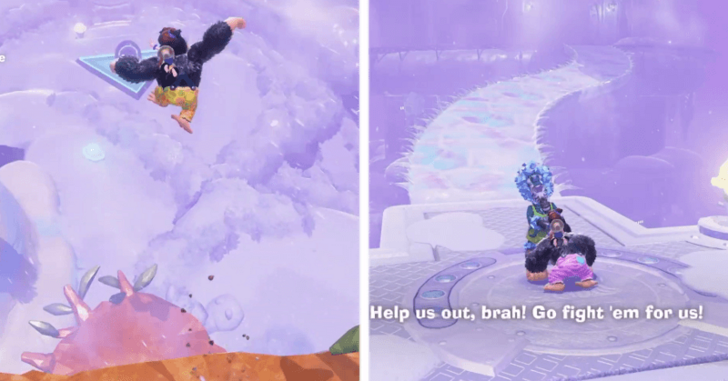 Talk to the Zebra near the bridge to the Cooling Tower. They will tell you to talk to the elder at Coolstripe Cavern. |
| 8 | 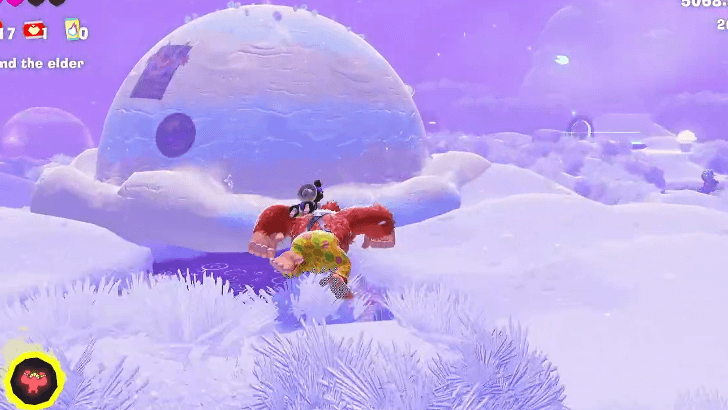 Turn around, and you'll notice an area covered in Voided Terrain. Follow the Void trail until you reach a yellow ice cream hut. Punch you way in and destroy the Terravoider inside. |
| 9 |  Dive Punch on the pressure plate to open a path to Coolstripe Cavern. |
| 10 |  Traverse to the end of the cavern. Throw chunks at large icicles on the ceiling to bring it down and create bridges. |
| 11 | 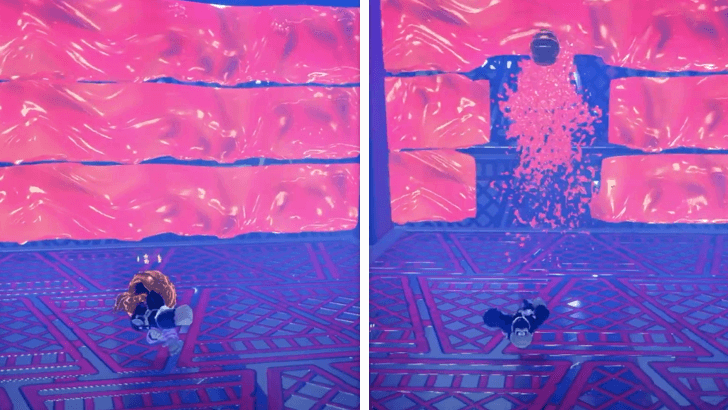 Upon reaching the Coolstripe Cavern Exit checkpoint, drop down and defeat the enemies in the pit. Punch their cores toward the lava to create a path for you to climb. |
| 12 | Destroy the Void Stake on top and drop down to the next sublayer. |
Freezer Sublayer 501
| Step-by-Step Guide | |
|---|---|
| 1 | 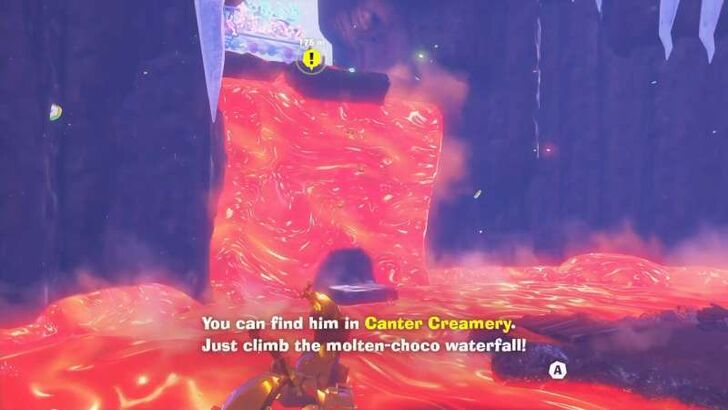 Upon landing, talk to the nearby Zebra. He will point you towards your next destination, the Canter Creamery. |
| 2 | 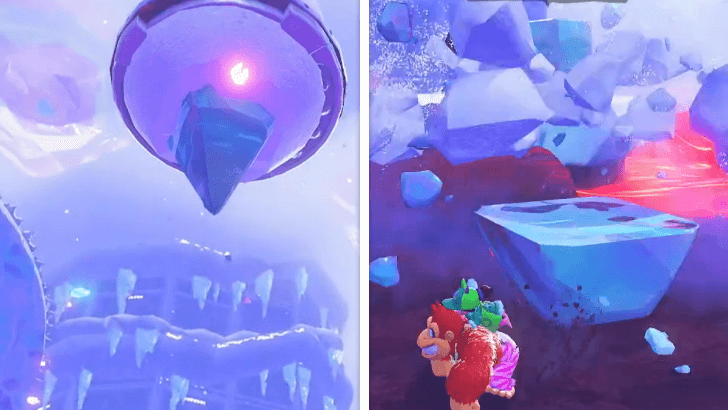 To cross the lava lake, you will need to bait the icicles into falling in front of you. This will immediately transform it into walkable terrain. |
| 3 | 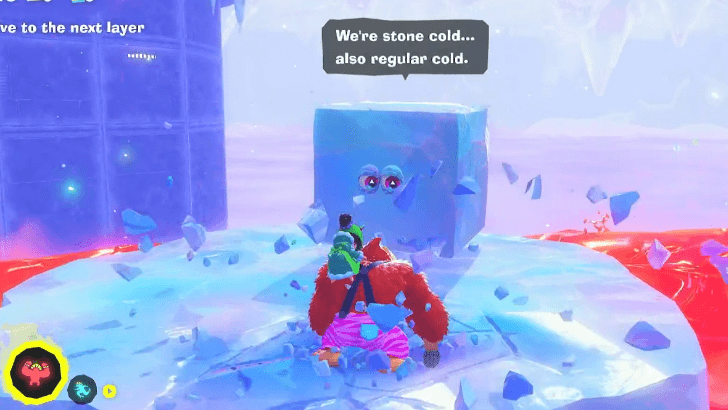 Use the ice block to grab ice chunks and throw it into the lava to create a pathway ahead. |
| 4 | 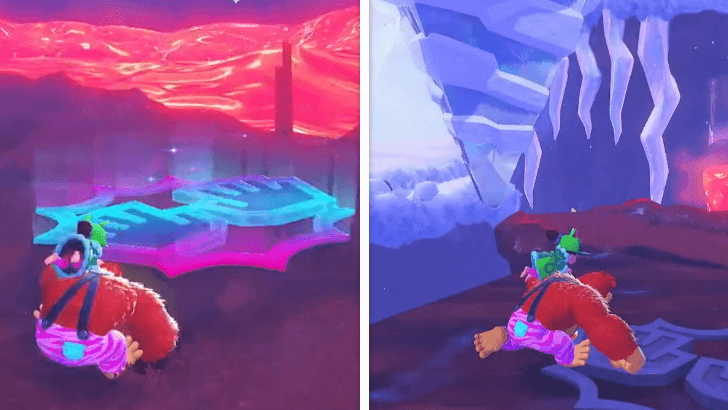 Use your Hand Slap to raise a tall dirt tower. Using that vantage point, throw a chunk at the icicle to your left. After the icicle falls, you can use it to get ice chunks and throw it at the lava wall. |
| 5 | 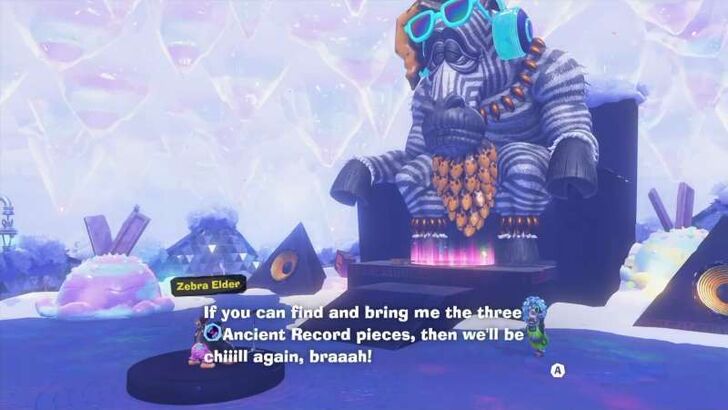 After reaching Canter Creamery, approach the Zebra Elder. He will task you with finding three Ancient Record Pieces in exchange for a new bananza form. |
| 6 | 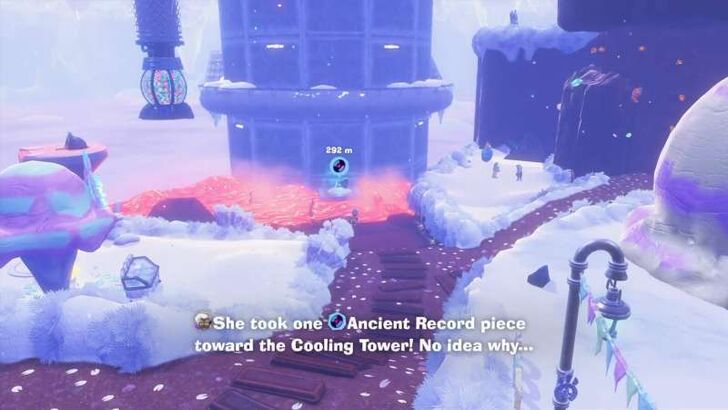 Talk to the Zebra to your immediate right. He will tell you that the first Ancient Record Piece is across a lava pool near the Cooling Tower. |
| 7 | 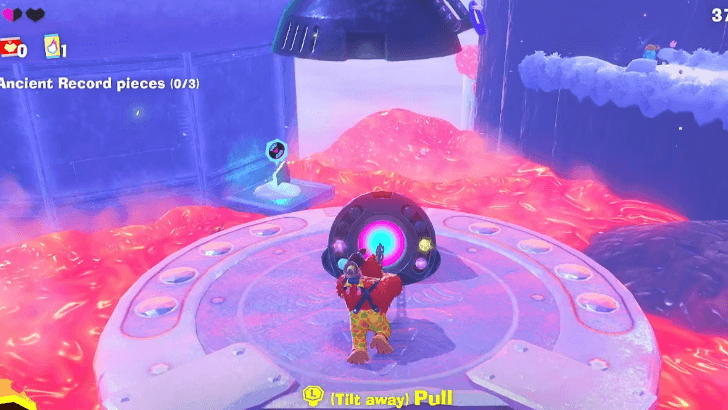 To cross the lava pool, you will need to activate the ice machine. Head up the path to your left and pull the chain at the top. You can use the surrounding snow to cool the lava blocking your way. |
| 8 | 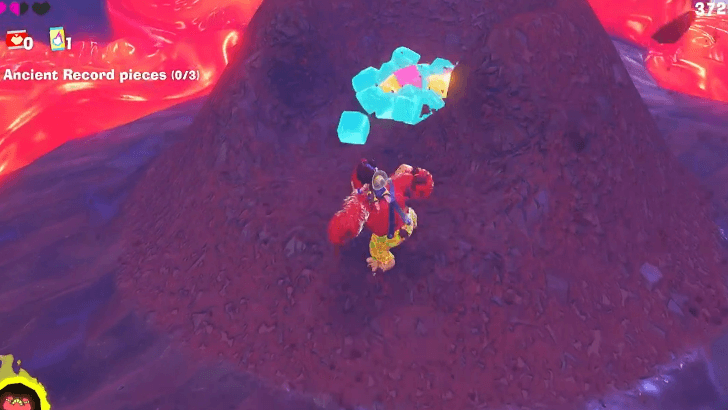 After turning on the machine, dig a path for the ice cubes to get to the lava. If you get stuck, you can reset the terrain by pressing + on the map screen. Resetting the terrain will return you to your last save point, so make sure to save nearby before resetting. ▶︎ How to Reset Terrain |
| 9 | Once you're able to walk over, pick up the Ancient Record piece and return it to the Zebra Elder's feet. |
| 10 |  Talk to the Zebra across the first Zebra NPC. He will tell you that the another Ancient Record Piece is located in the fans. |
| 11 | 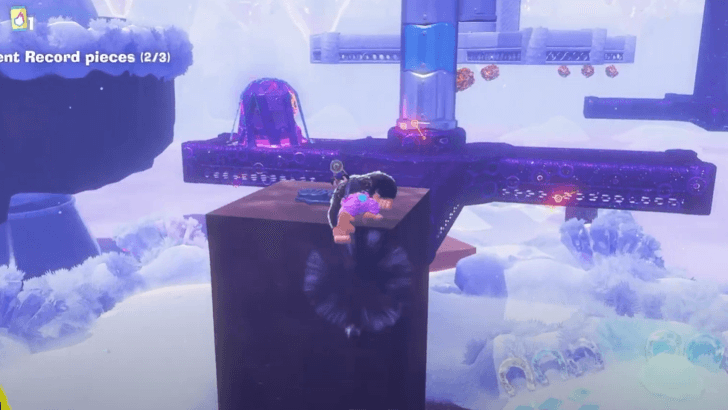 Climb up the terrain and activate the platform to reach the first fan, which is covered in void. After destroying the Terravoider, the fan will begin to move. |
| 12 | 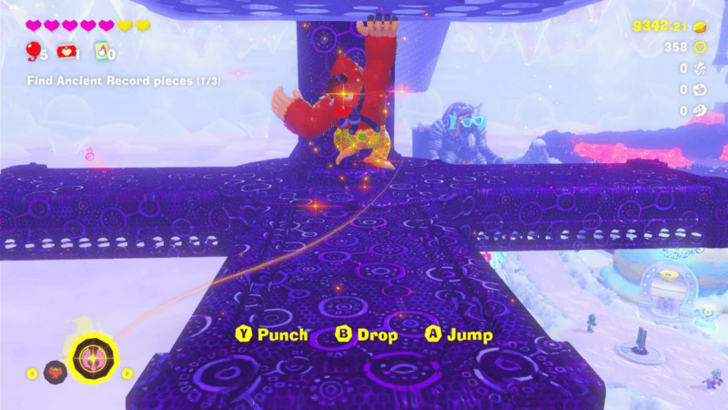 Time your jump to grab onto the mesh of the next fan. Make your way to the end of the moving fans until you reach another fan covered in Void. |
| 13 | 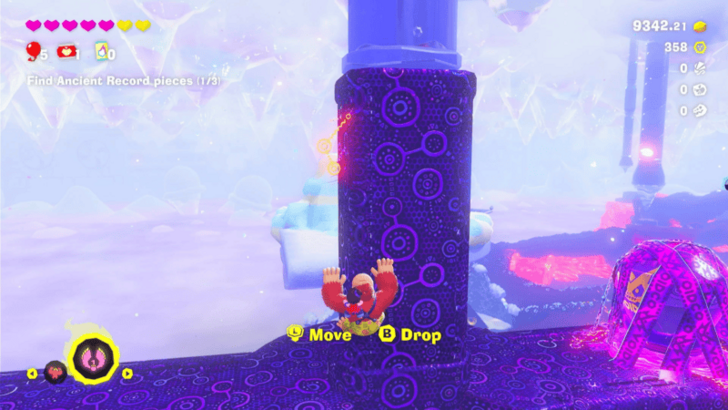 Climb up this Voided fan to find the Terravoider above. Destroy it, then get the Ancient Record piece. With this in hand, jump down the platform to get it back to the Zebra Elder. |
| 14 | 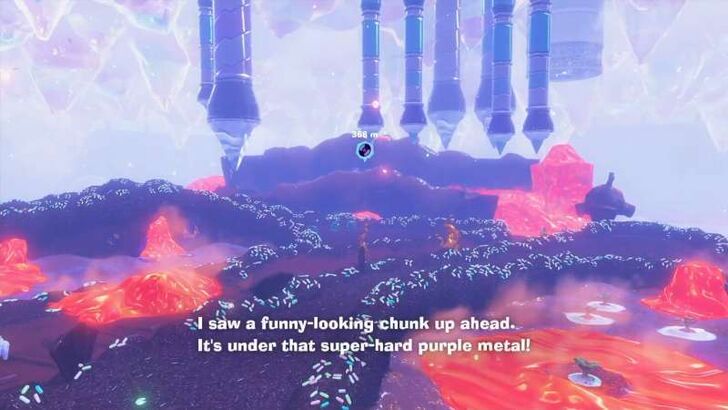 Go up the dirt and chocolate sprinkle path to the right of the Zebra Elder. Talk to the third Zebra for the last location of the Ancient Record Piece. He will point you to the lava area straight ahead. |
| 15 | Just like before, bait the icicles into falling to create a pathway. For larger icicles, throw a chunk to make them fall down. |
| 16 | 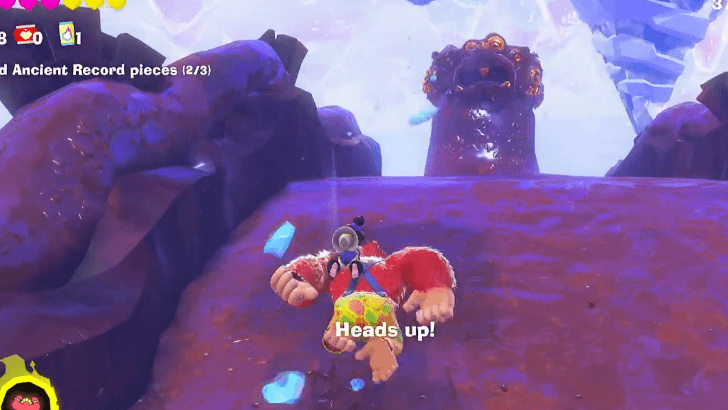 Be careful of enemies along the way. Either roll to dodge out of the way or defeat them by down punching on top of their backs. |
| 17 | 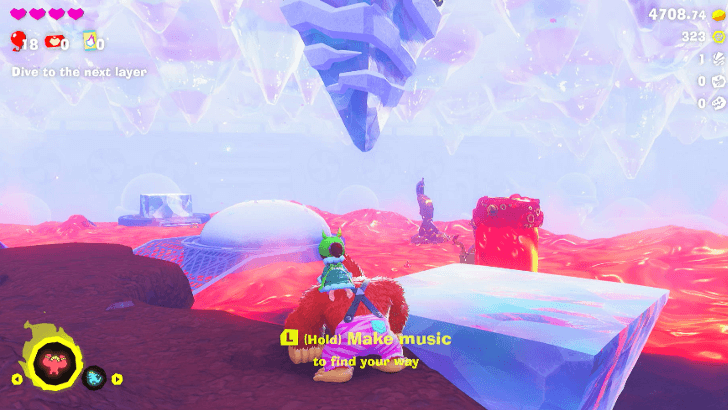 At the last section, throw chunks at the two icicles above to make them fall. We do not recommend fighting the lava enemy, since it will respawn some time after you defeat it. |
| 18 | 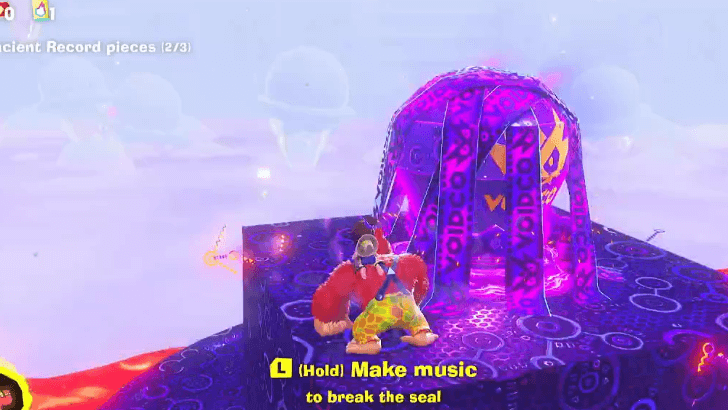 Jump onto the voided terrain and destroy the Terravoider at the end. |
| 19 | 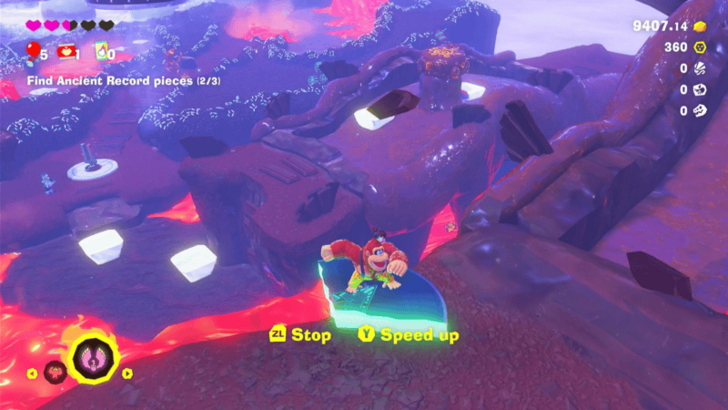 Tear off a chunk of the ice block below your feet, and Turf Surf on it to get to the Ancient Record piece. You can then use this to Turf Surf all the way back to the Zebra Elder. |
| 20 | 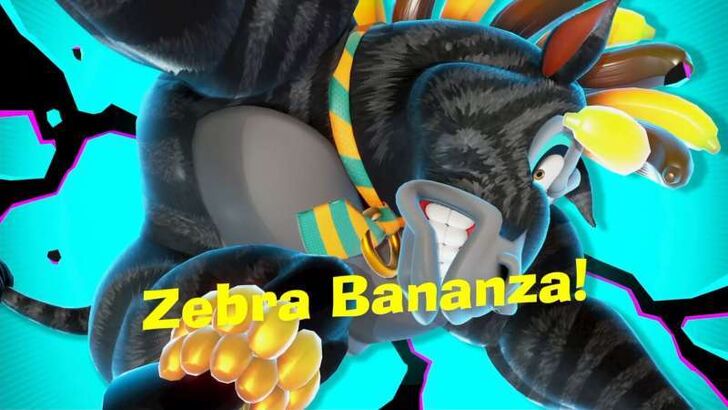 After completing the Ancient Record, you will unlock the Zebra Bananza transformation! ▶︎ How to Use Zebra Bananza Form |
| 21 |  Talk to the nearby Zebra NPC and he will point you to a Barrel Cannon that you can use to launch yourself back to the Freezer Layer Surface. |
Freezer Sublayer 500 Part 2
| Step-by-Step Guide | |
|---|---|
| 1 | After taking the barrel cannon, you will find yourself back at the Cooling Tower Entry. |
| 2 | 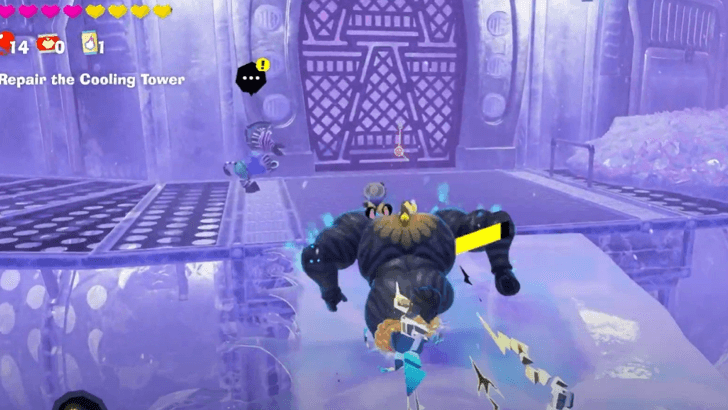 Use the Zebra Bananza Form to go up the crumbling ice path and talk to the Zebra in front of the tower door. |
| 3 | 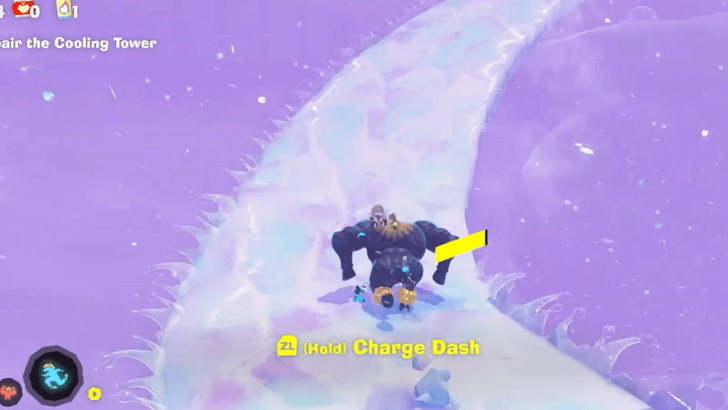 Go around and take the ice path behind the structure to get to the Cooling Tower Top Floor. |
| 4 | 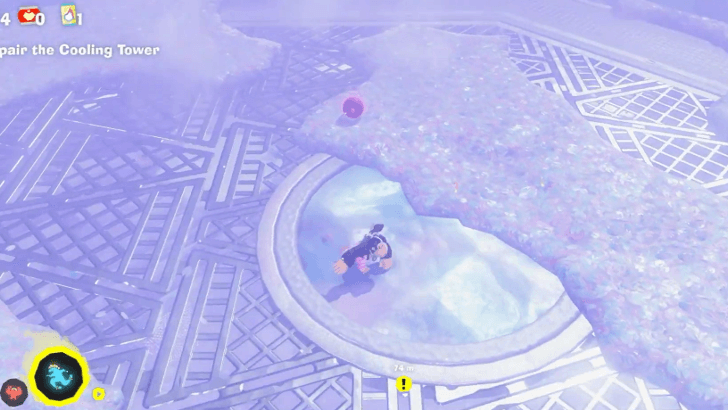 Clear up the snow ahead then Down Punch on the ice center. Be warned that this will trigger a boss fight. |
| 5 | 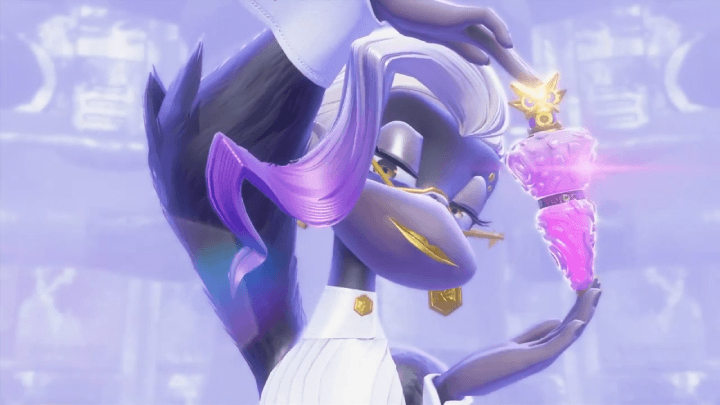 Defeat Poppy Kong. Use the snow to locate Poppy's location while she is invisible, then stun her using the Zebra Bananza transformation. This will knock her out of her invisibility and you will be able to inflict damage. ▶︎ How to Beat Poppy Kong |
| 6 | 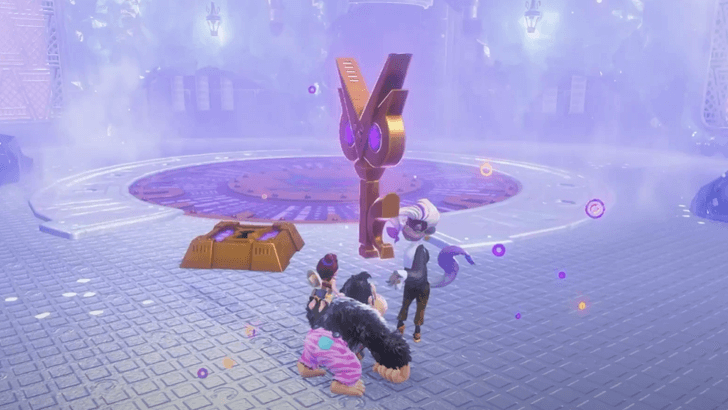 Talk to Poppy to obtain the Void Key then jump down to the Cooling Tower Interior. |
| 7 | 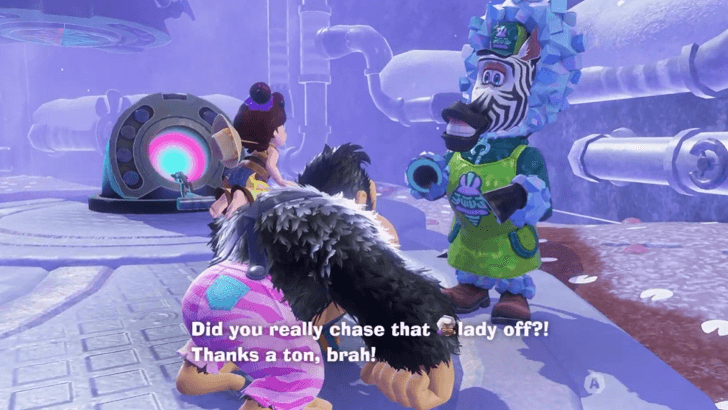 Talk to the Zebra by the pull lever. |
| 8 |  Pull the chain to dispense a pile of ice cubes. |
| 9 |  Dig down below the ice cubes and guide them to the molten lava below. |
| 10 | 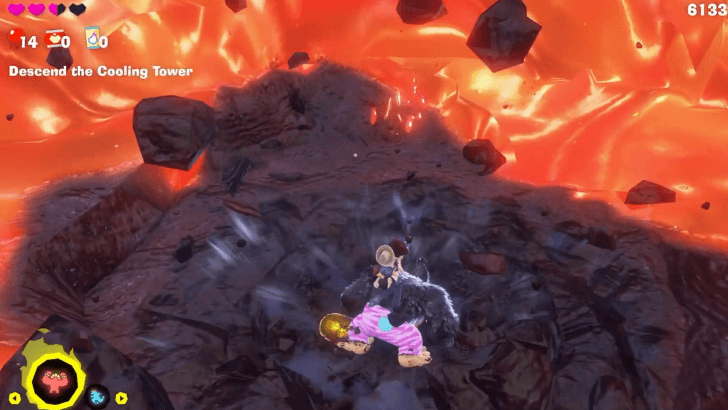 Once the lava has cooled off, dig down the middle of the pit. |
| 11 | 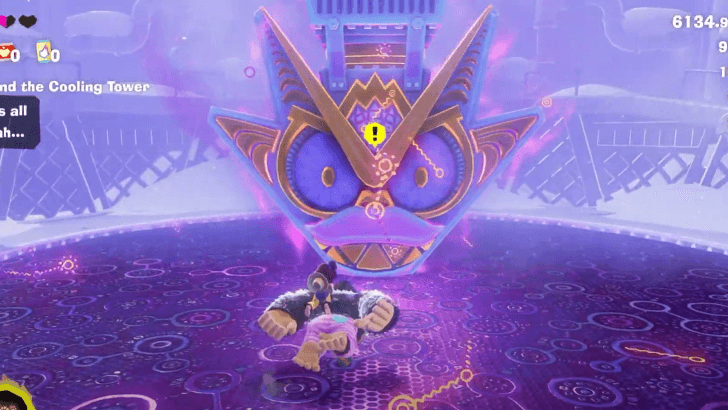 Destroy the Void Stake and jump down the newly made hole to proceed to the next sublayer. |
Freezer Sublayer 502
| Step-by-Step Guide | |
|---|---|
| 1 | 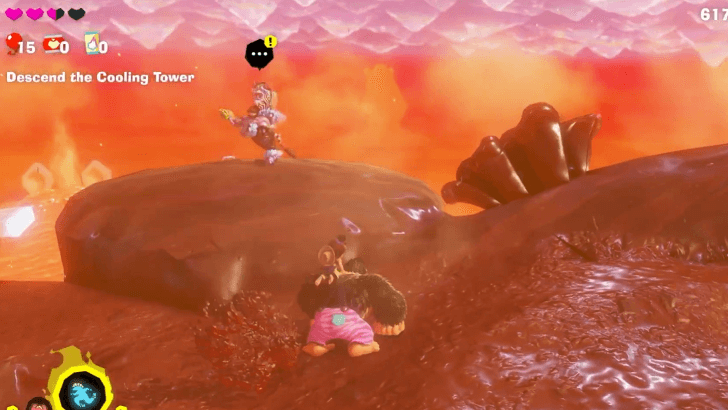 Talk to the Zebra to the right. |
| 2 | 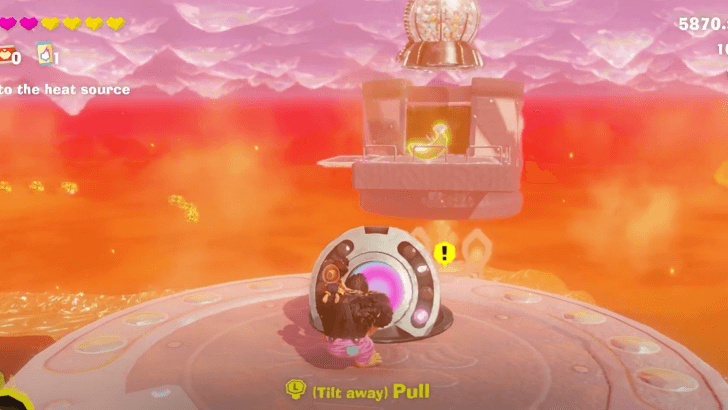 Climb up the white pillar and pull the chain lever at the top to activate the ice machine. |
| 3 | 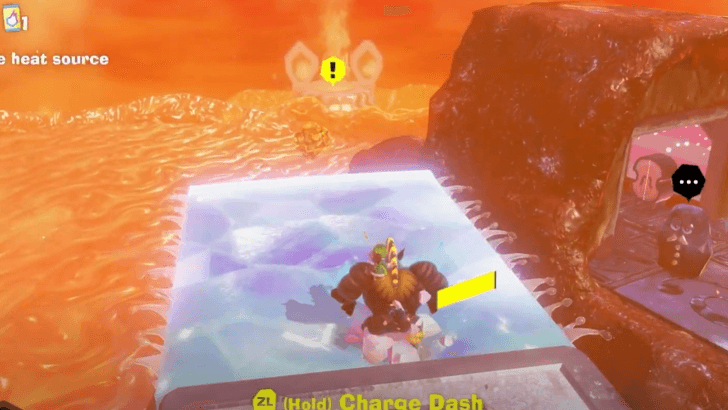 Go towards the ice path beside the Getaway. Use the Zebra Bananza to get to the ice machine at the top. |
| 4 | 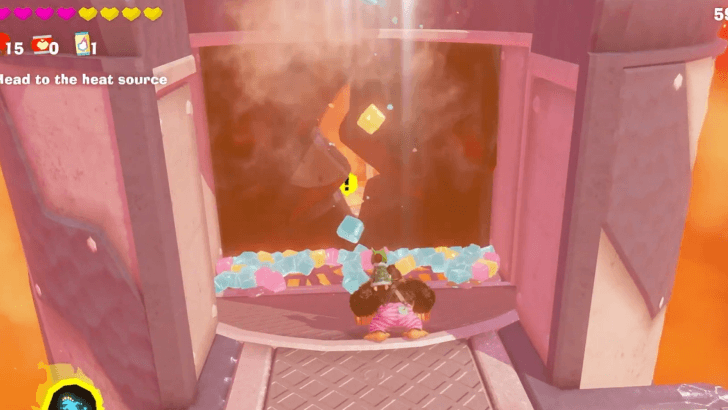 Break the wall of the ice machine to drop ice cubes into the lava. This will create a path to the heat source. |
| 5 | 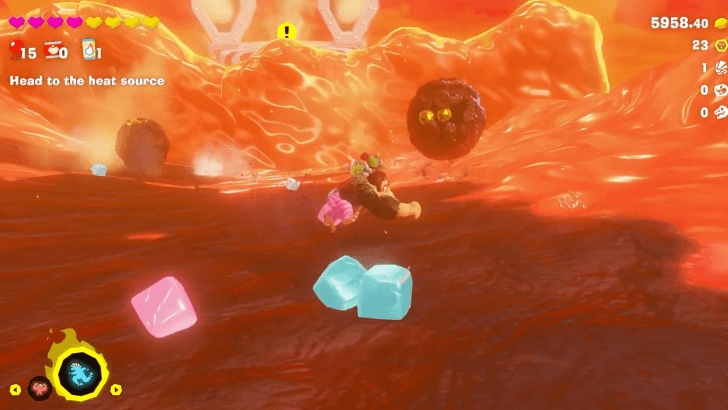 Head down towards the heat source. Punch through any tall walls that block the way of the ice cubes, and dodge enemies rolling your way until you reach the compressor. |
| 6 | 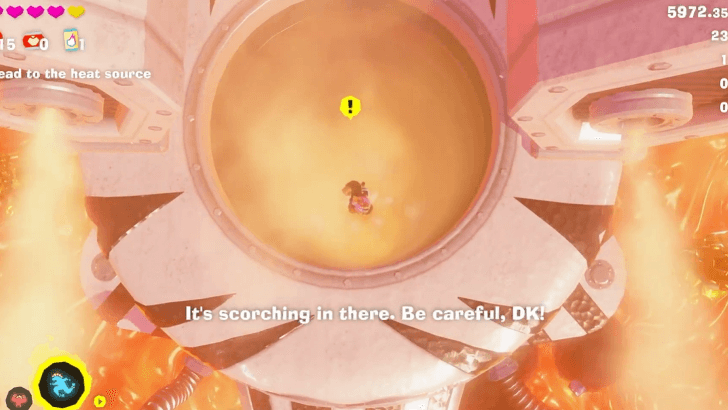 Jump down the hole on top of the compressor. Be warned that this will trigger a boss fight. |
| 7 | 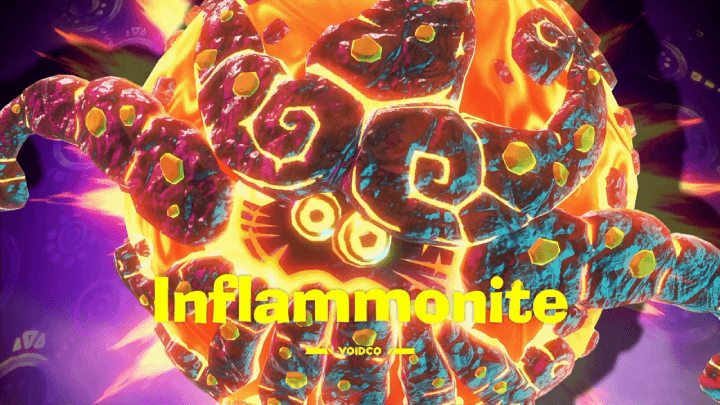 Defeat Inflammonite. Dodge out of the way of its rolls, and bait it into hitting the walls until snow falls on top of it. Break its outer shell, then chase after its core using Zebra Bananza. ▶︎ How to Beat Inflammonite |
| 8 | 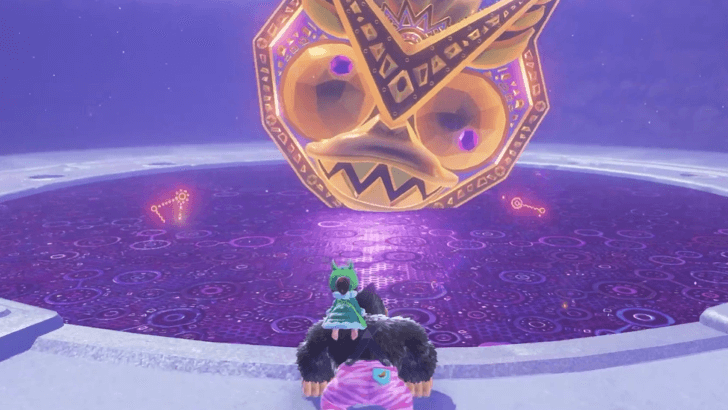 Destroy the Void Stake once Inflammonite is defeated. |
| 9 | Jump down the sinkhole to proceed to the next layer. |
The Junction
| Starting Points | |
|---|---|
| Freezer | Forest |
Freezer Path
| Step-by-Step Guide | |
|---|---|
| 1 | 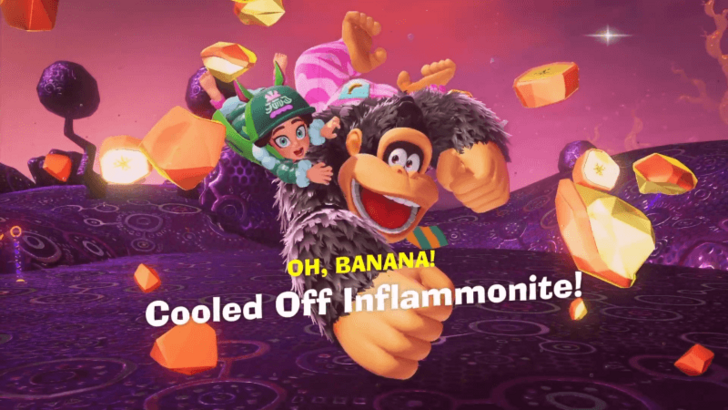 After completing the Freezer Layer, you will end up on the Freezer Path of The Junction. Collect the bunch of Banandium Gems before proceeding. |
| 2 |  Since the entire area is made out of Voided Terrain, there's not much for you to do other than to find the source. Follow the path downward, and make sure to avoid the lasers. ▶︎ How to Clear Voided Terrain |
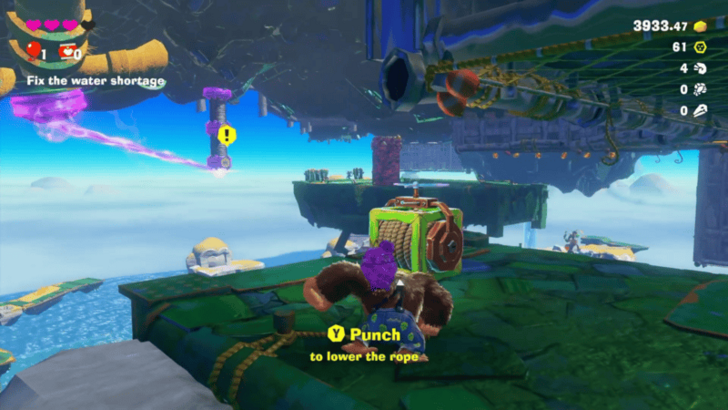
| 3 | 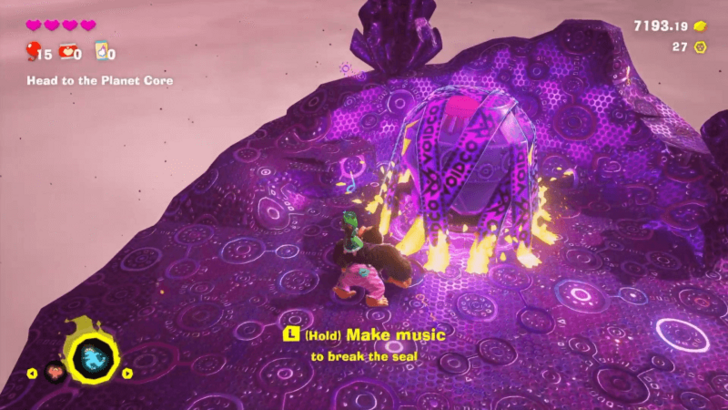 Unlock the VoidCo device at the end of the path by holding the L shoulder button. Destroy it to clear this side of The Junction of Voided Terrain. |
| 4 |  Head back to where you came from. The ground near the lasers is muddy, so you may want to use the Zebra Bananza form to avoid getting hit. |
| 5 |  Cross the newly unlocked bridge to the central area of The Junction. |
| 6 | If you've already cleared the Forest Path side of The Junction, you can cross the bridge to confront Void Kong. If half of the bridge is still unavailable, use the Warp Gong to return to The Divide and take on the Forest Layer. ▶︎ Confront Void Kong ▶︎ The Divide |
| * | There is a way to skip going through the other layer by using the Zebra Bananza Form or Ostrich Bananza Formto get to the other path, but this means that you will skip getting the other Bananza Form. ▶︎ How to Skip Layers |
Forest Path
| Step-by-Step Guide | |
|---|---|
| 1 |  After completing the Forest Layer, you will land in the Forest Path section of The Junction. Collect the bunch of Banandium Gems as your reward for completing the previous layer. |
| 2 | 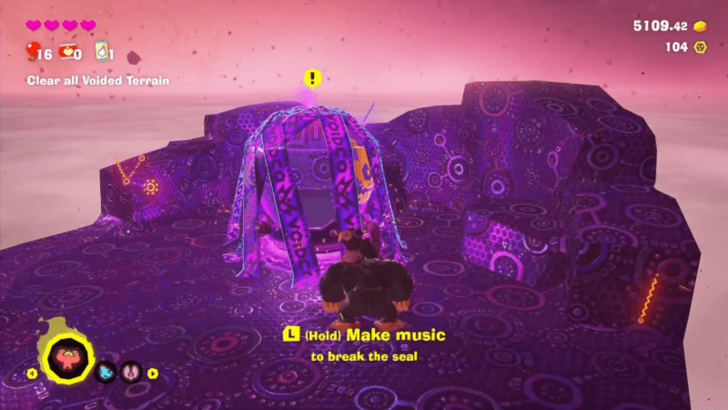 Follow the path downward and avoid the lasers to reach the VoidCo device at the end of the path. Hold L to make music and unlock this device. Then, destroy it to remove the Voided Terrain. |
| 3 | 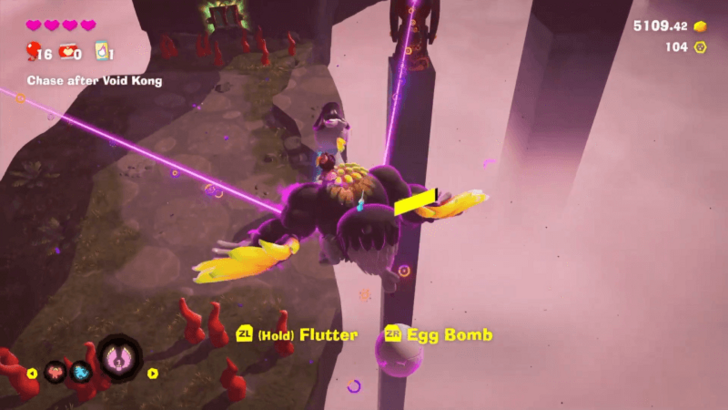 Once the terrain is cleared, red thorns will appear. Use your Ostrich Bananza transformation to avoid the thorns and the lasers as you make your way back. |
| 4 | 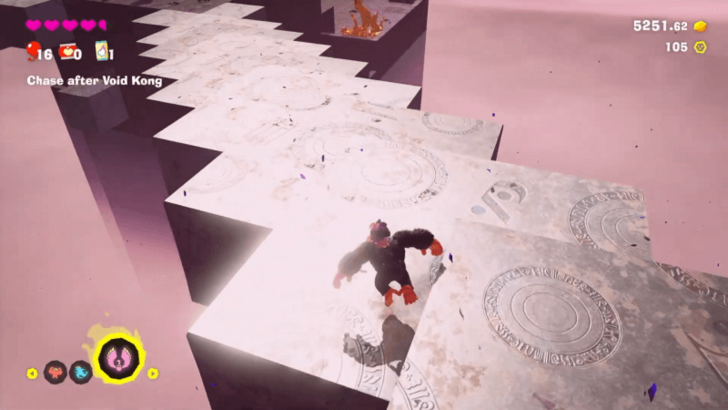 Cross the bridge to the central area of The Junction. |
| 5 | If you've already cleared the Freezer Path side of The Junction, you can cross the bridge to confront Void Kong. If half of the bridge is still unavailable, use the Warp Gong to return to The Divide and take on the Freezer Layer. ▶︎ Confront Void Kong ▶︎ The Divide |
Confront Void Kong
| Step-by-Step Guide | |
|---|---|
| 1 | 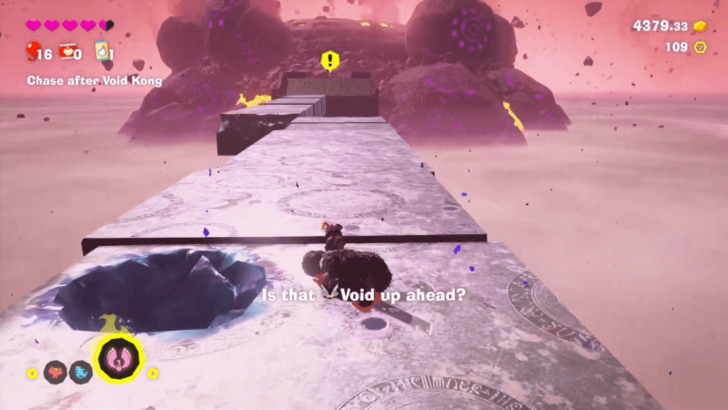 Once all Voided Terrain in The Junction is cleared, a bridge leading to Void Kong and his crew should appear. Cross this bridge, and a cutscene will play. |
| 2 | 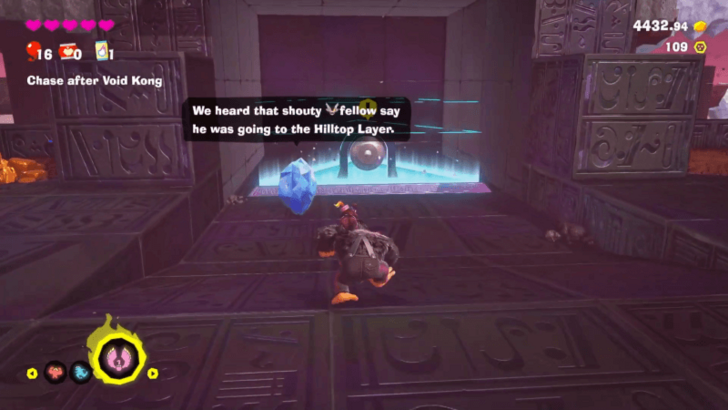 Head back towards the Warp Gong, and use the Eelevator to head to the Hilltop Layer. ▶︎ How to Teeleport |
Hilltop and Lagoon Layers
| Step-by-Step Guide | |
|---|---|
| 1 |  Once you reach Hilltop Layer, you will enter a fight with Void Kong. Use your Bananza transformations and the surrounding terrain to damage Void Kong. |
| 2 | 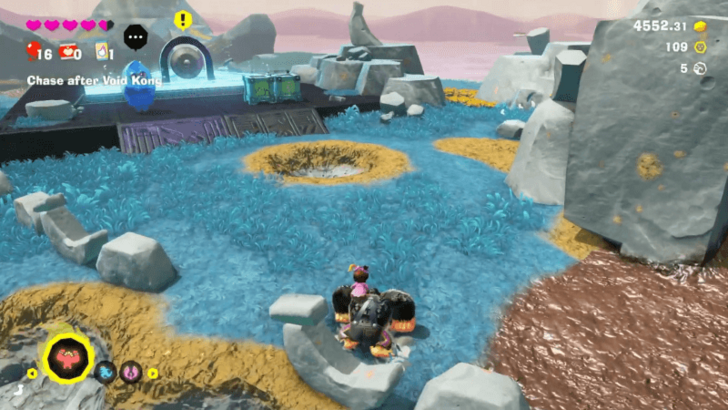 Void Kong will run away before you can completely defeat him. Go to the Warp Gong in Fractone Village, and take the Eelevator to Lagoon Layer. |
| 3 |  Fight Void Kong again until he flees. Head to the Warp Gong in Sublayer 101, then use it to return to The Junction. |
Clash Point
| Step-by-Step Guide | |
|---|---|
| 1 |  Now it's time to defeat Void Kong for real. Before proceeding, it is highly recommended to build a Getaway here and take a nap to increase your hearts. When you're ready, head towards the bridge to trigger the fight with Void Kong. ▶︎ How to Beat Void Kong |
| * |  Remember you can use the Ostrich Form to fly over walls. You can also use the Zebra Form to cross ice. |
| * |  When Void Kong's shield is down, use the Kong Form to break through the rising mud walls. |
| 2 | 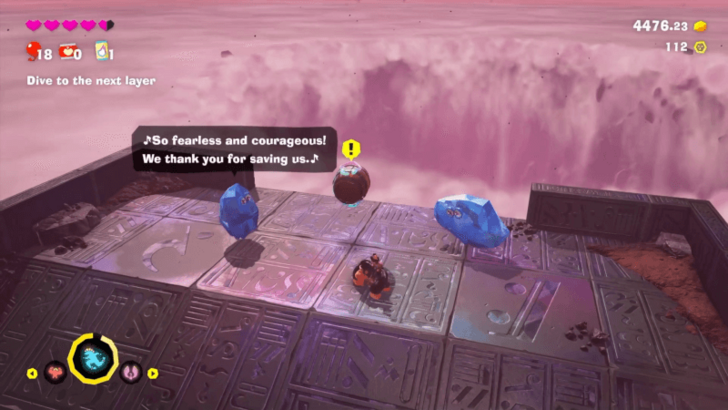 Defeat Void Kong, then use the Barrel Cannon to launch Donkey Kong and Pauline to the next layer. |
Resort Layer
Resort Layer Sublayer 800
| Step-by-Step Guide | |
|---|---|
| 1 | Get the bunch of Banandium Gems as your welcome gift in this layer. |
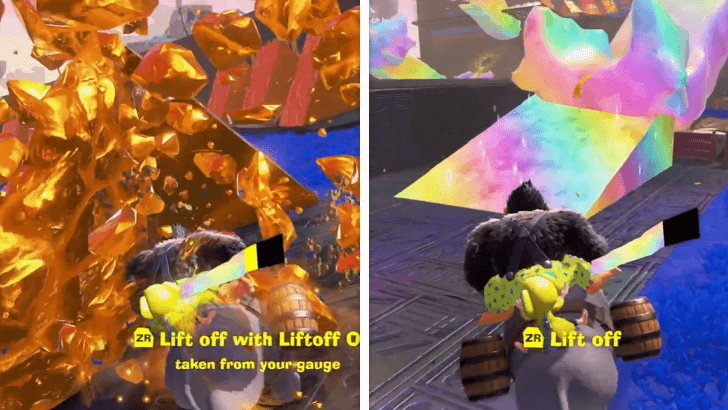
| 2 |  Talk to the Fractones to reveal your objective for this layer, which is to climb the big watermelon in the center of the Resort Layer. To do this, you'll need to make use of the Liftoff Ore scattered around the area. |
| 3 | 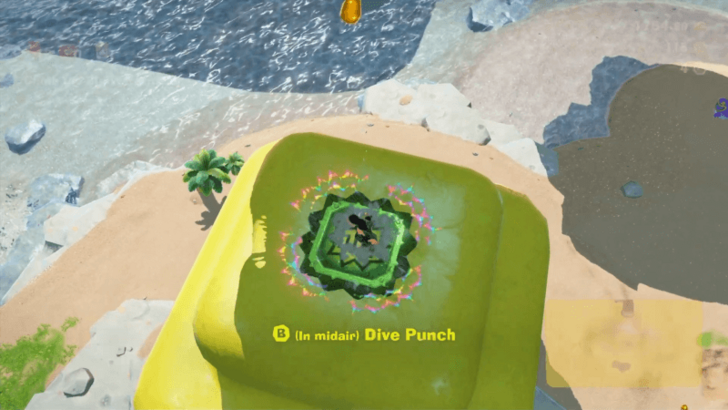 Use Dive Punch on the yellow fruit block near the Tropical Retreat Outskirts checkpoint to reveal a block of rainbow-colored Liftoff Ore. |
| 4 | 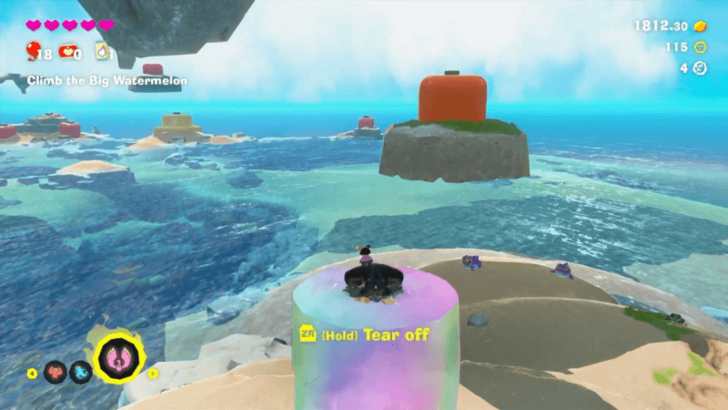 Tear off a chunk of Liftoff Ore to get to the platforms floating in midair. Have the Ostrich Bananza ready in case you need to glide to reach a platform. |
| 5 | Shark monsters can be found on these floating platforms. Hit them to create bridges of Liftoff Ore. |
| 6 |  You can tear off chunks from the Liftoff Ore bridges to float to even higher platforms. Keep doing this until you reach the Skydive Isle platform. |
| * |  An Architectone is available here on Skydive Isle. If you pay the required amount, you can build a Getaway where you can rest, change clothes, and play music. ▶︎ How to Build Getaways |
| * |  Rope can be found near the base of the platform with Liftoff Ore in this area. Activate it so it's easy to get back up in case you fall down. There is also a challenge battle you can take on here. |
| 7 | 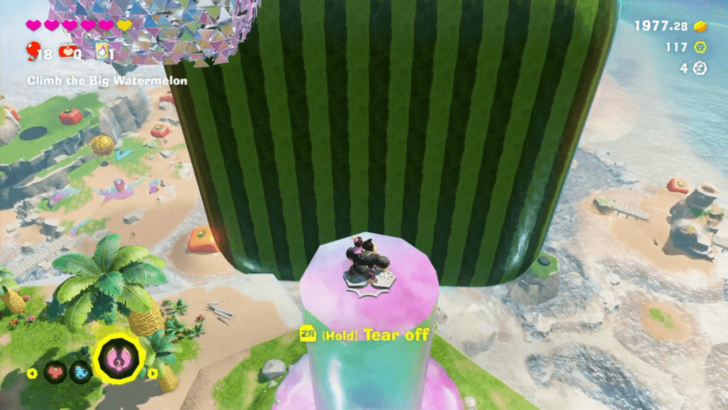 Once you're ready, go to the Liftoff Ore platform and use Hand Slap to raise yourself higher. |
| 8 | 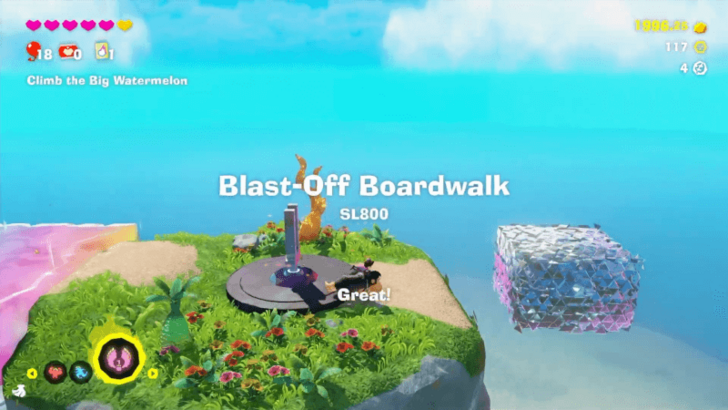 Tear off a chunk of Liftoff Ore to shoot up to the higher platform, Blast-Off Boardwalk. You can try to aim for the shifting platforms if you're struggling to make it all the way to the top. |
| 9 | Step onto the Liftoff Ore block, and it will move, snaking along the floating platforms nearby. Try your best to follow along if you don't want to fall. You can jump off once you're on top of the watermelon or you can keep going and use a chunk of Liftoff Ore to follow the gold, heading to an even higher platform. |
| 10 | 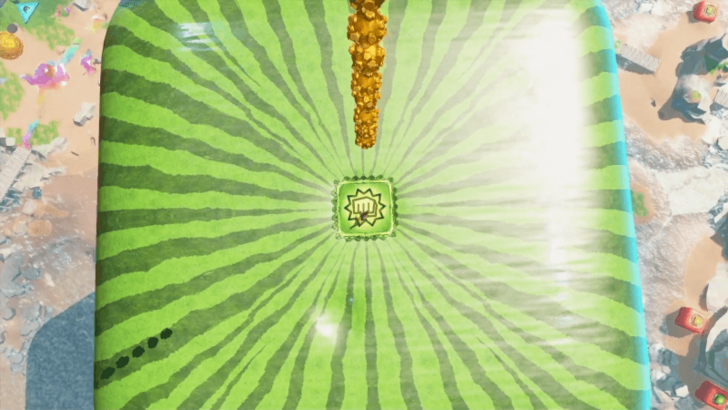 Use Dive Punch right into the middle of the watermelon, and it'll crack open. |
| 11 | 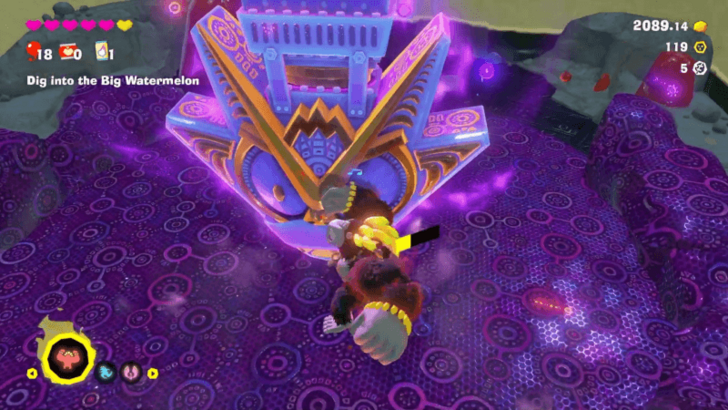 Punch your way down deeper into the center of the watermelon until you reach a Void Stake. |
| 12 | Destroy the Void Stake to open up the path to next layer. |
Tempest Layer
Mount Gusty Tusk Sublayer 900
| Step-by-Step Guide | |
|---|---|
| 1 |  Before anything else, get your Banandium Gem welcome gift. |
| 2 | 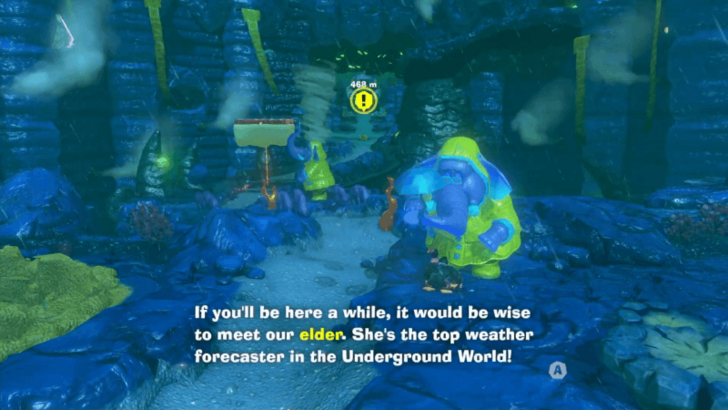 Talk to the nearest elephant NPC, and you'll be directed towards the Elephant Elder. |
| 3 | 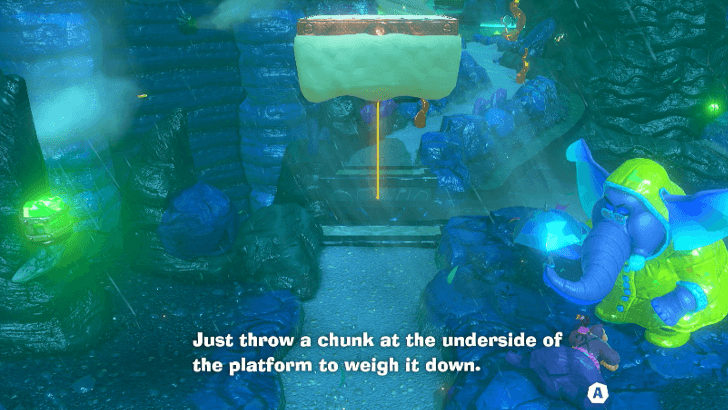 Throw chunks at Gloo Gum platforms to get them to drop down. Follow the path, and you should end up directly in front of the Elephant Elder. Use the microphone to talk to her. |
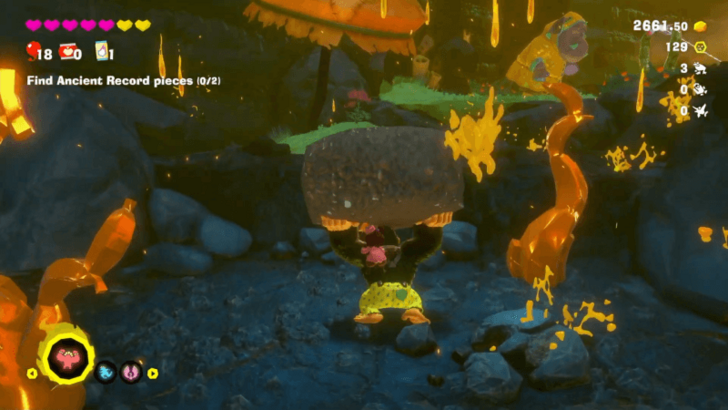
| 4 | 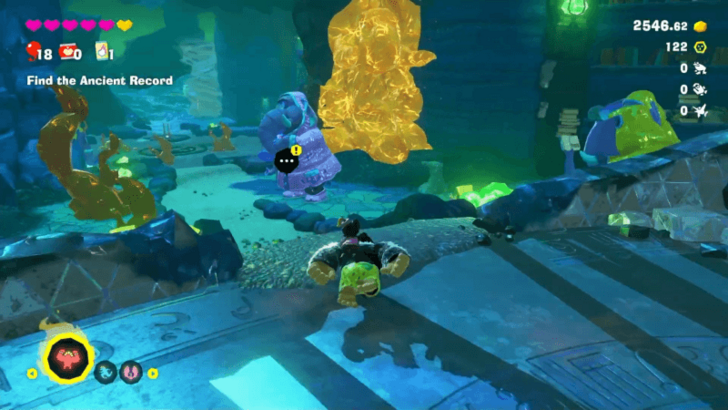 Talk to the elephant behind you to find the Ancient Record's whereabouts. You'll be directed to a nearby tunnel. |
| 5 | Go through the tunnel. Throw any chunk of terrain onto the Gloo Gum of the elevated platforms so that they drop down and let you cross. |
| * |  Just like with platforms, throw chunks at Gloo Gum bats so that they fall to the ground. You will not be able to punch Gloo Gum Bats until they have already fallen. |
| 6 | 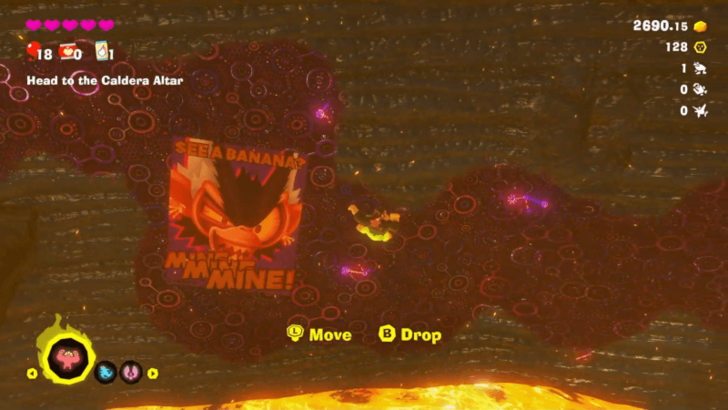 An elephant in the area will direct your attention to the Void device blocking the way to the Caldera Altar. Climb on the Voided wall to reach this device, avoiding enemies along the way. |
| 7 | 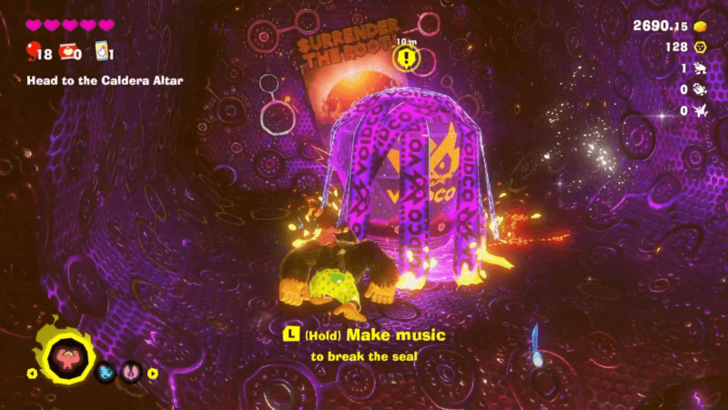 Hold L to make music to break the seal of the device. Then punch it until it's destroyed. |
| 8 | 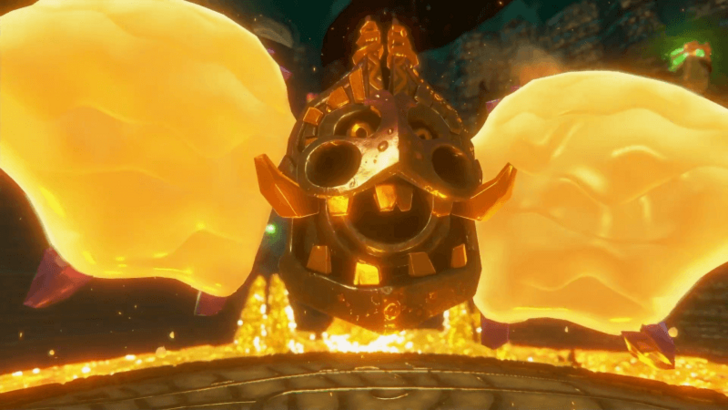 Head to the middle of the altar to start a boss battle against Sinister Blusterwing. You can beat it by throwing chunks at its wings and hitting it when it's down. ▶︎ How to Beat Sinister Blusterwing |
Tempest Sublayer 901
| Step-by-Step Guide | |
|---|---|
| 1 | 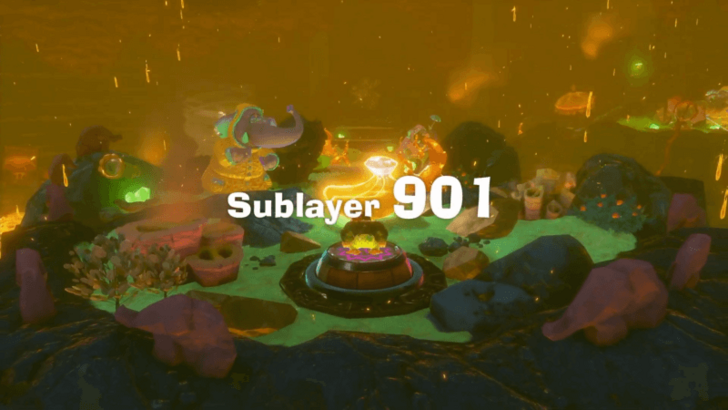 Jump down the hole left by Sinister Blusterwing, and get your Banandium Gem reward. |
| 2 | 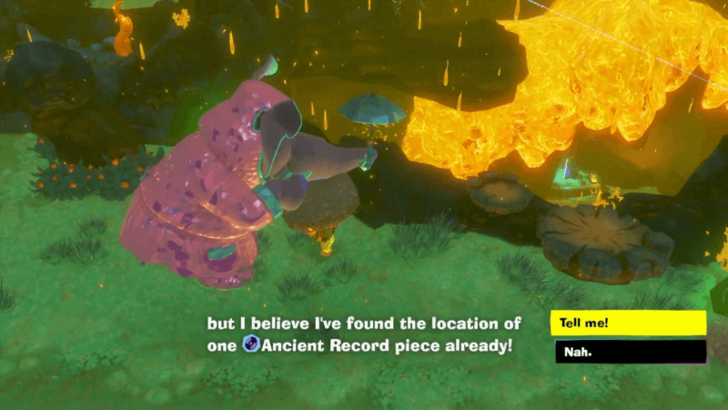 Follow the path. Talk to the elephants along the way to get directions for the Ancient Record locations. |
| * |  Watch out for the fiery rain as you go through this area! Tear off a chunk of the terrain to serve as your umbrella. You can go without any cover in grassy areas, which are safe spaces. |
| 3 |  While holding a chunk of sturdy terrain, go down the zipline at the end of the path. Go down another zipline beside it to reach the first record piece. |
| 4 | 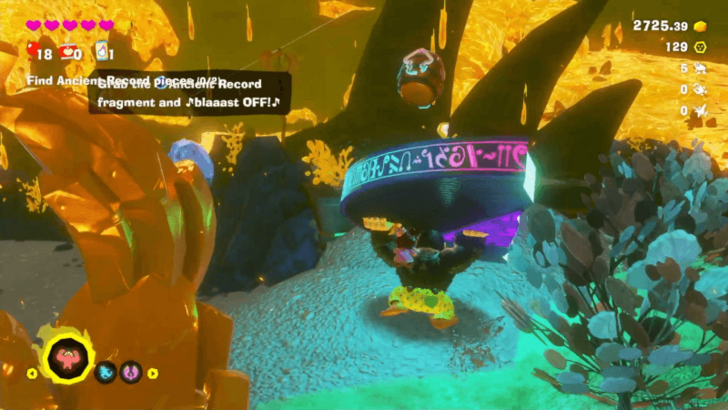 With the record piece in hand, use the Barrel Cannon to shoot up to a higher platform. Afterwards, jump into the Barrel Cannon next to the Getaway to return to Sublayer 900. |
| 5 | 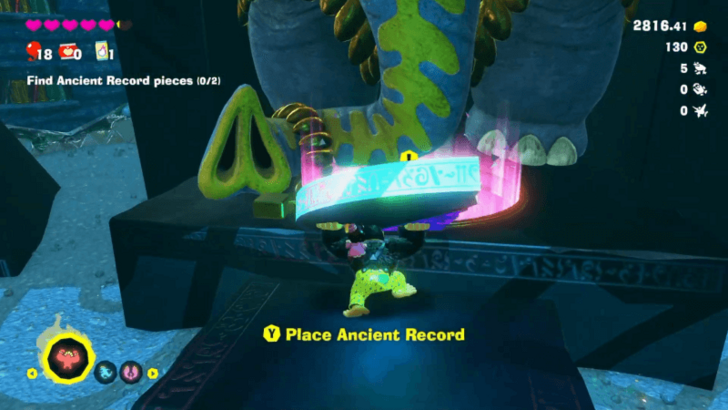 Go back to the Elephant Elder, and place the record piece onto the record player by her feet. |
| 6 |  Jump back down the hole you came from to return to Sublayer 901. This hole has a down-arrow-shaped Fractone standing beside it, so it's easy to see where you're supposed to go. |
| 7 |  Go back to Ancient Record Crossroads, but this time, head to the grassy platform on the right instead of the second zipline. You should end up in Voided Terrain if you keep going straight from here. |
| 8 |  Wait for the tall enemies to pop up from the ground, then use them to climb up onto the VoidCo device. Make music using L, then destroy it to clear the Voided Terrain. ▶︎ How to Clear Voided Terrain |
| 9 | 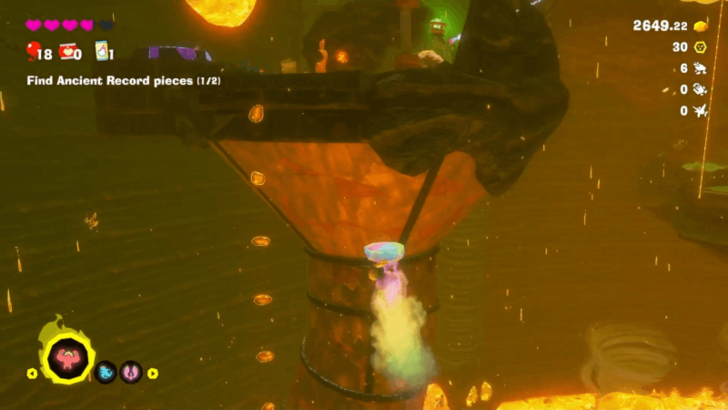 With the terrain clear, you can see that the moving enemies are made of rainbow-colored Liftoff Ore. Tear off a chunk of this ore to reach the higher platform. |
| 10 | 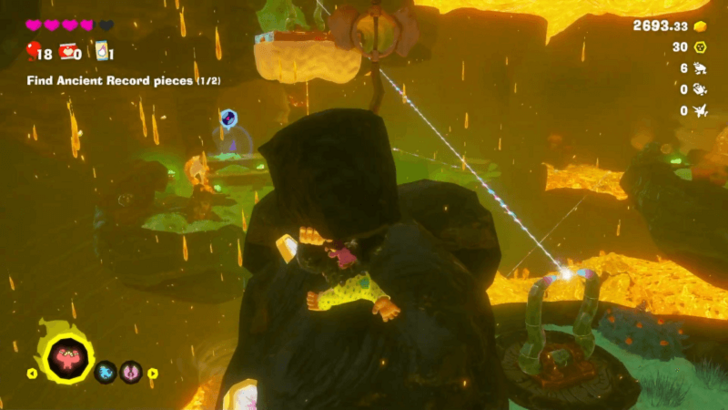 Throw a chunk of terrain onto Gloo Gum beneath the platform connected to the zipline. This should bring the platform down. |
| 11 | Tear off another chunk of terrain and zipline down to the second record piece. |
| 12 | 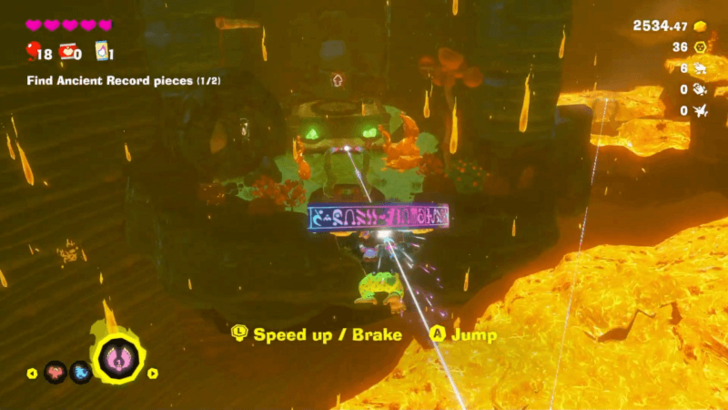 Pick up the record piece and use it on the zipline on the side. A Barrel Cannon should be nearby, which you can use to head straight back up to Sublayer 900. |
Elephant Bananza
| Step-by-Step Guide | |
|---|---|
| 1 | 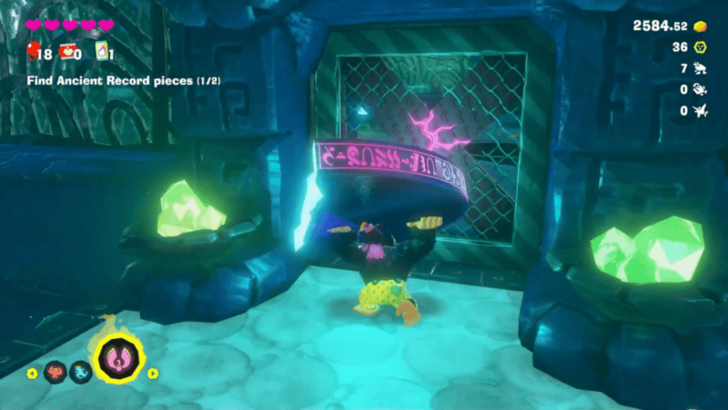 Avoid the tornado in this area, and head to the entryway with a cracked X. Swing the record piece you're carrying to break open the doorway. |
| 2 | 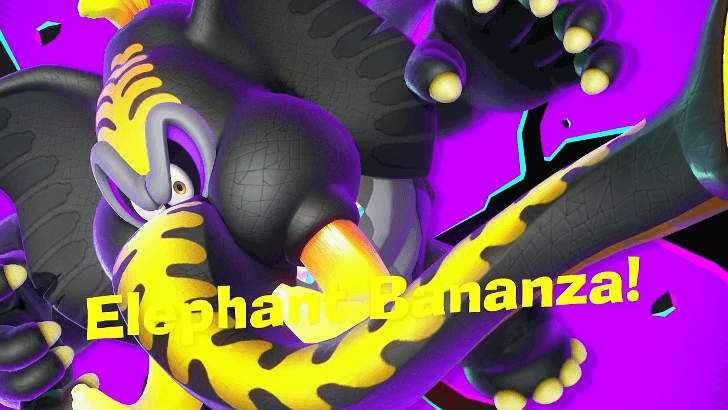 Carry the record piece back to the Elephant Elder, and place it alongside the first record piece. You will then learn the Elephant Bananza transformation. ▶︎ How to Use Elephant Bananza Form |
| 3 | Jump back down to Hot-Shower Cave in Sublayer 901. |
| 4 | 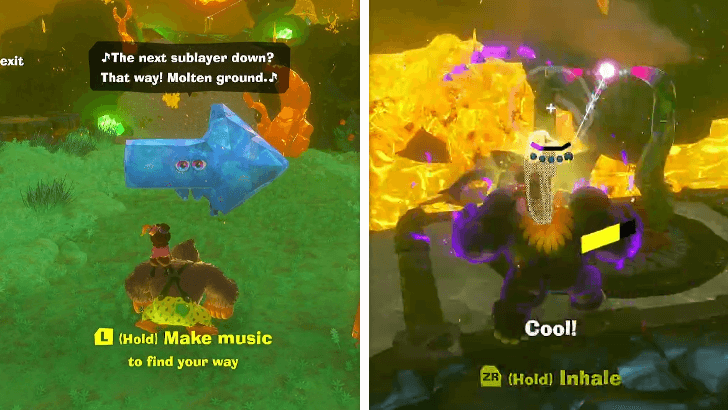 Follow the Fractone pointing to the right, and transform into the Elephant Bananza form. While in this form, suck up the lava along the path to clear the way until you reveal a zipline going down. |
| 5 | 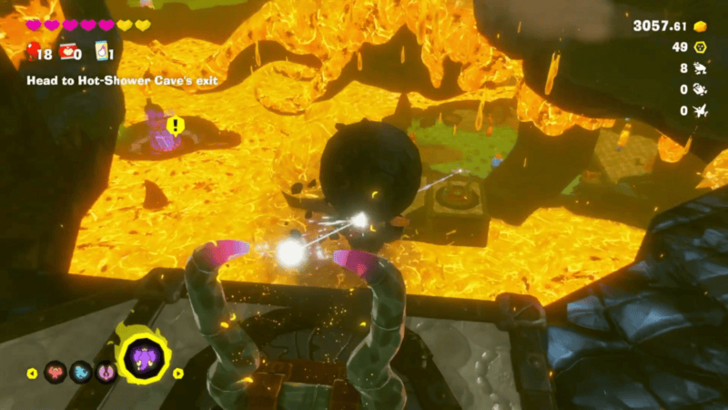 Press ZR to hold the chunk of terrain that you inhaled. Use this to zipline downward. |
| 6 | 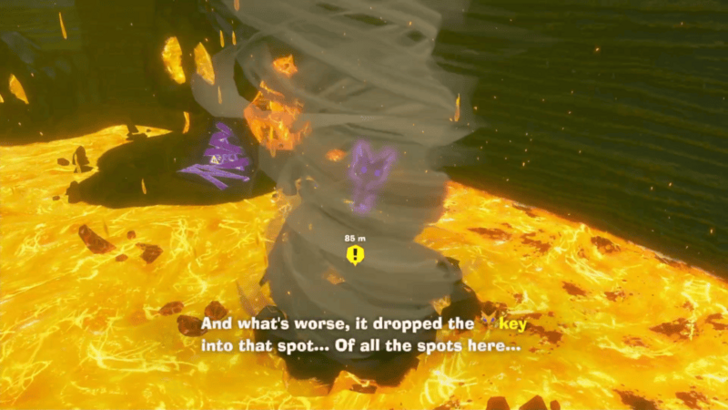 A Void Stake is locked in this area. Get the key from one of the tornadoes by inhaling with your Elephant Bananza form. Once free, the key will automatically slot into the lock. |
| 7 | 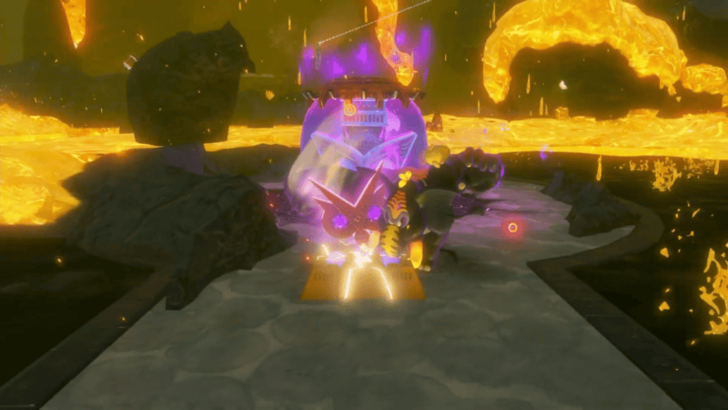 Clear a path to the key and Void Stake by inhaling the lava. Then, punch the key to unlock the Void Stake. |
| 8 | 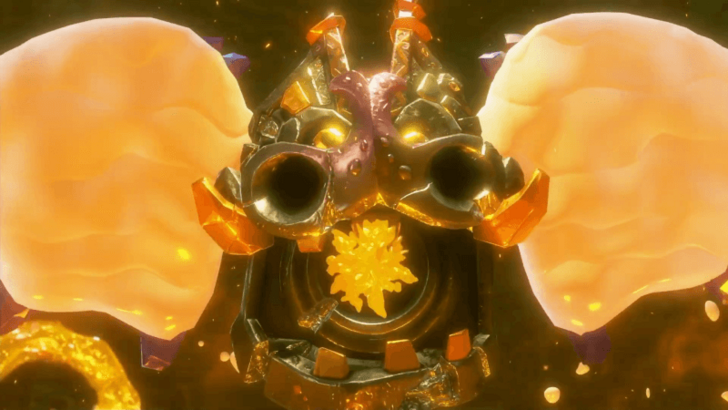 Destroy the Void Stake to open up the path to an arena below. Jump down, and you will be greeted immediately by Sinister Blusterwing, the boss you fought earlier. |
| 9 | Fight Sinister Blusterwing again, this time using your Elephant Bananza form to inhale the lava it brings to the field. Once defeated, the path to Sublayer 902 will open up. |
Tempest Sublayer 902
| Step-by-Step Guide | |
|---|---|
| 1 | 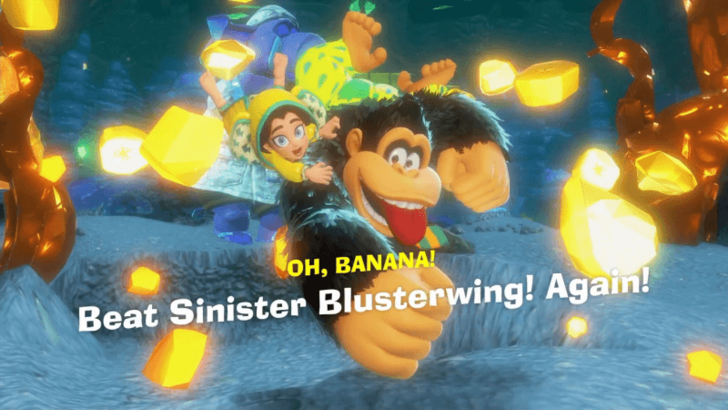 Dive down to Sublayer 902, and get your Banandium Gem reward for fighting Sinister Blusterwing. |
| 2 | 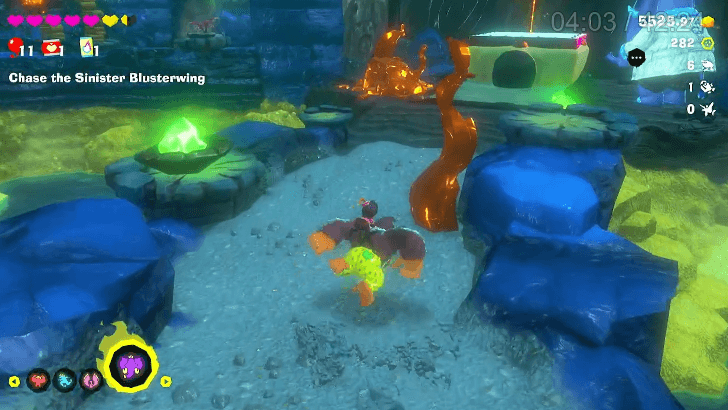 Follow the path where you can see a Gloo Gum platform weighed down by a rock at the end. Use Hand Slap while on top of the platform to shake off the chunk. |
| 3 | 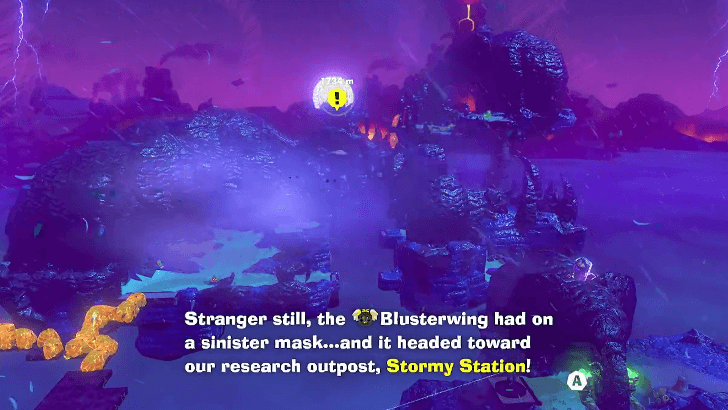 Talk to the elephant at the top. They will inform you that the Blusterwing is heading to the Stormy Station. |
| 4 | 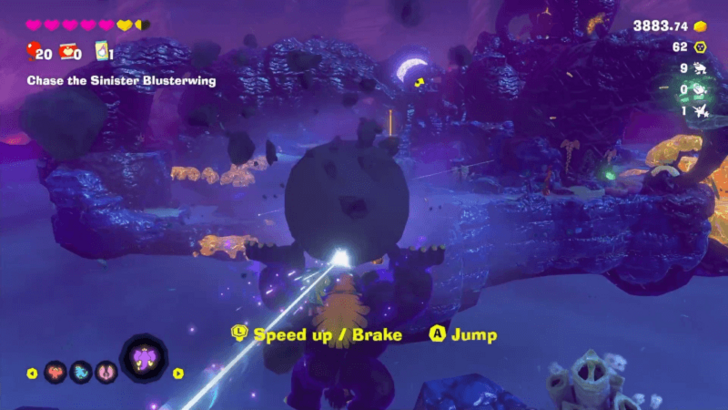 Tear off a chunk of sturdy terrain, then go down the zipline. Keep following the path until you reach an area with lava. |
| * | Beware of lightning strikes in the area. If you stay in one place too long, electricity will start to charge at your spot. Either roll out of the way or grab a chunk to use it as a shield. |
| 5 |  Use the Elephant Bananza form to inhale the lava. Once you've cleared the way, climb up to the other side. |
| 6 | 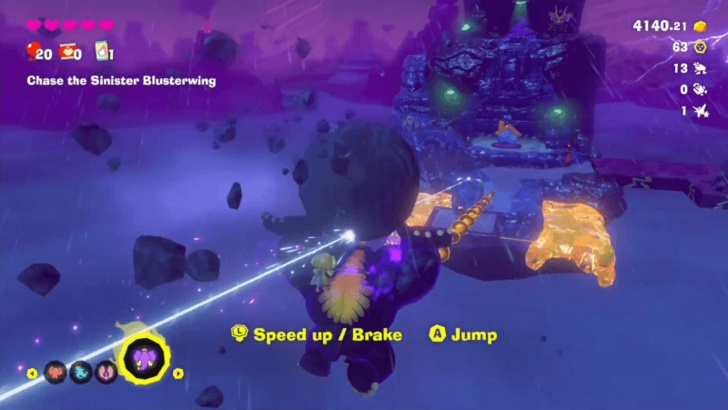 Another zipline can be found along the path. Tear off a chunk of terrain to go down this zipline. Try to time it so that the moving platform aligns with the fixed platform at the bottom to avoid getting hurt by the lava. |
| 7 | 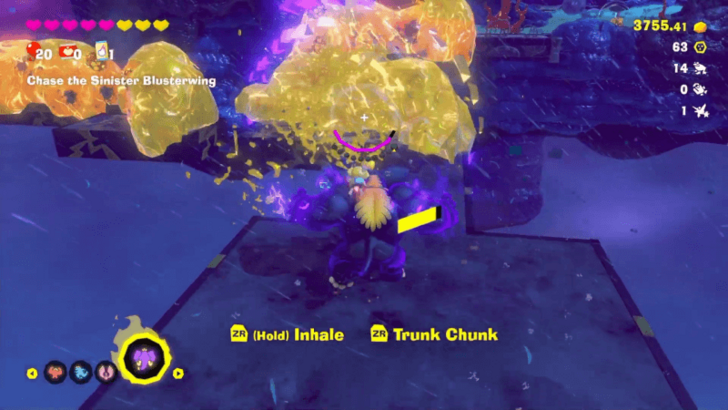 Use Elephant Bananza to clear off more lava along the way. |
| 8 |  When you reach the grassy area, turn right towards the Gloo Gum platforms. Throw chunks of terrain both platforms, so that you can get on. When you are on the second platform, use Hand Slap to remove the chunk, and raise you to the top |
| 9 |  Use Elephant Bananza to inhale the muddy terrain and reveal the Liftoff Ore hidden underneath. Use it to float up to the top. |
| 10 | Get a chunk of terrain, and zipline down. |
| 11 | 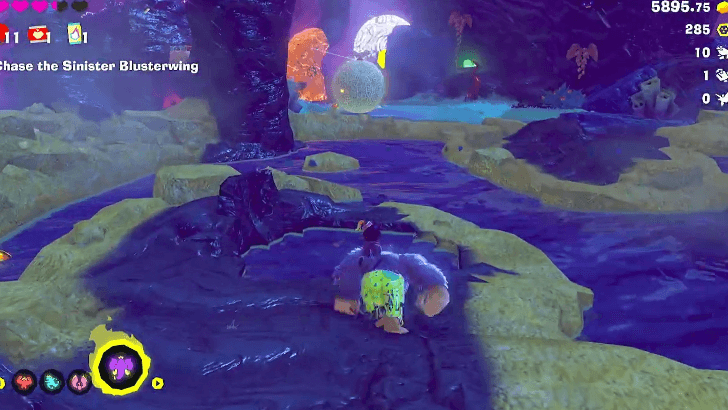 Cross the swampy area to reach the grassy area on the other side. Beware of Gloo Gum bats and lightning strikes. If lightning strikes water, it will electrify the entire pool. |
| 12 | 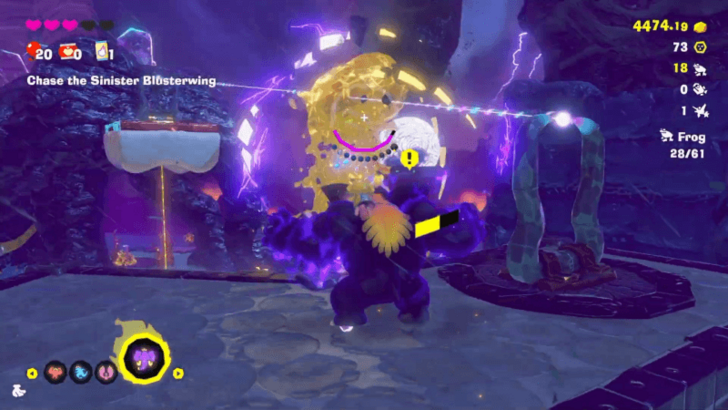 Transform into the Elephant Bananza form again to inhale the lava blocking the next zipline. |
| 13 | 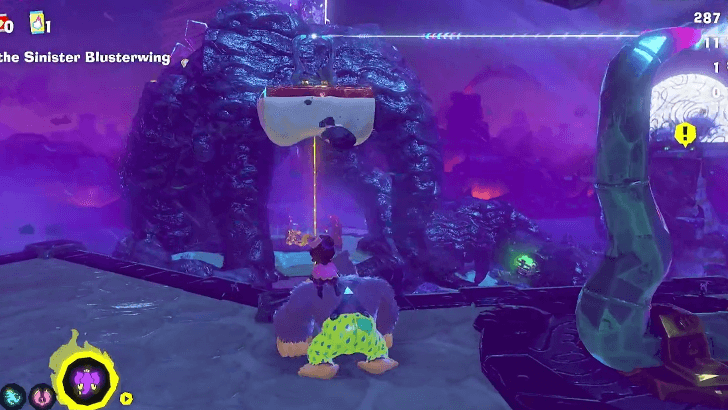 Afterwards, throw a chunk of terrain at the Gloo Gum platform on the other side. |
| 14 | Zipline down to the Clifftop Shelter. Afterwards, jump off the platform ahead. |
| 15 | 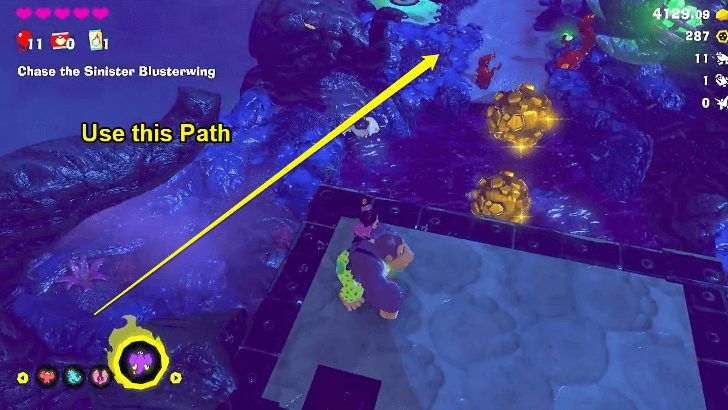 Use the rock formations to the left to avoid touching the water and get to the other side. If you stay too long in the water, you will get electrified by lightning. |
| 16 | Ride the zipline ahead to get to Stormy Station. |
| 17 | 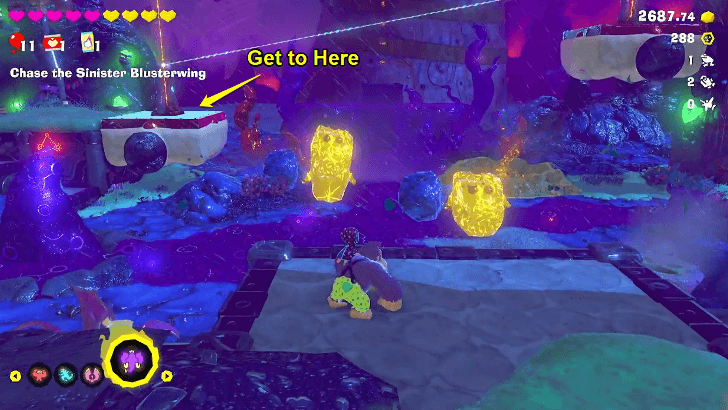 Go to the Gloo Gum platform on the left. Transform into the Elephant Bananza form, and store a chunk in your trunk. Dislodge the chunk stuck on the platform you're on using a Hand Slap. |
| 18 |  Use Trunk Chunk to zipline to the other side. Dislodge the chunk on this second platform with a Hand Slap. |
| 19 |  Break the seal on the Void device, then destroy it to remove the Voided Terrain. |
| 20 |  Jump down, then transform into the Elephant Bananza form. Inhale some of the Liftoff Ore before tearing off a chunk yourself and floating to a higher platform. Once that runs out, use Trunk Chunk to get a new chunk of Liftoff Ore to take you to an even higher platform. |
| 21 |  Once you're ready for the final boss battle, enter Stormy Station, and Dive Punch your way down the windy hole. When you land, you will face off against the Sinister Blusterwing one last time. |
| 22 |  Defeat Sinister Blusterwing. Use the Elephant Bananza Form to inhale the magma cubes flying in the wind around you. Do this while avoiding Blusterwing's lightning and wind attacks. When you have collected enough, use the Trunk Chunk and throw chunks at its wings to get it to the ground. |
| 23 | Punch the Void trinket to open up the way to the next layer. |
Landfill Layer
Landfill Sublayer 1000
| Step-by-Step Guide | |
|---|---|
| 1 | 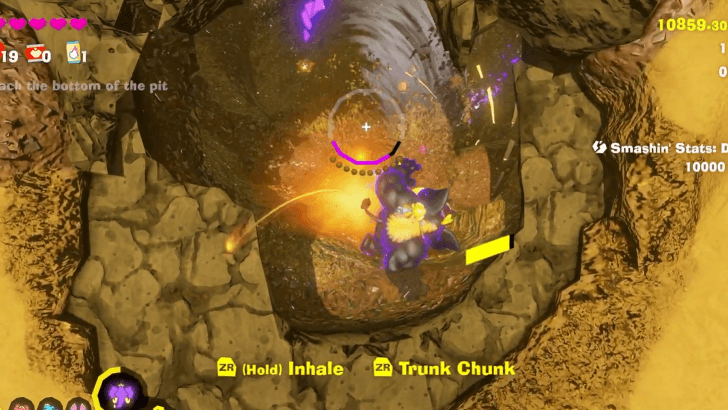 From the bunch of bananas, dig until you reach the bottom of the pit, past the Upper, Middle, and Lower Pit checkpoints. Use the Elephant Bananza Form to make it easier to dig and defeat enemies. ▶︎ How to Use Elephant Bananza Form |
| 2 | 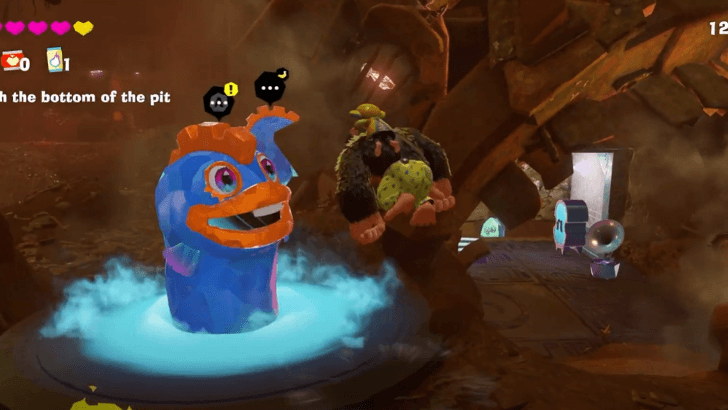 When you reach Trashtopia, talk to the Li'l Eelevator next to the Getaway. ▶︎ How to Build Getaways |
| 3 |  Destroy the Void Stake and continue digging downwards. |
| 4 |  Talk to Grumpy Kong.Be warned that this will trigger a boss fight. |
| 5 | 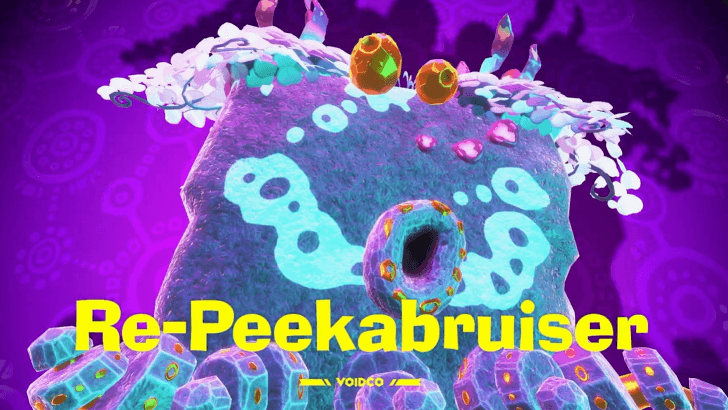 Defeat Re-Peekabruiser. Digging holes around the arena will cause it to trip when it charges, giving you an opportunity to attack. ▶︎ How to Beat Landfill Peekabruiser |
| * |  We recommend using the Zebra and Elephant Bananza forms in this battle. Use the Zebra form to charge towards the Re-Peekabruiser, then use the Elephant form to suck the small bruisers—preventing it from re-forming its shell. ▶︎ All Bananza Transformations and Forms |
| 6 | 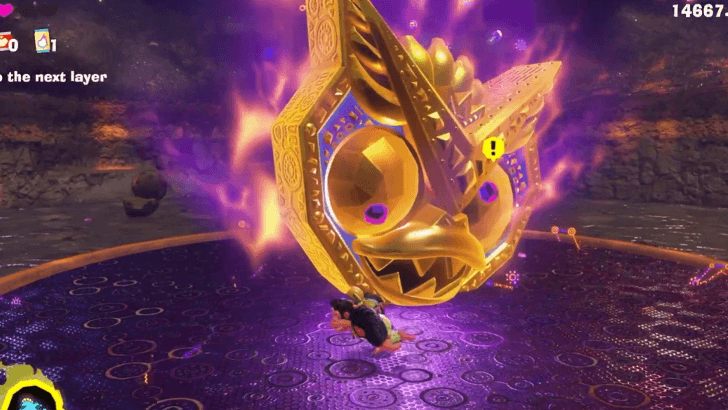 Destroy the Void Stake. |
| 7 | 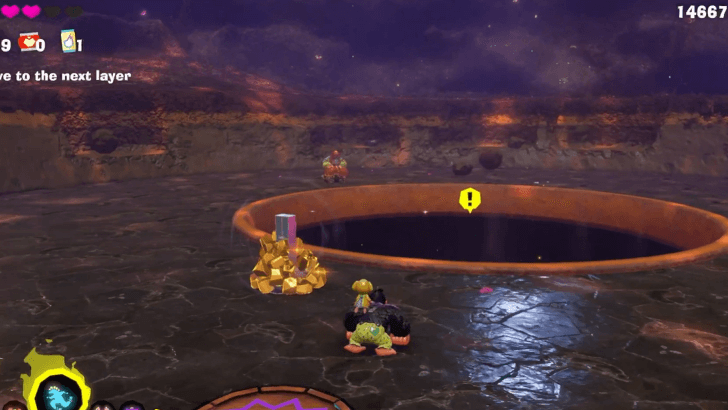 Jump down to the next layer. |
Racing Layer
Racing Sublayer 1100
| Step-by-Step Guide | |
|---|---|
| 1 |  Talk to the monkey on the pink platform ahead. |
| 2 |  Talk to Diddy and Dixie Kong at the reception desk. |
| 3 | 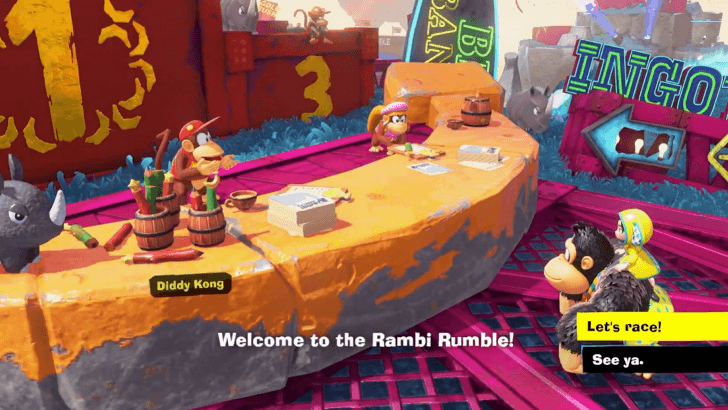 Talk to Diddy Kong when you are ready to race in the Rambi Rumble. The race will not begin right away after talking to Diddy Kong. You will be placed in a practice arena first to understand the basic controls. |
| * | 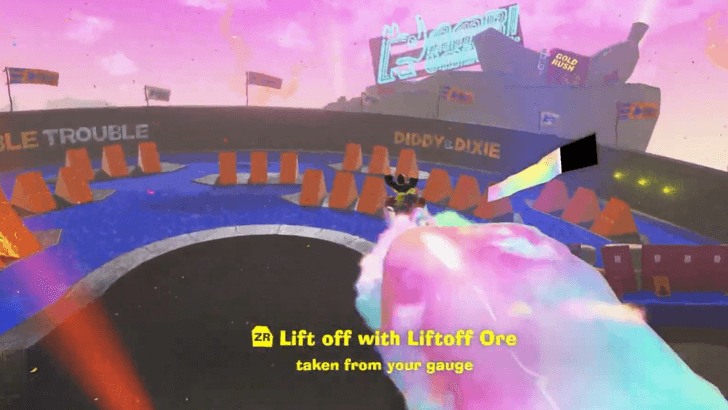 When the gauge is full, hold ZR to lift off. This will create a rainbow bridge which will lift you high into the air! Destroying objects will fill your gauge for lift off. |
| 4 |  Win the Rambi Rumble. |
| * |  Aim for gold obstacles to fill your gauge faster. Going on rainbow ramps will also boost your speed. |
| 5 | 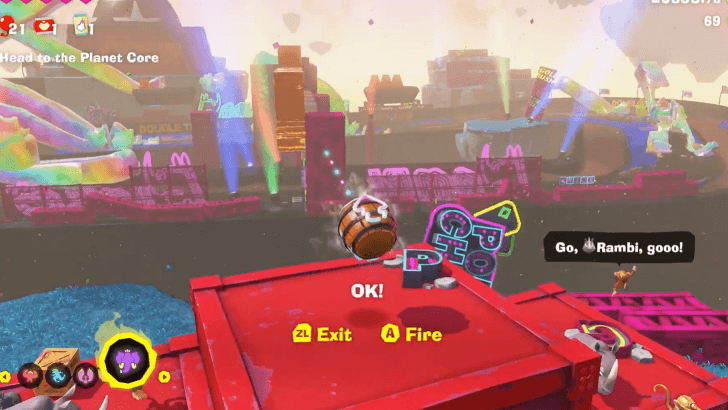 Launch yourself from the Barrel Cannon on the winner's podium. |
| 6 |  Destroy the Void Stake on the trophy. |
| 7 |  Jump down to the next layer. |
Radiance Layer
Shedlight Cave Sublayer 1200
| Step-by-Step Guide | |
|---|---|
| 1 |  Talk to the snake under the cave light. You may need to lure the nearby scorpion enemy to the light and defeat it before the snake NPC will talk to you. |
| * | When brought near a light source, some enemies will have their weakness exposed. Throwing Glow Stones will also have the same effect. ▶︎ All Terrain Types and Interactions |
| 2 |  Lure the Crockoid in front of the Void Stake into the stake's glowing purple light. This will turn the enemy's outer shell into destroyable stone. Defeat it to retrieve the Void Key. |
| * | You can also destroy the concrete pillars to let it more light. Use the Shade Ore left by the scorpion enemies or by using your Kong Bananza form to destroy them. |
| 3 | Destroy the Void Stake and head down. |
Radiance Sublayer 1201
| Step-by-Step Guide | |
|---|---|
| 1 | 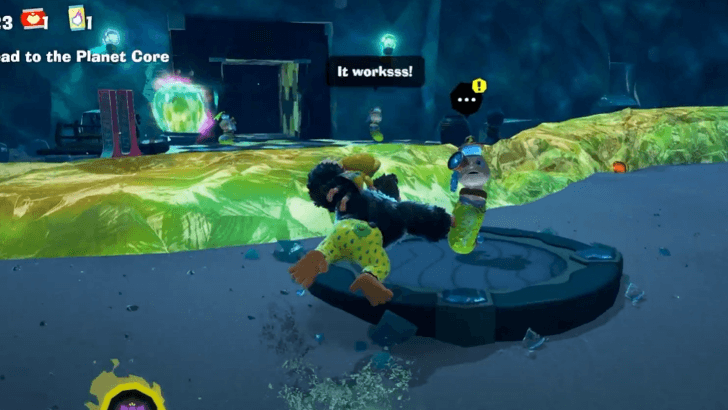 Talk to the snake beside the Glow Stone vein. |
| 2 | 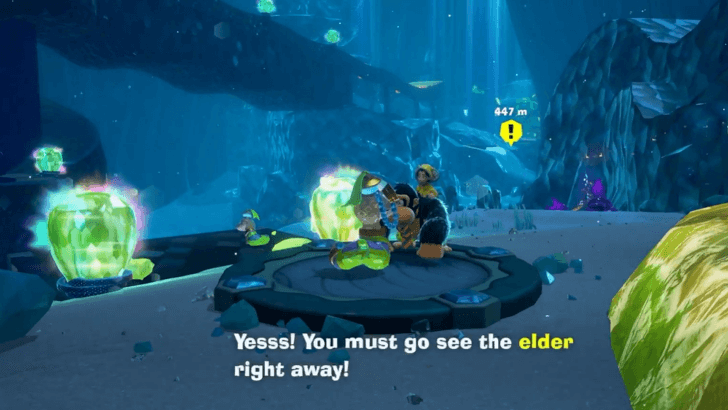 Grab a chunk of Glow Stone to incapacitate enemies in your way as you make your way towards the direction of the Snake Elder. He will be located at the east of Constrictor Corridor. |
| 3 |  Talk to the Snake Elder. You will be tasked with finding 4 Ancient Record pieces in exchange for a new Bananza Form transformation. ▶︎ All Bananza Transformations and Forms |
| 4 |  Go east and talk to the apprentice under the snake head. You will learn that one of the Ancient Record pieces is located near the bottom of Sidewinder Slide, which is pulsing in electricity. |
| 5 |  Go around and grab onto the wall behind the snake head. |
| 6 |  Descend down Sidewinder Slide. Be careful not to touch any of the electric parts. You can push up on the left stick to slow down your descent. |
| 7 | 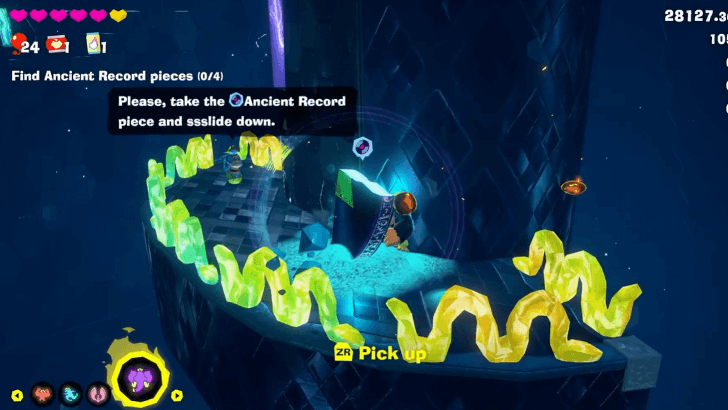 Pick up the Ancient Record piece on a platform, then climb up the wall towards the right to continue descending to the bottom of the slide. |
| 8 |  Go around and punch the metal square at the base of the structure. |
| 9 | Ride the Barrel Cannon back to the top and return the Ancient Record piece. |
| 10 | 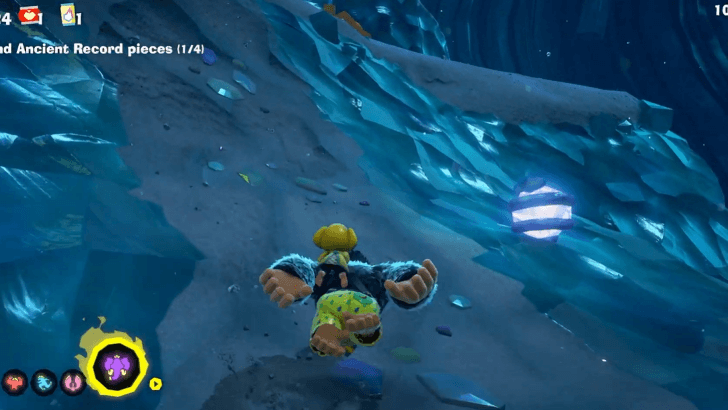 Go up the terrain to the right of the Snake Elder. |
| 11 | 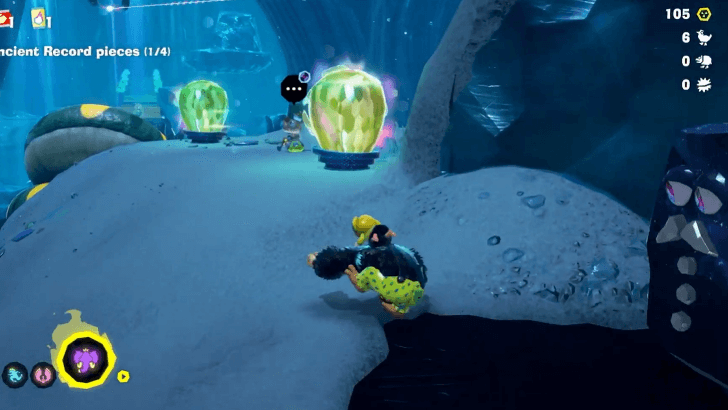 Talk to the apprentice near the Base Getaway. He'll tell you about the zipline and recommend you get a scorpion chunk. ▶︎ How to Build Getaways |
| 12 | 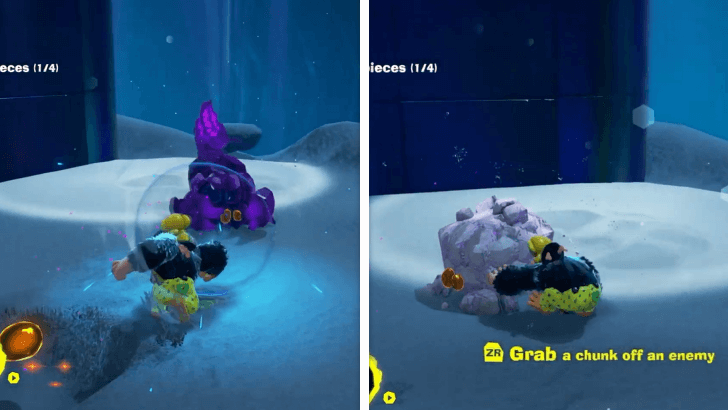 To get a scorpion chunk, expose one of the scorpions to a light source then press ZR to grab it like a chunk. When you retreat into the dark, the scorpion chunk will harden. |
| 13 |  Use the scorpion chunk on the zipline. Avoid touching the Glow Stones or else it will turn the material soft. |
| 15 |  Get the Ancient Record piece on the other end. Punch the blue balloon multiple times to raise the platform you're on, then use the record piece to zipline back to the Snake Elder. |
| 16 |  Go to the left of the Snake Elder and talk to the apprentice standing in front of two Glow Stones. |
| 17 | Go into the Sizzling Sunbath and retrieve the Ancient Record piece. Avoid the enemy in the middle by going around the circle. |
| 18 | 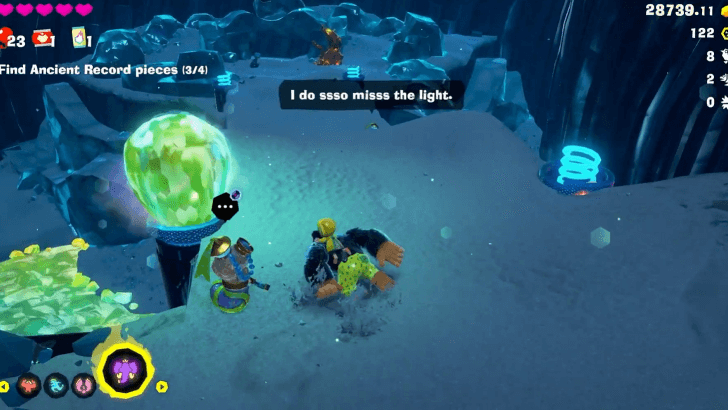 Talk to the apprentice right across the Sizzling Sunbath. |
| 19 | Go into the Pitch-Dark Pit. While inside, your surroundings will turn dark and your vision will become limited. |
| 20 | Use the Elephant Bananza Form or a chunk of Glow Stone to clear away the thorns and the dust blocking passageways and covering the blue coils on the ground. |
| 21 | 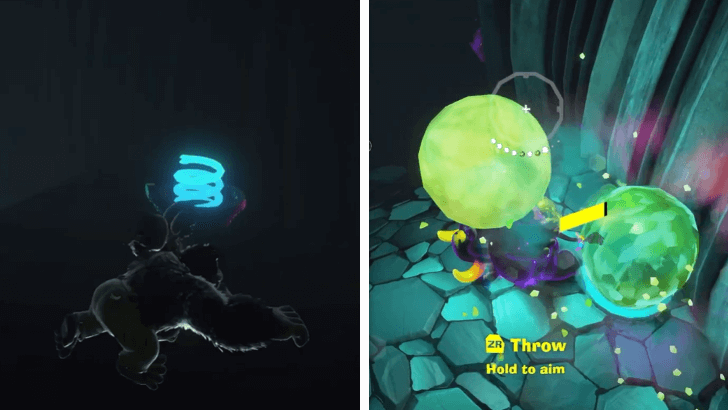 Place Glow Stones on the springs to light your way through the pit. You can get Glow Stone from the surface by using the Barrel Cannon to exit the pit. |
| 22 | 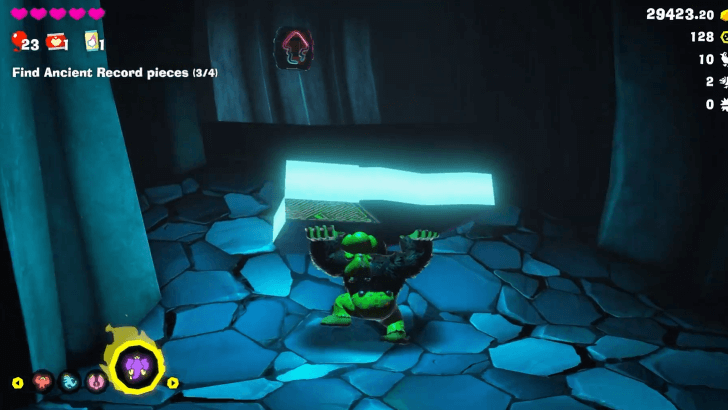 Get the Ancient Record piece then use the Barrel Cannon near the entrance to return to the Snake Elder. |
| 23 |  Once all the pieces have been collected, you will unlock the Snake Bananza Form. ▶︎ How to Use Snake Bananza Form |
| * | Press A twice while in Snake Bananza form to perform a double jump. Hold down A for a charged jump. You can also press Y to glare, slowing down platforms and obstacles for a short amount of time. |
| 24 | 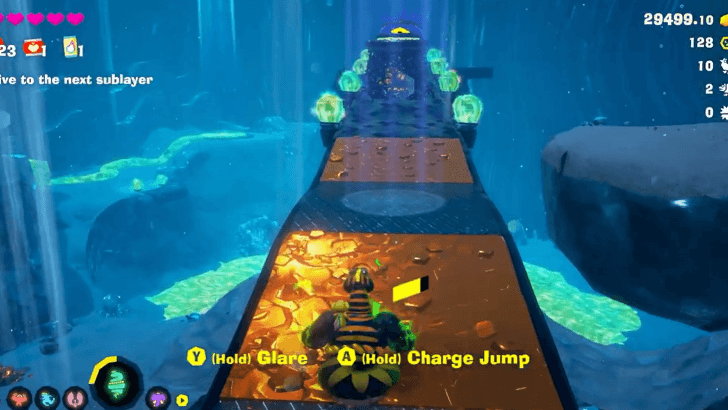 Charge jump to get on top of the Constrictor Corridor. |
| 25 |  Charge jump to get the Void Key floating above the Void Stake. |
| 26 | Destroy the Void Stake and jump down to the next sublayer. |
Radiance Sublayer 1202
| Step-by-Step Guide | |
|---|---|
| 1 |  Talk to the snake standing by a ledge. |
| 2 | Drop down and enter the tower. |
| 3 | 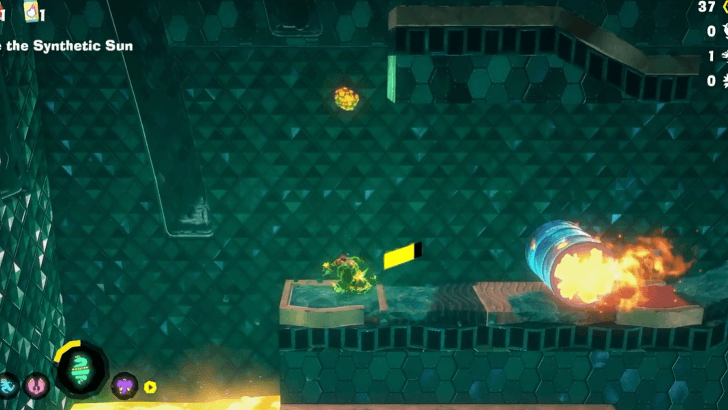 Get to the top floor. Use the Snake Bananza Form to reach higher platforms and slow down flaming barrels and other obstacles. |
| 4 | 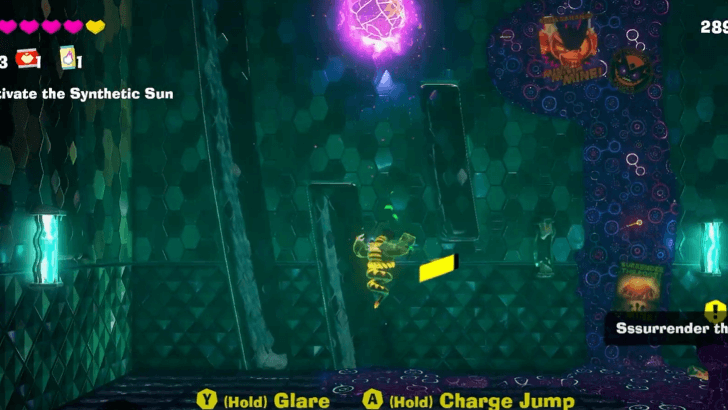 Climb the wall to the side to get close to the Terravoider. Hold down L to sing and destroy the seal. Afterwards, Charge Jump and destroy the Terravoider. |
| 5 | Before you take the Barrel Cannon to the top floor, make sure your Bananergy gauge is full. When you're ready, make your way up to the top. |
| 6 |  Use the Glow Stone ceiling to defeat the enemies in this room. Break it using the Snake Bananza form so that the pieces will fall on top of the enemies. Defeat the Crockoid to retrieve the Void Key. |
| 7 | Punch the snake switch to turn on the sun. Punch the solar powered door to get out. You can build a bridge back to the starting area of this sublayer by paying the Constructone. |
| 8 |  Talk to the snake that was on the ledge again. |
| 9 |  Drop down to the platform and punch down on the glowing center. Be warned that this will trigger a boss fight. |
| 10 |  Defeat Poppy Kong. Use the dust to locate Poppy Kong while she is invisible. You can use the Snake Form in this fight to slow her down and be able to hit her. ▶︎ How to Beat Poppy Kong |
| 11 | After defeating Poppy, break the Voidco platform and descend to the next sublayer. |
Radiance Sublayer 1203
| Step-by-Step Guide | |
|---|---|
| 1 | 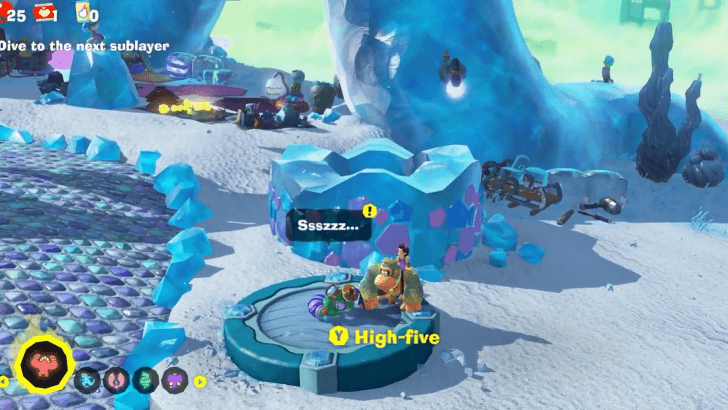 Wake the sleeping snake near the entrance of the Oasis village. |
| 2 | 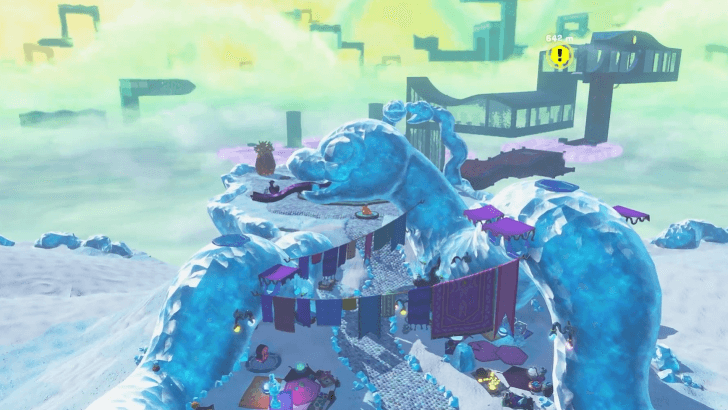 Head towards the structure to the north. |
| 3 |  Punch the switch in front of the cloudy area in front of the tall wall to solidify the bridge. Jump past the enemy and up the wall using the Snake Bananza form. |
| 4 |  Defeat the Crockoid near the Void Stake to get the Void Key. Lure it in front of the light to make its hide breakable. |
| 5 | Destroy the Void Stake then drop down to the next floor. |
| 6 | 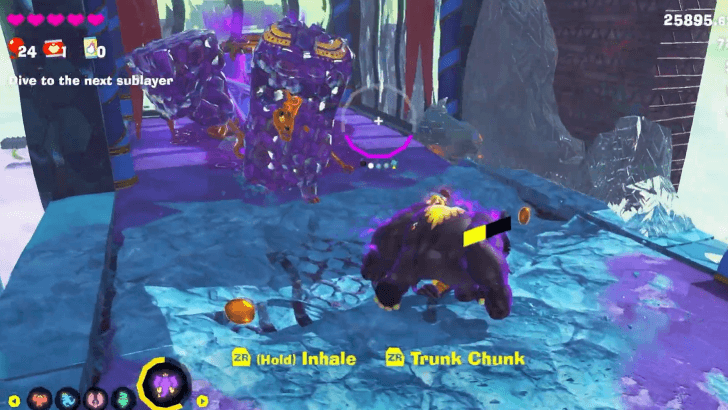 Defeat the Crockoid at the end of the path to gain a Void Key. |
| 7 | Destroy the second Void Stake and drop down. |
| 8 |  Climb up or use the Snake Form to jump up the wall by the Shade Clouds checkpoint. |
| 9 |  Get to the pillar at the farthest end of the Shade Clouds by throwing a chunk at the moving switch floating in the clouds. This should make a path to the right appear. Once this path ends, throw another chunk at the switch to open up another path. Do this until you reach the pillar. |
| * | If your Bananergy meter is full, you can also use the Ostrich Bananza form to cross from the platform near the Getaway to the far pillar. This is the faster method, but you can miss out on some collectibles. |
| 10 | 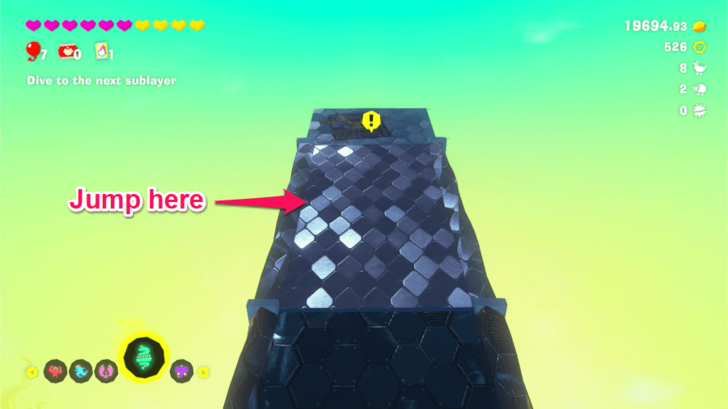 When you reach the pillar, climb to the top by using the Snake Bananza form to Charge Jump up to the non-slippery part of the pillar. Climb up until you reach the top. |
| 11 | 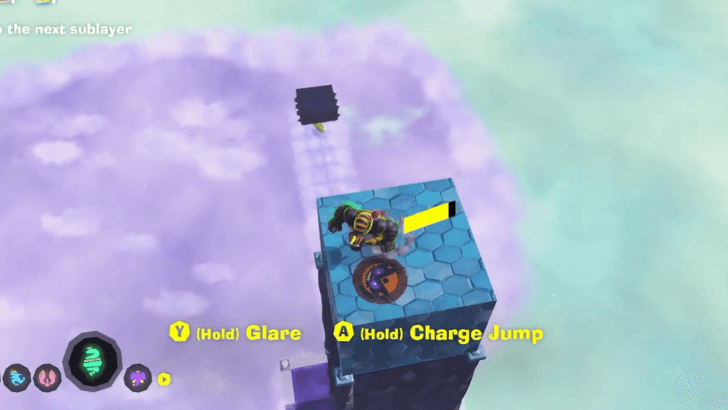 Once you're at the top, punch down on the block with the Voidco symbol. You'll want to destroy enough of this blue block to let in light until a hole appears in the path you came from. |
| 12 |  Head towards the square grid in the path and drop down. |
| 13 | 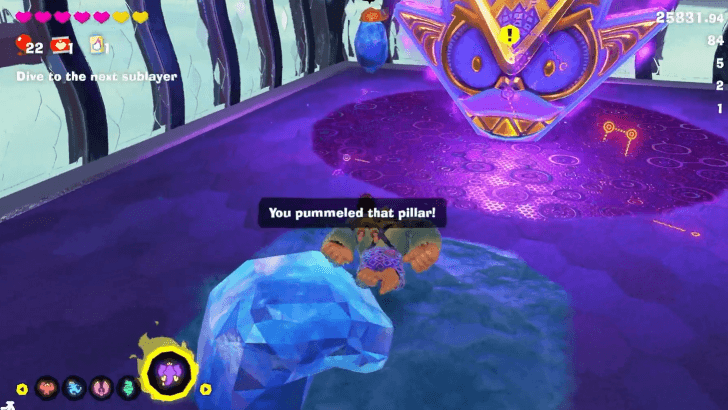 Destroy the Void Stake and drop down to the next sublayer. |
Radiance Sublayer 1204
| Step-by-Step Guide | |
|---|---|
| 1 | 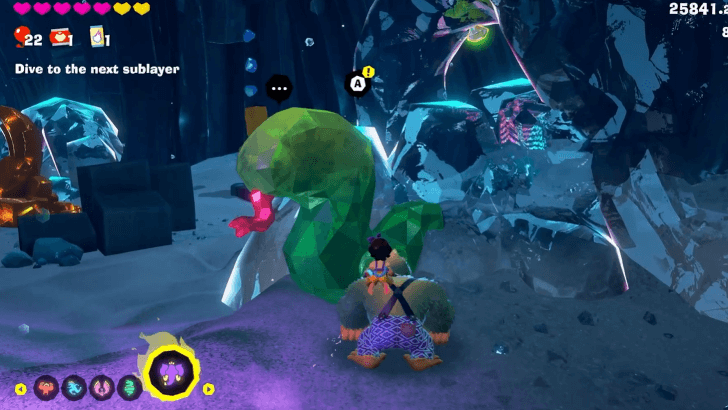 Talk to the snake-shaped fractone next to the Void Stake. It will point you towards a hole in the ground. |
| 2 |  Smash through the crystal covering the hole. Be warned that dropping down will trigger a boss fight. |
| 3 |  Defeat Grumpy Kong. Use the Snake Bananza Form to break holes into the ceiling. This will shine light in the arena, allowing you to destroy Grumpy Kong's body. ▶︎ How to Beat Radiance Grumpy Kong |
| 4 | You will immediately proceed to the next layer after defeating Grumpy Kong. |
Groove Layer
Prison Break
| Step-by-Step Guide | |
|---|---|
| 1 |  Make your way out of prison by punching downward until you end up in a crevice underground. |
| 2 |  Follow the path, and punch your way through the gold. At the sign in front of a fork in the road, go right. |
| 3 |  Climb up the wall, following the jagged terrain, and punch upward. You should end up in the Jail Hall right outside your cell. |
| 4 | Talk to the guard on the left. You can then use Dive Punch to use him as a trampoline to get to the upper platform. ▶︎ All Terrain Types and Interactions |
| 5 |  Follow the path, and jump onto the next guard. On this platform, you'll find Poppy Kong imprisoned in a cell. |
| 6 |  At the end of the walkway is an open cell where you can get gold blocks. Carry some gold, and throw it at Poppy's cell door to bust her out. |
| 7 |  Head back down to the ground floor and talk to the guard. They'll unlock the exit for you. |
Beat Source Track
| Step-by-Step Guide | |
|---|---|
| 1 |  Punch your way through to the Groove Layer Disco Hall and claim your welcome banana. |
| 2 |  Talk to Poppy Kong to get your next objective. You will then be directed to the leftmost doorway. Talk to the Fractone here to open the way to Beat Source Track. |
| 3 | Continue onward, but watch out for the walls blocking the way! Approach the wall until a face appears, then roll back by moving down while pressing ZL before the wall falls onto you. Do the same with the next wall. |
| 4 |  The first Terravoider can be found at the end of the hall. Destroy it to clear the Voided Terrain. |
| 5 | 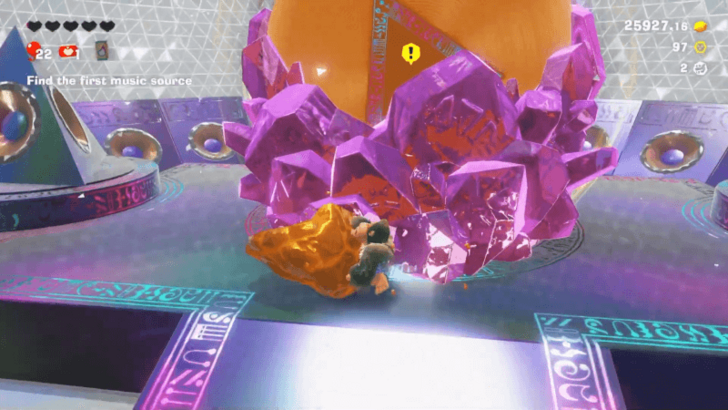 Return to the previous room, and punch the purple crystal to release the trapped record. |
| 6 | 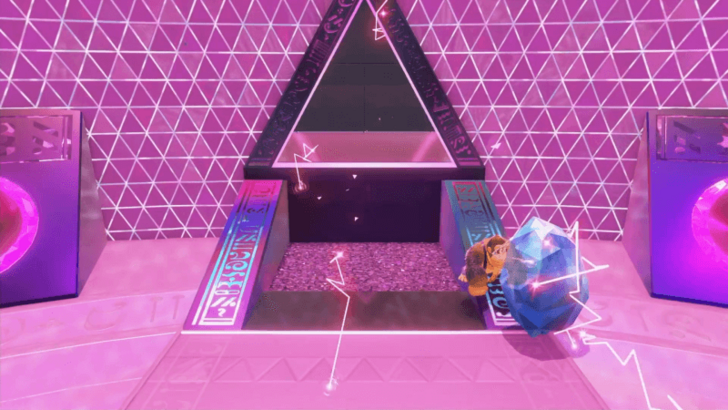 The path you used to get here will now be blocked. Talk to the Fractone near the exit, and they'll give you another way out. |
| 7 | 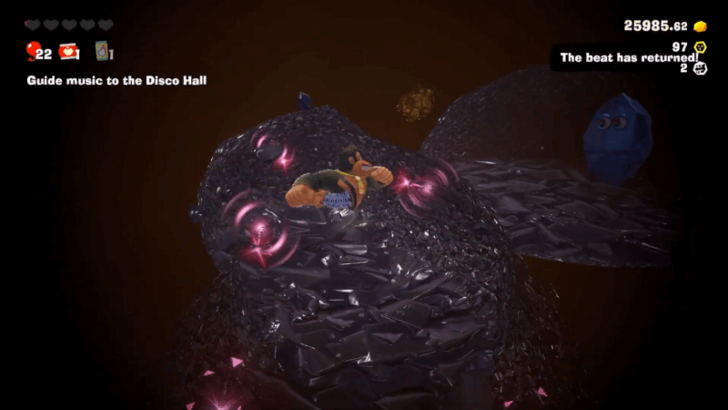 Punch down on the dirt until you reach Beat Tunnel. Get out of the water and punch straight through the dirt to make your path. A Fractone and some gold pieces can help guide your way to the exit. |
| 8 | 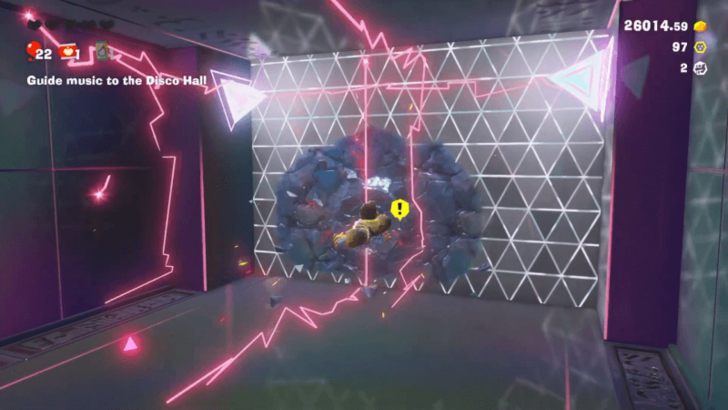 Punch your way through the wall. This should allow the music to reach Disco Hall. |
Bass Source Track
| Step-by-Step Guide | |
|---|---|
| 1 | 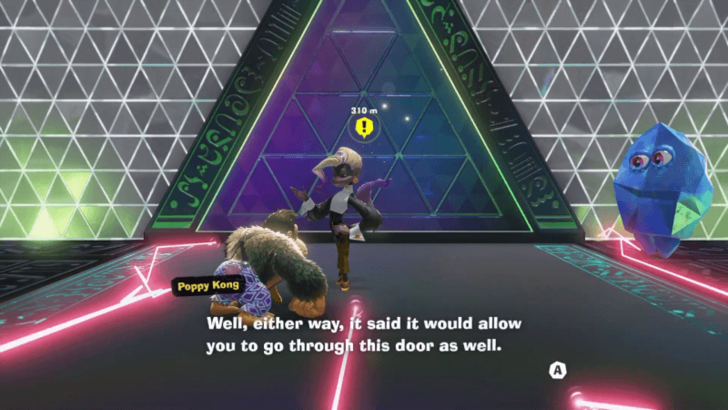 Get your banana reward, then talk to Poppy by the second doorway. |
| 2 |  Enter the hallway, and watch out for the walls again. The first wall is made of dirt, so you can either punch it to defeat it or avoid it. |
| 3 |  The second wall will spawn on the right side. This is also made of dirt, so you can also punch through it. |
| 4 |  The third wall is made of extra sturdy material, so you can't punch through it. Roll back when it falls to avoid it then proceed onward to the Bass Source. |
| 5 | 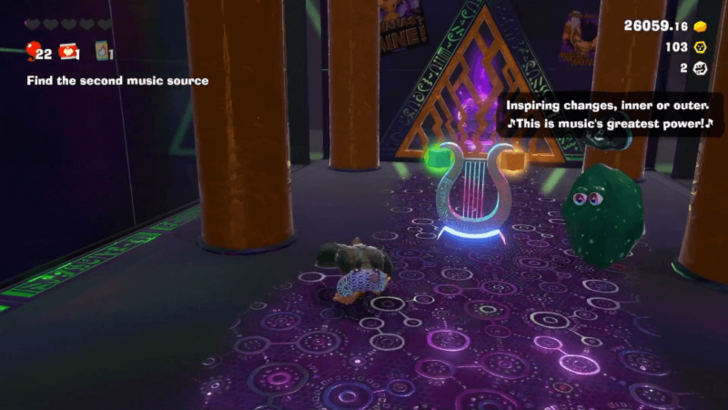 Head to the last room. Hit the Swap Harp to change the rubber pillars into gold. |
| 6 |  Punch the barrier to the Terravoider. Destroy this Terravoider to remove the Voided Terrain. |
| * | There are some fossils attached to the pillars. Change the pillar to gold in order to collect the fossil. |
| 7 | Return to the room with the trapped record. Punch the purple crystal to activate the music. Then, talk to the Fractone by the exit to uncover the dirt-filled exit. Punch your way downward. |
| 8 | 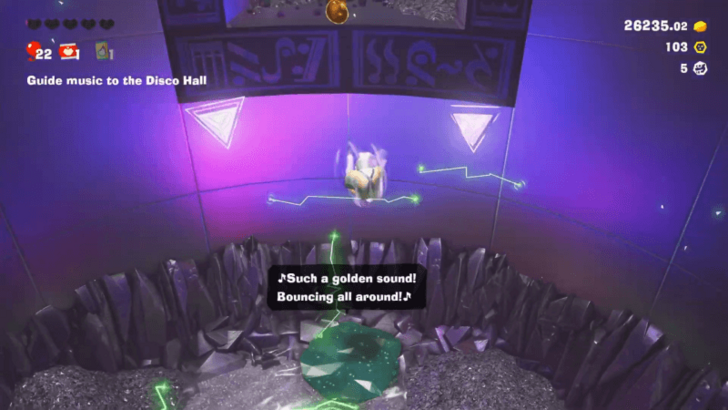 If the Fractone in this area is gold, hit the Swap Harp in this room to change the gold into rubber. Dive Punch on the rubberized Fractone to reach the upper platform. |
| 9 | 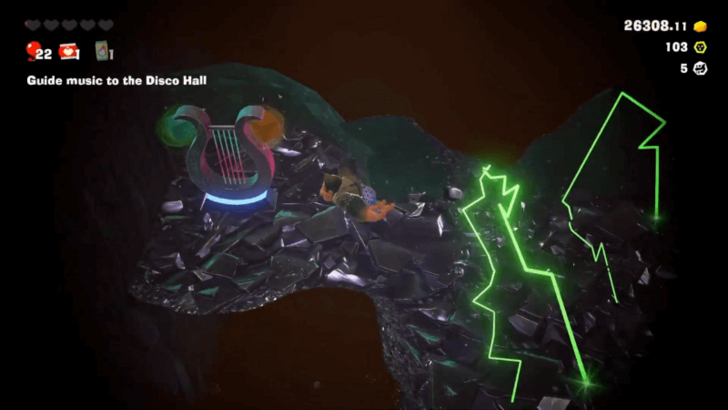 Punch your way through the blocked tunnel until you reach a wall of rubber. Hit the Swap Harp nearby to change it to punchable gold. |
| 10 | 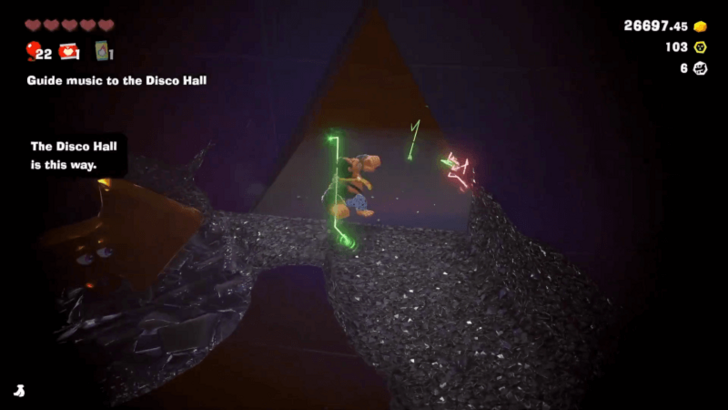 Beyond the gold layer is another wall of rubber. Hit the harp again once you've cleared the first layer of gold to change the second wall to gold. Punch your way through until you find the triangle-shaped doorway. |
| * | Concrete pillars can be found along the way containing a fossil and a banana. Use the gold to destroy these concrete pillars. |
| 11 | Go through this doorway, then punch through the sturdy wall to let the music reach Disco Hall. Collect the banana as your reward. |
Melody Source Track
| Step-by-Step Guide | |
|---|---|
| 1 | Head left, and talk to Poppy Kong again to open up the way to the third Terravoider. |
| 2 |  Hit the Swap Harp to turn the wall in front of you to gold. Hit it before it falls on you to collect the fossil trapped in it. |
| 3 | 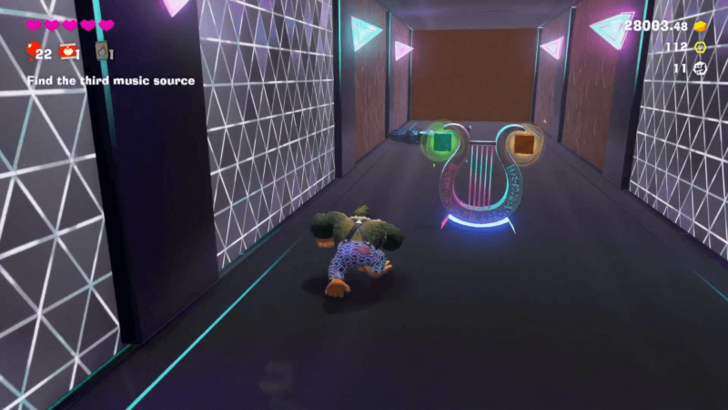 Go forward, and hit the Swap Harp to change the walls in front to gold. Watch out for the hostile walls on the side. |
| 4 | 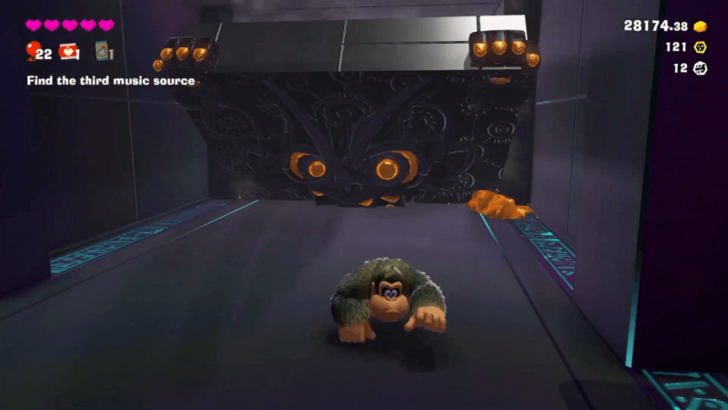 Smash through the gold wall at the end of the hall. Avoid the final falling wall, and enter the Melody Source. |
| 5 | 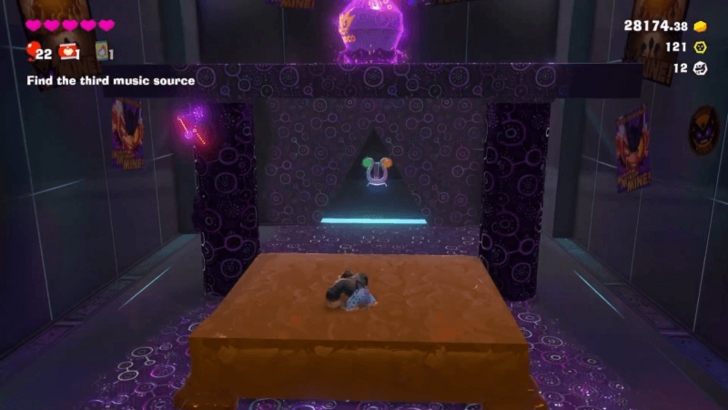 Head to the back to find the Terravoider. Climb up the Void-covered wall, then break or avoid the falling gold wall that will suddenly appear between the pillars. |
| 6 |  Hit the Swap Harp at the back, then return to the falling wall. Wait for it to fall, then jump on it to reach the upper platform. Destroy the last Terravoider to restore the terrain. |
| 7 | 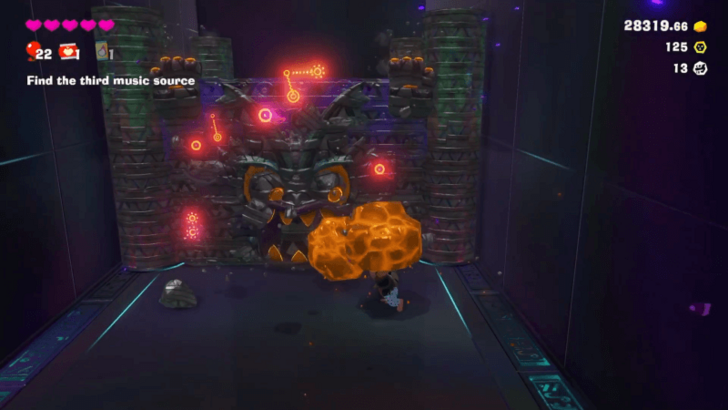 Tear off a chunk of gold from the pillar, and throw it at the extra sturdy wall blocking your way. |
| 8 | Break the purple crystal trapping the record. Then, talk to the Fractone by the exit to open the way to the tunnel. |
| 9 | 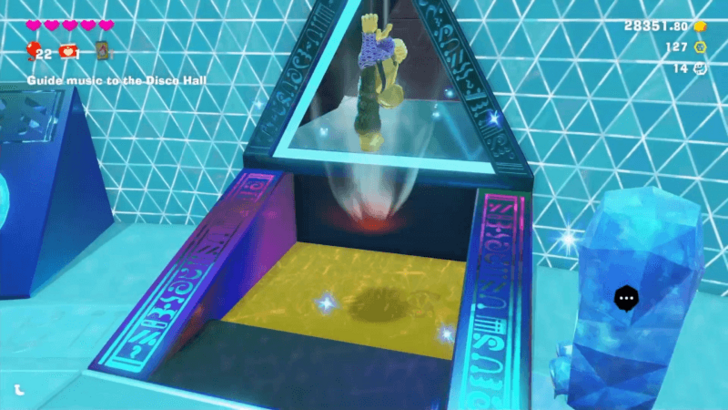 Dive Punch down on the gold towards the tunnel. Climb out of the water and onto the platform leading to the tunnel. |
| 10 | 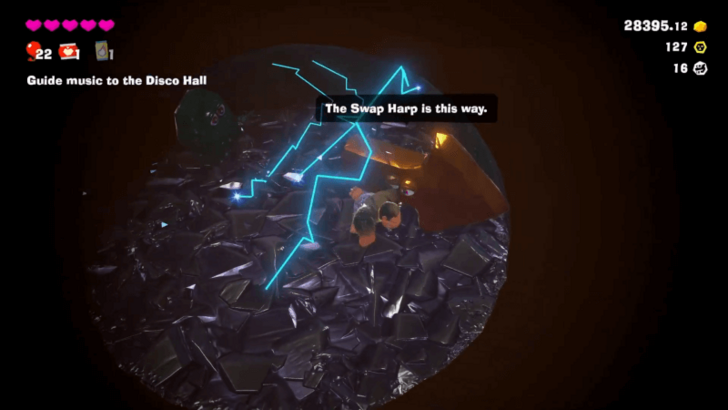 Punch your way through, following the directions of the Fractones along the way. Hit the Swap Harp at the end of the path to turn the rubber wall blocking the way into gold. |
| 11 | 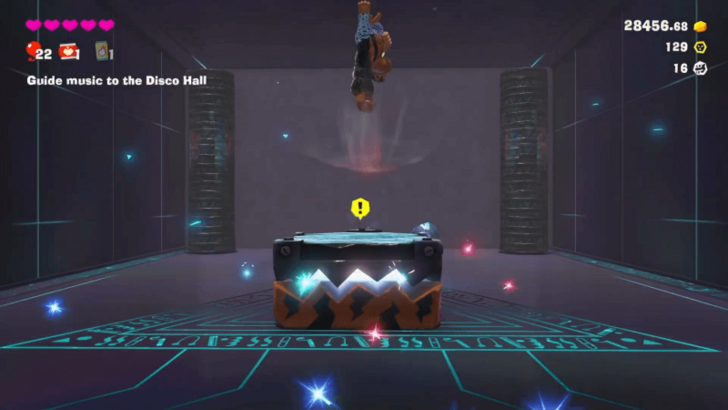 Punch through the gold wall and dirt to reach the exit. Avoid the falling wall blocking the way, then use Dive Punch on the platform marked with the fist icon. Collect the banana as you return to Disco Hall. |
The Great Harmoneel
| Step-by-Step Guide | |
|---|---|
| 1 |  Talk to the nearby Fractone, and you will be directed to the entrance. Talk to Poppy Kong here. |
| 2 | 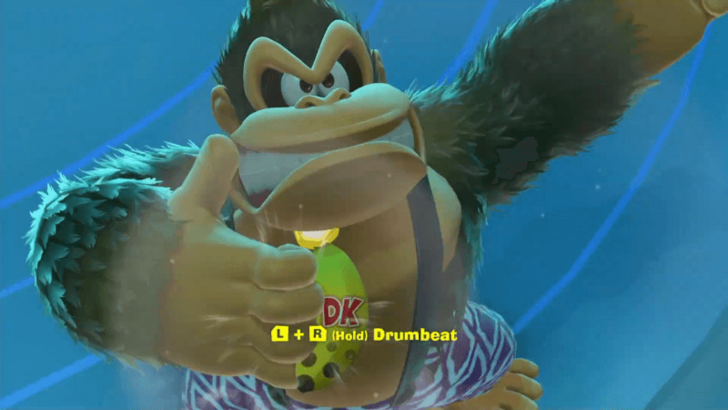 Hold the L and R shoulder buttons to make a drumbeat when prompted. This will summon the Great Harmoneel. |
| 3 |  Talk to Poppy Kong. Regardless of what you tell her, she'll leave you with a Barrel Cannon. Once you're ready to proceed, use the Barrel Cannon to descend into the Great Harmoneel. |
| 4 | 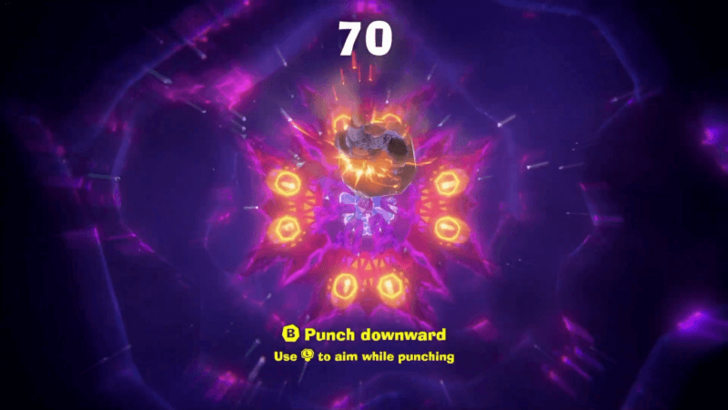 Use the B button as you fall to parry chunks of rock. It's recommended to hold the B button throughout the entirety of this section to make aiming at the Void targets easier. Try to avoid obstacles that might slow you down. Once the Void is cleared, use Dive Punch to rescue Pauline and descend to the next layer. |
Feast Layer
Feast Sublayer 1400
| Step-by-Step Guide | |
|---|---|
| 1 | 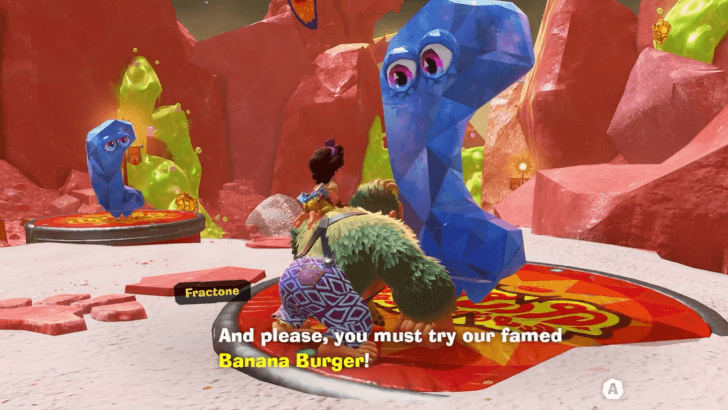 Talk to the banana-shaped Fractone. |
| 2 |  Throw salt—the white, sandy-looking terrain—at the green slime to dissolve it. ► All Terrain Types and Interactions |
| 3 | 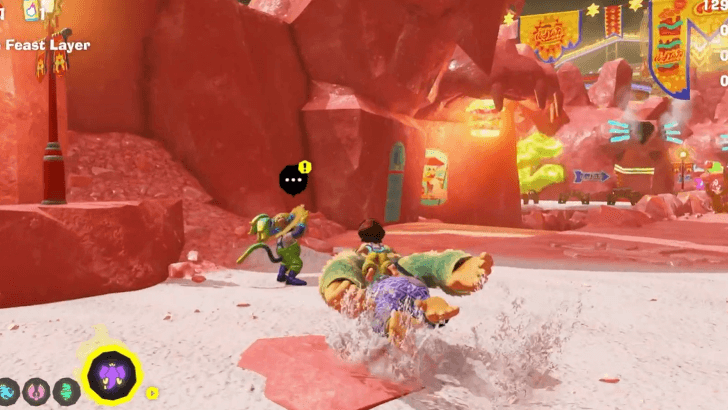 Talk to the monkey in front of the Mane Gate Market. |
| 4 | 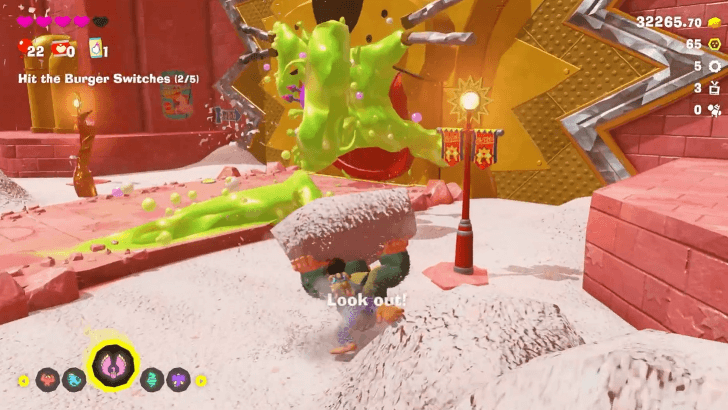 Use salt on the slime blocking the Mane Gate entrance. |
| 5 | 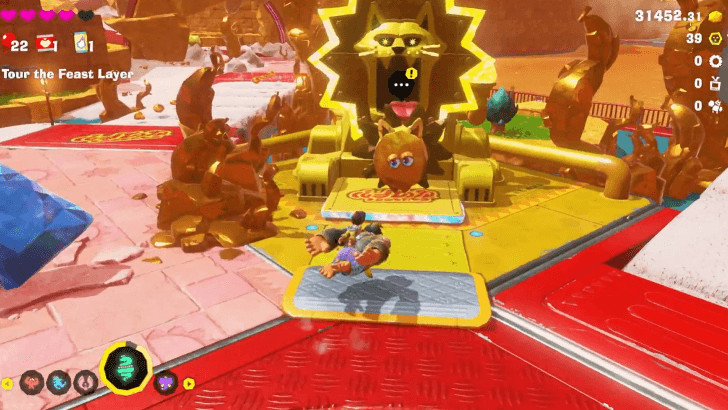 Talk to the lion-shaped fractone. |
| 6 | 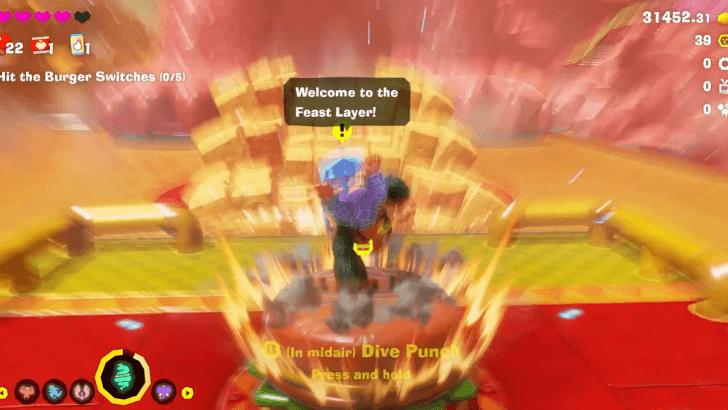 Dive Punch on the burger switch ahead. ► How to Dive Punch |
| 7 | 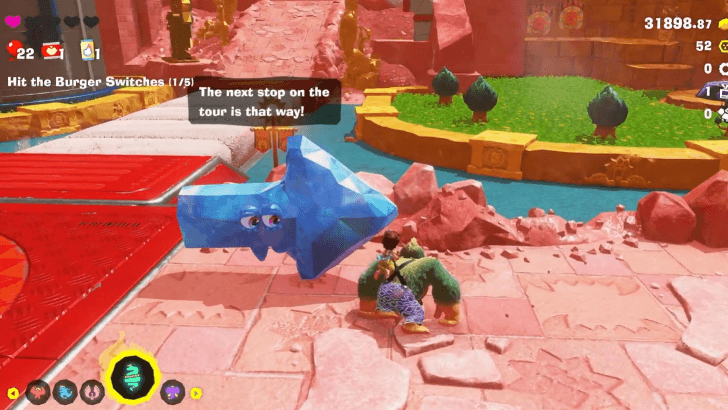 Follow the arrow fractones to the next burger switch location. Throw salt on any muck monsters you encounter along the way. |
| 8 |  Use the Zebra Bananza Form to go up the Grater-Go-Round. Punch through or avoid any walls that suddenly pop up along the way. ► How to Use Zebra Bananza Form |
| 9 | 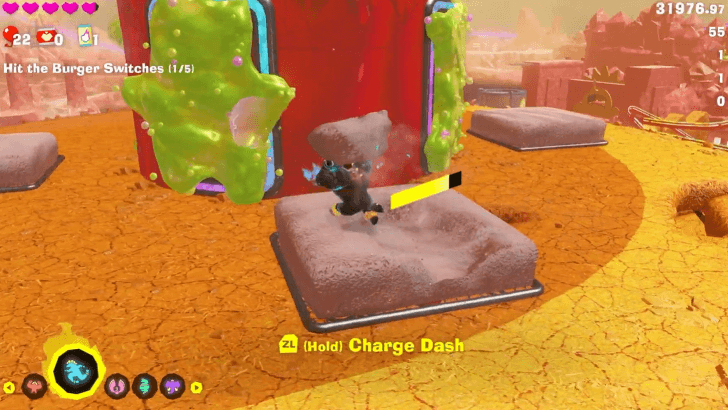 Throw salt to clear the green muck. Going counter-clockwise, the muck-covered openings hide boxes, Banandium Chips, the hole going down to the burger switch, and a fossil. |
| 10 | Once you find the hole, drop and punch down on the burger switch. Get your bananas and punch your way out of the Grater-Go-Round. |
| 11 | 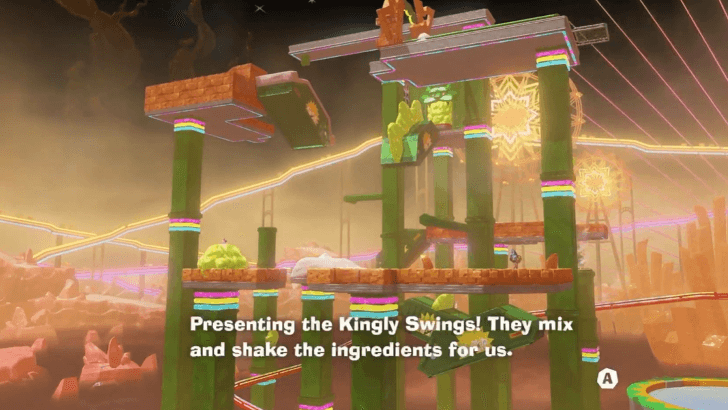 Follow the arrow fractones to the Kingly Swings. |
| 12 | 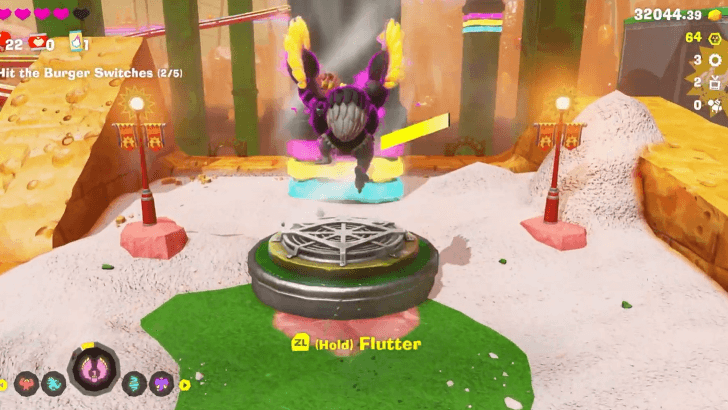 Dissolve the green muck and use the updraft fan while in Ostrich Bananza Form to fly up. ► How to Use Ostrich Bananza Form |
| 13 | Make your way up the Kingly Swings using the swings and updrafts while in Ostrich Bananza form. Use the salt platforms to dissolve the green muck blocking your way. |
| 14 | Punch down the burger switch at the top. Then, get your bananas and dive down into the water below. |
| 15 | 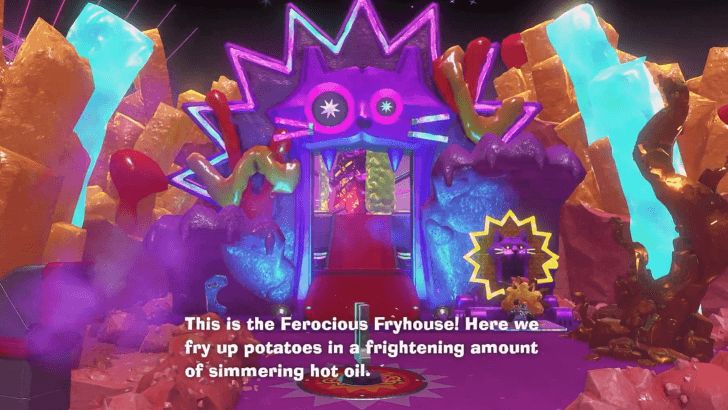 Follow the path through the tunnel until you reach the Ferocious Fryhouse. Entering the Ferocious Fryhouse and jumping into the cart will trigger a boss fight. |
| * | You can also ride the right cart of the Roarcoaster between the Kingly Swings and Grater-Go-Round to get to the Ferocious Fryhouse Station. |
| 16 | 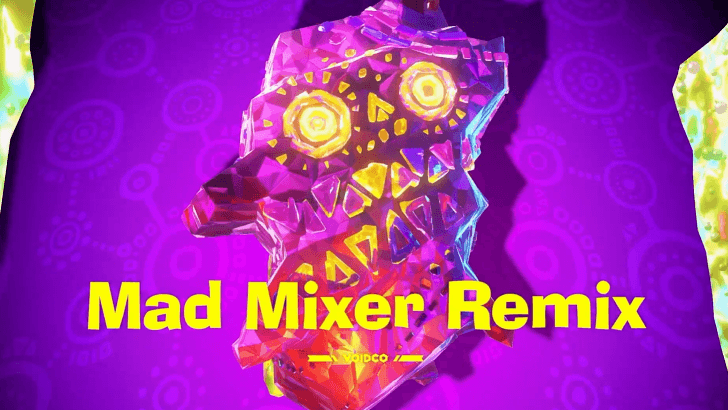 Defeat Mad Mixer Remix. While riding the cart, jump up and collect the salt chunks to throw at the green muck protecting the boss. When there's an opening, collect the boom rocks and aim them at Mad Mixer Remix. |
| 17 | Punch down the burger switch on the platform, then collect your bananas. Exit the Ferocious Fryhouse. |
| 18 | 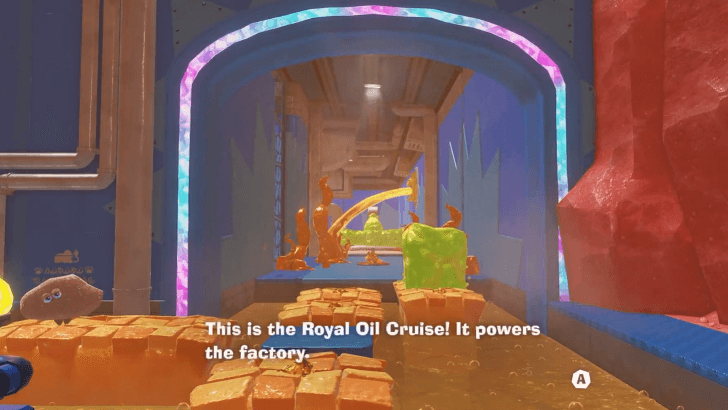 Follow the arrow going left down the purple path until you reach a diving platform. Dive down to the water below, and make your way to the Royal Oil Cruise. |
| * | Time your jumps and throw salt on the muck occupying the platforms. We recommend resting at a Base Getaway before attempting the Royal Oil Cruise. ► How to Build Getaways |
| 19 | 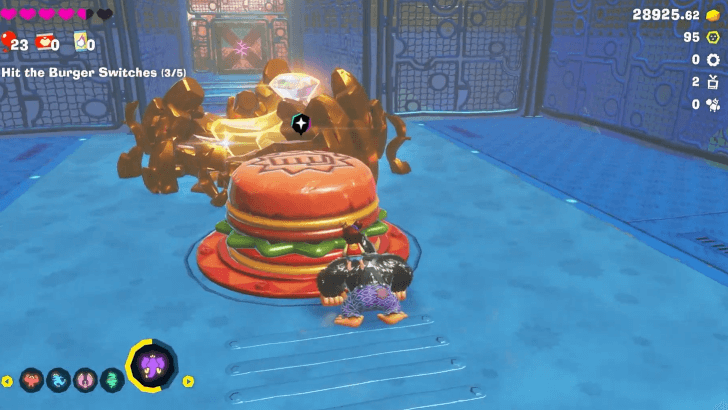 Punch down the burger switch at the end of the ride. After a cutscene, collect your bananas and exit the Royal Oil Cruise. |
| 20 | 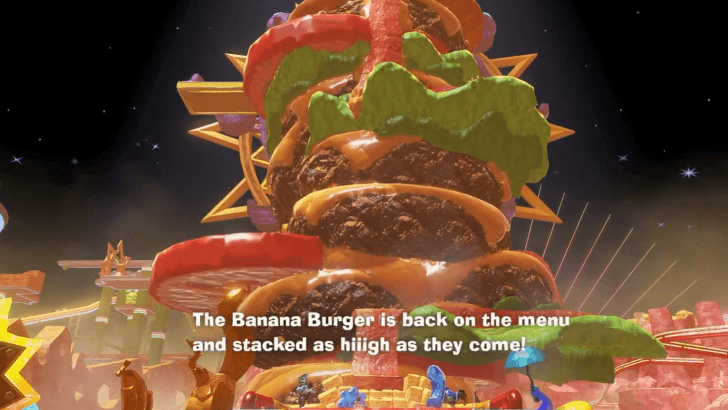 Follow the path to return to Fried Pride Plaza. Go to the platform where the first burger switch was, then make your way to the top of the Banana Burger using the bacon as your road. |
| * | 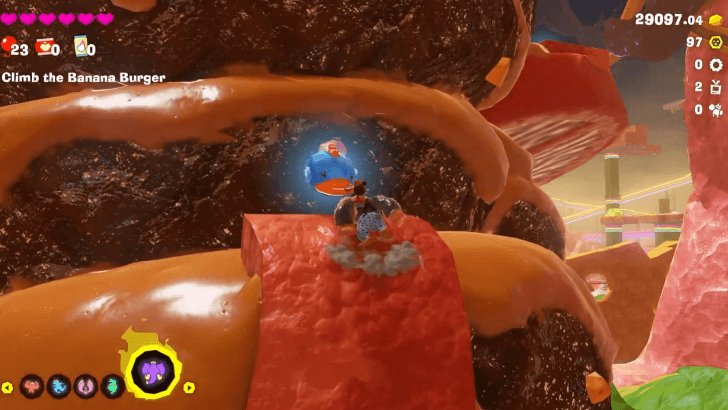 Approach mini-eelevators to create tunnels through the burger. |
| 21 | Once you get to the top, talk to the lion-shaped Fractone near the Void Stake in front of the Feral Wheel. |
| 22 | 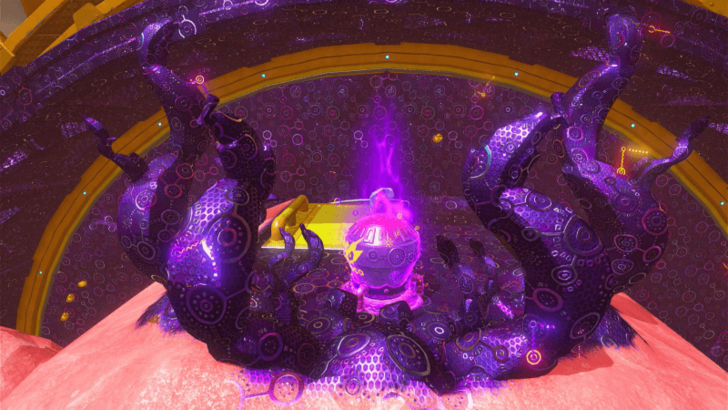 Enter the mouth of the Feral Wheel, and climb up following the Void-covered wall. Break the Terravoider at the top. This will cause the Feral Wheel to move. |
| 23 |  Jump down to the platform with a Fractone to get onto a gondola. Take note that there may be enemies on the ride as well. Ride the Feral Wheel to the top and collect the Void Key. |
| 24 |  Destroy the Void Stake and drop down to the next sublayer. |
Feast Sublayer 1401
| Step-by-Step Guide | |
|---|---|
| 1 |  Collect your bananas, then head down the tunnel. Wait for the muck slugs to melt the metal grate blocking the way. Make sure to avoid their attacks as you go through. |
| 2 |  At the salt storage area, get the slugs to melt the ground and reveal the salt hidden underneath. Throw it at the green muck. |
| 3 |  Talk to the fractone by the Waste-Oil Container. |
| 4 |  Head to the Loading Bay. Bait the enemies into melting the metal grate blocking the way, but try your best to avoid their attacks. |
| * | A block of salt can be raised at the end of the path to the Loading Bay. You can use this to gather collectibles stuck in the muck in this area. |
| 5 | 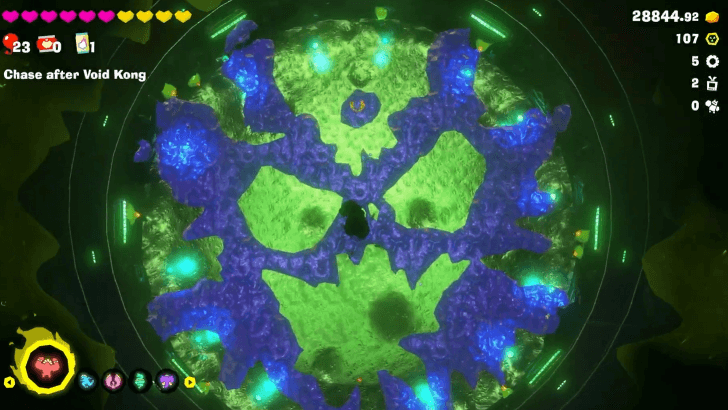 Jump down the pit in the Loading Bay. Be warned that this will trigger a boss fight. |
| 6 | 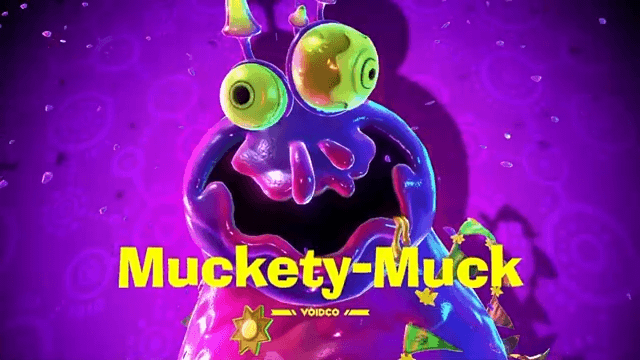 Defeat Muckety-Muck. Bait Muckety-Muck to melt the ground. Get the salt from underneath and aim it at the boss. Once the body is melted, strike the core. ► How to Beat Muckety-Muck |
| 7 | Break the Void Stake to open up the way to the next layer. Before proceeding, it is recommended to gather up gold in case you're running low. You will need to spend around 16,999 Gold to easily get through the next layer. |
Forbidden Layer
Forbidden Sublayer 1500
| Step-by-Step Guide | |
|---|---|
| 1 | 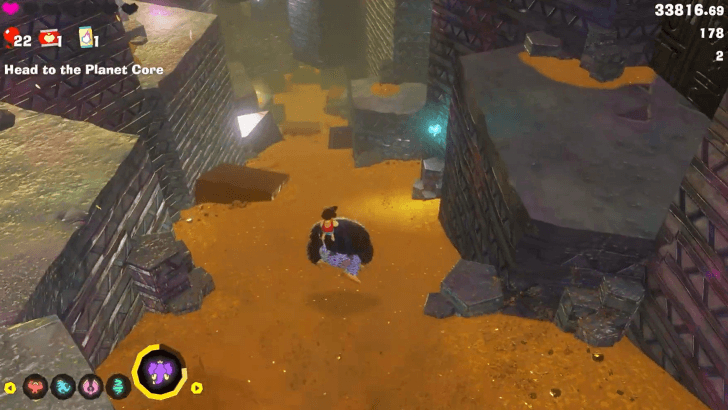 Collect your bananas, and go deeper into the Shuffling Shaft. |
| 2 | 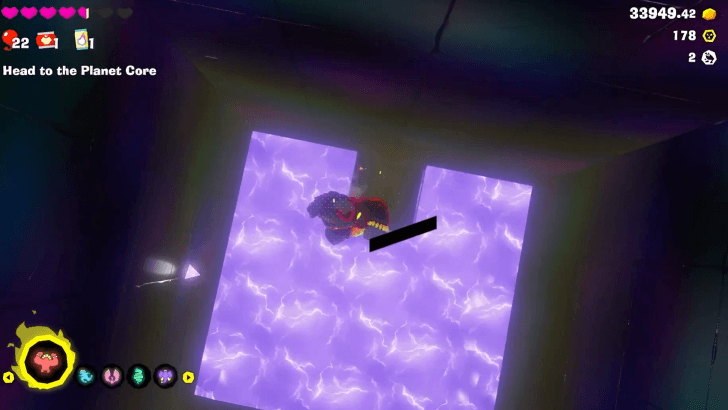 Drop down the pit, aiming for the square with a fossil on the ground. Be careful since the rest of the pit crackles with electricity after every few seconds. |
| 3 |  Wait for the electricity to turn off then climb onto the north-facing wall. |
| 4 | 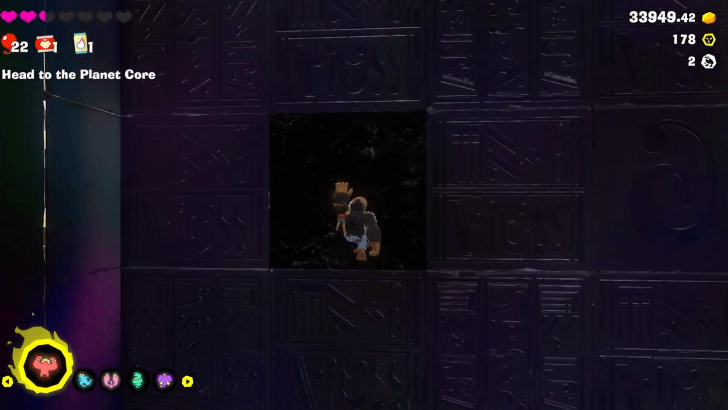 Punch through the darkened square that looks different from the rest. |
| * | 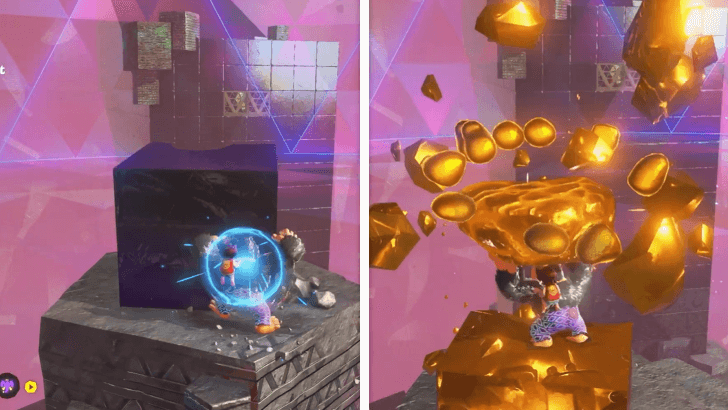 In this layer, certain blocks and terrain will flash between breakable and unbreakable during short intervals of time. Wait for the block to become breakable to interact with it. |
| 5 | 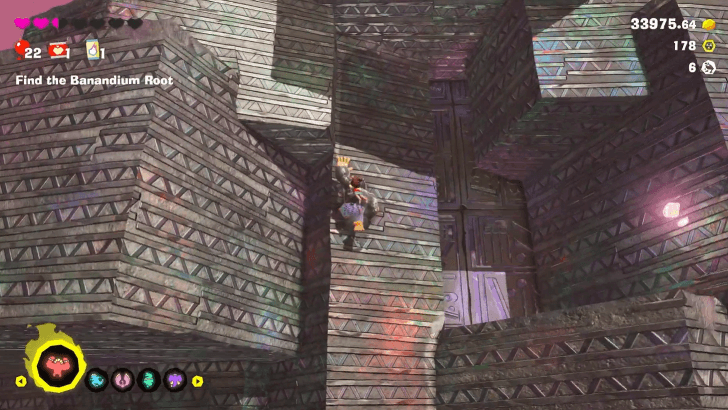 Make your way to the tall concrete structure, then climb up to the top. |
| 6 | 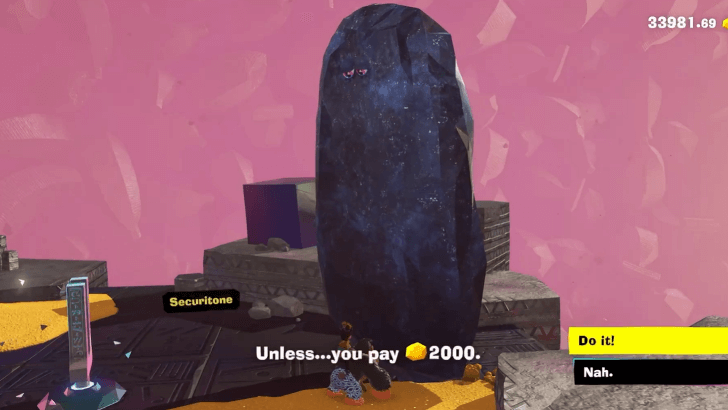 Pay Securitone 2000 Gold. Take note that more Securitones will be in this layer, and you will need around 16,999 Gold in total to pay the ones that allow you to cross to the other side. ► How to Farm Gold |
| * | You can avoid paying this first Securitone by using the Ostrich Bananza form to flutter to the floating cube with a fossil. Then from here, flutter then glide towards the Second Concrete Tower. You need to have the Glide and Better Flutter skills unlocked in order to pull this off. ► How to Use Ostrich Bananza Form |
| 7 | 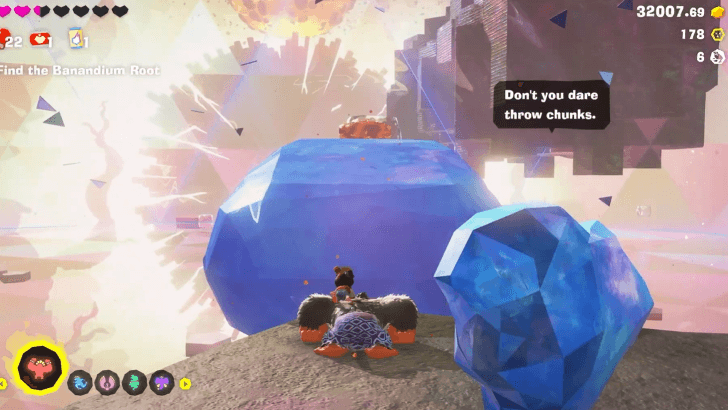 If you've paid the Securitone, you can throw chunks in the air to build bridges. The easiest chunk to get is either the yellow sand or a chunk from the blue Fractone. |
| 8 |  Build a bridge towards the next concrete structure floating in the air. |
| 9 |  Go to the edge and drop down to the Second Concrete Tower. |
| 10 | Pay the Securitone 5000 Gold, then build a bridge to the Third Concrete Tower. You can also use the Ostrich Bananza form to glide to the Third Concrete Tower if you want to avoid paying. |
| 11 | At the Third Concrete Tower, pay the last Securitone 9,999 Gold. |
| * | If you don't want to pay, you can use your Bananza forms to bypass this, but it's much more complicated compared to the previous times. Climb up on the Securitone for a higher starting point, then use the Snake Bananza form to Charge Jump. Quickly switch to the Ostrich Bananza form to glide to the triangular platform next to the laser. Switch back to Snake Bananza to Charge Jump, then switch again to Ostrich Bananza to glide the rest of the way. |
| 12 |  If you opted to pay, build a bridge towards Go-No-Further Gate. Watch out for the laser that will target and attack you. |
| * | 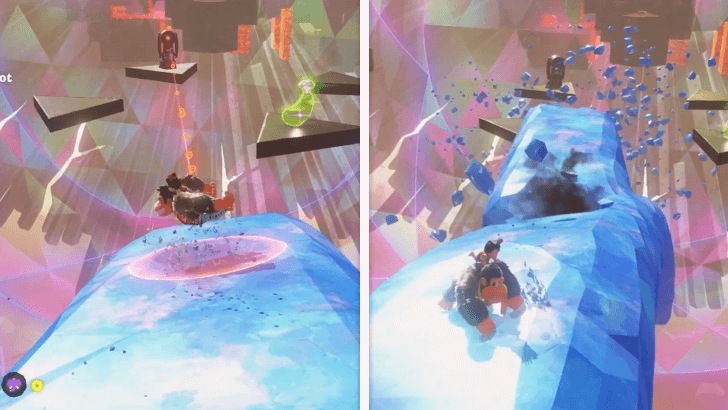 Lasers can also form structures in the air. |
| * | 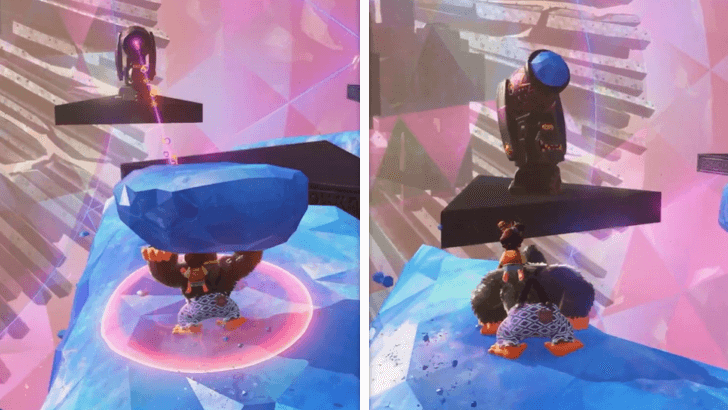 Lasers can be temporarily blocked by throwing chunks at them. |
| 13 | 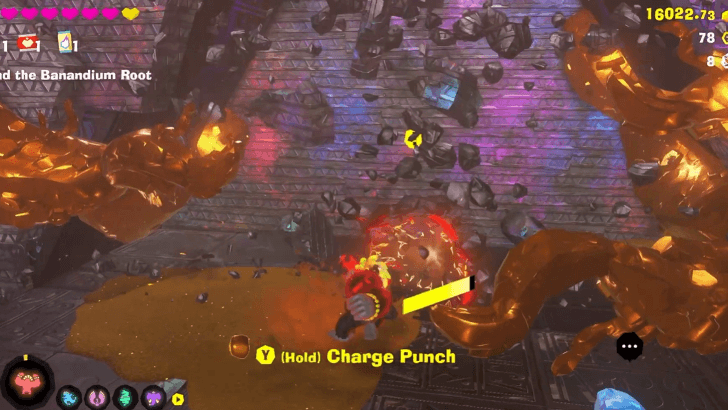 Transform into Kong Bananza and use Charge Punch to break through several layers of concrete at the Go-No-Further Gate. |
| 14 | 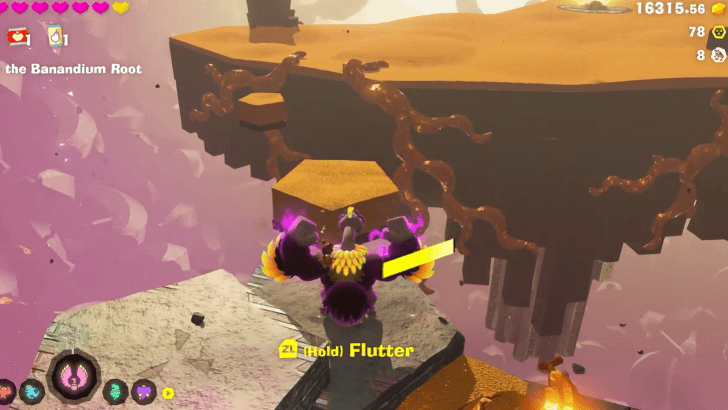 Use Ostrich Bananza to fly over the platforms. |
| 15 | 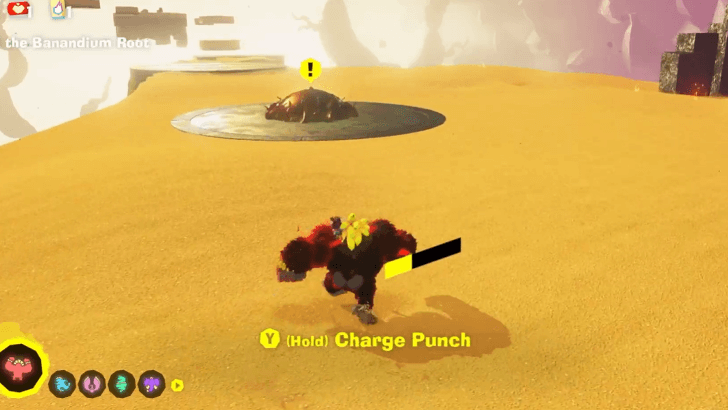 Approach the Banandium Root. Be warned that approaching the root will trigger a boss fight. |
| 16 |  Defeat Void Kong. Throw chunks at Void Kong to damage him. Make sure to dodge out of the way of his attacks. As he flies farther away, build bridges to pursue him. ►How to Beat Forbidden Void Kong |
| * | 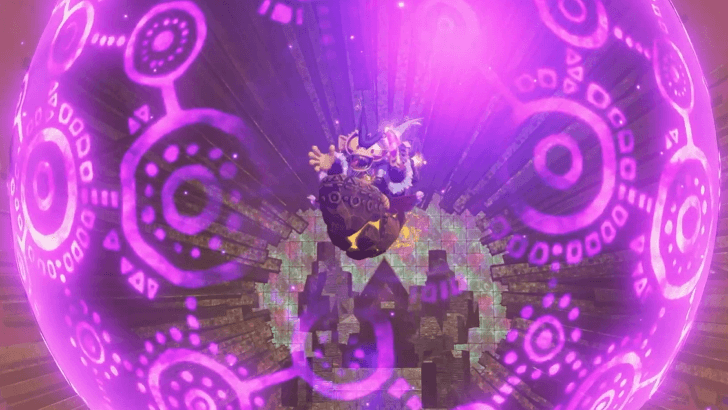 When you reach the Golden Core, Void Kong's shield will activate. Destroy the Terravoiders to lower his shield then strike him when he's vulnerable. |
| * | 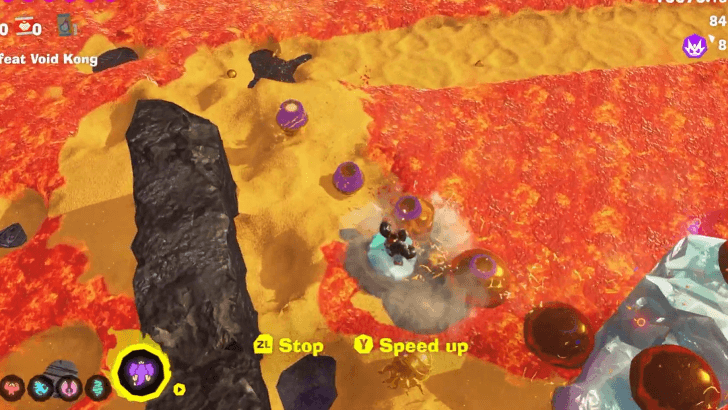 Take an ice chunk and Turf Surf across the lava terrain to avoid damage. ► How to Turf Surf |
| 17 | After the cutscene ends, drop down to the Planet Core. |
Planet Core
Planet Core Sublayers 1600-1606
| Step-by-Step Guide | |
|---|---|
| 1 | 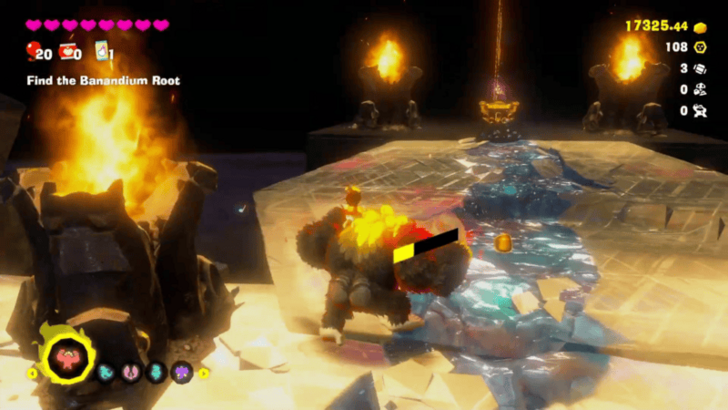 Consume the bananas upon landing in the Planet Core. Follow the path and head left to reach a minecart. Fight or avoid the enemies along the way. Ride the cart to get to Fractone Fort in Sublayer 1601. |
| 2 |  At Fractone Fort, you can buy some supplies or rest in a Getaway. Once you're ready to proceed, ride the minecart, which should take you to Necky Skyway in Sublayer 1602. There are several flying enemies in this area, which you can defeat by throwing chunks of terrain. |
| 3 |  Step onto the gravel platform. This will cause it to start moving. Follow the path it creates, taking care not to fall behind (literally). Throw chunks at enemies as you go to prevent them from throwing you off. |
| 4 | At the solid platform at the end of the gravel path, jump into another minecart to reach Klaptrap Krossing in Sublayer 1603. |
| 5 |  Step onto the pink platform. A Klaptrap will show up and start munching on the platform, replacing it with its own body. Wait for it to reach your side, but avoid the crocodile's jaws. Jump onto its body and head to the blue platform. |
| * | Blue platforms appear in the same pattern as the consumed pink platforms. If you want the blue platform to reach all the way to the other side, you have to make sure the Klaptrap eating the pink platform eats the full length of it. |
| 6 |  Another Klaptrap will show up once you reach the second pink platform. Have it munch on the platform while you avoid getting eaten, then climb up the blue platform being generated. |
| 7 |  Step onto the right side of the next pink platform, near the Klaptrap source. Two Klaptraps will pop out—one eating the pink platform, and one going for the blue. Make the first Klaptrap eat through the right side of the pink platform, going straight. Quickly go up the blue platform before the second Klaptrap can eat through it. |
| 8 | Get a banana for your troubles, then climb into another minecart to take you to Kritter Krevasse in Sublayer 1604. |
| 9 | 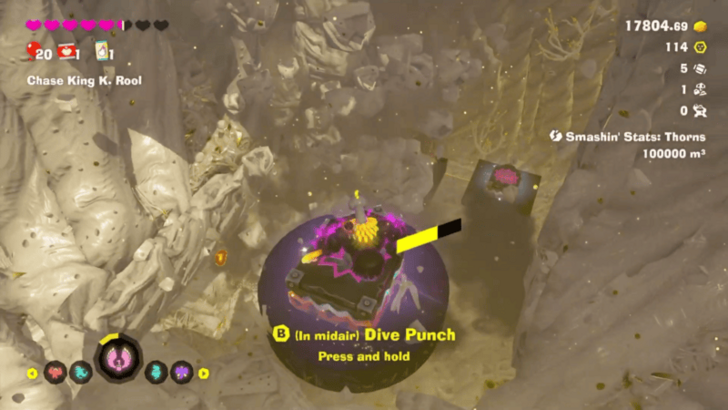 At the end of the platform, transform into the Ostrich Bananza form. Fly to the platform with the Dive Punch icon, and use Dive Punch on it. Do the same for the lower Dive Punch platforms, which get revealed with each punch. |
| * | If you run out of Bananergy and lose your transformation, you can still make it to the platforms by jumping, then rolling mid-air using ZL to essentially double jump. |
| 10 | Glide down until you reach the next minecart, which will take you to Kremling Kamp in Sublayer 1605. |
| 11 | 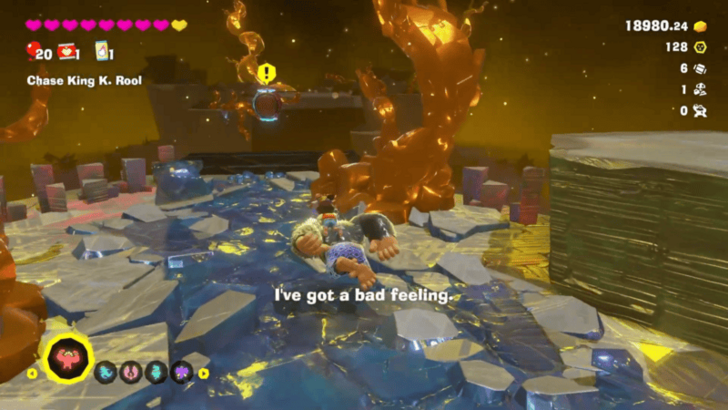 Jump down the platforms, either fighting or avoiding enemies along the way, until you reach the platform with a Barrel Cannon. Using it will launch you straight into a boss battle, so make sure you're ready before proceeding. |
| * | 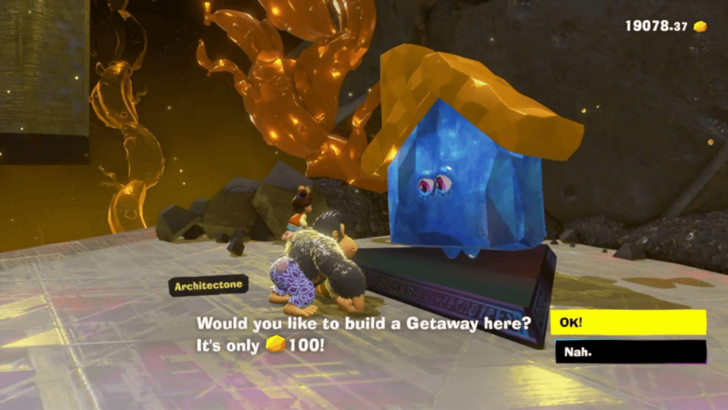 An Architectone is available on this platform. Build a Getaway if you want to rest and replenish your health. |
| 12 | Defeat K. Stompenclomper. Aim for its stone foot to stagger it, then punch its head once it's fallen over. ▶︎ How to Beat K. Stompenclomper |
| 13 |  Once K. Stompenclomper is defeated, get your banana, then ride the minecart to Fractone Cradle in Sublayer 1606. Drop down to the lower platform, and you can take the time to shop, change clothes, or rest in a Getaway. Ride down the minecart once you're ready to proceed. |
Kremling Sublayers 1607-1609
| Step-by-Step Guide | |
|---|---|
| 1 | 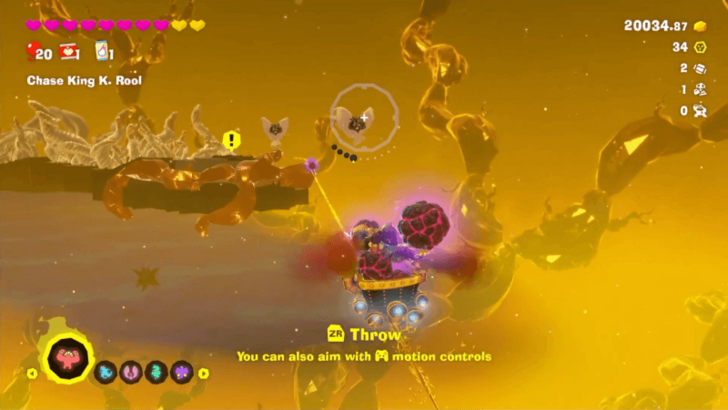 While in the minecart, you'll be able to pick up rocks to throw at the flying enemies. Defeat these enemies before they can attack you. |
| 2 | 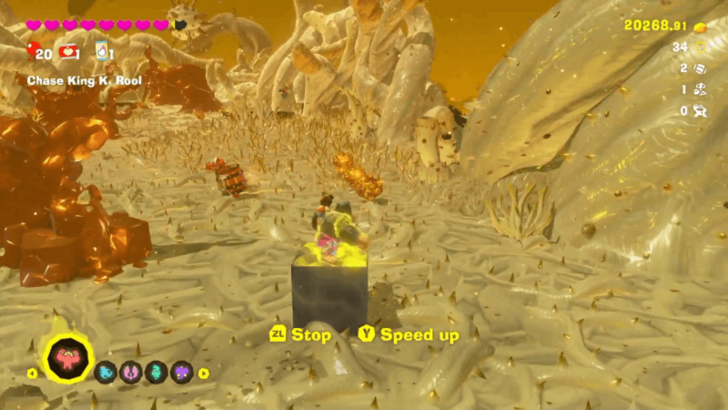 At the end of the minecart ride, you'll end up in Kremling Kuagmire in Sublayer 1607. Break open the boxes to get blocks of Slippery Iron. Use one to Turf Surf down the jagged terrain. |
| 3 | Avoid the obstacles until you reach a gold wall blocking the way at the end. You can speed up into an enemy to send it hurtling through the wall or punch the wall yourself. Turf Surf all the way down the next section until you reach another wall of gold blocking the way forward. |
| 4 | Either speed into an enemy to launch it at the gold wall or punch your way through. The terrain beyond should be safe to step on, but you can keep Turf Surfing if you want to. Claim your Banandium Gem reward at the end, and ride the minecart to Sublayer 1608. |
| 5 | 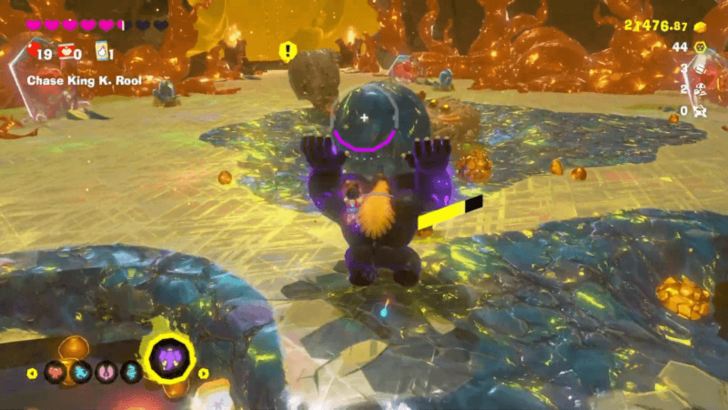 Jump down to the Kremling Koliseum arena to fight against 6 waves of crocodilian enemies. All of them can be defeated by throwing or swinging terrain chunks at them. Feel free to use Elephant Bananza or Kong Bananza if it'll make things easier for you. |
| * | 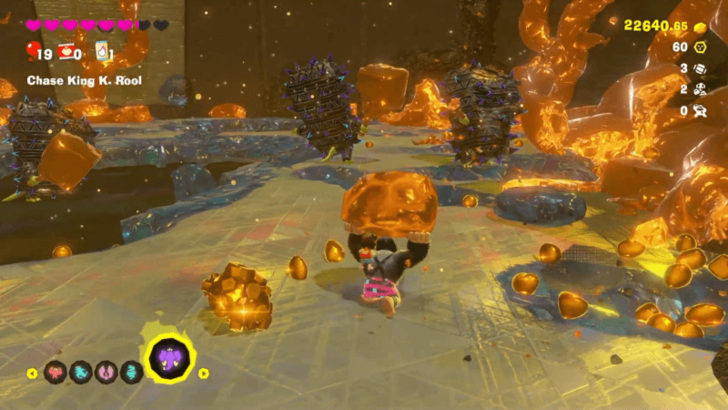 Try not to destroy all the gold in the area before defeating the enemies. Gold chunks are especially good to use against the final wave of Crockoid Kremlings, which have extra sturdy spiky concrete shells. |
| 6 | 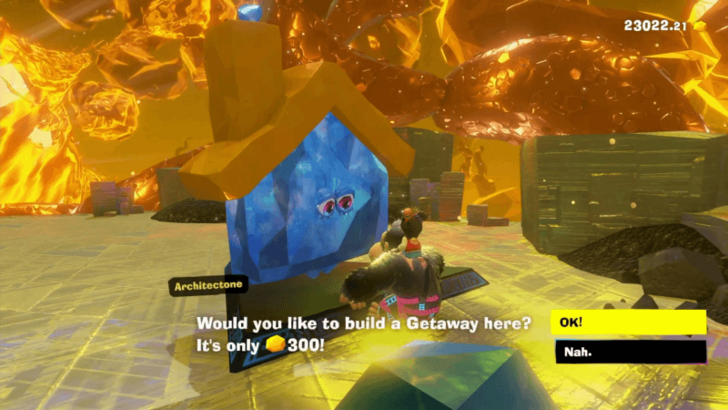 Once all enemies are defeated, a minecart will appear. Ride this to Climactic Cliff on Sublayer 1609. It is recommended to build a Getaway here and heal up before proceeding. |
| * | Your Bananergy will not deplete for the last sections of the game. This means you can freely stay in your Bananza forms. It is recommended to change clothes if you're wearing Bananergy-related ones. ▶︎ List of All Outfits |
| 7 | 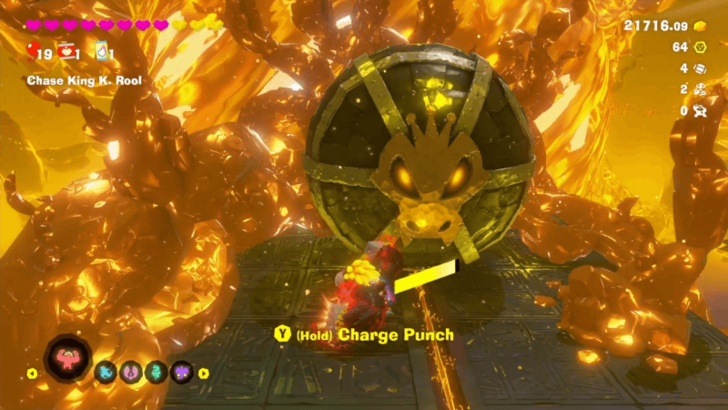 Transform into the Kong Bananza form, and use Charge Punch on the large boulder blocking the minecart rail. Ride the minecart towards the boss battle. |
| 8 | You will have to face off against King K. Rool. Use your Kong Bananza form to parry the projectiles he launches at you, and use Elephant Bananza to inhale excess gold from his attacks. ▶︎ Final Boss Guide: King K. Rool |
| 9 | 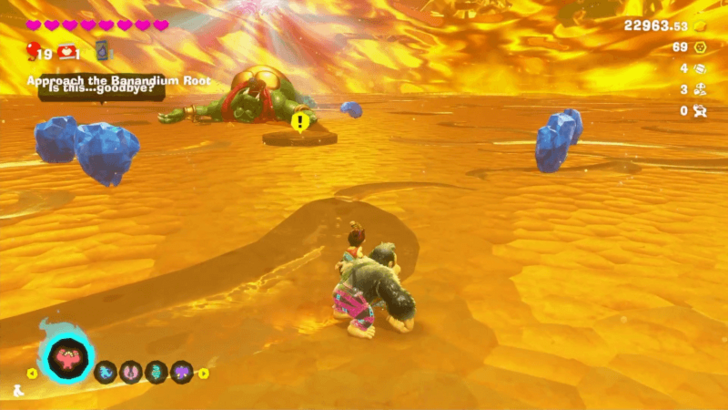 Defeat King K. Rool, and get your bananas. A Stuff Shop and an Eelevator will appear in this area. Feel free to use them before you go onto the circular platform to make your wish to the Banandium Root. |
| 10 | The Banandium Root will grant your wish of returning to the surface. But stay on your guard! The fight isn't over yet. Tear off chunks from the Banandium Root platform, and throw them at K. Rool. Avoid his attacks highlighted in red and purple until you reach the surface. |
New Donk City
| Step-by-Step Guide | |
|---|---|
| 1 | Transform into the Ostrich Bananza form. Use the updraft to glide onto the red pillars. Avoid the snakes of rot, and make your way to the area with flags. |
| 2 | Change into the Kong Bananza form before climbing up the building. Punch upward as you climb when blocked by concrete. |
| 3 | 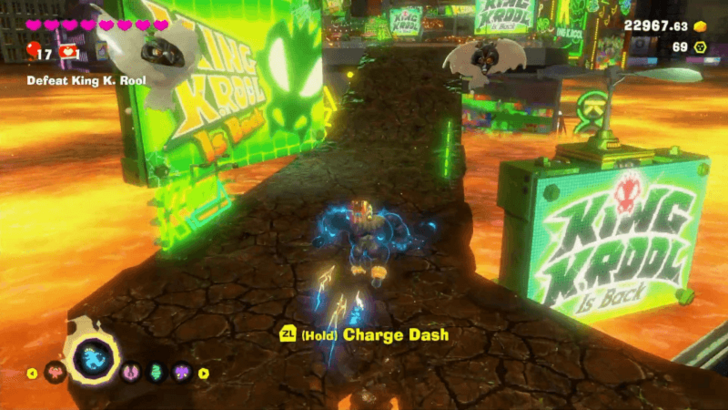 Switch to the Zebra Bananza form and dash across the crumbling pathway. |
| 4 | At the end of the crumbling path, change into the Elephant Banaza form. Inhale all the rot blocking your way, and use Trunk Chunk to throw chunks at the wall enemies along the way. |
| 5 | Use the Barrel Cannon to go up, and change back into the Kong Bananza form. Use Charge Punch on the large metal ball. |
| 6 | 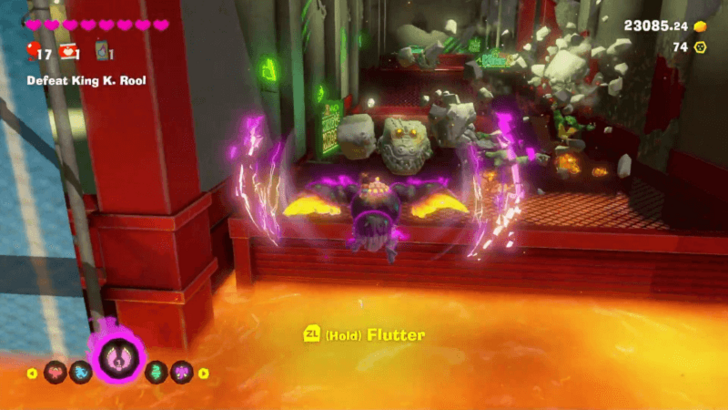 Cross the gap using the Ostrich Bananza form, and defeat or avoid the enemies on this side. Take note that the molten liquid will continue to rise as you go through this section. |
| 7 | Jump into the Barrel Cannon at the end of the path. The Kong Bananza form is recommended here, so you can punch the large rolling balls into enemies. |
| 8 | Climb up the red metal structure and punch any terrain in your way. |
| 9 | Change into the Zebra Bananza form, and run across the crumbling pathway, jumping to avoid the rot monsters as you go. Get into the Barrel Cannon at the end of this road. |
| 10 | 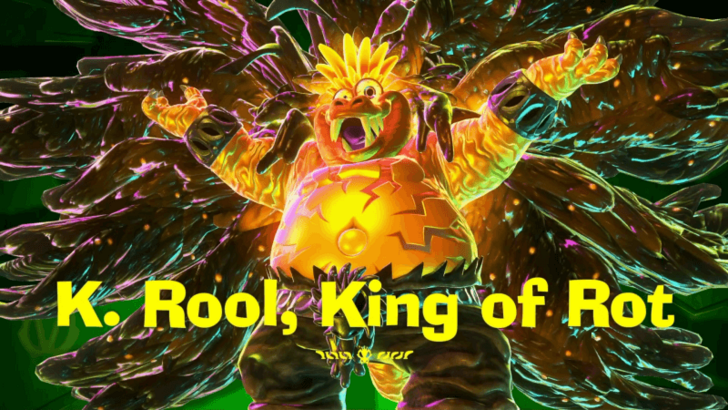 Keep dashing along the crumbling pathways and launching up Barrel Cannons until you reach King K. Rool. ▶︎ How to Beat K. Rool, King of Rot |
| 11 | Defeat K. Rool one more time using all of your Bananza powers, similar to how you used them to go through New Donk City. Completing this ends the main story of Donkey Kong Bananza. ▶︎ Post-Game Guide |
How Many Layers Are There?
17 Main Layers
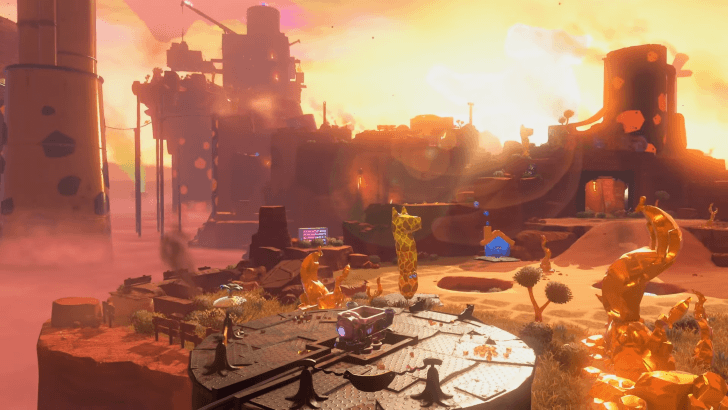
There are 17 main layers in Donkey Kong Bananza, with the Planet Core found at Sublayer 1600. However, some layers have multiple sublevels, so we can expect to go through more than 17 layers in total in this game.
10 Playable Layers for Emerald Rush
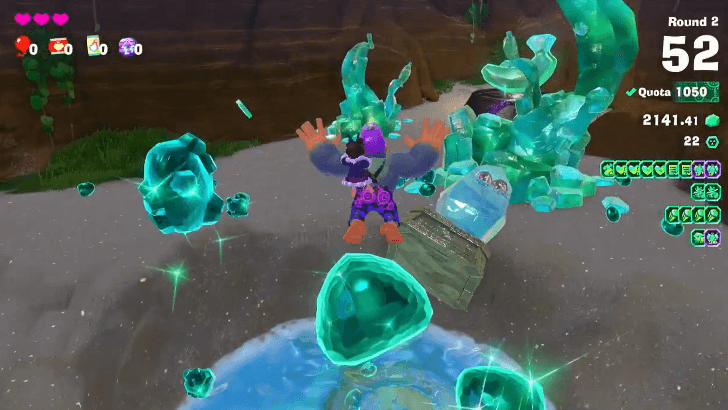
Emerald Rush is a roguelite mode that was added in the DK Island and Emerald Rush DLC. In this mode, you will work with Void Kong to get as many emerald as possible.
You'll be able to play this mode on 10 layers as you raise your Rating Points across your runs.
Donkey Kong Bananza Related Guides
Guides by Category
| List of Categories | |
|---|---|
 Walkthrough Walkthrough |
 Layers Layers |
 Banandium Gems Banandium Gems |
 How-To Guides How-To Guides |
 Challenge Ruins Challenge Ruins |
 Bananza Forms Bananza Forms |
 Outfits Outfits |
 Bosses Bosses |
 Fossils Fossils |
 Post-Game Post-Game |
 Music Discs Music Discs |
 Items Items |
 Terrain Types Terrain Types |
 Skills Skills |
 Message Boards Message Boards |
 Latest News Latest News |
Recommended Guides
Author

100% Walkthrough Guide
Please participate in our site
improvement survey
04/2026
improvement survey
04/2026
Would you assist in
improving Game8's site?
improving Game8's site?

×
We are listening to our users' valuable opinions and discussing how to act on them.
The information collected through this survey will be used for the purpose of improving our services. In addition, the information will only be disclosed a part of a statistic in a format that will not allow identification of personal information.
Begin Survey
Not Now
×
Please rate each item regarding Game8.co's Advertisements.
Amount of Ads
Very Dissatisfied
Somewhat Dissatisfied
Fine
Somewhat Satisfied
Highly Satisfied
Placement of Ads
Timing of Ad Display
Ad Loading Speed
Safeness of Ads
Content of Ads
×
Please rate each item regarding Game8.co's Quality of Articles.
Amount of information
Very Dissatisfied
Somewhat Dissatisfied
Fine
Somewhat Satisfied
Highly Satisfied
Frequency of updates
Speed of new information
Accuracy of articles
Understandibility of articles
Readability of sentences
×
Please rate each item regarding Game8.co's Usability of the Site.
Ease of finding information
Very Dissatisfied
Somewhat Dissatisfied
Fine
Somewhat Satisfied
Highly Satisfied
Loading Speed
Use of Color
Font Size
Visibility of Images
Easy to Understand Layout
×
Please rate each item regarding Game8.co's Message Boards, Comments.
Ease of Writing
Very Dissatisfied
Somewhat Dissatisfied
Fine
Somewhat Satisfied
Highly Satisfied
Readability
Ease in Finding Information
Comment Quality
Comment Quantity
Admin Response
×
Please rate each item regarding Game8.co's Site's new design.
Please rate our site's new design
Very Dissatisfied
Somewhat Dissatisfied
Fine
Somewhat Satisfied
Highly Satisfied
Do you think that the website's design change makes the site easier to use?
Has the new design made it easier for you to find information on the site?
Has the new design improved the overall visual appeal of the site?
How would you rate your overall satisfaction with the new design of the site?
×
How likely are you to recommend Game8 to someone you know?
Very Unlikely
0
1
2
3
4
5
6
7
8
9
10
Very Likely
If you have other opinions regarding potential improvement to the website, please share them with us. We would appreciate your honest opinion.
Note: This is a free response section, so you can proceed without entering anything.
Note: Please be sure not to enter any kind of personal information into your response.
Note: Please be sure not to enter any kind of personal information into your response.
×
Thank You
×
Thank you for participating in our survey! Your answers will help us to improve the quality of our website and services.
We hope you continue to make use of Game8.
We hope you continue to make use of Game8.
Close
Rankings
- We could not find the message board you were looking for.
Gaming News


![Forza Horizon 6 Review [Preview] | Beautiful Roads With a Whole Lot of Oversteer](https://img.game8.co/4460981/a7254c24945c43fbdf6ad9bea52b5ce9.png/thumb)
Popular Games

Genshin Impact Walkthrough & Guides Wiki
Crimson Desert Walkthrough & Guides Wiki
Umamusume: Pretty Derby Walkthrough & Guides Wiki
Honkai: Star Rail Walkthrough & Guides Wiki
Monster Hunter Stories 3: Twisted Reflection Walkthrough & Guides Wiki
Wuthering Waves Walkthrough & Guides Wiki
The Seven Deadly Sins: Origin Walkthrough & Guides Wiki
Pokemon TCG Pocket (PTCGP) Strategies & Guides Wiki
Pokemon Pokopia Walkthrough & Guides Wiki
Zenless Zone Zero Walkthrough & Guides Wiki


Recommended Games
Monster Hunter World Walkthrough & Guides Wiki
Fire Emblem Heroes (FEH) Walkthrough & Guides Wiki
Pokemon Brilliant Diamond and Shining Pearl (BDSP) Walkthrough & Guides Wiki
Super Smash Bros. Ultimate Walkthrough & Guides Wiki
Diablo 4: Vessel of Hatred Walkthrough & Guides Wiki
Cyberpunk 2077: Ultimate Edition Walkthrough & Guides Wiki
Yu-Gi-Oh! Master Duel Walkthrough & Guides Wiki
Elden Ring Shadow of the Erdtree Walkthrough & Guides Wiki
The Legend of Zelda: Tears of the Kingdom Walkthrough & Guides Wiki
Persona 3 Reload Walkthrough & Guides Wiki


All rights reserved
© Nintendo. Games are property of their respective owners. Nintendo of America Inc.
The copyrights of videos of games used in our content and other intellectual property rights belong to the provider of the game.
The contents we provide on this site were created personally by members of the Game8 editorial department.
We refuse the right to reuse or repost content taken without our permission such as data or images to other sites.
Hello, I was using your fantastic guide but you were missing the first bonus level. In this level you.have two yellow and one Grey enemy . The Grey one takes a few hit using the y button. Once you have wasted that one use wall grab and throw it at they yellow ones, keep hitting since they fall apart quickly. Blessed Be LillyAnn EverDawn