Feast Layer Banana and Fossil Locations (SL 1400-1401)
☽ DK Island and Emerald Rush DLC out now!
☽ Learn how to solve Banandiumtone's Puzzles.
☽ All Collectibles: Banandium Gems and Fossils
☽ Learn How to Skip Layers Entirely!
☽ How to Beat the Final Boss
☽ Post-Game: Rehearsal Halls | Secret Ending
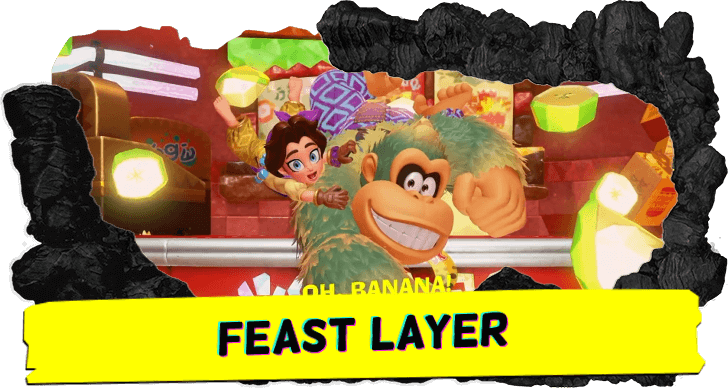
Feast Layer is the fifteenth layer in Donkey Kong Bananza. Check out where to find the locations of all Feast Layer Bananas, fossils, and other collectibles in this level!
| Feast Layer Guides | |
|---|---|
| Walkthrough | Collectibles |
List of Contents
Feast Layer Collectibles Overview
List of Collectibles
| Banandium Gems | Total: 69
・SL 1400: 57 ・SL 1401: 12 |
|---|---|
| Fossils | Total: 72
|
| Checkpoints | Total: 18 |
| Challenges | Total: 11 |
There are 69 bananas and 72 fossils available in Feast Layer.
Feast Layer Bananas
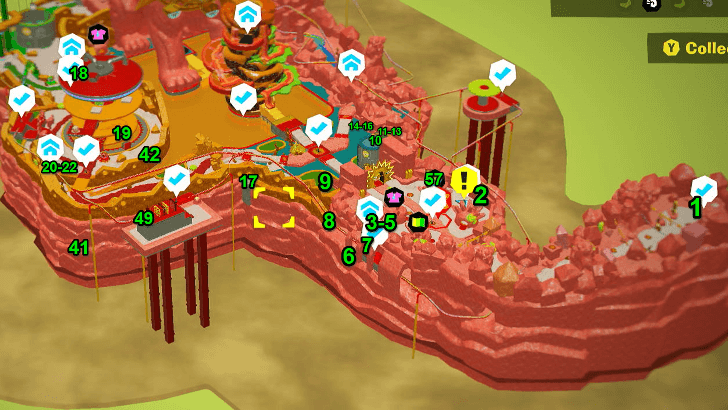
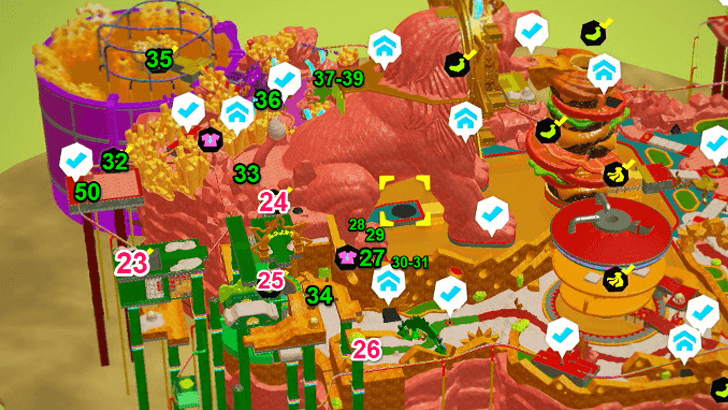
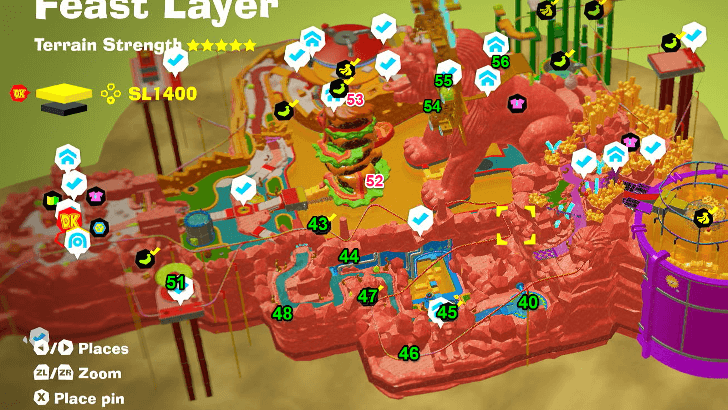
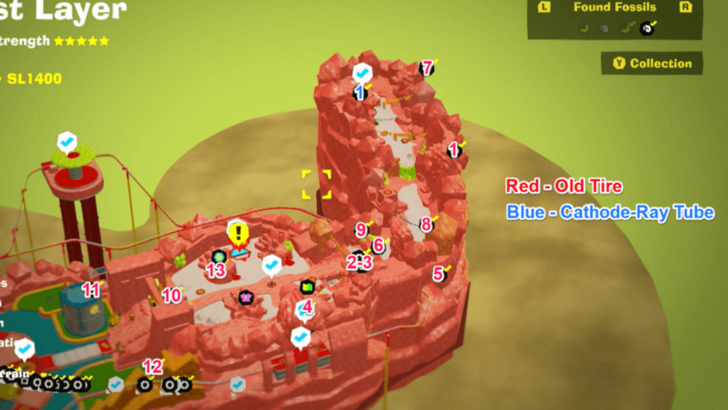
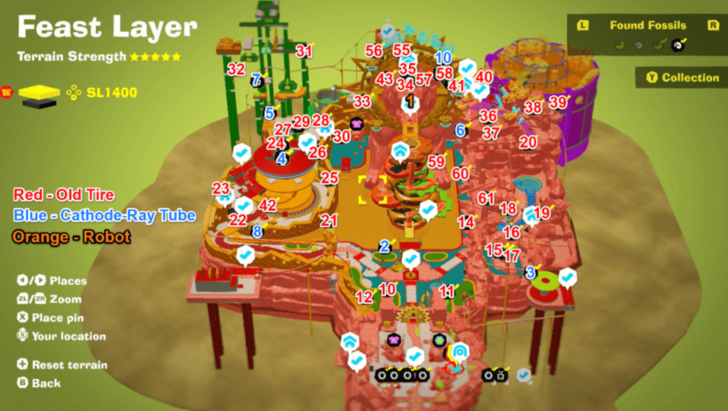
Banandium Gems Map Overview
SL 1400 Banana Locations
| Overworld View | Map Location | |
|---|---|---|
| 01 |
 |
 |
|
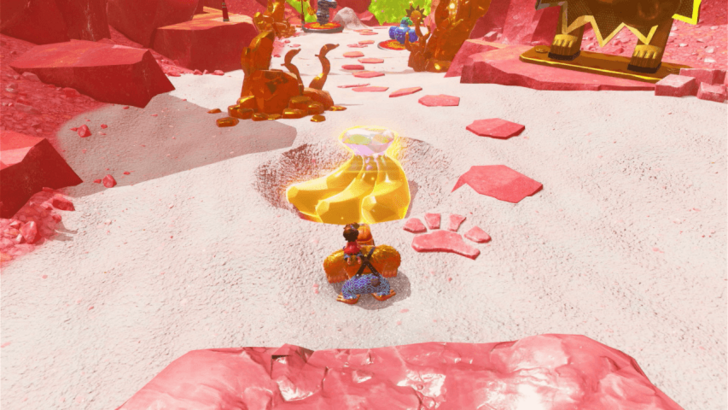
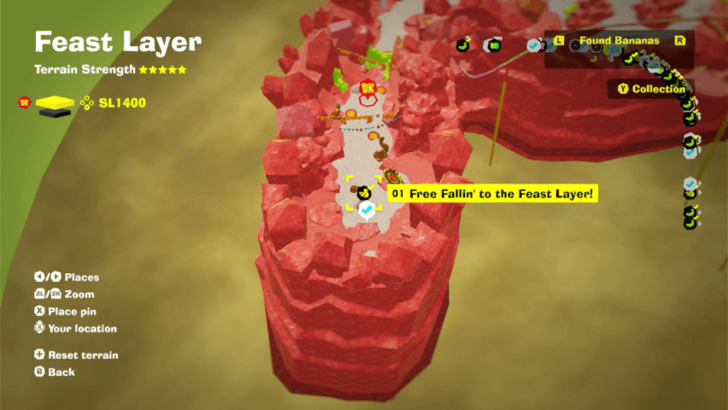
After finishing the game, go back to the SL1204 in the Radiance Layer and destroy the Void Stake there. The key can be found within the level below Crystal-Cobra Den. After destroying the Void Stake, go down the sinkhole, and you'll find the gem when you land in Feast Layer. |
||
| 02 |
 |
 |
|
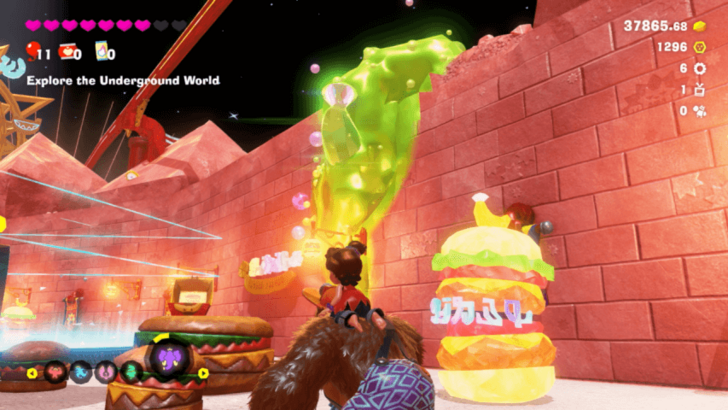
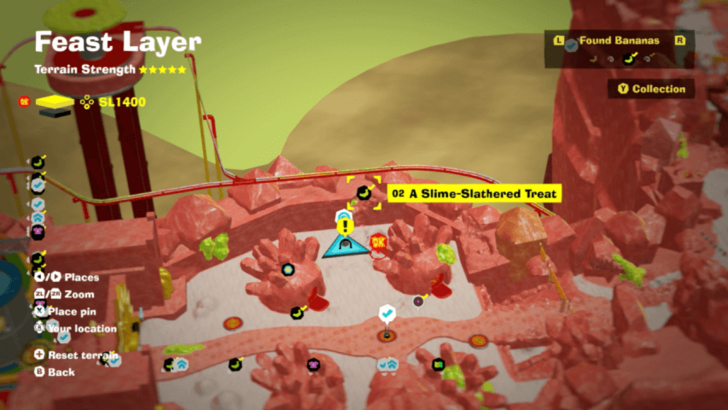
Found stuck to a wall with muck in the Mane Gate area. Throw sand above the Banandium Gem to melt it out of the wall. |
||
| 03 |
 |
 |
|
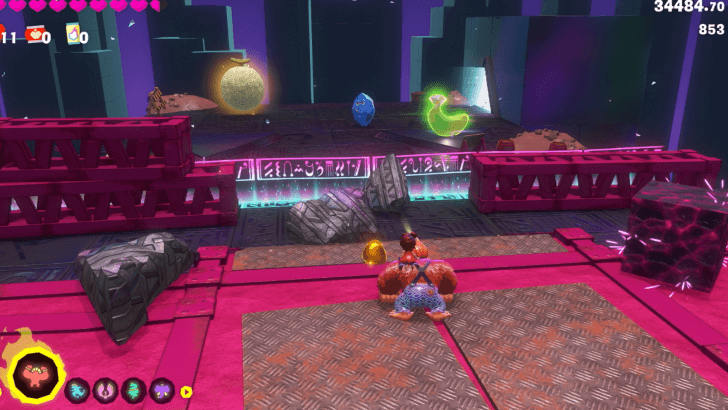
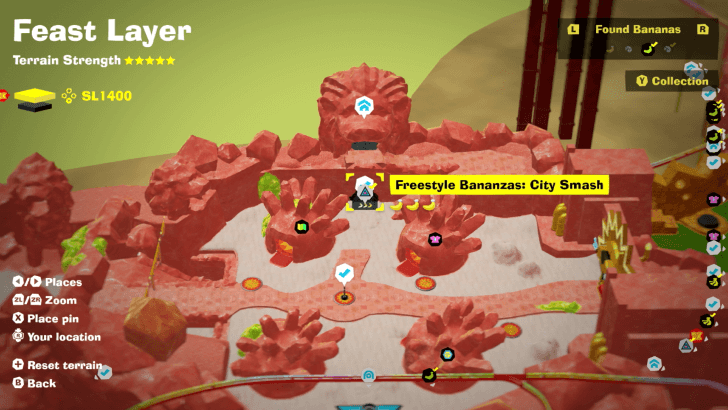
Found inside Freestyle Bananza City Smash. Get a 100% score before the timer runs out. |
||
| 04 |
 |
|
|
Found inside Freestyle Bananza City Smash. Get a 100% score with 20 seconds or more left on the timer. |
||
| 05 |
 |
 |
|
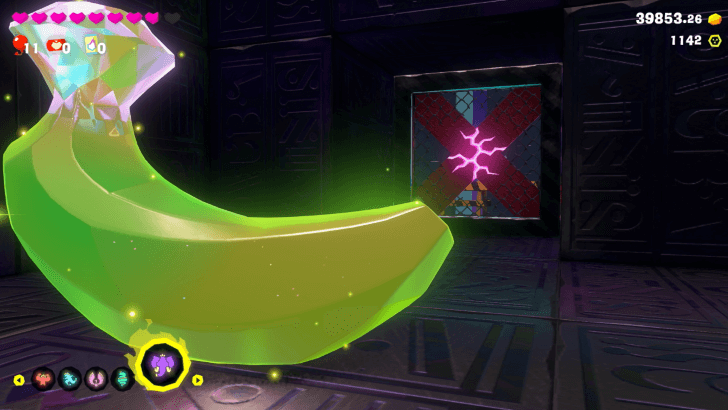
Found inside Freestyle Bananza City Smash. Hit the blue balloon on the bottom floor to make the platform rise. Go under the platform to find a hole leading down, with a secret room containing the Banandium Gem. |
||
| 06 |
 |
 |
|
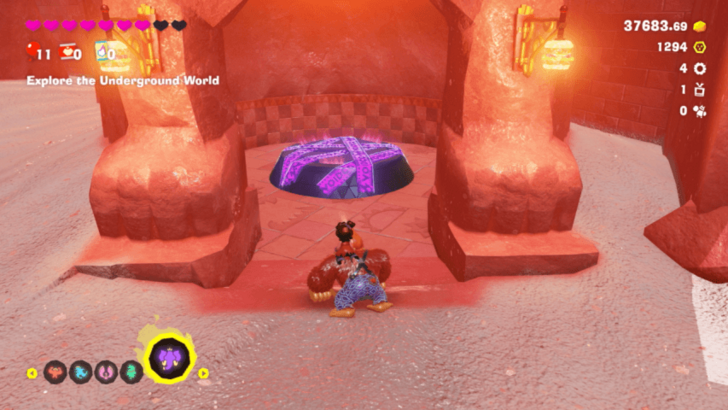
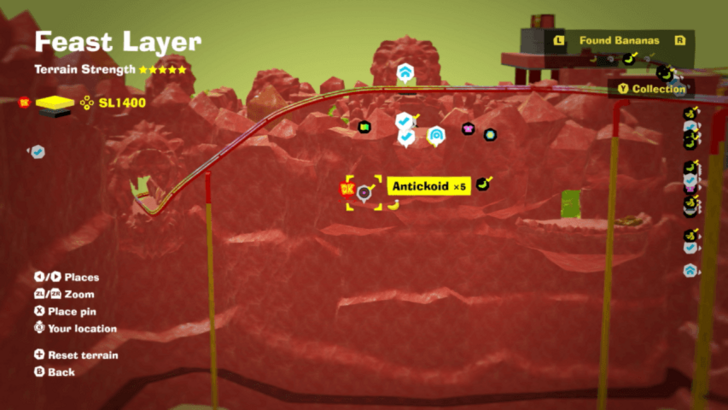
In the basement area below the Mane Gate town. |
||
| 07 |
 |
 |
|
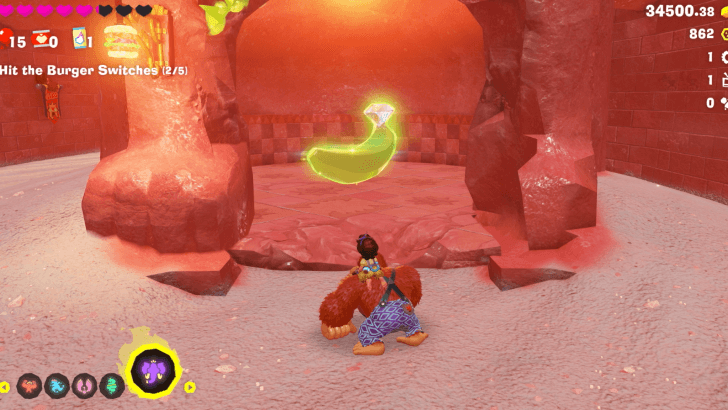
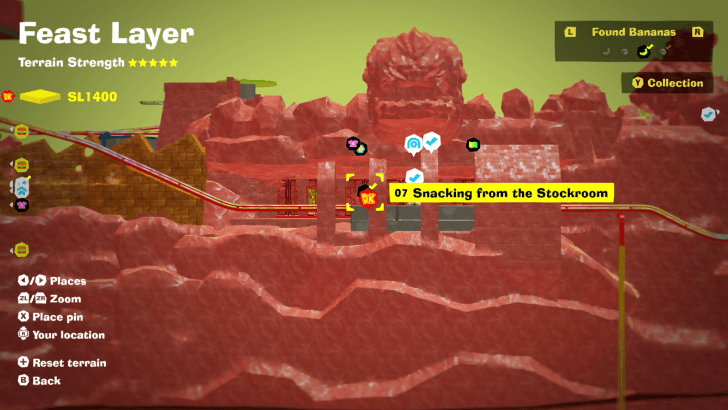
In the basement area below the Mane Gate town. Throw salt at a wall covered with muck to reveal it. |
||
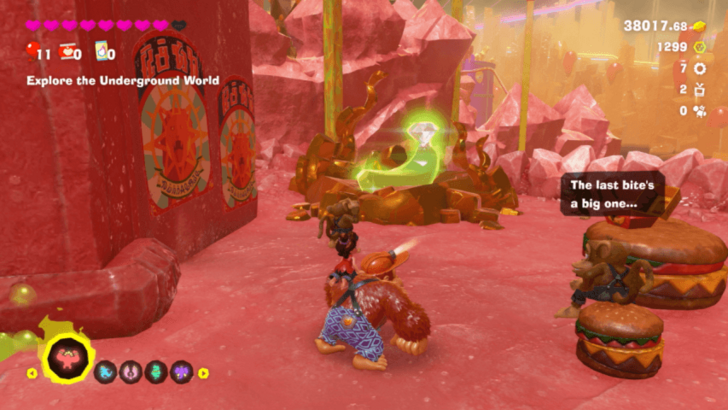
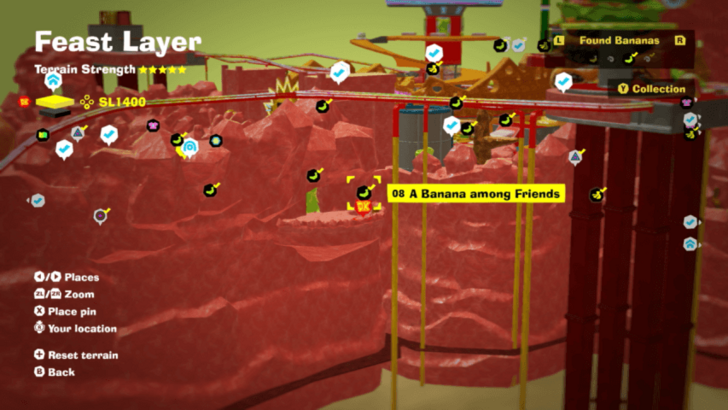
| 08 |
 |
 |
|
In the area with Growtone, wrap around the wall to find a hidden cliff off the edge with a Banandium Gem. |
||
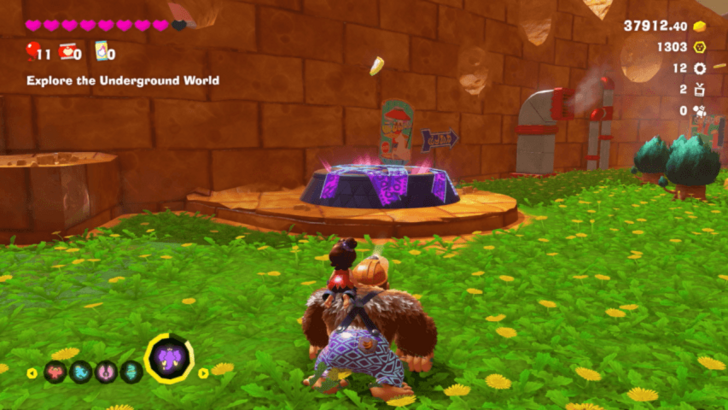
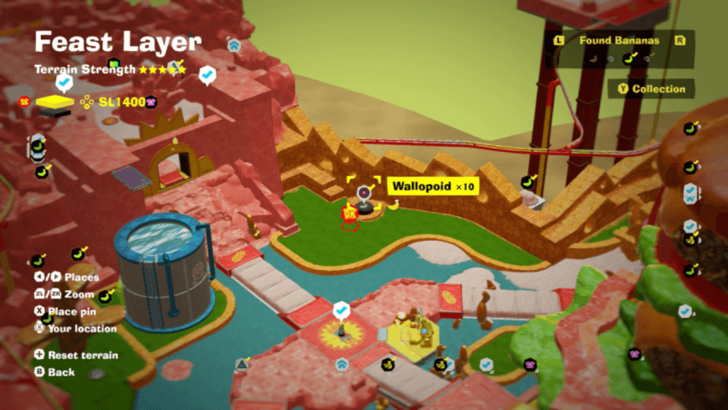
| 09 |
 |
 |
|
Found in the grassy area in Fried Pride Plaza. |
||
| 10 |
 |
 |
|
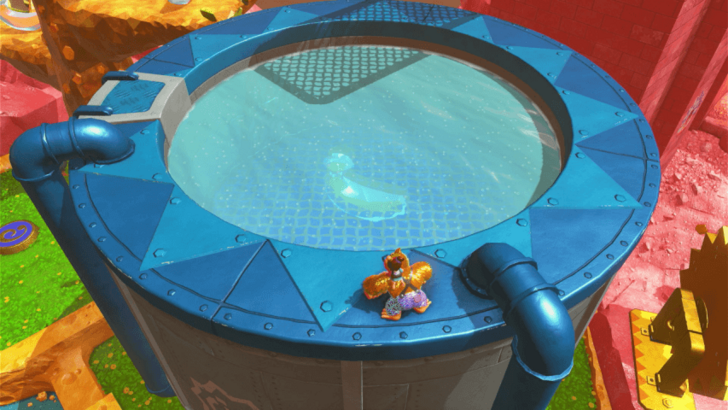
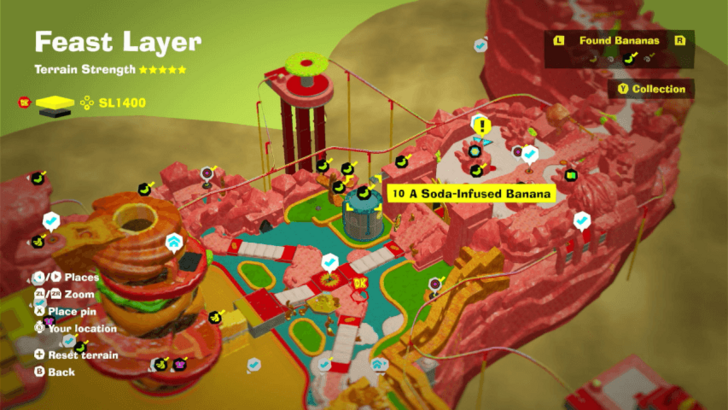
Found submerged in the soda tank. Perform a Dive Punch to break it. |
||
| 11 |
 |
 |
|
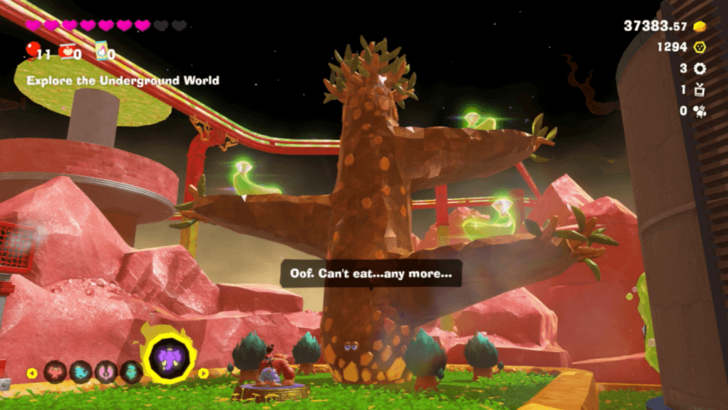
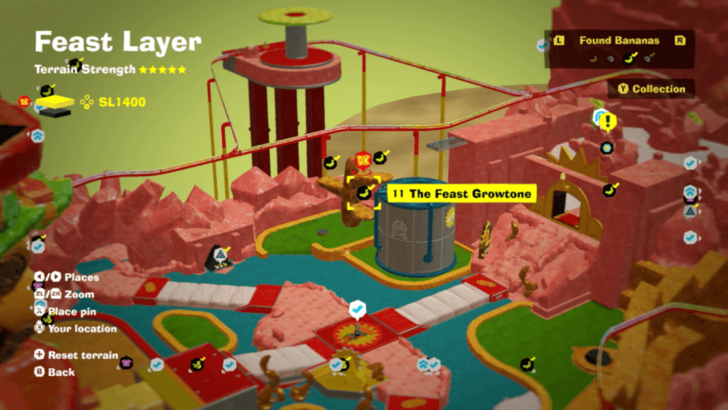
Feed the Growtone 500 gold to get the first Banandium Gem. |
||
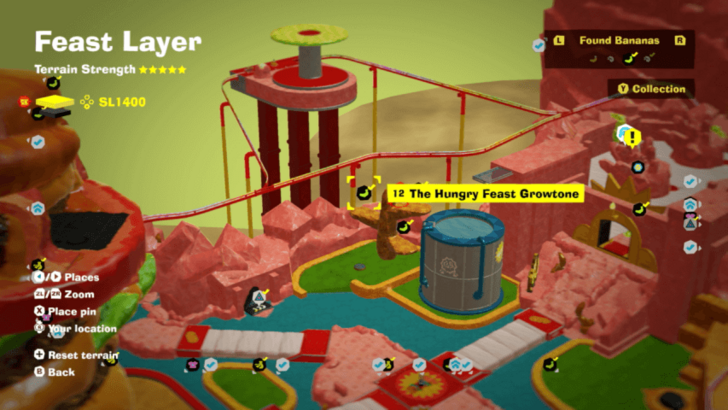
| 12 |
 |
 |
|
Feed the Growtone 2000 more gold to get the second Banandium Gem. |
||
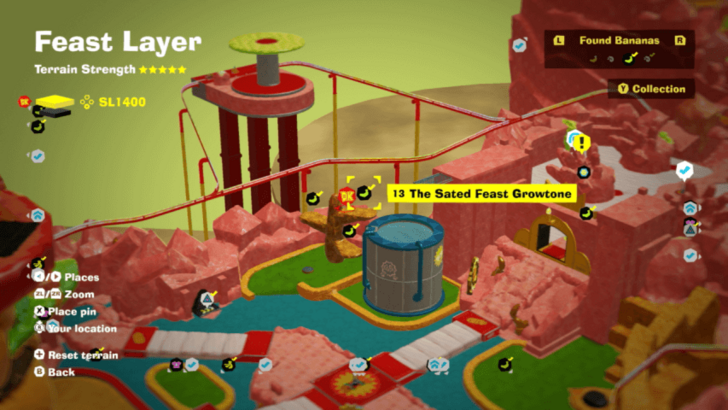
| 13 |
 |
 |
|
Feed the Growtone 2500 more gold to get the third Banandium Gem. |
||
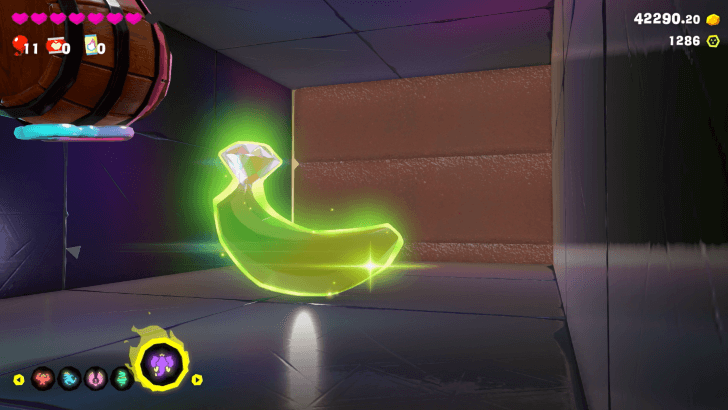
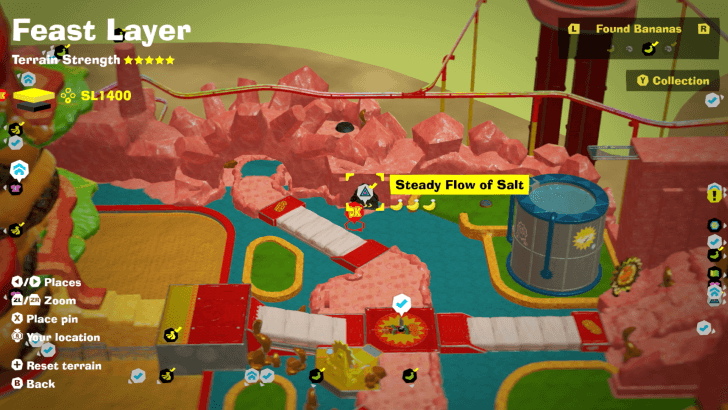
| 14 |
 |
 |
|
Found inside Steady Flow of Salt Challenge Course 2. In the area where the sand wall is moving upwards, punch through near the top of the wall to find a secret room with a Banandium Gem behind. |
||
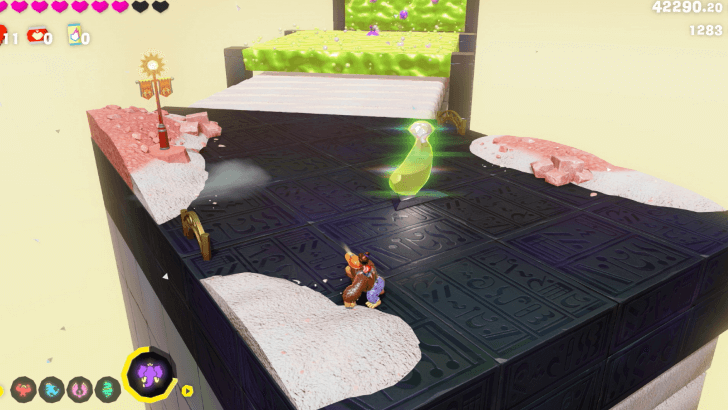
| 15 |
 |
 |
|
Found inside Steady Flow of Salt Challenge Course 2. It is found along the course. |
||
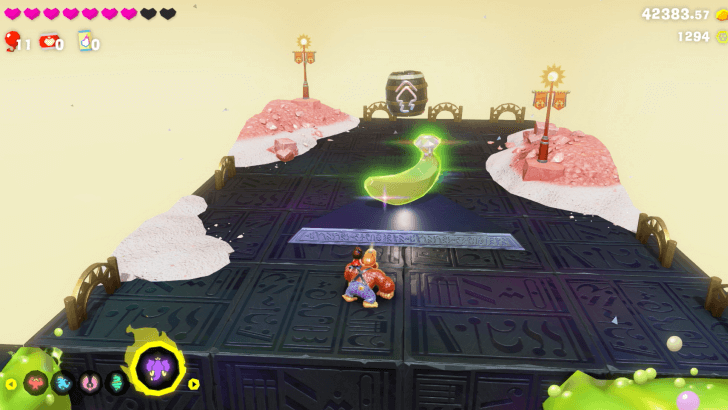
| 16 |
 |
 |
|
Found at the end of Steady Flow of Salt Challenge Course 2. |
||
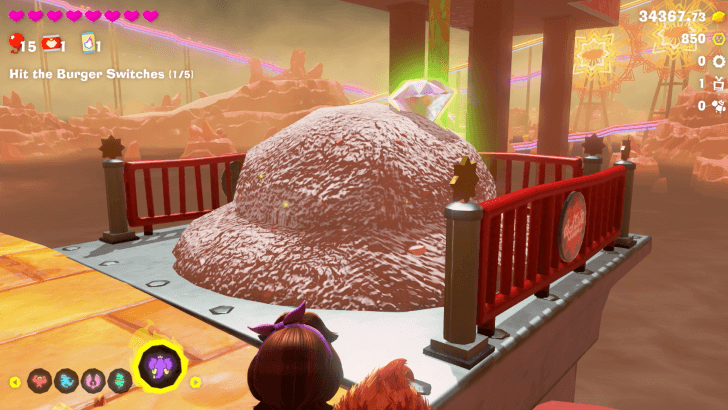
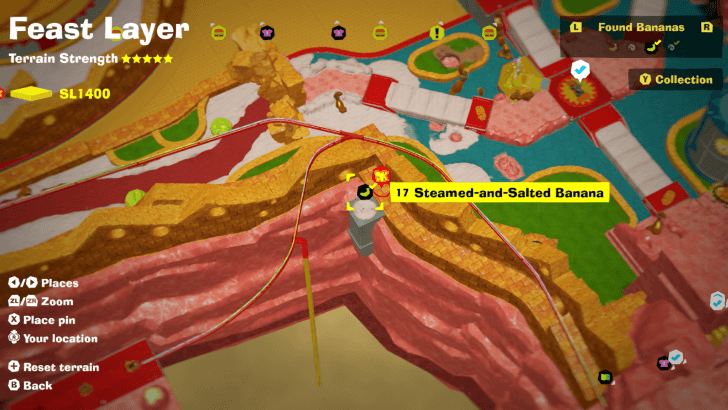
| 17 |
 |
 |
|
Found buried in a salt pile. |
||
| 18 |
 |
 |
|
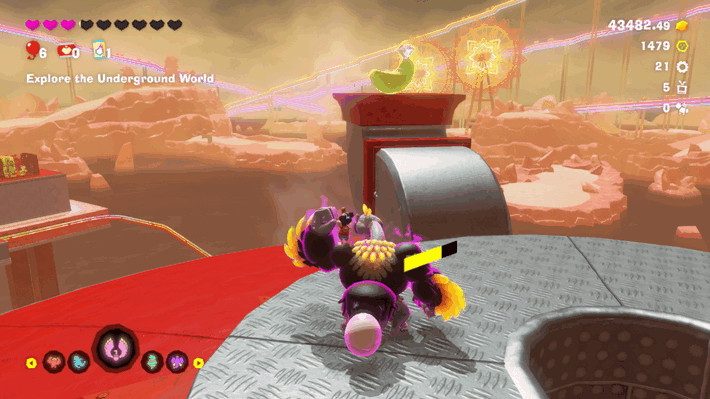
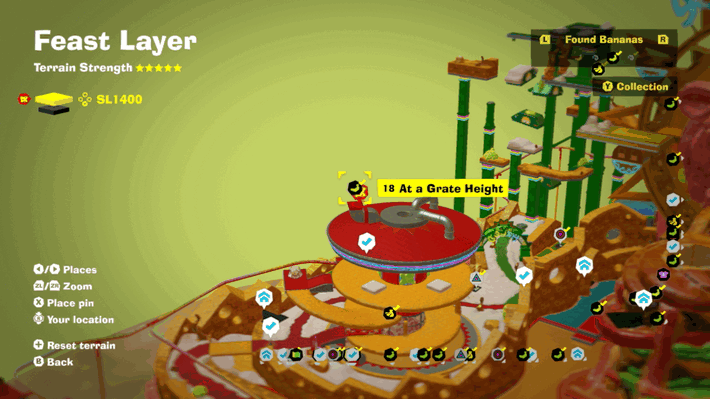
From the top of the Feral Wheel, flutter to the top of the nearby tower with Ostrich Bananza to grab it. |
||
| 19 |
 |
 |
|
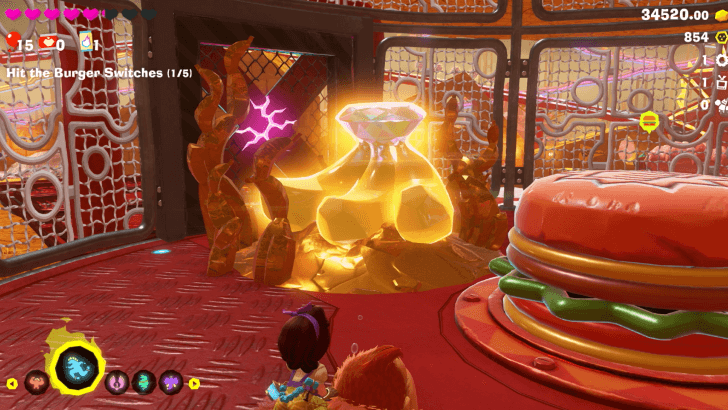
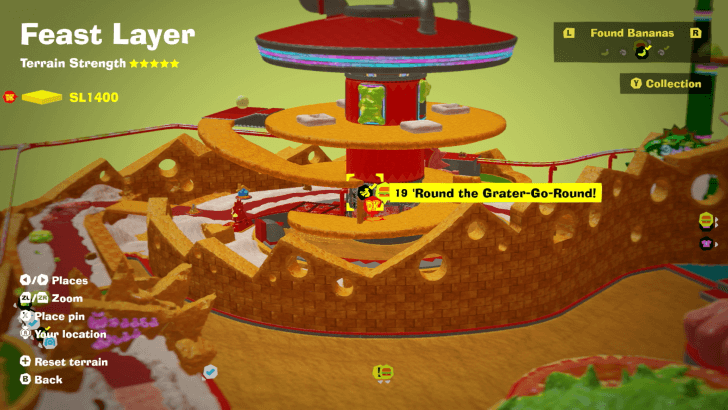
Found with story progression. |
||
| 20 |
 |
 |
|
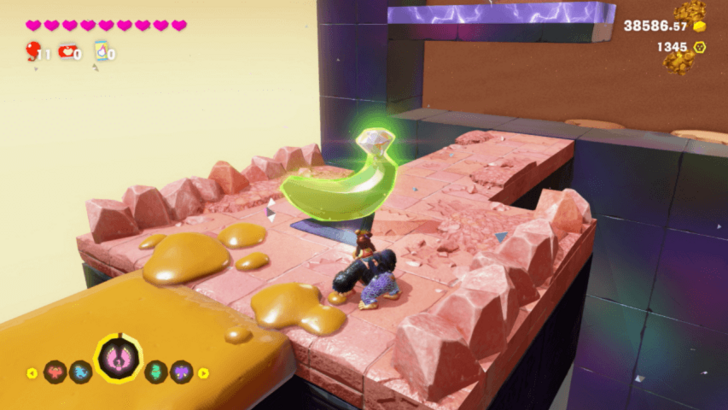
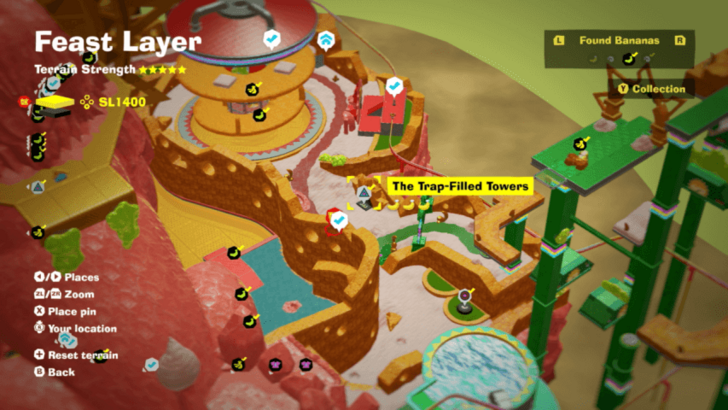
Found along the course. |
||
| 21 |
 |
|
|
Near the end of the course, when you cross a row of Wallopoids on stone walls, go past the middle one to find a hole behind with a stone wall in the floor. Punch through and climb along the wall at the bottom to find a single stone wall with a Banandium Gem behind it. |
||
| 22 |
 |
 |
|
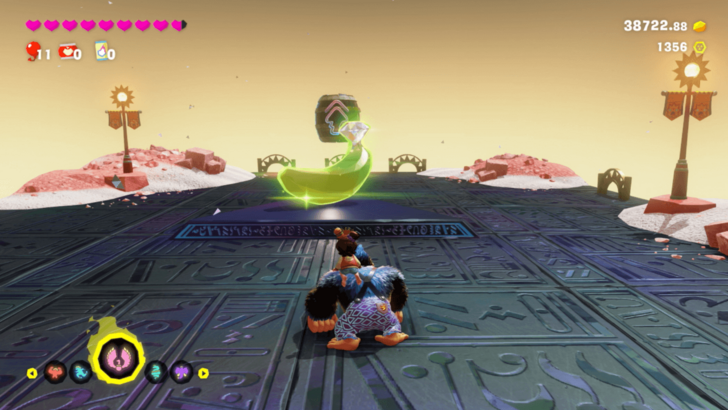
Found at the end of the course. |
||
| 23 |
 |
 |
|
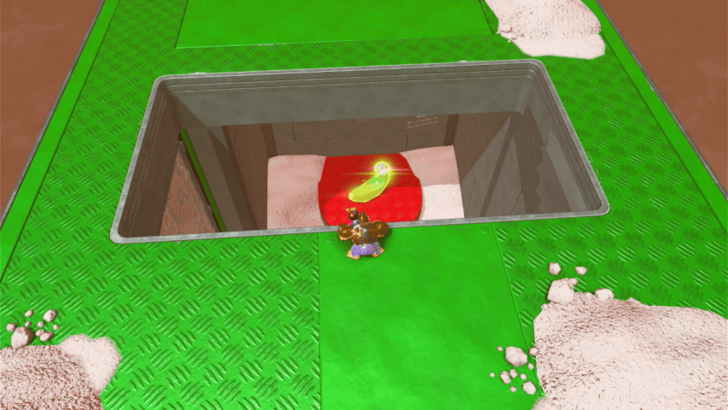
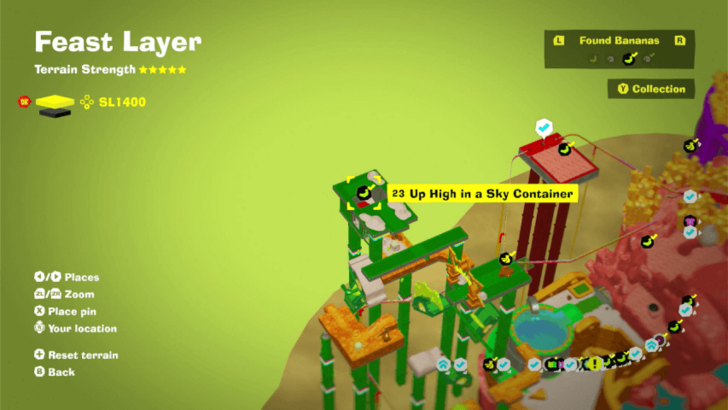
Reach the highest point of the Kingly Swings, and drop down to the opening there to get the gem. |
||
| 24 |
 |
 |
|
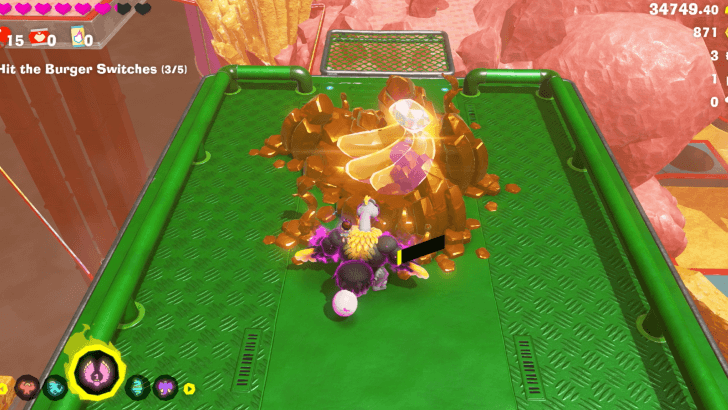
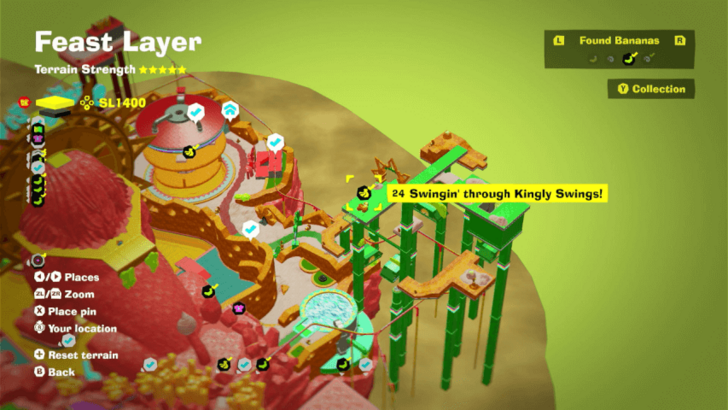
Found with story progression. |
||
| 25 |
 |
 |
|
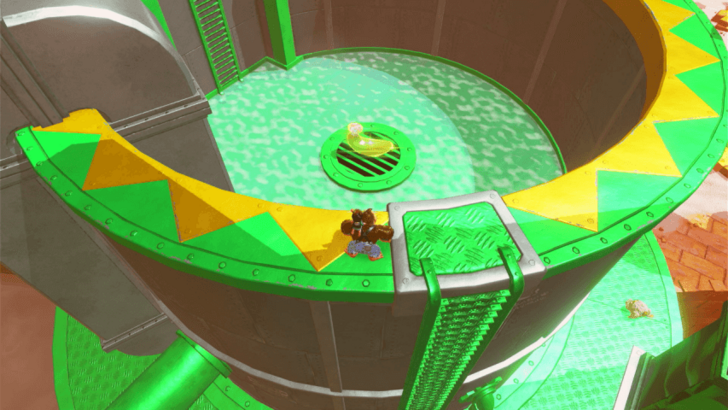
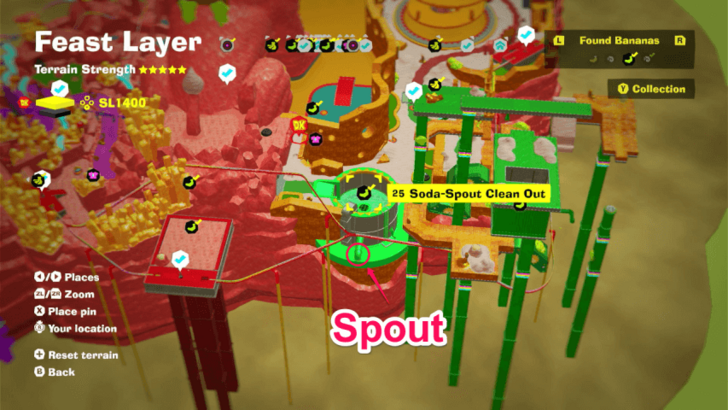
Throw salt onto the muck-covered spout of the big tank in the Kingly Swings to empty the liquid inside. Go inside the tank to get the gem. |
||
| 26 |
 |
 |
|
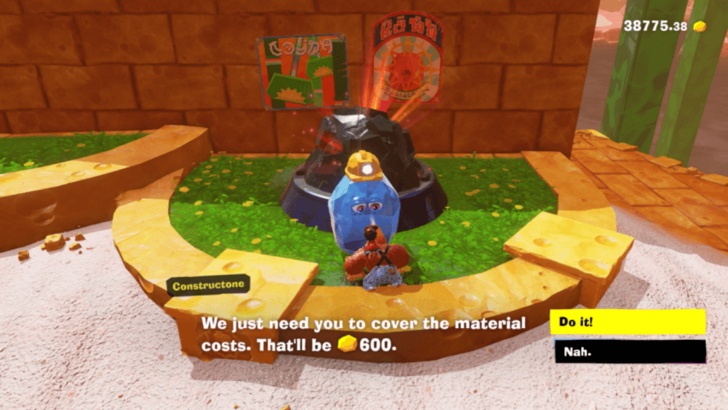
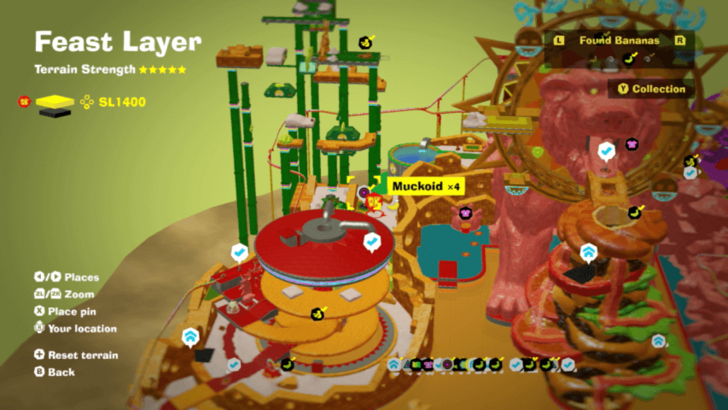
Must pay 600 gold to enter. |
||
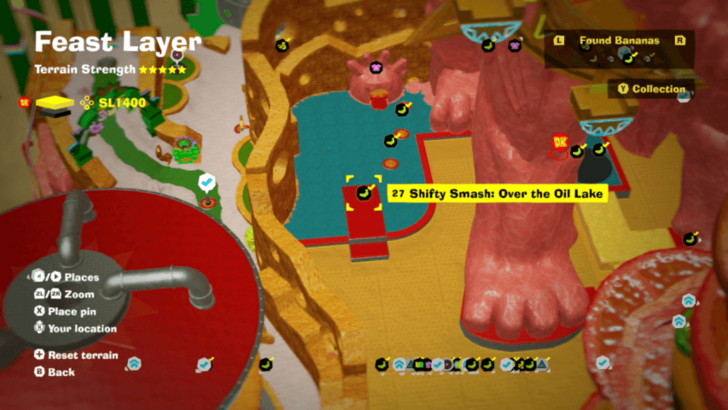
| 27 |
 |
 |
|
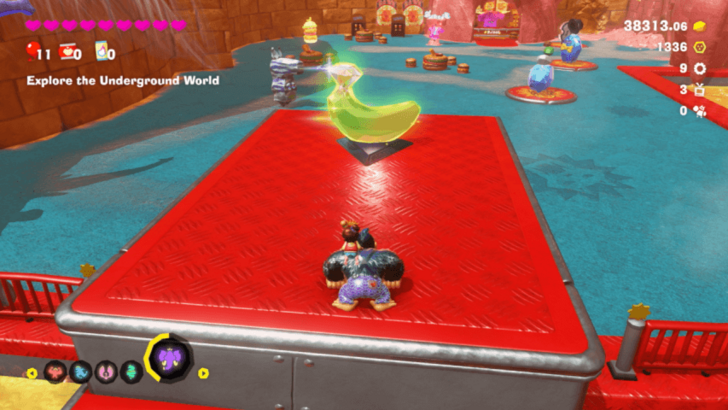
Break the prism and go to the far end of the white platform that appears; inhale and go backwards along the path to reach 100% without falling in. A Banandium Gem will appear. |
||
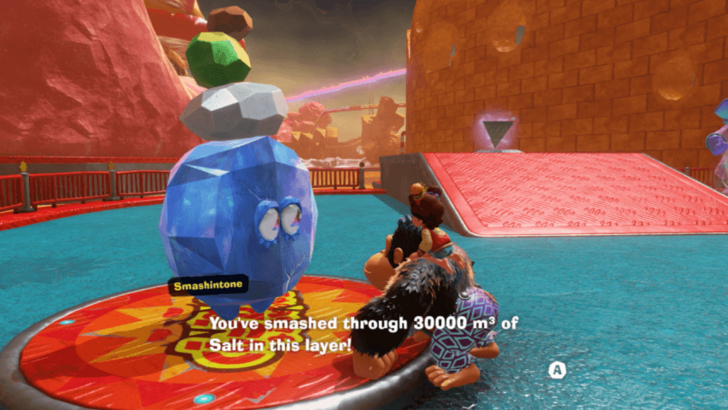
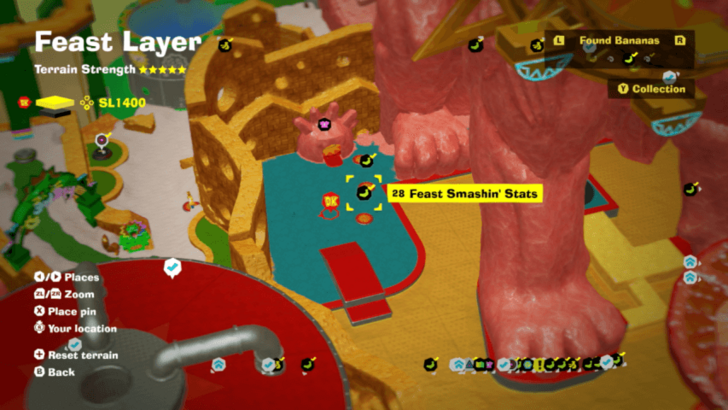
| 28 |
 |
 |
|
Break 30000m of Salt in Feast Layer and talk to Smashintone to get a Banandium Gem. |
||
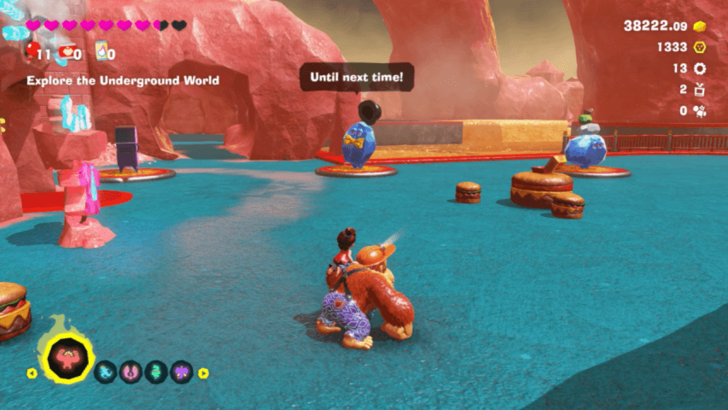
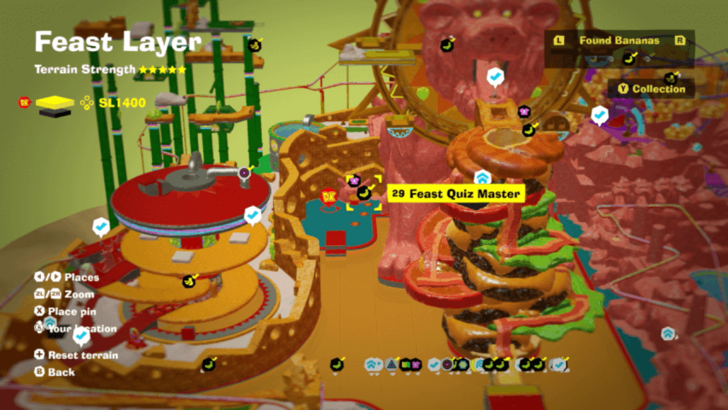
| 29 |
 |
 |
|
Answer all 3 of Quiztone's questions correctly to get a Banandium Gem. 1. A Giant Speaker. 2. Lighting Equipment. 3. A Forrest of Nuggets |
||
| 30 |
 |
 |
|
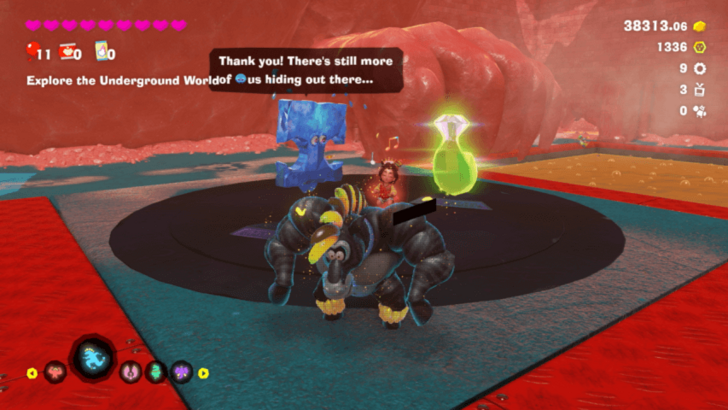
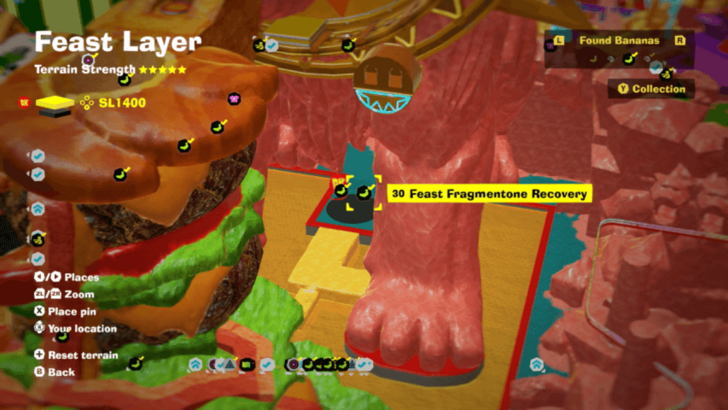
Go on the path and to the left to find the first Fragmentone piece. Bring it back with you by jumping on the platform repeatedly to keep it from sinking. Get a Banandium Gem when you bring it back. |
||
| 31 |
 |
 |
|
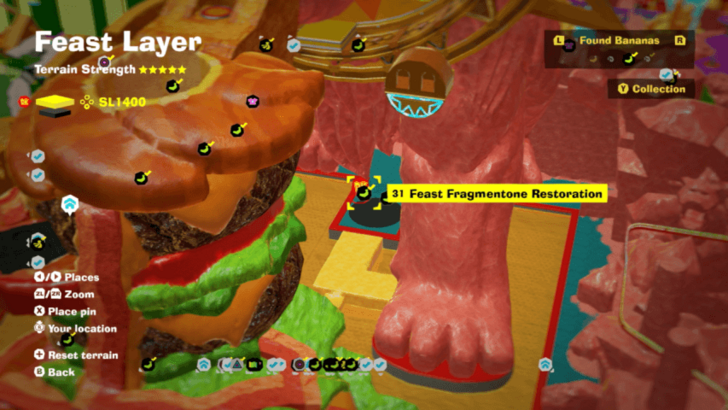
Go on the path and to the right and punch through the wall to find the last two Fragmentone pieces. Bring them back along with the first piece to get a second Banandium Gem. |
||
| 32 |
 |
 |
|
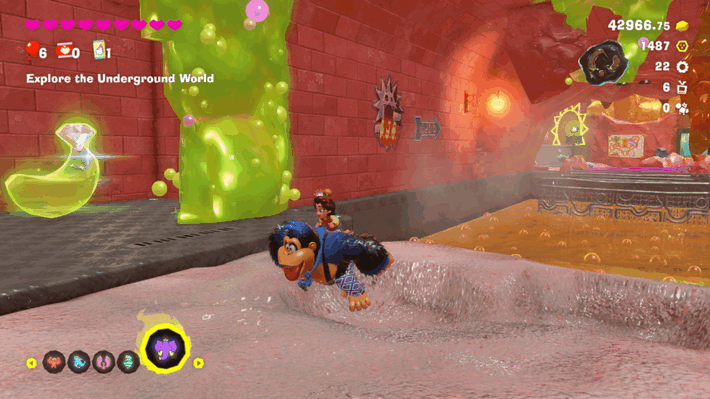
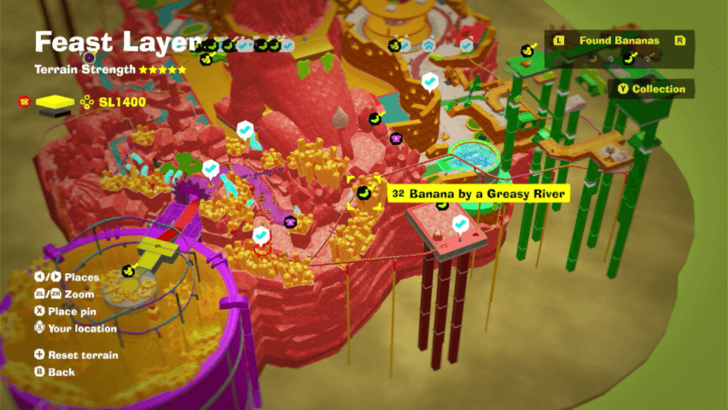
Ride a sand platform around the oil river and find a wall of muck on the side near the lion statue. Throw sand at it to reveal a Banandium Gem behind. |
||
| 33 |
 |
 |
|
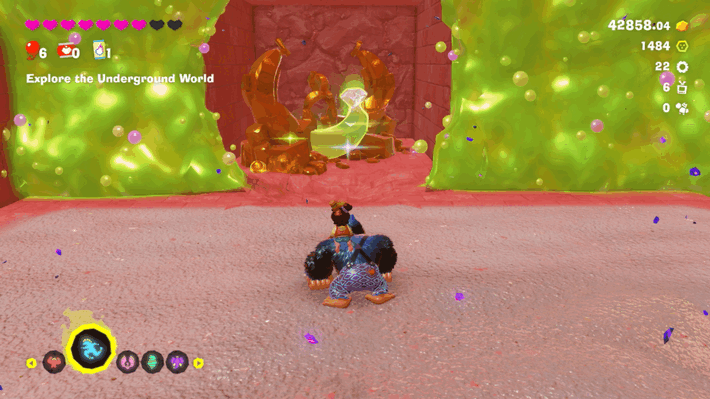
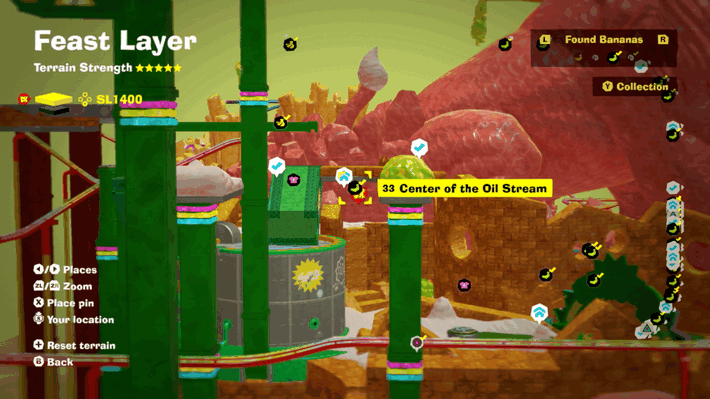
At the back of the lion statue is a ring of platforms going around an oil river. Find it in the middle of the circle through a wall of muck. |
||
| 34 |
 |
 |
|
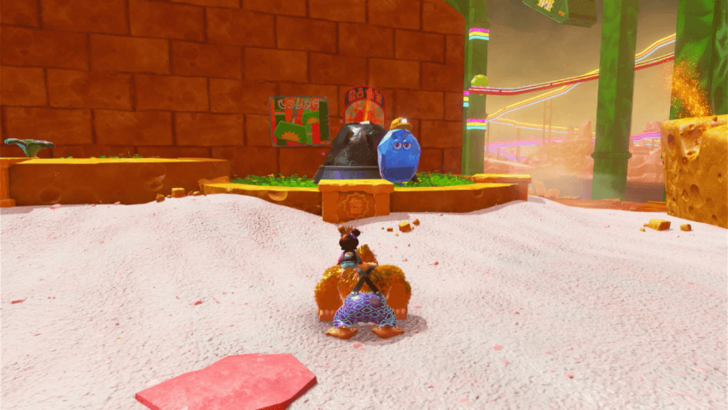
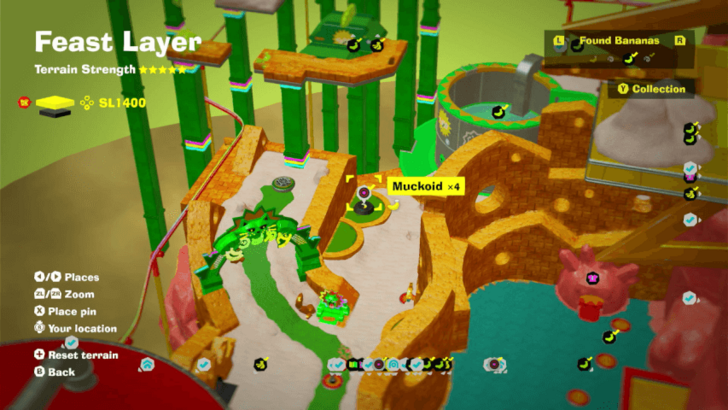
Pay the Constructone to remove the rock covering the entrance to the battle challenge. To win, just throw salt at the Muckoids. |
||
| 35 |
 |
 |
|
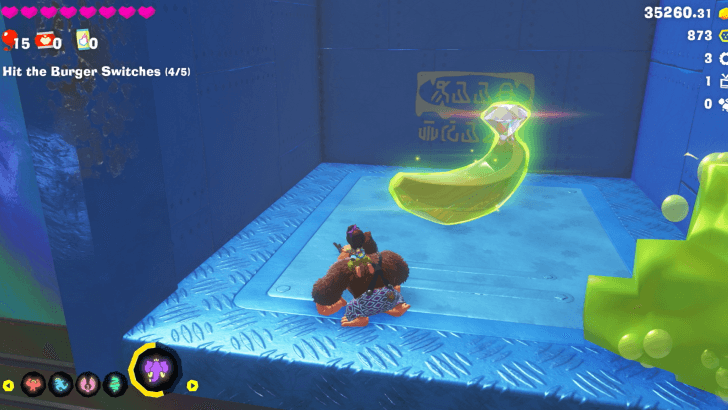
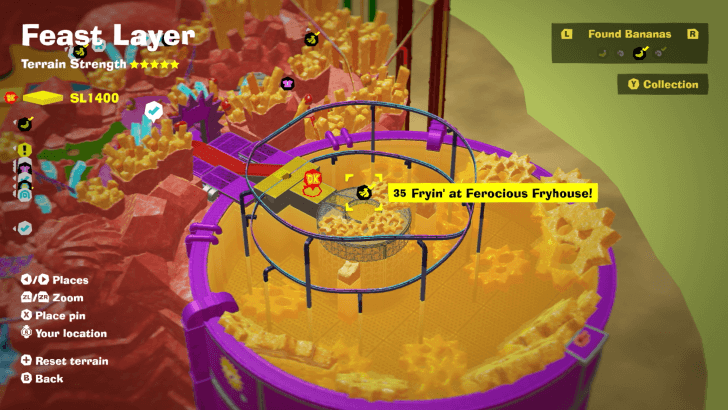
Found with story progression. |
||
| 36 |
 |
|
|
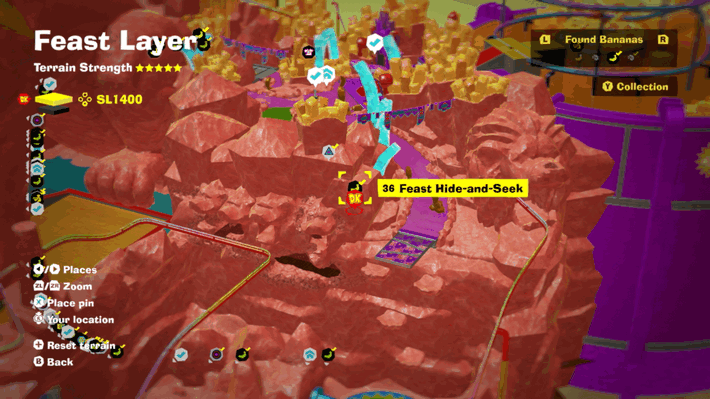
In a hidden room near the Branching Track Roarcoaster entrance; find all 4 of the Fractone's friends to get a Banandium Gem. |
||
| 37 |
 |
 |
|
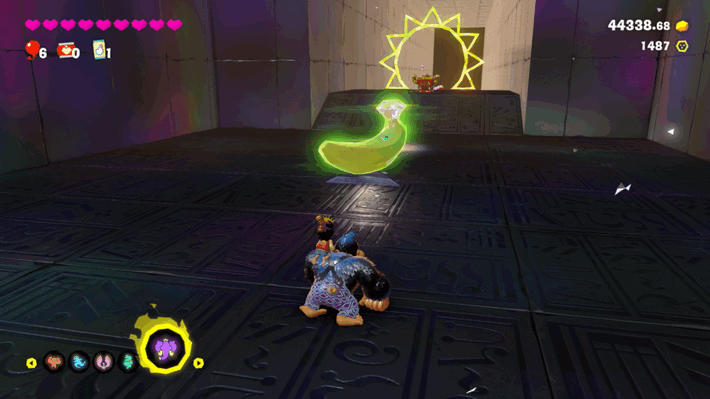
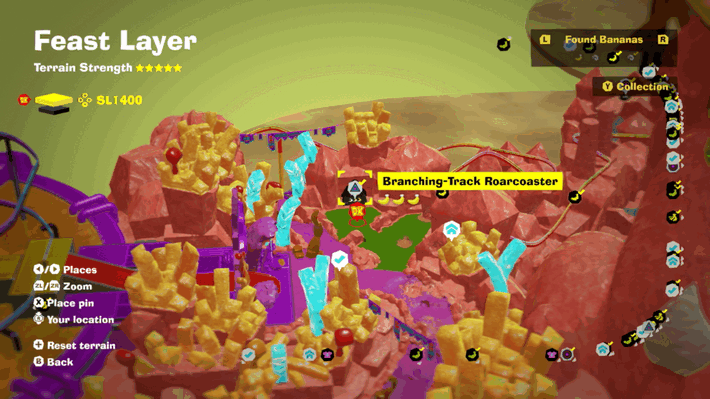
Found along the Branching-Track Roarcoaster course. |
||
| 38 |
 |
 |
|
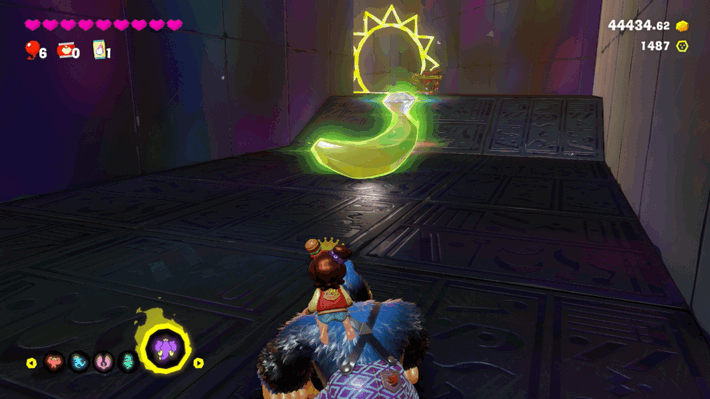
During the course, look for a waterfall with a sign and path half-covered behind it. Hit the sign to go behind the waterfall and find the Banandium Gem. |
||
| 39 |
 |
 |
|
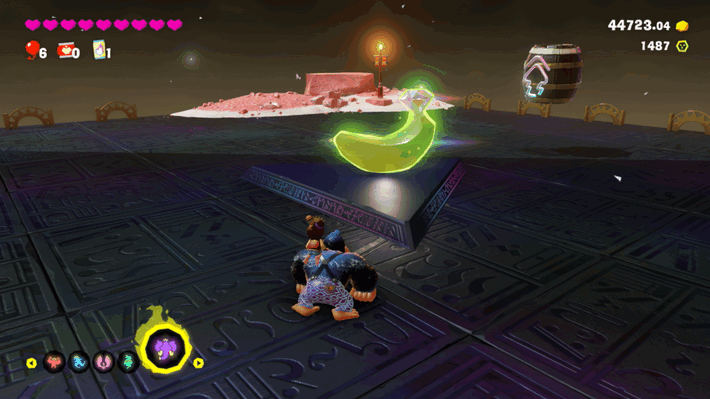
Found at the end of the Branching-Track Roarcoaster Course. |
||
| 40 |
 |
 |
|
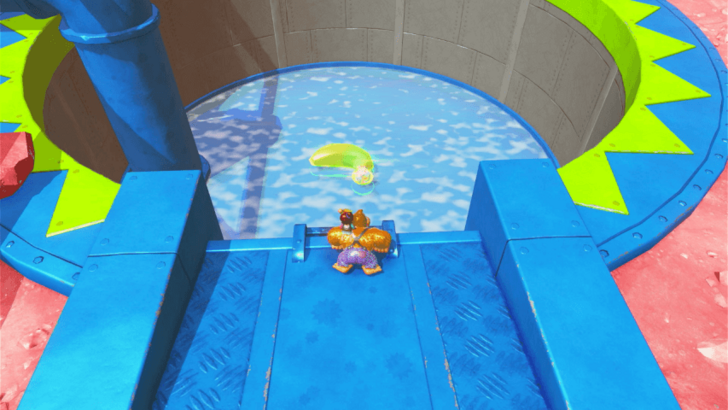
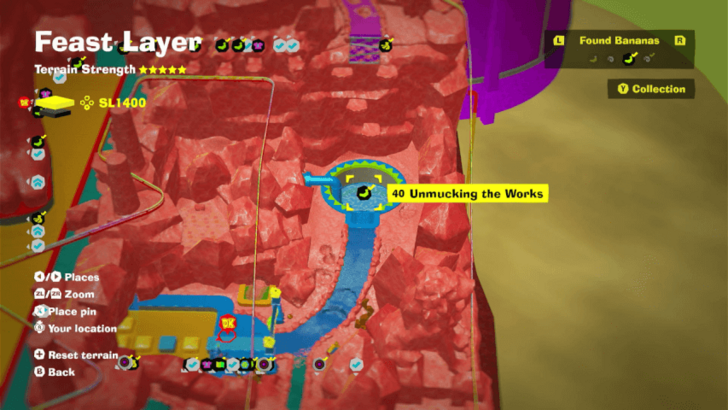
Break the wall at the right side of the blue archway near entrance to the Royal Oil Cruise. Throw salt at the muck covering the blue pipeline to drain the liquid inside the pool. Go inside the pool to get the gem. |
||
| 41 |
 |
 |
|
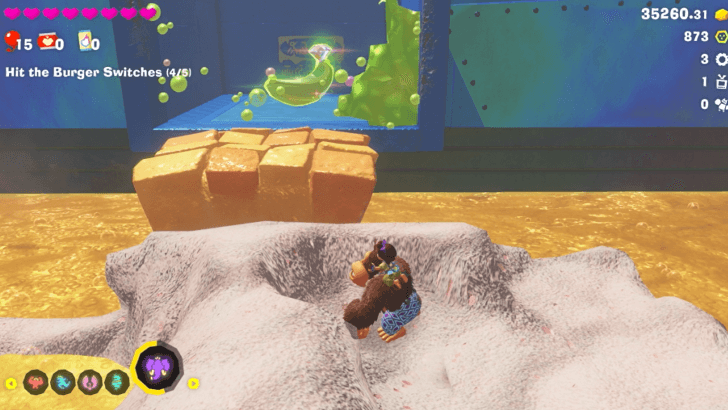
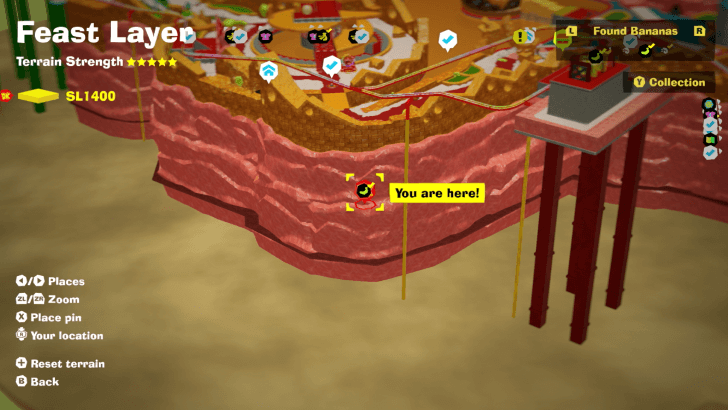
On the Royal Oil Cruise, throw sand at a wall of muck to the right from your platform to reveal a Banandium Gem behind it. |
||
| 42 |
 |
 |
|
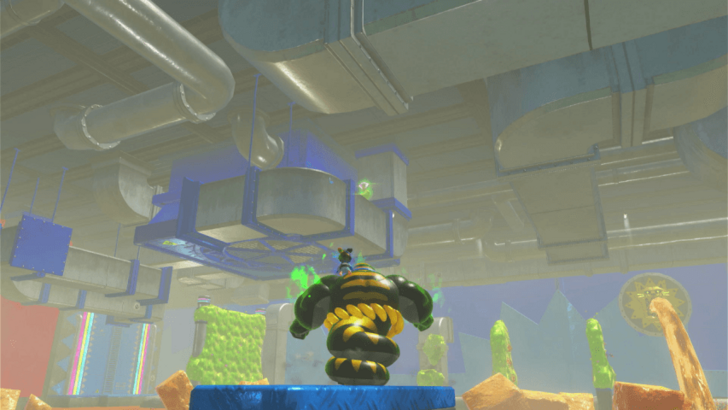
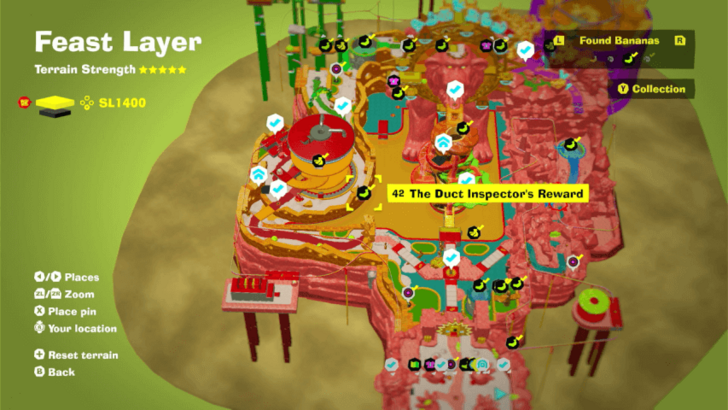
Found on the vents on the ceiling of the Royal Oil Cruise. When you reach the end of the cruise, climb up, and use Ostrich Bananza Form to Flutter to the vents. Just follow the vents until you reach the center fan. |
||
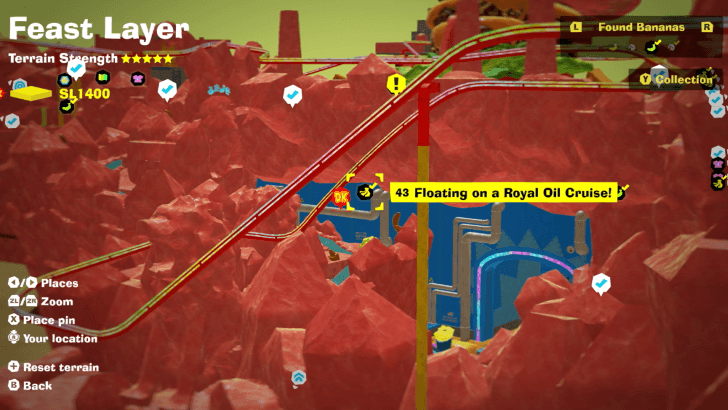
| 43 |
 |
 |
|
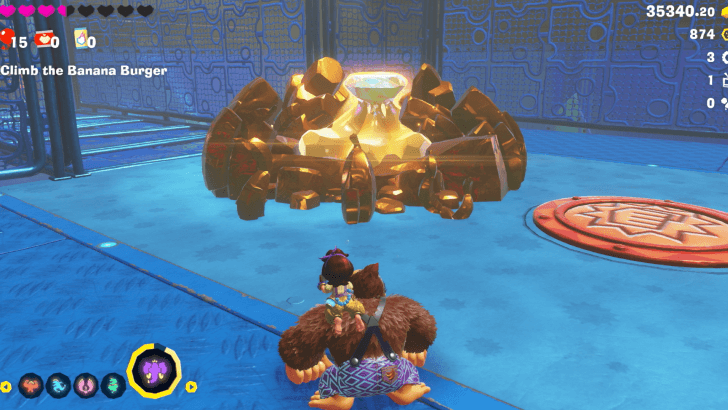
Found with story progression. |
||
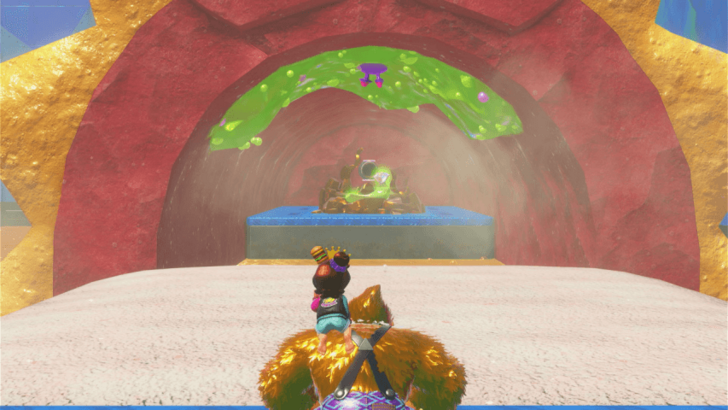
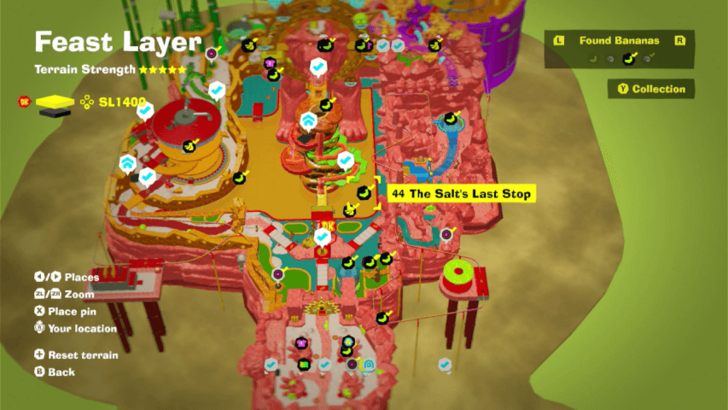
| 44 |
 |
 |
|
Upon reaching the end of the Royal Oil Cruise, go right and follow the path instead of climbing up. Just ride the salt platform to get to the gem. |
||
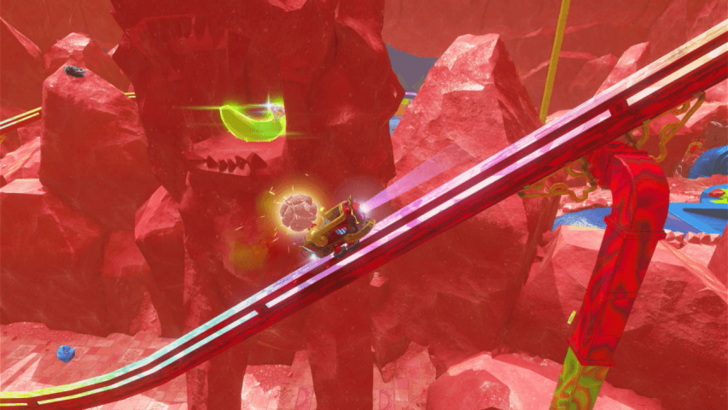
| 45 |
 |
 |
|
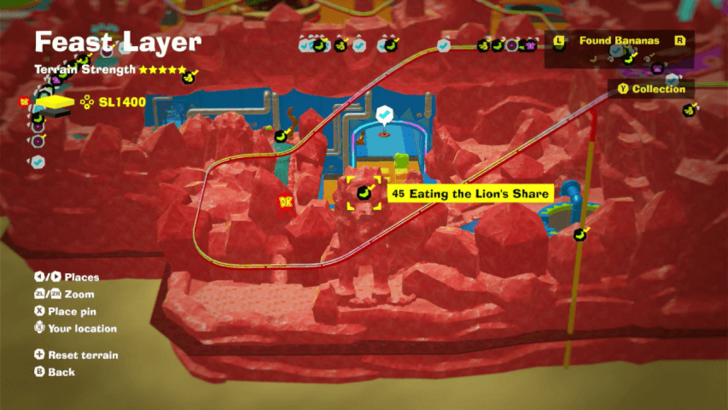
Found inside the mouth of a large lion statue at the east of the layer. You can take the left track in the Mane Gate Market Station, and you'll see it. To get the gem, just climb the lion statue and go inside its mouth. |
||
| 46 |
 |
 |
|
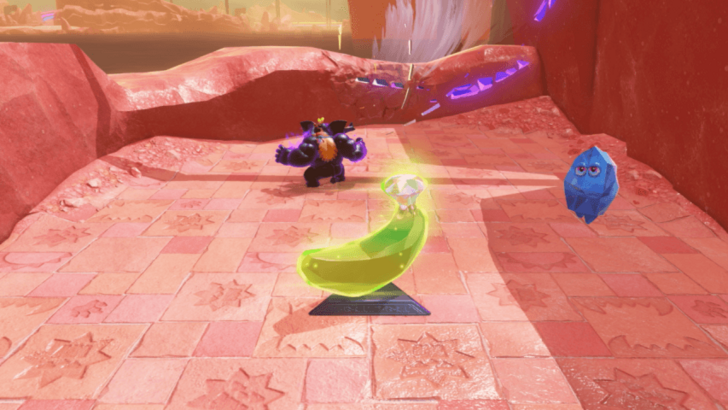
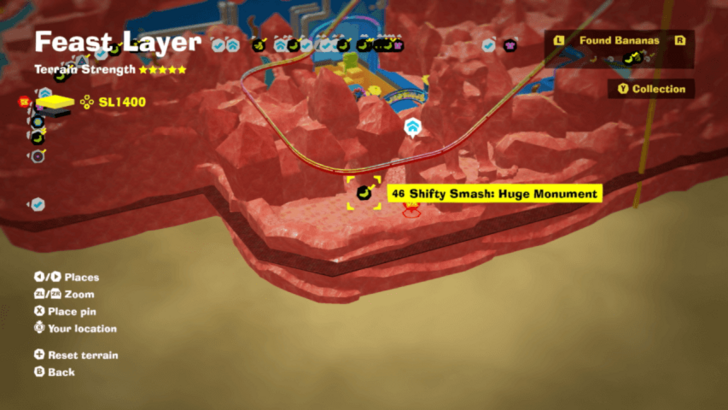
Hit the prism, then use inhale on the monument to reach 100% quickly and get the Banandium Gem. |
||
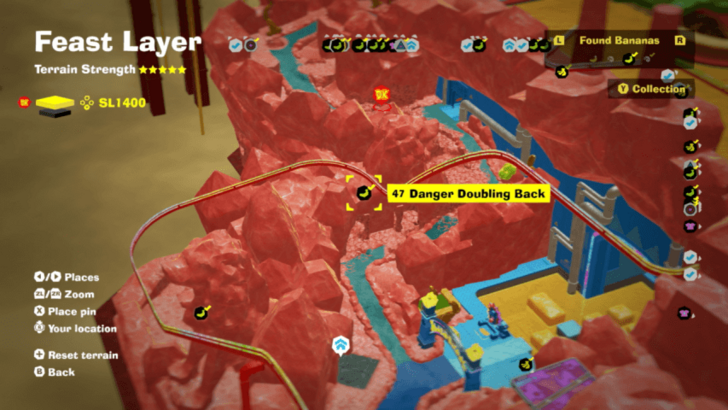
| 47 |
 |
 |
|
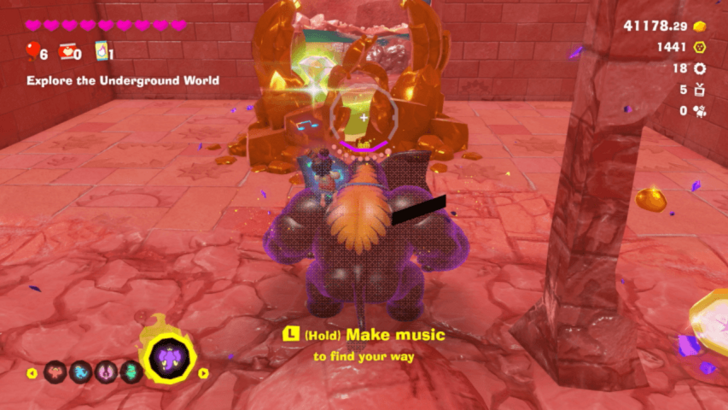
Find the Void switch within the tunnel to remove the Void Terrain and grab the Banandium Gem while avoiding the Wallopoids. |
||
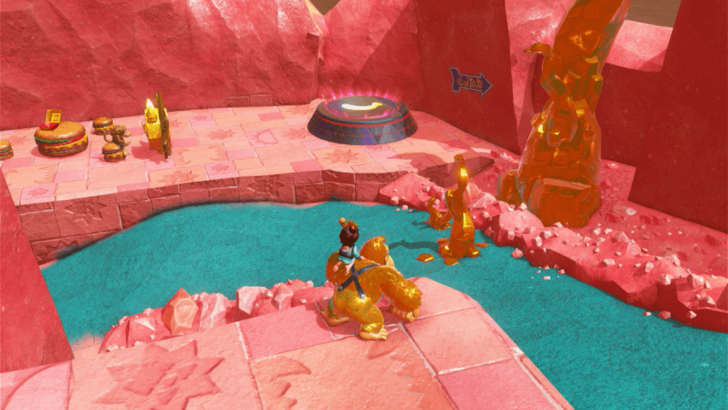
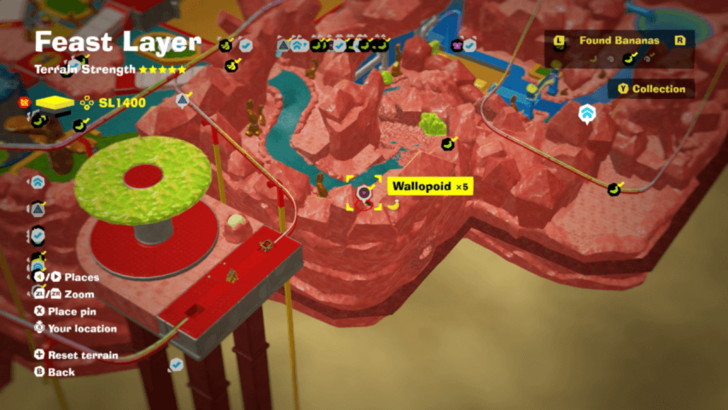
| 48 |
 |
 |
|
To win, instead of destroying the labyrinth, follow the path to make the Wallopoids appear and destroy them all to get the Banandium Gem. |
||
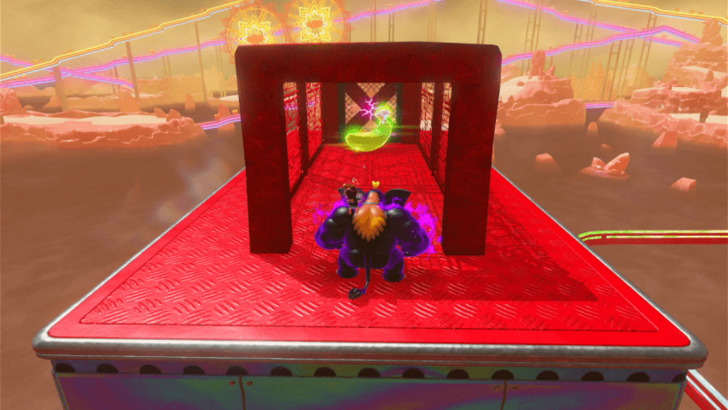
| 49 |
 |
 |
|
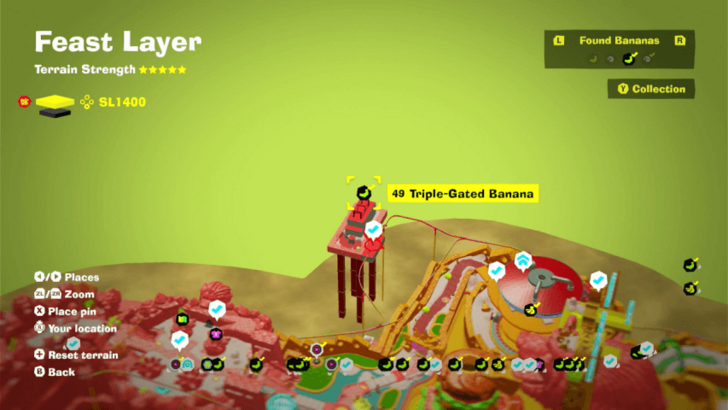
Found inside the grated box on To-Go Box Station. Transform into the Elephant Bananza Form and inhale the salt there. Use the salt to remove the muck blocking the way to the gem. |
||
| 50 |
 |
 |
|
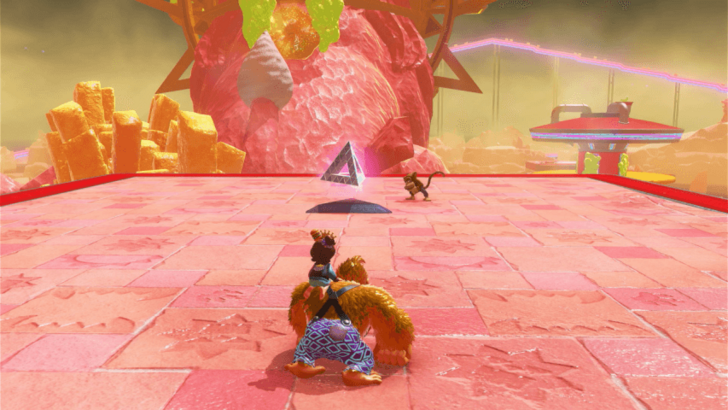
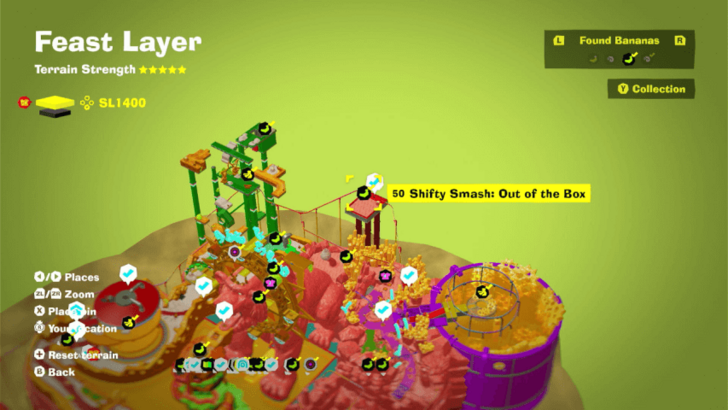
Given after winning the Shifty Smash challenge. To win, transform into the Kong Bananza Form and smash the wall to break free, then climb on top and puch a hole there to get to the second level. |
||
| 51 |
 |
 |
|
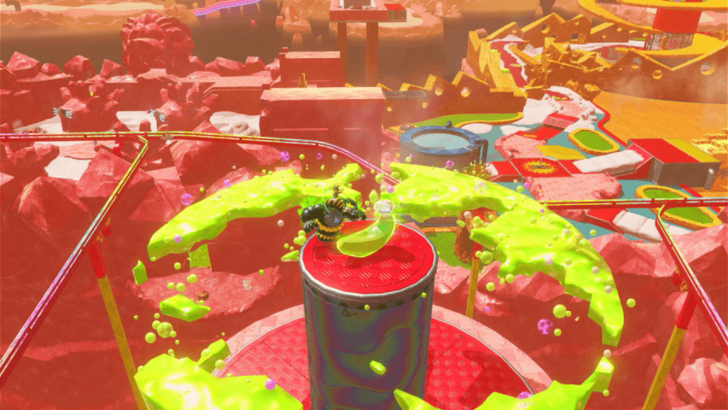
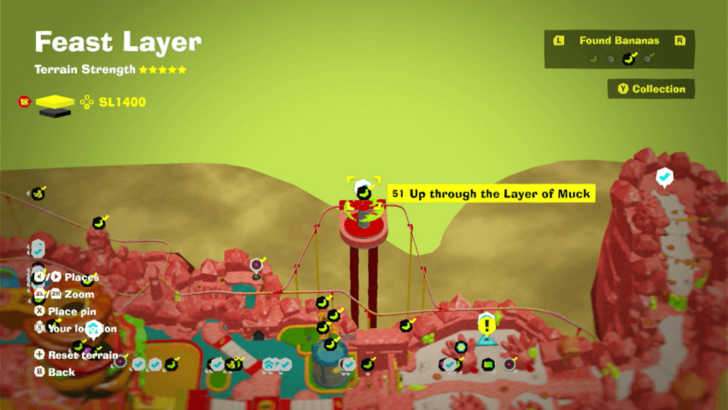
Found on top of the Umbrella-Straw Station. Grab pieces of tue salt Fractone there to clear the muck, then use Snake Bananza Form to Charge Jump on top to get the gem. |
||
| 52 |
 |
 |
|
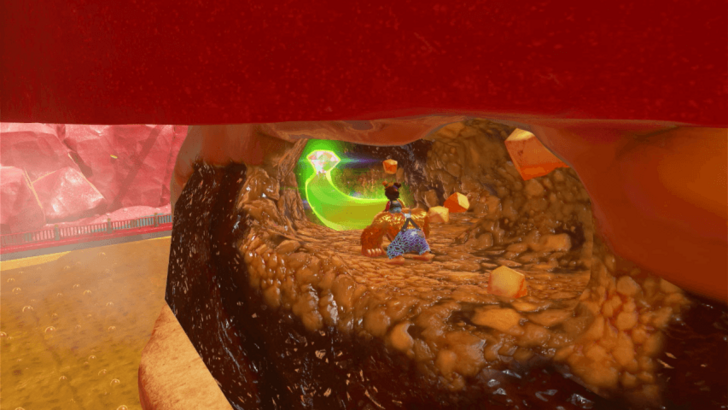
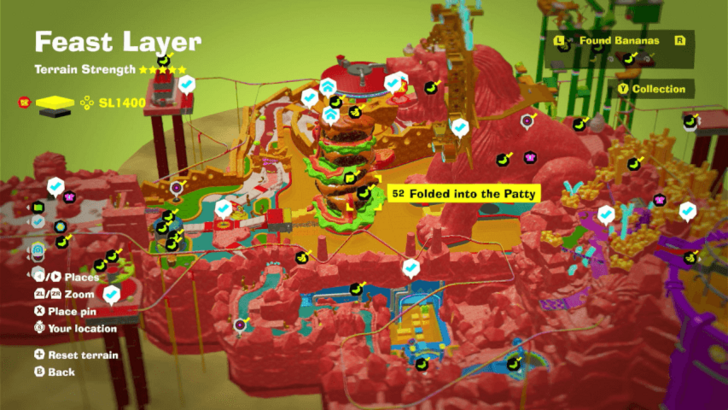
Buried in the bottom patty of the giant hamburger. |
||
| 53 |
 |
 |
|
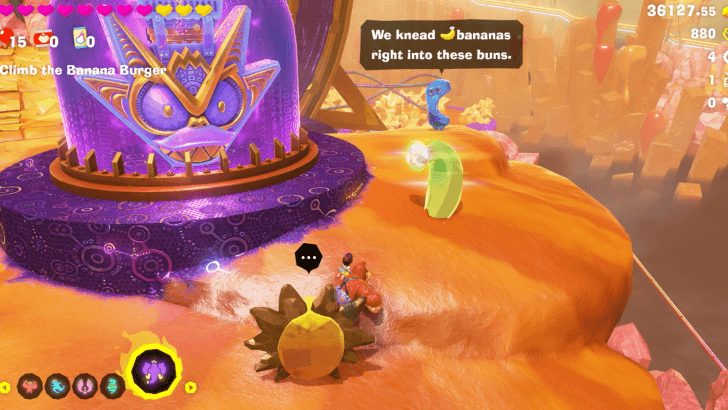
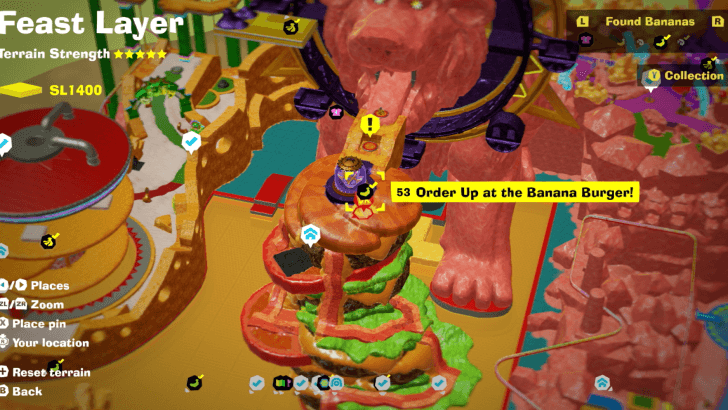
On top of the Banana Burger, found lodged in the bun. |
||
| 54 |
 |
 |
|
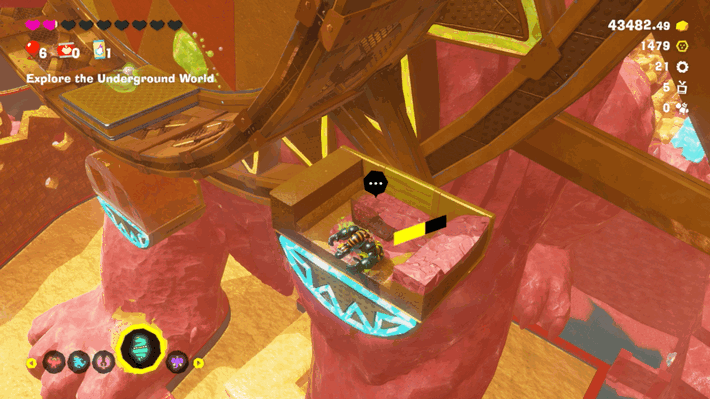
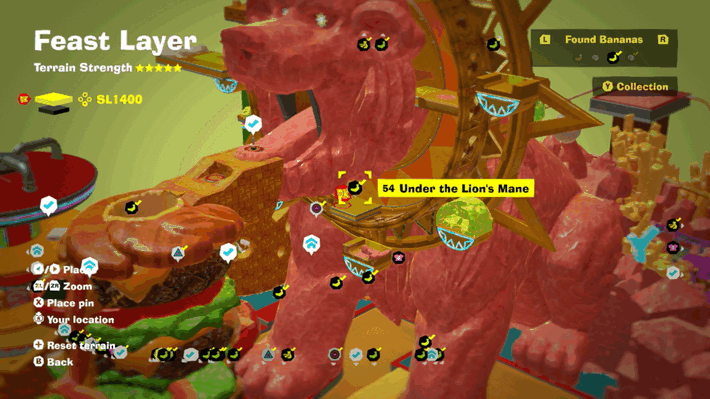
At the bottom of the inner wheel of the Feral Wheel. |
||
| 55 |
 |
 |
|
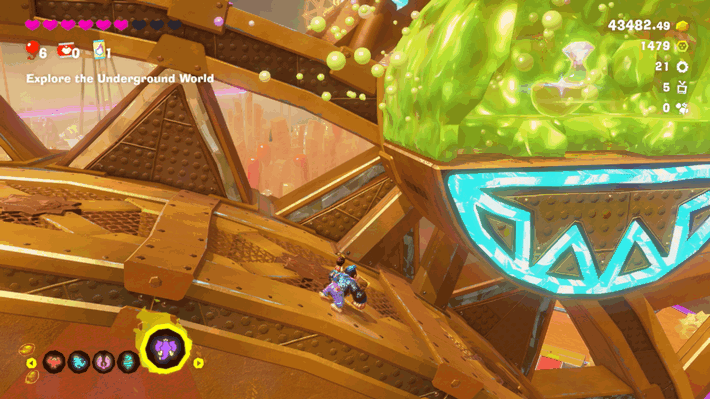
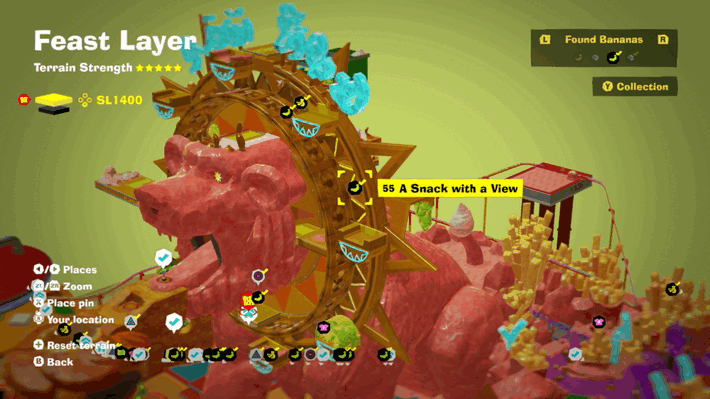
On the Feral Wheel, find the car covered with Muck. Throw sand at it to break in and grab the Banandium Gem. |
||
| 56 |
 |
 |
|
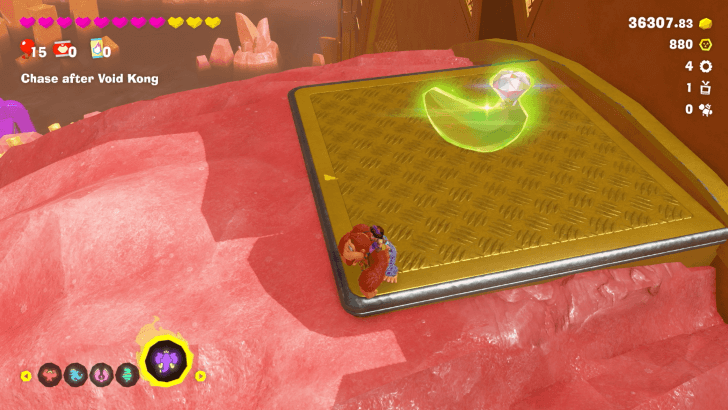
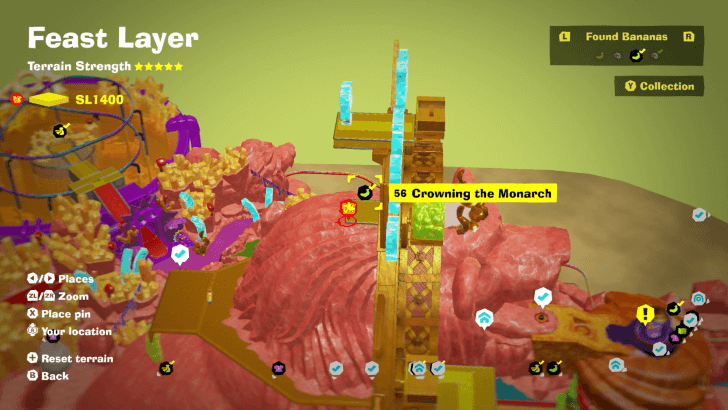
Found on a platform on the king lion statue's head, directly behind the Feral Wheel. |
||
| 57 |
 |
 |
|
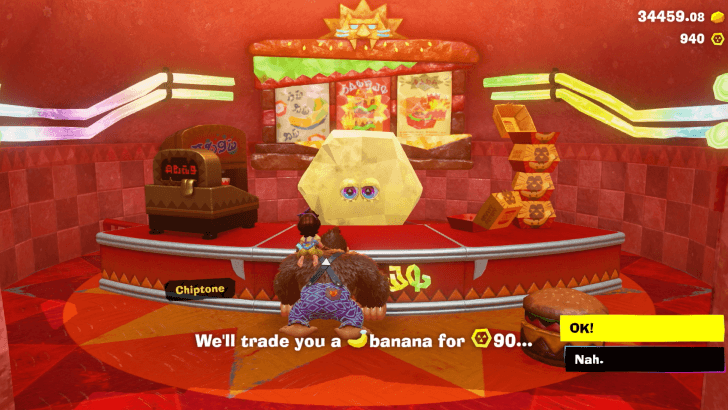
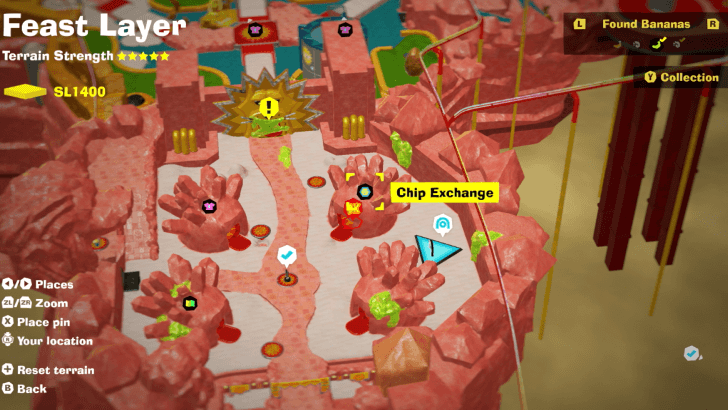
Buy with Banandium Chips to get a Gem. The price will vary depending on how many you have purchased from other layers. You only need to exchange once for the collectible to count. |
||
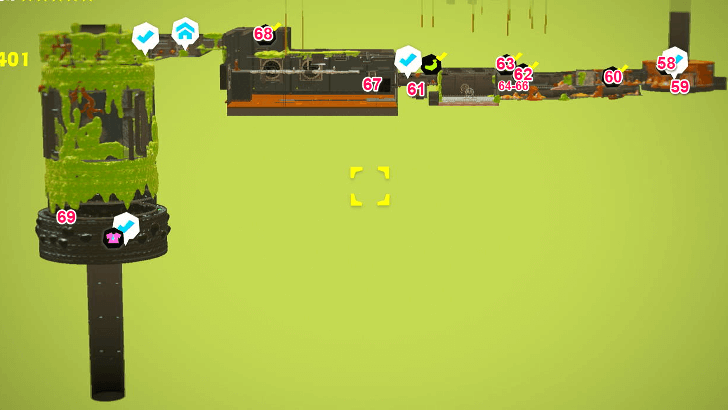
SL 1401 Banana Locations
| Overworld View | Map Location | |
|---|---|---|
| 58 |
 |
 |
|
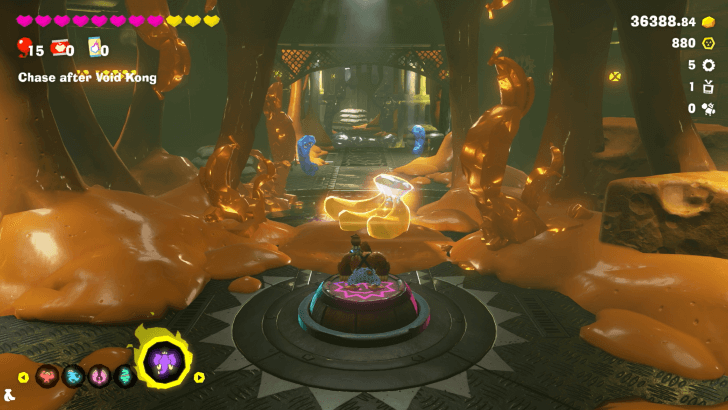
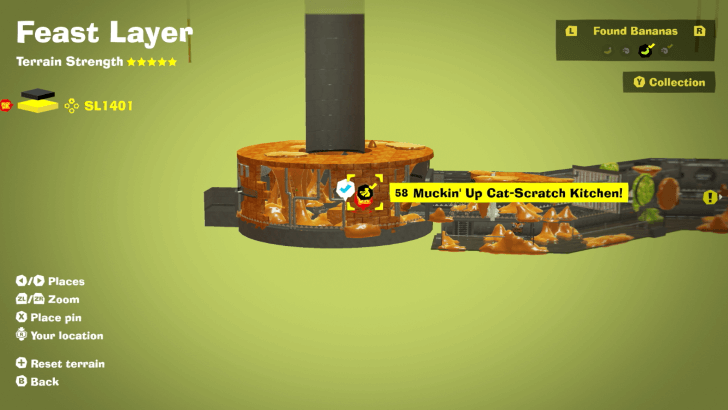
Found with story progression. |
||
| 59 |
 |
 |
|
|
||
| 60 |
 |
 |
|
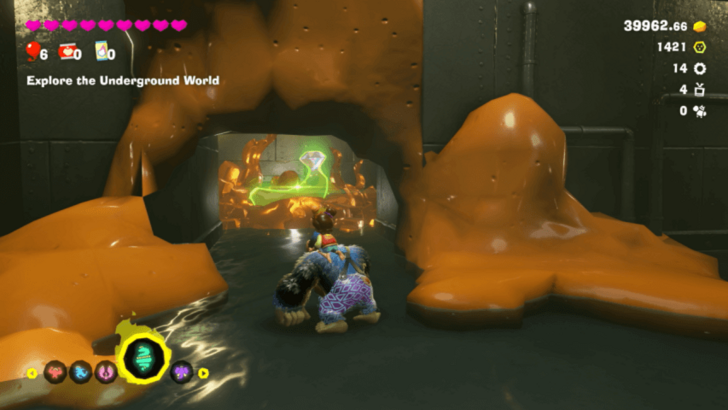
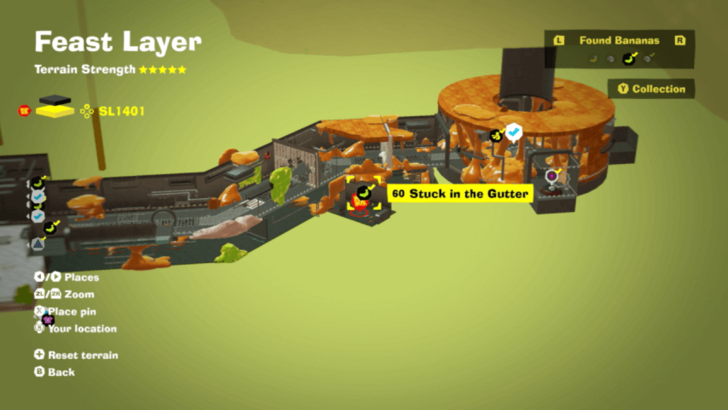
In the room with Muckoids on either wall, stand on the grate on the floor to lure them to fire their acid spray and melt through it. Fall into the grate and find a wall covered with cheese; punch through it to find the Banandium Gem. |
||
| 61 |
 |
 |
|
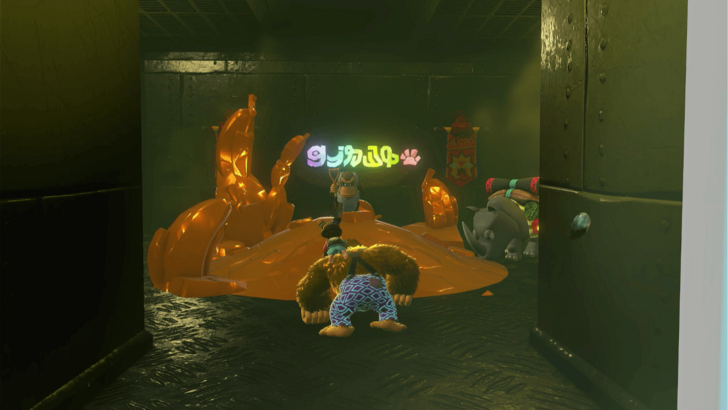
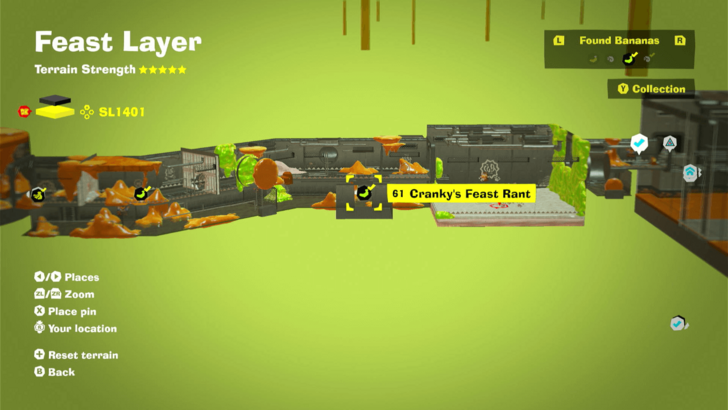
Given after listening to Cranky's rant. Cranky can be found in a hidden room behind a waterfall in the lower section of the Cat-Scratch Kitchen. |
||
| 62 |
 |
 |
|
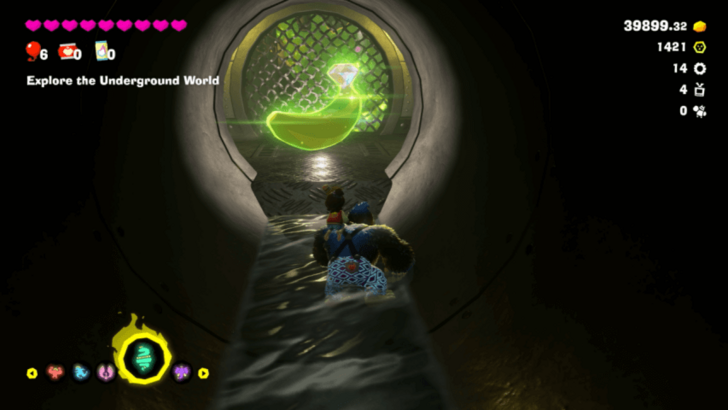
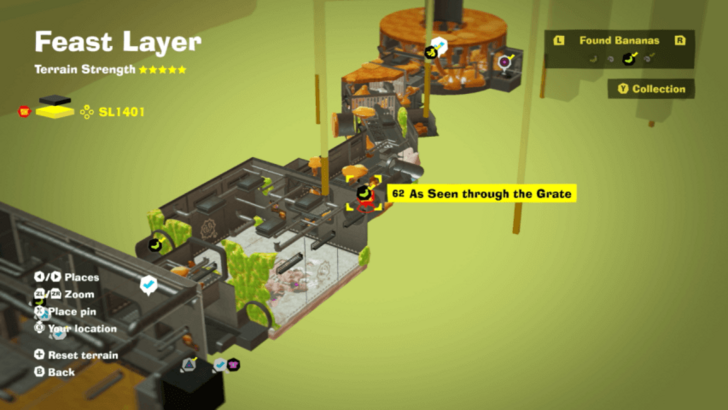
In the room before the large room with salt in the floor, find a waterfall on the left side and go behind it to find a secret tunnel; go right to find the Banandium Gem. |
||
| 63 |
 |
 |
|
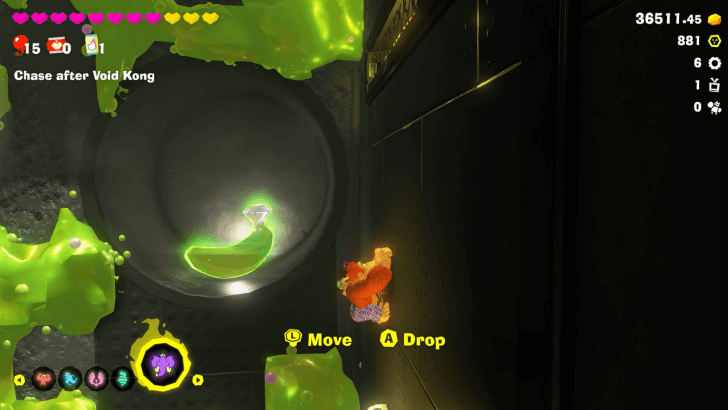
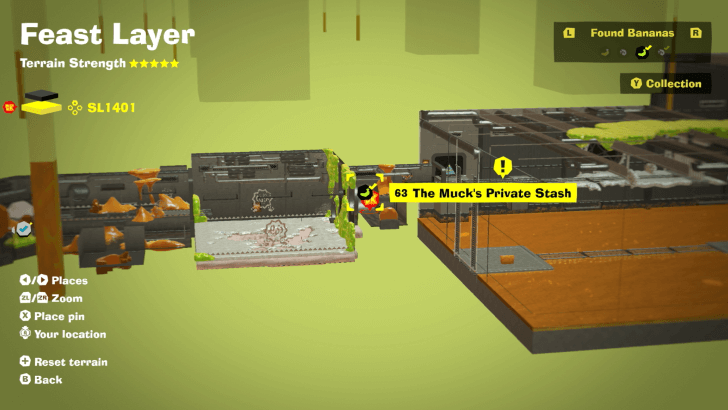
In the room with sand below the floor and muck covering the wall ahead, throw sand at the muck patch in the top right to reveal a Banandium Gem behind it. |
||
| 64 |
 |
 |
|
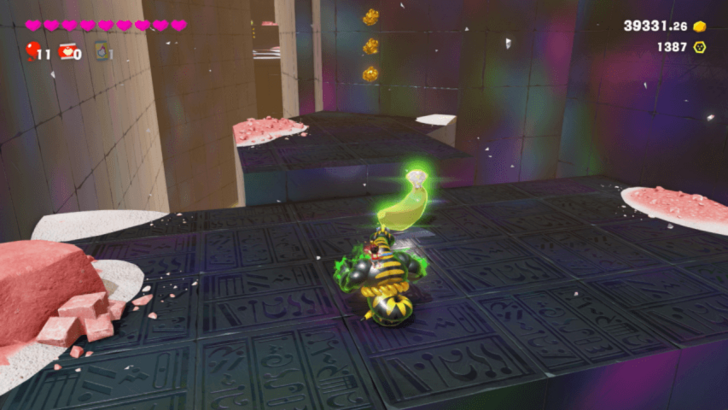
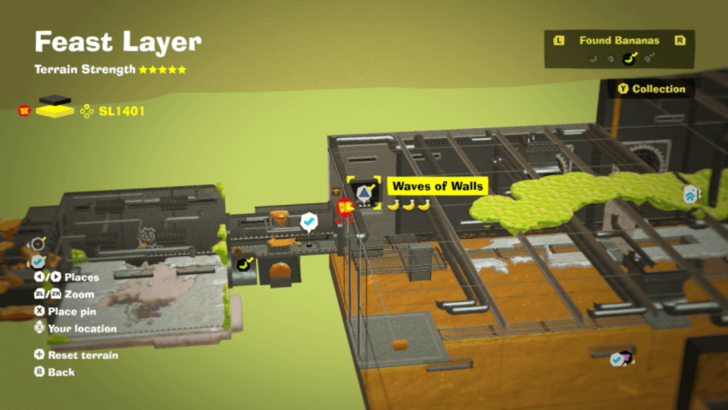
Found along the course. |
||
| 65 |
 |
|
|
At the very end of the course, wait until one of the tall walls is about to come out of the grate and charge a jump, then move onto it when it comes out and jump at its highest point to grab onto the ceiling mesh, where you can find a Banandium Gem. |
||
| 66 |
 |
 |
|
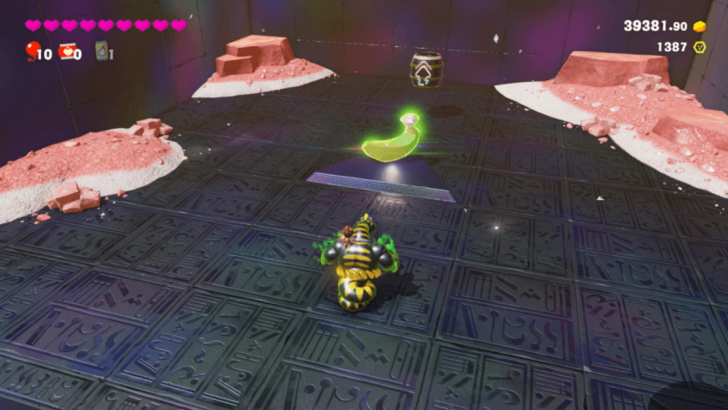
Found at the end of the course. |
||
| 67 |
 |
 |
|
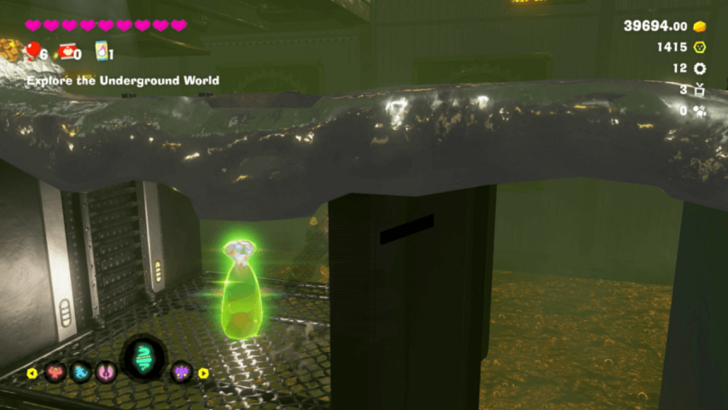
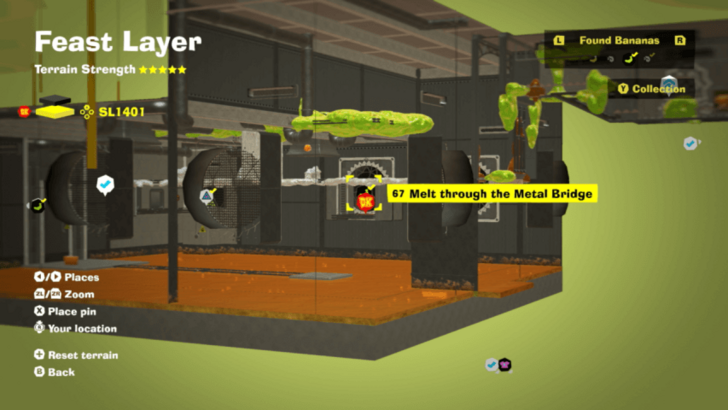
Lure the Muckoids to fire their acid spray at the bridge above to melt it, allowing you to pass through to get the Banandium Gem. |
||
| 68 |
 |
 |
|
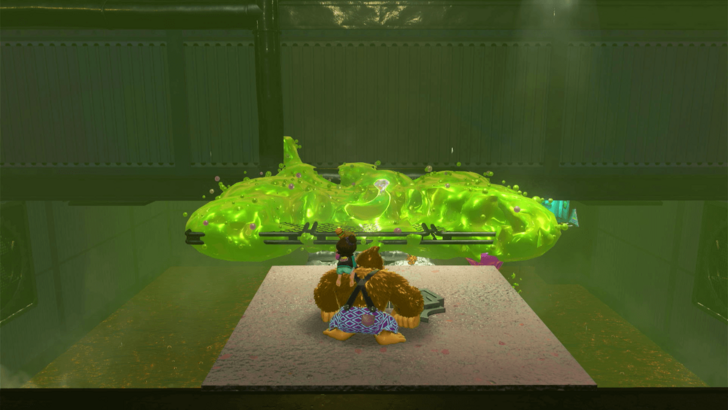
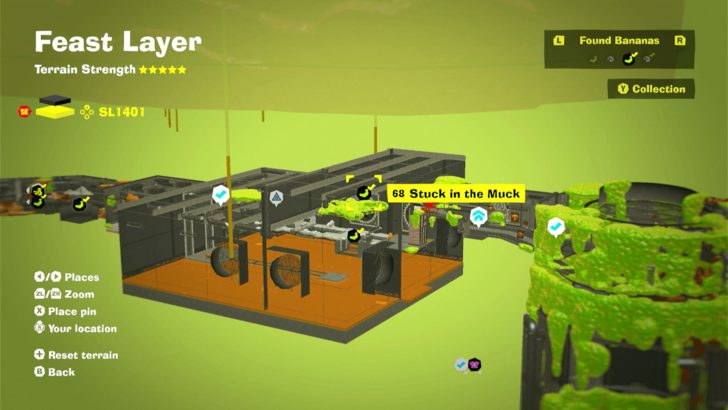
Found on a platform behind the Hand Slap pile at the end of the Waste-Oil Container, just before entering the Loading Bay. After raising the Hand Slap pile, look behind, and you'll see the gem covered in muck. Just throw salt to clear the area to get the gem. |
||
| 69 |
 |
 |
|
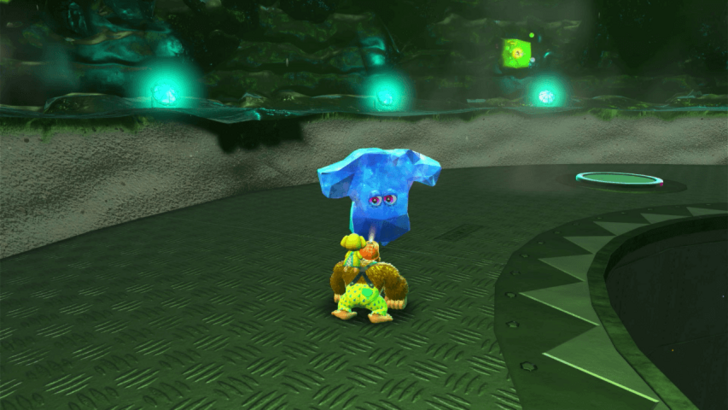
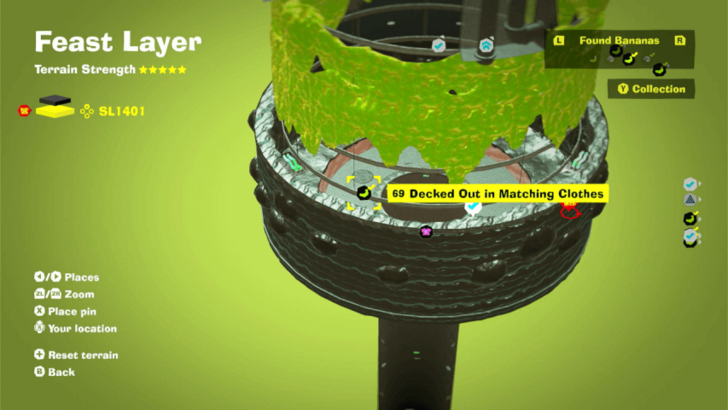
After finishing the game, change into the Yellow Tempest Coat and Burn-Proof Britches, then talk to the Glamtone near the sinkhole. |
||
Banandium Gems List and Locations
Feast Layer Fossils
Fossils Map Overview
SL 1400 Fossil Locations
| Overworld View | Map Location | |
|---|---|---|
 |
 |
|
|
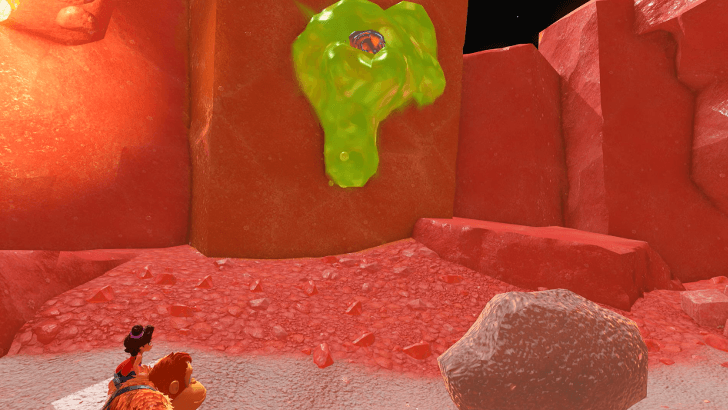
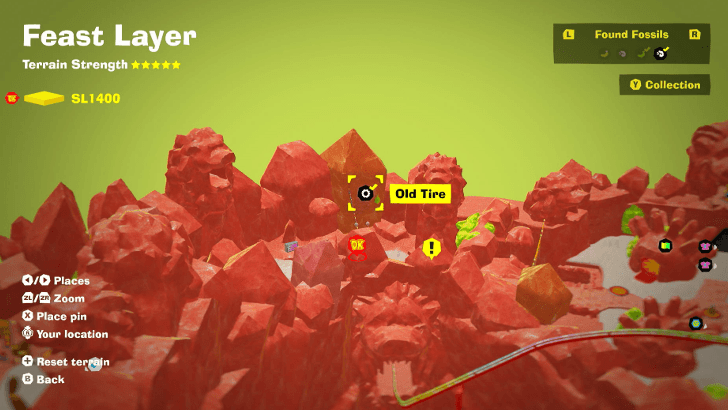
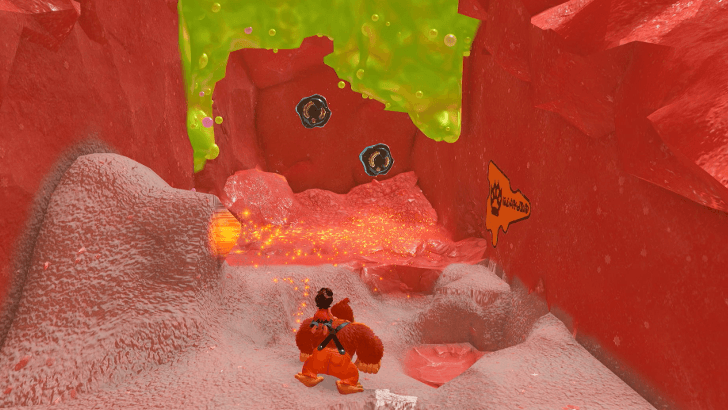
Located at the Arrival Gate. It is found stuck on a wall. |
||
 |
 |
|
|
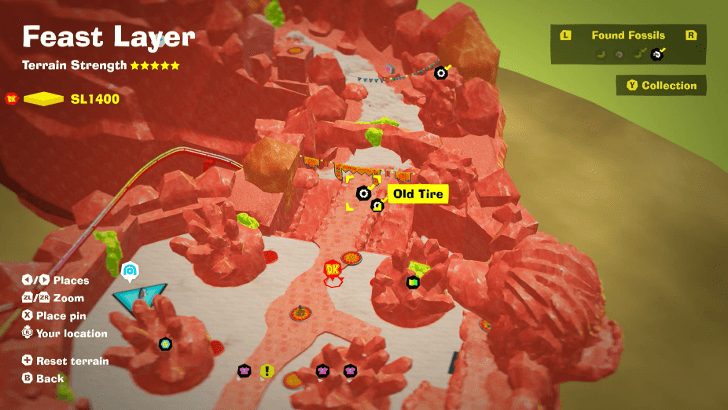
Located at Mane Gate Market. It is found below the rock bridge behind a wall of muck. |
||
 |
 |
|
|
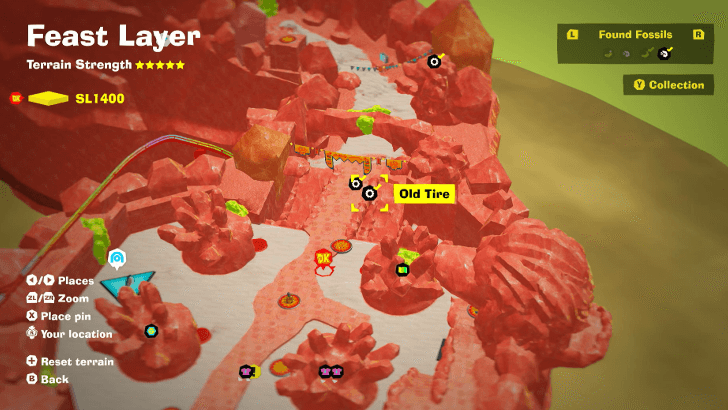
Located at Mane Gate Market. It is found below the rock bridge behind a wall of muck. |
||
 |
 |
|
|
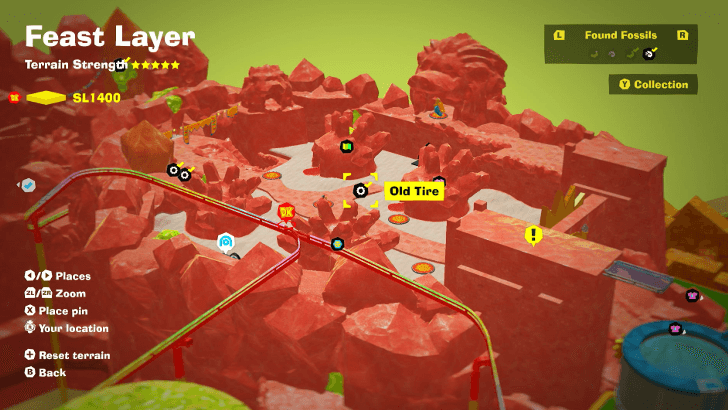
Located at Mane Gate Market. It is found below the rock bridge |
||
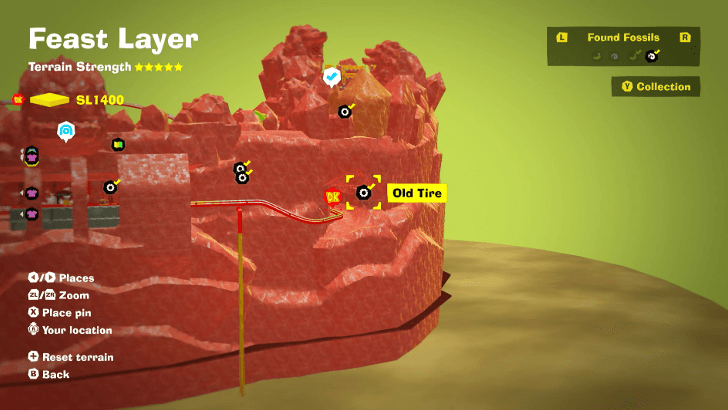
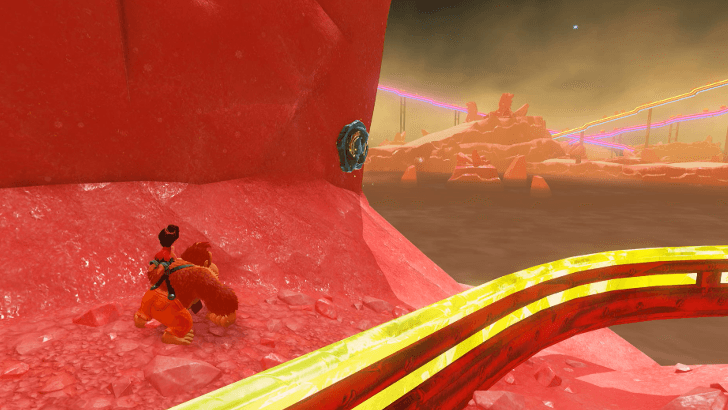 |
 |
|
|
Located below Mane Gate Market. It is found near the tracks. |
||
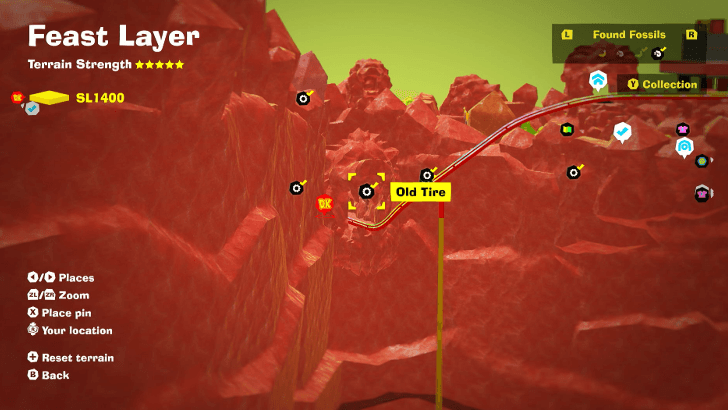
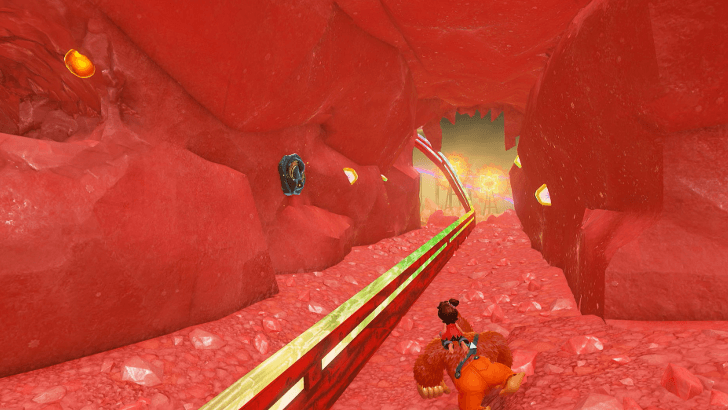 |
 |
|
|
Located below Mane Gate Market. It is found insde a tunnel, near the tracks. |
||
 |
 |
|
|
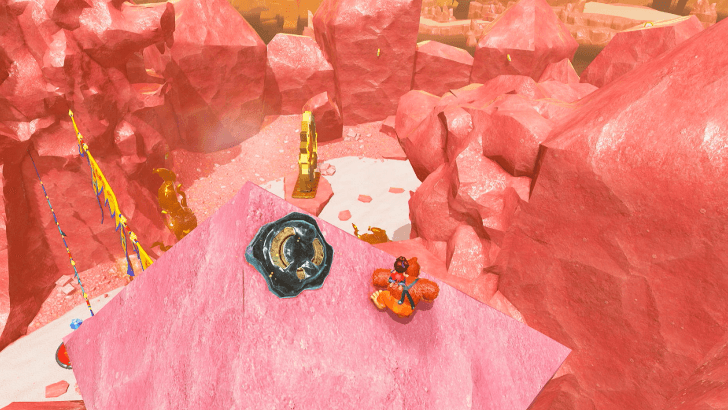
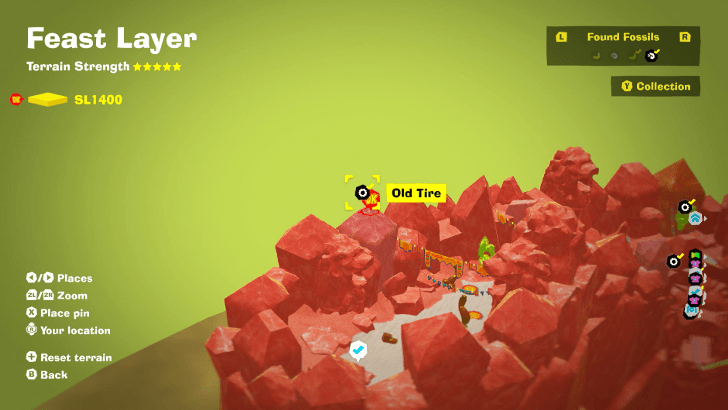
Located at Arrival Gate, above the banners. |
||
 |
 |
|
|
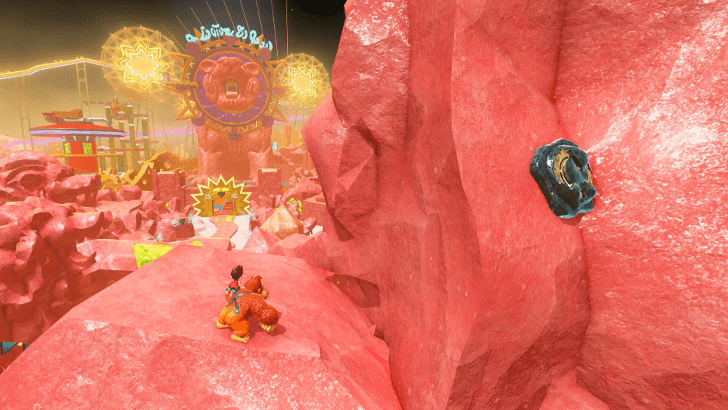
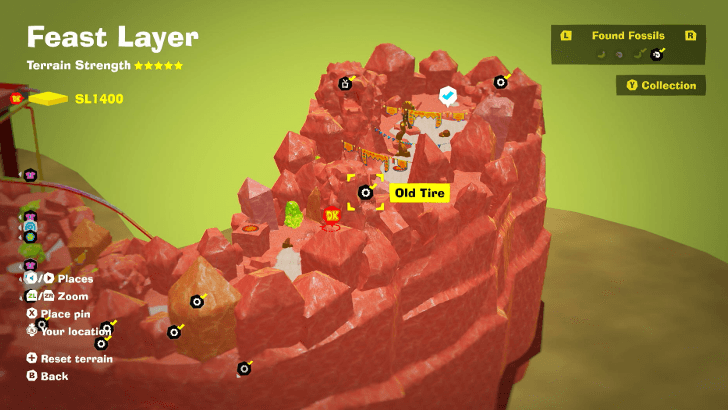
Located between Arrival Gate and Mane Gate Market. It is found at the back of a stone lion head. |
||
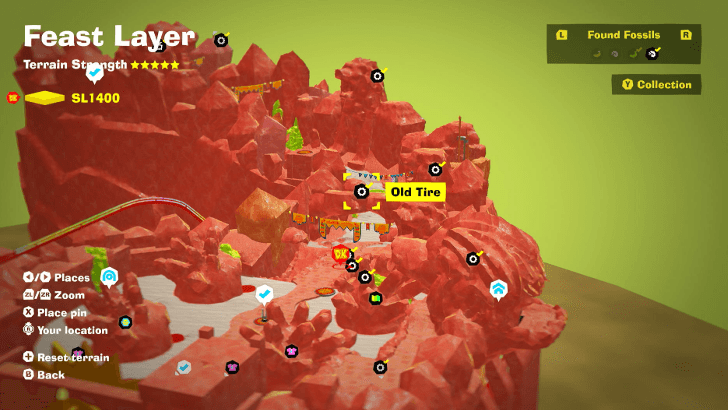
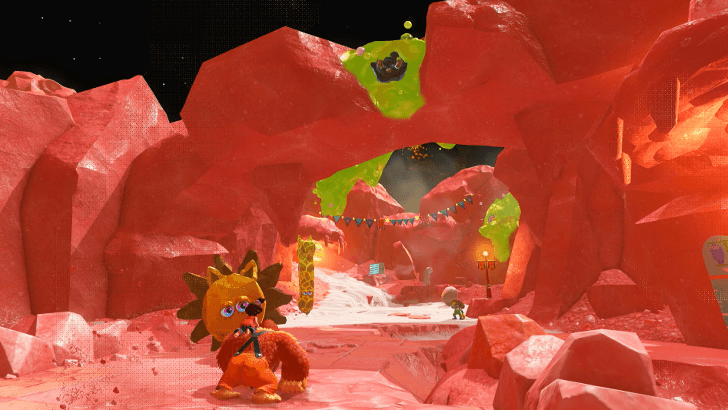 |
 |
|
|
Located at the entrance to Mane Gate Market. |
||
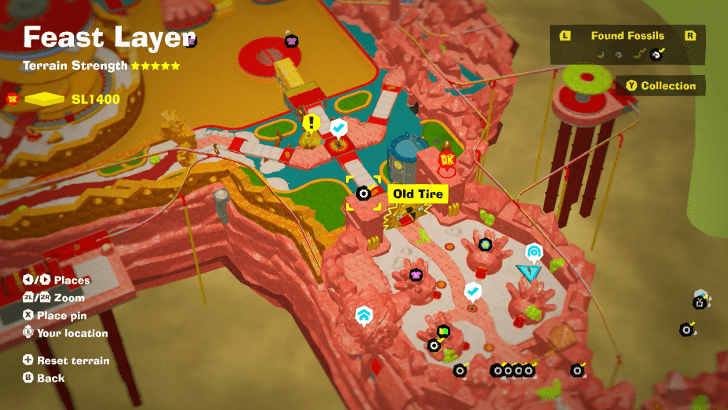
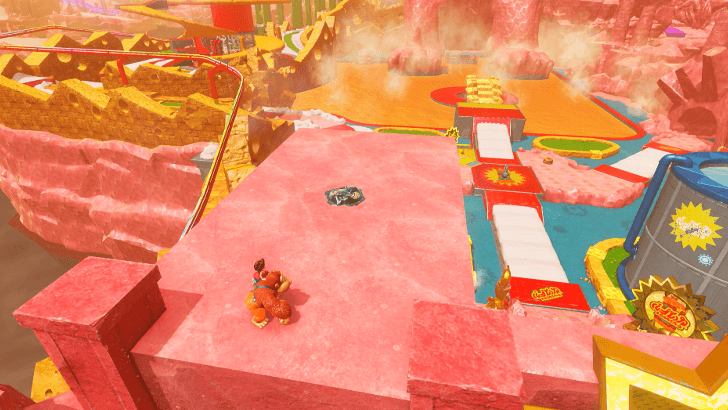 |
 |
|
|
Located on top of the entrance gate to Fried Pride Plaza. |
||
 |
 |
|
|
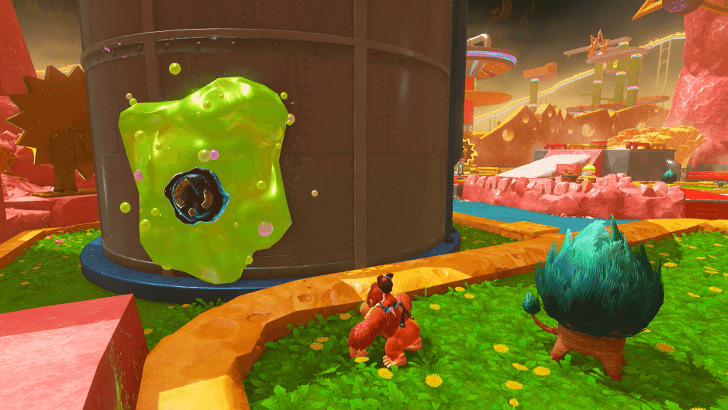
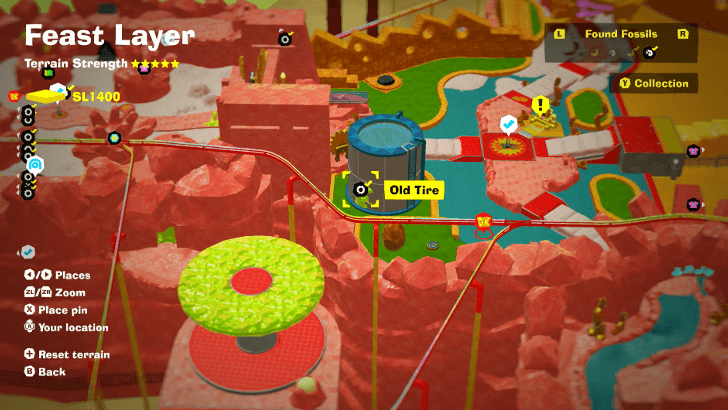
Located behind the pool tower at the Fried Pride Plaza. |
||
 |
 |
|
|
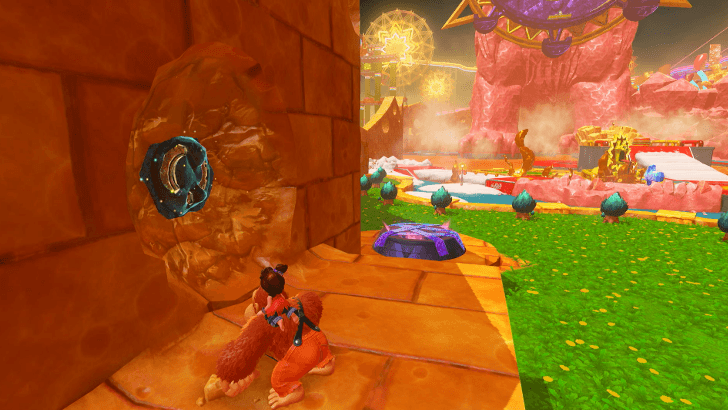
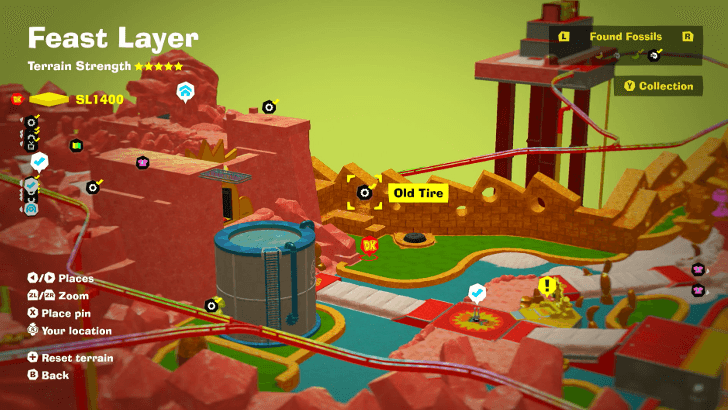
Located at the Fried Pride Plaza. Found on the wall near the entrance. |
||
 |
 |
|
|
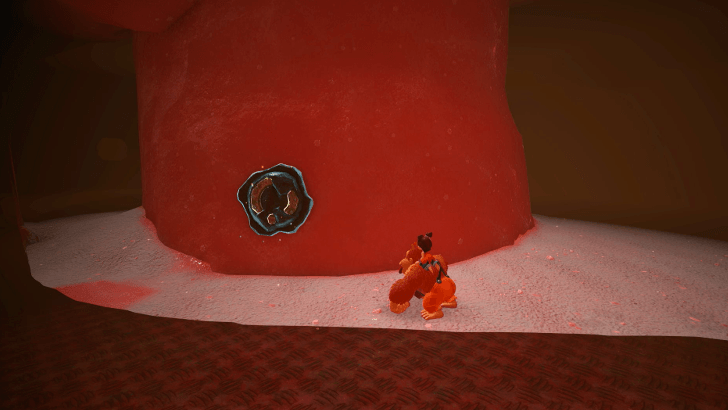
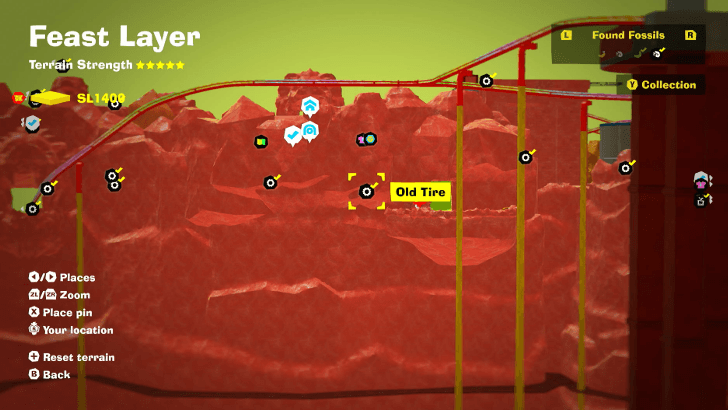
Located at Mane Gate Market. The Fossil is found below the rock bridge. |
||
 |
 |
|
|
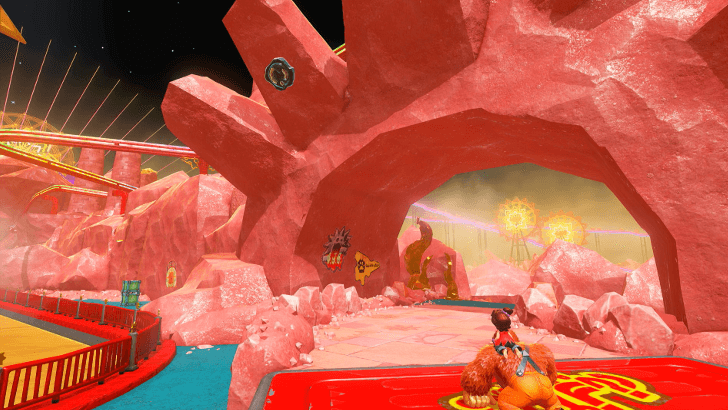
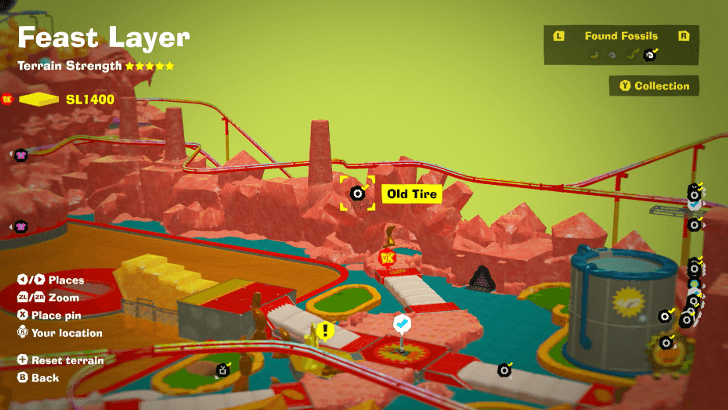
Located at the Fried Pride Plaza, on the stone arch. |
||
 |
 |
|
|
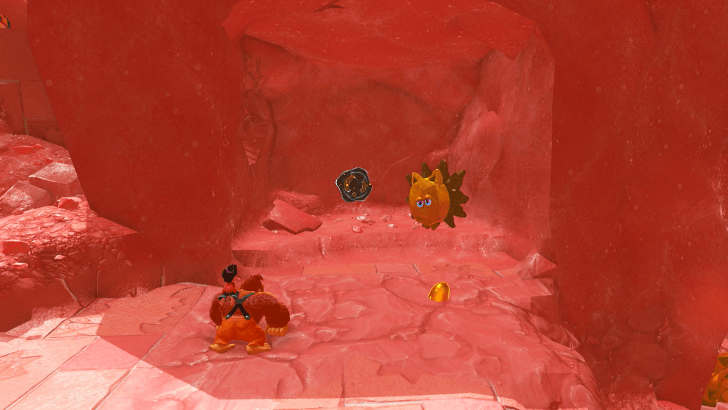
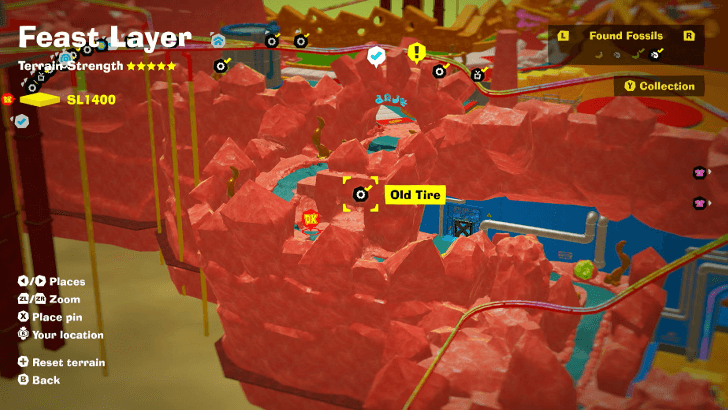
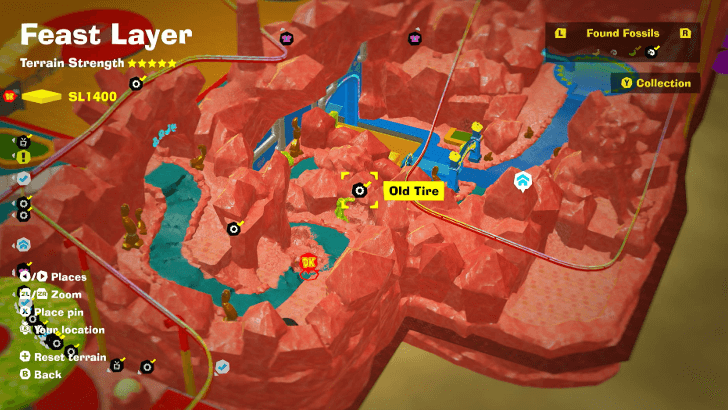
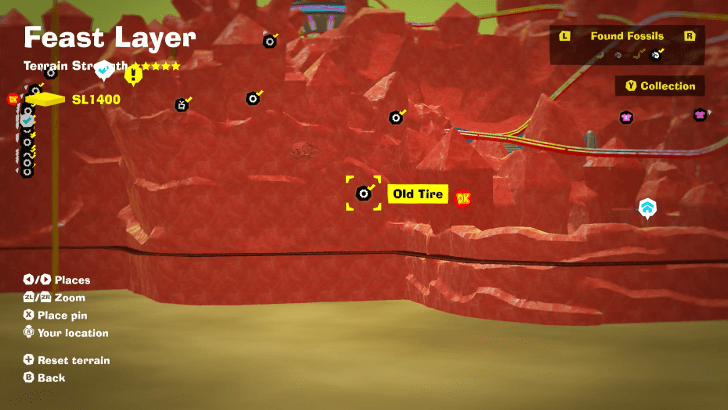
Located along the path between Fried Pride Plaza and the Refinery. |
||
 |
||
|
Located along the path between Fried Pride Plaza and the Refinery, behind a wall of Musk. |
||
 |
||
|
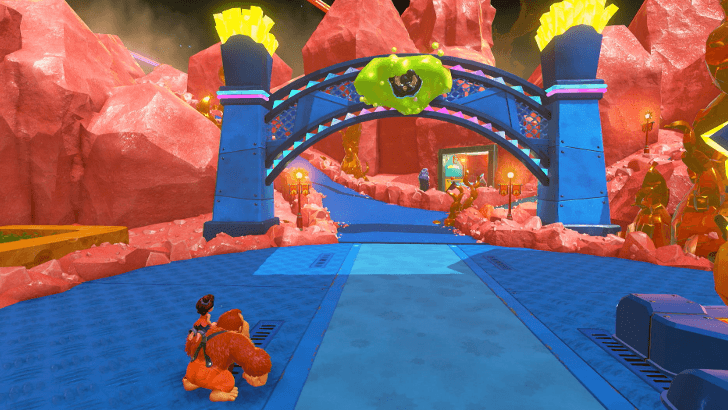
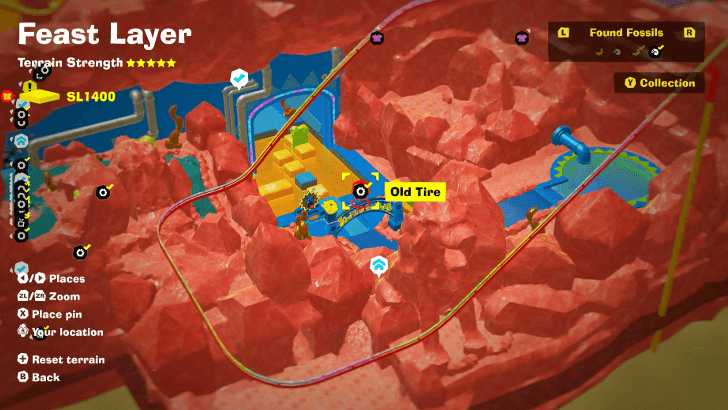
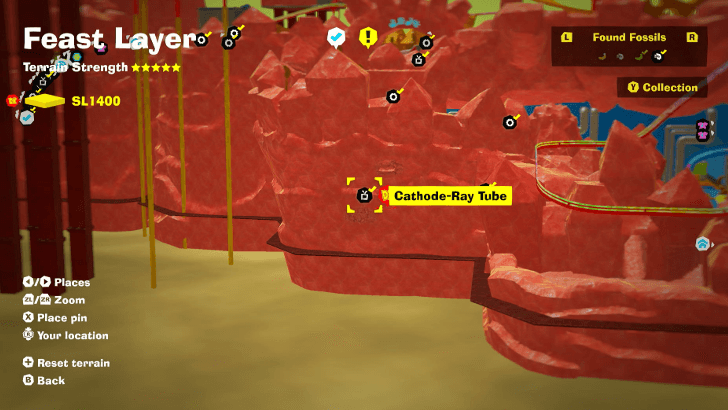
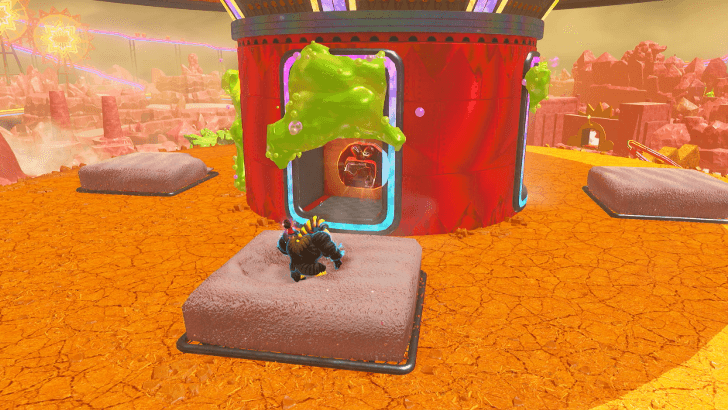
Located near the Refinery, inside a cave. Clear the Void first to get the Fossil. |
||
 |
 |
|
|
Found on the arch near the Refinery Getaway. |
||
 |
 |
|
|
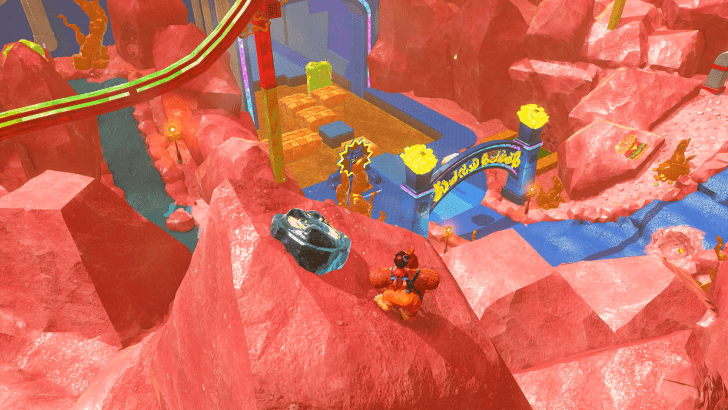
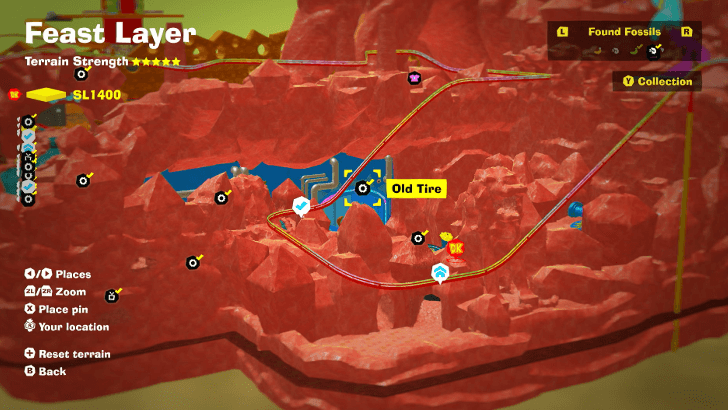
Located at the top of the Refinery Getaway. |
||
 |
 |
|
|
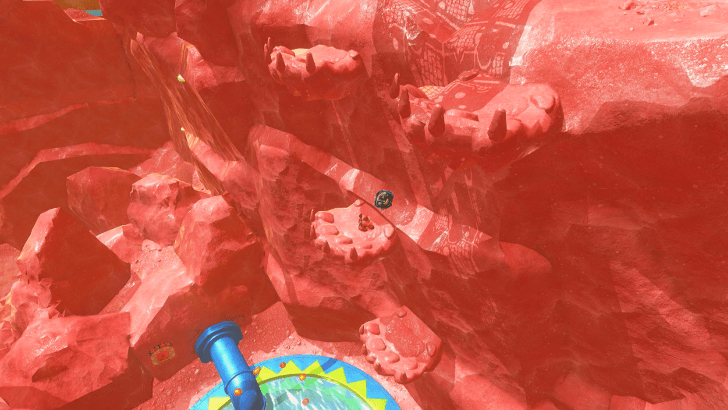
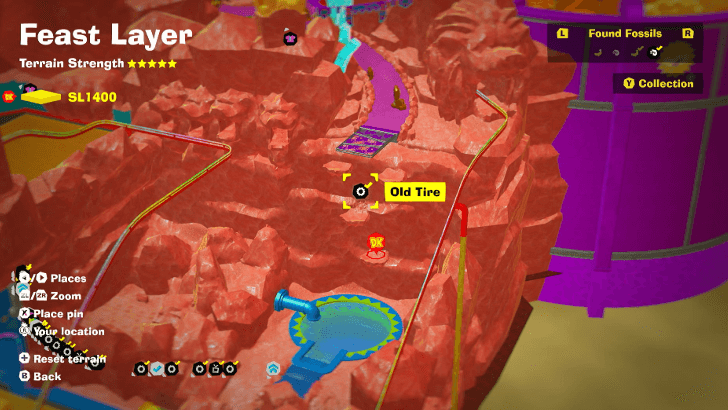
Located above the pool of water at the Refinery. |
||
 |
 |
|
|
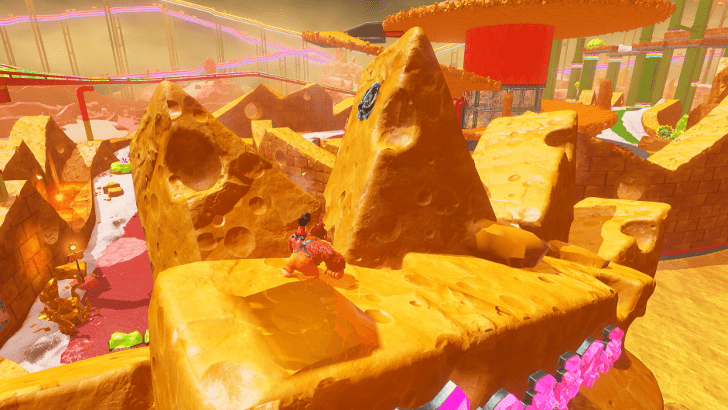
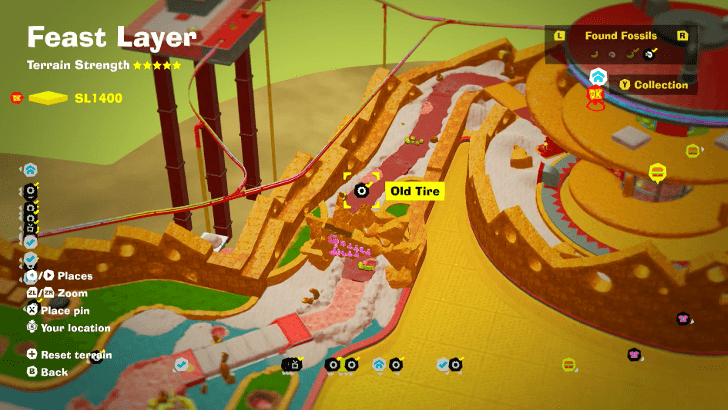
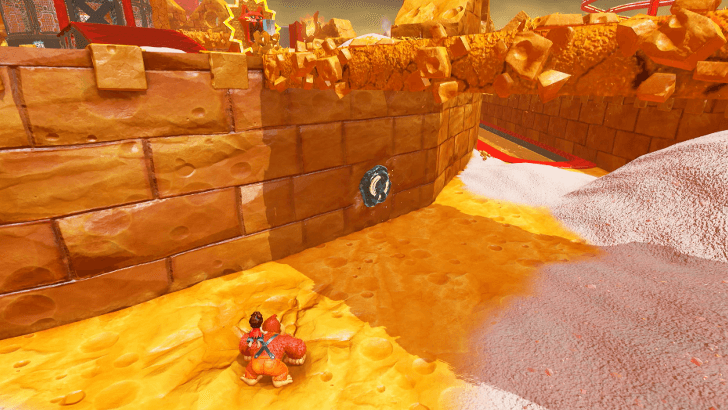
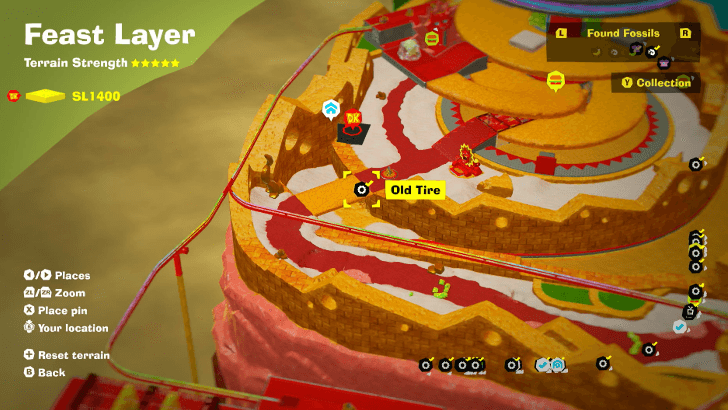
Located on top of the entrance to Grater-Go-Round. |
||
 |
 |
|
|
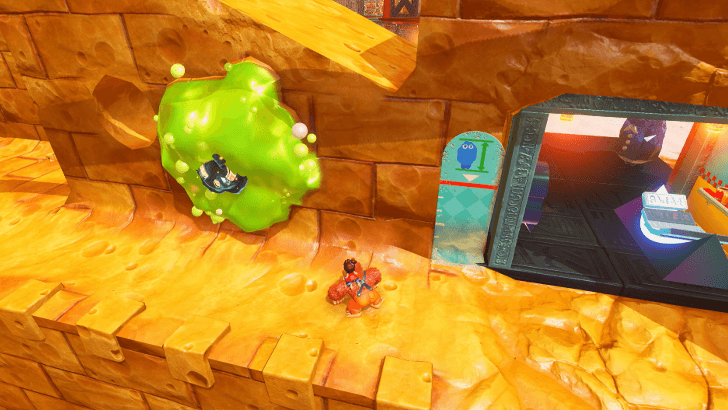
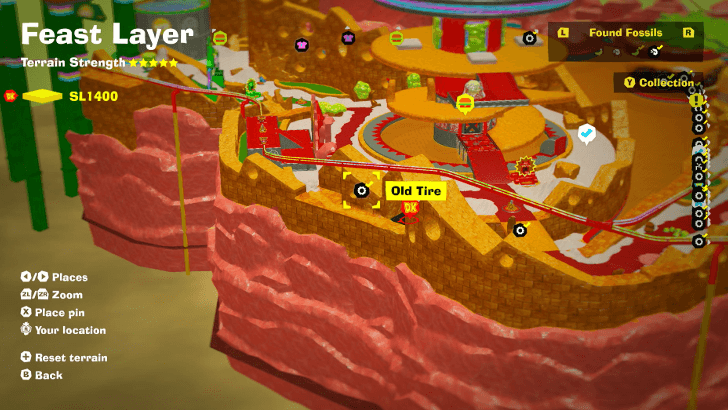
Found under the bridge near the Grater-Go-Round Getaway. |
||
 |
 |
|
|
Found behind the Grater-Go-Round Getaway. |
||
 |
 |
|
|
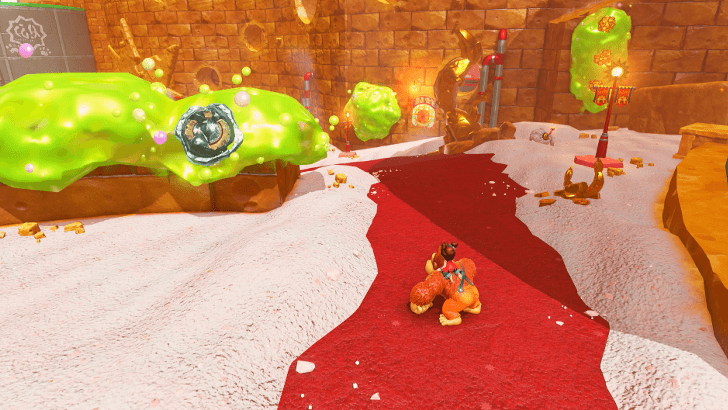
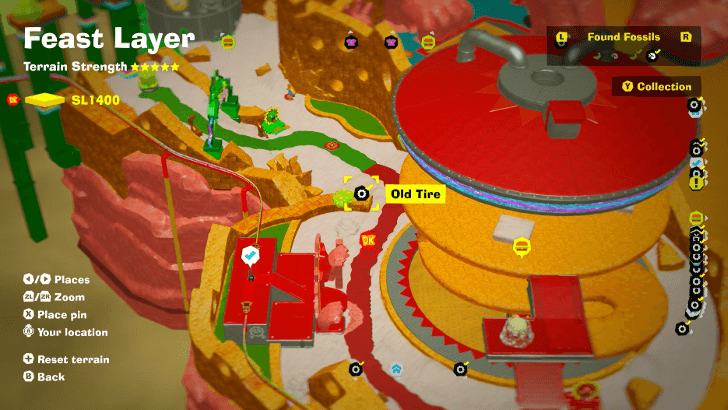
Found at the Grater-Go-Round Station. |
||
 |
 |
|
|
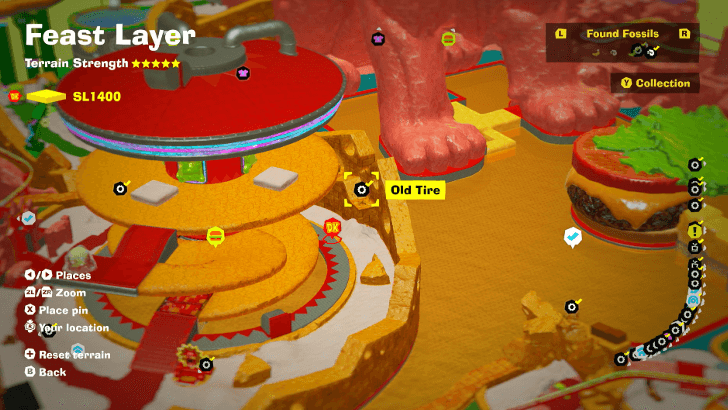
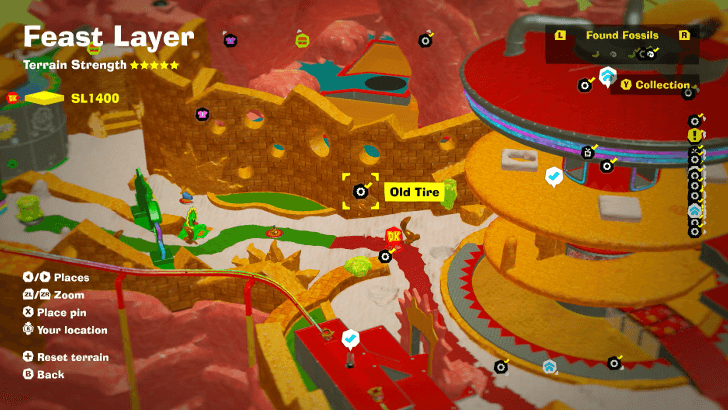
Found on the wall at the back of the Grater-Go-Round Station. |
||
 |
||
|
Found at Kingly Swings, behind a wall of muck. |
||
 |
 |
|
|
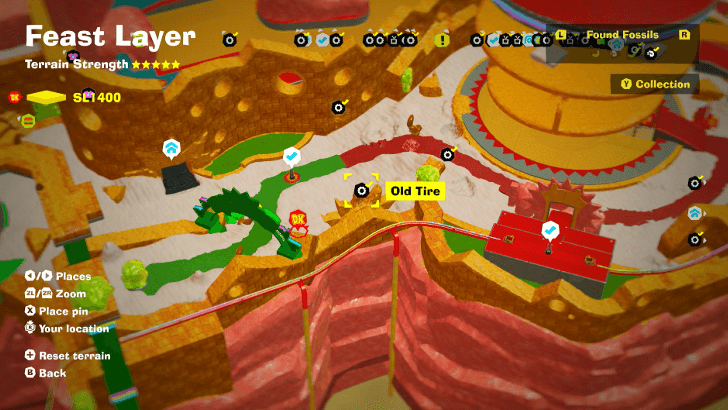
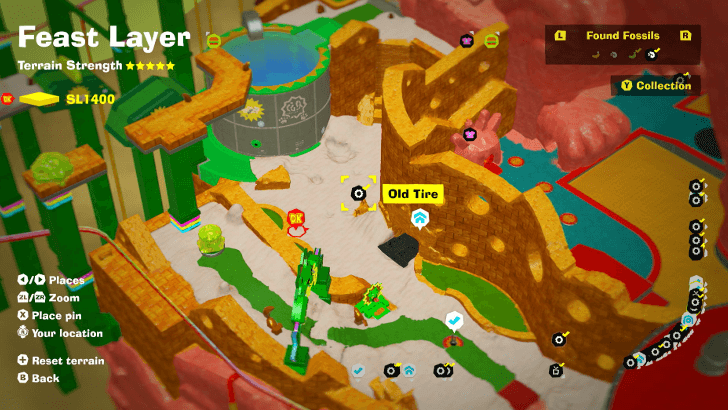
Located behind the Challenge Ruin at Kingly Swings. |
||
 |
||
|
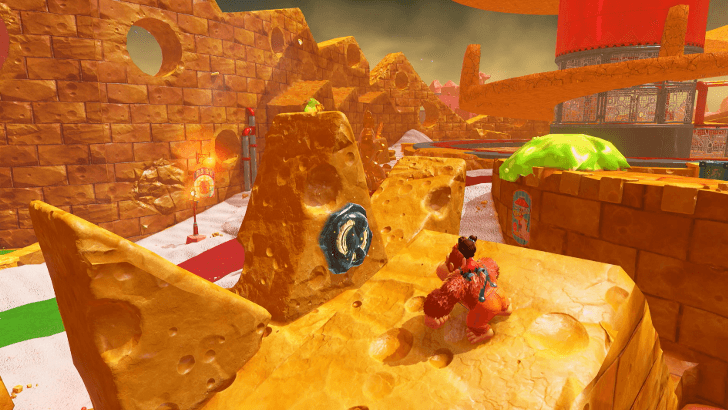
Found under a block that looks like a giant cheese at Kingly Swings Getaway. |
||
 |
||
|
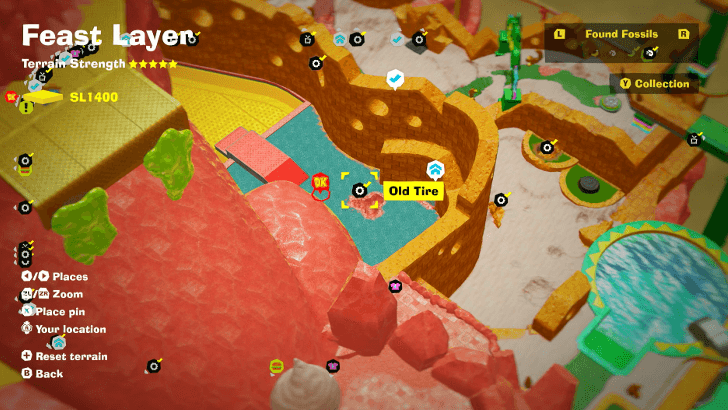
Found underground after pulling the turnip near a Battle Challenge at Kingly Swings. |
||
 |
 |
|
|
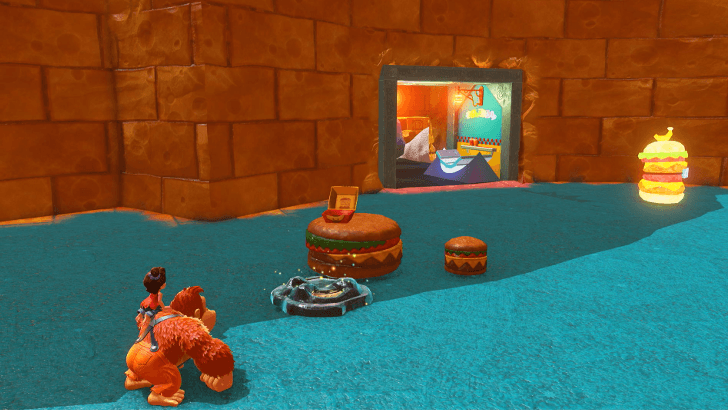
Found on the ground behind the Swings Getaway. |
||
 |
 |
|
|
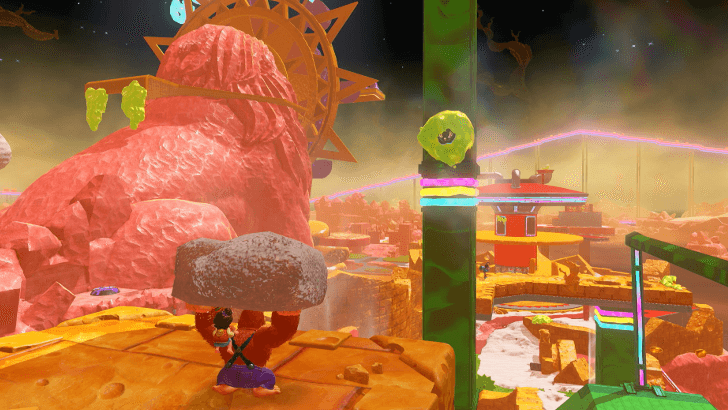
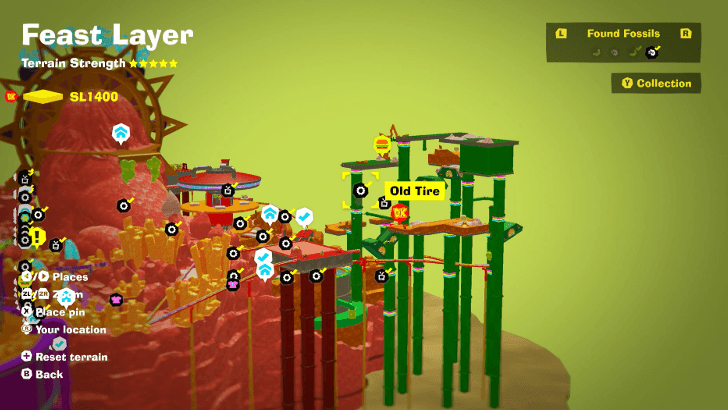
Located at Kingly Swings Ride, stuck on a muck on a pillar nearest to the checkpoint. |
||
 |
 |
|
|
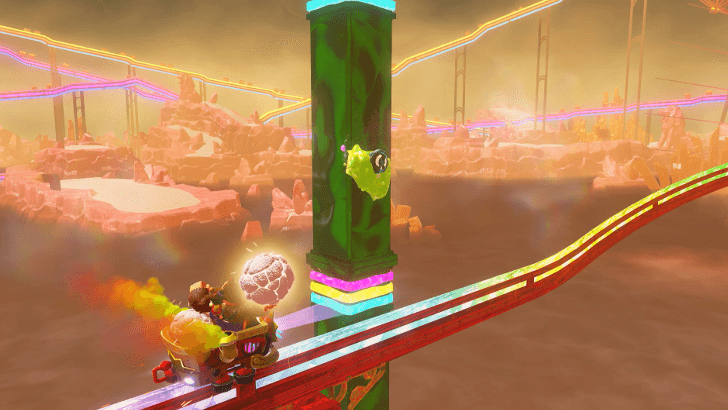
Located at Kingly Swings Ride. Ride along the tracks and throw a bomb rock at it as you pass by. |
||
 |
 |
|
|
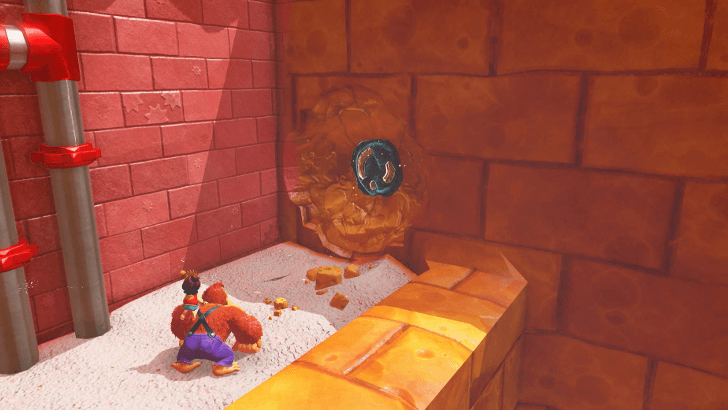
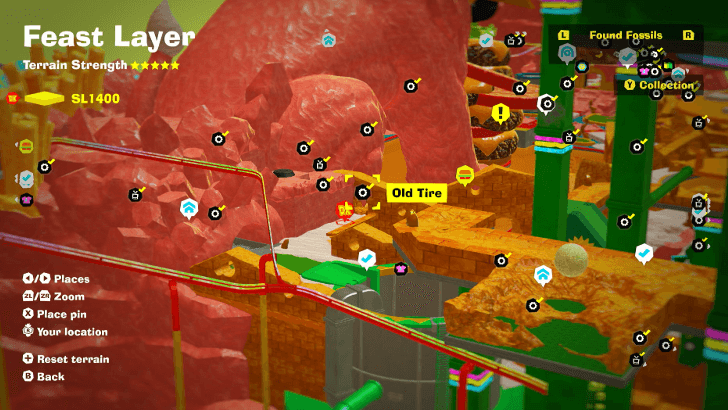
Located above the Style Shop in Kingly Swings. |
||
 |
 |
|
|
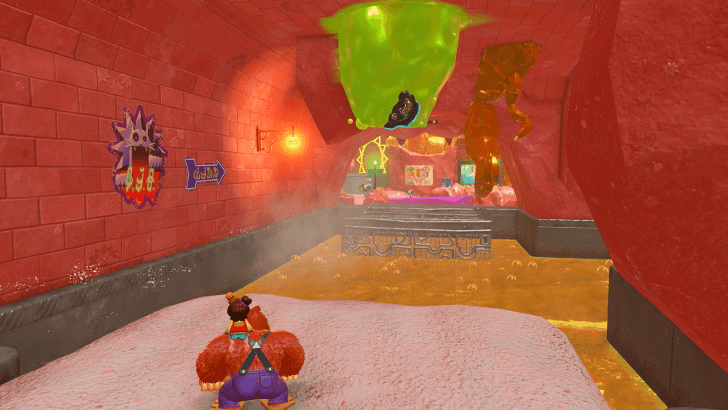
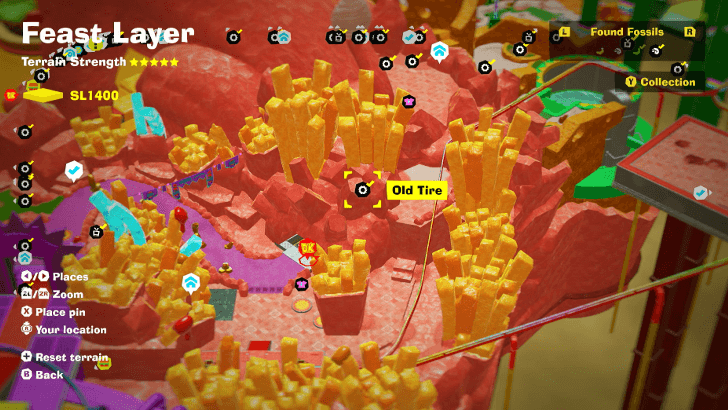
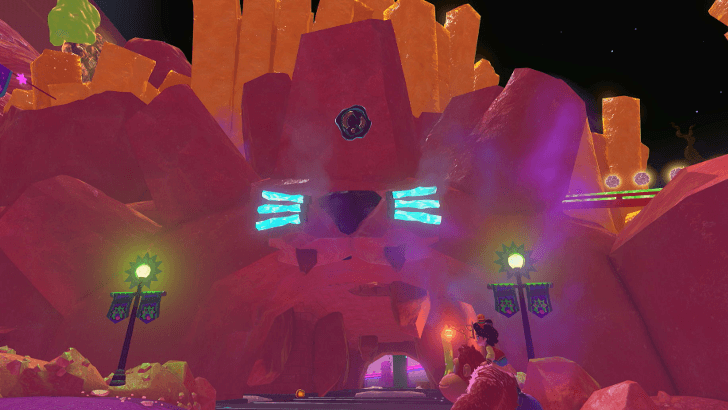
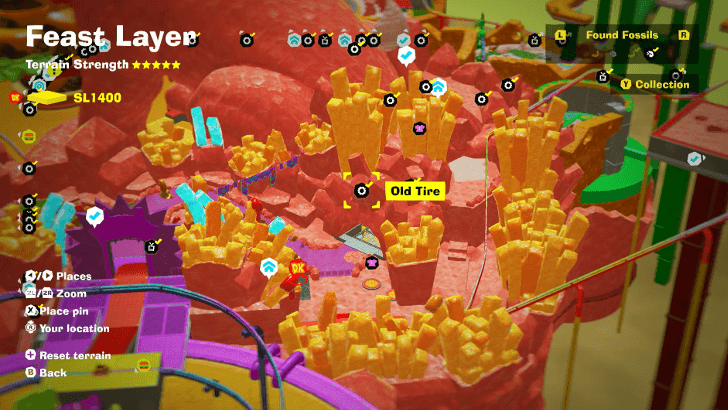
Located near the Station Gateway, on the ceiling inside the tunnel. |
||
 |
 |
|
|
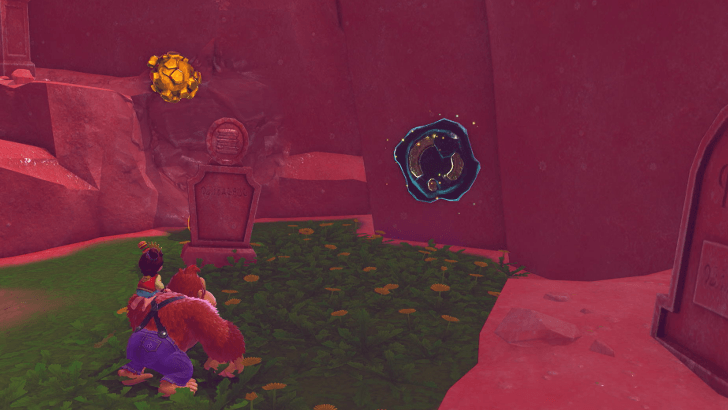
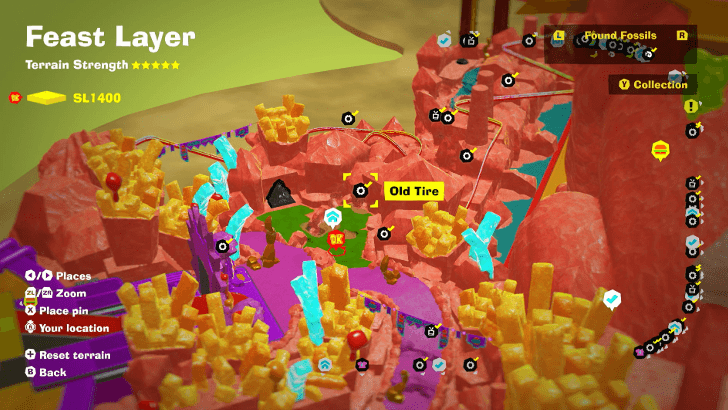
Located at the Station Gateway, above the entrance to the tunnel. |
||
 |
 |
|
|
Located near the checkpoint at the Ferocious Fryhouse. |
||
 |
 |
|
|
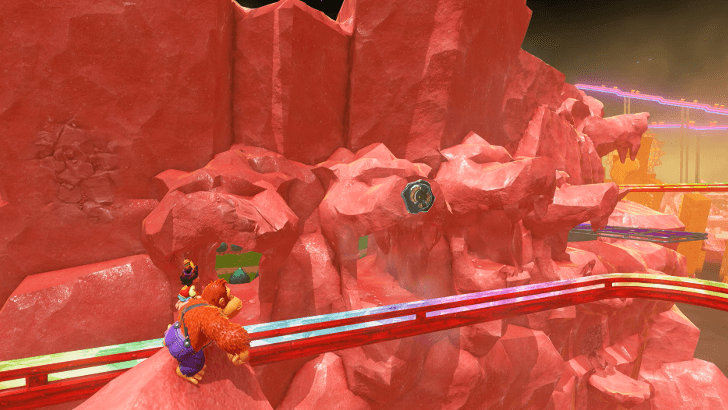
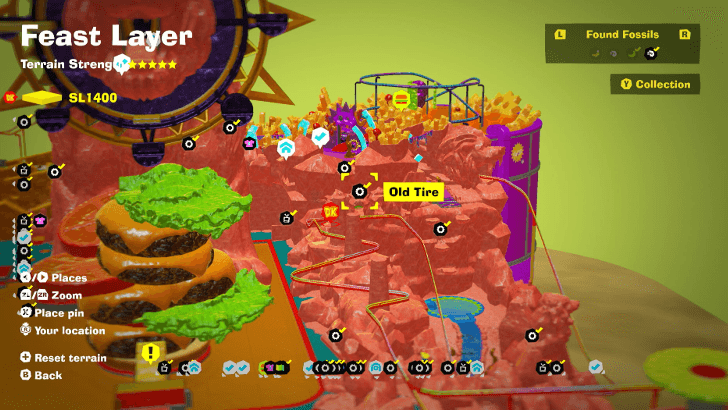
Located at the Refinery. Found on the second lion head above the rails. |
||
 |
 |
|
|
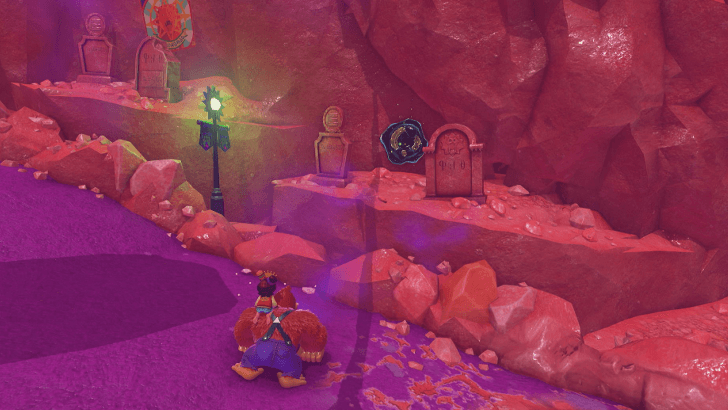
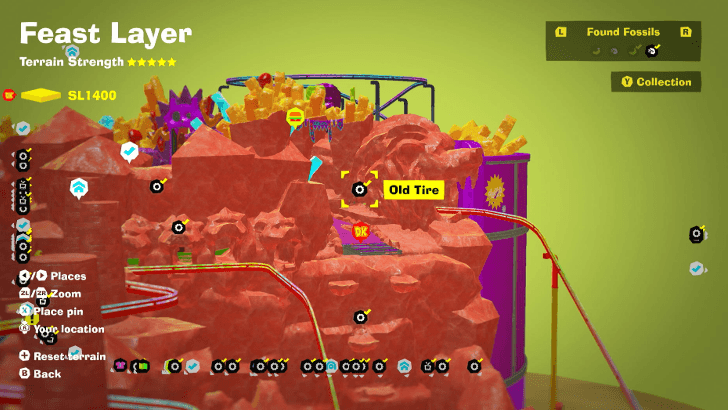
Located at the Ferocious Fryhouse, near the Refinery. |
||
 |
 |
|
|
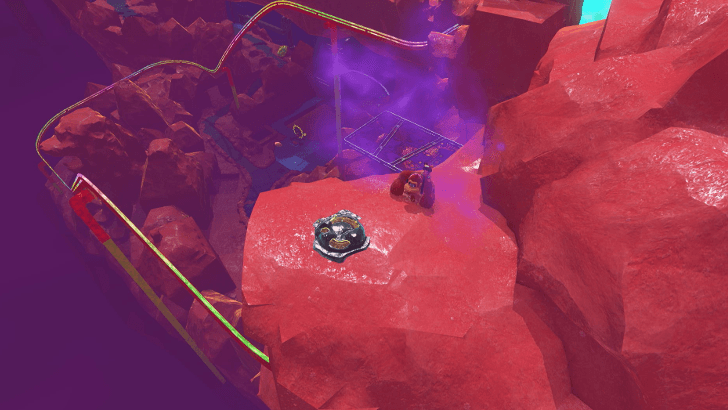
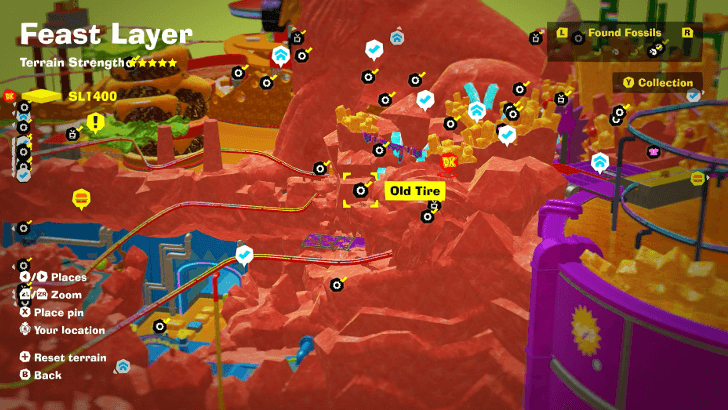
Located at the Ferocious Fryhouse, on the nose of one of the lion heads above the rails. |
||
 |
 |
|
|
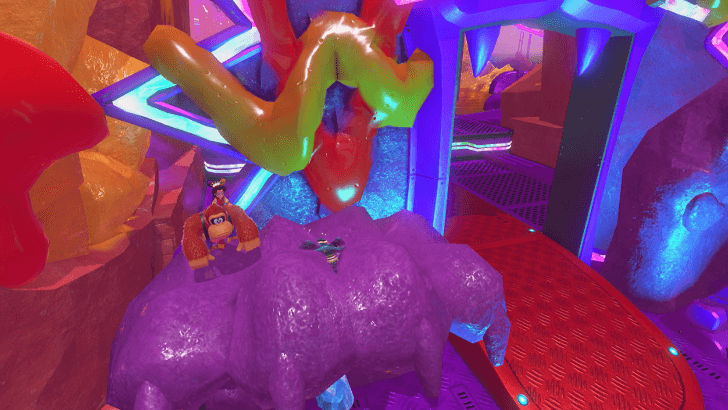
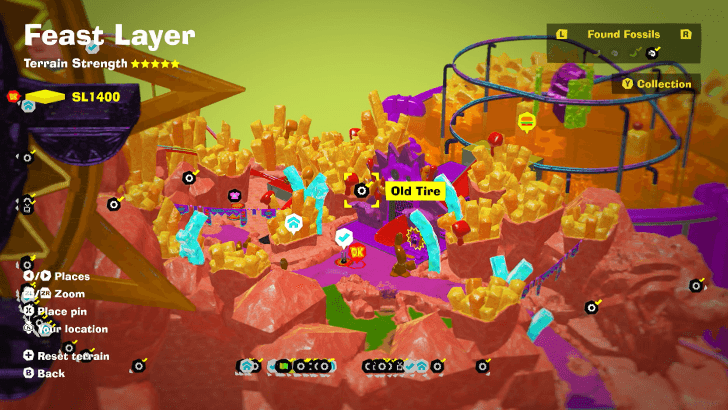
Located at the gate past the Ferocious Fryhouse Checkpoint. |
||
 |
 |
|
|
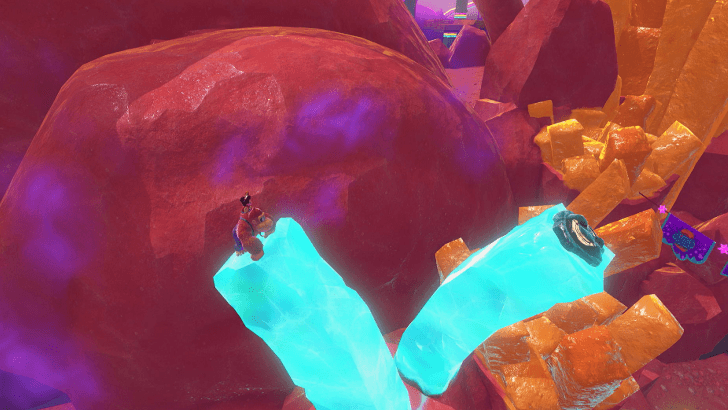
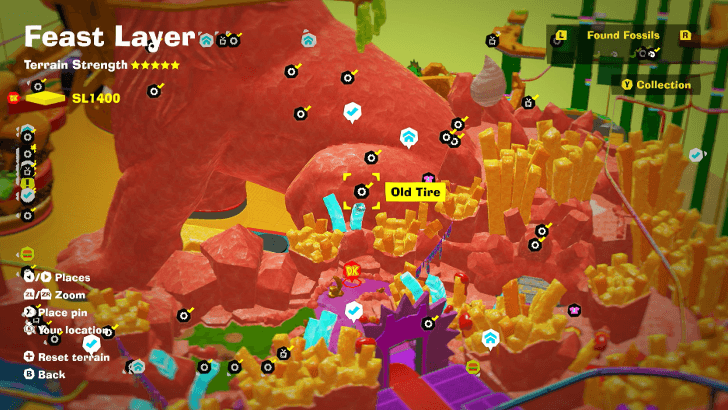
Located near the Ferocious Fryhouse Checkpoint, on a blue glowing french fry pillar. |
||
 |
 |
|
|
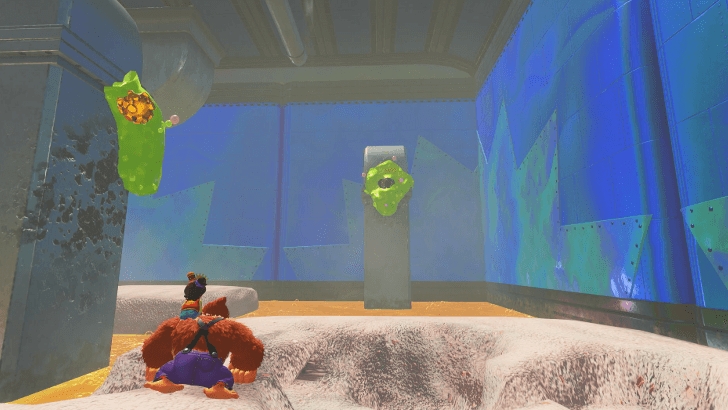
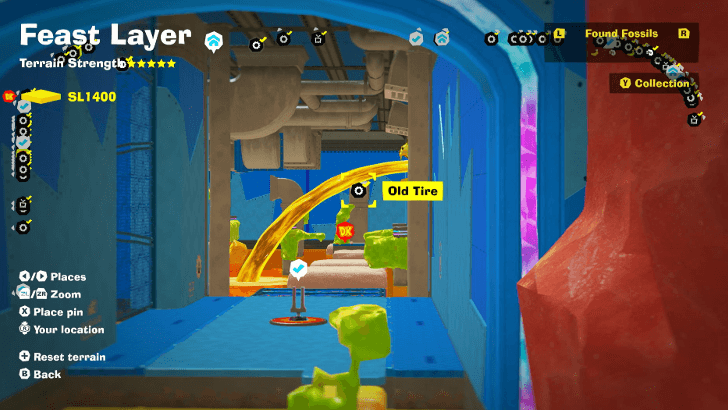
Located inside the Royal Oil Cruise, on a pillar in a corner. |
||
 |
 |
|
|
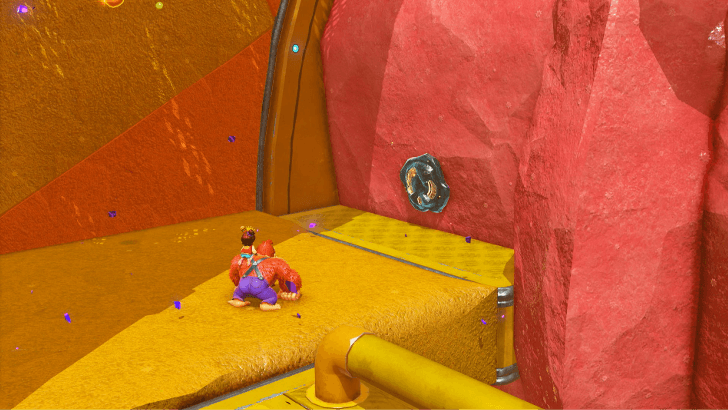
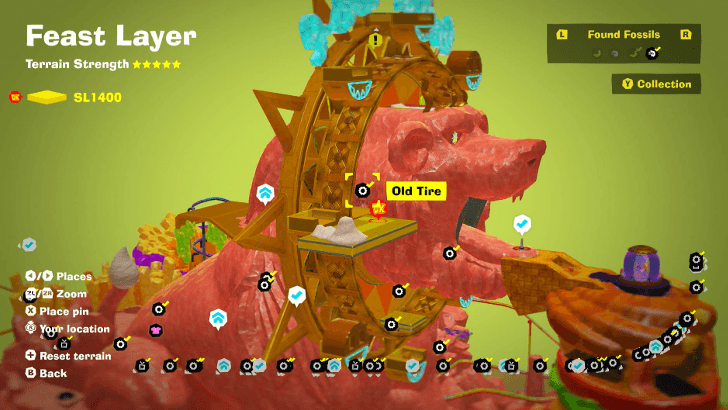
Located at Feral Wheel, below the lion's right ear. |
||
 |
 |
|
|
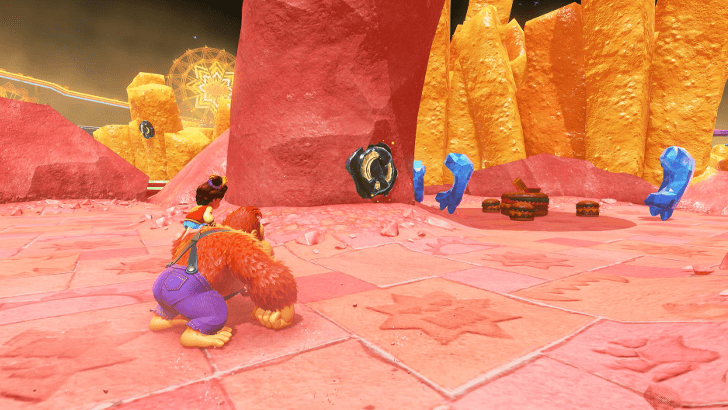
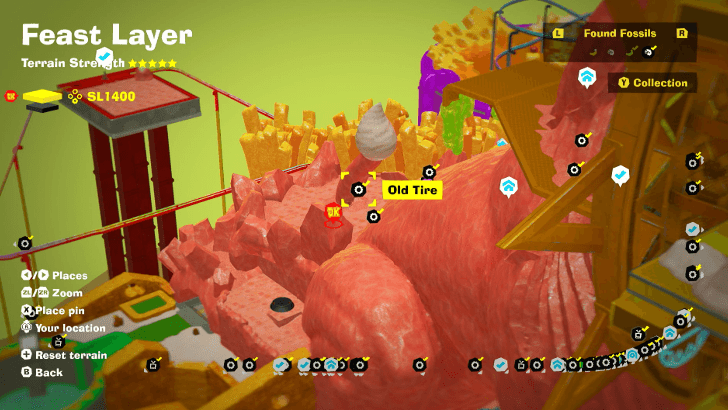
Found at the base of the lion tail in the Feral Wheel. |
||
 |
 |
|
|
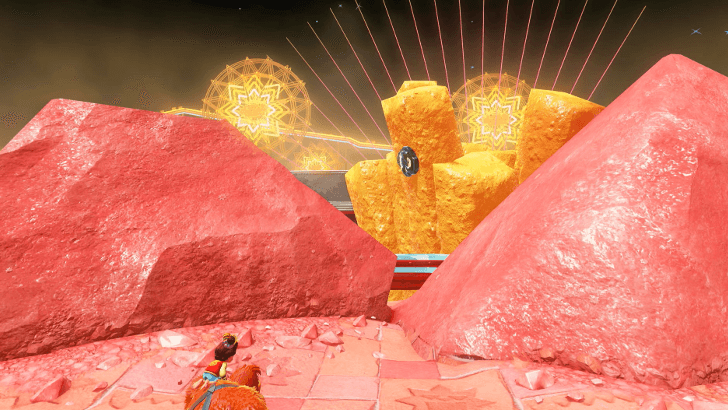
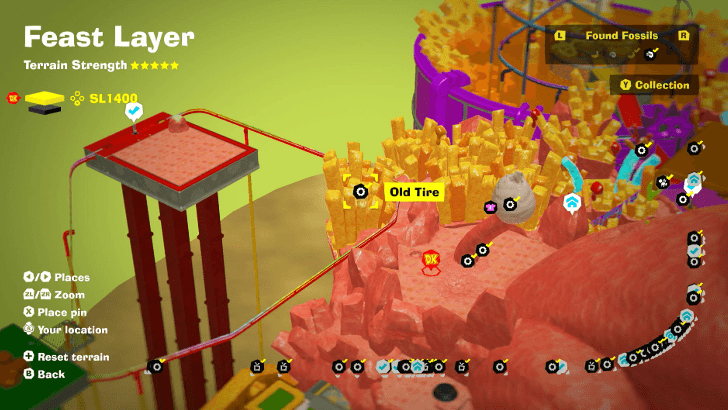
Found on a giant fry behind the Feral Wheel. |
||
 |
 |
|
|
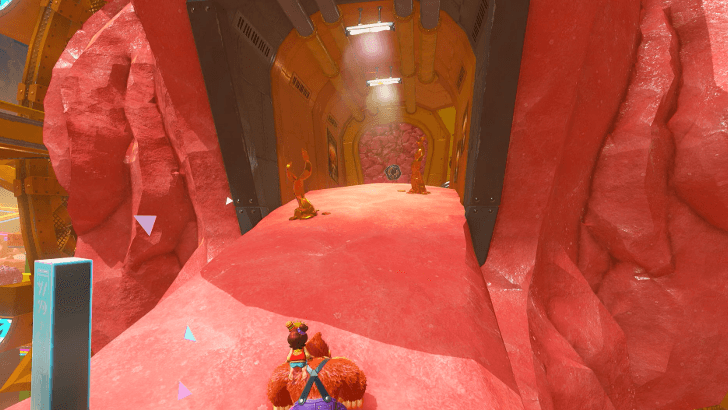
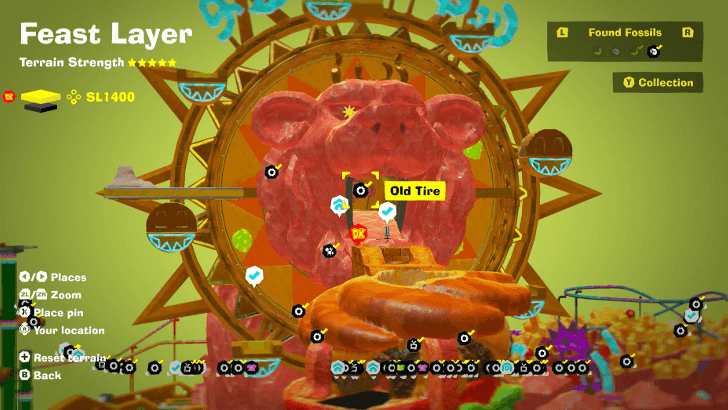
Found inside the mouth of the Feral Wheel lion. |
||
 |
 |
|
|
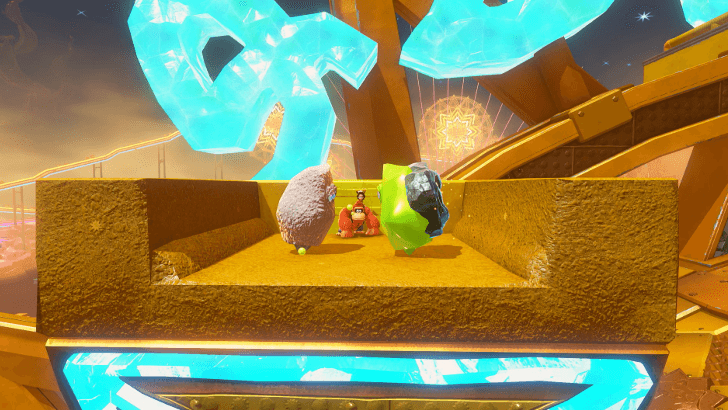
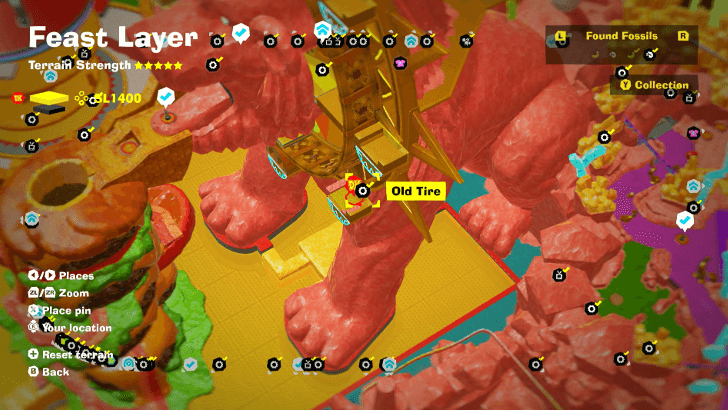
Found on one of the moving platforms at the Feral Wheel, at the back of one of the Fractones. |
||
 |
 |
|
|
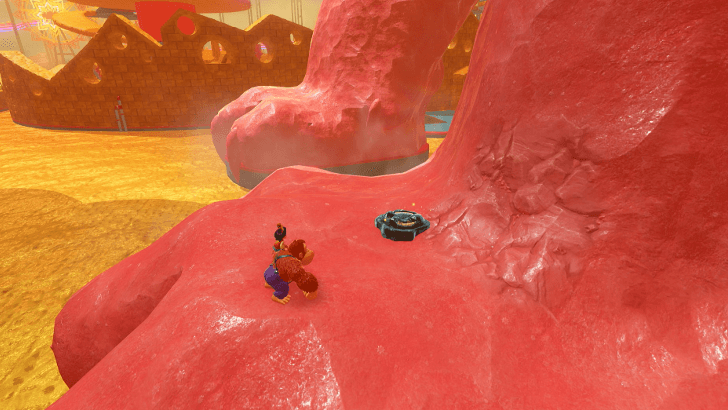
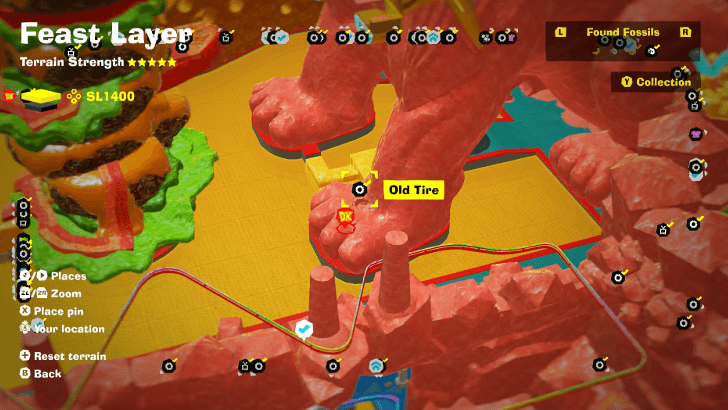
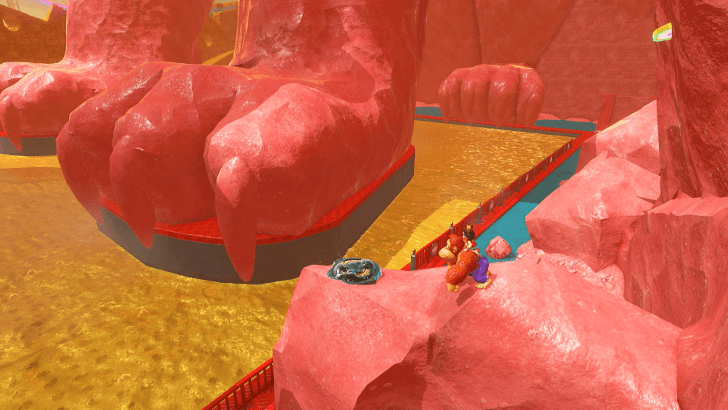
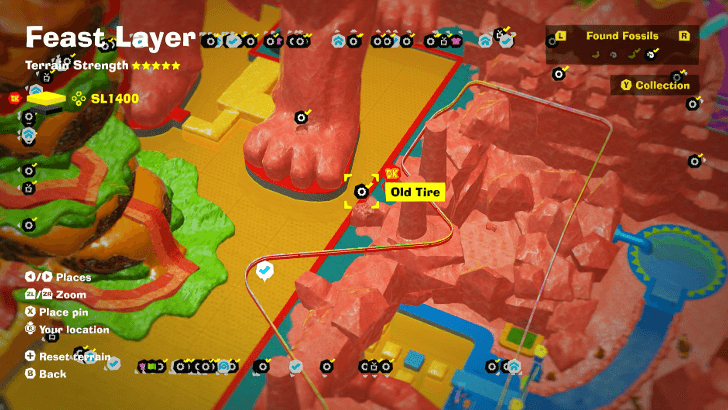
Found on the left forefoot of the Feral Wheel lion. |
||
 |
 |
|
|
Found on a stone near the left forefoot of the Feral Wheel lion. |
||
 |
 |
|
|
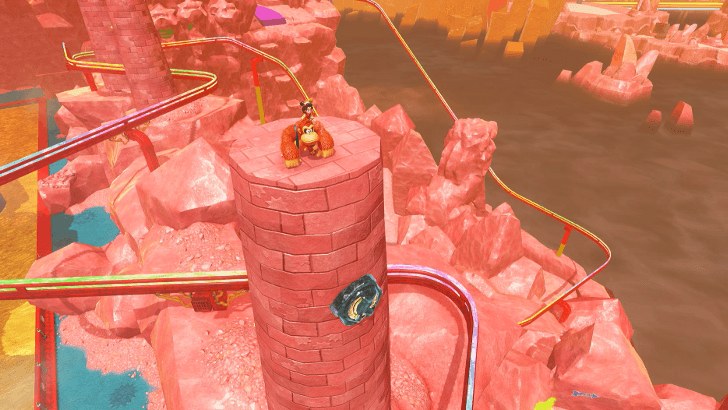
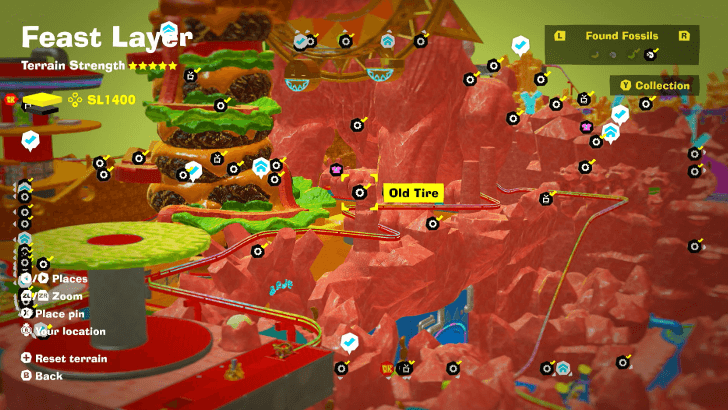
Found on a pillar along the rails near the Umbrella-Straw Station. |
||
 |
 |
|
|
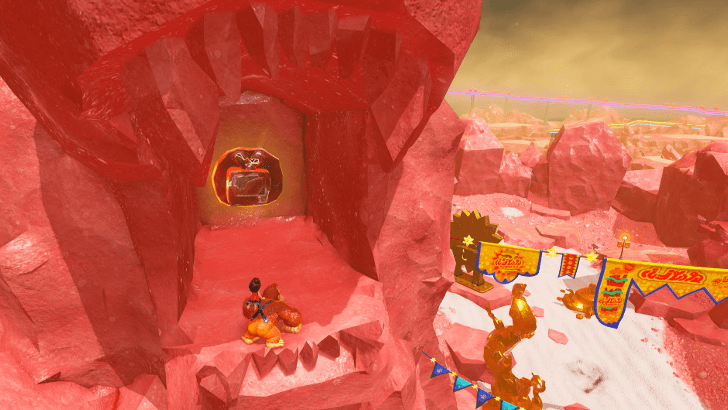
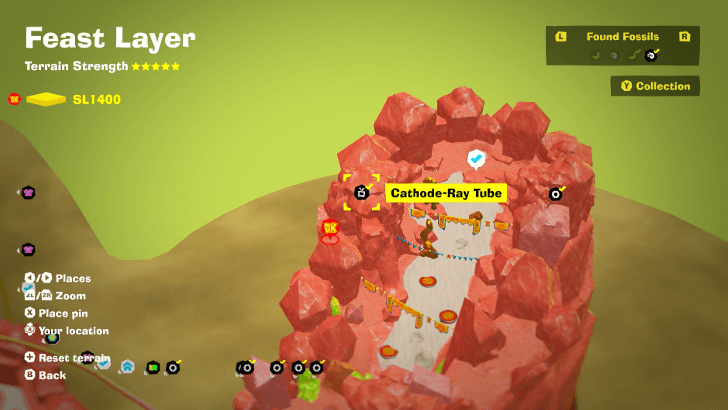
Located at Arrival Gate. Found inside the mouth of a stone lion head. |
||
 |
||
|
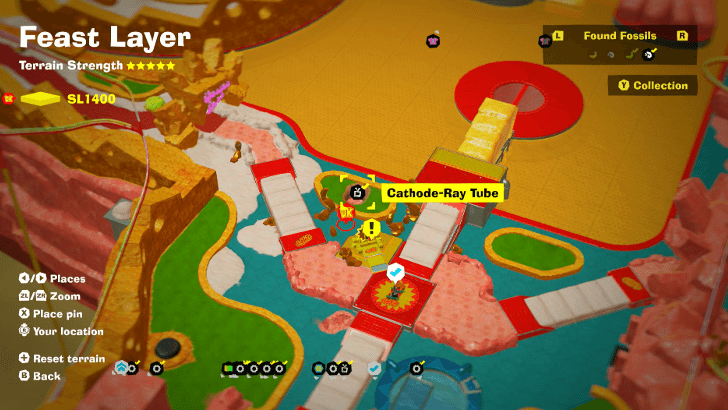
Located at the Fried Pride Plaza. Found underground after pulling a turnip and revealing a room with the Fossil. |
||
 |
 |
|
|
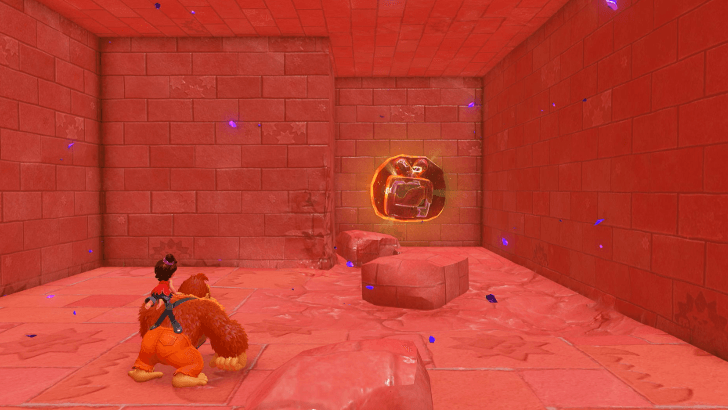
Located near the Refinery, inside a cave. Clear the Void first to get the Fossil. |
||
 |
 |
|
|
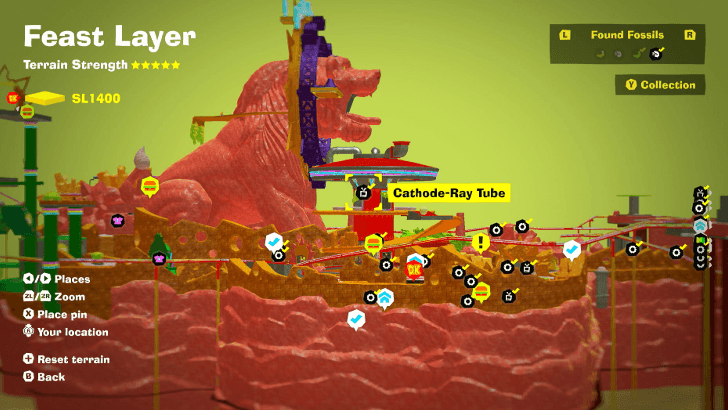
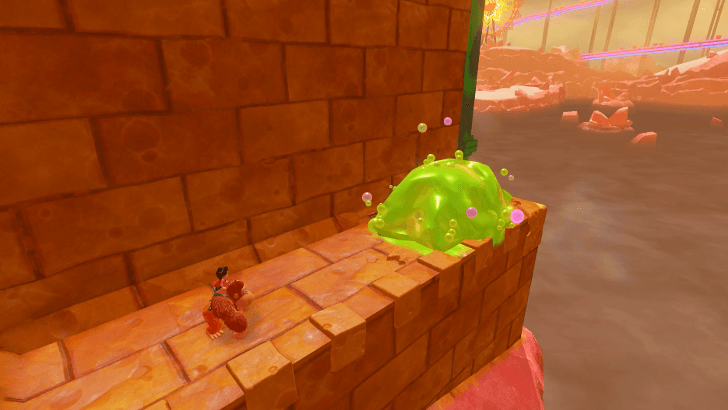
Found in an alcove near the top of the Grater-Go-Round Station. |
||
 |
 |
|
|
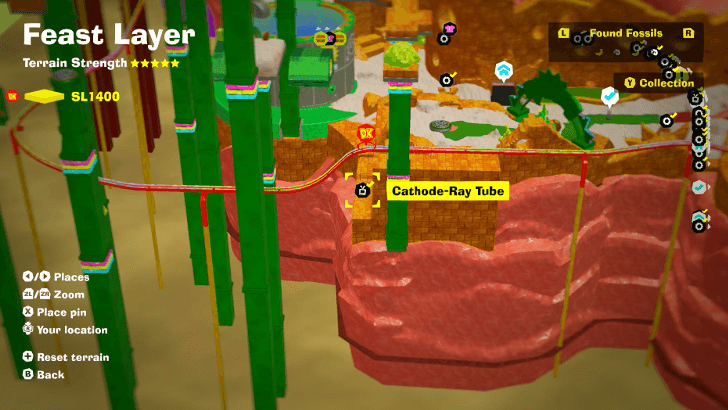
Located on the opposite side of the Swings Getaway, at the edge of the map. |
||
 |
 |
|
|
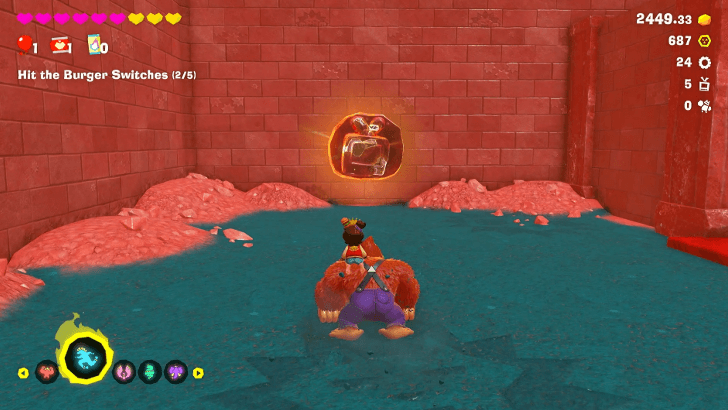
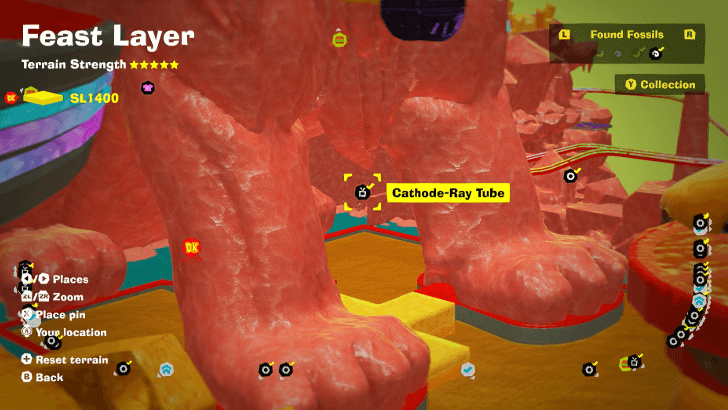
Located below the Feral Wheel, embedded on a wall. |
||
 |
||
|
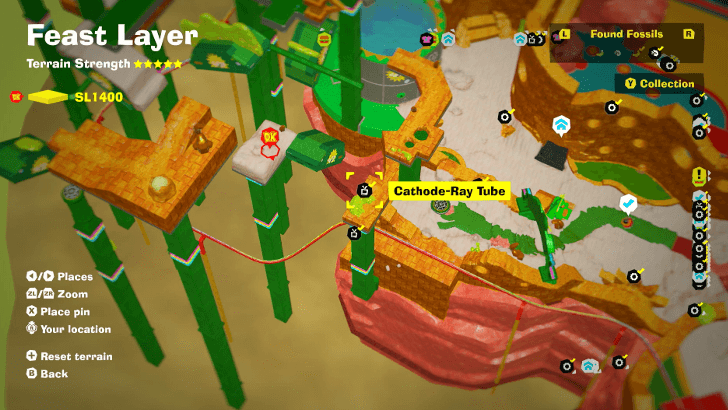
Located on one of the platforms next to Kingly Swings Ride. |
||
 |
 |
|
|
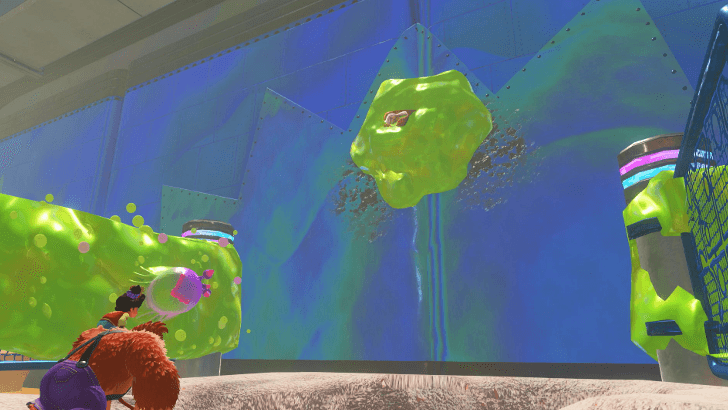
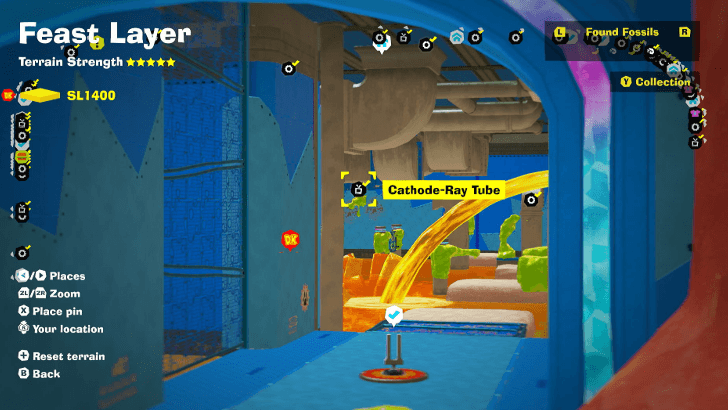
Located inside the Royal Oil Cruise, stuck on a muck on the wall. |
||
 |
 |
|
|
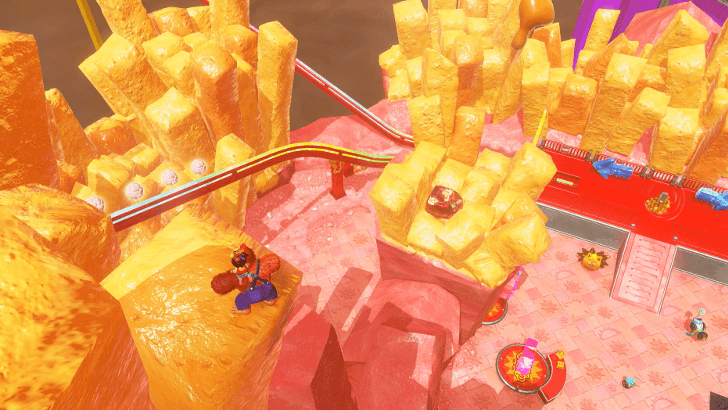
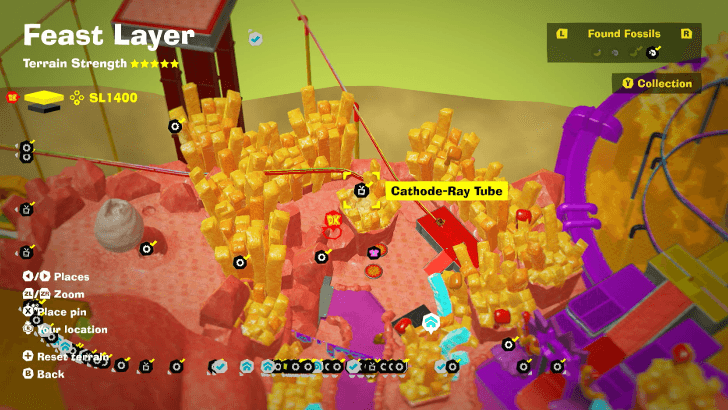
Located in front of the Station Getaway, on the fries above the Style Shop. |
||
 |
 |
|
|
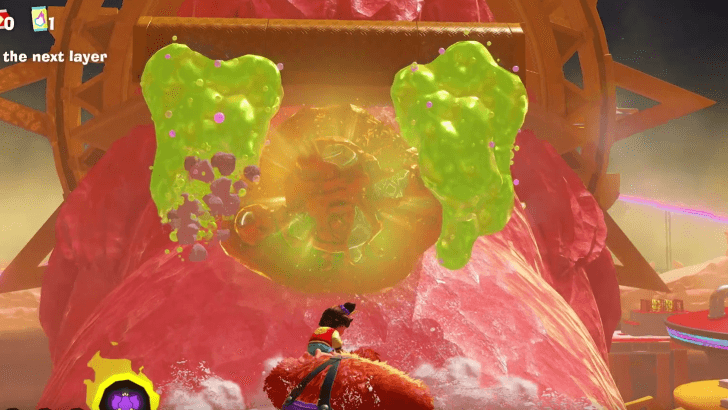
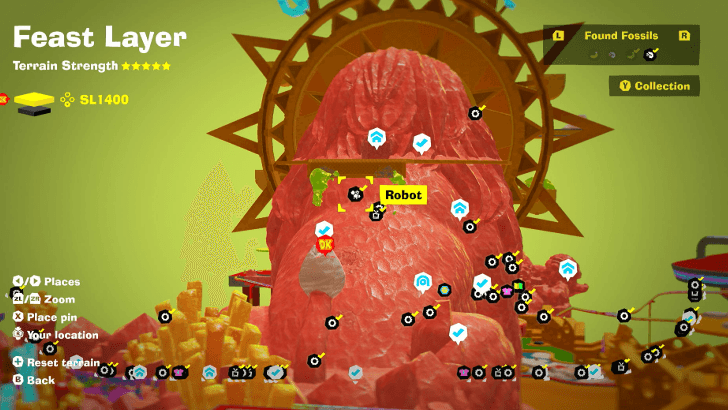
Found at the back of the Feral Wheel lion. Climb its tail first and throw chunks of the tail tip at the muck to remove them from the Fossil and obtain it. |
||
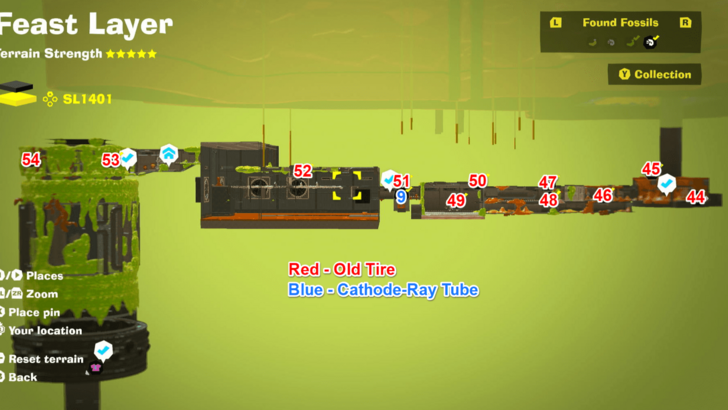
SL 1401 Fossil Locations
| Overworld View | Map Location | |
|---|---|---|
 |
 |
|
|
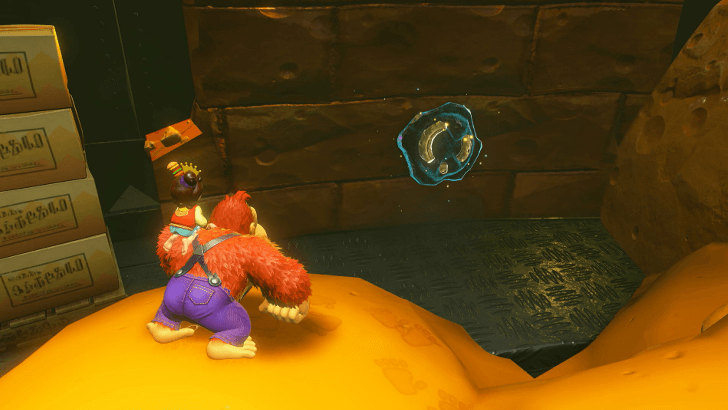
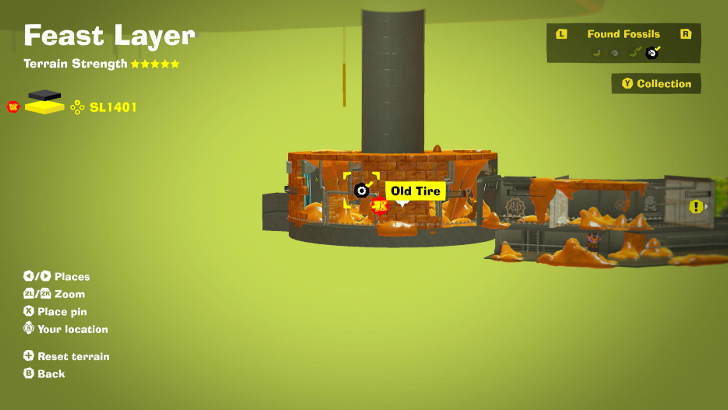
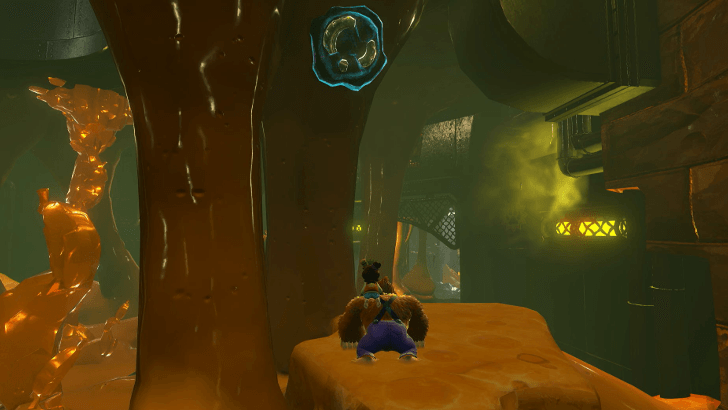
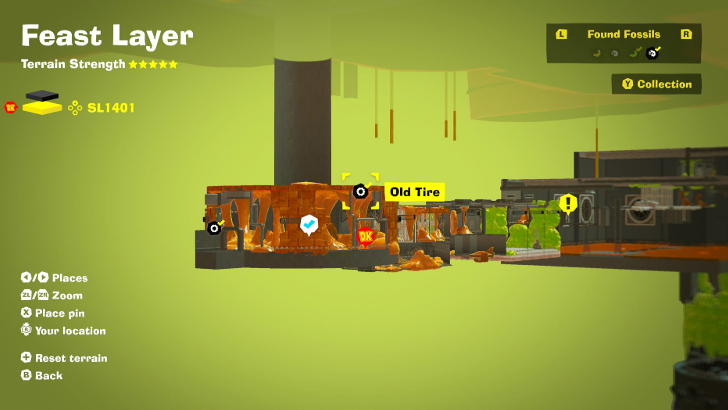
Found on a wall inside the Cat-Scratch Kitchen. |
||
 |
 |
|
|
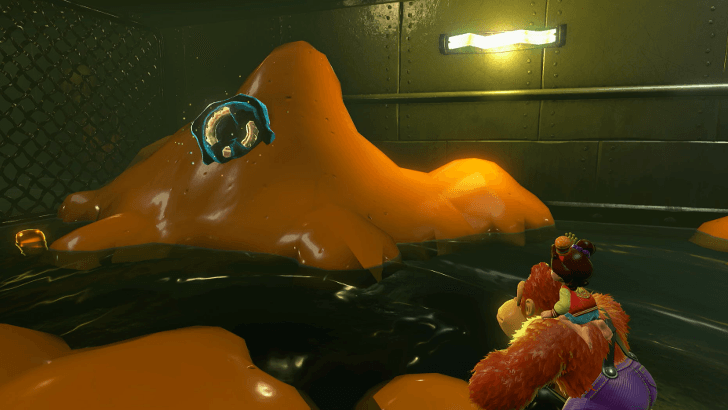
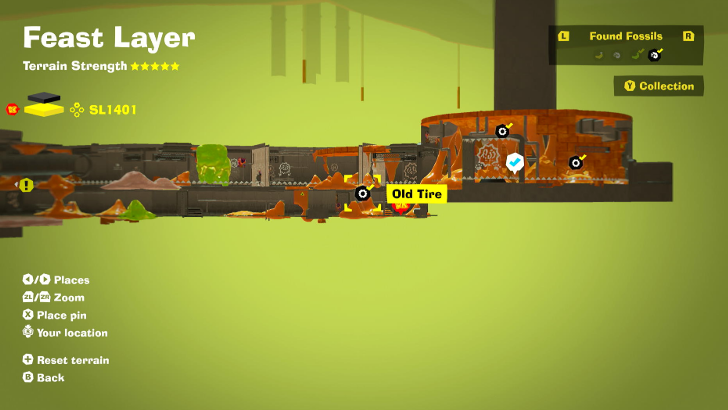
Found on one of the pillars in Cat-Scratch Kitchen. |
||
 |
 |
|
|
Look for a ladder while heading out the Cat-Scratch Kitchen and climb down to find the Fossil. |
||
 |
 |
|
|
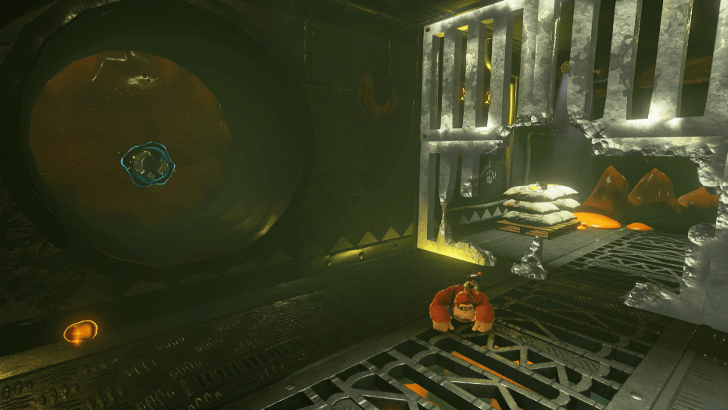
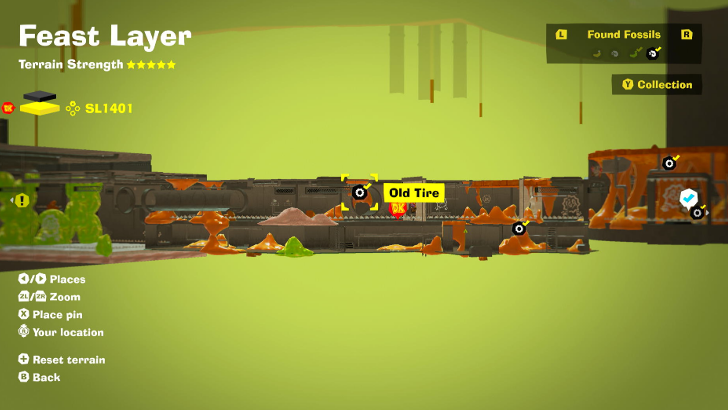
Found on an opening near a grate at the Cat-Scratch Kitchen. |
||
 |
 |
|
|
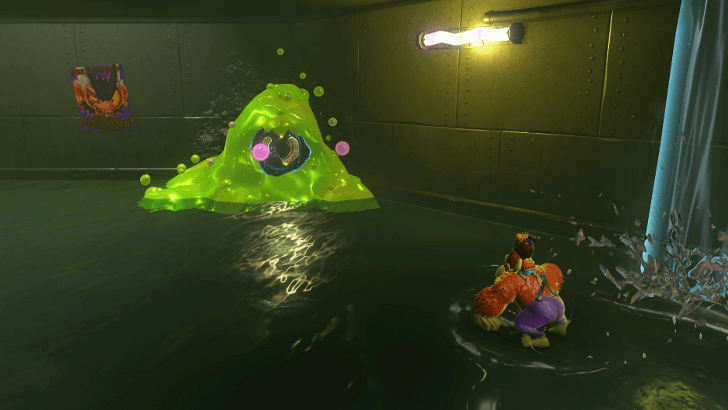
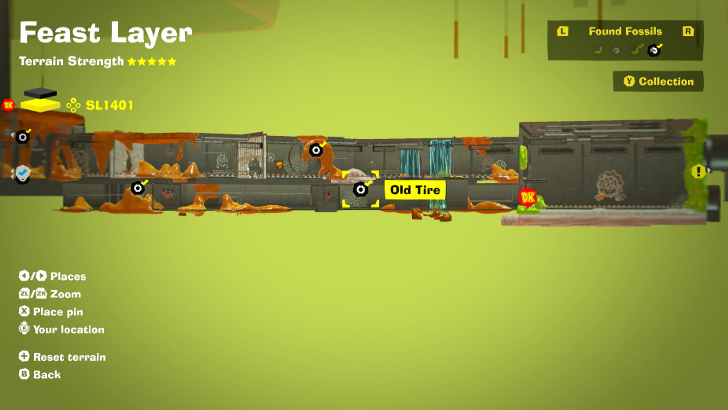
Found on the lower level near the Cat-Scratch Kitchen, stuck on a muck on a wall. |
||
 |
 |
|
|
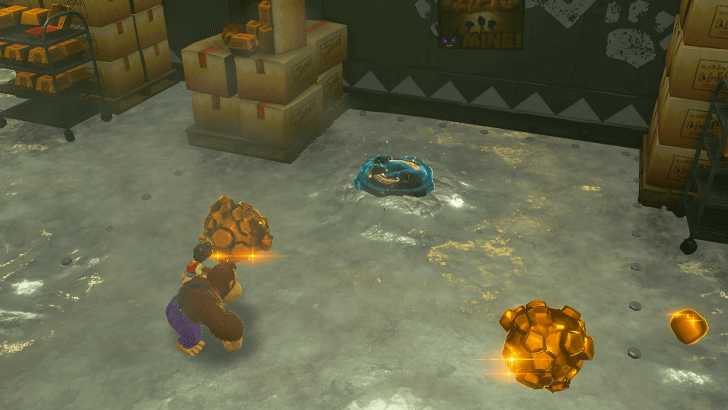
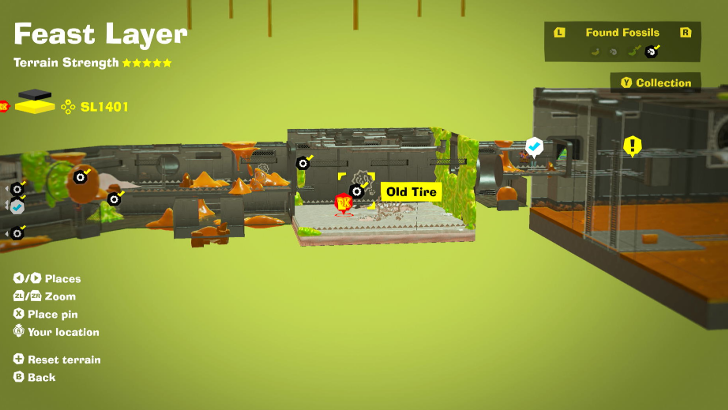
Located inside a warehouse just before the Waste Oil Container area. The Fossil is on the floor between two stacks of boxes. |
||
 |
 |
|
|
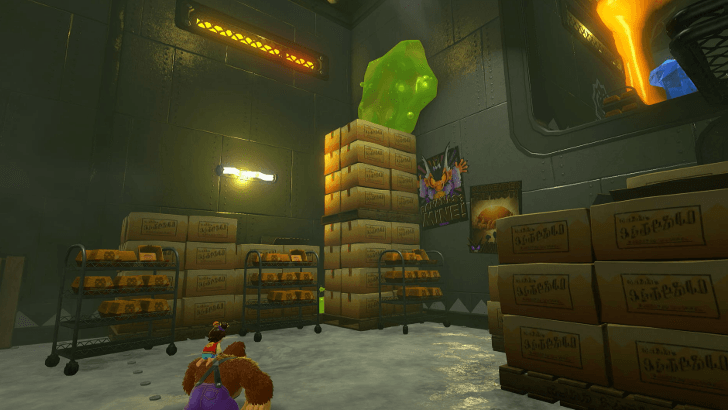
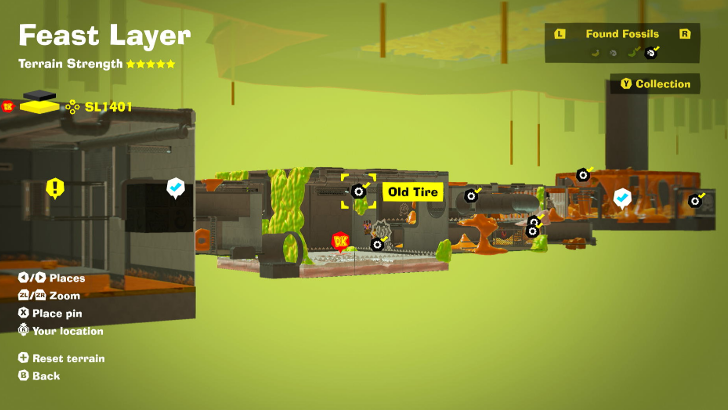
Located inside a warehouse just before the Waste Oil Container area. The Fossil is stuck and covered in muck on the wall. |
||
 |
 |
|
|
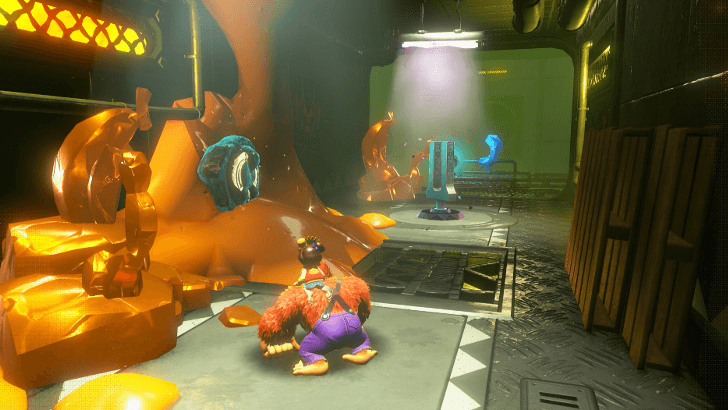
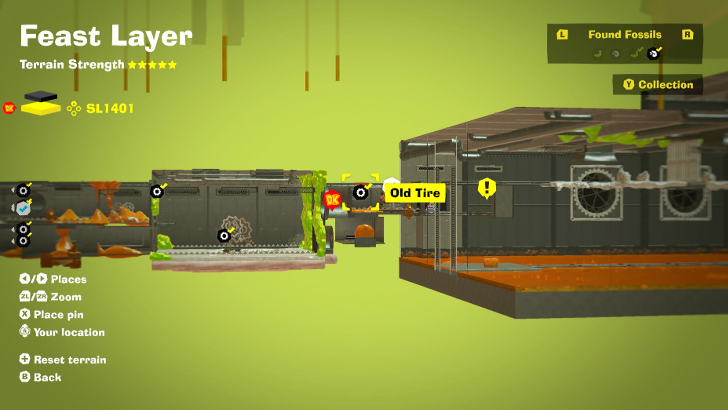
Found right next to the Waste Oil Container Checkpoint. |
||
 |
 |
|
|
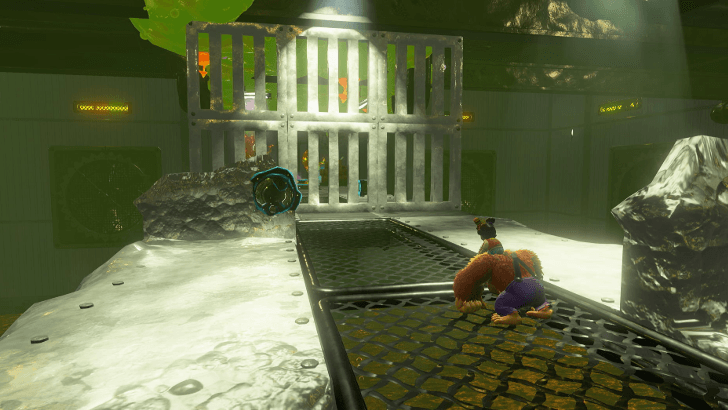
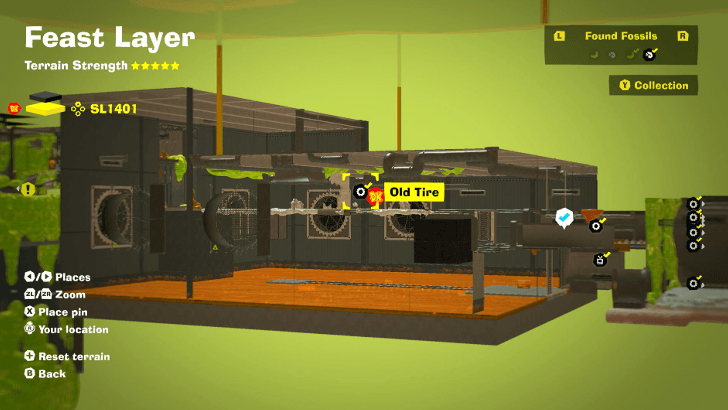
Found along the path after climbing the ladder in the Waste Oil Container. |
||
 |
 |
|
|
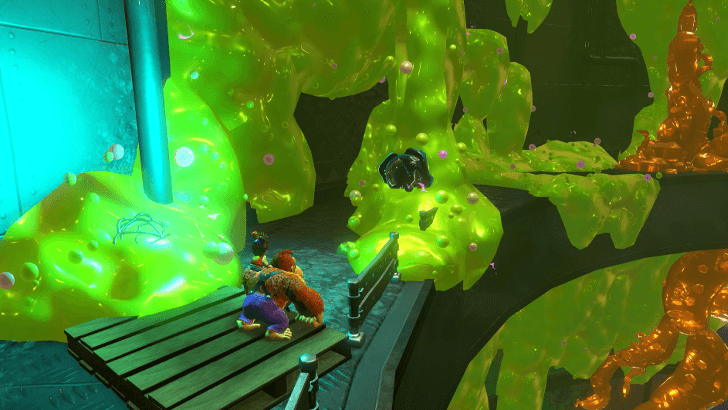
Found stuck on a muck at the Loading Bay. |
||
 |
 |
|
|
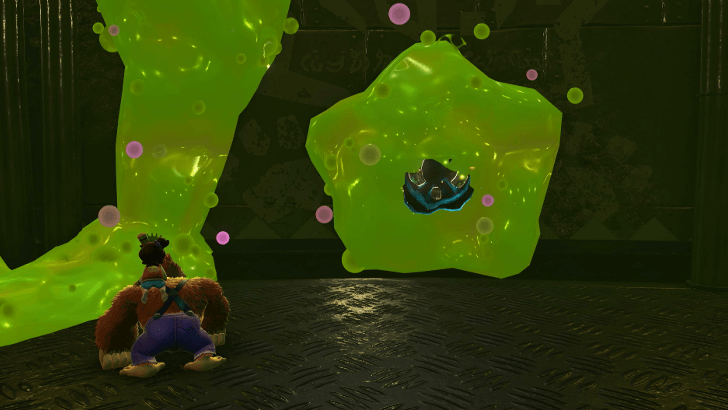
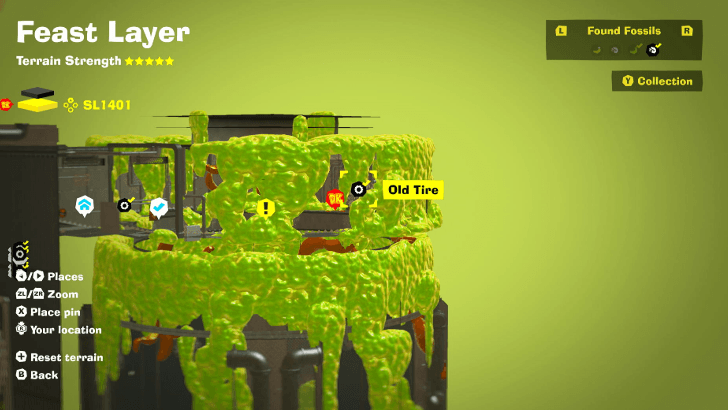
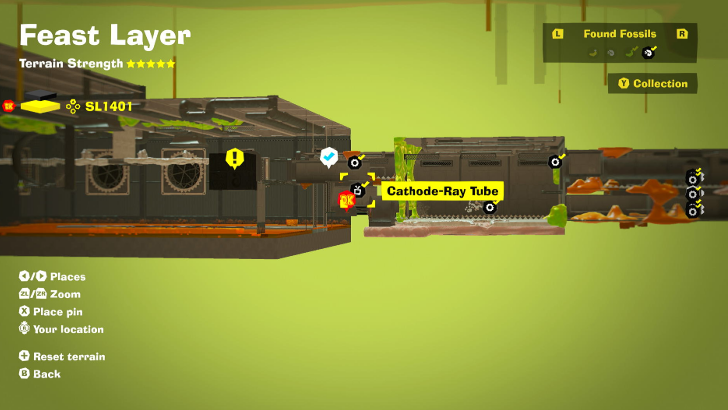
Found on the other side of the Loading Bay. |
||
 |
||
|
Located right below the Waste-Oil Container Checkpoint. Look for a doorway near the Checkpoint that leads to the room below to find the Fossil. |
||
Feast Layer Checkpoints
All Checkpoint Locations
| Overworld View | Map Location | |
|---|---|---|
 |
 |
|
|
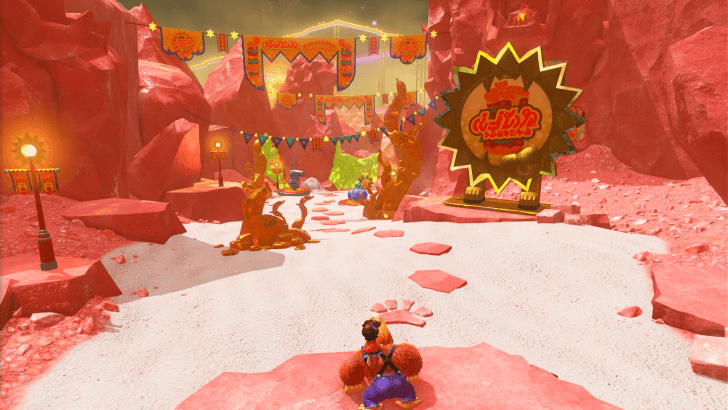
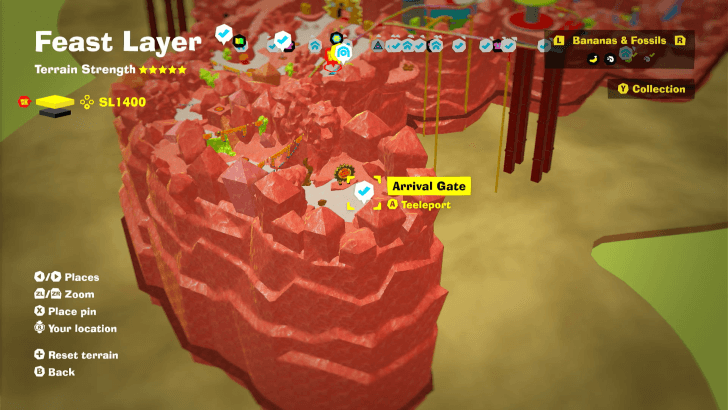
Arrival Gate Checkpoint (SL 1400)
This is the starting point of the Feast Layer after completing Groove Layer. |
||
 |
 |
|
|
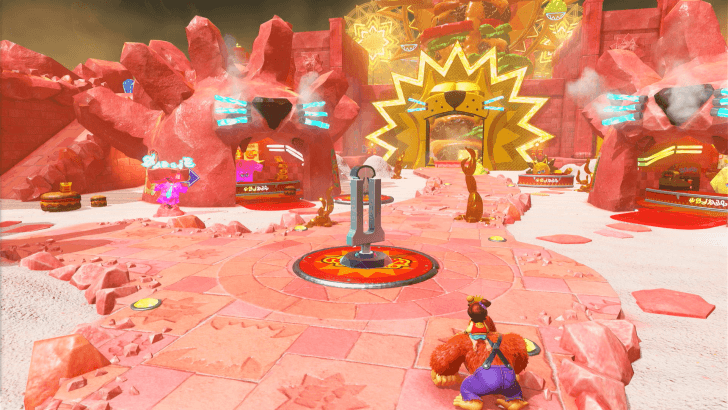
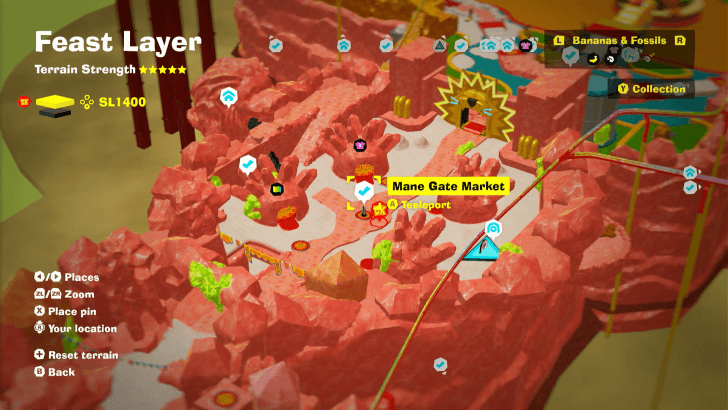
Mane Gate Market Checkpoint (SL 1400)
Located at the center of the market, near the Warp Gong. |
||
 |
 |
|
|
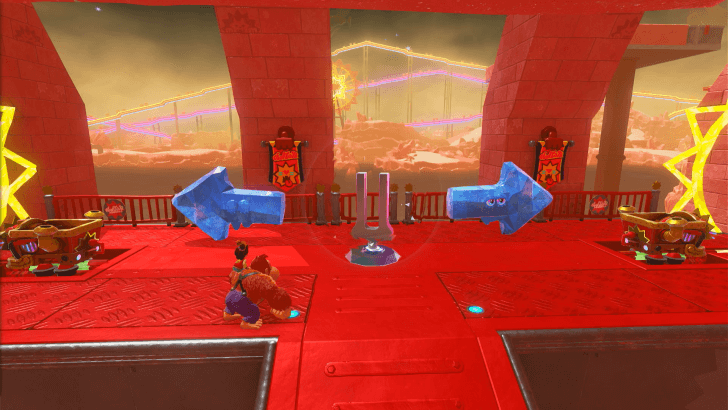
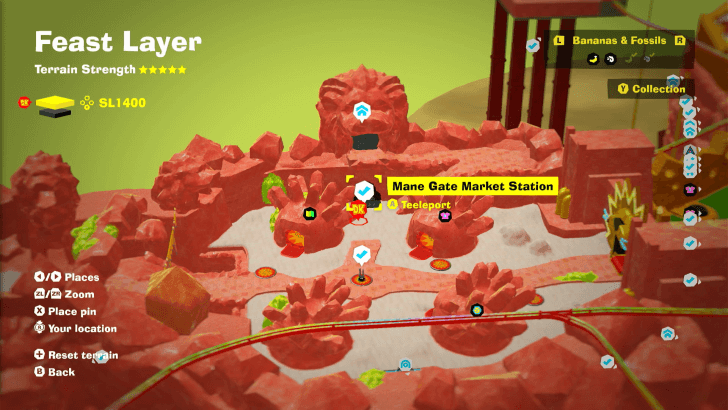
Mane Gate Market Station Checkpoint (SL 1400)
Located below the Mane Gate Market. |
||
 |
 |
|
|
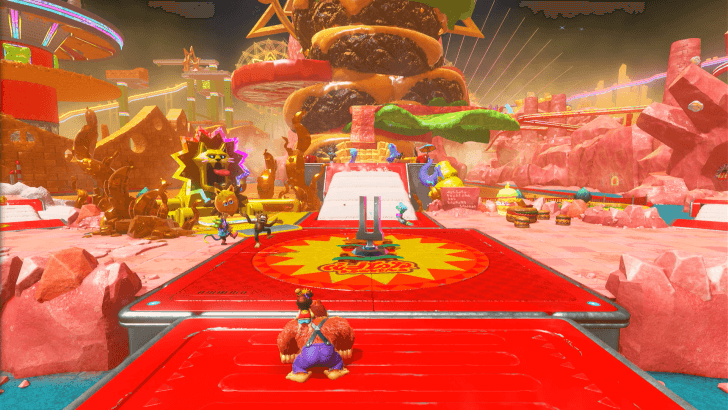
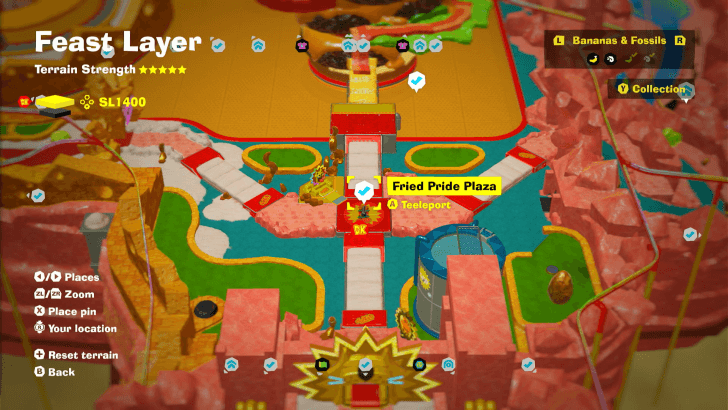
Fried Pride Plaza Checkpoint (SL 1400)
Located at the center of the plaza in front of the burger tower. |
||
 |
 |
|
|
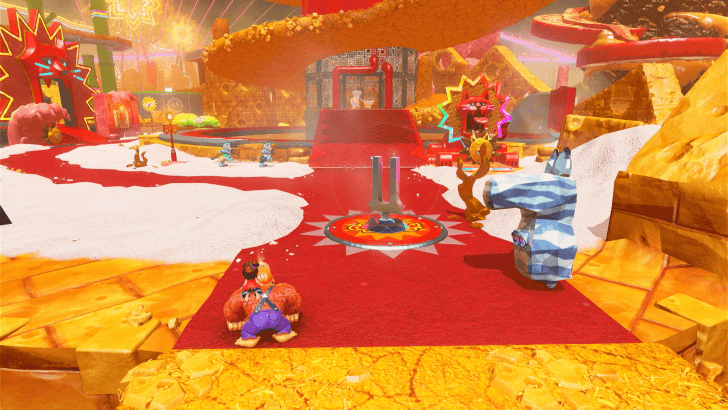
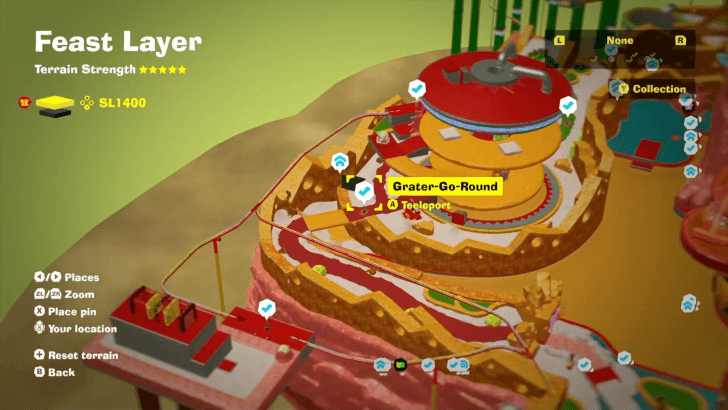
Grater-Go-Round Checkpoint (SL 1400)
Found in front of the Grater-Go-Round. |
||
 |
 |
|
|
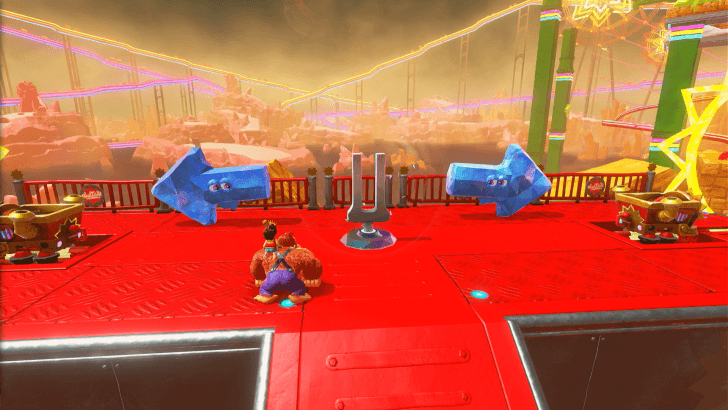
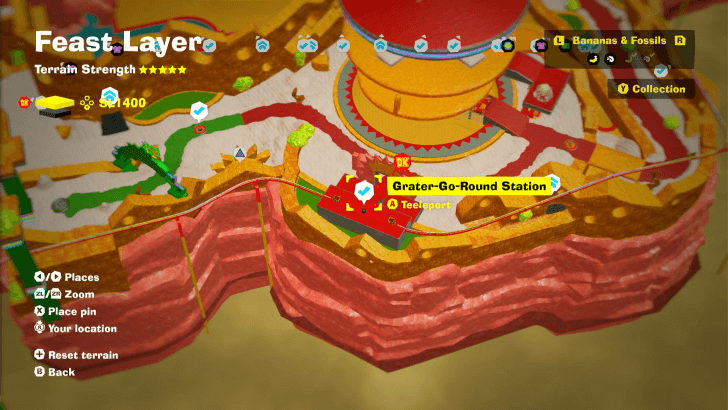
Grater-Go-Round Station Checkpoint (SL 1400)
Located at the side of the Grater-Go-Round, near the Kingly Swings area. |
||
 |
 |
|
|
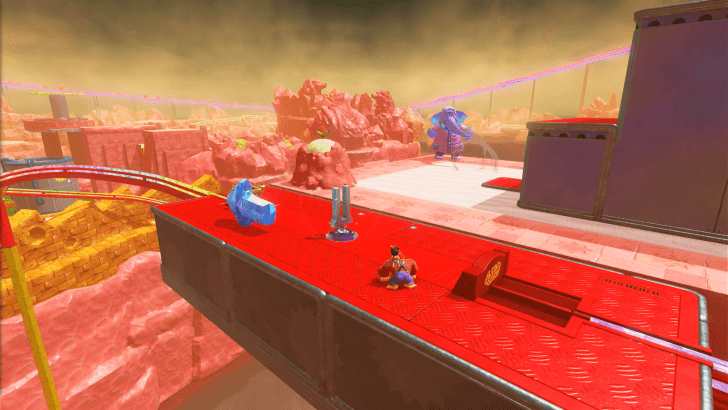
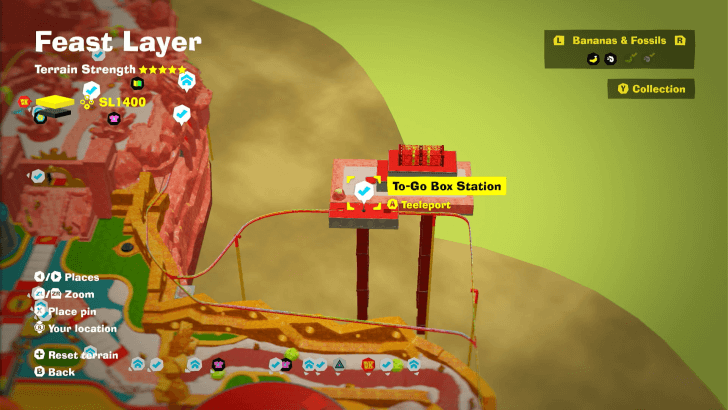
To-Go Box Station Checkpoint (SL 1400)
Ride the left cart at Grater-Go-Round Station to find this checkpoint. |
||
 |
 |
|
|
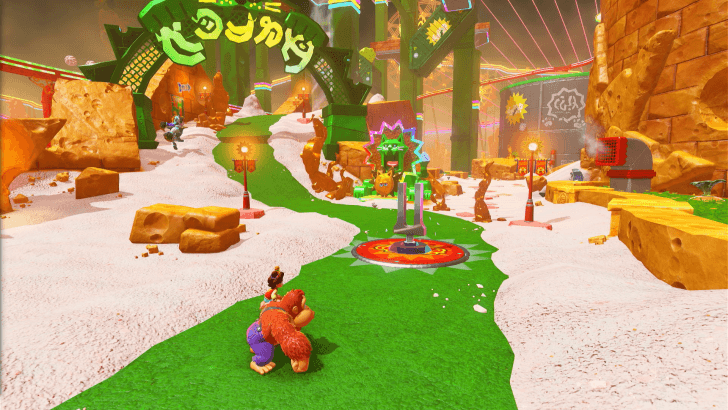
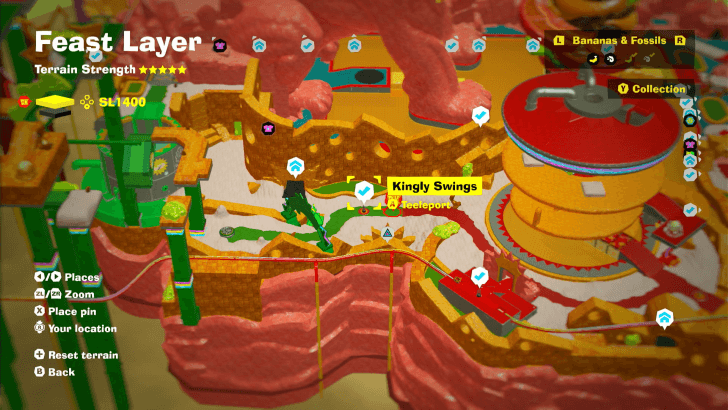
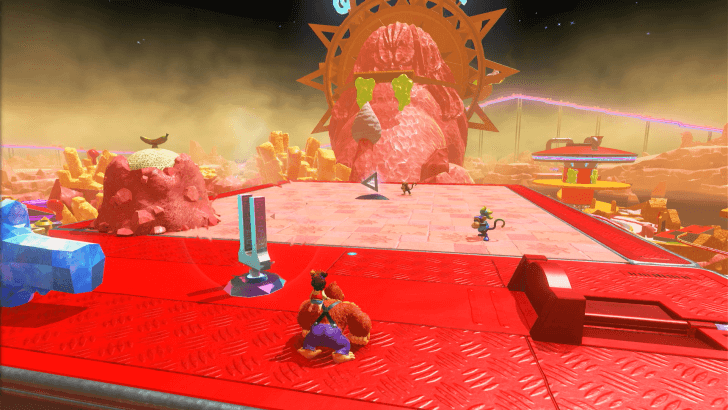
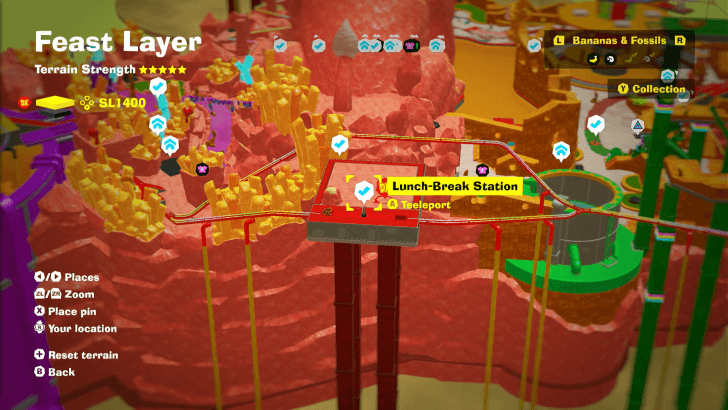
Kingly Swings Checkpoint (SL 1400)
Located behind the Grater-Go-Round. |
||
 |
 |
|
|
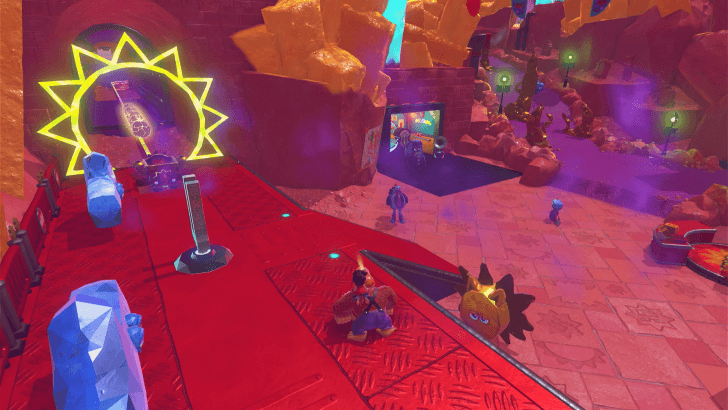
Lunch-Break Station Checkpoint (SL 1400)
Ride the right cart at Grater-Go-Round Station to find this checkpoint. You can also ride the cart from the Ferocious Fryhouse Station to get here. |
||
 |
 |
|
|
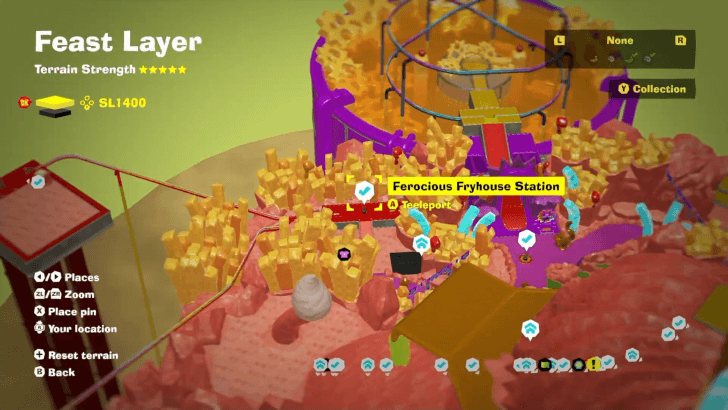
Ferocious Fryhouse Station Checkpoint (SL 1400)
Found on a platform surrounded by the french fry structures near a Style Shop. This can be reached from the Lunch-Break Station. |
||
 |
 |
|
|
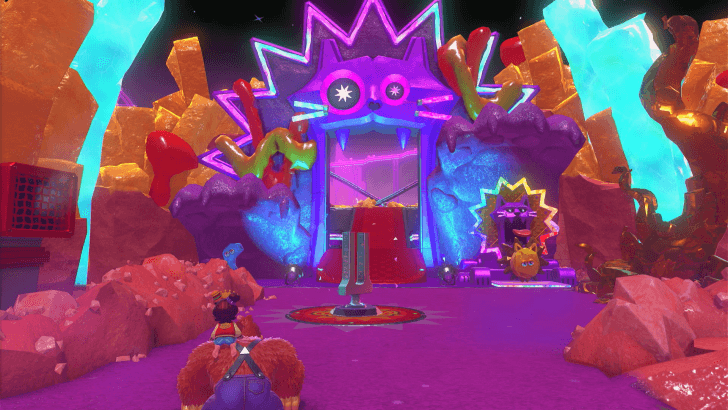
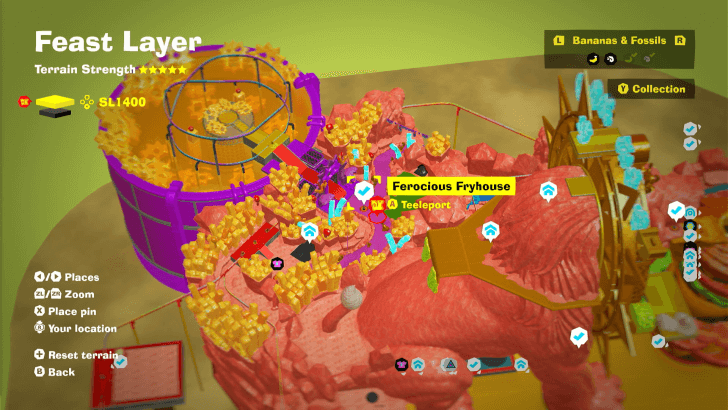
Ferocious Fryhouse Checkpoint (SL 1400)
Found in front of the entrance to an arena in the french fry area. |
||
 |
 |
|
|
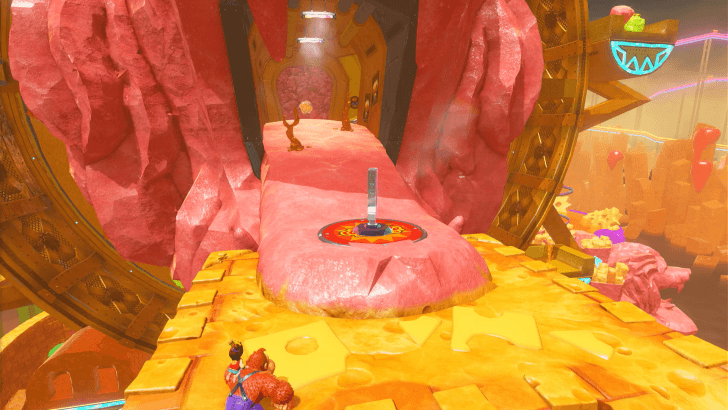
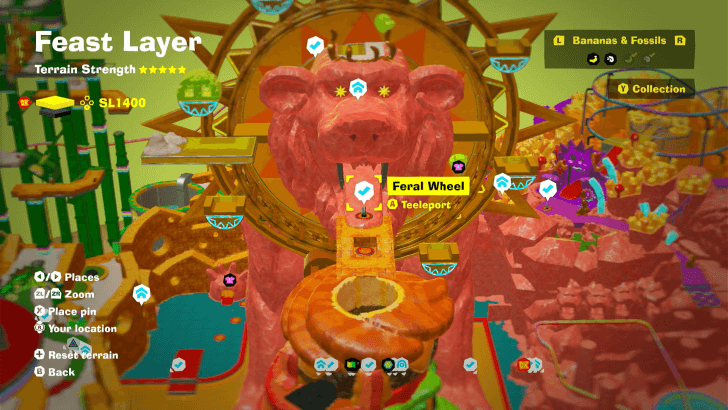
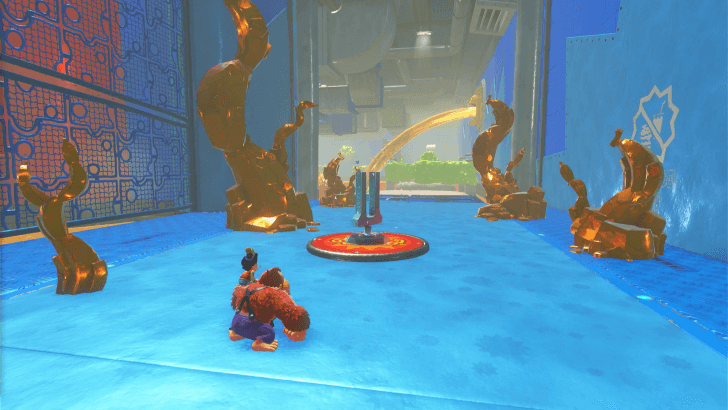
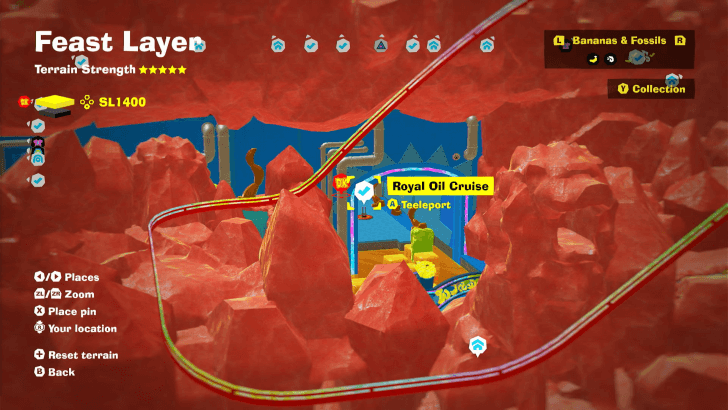
Feral Wheel Checkpoint (SL 1400)
Located on the tongue of the large stone lion ferris wheel in the middle of the layer. |
||
 |
 |
|
|
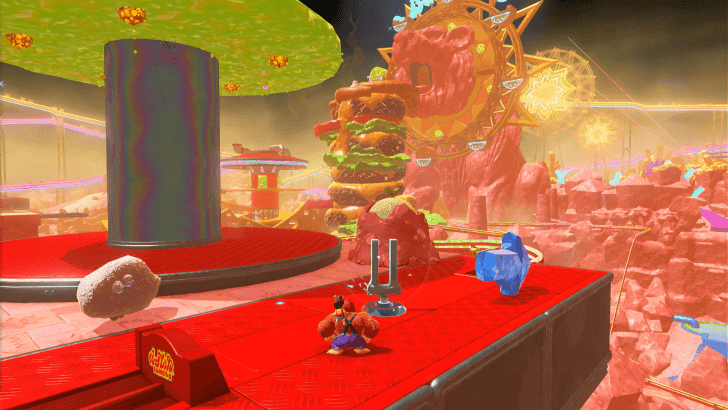
Royal Oil Cruise Checkpoint (SL 1400)
Located near the refinery. This is found below the burger tower. |
||
 |
 |
|
|
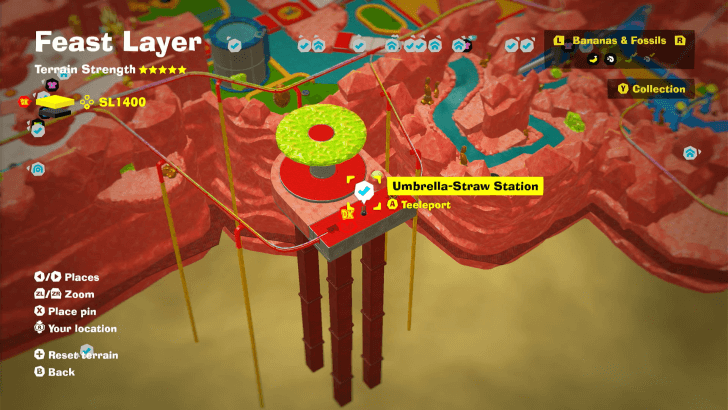
Umbrella-Straw Station Checkpoint (SL 1400)
Get on the ride from Mane Gate Market Station or from the Ferocious Fryhouse Station to reach this area. |
||
 |
 |
|
|
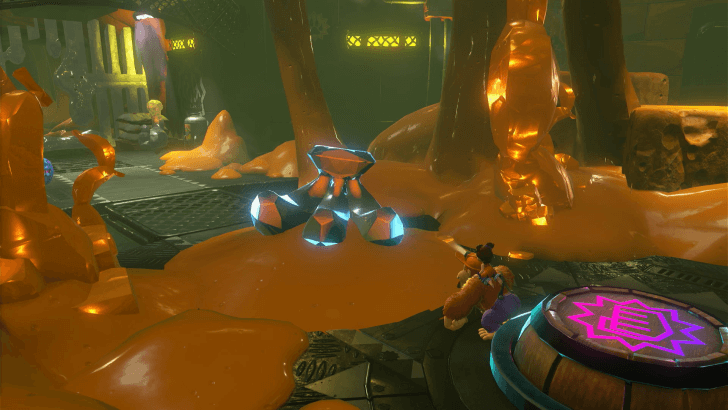
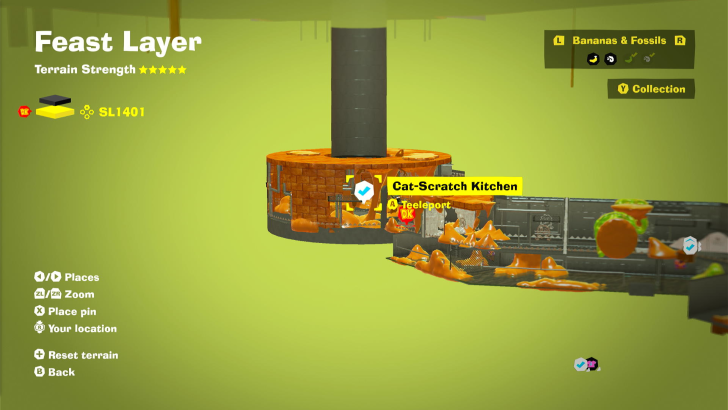
Cat-Scratch Kitchen Checkpoint (SL 1401)
Unlocks after dropping from Sublayer 1400. |
||
 |
 |
|
|
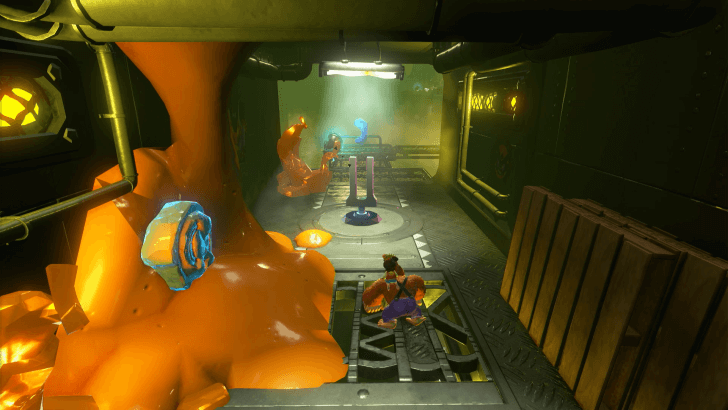
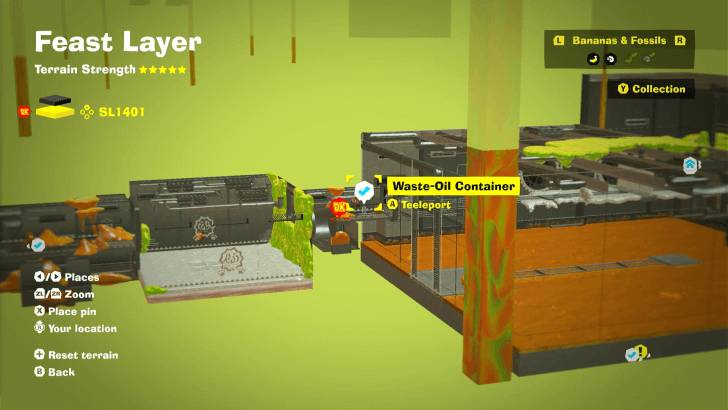
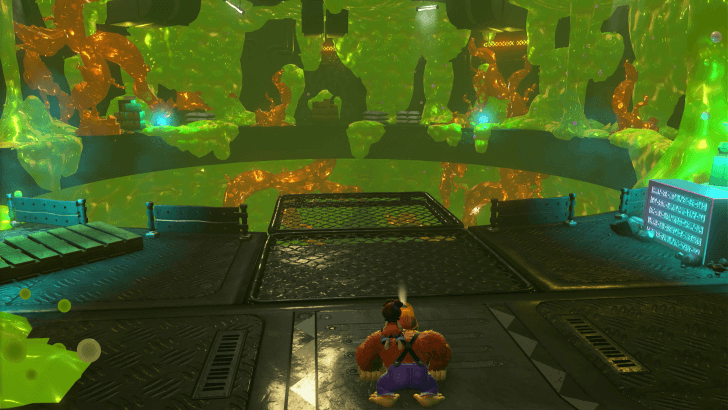
Waste-Oil Container Checkpoint (SL 1401)
Follow the path from the Cat-Scratch Kitchen to reach this checkpoint. |
||
 |
 |
|
|
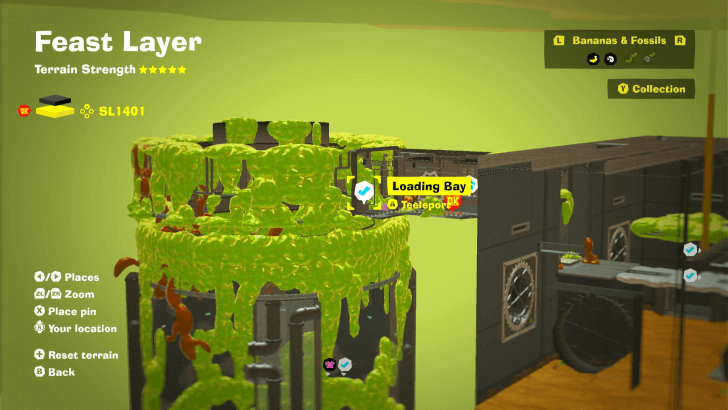
Loading Bay Checkpoint (SL 1401)
Unlocked after crossing the Waste-Oil Container. |
||
 |
 |
|
|
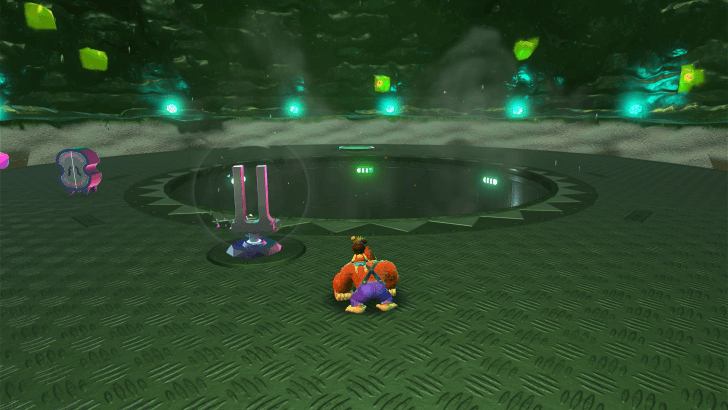
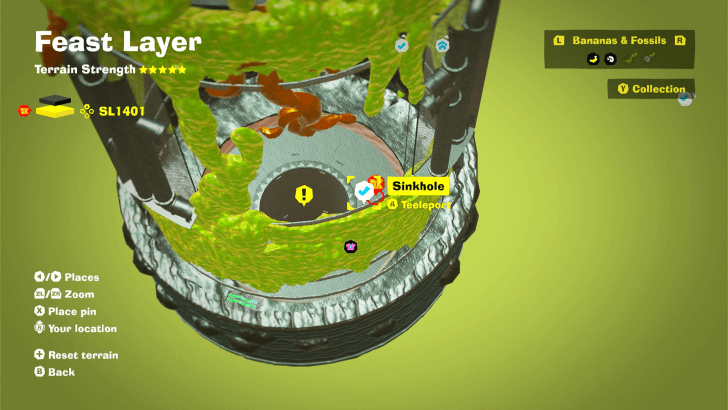
Sinkhole SL1401 Checkpoint (SL 1401)
Located below the Loading Bay. |
||
Warp Gong Location
| Layer | Overworld View | Map Location |
|---|---|---|
| SL 1400 |
 |
 |
|
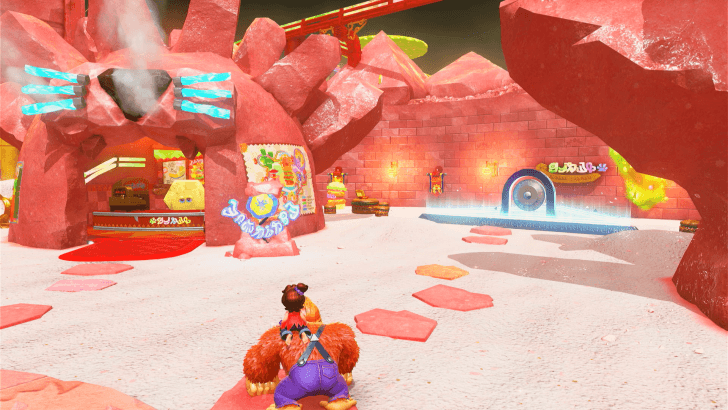
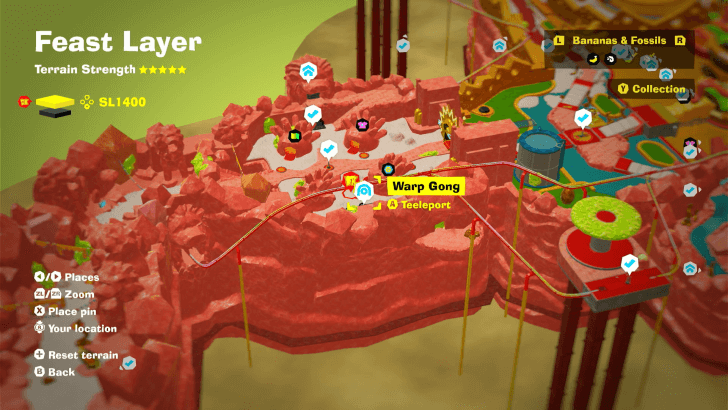
Mane Gate Market Warp Gong
Located at Mane Gate Market beside the Chip Exchange. |
||
How to Teeleport: Fast Travel Guide
Feast Layer Challenges
All Challenge Locations
| Layer | Overworld View | Map Location |
|---|---|---|
| SL 1400 |
 |
 |
|
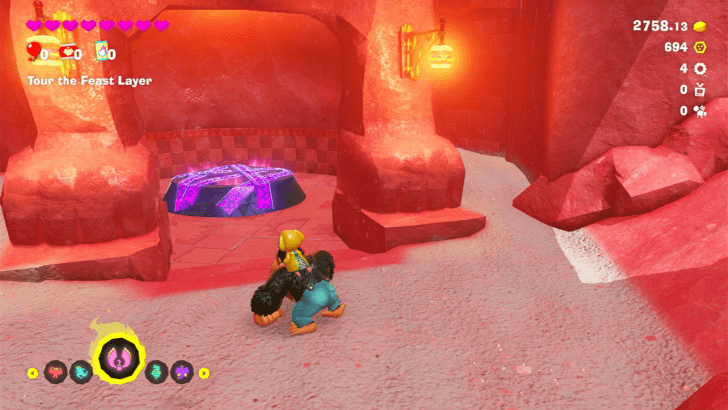
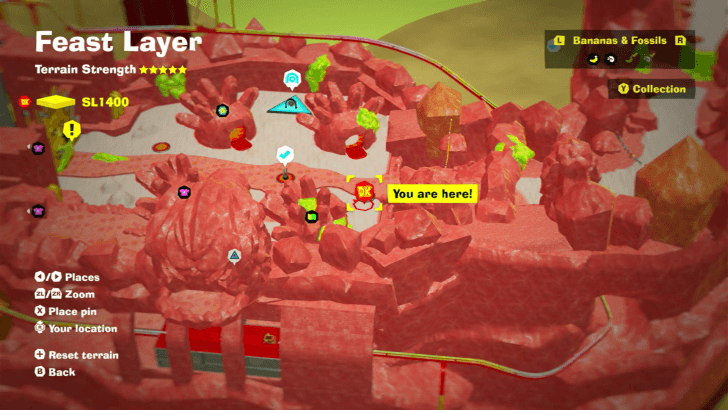
Antickoid x5 Feast Layer Battle Challenge 1 On the lower level below the Mane Gate Market. |
||
| SL 1400 |
 |
 |
|
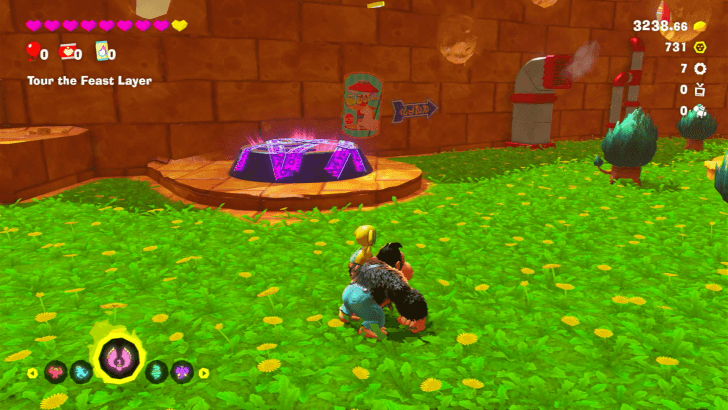
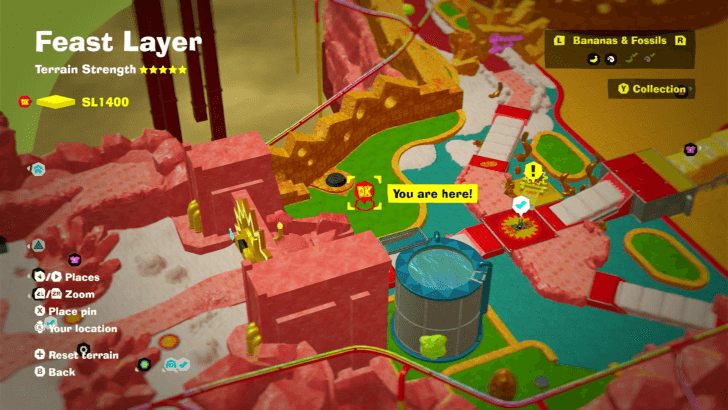
Wallopoid x10 Feast Layer Battle Challenge 2 Located east of the Tour of the Feast Layer checkpoint. |
||
| SL 1400 |
 |
 |
|
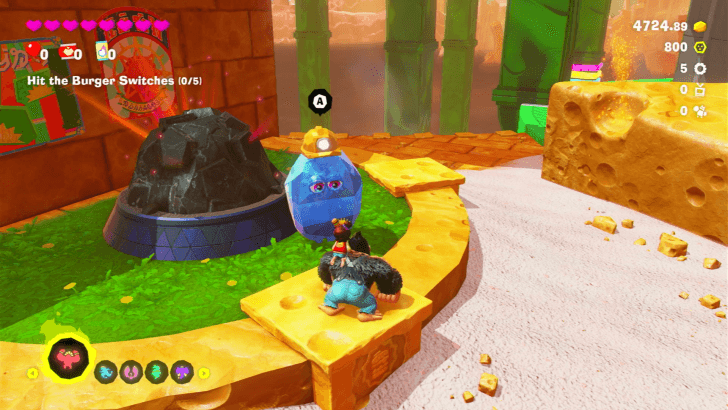
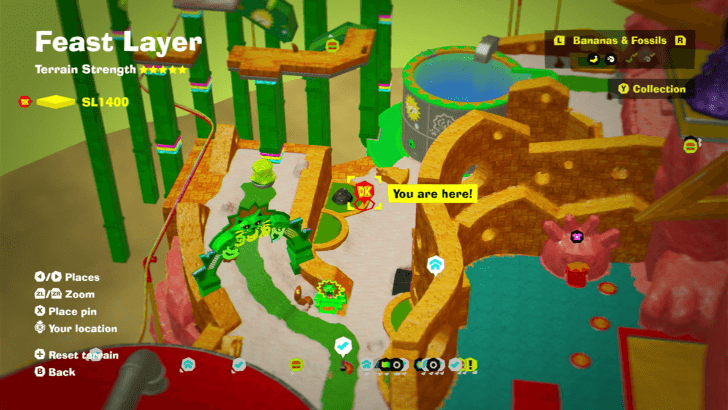
Muckoid x4 Feast Layer Battle Challenge 3 Located opposite of the Swings Getaway. Speak to the Constructone and pay 600 gold to clear the debris blocking the challenge ruin. |
||
| SL 1400 |
 |
 |
|
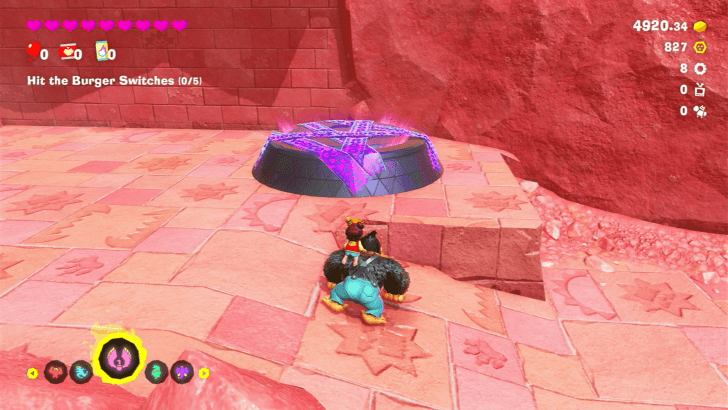
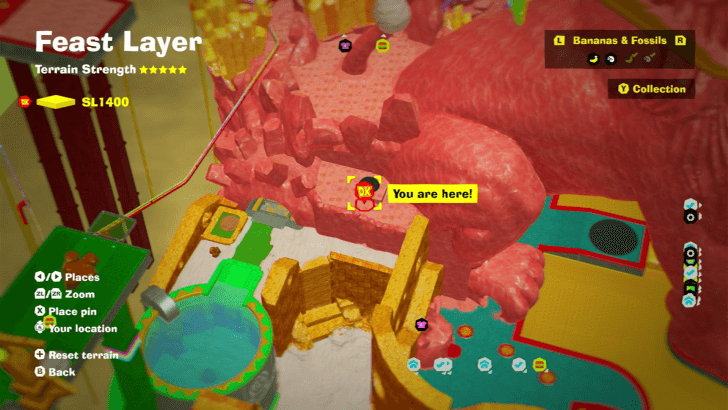
Muckoid x13 Feast Layer Battle Challenge 4 On a ledge overlooking the pool area and right before the tunnel in Kingly Swings. |
||
| SL 1400 |
 |
 |
|
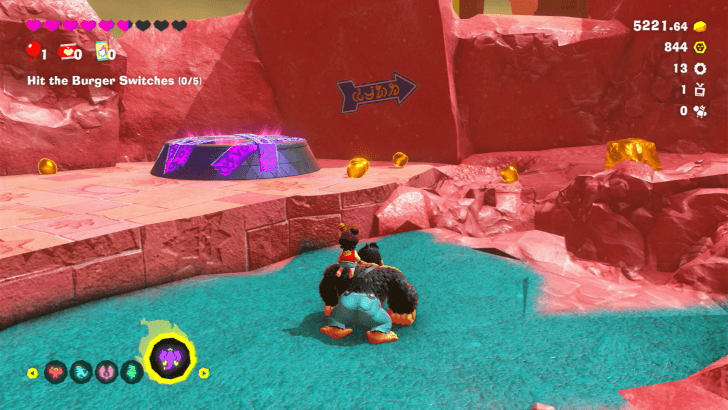
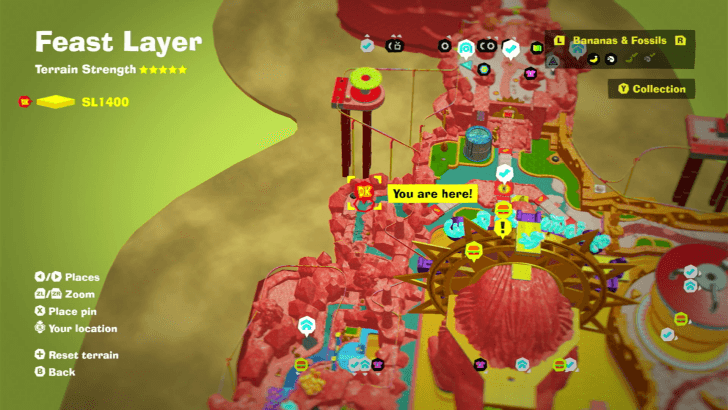
Wallopoid x5 Feast Layer Battle Challenge 5 On the side of the road north of the Refinery Getaway. |
||
| SL 1401 |
 |
 |
|
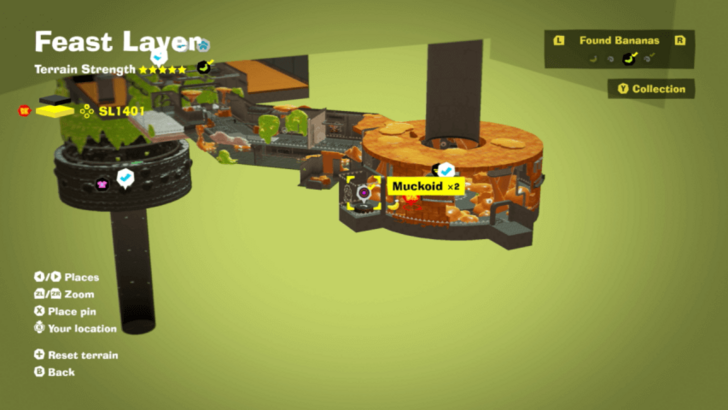
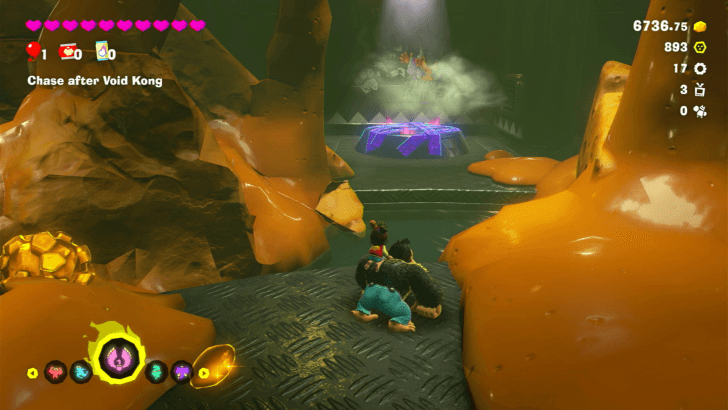
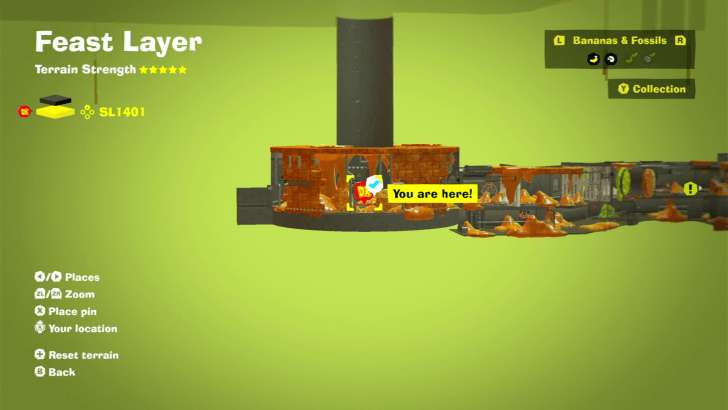
Muckoid x2 Feast Layer Battle Challenge 6 To the left of where you dropped in Cat-Scratch Kitchen. |
||
| SL 1400 |
 |
 |
|
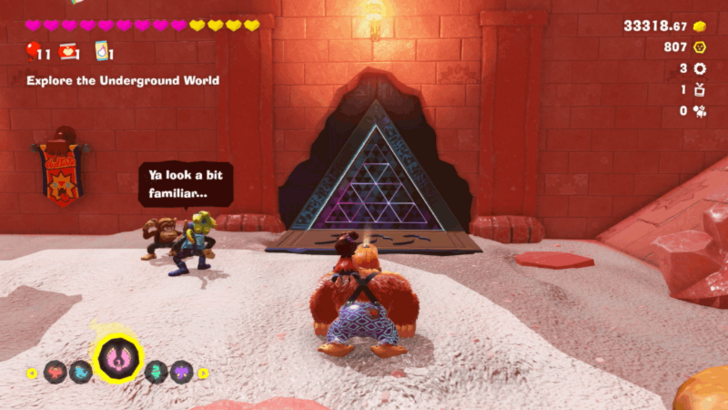
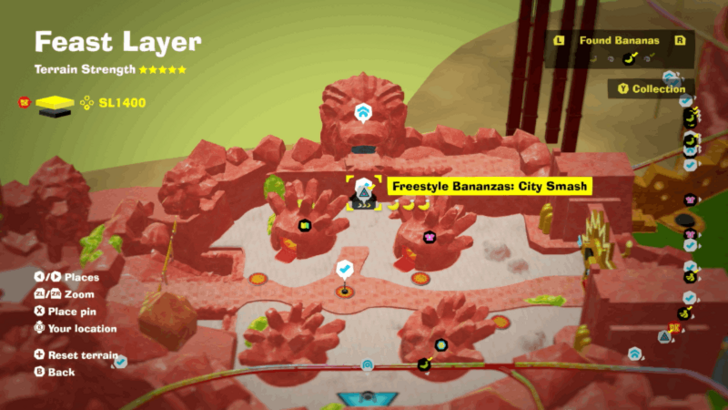
Freestyle Bananzas: City Smash Feast Layer Challenge Course 1 |
||
| SL 1400 |
 |
 |
|
The Trap-Filled Towers Feast Layer Challenge Course 2 Located to the left of the Kingly Swings checkpoint. |
||
| SL 1400 |
 |
 |
|
Branching-Track Roarcoaster Feast Layer Challenge Course 3 Located to the west of the Ferocious Fryhouse checkpoint. Speak to the Constructone and pay 600 gold to clear the debris blocking the ruins. |
||
| SL 1400 |
 |
 |
|
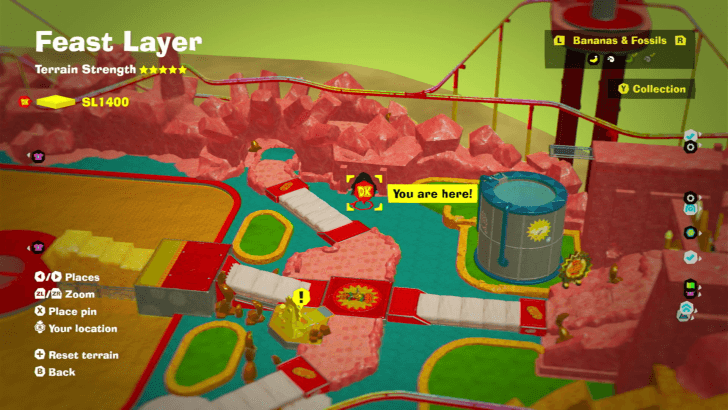
Steady Flow of Salt Feast Layer Challenge Course 4 Located west of the Tour of the Feast Layer checkpoint. |
||
| SL 1401 |
 |
 |
|
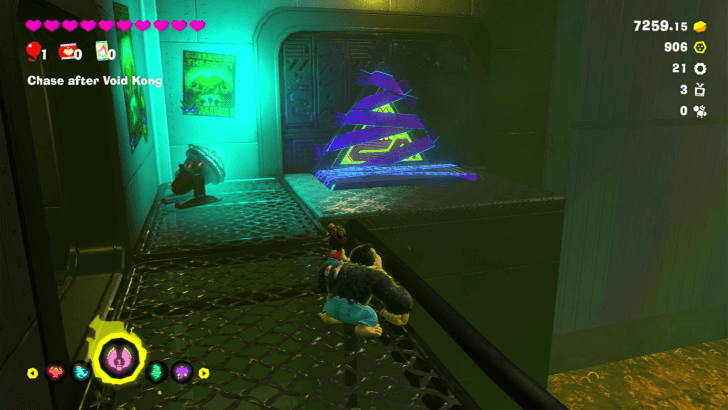
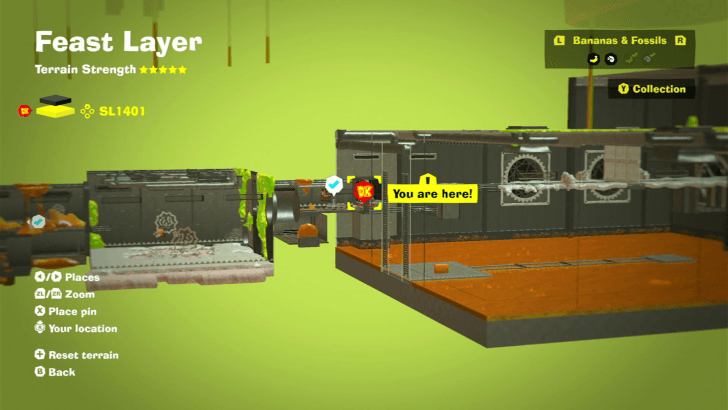
Waves of Walls Challenge Feast Layer Challenge Course 5 On the left path just past the Waste-Oil Container checkpoint. |
||
Bonus Stage Location
| Layer | Overworld View | Map Location |
|---|---|---|
| SL 1400 |
 |
|
|
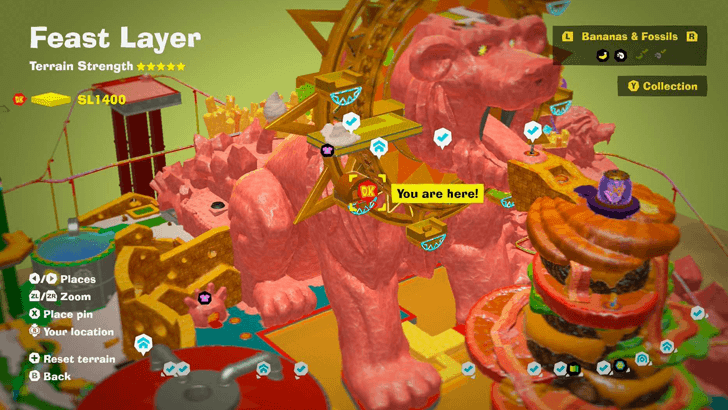
Bouncing for Gold
From the Feral Wheel checkpoint, break the wall straight ahead and drop down the hole. You'll need to clear the void to break the wall. |
||
Feast Layer Shops
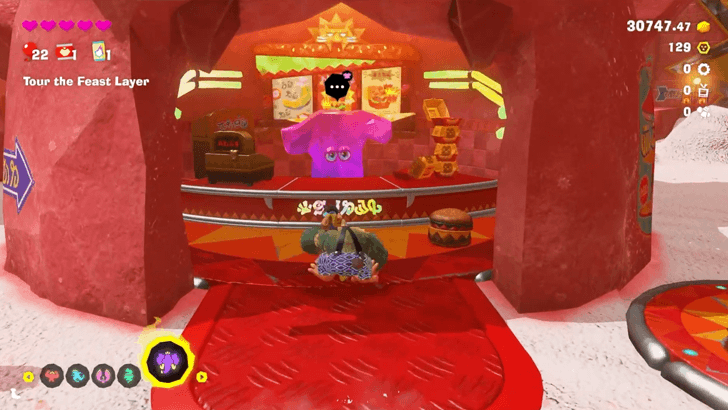
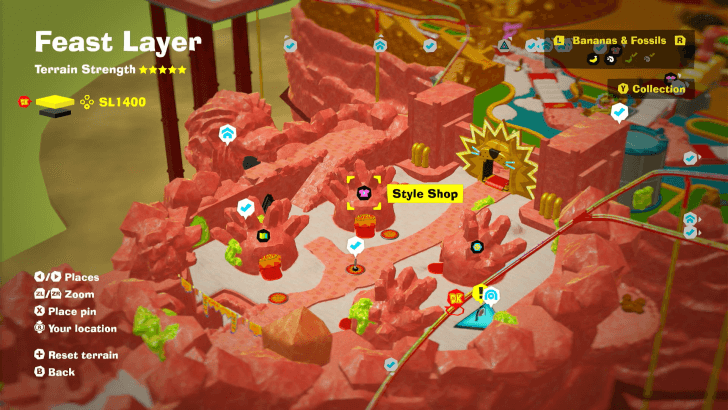
Feast Layer Style Shop
Style Shop Locations
| Layer | Overworld View | Map Location |
|---|---|---|
| SL 1400 |
 |
 |
|
Mane Gate Market Style Shop
Located in the Mane Gate Market near the starting point of the Feast Layer and the Warp Gong. |
||
| SL 1400 |
 |
 |
|
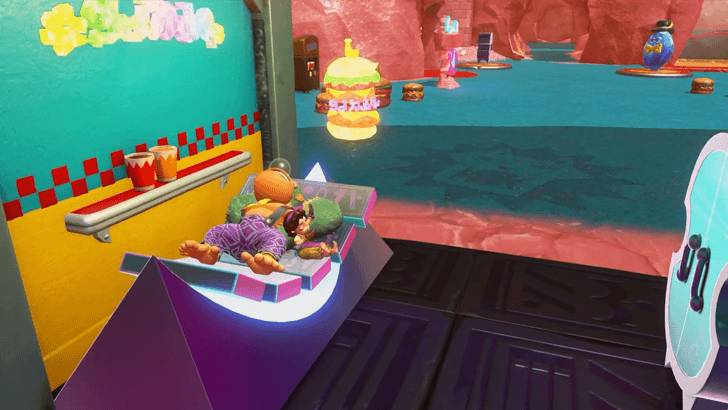
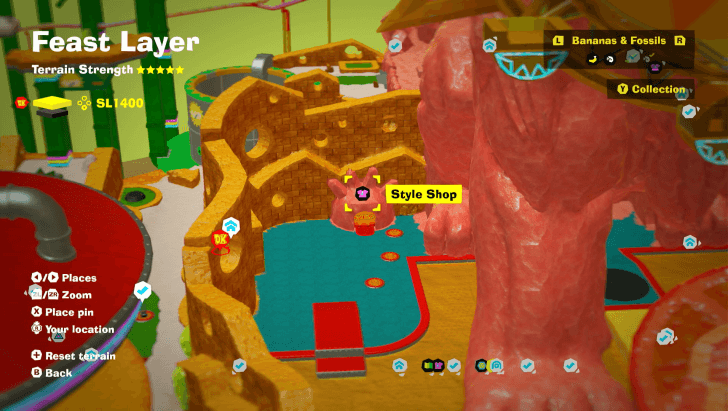
Kingly Swings Style Shop
Found near the Kingly Swings checkpoint below the Feral Wheel. |
||
| SL 1400 |
 |
 |
|
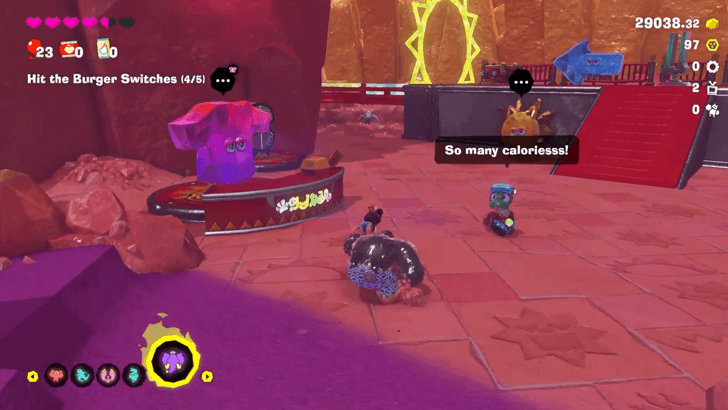
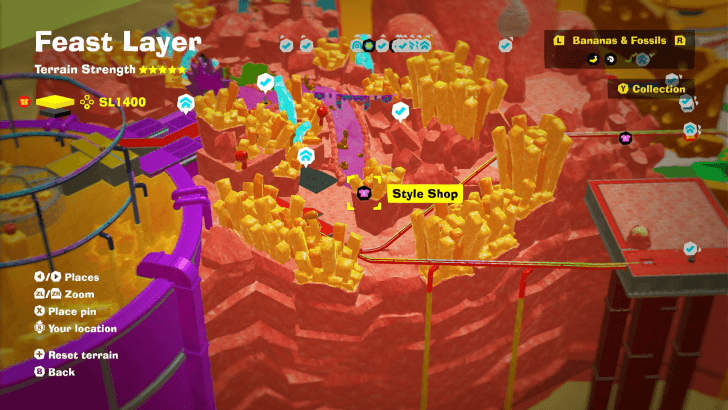
Ferocious Fryhouse Station Style Shop
Found near the Ferocious Fryhouse Station checkpoint. |
||
| SL 1401 |
 |
 |
|
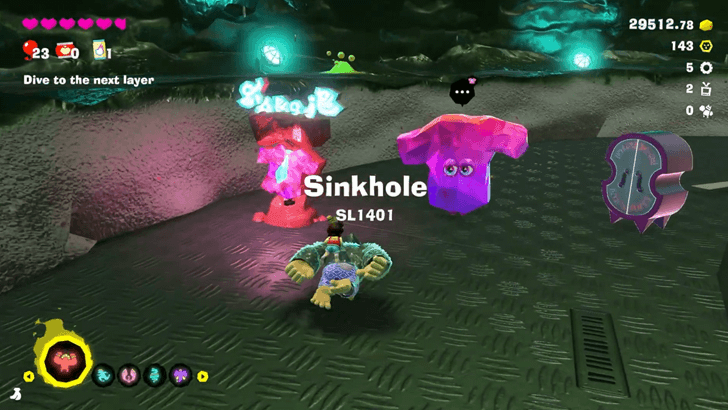
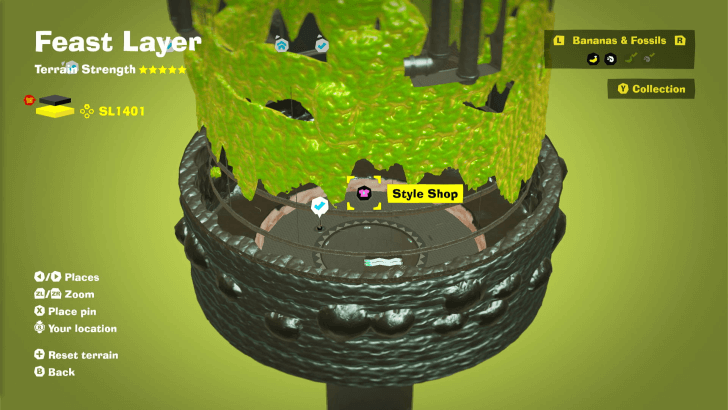
Loading Bay Sinkhole Style Shop
|
||
Available Outfits
| Name | Type | Cost | Effect | |||||||
|---|---|---|---|---|---|---|---|---|---|---|
|
|
Britches |
|
Reduces shock damage from electrified iron or muck by 10 percent. | |||||||
|
|
Britches |
|
Reduces shock damage from electrified iron or muck by 20 percent. | |||||||
|
|
Neckwear |
|
Pressing Y to eat any foods or food-based terrain (not just fruit) will recover your health. | |||||||
|
|
Pauline Outfits |
|
During Bananzas, your health will gradually recover. | |||||||
|
|
Pauline Outfits |
|
During Bananzas, your health will gradually recover. | |||||||
|
|
Pauline Outfits |
|
During Bananzas, your health will gradually recover. | |||||||
|
|
Fur Color |
|
Deep and calming, like the serenity of midnight. | |||||||
|
|
Fur Color |
|
Hearty and colorful, like a midly sweet tropical fruit. | |||||||
Stuff Shop Location
| Layer | Overworld View | Map Location |
|---|---|---|
| SL 1400 |
 |
 |
|
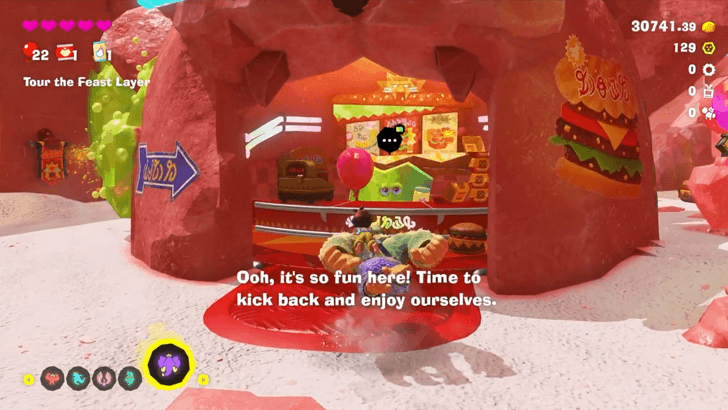
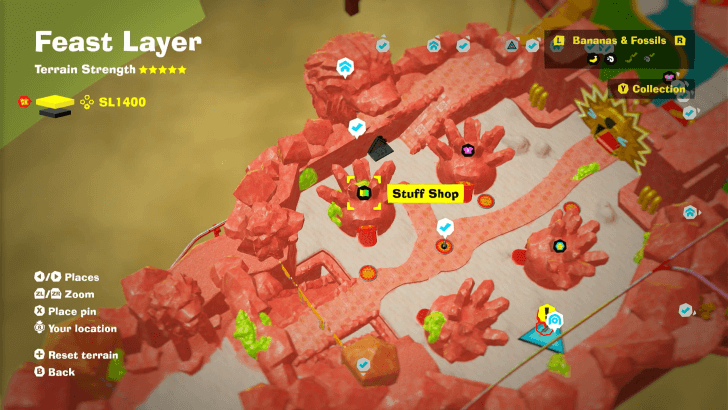
Mane Gate Market Stuff Shop
Located in the Mane Gate Market near the starting point of the Feast Layer and the Warp Gong. |
||
Chip Exchange Location
| Layer | Overworld View | Map Location |
|---|---|---|
| SL 1400 |
 |
 |
|
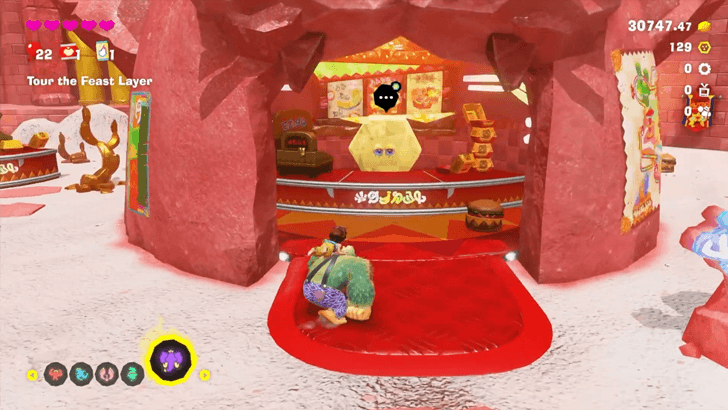
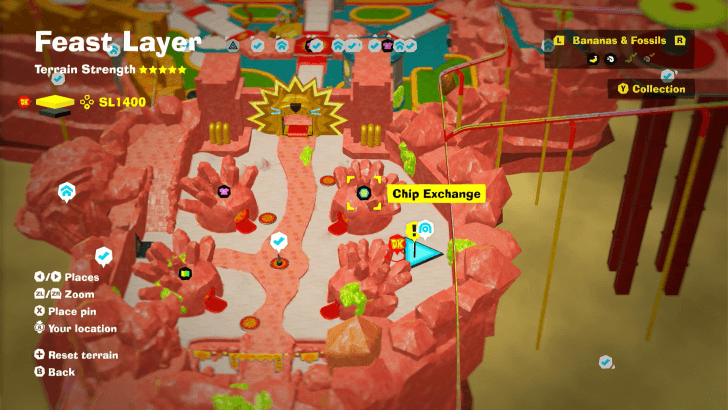
Mane Gate Market Chip Exchange
Located in the Mane Gate Market near the starting point of the Feast Layer and the Warp Gong. |
||
Feast Layer Void Stakes
Void Stake Locations
| Layer | Overworld View | Map Location |
|---|---|---|
| SL 1400 |
 |
 |
|
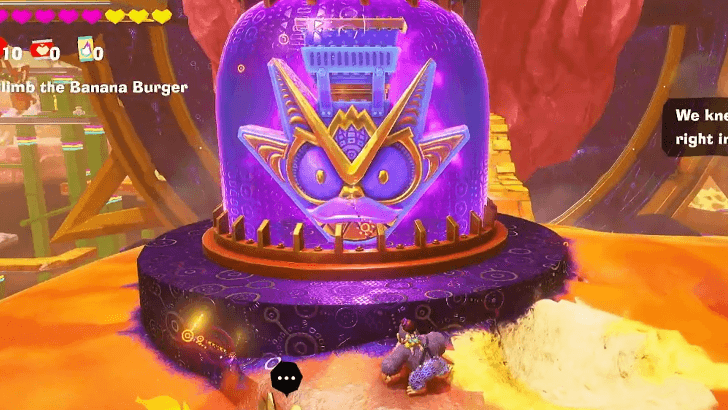
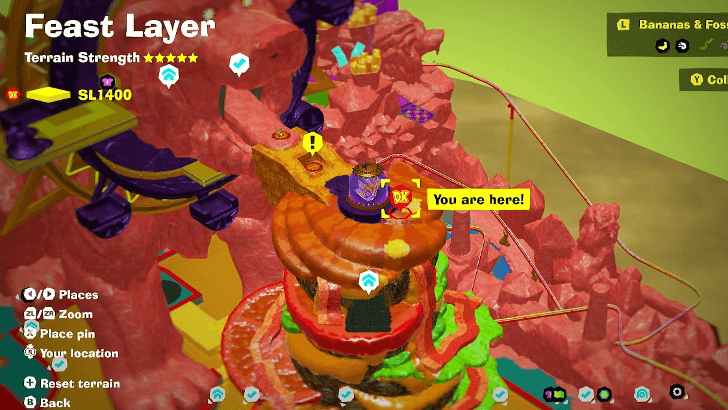
Banana Burger Void Stake
At the top of the Banana Burger |
||
| SL 1401 |
 |
 |
|
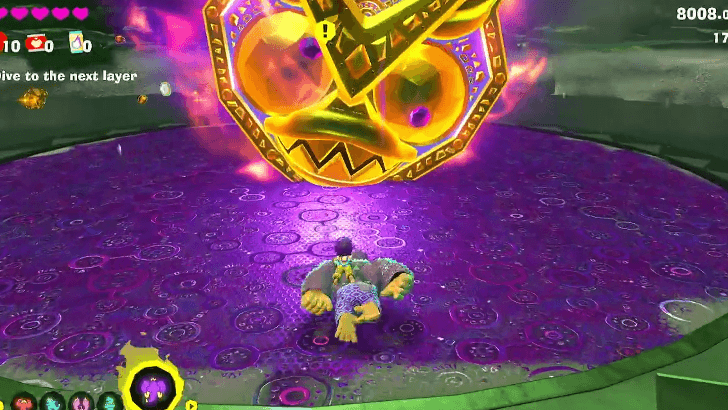
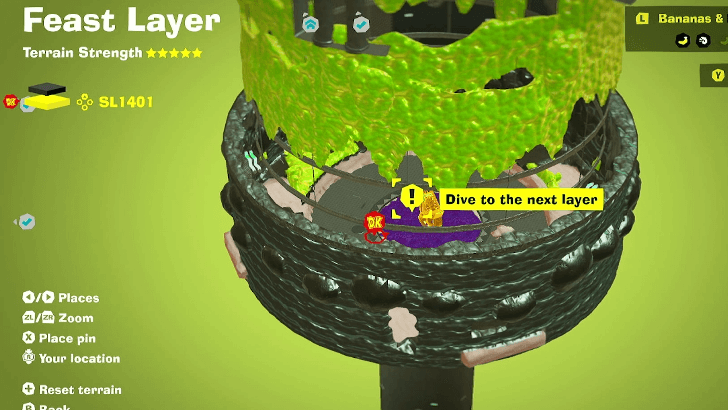
Waste-Oil Container Void Stake
Revealed after defeating Muckety-Muck. |
||
Cranky Kong Location
Behind a Waterfall in SL 1401
| Map / Overworld Image | Video Directions |
|---|---|
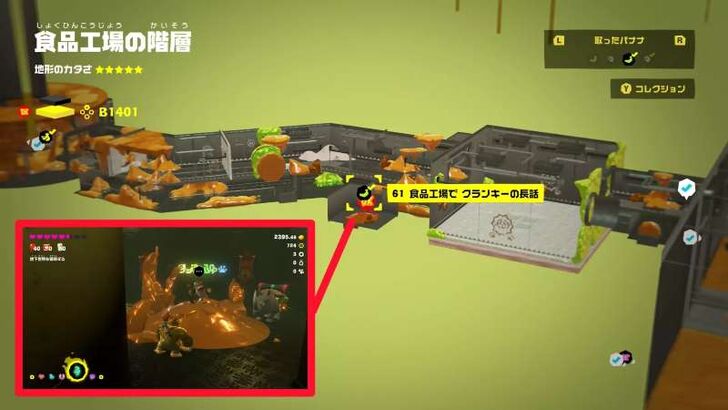 |
In SL1401’s big slime-filled room, turn around from the entrance, smash the pallet, and drop into a hidden tunnel.
Feast Layer Getaways
All Getaway Locations
| Map Location | Overworld Image |
|---|---|
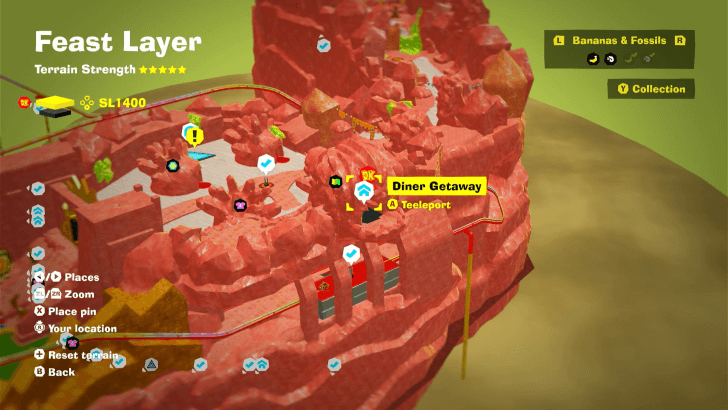 Feast Layer (SL 1400) |
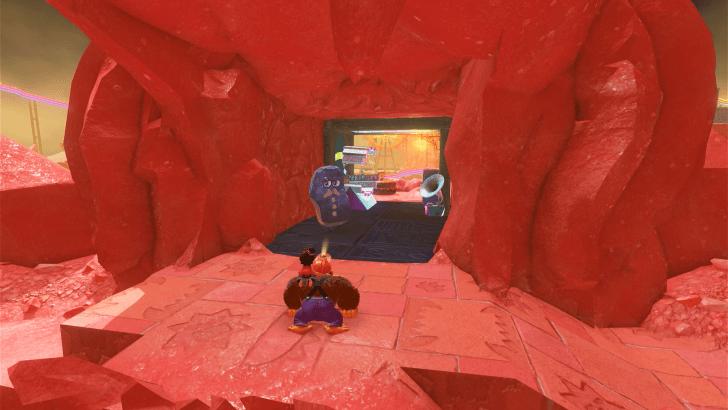 Diner Getaway |
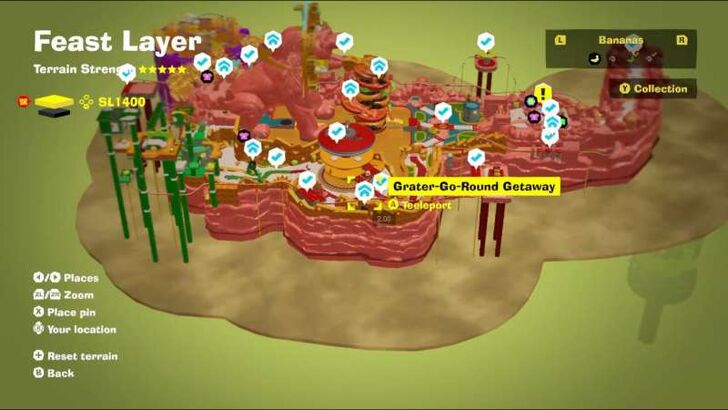 Feast Layer (SL 1400) |
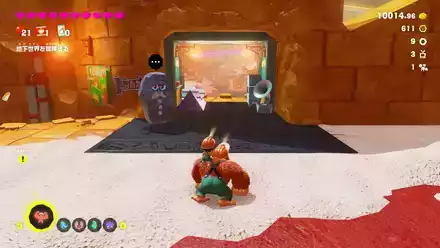 Grater-Go-Round Getaway |
 Feast Layer (SL 1400) |
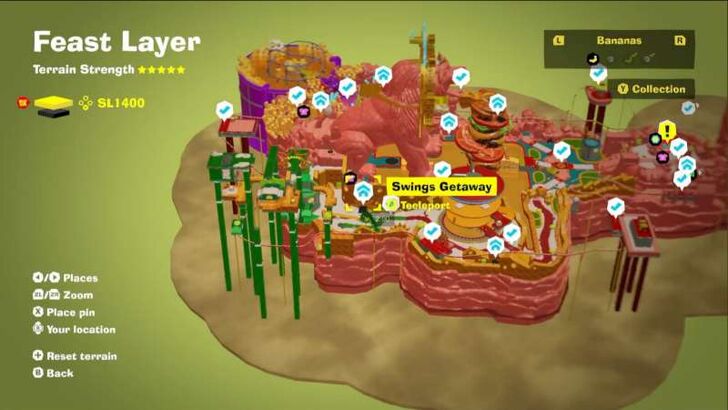
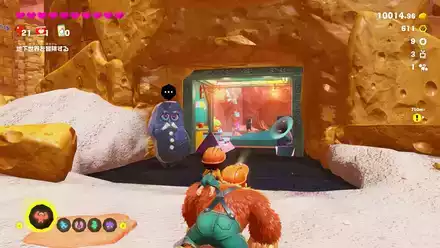 Swings Getaway |
 Feast Layer (SL 1400) |
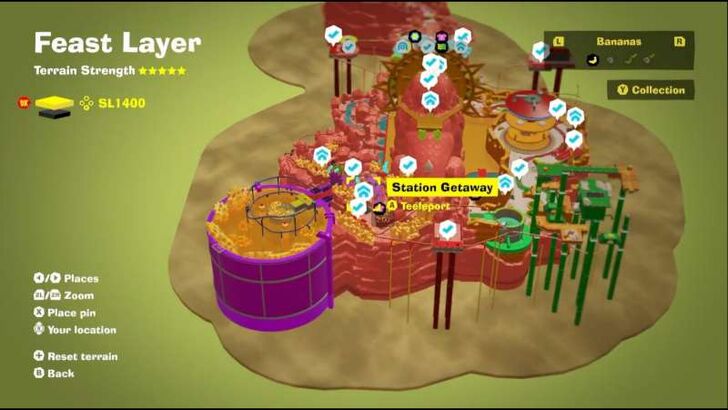
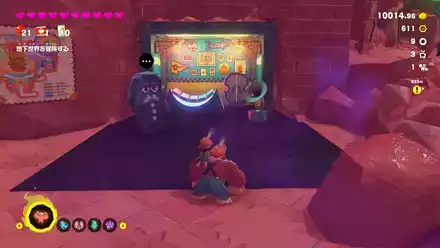 Station Getaway |
 Feast Layer (SL 1400) |
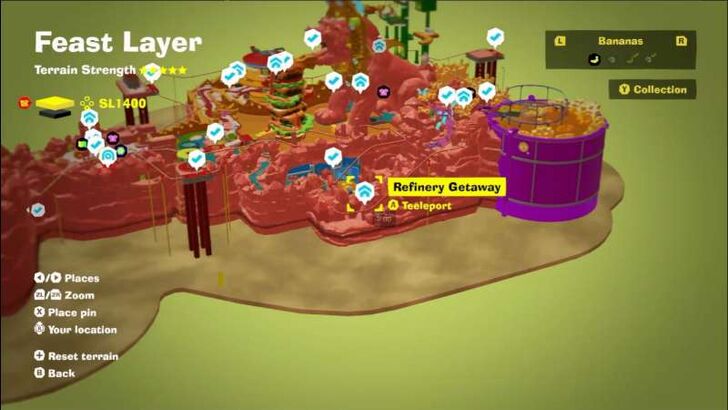
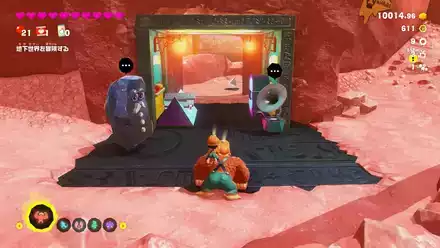 Refinery Getaway |
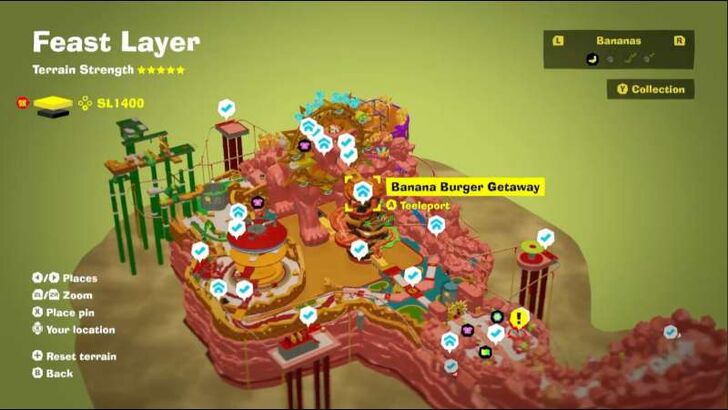
 Feast Layer (SL 1400) |
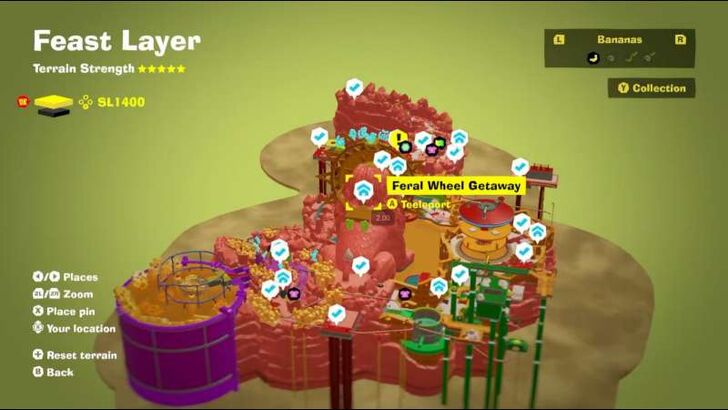
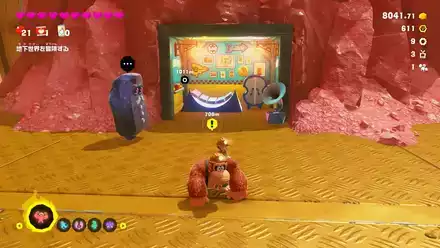 Feral Wheel Getaway |
 Feast Layer (SL 1400) |
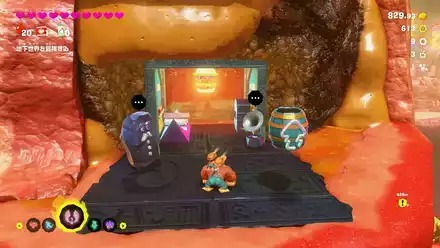 Banana Burger Getaway |
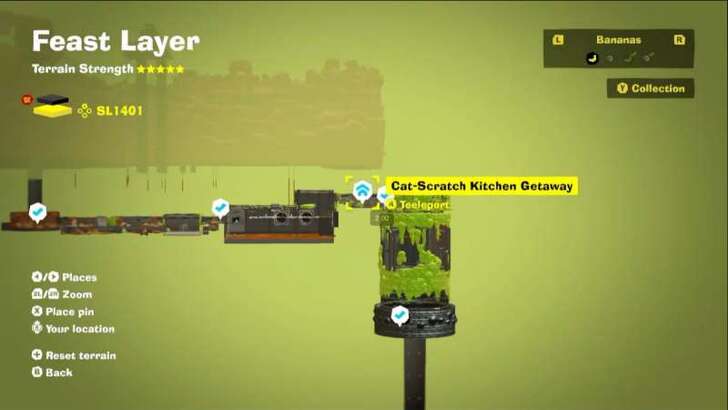 Feast Layer (SL 1401) |
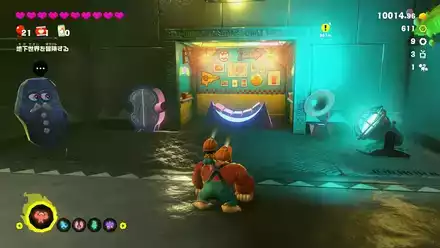 Cat-Scratch Kitchen Getaway |
Getaway Guide: All Getaway Locations
Donkey Kong Bananza Related Guides
All Layers
Author
Feast Layer Banana and Fossil Locations (SL 1400-1401)
improvement survey
04/2026
improving Game8's site?

Your answers will help us to improve our website.
Note: Please be sure not to enter any kind of personal information into your response.

We hope you continue to make use of Game8.
Rankings
- We could not find the message board you were looking for.
Gaming News
Popular Games

Genshin Impact Walkthrough & Guides Wiki

Crimson Desert Walkthrough & Guides Wiki

Umamusume: Pretty Derby Walkthrough & Guides Wiki

Honkai: Star Rail Walkthrough & Guides Wiki

Monster Hunter Stories 3: Twisted Reflection Walkthrough & Guides Wiki

Wuthering Waves Walkthrough & Guides Wiki

The Seven Deadly Sins: Origin Walkthrough & Guides Wiki

Pokemon TCG Pocket (PTCGP) Strategies & Guides Wiki

Pokemon Pokopia Walkthrough & Guides Wiki

Zenless Zone Zero Walkthrough & Guides Wiki
Recommended Games

Monster Hunter World Walkthrough & Guides Wiki

Fire Emblem Heroes (FEH) Walkthrough & Guides Wiki

Pokemon Brilliant Diamond and Shining Pearl (BDSP) Walkthrough & Guides Wiki

Super Smash Bros. Ultimate Walkthrough & Guides Wiki

Diablo 4: Vessel of Hatred Walkthrough & Guides Wiki

Cyberpunk 2077: Ultimate Edition Walkthrough & Guides Wiki

Yu-Gi-Oh! Master Duel Walkthrough & Guides Wiki

Elden Ring Shadow of the Erdtree Walkthrough & Guides Wiki

The Legend of Zelda: Tears of the Kingdom Walkthrough & Guides Wiki

Persona 3 Reload Walkthrough & Guides Wiki
All rights reserved
© Nintendo. Games are property of their respective owners. Nintendo of America Inc.
The copyrights of videos of games used in our content and other intellectual property rights belong to the provider of the game.
The contents we provide on this site were created personally by members of the Game8 editorial department.
We refuse the right to reuse or repost content taken without our permission such as data or images to other sites.

 Ingot Isle
 Lagoon Layer
 Hilltop Layer
 Canyon Layer
 The Divide
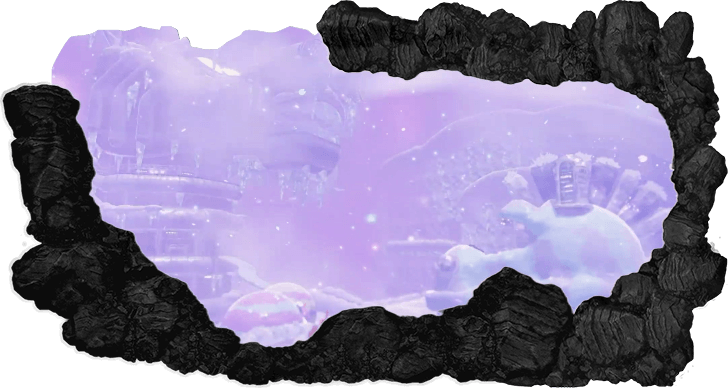 Freezer Layer
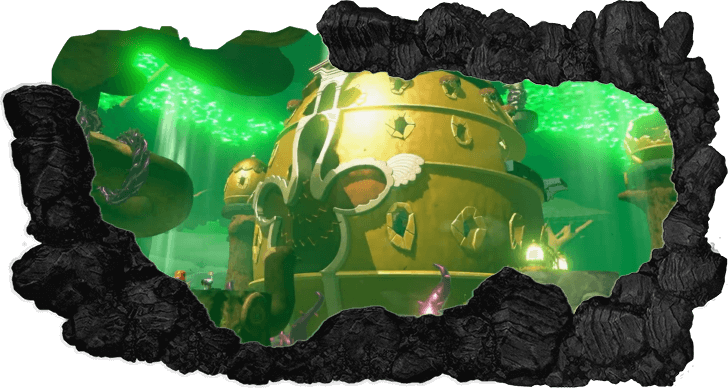 Forest Layer
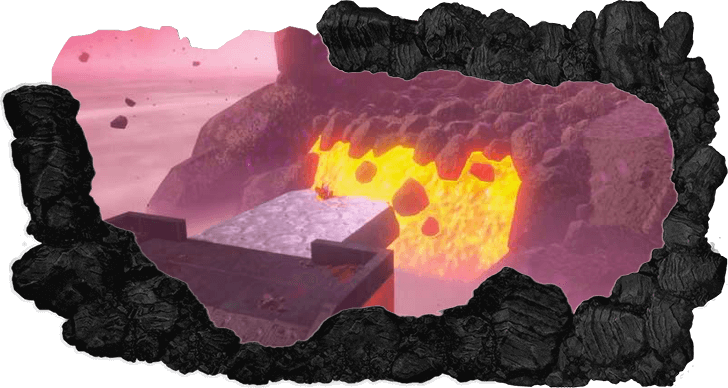 The Junction
 Resort Layer
 Tempest Layer
 Landfill Layer
 Racing Layer
 Radiance Layer
 Groove Layer
 Feast Layer
 Forbidden Layer
 Planet Core
 DK Island


![Forza Horizon 6 Review [Preview] | Beautiful Roads With a Whole Lot of Oversteer](https://img.game8.co/4460981/a7254c24945c43fbdf6ad9bea52b5ce9.png/show)


![Forza Horizon 6 Review [Preview] | Beautiful Roads With a Whole Lot of Oversteer](https://img.game8.co/4460981/a7254c24945c43fbdf6ad9bea52b5ce9.png/thumb)


hey number 34 is a bit above on the cliffside. the map is wrong.