Canyon Layer Banana and Fossil Locations (SL 300-302)
☽ DK Island and Emerald Rush DLC out now!
☽ Learn how to solve Banandiumtone's Puzzles.
☽ All Collectibles: Banandium Gems and Fossils
☽ Learn How to Skip Layers Entirely!
☽ How to Beat the Final Boss
☽ Post-Game: Rehearsal Halls | Secret Ending
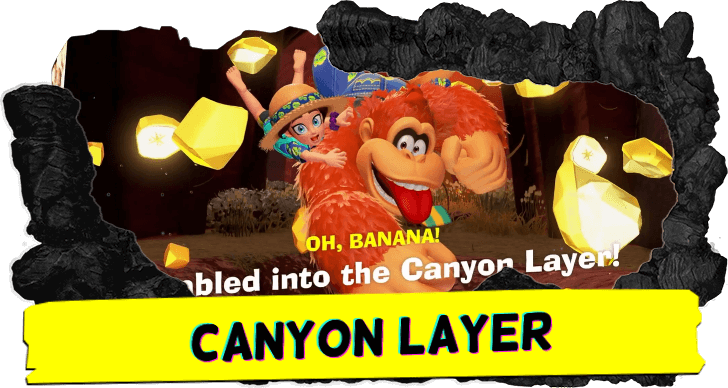
Canyon Layer is the fourth layer in Donkey Kong Bananza. Check out where to find the locations of all Canyon Layer Bananas, fossils, and other collectibles in this level!
| Canyon Layer Guides | |
|---|---|
| Walkthrough | Collectibles |
List of Contents
Canyon Layer Collectibles Overview
List of Collectibles
| Banandium Gems | Total: 80
・SL 300: 60 ・SL 301: 19 ・SL 302: 1 |
|---|---|
| Fossils | Total: 72
|
| Checkpoints | Total: 7 |
| Challenges | Total: 11 |
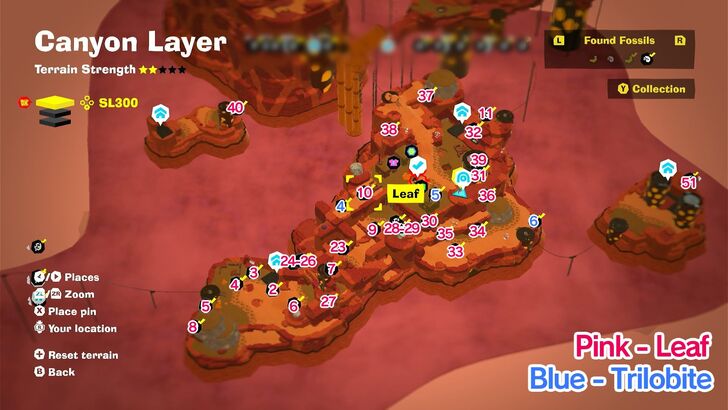
There are 80 bananas and 72 fossils available in Canyon Layer.
Canyon Layer Bananas
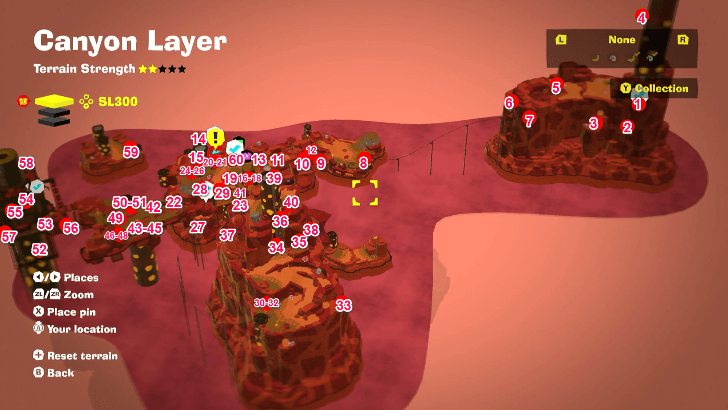
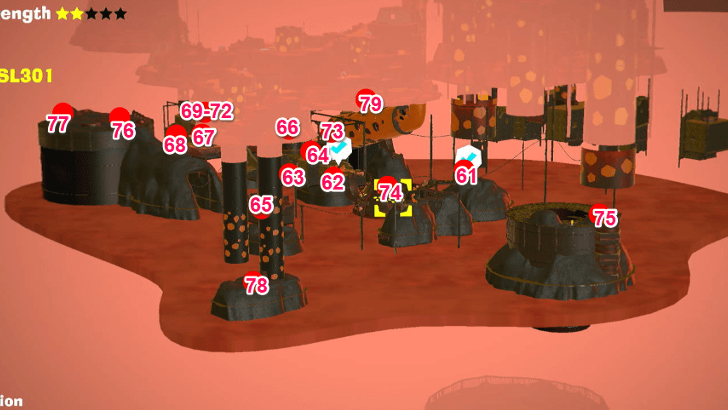
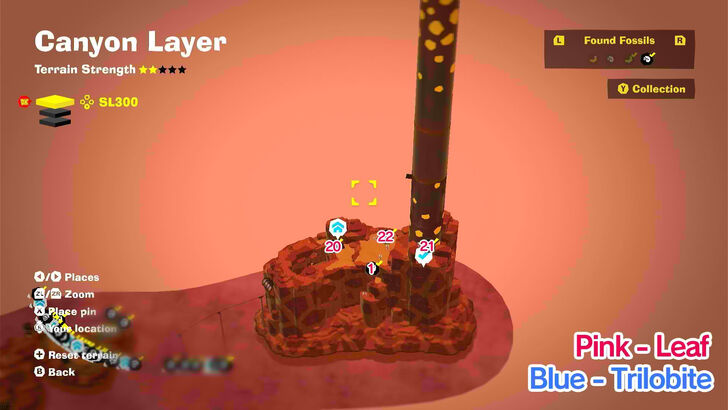
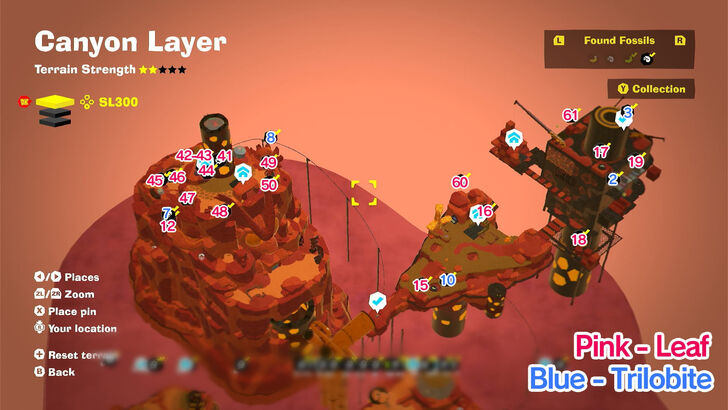
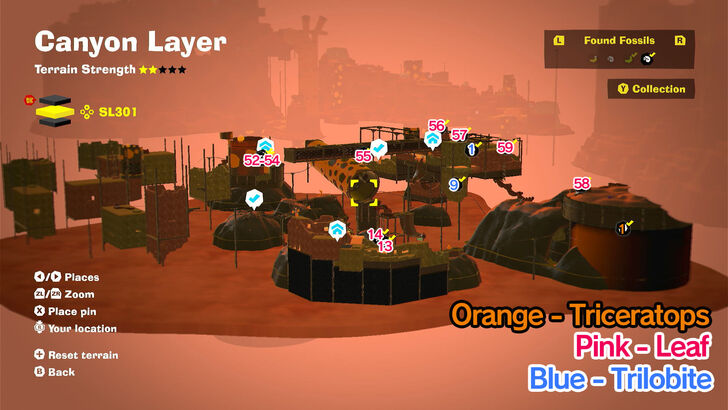
Banandium Gems Map Overview
SL 300 Banana Locations
| Overworld View | Map Location | |
|---|---|---|
| 01 |
 |
 |
|
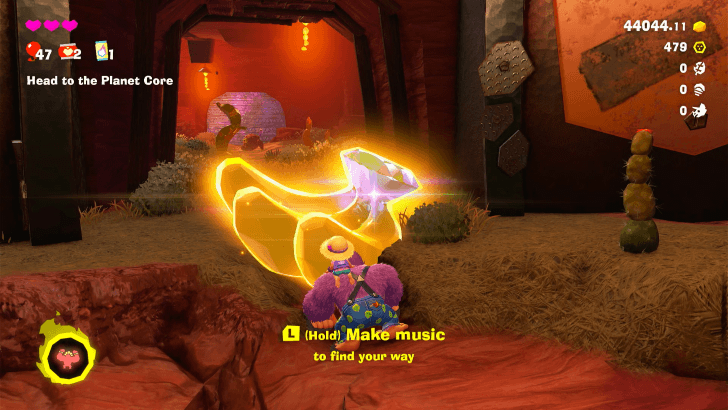
Found with story progression. |
||
| 02 |
 |
 |
|
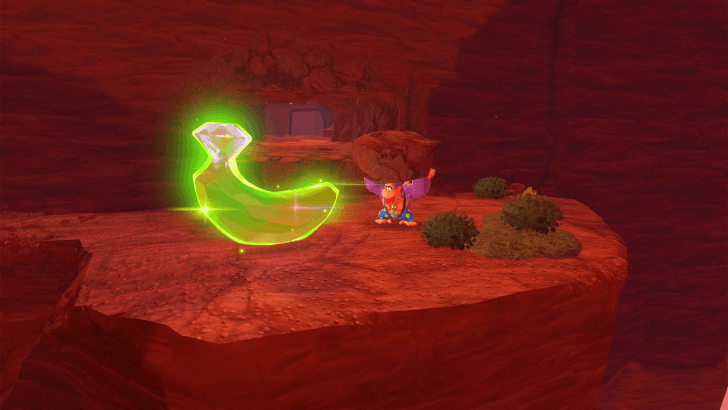
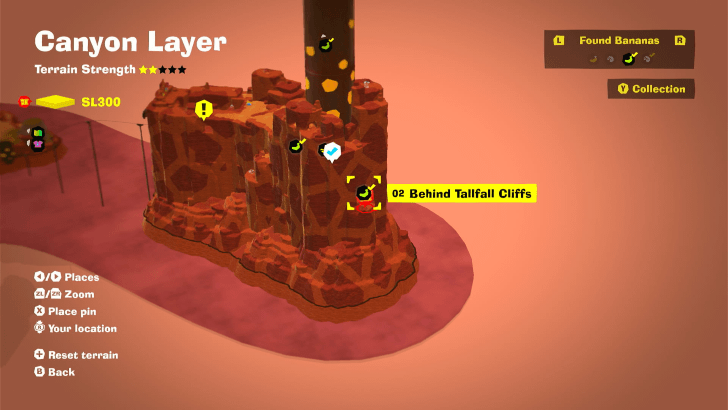
Found on one of the ledges of the narrow end of Tallfall Cliffs. You can drop from the smokestack above, or dig down and out from the Tallfall Cliffs checkpoint. |
||
| 03 |
 |
 |
|
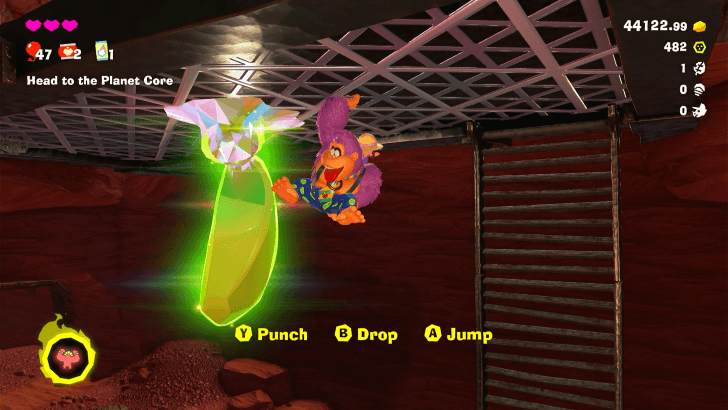
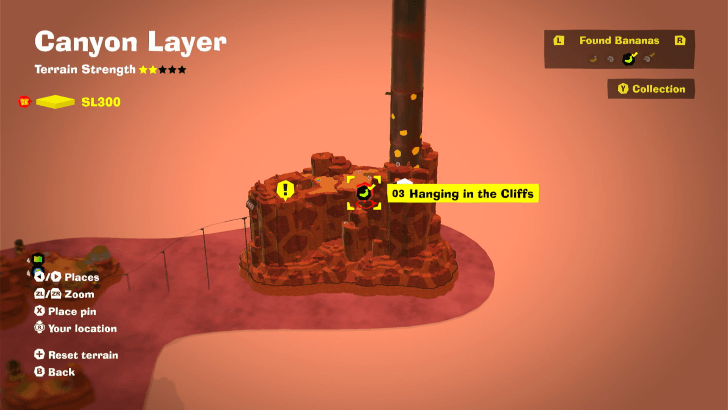
In a room near the entrance to the layer, dig to reach the Banandium Gem. |
||
| 04 |
 |
 |
|
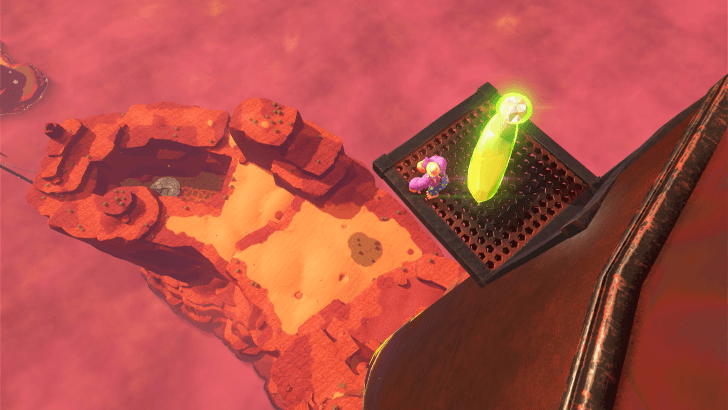
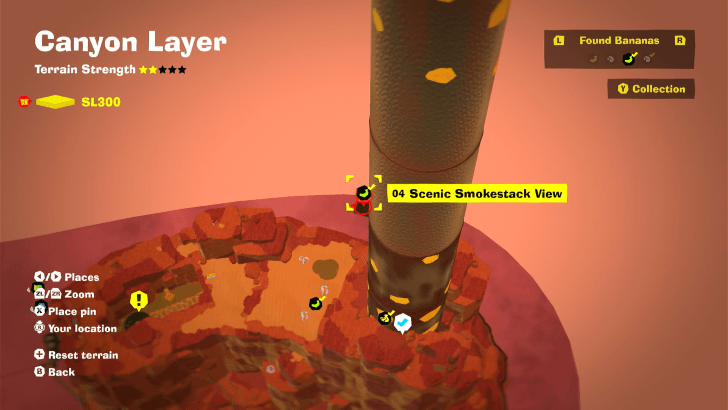
Near the top of the tall smokestack on the same island that you first arrive on in the Canyon Layer. |
||
| 05 |
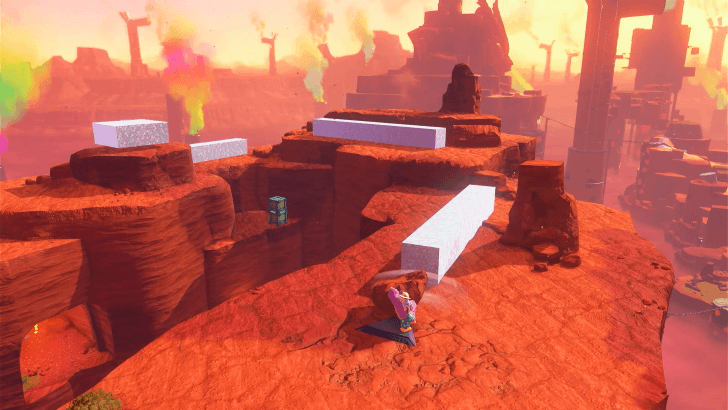 |
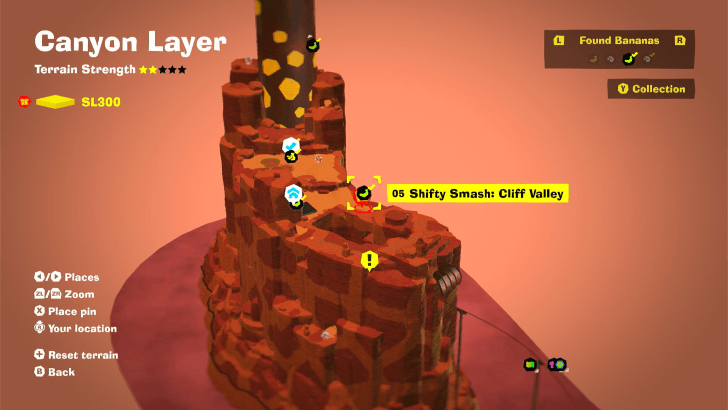 |
|
Found near the Tallfall Cliffs Getaway on the top surface of the Tallfall Cliffs. This is a Shifty Smash Challenge that requires you to clear 4 sections of Shifty Stone in 20 seconds. When completed, the Gem appears nearby. |
||
| 06 |
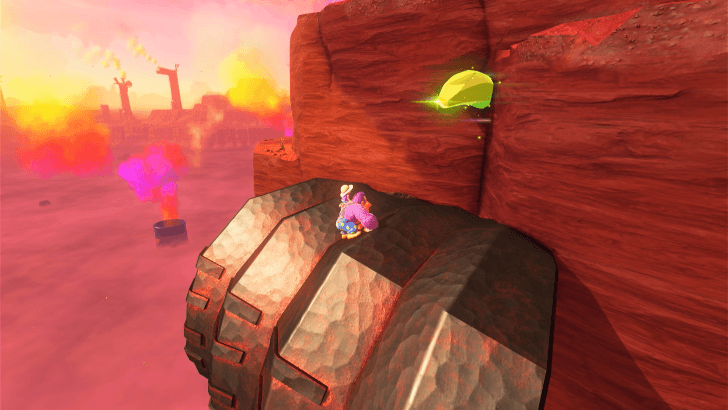 |
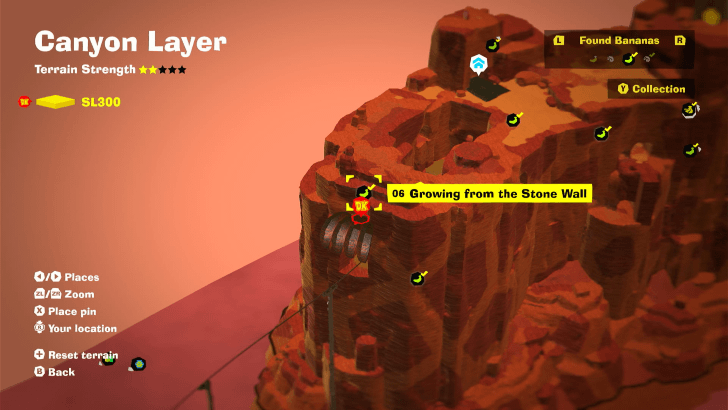 |
|
Found just outside and above the entrance of the minecart room of Tallfall Cliffs. This gem is partially exposed, so it should be easy to find. |
||
| 07 |
 |
 |
|
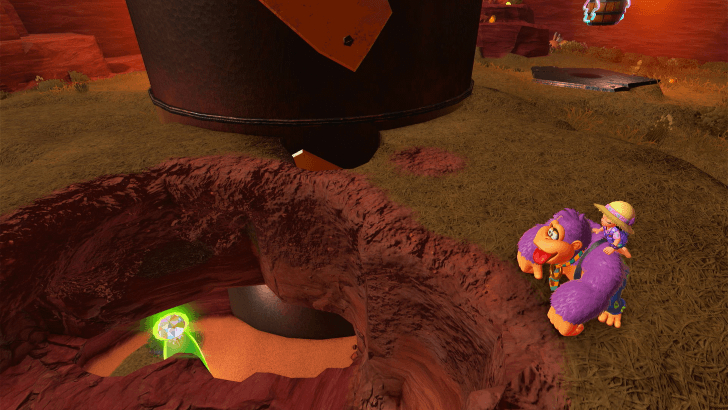
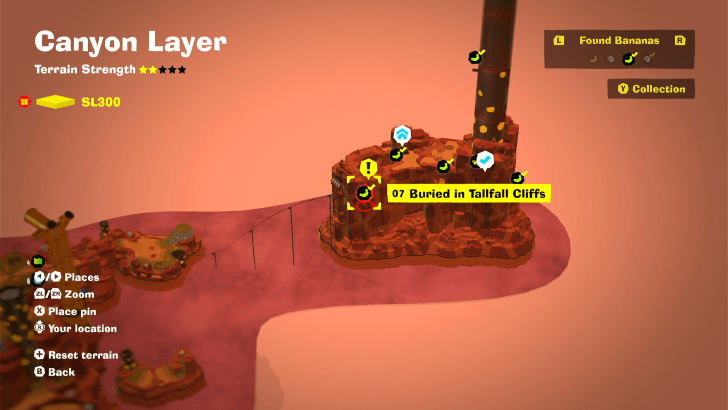
Found buried in the room beneath the minecart room in Tallfall Cliffs. It should be detectable with Hand Slaps from near where the barrel cannon is. |
||
| 08 |
 |
 |
|
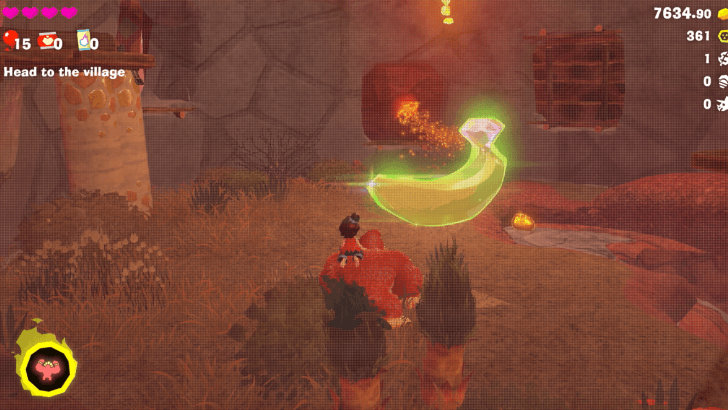
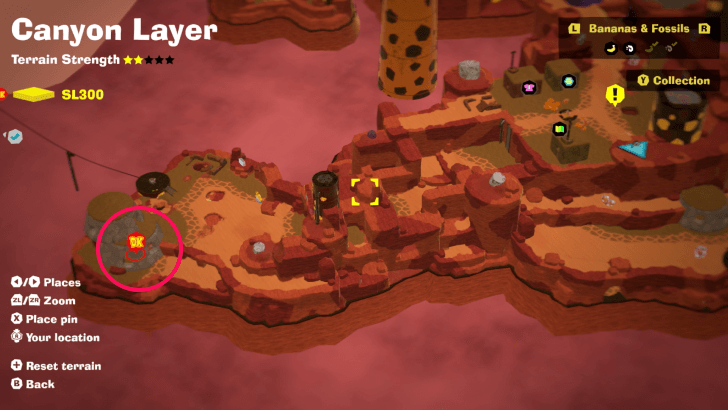
Found inside a house on the island with Longneck Plateau Village, on the edge close to the entrance to the layer. |
||
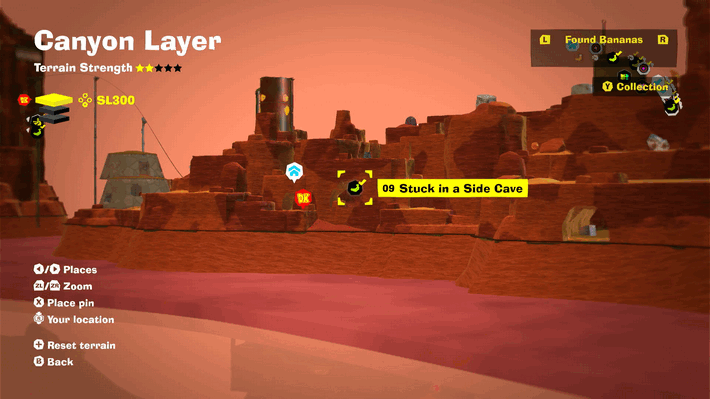
| 09 |
 |
|
|
Found jammed in the wall near a getaway. |
||
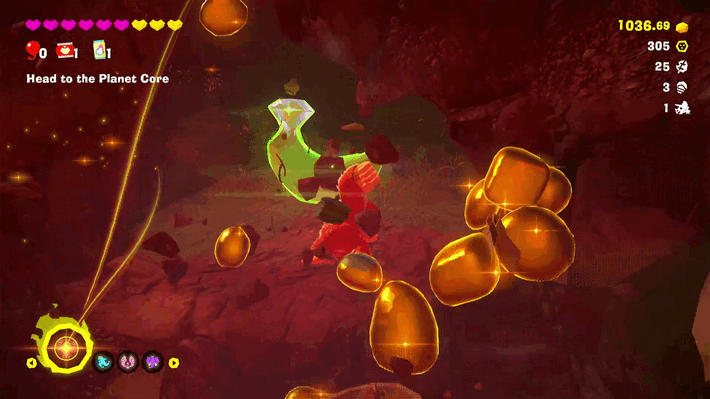
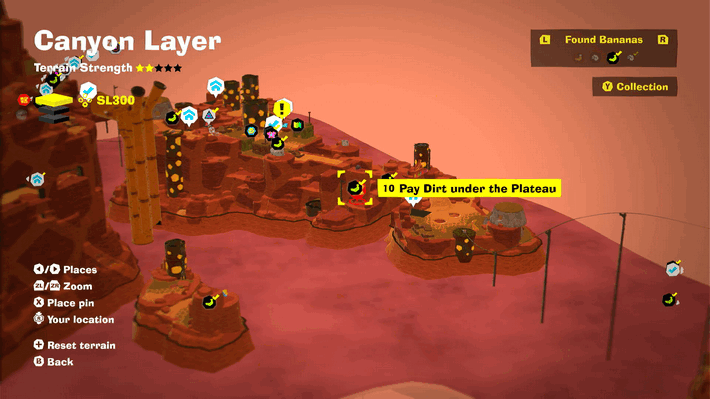
| 10 |
 |
 |
|
Dig down the terrain in the middle of the hill to get a Banandium Gem. |
||
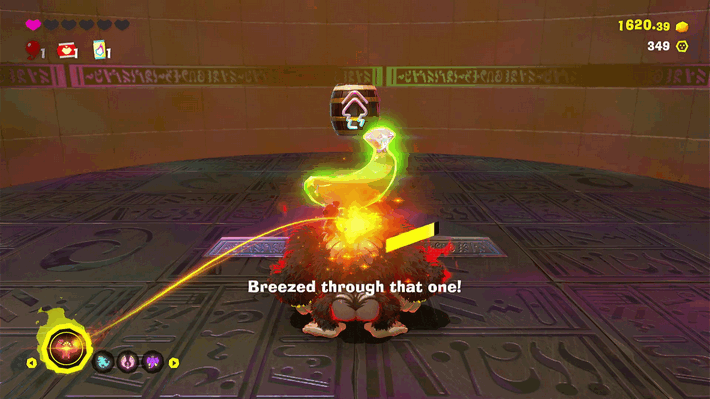
| 11 |
 |
 |
|
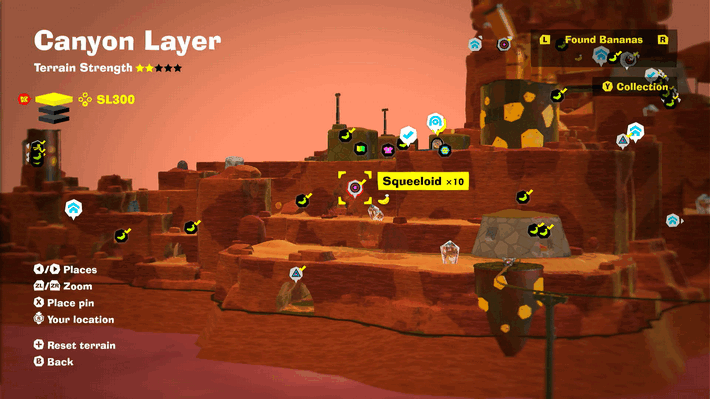
Enter the manhole found behind the terrain and defeat ten Squeeloids. |
||
| 12 |
 |
|
|
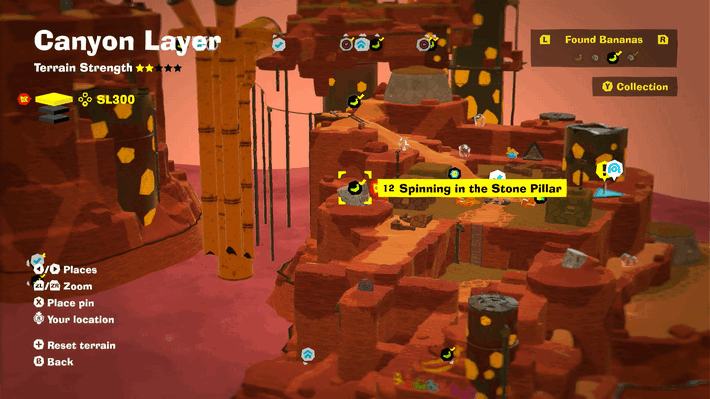
Destroy the revolving pillar to reveal a Banandium Gem. |
||
| 13 |
 |
 |
|
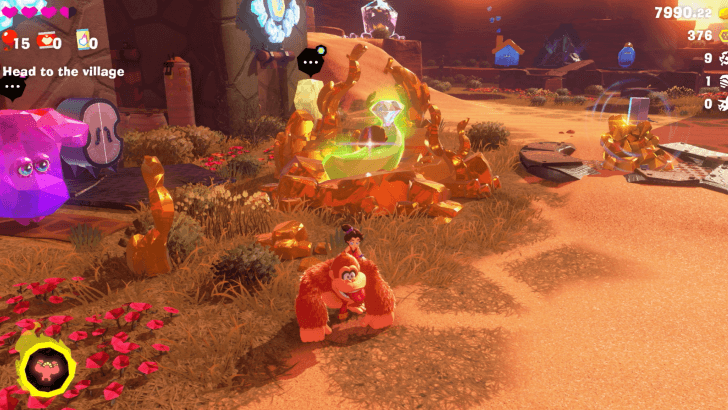
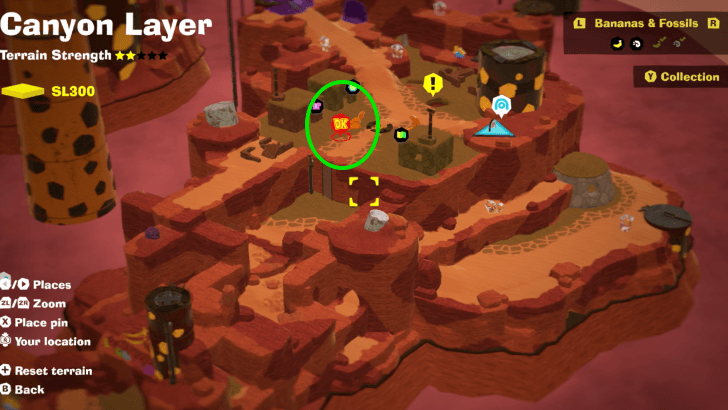
Found in the middle of Longneck Plateau Village. |
||
| 14 |
 |
 |
|
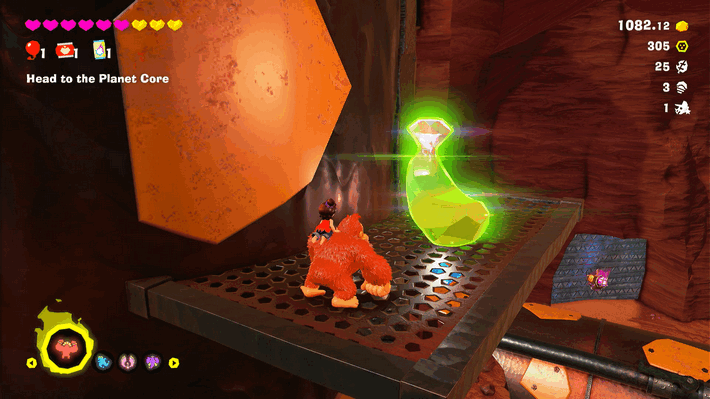
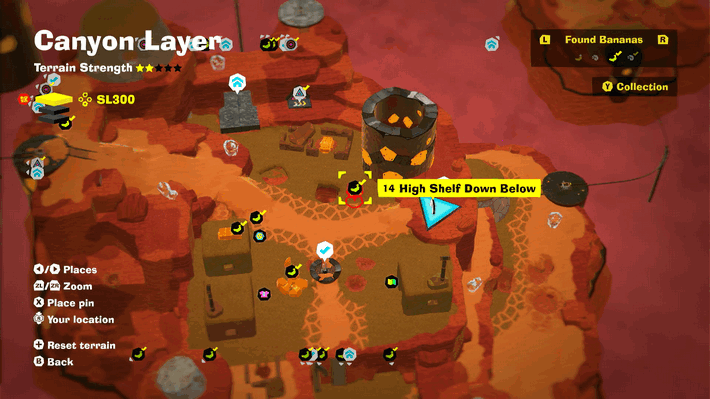
Found on a platform jutting out of a smokestack near the checkpoint. |
||
| 15 |
 |
 |
|
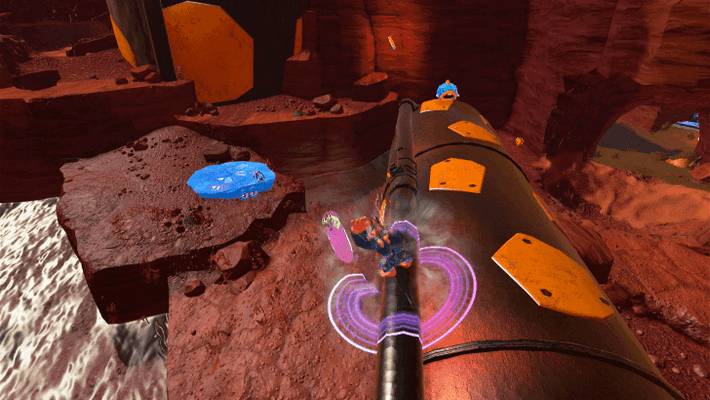
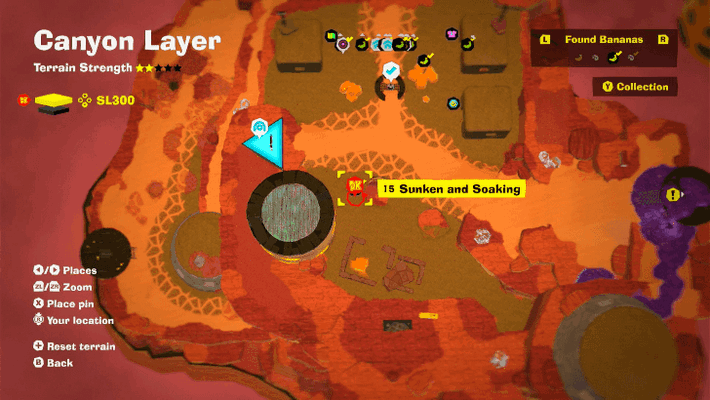
Found submerged in water next to the large horizontal pipe, near a baby eel and a very flat Fractone. |
||
| 16 |
 |
|
|
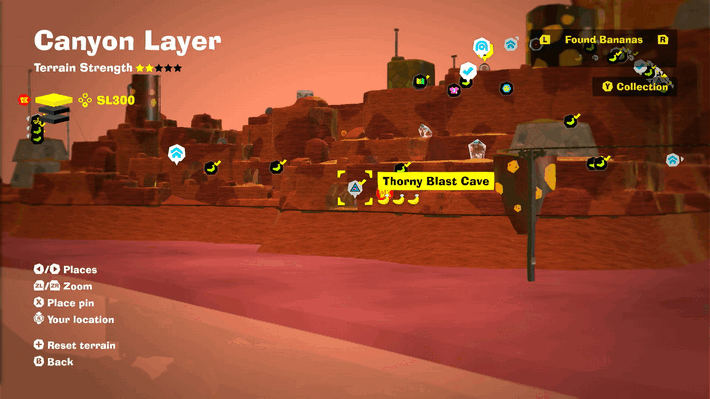
Found inside the Thorny Blast Cave Challenge Course. The Banandium Gem is found along the course. |
||
| 17 |
 |
|
|
Found inside the Thorny Blast Cave Challenge Course. In the middle of the course, activate the bomb to reveal a hole. Jump down and activate all the bombs to destroy the thorny vines and reveal a Banandium Gem. |
||
| 18 |
 |
 |
|
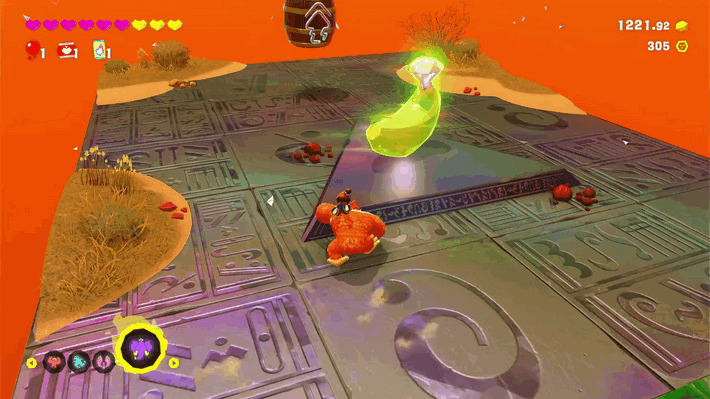
Found at the end of the Thorny Blast Cave Challenge Course. |
||
| 19 |
 |
|
|
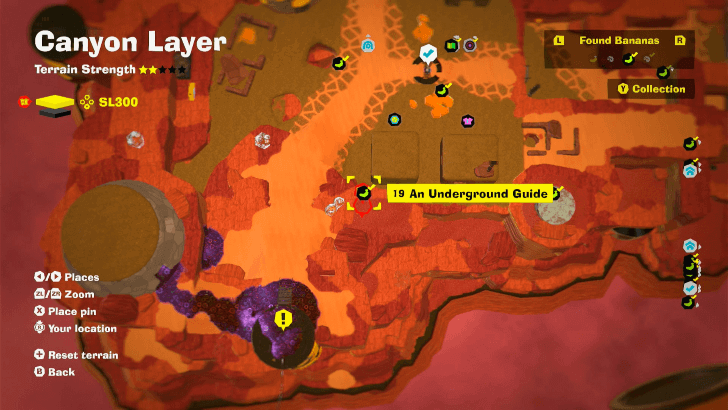
Near Gem #15 (Sunken and Soaking) there is a baby Eel on the large horizontal pipe. Interact with the Eel and follow it as it burrows. The Gem can be found just behind the dirt where his burrow ends. |
||
| 20 |
 |
|
|
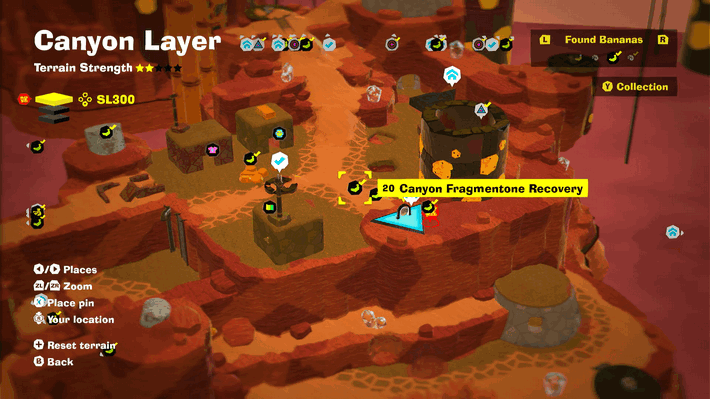
Collect a fragment found near the Fragmentone. Destroy the nearby terrain to find them. |
||
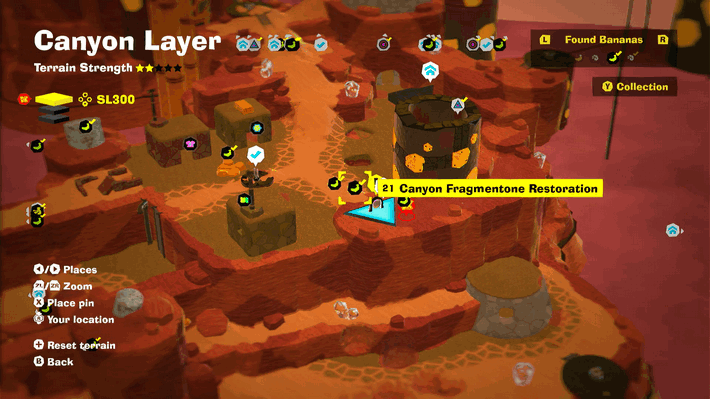
| 21 |
 |
|
|
Collect all three fragments found near the Fragmentone. Destroy the nearby terrain to find them. |
||
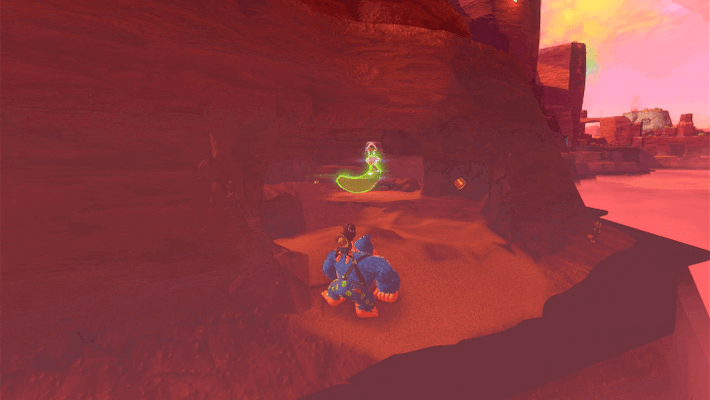
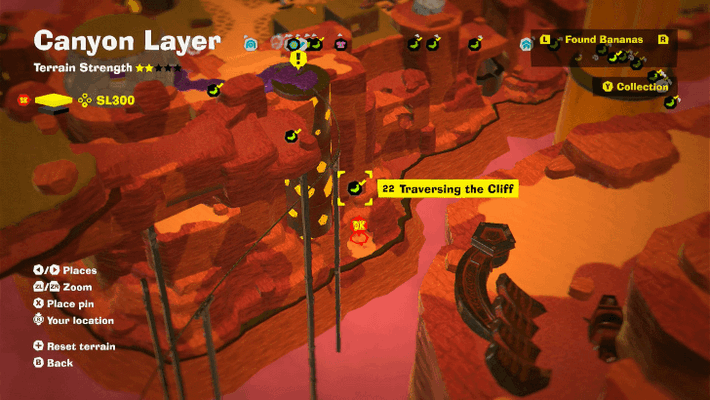
| 22 |
 |
 |
|
Found along the outer cliffs of Longneck Plateau. You can find this Banandium Gem at the bottom of the cliffs behind the Plateau Village Getaway. |
||
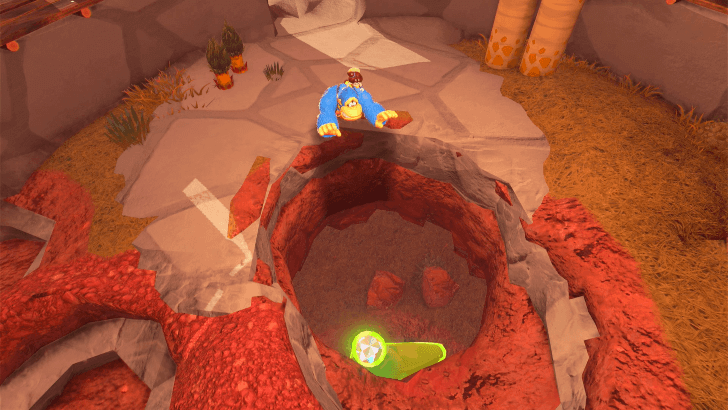
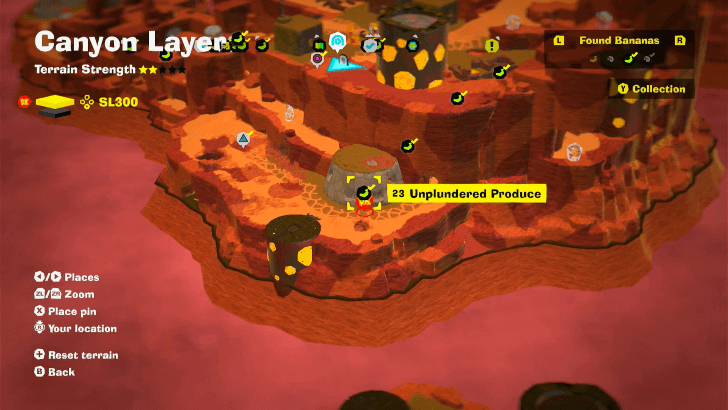
| 23 |
 |
 |
|
There is a house on the lower plateau to the side of Longneck Plateau Village. In it, you'll find a turnip growing in the middle of the room. Pull it out to reveal this Gem beneath. |
||
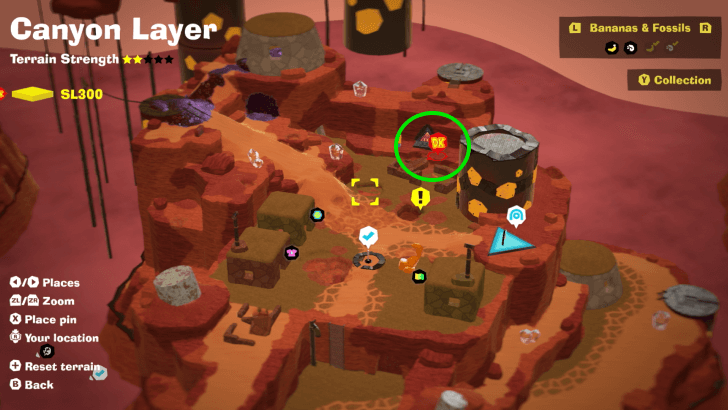
| 24 |
 |
|
|
Found inside Kong Bananza City Smash Challenge Course 1. Reach 100% destruction within the time limit. Concentrate on destroying the concrete pillars to quickly reach 100%. |
||
| 25 |
 |
|
|
Found inside Kong Bananza City Smash Challenge Course 1. Reach 100% destruction with 20 seconds or more remaining. Concentrate on destroying the concrete pillars to quickly reach 100%. |
||
| 26 |
 |
|
|
Found inside Kong Bananza City Smash Challenge Course 1. Get to the top of the building and break the concrete pillar in the middle, then jump down and break through the ground where the pillar used to be to find the Banandium Gem. |
||
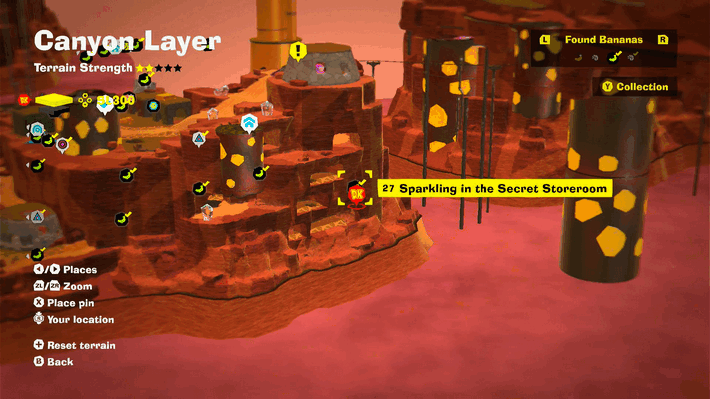
| 27 |
 |
|
|
Hidden behind a wall, found near the outside edge of the bottom of the cliffs behind the Plateau Village Getaway. |
||
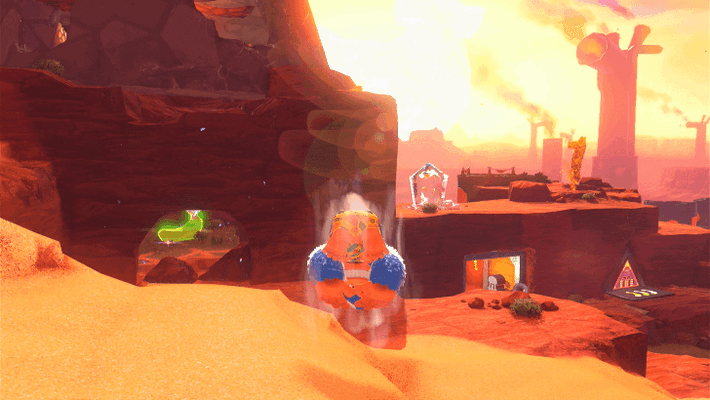
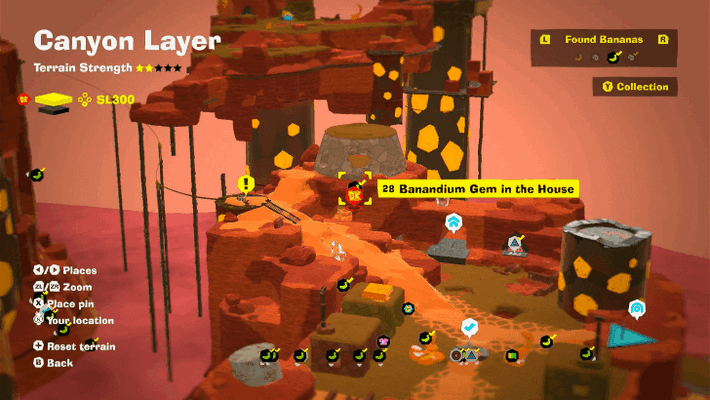
| 28 |
 |
 |
|
One floor beneath the Void Device that you have to clear to progress beyond the Plateau Village. |
||
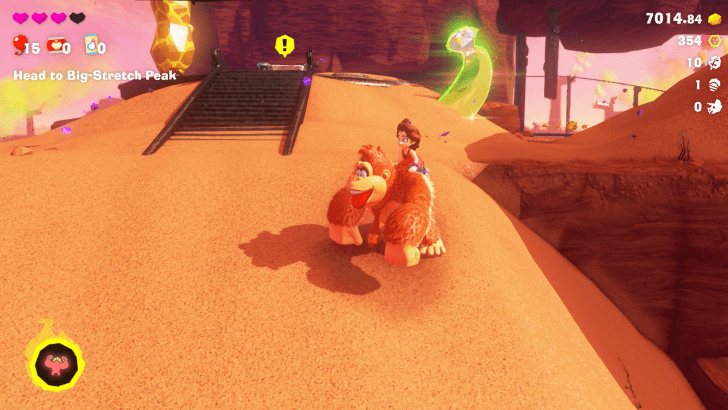
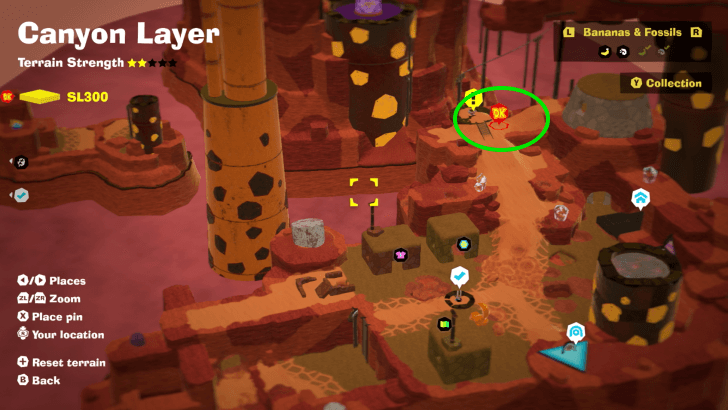
| 29 |
 |
 |
|
Found with story progression. |
||
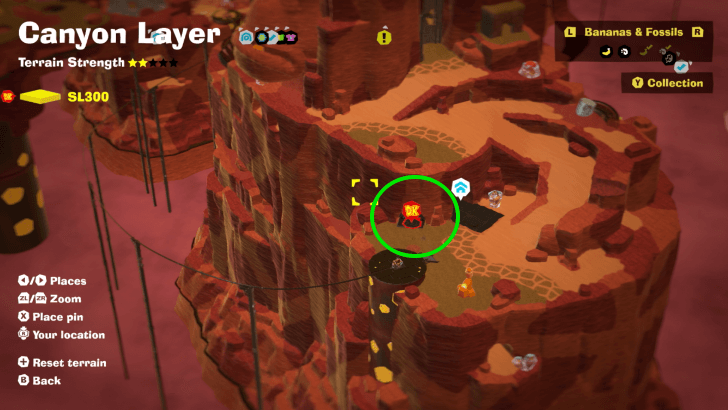
| 30 |
 |
|
|
Found inside Big-Wheel Balloon Hunt Challenge Course 3. Collect all 5 balloons. Break through the wheel and ride it up on the right side to climb onto the top of the wheel, then fall down at the highest point to get the two on near the top. To get the one in the cage, make a hole in the wheel and ride it onto the leftmost point, then walk to the right to get inside the cage. |
||
| 31 |
 |
|
|
Found inside Big-Wheel Balloon Hunt Challenge Course 3. Break through the wheel and ride it up on the right side to climb onto the top of the wheel, then go to the back edge and look down. Drop off the edge and gradually slide down to find a gap you can land in; go inside to find the Banandium Gem. |
||
| 32 |
 |
|
|
Found inside Big-Wheel Balloon Hunt Challenge Course 3. Near the right edge of the wheel, there's a wall you can climb on to go around the corner to the back side of the structure. To avoid falling off, make a gap big enough pass through in the wheel ahead of time, then start climbing on the wall. Pass through the gap while hanging onto the wall and reach the back of the structure to find this Banandium Gem. |
||
| 33 |
 |
 |
|
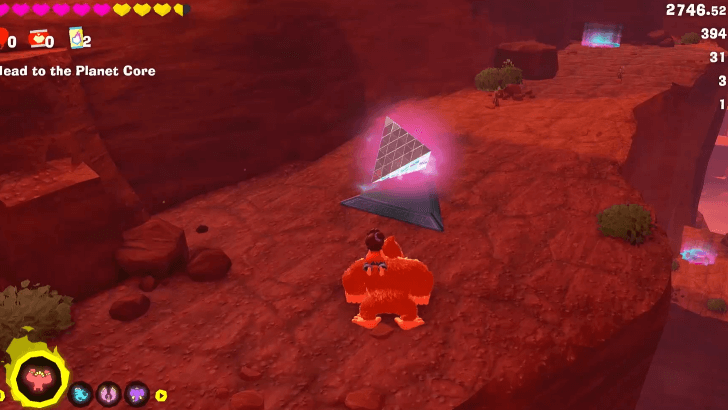
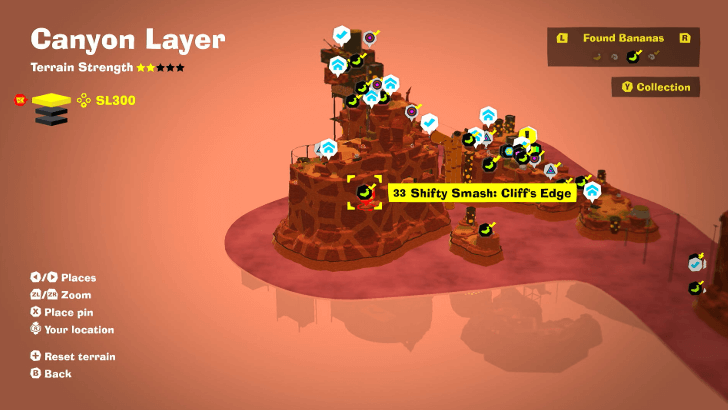
Activate the Shifty Smash Challenge located below the Big-Stretch Base Getaway and smash the three targets before the time limit ends. |
||
| 34 |
 |
 |
|
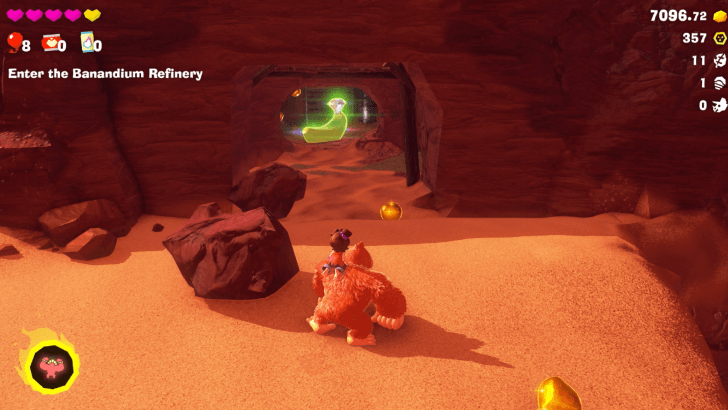
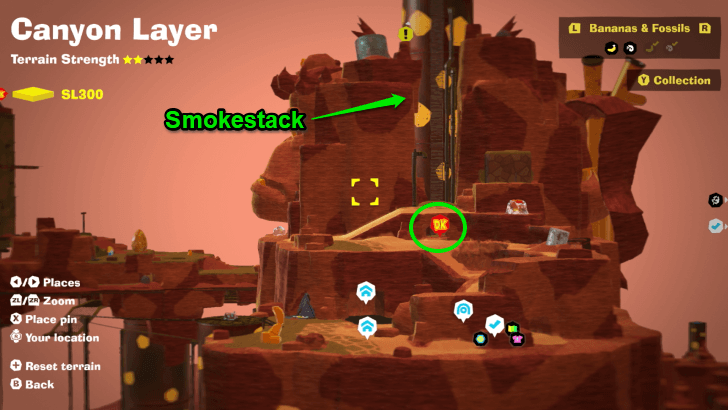
Break the wall found right below the tall smokestack and head inside to get the Banandium Gem. |
||
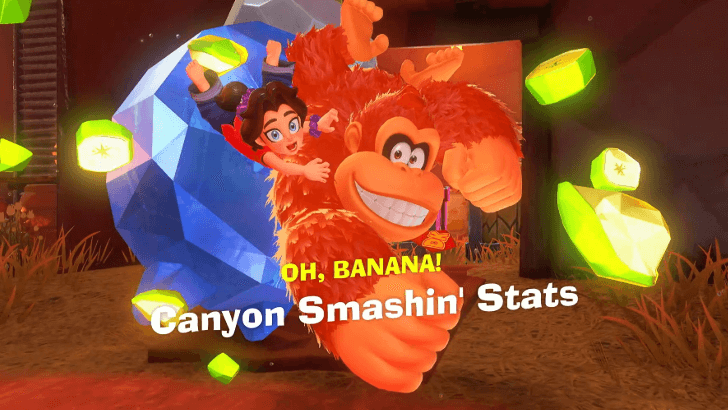
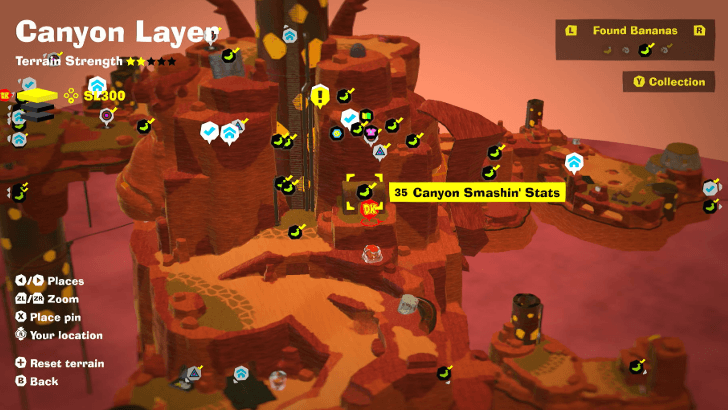
| 35 |
 |
 |
|
Located near Big Stretch Base Bateway, Poppy Kong's face carving. Smash 30000m3 of stone in Canyon Layer to get the Banandium Gem. |
||
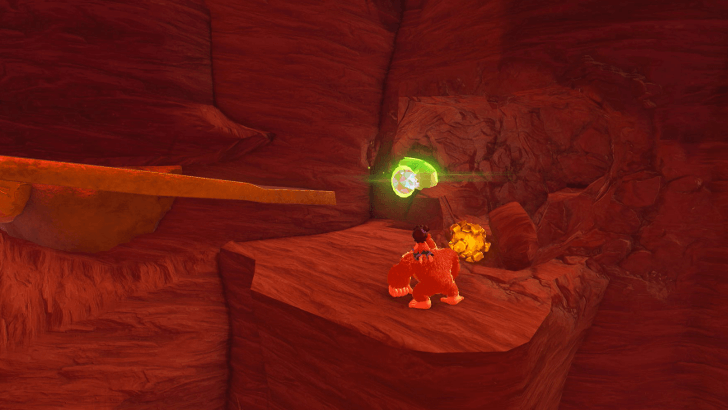
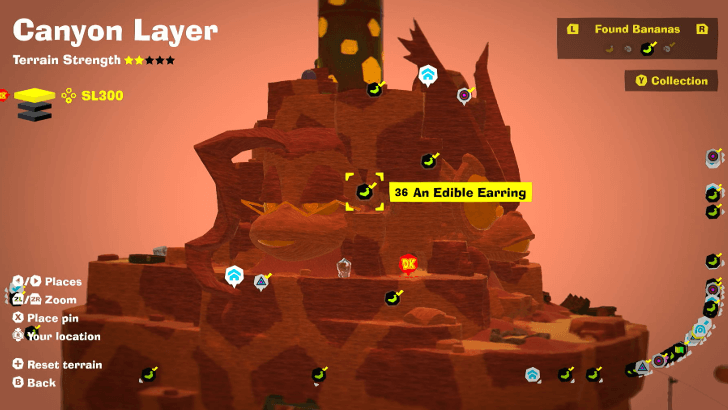
| 36 |
 |
 |
|
Located at the right ear of Poppy Kong's face carving. |
||
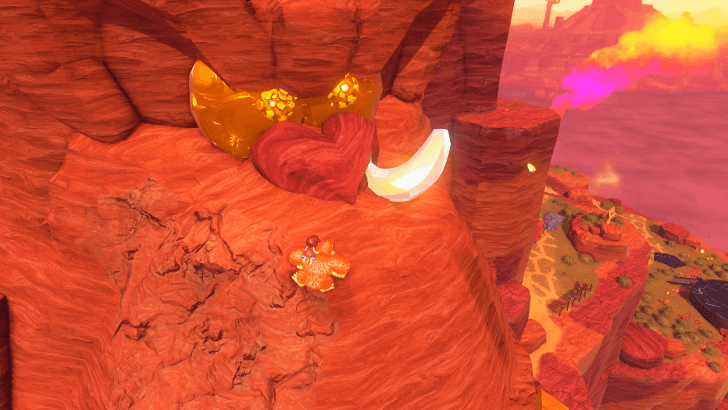
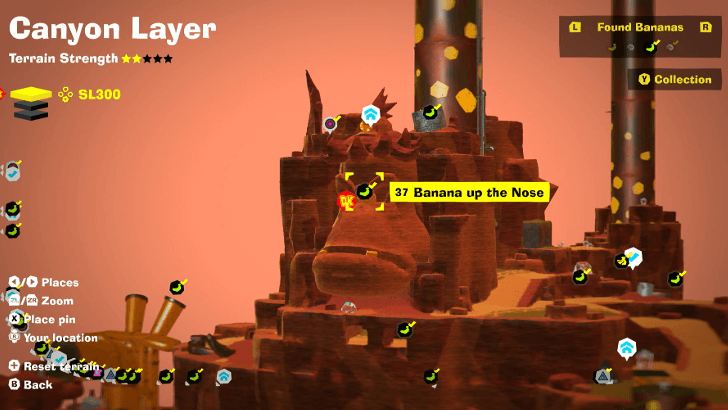
| 37 |
 |
 |
|
Located in the nose of Grumpy Kong's face carving, |
||
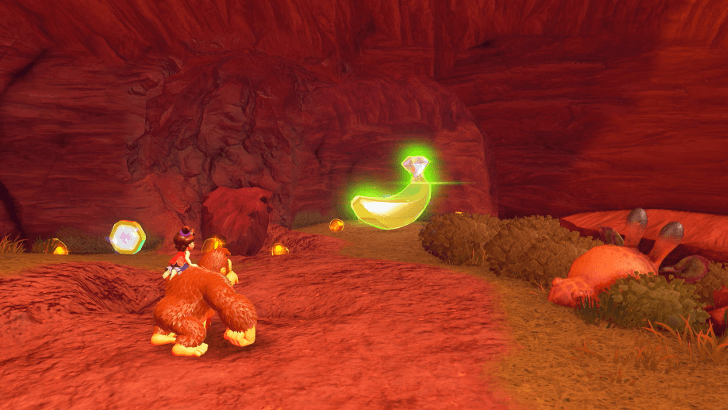
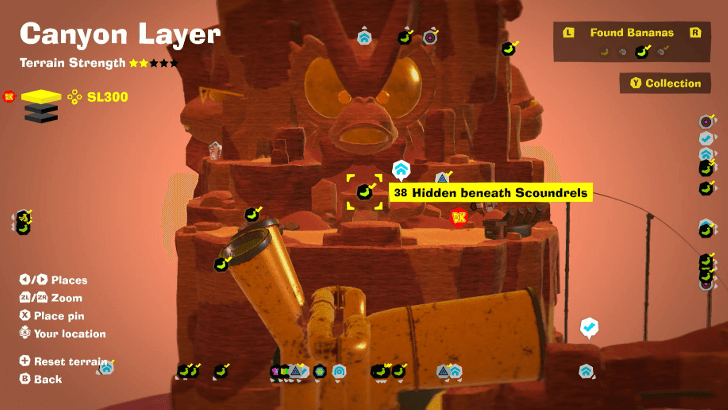
| 38 |
 |
 |
|
Located inside an entrance below the face carving of Void Kong. |
||
| 39 |
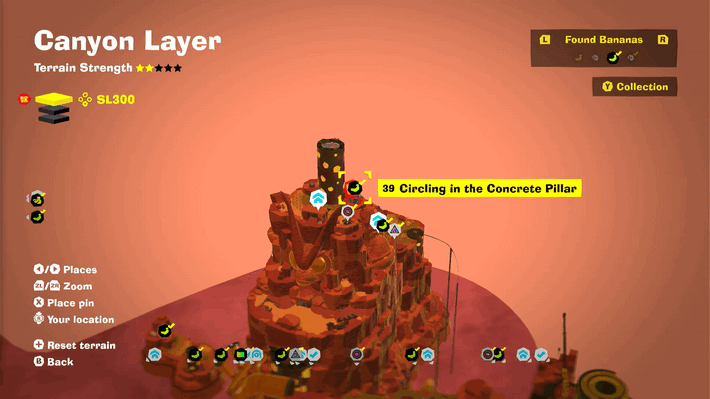 |
|
|
Transform into Kong Bananza and destory the concrete pillar to reveal a Banandium Gem. |
||
| 40 |
 |
 |
|
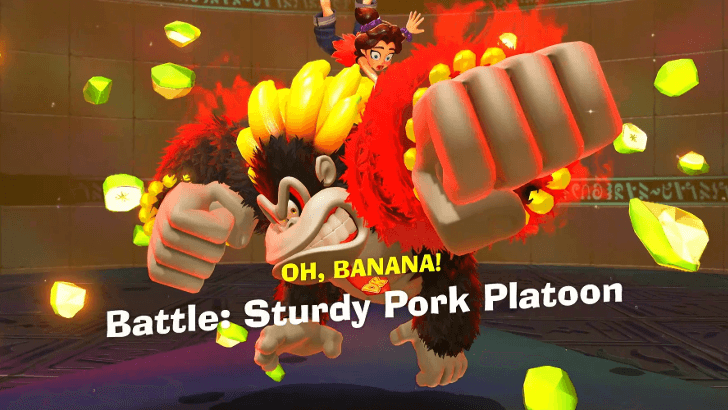
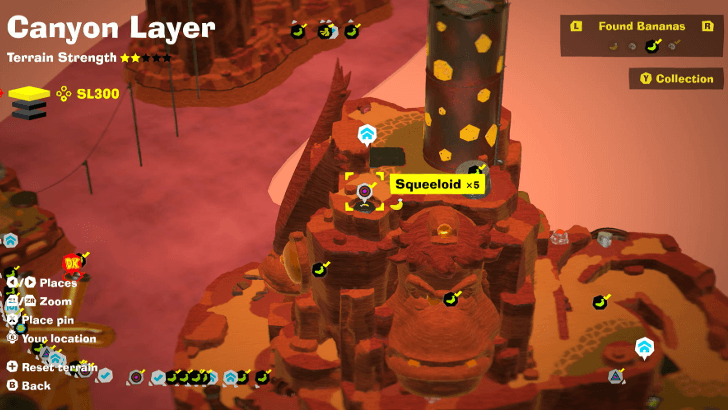
Enter the manhole near the smokestack and defeat five Squeeloids. |
||
| 41 |
 |
 |
|
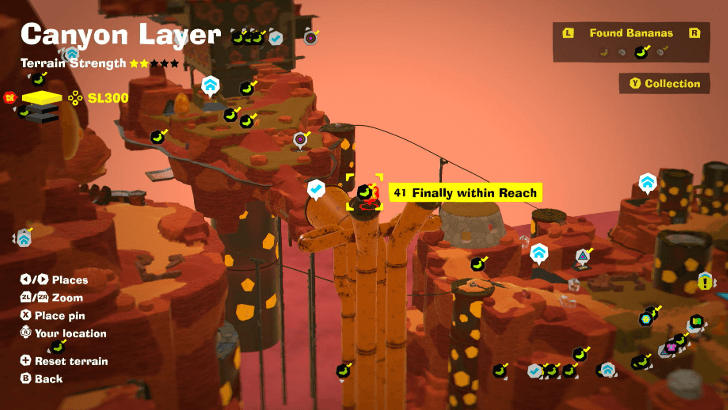
Located at Neckreach Smokestack Exit. The Banandium Gem is above the pipes at the exit. |
||
| 42 |
 |
 |
|
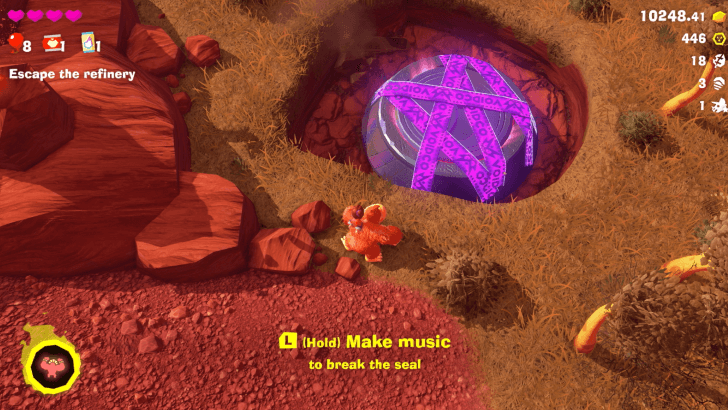
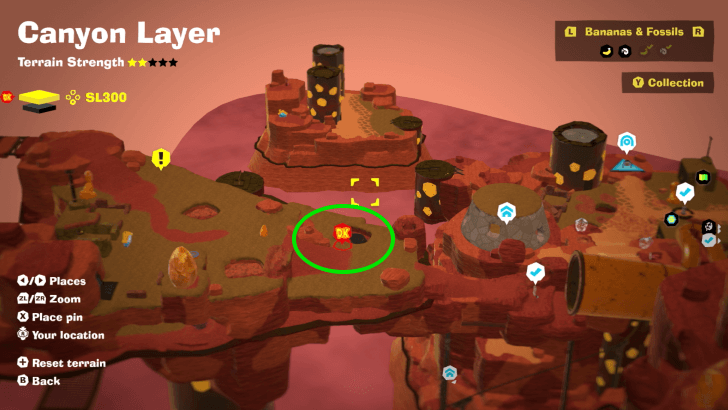
Enter the manhole and defeat five Stompoids. |
||
| 43 |
 |
 |
|
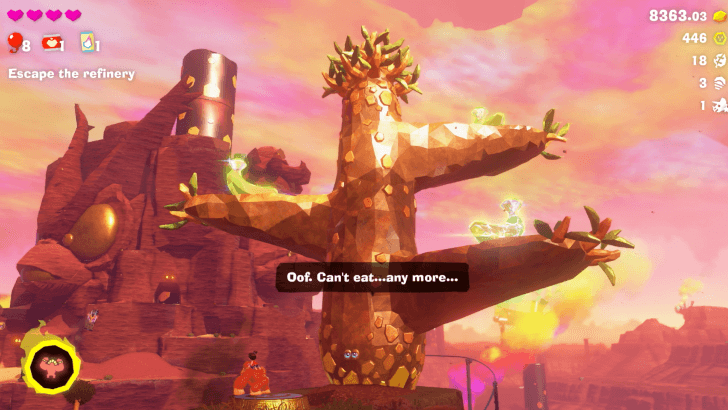
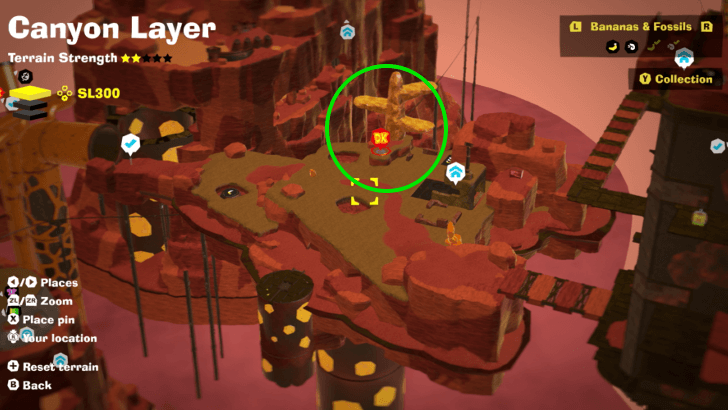
Give 250 gold to the Canyon Growtone. The Growtone is found near the Neckreach Smokestack Exit fast travel point, and Mechaneck Isle Getaway. |
||
| 44 |
 |
 |
|
Give 750 gold to the Canyon Growtone. The Growtone is found near the Neckreach Smokestack Exit fast travel point, and Mechaneck Isle Getaway. |
||
| 45 |
 |
 |
|
Give 100 gold to the Canyon Growtone. The Growtone is found near the Neckreach Smokestack Exit fast travel point, and Mechaneck Isle Getaway. |
||
| 46 |
 |
 |
|
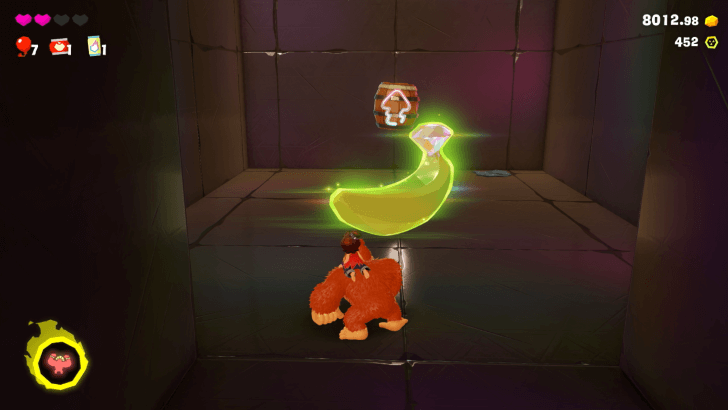
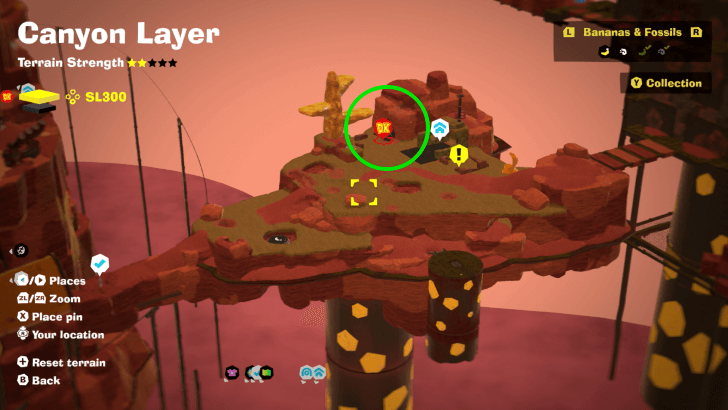
Found inside Stompy Ascent Challenge Course 5. On the first lift, the second gap in the wall ahead will be made of stone instead of spikes. Break through it to find the Banandium Gem. |
||
| 47 |
 |
 |
|
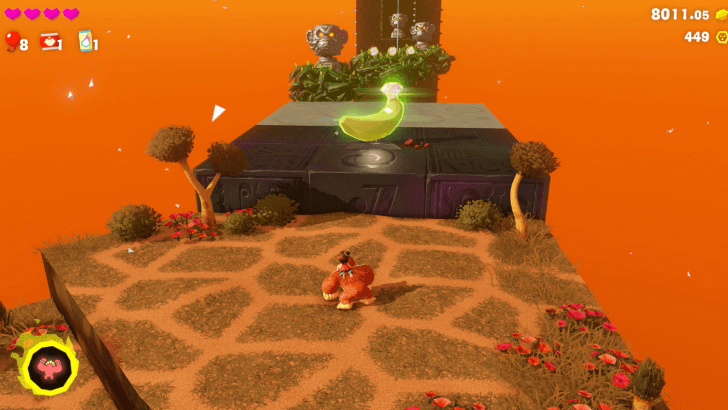
Found inside Stompy Ascent Challenge Course 5. Can be found as you go through the course. |
||
| 48 |
 |
 |
|
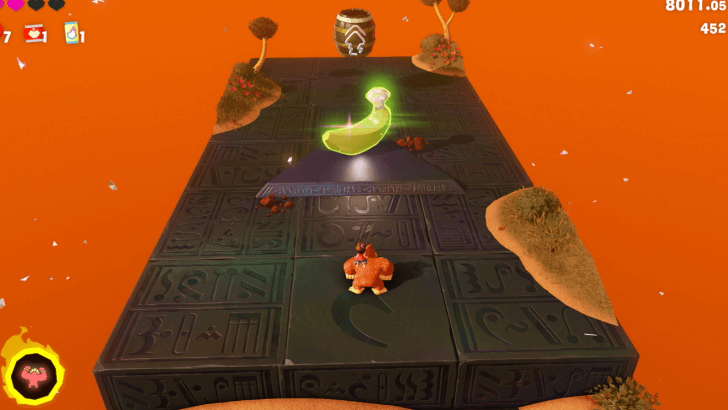
Found at the end of Stompy Ascent Challenge Course 5. |
||
| 49 |
 |
 |
|
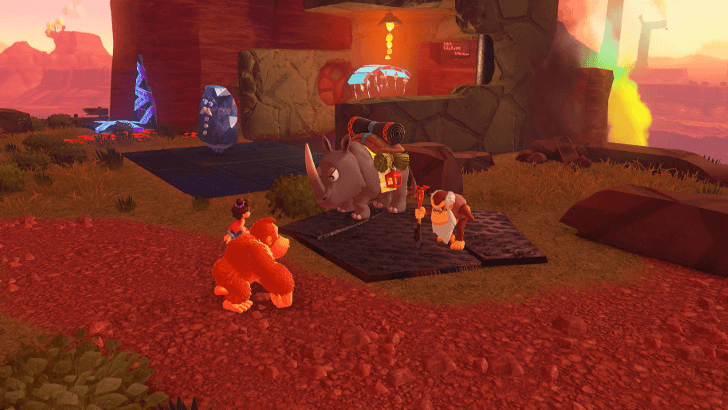
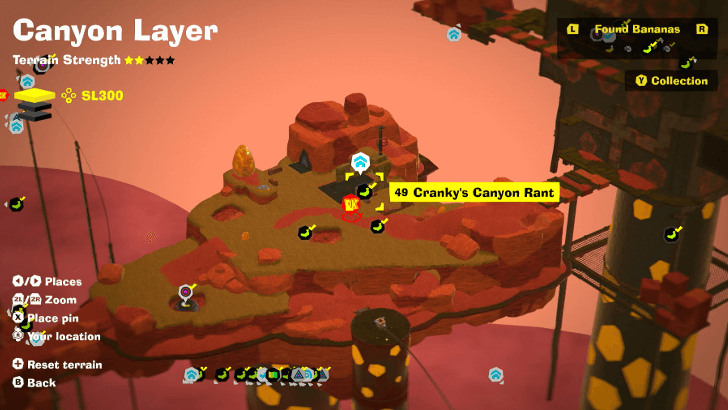
Talk to Cranky Kong to get a Banandium Gem. |
||
| 50 |
 |
|
|
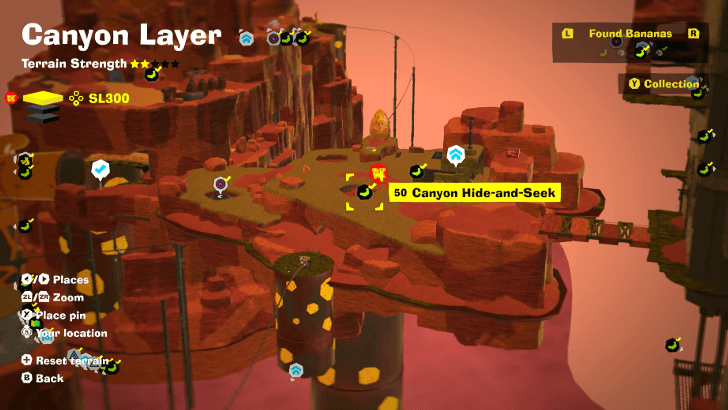
Find all four Hiddenstones near the area to get a Banandium Gem. |
||
| 51 |
 |
|
|
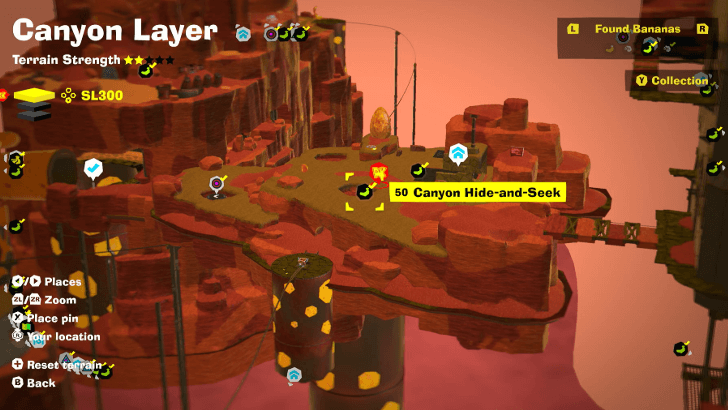
Located below Mechaneck Isle Getaway, Punch the balloon in order to move the Banandium Gem to DK. |
||
| 52 |
 |
 |
|
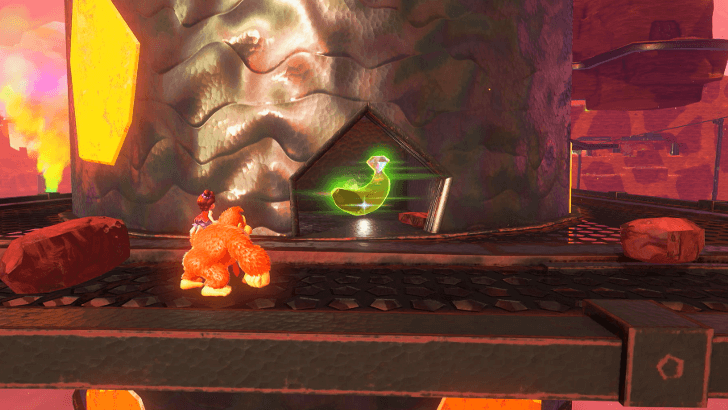
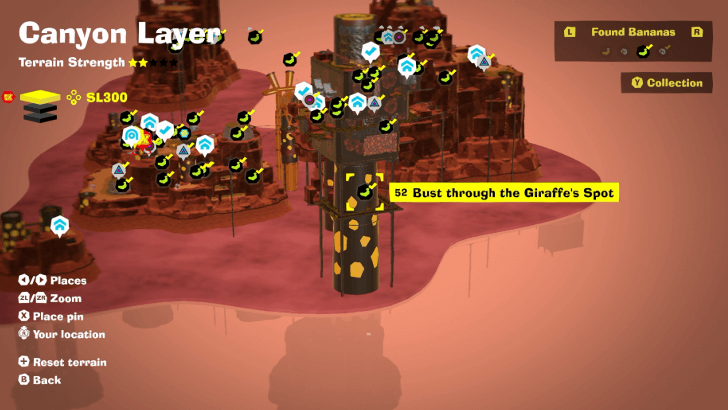
Found at the lower-level of Smokestack behind a wall. |
||
| 53 |
 |
|
|
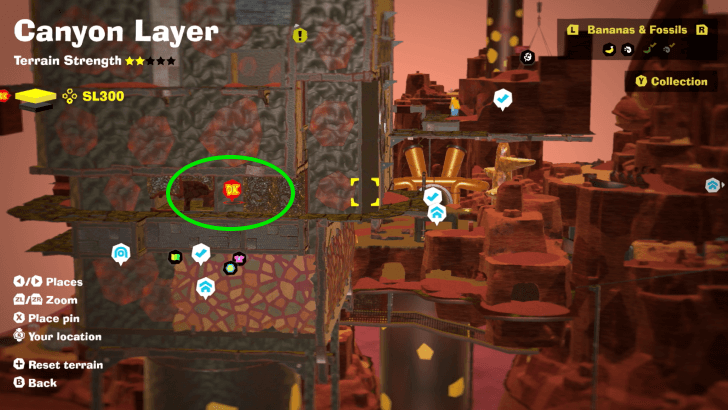
Break through the row of walls to find a Banandium Gem in an opening behind them. |
||
| 54 |
 |
|
|
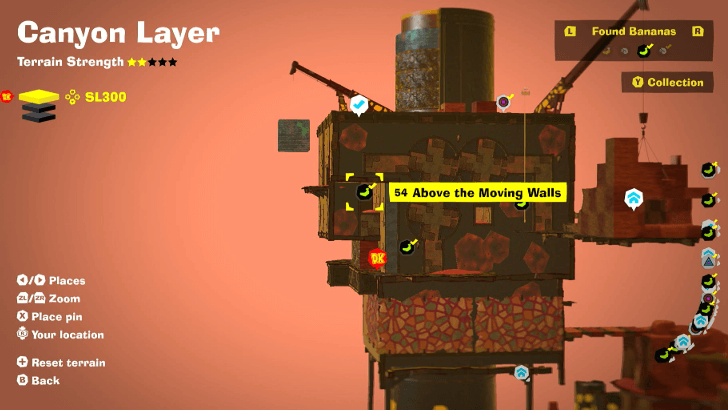
Located at Smokestack, the Banandium Gem is above the moving walls behind a wall. |
||
| 55 |
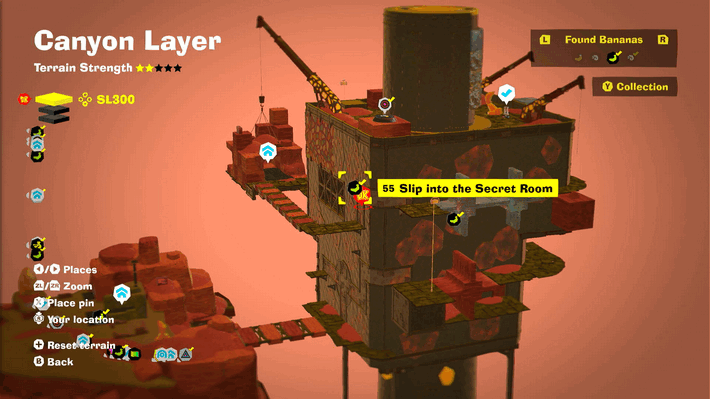 |
|
|
Scale the metal wall and head inside the opening. Follow the path which leads to a Banandium Gem. |
||
| 56 |
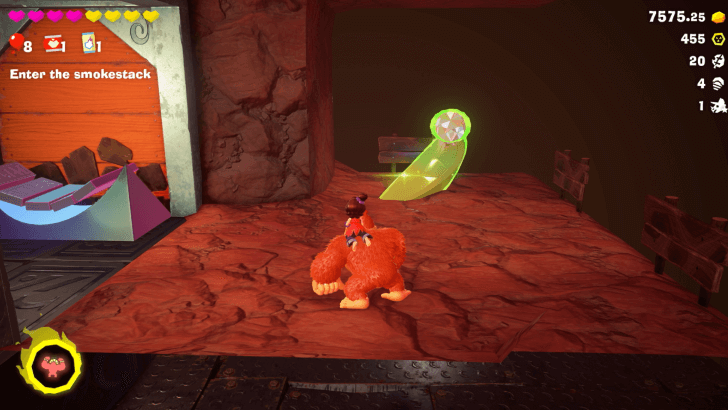 |
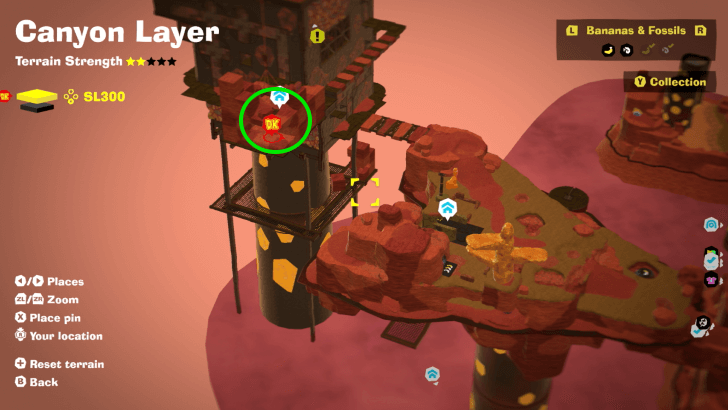 |
|
After unlocking the Smokestack Getaway, go across to the far side to find a Banandium Gem. |
||
| 57 |
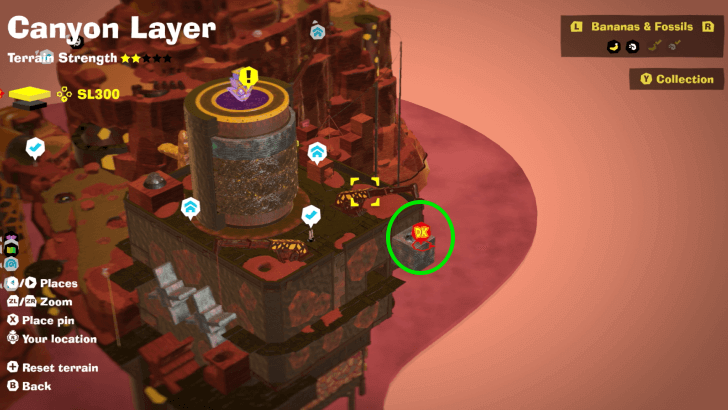 |
|
|
Jump onto the box hoisted by the crane and use Kong Bonanza to smsah down into the concrete, revealing the Banandium Gem. |
||
| 58 |
 |
 |
|
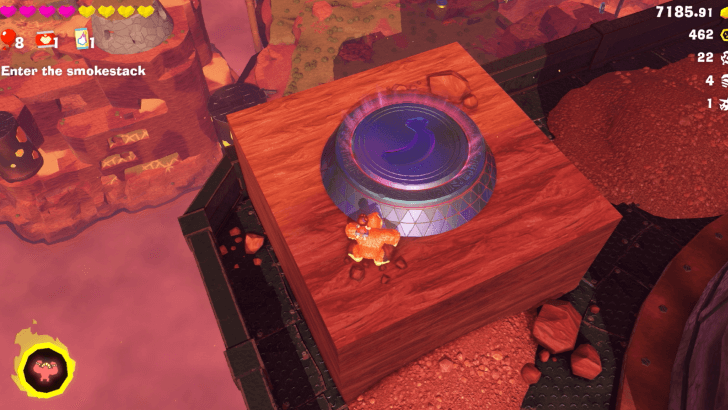
Enter the manhole found near the cylindrical structure and defeat two Crockoids. |
||
| 59 |
 |
|
|
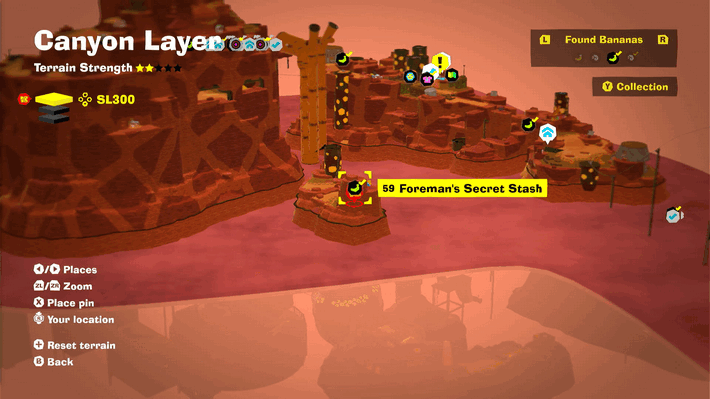
Head to the end of the steel cage and use the barrel to launch yourself upwards. Head down the path and destory the dirt to reveal a Banandium Gem. |
||
| 60 |
 |
 |
|
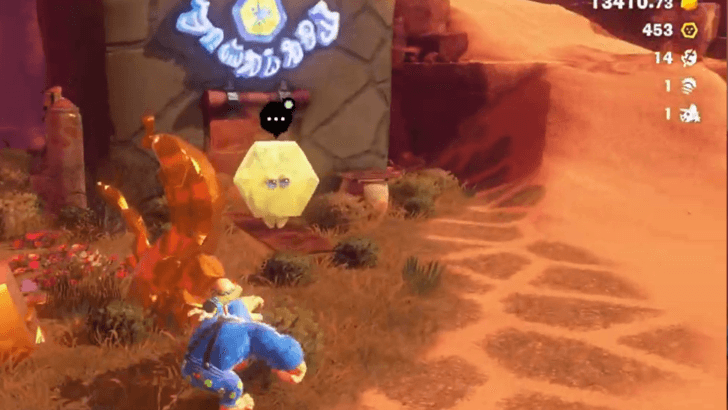
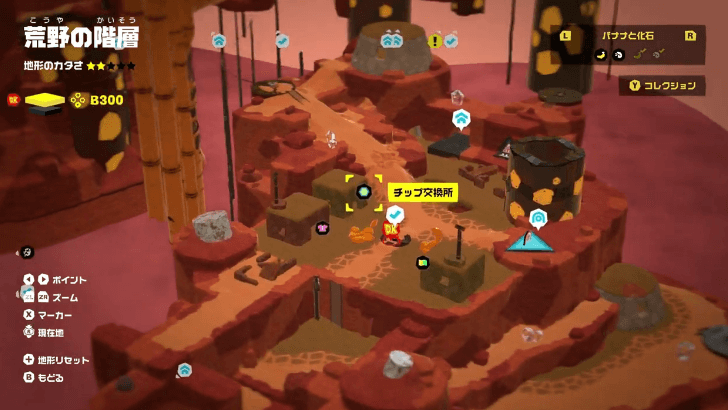
Buy with Banandium Chips to get a Gem. The price will vary depending on how many you have purchased from other layers. You only need to exchange once for the collectible to count. |
||
SL 301 Banana Locations
| Overworld View | Map Location | |
|---|---|---|
| 61 |
 |
 |
|
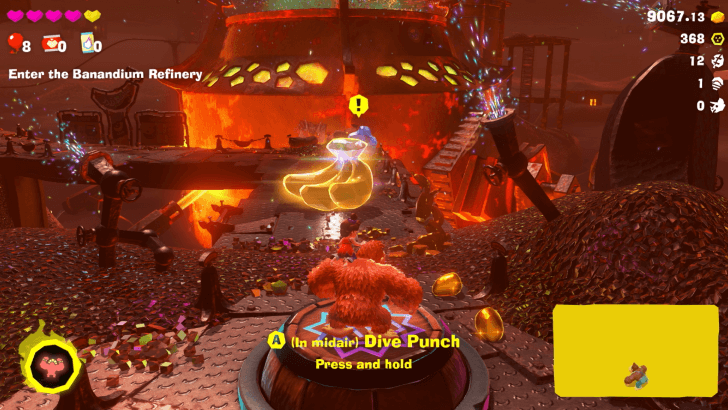
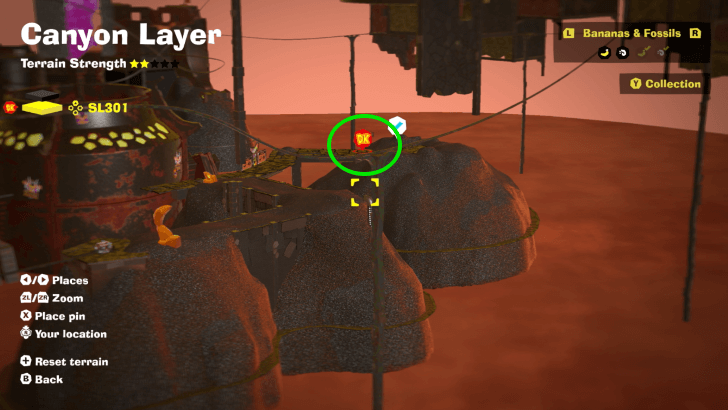
Defeat the boss Grumpy Kong. |
||
| 62 |
 |
 |
|
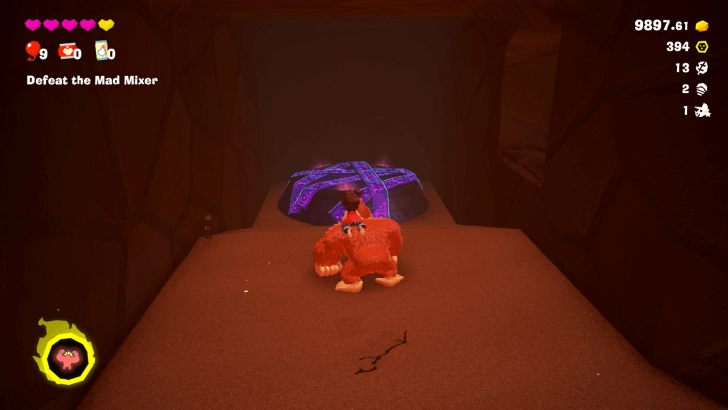
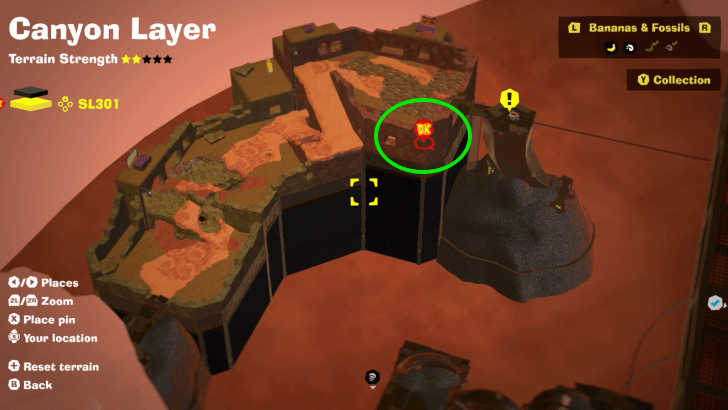
Enter the manhole found at the end of a hallway on the edge wall and defeat three Crockoids. |
||
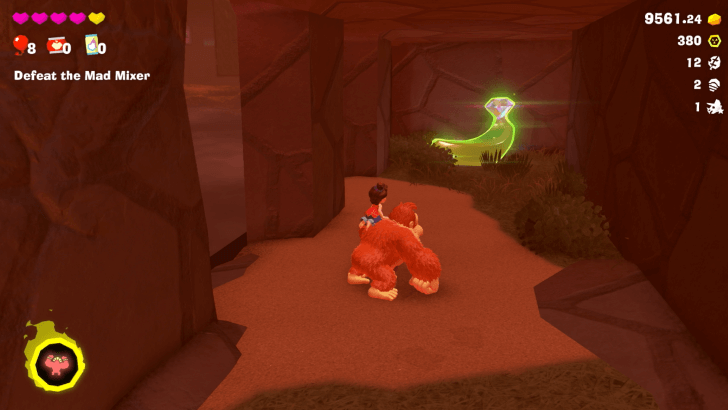
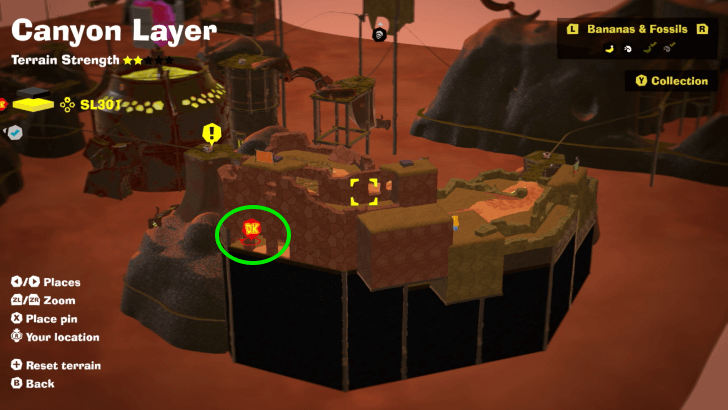
| 63 |
 |
 |
|
Found inside the building at the far end of a hallway on the ground floor. |
||
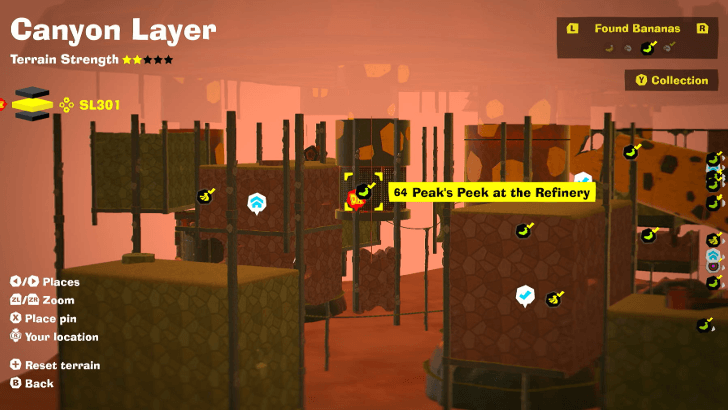
| 64 |
 |
|
|
Located below Big-Stretch Base Getaway, Entrance is near Shifty Smash Challenge. Destroy the concrete floor to get to the Gem. |
||
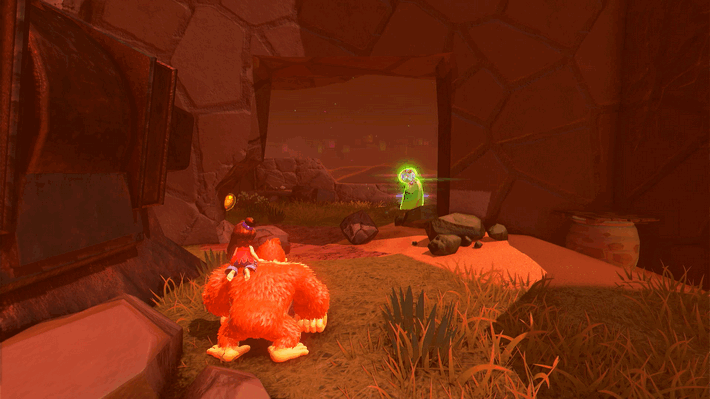
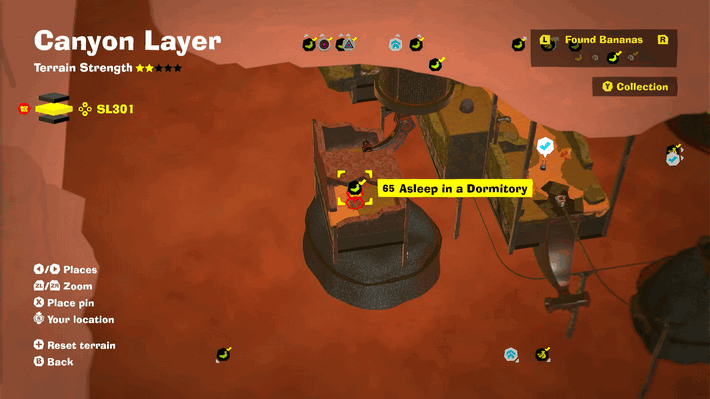
| 65 |
 |
 |
|
Located inside the room covered by a stone door. |
||
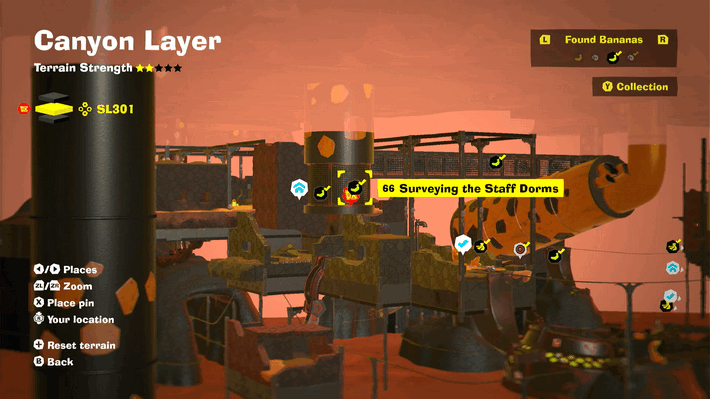
| 66 |
 |
|
|
Jump down the pipe to reach a room containing a Banandium Gem. |
||
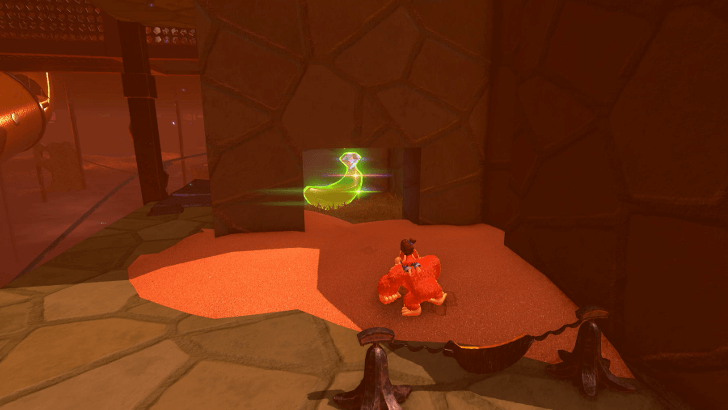
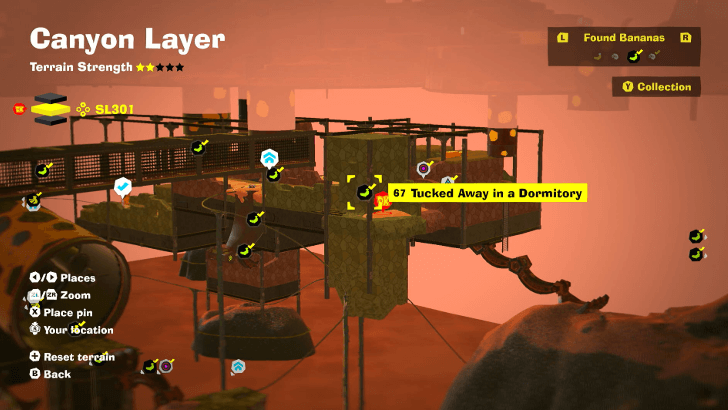
| 67 |
 |
 |
|
Located near the Banandium Refinery Terrace Getaway, Right of the Spinning Laser Zone. |
||
| 68 |
 |
 |
|
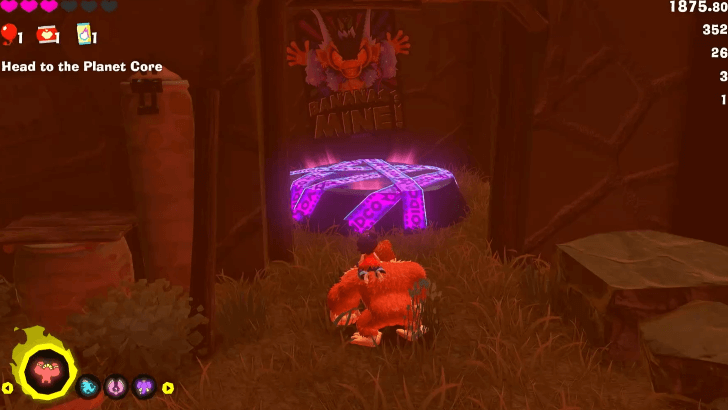
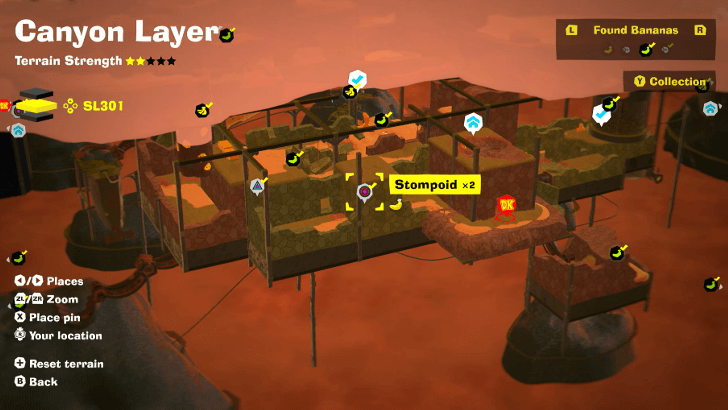
Jump down the manhole found near the Banandium Refinery Terrace Getaway and defeat two Stompoids. |
||
| 69 |
 |
 |
|
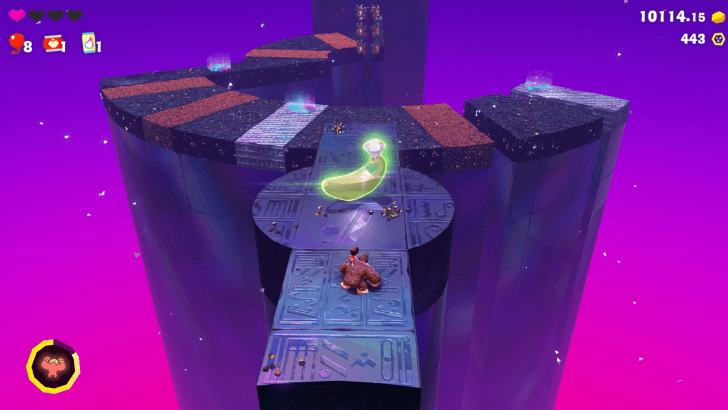
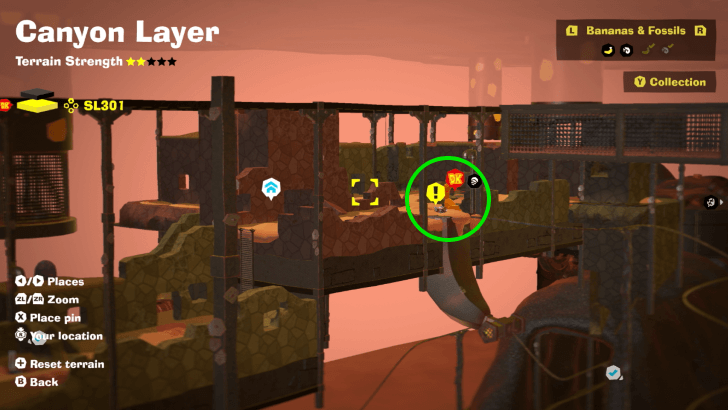
Found inside Spinning Laser Zone Challenge Course 4. Located on top of a platform. |
||
| 70 |
 |
|
|
Found inside Spinning Laser Zone Challenge Course 4. Located below a dirt pile. |
||
| 71 |
 |
 |
|
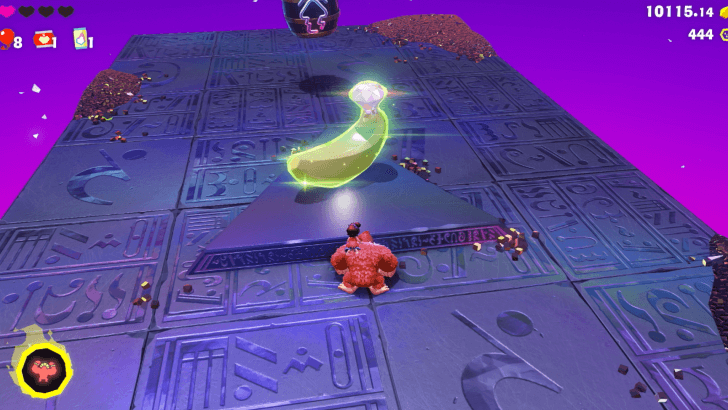
Found at the end of Spinning Laser Zone Challenge Course 4. |
||
| 72 |
 |
 |
|
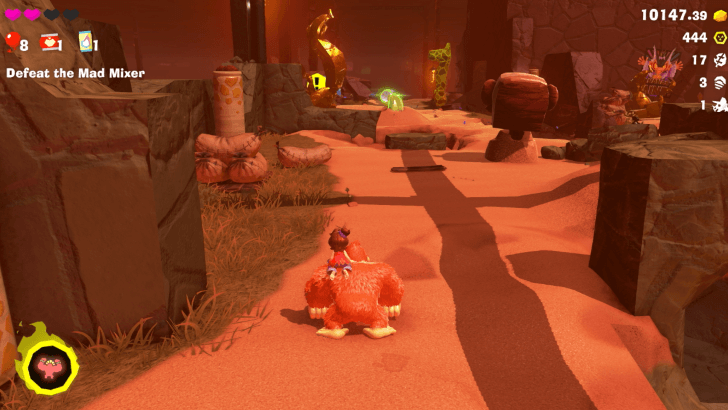
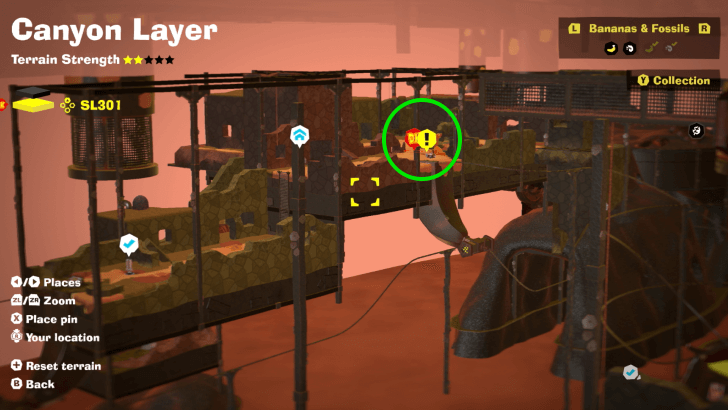
Found with story progression. |
||
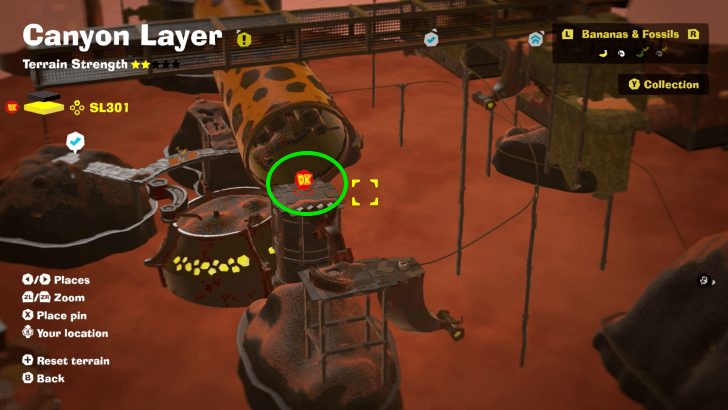
| 73 |
 |
 |
|
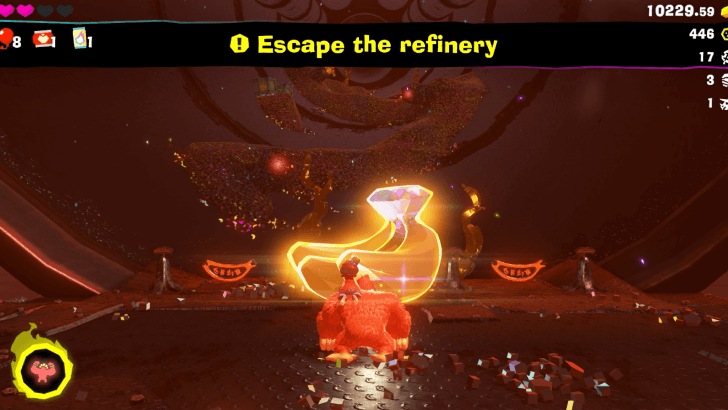
Defeat the boss Mad Mixer. |
||
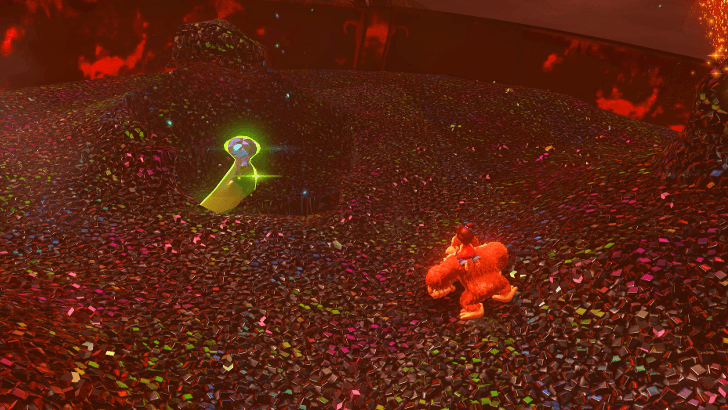
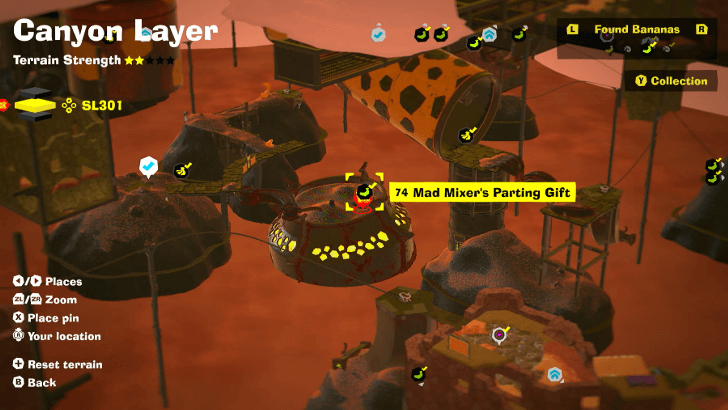
| 74 |
 |
 |
|
Located under a small hill of dirt, near Banandium Refinery Gravel Storage |
||
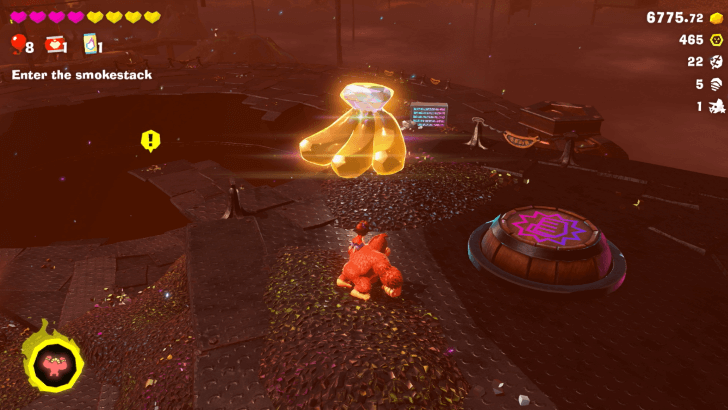
| 75 |
 |
 |
|
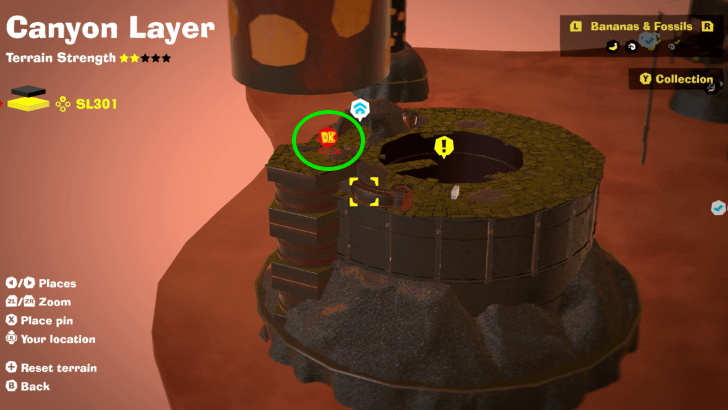
Found with story progression. |
||
| 76 |
 |
 |
|
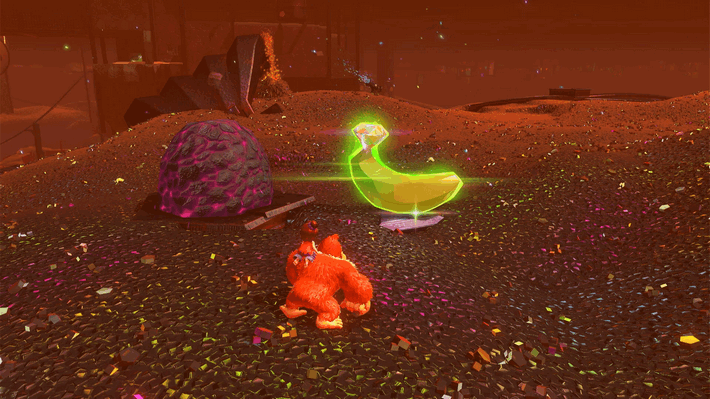
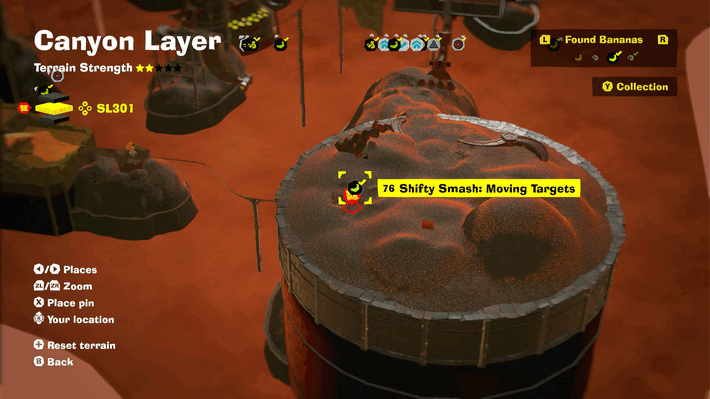
Hit the Shifty Smash Challenge and use the Boom Stones to destroy the moving targets. |
||
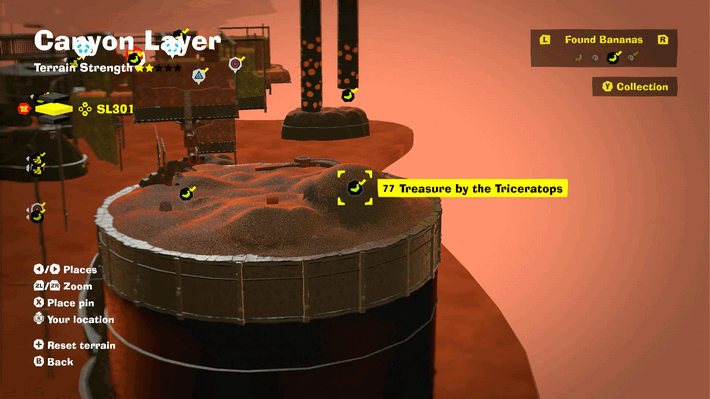
| 77 |
 |
 |
|
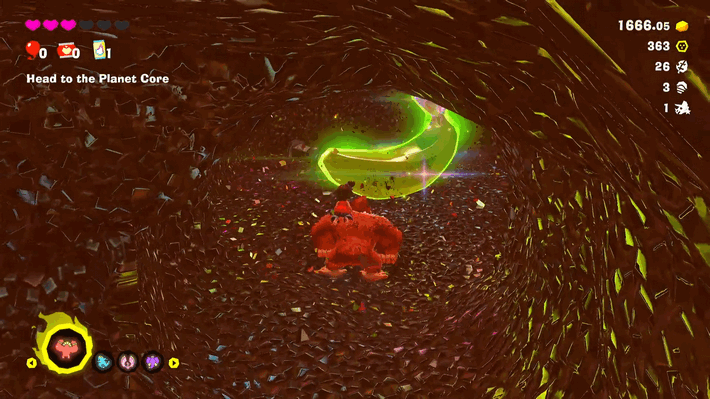
Found buried underneath a small hill. |
||
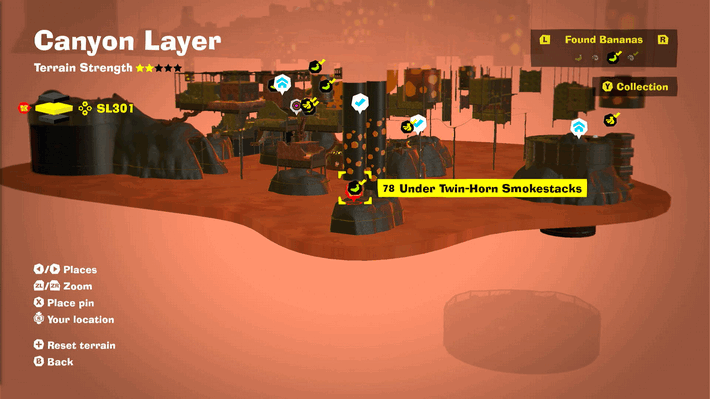
| 78 |
 |
|
|
Transform into Kong Bananza while on top of one of the smokestacks and perform a Dive Punch to destroy the concrete. Head down the chimney to get a Banandium Gem. |
||
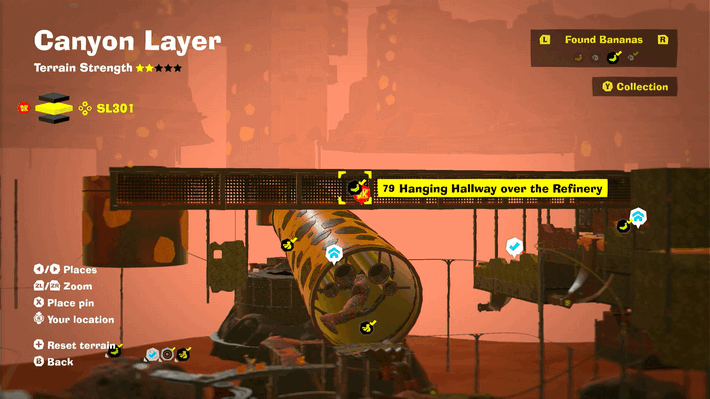
| 79 |
 |
|
|
Remove the Void Stake and jump down the steel cage to get the Banandium Gem. |
||
SL 302 Banana Location
| Overworld View | Map Location | |
|---|---|---|
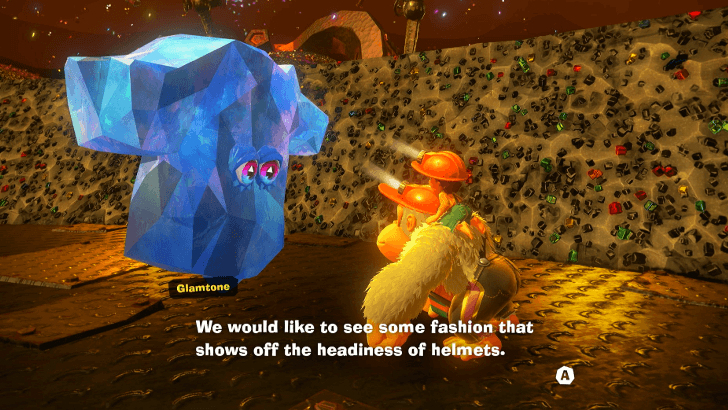
| 80 |
 |
 |
|
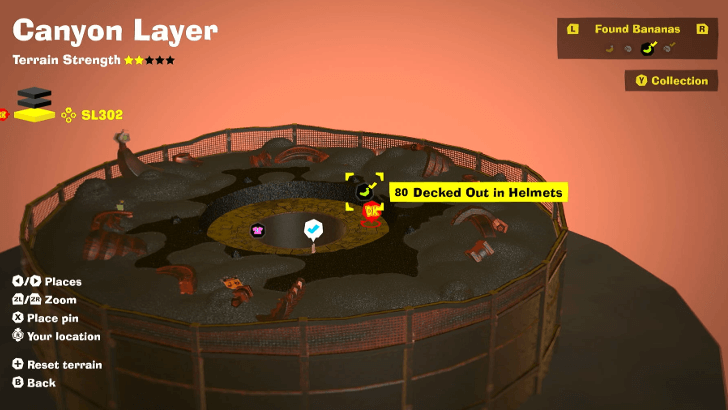
Solve the Glamtone's outfit puzzle by equipping DK's Mining Helmet and Pauline's Gold-Mining Gear. Both outfits automatically unlocked after beating the main story and reuniting with Pauline. |
||
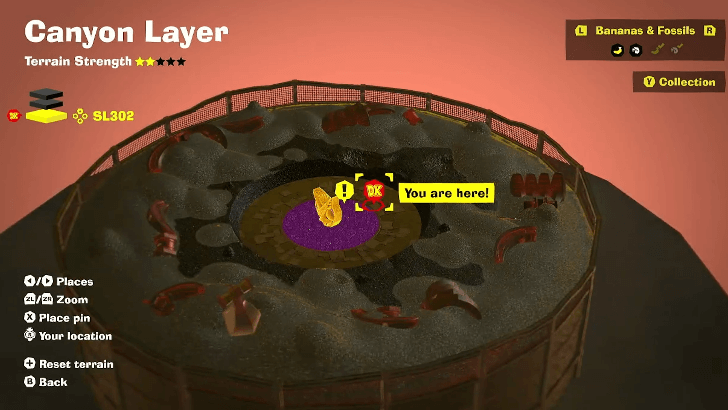
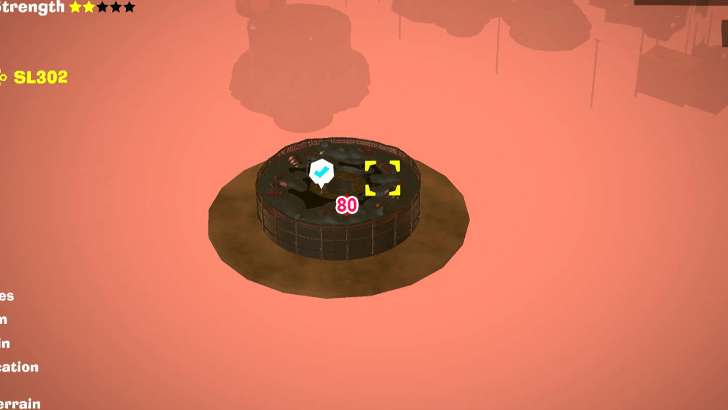
There is one Banandium Gem that can be found in SL 302. However, this area is only accessible in the post game.
Banandium Gems List and Locations
Canyon Layer Fossils
SL 300 Fossil Locations
| Overworld View | Map Location | |
|---|---|---|
 |
 |
|
|
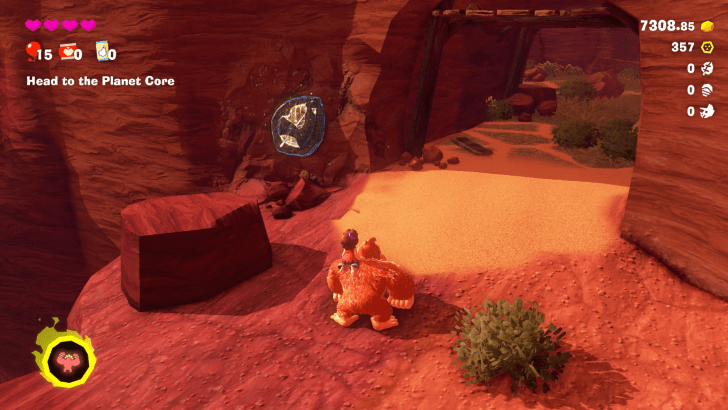
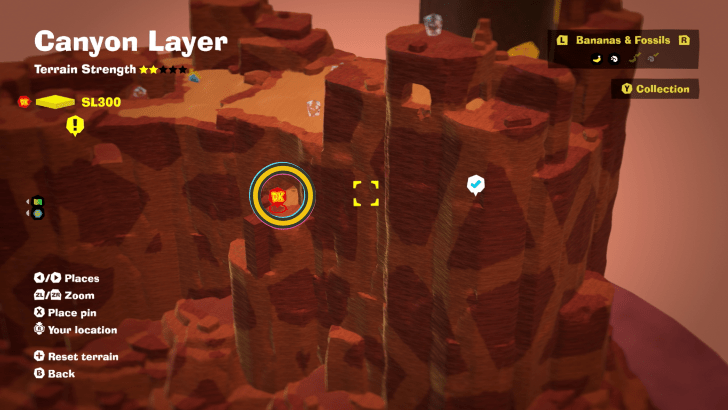
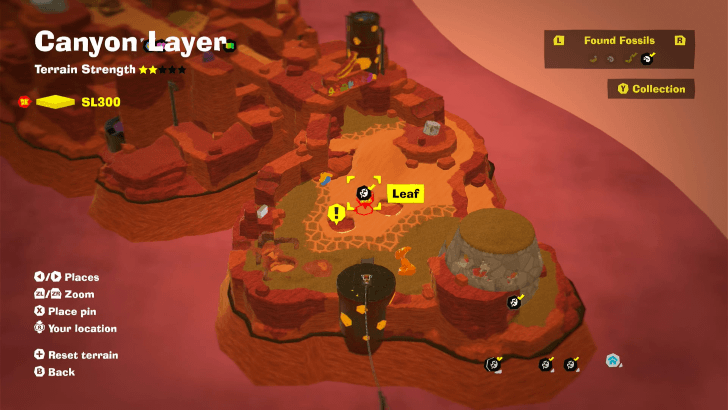
From the Tallfall Cliffs Checkpoint, follow the path, and you'll find an opening to a cliff to your left. The Leaf will be on the outer wall of this opening. |
||
 |
 |
|
|
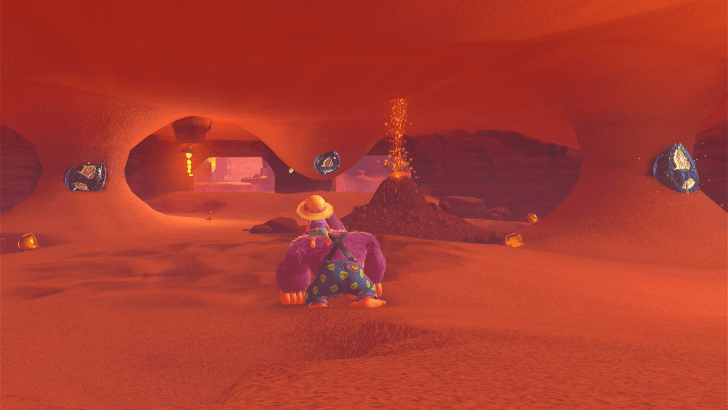
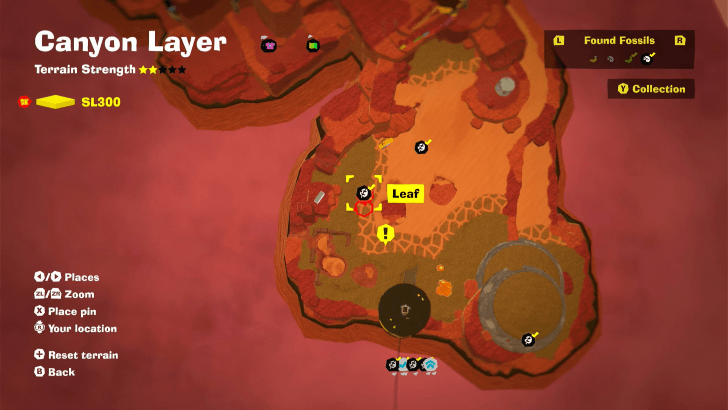
Upon arriving in Longneck Plateau via minecart from Tallfall Cliffs, these fossils are in a sandy pit just beneath the surface. Beware of nearby enemies. |
||
 |
 |
|
|
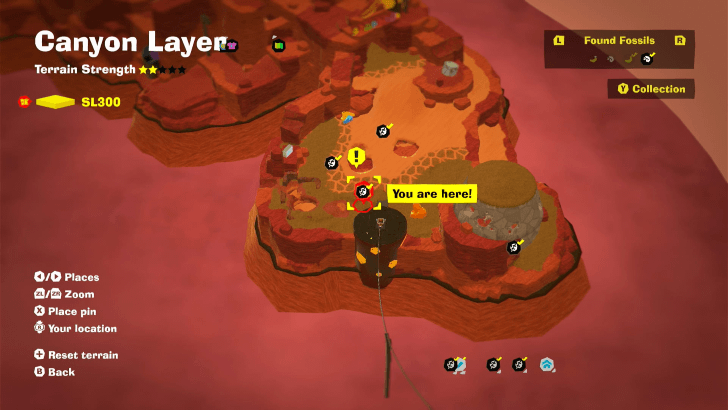
Upon arriving in Longneck Plateau via minecart from Tallfall Cliffs, these fossils are in a sandy pit just beneath the surface. Beware of nearby enemies. |
||
 |
 |
|
|
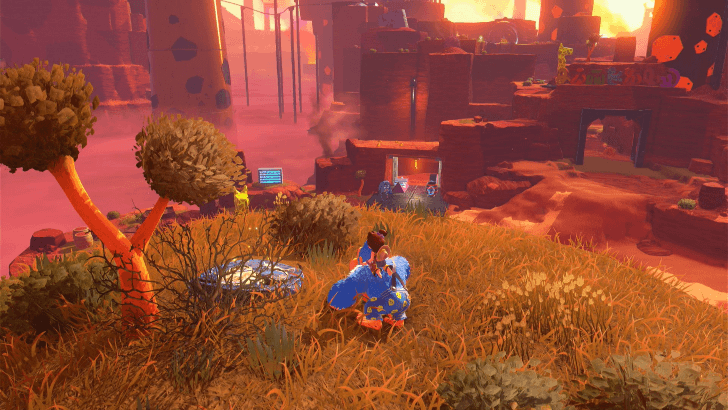
Upon arriving in Longneck Plateau via minecart from Tallfall Cliffs, these fossils are in a sandy pit just beneath the surface. Beware of nearby enemies. |
||
 |
 |
|
|
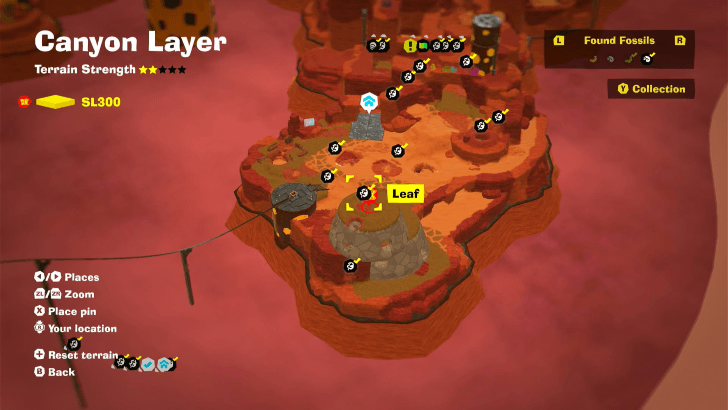
Upon arriving in Longneck Plateau via minecart, found on top of the house to your right. |
||
 |
 |
|
|
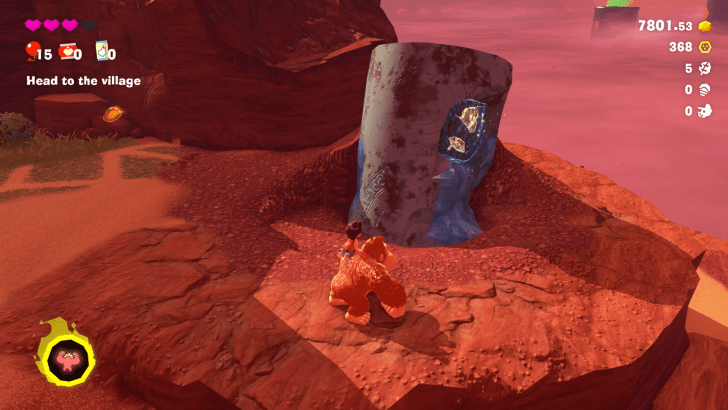
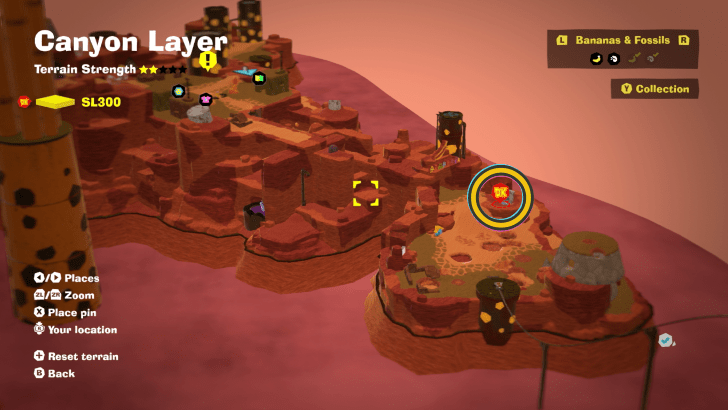
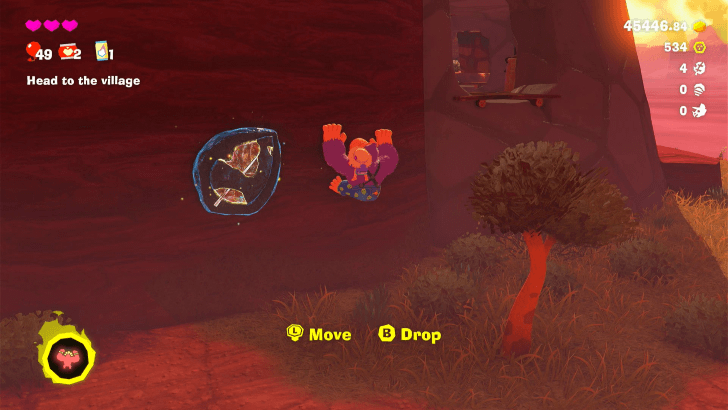
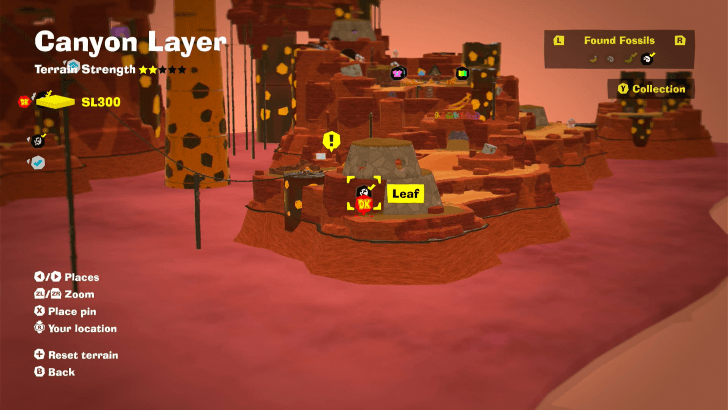
On a stone cylinder on a raised ledge to your right, just before you make for Longneck Plateau Village. |
||
 |
 |
|
|
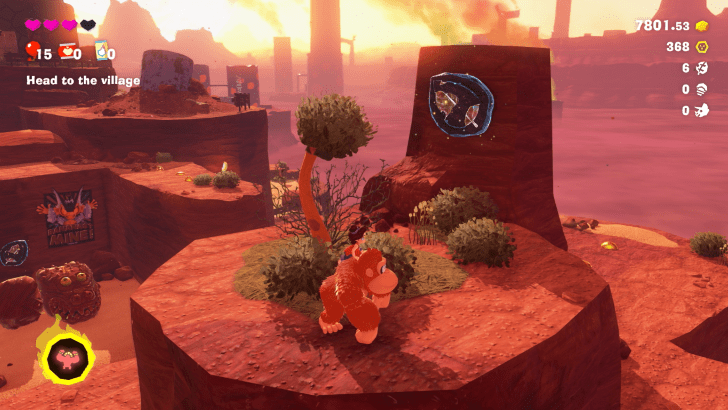
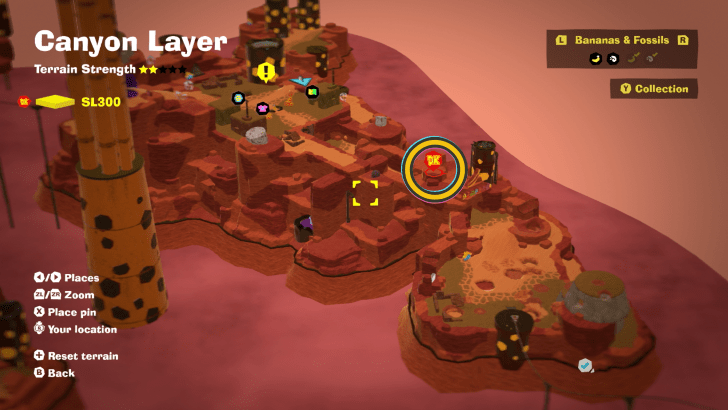
On an outcrop next to a raised grassy platform in the area between Longneck Plateau and Longneck Plateau village. |
||
 |
 |
|
|
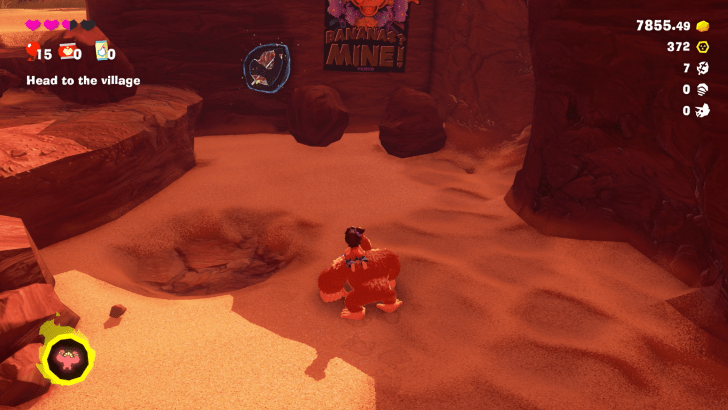
Upon arriving in Longneck Plateau via minecart, found on the wall next to the bottom floor of the house to your right. |
||
 |
 |
|
|
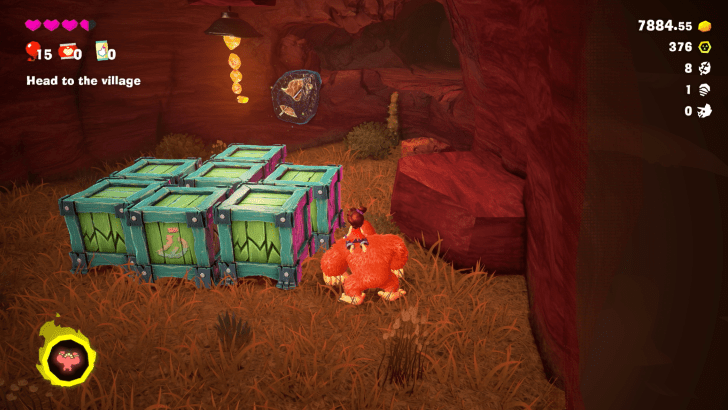
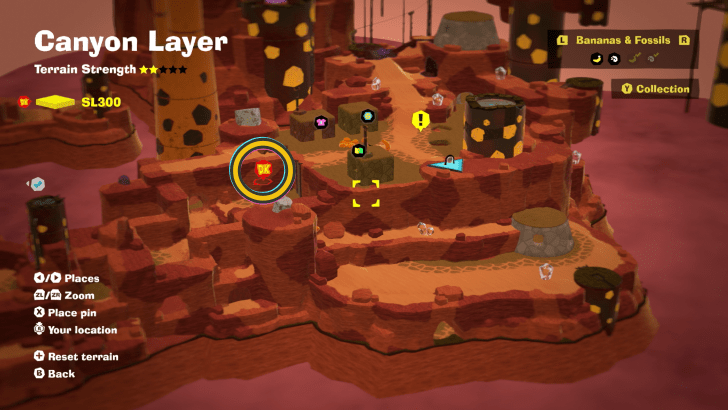
Next to a poster of Void on the ramp up to Longneck Plateau Village. Beware of nearby Crockoids. |
||
 |
 |
|
|
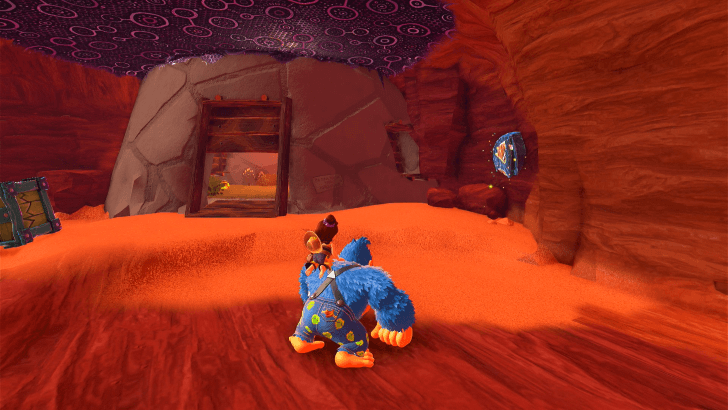
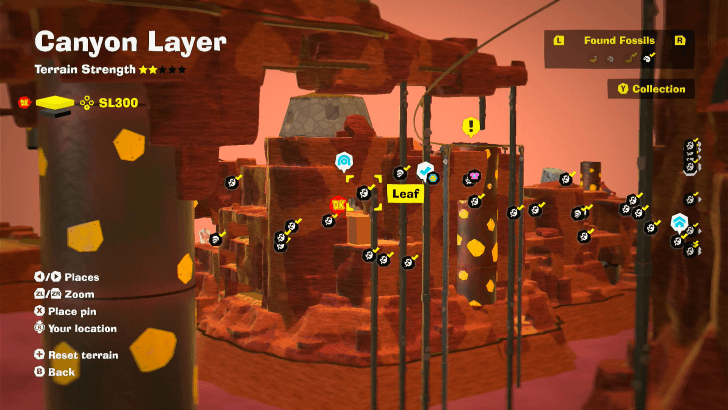
Hidden behind the long left wall just before the ladder that leads to Longneck Plateau Village. |
||
 |
 |
|
|
On the outside wall of a house near the voided minecart station in Plateau Village Getaway |
||
 |
 |
|
|
On the same plateau as the Big-Stretch Base Getaway, can be found beneath the slope leading up to the tall smokestack. |
||
 |
 |
|
|
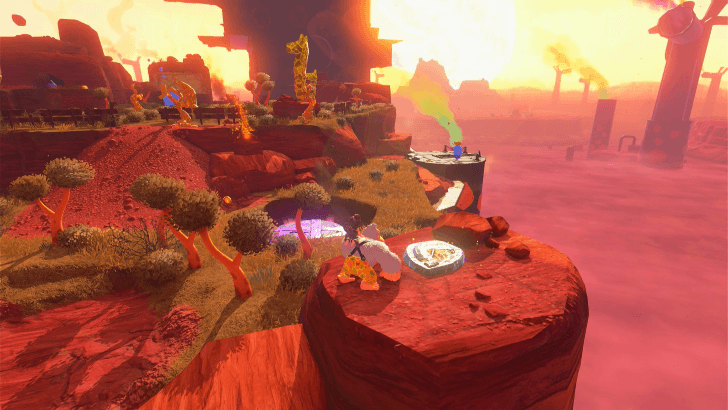
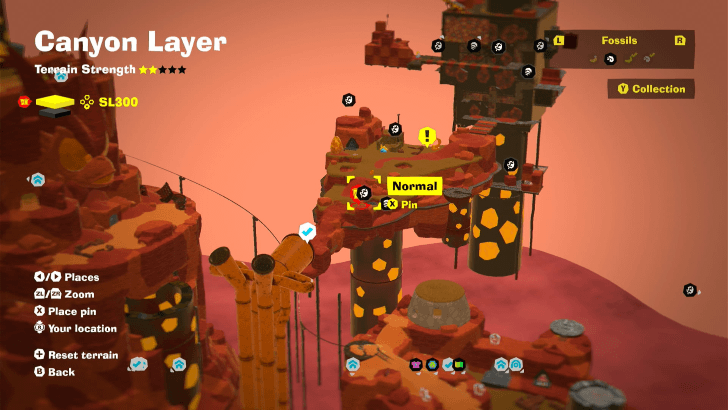
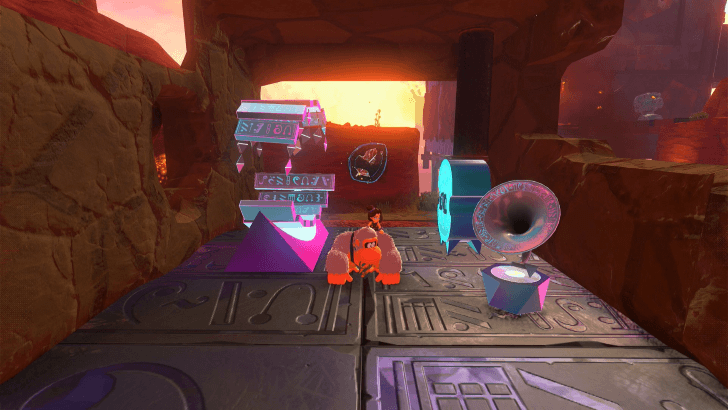
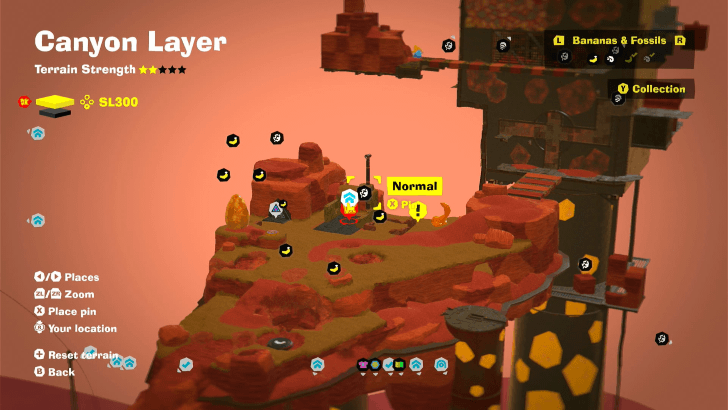
On a raised platform just on the outskirts of Mechaneck Isle |
||
 |
 |
|
|
Visible from the back exit of the Mechaneck Isle Getaway |
||
 |
 |
|
|
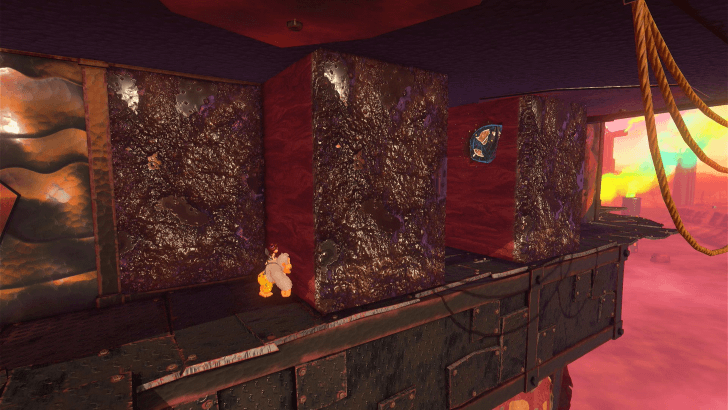
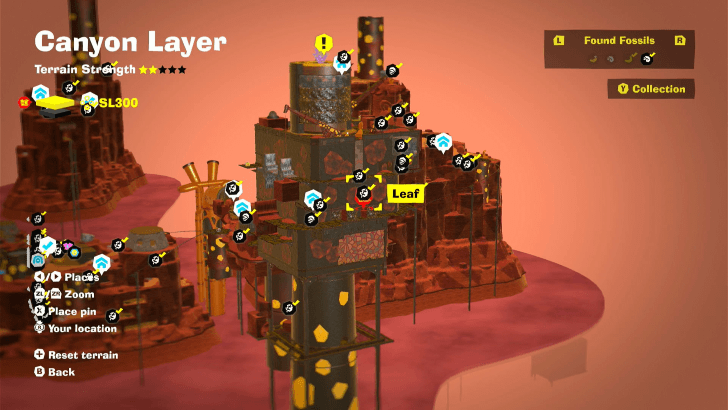
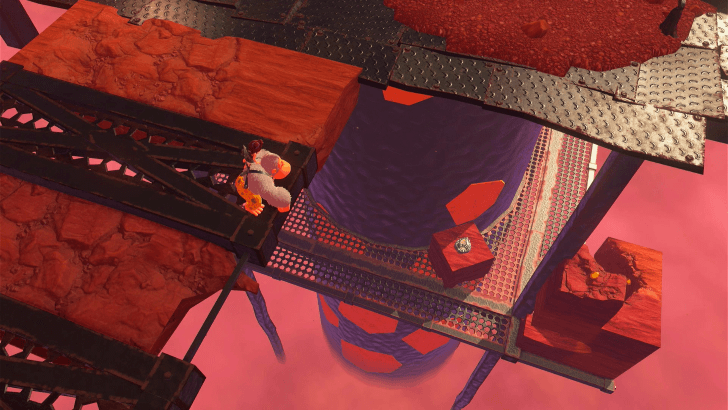
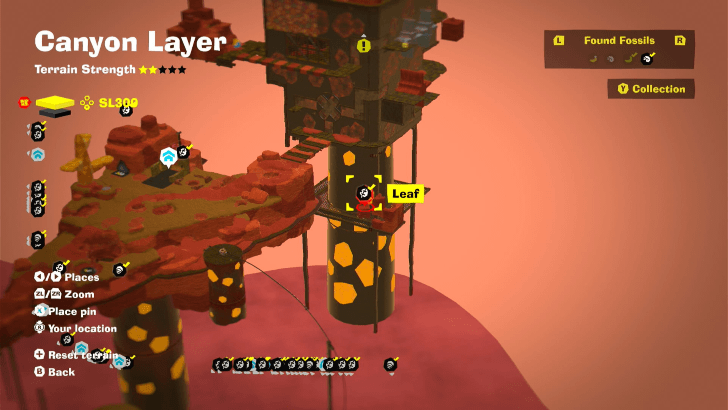
Embedded in the moving walls in your way as you ascend the huge smokestack next to Mechaneck Isle. |
||
 |
 |
|
|
At the base of the huge smokestack next to Mechaneck Isle. |
||
 |
 |
|
|
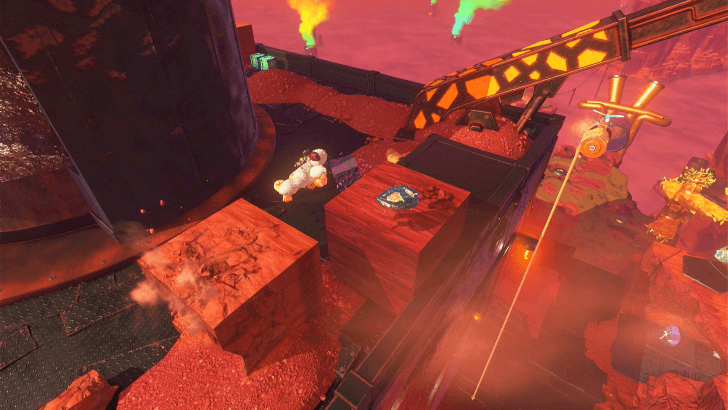
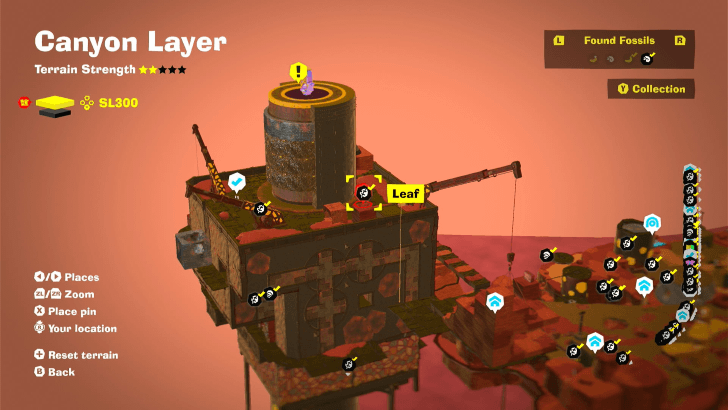
On a large dirt cube near the very top of the huge smokestack next to Mechaneck Isle. |
||
 |
 |
|
|
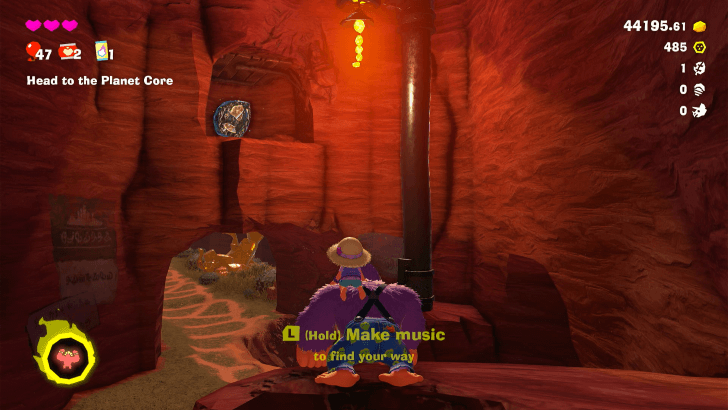
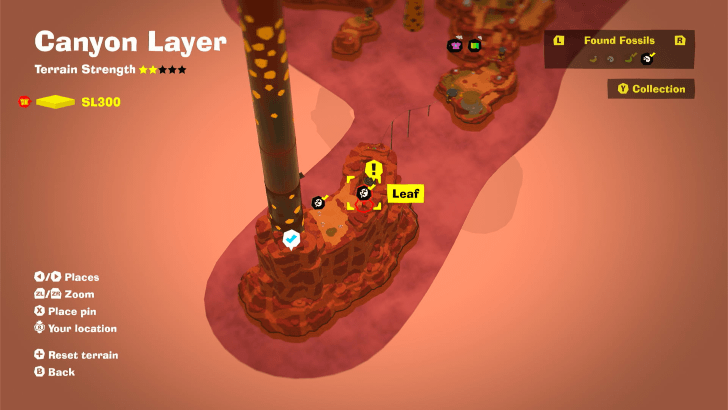
From the Tallfall Cliffs checkpoint, as you follow the path forward, look for an alcove above a concrete wall where this Leaf Fossil can be found. |
||
 |
 |
|
|
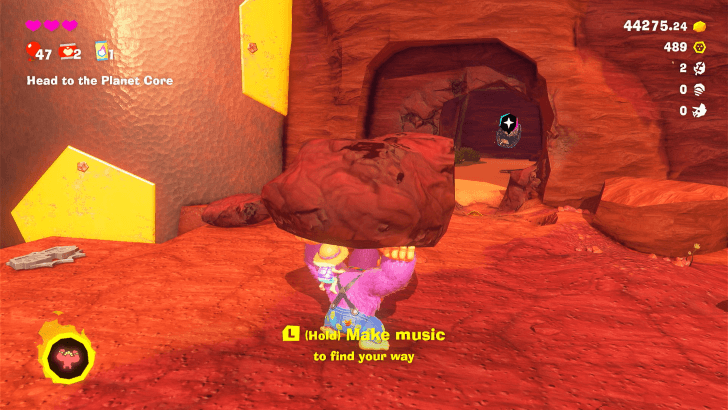
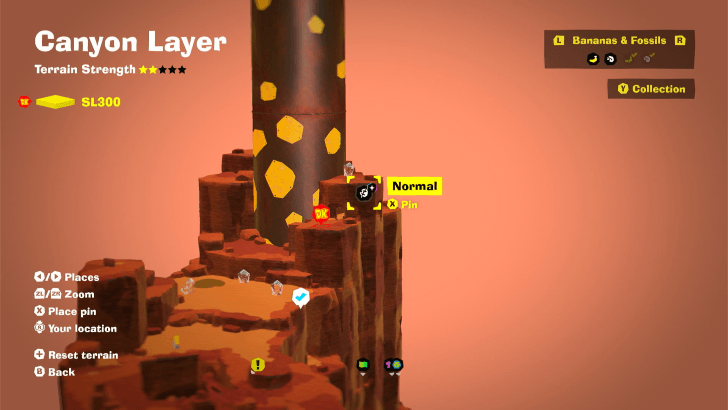
From the Scenic Smokestack View Banandium Gem, drop to the cliffs below. This fossil is in an upper level cave near the base of this smokestack. |
||
 |
 |
|
|
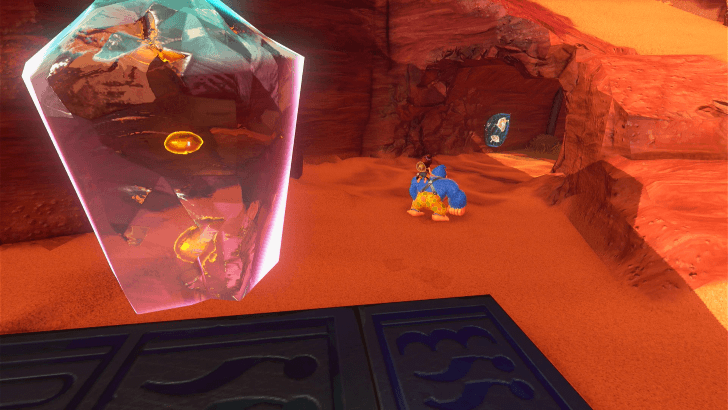
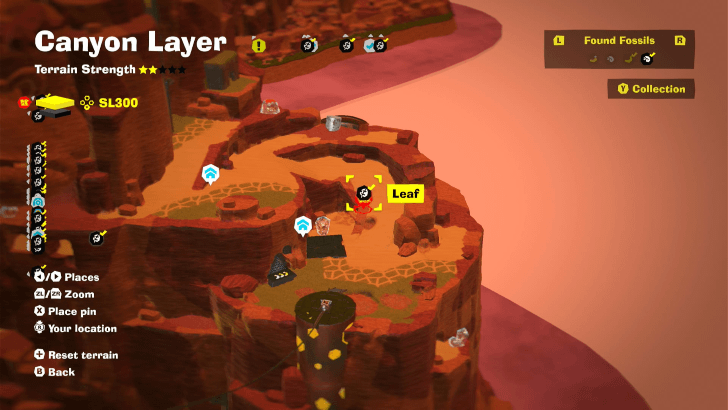
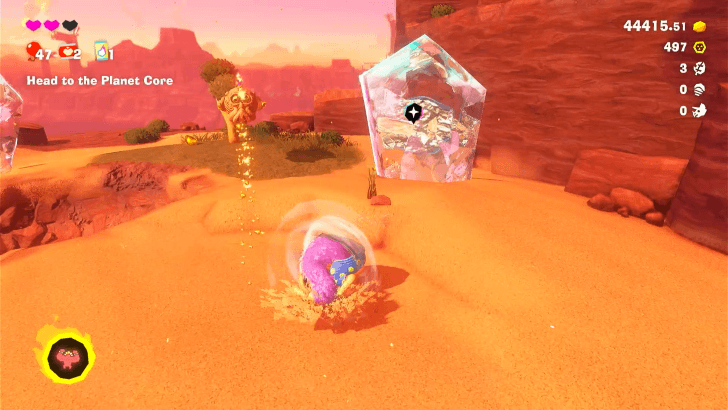
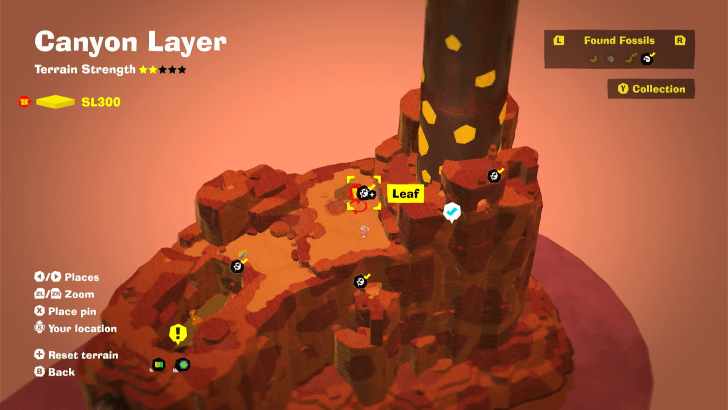
On the top surface of Tallfall Cliffs, this Leaf fossil is encased in Crystal. Beware of the explosive enemies in the vicinity. |
||
 |
 |
|
|
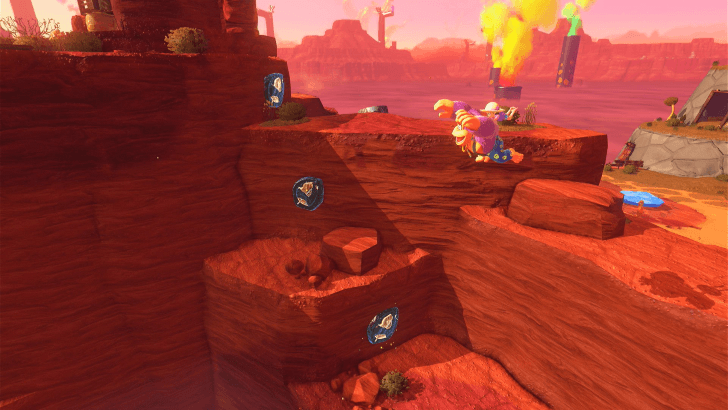
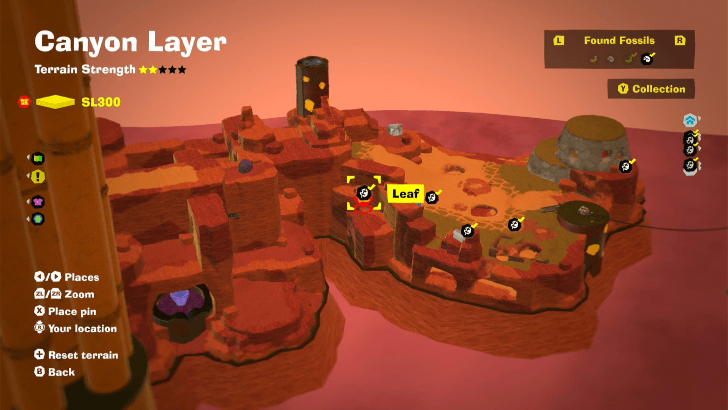
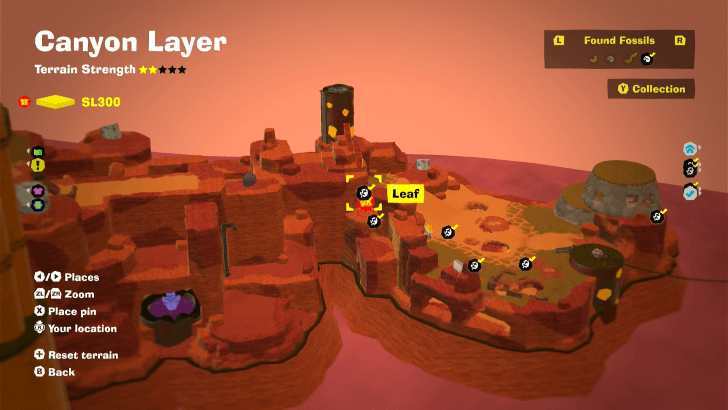
Found on the stepped cliffs behind the Longneck Plateau Getaway |
||
 |
 |
|
|
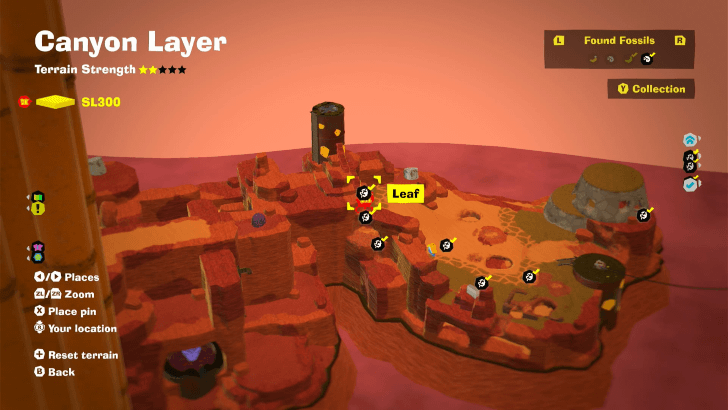
Found on the stepped cliffs behind the Longneck Plateau Getaway |
||
 |
 |
|
|
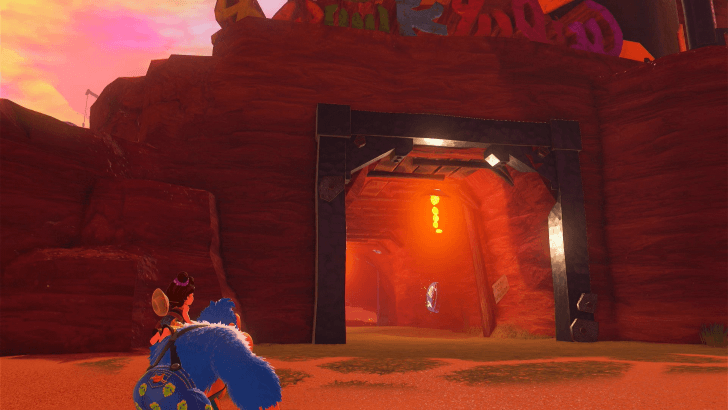
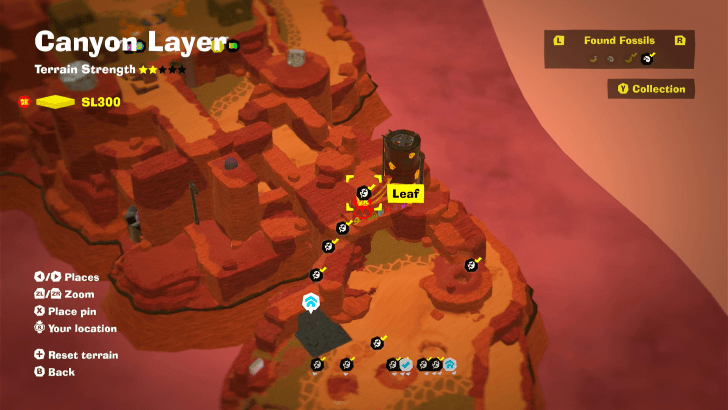
Found on the stepped cliffs behind the Longneck Plateau Getaway |
||
 |
 |
|
|
In the path from Longneck Plateau to Longneck Plateau Village |
||
 |
 |
|
|
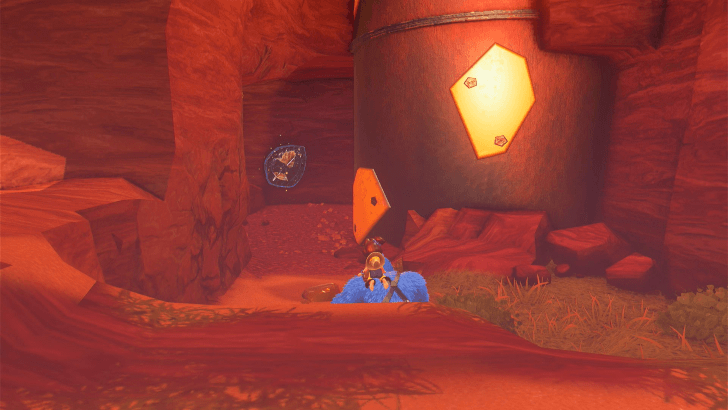
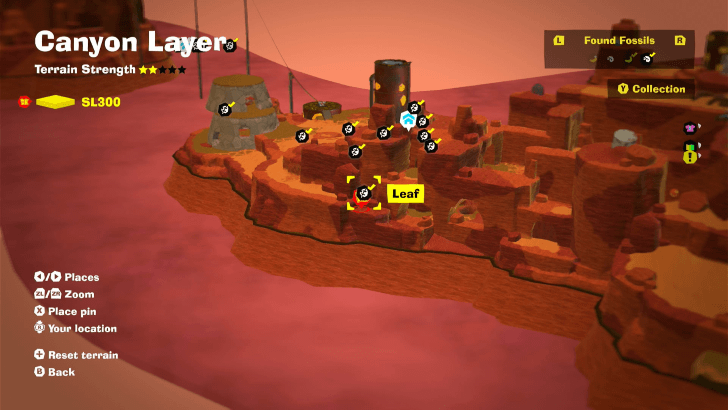
Near a shorter smokestack on the outside edge of Longneck Plateau. |
||
 |
 |
|
|
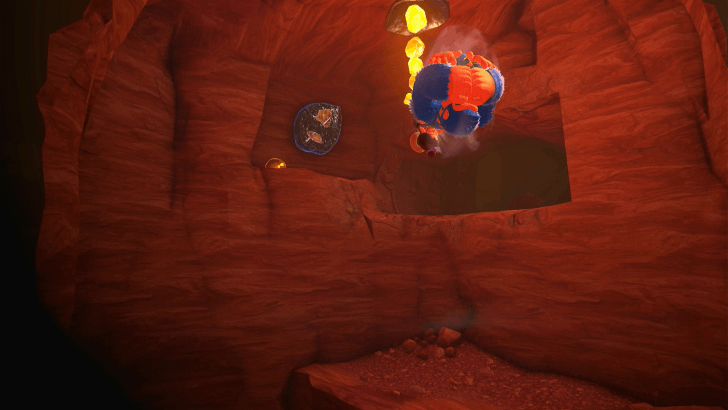
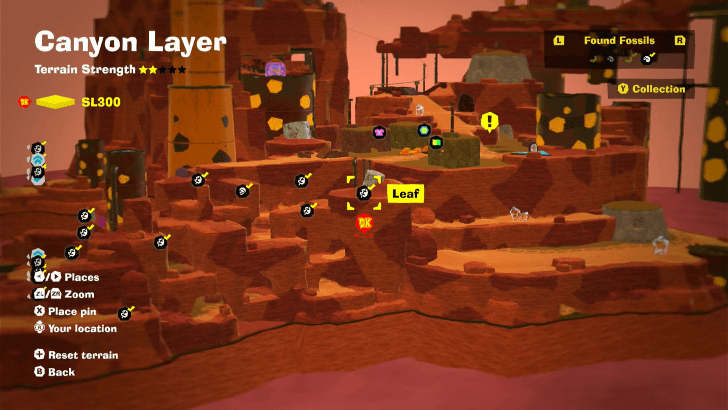
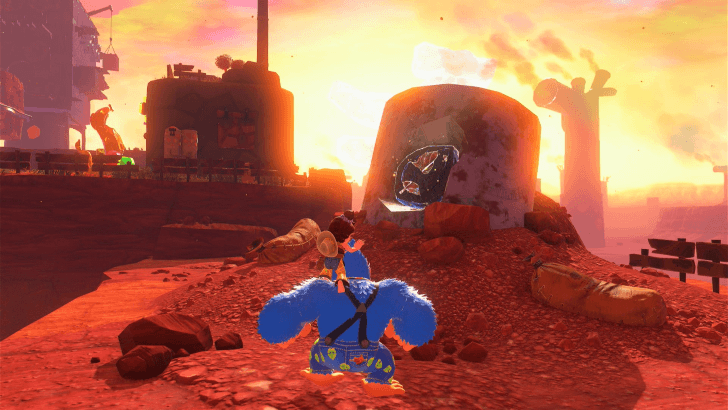
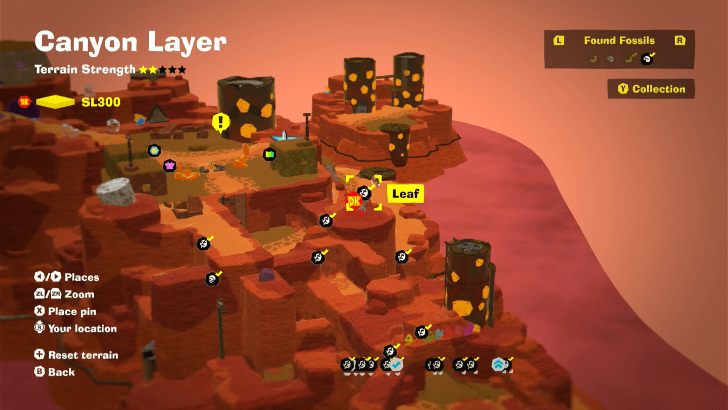
In an alcove just outside of Longneck Plateau Village. In the area just beneath one of the cliffs with a stone cylinder sticking out of it. |
||
 |
 |
|
|
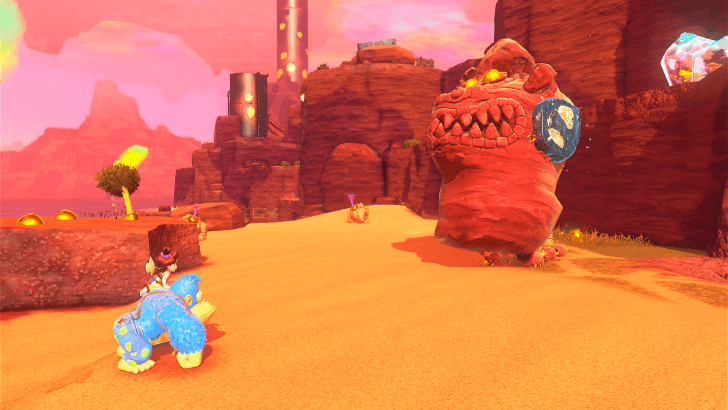
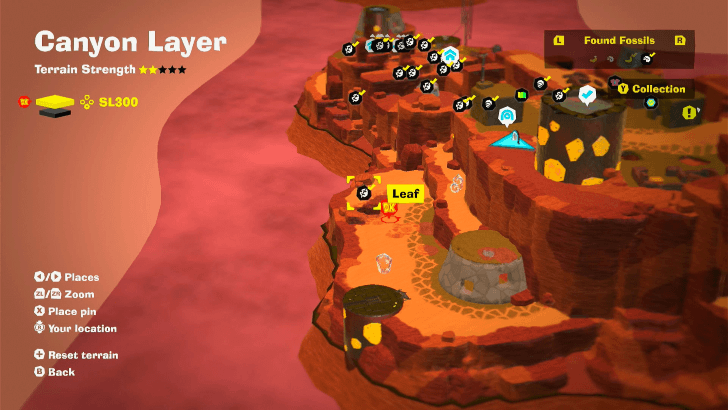
On a stone cylinder on a cliff just outside of Longneck Plateau Village. |
||
 |
 |
|
|
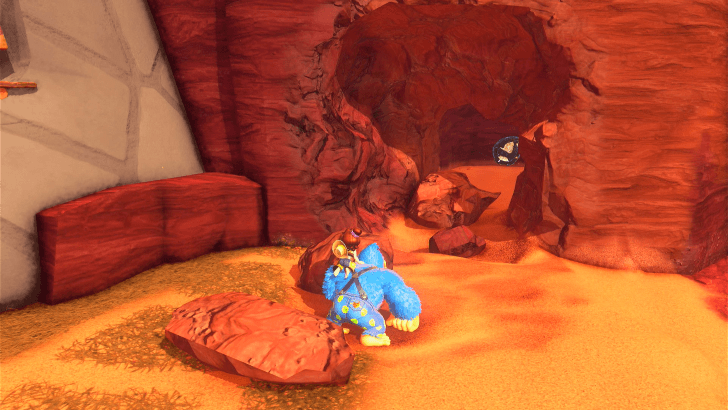
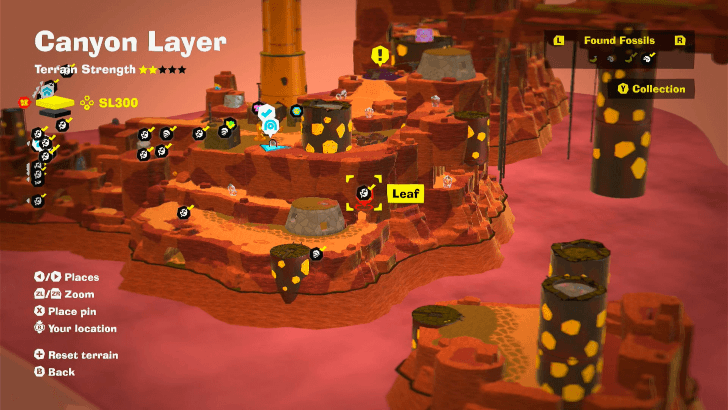
Stuck on a Crockoid in the lower plateau to the side of Longneck Plateau Village. |
||
 |
 |
|
|
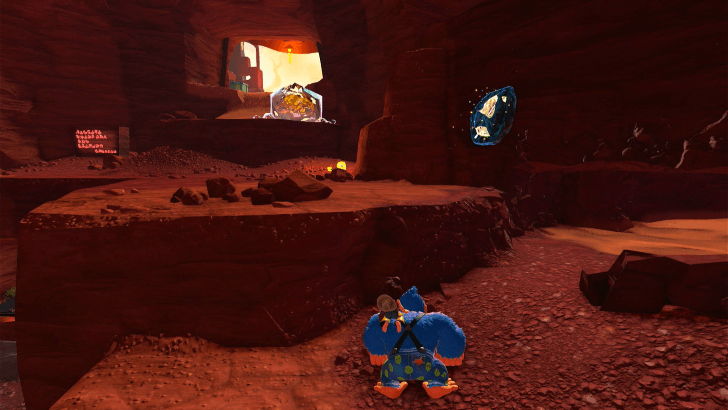
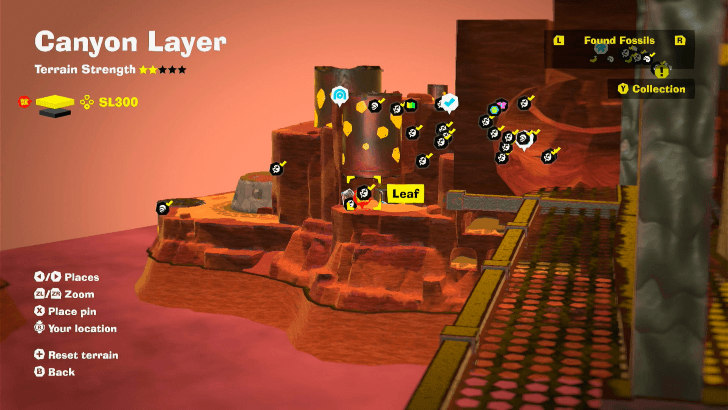
Behind a wall to the right of the house on the lower plateau to the side of Longneck Plateau Village. |
||
 |
 |
|
|
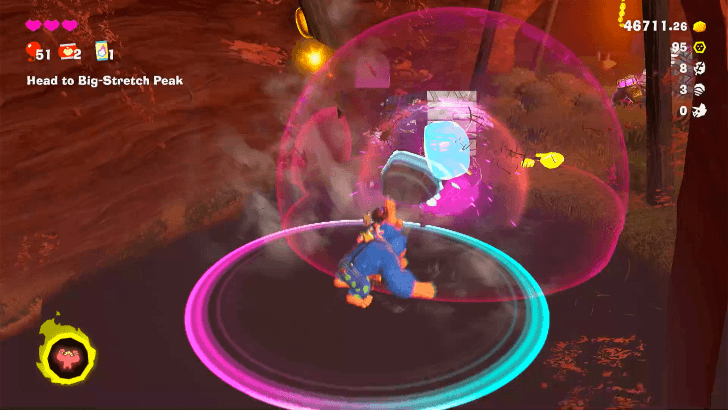
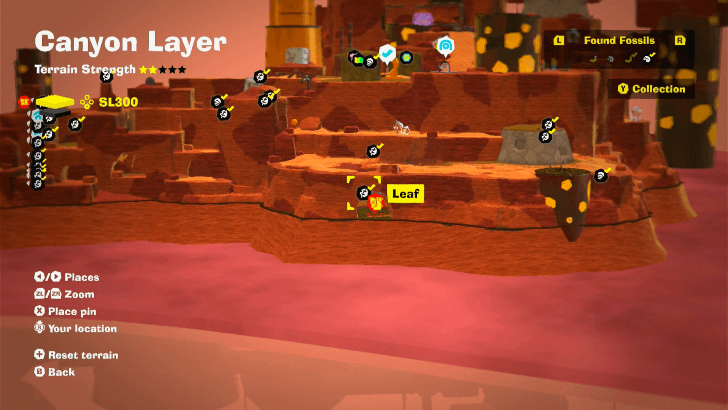
In an underground chamber beneath Longneck Plateau Village. |
||
 |
 |
|
|
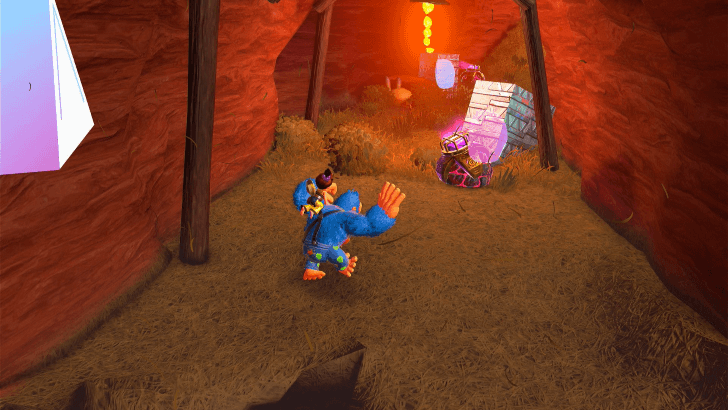
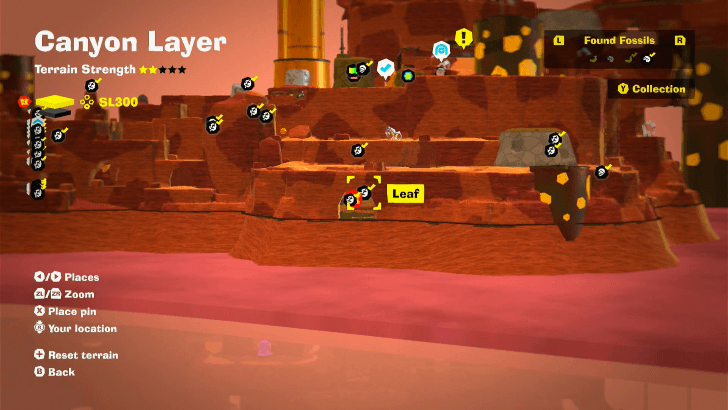
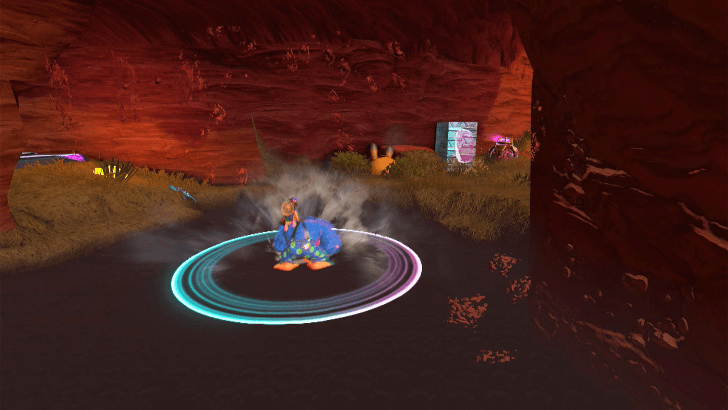
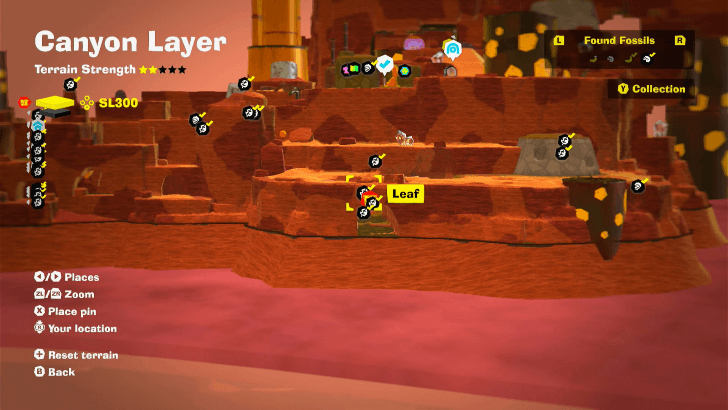
In an underground tunnel at the lowest platform beneath Longneck Plateau Village. The fossil is embedded in concrete, but you can detonate the nearby bomb to collect the fossil. |
||
 |
 |
|
|
In an underground tunnel at the lowest platform beneath Longneck Plateau Village. The fossil is embedded in concrete, but you can detonate the nearby bomb to collect the fossil. |
||
 |
 |
|
|
In an underground tunnel at the lowest platform beneath Longneck Plateau Village. The fossil is embedded in concrete, but you can detonate the nearby bomb to collect the fossil. |
||
 |
 |
|
|
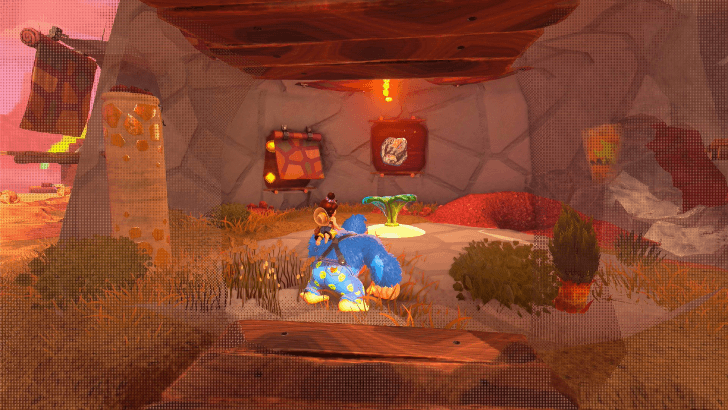
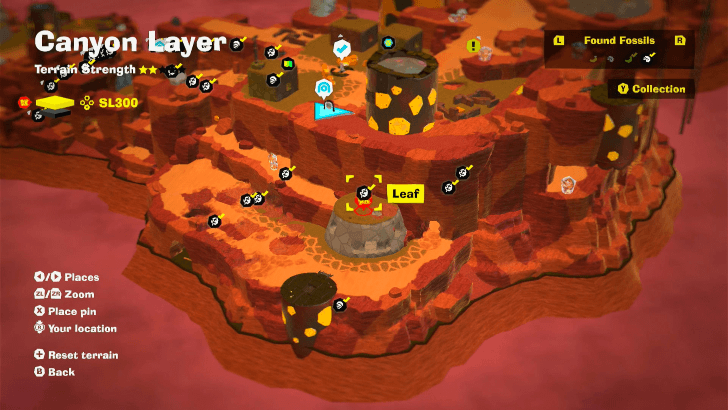
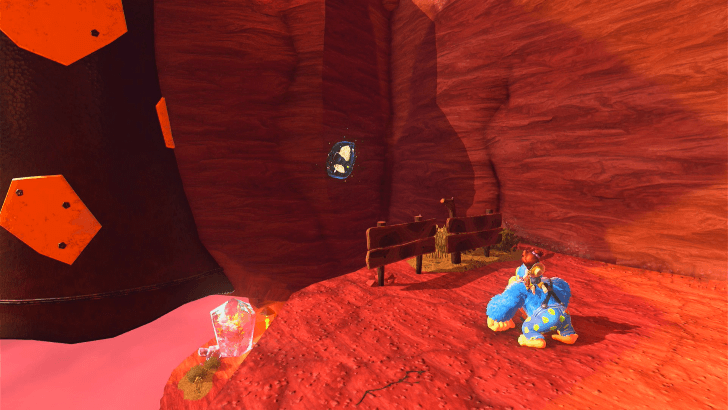
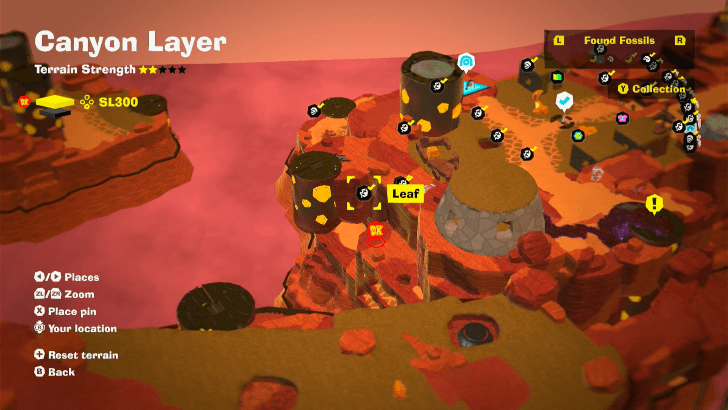
In the window of the house on the lower plateau to the side of Longneck Plateau Village. |
||
 |
 |
|
|
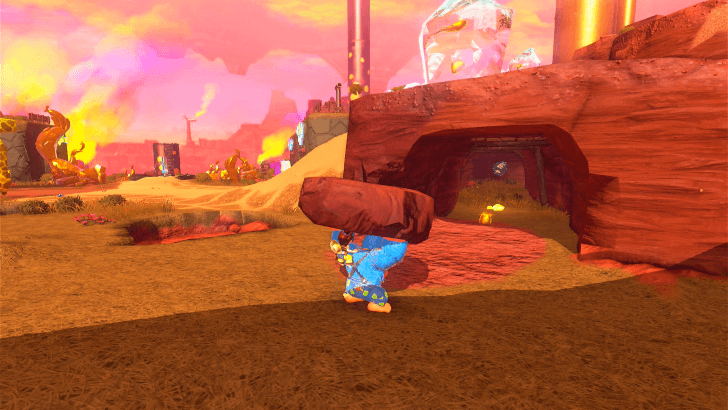
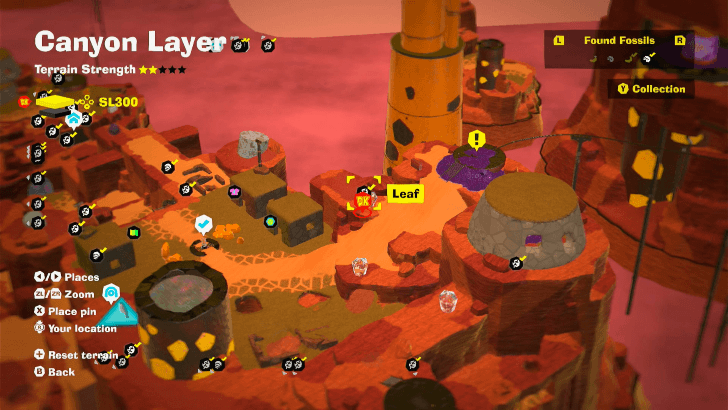
On the side of a cliff as seen to the right of the back exit of the Plateau Village Getaway. |
||
 |
 |
|
|
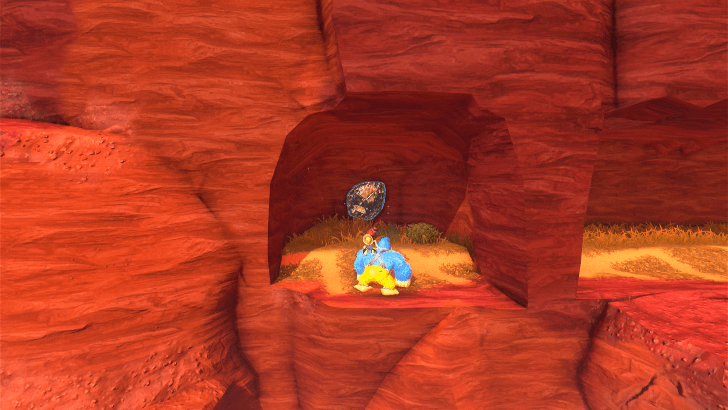
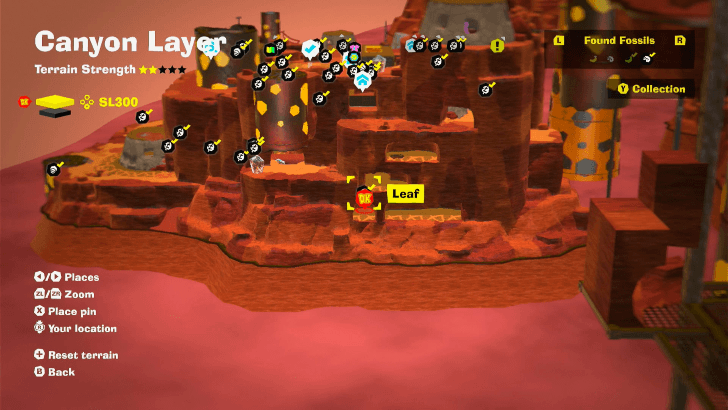
At the end of a long corridor that runs under the sandy slope up to the minecart station that leads to Big-Stretch Peak. The entrance to the corridor should be right by the Plateau Village Getaway. |
||
 |
 |
|
|
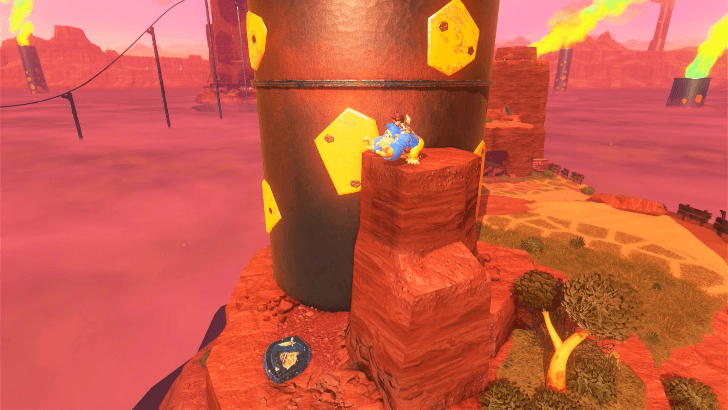
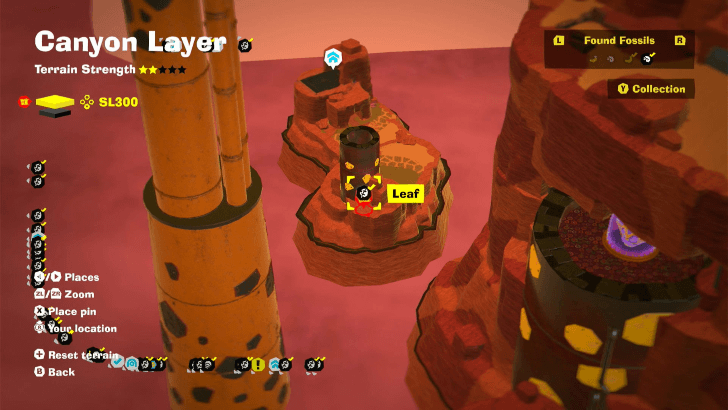
From the back exit of the Plateau Village Getaway, drop down to the lowest section. This fossil is in a small alcove and visible from the outside edge of the map. |
||
 |
 |
|
|
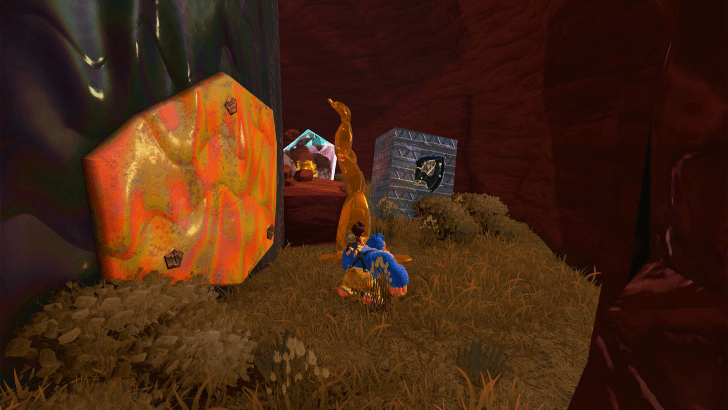
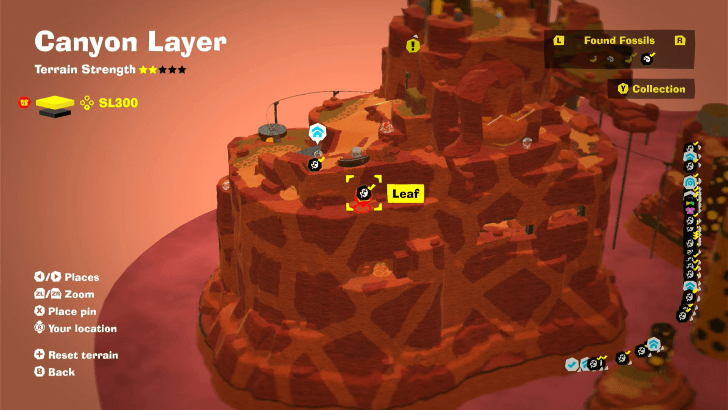
Found near the lone smokestack on the Foreman's Island. You can reach this island by clearing a nearby void stake, and taking a path that goes through SL 301, where Banandium Gem 79 is. |
||
 |
 |
|
|
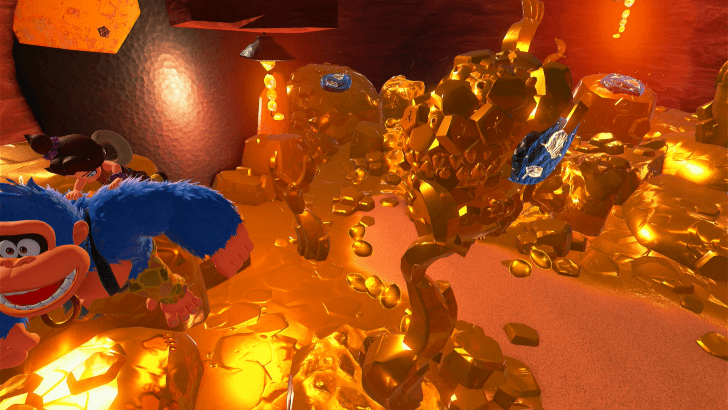
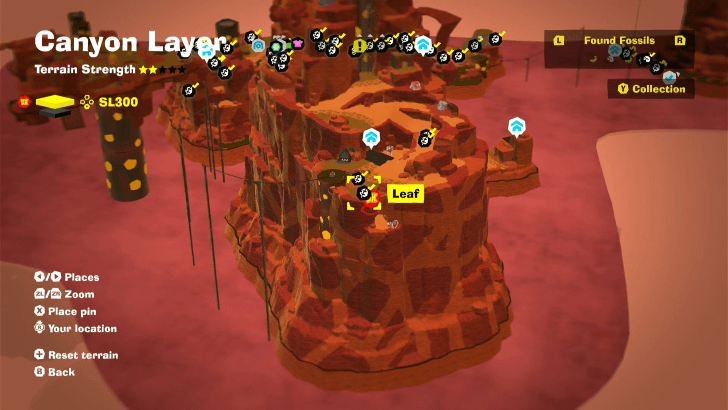
From where Banandium Gem 33 is obtained, there is an entrance to a cave where this fossil can be found. The fossil itself is embedded in concrete so you'll have to smash it out of the block. |
||
 |
 |
|
|
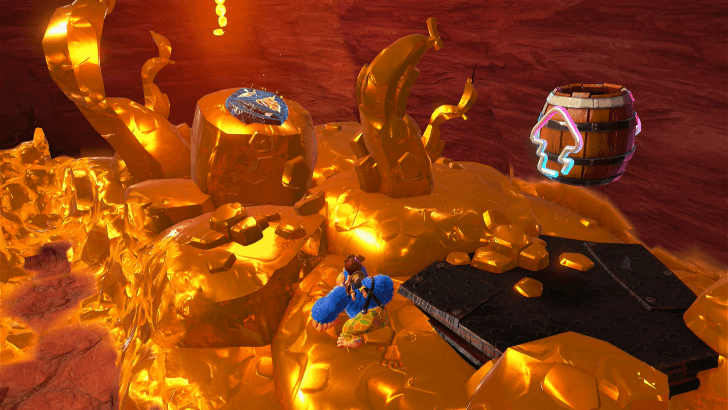
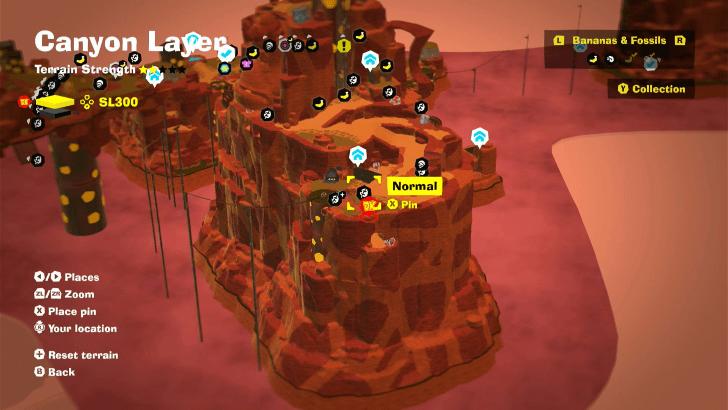
Just beneath Big-Stretch Base Getaway and its nearby minecart station is a chamber full of Gold deposits. This fossil can be found stuck on a Golden Crockoid. |
||
 |
 |
|
|
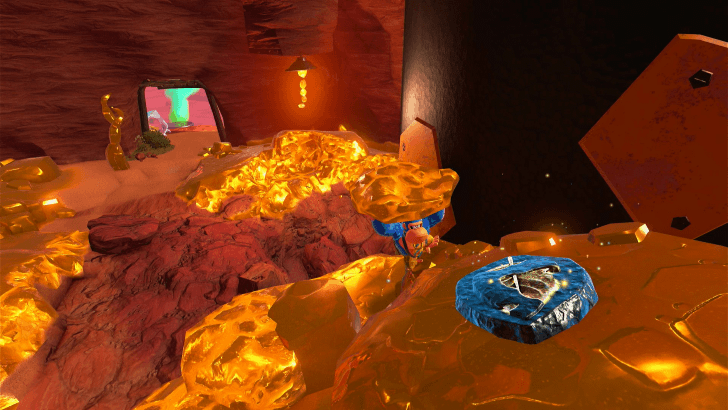
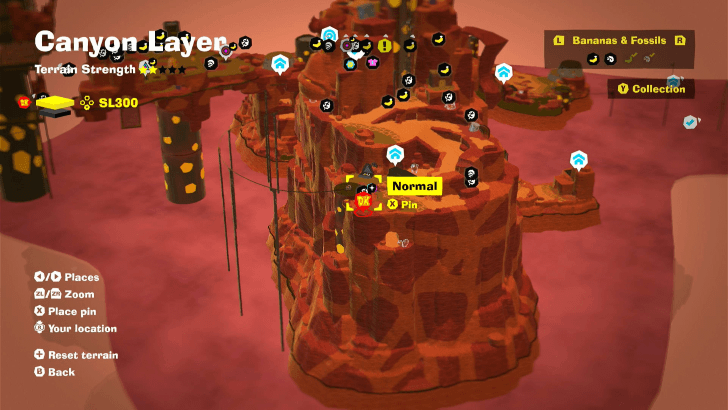
Just beneath Big-Stretch Base Getaway and its nearby minecart station is a chamber full of Gold deposits. This fossil is right next to the barrel cannon that will return you to the top of the plateau. |
||
 |
 |
|
|
Just beneath Big-Stretch Base Getaway and its nearby minecart station is a chamber full of Gold deposits. This fossil is near the base of the smokestack in this room. |
||
 |
 |
|
|
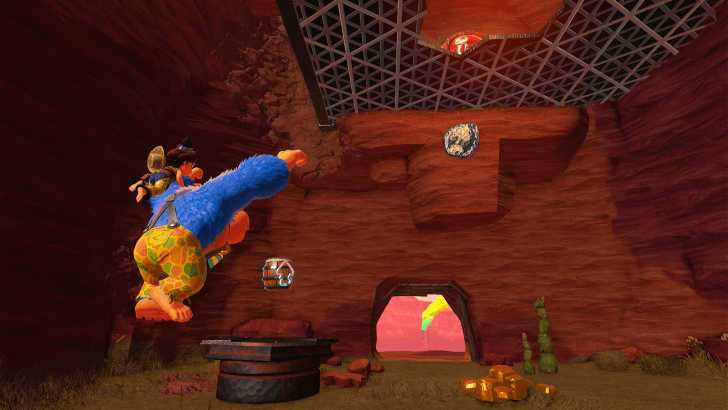
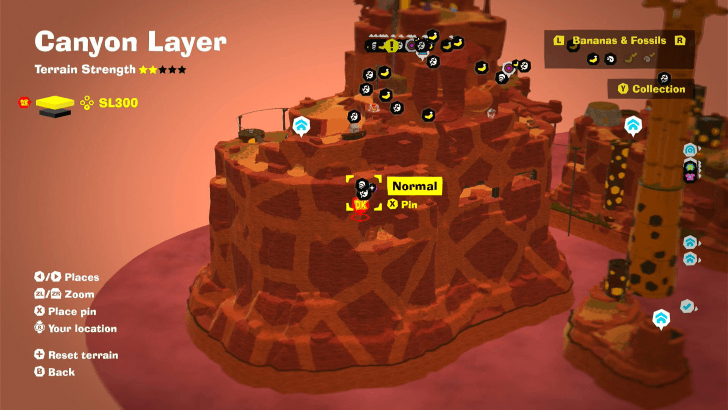
On the other side of the slope next to Big-Stretch Getaway, there is a large cave you can enter. Once inside, turn around and look up to find this Leaf fossil just above the entryway. |
||
 |
 |
|
|
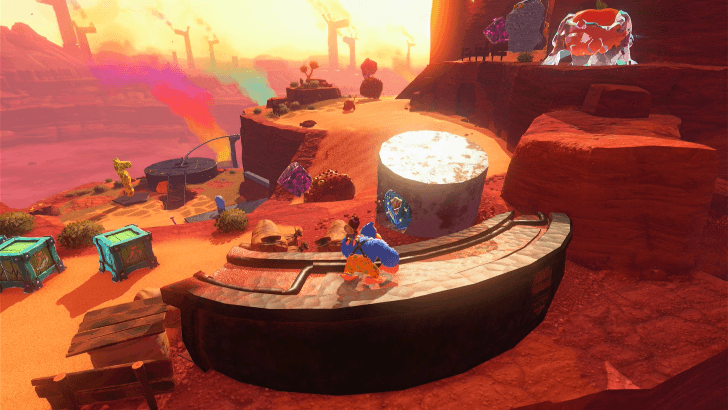
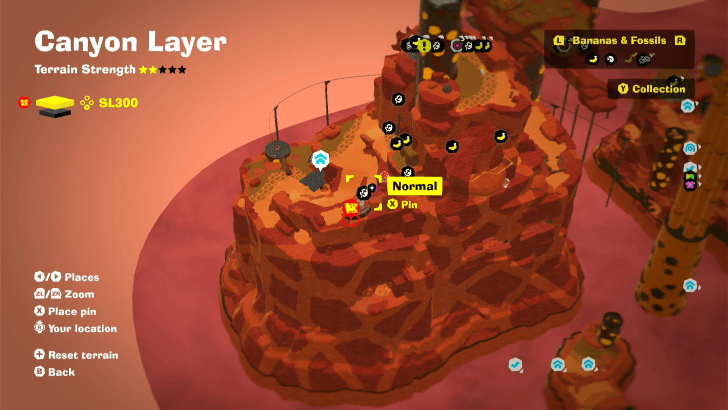
On a stone cylinder on the slope leading up to the tall smokestack on Big-Stretch Peak. |
||
 |
 |
|
|
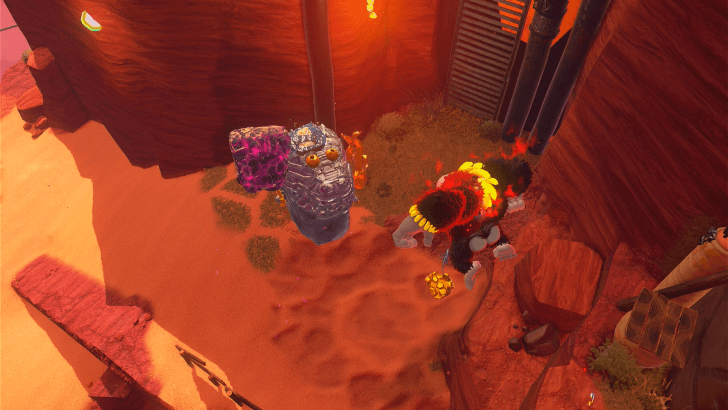
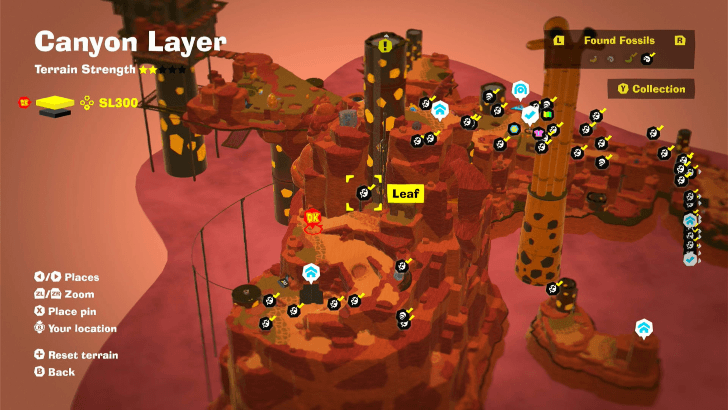
On the top of the head of a Concrete Crockoid found at the base of the ladder leading up to the tallest smokestack on Big-Stretch Peak. |
||
 |
 |
|
|
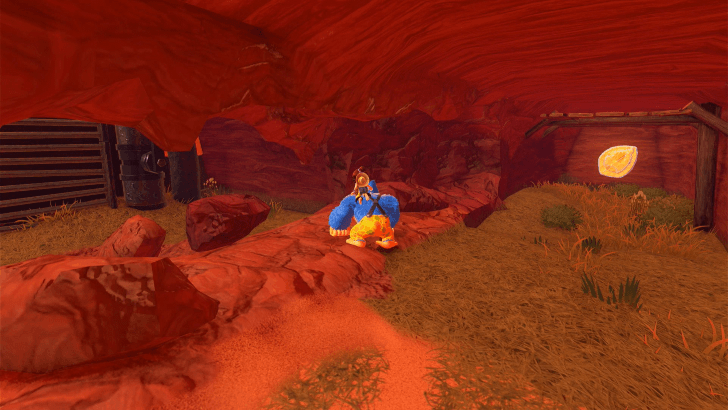
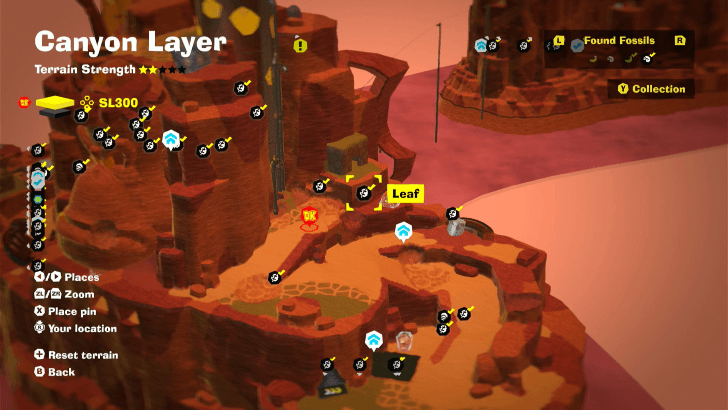
From the base of the ladder of the smokestack on Big-Stretch Peak, dig beneath it to find Banandium Gem 34. With a hand slap, you should detect this Leaf fossil hidden in a nearby wall. |
||
 |
 |
|
|
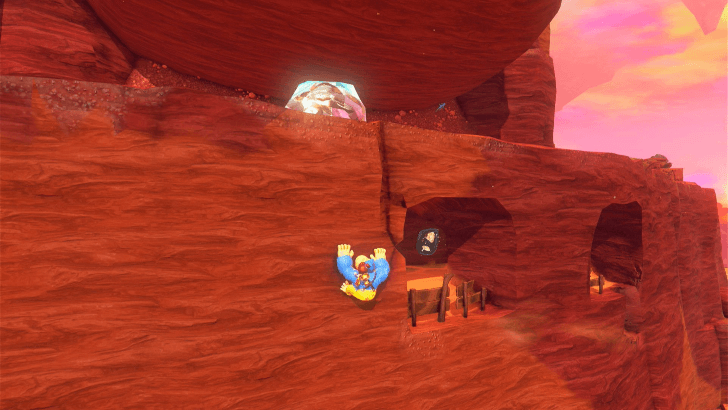
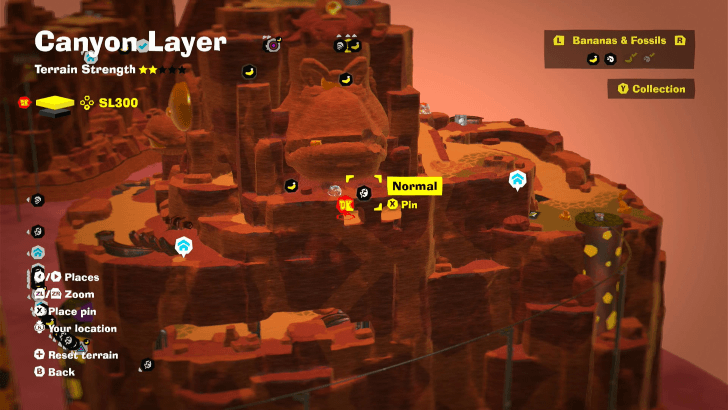
In an alcove beneath the sculpture of Cranky Kong's head on the side of Big-Stretch Peak. |
||
 |
 |
|
|
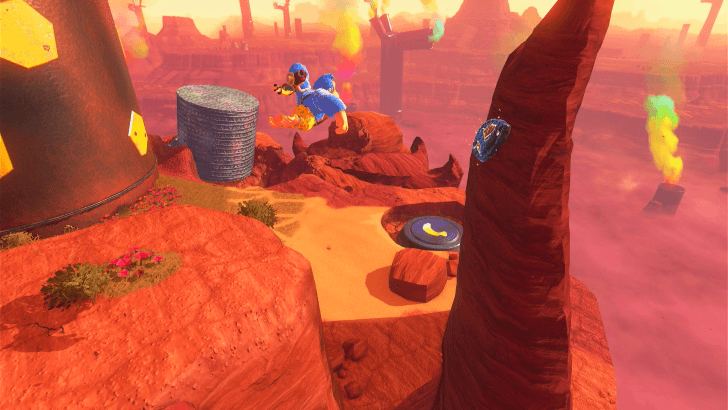
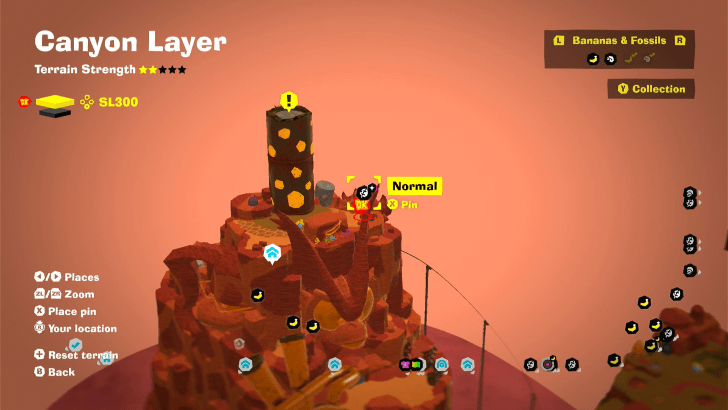
Near the tip of the ear of the sculpture of Void Kong's head on the far-side of Big-Stretch Peak. |
||
 |
 |
|
|
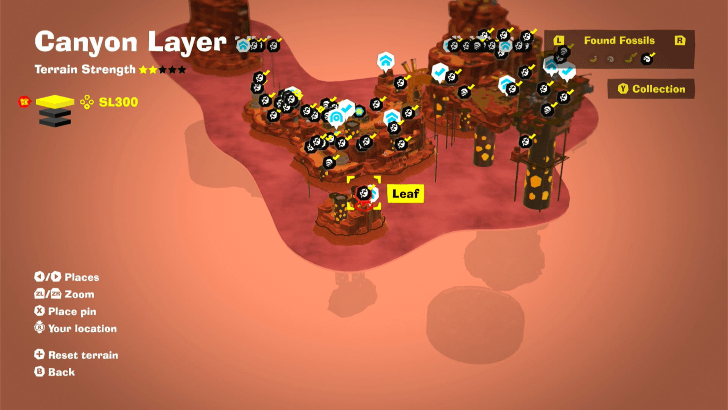
Found just above the Twin-Horn Smokestacks Getaway. |
||
 |
 |
|
|
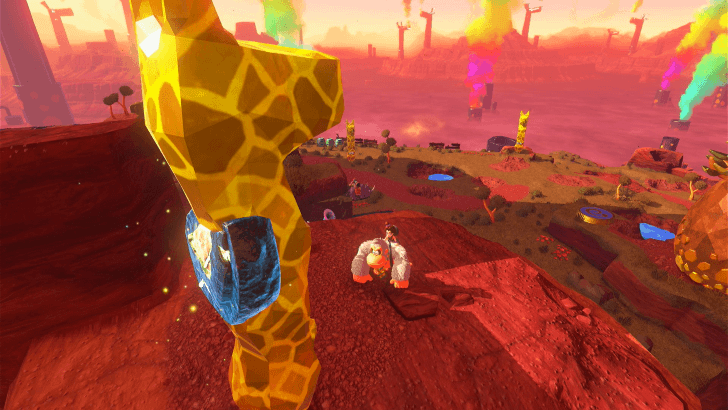
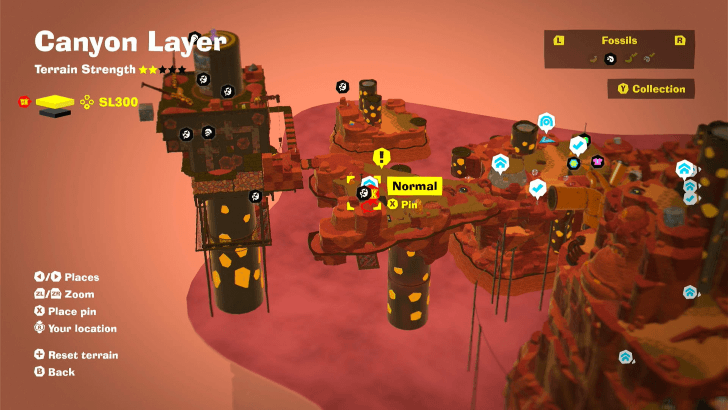
On the neck of a Giraffe Fractone found near the Mechaneck Isle Getaway. |
||
 |
 |
|
|
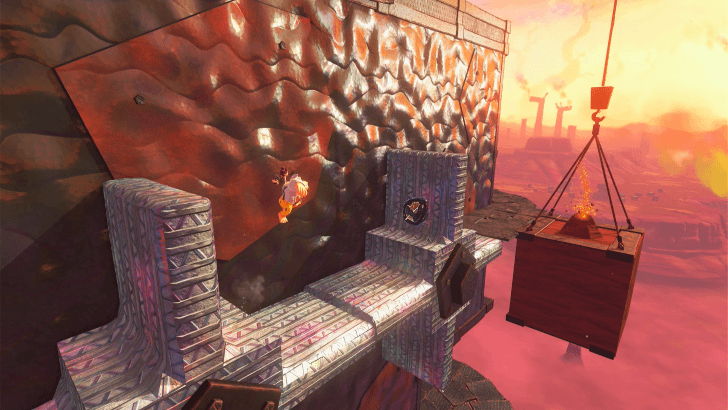
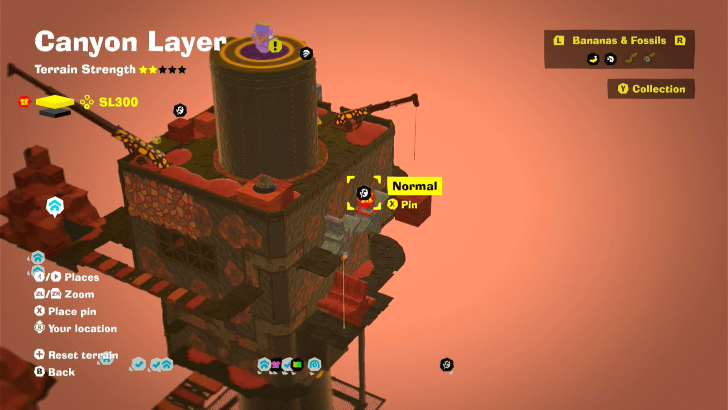
Embedded in the concrete rotating obstacles as you ascend the huge smokestack next to Mechaneck Isle. |
||
 |
 |
|
|
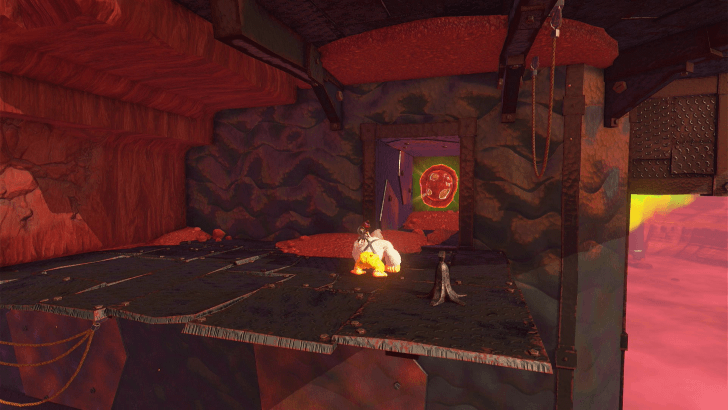
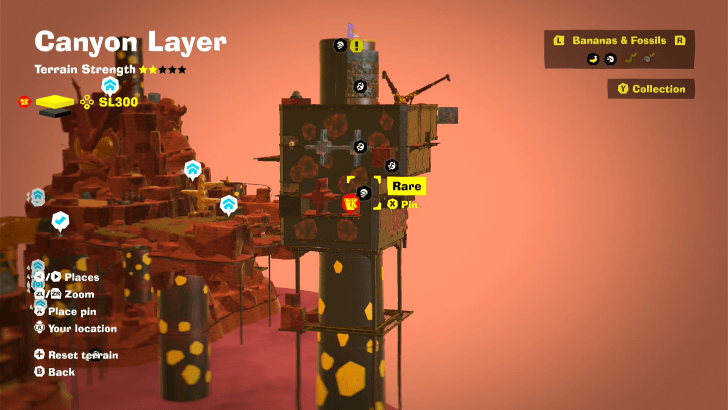
Intentionally drop down from the rotating dirt cogs and find this Trilobite fossil behind a wall. |
||
 |
 |
|
|
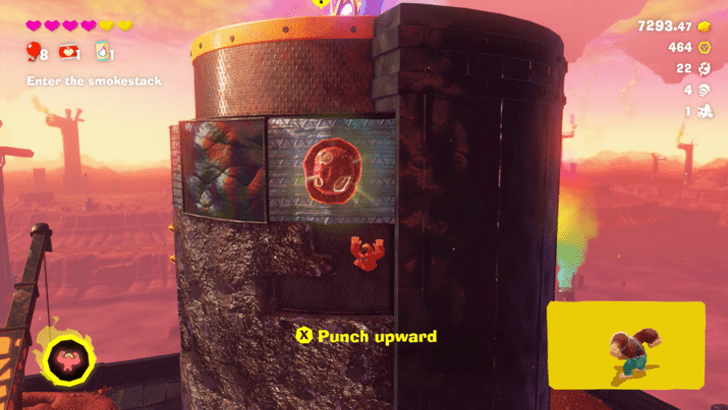
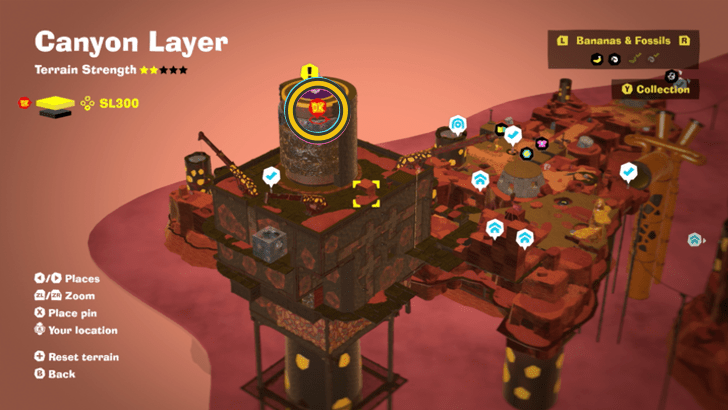
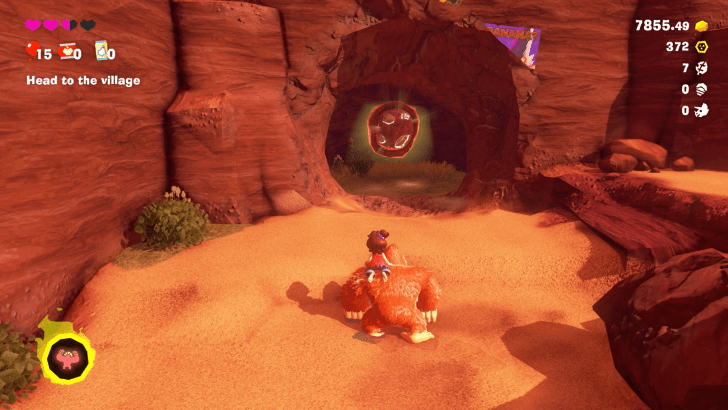
One of the rotating concrete segments on the smokestack will have this Fossil embedded to it. Transform into Kong Bananza so you can punch through the Fossil. |
||
 |
 |
|
|
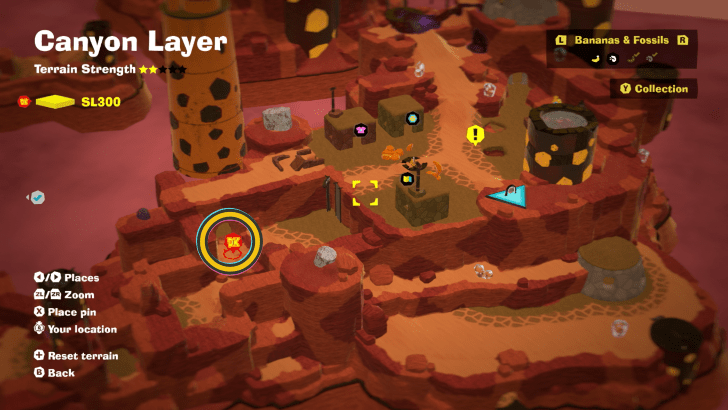
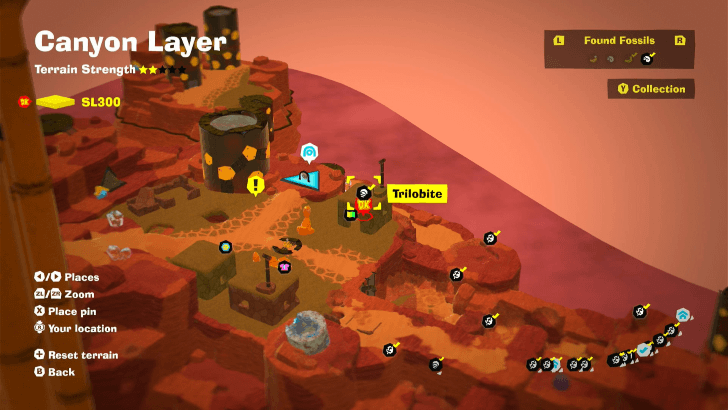
Right before the ladder that leads to the Longneck Plateau Village is a wall with a Void Kong poster. Punch through the poster to reveal a small room behind it with the Fossil inside. |
||
 |
 |
|
|
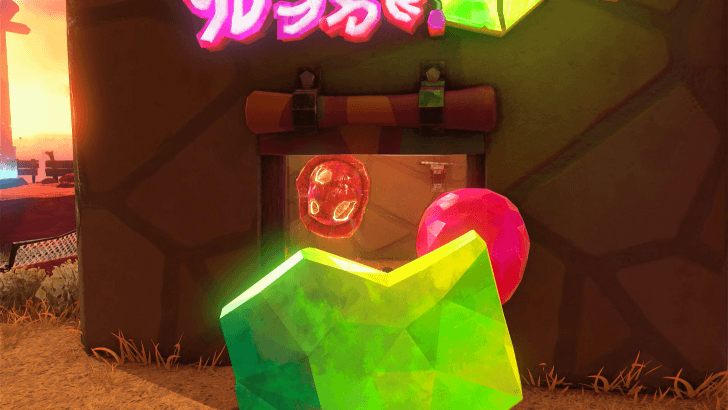
In the Stuff Shop in the Longneck Plateau Village. |
||
 |
 |
|
|
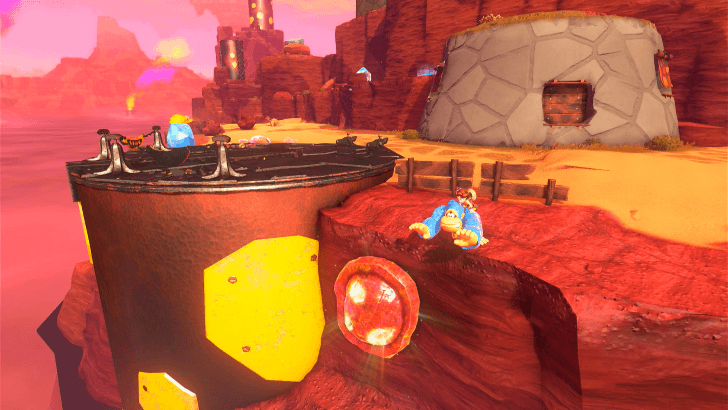
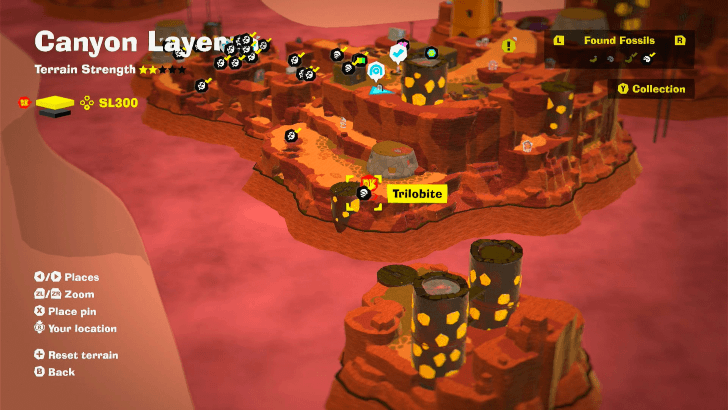
On the edge next to the minecart platform on the lower plateau to the side of Longneck Plateau Village. |
||
 |
 |
|
|
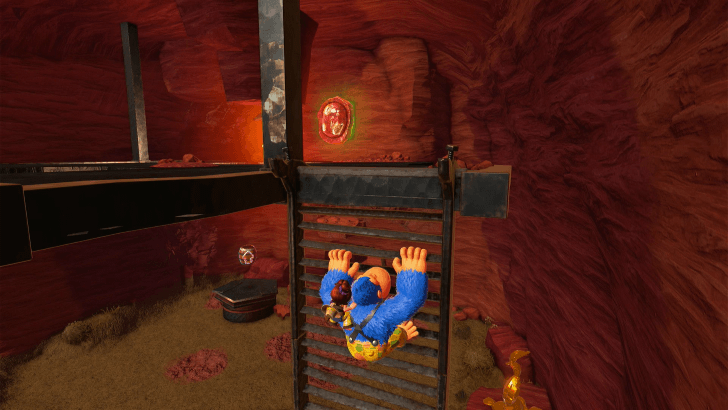
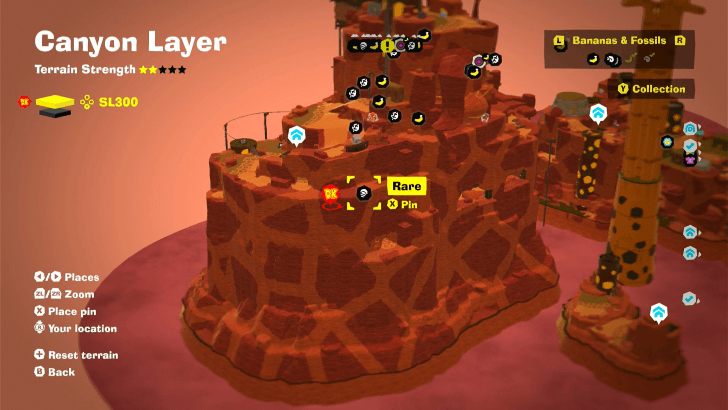
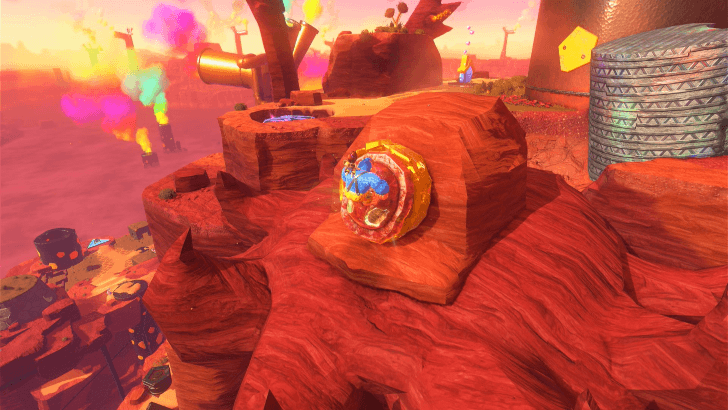
On the other side of the slope next to Big-Stretch Getaway, there is a large cave you can enter. Once inside, you'll find a ladder you can climb up to reach this Trilobite. |
||
 |
 |
|
|
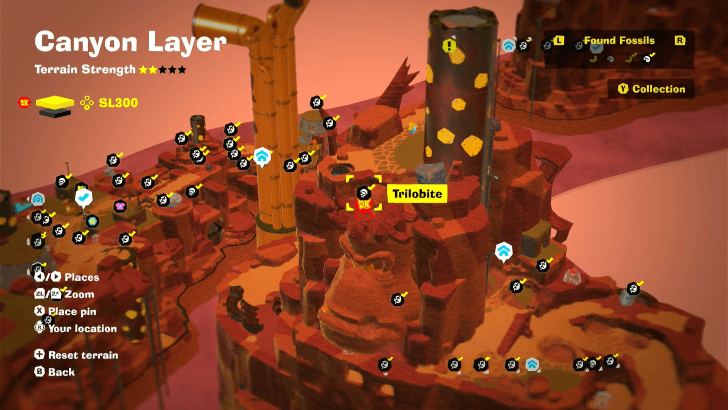
Found on the helmet portion of the sculpture of Cranky Kong's head on the side of Big-Stretch Peak |
||
 |
 |
|
|
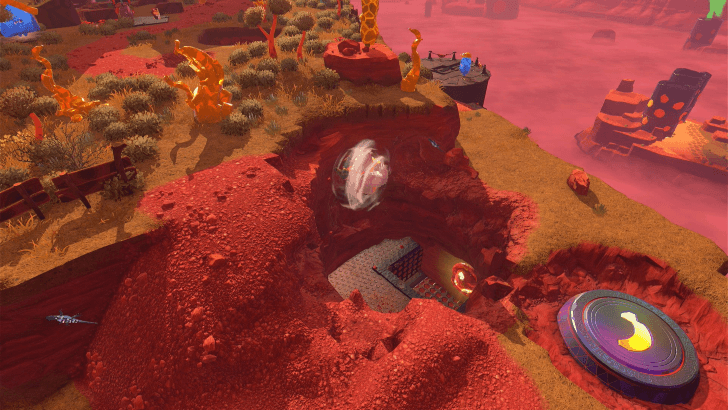
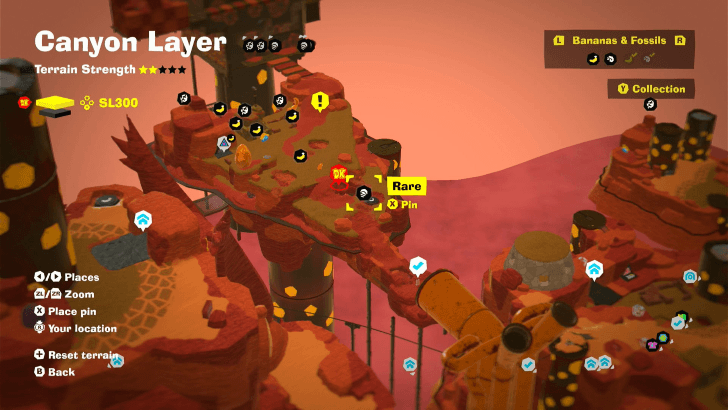
Hidden in the ground near the Battle Challenge entrance on the on the outskirts of Mechaneck Isle. |
||
SL 301 Fossil Locations
| Overworld View | Map Location | |
|---|---|---|
 |
 |
|
|
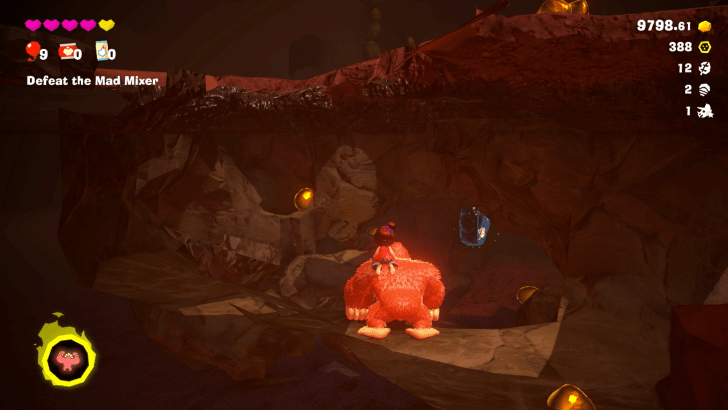
On the slopes next to the Banandium Refinery Offices, you can detect this fossil with a hand slap. It is hidden behind a wall marked by a sticker with a necktie design. |
||
 |
 |
|
|
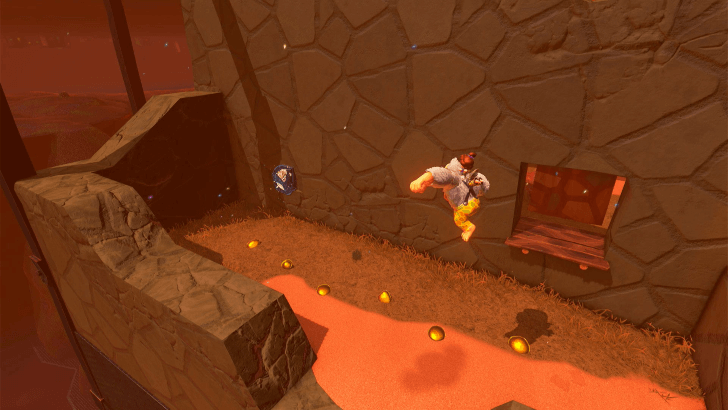
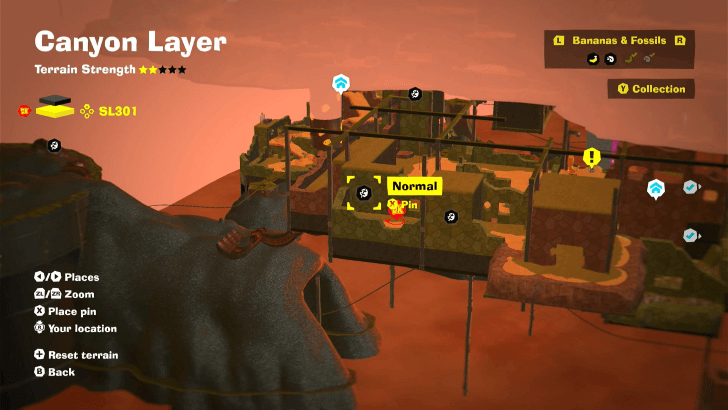
In one of the larger rooms in the Banandium Refinery Staff Dorms. |
||
 |
 |
|
|
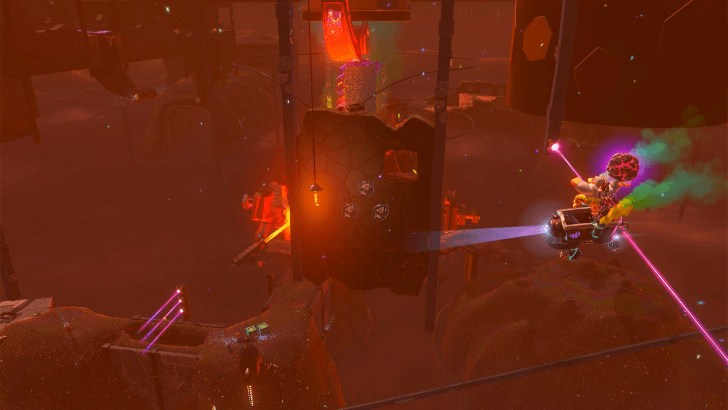
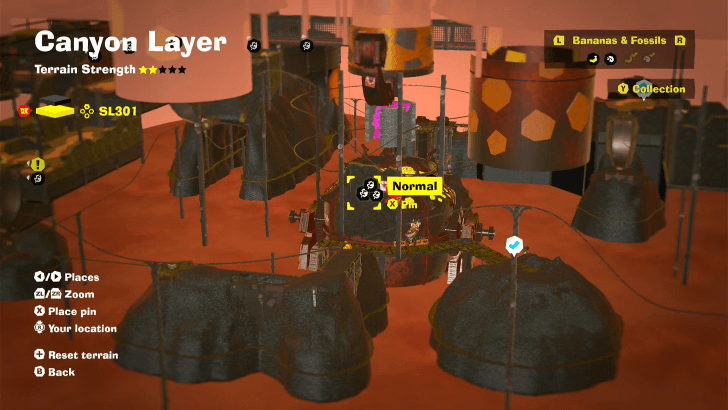
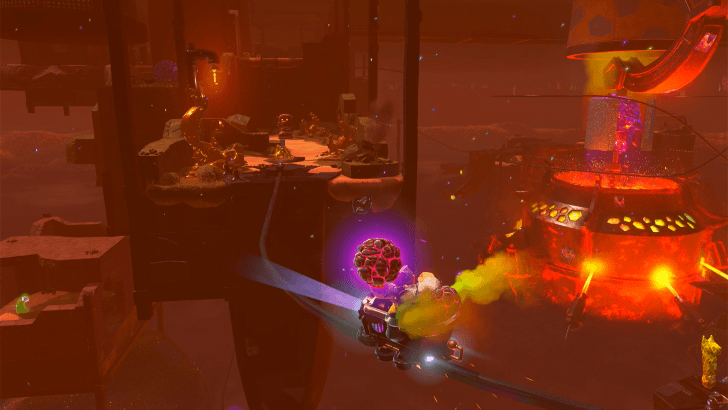
In one of the minecart rides in SL 301, past the laser section, keep an eye out for this stone wall with a cluster of 3 Leaf fossils. Throw a Boom Rock at them to collect them. |
||
 |
 |
|
|
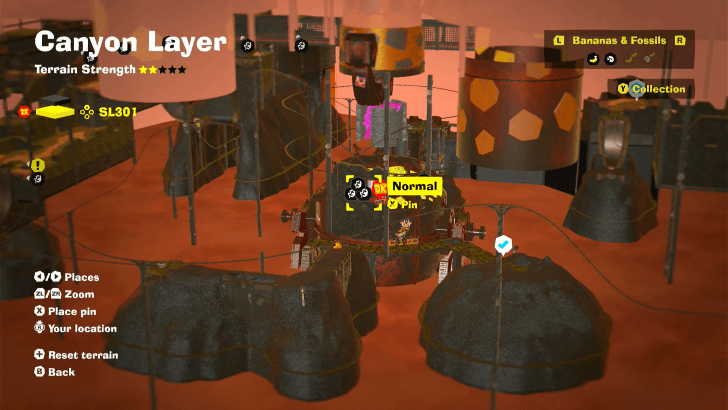
In one of the minecart rides in SL 301, past the laser section, keep an eye out for this stone wall with a cluster of 3 Leaf fossils. Throw a Boom Rock at them to collect them. |
||
 |
 |
|
|
In one of the minecart rides in SL 301, past the laser section, keep an eye out for this stone wall with a cluster of 3 Leaf fossils. Throw a Boom Rock at them to collect them. |
||
 |
 |
|
|
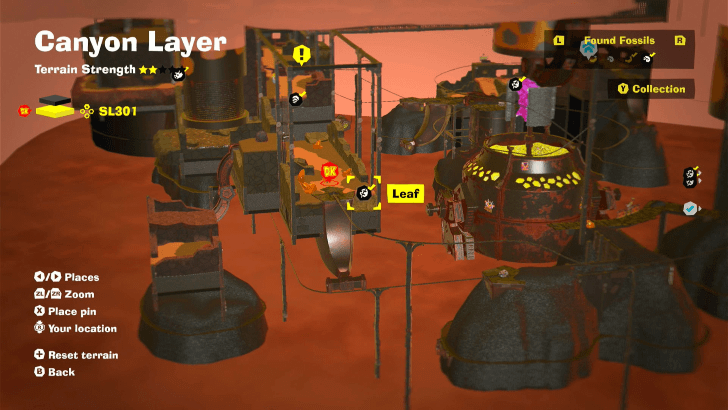
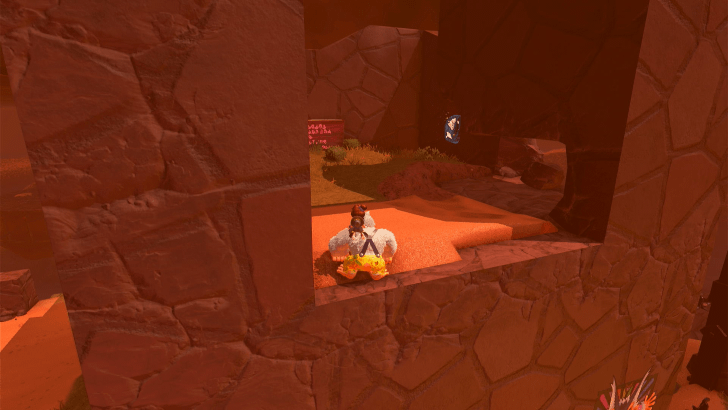
In the sand just to the right of where the minecart arrives at the Banandium Refinery Staff Dorms. |
||
 |
 |
|
|
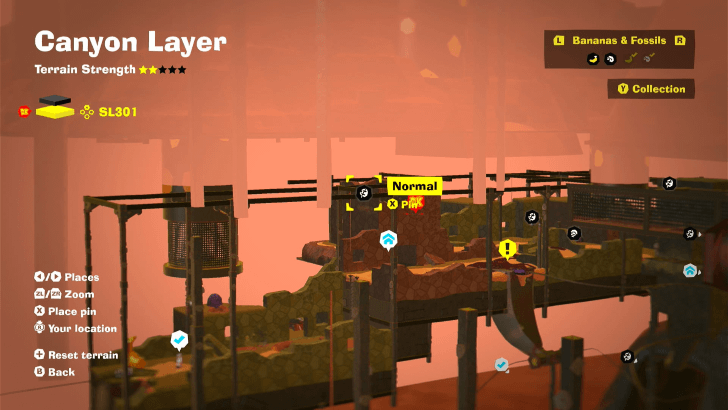
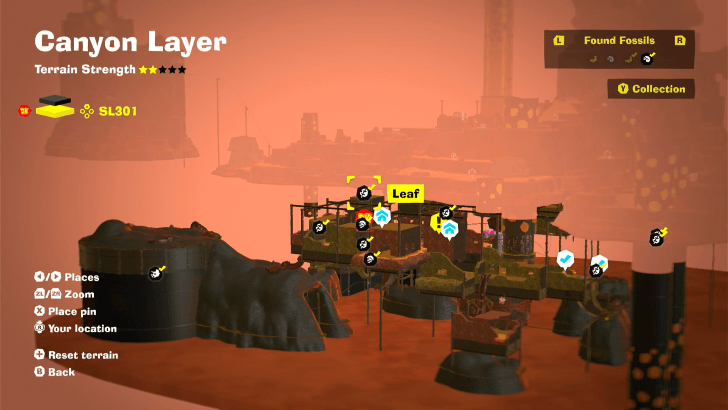
On the upper floor of the Banandium Refinery Terrace Getaway. |
||
 |
 |
|
|
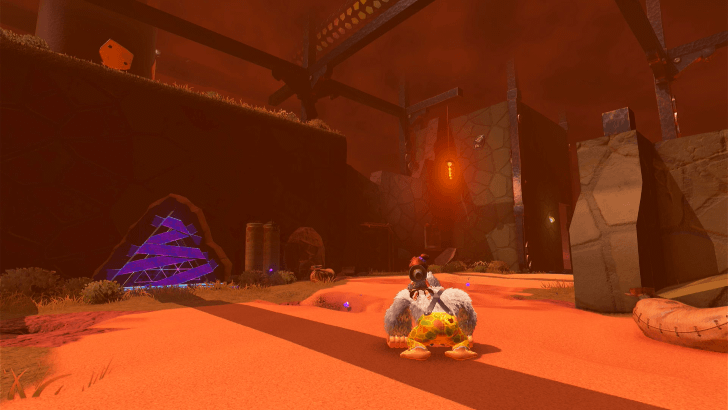
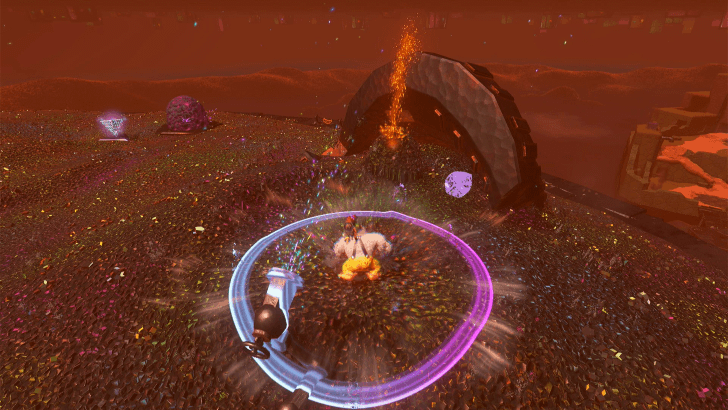
Near the top of a high wall of one one of the rooms in the Banandium Refinery Staff Dorms. |
||
 |
 |
|
|
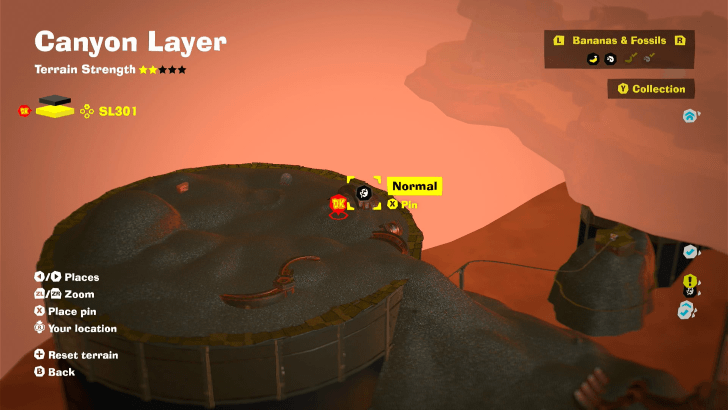
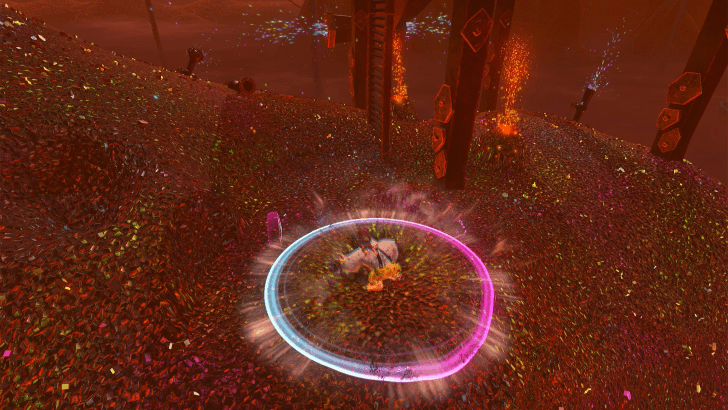
On top of one of the refineries filled with scrap material. This fossil is just beneath the surface next to a gold spout and just a short distance away from Banandium Gem 76. |
||
 |
 |
|
|
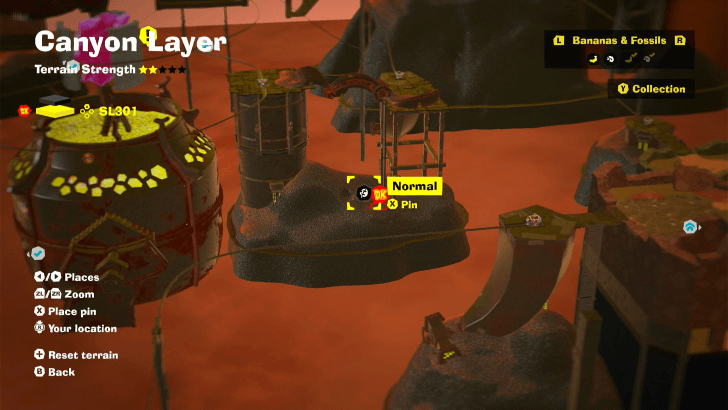
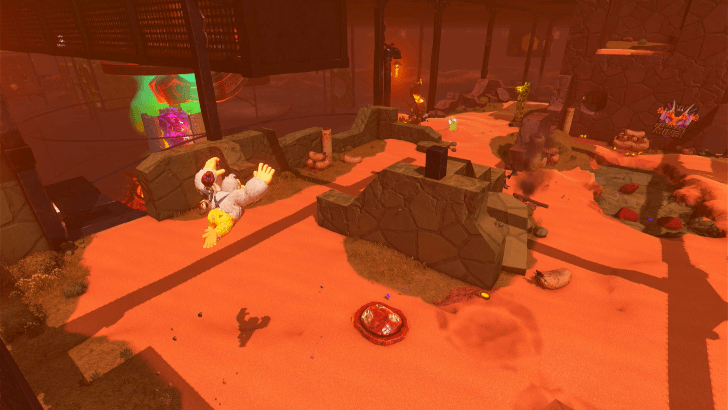
At the base of the last scaffolding before reaching where the Mad Mixer is. It will be just below where the base of the ladder ends. |
||
 |
 |
|
|
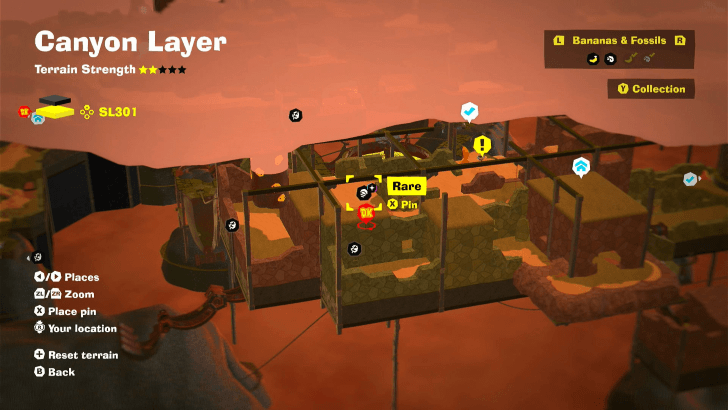
Found on the floor in front of the Challenge Ruins in the Banandium Refinery Staff Dorms. |
||
 |
 |
|
|
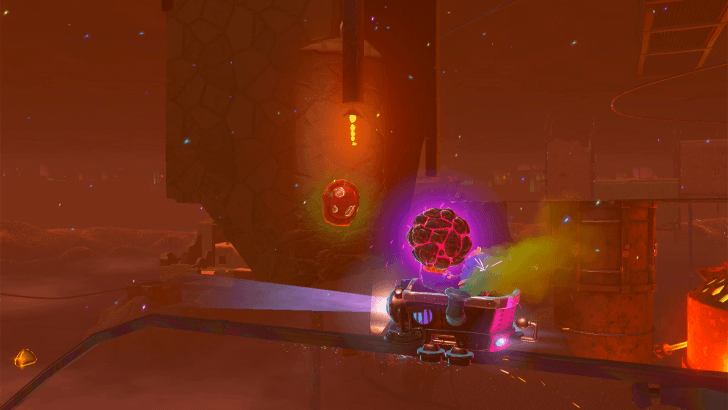
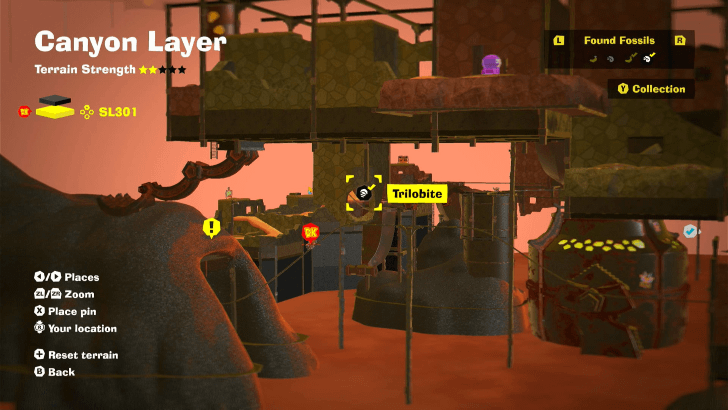
In one of the minecart rides in SL301, watch for the stone surface with this bright red Trilobite. Throw a Boom Rock at it to collect it. |
||
 |
 |
|
|
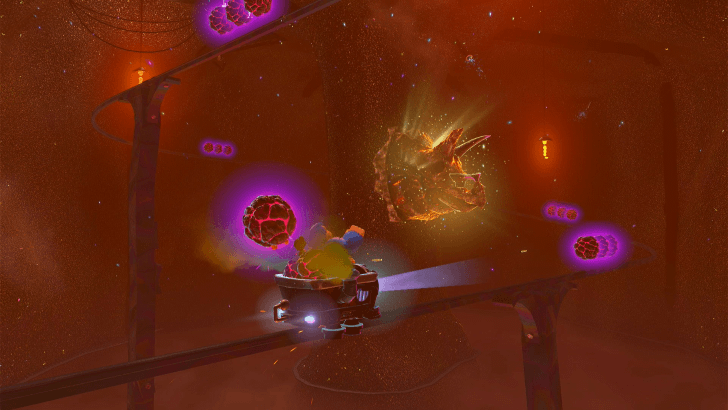
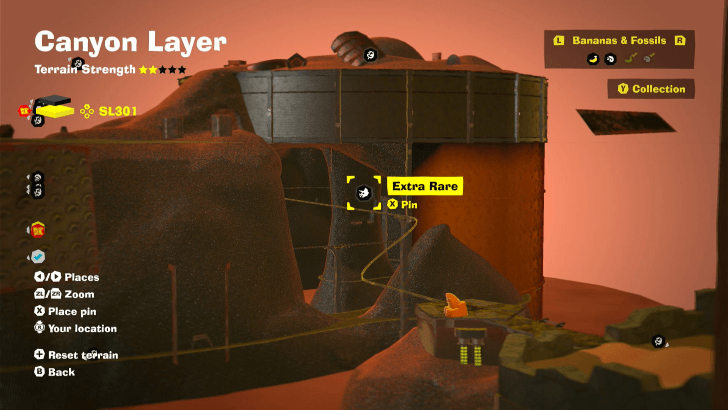
In one of the minecart rides in SL 301, you'll enter an abandoned refinery where the large Triceratops Fossil is on full-display. Throw several Boom Rocks at it to collect it. |
||
Canyon Layer Checkpoints
All Checkpoint Locations
| Overworld View | Map Location | |
|---|---|---|
 |
 |
|
|
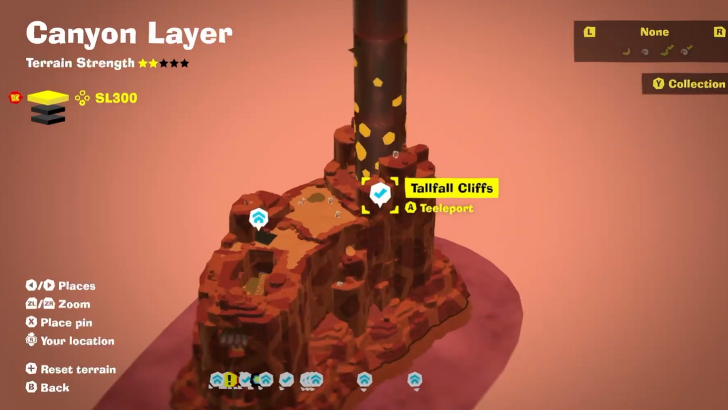
Tallfall Cliffs Checkpoint (SL 300)
Drop down from the Hilltop Layer Sinkhole. This is where you will start. |
||
 |
 |
|
|
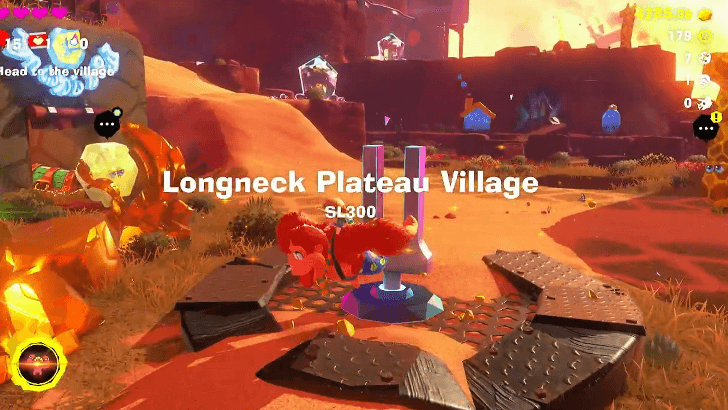
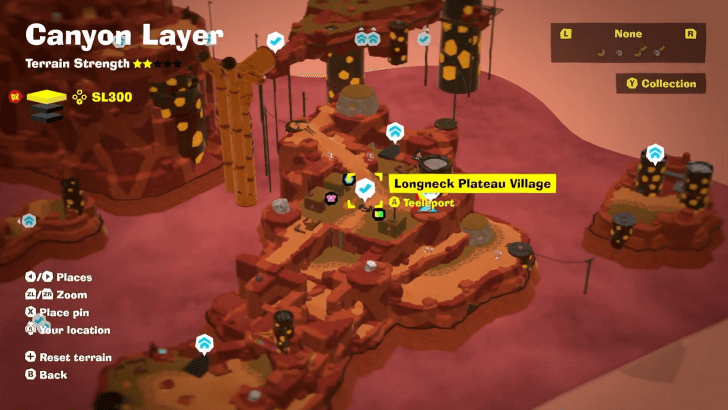
Longneck Plateau Village Checkpoint (SL 300)
Ride the cart from Tallfall Cliffs and head straight until you reach Longneck Plateu Village Checkpoint. |
||
 |
 |
|
|
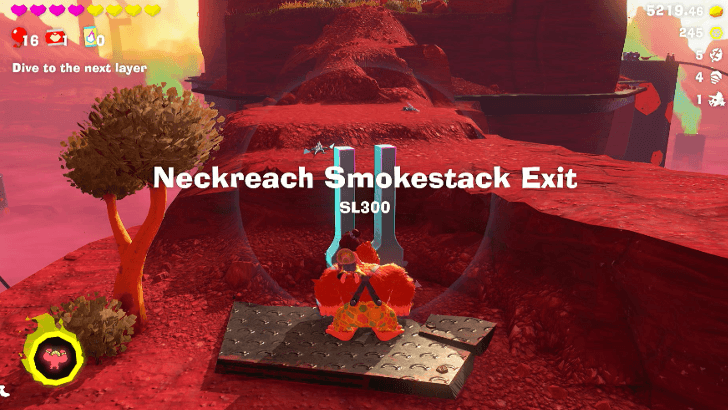
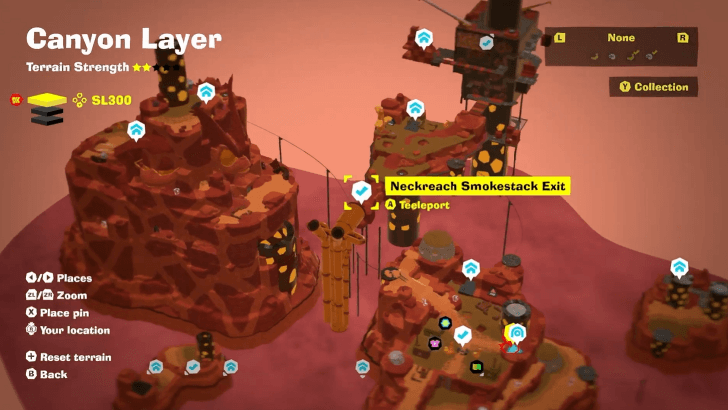
Neckreach Smokestack Exit Checkpoint (SL 300)
Climb up the Banana Refinery Mixer. Reach outside to get to the Neckreach Smokestack Exit Checkpoint. |
||
 |
 |
|
|
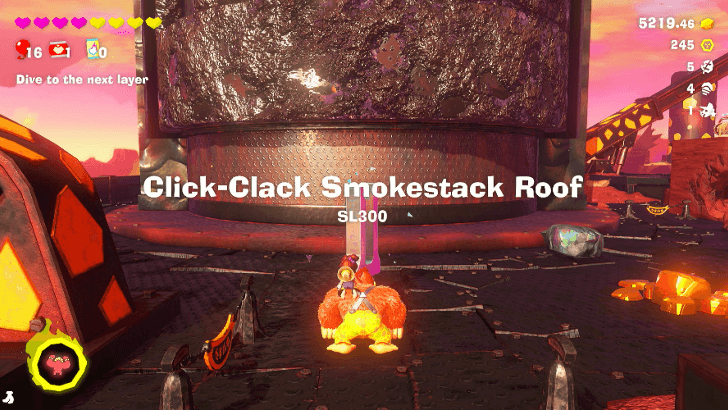
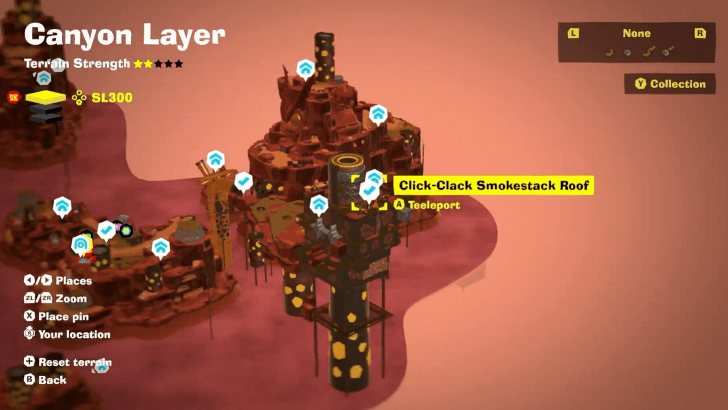
Click-Clack Smokestack Roof Checkpoint (SL 300)
Climb to the top of the Click-Clack Smokestack. |
||
 |
 |
|
|
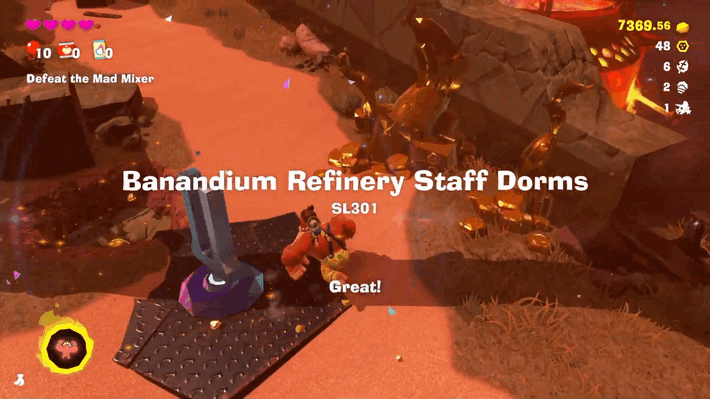
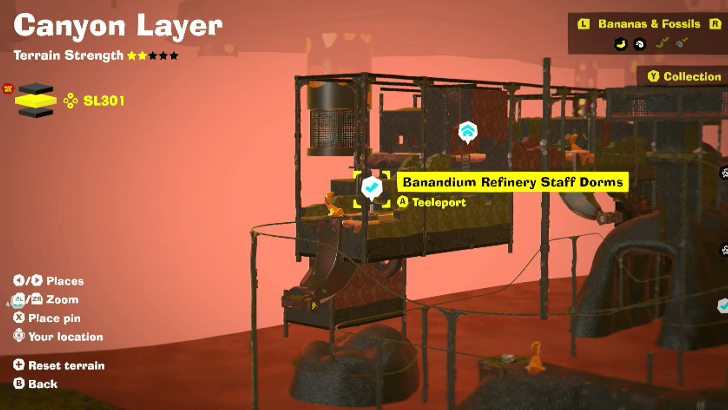
Banandium Refinery Staff Dorms Checkpoint (SL 301)
Ride the Cart from Banandium Refinery Staff Office |
||
 |
 |
|
|
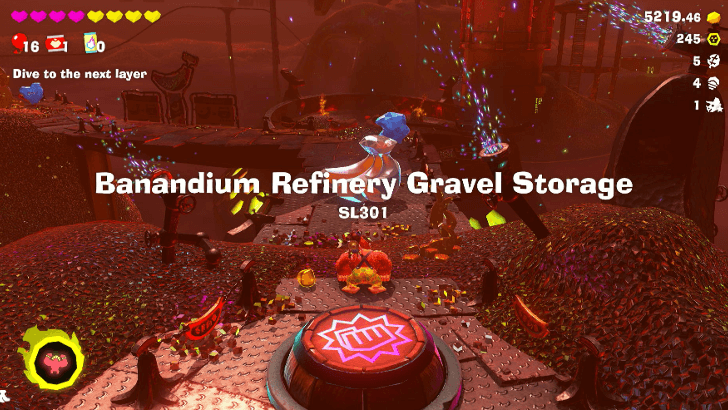
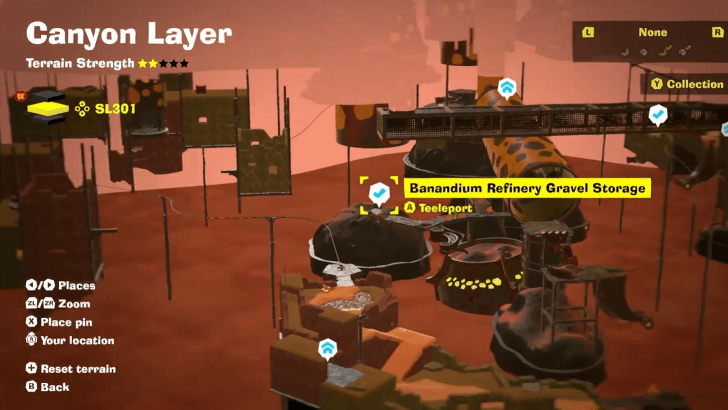
Banandium Refinery Gravel Storage Checkpoint (SL 301)
After defeating Grumpy Kong, drop down into the hole in the tower. This is where you will land. |
||
 |
 |
|
|
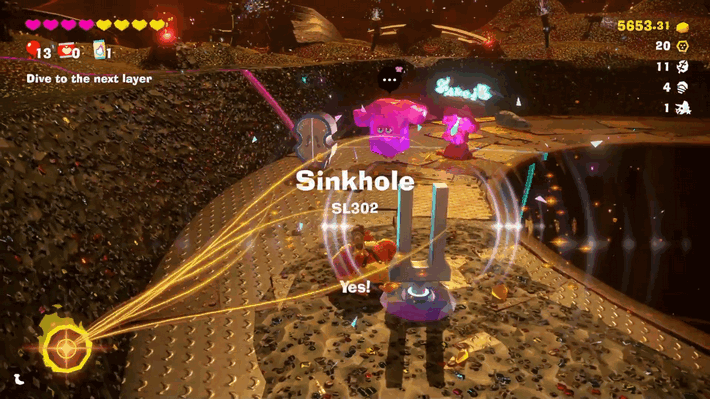
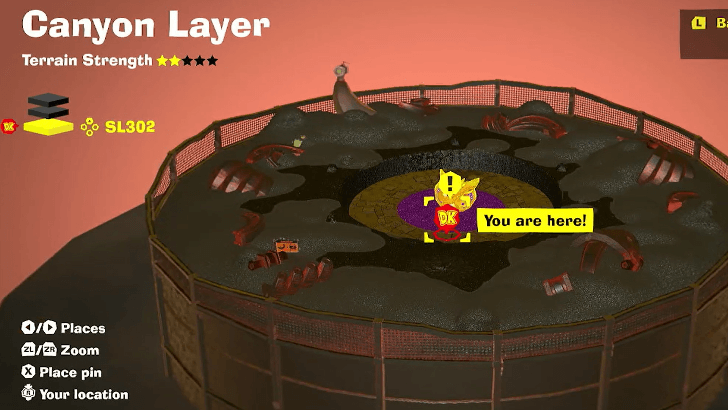
Sinkhole SL302 Checkpoint (SL 302)
Revealed after defeating Stompenclomper. |
||
Warp Gong Location
| Layer | Overworld View | Map Location |
|---|---|---|
| SL 300 |
 |
 |
|
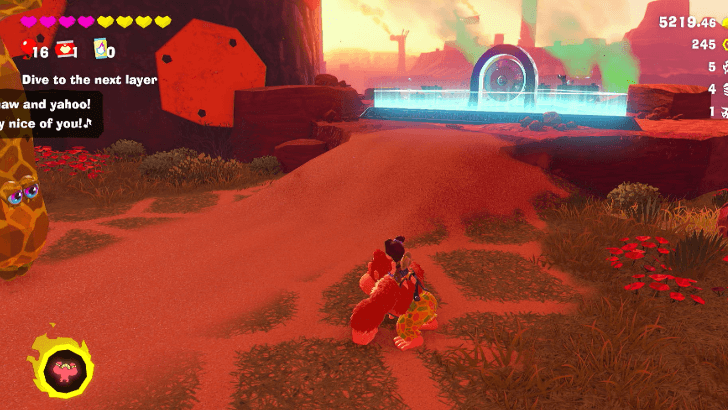
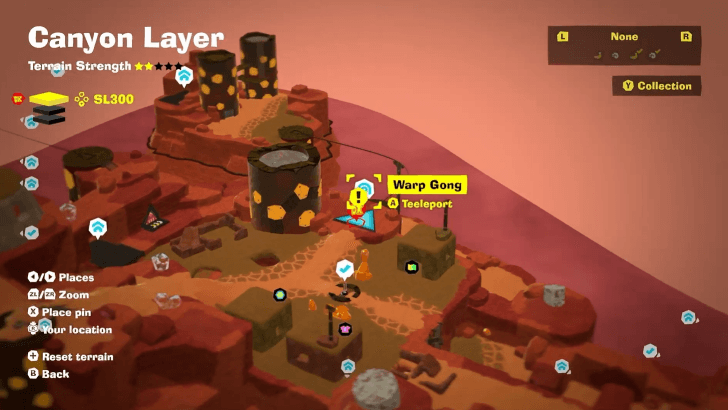
Longneck Plateau Village Warp Gong
To the right of the Longneck Plateu Village Checkpoint. |
||
How to Teeleport: Fast Travel Guide
Canyon Layer Challenges
All Challenge Locations
| Layer | Overworld View | Map Location |
|---|---|---|
| SL300 |
 |
 |
|
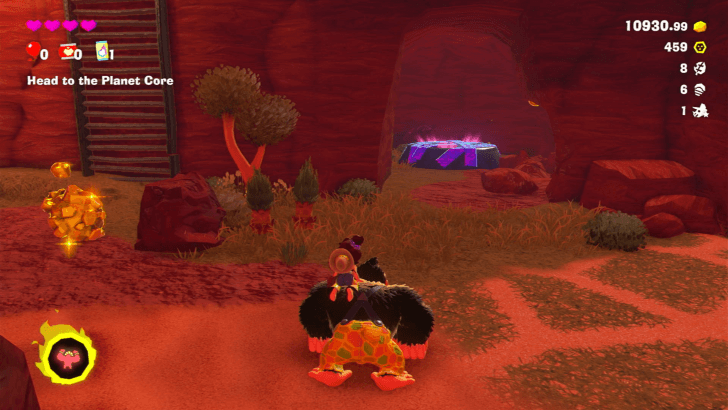
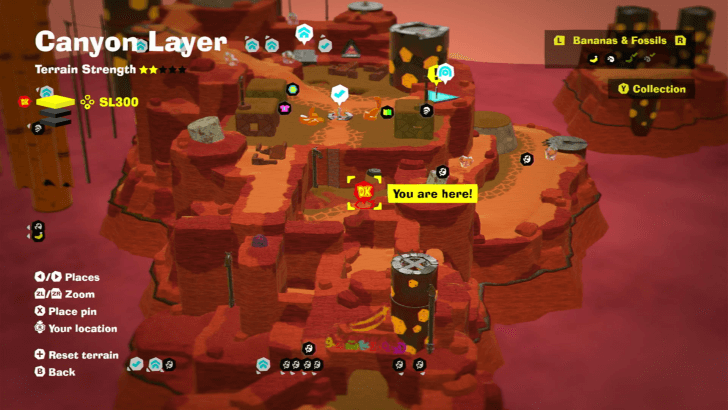
Squeeloid x10 Canyon Layer Battle Challenge 1 Located behind a rock wall to the right of the ladder heading to Longneck Plateau Village. |
||
| SL300 |
 |
 |
|
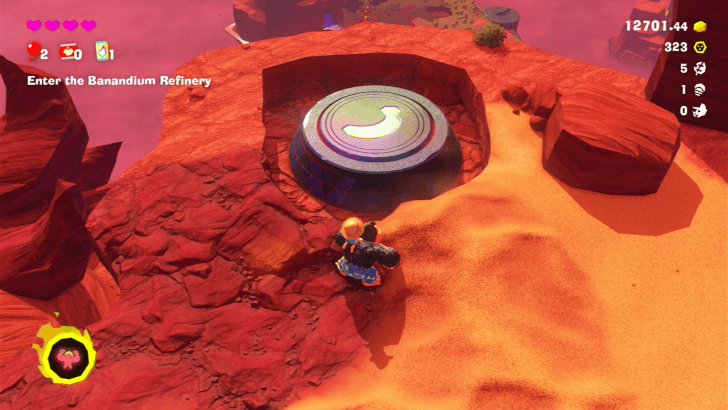
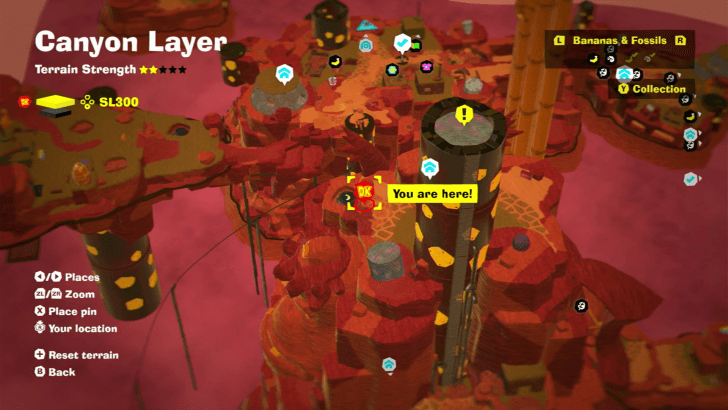
Squeeloid x5 Canyon Layer Battle Challenge 2 Located next to the entrance of Big-Stretch Peak Getaway. |
||
| SL301 |
 |
 |
|
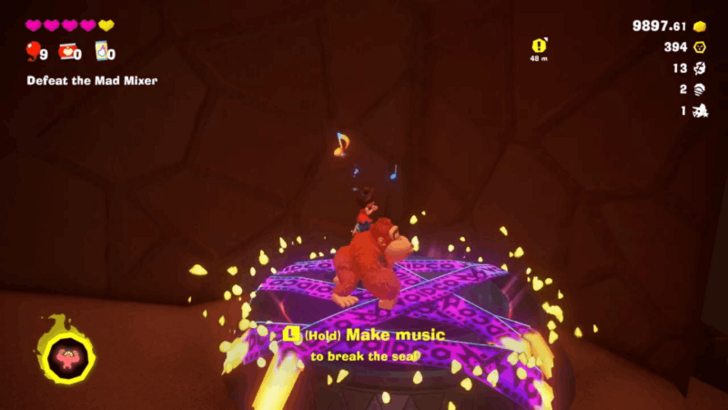
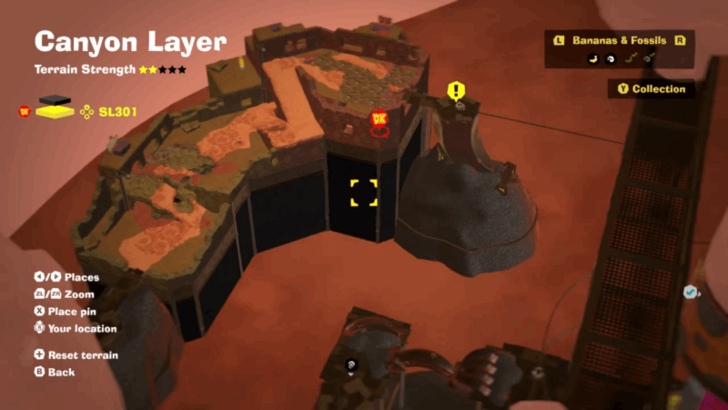
Crockoid x3 Canyon Layer Battle Challenge 3 Located underneath the muddy area slightly northeast of the Banandium Refinery Offices Getaway, and just before the minecart. |
||
| SL301 |
 |
 |
|
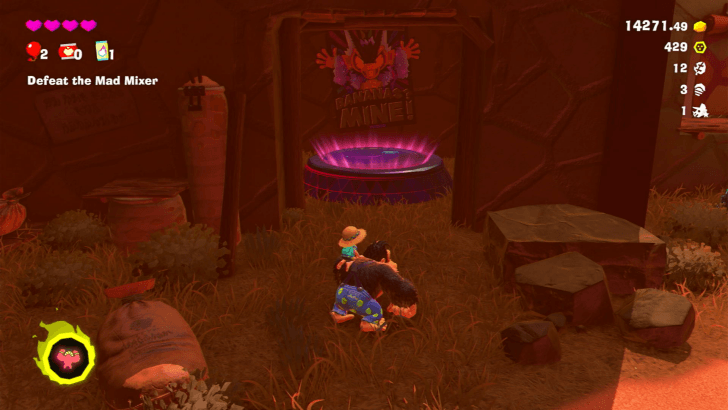
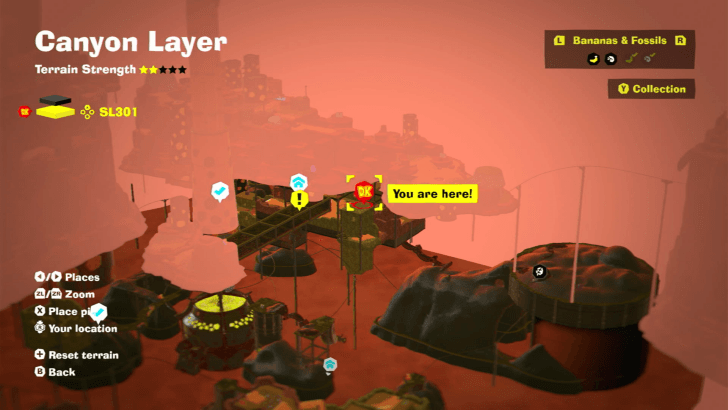
Stompoid x2 Canyon Layer Battle Challenge 4 Located in a small room in the Banandium Refinery Terrace right before the minecart heading to the Mad Mixer. |
||
| SL301 |
 |
 |
|
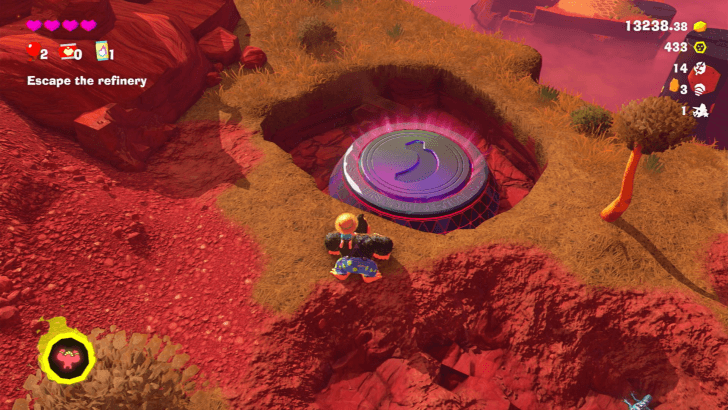
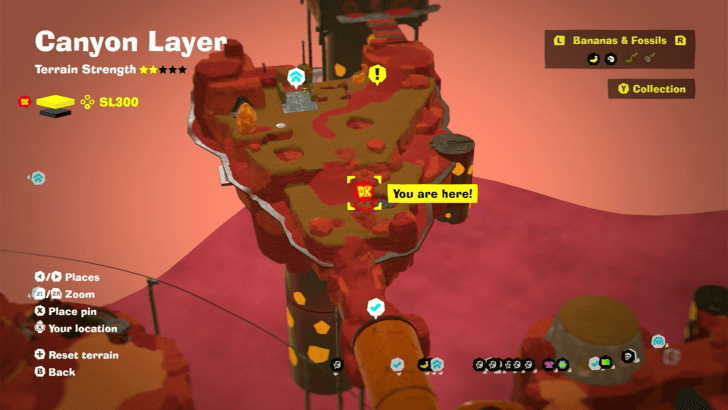
Stompoid x5 Canyon Layer Battle Challenge 5 Located in Mechaneck Isle, the area you arrive after defeating the Mad Mixer. |
||
| SL300 |
 |
 |
|
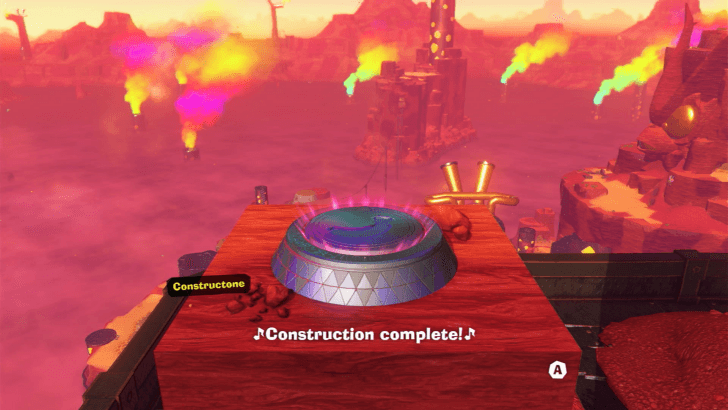
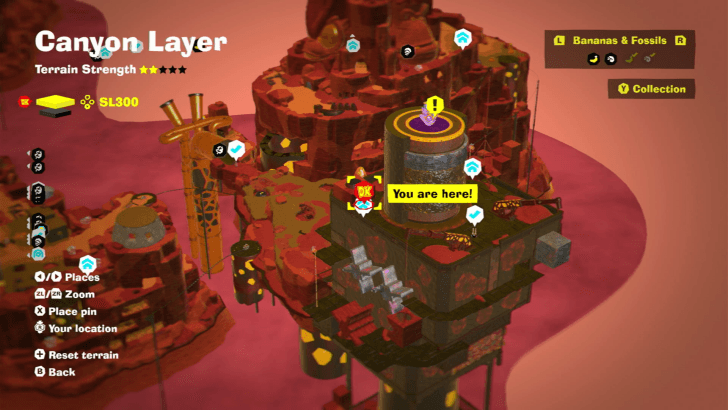
Stompoid x2 Canyon Layer Battle Challenge 6 Located on Click-Clack Smokestack Roof. Speak to the Constructone and pay 600 Gold to clear the rubble to access the Challange Ruin. |
||
| SL300 |
 |
 |
|
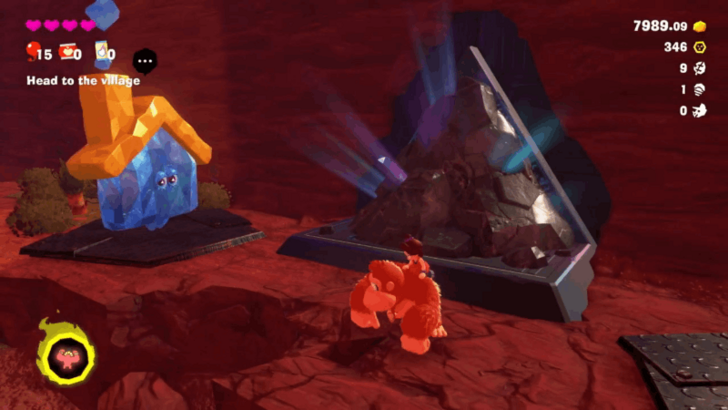
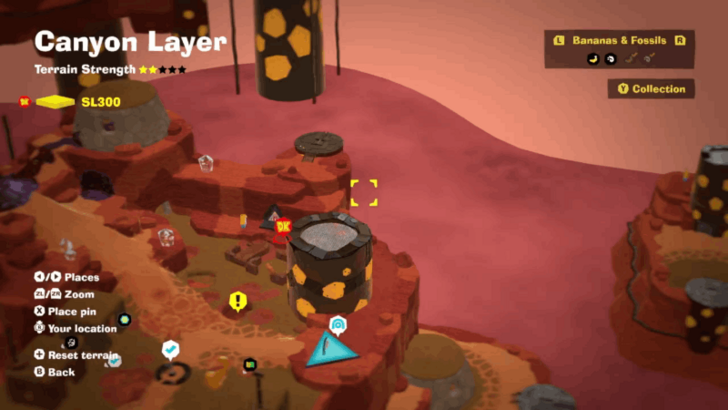
Kong Bananza: City Smash Canyon Layer Challenge Course 1 |
||
| SL300 |
 |
 |
|
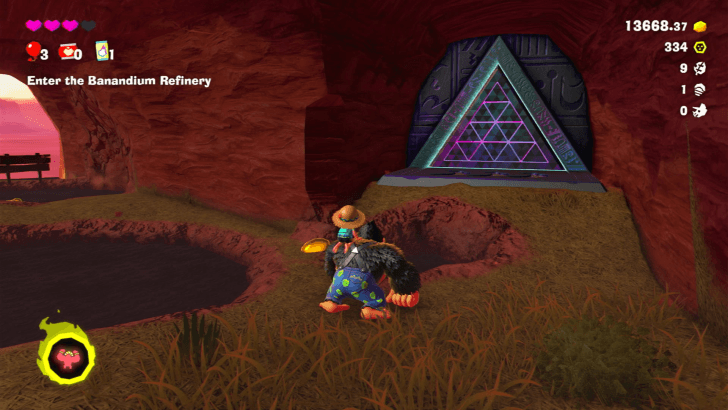
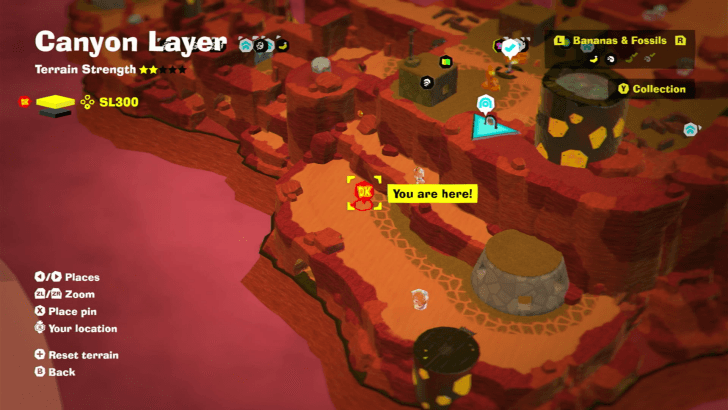
Thorny Blast Cave Canyon Layer Challenge Course 2 Located in a cave system underneath Longneck Plateau Village |
||
| SL300 |
 |
 |
|
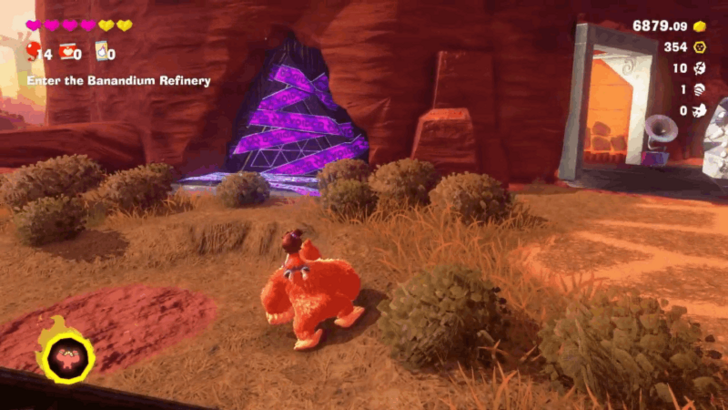
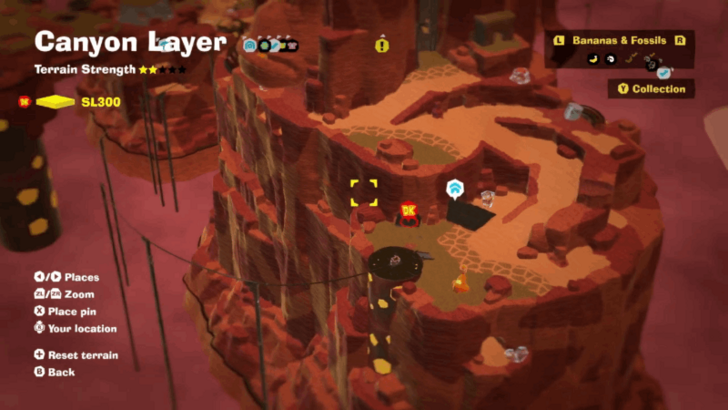
Big-Wheel Balloon Hunt Canyon Layer Challenge Course 3 |
||
| SL301 |
 |
 |
|
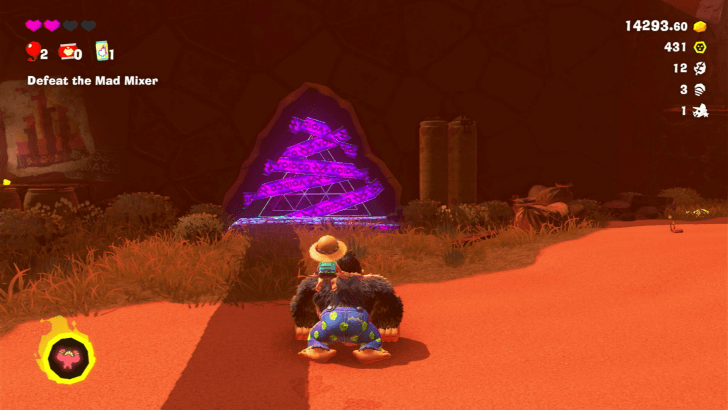
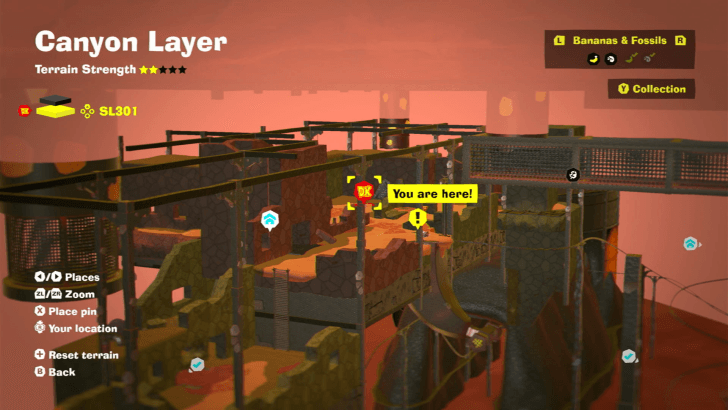
Spinning Laser Zone Canyon Layer Challenge Course 4 Located on a wall in the Banandium Refinery Terrace right before the minecart heading to the Mad Mixer. |
||
| SL301 |
 |
 |
|
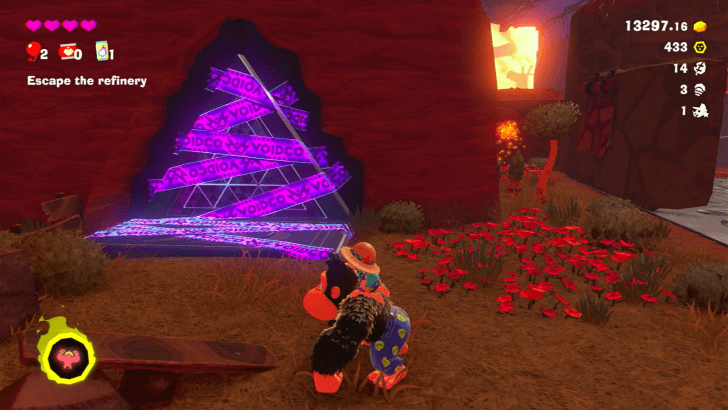
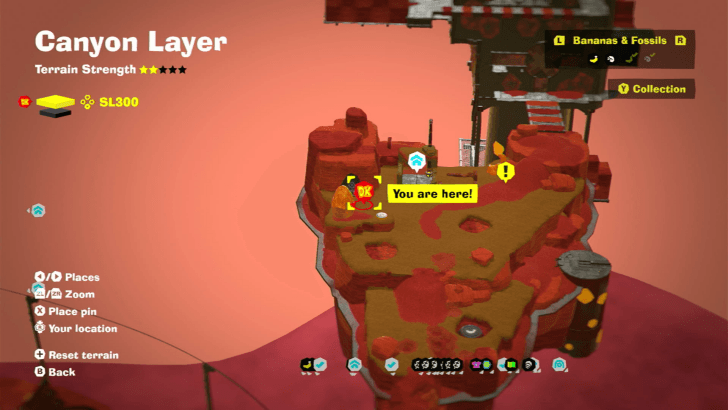
Stompy Ascent Canyon Layer Challenge Course 5 Located in Mechaneck Isle right next to the Getaway, in the area you arrive after defeating the Mad Mixer. |
||
Bonus Stage Location
| Layer | Overworld View | Map Location |
|---|---|---|
| SL 300 |
 |
|
|
Blasting for Gold
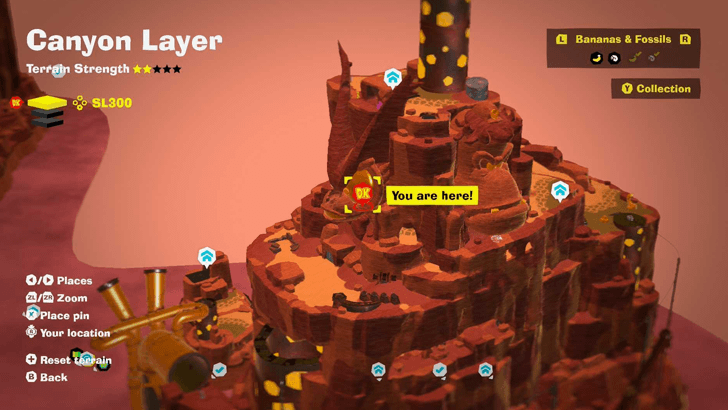
Found below the Big-Stretch Peak Getaway. Dig through the Void Kong face by the side of the mountain. |
||
Canyon Layer Shops
Canyon Layer Style Shop
Style Shop Locations
| Layer | Overworld View | Map Location |
|---|---|---|
| SL 300 |
 |
 |
|
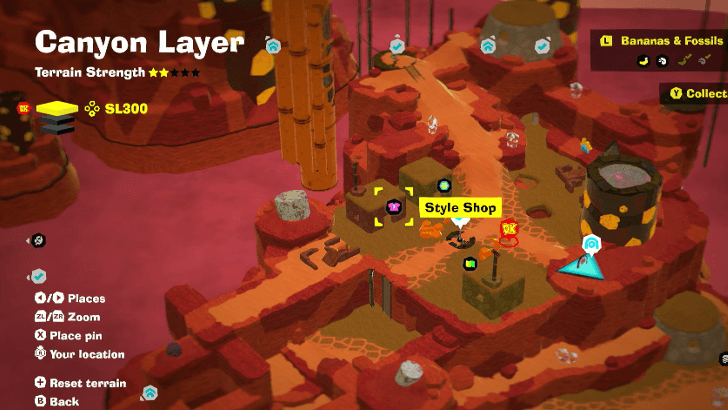
Longneck Plateau Village Style Shop
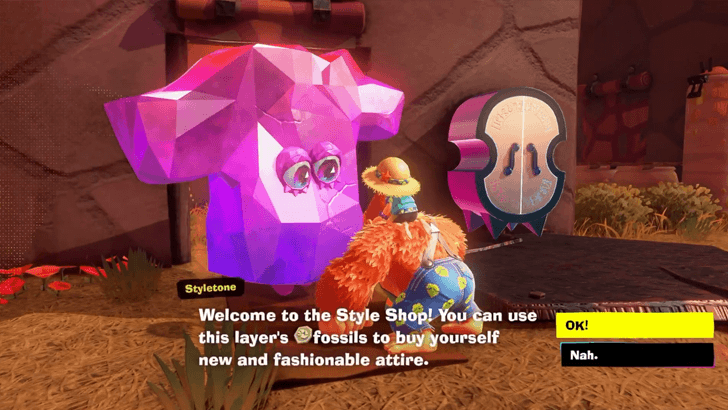
The Style Shop is located to the left of the Longneck Plateau Village. |
||
| SL 302 |
 |
 |
|
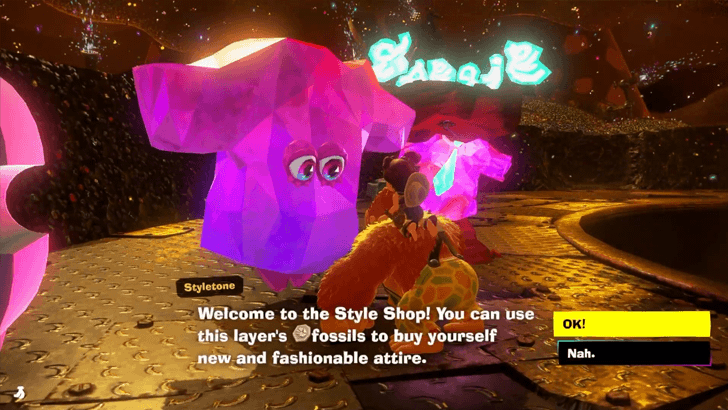
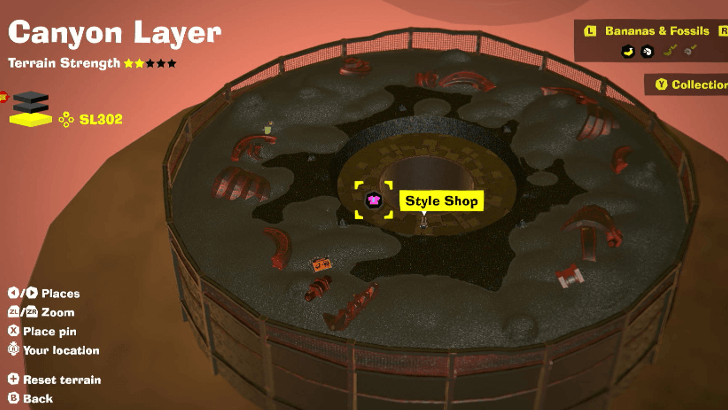
Canyon Layer Sinkhole Style Shop
Found near the Sinkhole after defeating Stompenclomper. |
||
Available Outfits
| Name | Type | Cost | Effect | |||||||
|---|---|---|---|---|---|---|---|---|---|---|
|
|
Neckwear |
|
Increases the amount of Bananergy gained from gold by 25 percent. | |||||||
|
|
Fur Color |
|
Fiery, like a setting sun sinking behind the savanna horizon. | |||||||
|
|
Fur Color |
|
Dapper and dashing, with a dark and smoky aesthetic. | |||||||
|
|
Britches |
|
Increases your speed in mud and fresh snow by 10 percent. | |||||||
|
|
Britches |
|
Increases your speed in mud and fresh snow by 20 percent. | |||||||
|
|
Pauline Outfits |
|
Extends your Kong Bananza time by 40 percent. | |||||||
|
|
Pauline Outfits |
|
Extends your Kong Bananza time by 40 percent. | |||||||
|
|
Pauline Outfits |
|
Extends your Kong Bananza time by 40 percent. | |||||||
Stuff Shop Location
| Layer | Overworld View | Map Location |
|---|---|---|
| SL 300 |
 |
 |
|
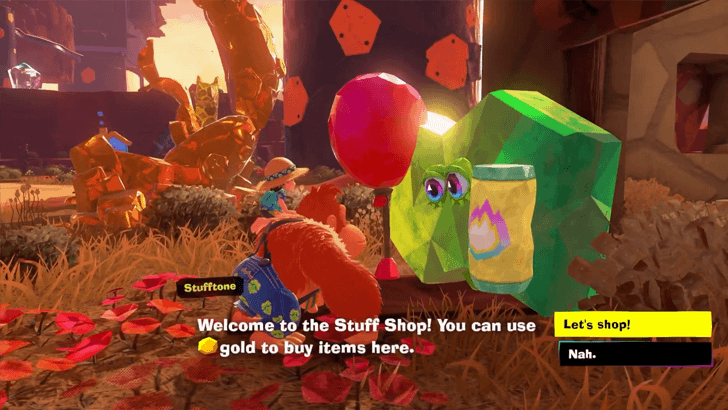
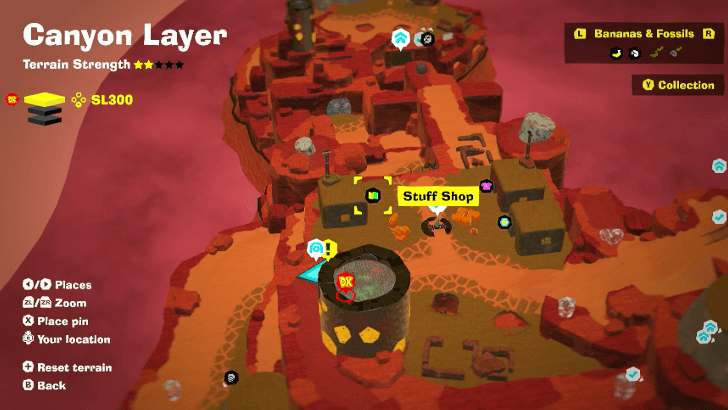
Longneck Plateau Village Stuff Shop
Across the Style Shop in Longneck Plateau Village. |
||
Chip Exchange Location
| Layer | Overworld View | Map Location |
|---|---|---|
| SL300 |
 |
 |
|
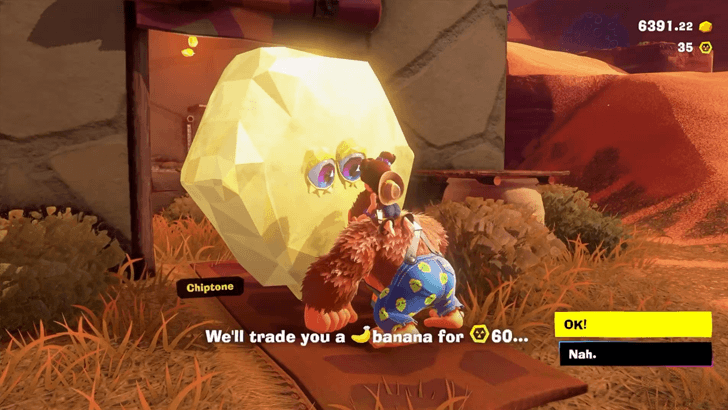
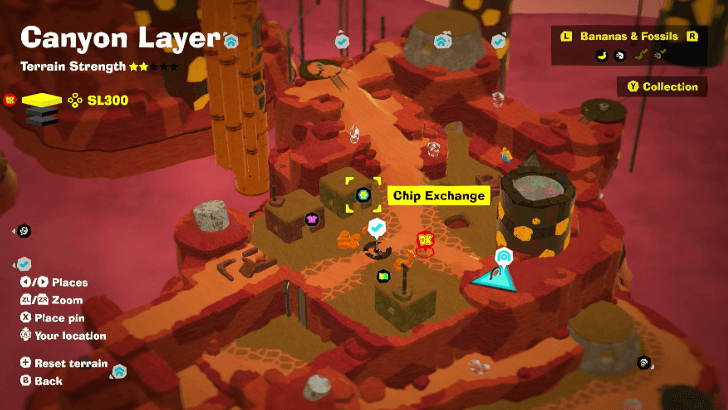
Longneck Plateau Village Chip Exchange
The Chip Exchange is located to the left of Longneck Plateau Village and is right next to the Style Shop. |
||
Canyon Layer Void Stakes
Void Stake Locations
| Layer | Overworld View | Map Location |
|---|---|---|
| SL 300 |
 |
 |
|
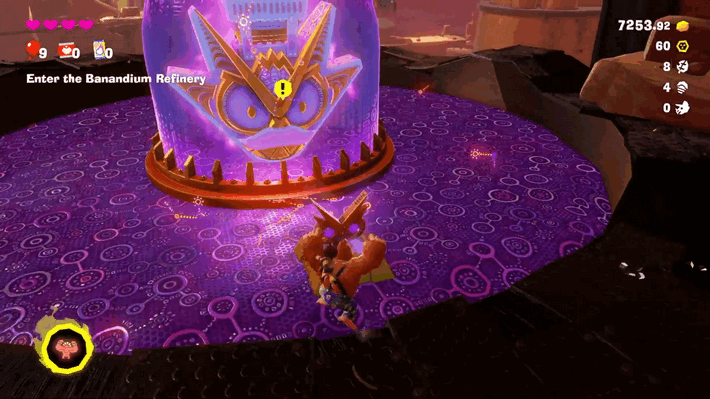
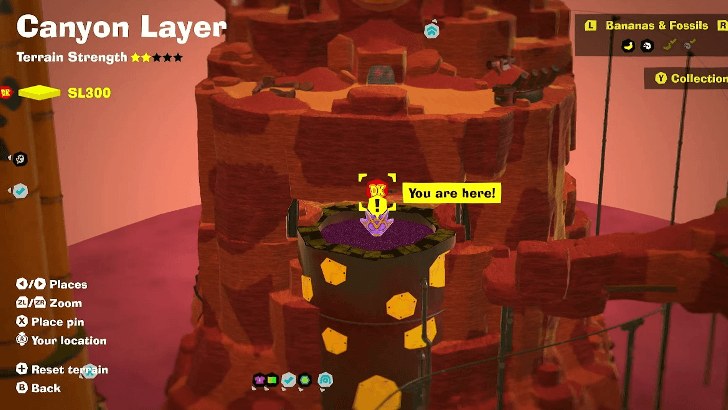
Sublayer 301 Void Stake
Revealed after defeating Grumpy Kong |
||
| SL 300 |
 |
 |
|
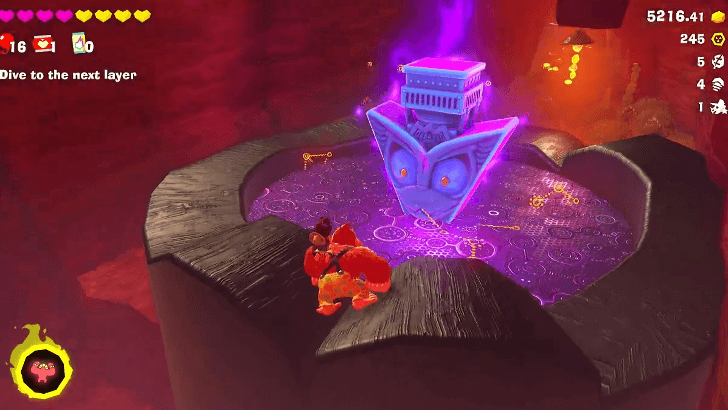
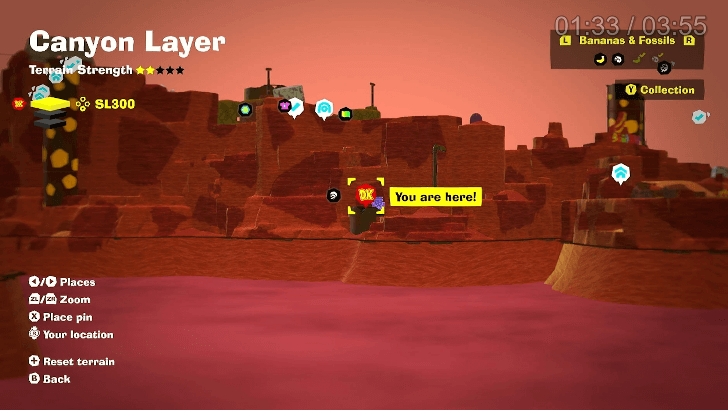
Longneck Plateau Void Stake
Head South West from the Longneck Plateau Village Checkpoint and drop down to a ledge with 2 crates. Down Punch and you will arrive at the Void Stake. |
||
| SL 301 |
 |
 |
|
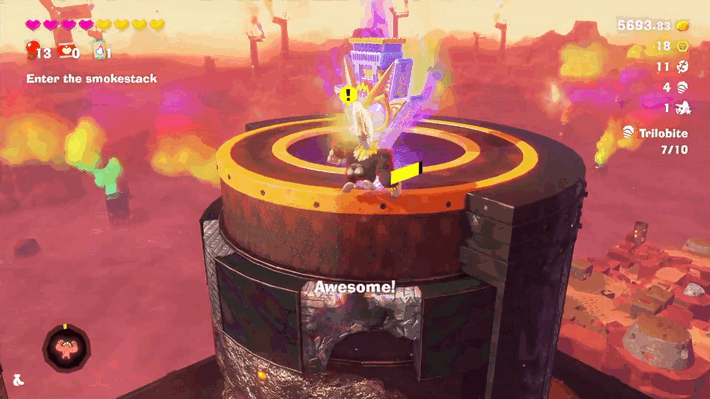
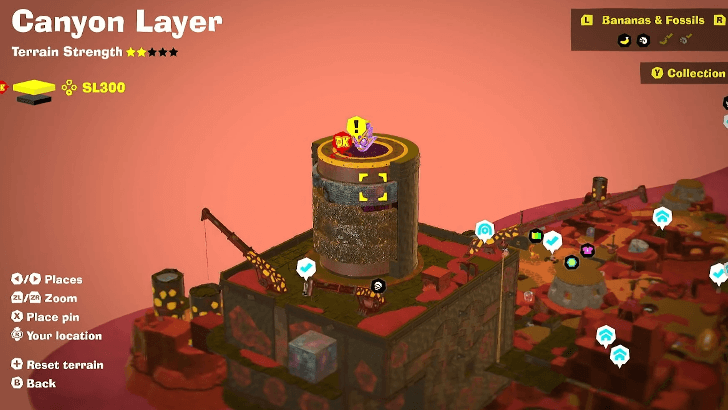
Click-Clack Smokestack Depths Void Stake
At the top of the Smokestack structure |
||
| SL 302 |
 |
 |
|
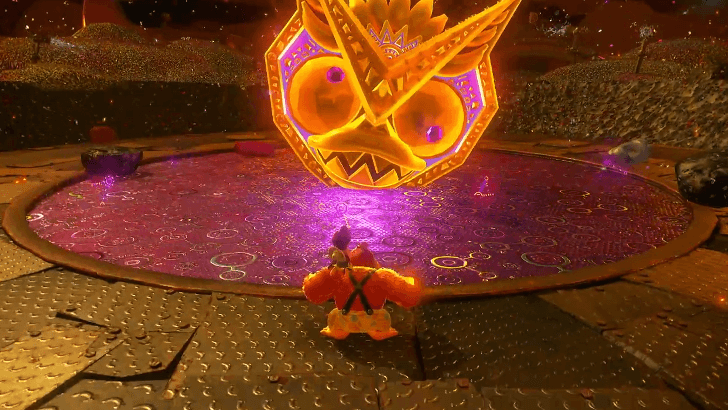
Sinkhole SL302 Void Stake
Revealed after defeating Stompenclomper |
||
Cranky Kong Location
Beside a Getaway in SL 300
| Map / Overworld Image | Video Directions |
|---|---|
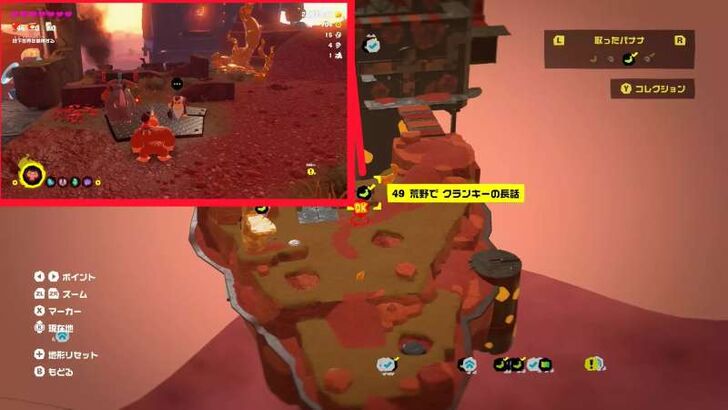 |
After the Mixer boss, in the next area with the Hideout and Growtone, Cranky is just ahead along the main path.
Canyon Layer Getaways
All Getaway Locations
| Map Location | Overworld Image |
|---|---|
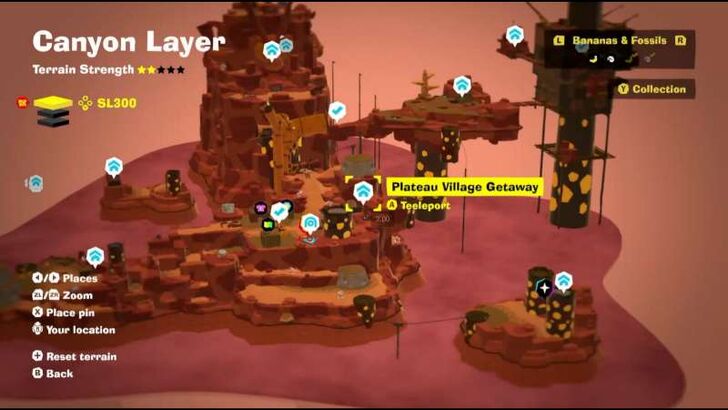 Canyon Layer (SL 300) |
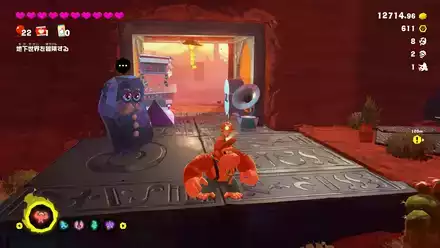 Plateau Village Getaway |
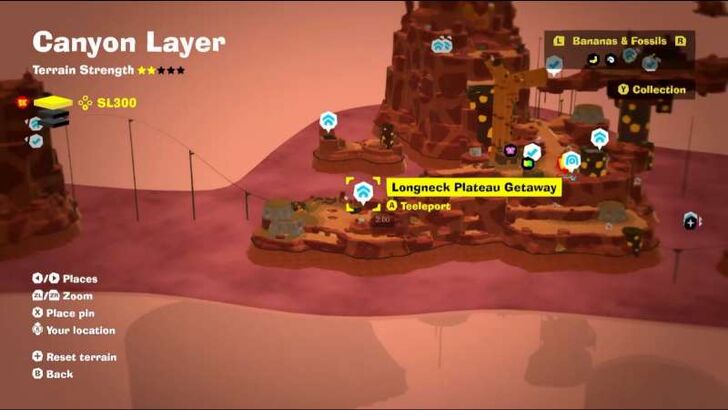 Canyon Layer (SL 300) |
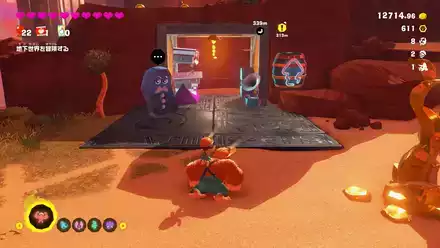 Longneck Plateau Getaway |
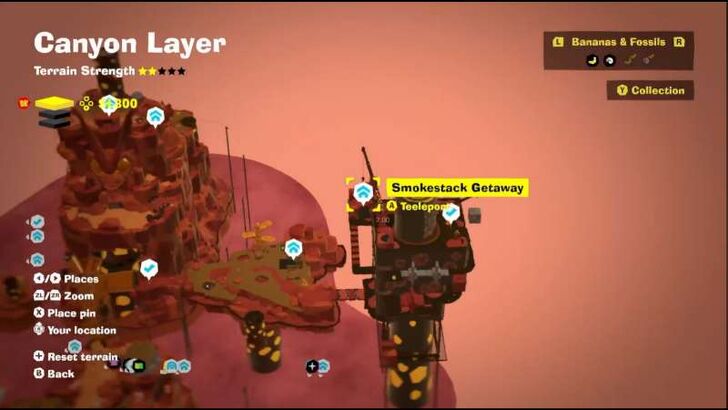 Canyon Layer (SL 300) |
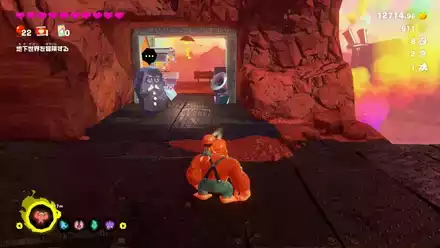 Smokestack Getaway |
 Canyon Layer (SL 300) |
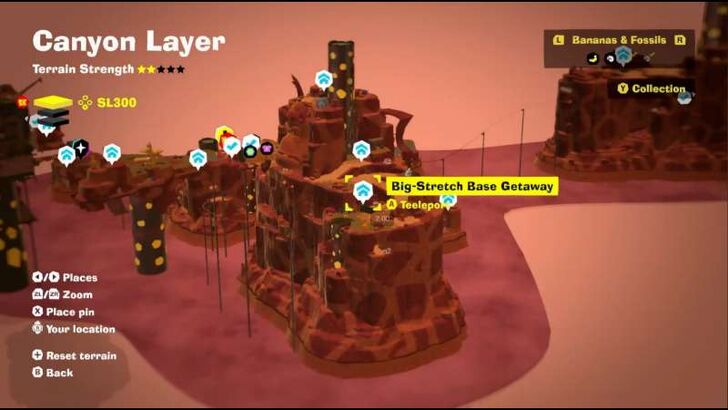
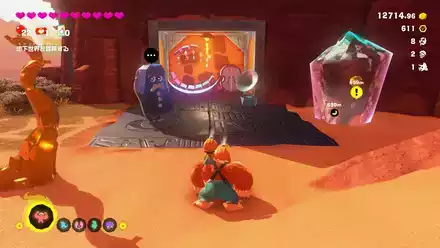 Big-Stretch Base Getaway |
 Canyon Layer (SL 300) |
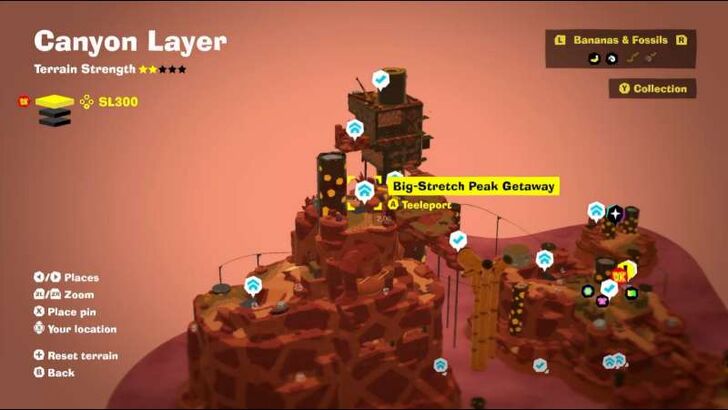
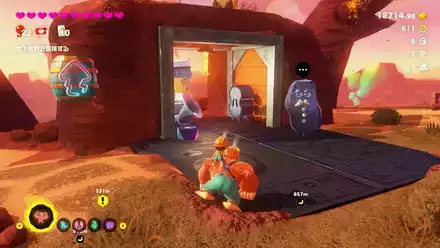 Big-Stretch Peak Getaway |
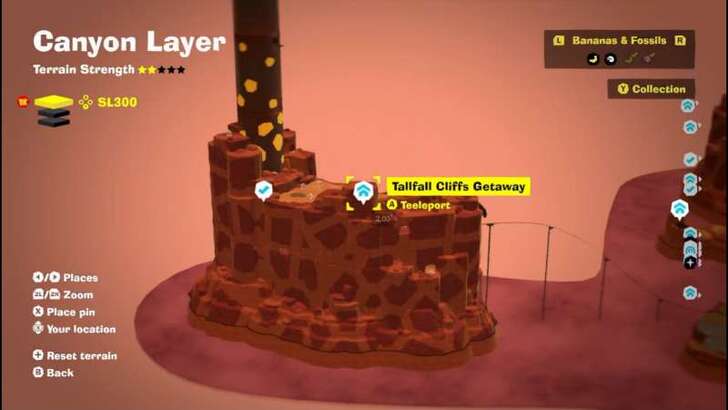 Canyon Layer (SL 300) |
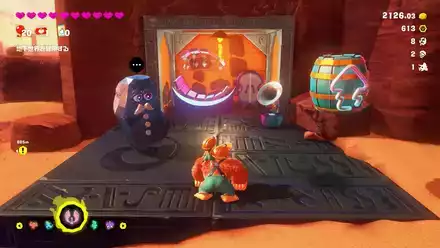 Tallfall Cliffs Getaway |
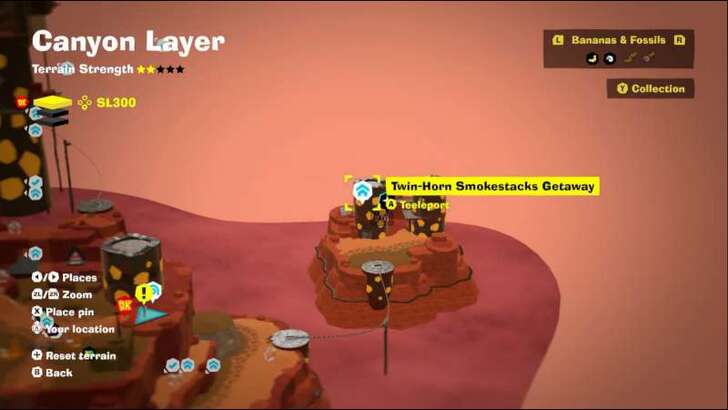 Canyon Layer (SL 300) |
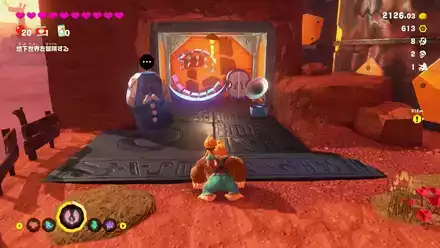 Twin-Horn Smokestacks Getaway |
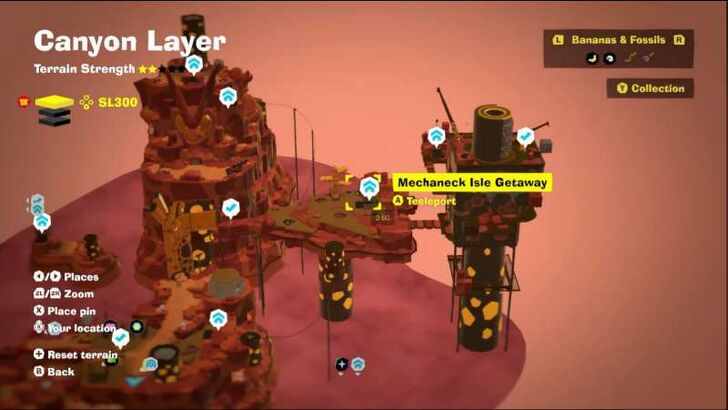 Canyon Layer (SL 300) |
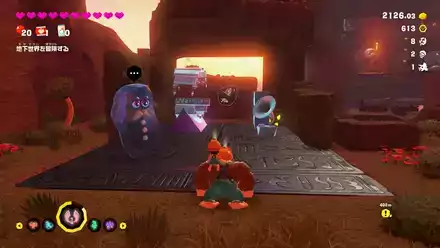 Mechaneck Isle Getaway |
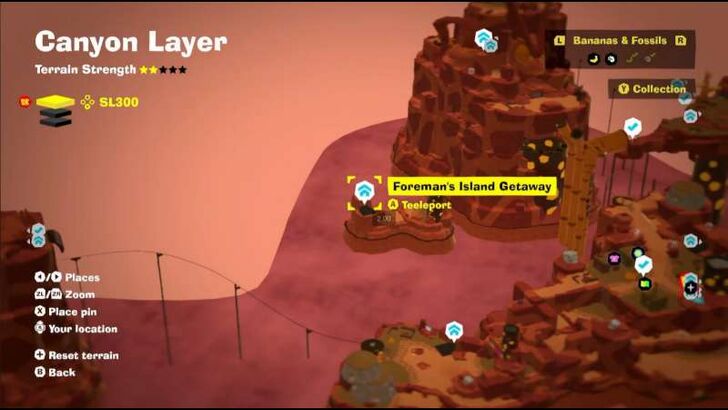 Canyon Layer (SL 300) |
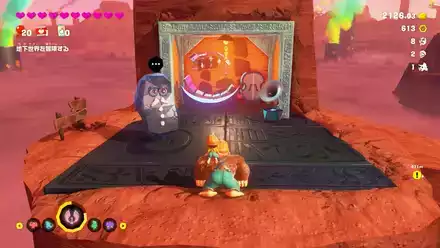 Foreman Island's Getaway |
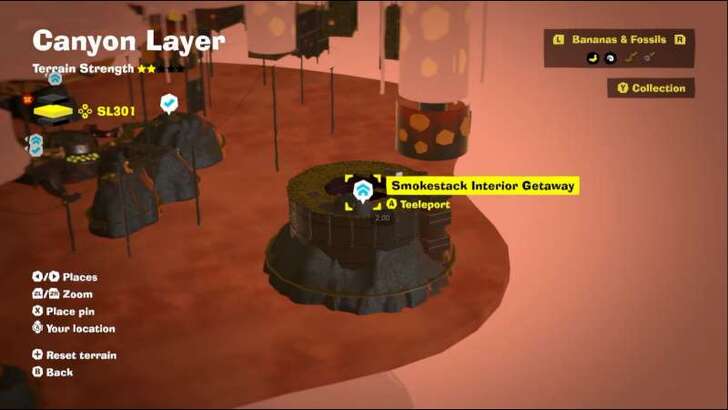 Canyon Layer (SL 301) |
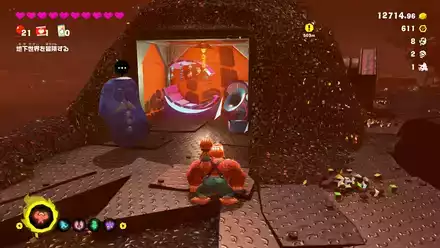 Smokestack Interior Getaway |
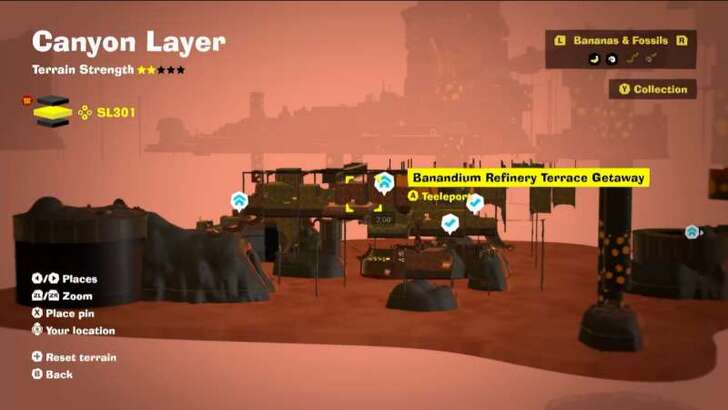 Canyon Layer (SL 301) |
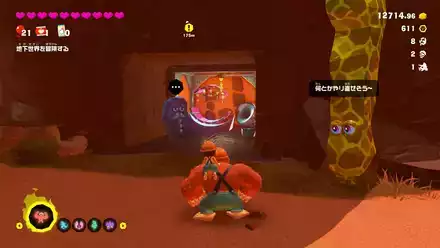 Banandium Refinery Terrace Getaway |
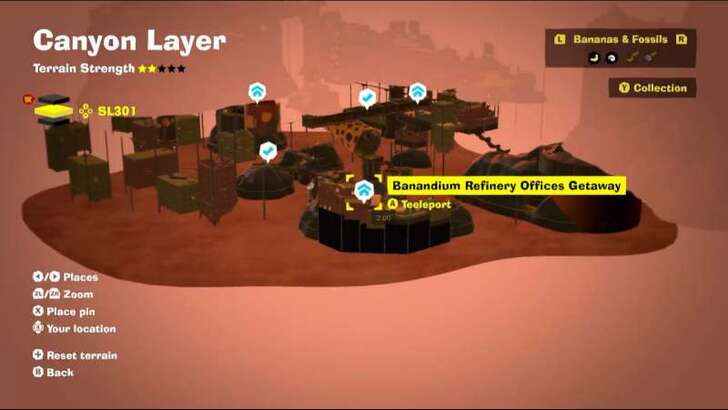 Canyon Layer (SL 301) |
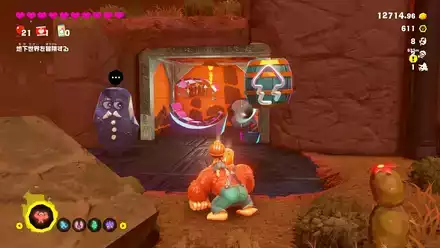 Banandium Refinery Offices Getaway |
Getaway Guide: All Getaway Locations
Donkey Kong Bananza Related Guides
All Layers
Comment
Author
Canyon Layer Banana and Fossil Locations (SL 300-302)
improvement survey
04/2026
improving Game8's site?

Your answers will help us to improve our website.
Note: Please be sure not to enter any kind of personal information into your response.

We hope you continue to make use of Game8.
Rankings
- We could not find the message board you were looking for.
Gaming News
Popular Games

Genshin Impact Walkthrough & Guides Wiki

Crimson Desert Walkthrough & Guides Wiki

Umamusume: Pretty Derby Walkthrough & Guides Wiki

Honkai: Star Rail Walkthrough & Guides Wiki

Monster Hunter Stories 3: Twisted Reflection Walkthrough & Guides Wiki

Wuthering Waves Walkthrough & Guides Wiki

The Seven Deadly Sins: Origin Walkthrough & Guides Wiki

Pokemon TCG Pocket (PTCGP) Strategies & Guides Wiki

Pokemon Pokopia Walkthrough & Guides Wiki

Zenless Zone Zero Walkthrough & Guides Wiki
Recommended Games

Monster Hunter World Walkthrough & Guides Wiki

Fire Emblem Heroes (FEH) Walkthrough & Guides Wiki

Pokemon Brilliant Diamond and Shining Pearl (BDSP) Walkthrough & Guides Wiki

Super Smash Bros. Ultimate Walkthrough & Guides Wiki

Diablo 4: Vessel of Hatred Walkthrough & Guides Wiki

Cyberpunk 2077: Ultimate Edition Walkthrough & Guides Wiki

Yu-Gi-Oh! Master Duel Walkthrough & Guides Wiki

Elden Ring Shadow of the Erdtree Walkthrough & Guides Wiki

The Legend of Zelda: Tears of the Kingdom Walkthrough & Guides Wiki

Persona 3 Reload Walkthrough & Guides Wiki
All rights reserved
© Nintendo. Games are property of their respective owners. Nintendo of America Inc.
The copyrights of videos of games used in our content and other intellectual property rights belong to the provider of the game.
The contents we provide on this site were created personally by members of the Game8 editorial department.
We refuse the right to reuse or repost content taken without our permission such as data or images to other sites.

 Ingot Isle
 Lagoon Layer
 Hilltop Layer
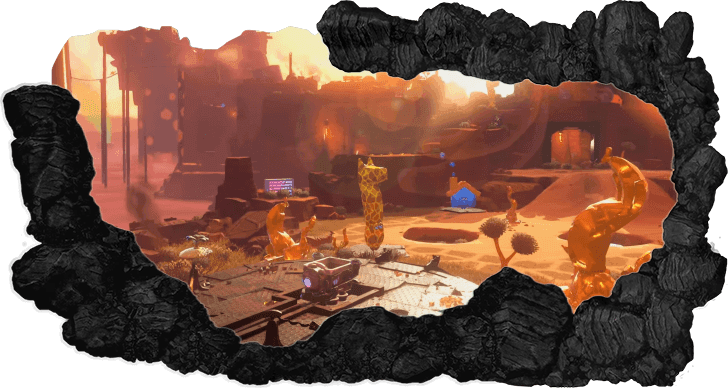 Canyon Layer
 The Divide
 Freezer Layer
 Forest Layer
 The Junction
 Resort Layer
 Tempest Layer
 Landfill Layer
 Racing Layer
 Radiance Layer
 Groove Layer
 Feast Layer
 Forbidden Layer
 Planet Core
 DK Island


![Forza Horizon 6 Review [Preview] | Beautiful Roads With a Whole Lot of Oversteer](https://img.game8.co/4460981/a7254c24945c43fbdf6ad9bea52b5ce9.png/show)


![Forza Horizon 6 Review [Preview] | Beautiful Roads With a Whole Lot of Oversteer](https://img.game8.co/4460981/a7254c24945c43fbdf6ad9bea52b5ce9.png/thumb)


