All Frog (alt color) Fossil Locations
☽ DK Island and Emerald Rush DLC out now!
☽ Learn how to solve Banandiumtone's Puzzles.
☽ All Collectibles: Banandium Gems and Fossils
☽ Learn How to Skip Layers Entirely!
☽ How to Beat the Final Boss
☽ Post-Game: Rehearsal Halls | Secret Ending
Frog (alt color) is a type of Fossil that can be found at the Forbidden Layer in Donkey Kong Bananza. See the map locations for all 30 Frog (alt color) Fossils, what outfits you can buy with them, and more in this guide!
List of Contents
All Frog (alt color) Fossil Locations
※ Look for keywords in the Search bar or select a filter/s below. You can also track your collection with the checkboxes!
| Fossil | Layer | Location |
|---|---|---|
| Forbidden Layer (SL 1500) |
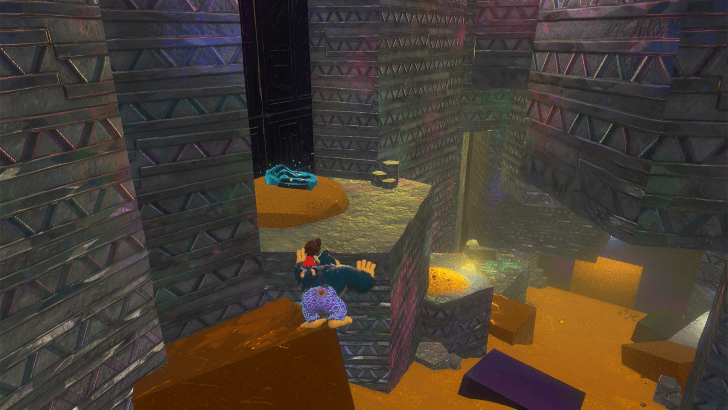 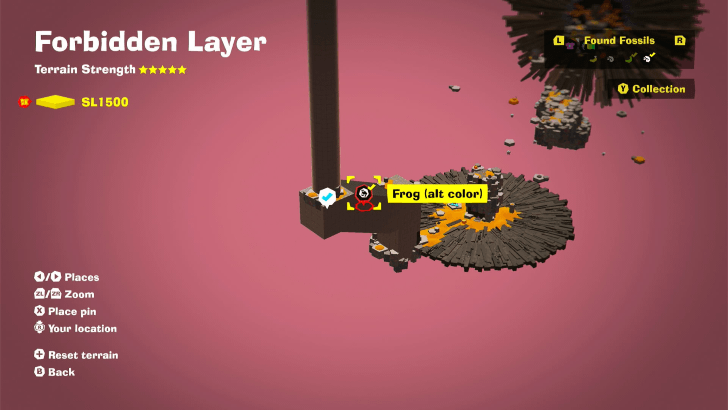 Found on your left as you go down the ramp from the Shuffling Shaft. | |
| Forbidden Layer (SL 1500) |
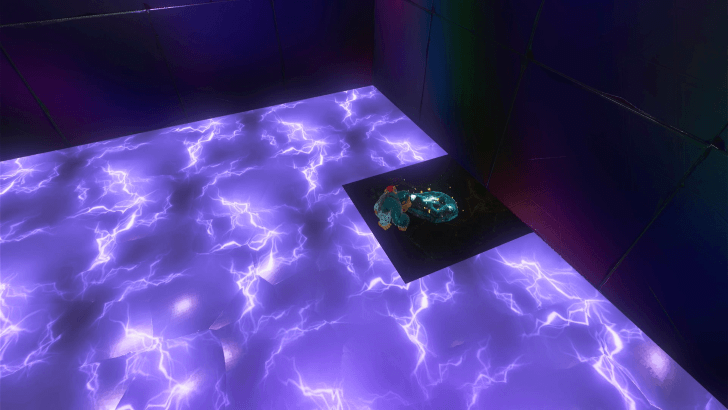 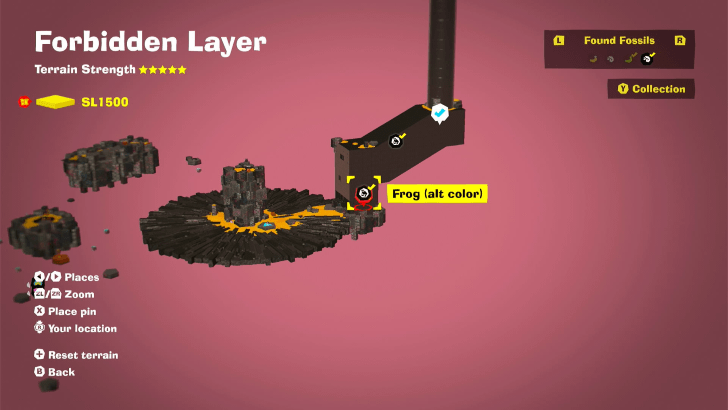 On a safe section of the electric floor at the base of the Shuffling Shaft. | |
| Forbidden Layer (SL 1500) |
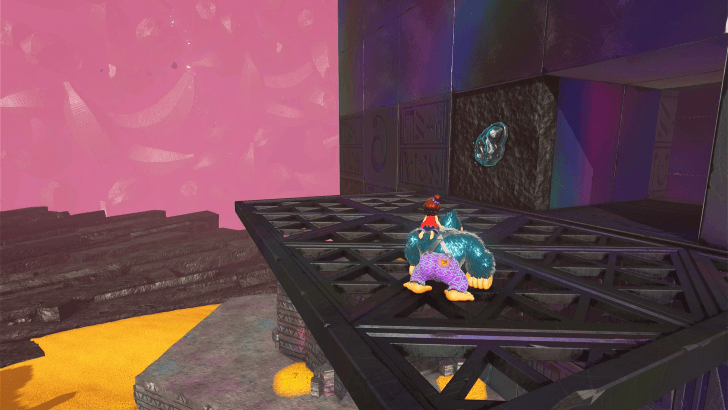 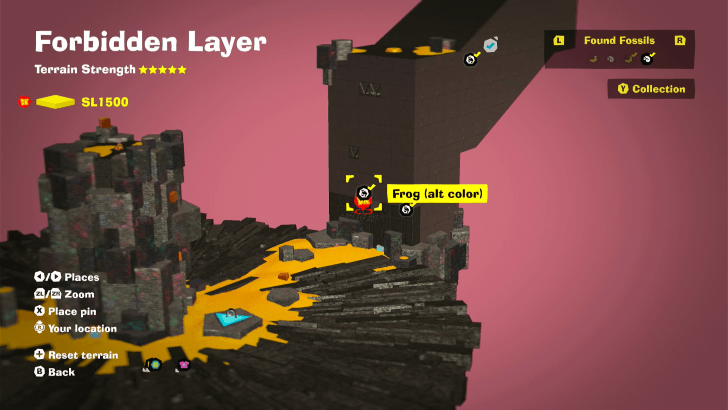 On the wall as you exit the Shuffling Shaft. | |
| Forbidden Layer (SL 1500) |
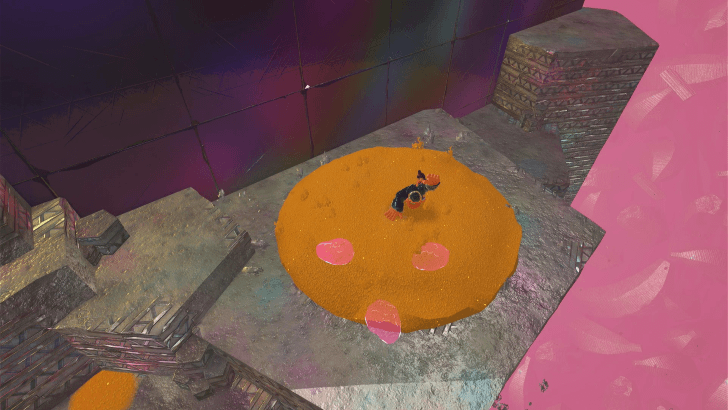 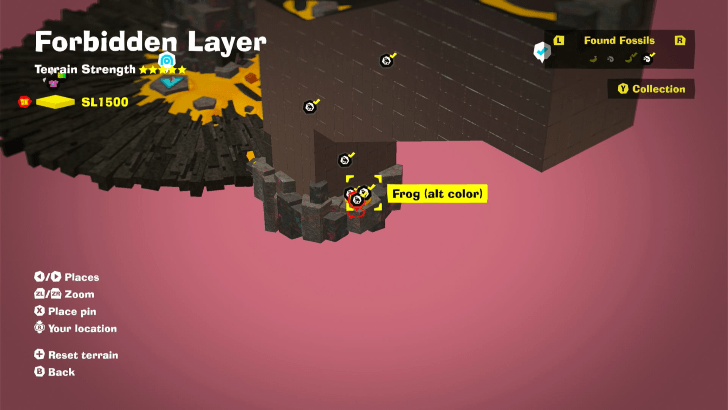 Hidden beneath sand at the back side of the base of Shuffling Shaft. You can discern its location with a hand slap. | |
| Forbidden Layer (SL 1500) |
 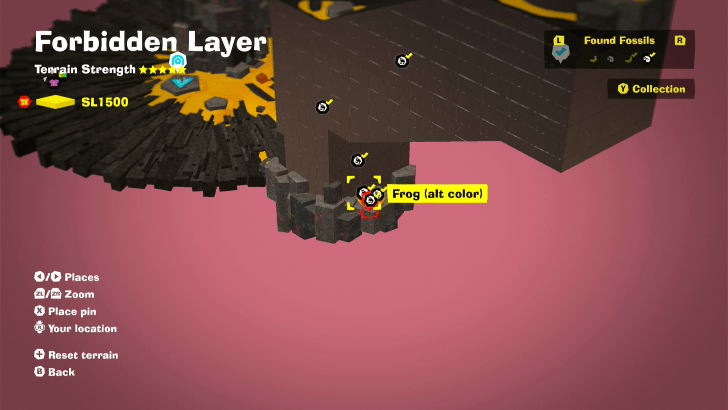 Hidden beneath sand at the back side of the base of Shuffling Shaft. You can discern its location with a hand slap. | |
| Forbidden Layer (SL 1500) |
 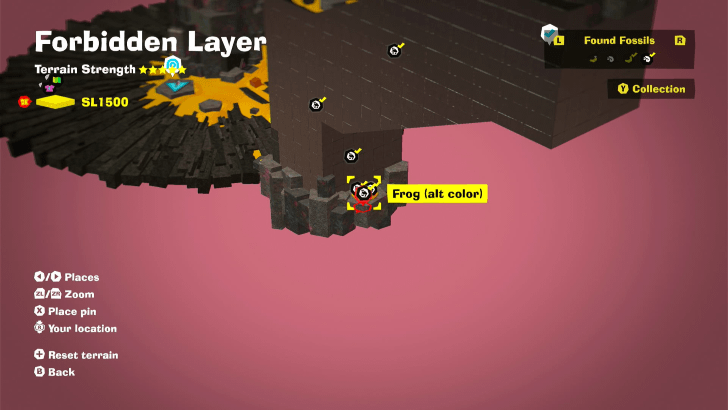 Hidden beneath sand at the back side of the base of Shuffling Shaft. You can discern its location with a hand slap. | |
| Forbidden Layer (SL 1500) |
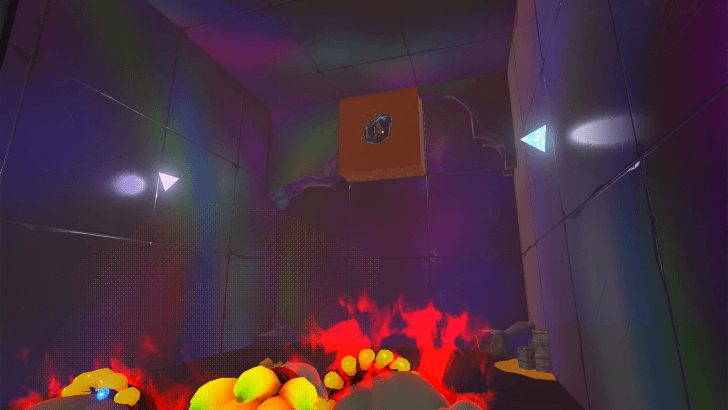 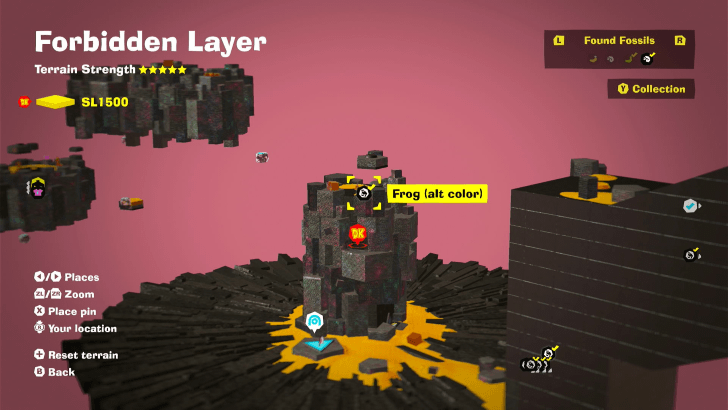 From the First Concrete Tower, there is a side entrance about halfway up where this fossil can be found. | |
| Forbidden Layer (SL 1500) |
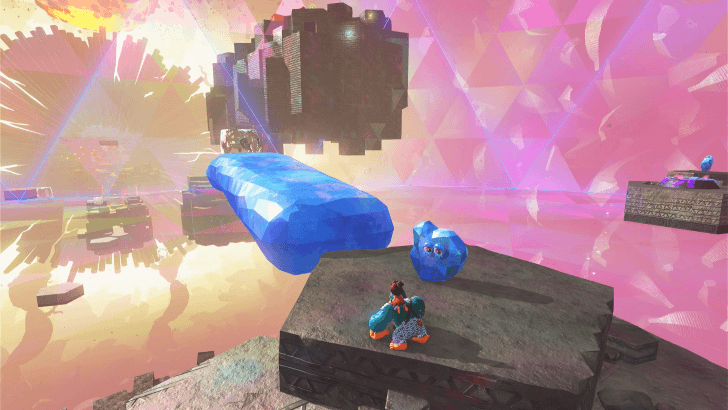 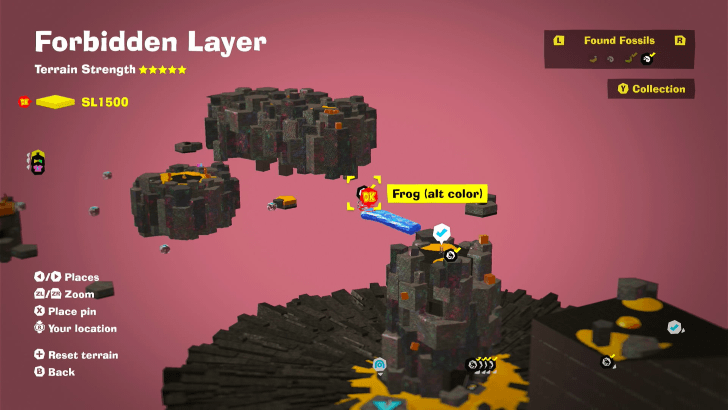 After paying the Securitone at the First Concrete Tower, you can generate Passage Stones in the area. From the First Concrete Tower, bridge to this fossil encased in crystal. | |
| Forbidden Layer (SL 1500) |
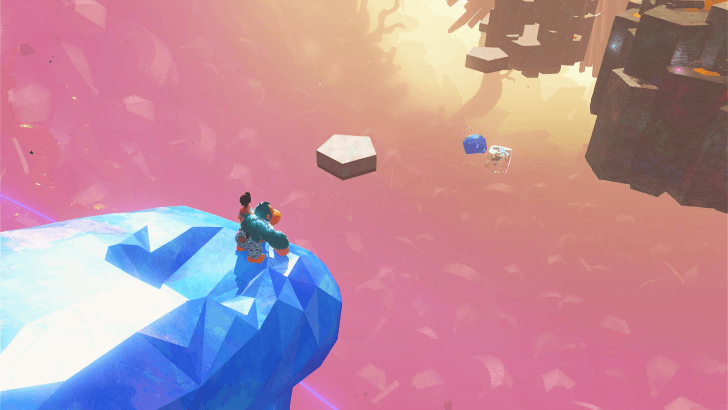 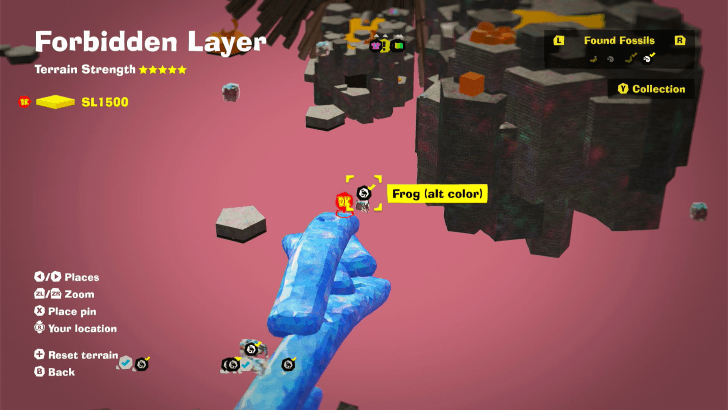 This fossil is encased in a crystal floating in the air around the Second Concrete tower, but you can actually collect it by throwing a chunk from the edge of the First Concrete tower's passage stone limits. | |
| Forbidden Layer (SL 1500) |
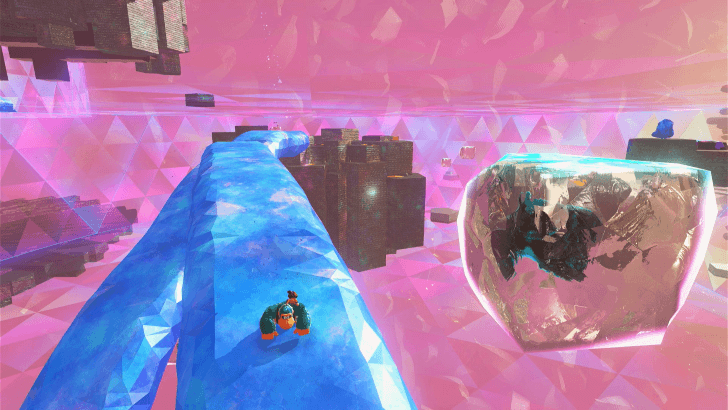 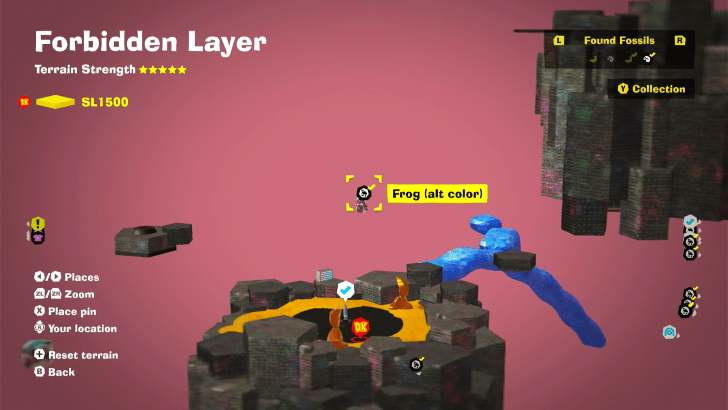 This fossil is encased in a crystal floating in the air in the direction of the Second Concrete Tower's nearby stela. Bridge to this fossil after paying the Securitone on the Second Concrete Tower. | |
| Forbidden Layer (SL 1500) |
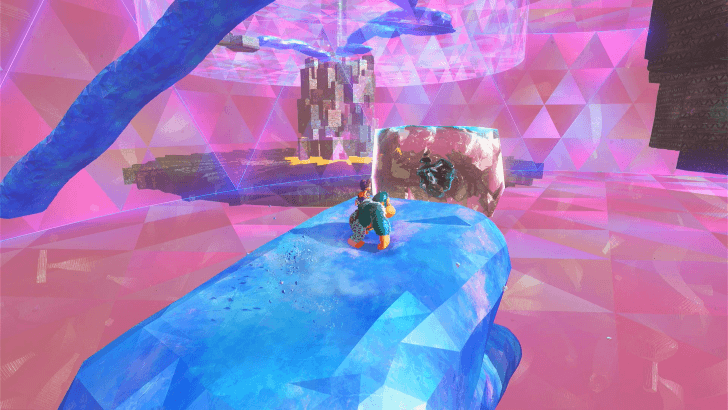 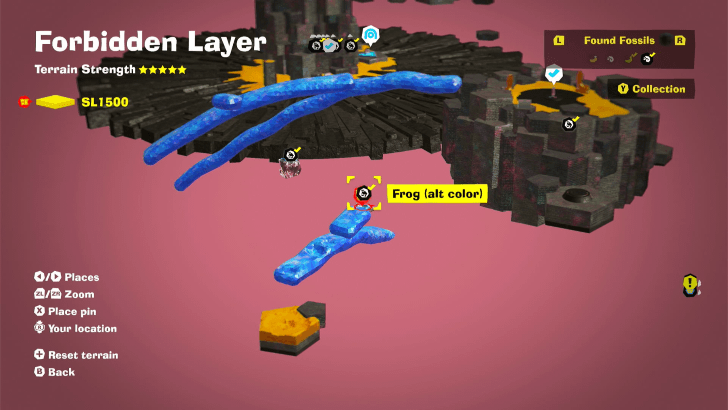 This fossil is encased in a crystal floating in the air in near the Second Concrete Tower. It is at a lower altitude close to where a sandy platform is. Bridge to this fossil after paying the Securitone on the Second Concrete Tower. | |
| Forbidden Layer (SL 1500) |
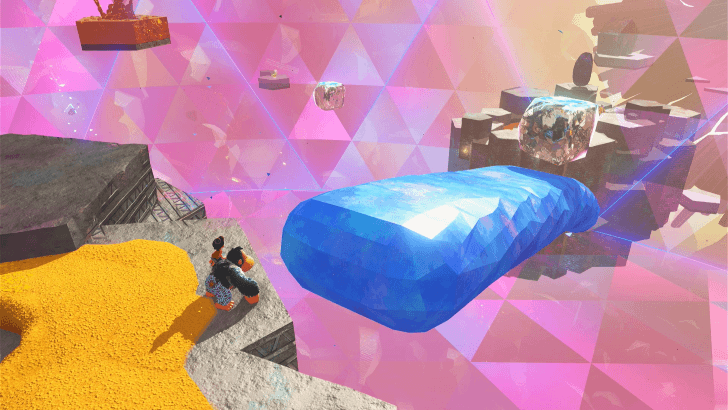  This fossil is encased in a crystal floating in the air in near the Second Concrete Tower. It can be found in the general direction of where you need to go to move forward. Bridge to this fossil after paying the Securitone on the Second Concrete Tower. | |
| Forbidden Layer (SL 1500) |
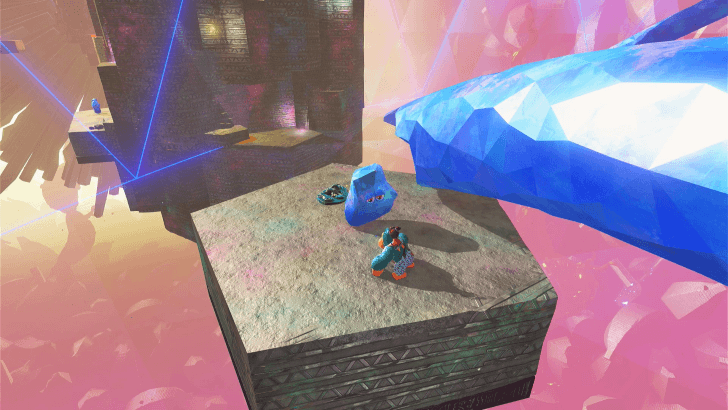 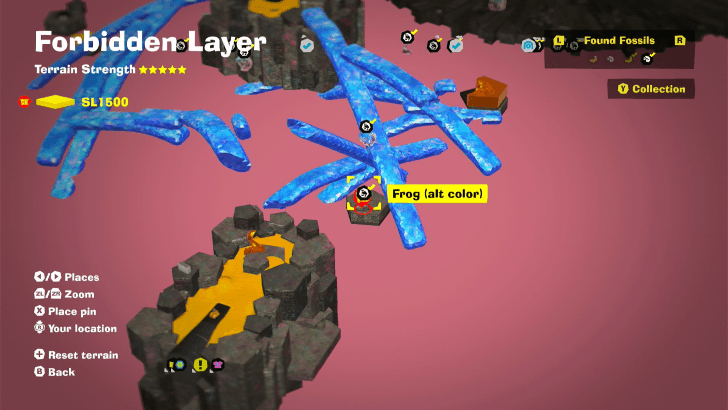 Next to Fractone on a hexagonal concrete platform near the edge of the Second Concrete tower's passage stone limits. Bridge to this fossil after paying the Securitone on the Second Concrete Tower. | |
| Forbidden Layer (SL 1500) |
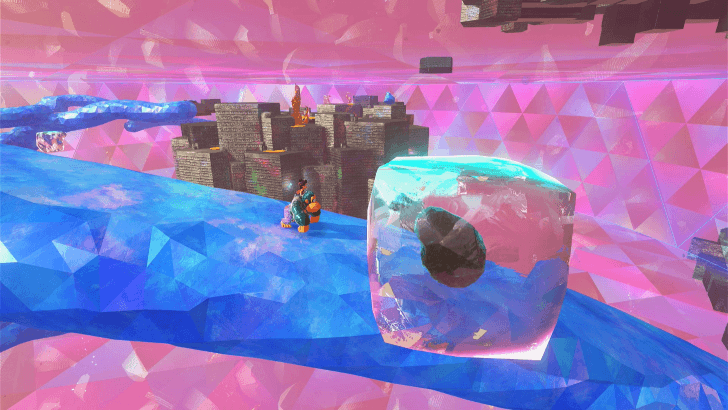 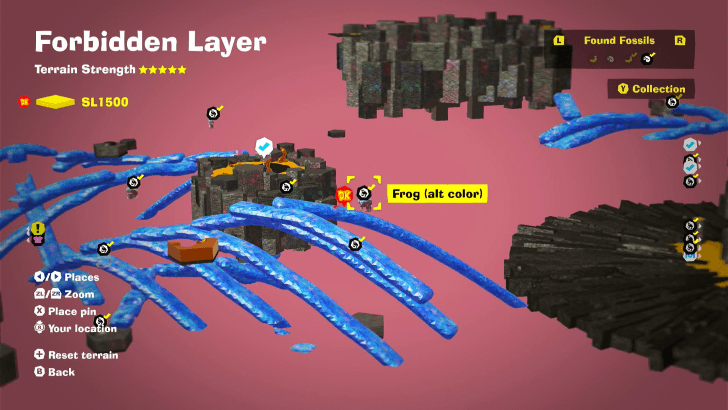 This fossil is encased in a crystal floating in the air above a hexagonal concrete platform near the Second Concrete Tower. Bridge to this fossil after paying the Securitone on the Second Concrete Tower. | |
| Forbidden Layer (SL 1500) |
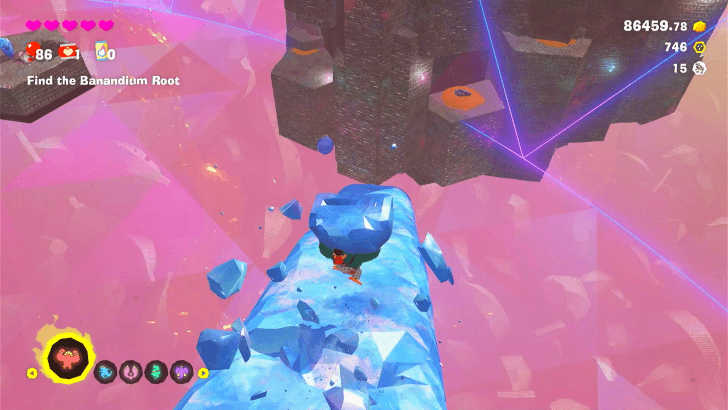 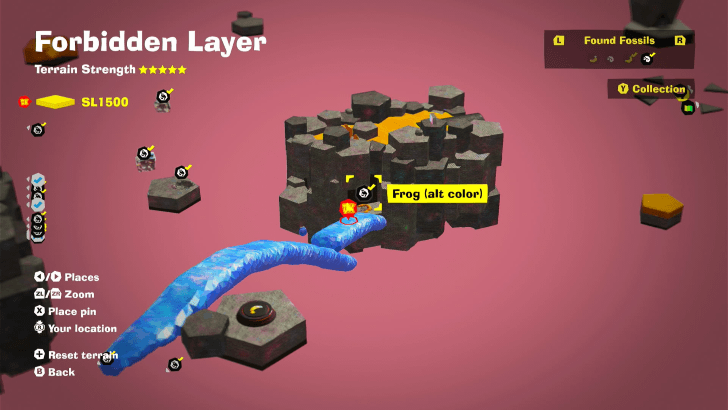 Embedded in Sand on the outer cliffs of the Third Concrete Tower. Bridge to this fossil after paying the Securitone on the Second Concrete Tower. | |
| Forbidden Layer (SL 1500) |
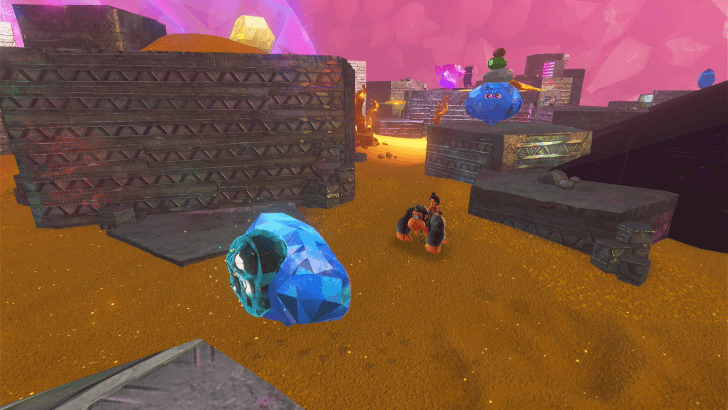 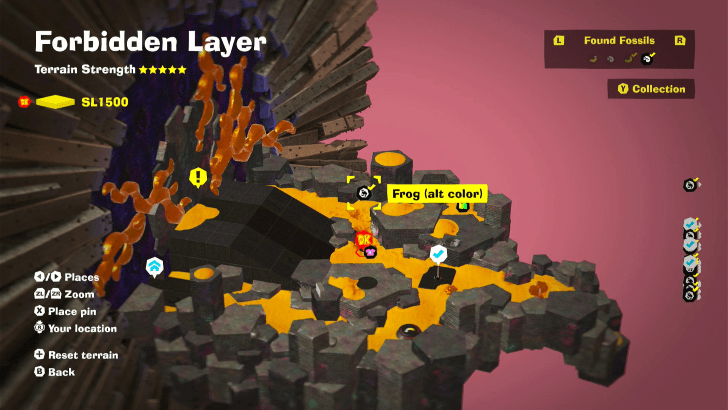 Stuck on the back of a Fractone near the Chip Exchange at the Go-No-Further Gate. This fractone will be invulnerable if you get too close, so blast them to smithereens with explosive gold from a distance. | |
| Forbidden Layer (SL 1500) |
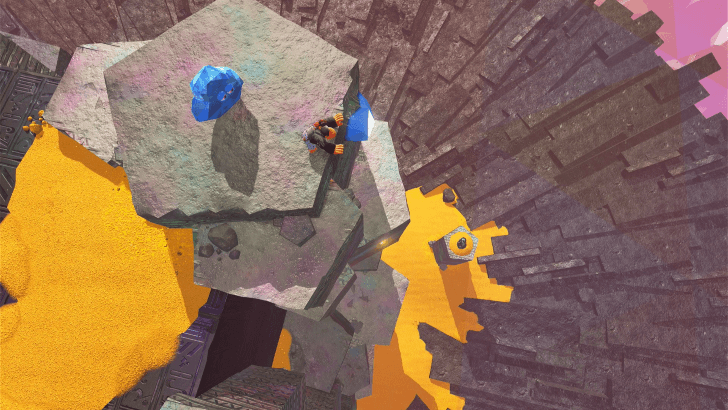 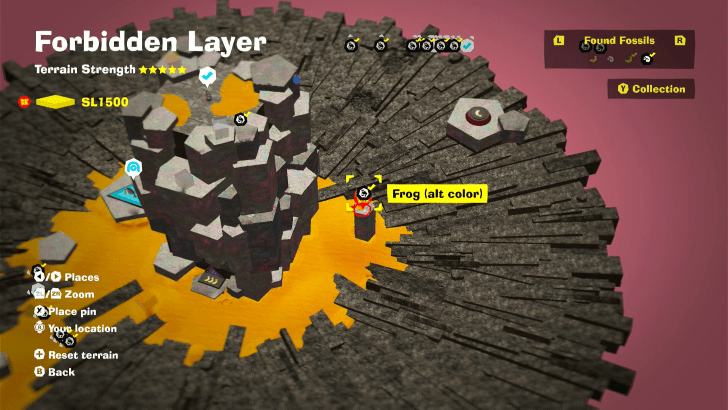 On top of a lone pillar visible from the top of the First Concrete Tower. | |
| Forbidden Layer (SL 1500) |
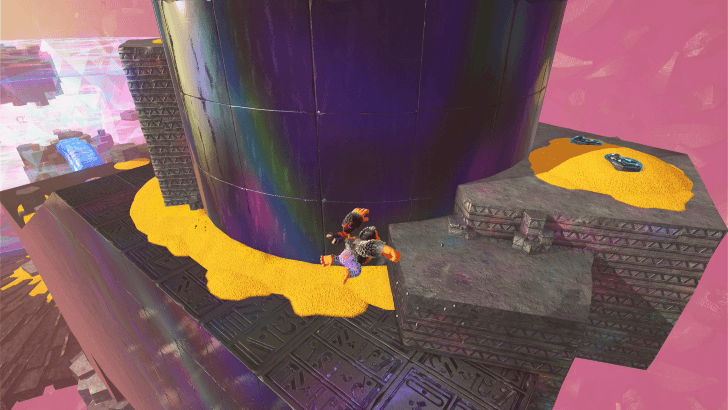 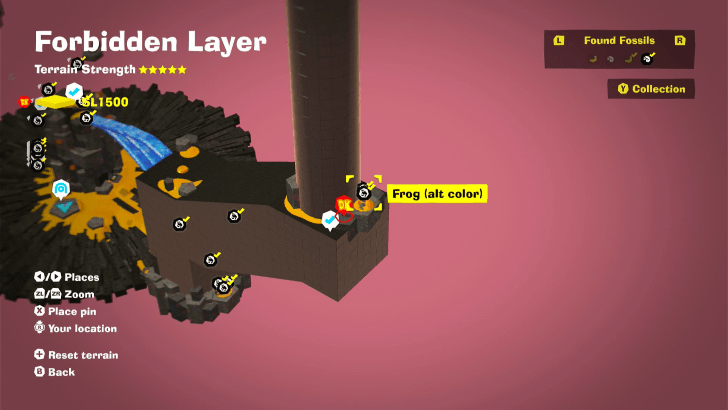 After paying the Securitone on the First Concrete Tower, you can now bridge to the roof of the Shuffling Shaft. Make your way up to where the base of the pillar is, and behind it you'll find this and another fossil. | |
| Forbidden Layer (SL 1500) |
 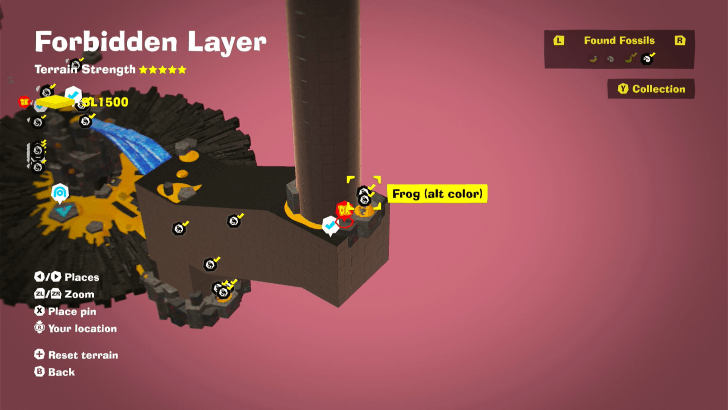 After paying the Securitone on the First Concrete Tower, you can now bridge to the roof of the Shuffling Shaft. Make your way up to where the base of the pillar is, and behind it you'll find this and another fossil. | |
| Forbidden Layer (SL 1500) |
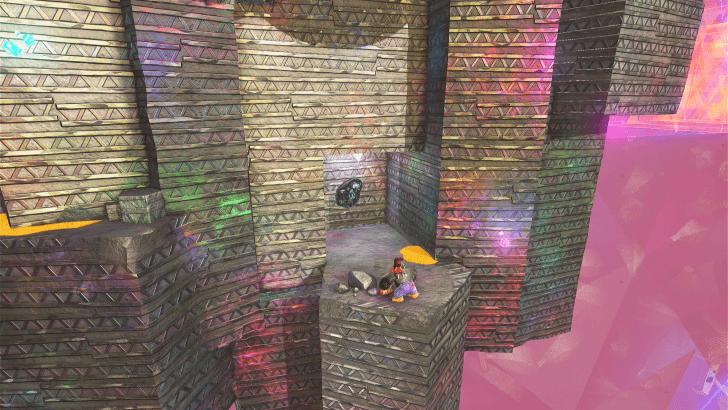 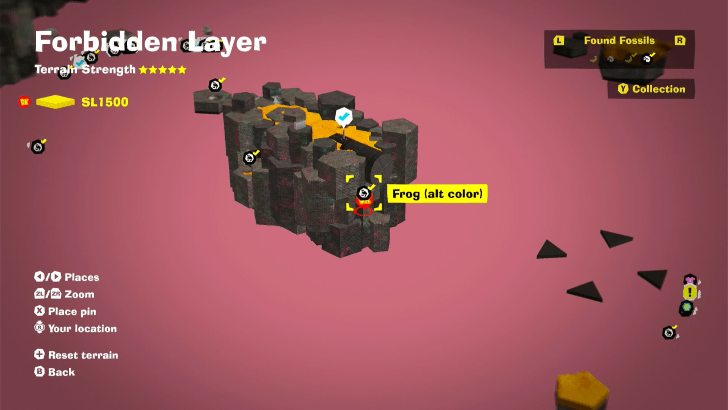 In an alcove in the front cliffs of the Third Concrete Tower. | |
| Forbidden Layer (SL 1500) |
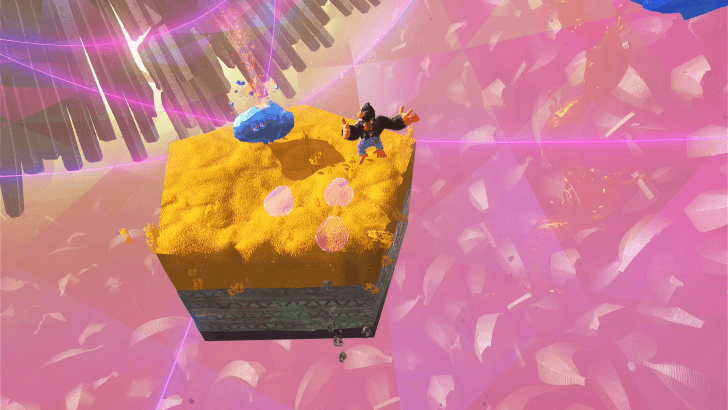 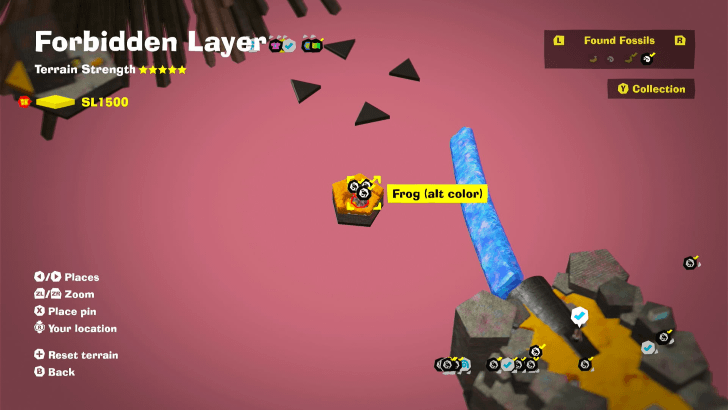 On a sandy hexagonal platform just slightly below altitude from the Third Concrete Tower. There's a fractone nearby, but you can detect the fossils beneath with a hand slap. Bridge to this fossil after paying the Securitone on the Third Concrete Tower. | |
| Forbidden Layer (SL 1500) |
 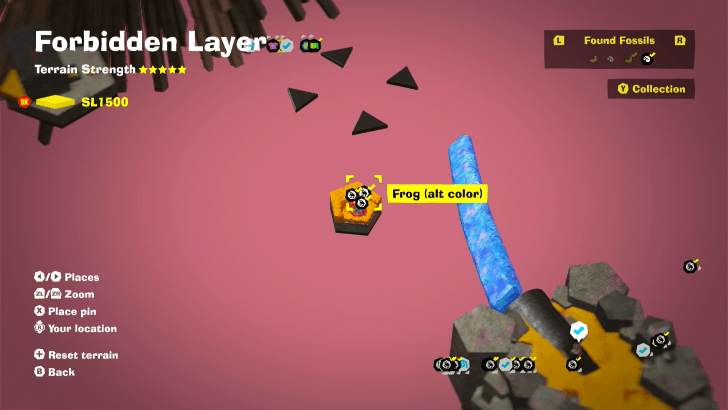 On a sandy hexagonal platform just slightly below altitude from the Third Concrete Tower. There's a fractone nearby, but you can detect the fossils beneath with a hand slap. Bridge to this fossil after paying the Securitone on the Third Concrete Tower. | |
| Forbidden Layer (SL 1500) |
 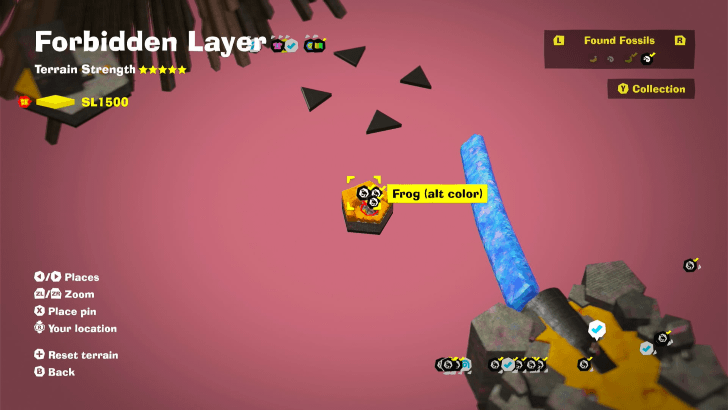 On a sandy hexagonal platform just slightly below altitude from the Third Concrete Tower. There's a fractone nearby, but you can detect the fossils beneath with a hand slap. Bridge to this fossil after paying the Securitone on the Third Concrete Tower. | |
| Forbidden Layer (SL 1500) |
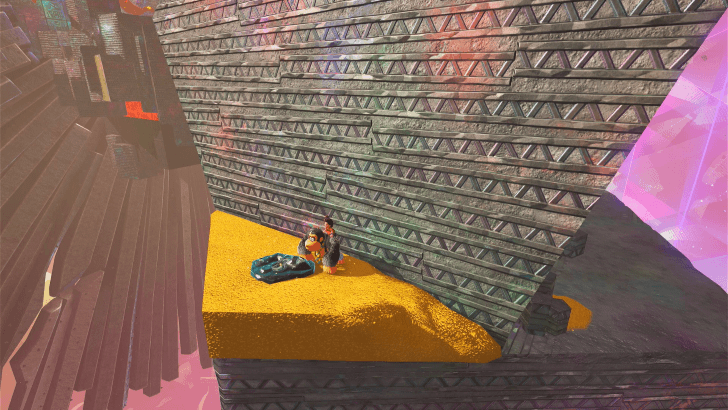 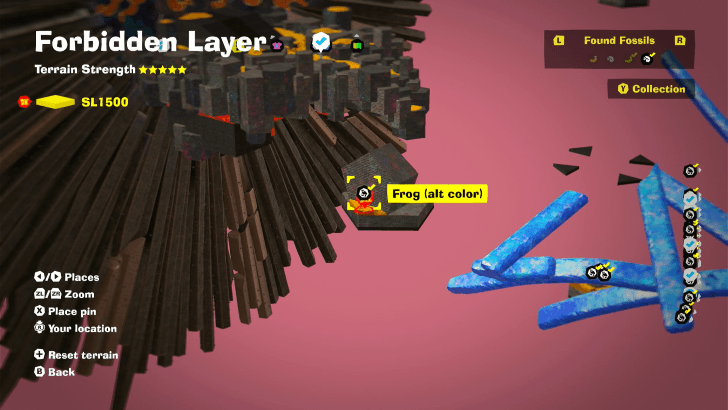 Behind the Lost in the Shuffle Challenge Ruin. | |
| Forbidden Layer (SL 1500) |
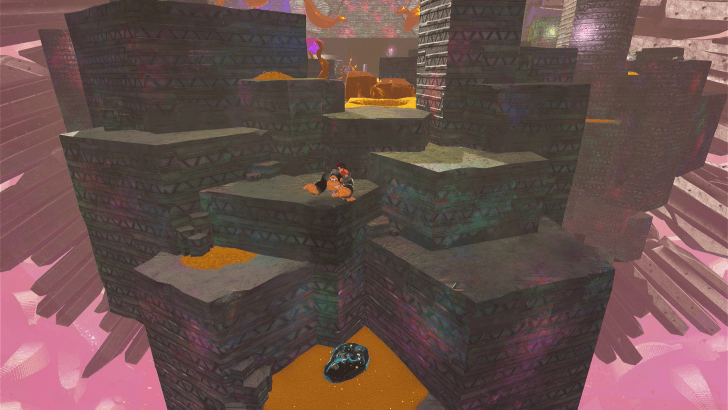 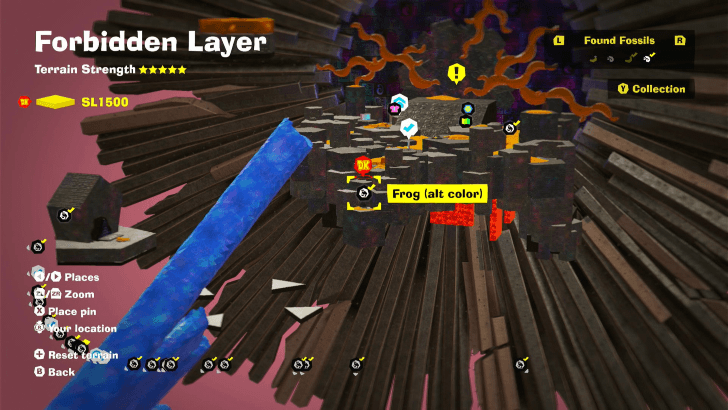 In the cliffs by the entrance to the Go-No-Further Gate. | |
| Forbidden Layer (SL 1500) |
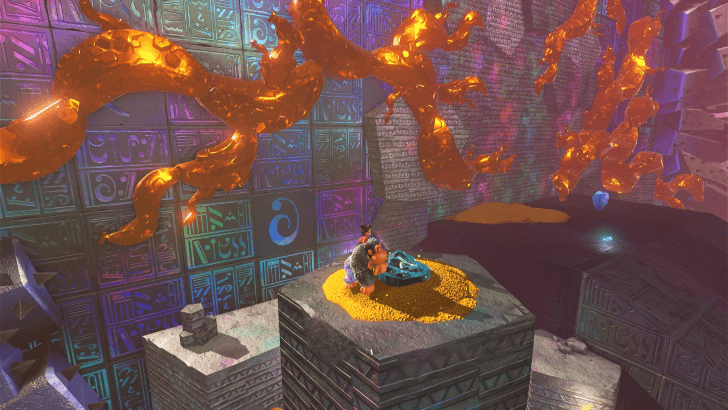 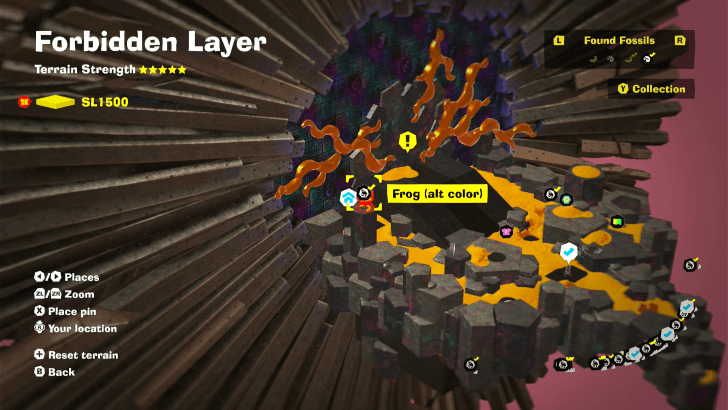 On a Concrete Pillar near the Go-No-Further Gate Getaway. | |
| Forbidden Layer (SL 1500) |
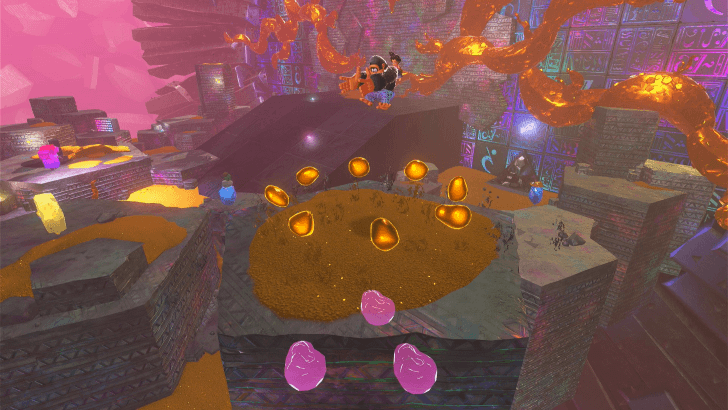 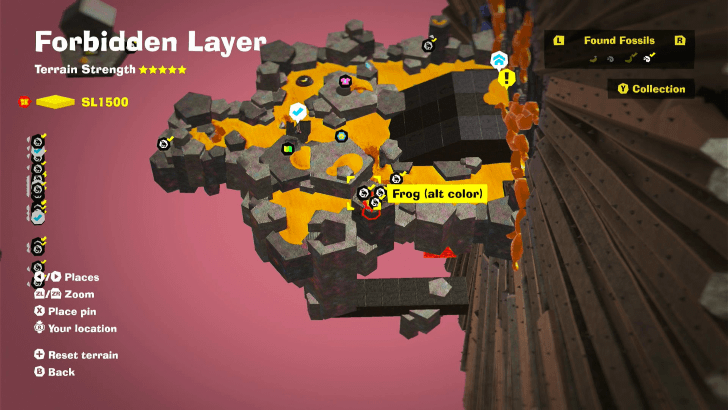 In a Concrete Pillar just past the Chip Exchange at the Go-No-Further Gate. The pillar itself has sand on top of it and gold in a circular pattern. Discern the location of the fossils with a hand slap. | |
| Forbidden Layer (SL 1500) |
 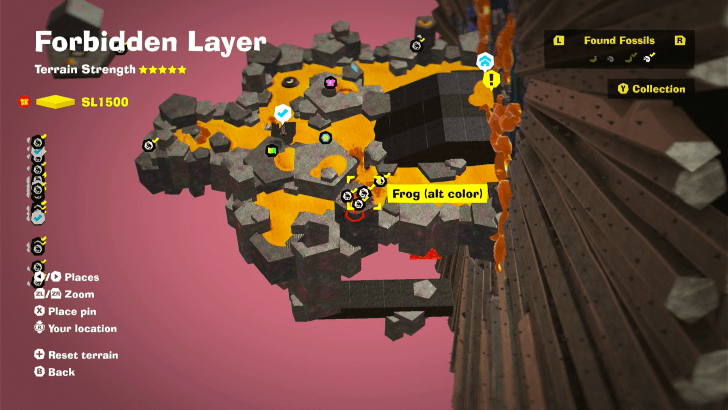 In a Concrete Pillar just past the Chip Exchange at the Go-No-Further Gate. The pillar itself has sand on top of it and gold in a circular pattern. Discern the location of the fossils with a hand slap. | |
| Forbidden Layer (SL 1500) |
 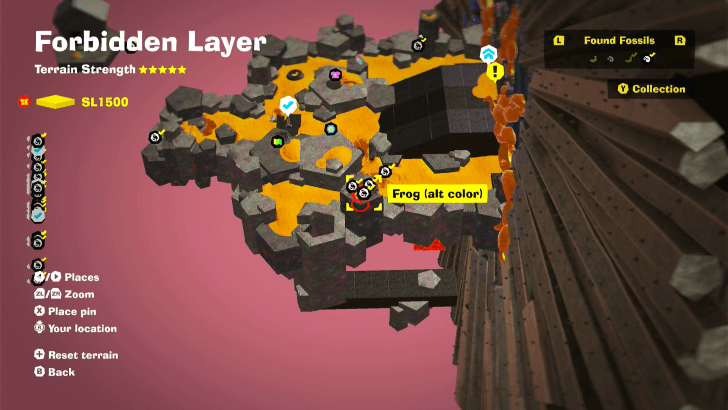 In a Concrete Pillar just past the Chip Exchange at the Go-No-Further Gate. The pillar itself has sand on top of it and gold in a circular pattern. Discern the location of the fossils with a hand slap. | |
| Forbidden Layer (SL 1500) |
 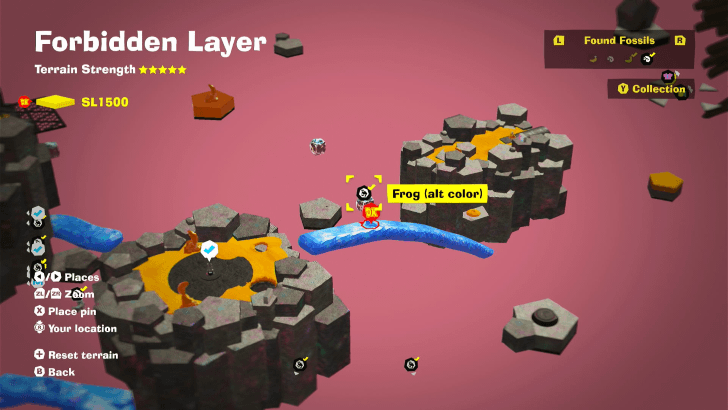 This fossil is encased in a crystal floating in the air above a concrete hexagonal platform near the Second Concrete Tower. Bridge to this fossil after paying the Securitone on the Second Concrete Tower. |
All Frog (alt color) Fossil Outfits
| Outfit | Description | Cost |
|---|---|---|
 Sesame Gradient Fur Sesame Gradient Fur |
Mild and soothing, like the oil from a sesame seed. |
Lv1: |
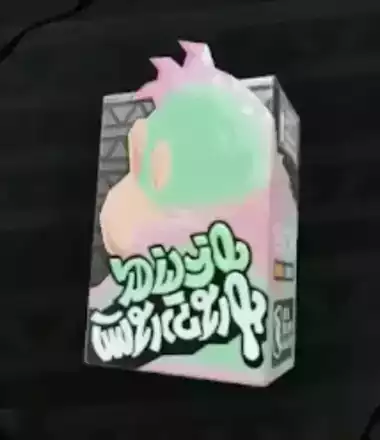 Macaron Gradient Fur Macaron Gradient Fur |
Mouthwatering colors that will make your stomach growl. |
Lv1: |
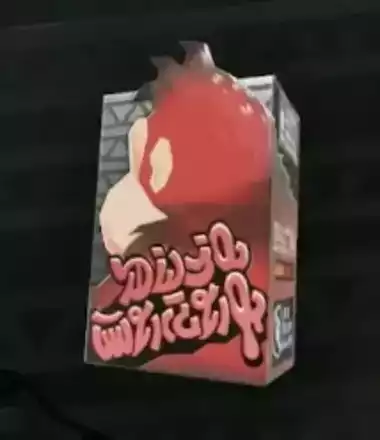 Burnt-Red Gradient Fur Burnt-Red Gradient Fur |
Burning, like the lingering embers of a formerly roaring fire. |
Lv1: |
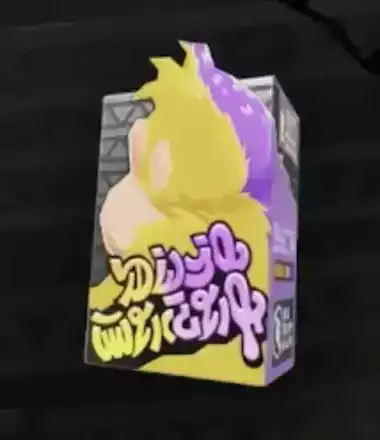 Passion-Fruit Split Fur Passion-Fruit Split Fur |
Vivid and exciting, like a surprisingly sweet tropical fruit. |
Lv1: |
All Outfits and How to Change Costumes
Donkey Kong Bananza Related Guides
List of All Fossils
Comment
Author
All Frog (alt color) Fossil Locations
improvement survey
04/2026
improving Game8's site?

Your answers will help us to improve our website.
Note: Please be sure not to enter any kind of personal information into your response.

We hope you continue to make use of Game8.
Rankings
- We could not find the message board you were looking for.
Gaming News
Popular Games

Genshin Impact Walkthrough & Guides Wiki

Crimson Desert Walkthrough & Guides Wiki

Umamusume: Pretty Derby Walkthrough & Guides Wiki

Honkai: Star Rail Walkthrough & Guides Wiki

Monster Hunter Stories 3: Twisted Reflection Walkthrough & Guides Wiki

Wuthering Waves Walkthrough & Guides Wiki

The Seven Deadly Sins: Origin Walkthrough & Guides Wiki

Pokemon TCG Pocket (PTCGP) Strategies & Guides Wiki

Pokemon Pokopia Walkthrough & Guides Wiki

Zenless Zone Zero Walkthrough & Guides Wiki
Recommended Games

Monster Hunter World Walkthrough & Guides Wiki

Fire Emblem Heroes (FEH) Walkthrough & Guides Wiki

Pokemon Brilliant Diamond and Shining Pearl (BDSP) Walkthrough & Guides Wiki

Super Smash Bros. Ultimate Walkthrough & Guides Wiki

Diablo 4: Vessel of Hatred Walkthrough & Guides Wiki

Cyberpunk 2077: Ultimate Edition Walkthrough & Guides Wiki

Yu-Gi-Oh! Master Duel Walkthrough & Guides Wiki

Elden Ring Shadow of the Erdtree Walkthrough & Guides Wiki

The Legend of Zelda: Tears of the Kingdom Walkthrough & Guides Wiki

Persona 3 Reload Walkthrough & Guides Wiki
All rights reserved
© Nintendo. Games are property of their respective owners. Nintendo of America Inc.
The copyrights of videos of games used in our content and other intellectual property rights belong to the provider of the game.
The contents we provide on this site were created personally by members of the Game8 editorial department.
We refuse the right to reuse or repost content taken without our permission such as data or images to other sites.


![Forza Horizon 6 Review [Preview] | Beautiful Roads With a Whole Lot of Oversteer](https://img.game8.co/4460981/a7254c24945c43fbdf6ad9bea52b5ce9.png/show)


![Forza Horizon 6 Review [Preview] | Beautiful Roads With a Whole Lot of Oversteer](https://img.game8.co/4460981/a7254c24945c43fbdf6ad9bea52b5ce9.png/thumb)


