Radiance Layer Banana and Fossil Locations (SL 1200-1204)
☽ DK Island and Emerald Rush DLC out now!
☽ Learn how to solve Banandiumtone's Puzzles.
☽ All Collectibles: Banandium Gems and Fossils
☽ Learn How to Skip Layers Entirely!
☽ How to Beat the Final Boss
☽ Post-Game: Rehearsal Halls | Secret Ending
Radiance Layer is the thirteenth layer in Donkey Kong Bananza. Check out where to find the locations of all Tempest Layer Bananas, fossils, and other collectibles in this level!
| Radiance Layer Guides | |
|---|---|
| Walkthrough | Collectibles |
List of Contents
Radiance Layer Collectibles Overview
List of Collectibles
| Banandium Gems | Total: 76
・SL 1200: 3 ・SL 1201: 27 ・SL 1202: 15 ・SL 1203: 26 ・SL 1204: 5 |
|---|---|
| Fossils | Total: 72
|
| Checkpoints | Total: 11 |
| Challenges | Total: 11 |
There are 76 bananas and 72 fossils available in Radiance Layer.
Radiance Layer Bananas
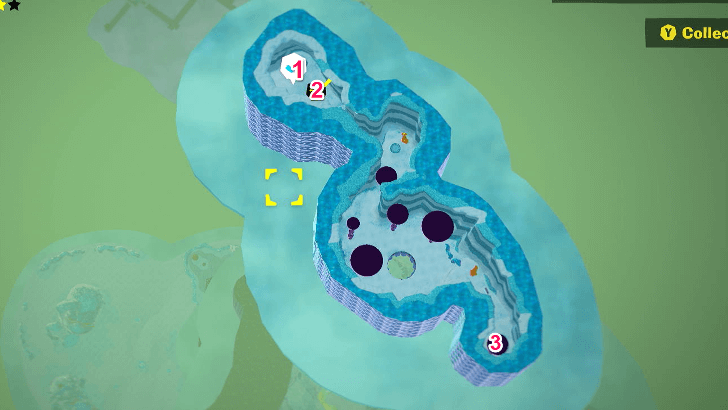
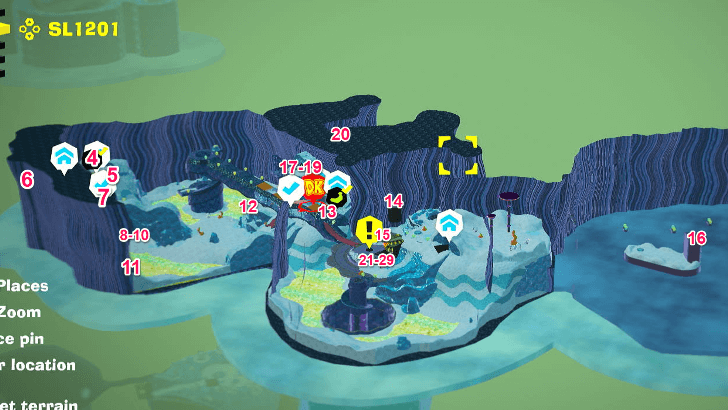
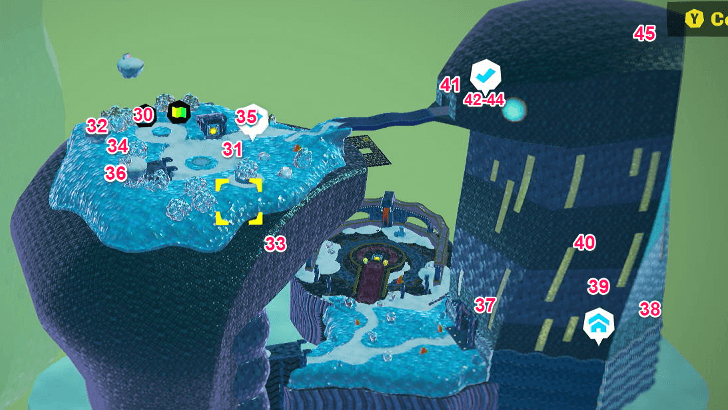
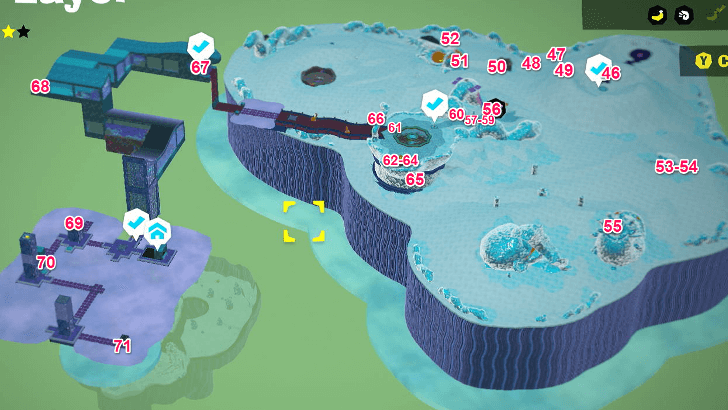
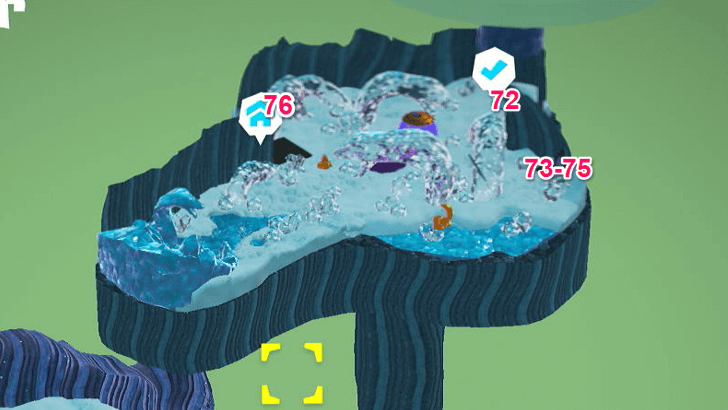
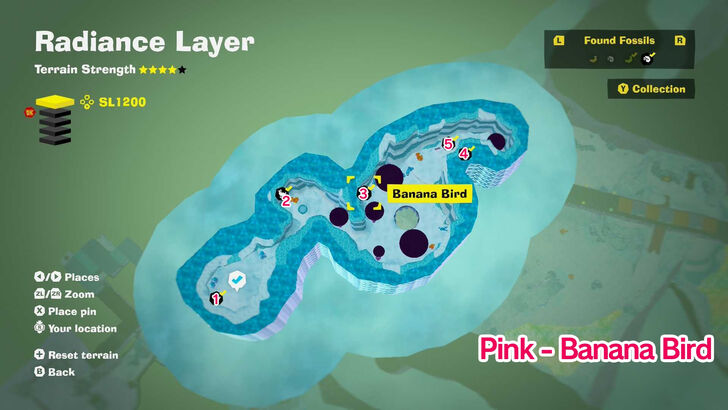
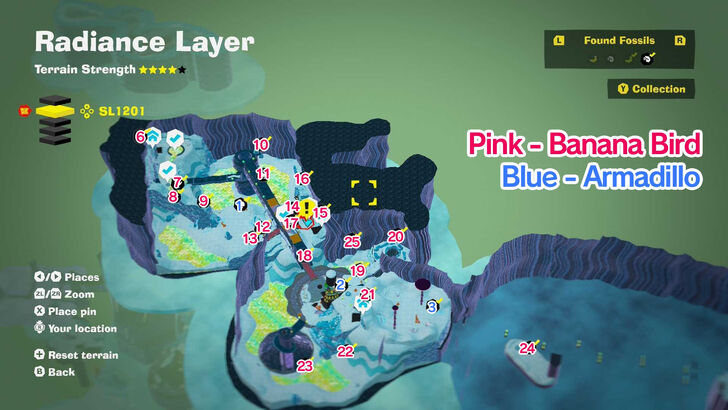
Banandium Gems Map Overview
SL 1200 Banana Locations
| Overworld View | Map Location | |
|---|---|---|
| 01 |
 |
 |
|
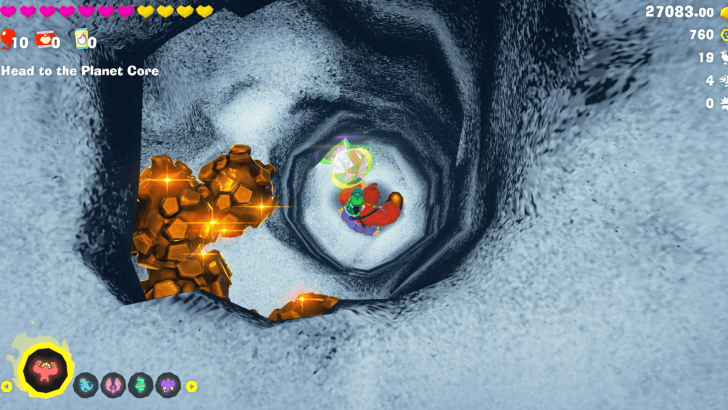
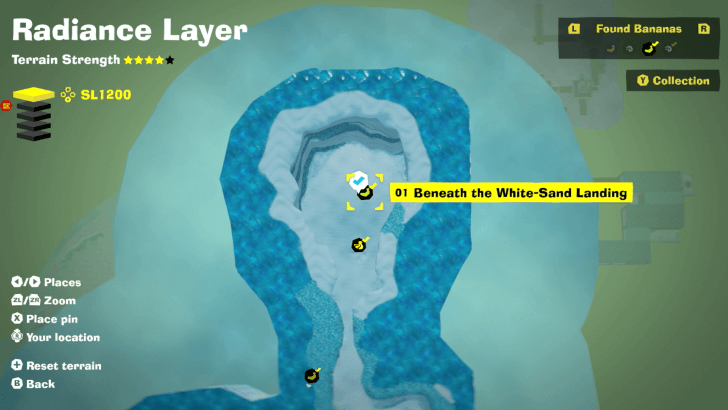
Dig down from the starting point to find the Gem. |
||
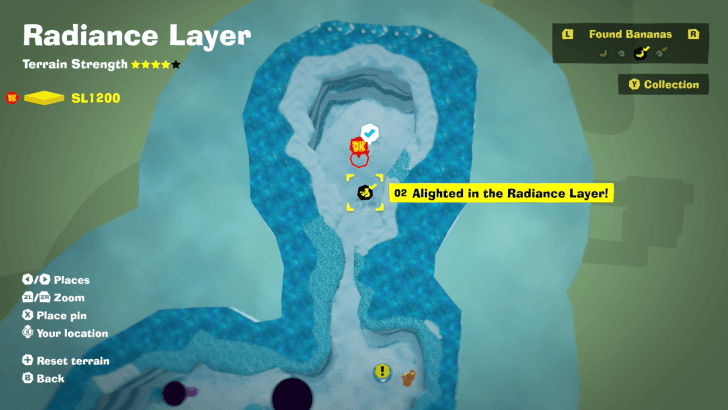
| 02 |
 |
 |
|
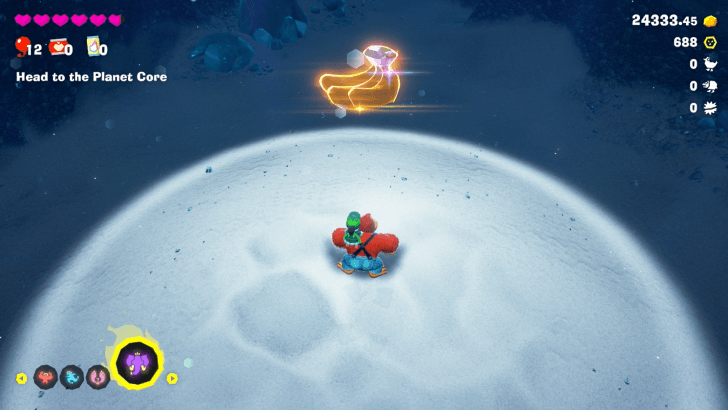
Found with story progression. |
||
| 03 |
 |
 |
|
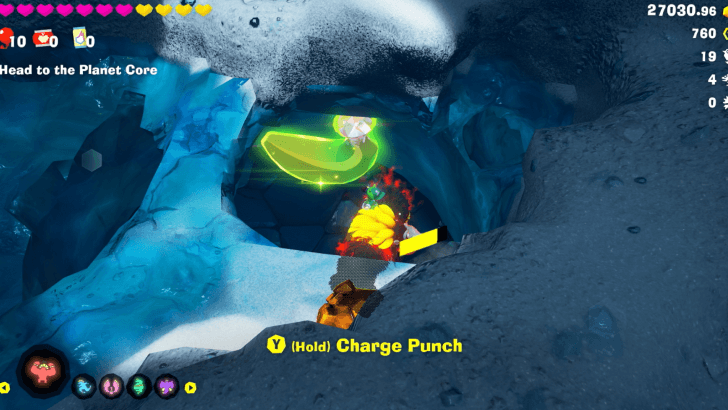
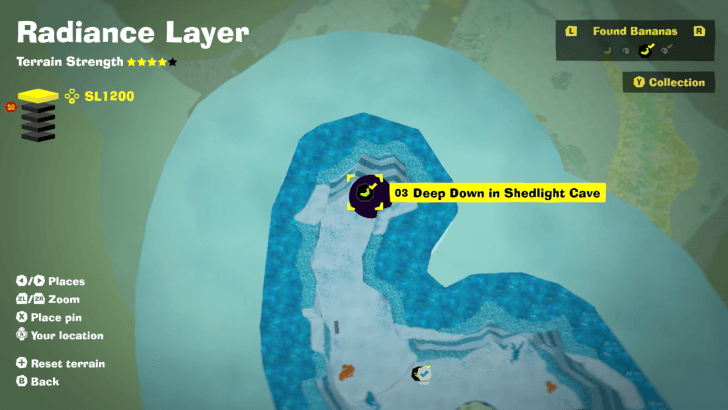
Dig down and use Kong Bananza to destroy the concrete below the floor. Find the Banandium Gem below. |
||
SL 1201 Banana Locations
| Overworld View | Map Location | |
|---|---|---|
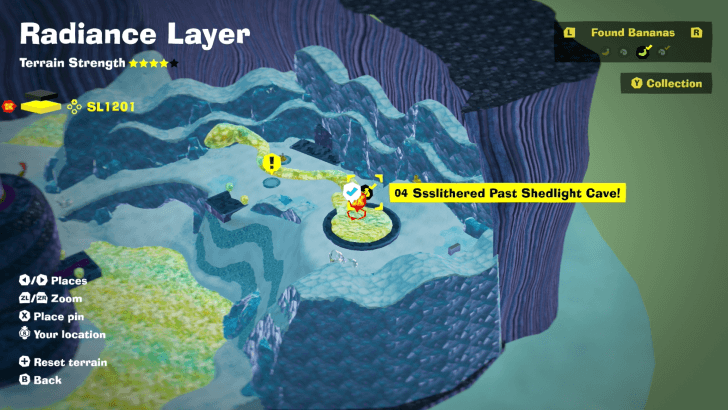
| 04 |
 |
 |
|
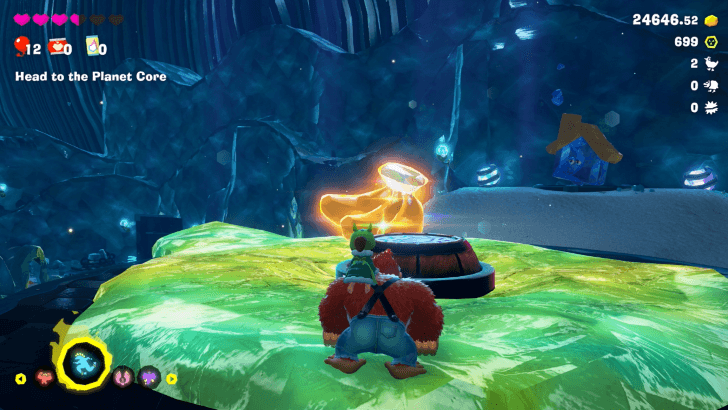
Found with story progression. |
||
| 05 |
 |
|
|
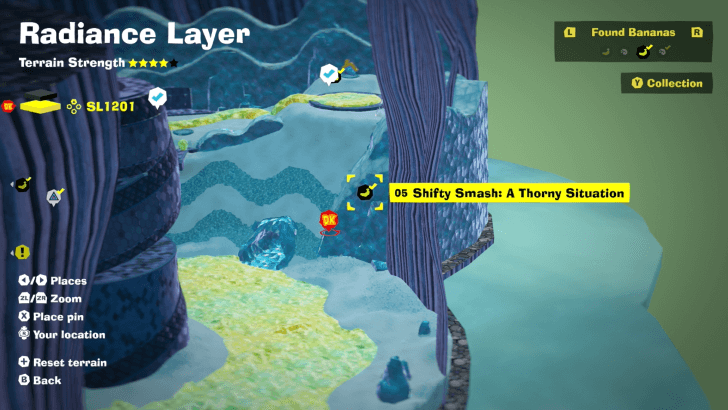
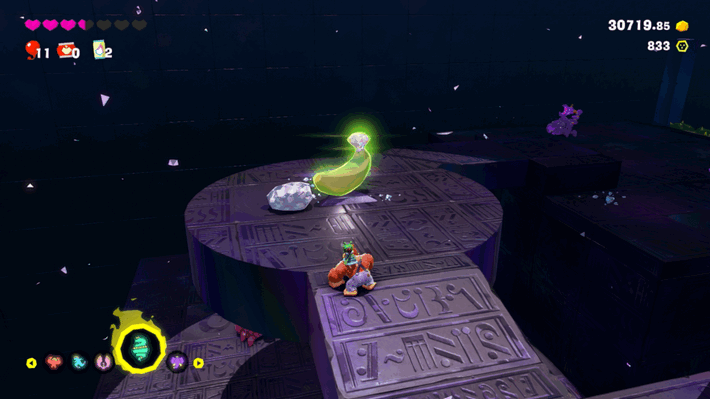
Hit the Shifty Smash Challenge to start the timer, and use Elephant Bananza to inhale all the white walls. If any remains, climb to the top and break it. Get 100% to make the Banandium Gem appear. |
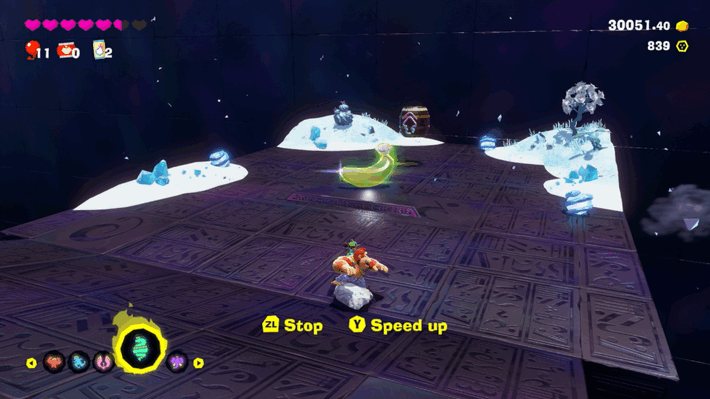
||
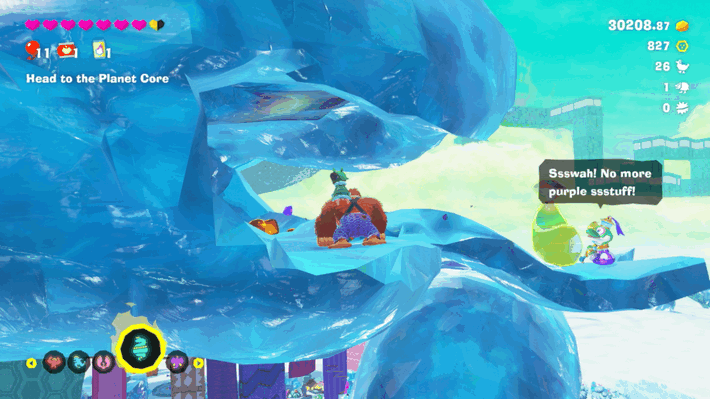
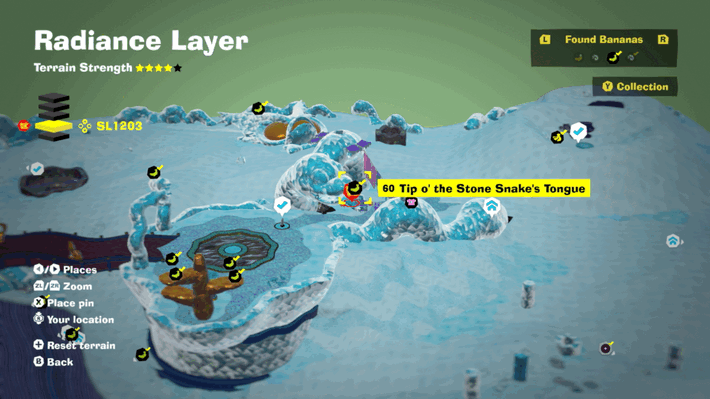
| 06 |
 |
 |
|
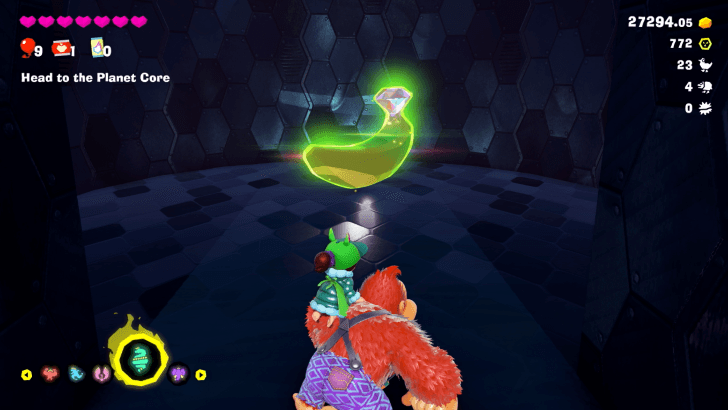
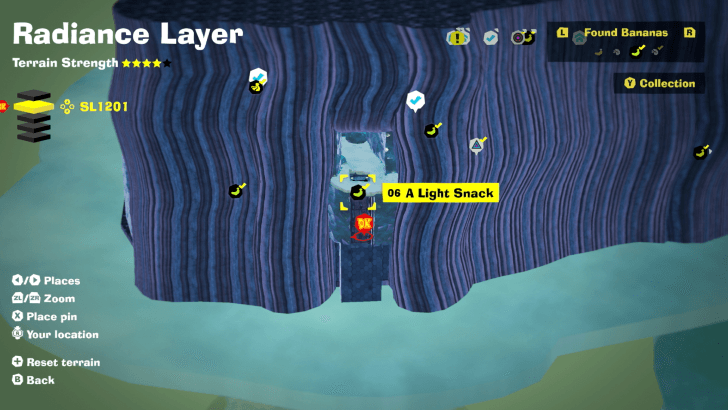
From the entrance of SL 1201, punch through the wall to find an opening to the opposite side, where you can find a Banandium Gem. |
||
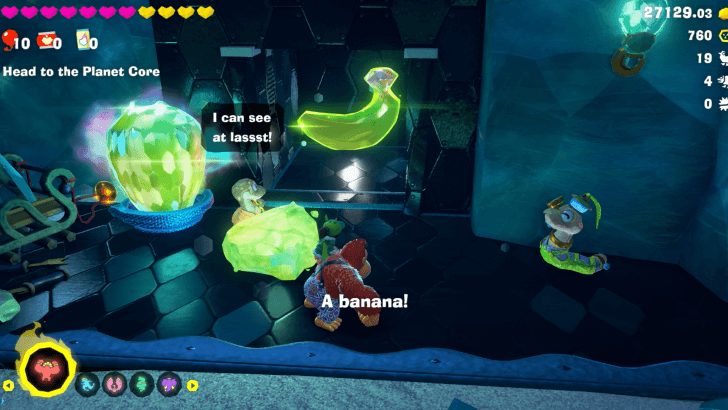
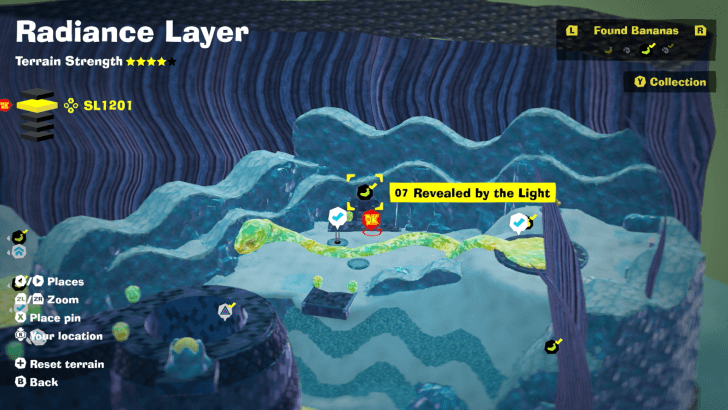
| 07 |
 |
 |
|
Throw a Glow Stone onto the empty coil to open the door, revealing a Banandium Gem. |
||
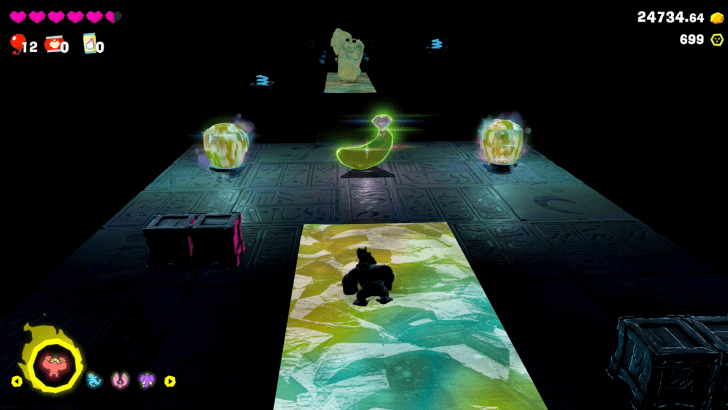
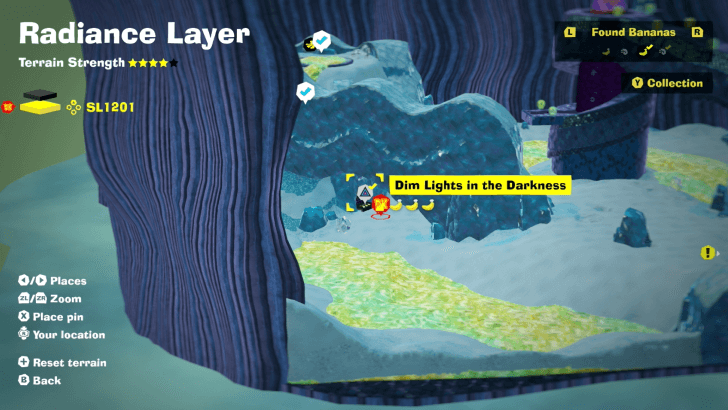
| 08 |
 |
 |
|
Found inside Dim Lights in the Darkness Challenge Course 2. It is found along the course. |
||
| 09 |
 |
|
|
On the wide platform where you fight the Crockoid, look to the left to see an unattached coil. Throw a Glow Stone at it to make platforms rise up which you can cross to find a Banandium Gem. |
||
| 10 |
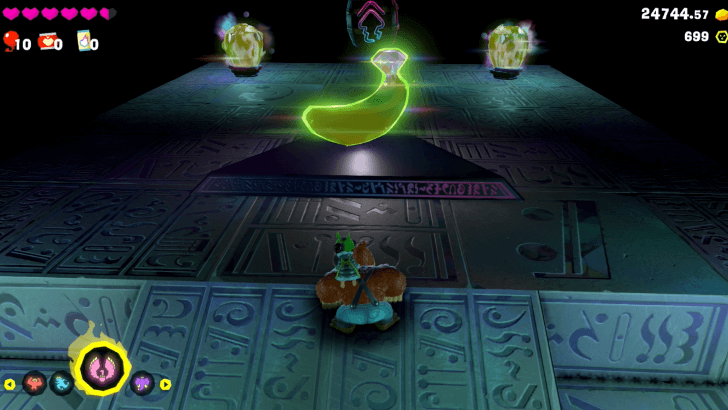 |
 |
|
Found at the end of the Dim Lights in the Darkness Challenge Course 2. |
||
| 11 |
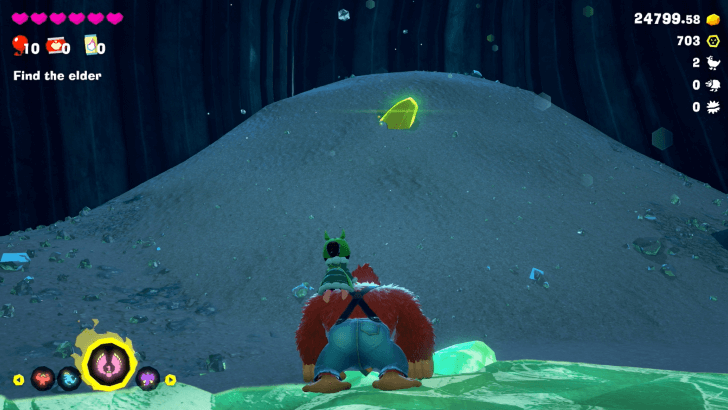 |
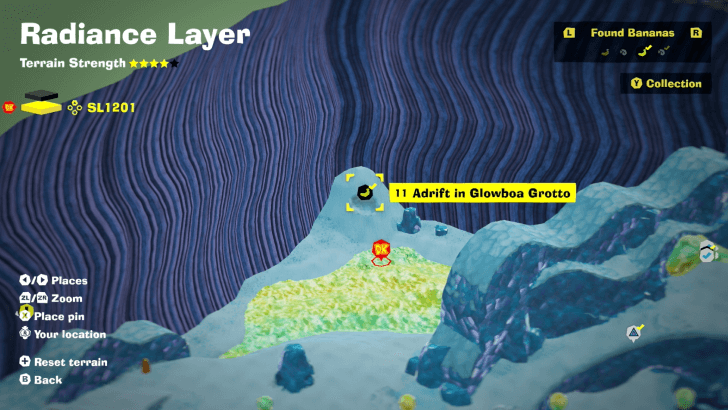 |
|
Found buried in a hill. |
||
| 12 |
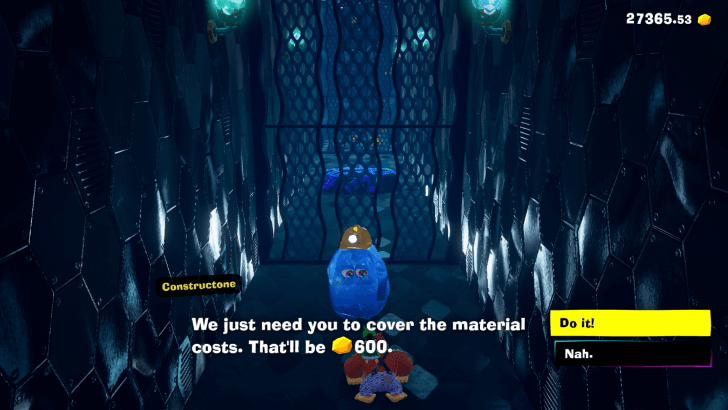 |
 |
|
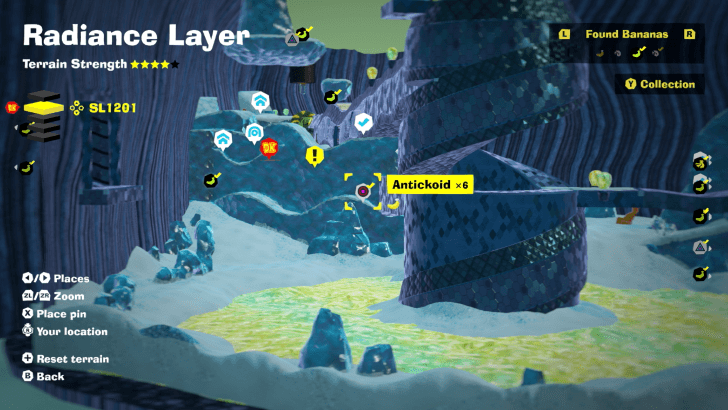
Found in a cave below Constrictor Corridor; find the entrance on the side facing the hole leading to the next sublayer. You must pay gold to enter. |
||
| 13 |
 |
 |
|
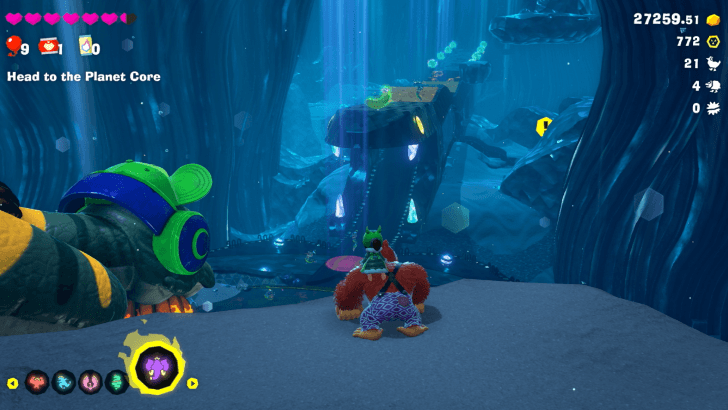
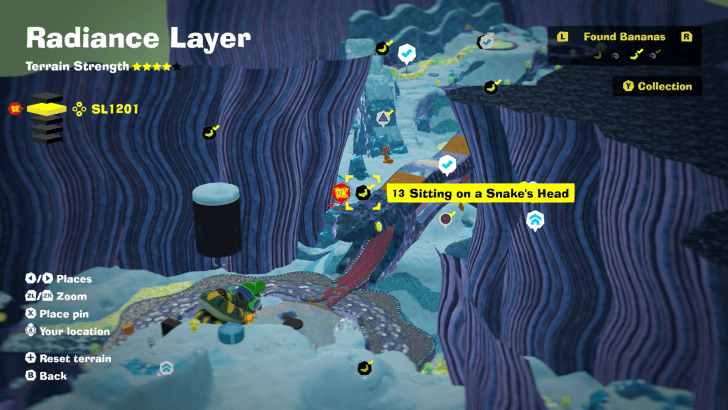
On top of the side of the ceiling of Constrictor Corridor facing the Snake Elder. |
||
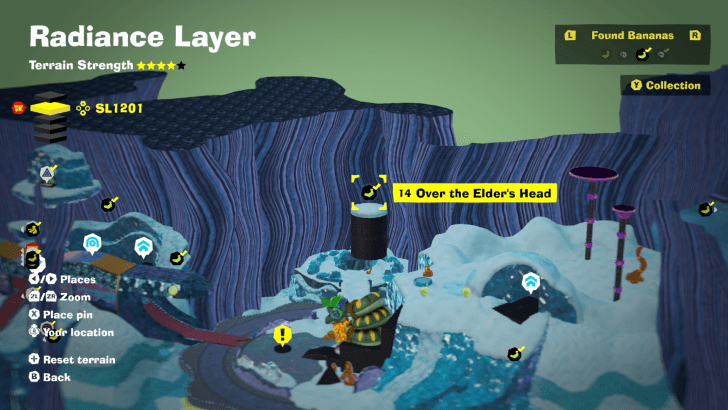
| 14 |
 |
 |
|
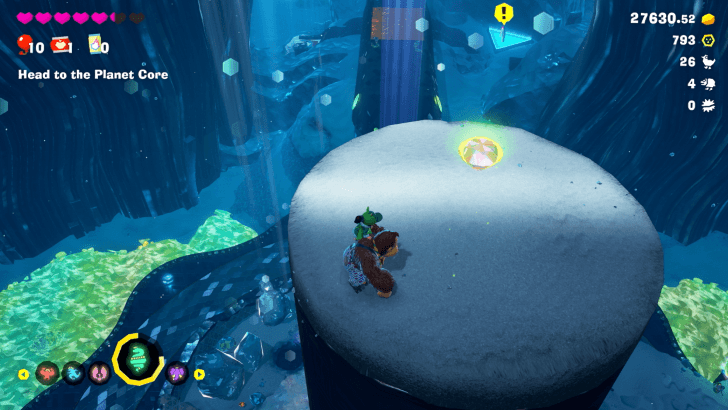
Use Snake Bananza to bounce up onto a platform over the Snake Elder's head and find it on top. |
||
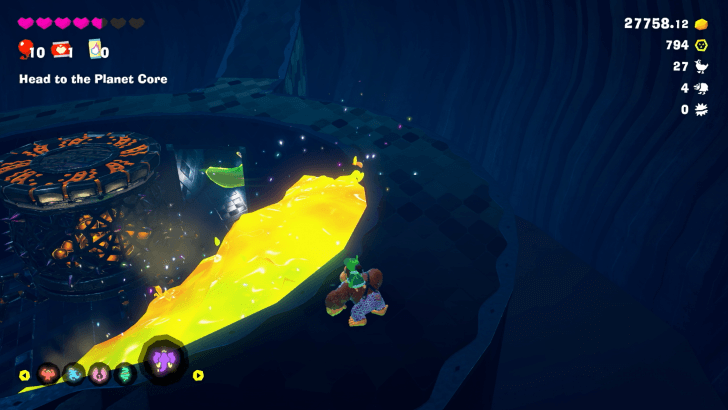
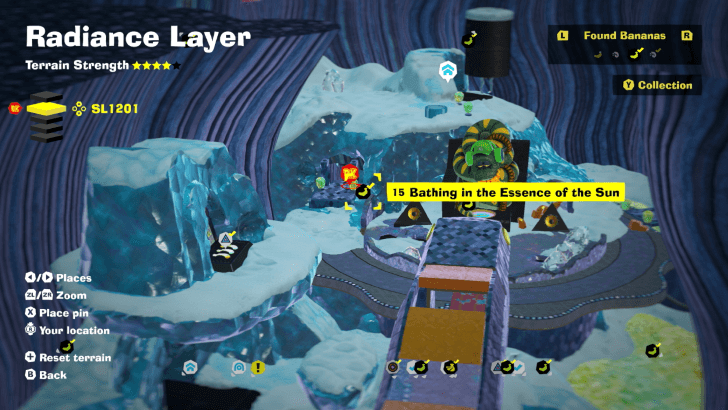
| 15 |
 |
 |
|
In the room filled with lava and the Trapantuloid, use Elephant Bananza to inhale the lava, revealing the Bananza Gem underneath. |
||
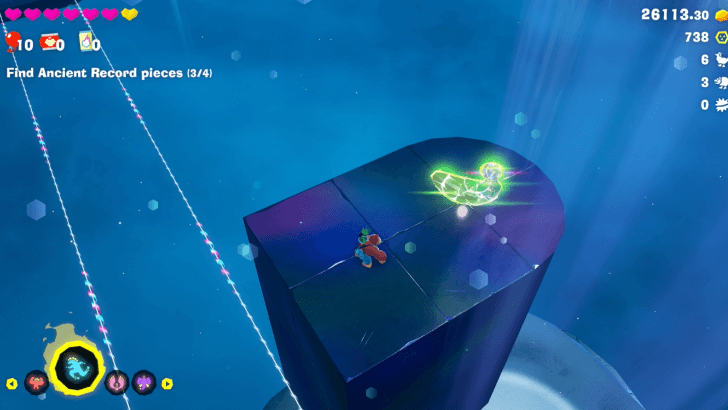
| 16 |
 |
 |
|
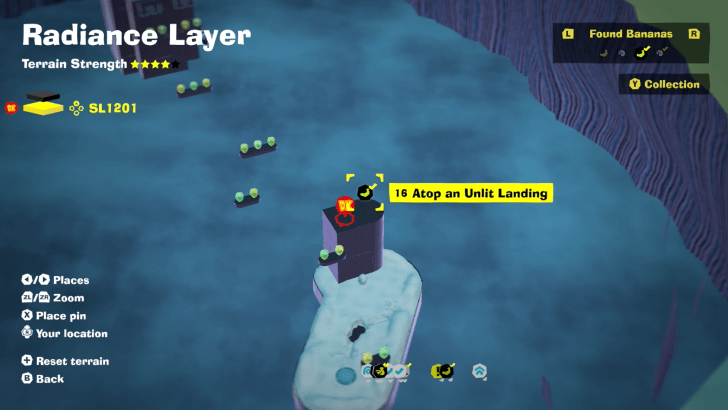
When riding the zipline towards the Ancient Record, jump off to the right to get it on top of the pillar. |
||
| 17 |
 |
 |
|
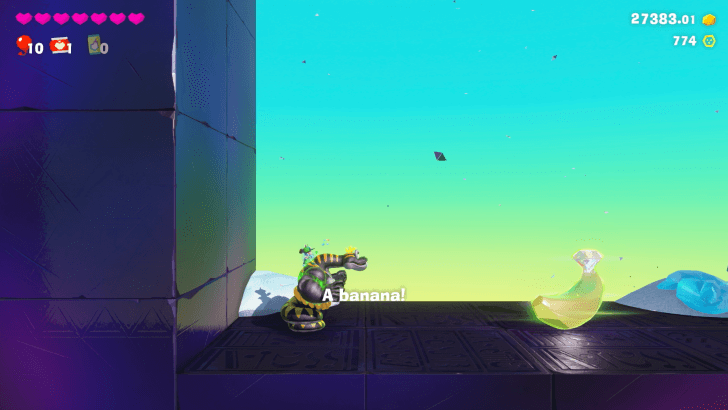
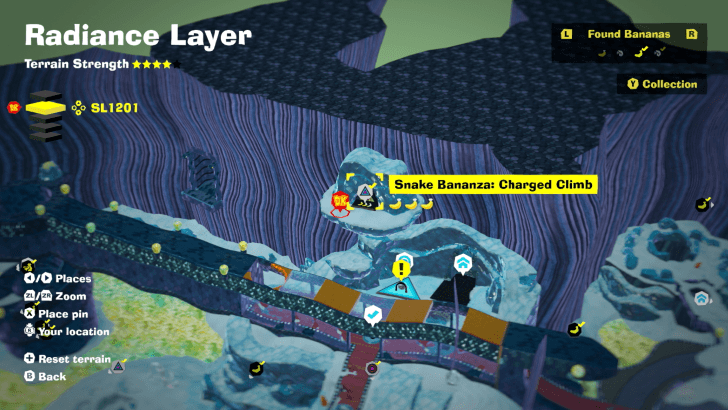
Found inside the Snake Bananza: Charged Climb Challenge Course. Find a square patch of sand in the ground which you can dig into. The Banandium Gem is in a secret room below. |
||
| 18 |
 |
 |
|
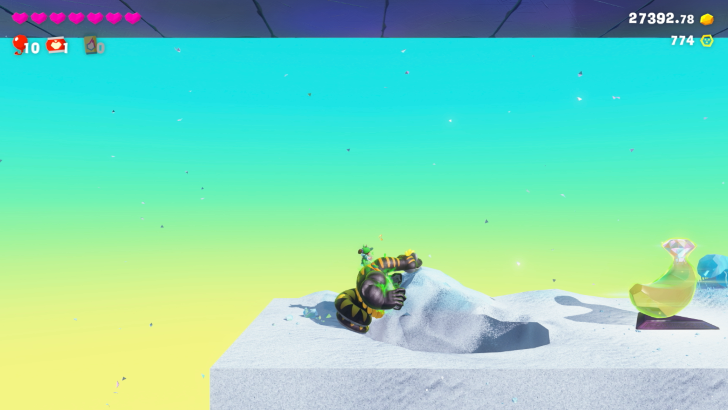
Found inside the Snake Bananza: Charged Climb Challenge Course. This Banandium Gem is found along the course. |
||
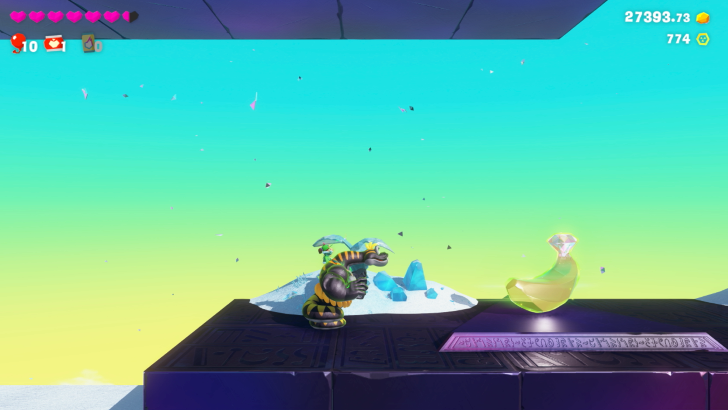
| 19 |
 |
 |
|
Found inside the Snake Bananza: Charged Climb Challenge Course. This Banandium Gem is found at the end of the course. |
||
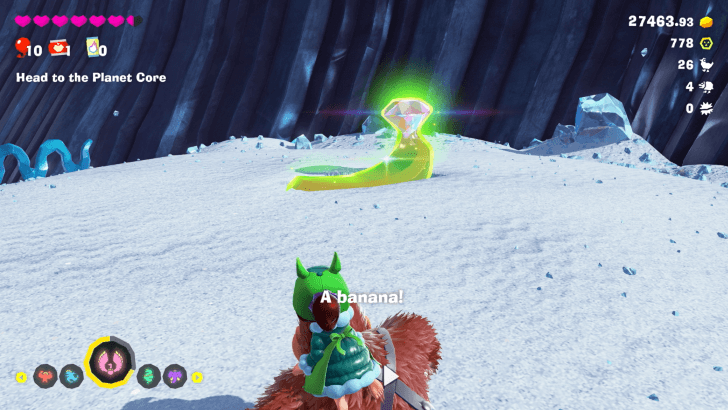
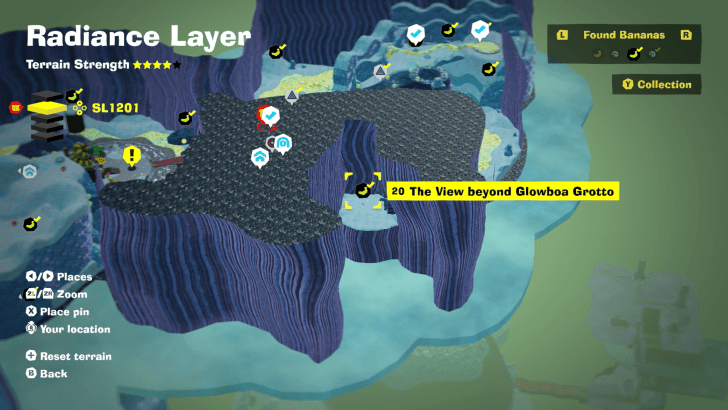
| 20 |
 |
 |
|
From the ceiling of Constrictor Corridor, use Ostrich Bananza to fly into the door on the wall to the right. Find the Banandium Gem on the other side. |
||
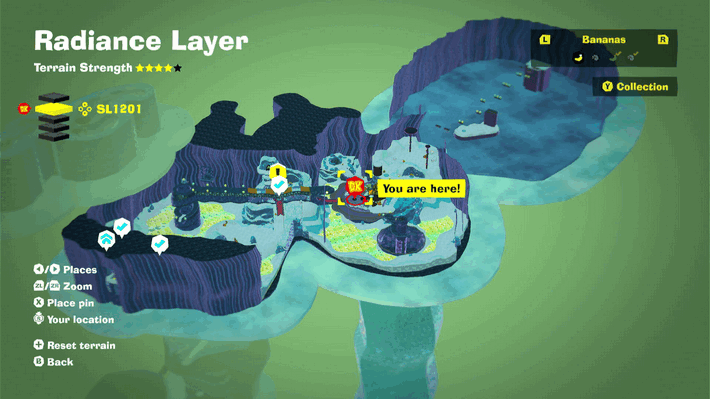
| 21 |
 |
|
|
Found at the end of the First Scale area. Use Charge jumps until you reach the top of the area with pink and blue terrain. |
||
| 22 |
 |
|
|
Found at the detour path left of the apple by the end of the First Scale area. Use Charge Jumps to use the slithering dirt terrain as a platform. |
||
| 23 |
 |
|
|
Found at the end of the Second Scale area. Throw Boom Rocks at the concrete wall to create an opening. |
||
| 24 |
 |
|
|
Found at the detour path left of the apple by the end of the Second Scale area. Use Glare and pick up the Liftoff Ore to float into the air while avoiding the laser. |
||
| 25 |
 |
|
|
Found at the end of the Third Scale area. Climb the black terrain and punch the blue button to make the platform move. |
||
| 26 |
 |
|
|
Found at the detour path left of the apple by the end of the Third Scale area. Use Glare then jump to the top of the dirt terrain to reach the ceiling with the Gem. |
||
| 27 |
 |
|
|
Found at the end of the Fourth Scale area. Climb the wall and use Charge Jumps to pass through the moving block. Use Glare on the second wall to avoid the electricity. |
||
| 28 |
 |
|
|
Found at the detour path left of the apple by the end of the Fourth Scale area. Perform a Charge Jump and Dive Jump towards the grey terrain to create a hole that leads to shallow water. Make the enemies fall into the water to receive the Gem. |
||
| 29 |
 |
|
|
Found at the Snake Elder's Throne. Use Glare and Charge Jumps to climb on the falling walls until you reach the top of the platform. |
||
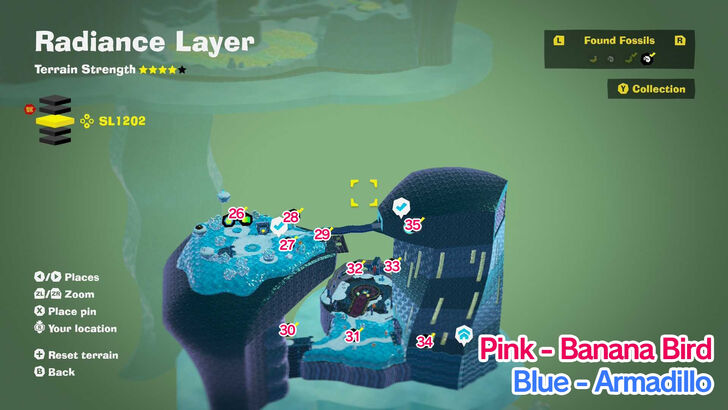
SL 1202 Banana Locations
| Overworld View | Map Location | |
|---|---|---|
| 30 |
 |
 |
|
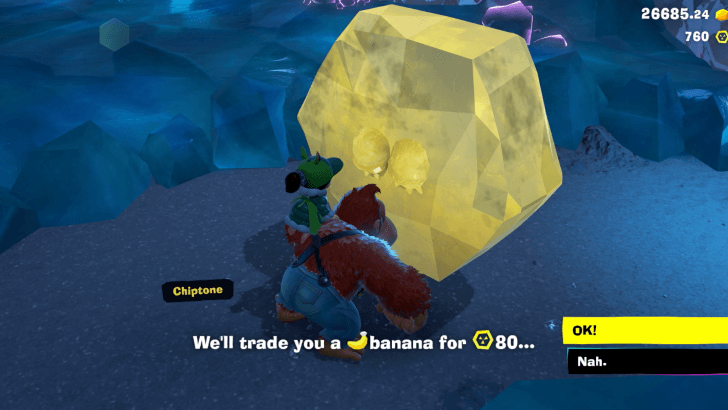
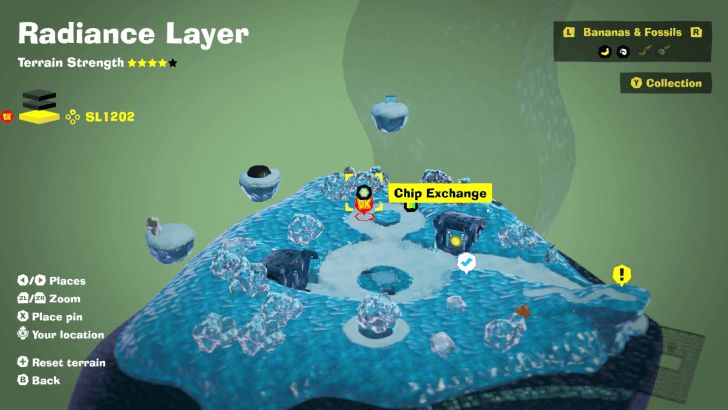
Buy with Banandium Chips to get a Gem. The price will vary depending on how many you have purchased from other layers. You only need to exchange once for the collectible to count. |
||
| 31 |
 |
 |
|
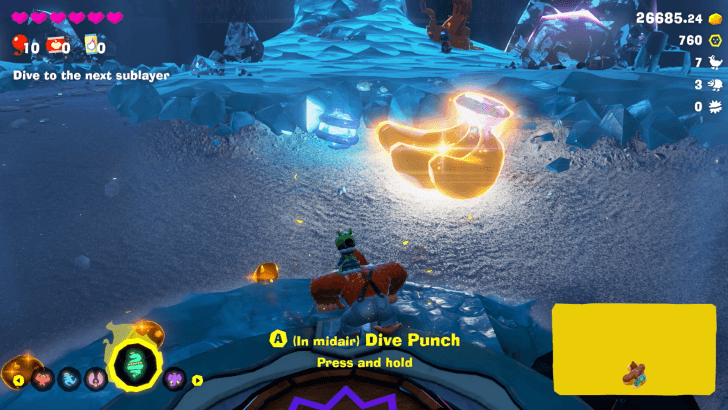
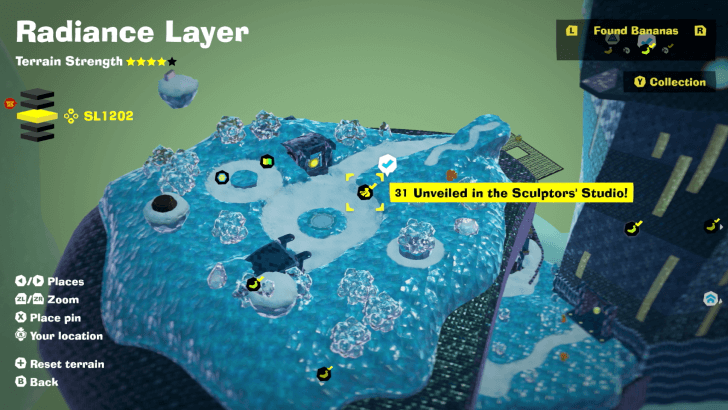
Found with story progression. |
||
| 32 |
 |
 |
|
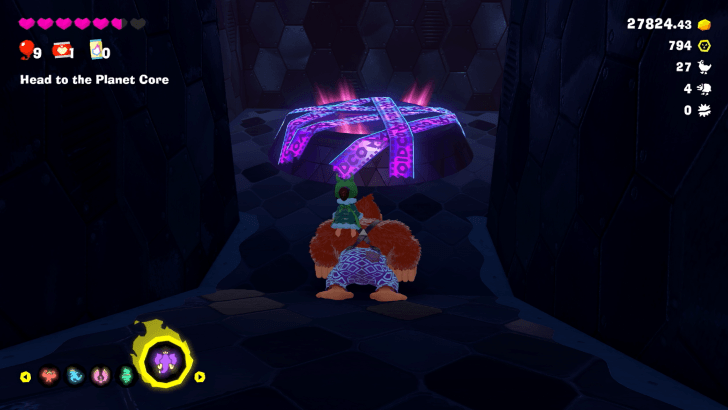
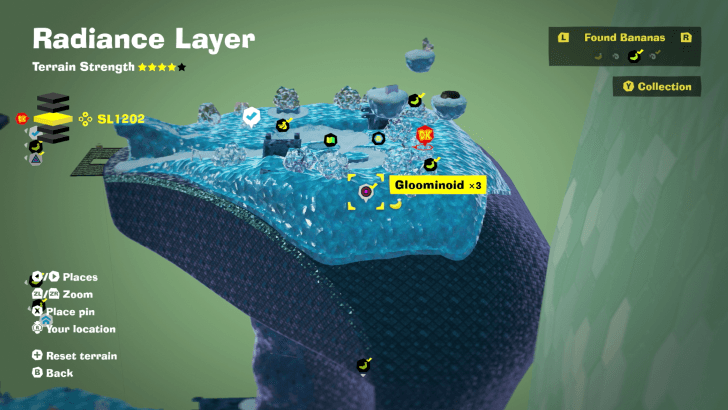
After re-activating the sun, this Battle Challenge is found in one of the two doors near the entrance to the sublayer. |
||
| 33 |
 |
|
|
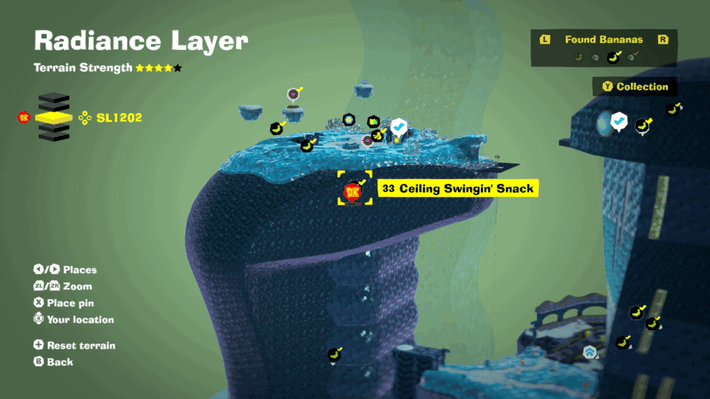
Find a hole which you can drop down into to find a secret room with a banana up and across a gap filled with lava. Use Snake Bananza to jump onto the mesh on the ceiling and climb across to the Banandium Gem. |
||
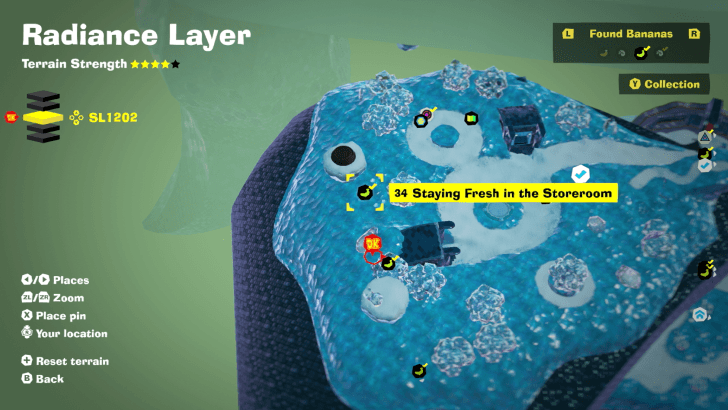
| 34 |
 |
 |
|
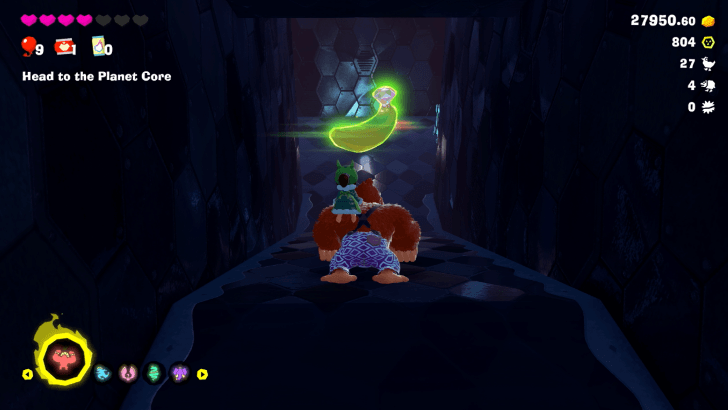
After re-activating the sun, found in one of the two doors near the entrance to the sublayer. |
||
| 35 |
 |
 |
|
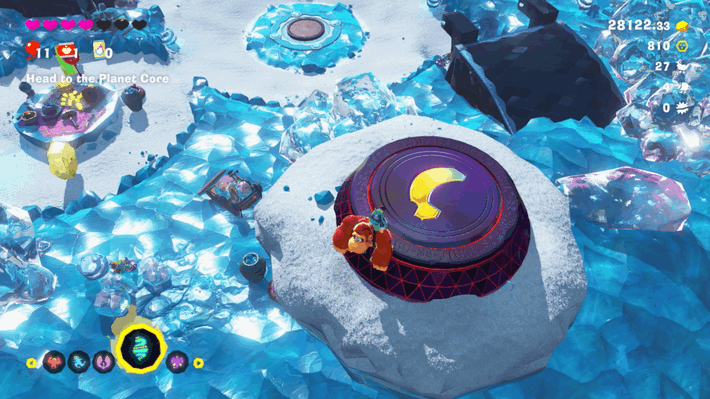
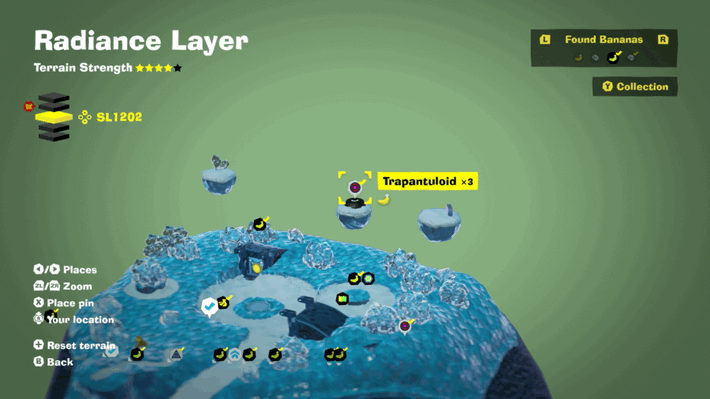
Use Snake Bananza to bounce up to a high platform to find Battle Challenge Trapantuloid x3. |
||
| 36 |
 |
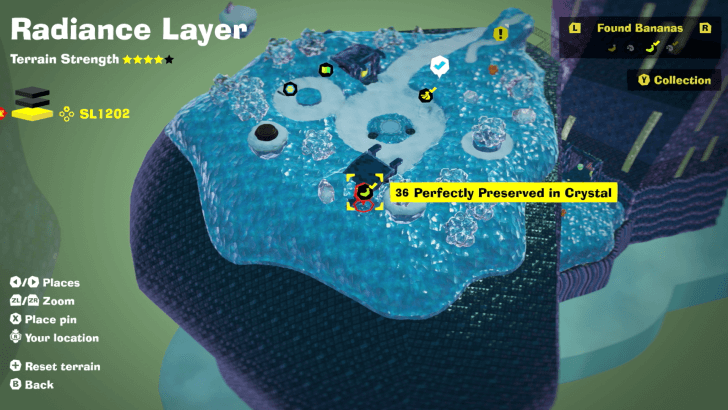 |
|
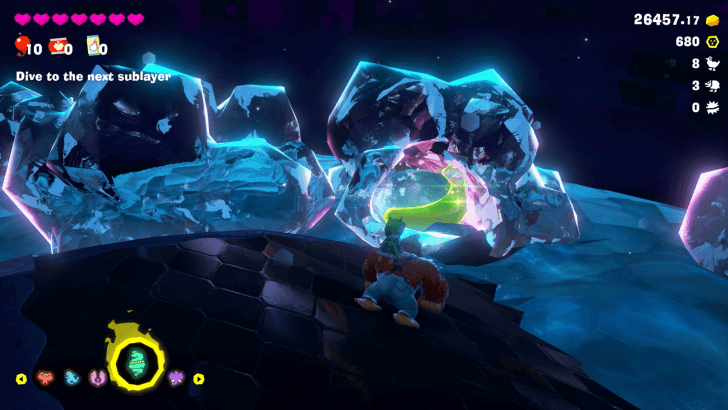
Found encased in a crystal. |
||
| 37 |
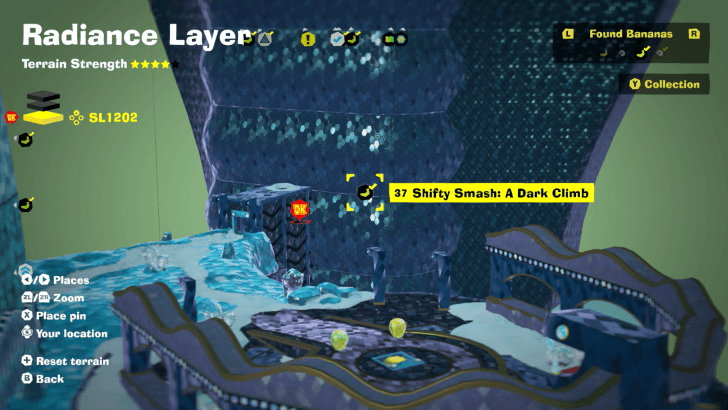 |
|
|
Activate the Shifty Smash Challenge and use Snake Bananza to bounce up the platforms and reach it. |
||
| 38 |
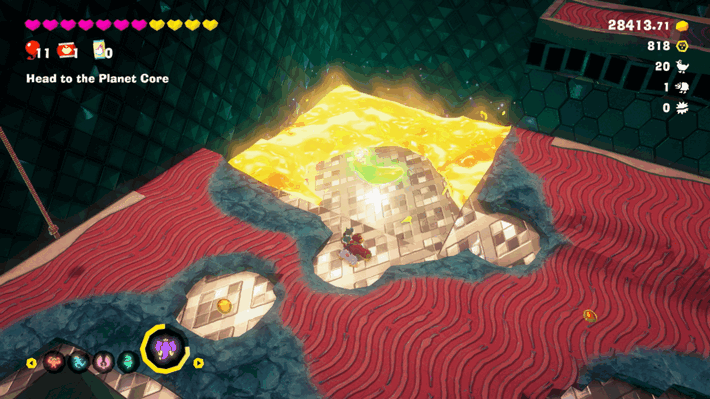 |
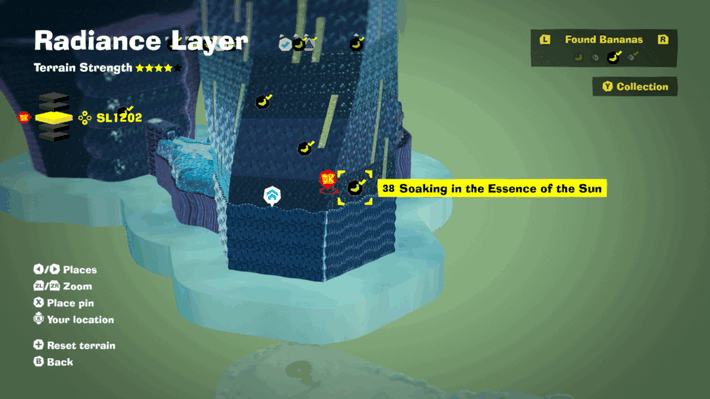 |
|
On the first floor of the Central Control Tower, use Elephant Bananza to inhale the lava and find the Banandium Gem underneath. |
||
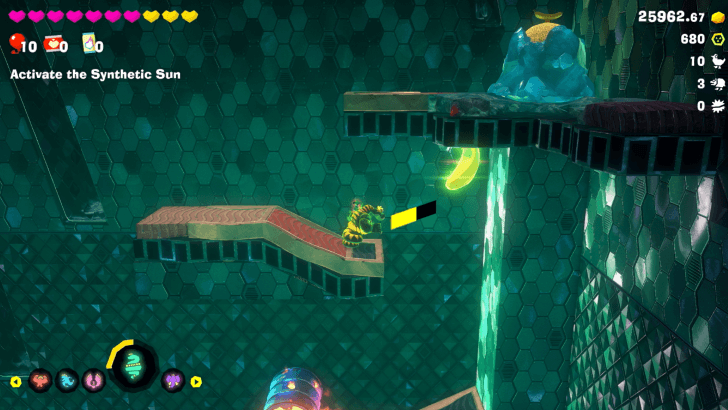
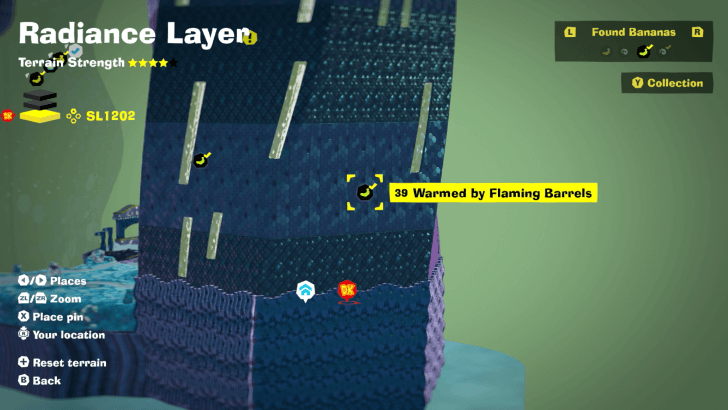
| 39 |
 |
 |
|
Found hanging from the ceiling. |
||
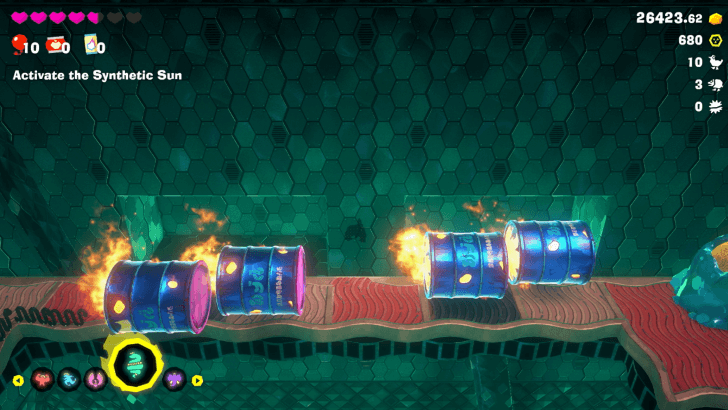
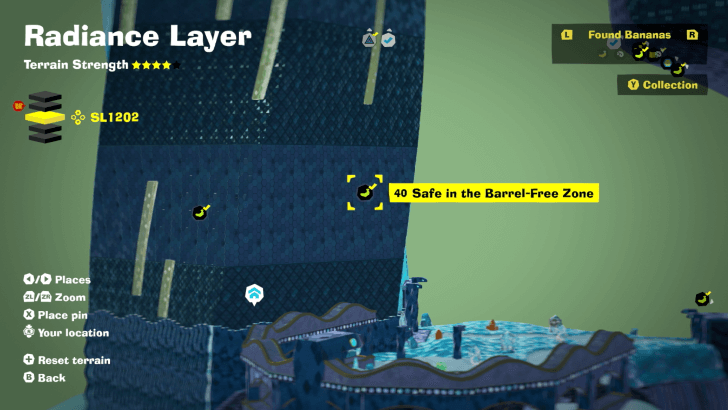
| 40 |
 |
 |
|
Behind the wall between the two sets of falling barrels. Wait for a gap and run around the wall to find the Gem. |
||
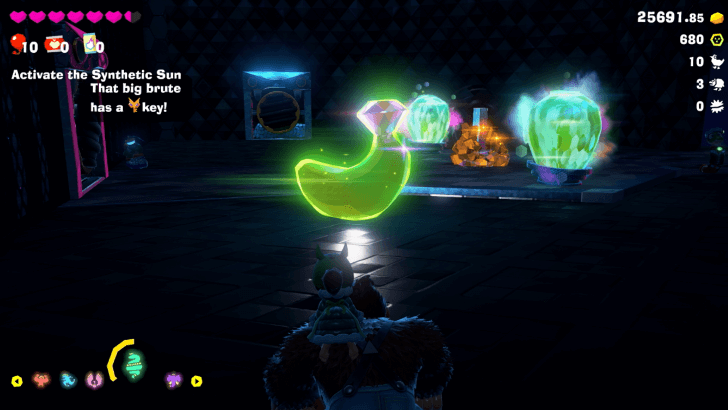
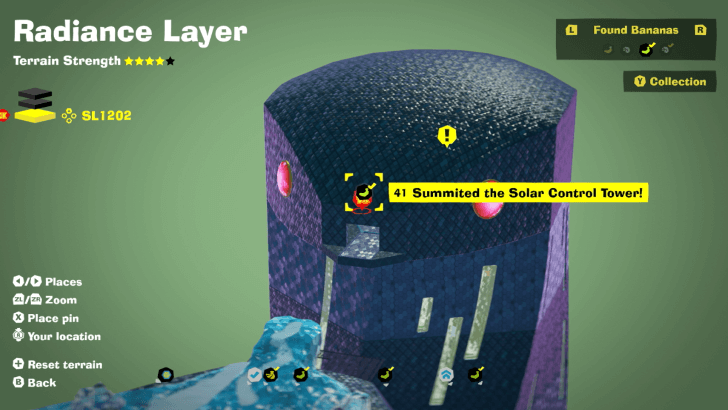
| 41 |
 |
 |
|
In the room with the Crockoids, break through the ceiling and go to the adjacent room to find the Gem. |
||
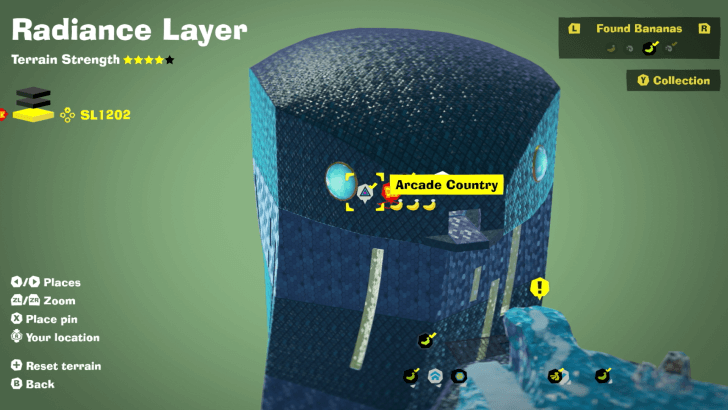
| 42 |
 |
|
|
Found inside Arcade Country Challenge Course 3. When you find a gold path above you leading up out of reach, use Snake Bananza's Charge Jump to jump up and to the right to find the Gem. |
||
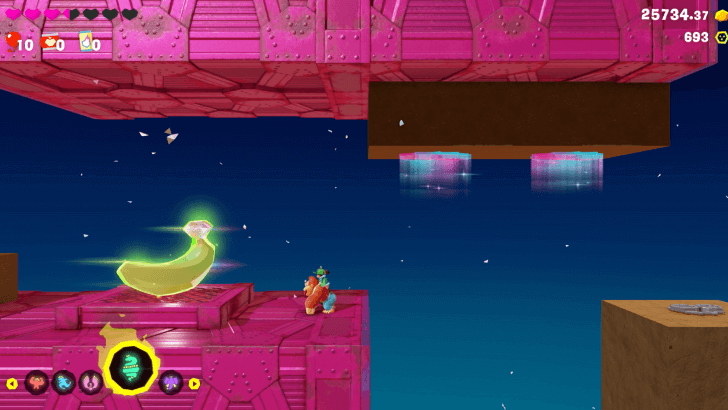
| 43 |
 |
 |
|
Found inside Arcade Country Challenge Course 3. |
||
| 44 |
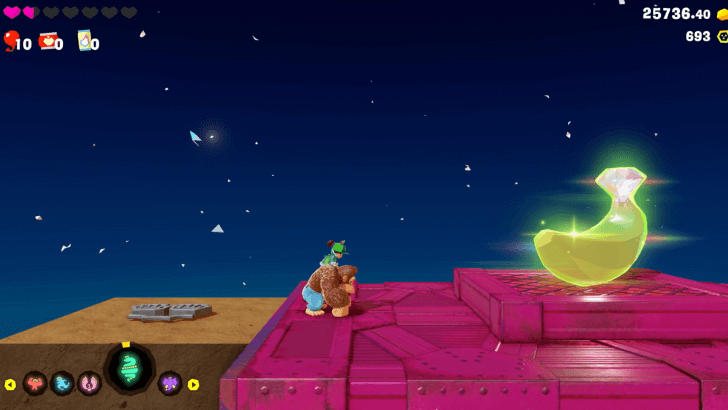 |
 |
|
Found at the end of the Arcade Country Challenge Course 3. |
||
| 45 |
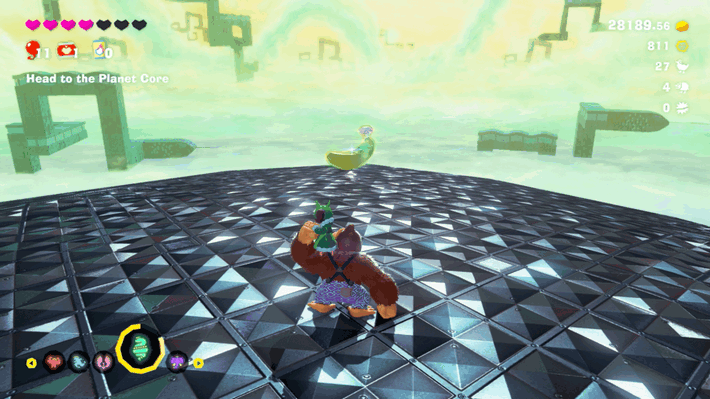 |
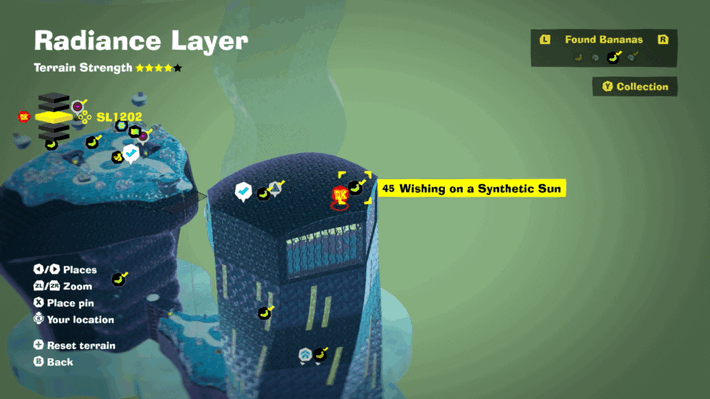 |
|
From the top room of the Central Control Tower, go to the balcony and use Snake Bananza to jump up onto the roof. Walk to the back end to find the Banandium Gem. |
||
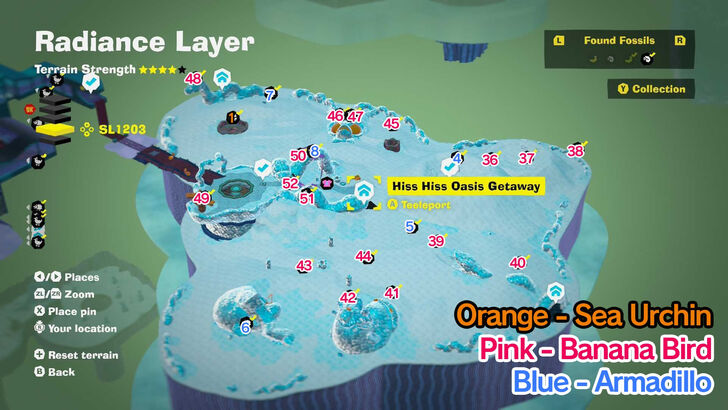
SL 1203 Banana Locations
| Overworld View | Map Location | |
|---|---|---|
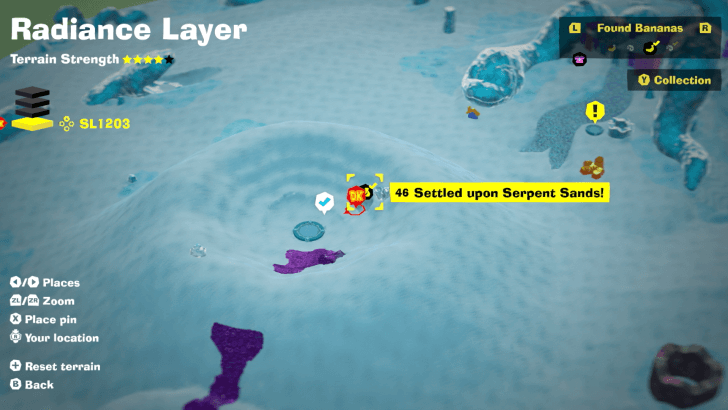
| 46 |
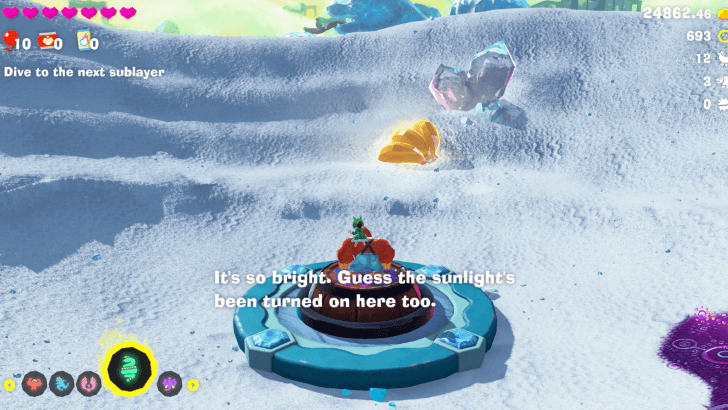 |
 |
|
Found with story progression. |
||
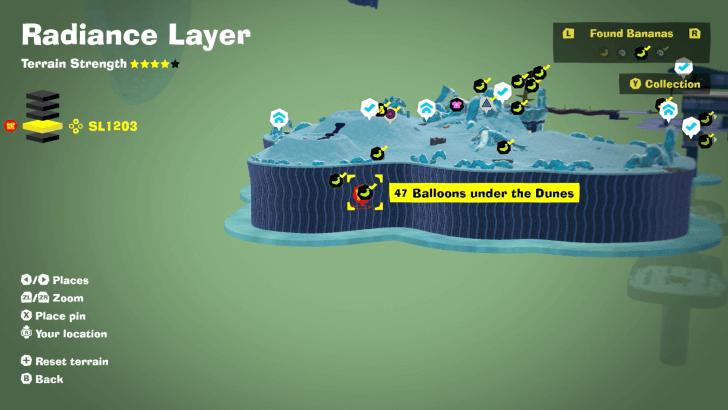
| 47 |
 |
|
|
From the Serpent Sands checkpoint, smash the chunk of crystal nearby and drop down the hole. Defeat all 5 Trapantuloids and get the Balloons inside, and the Banandium Gem will appear on the bottom floor. |
||
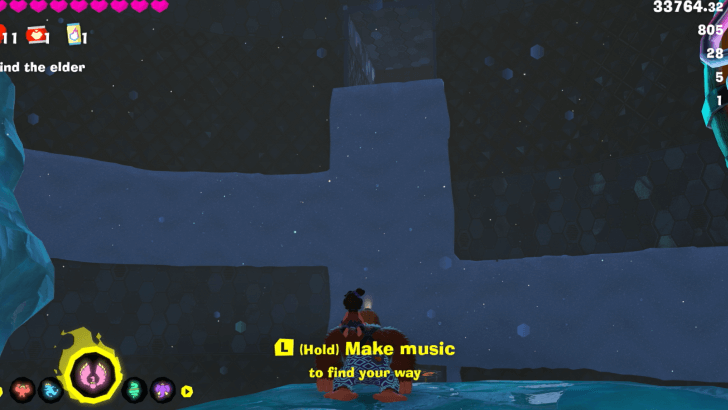
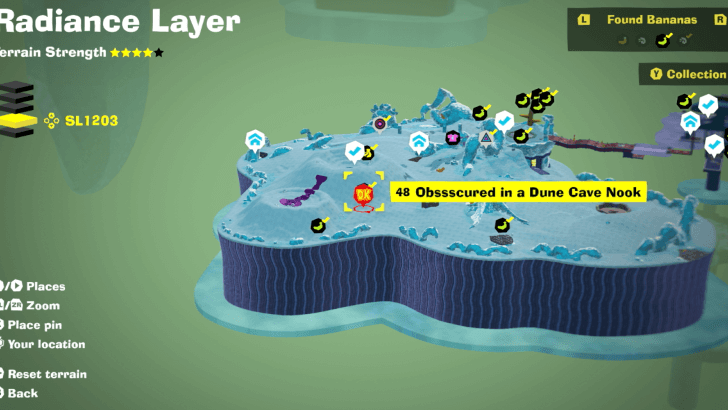
| 48 |
 |
 |
|
On the second floor of the cave, climb around on the wall covered with snow and up into the highest corridor to find the Banandium Gem. |
||
| 49 |
 |
|
|
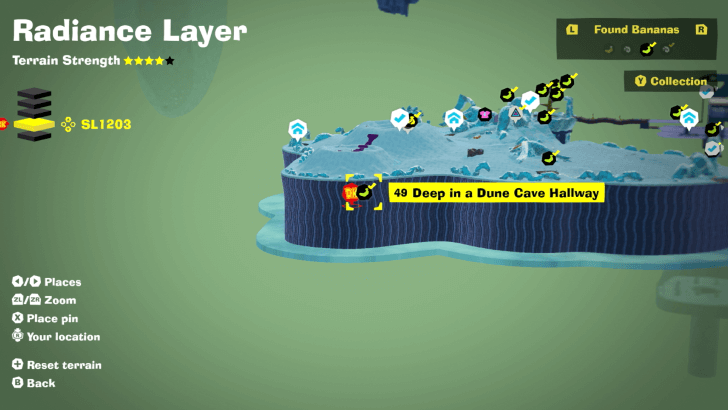
From the Serpent Sands fast travel point, dig down to find a hidden cave. The next 3 bananas are all in here. On the second floor of the cave, find the hallway with thorns on the ceiling. Defeat the Trapantuloid or go around it and find the sand patch in the ground. Dig down into it to find the Banandium Gem in the corridor below. |
||
| 50 |
 |
 |
|
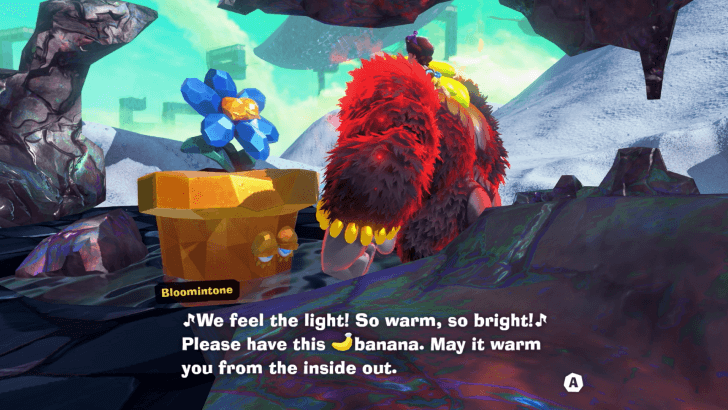
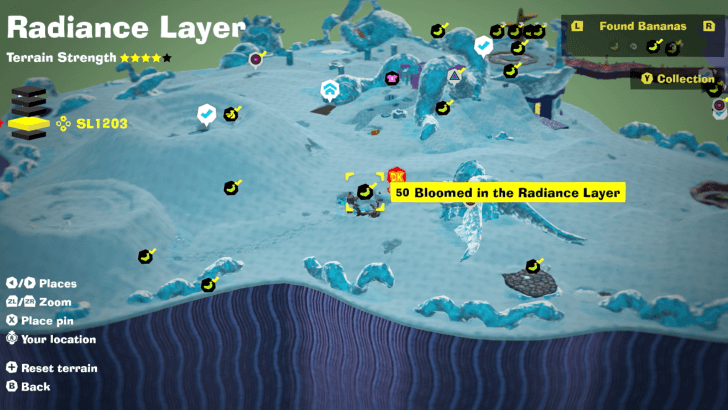
Use Kong Bananza to break the concrete wall surrounding the flower. When enough of the wall is broken, it will give you a Banandium Gem. |
||
| 51 |
 |
 |
|
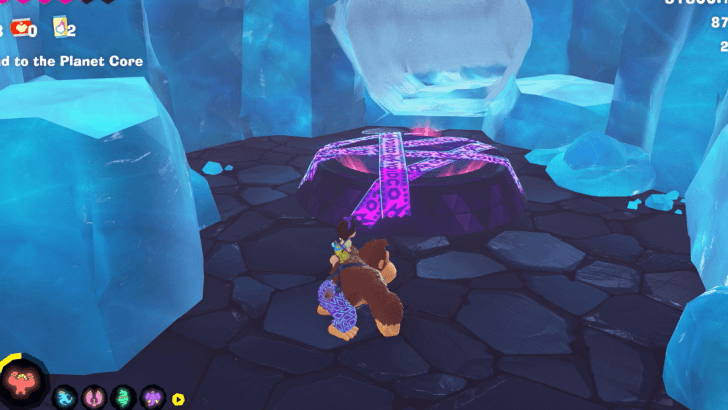
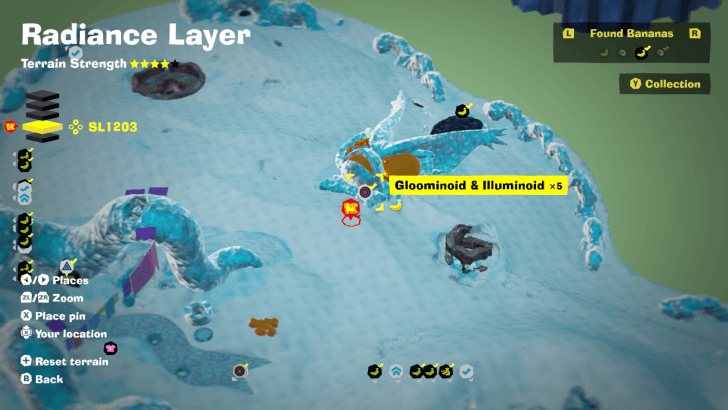
Dig inside an ice sculpture shaped like Void Kong's head. Enter the manhole and defeat Gloominoids and Illuminoids. |
||
| 52 |
 |
|
|
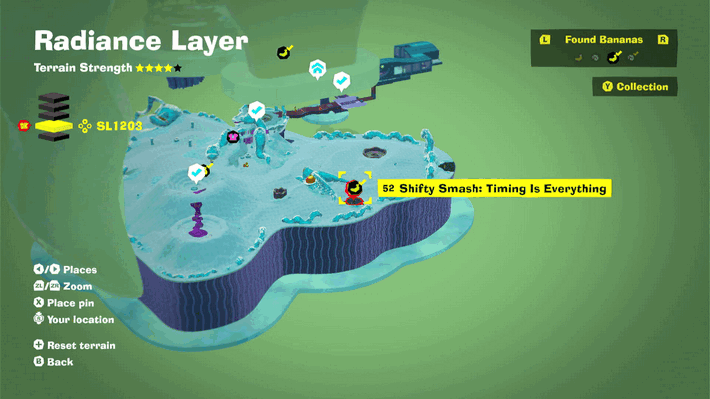
While in Snake Bananza, stand on the grey circle on the platform, then slow down time once the blocks are farthest from you. After slowing time, use your charge jump to break all grey blocks in one go. |
||
| 53 |
 |
|
|
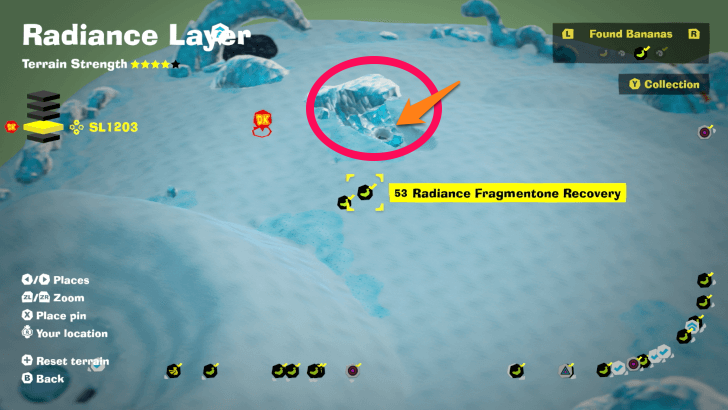
Look for an ice sculpture of a snake's head with its mouth open and dig down in the snow circle in its mouth to find a hidden hole leading to a Fragmentone. Grab a Glow Stone and bring one across the gap before the wall slides out and pushes them into the water. |
||
| 54 |
 |
|
|
Bring all three pieces of the Fragmentone. |
||
| 55 |
 |
 |
|
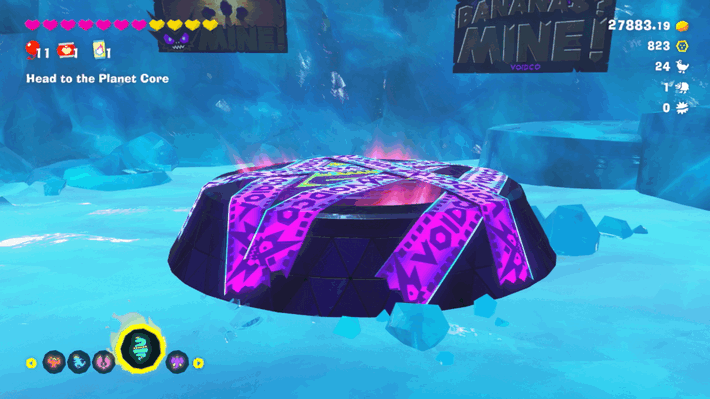
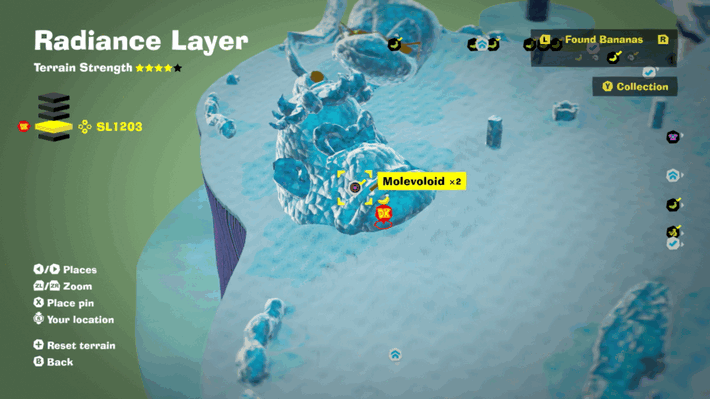
Dig inside the ice sculpture shaped like Grumpy Kong's head to find it. Battle name is Molevoloid x2. |
||
| 56 |
 |
 |
|
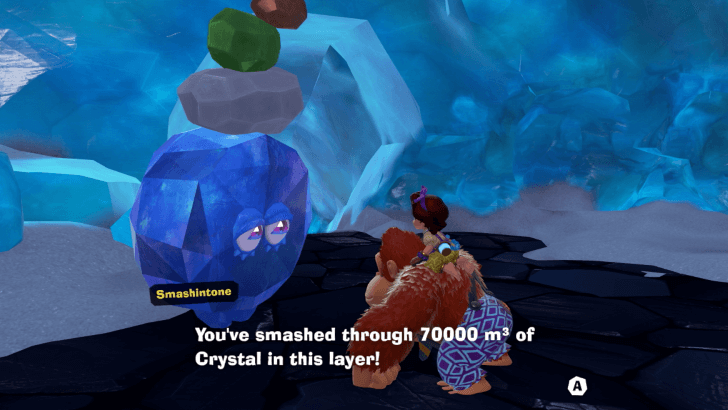
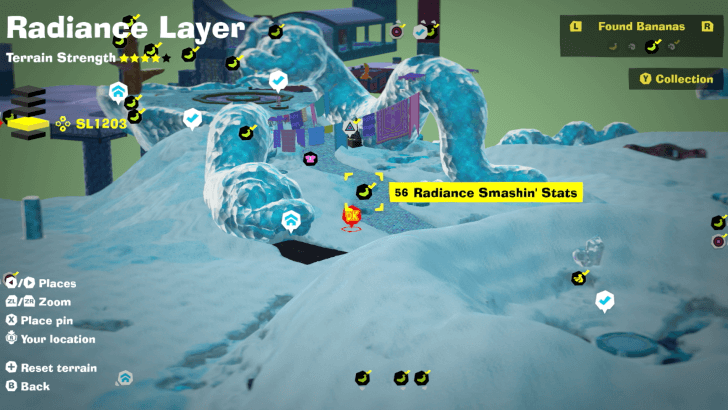
Smash 70000 m3 of Crystal in the Radiance Layer and find Smashintone in a hidden room under the snow to get a Banandium Gem. The best places to smash Crystal are the Window Viper section of SL 1203 and the Constrictor Corridor of SL 1201. |
||
| 57 |
 |
|
|
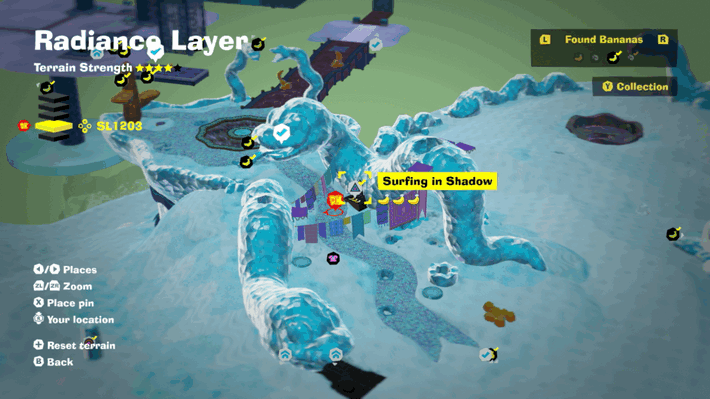
From the Shadow-Path Rest Stop platform, drop down to find a group of Illuminoids, the sun-loving enemies. Grab one of their shells and climb up, and Turf Surf back the way you came to cross over a narrow bridge in the sun to the right. Find the Banandium Gem at the end of the path. |
||
| 58 |
 |
 |
|
Found along the course of Surfing in Shadow Challenge Course 4. |
||
| 59 |
 |
 |
|
Found at the end of Surfing in Shadow Challenge Course 4. |
||
| 60 |
 |
 |
|
Go inside the snake ice sculpture's head to find a switch you can break to remove the Void Terrain. Go back onto the tongue to find the Banandium Gem on top. |
||
| 61 |
 |
 |
|
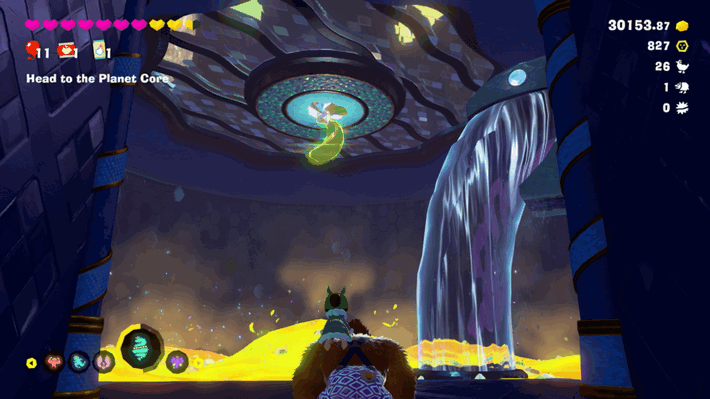
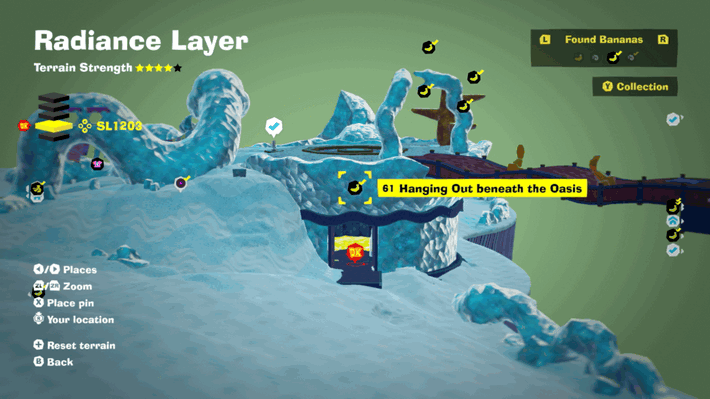
Use Elephant Bananza to clear a path in the lava to the spot below the Banandium Gem on the ceiling, then switch to Snake Bananza to jump up and break it. |
||
| 62 |
 |
 |
|
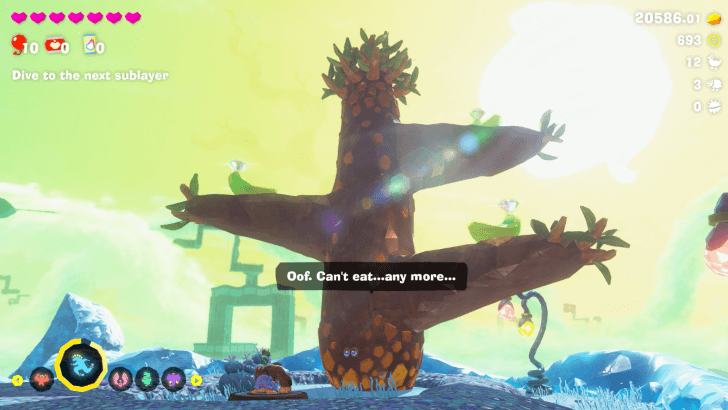
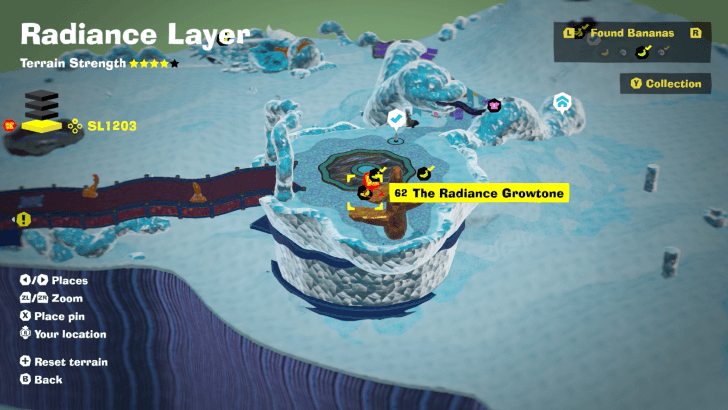
Feed the Growtone 400 gold to get the first Banandium Gem. |
||
| 63 |
 |
 |
|
Feed the Growtone 1700 gold to get the second Banandium Gem. |
||
| 64 |
 |
 |
|
Feed the Growtone 1900 gold to get the third Banandium Gem. |
||
| 65 |
 |
 |
|
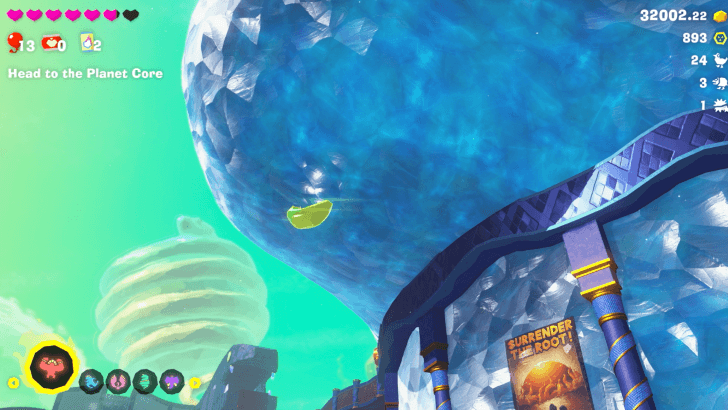
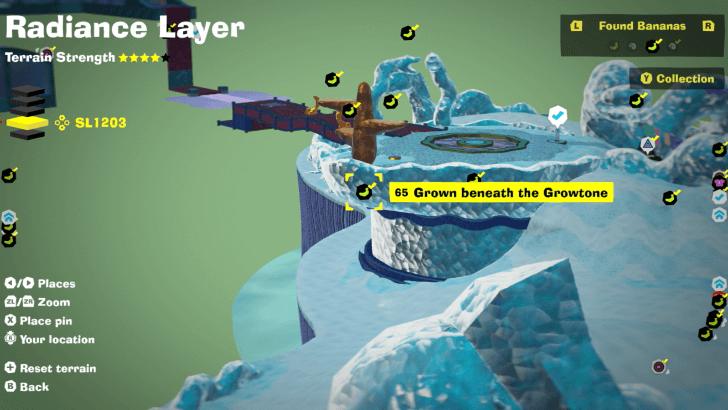
Use Snake Bananza to jump up and break it. |
||
| 66 |
 |
 |
|
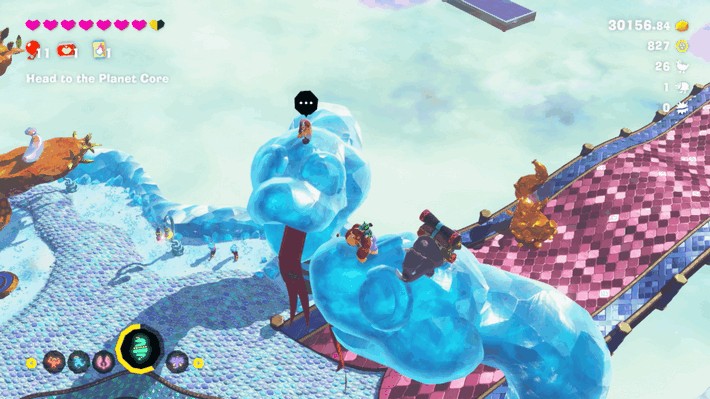
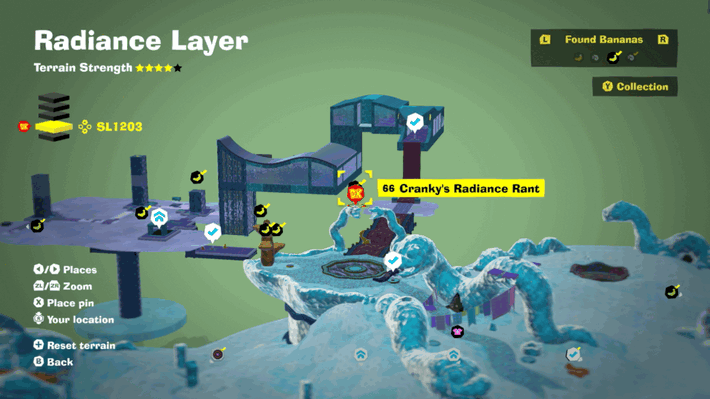
Find Cranky Kong on top of an ice sculpture of a snake. Talk to him to get a Banandium Gem. |
||
| 67 |
 |
 |
|
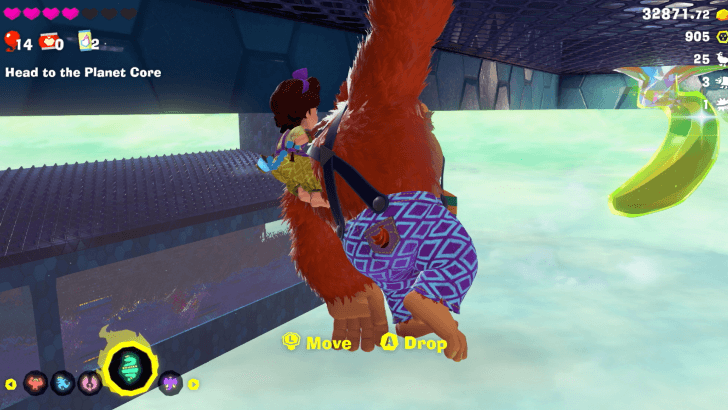
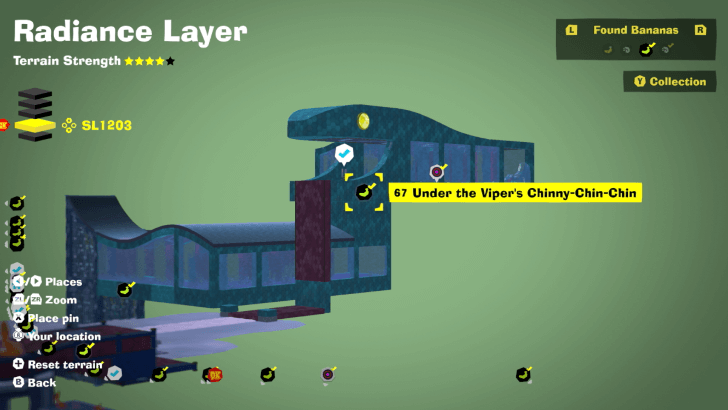
Climb up the opposite side of the ladder leading up to the Window Viper fast travel point and hang onto the mesh to climb over and break the Banandium Gem hanging from the ceiling. |
||
| 68 |
 |
 |
|
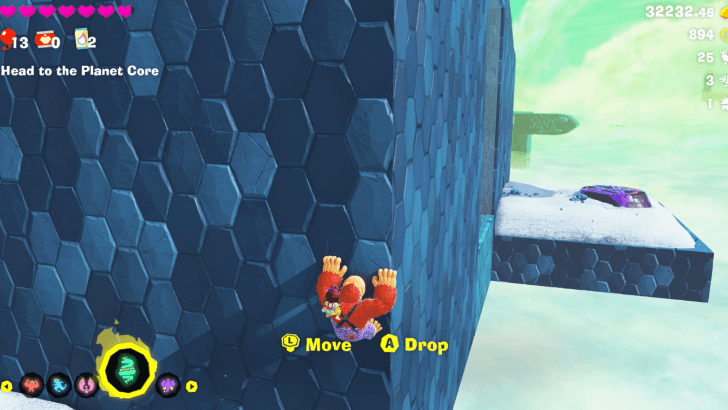
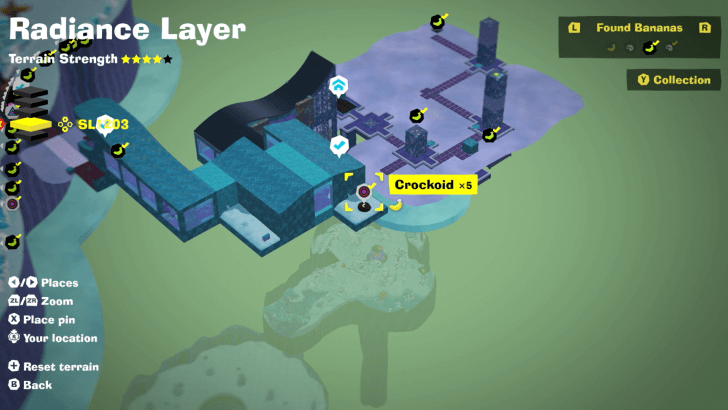
Climb out the window and around to reach the manhole, then defeat five Crockoids. |
||
| 69 |
 |
 |
|
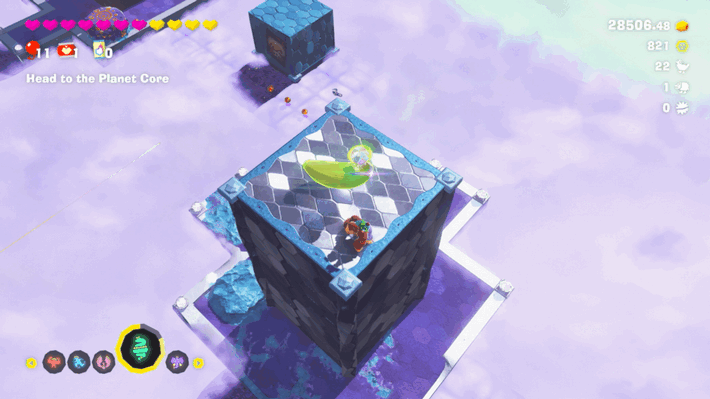
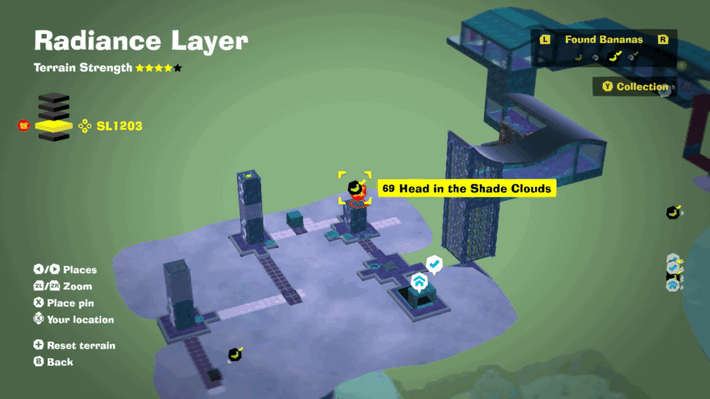
On top of the first of the 3 pillars. Use Snake Bananza to jump up and get the Banandium Gem on top of the pillar. |
||
| 70 |
 |
|
|
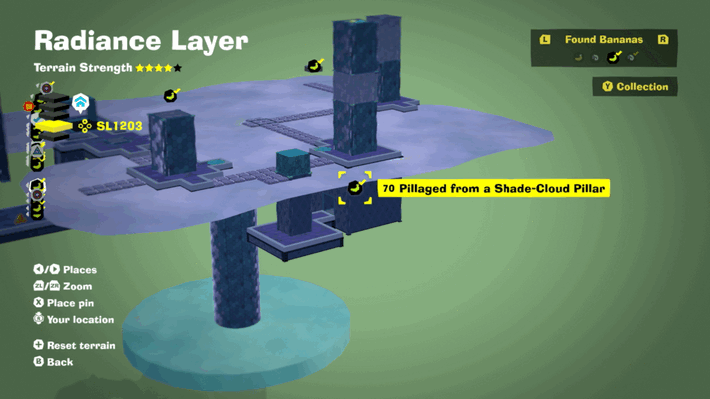
On the middle pillar in Shade Clouds, use Snake Bananza to jump up to the middle section, then charge jump again while holding the wall to reach the top. Punch down to go inside and find the Banandium Gem in a hidden room below. |
||
| 71 |
TBD |
 |
|
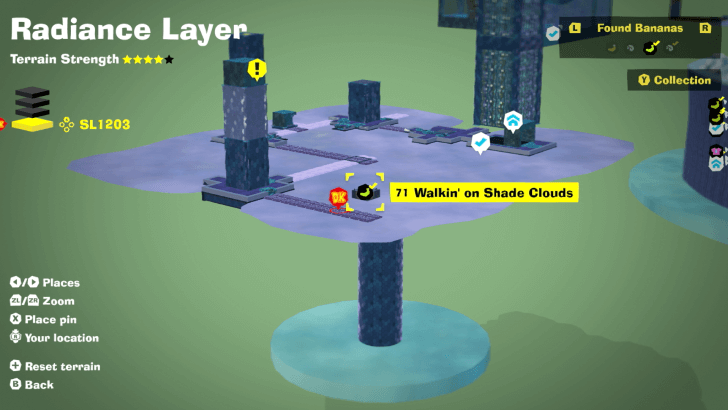
Reach the end of the cloud walkway. To make the last walkway appear, throw Turf at the light machine from a distance; aim well above it to land the hit. |
||
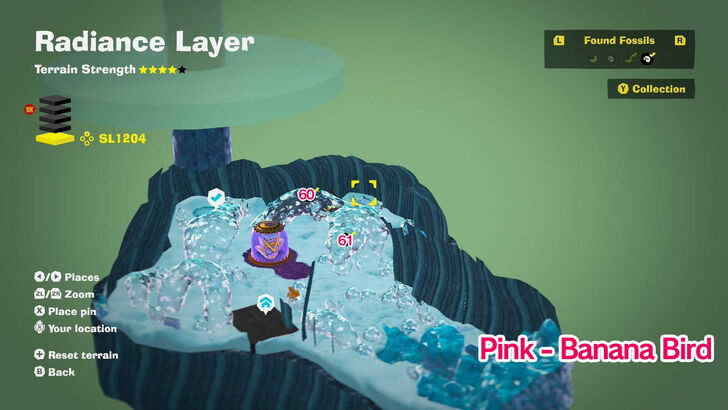
SL 1204 Banana Locations
| Overworld View | Map Location | |
|---|---|---|
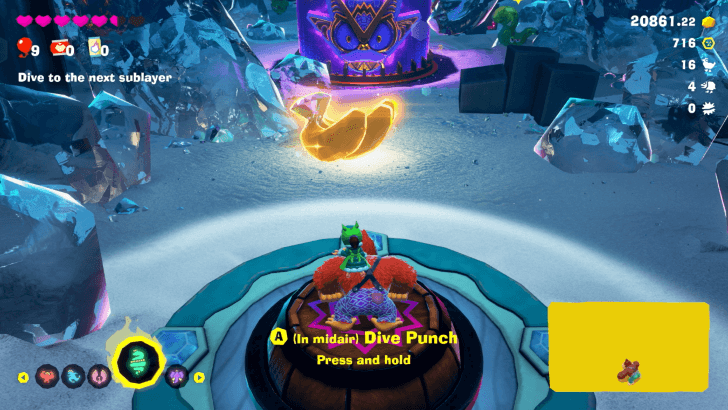
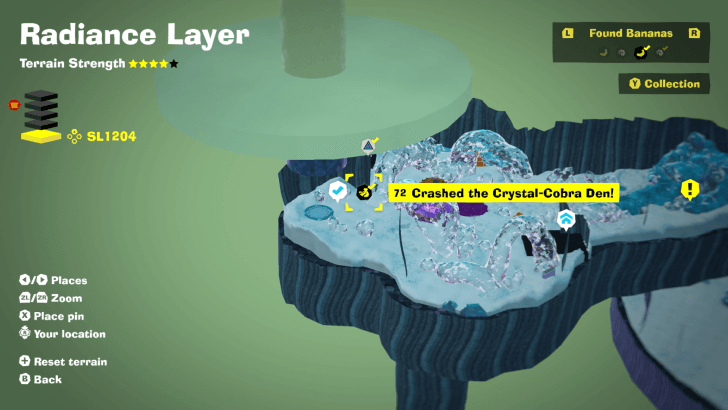
| 72 |
 |
 |
|
Found with story progression. |
||
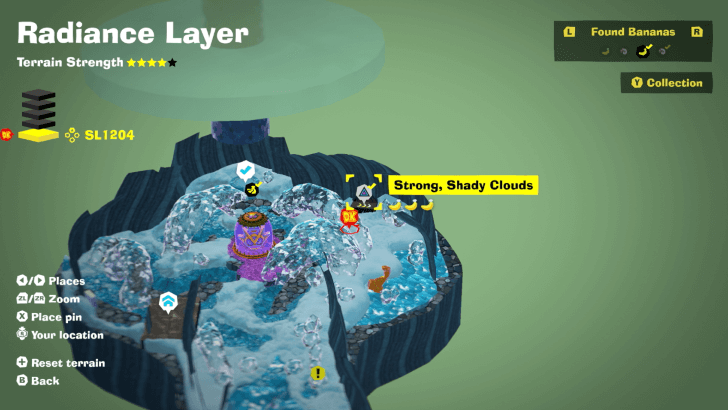
| 73 |
 |
|
|
Found inside Strong, Shady Clouds Challenge Course 5. From the start, the far wall directly ahead across the gap has a wall made of thorns. Break the wall to find a Banandium Gem inside. |
||
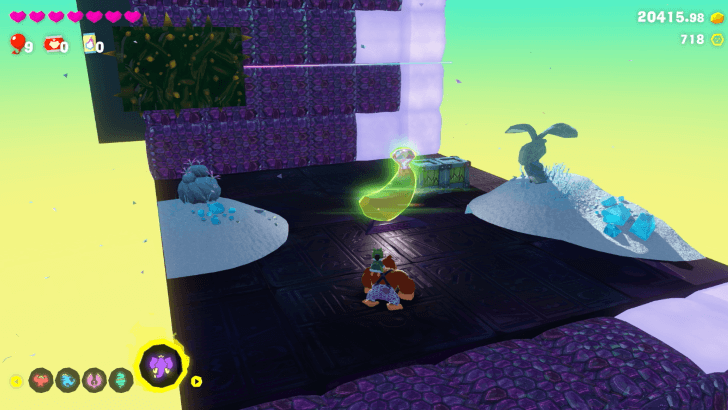
| 74 |
 |
 |
|
Found inside Strong, Shady Clouds Challenge Course 5. It is found along the course. |
||
| 75 |
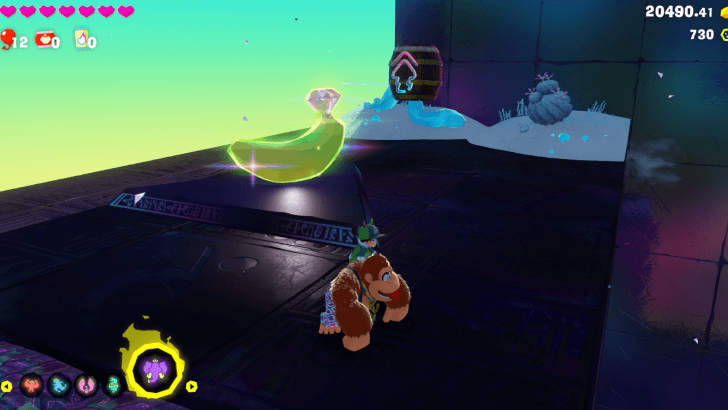 |
 |
|
Found at the end of the Strong, Shady Clouds Challenge Course 5. |
||
| 76 |
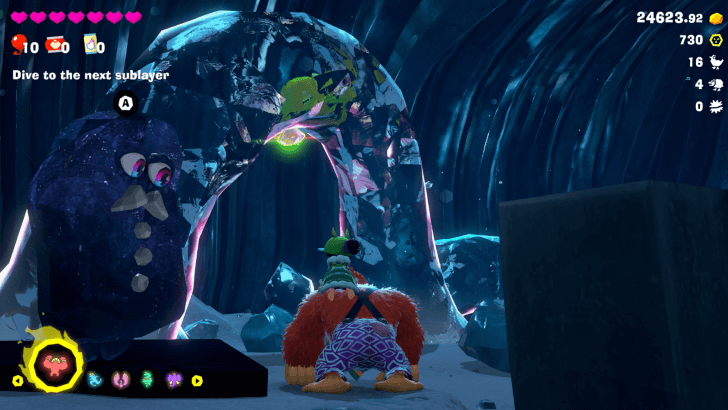 |
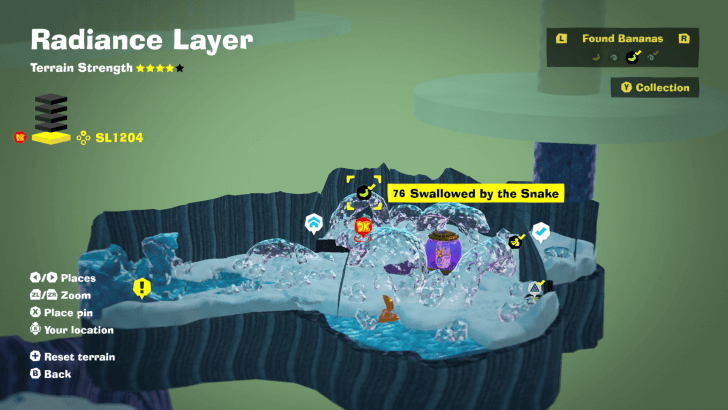 |
|
Inside a crystal arch in the shape of a snake. |
||
Banandium Gems List and Locations
Radiance Layer Fossils
SL 1200 Fossil Locations
| Overworld View | Map Location | |
|---|---|---|
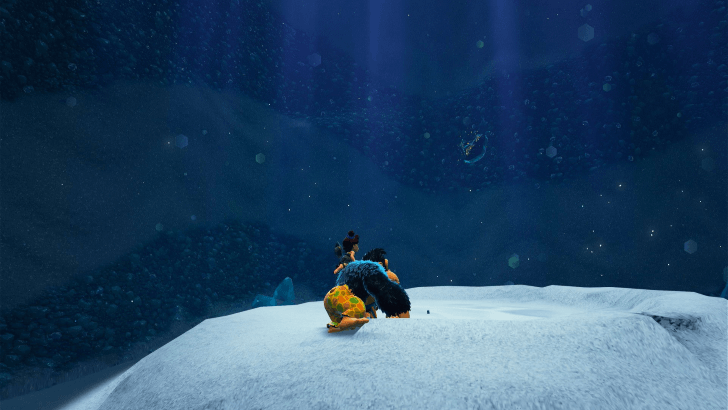 |
 |
|
|
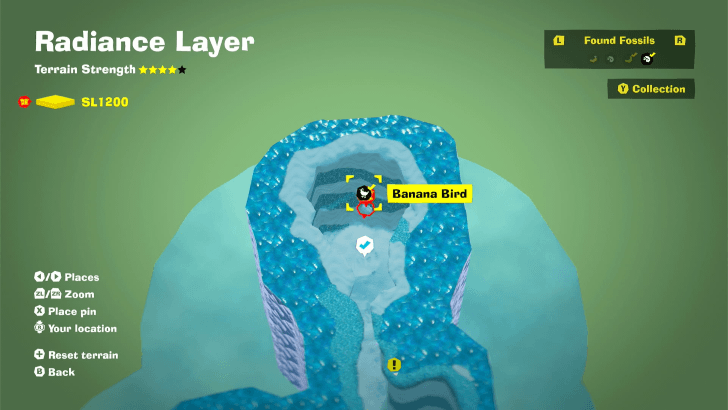
As you arrive in Shedlight Cave, this fossil is on the wall behind where you land. |
||
 |
 |
|
|
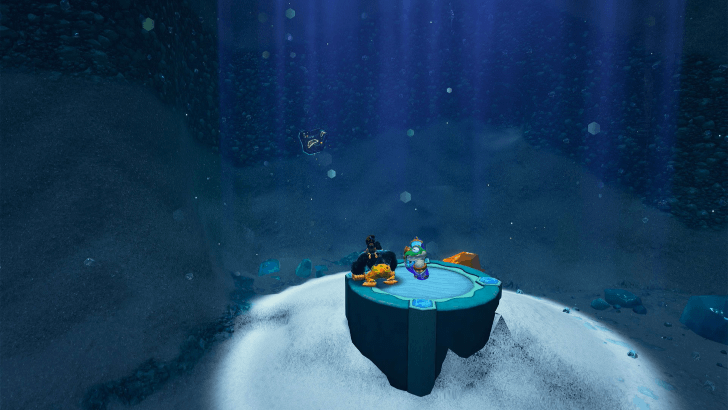
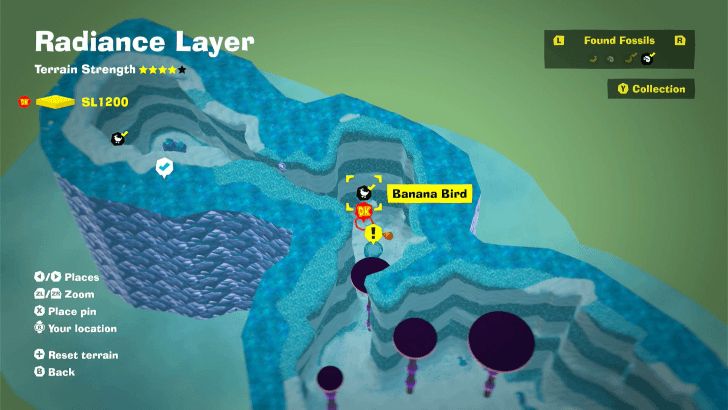
On the wall near the first Snake you encounter. |
||
 |
 |
|
|
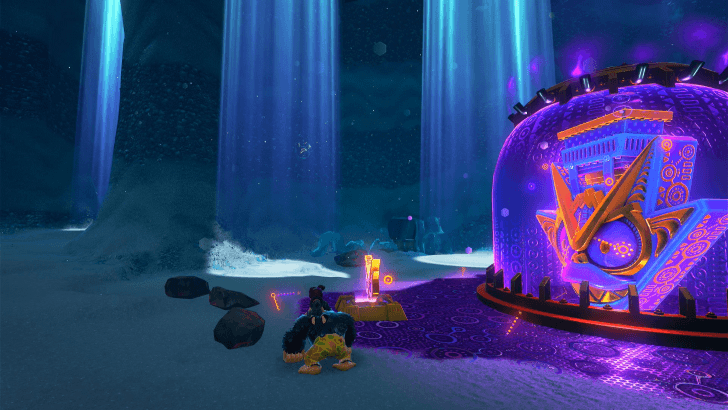
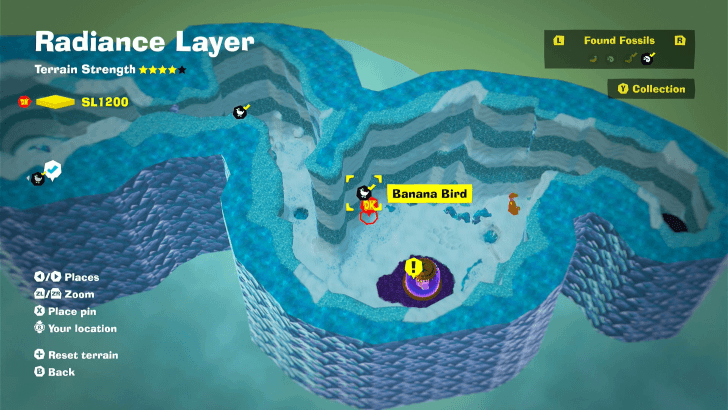
As you approach the Void Stake, you can spot this fossil on the left wall. |
||
 |
 |
|
|
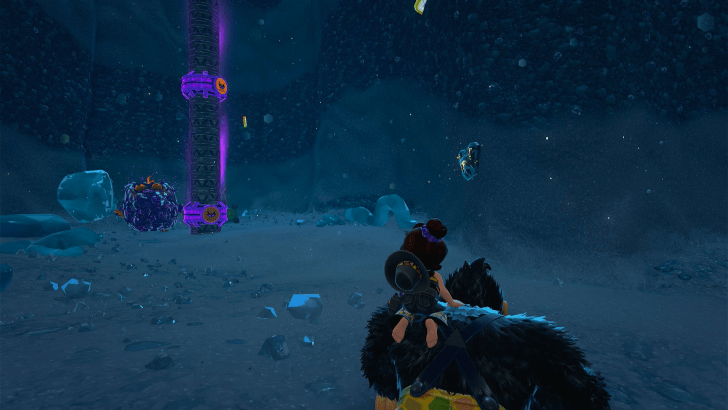
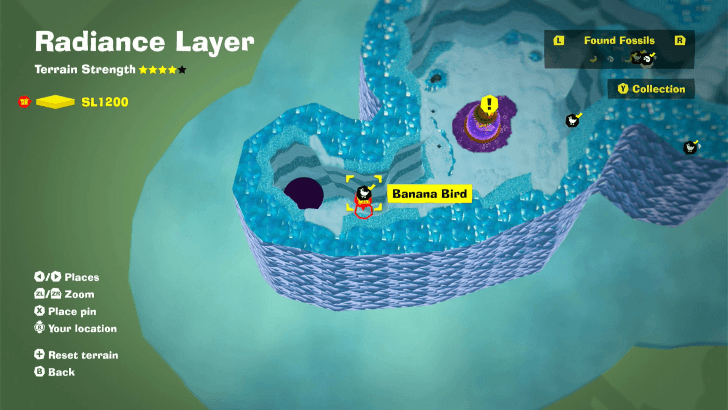
In the chamber past the Void Stake, it will be on the right wall. Beware of the nearby Crockoid. |
||
 |
 |
|
|
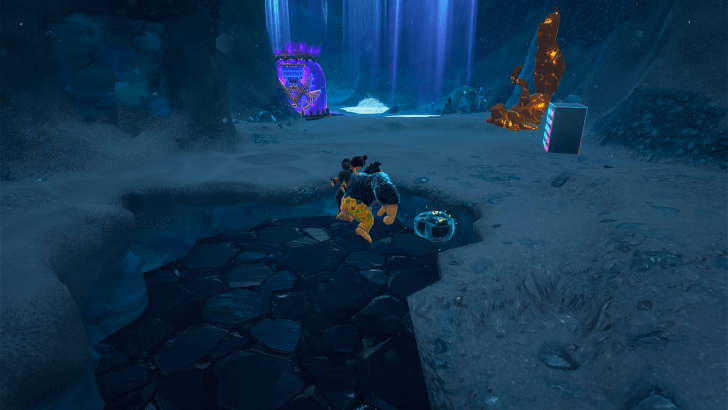
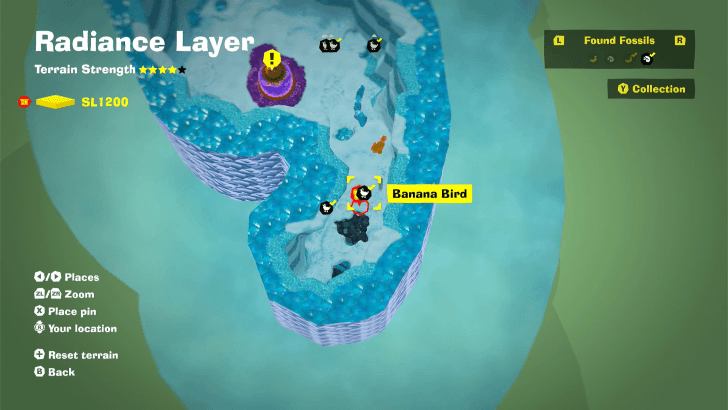
Hidden beneath the sign near the Void Stake. You may Hand Slap to detect where exactly it is. |
||
SL 1201 Fossil Locations
| Overworld View | Map Location | |
|---|---|---|
 |
 |
|
|
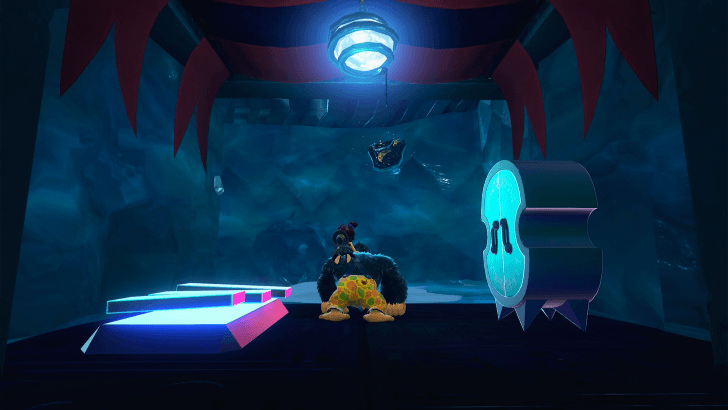
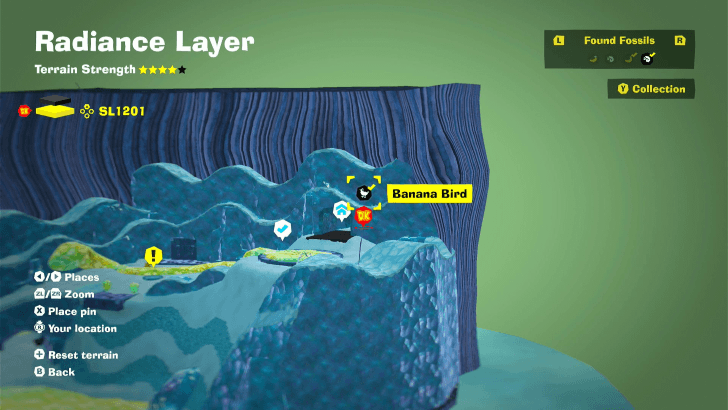
After constructing the Glowboa Grotto Getaway, this Fossil can be found on the back wall. |
||
 |
 |
|
|
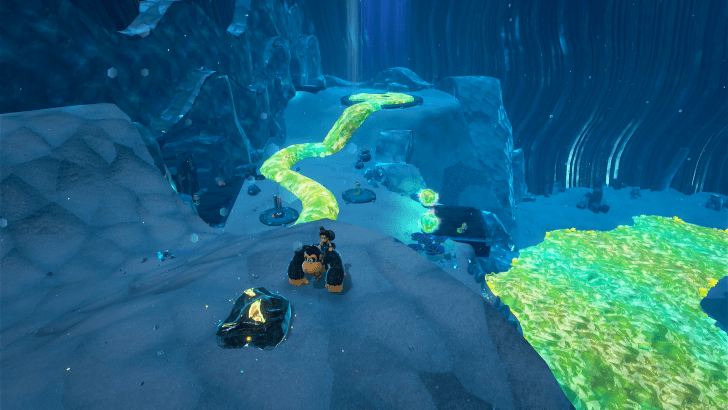
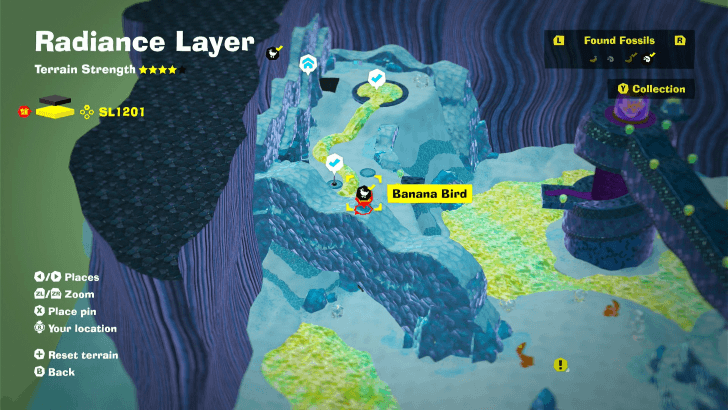
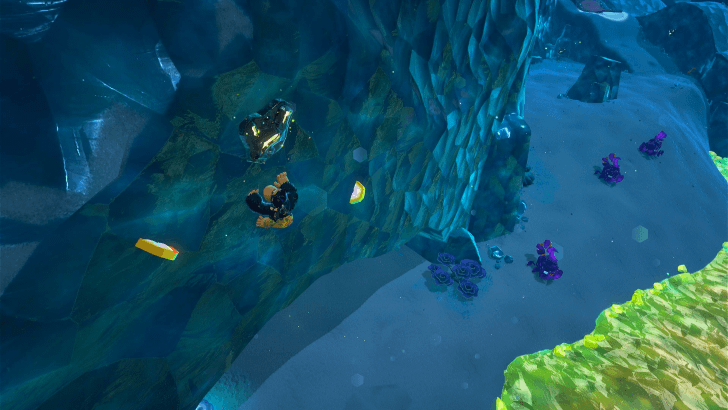
On top of a curvy wall downhill from Glowboa Grotto. |
||
 |
 |
|
|
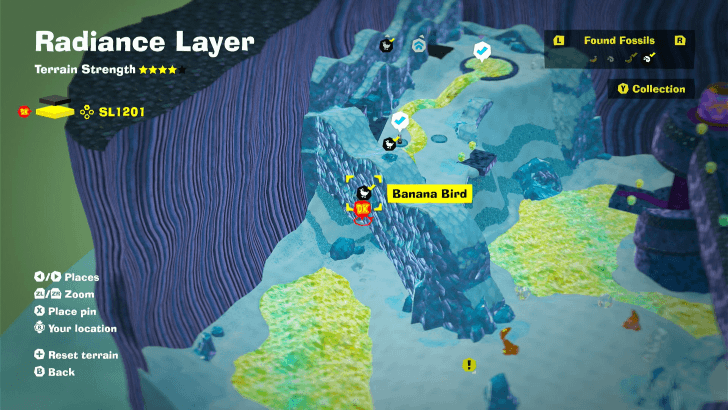
On the back side of a curvy wall downhill from Glowboa Grotto. |
||
 |
 |
|
|
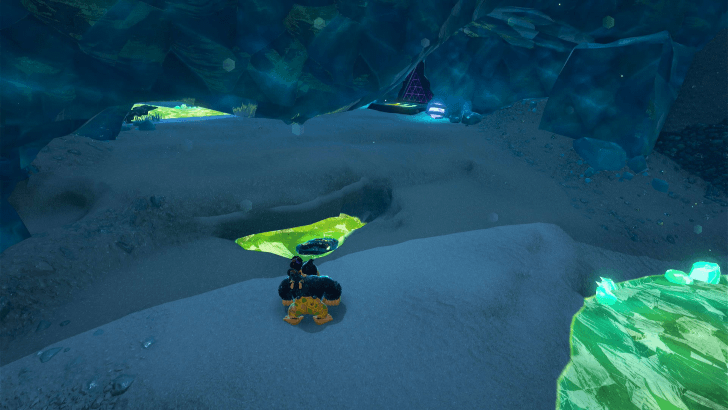
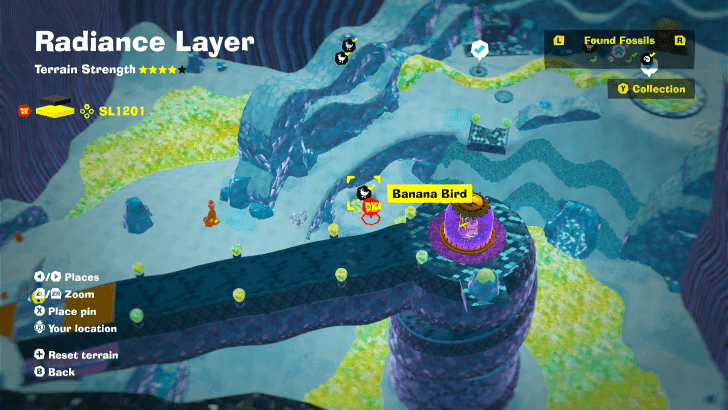
Beneath the surface just outside of the Dim Lights in the Darkness Challenge Ruins. You can detect it with a hand slap. |
||
 |
 |
|
|
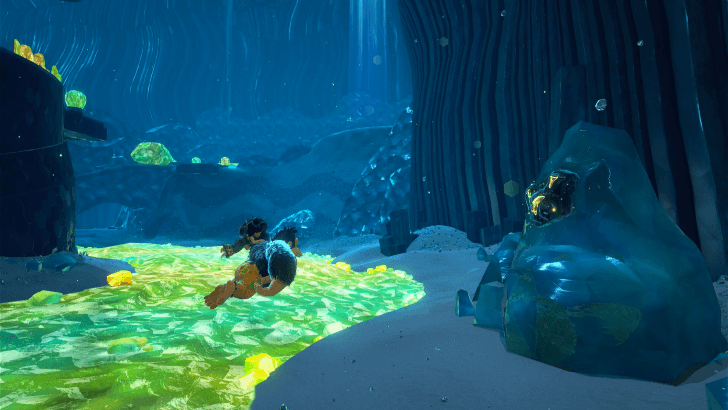
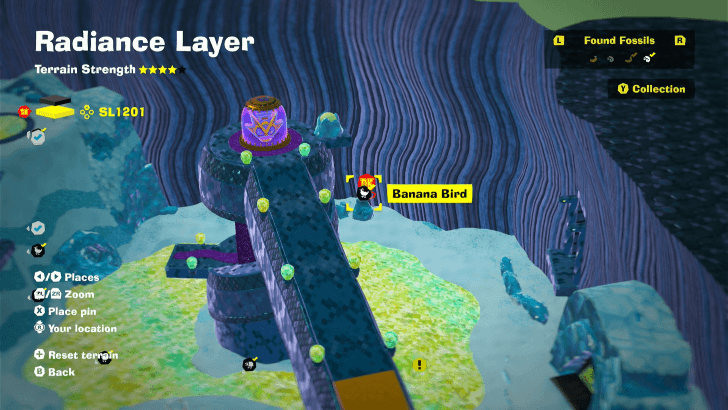
On one of the rocks surrounding Glowboa Grotto. |
||
 |
 |
|
|
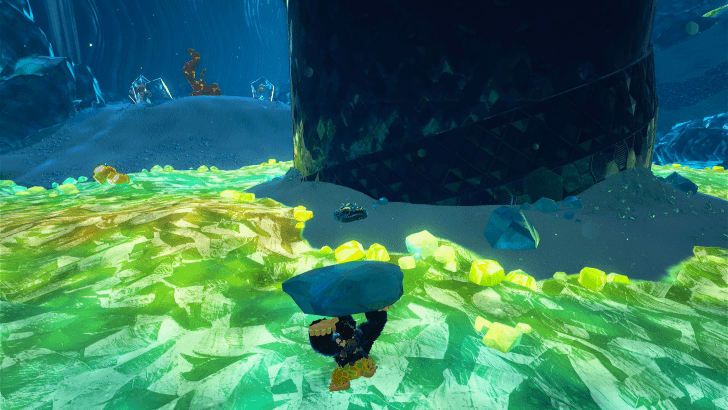
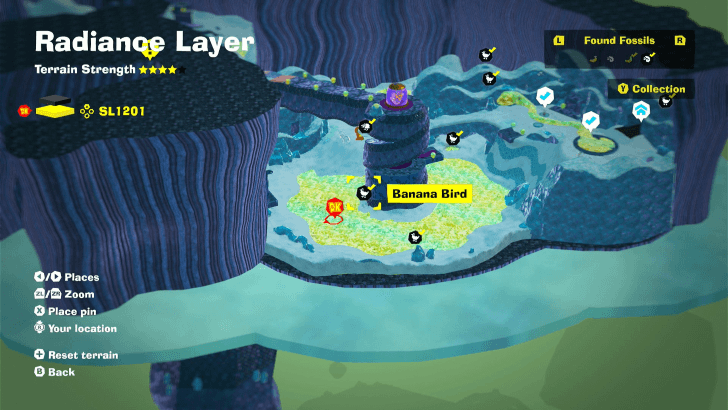
At the base of the pillar in the middle of Glowboa Grotto. |
||
 |
 |
|
|
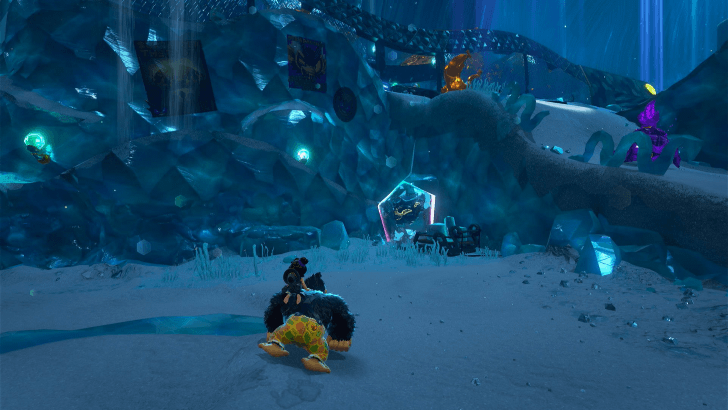
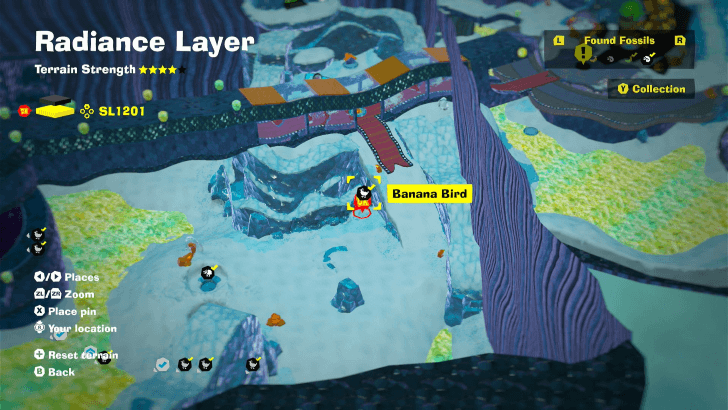
Encased in glass near the slope leading up to Constrictor Corridor. |
||
 |
 |
|
|
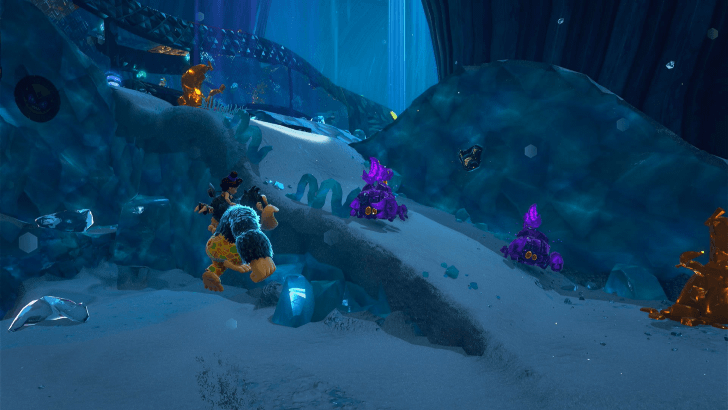
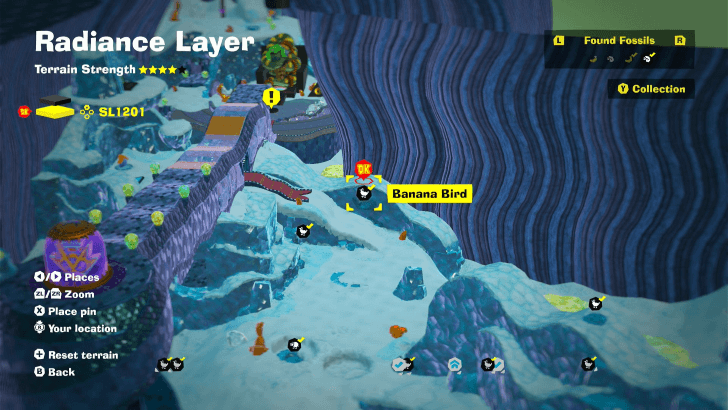
Embedded on a curvy wall to your right, on way up the slope leading up to Constrictor Corridor. |
||
 |
 |
|
|
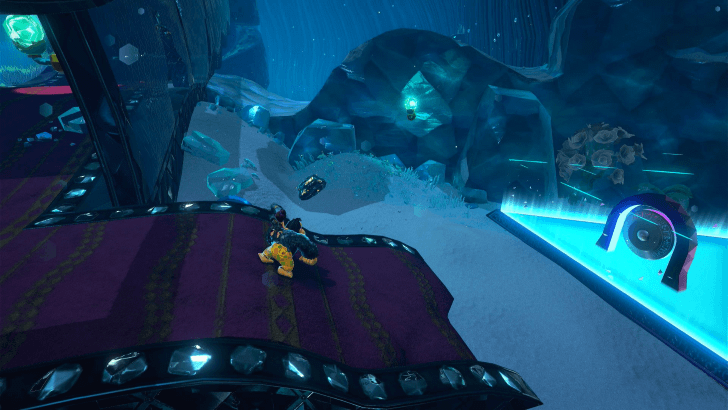
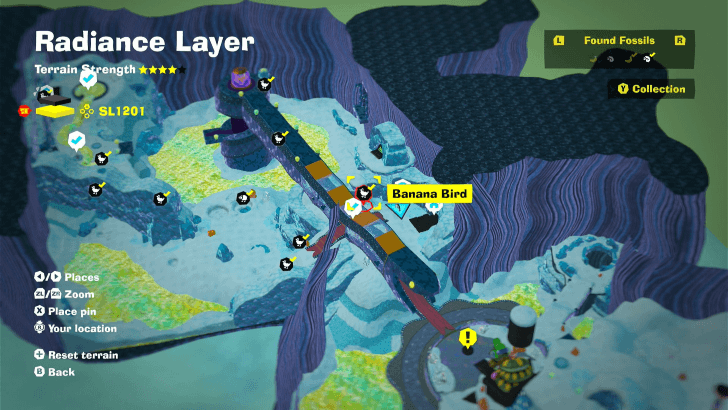
Near the Warp Gong by Constrictor Corridor. |
||
 |
 |
|
|
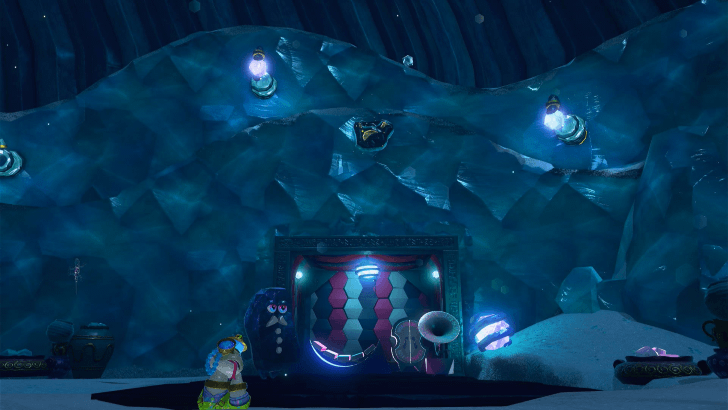
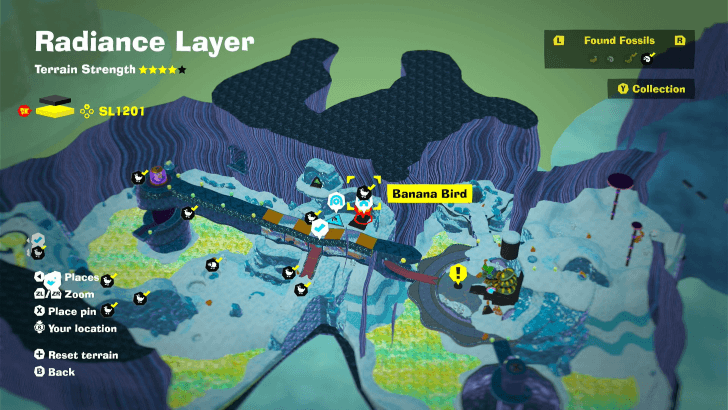
On the wall directly above the Constrictor Corridor Getaway |
||
 |
 |
|
|
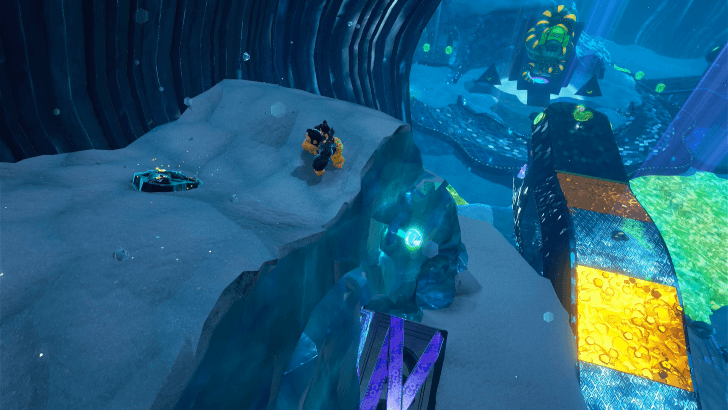
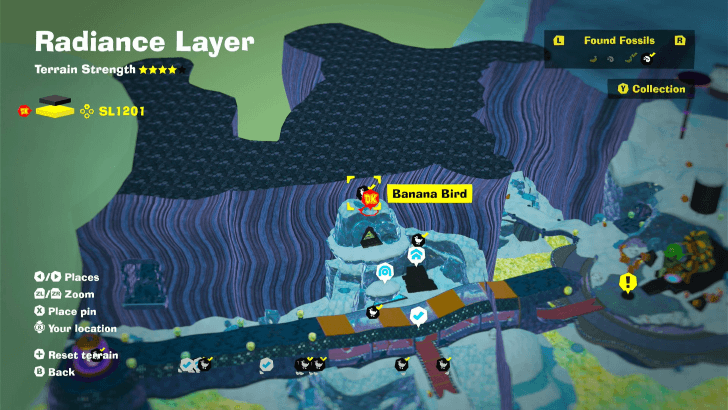
On top of the entrance to the Snake Bananza Charged Climb Challenge Ruin |
||
 |
 |
|
|
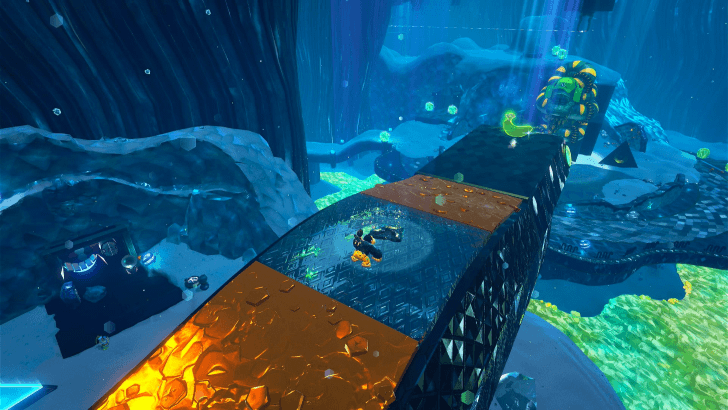
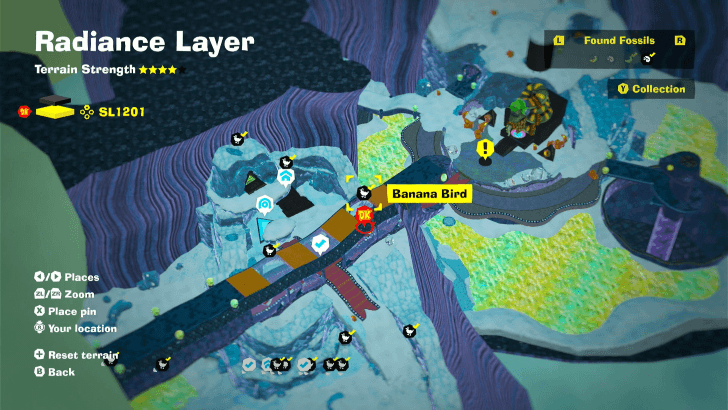
On top of Constrictor Corridor. |
||
 |
 |
|
|
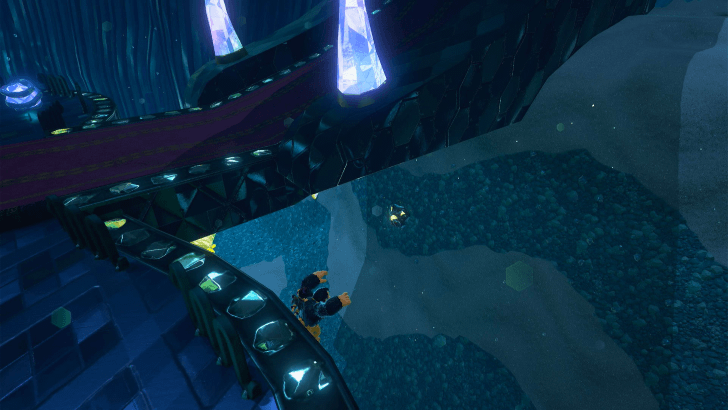
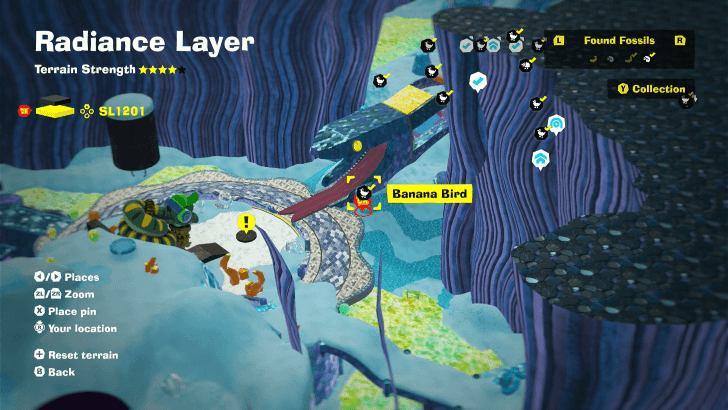
Below the chin portion of the Constrictor Corridor's face. |
||
 |
 |
|
|
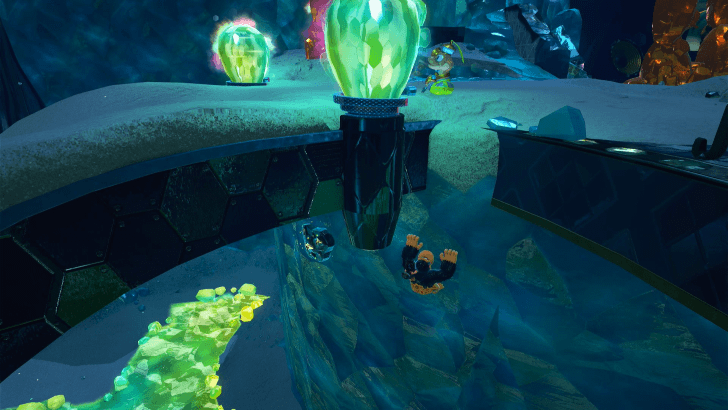
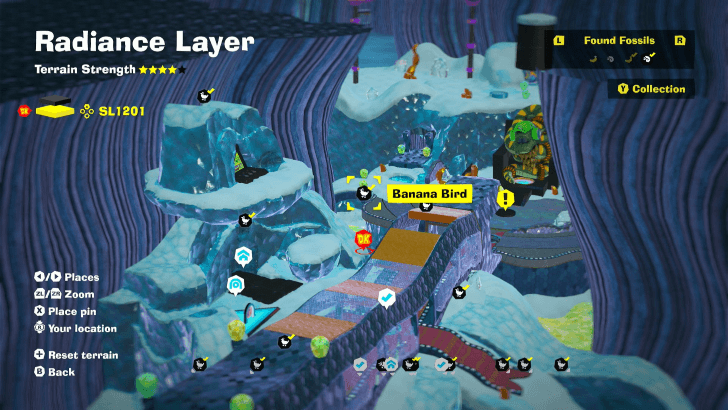
When facing the Elder Snake from Constrictor Corridor, head left. There'll be a bridge for you to cross, but the fossil is under this bridge. |
||
 |
 |
|
|
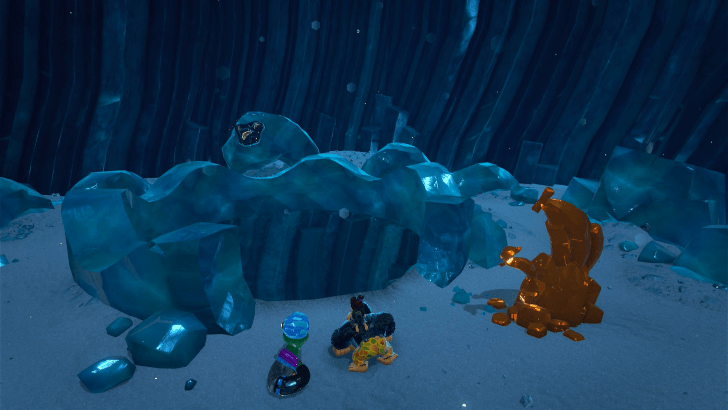
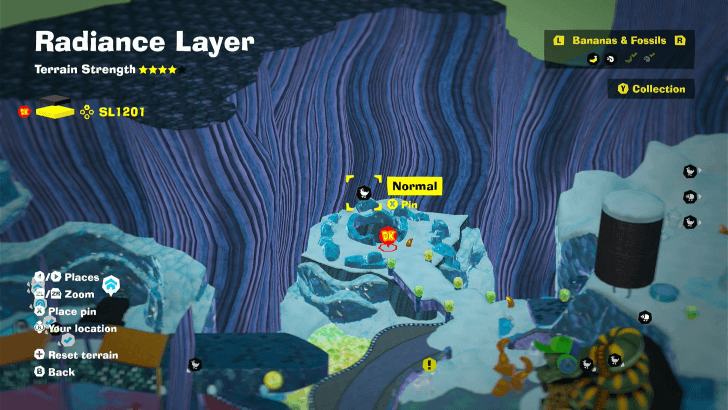
On one of the rocks surrounding the pit at the end of the bridge to the left of the Elder Snake |
||
 |
 |
|
|
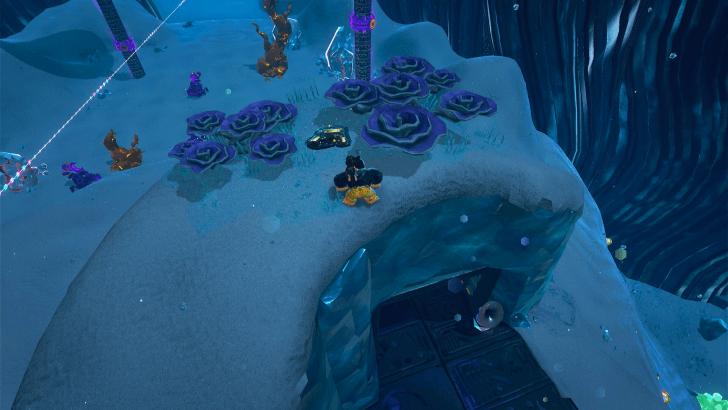
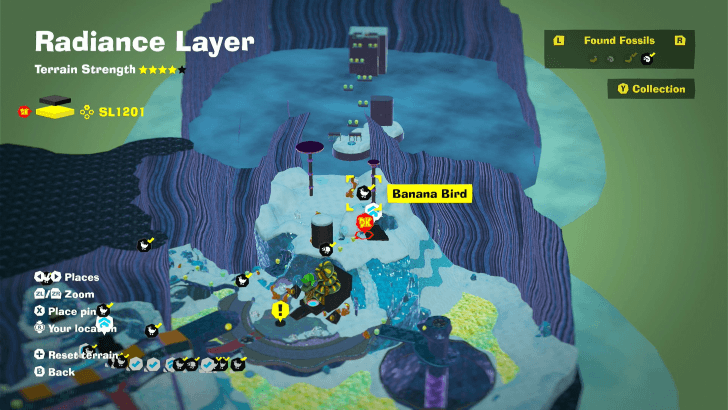
Just above the Elder's Back Getaway. |
||
 |
 |
|
|
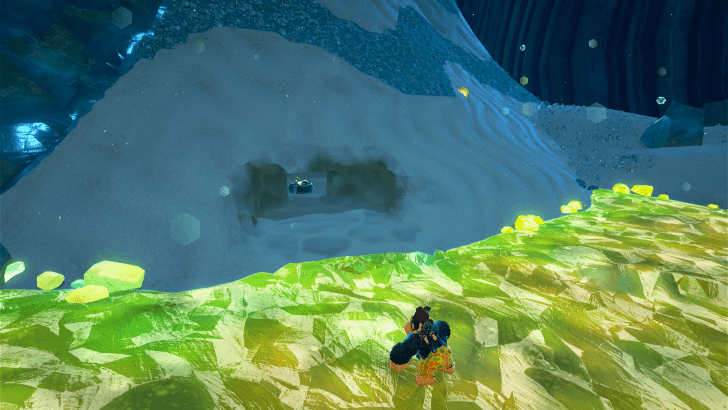
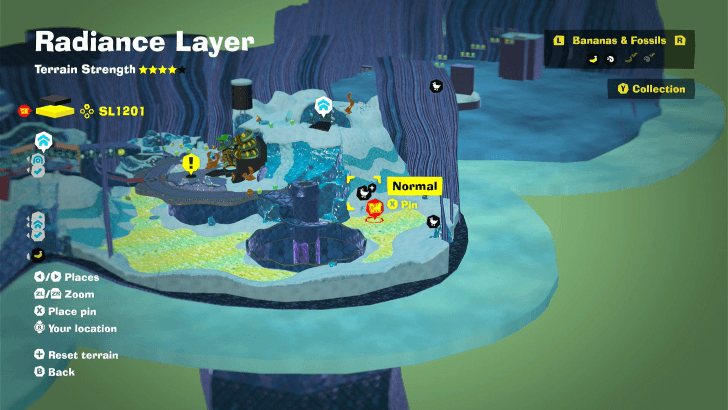
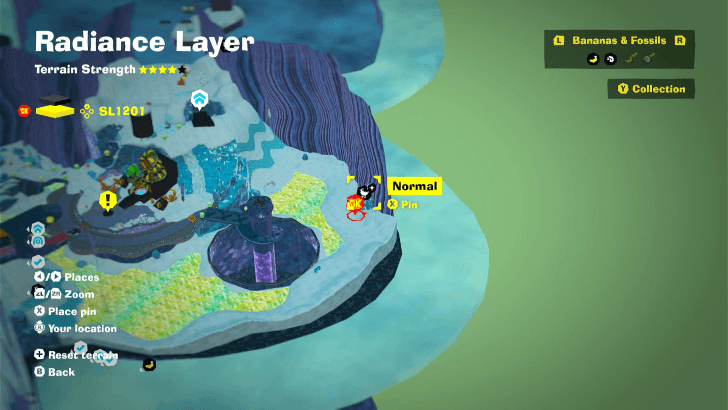
Downhill from the Elder's Back Getaway. The fossil is hidden within the slope, so you can detect its exact location with a hand slap. |
||
 |
 |
|
|
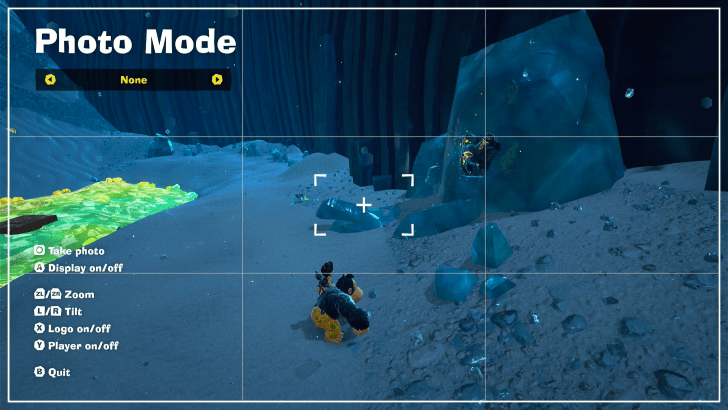
On a rock past the water, downhill from the Elder's Back Getaway. |
||
 |
 |
|
|
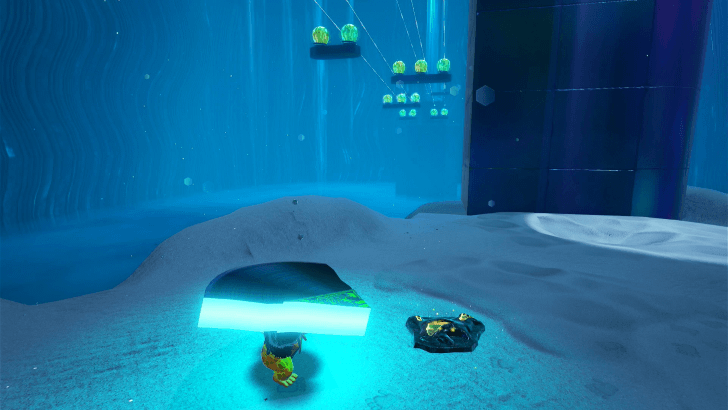
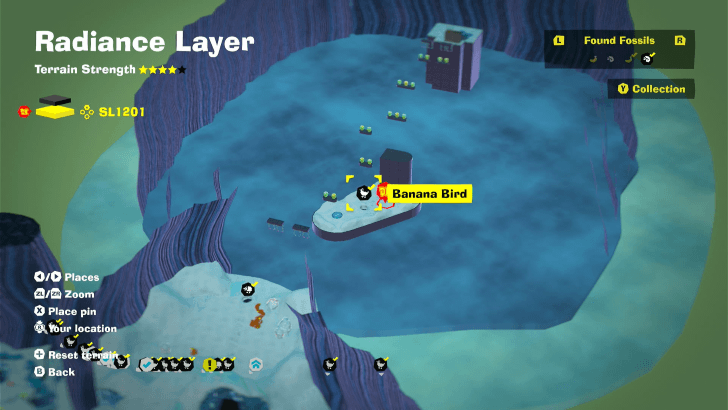
On the land formation beneath the ziplines. |
||
 |
 |
|
|
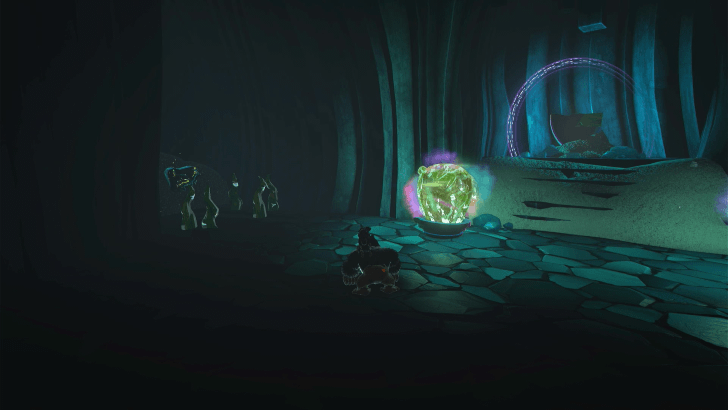
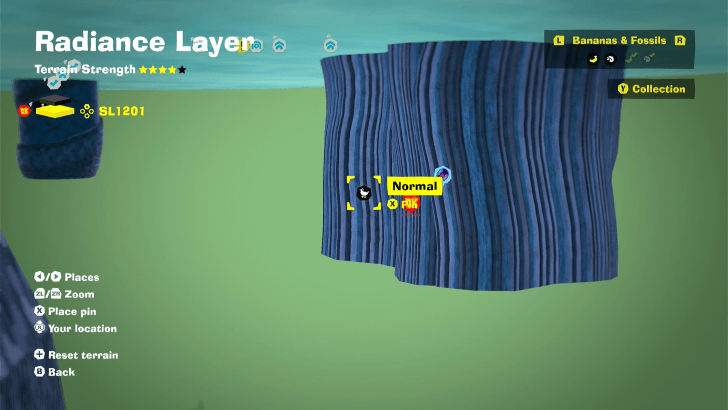
Behind some vines in a dark corner of the room where you get one of the Record pieces for Elder Snake. |
||
 |
 |
|
|
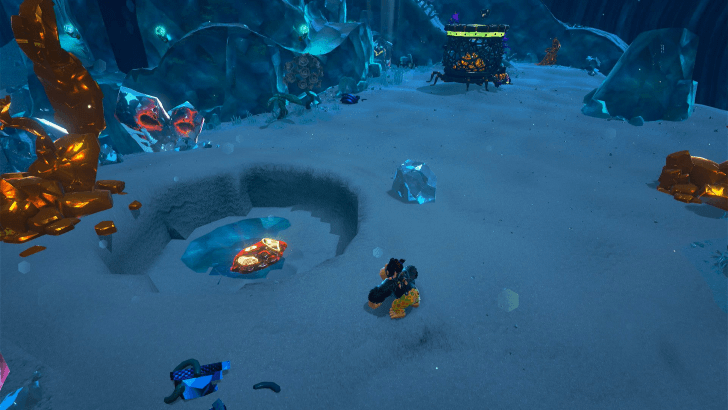
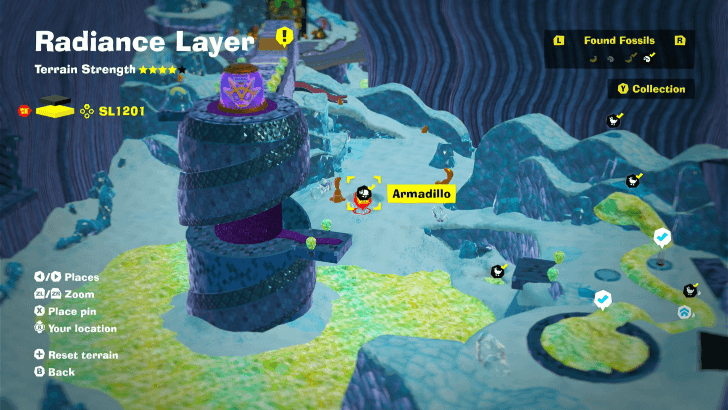
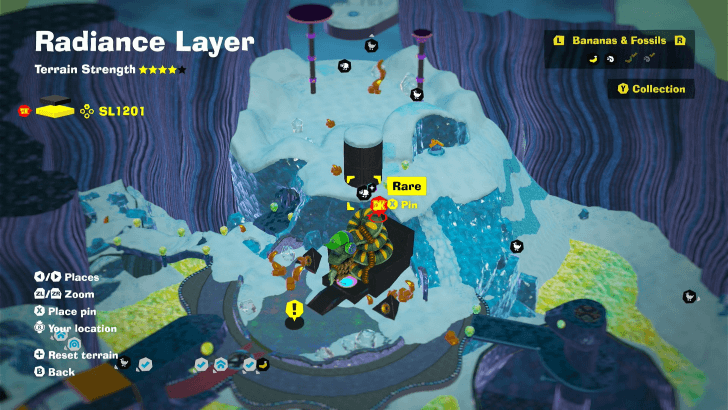
Beneath the surface In the snowy clearing just past Glowboa Grotto. You may detect it with a hand slap. Beware the large enemy nearby. |
||
 |
 |
|
|
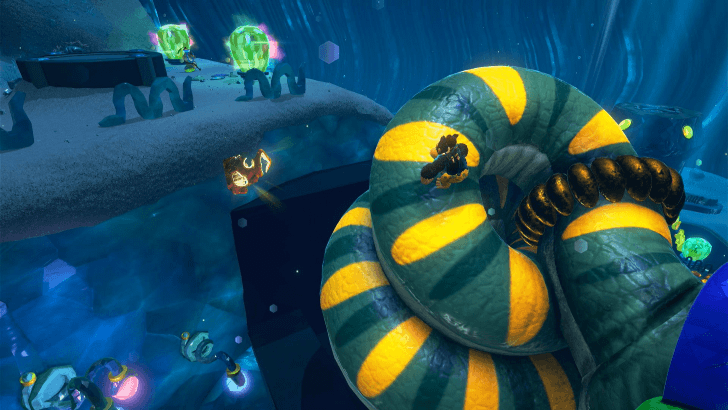
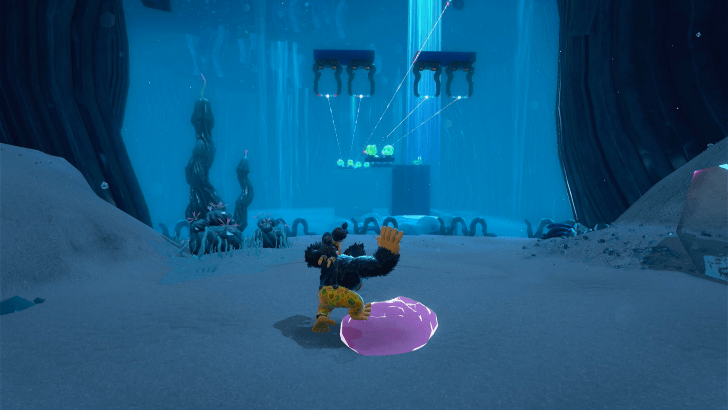
On the wall just behind Elder Snake's Throne. |
||
 |
 |
|
|
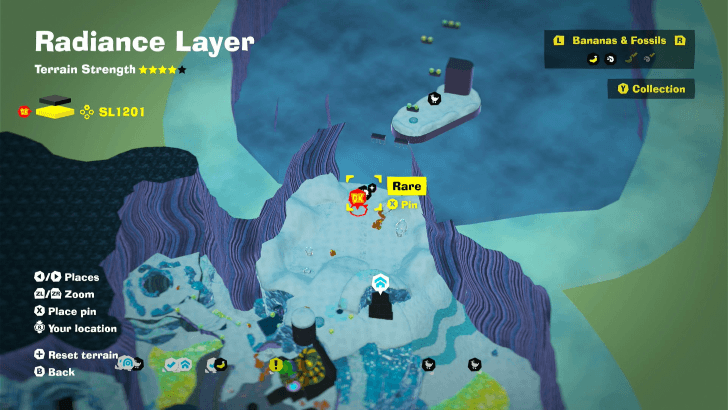
Beneath the surface, near the edge of the clearing past Elder's Back Getaway. You may detect its exact location with a hand slap. |
||
SL 1202 Fossil Locations
| Overworld View | Map Location | |
|---|---|---|
 |
 |
|
|
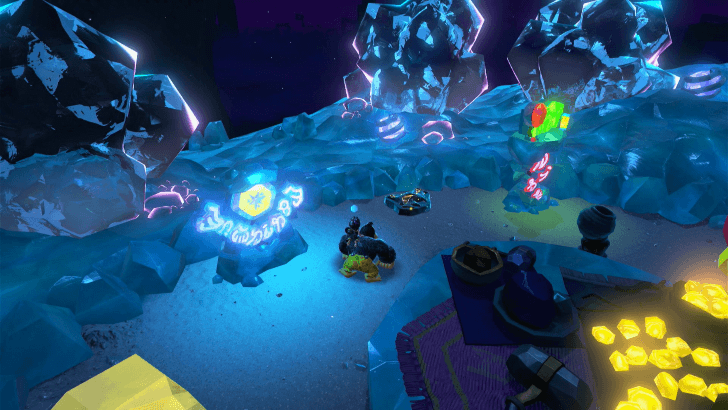
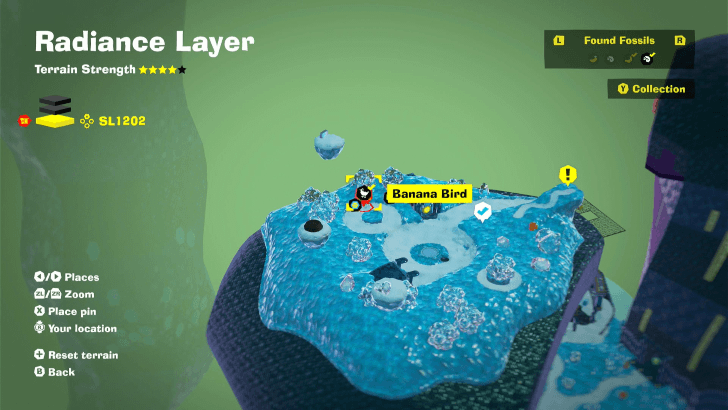
By the Chip Exchange in Sculptor's Studio. |
||
 |
 |
|
|
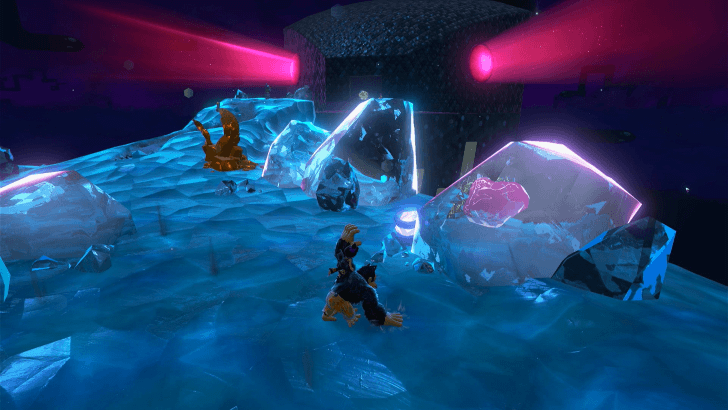
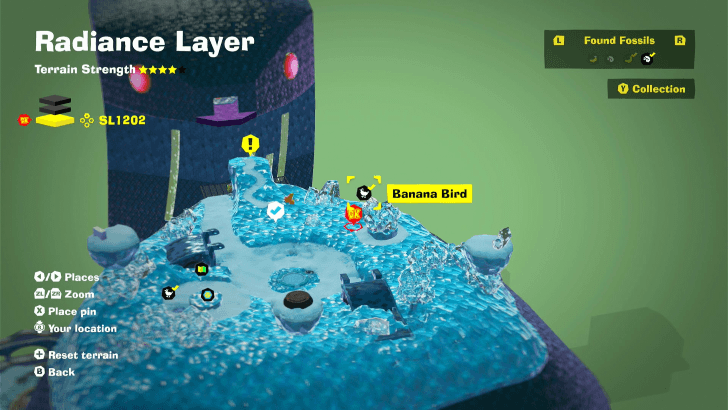
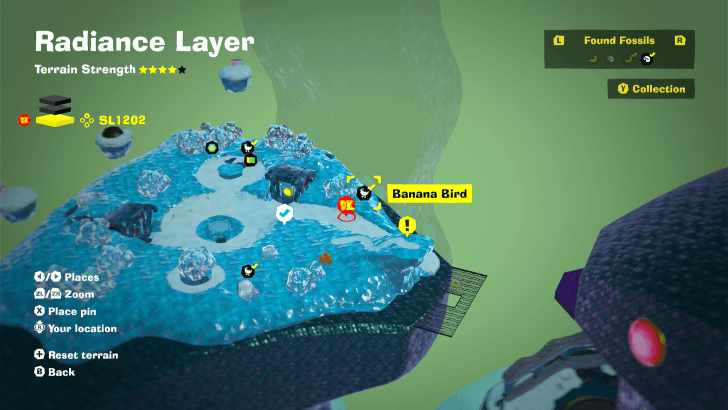
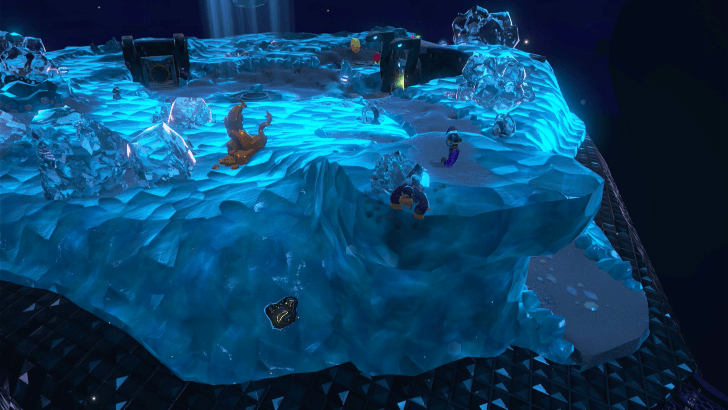
Encased in Crystal near Sculptor's Studio. |
||
 |
 |
|
|
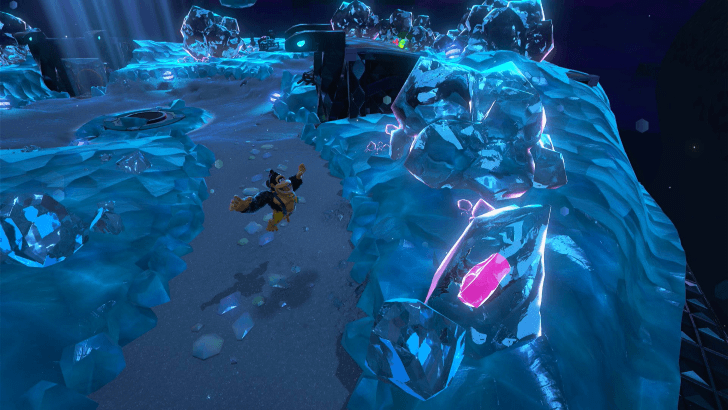
Encased in Crystal near Sculptor's Studio. |
||
 |
 |
|
|
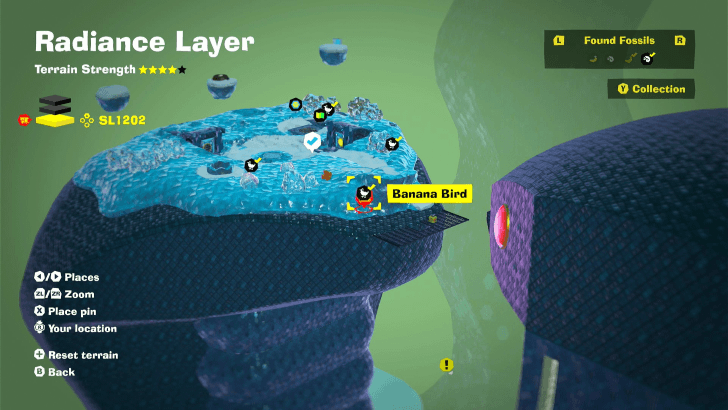
On a wall near the snout section of Sculptor Studio's snake-like platform. |
||
 |
 |
|
|
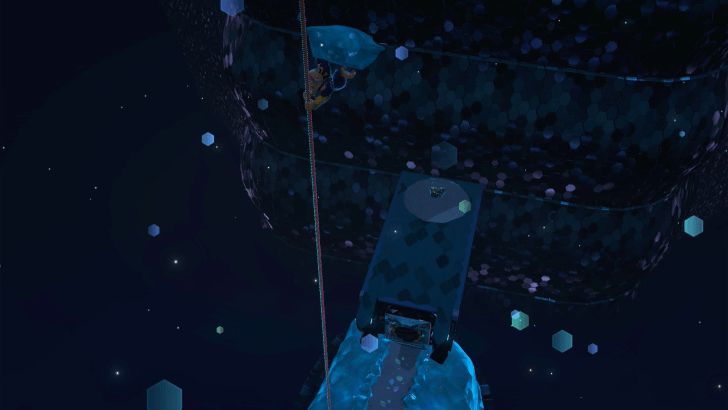
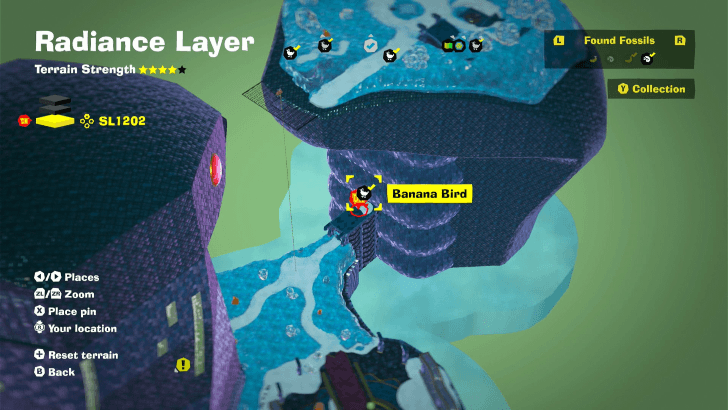
On top of a roof beneath the Sculptor Studio's snake-like platform. |
||
 |
 |
|
|
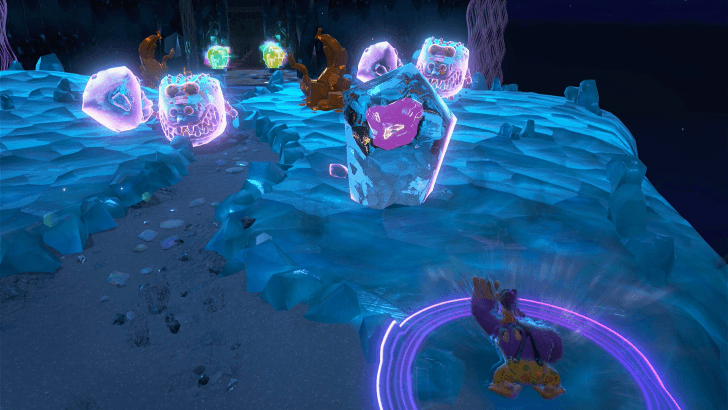
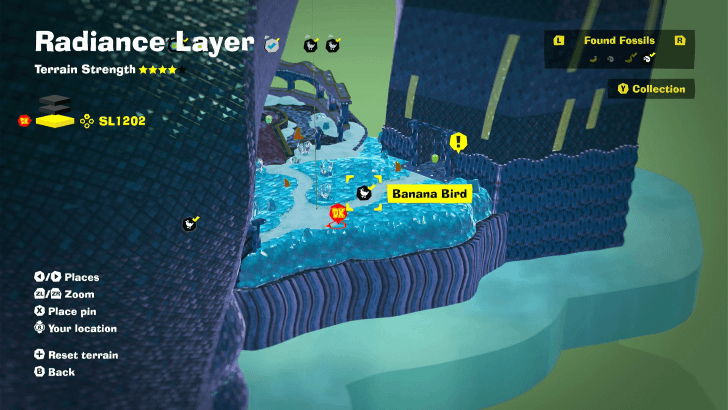
Encased in Crystal in the section between Sculptor's Studio and the Solar Control Tower. Beware of the nearby Crockoids. |
||
 |
 |
|
|
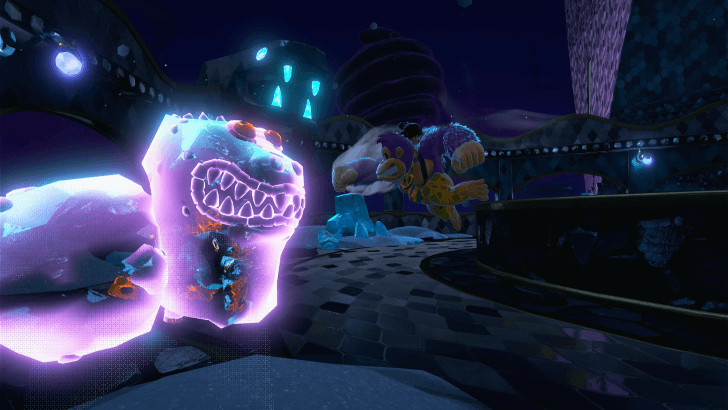
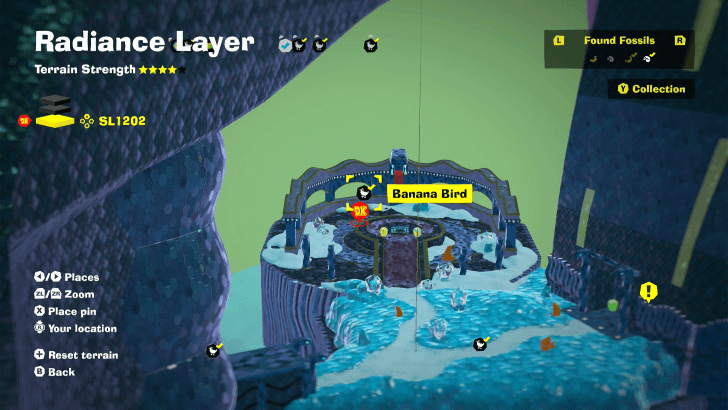
Encased in a Crystal Crockoid near the Entrance to SL1203. Destroy the Crystal to retrieve the fossil. |
||
 |
 |
|
|
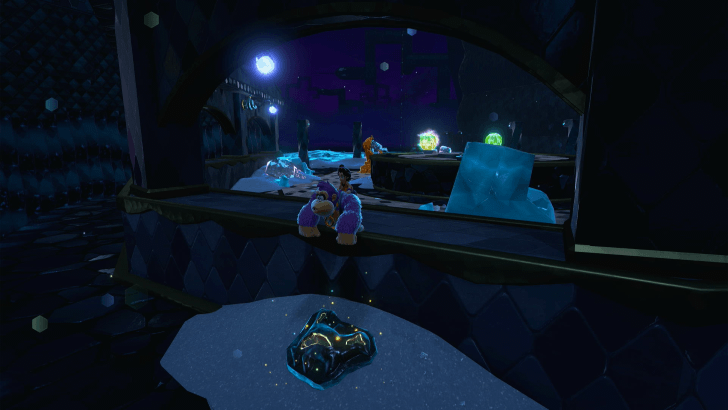
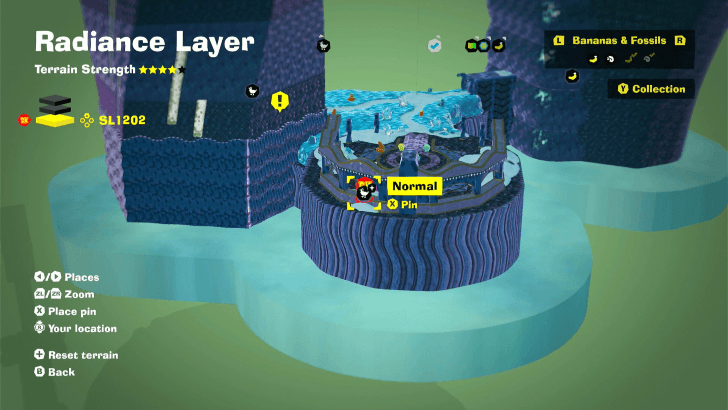
Found just outside a window ledge of the area near the Entrance to SL1203. |
||
 |
 |
|
|
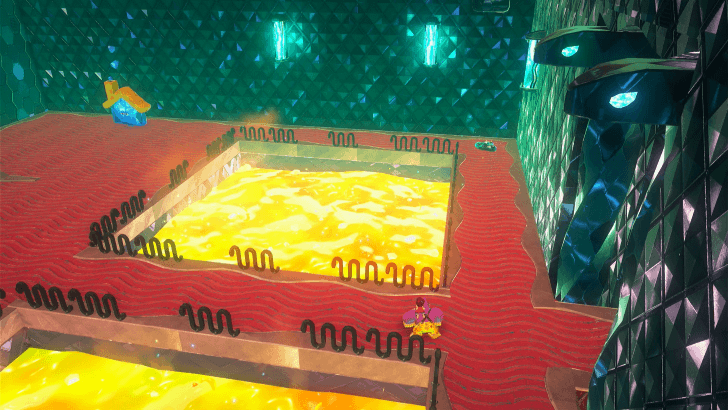
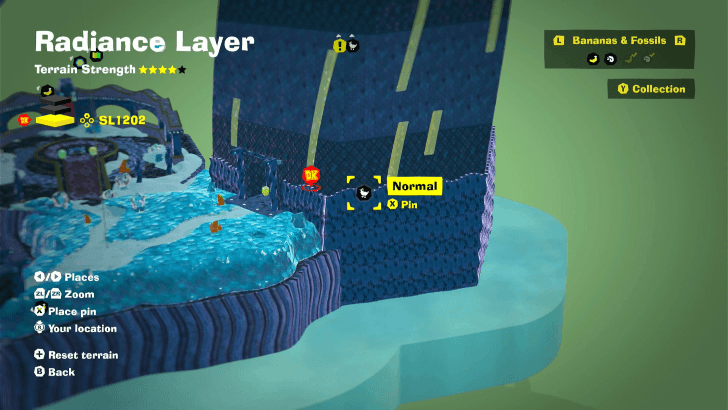
In the corner of the bottom floor of the Solar Control Tower. |
||
 |
 |
|
|
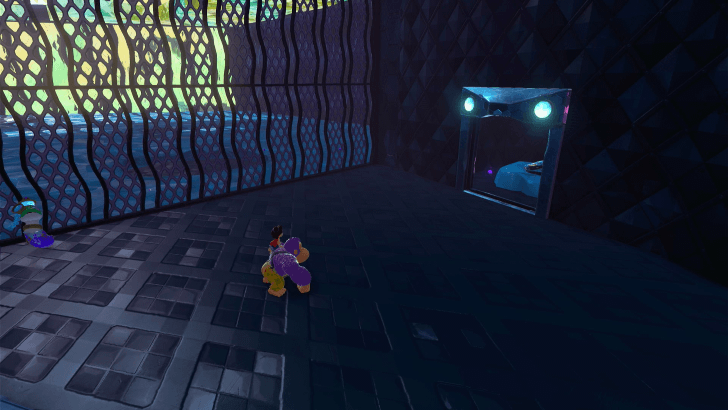
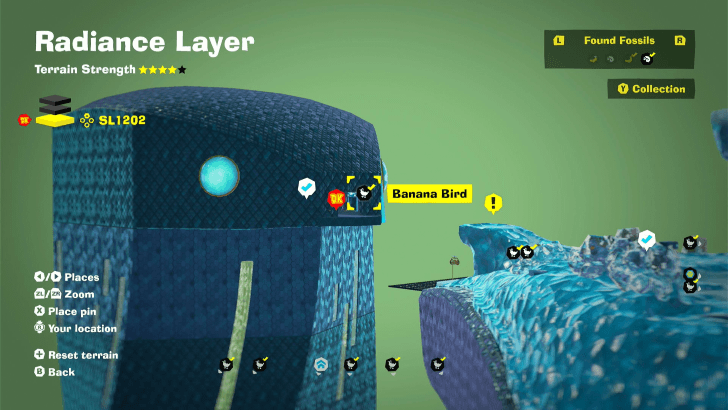
In a side room at the top of the Solar Control Tower. Can only be opened after the Solar Power has been restored. |
||
SL 1203 Fossil Locations
| Overworld View | Map Location | |
|---|---|---|
 |
 |
|
|
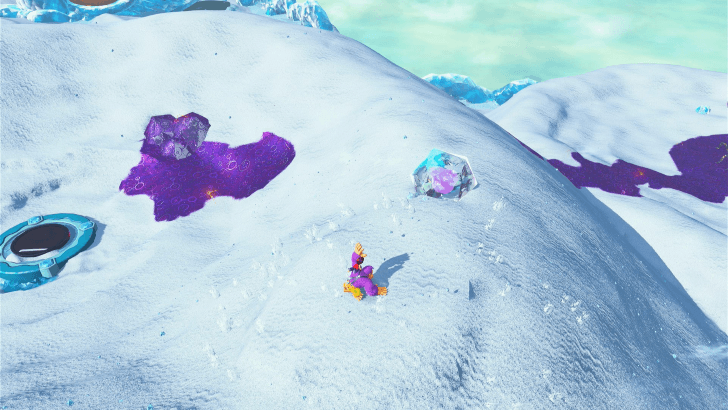
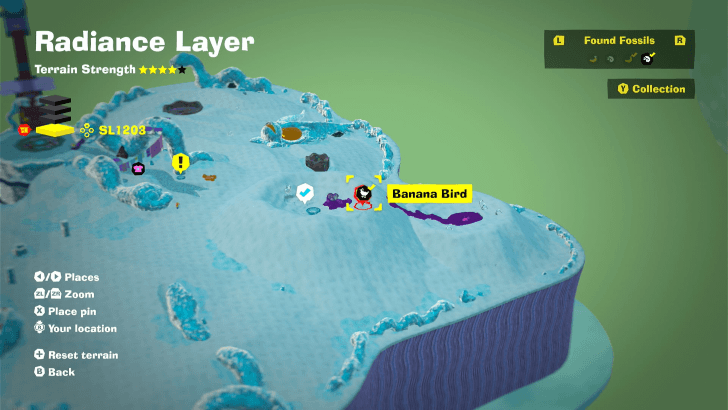
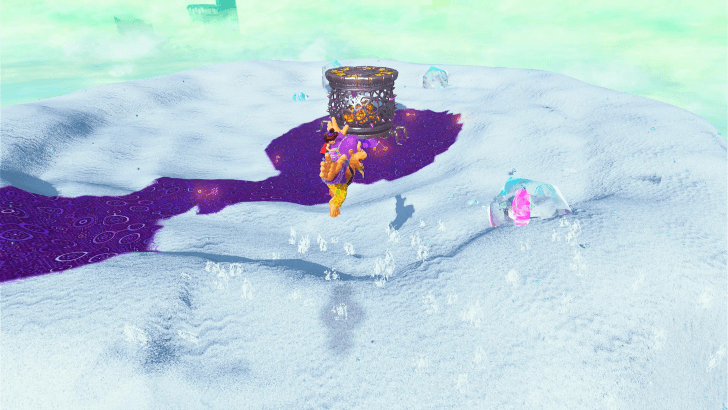
As you drop into Serpent Sands, you'll find this fossil encased in a crystal nearby. |
||
 |
 |
|
|
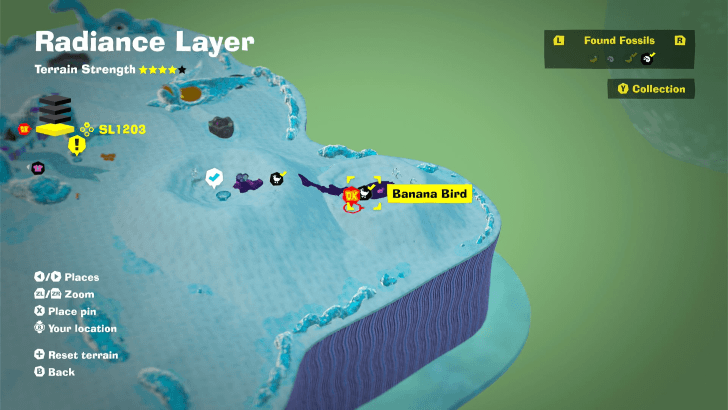
When you drop into Serpent Sands, there is Voided Terrain nearby. As you follow it to its source, you can spot this fossil encased in crystal nearby. |
||
 |
 |
|
|
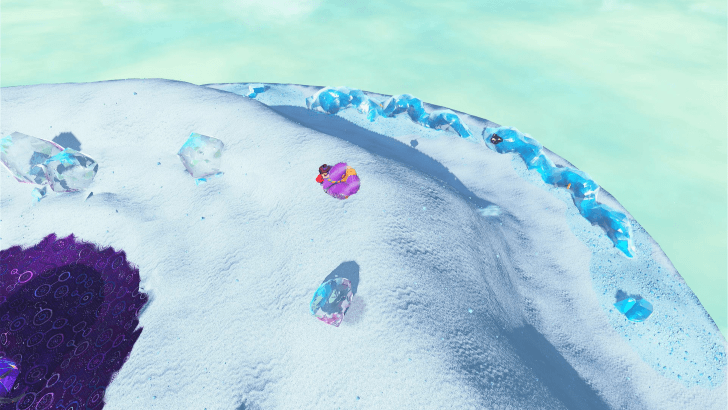
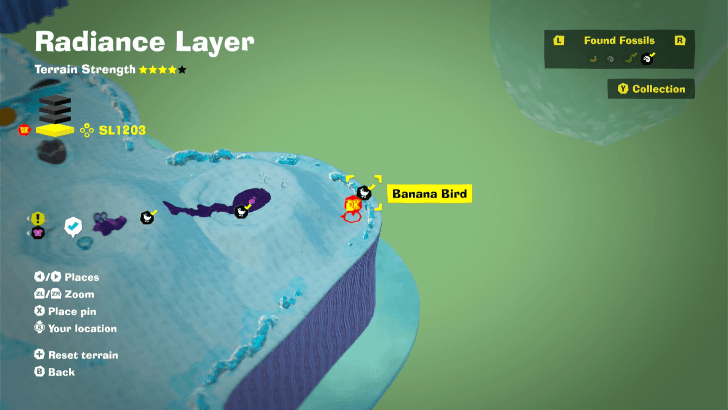
When you drop into Serpent Sands, there is Voided Terrain nearby. As you follow it to its source, go just beyond where the device is to spot this fossil encased in crystal right by the edge of the map. |
||
 |
 |
|
|
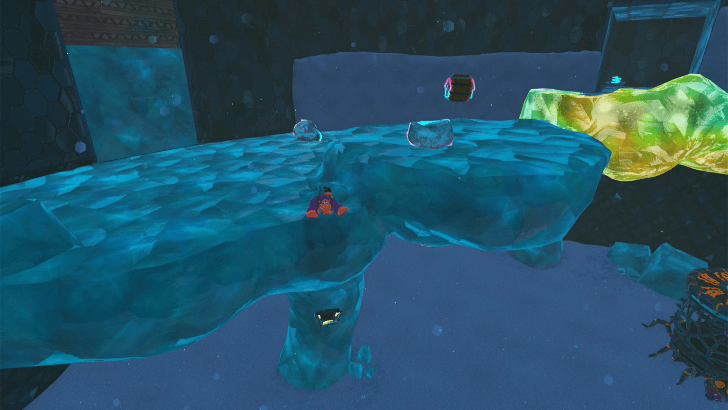
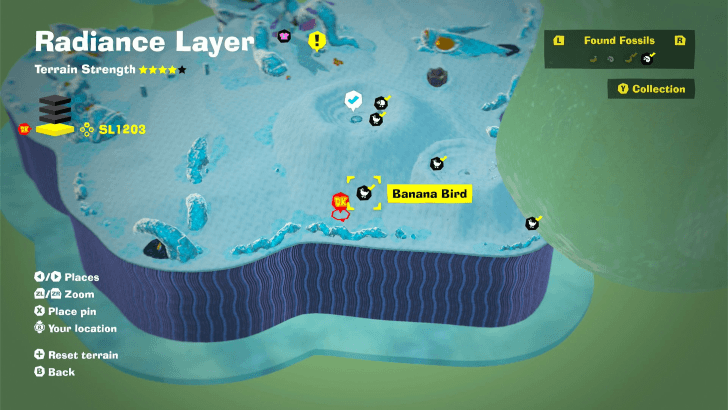
Beneath Serpent Sands is a large chamber where you can work towards Banandium Gem 47. This fossil can be found underneath one of the platforms in the chamber. |
||
 |
 |
|
|
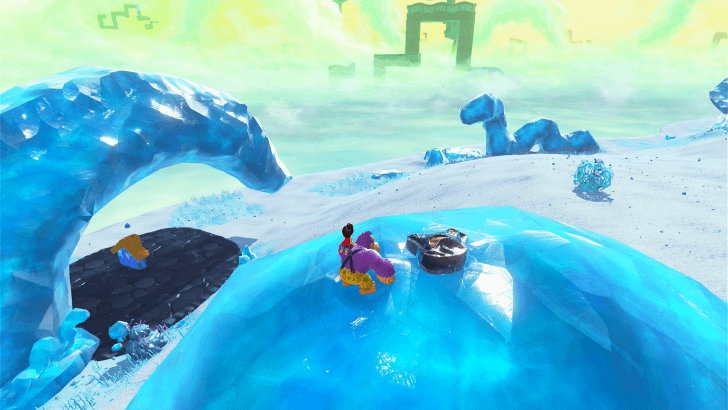
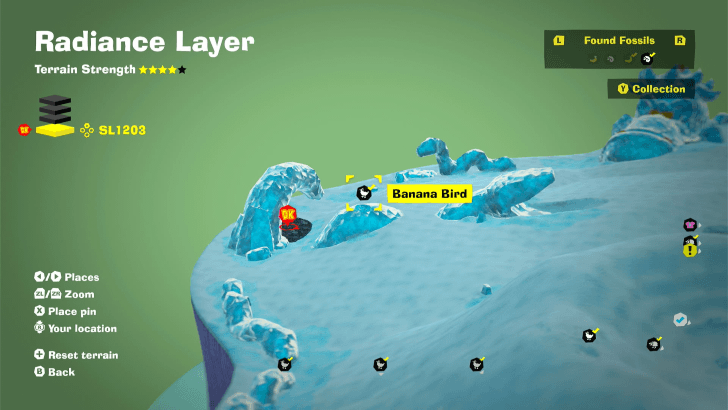
On top of a curved stone near the Tail-End Getaway. |
||
 |
 |
|
|
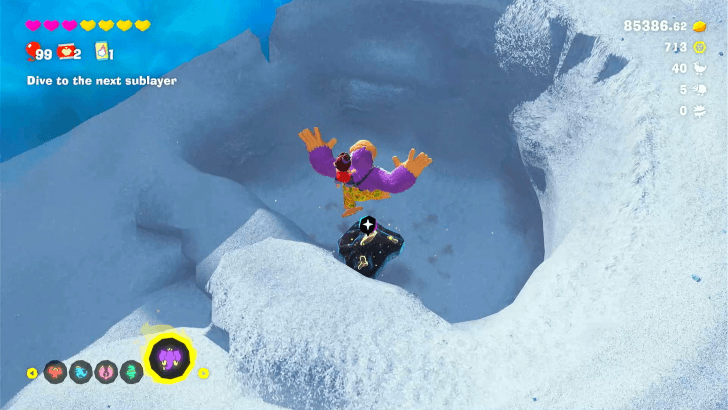
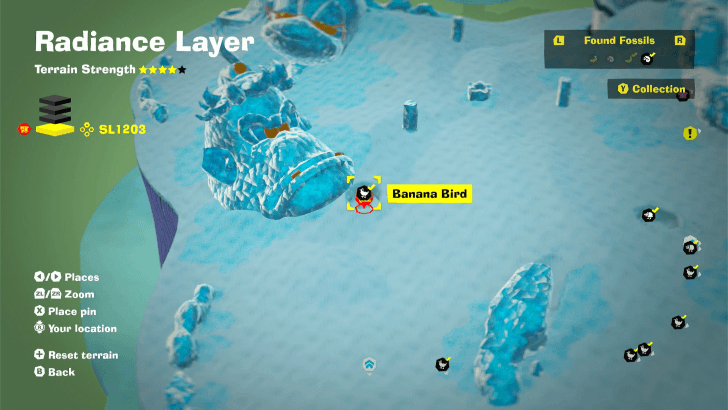
Beneath the surface of the sands just under the chin of the stone sculpture of Grumpy Kong's face. You may need to do a hand slap to discern the exact location. |
||
 |
 |
|
|
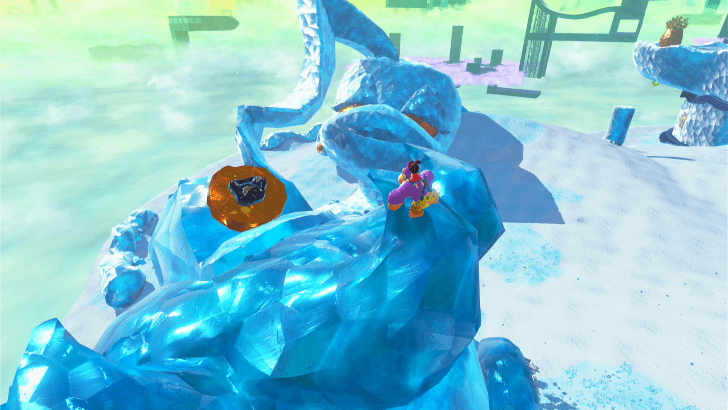
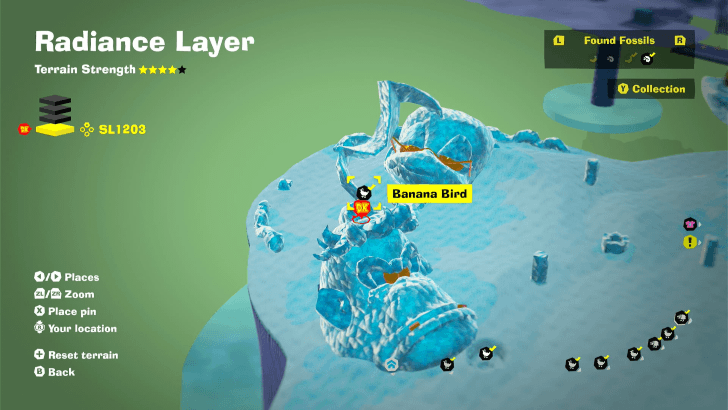
On the helmet section of the stone sculpture of Grumpy Kong's face. |
||
 |
 |
|
|
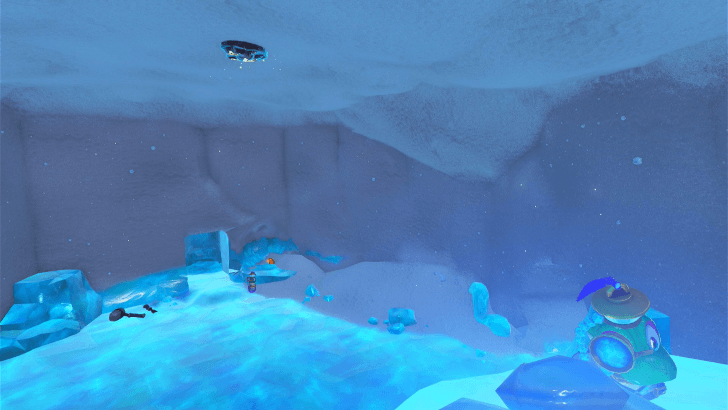
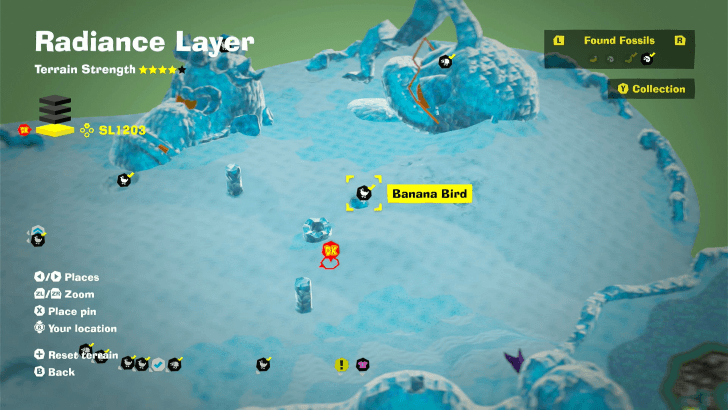
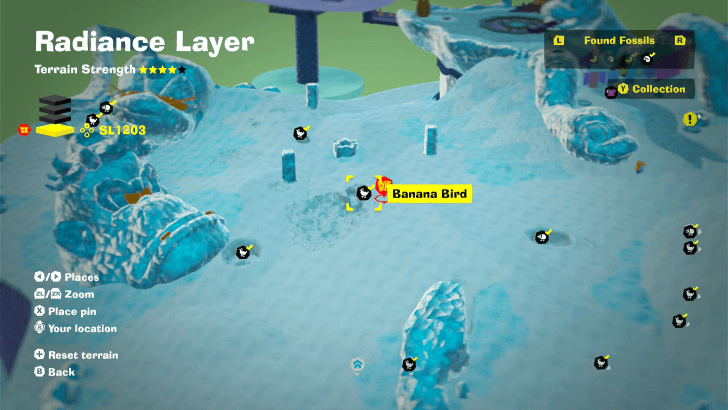
In the clearing near the sculptures of Grumpy Kong and Poppy Kong is a well that serves as an entrance into an underground chamber. This fossil is found on the ceiling of that chamber. |
||
 |
 |
|
|
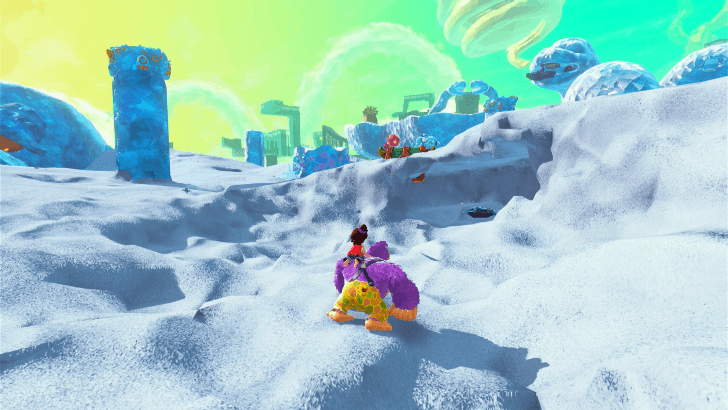
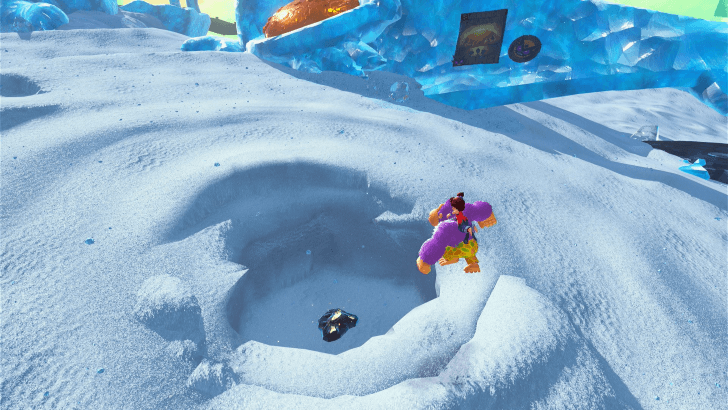
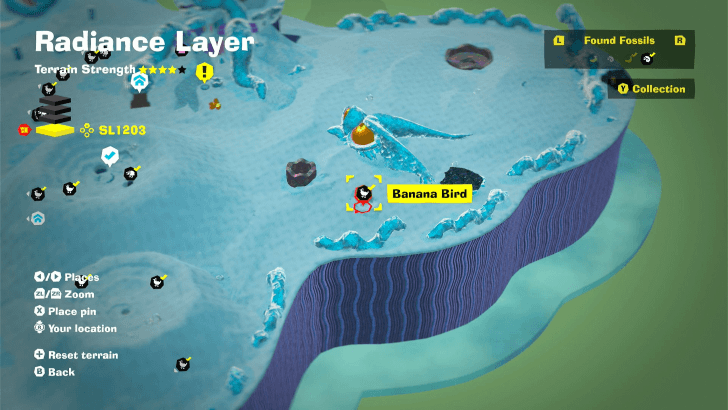
Beneath the surface of the sands in the clearing near the sculptures of Grumpy Kong and Poppy Kong. There is a slight circular pattern on the sand that hints at this fossil's location. Beware of the nearby enemies. |
||
 |
 |
|
|
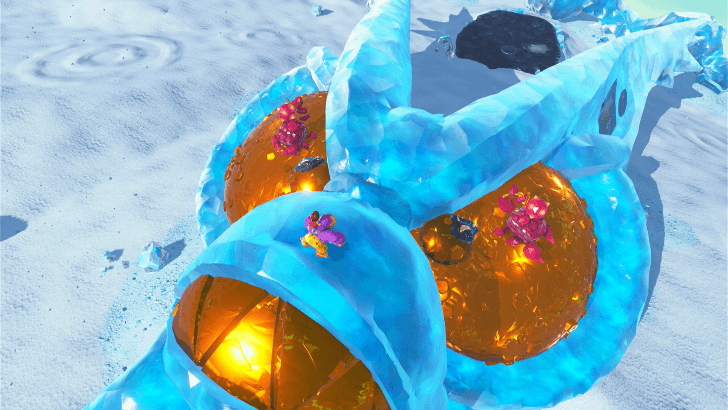
Beneath the surface of the sands in the clearing near the sculptures of Void Kong. There is a slight circular pattern on the sand that hints at this fossil's location. |
||
 |
 |
|
|
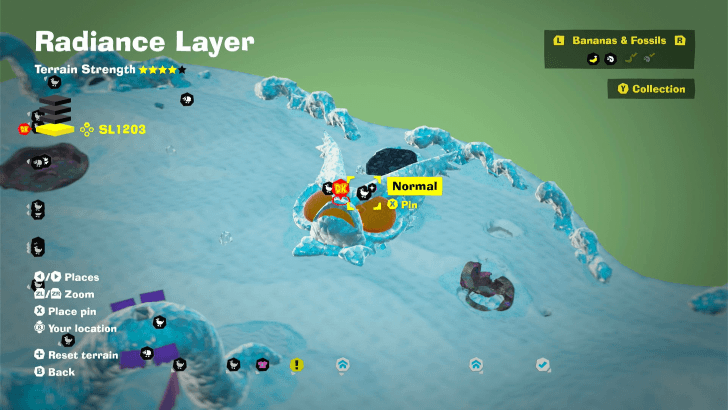
This fossil and another serve as the pupils for the eyes of the Void Kong stone sculpture. |
||
 |
 |
|
|
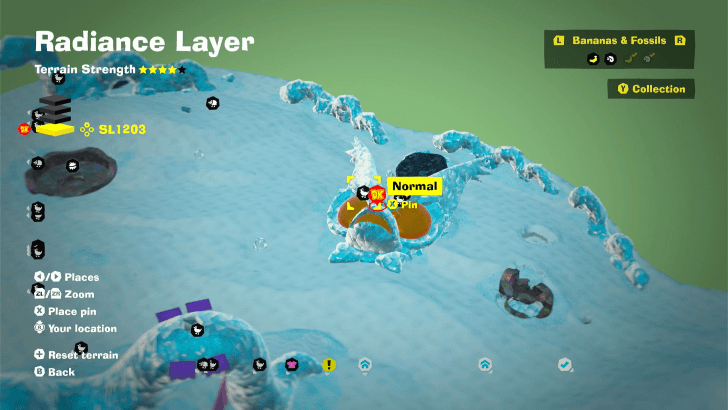
This fossil and another serve as the pupils for the eyes of the Void Kong stone sculpture. |
||
 |
 |
|
|
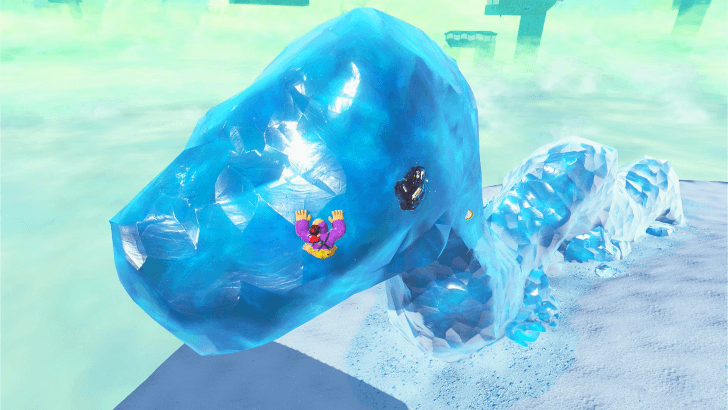
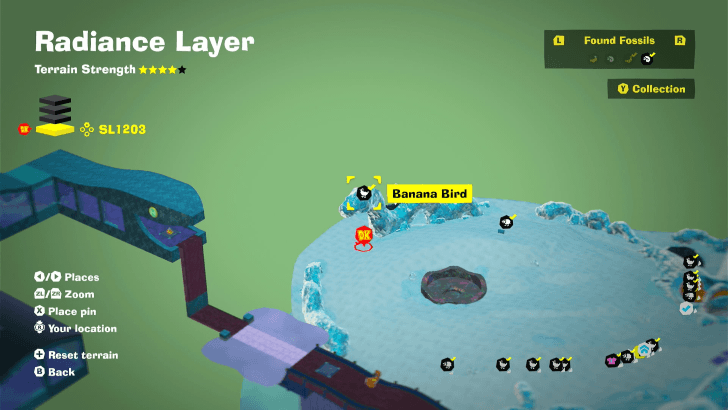
At the tip of a curvy stone structure that resembles a snake near the Desert Outskirts Getaway. |
||
 |
 |
|
|
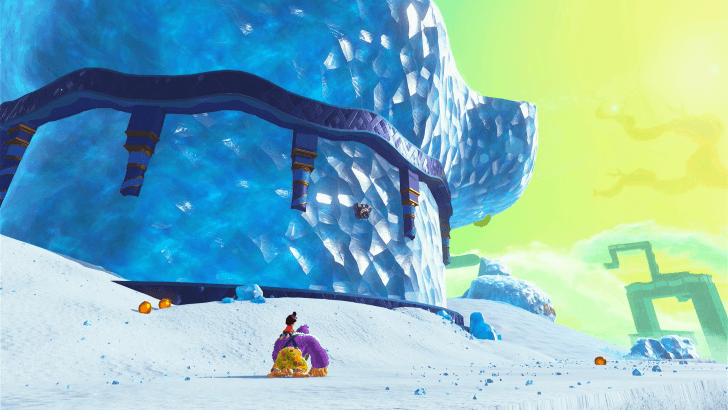
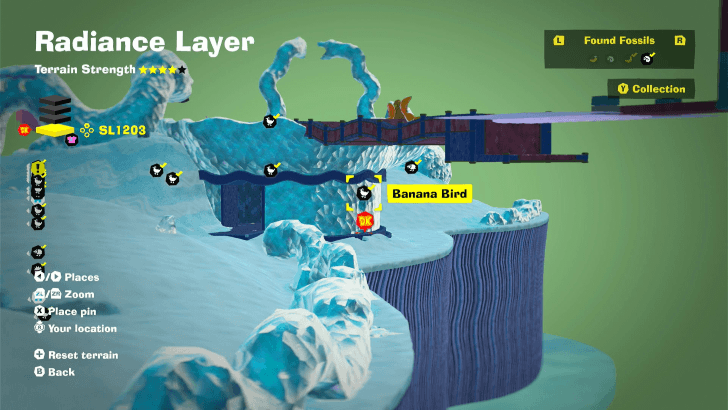
On a wall at the base of the Oasis, just outside the entrance to where Banandium Gem 61 is. |
||
 |
 |
|
|
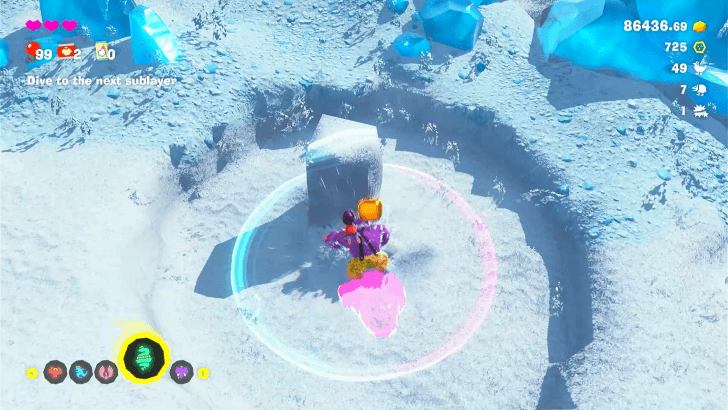
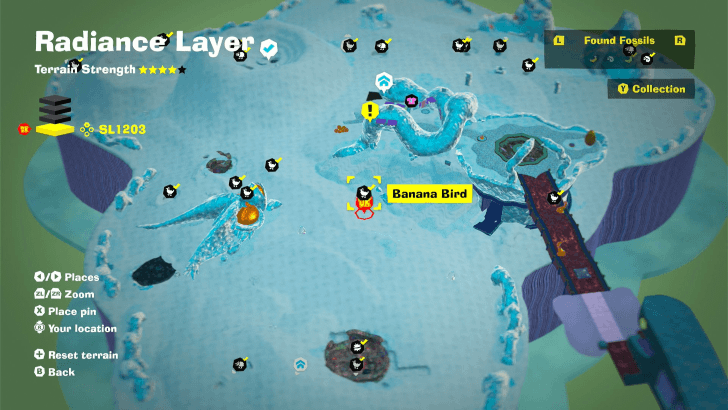
Beneath the surface of the sands on the outskirts of the Oasis. You may discern its location with hand slaps. |
||
 |
 |
|
|
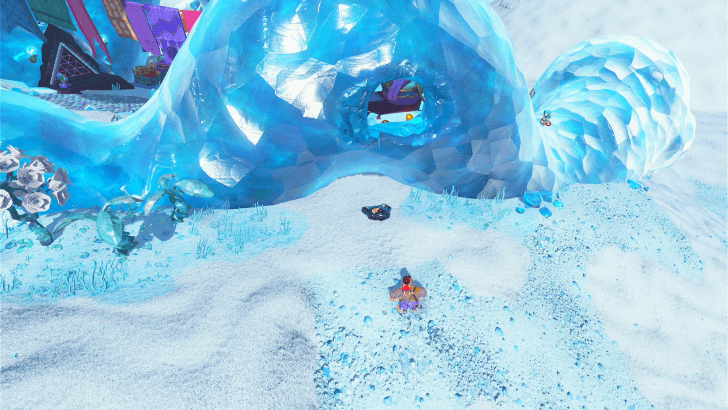
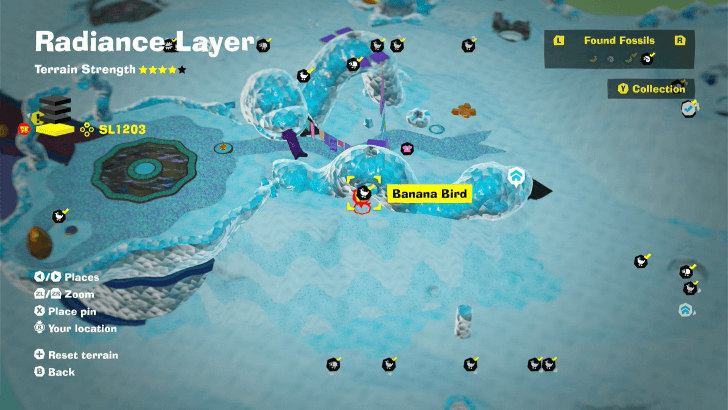
Just behind the stone snake structure behind the Style Shop in the Hiss Hiss Oasis. |
||
 |
 |
|
|
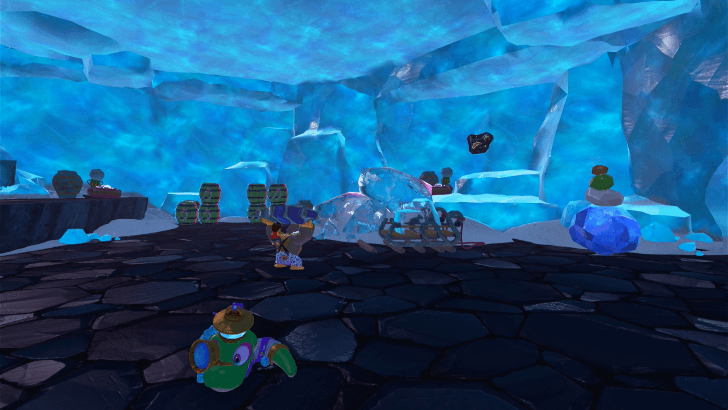
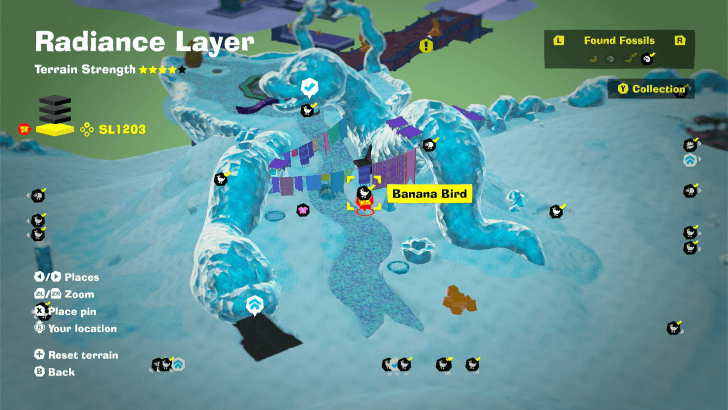
Beneath the Oasis is an underground storage chamber. This fossil is on the wall of the storage chamber. |
||
 |
 |
|
|
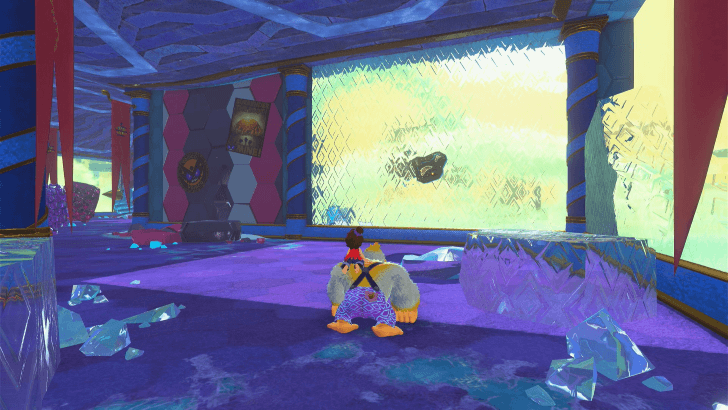
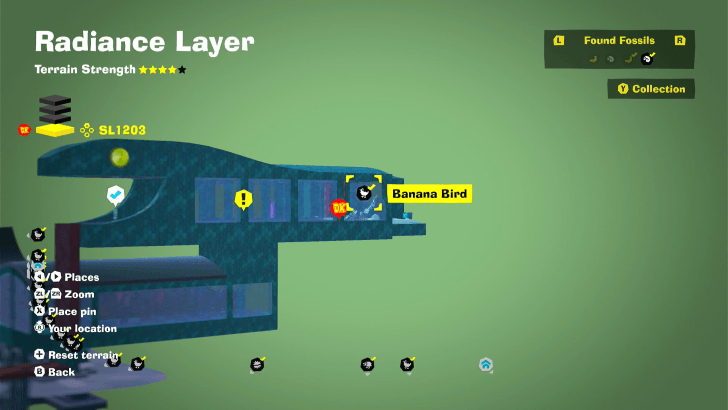
After arriving at the Window Viper, this fossil can be found embedded in a window right in view. |
||
 |
 |
|
|
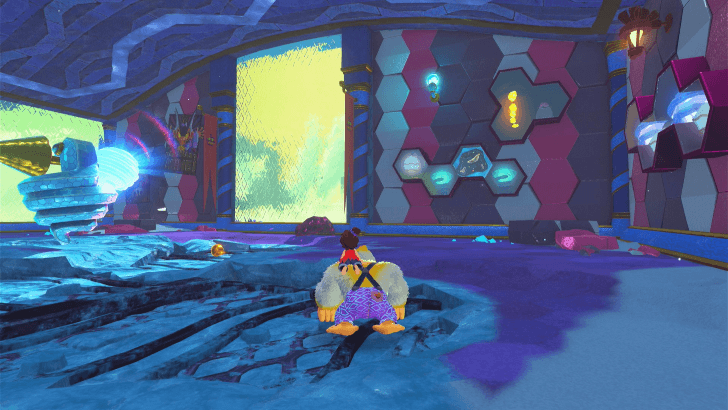
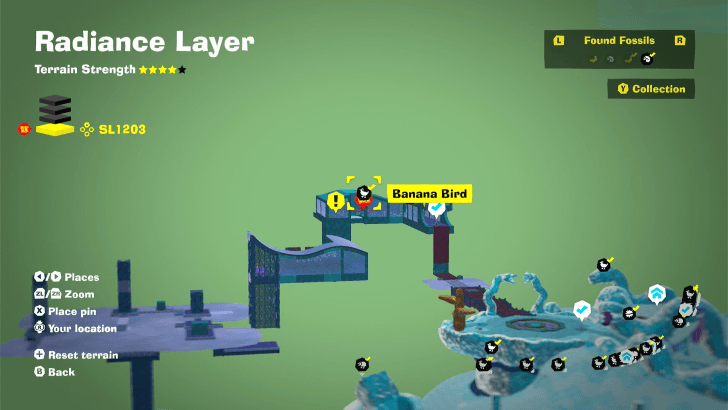
In a frame in the room with the sun switch in the highest floor of the Window Viper. Beware of nearby Crockoids. |
||
 |
 |
|
|
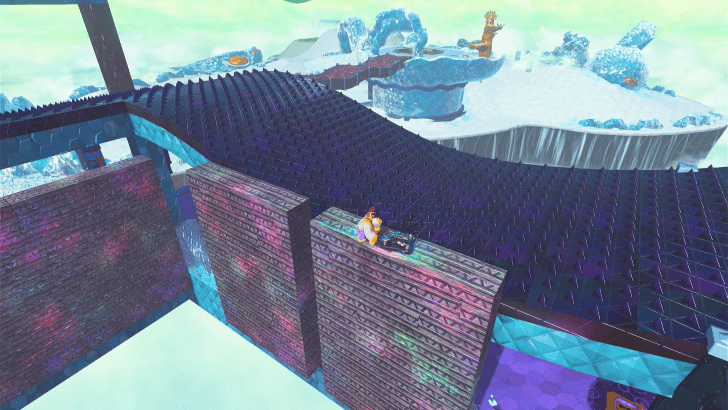
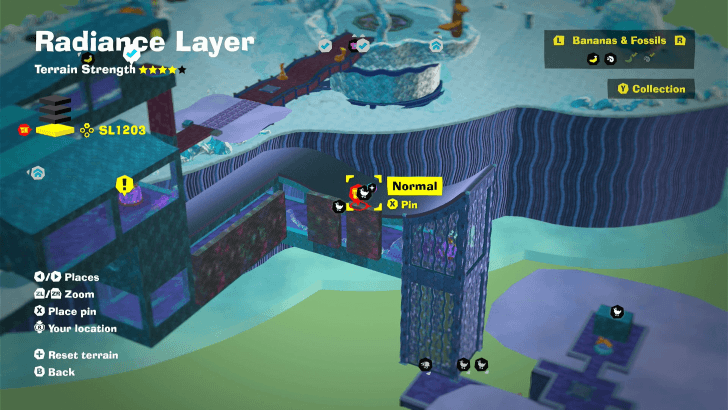
On top of a moving concrete wall near the tail end of the Window Viper area. |
||
 |
 |
|
|
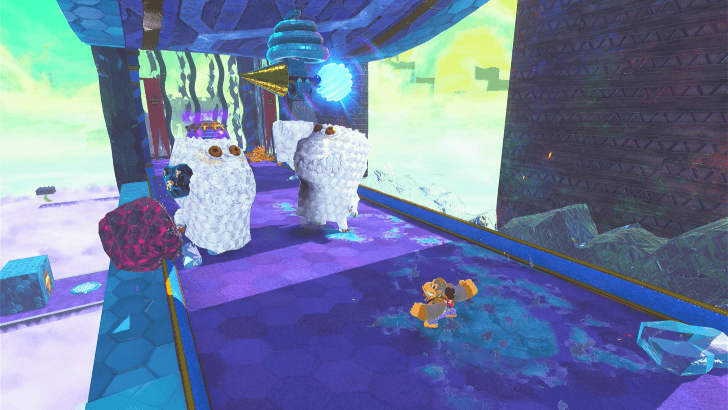
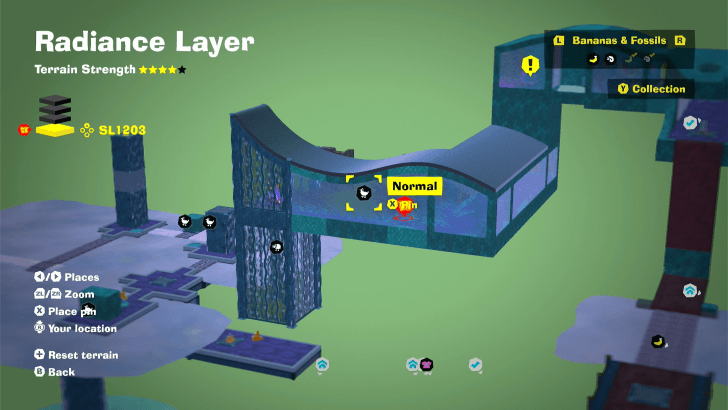
On the side of a Crockoid on the tail-end corridor of the Window Viper area. You'll have to manipulate the light and shadows to render the Crockoid vulnerable. Defeat the Crockoid to collect the fossil. |
||
 |
 |
|
|
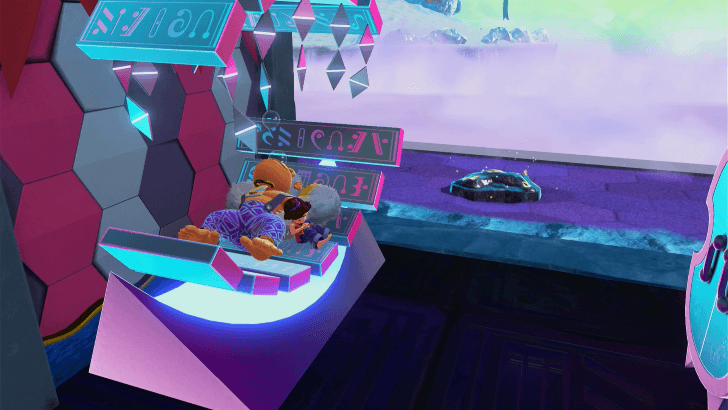
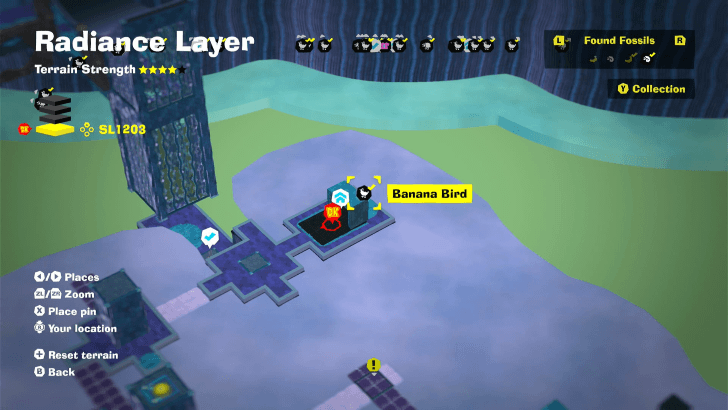
Visible after constructing the Shade Clouds Getaway. |
||
 |
 |
|
|
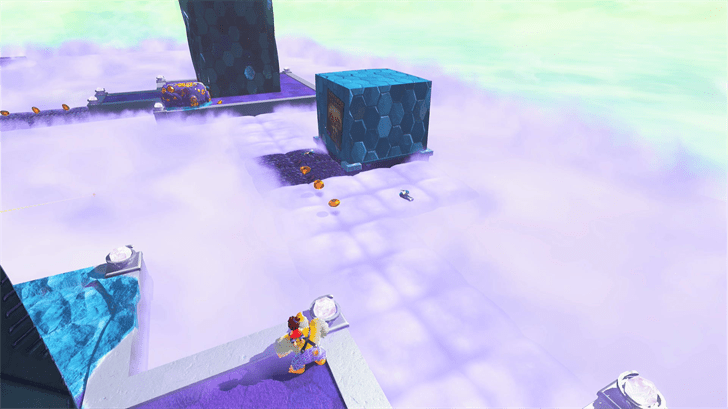
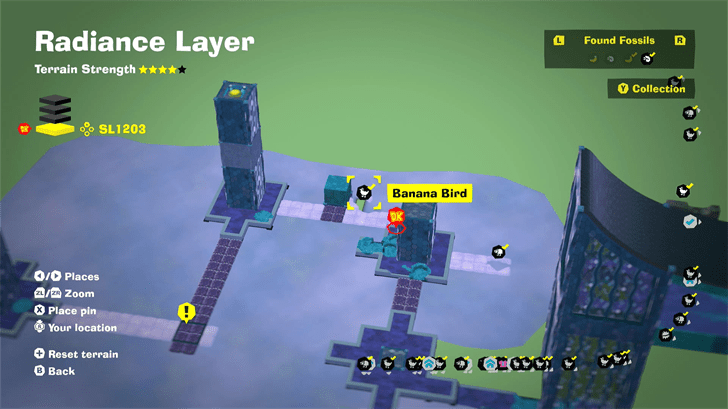
On a cloud platform along the Shade Clouds paths. You'll have to manipulate the sun direction so that a shadow is not cast on the fossil so that you can break it off of the cloud. |
||
 |
 |
|
|
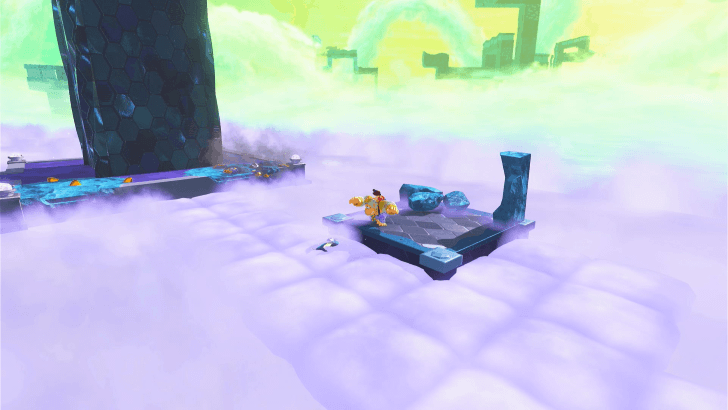
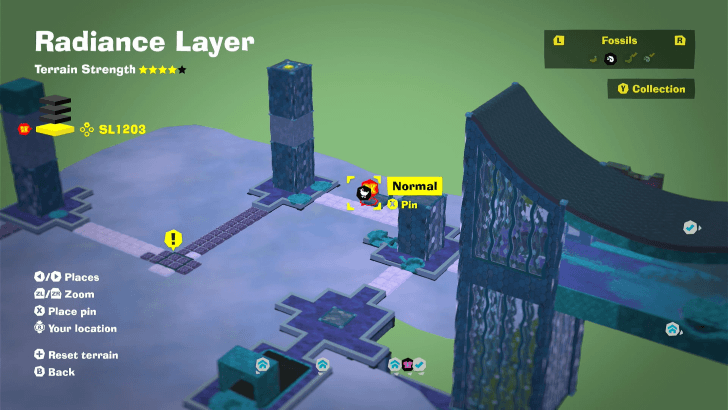
On a cloud platform along the Shade Clouds paths. You'll have to break the nearby stone so its shadow is not cast on the fossil so that you can break it off of the cloud. |
||
 |
 |
|
|
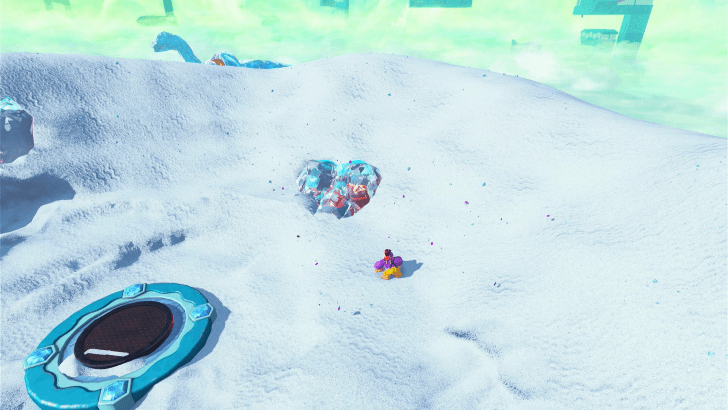
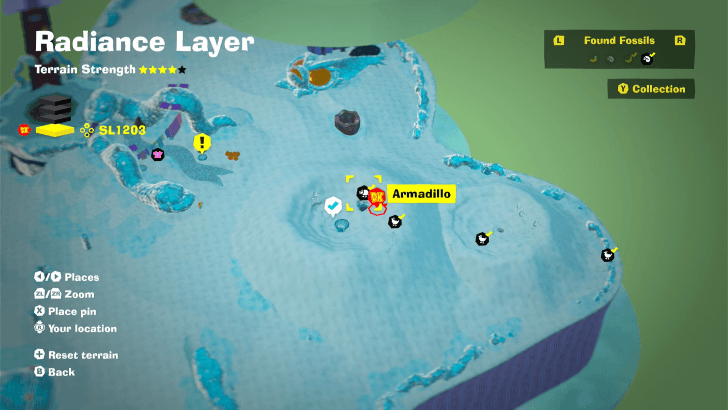
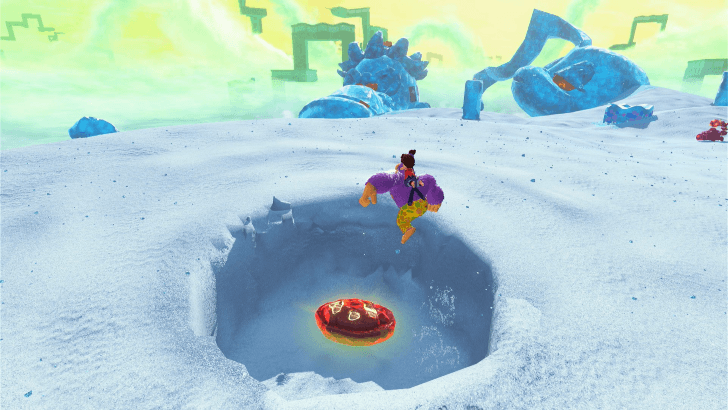
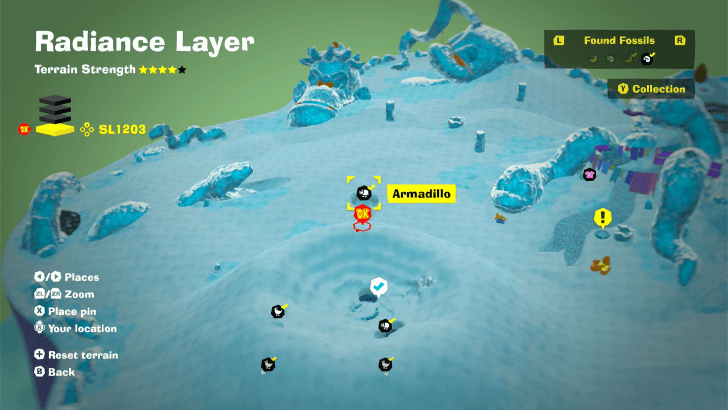
When you drop into Serpent Sands, there is Voided Terrain nearby. Within this voided terrain is an Armadillo Fossil. Clear the Voided Terrain to dig up this fossil. |
||
 |
 |
|
|
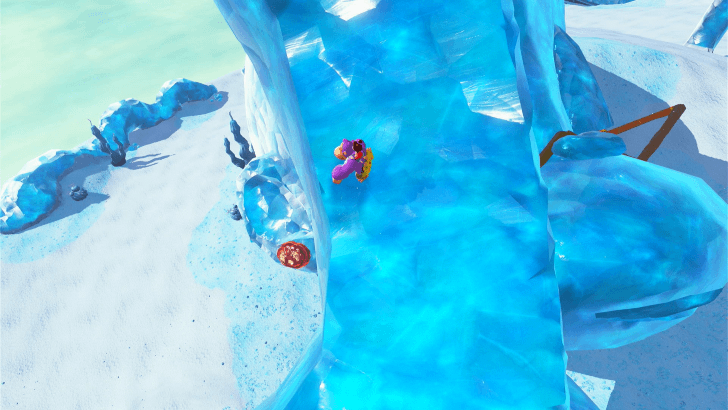
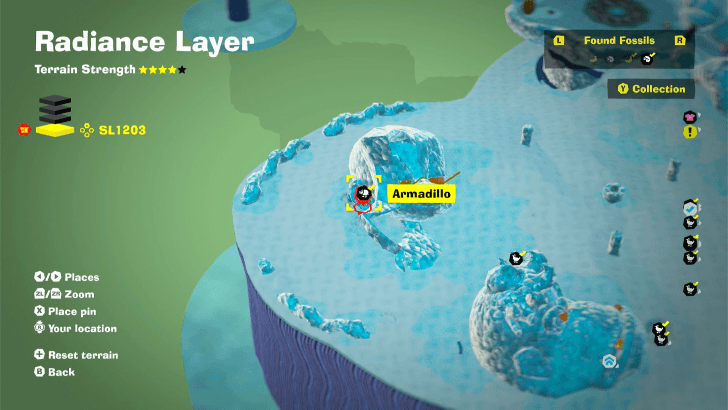
Beneath the surface of the sands in the clearing as you move towards the large stone sculptures of Grumpy Kong and Poppy Kong's faces. There is a slight circular pattern on the sand that hints at this fossil's location. |
||
 |
 |
|
|
On the ear section of the stone sculpture of Poppy Kong's face. |
||
 |
 |
|
|
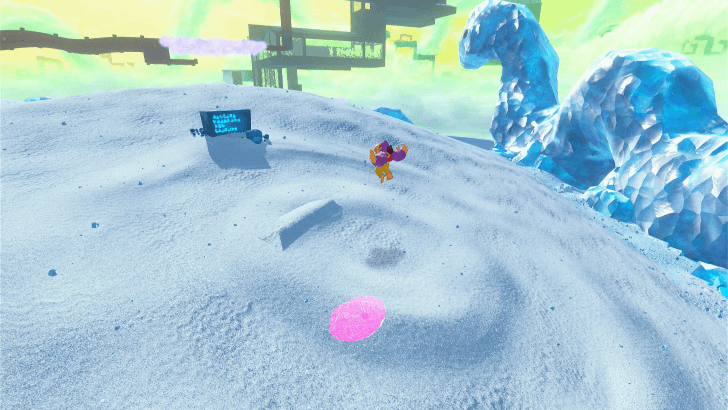
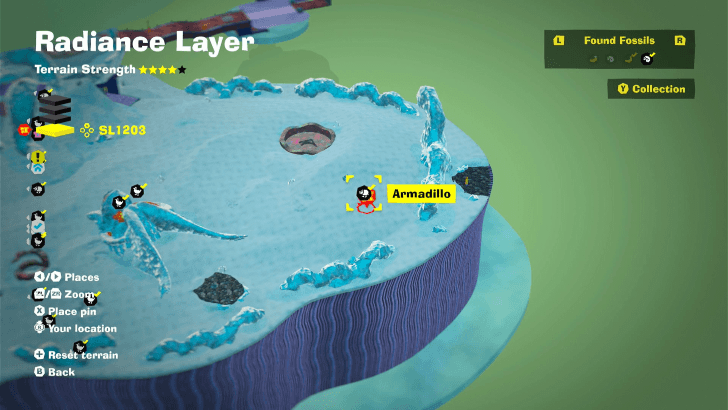
Beneath the surface of the sands on a dune as you approach the Desert Outskirts Getaway. There is a slight circular pattern on the sand that hints at this fossil's location. |
||
 |
 |
|
|
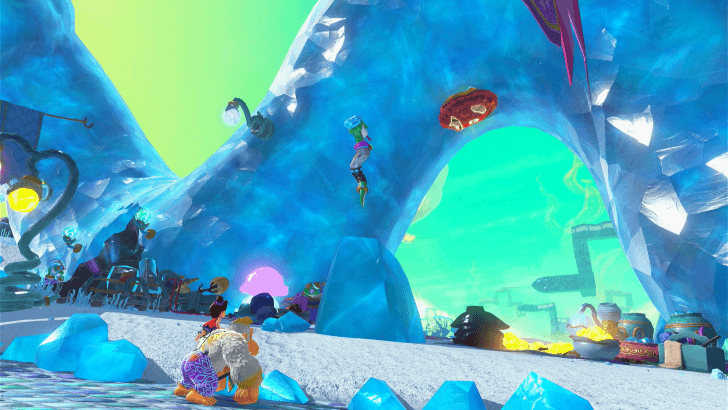
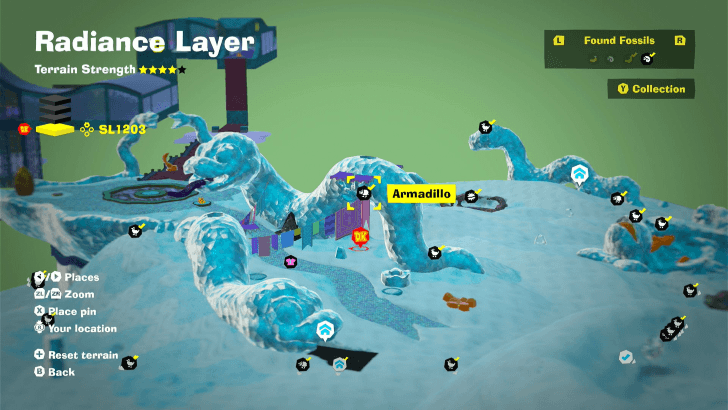
On the underside of a stone snake structure across the Style Shop in the Hiss Hiss Oasis. |
||
 |
 |
|
|
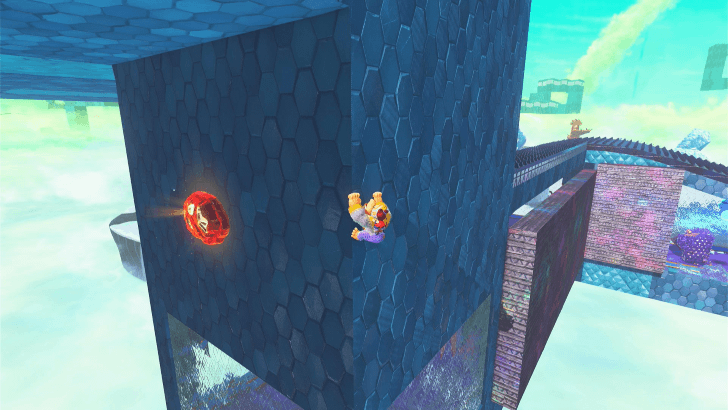
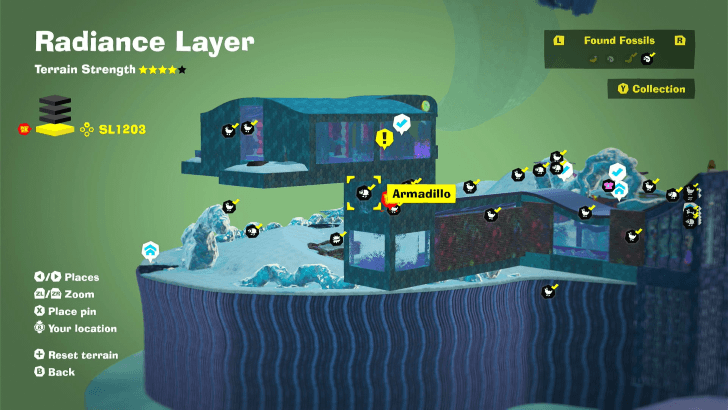
On the outside wall after the first descent of the Window Viper area. |
||
 |
 |
|
|
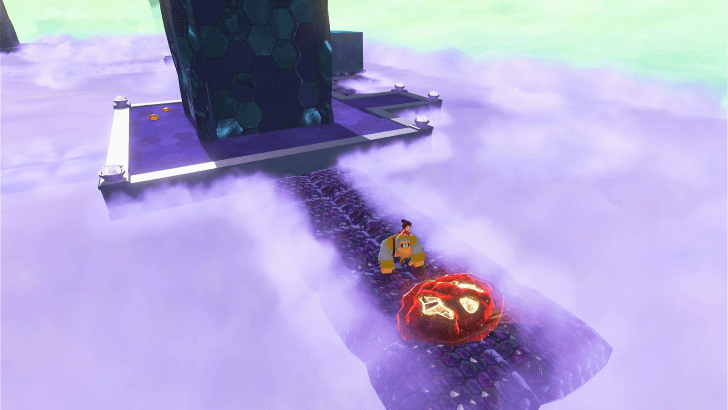
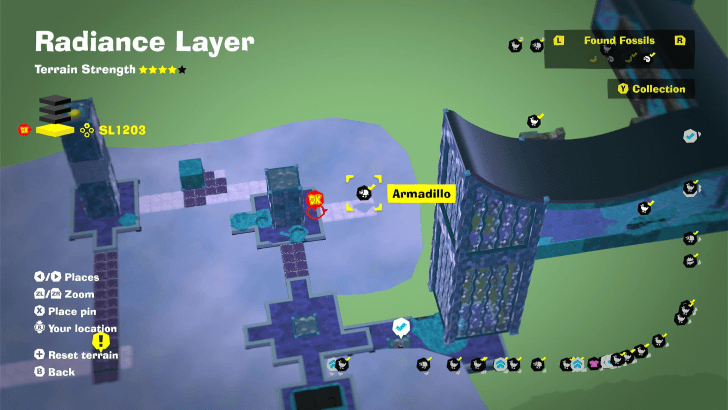
On a cloud platform along the Shade Clouds paths. You'll have to manipulate the sun direction so that a shadow is not cast on the fossil so that you can break it off of the cloud. |
||
 |
 |
|
|
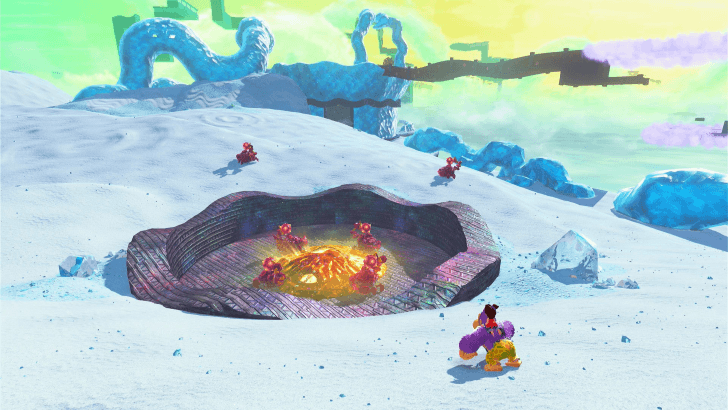
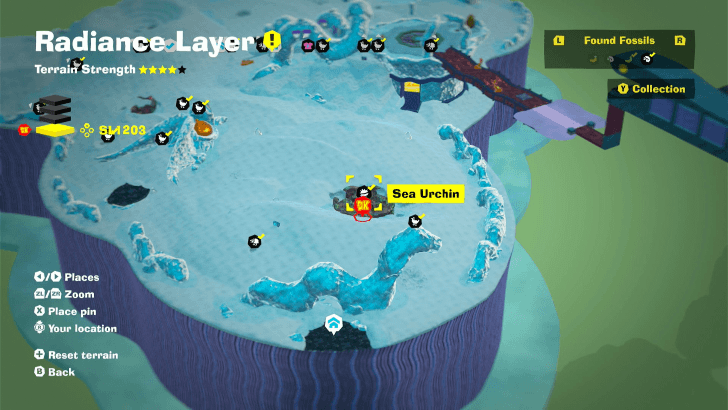
In the middle of a large concrete platform amidst the dunes near the Desert Outskirts Getaway. You'll have to clear away the concrete to unearth the Sea Urchin fossil, but beware of the nearby enemies. |
||
SL 1204 Fossil Locations
| Overworld View | Map Location | |
|---|---|---|
 |
 |
|
|
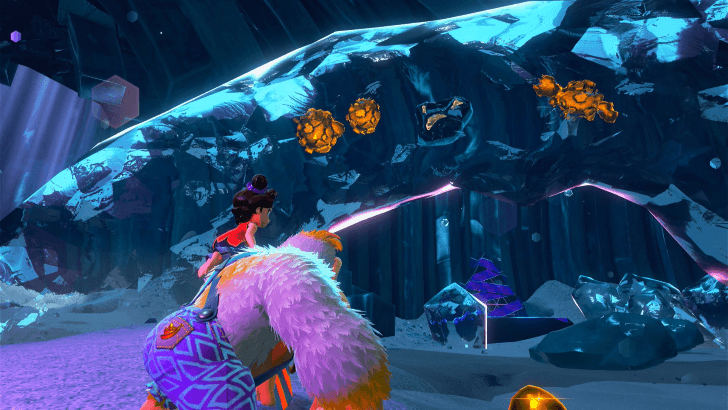
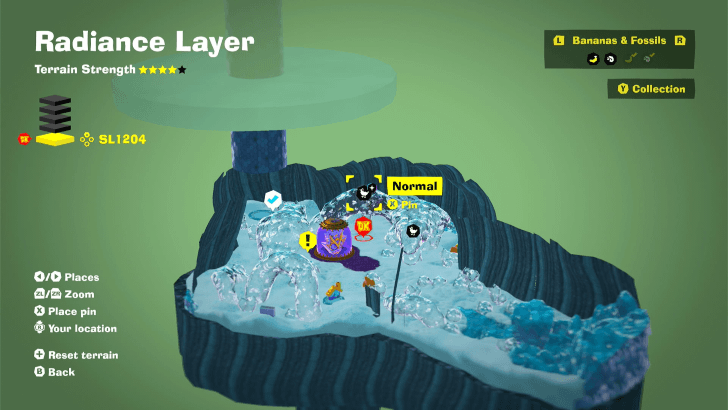
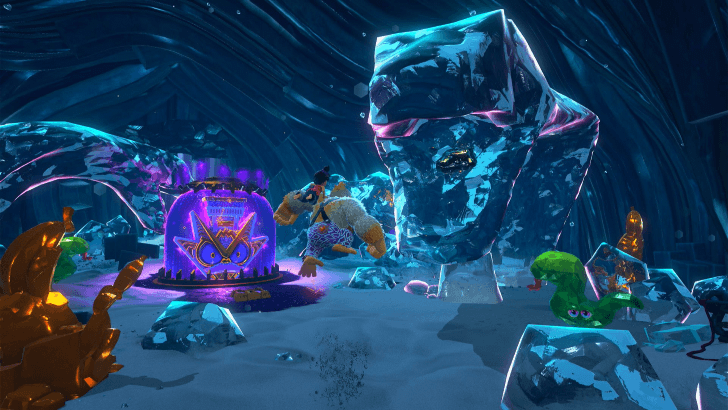
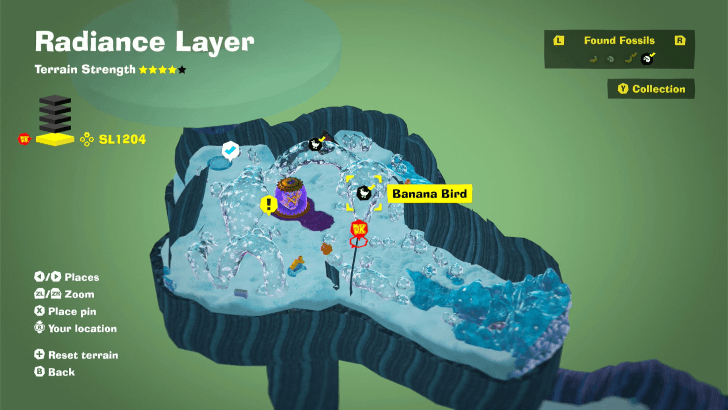
In the Crystal Cobra Den, embedded in a curved crystal near the entrance to the nearby Challenge Ruins. |
||
 |
 |
|
|
In the Crystal Cobra Den, in the mouth of the Crystal Cobra structure. |
||
Radiance Layer Checkpoints
All Checkpoint Locations
| Overworld View | Map Location | |
|---|---|---|
 |
 |
|
|
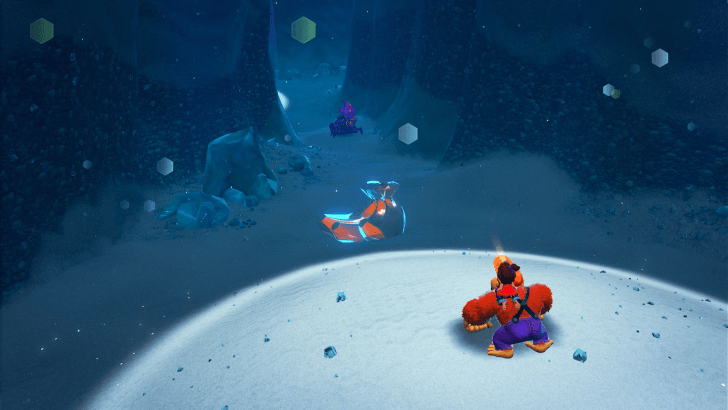
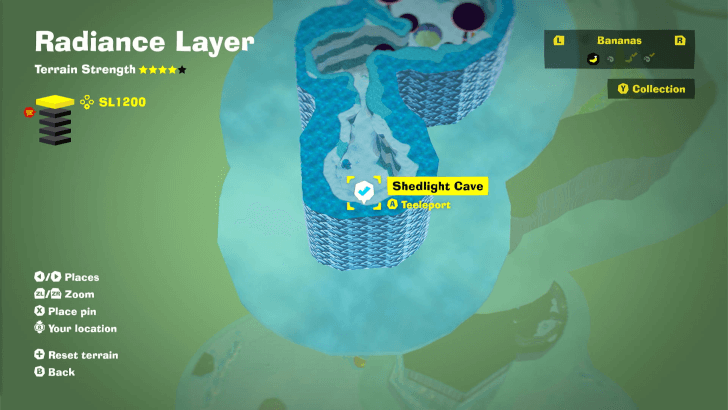
Shedlight Cave Checkpoint (SL 1200)
This is the starting point of the Radiance Layer upon dropping down from the Racing Layer. |
||
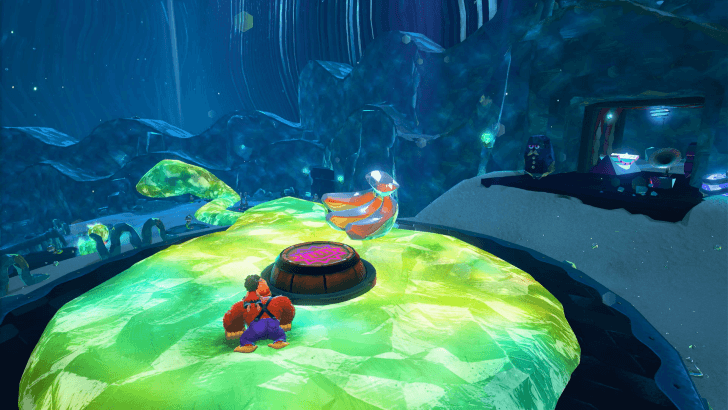 |
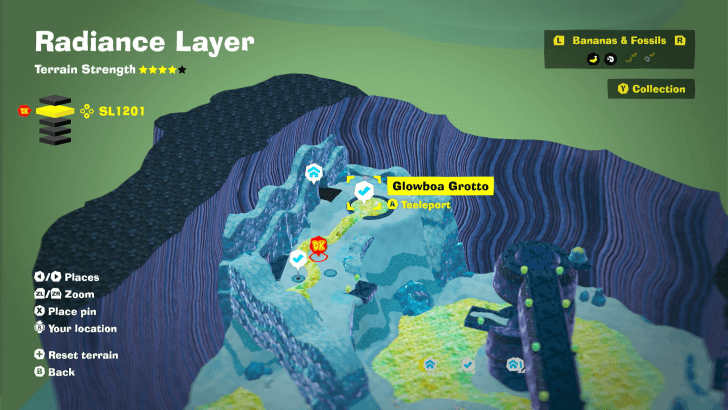 |
|
|
Glowboa Grotto Checkpoint (SL 1201)
This is where you land upon dropping down from Sublayer 1200. |
||
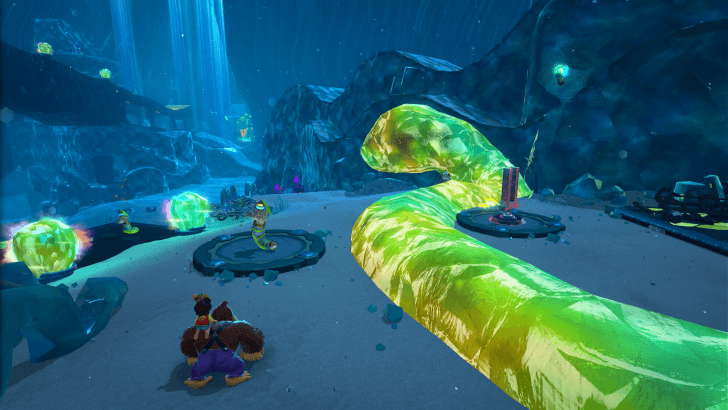 |
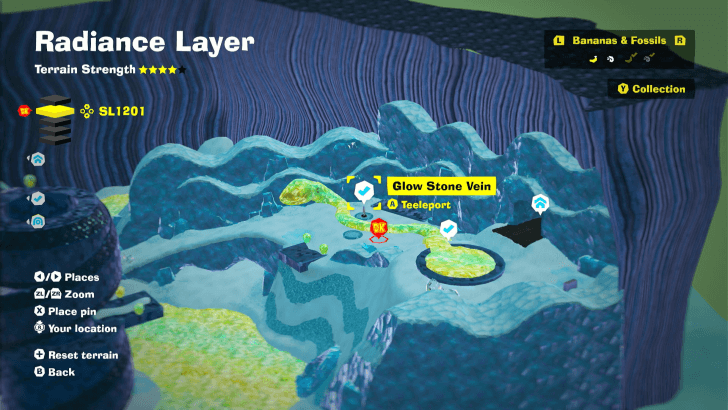 |
|
|
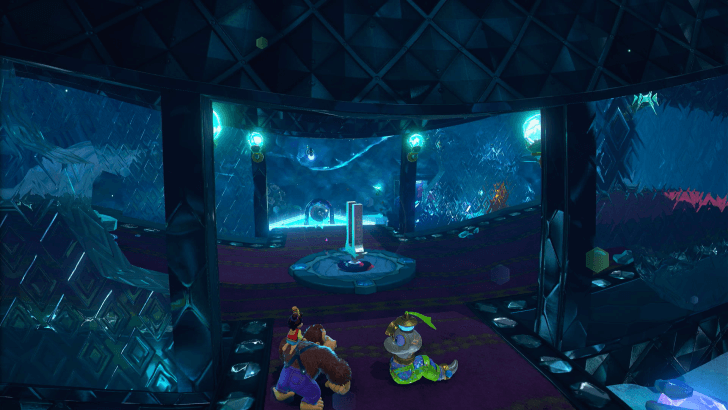
Glow Stone Vein Checkpoint (SL 1201)
Located at Glowboa Grotto. |
||
 |
 |
|
|
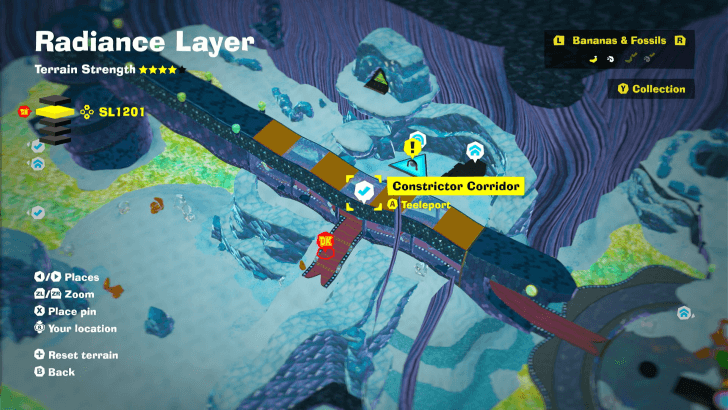
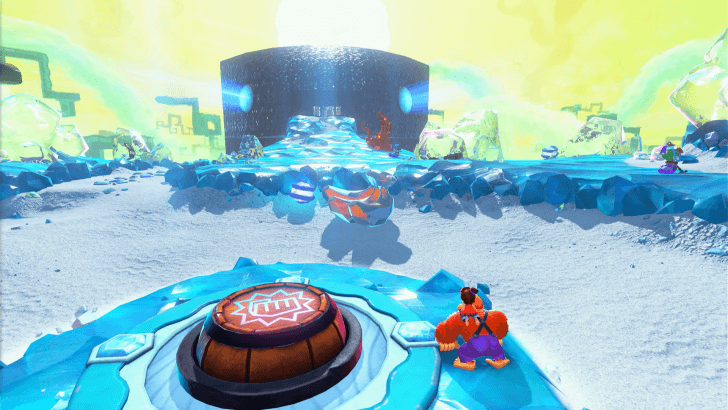
Constrictor Corridor Checkpoint (SL 1201)
Located near the Radiance Layer Warp Gong. |
||
 |
 |
|
|
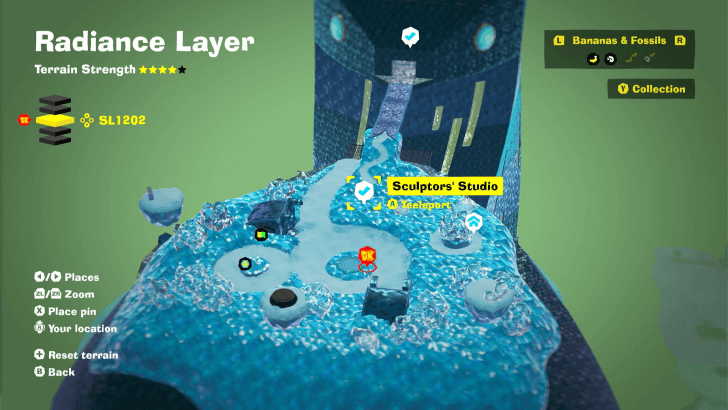
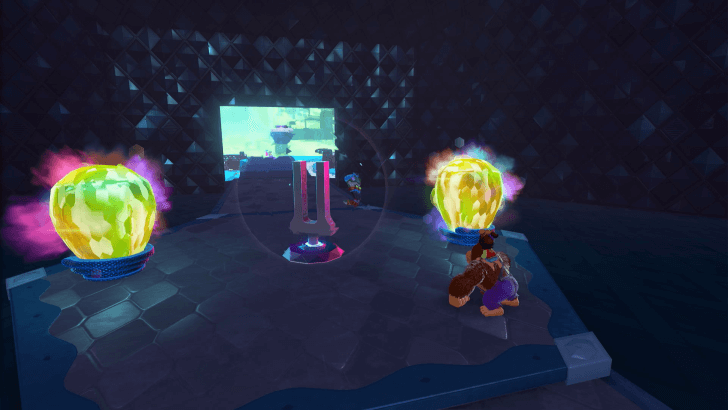
Sculptors' Studio Checkpoint (SL 1202)
This is where you land upon dropping down from Sublayer 1201. |
||
 |
 |
|
|
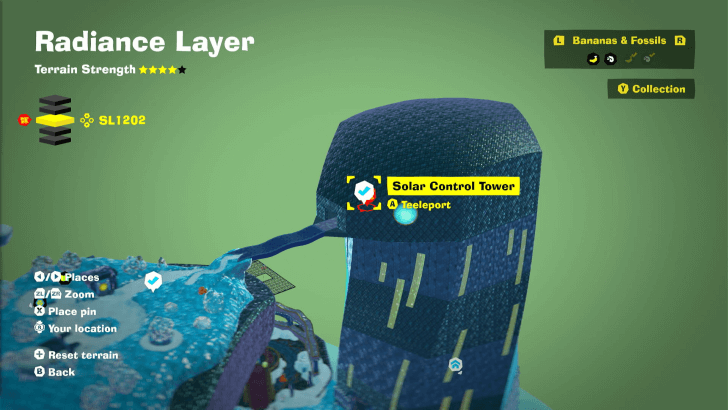
Solar Control Tower Checkpoint (SL 1202)
Located across the bridge from the Sculptors' Studio. |
||
 |
 |
|
|
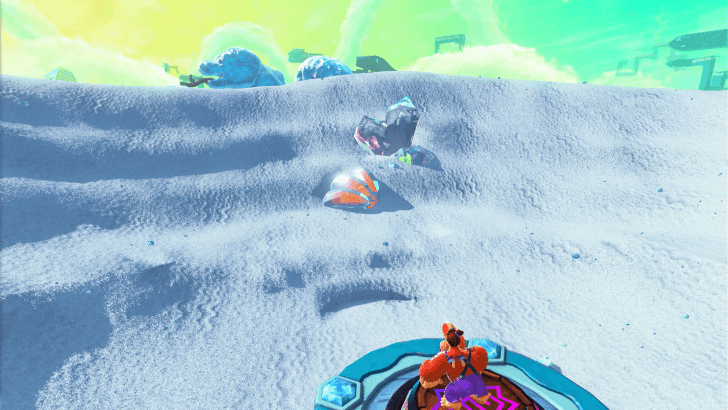
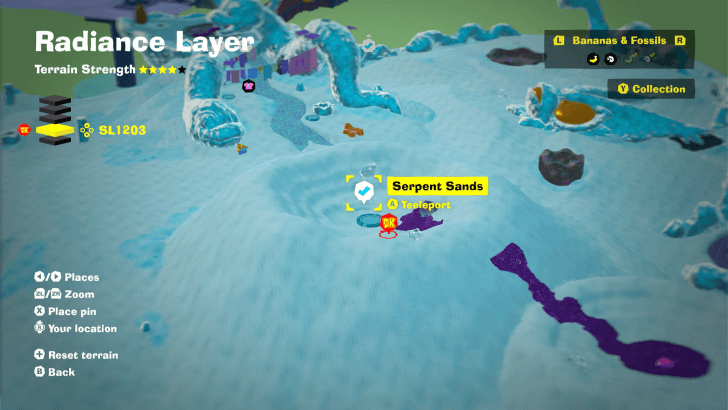
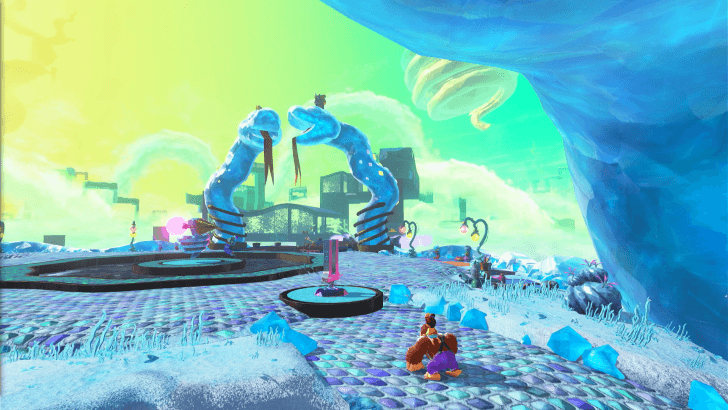
Serpent Sands Checkpoint (SL 1203)
This is where you land upon dropping down from Sublayer 1202. |
||
 |
 |
|
|
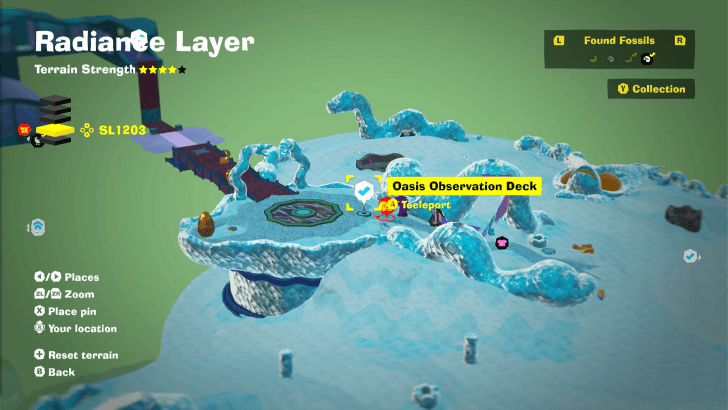
Oasis Observation Deck Checkpoint (SL 1203)
Located near the Serpent Sands and the blue snake structures. |
||
 |
 |
|
|
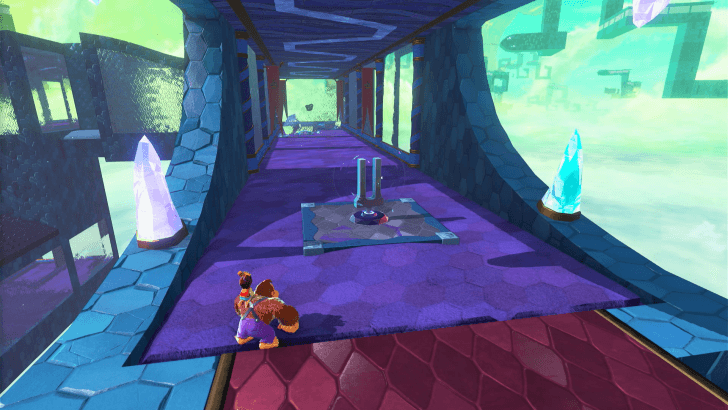
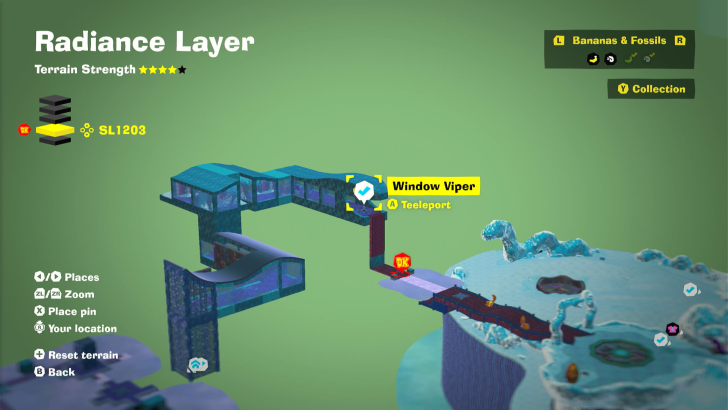
Window Viper Checkpoint (SL 1203)
Can be reached by climbing up the wall straight ahead from the Oasis Observation Deck. |
||
 |
 |
|
|
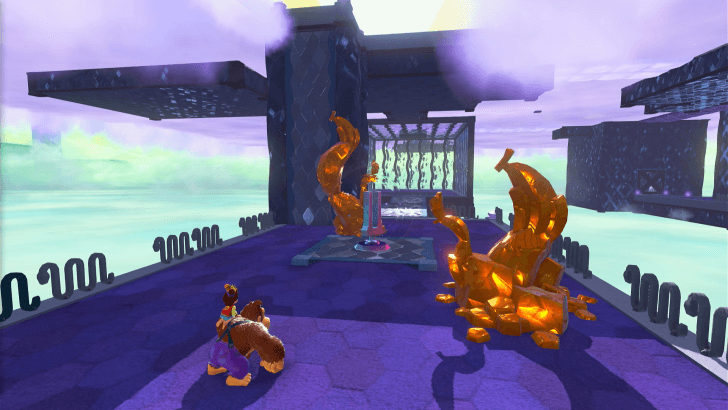
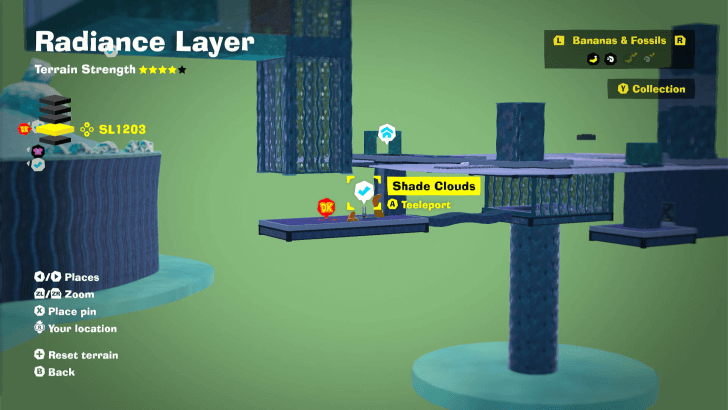
Shade Clouds Checkpoint (SL 1203)
Located near the end of the Window Viper area. |
||
 |
 |
|
|
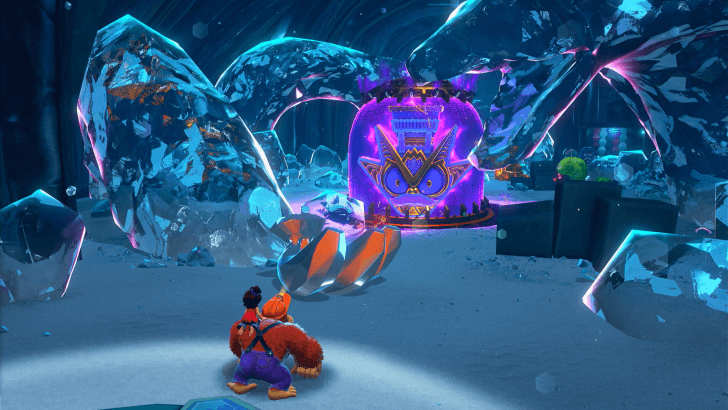
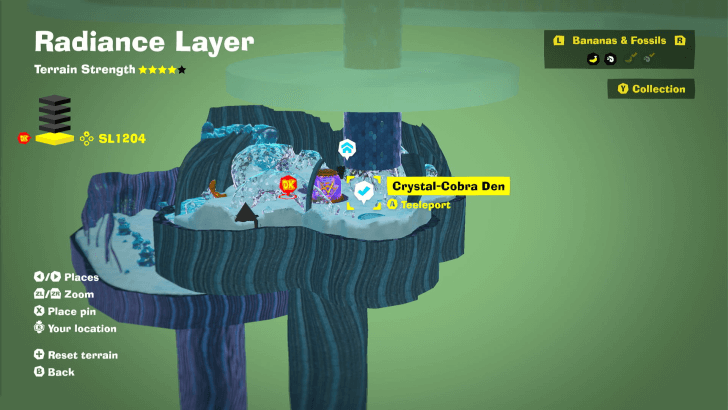
Crystal-Cobra Den Checkpoint (SL 1204)
This is where you land upon dropping down from Sublayer 1203. |
||
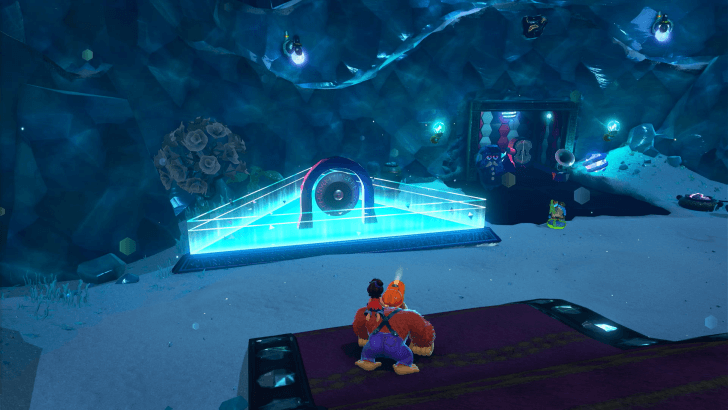
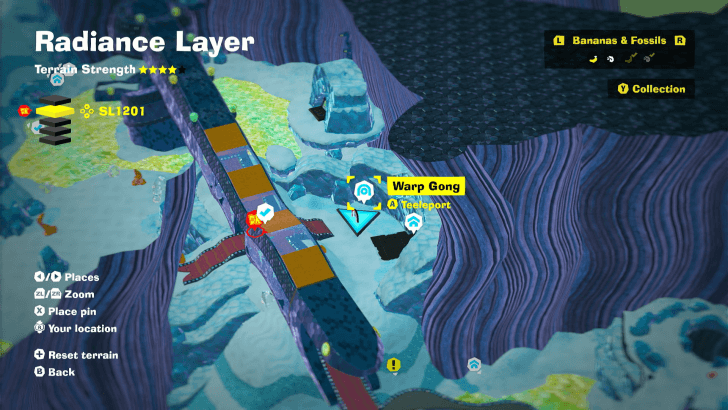
Warp Gong Location
| Layer | Overworld View | Map Location |
|---|---|---|
| SL 1201 |
 |
 |
|
Constrictor Corridor Warp Gong
Located at Constrictor Corridor beside the Getaway. |
||
How to Teeleport: Fast Travel Guide
Radiance Layer Challenges
All Challenge Locations
| Layer | Overworld View | Map Location |
|---|---|---|
| SL 1201 |
 |
 |
|
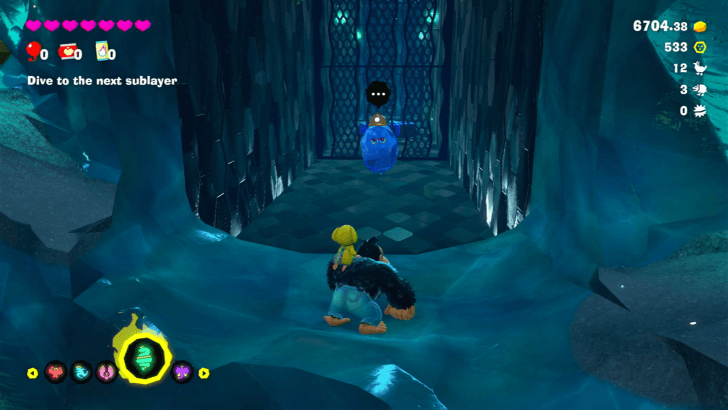
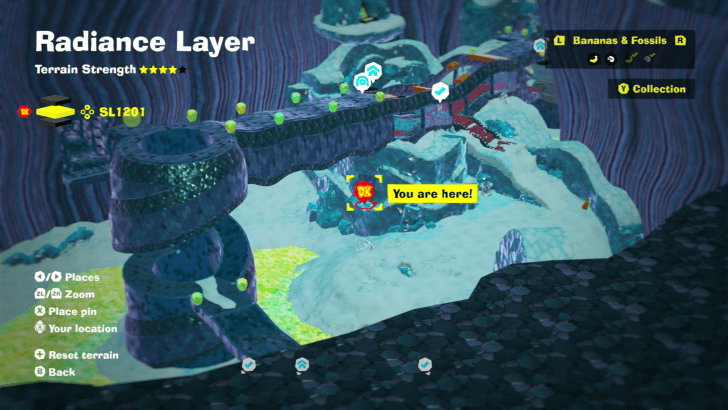
Antickoid x6 Radiance Layer Battle Challenge 1 Speak to the Constructone and pay 600 gold to open the gate to the challenge ruins. |
||
| SL 1202 |
 |
 |
|
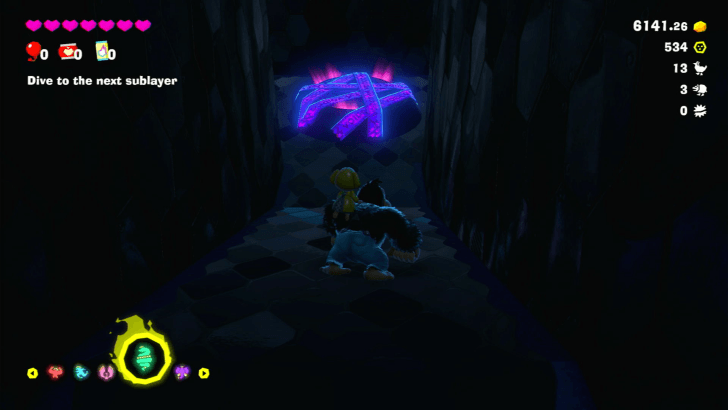
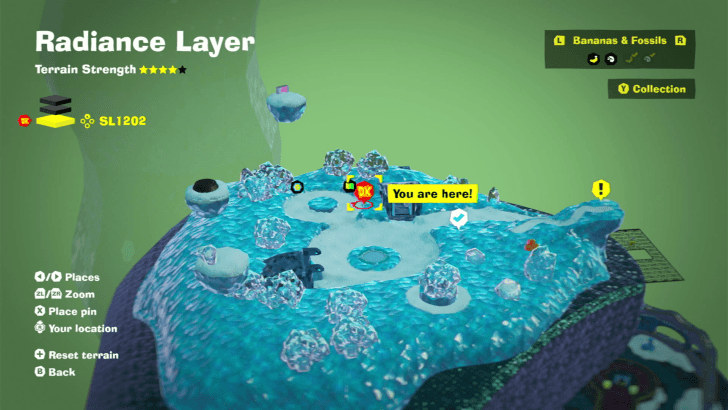
Gloominoid x3 Radiance Layer Battle Challenge 2 Inside one of the doors with a Glow Stone. Punch the Glow Stone door to access the hidden area where the challenge ruin is. |
||
| SL 1202 |
 |
 |
|
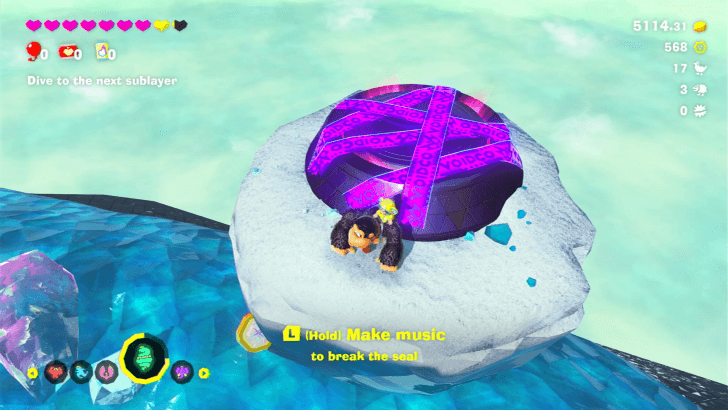
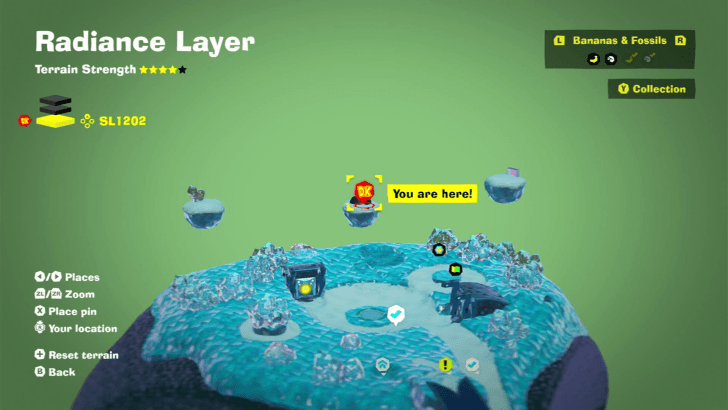
Tarpantuloid x3 Radiance Layer Battle Challenge 3 On a floating rock above the Sculptor's Studio area. |
||
| SL 1203 |
 |
 |
|
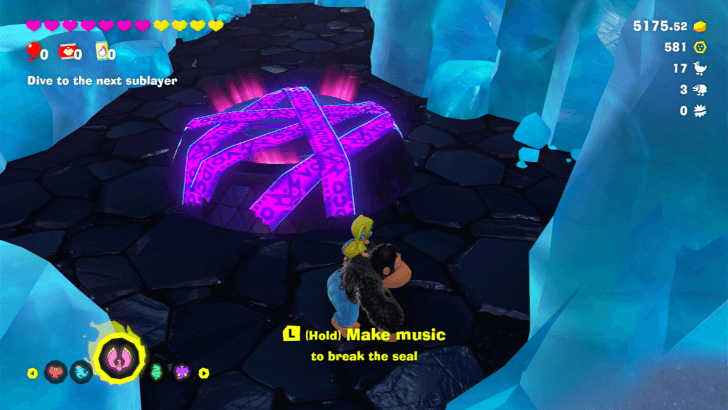
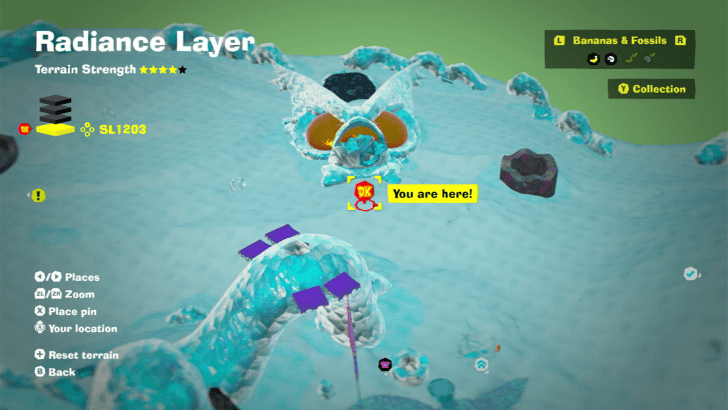
Gloominoid & Illuminoid x5 Radiance Layer Battle Challenge 4 In a cave under the Void Kong-shaped ice structure. |
||
| SL 1203 |
 |
 |
|
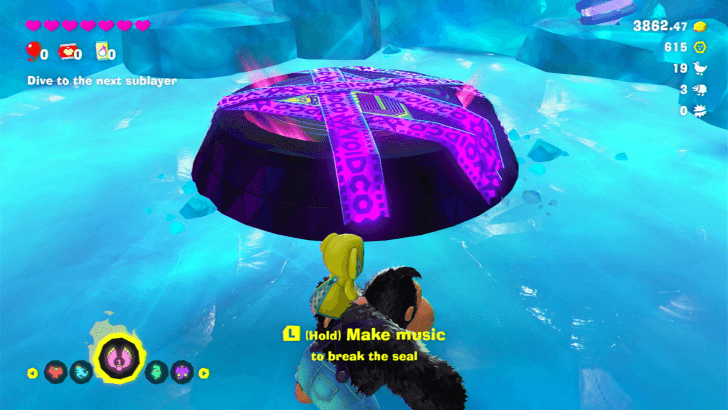
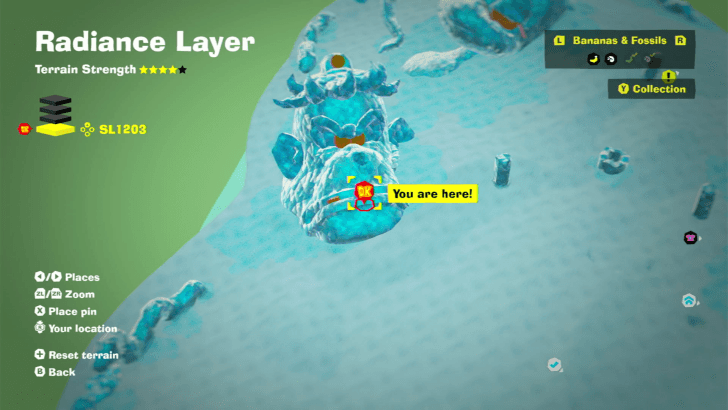
Molevoloid x2 Radiance Layer Battle Challenge 5 Make your way to the large Grumpy Kong ice structure and dig down to reach the challenge ruins. |
||
| SL 1203 |
 |
 |
|
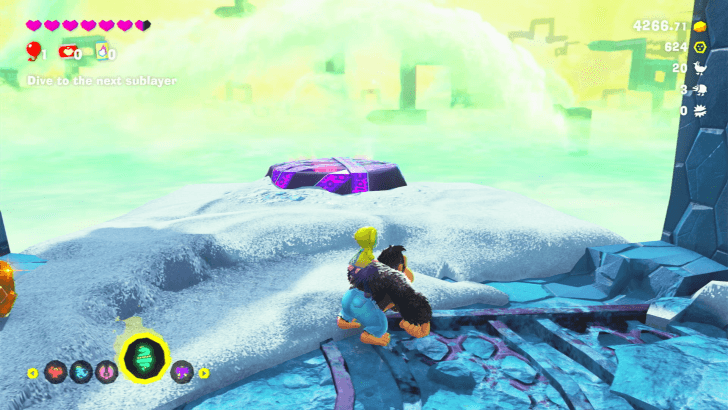
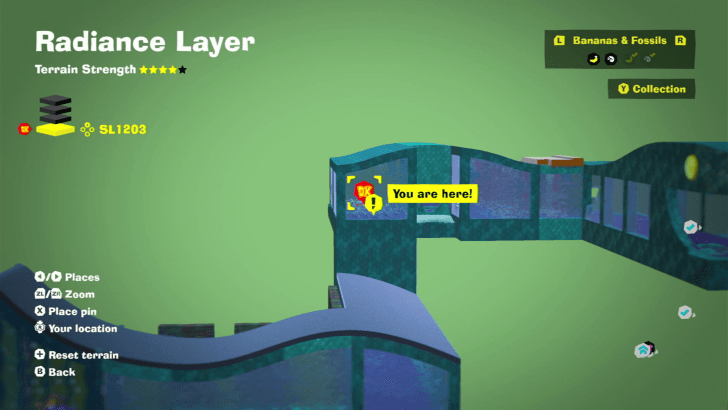
Crockoid x5 Radiance Layer Battle Challenge 6 Behind a wall in the Window Viper area. |
||
| SL 1201 |
 |
 |
|
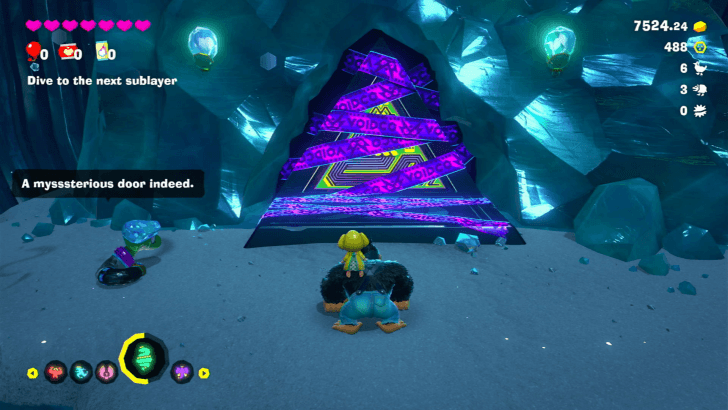
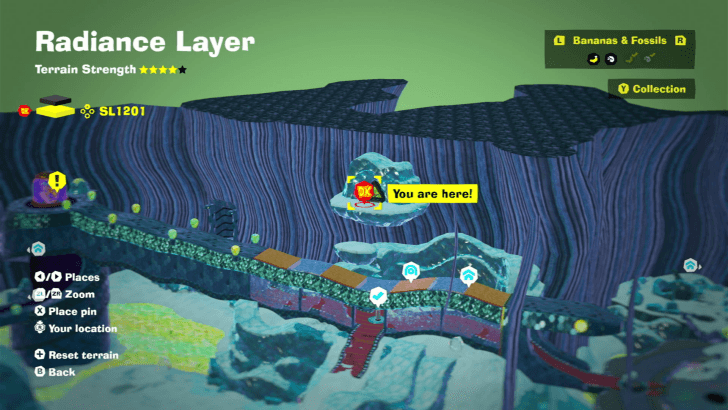
Snake Bananza: Charged Climb Radiance Layer Challenge Course 1 On the floating cave right above the Constrictor Corridor checkpoint. |
||
| SL 1201 |
 |
 |
|
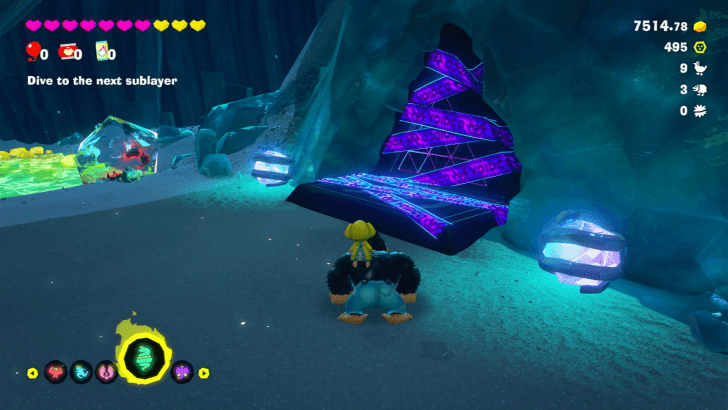
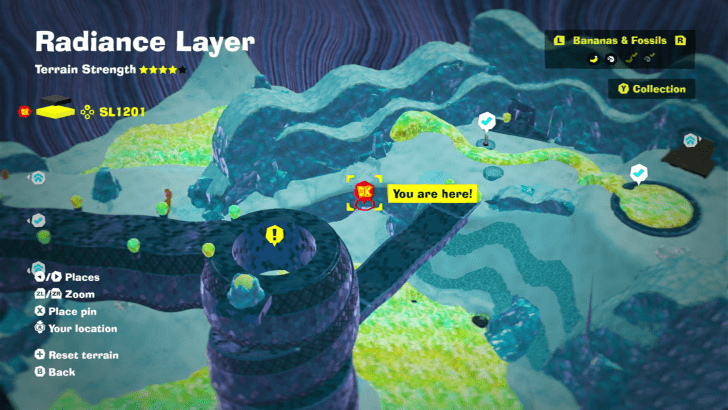
Dim Lights in the Darkness Radiance Layer Challenge Course 2 On the lower floor in Glowboa Grotto just past the Glow Stone Vein checkpoint. |
||
| SL 1202 |
 |
 |
|
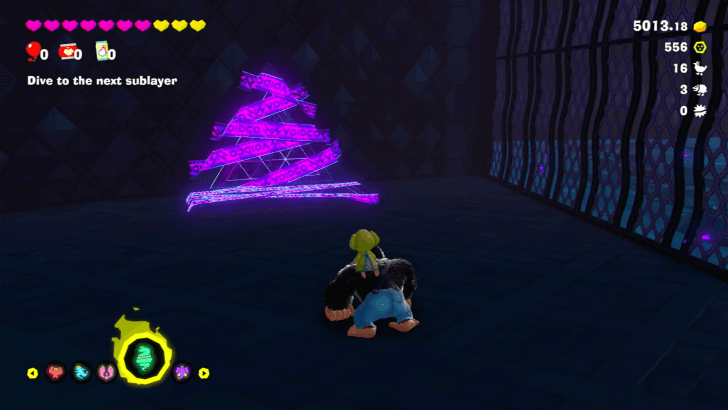
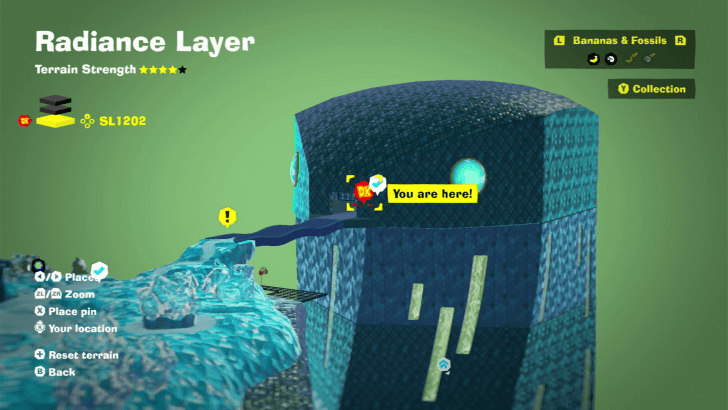
Arcade Country Radiance Layer Challenge Course 3 Located right next to the Solar Control Tower checkpoint. |
||
| SL 1203 |
 |
 |
|
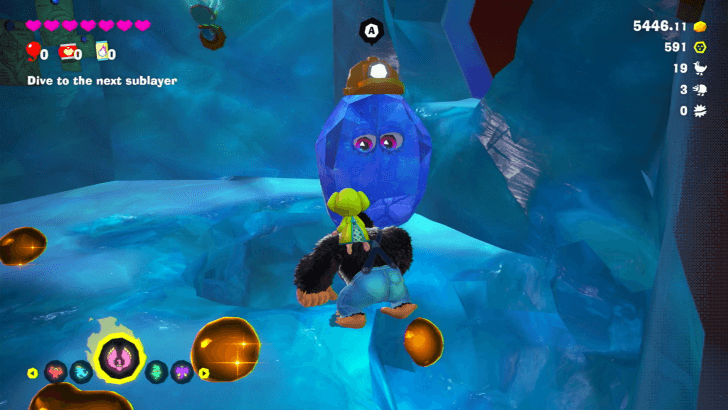
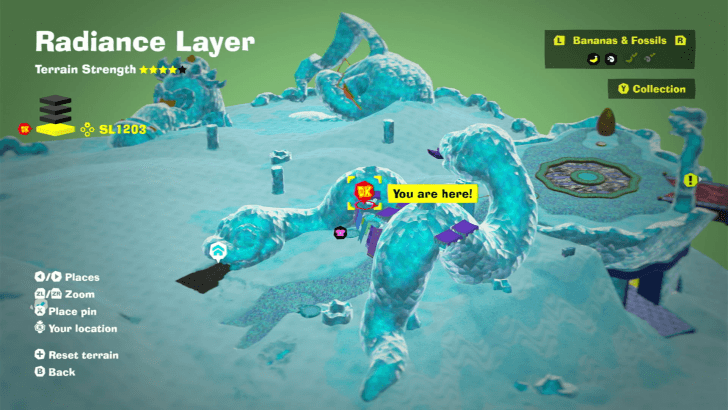
Surfing in Shadow Radiance Layer Challenge Course 4 Speak to the Constructone in the small house to the right of the Style Shop and pay it 1000 gold to clear the debris to the challenge ruins on the opposite side of the road. |
||
| SL 1204 |
 |
 |
|
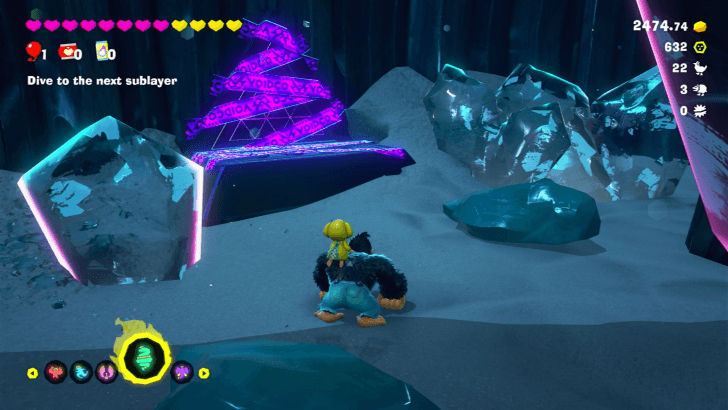
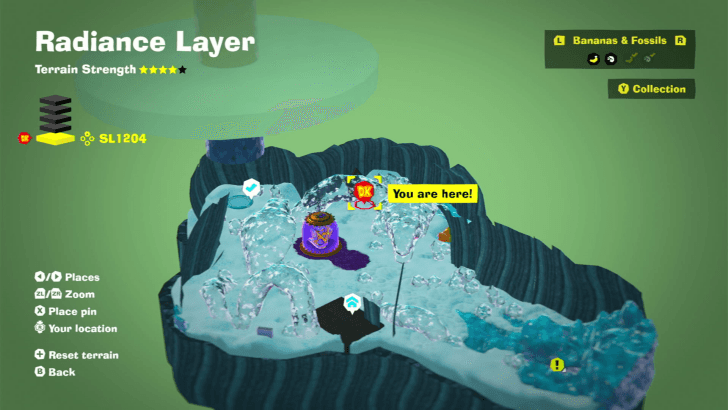
Strong, Shady Clouds Radiance Layer Challenge Course 5 Located to the right of the Void Stake. |
||
Bonus Stage Location
| Layer | Overworld View | Map Location |
|---|---|---|
| SL 1203 |
 |
|
|
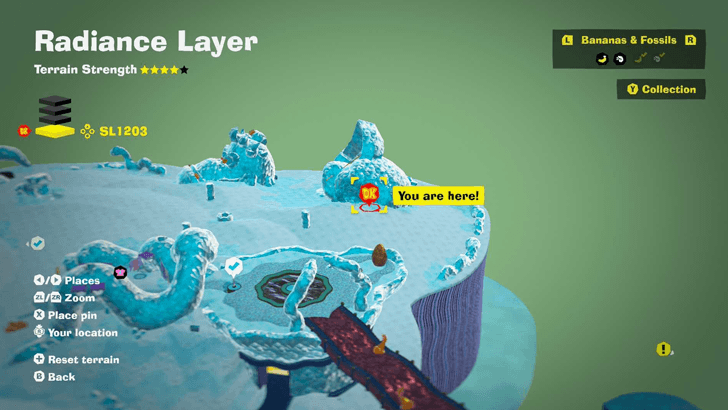
Blasting for Gold
From the Oasis Observation Deck, head towards the structure of ice shaped like Poppy Kong's head, then dig through to find the Bonus Stage. |
||
Radiance Layer Shops
Radiance Layer Style Shop
Style Shop Location
| Layer | Overworld View | Map Location |
|---|---|---|
| SL 1203 |
 |
 |
|
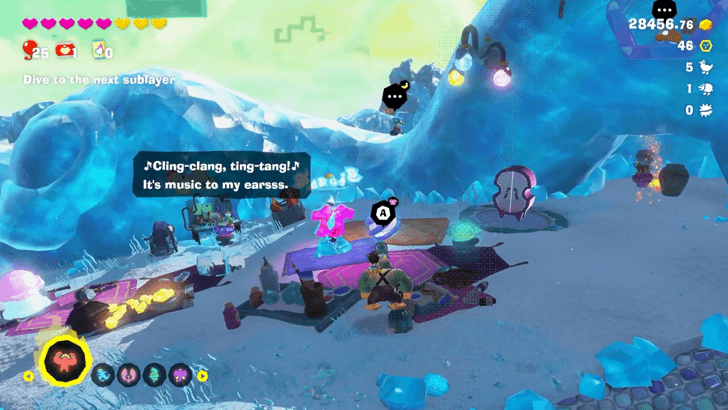
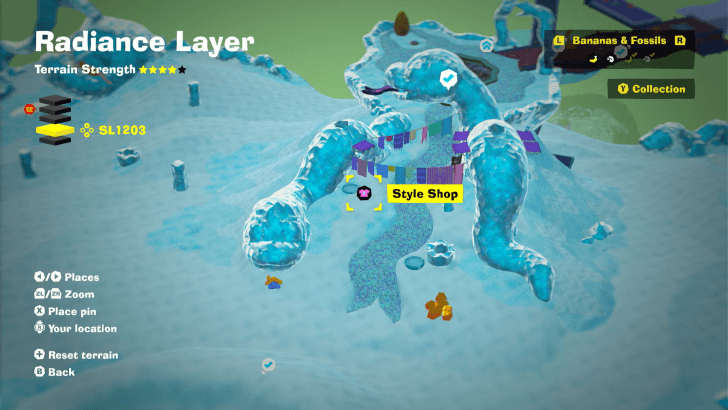
Hiss Hiss Oasis Style Shop
|
||
Available Outfits
| Name | Type | Cost | Effect | |||||||
|---|---|---|---|---|---|---|---|---|---|---|
|
|
Britches |
|
Reduces damage from enemies by 10 percent. | |||||||
|
|
Britches |
|
Reduces damage from enemies by 15 percent. | |||||||
|
|
Neckwear |
|
Increases the chance of doubling any Banandium Chips you collect by 20 percent. | |||||||
|
|
Pauline Outfits |
|
Extends your Snake Bananza time by 40 percent. | |||||||
|
|
Pauline Outfits |
|
Extends your Snake Bananza time by 40 percent. | |||||||
|
|
Pauline Outfits |
|
Extends your Snake Bananza time by 40 percent. | |||||||
|
|
Fur Color |
|
Tangy and refreshing, like an ice-cold beverage on a hot day. | |||||||
|
|
Fur Color |
|
Sparkly and shiny, like an aquamarine gemstone. | |||||||
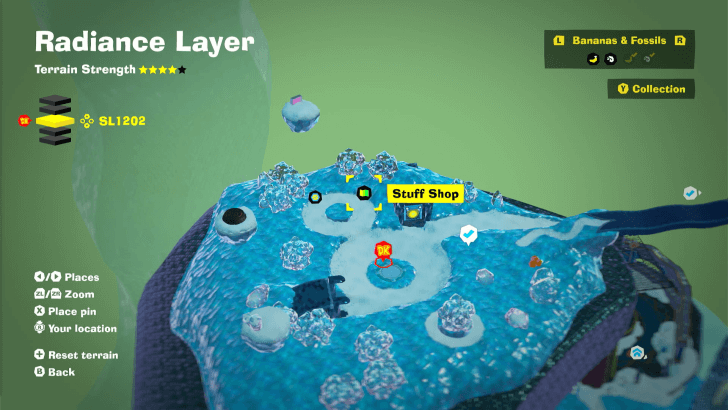
Stuff Shop Locations
| Layer | Overworld View | Map Location |
|---|---|---|
| SL 1202 |
 |
 |
|
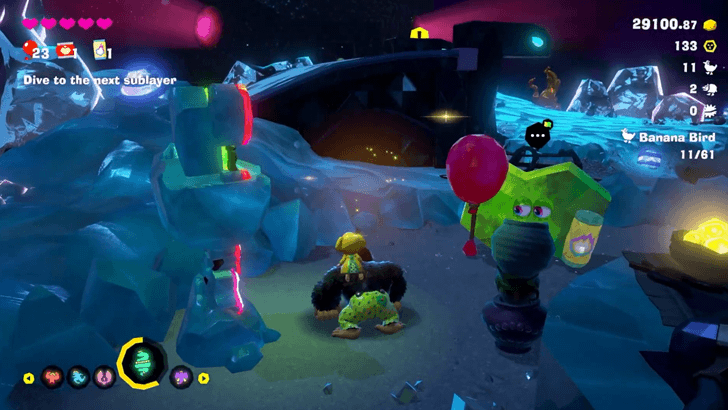
Sculptors' Studio Stuff Shop
|
||
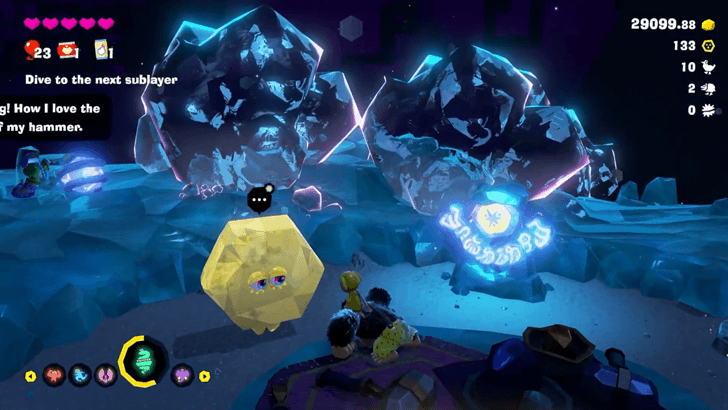
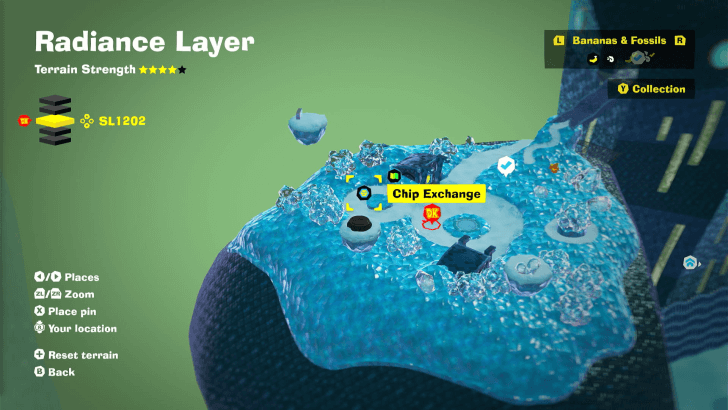
Chip Exchange Location
| Layer | Overworld View | Map Location |
|---|---|---|
| SL 1202 |
 |
 |
|
Sculptors' Studio Chip Exchange
|
||
Radiance Layer Void Stakes
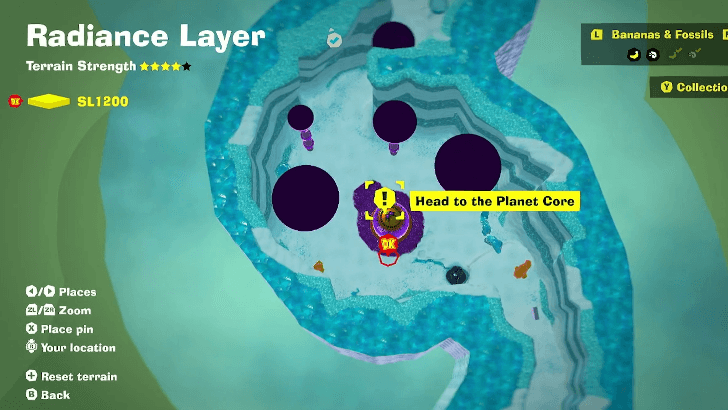
Void Stake Locations
| Layer | Overworld View | Map Location |
|---|---|---|
| SL 1200 |
 |
 |
|
Shedlight Cave Void Stake
Go past the snake NPC at the entrance. Defeat the Crockoid nearby to get the Void Key. |
||
| SL 1201 |
 |
 |
|
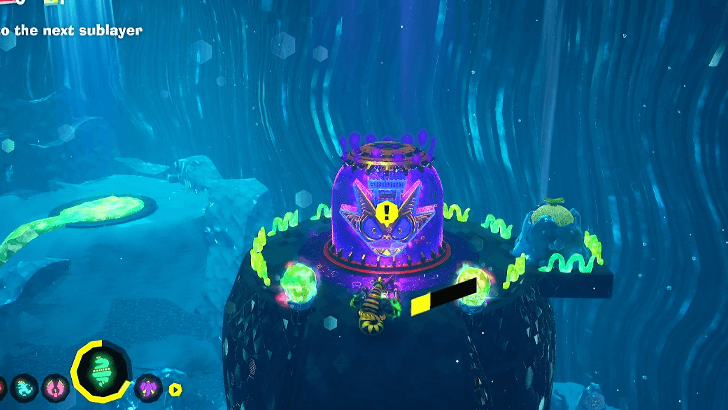
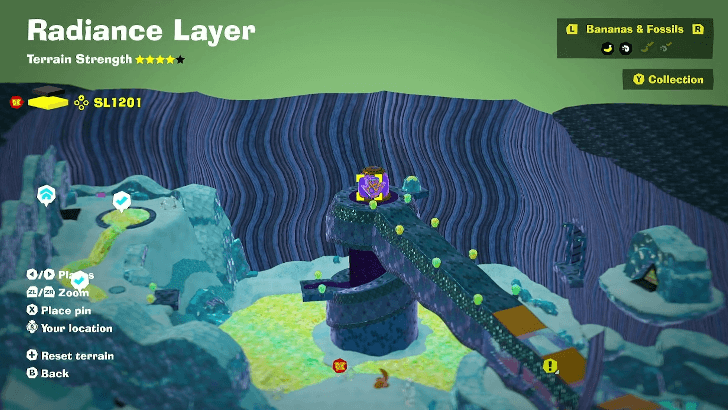
Constrictor Corridor Void Stake
Use the Snake Bananza Form to Charge Jump on top of the Constrictor Corridor. Charge Jump on top of the Void Stake to recover the key floating above it. |
||
| SL 1203 |
 |
 |
|
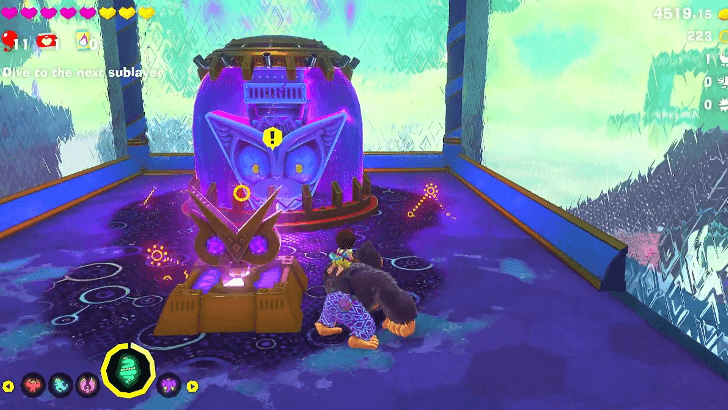
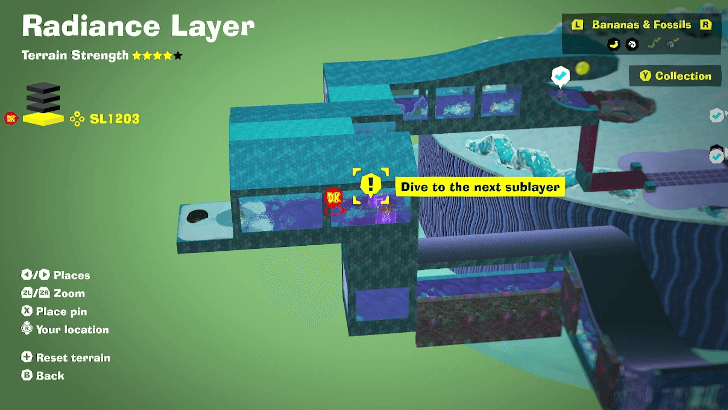
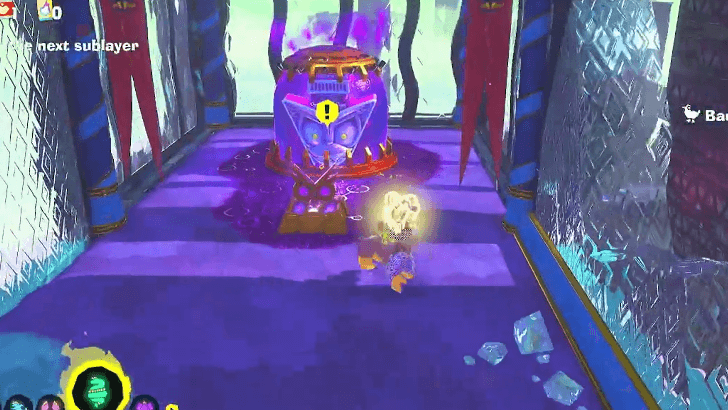
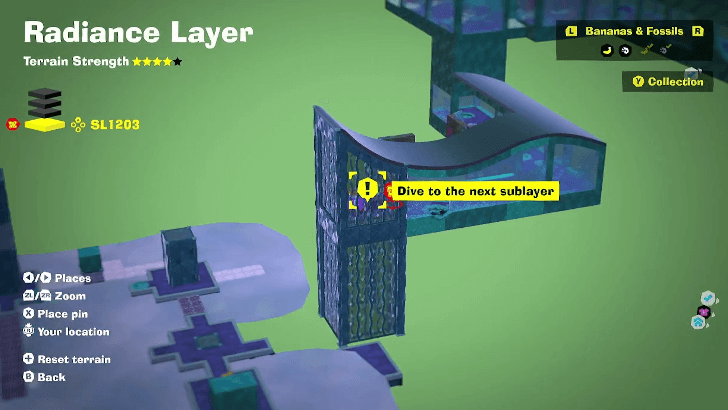
Window Viper Void Stake 1
Located at the end of the hall of the first floor of Window Viper. Defeat the Crockoid nearby to get the Void Key. |
||
| SL 1203 |
 |
 |
|
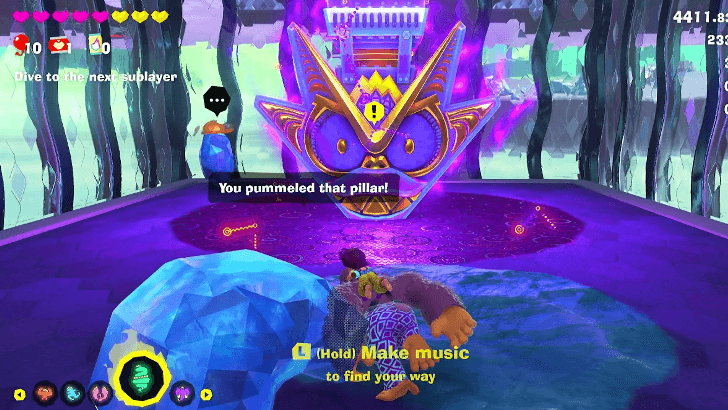
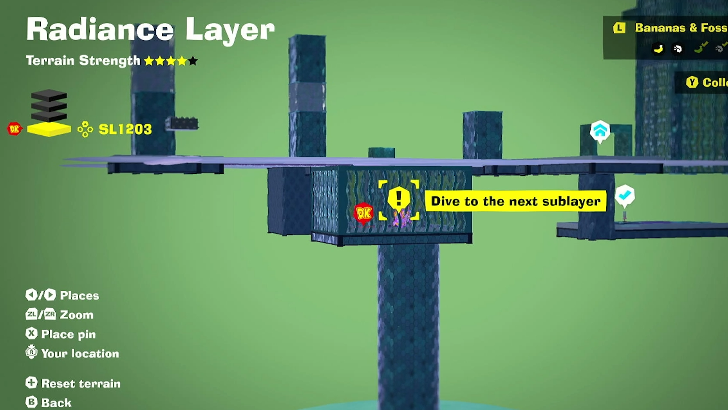
Window Viper Void Stake 2
Located at the end of the hall of the second floor of Window Viper. Defeat the Crockoid nearby to get the Void Key. |
||
| SL 1203 |
 |
 |
|
Shade Clouds Void Stake
Located in a glass room below Shade Clouds. Down Punch the box on top of the farthest tower in Shade Clouds to open the door. |
||
| SL 1204 |
 |
 |
|
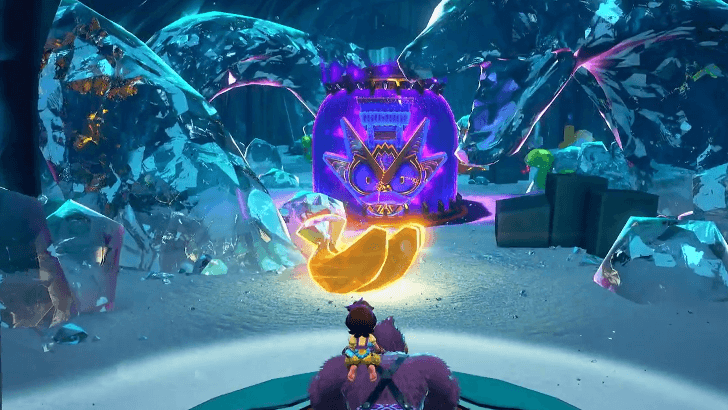
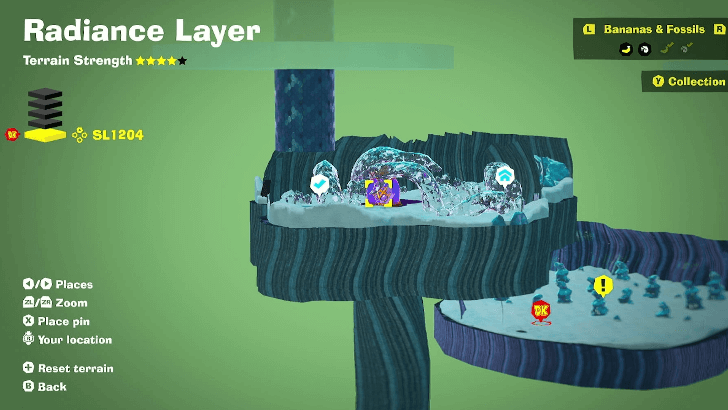
Crystal Cobra Den Void Stake
Located in the Crystal Cobra Den. This can only be unlocked during the post-game and will lead to the Feast Layer. |
||
Cranky Kong Location
Sublayer 1203
| Map / Overworld Image | Video Directions |
|---|---|
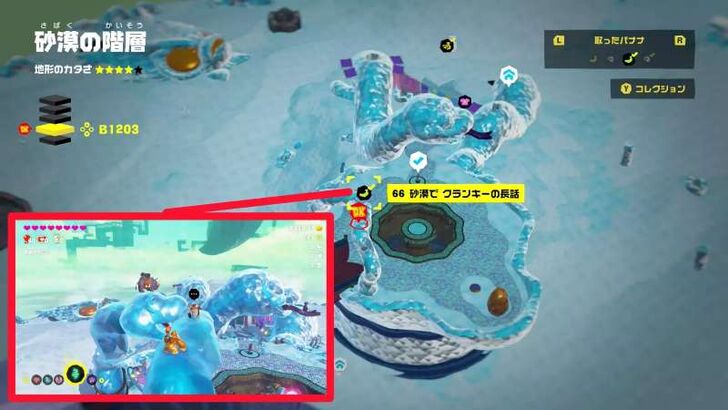 |
In SL1203, head to the serpent town plaza with a central pool. Cranky is perched atop the left icy serpent statue.
Radiance Layer Getaways
All Getaway Locations
| Map Location | Overworld Image |
|---|---|
 Radiance Layer (SL 1201) |
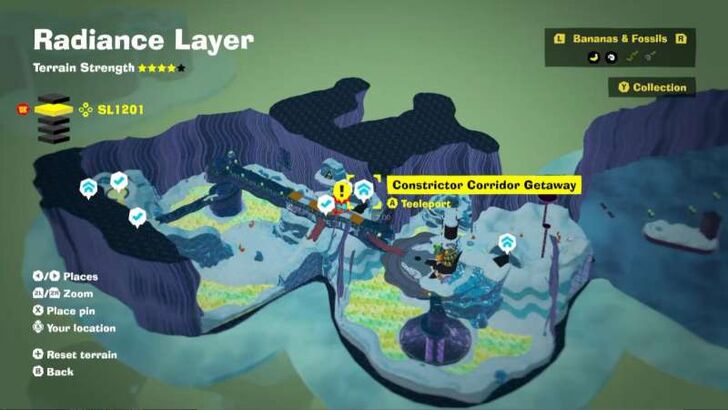
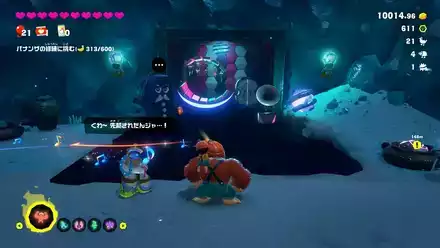 Constrictor Corridor Getaway |
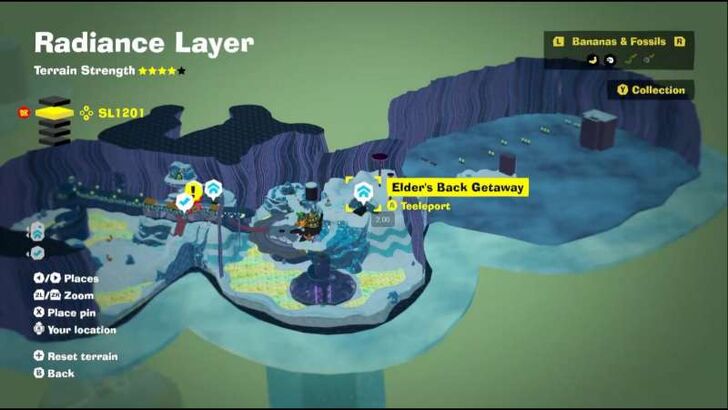 Radiance Layer (SL 1201) |
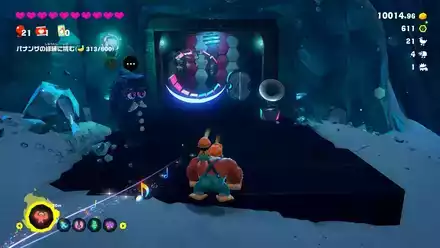 Elder's Back Getaway |
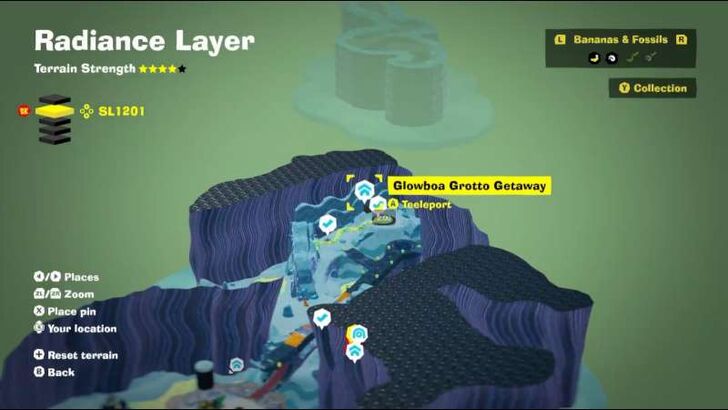 Radiance Layer (SL 1201) |
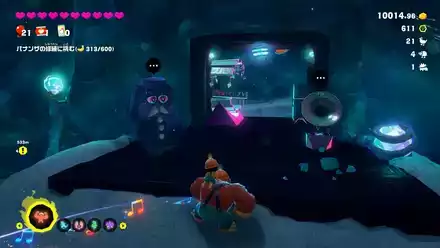 Glowboa Grotto Getaway |
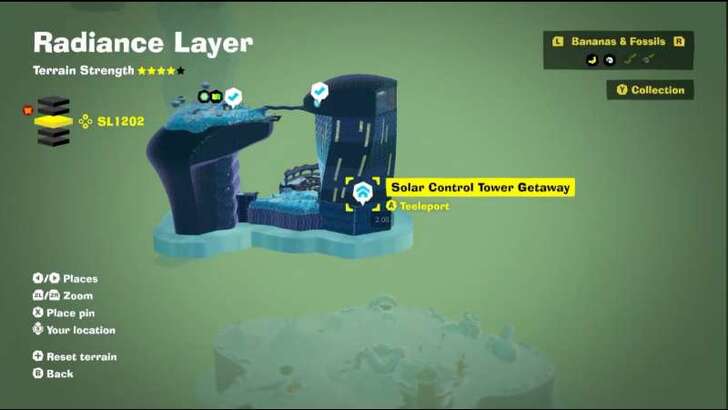 Radiance Layer (SL 1202) |
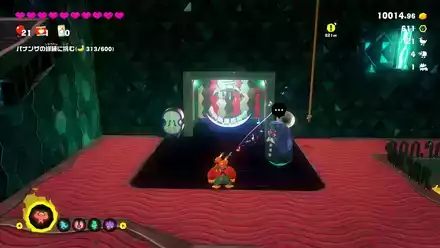 Solar Control Tower Getaway |
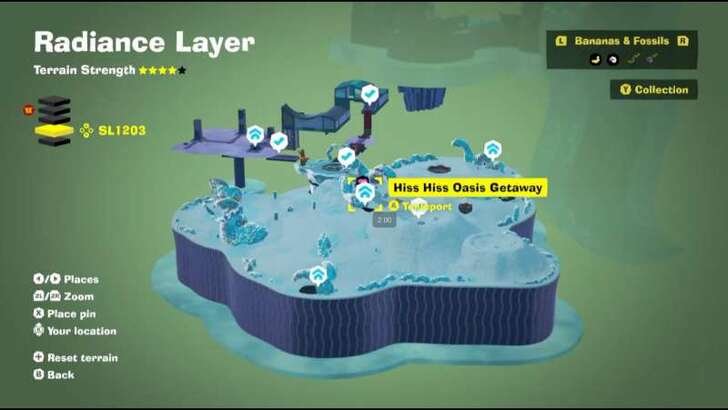 Radiance Layer (SL 1203) |
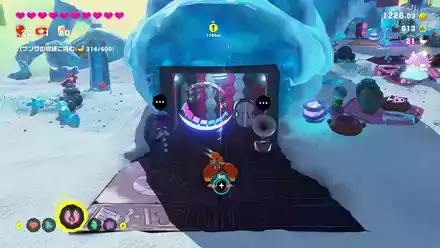 Hiss Hiss Oasis Getaway |
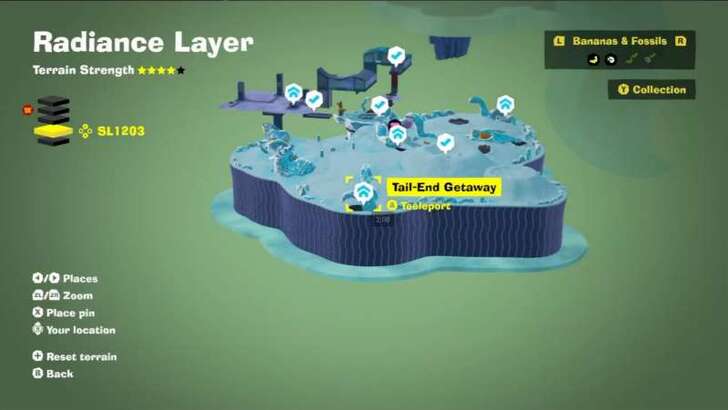 Radiance Layer (SL 1203) |
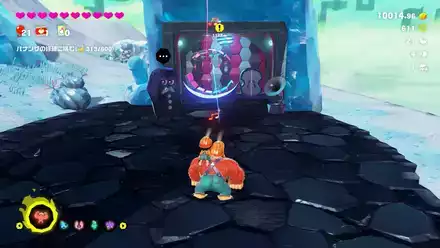 Tail-End Getaway |
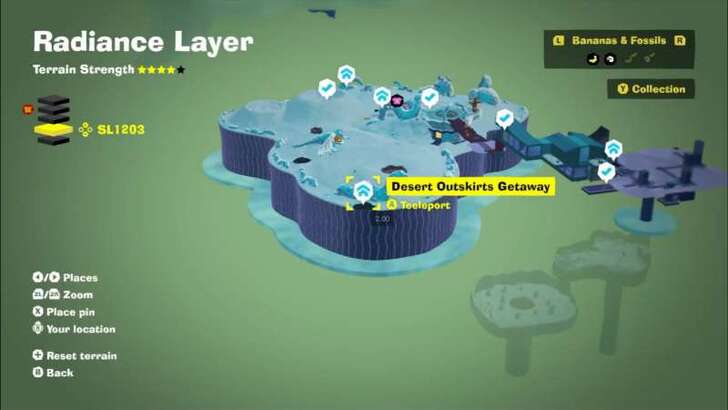 Radiance Layer (SL 1203) |
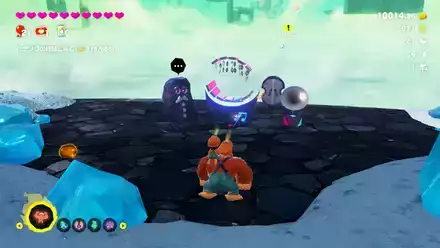 Desert Outskirts Getaway |
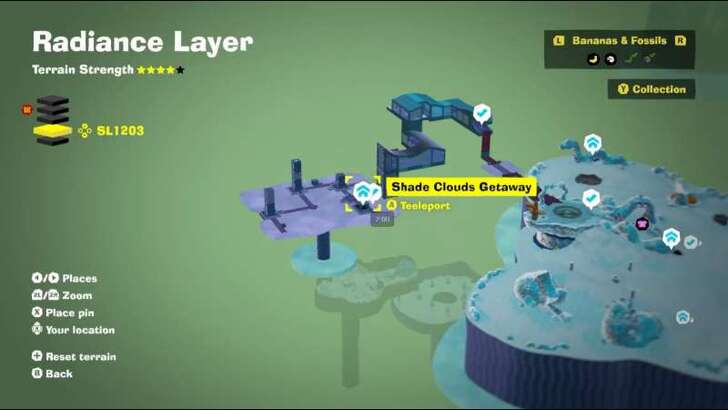 Radiance Layer (SL 1203) |
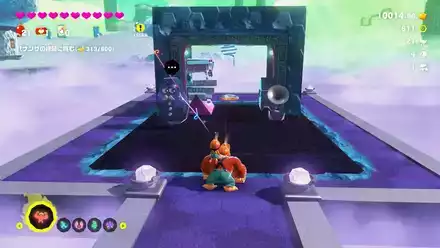 Shade Clouds Getaway |
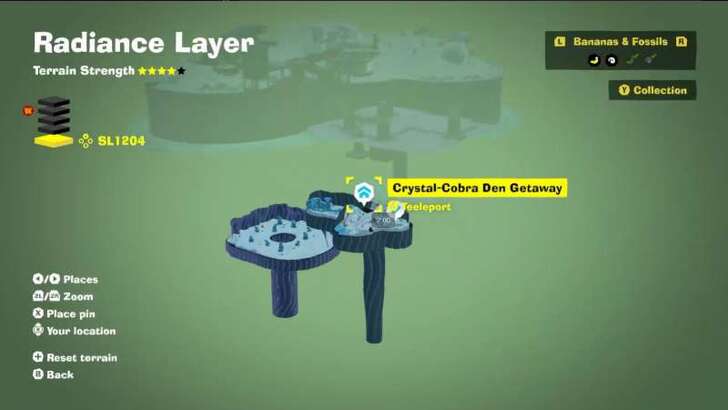 Radiance Layer (SL 1204) |
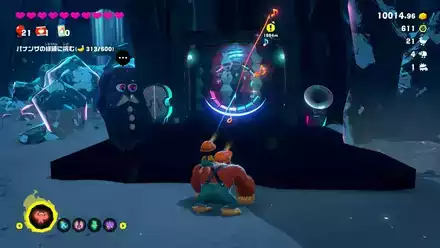 Crystal-Cobra Den Getaway |
Getaway Guide: All Getaway Locations
Donkey Kong Bananza Related Guides
All Layers
Comment
Author
Radiance Layer Banana and Fossil Locations (SL 1200-1204)
improvement survey
04/2026
improving Game8's site?

Your answers will help us to improve our website.
Note: Please be sure not to enter any kind of personal information into your response.

We hope you continue to make use of Game8.
Rankings
- We could not find the message board you were looking for.
Gaming News
Popular Games

Genshin Impact Walkthrough & Guides Wiki

Crimson Desert Walkthrough & Guides Wiki

Umamusume: Pretty Derby Walkthrough & Guides Wiki

Honkai: Star Rail Walkthrough & Guides Wiki

Monster Hunter Stories 3: Twisted Reflection Walkthrough & Guides Wiki

Wuthering Waves Walkthrough & Guides Wiki

The Seven Deadly Sins: Origin Walkthrough & Guides Wiki

Pokemon TCG Pocket (PTCGP) Strategies & Guides Wiki

Pokemon Pokopia Walkthrough & Guides Wiki

Zenless Zone Zero Walkthrough & Guides Wiki
Recommended Games

Monster Hunter World Walkthrough & Guides Wiki

Fire Emblem Heroes (FEH) Walkthrough & Guides Wiki

Pokemon Brilliant Diamond and Shining Pearl (BDSP) Walkthrough & Guides Wiki

Super Smash Bros. Ultimate Walkthrough & Guides Wiki

Diablo 4: Vessel of Hatred Walkthrough & Guides Wiki

Cyberpunk 2077: Ultimate Edition Walkthrough & Guides Wiki

Yu-Gi-Oh! Master Duel Walkthrough & Guides Wiki

Elden Ring Shadow of the Erdtree Walkthrough & Guides Wiki

The Legend of Zelda: Tears of the Kingdom Walkthrough & Guides Wiki

Persona 3 Reload Walkthrough & Guides Wiki
All rights reserved
© Nintendo. Games are property of their respective owners. Nintendo of America Inc.
The copyrights of videos of games used in our content and other intellectual property rights belong to the provider of the game.
The contents we provide on this site were created personally by members of the Game8 editorial department.
We refuse the right to reuse or repost content taken without our permission such as data or images to other sites.

 Ingot Isle
 Lagoon Layer
 Hilltop Layer
 Canyon Layer
 The Divide
 Freezer Layer
 Forest Layer
 The Junction
 Resort Layer
 Tempest Layer
 Landfill Layer
 Racing Layer
 Radiance Layer
 Groove Layer
 Feast Layer
 Forbidden Layer
 Planet Core
 DK Island


![Forza Horizon 6 Review [Preview] | Beautiful Roads With a Whole Lot of Oversteer](https://img.game8.co/4460981/a7254c24945c43fbdf6ad9bea52b5ce9.png/thumb)


