Castle in the Void Palace Puzzles and Walkthrough
★Version 3.3 is now live: Firecracker Rin | Banner
┗ Skill Cards | New Year's Light Banner | LNY Event
☆ Version 3.2.2 is now live: Matoi | Banner
┗ Throne | Entropy Banner | Take Your Love
★Tier Lists: Characters | Personas | Rerolls
☆Boards: Companio | Friends | Toy Trading
This is a guide to Castle in the Void, Kamoshida's Palace in Persona 5: The Phantom X (P5X). Check out our complete step-by-step walkthrough and rewards in this guide.
List of Contents
Castle in the Void Palace Boss
Raga the Sinner of Lust
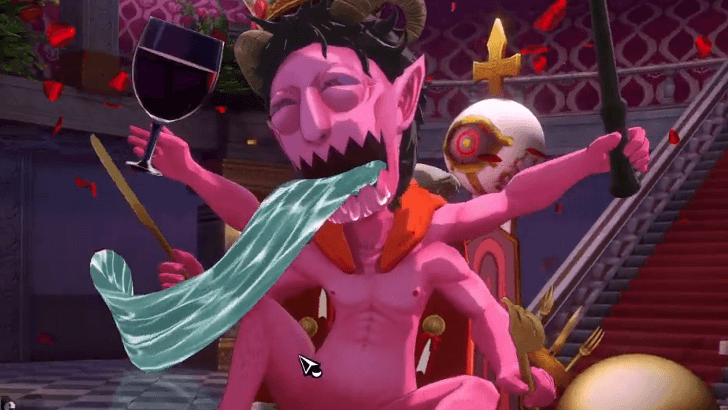
Raga, the Sinner of Lust who takes on the appearance of Shadow Kamoshida, is the Palace Ruler of the Castle in the Void.
The Raga fight recommends players to tackle this boss with a team that is at least Level 54. However, we highly recommend you get Wonder and his teammates to at least Level 60 instead.
Raga (Shadow Kamoshida) Boss Fight Guide
Kamoshida Palace Walkthrough
| Castle in the Void | |
|---|---|
|
|
|
Stage 1-1
Enemy Party
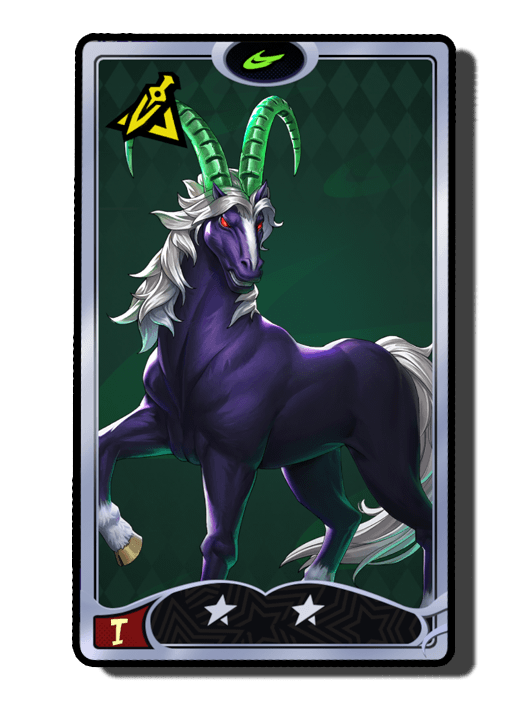 Bicorn Weakness: Electric
Bicorn
Resistance: Curse Passive: Dance of the Wind Increase Atk 2.9%. After knockdown, increase Wind damage 20% (2 turns). |
Party Restriction
| Guest Party Member (Required in party) |
|---|
|
・Ryuji Sakamoto
・Morgana |
If you own the unit, you can replace the story Phantom Thief with your own to get better stats.
Walkthrough
| An Unexpected Encounter | |
|---|---|
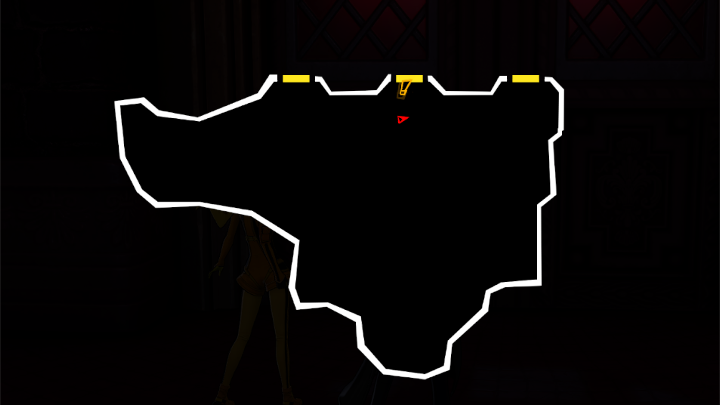 Old Castle - Castle Gate Map |
|
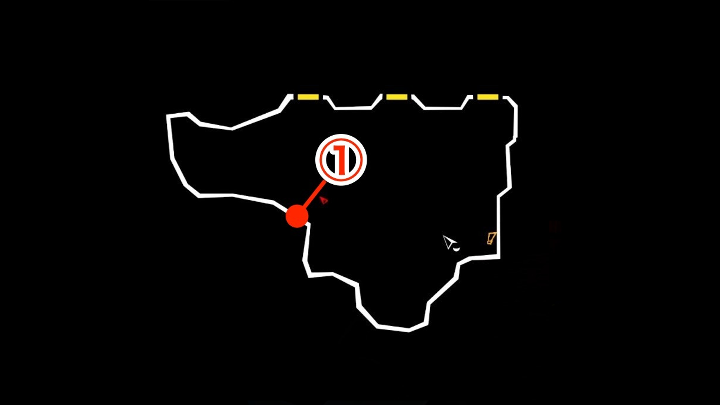
| 1 | 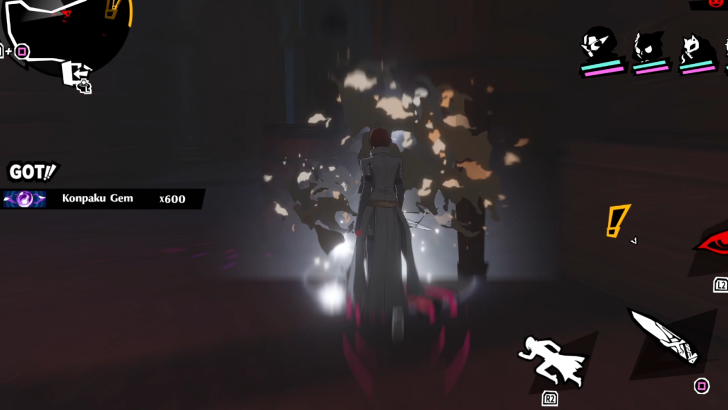
After the initial dialogue, you can explore the exterior of the palace. You can break some barrels to collect Konpaku Gems. Otherwise, head inside to continue. |
| 2 | 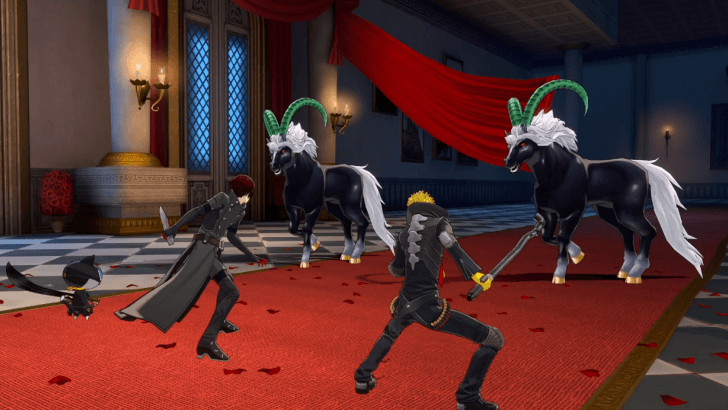
In this boss fight, you will assist Ryuji and Mona in fighting enemy shadows. Defeat both Bison and select the correct dialogue options to finish this section. You can exploit the Bisons' weakness by bringing a Persona with the Lightning element. |
| ▲Return to Chapter Selection▲ |
|---|
Stage 1-2
Enemy Party
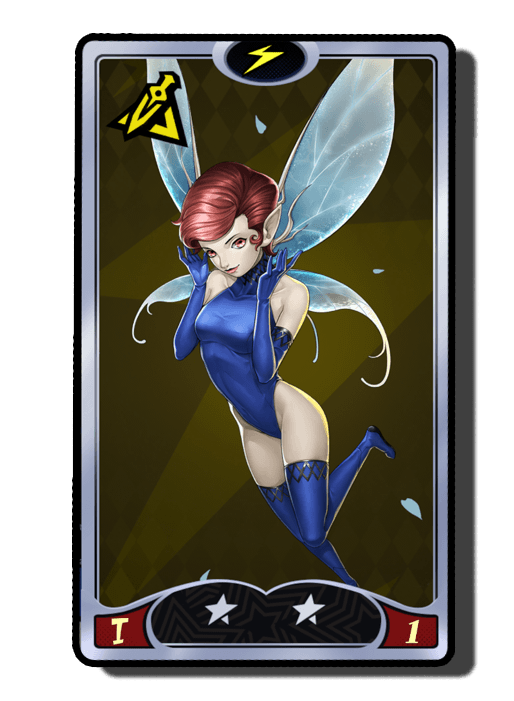 Pixie Weakness: Gun, Ice, Curse
Pixie
Resistance: Electric, Bless Passive: Guide the Lost Increase Atk 2.9%. After knockdown, increase party's Atk 14.3% (2 turns). |
Party Restriction
| Guest Party Member (Required in party) |
|---|
|
・Ryuji Sakamoto
・Morgana |
If you own the unit, you can replace the story Phantom Thief with your own to get better stats.
Walkthrough
| Run | |||||
|---|---|---|---|---|---|
 Old Castle - Central Hall |
 Old Castle - Underground Walkway |
||||
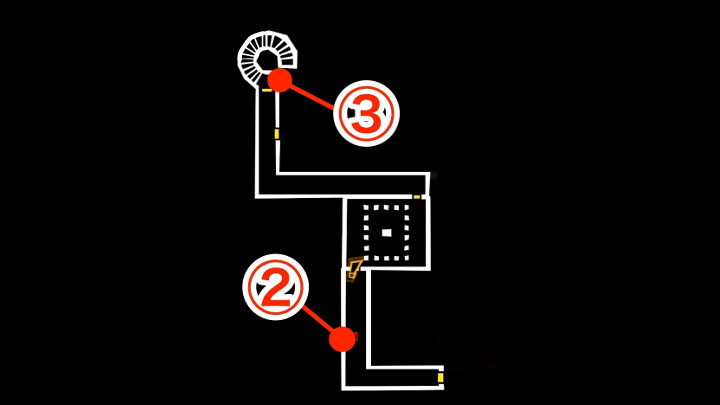
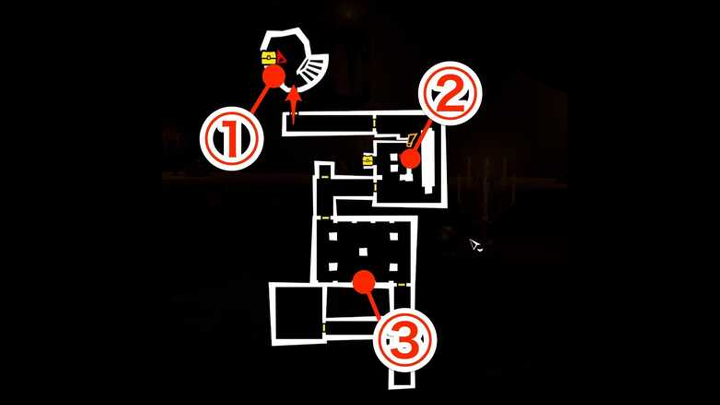
| 1 | 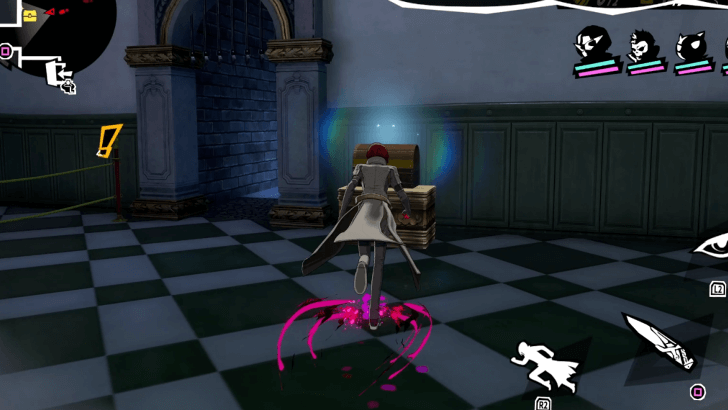
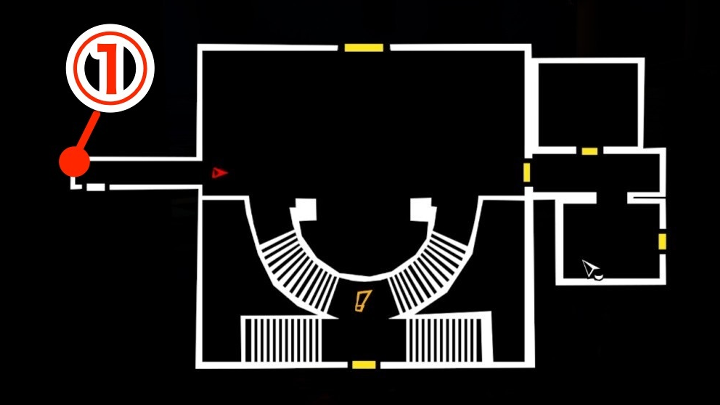
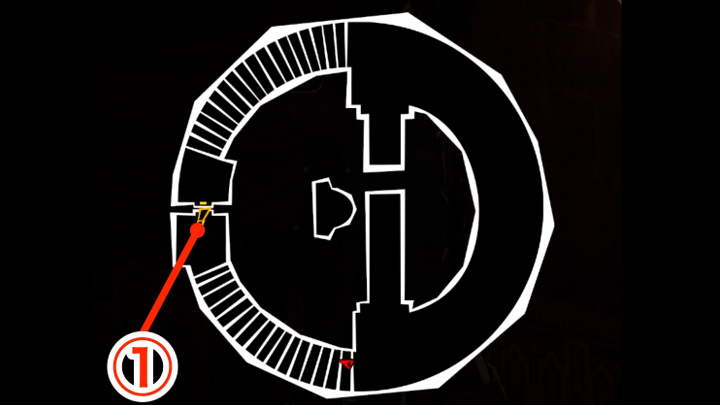
Turn right at the central hall and grab the first chest. |
||||
| 2 | 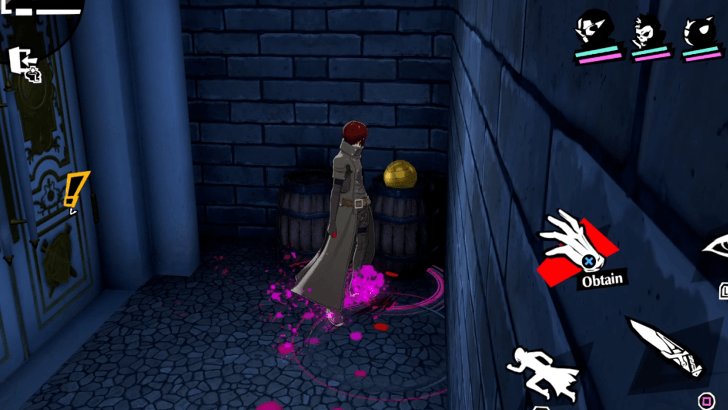
Go to the left of the first chest and down the stairs. Grab the volleyball and go back upstairs. |
||||
| 3 | 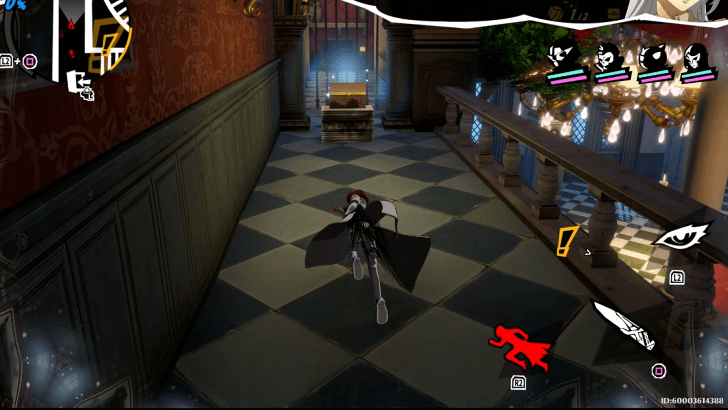
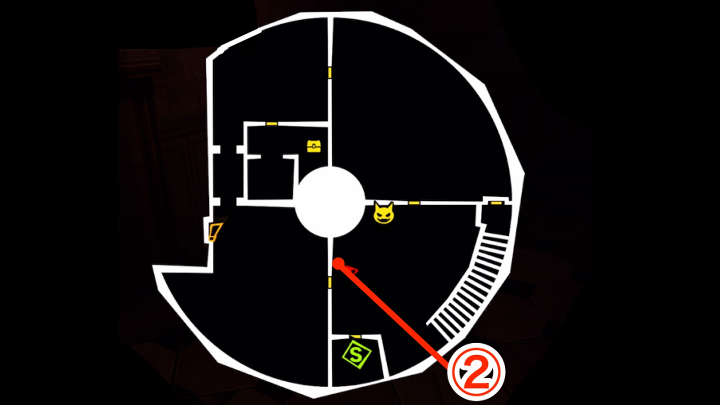
Go north in the main hall and turn right at the stairs. Follow the path to find the second treasure chest in this area. |
||||
| 3 | 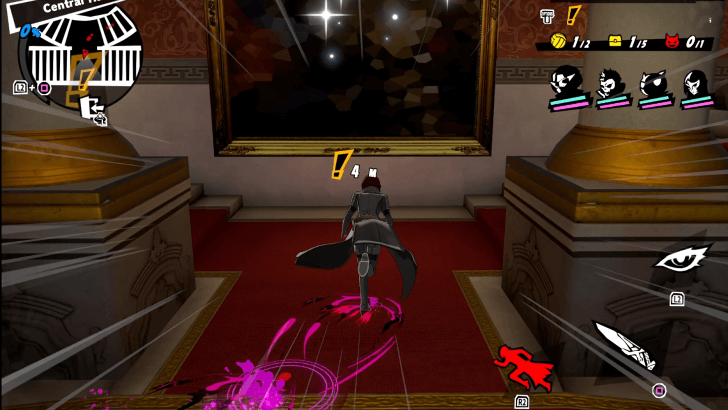
Interact with the painting to move on to the next area. |
||||
| 4 | 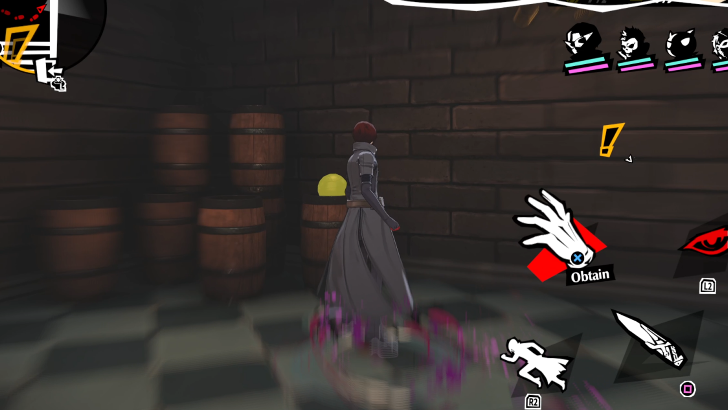
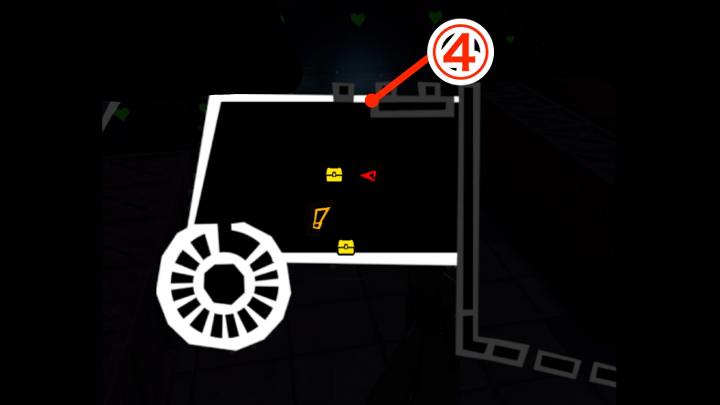
As soon as you arrive to the next section, turn left. You'll see the second volleyball in this area, and you can grab it. |
||||
| 5 | 
After grabbing the second volleyball, head down the stairs to your right and grab the third treasure chest. |
||||
| 6 | 
Proceed back up near the entrance and interact with the mechanism to head to the upper level. |
||||
| 7 | 
Before proceeding towards the objective, make a left turn to locate the fourth treasure chest, which is guarded by a strong enemy. Defeat it, and you will be able to access the fourth and final treasure chest. |
||||
| 8 | 
Follow the objective marker in order to reach the elevated section. Pull the lever to get the grate out of the way. |
||||
| 9 | 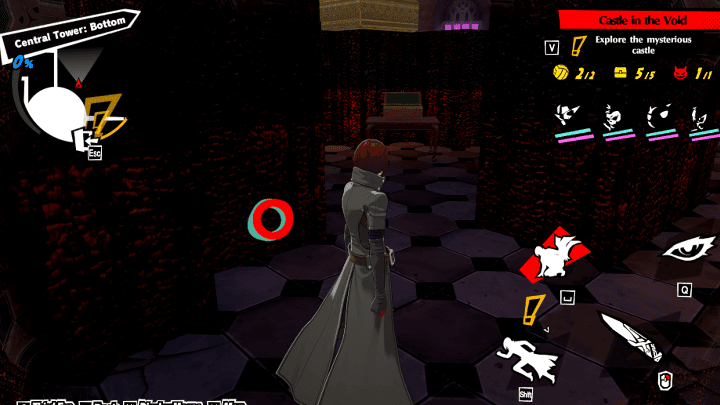
Before leaving the area, you can find the last treasure chest hiding behind the elevated floor. There will be a shadow blocking your way. |
||||
| 10 | 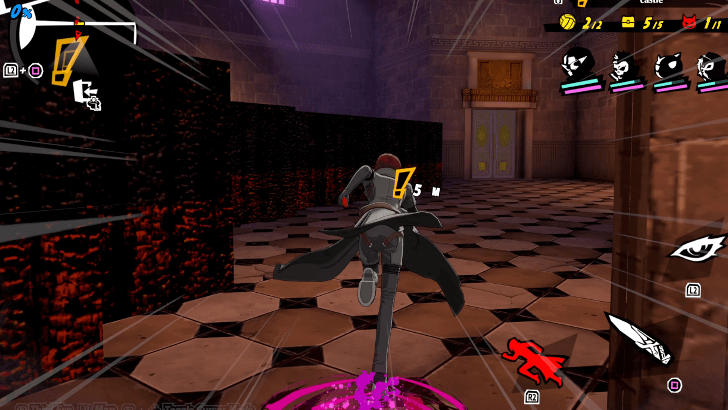
With the path to the final boss cleared, proceed to the next area to engage in combat with the final boss. As with the Bisons, the boss is vulnerable to lightning attacks. This makes Motoha's skills highly effective against the boss. |
||||
| ▲Return to Chapter Selection▲ |
|---|
Stage 1-3
Enemy Party
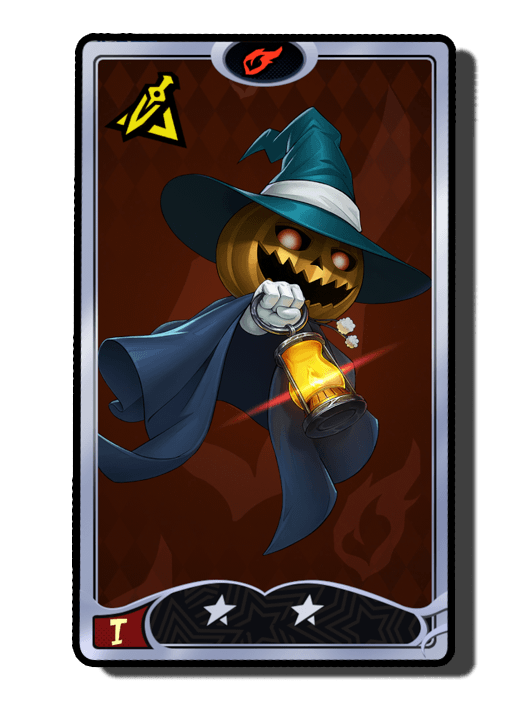 Jack-o'-Lantern Weakness: Gun, Ice, Wind
Jack-o'-Lantern
Resistance: Fire Passive: Feast of Fools Increase Atk 2.9%. After knockdown, increase Fire damage 20% (2 turns). |
Pixie Weakness: Gun, Ice, Curse
Pixie
Resistance: Electric, Bless Passive: Guide the Lost Increase Atk 2.9%. After knockdown, increase party's Atk 14.3% (2 turns). |
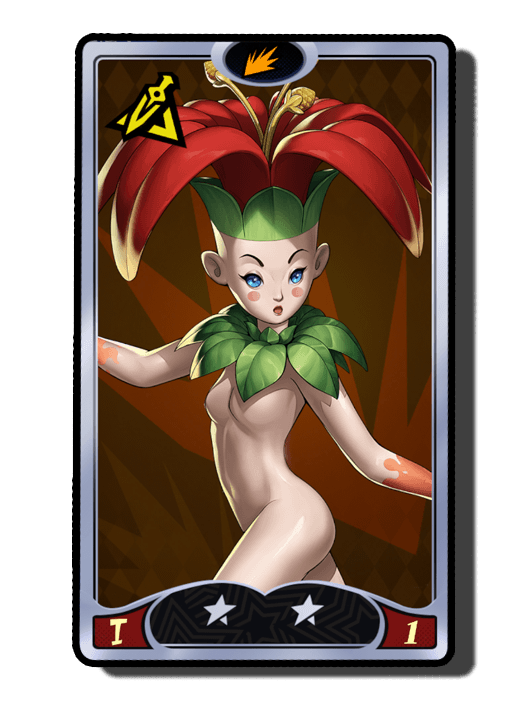 Mandrake Weakness: Fire
Mandrake
Resistance: Electric, Bless Passive: Earth-Splitting Wall Increase Atk 2.9%. At start of battle, increase Atk 15% (3 turns). |
 Agathion Weakness: Wind
Agathion
Resistance: Gun, Electric Passive: Gratitude in a Bottle Increase Def 4.4%. When healed, increase healing 27%. |
Party Restriction
| Guest Party Member (Required in party) |
|---|
|
・Ryuji Sakamoto
・Morgana |
If you own the unit, you can replace the story Phantom Thief with your own to get better stats.
Walkthrough
| Tasteless Castle | |||||
|---|---|---|---|---|---|
 Old Castle - Castle Gate |
 Old Castle - Central Hall |
||||
| 1 | 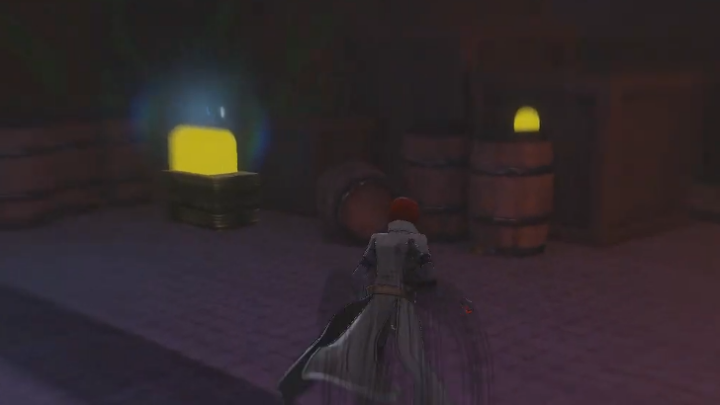 As soon as the stage begins, grab the volleyball and treasure chest on your right. You can use the Third Eye feature to highlight these items and make them easier to spot. |
||||
| 2 | 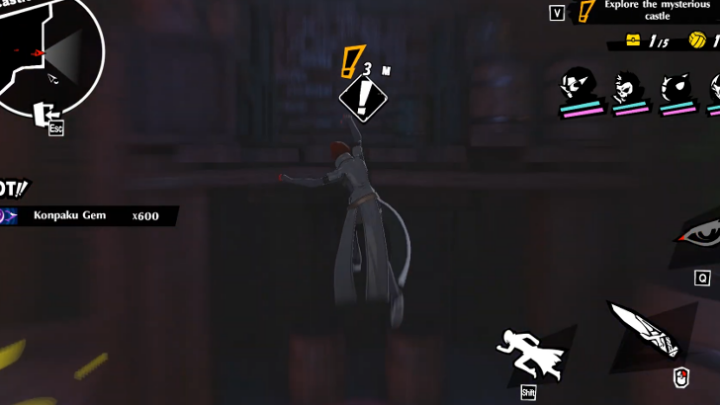 Hop on to the ledge to reach an opening in the upper area that leads to the palace. |
||||
| 3 |  Jump from one chandelier to the next to traverse the upper area until you reach the area near the wall. A shadow fight will begin as soon as you go down, so get ready. |
||||
| 4 | 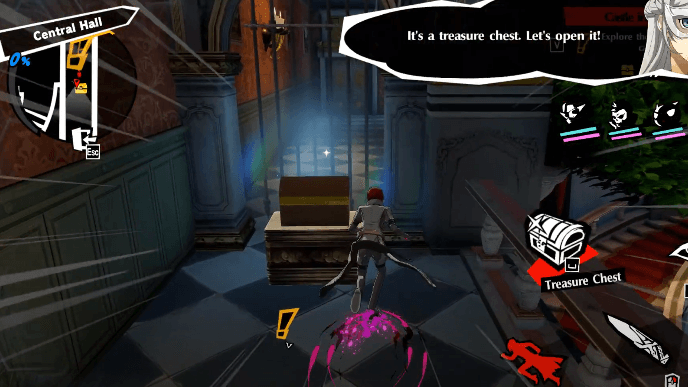 After the fight, you'll see a treasure chest near a gated door. Pick it up and head to the door. |
||||
| 5 | 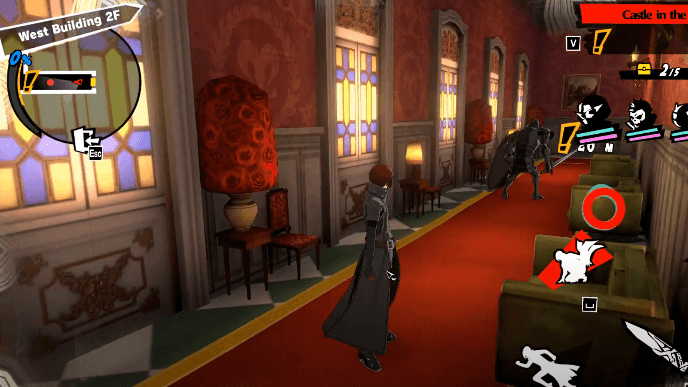 In the hallway, you'll encounter another shadow. Take it out and make your way further into the hallway. Grab the volleyball on the shelf to the left before fighting the next shadow. |
||||
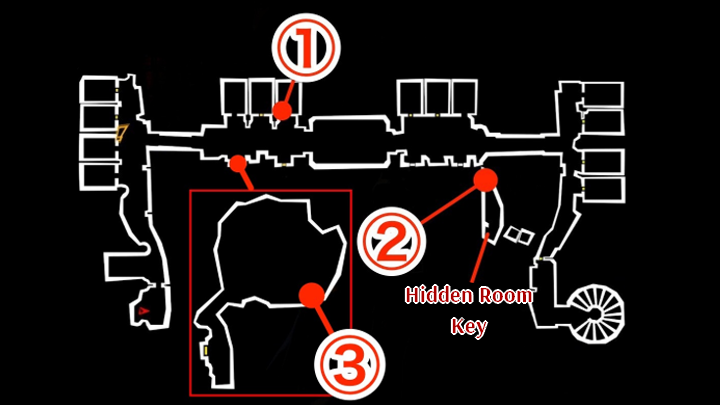
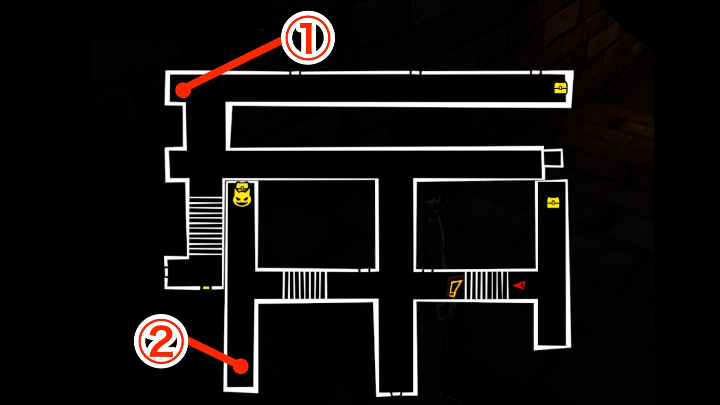
| 6 | 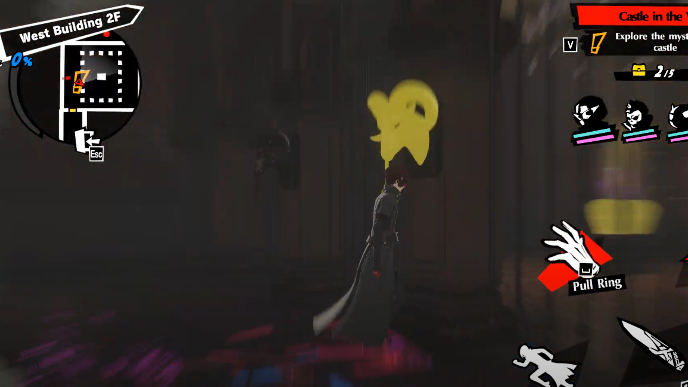 Make your way inside the room and you'll see a puzzle for a treasure chest. To solve it, use your Third Eye to find out which mechanisms need to be pulled to unlock the gates. You'll have to pull the first mechanism on the initial side and another mechanism on the other side of the treasure chest. |
||||
| 7 | 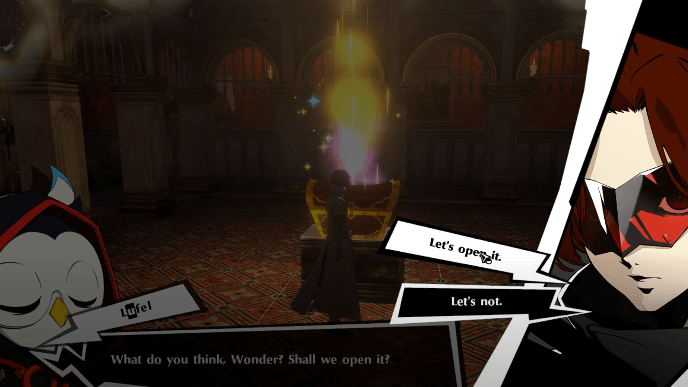 Open the chest and you'll be fighting a shadow. After defeating it, follow the mission marker to the next area. Enter the hallway and you'll see more shadows you can avoid or fight. |
||||
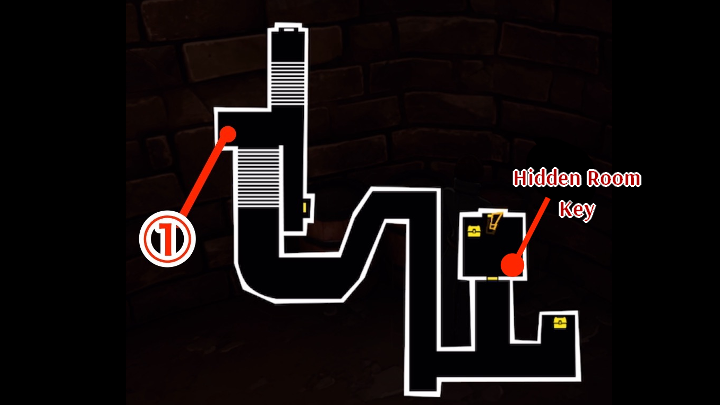
| 8 | 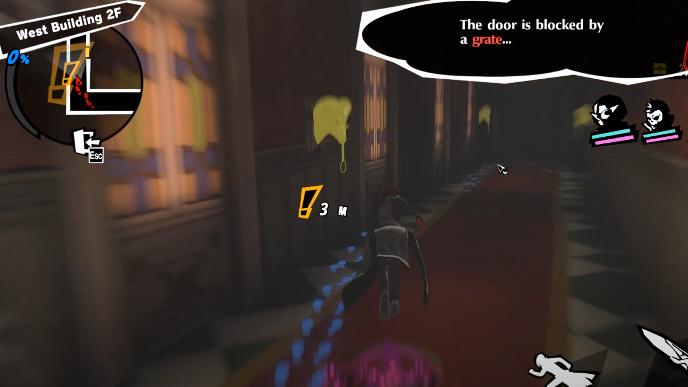 At the end of the hallway, the door will be blocked by a grate. To remove the grate, you must use your Third Eye and activate the mechanisms in order. Follow where the footsteps lead first and it'll show you the order which the mechanisms should be pulled in. The mission marker also helps you with this. |
||||
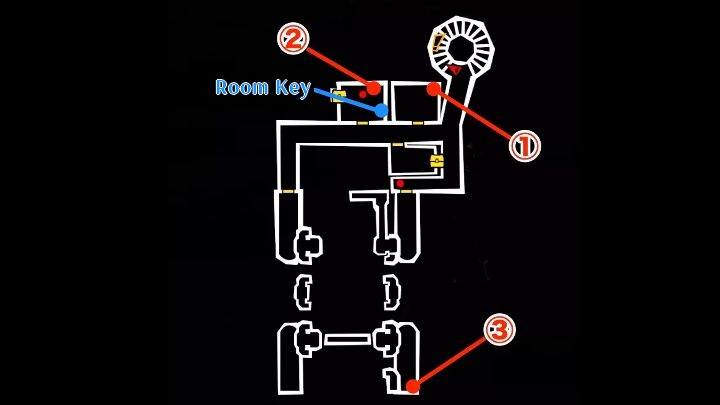
| 9 |  To proceed, you'll have to pick up a Hidden Room Key from a shelf nearby. Just follow the mission marker to find where it is and pick up the item. Use it to unlock the door with chains. |
||||
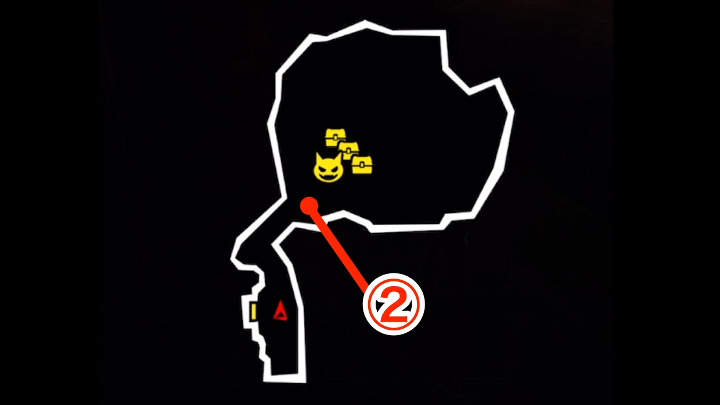
| 10 | 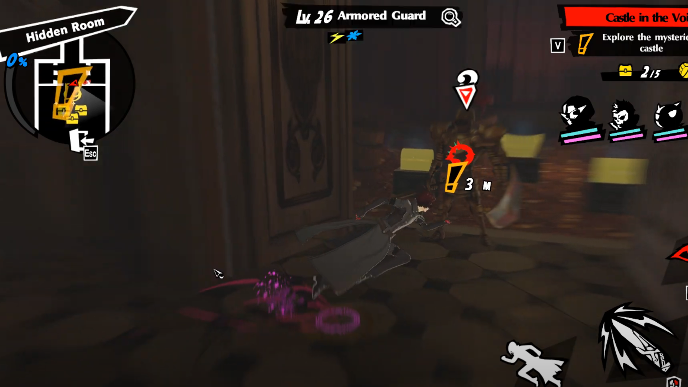 Enter the room and you'll see a shadow guarding a pile of treasure and three chests. Defeat it to claim all of the treasure chests and go back outside. |
||||
| 11 | 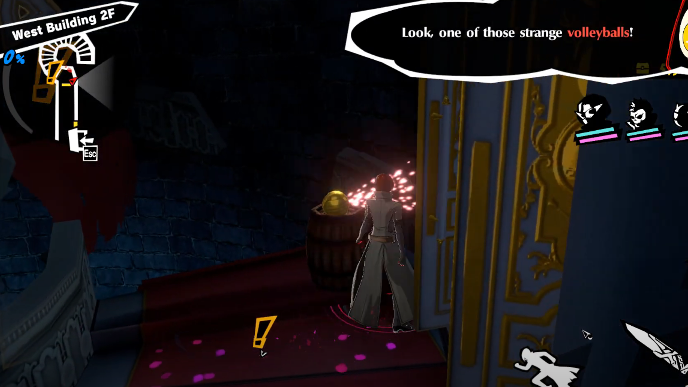 Go to the door with the grate from earlier and open it to proceed. Pick up the volleyball to the right once you exit the hallway and enter the stairwell. |
||||
| ▲Return to Chapter Selection▲ |
|---|
Stage 1-4
Enemy Party
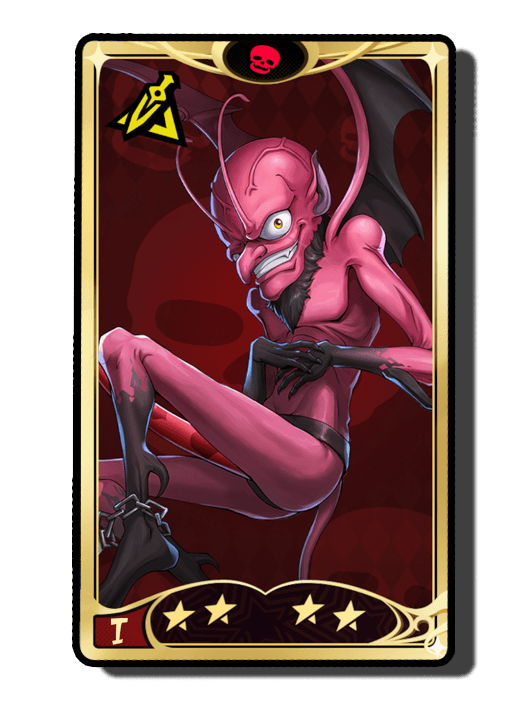 Incubus Weakness: Gun, Bless
Incubus
Resistance: Electric Passive: Corrupting Whisper Increase max HP 3.5%. When dealing Curse damage, decrease target's Atk 10% (2 turns). |
Agathion Weakness: Wind
Agathion
Resistance: Gun, Electric Passive: Gratitude in a Bottle Increase Def 4.4%. When healed, increase healing 27%. |
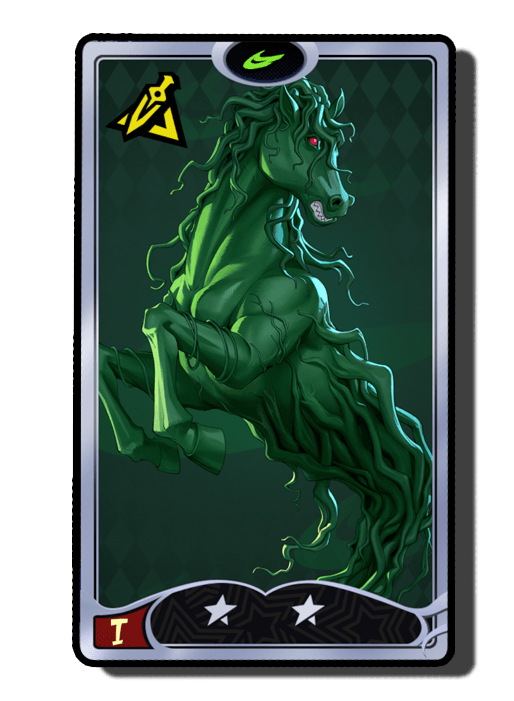 Kelpie Weakness: Electric
Kelpie
Resistance: Ice Passive: Fog-Shrouded Lands Increase critical damage 3.5%. When only 1 foe on field, increase Wind damage 21%. |
There are 2 Agathions
Party Restriction
| Guest Party Member (Required in party) |
|---|
|
・Ryuji Sakamoto
・Morgana |
If you own the unit, you can replace the story Phantom Thief with your own to get better stats.
Walkthrough
| Raucous Teammates | |
|---|---|
 Old Castle - West Building 1F |
|
| 1 | 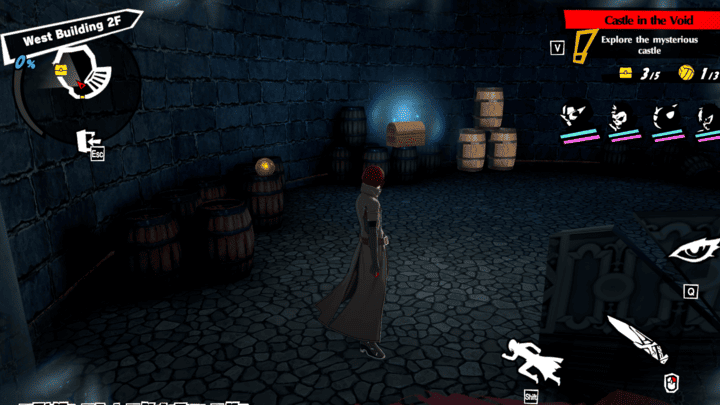
Before proceeding to the next area, turn around and enter the door behind you. There will be a chest and a Volleyball in the room. You can also break the barrel for Konpaku Gems. You won't be able to go up the stairs, so after getting these, you can proceed to the next area. |
| 2 | 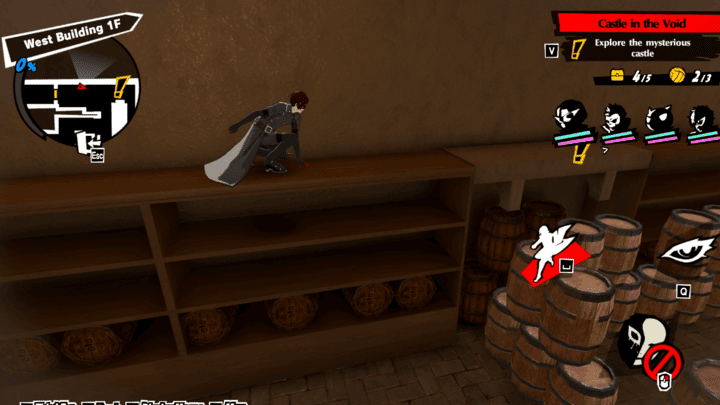
Follow the waypoint, and it will lead you to another room. You won't be able to jump over the barrels, so go towards the shelf and jump on top of it to reach the other side of the room. |
| 3 | 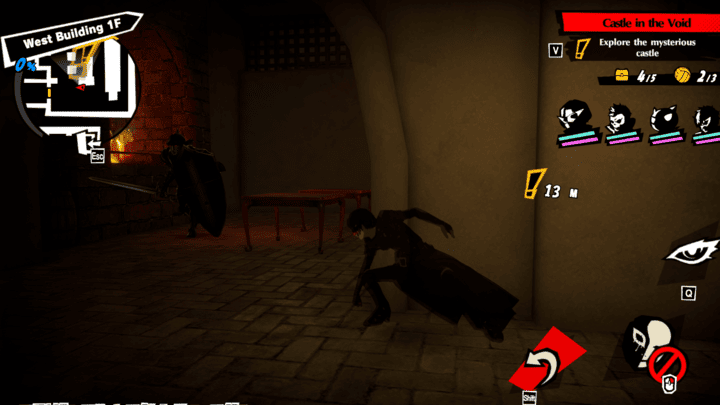
Once you reach the other side, hop down the shelf and hide, there will be Shadow waiting for you and a gate will be blocking the door. After defeating the Shadow, you will see a chest containing some fire in the fireplace. |
| 4 | 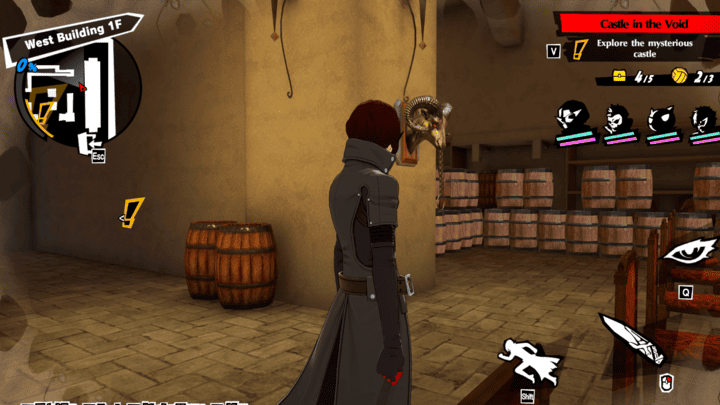
To turn off the fire and open the gates, find the Goat Head with the Ring and pull on it. Go back and open the treasure chest before you leave the room. |
| 5 | 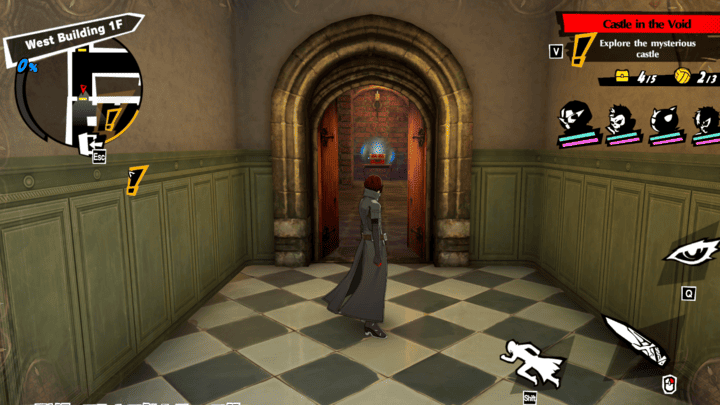
When you reach the next area, there will be a cutscene, and more shadows will appear. There will be a chest directly across the door. |
| 6 | 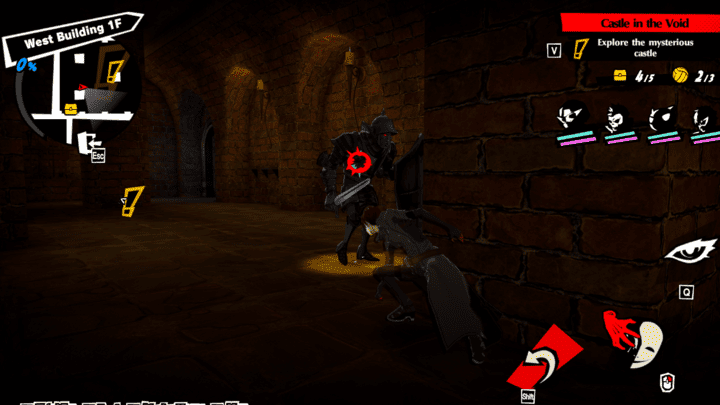
Hide behind the pillars and defeat the Shadow. Pick up the Volleyball on one of the shelves and the Key in the weapons rack. |
| 7 | 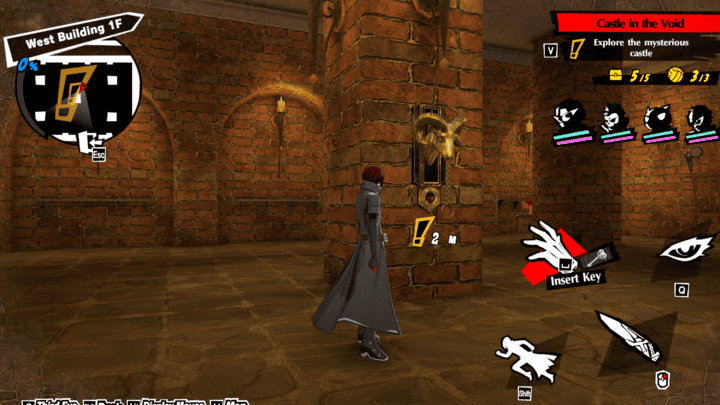
With the key, go to the center of the room and use it to pull on the goat head. This will open the gate to the next area. |
| 8 | 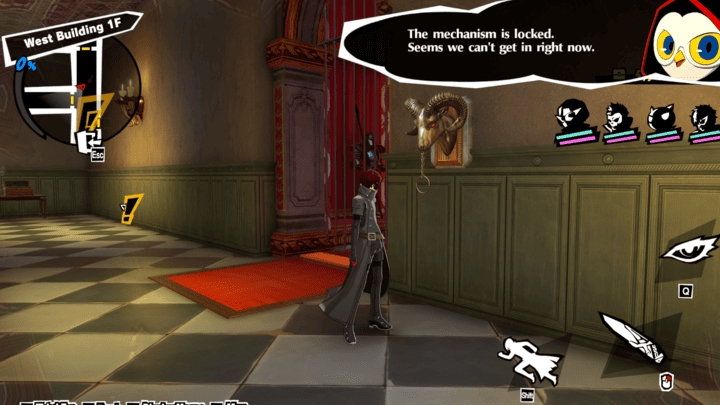
You won't be able to pull on the ring in the next area since it is locked, there will be chest at the end of this corridor. Follow the waypoint through a few rooms, and you will pass by the last chest on the way. |
| 9 | 
At the very end of this path is the boss battle. Before you enter the room, Lufel will ask you if you are ready. Enter the room when you are, and defeat the enemies to obtain the Dungeon Key |
| ▲Return to Chapter Selection▲ |
|---|
Stage 1-5
Enemy Party
|
Incubus Weakness: Gun, Bless
Incubus
Resistance: Electric Passive: Corrupting Whisper Increase max HP 3.5%. When dealing Curse damage, decrease target's Atk 10% (2 turns). |
There are 4 Incubus
Party Restriction
| Guest Party Member (Required in party) |
|---|
|
・Ryuji Sakamoto
・Morgana |
If you own the unit, you can replace the story Phantom Thief with your own to get better stats.
Walkthrough
| Prison Break | |
|---|---|
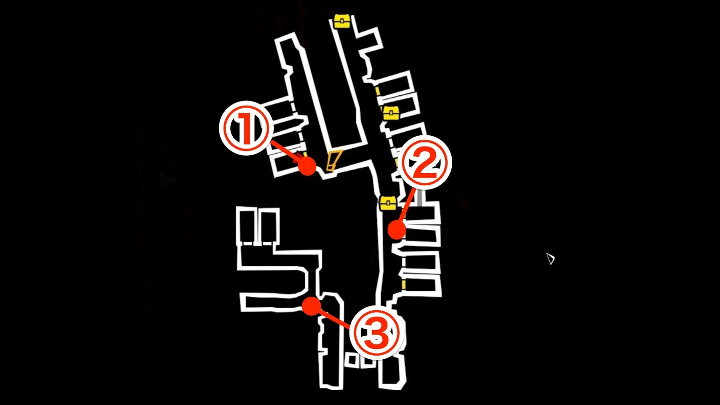 Old Castle - Underground Prison 2F |
|
| 1 | 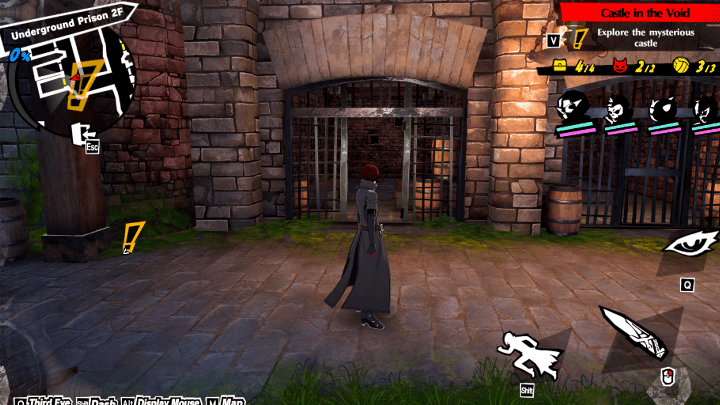
In the castle dungeon, look into the third prison cell from the stairs where you came from to find a Volleyball. |
| 2 | 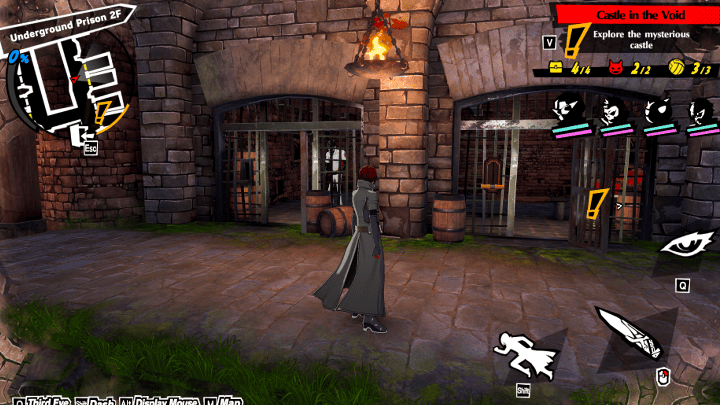
Cross the bridge, if you try to open the cell with the lever, Lufel will tell you to explore a bit more. Turn left, and there will be a cell two doors down with a treasure chest. To open the gate, defeat the shadow in the next cell. |
| 3 | 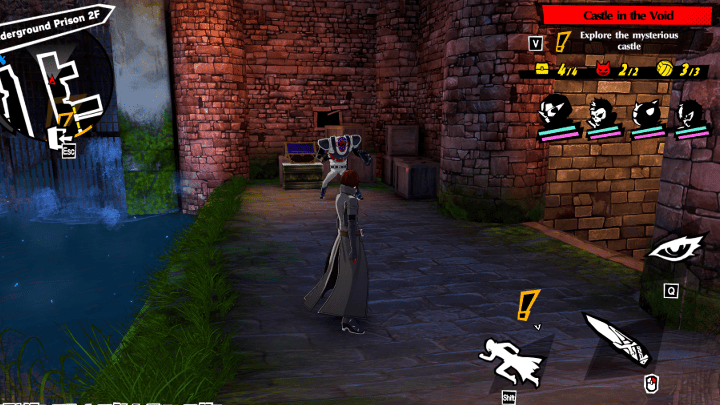
After getting that chest, continue to the end of the corridor. There will be a shadow blocking another treasure chest; defeat it to get the treasure. ignore the stairs, you won't be able to go down there . |
| 4 | 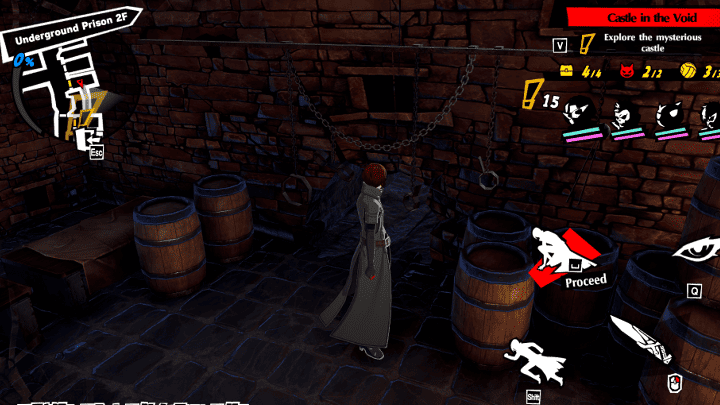
After getting all these, go back to that first cell and pull the lever. Enter the cell and destroy the barrels blocking a hole in the wall. |
| 5 | 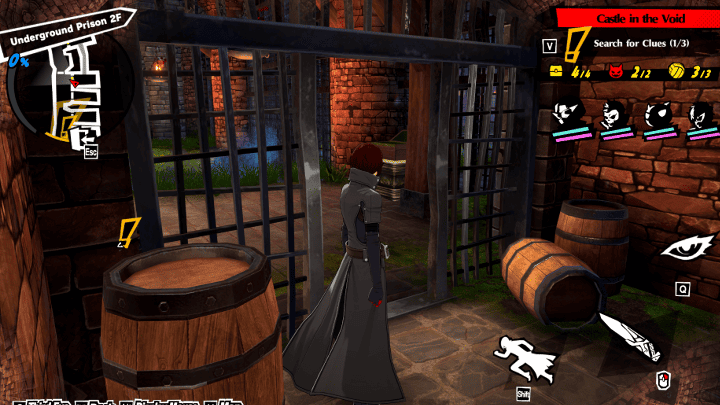
Passing through the hole into the other side, you will find the clue Panther left behind. There will be a treasure chest just outside the cell door, as well as a Volleyball on a barrel. |
| 6 | 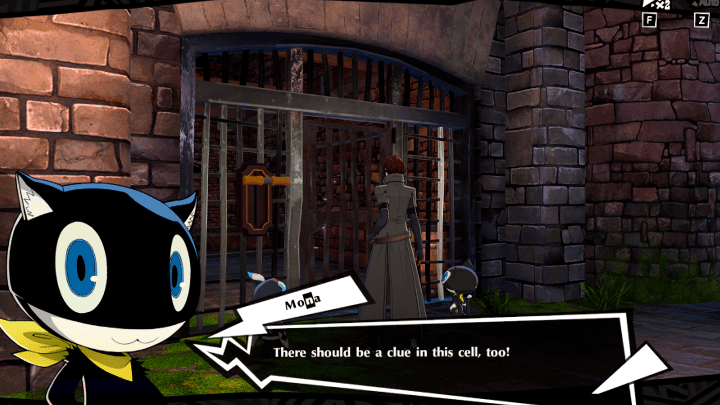
Continue down the hall and you will see a cell with s sparkling wall. You will be attacked by a shadow after the cutscene and will be able to open the cell door after the fight, go inside, and grab the clue. |
| 7 | 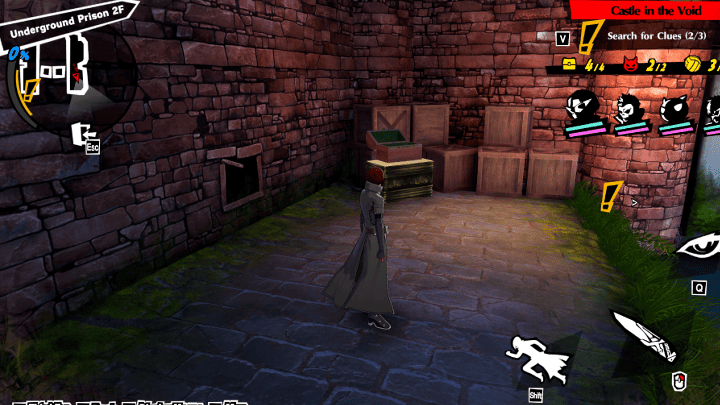
Cross the plank bridge, and there will be a treasure chest on the other side. Grab it and jump to the other side to grab the next clue and a nearby Volleyball. |
| 8 | 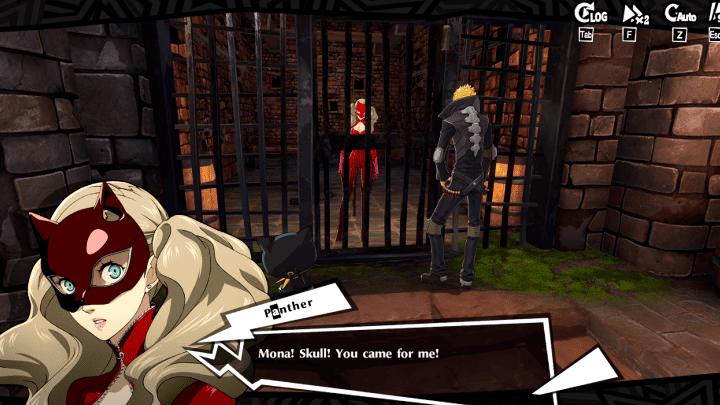
Follow the way point and free Panther from her cell. This will initiate the boss fight, so be ready. |
| ▲Return to Chapter Selection▲ |
|---|
Stage 1-6
Enemy Party
|
Incubus Weakness: Gun, Bless
Incubus
Resistance: Electric Passive: Corrupting Whisper Increase max HP 3.5%. When dealing Curse damage, decrease target's Atk 10% (2 turns). |
Agathion Weakness: Wind
Agathion
Resistance: Gun, Electric Passive: Gratitude in a Bottle Increase Def 4.4%. When healed, increase healing 27%. |
Kelpie Weakness: Electric
Kelpie
Resistance: Ice Passive: Fog-Shrouded Lands Increase critical damage 3.5%. When only 1 foe on field, increase Wind damage 21%. |
 Silky Weakness: Fire, Electric
Silky
Resistance: Ice Passive: Benevolent Guardian Increase max HP 3.5%. When curing spiritual ailments, restore target's HP 12.5% of Atk. |
 Berith Weakness: Ice
Berith
Resistance: Gun, Fire Passive: Duke's Intimidation Increase Def 5.3%. Decrease weakness damage 24%. |
There are 2 Incubus and 2 Agathions
Party Restriction
| Guest Party Member (Required in party) |
|---|
|
・Ryuji Sakamoto
・Morgana ・Ann Takamaki |
If you own the unit, you can replace the story Phantom Thief with your own to get better stats.
Walkthrough
| Person with Good Taste | |
|---|---|
 Old Castle - Underground Prison 1F |
|
| 1 | 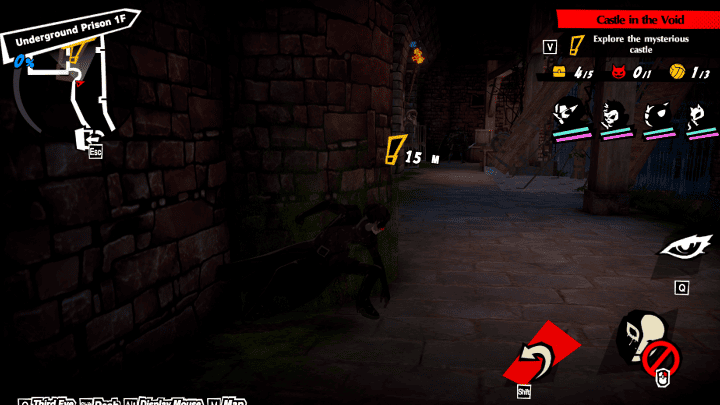
Walk further into the dungeon, and there will be a shadow near the end of this corridor where your waypoint is. Defeat him and look through the prison cells. In the last one will be a treasure chest. |
| 2 | 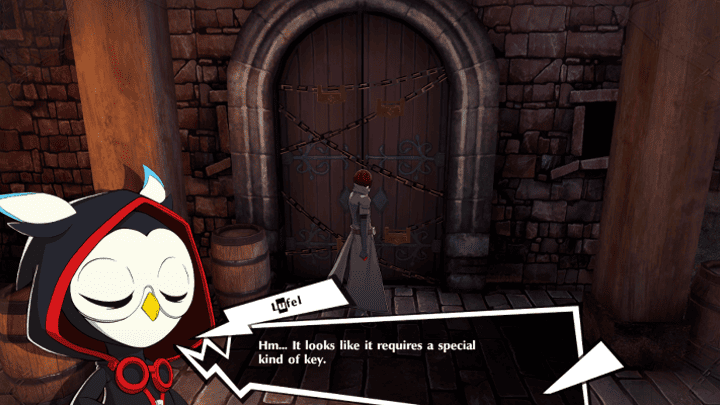
Go back outside and pull the ring to bring the bridge down. After crossing, there will be a door covered in chains, you will need a key to open this |
| 3 | 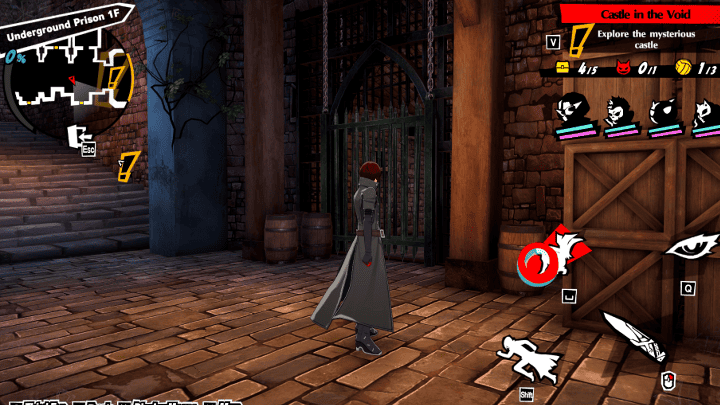
Check out the other cells. Across the locked door will be a Volleyball, then in the middle cell, will be a treasure chest. On the same side, at the end of the hall, will be a stairway with a closed gate. You will need another key for this. |
| 4 | 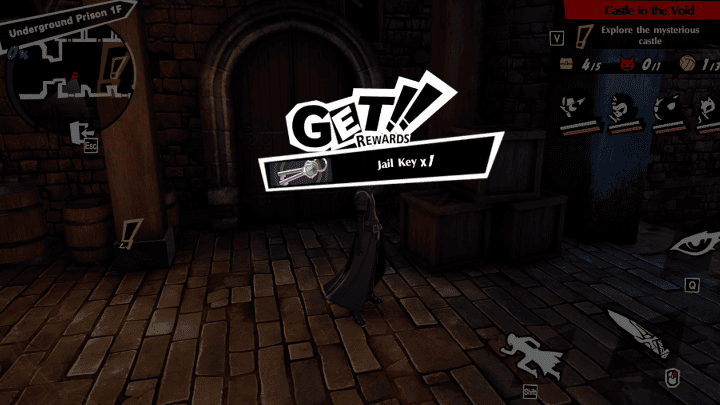
Go up the stairs and once you reach the top, look to the right, a Jail Key will be on the boxes. On the first cell to your left will be a treasure chest, and a shadow will be in the next cell. |
| 5 | 
Continue forward and you'll see the ring mechanism. This will be locked. Go back to the cell with the shadow and defeat it to get the Ring Key. |
| 6 | 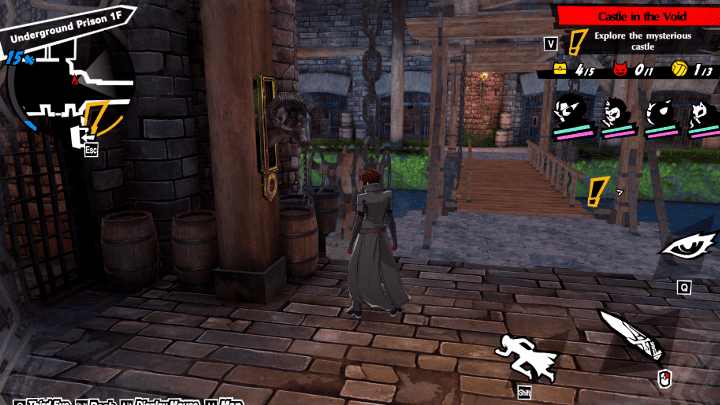
Use the key to bring down the bridge. On the left side of the bridge, you will see a lever with a gold handle Use the Prison Key to open this cell and get the chest inside. |
| 7 | 
After exploring the cells, proceed to the right side of the bridge. Near the gate, you can use the hanging cages to cross the river to the other side. |
| 8 | 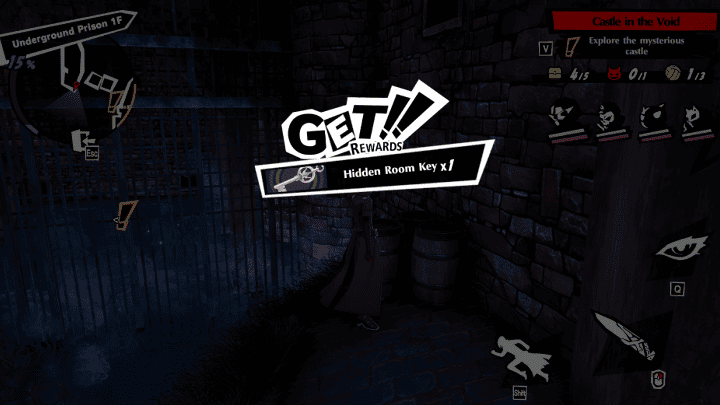
Pick up the Hidden Room Key and the Volleyball, then go back to the door with the chains. |
| 9 | 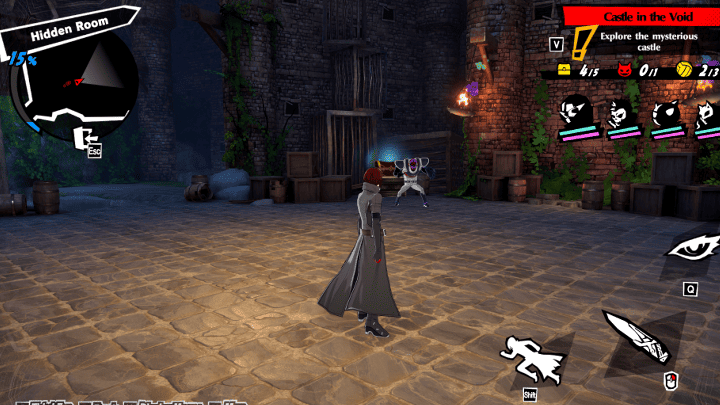
Be prepared before entering the room, there is a difficult enemy here. Grab the Volleyball, then face the shadow to reach the treasure. |
| 10 | 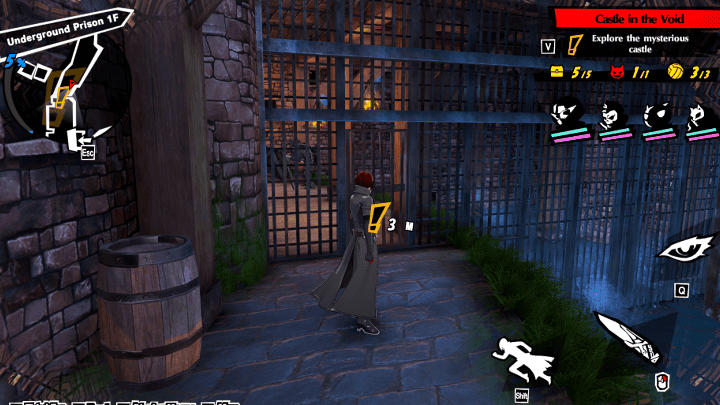
After finishing the Hidden Room, go back to where the waypoint is. Entering the gate will start the final battle of this stage, so make sure that you are ready. |
| ▲Return to Chapter Selection▲ |
|---|
Stage 1-7
Enemy Party
|
Mandrake Weakness: Fire
Mandrake
Resistance: Electric, Bless Passive: Earth-Splitting Wall Increase Atk 2.9%. At start of battle, increase Atk 15% (3 turns). |
Agathion Weakness: Wind
Agathion
Resistance: Gun, Electric Passive: Gratitude in a Bottle Increase Def 4.4%. When healed, increase healing 27%. |
Kelpie Weakness: Electric
Kelpie
Resistance: Ice Passive: Fog-Shrouded Lands Increase critical damage 3.5%. When only 1 foe on field, increase Wind damage 21%. |
Silky Weakness: Fire, Electric
Silky
Resistance: Ice Passive: Benevolent Guardian Increase max HP 3.5%. When curing spiritual ailments, restore target's HP 12.5% of Atk. |
|
Berith Weakness: Ice
Berith
Resistance: Gun, Fire Passive: Duke's Intimidation Increase Def 5.3%. Decrease weakness damage 24%. |
There are 2 Agathions
Party Restriction
| Guest Party Member (Required in party) |
|---|
|
・Ryuji Sakamoto
・Morgana ・Ann Takamaki |
If you own the unit, you can replace the story Phantom Thief with your own to get better stats.
Walkthrough
| Unpleasant Memories | |
|---|---|
| Battle Mission Defeat the last 2 foes in Stage 1-7 in 1 turn with Gun Attacks. |
|
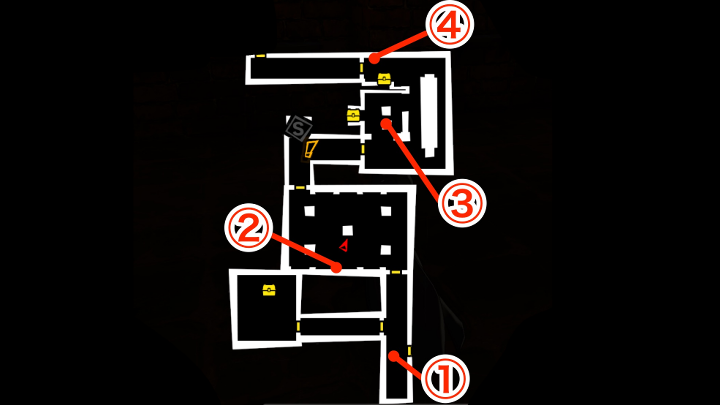 Old Castle - West Building 1F |
|
| 1 | 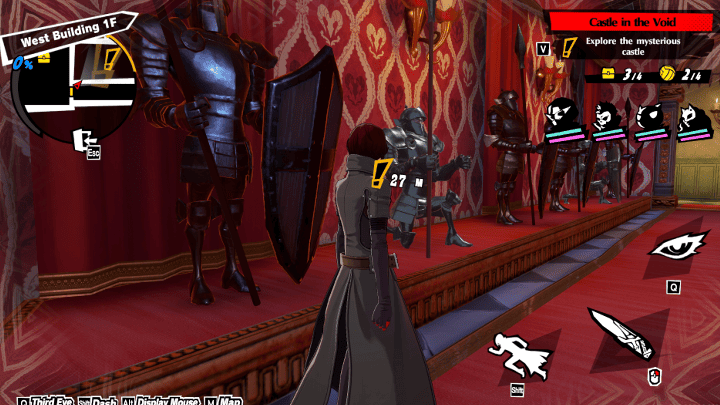
At the start of the stage you will be back in the West Building. Observe the armored suits and you'll notice that some of them are missing weapons and shields. Find the needed items to unlock the door. |
| 2 | 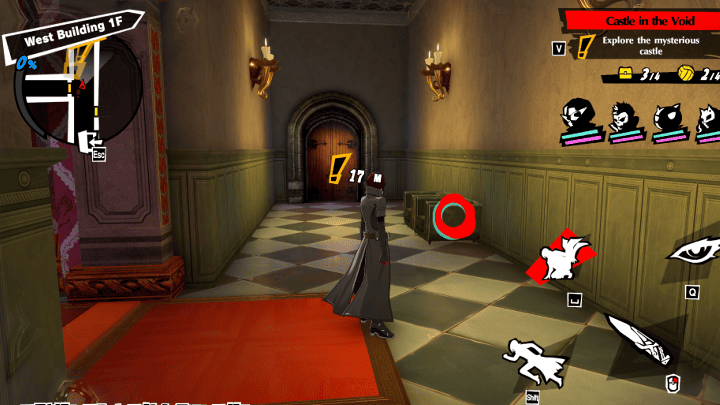
Defeat the shadow up ahead. Turn right and on one of the couches will be a Volleyball. Go to the other side of the hall and enter the next room. |
| 3 | 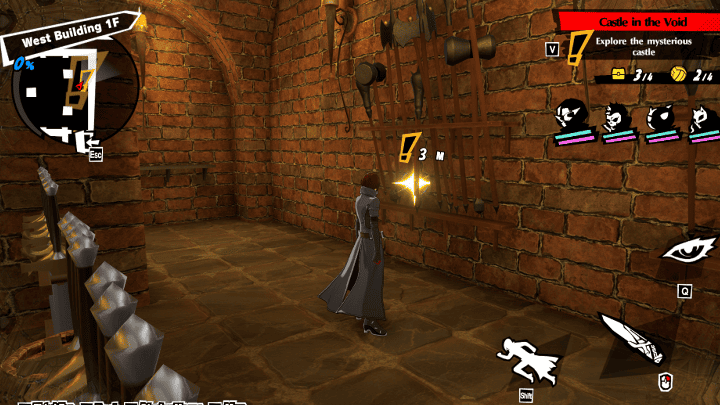
You have entered the armory, collect the items that sparkle around the room. |
| 4 | 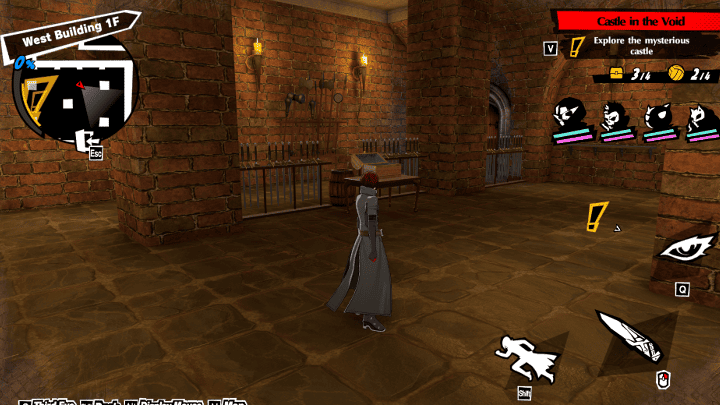
Defeat the shadow and grab the treasure in the armory, there will also be a Volleyball on one of the shelves. By this point, you should have 2 spears before you proceed to the next room. |
| 5 | 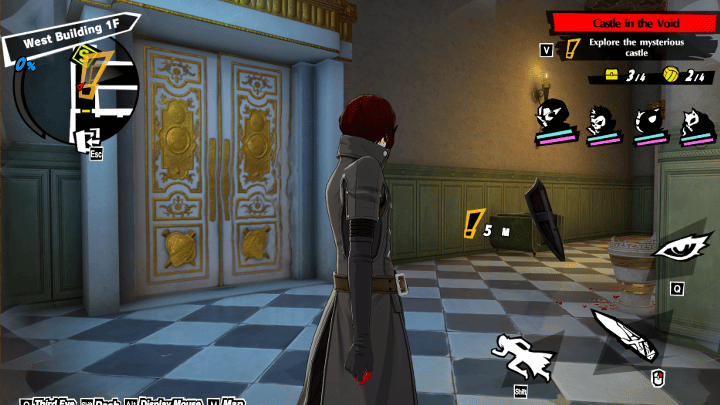
After exiting the room, there will be a safe room. Heal your party if you need to. A shield will be leaning against a couch, grab that and enter the next room. |
| 6 | 
Defeat the shadow in the room and grab the Volleyball on the table. A chest will be inside the fireplace. approach the armor with a shield and take the shield, this will start a battle. After defeating it, the fire covering the chest should be out, and you should be able to open it. |
| 7 | 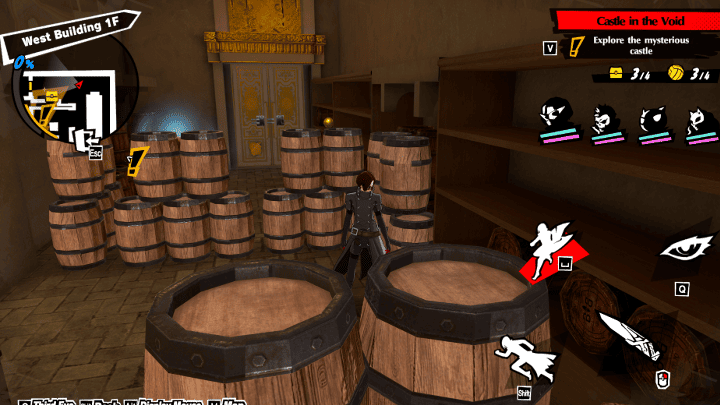
Before leaving the room, climb onto the shelves to access the area where the barrels are blocking it off. Grab the treasure chest and the Volleyball. After this go back to the first are where the suits of armor are. |
| 8 | 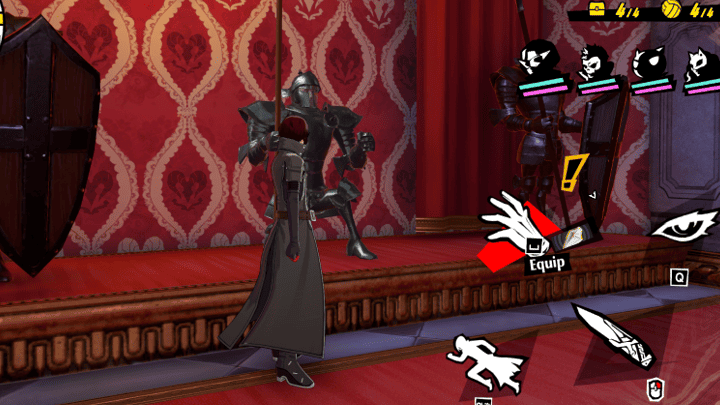
Place the correct equipment on the suits of armor. The door to the next room will open. |
| 9 | 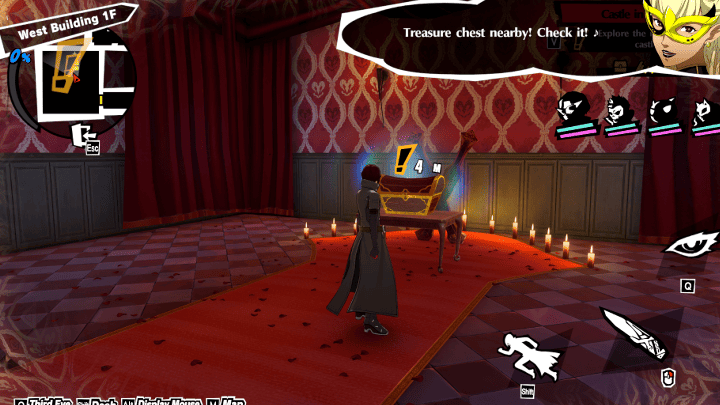
There will be a large treasure chest in the middle of the room. Once you grab this, it will initiate the boss fight of this stage. |
Battle Mission: Goal 4 - Gun Attack
| How to Complete the Mission |
|---|
|
|
This Battle Mission will need some maneuvering to accomplish. The enemy needs to be defeated in 1 turn, but the last shots need to be done with a gun.
| ▲Return to Chapter Selection▲ |
|---|
Stage 1-8
Enemy Party
|
Kelpie Weakness: Electric
Kelpie
Resistance: Ice Passive: Fog-Shrouded Lands Increase critical damage 3.5%. When only 1 foe on field, increase Wind damage 21%. |
Silky Weakness: Fire, Electric
Silky
Resistance: Ice Passive: Benevolent Guardian Increase max HP 3.5%. When curing spiritual ailments, restore target's HP 12.5% of Atk. |
There are 2 Kelpies
Party Restriction
| Guest Party Member (Required in party) |
|---|
|
・Ryuji Sakamoto
・Morgana ・Ann Takamaki |
If you own the unit, you can replace the story Phantom Thief with your own to get better stats.
Walkthrough
| For Friends | ||||||||
|---|---|---|---|---|---|---|---|---|
| Battle Mission Defeat 6 strong enemies (6/6) |
||||||||
 Old Castle - Underground Walkway |
 Old Castle - Hidden Room |
 Old Castle - Training Hall of Love |
||||||
| 1 | 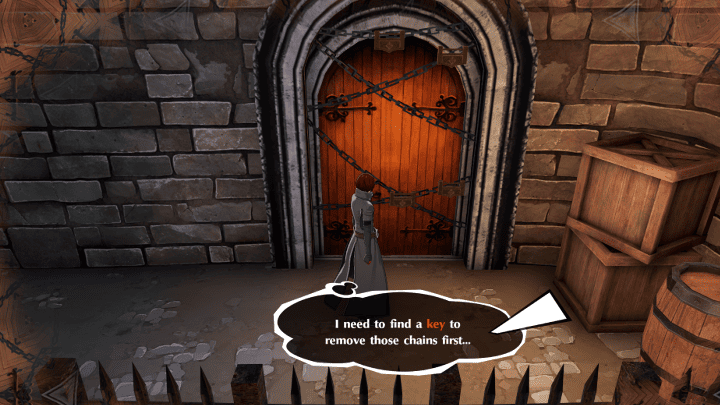
There will be a chained door when you go down the first flight of stairs, you will need a key for this. On the landing before the next flight of stairs a Volleyball will be on a box. |
|||||||
| 2 | 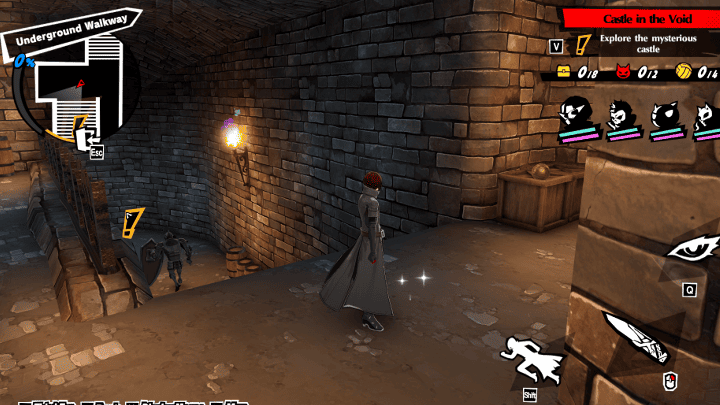
A shadow will be waiting at the very bottom. Quickly hide behind a box and defeat it. Continue following the waypoint, and there will be another shadow beside the moat. |
|||||||
| 3 | 
After crossing the bridge, look left and there will be a shadow guarding a door. Defeat it and enter the room. The Hidden Room Key will be on the barrels beside the door, and a treasure chest will be in the room as well. |
|||||||
| 4 | 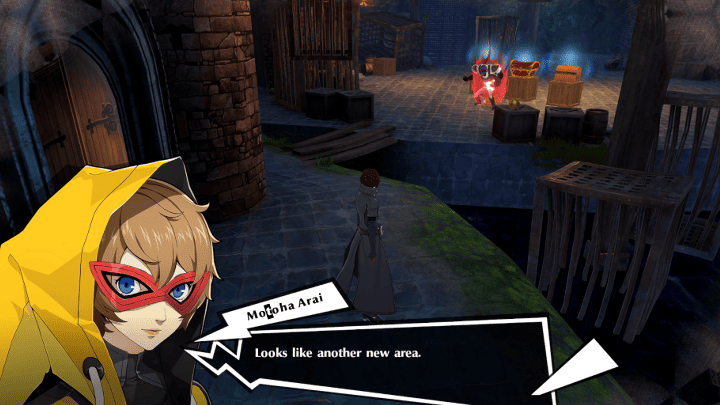
Before moving to the next area, go back to the chained door. The room will have a tough enemy, a Volleyball, and three treasure chests. |
|||||||
| 5 | 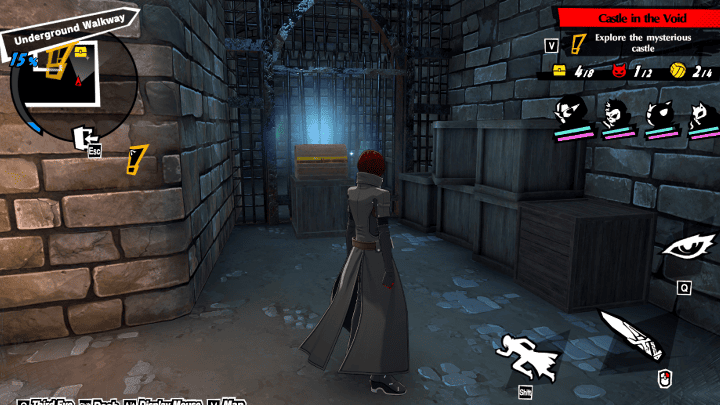
Walk past the door to the new area and grab the chest at the end of the corridor. Go back to the room after that and enter the next area. |
|||||||
| 6 | 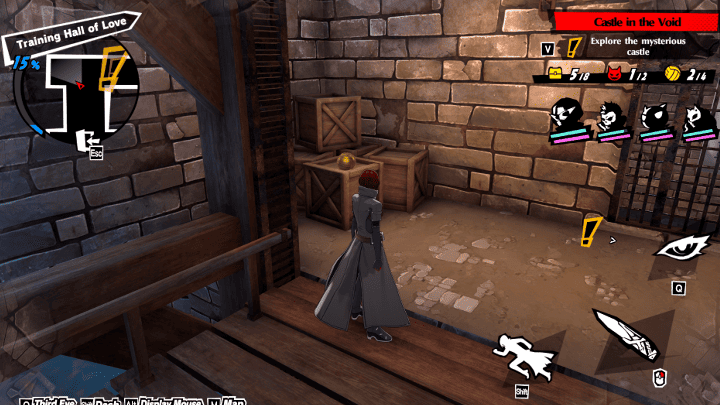
Cross the bridge, and to the left will be a pile of boxes with a Volleyball. The lever to open the gate will be locked; you need to find a key. |
|||||||
| 7 | 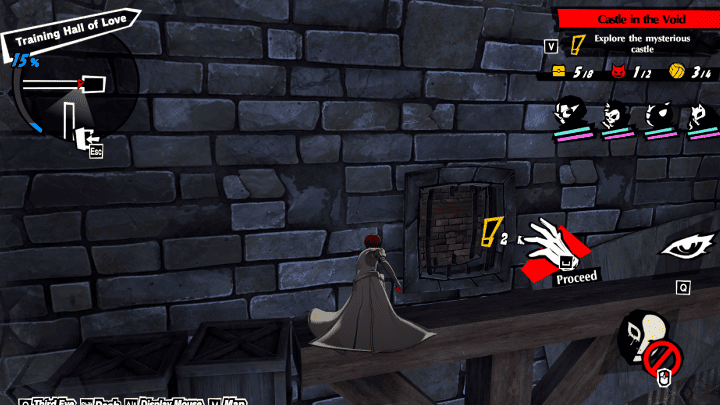
Go back to the other side of the bridge and enter the gate there. Jump onto the boxes and there will be a small window you can pass through to get to the other side of the map. |
|||||||
| 8 | 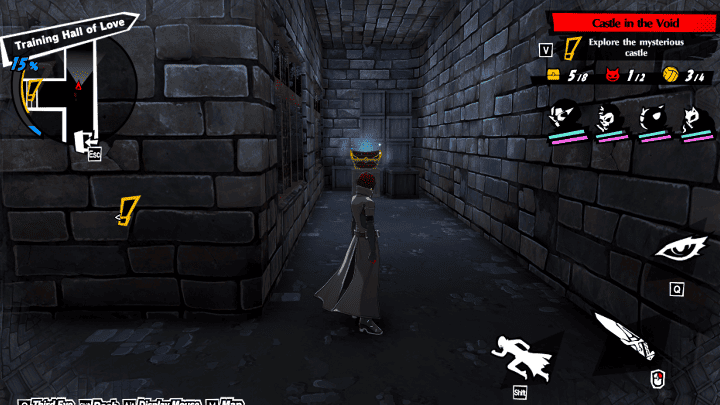
When you drop off, climb up the stairs to your left and grab the treasure chest on the boxes. |
|||||||
| 9 | 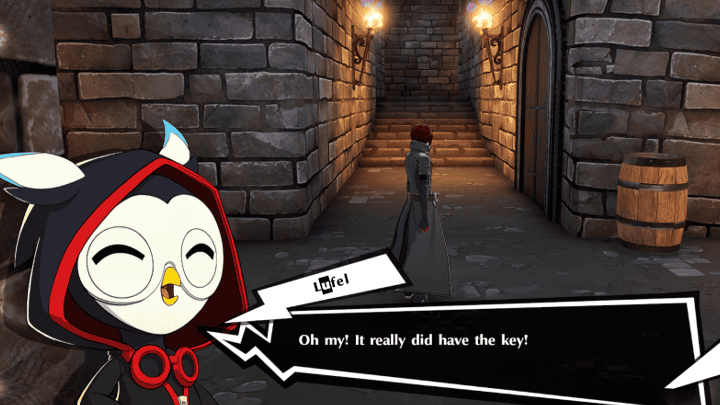
Turn back around and defeat the wandering shadow, it will have the key you need. |
|||||||
| 10 | 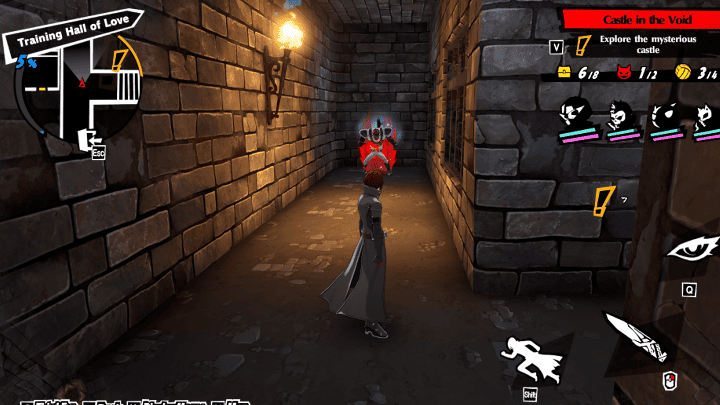
Before following the waypoint, continue down the east corridor and get the Volleyball from the left corridor and face the tough shadow protecting a treasure chest in the right. |
|||||||
| 11 | 
Go back and open the locked gate, before taking a peek, go to the end of the corridor and grab the last treasure chest. Return to the door and take a peek, this will initiate the boss battle of this stage. |
|||||||
Battle Mission: Goal 2 - Defeat Strong Enemies
When you reach this stage, you should be able to complete this Battle Mission if you defeated all the Bosses in the previous stages.
| ▲Return to Chapter Selection▲ |
|---|
Stage 1-9
Enemy Party
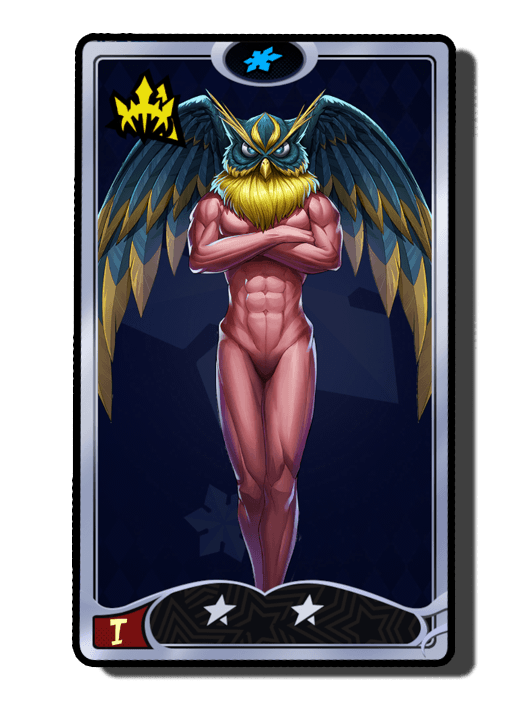
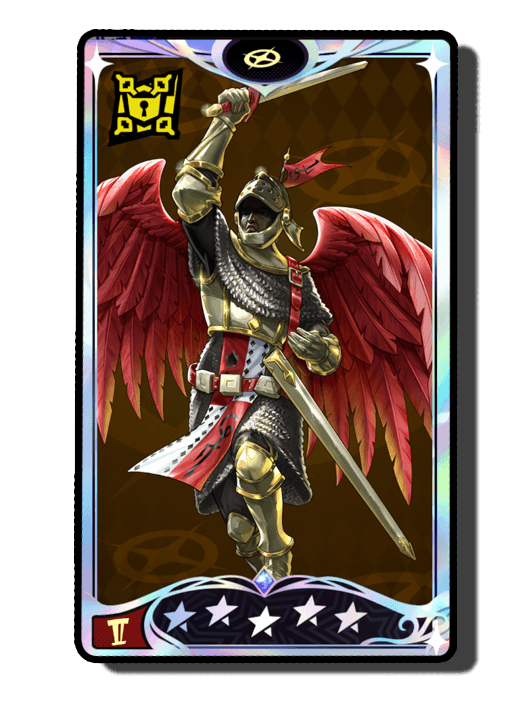 Archangel Weakness: Electric, Curse
Archangel
Resistance: Bless Passive: Sublime Luminance Increase ailment accuracy 10%. After using a skill, 30% chance to gain 1 Blessing. If the skill dealt Bless damage, gain 1 more Blessing. |
Party Restriction
| Guest Party Member (Required in party) |
|---|
| ・Joker |
If you own the unit, you can replace the story Phantom Thief with your own to get better stats.
Walkthrough
| For Friends | ||||||||
|---|---|---|---|---|---|---|---|---|
| 1 | 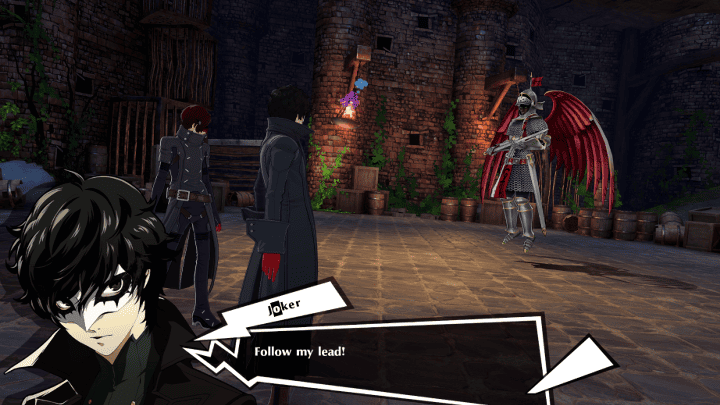
This stage will go straight into a two vs one battle against Archangel with only Joker as your teammate. |
|||||||
| ▲Return to Chapter Selection▲ |
|---|
Stage 1-10
Enemy Party
|
Incubus Weakness: Gun, Bless
Incubus
Resistance: Electric Passive: Corrupting Whisper Increase max HP 3.5%. When dealing Curse damage, decrease target's Atk 10% (2 turns). |
Bicorn Weakness: Electric
Bicorn
Resistance: Curse Passive: Dance of the Wind Increase Atk 2.9%. After knockdown, increase Wind damage 20% (2 turns). |
Silky Weakness: Fire, Electric
Silky
Resistance: Ice Passive: Benevolent Guardian Increase max HP 3.5%. When curing spiritual ailments, restore target's HP 12.5% of Atk. |
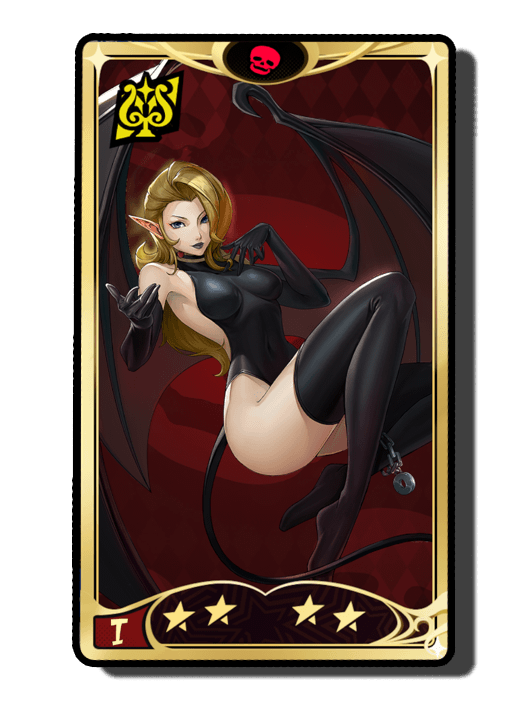 Succubus Weakness: Gun, Bless
Succubus
Resistance: Fire, Curse Passive: Intoxicated Whisper Increase Atk 3.5%. When an ally uses a skill, increase their critical rate 10.2% (1 turn). |
Party Restriction
| Guest Party Member (Required in party) |
|---|
| ・ Joker |
If you own the unit, you can replace the story Phantom Thief with your own to get better stats.
Walkthrough
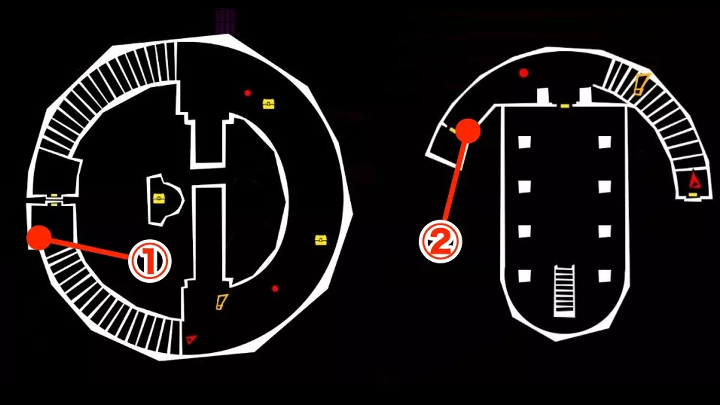
| Thieves' Alliance | |||||||||
|---|---|---|---|---|---|---|---|---|---|
 Old Castle - Central Tower: Top |
 Old Castle - Central Tower: Bottom |
||||||||
 Old Castle - Central Tower |
 Old Castle - Central Tower |
||||||||
| 1 | 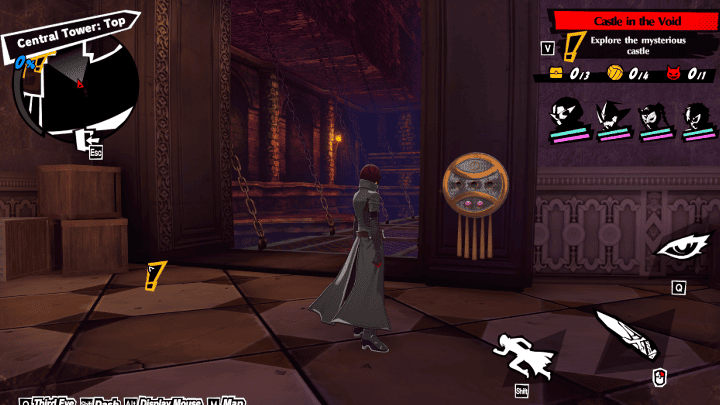
Similar to the Kiuchi Palace, you will need to find 3 baseballs to slot into the lock to stop the scythes. |
||||||||
| 2 | 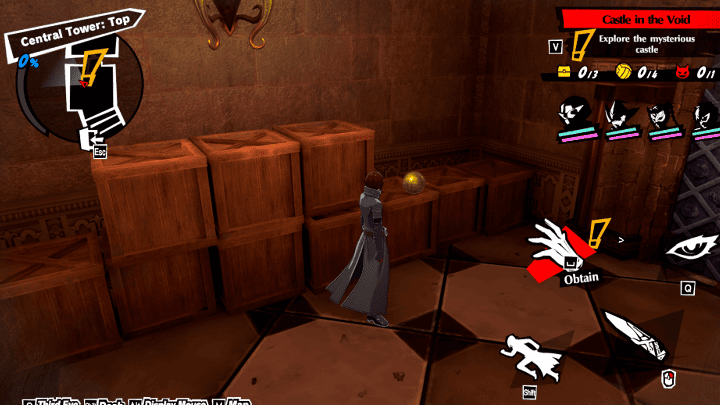
The right path will be blocked off once you try to go there; instead, go down the stairs. Grab the Volleyball on the boxes before you pass through the door. |
||||||||
| 3 | 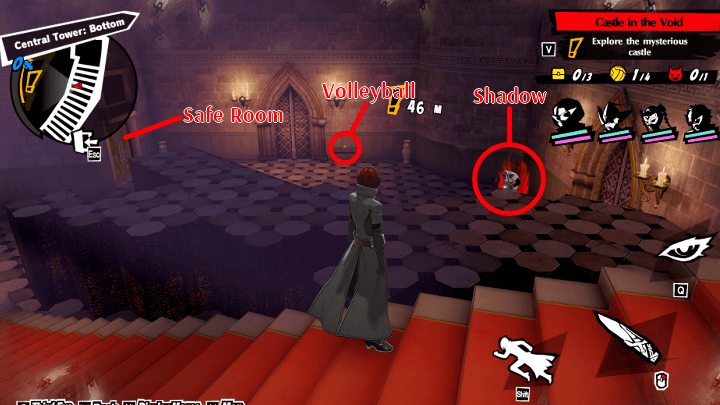
As you go down the stairs, the floors will rise and block off some paths. There will be a Safe Room at the bottom of the stairs and a Volleyball on the table beside the Main doors. There will be a tough shadow on this floor for you to defeat. |
||||||||
| 4 | 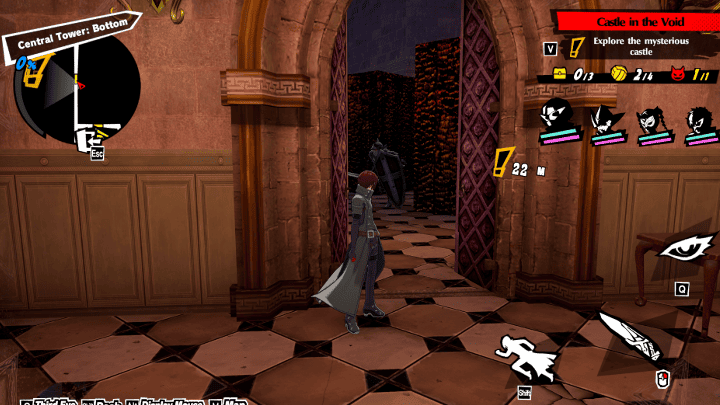
When you open the door to the next area, there will be a roaming shadow. After defeating it, pull the ring to open the gates. |
||||||||
| 5 | 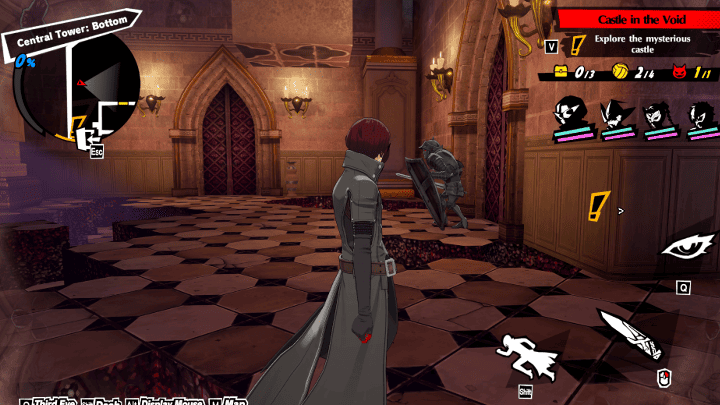
Defeat the shadow guarding the door, and there will be a treasure chest and an elevator inside. Ignore the elevator for now and continue exploring. |
||||||||
| 6 | 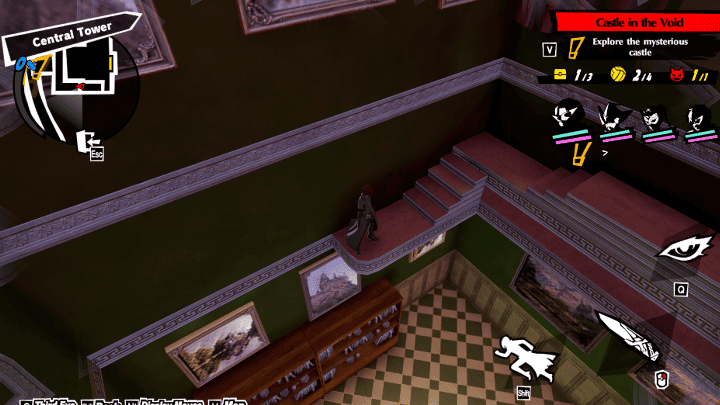
Climb up the bookshelf to find your way outside. |
||||||||
| 7 | 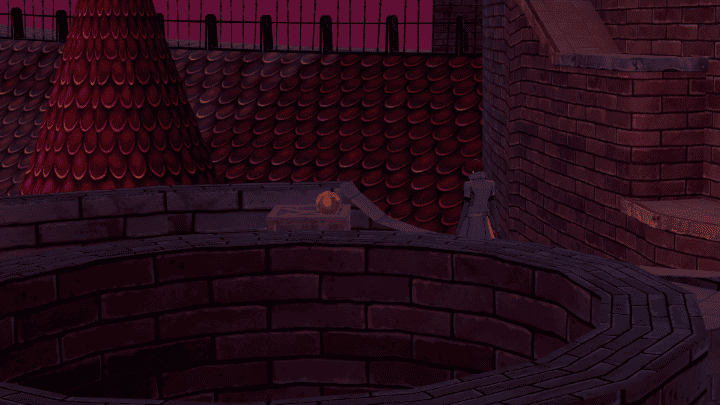
As you make your way to the other side of the tower, grab the Volleyball on a box. |
||||||||
| 8 | 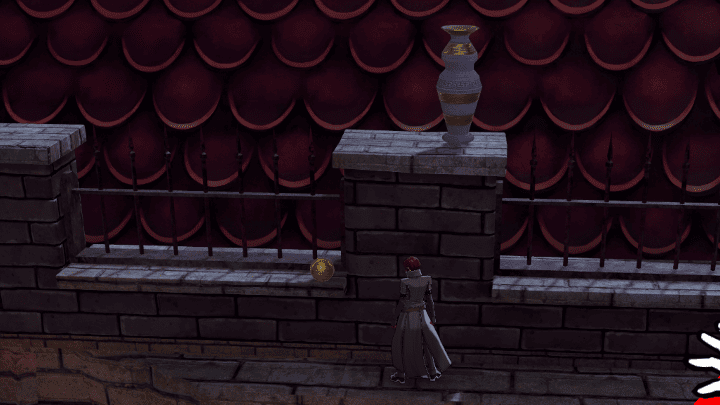
Before you get off the wall to the area full of boxes, grab the last Volleyball. |
||||||||
| 9 |
The Box Puzzle is simple, just push the box to its matching design and the blocks will disappear. |
||||||||
| 10 | 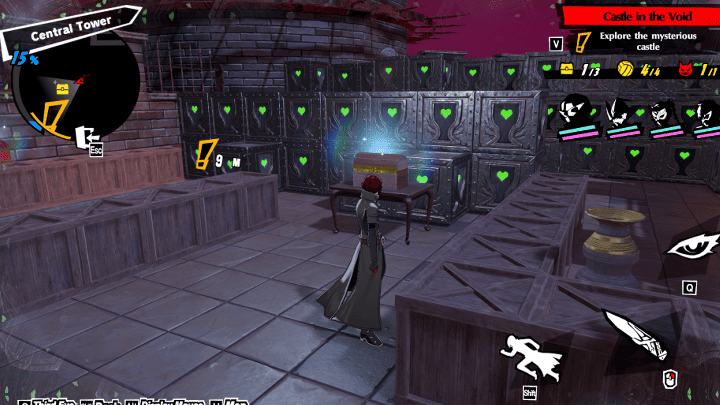
There will be shadow guarding the area, defeat it, then grab the treasure chest. Grab the block and drag it into place to remove more blocks. |
||||||||
| 11 | 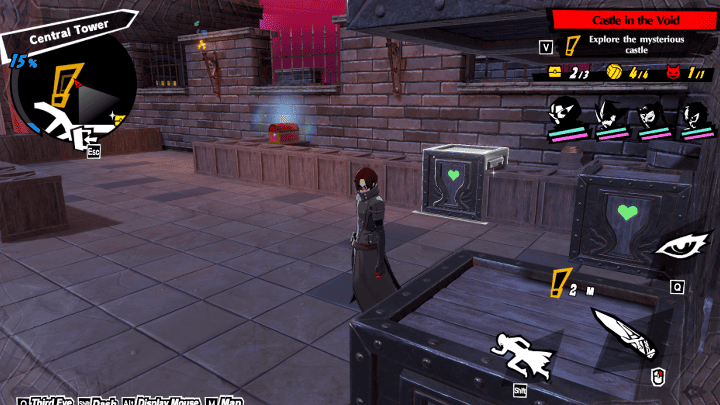
Open the path to the other chest by dragging away the block. After grabbing the treasure, slot it into place. Grab the second block and slot it in to take down the wall. |
||||||||
| 12 | 
When the wall disappears, a shadow will initiate a battle with you. Defeating this enemy will drop the Baseball you need to stop the scythes in the tower. |
||||||||
| ▲Return to Chapter Selection▲ |
|---|
Stage 1-11
Enemy Party
|
Jack-o'-Lantern Weakness: Gun, Ice, Wind
Jack-o'-Lantern
Resistance: Fire Passive: Feast of Fools Increase Atk 2.9%. After knockdown, increase Fire damage 20% (2 turns). |
Pixie Weakness: Gun, Ice, Curse
Pixie
Resistance: Electric, Bless Passive: Guide the Lost Increase Atk 2.9%. After knockdown, increase party's Atk 14.3% (2 turns). |
 Andras Weakness: Fire, Gun
Andras
Resistance: Ice Passive: Release of Grudges Increase Atk 2.9%. After using skills on foes, increase main target's Ice damage taken 6.6% (2 turns). |
Walkthrough
| Past Wisdom | |||||||||
|---|---|---|---|---|---|---|---|---|---|
 Old Castle - East Building Annex |
|||||||||
| 1 | 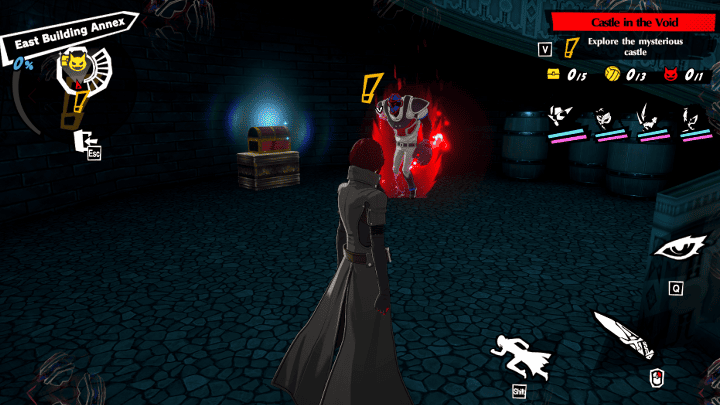
Go straight to the bottom of the spiral staircase. There will be a chest there guarded by a tough enemy. |
||||||||
| 2 | 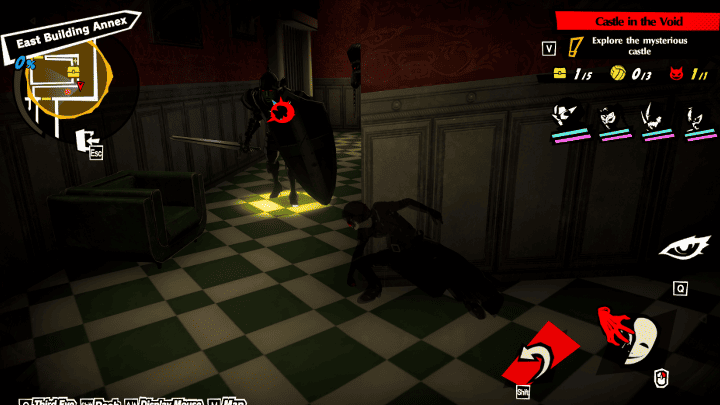
Follow your waypoint and enter the corridor, defeat the roaming shadow there. Pull the ring to open the gates in the other hallway. |
||||||||
| 3 | 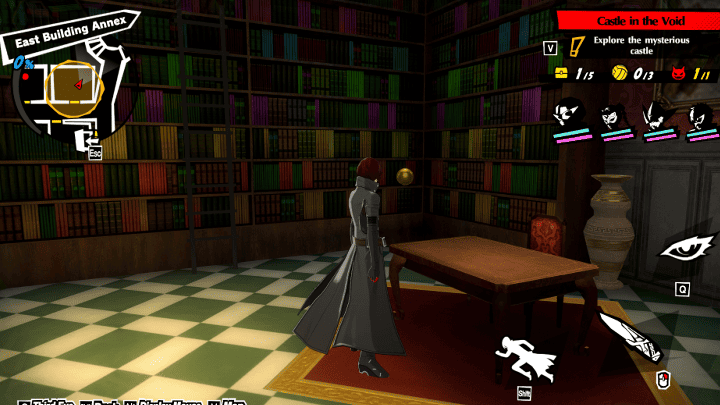
In the first room to the right, the Volleyball will be in the bookshelf. Pull the ring in this room will block the way out of the corridor, but it will open another room in the hallway. |
||||||||
| 4 | 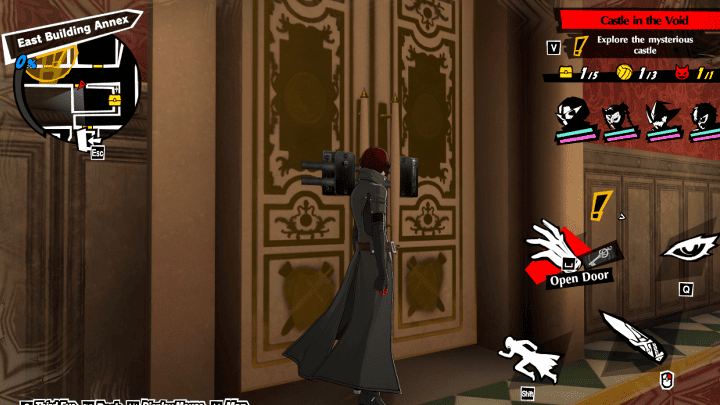
The room across is locked, find the key to open it. In the meantime, go to the next room. |
||||||||
| 5 | 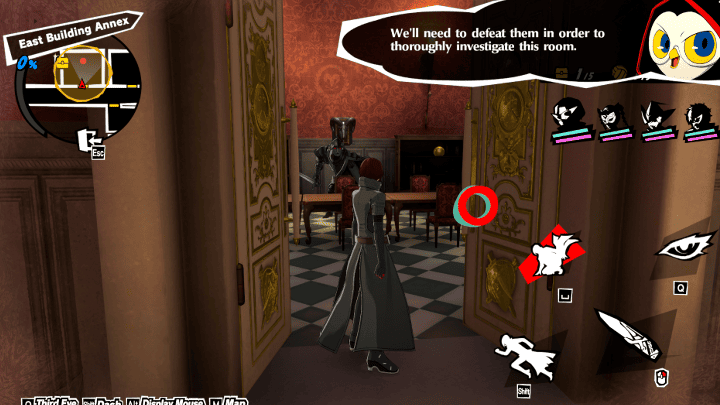
There will be a Volleyball on the shelf, and a shadow guarding the next pull ring. Defeat the shadow and pull the ring. This will lower the gates again. The Castle Room Key will be on the shelf, right side of the room. |
||||||||
| 6 | 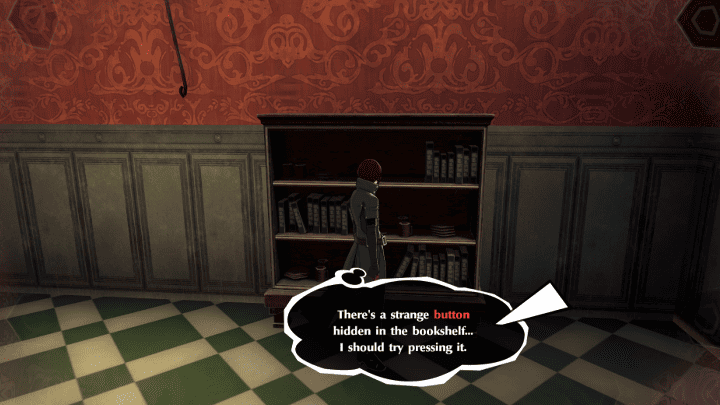
Go to the shelf on the other side of the room where you got the Castle Room key and inspect it. Press the button to reveal the treasure. |
||||||||
| 7 | 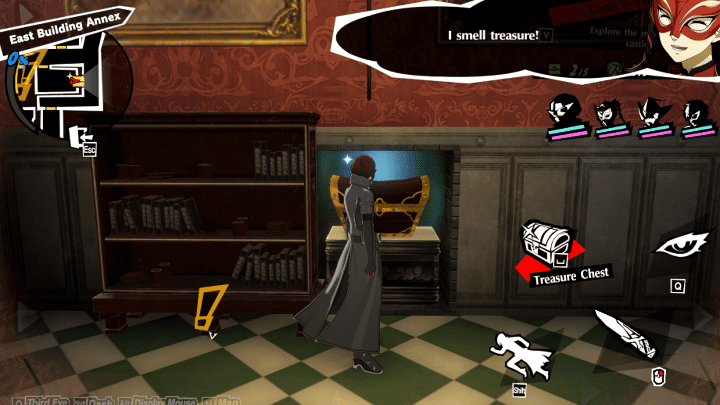
Before you proceed to the next area, go back to the locked door and use the key to open it. In the room inspect the shelf on the left side wall and press the button to get the treasure. |
||||||||
| 8 | 
Follow your waypoint and enter the next area. The treasure will be right there when you open the door. |
||||||||
| 9 | 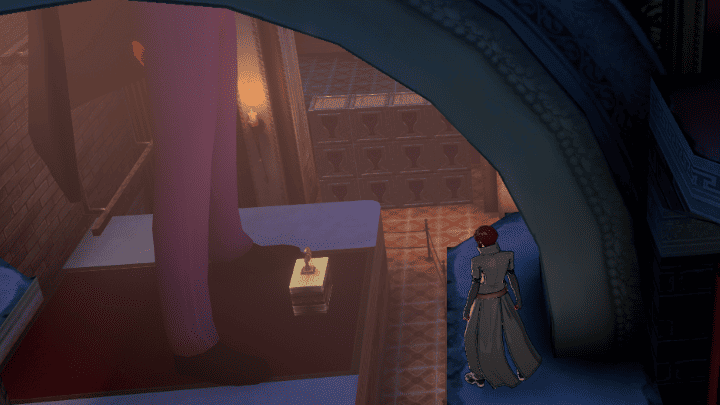
You need to grab the baseball on the altar. Jump across the ledges to reach the area south of the map and pull the ring. This will bring down the scaffolding for you to cross to the other side. |
||||||||
| 10 | 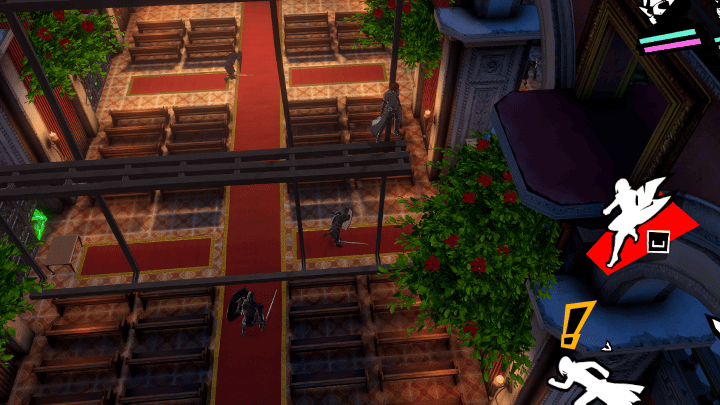
From where the ring is, jump onto the pillar and cross the room using the scaffolding. Defeat the shadow waiting there and grab the Volleyball and treasure chest. Jump up the pillar closest to the wall, and there will be another ring to pull there. |
||||||||
| 11 | 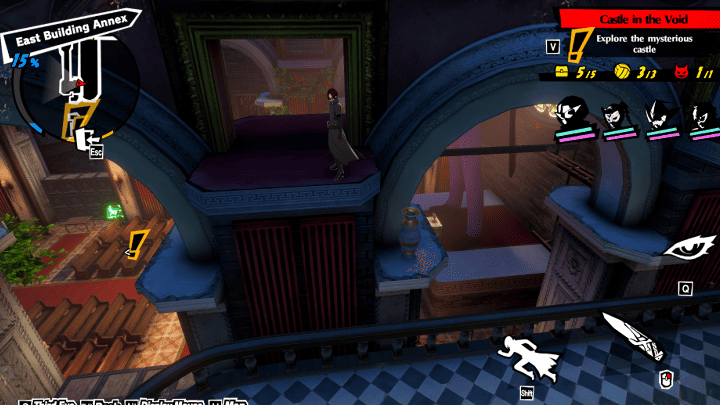
make your way across the pillars and go to the front of the room |
||||||||
| 12 | 
Use the scaffolding to get behind the giant statue, climb down, and grab the ball. |
||||||||
| ▲Return to Chapter Selection▲ |
|---|
Stage 1-12
Enemy Party
|
Pixie Weakness: Gun, Ice, Curse
Pixie
Resistance: Electric, Bless Passive: Guide the Lost Increase Atk 2.9%. After knockdown, increase party's Atk 14.3% (2 turns). |
Incubus Weakness: Gun, Bless
Incubus
Resistance: Electric Passive: Corrupting Whisper Increase max HP 3.5%. When dealing Curse damage, decrease target's Atk 10% (2 turns). |
Andras Weakness: Fire, Gun
Andras
Resistance: Ice Passive: Release of Grudges Increase Atk 2.9%. After using skills on foes, increase main target's Ice damage taken 6.6% (2 turns). |
Silky Weakness: Fire, Electric
Silky
Resistance: Ice Passive: Benevolent Guardian Increase max HP 3.5%. When curing spiritual ailments, restore target's HP 12.5% of Atk. |
|
Berith Weakness: Ice
Berith
Resistance: Gun, Fire Passive: Duke's Intimidation Increase Def 5.3%. Decrease weakness damage 24%. |
Party Restriction
| Guest Party Member (Required in party) |
|---|
| ・Ryuji Sakamoto |
If you own the unit, you can replace the story Phantom Thief with your own to get better stats.
Walkthrough
| Temporary Rest | |
|---|---|
 Old Castle - East Building Annex |
|
| 1 | 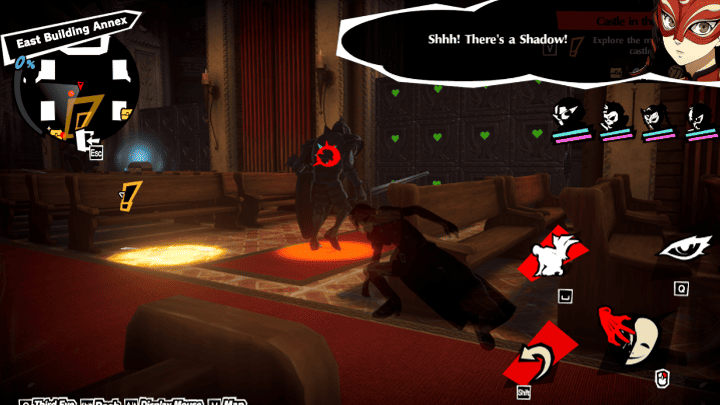
You will start where you ended in the last stage, right in front of Kamoshida's statue. Quickly hide behind one of the pews to avoid getting caught by a shadow. |
| 2 | 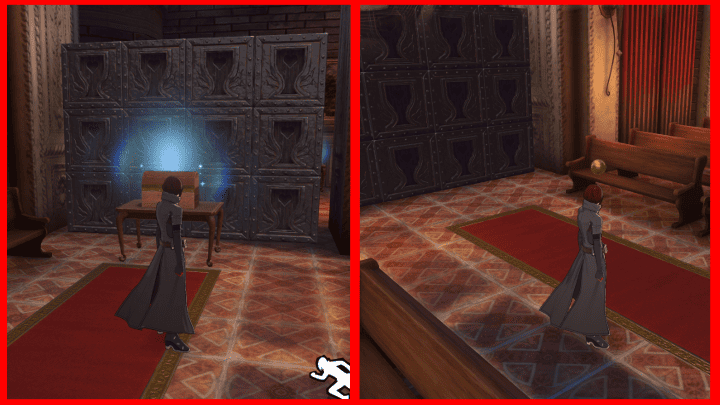
Finish off the three shadows in the main area. Once the room is clear grab the chest and Volleyball |
| 3 | 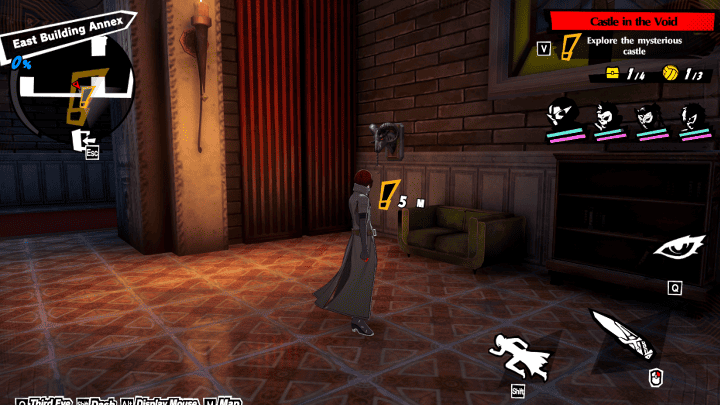
Pull on the Ring at the very back of the room. This will unlock the gates on the right side. |
| 4 | 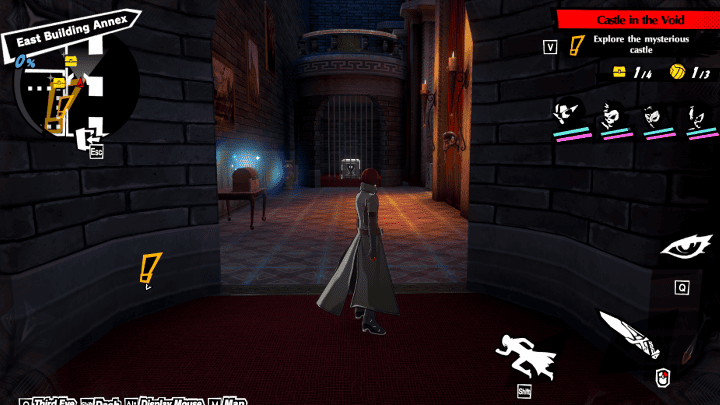
Don't leave the room yet. If you turn to the right after entering the gate, you will see a treasure chest and another ring to pull. Pull the ring to open the gate where the blocks for the puzzles are. |
| 5 |
Drag the blocks over to the wall and fit them in. This will open the passage. Do the same for the second block for the wall across the room. |
| 6 | 
After taking down the wall, defeat the roaming shadow. There will be a treasure chest on a table on the right side of where you entered. |
| 7 | 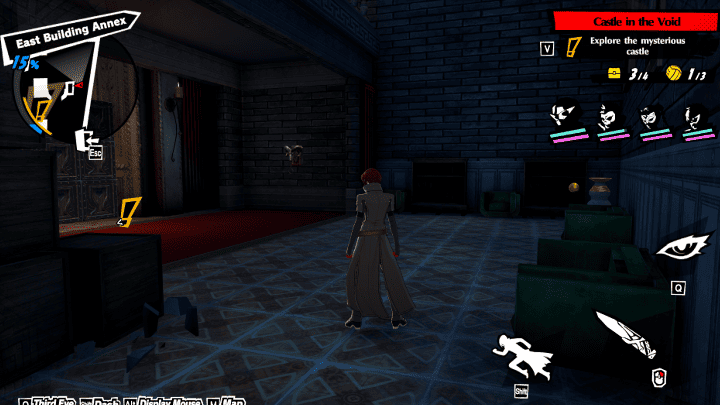
Go further into the room and grab the Volleyball on a shelf and pull the ring. This will open all the gates in the room. |
| 8 | 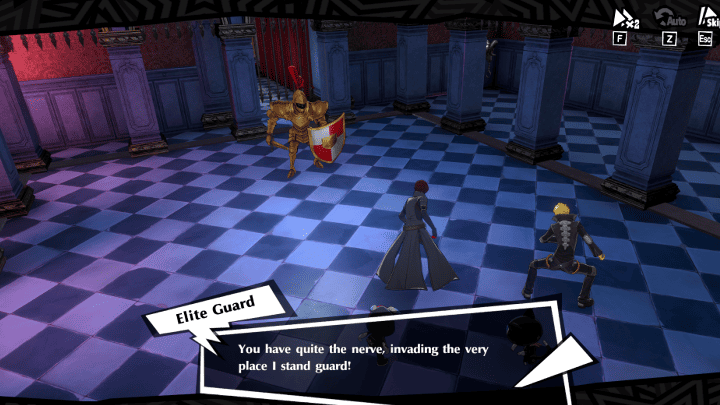
Go back to the door and go to the next area. Once you enter the room you will be ambushed by an enemy. It will be a series of two battles, the first one will be easier, followed by the elite guar,d which will be a harder enemy. |
| 9 | 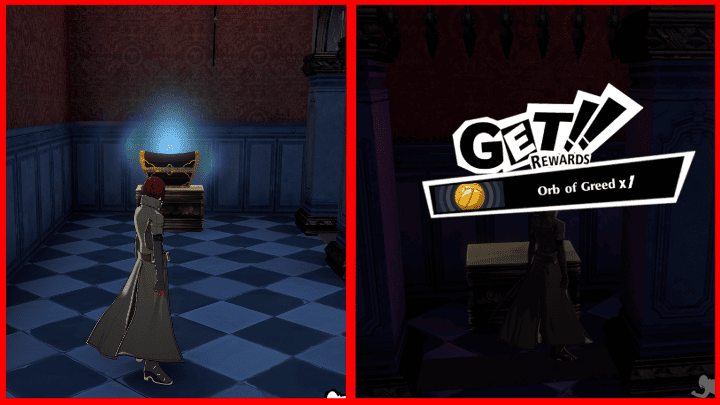
After defeating the enemy grab the chest and Volleyball on either side of the room. Pull the ring to open the gate and go to the next area and finish this stage. |
| ▲Return to Chapter Selection▲ |
|---|
Stage 1-13
Enemy Party
|
Andras Weakness: Fire, Gun
Andras
Resistance: Ice Passive: Release of Grudges Increase Atk 2.9%. After using skills on foes, increase main target's Ice damage taken 6.6% (2 turns). |
Succubus Weakness: Gun, Bless
Succubus
Resistance: Fire, Curse Passive: Intoxicated Whisper Increase Atk 3.5%. When an ally uses a skill, increase their critical rate 10.2% (1 turn). |
Berith Weakness: Ice
Berith
Resistance: Gun, Fire Passive: Duke's Intimidation Increase Def 5.3%. Decrease weakness damage 24%. |
Archangel Weakness: Electric, Curse
Archangel
Resistance: Bless Passive: Sublime Luminance Increase ailment accuracy 10%. After using a skill, 30% chance to gain 1 Blessing. If the skill dealt Bless damage, gain 1 more Blessing. |
Walkthrough
| Temporary Rest | |
|---|---|
| Battle Mission Clear the last battle in Stage 1-13 with an All-Out Attack |
|
 Old Castle - East Building 3F |
|
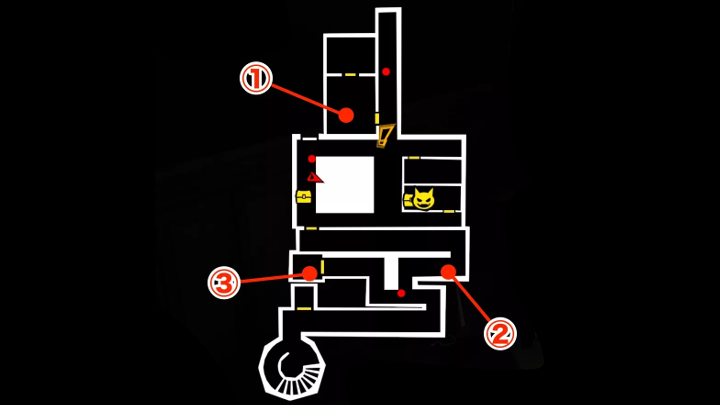
| 1 | 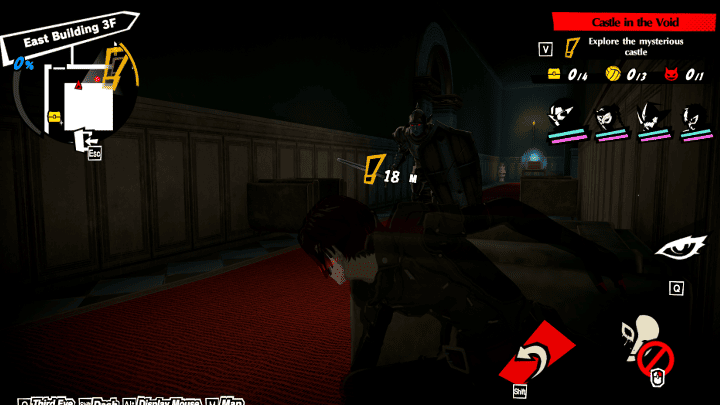
Be careful when you enter the room, there will be a roaming shadow walking past the entrance. |
| 2 | 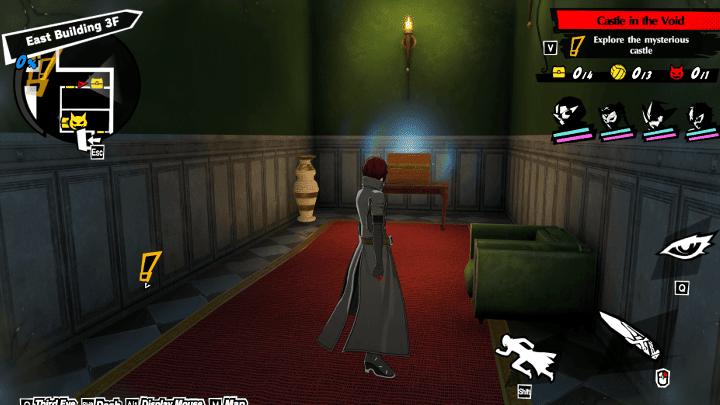
After defeating the shadow, there will be a chest at the very end of the left side corridor. You won't be able to open the door yet so explore the other areas. |
| 3 | 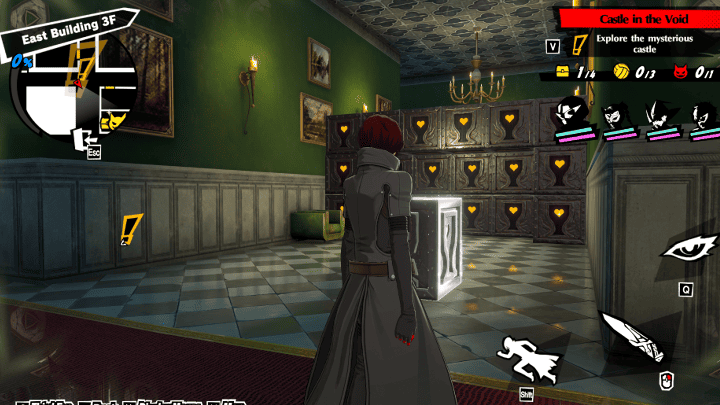
Near the door will be a wall of blocks. You will need two blocks to remove it. Push the first block into place, for the second one, there will be a block in the corridor across the wall. |
| 4 | 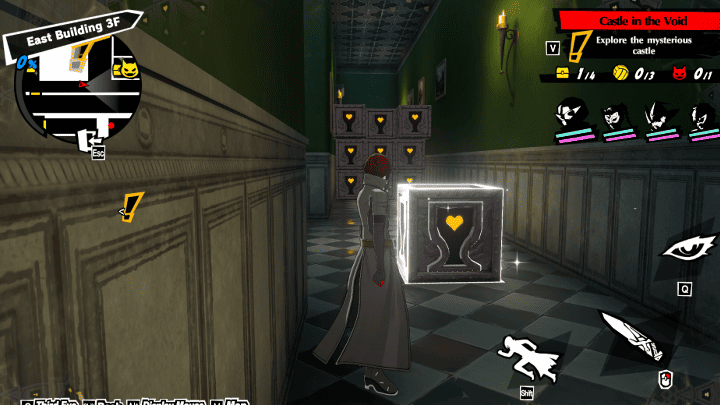
There will be another wall on the left side after you enter the blocked-off area. Push the block to take it down. There will be another room in this area but you won't be able to enter yet. Continue exploring other areas. |
| 5 | 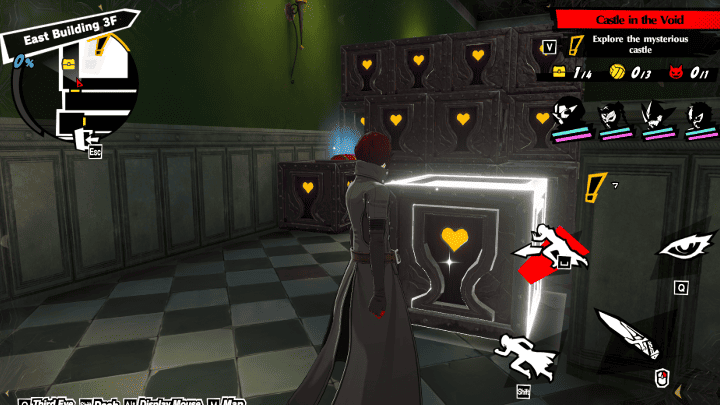
Run to the other side of the corridor, and there will be another block of walls for you to remove. There will be ta reasure chest behind these walls. Ignore the room for now since you won't be able to enter it yet. |
| 6 | 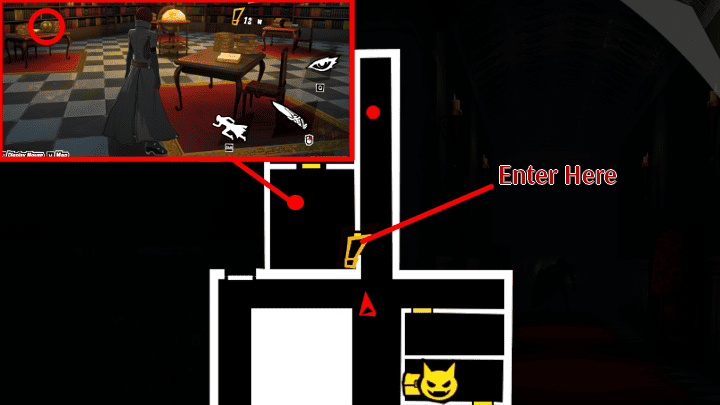
After unblocking all the walls, enter the corridor north of the map and enter the first room on the left. After entering the library, grab the Volleyball on the table, then go to the shelf where the waypoint is. You will need books to open the locked bookcase. |
| 7 | 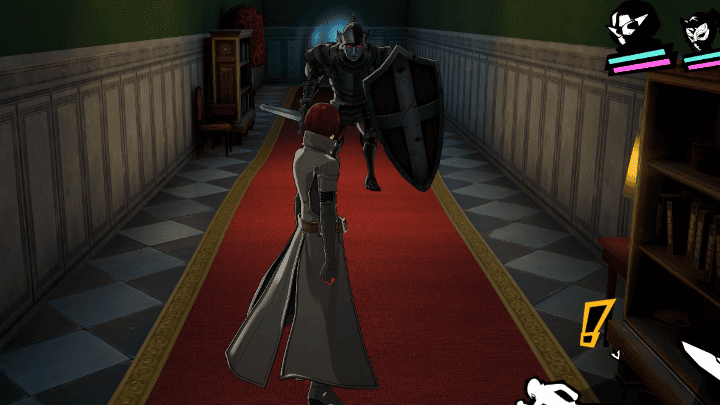
Leave the room for now and defeat the roaming shadow. At the end of the corridor is a chest. |
| 8 | 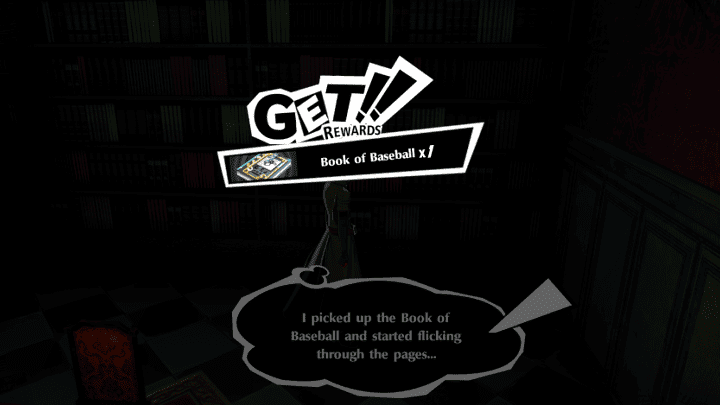
Follow the waypoint for the first book. Enter the room and get the Book of Baseball. Since you removed all the walls earlier, it will be easier to move around. Leave the room and enter the corridor beside it, turn left, and enter the room at the end of the hall. |
| 9 | 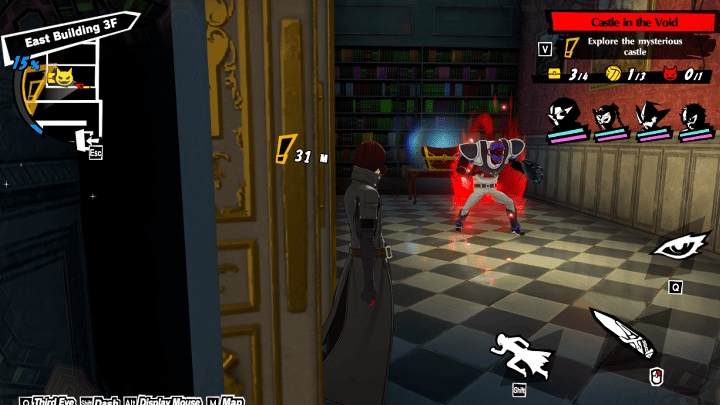
There will be a Boss Enemy inside the room, defeat it and get the treasure chest. |
| 10 | 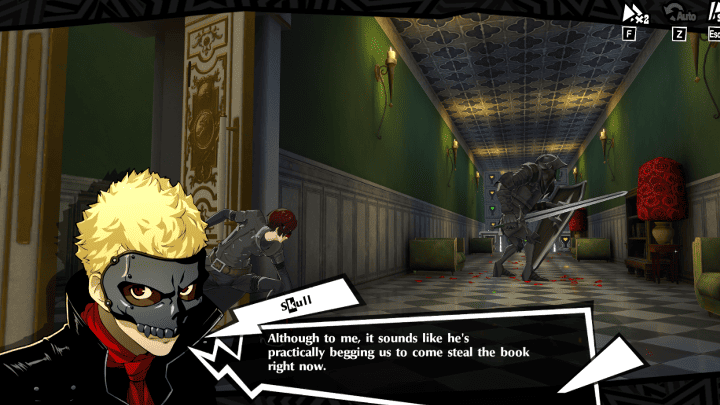
Follow the waypoint to find the next book. After entering the door, defeat the shadow holding the Book of Domination. |
| 11 |
The hallway will be blocked by blocks again; match the corresponding colored boxes to remove the wall. |
| 12 | 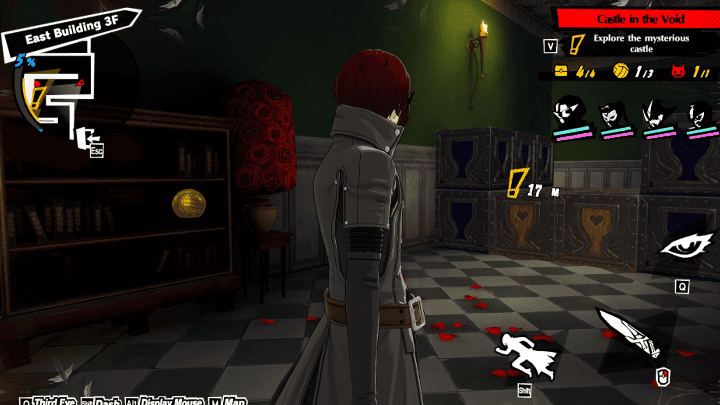
Grab the Volleyball on the shelf and jump over the box. Make sure to time it so that you don't get attacked by the roaming shadow. |
| 13 |
Solve another block puzzle to enter the room. Grab the Last Volleyball and the Book of Punishment. Go back to the room with the mechanism. |
| 14 | 
After opening the shelf, defeat the enemy guarding the last Baseball. |
Battle Mission: Goal 5 - All-Out Attack
| How to Complete the Mission |
|---|
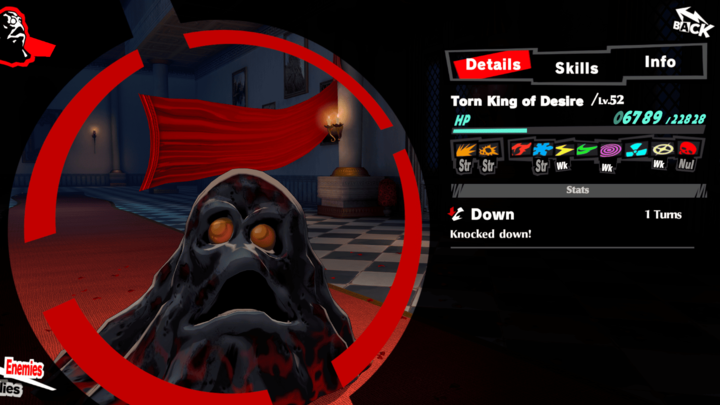 |
The Torn King of Desire is the final enemy of this stage. This enemy has the same appearance and stat block as the Black Ooze. To complete this mission, you will need to knock it down and defeat it with an All-Out Attack. Make sure to time it correctly so you dont defeat the enemy before you can initiate the attack.
How to Perform All-Out Attacks
| ▲Return to Chapter Selection▲ |
|---|
Stage 1-14
Enemy Party
|
Pixie Weakness: Gun, Ice, Curse
Pixie
Resistance: Electric, Bless Passive: Guide the Lost Increase Atk 2.9%. After knockdown, increase party's Atk 14.3% (2 turns). |
Andras Weakness: Fire, Gun
Andras
Resistance: Ice Passive: Release of Grudges Increase Atk 2.9%. After using skills on foes, increase main target's Ice damage taken 6.6% (2 turns). |
 Eligor Weakness: Electric
Eligor
Resistance: Gun, Fire Passive: Knight's Glare Increase critical damage 10%. When dealing Physical damage to 1 foe, increase Atk 15% and increase critical rate 8%. |
Party Restriction
| Guest Party Member (Required in party) |
|---|
| ・ Joker |
If you own the unit, you can replace the story Phantom Thief with your own to get better stats.
Walkthrough
| It's Ours! | |
|---|---|
| Battle Mission Defeat Raga with no KO'd allies |
|
 Old Castle - Central Tower Top |
|
| 1 | 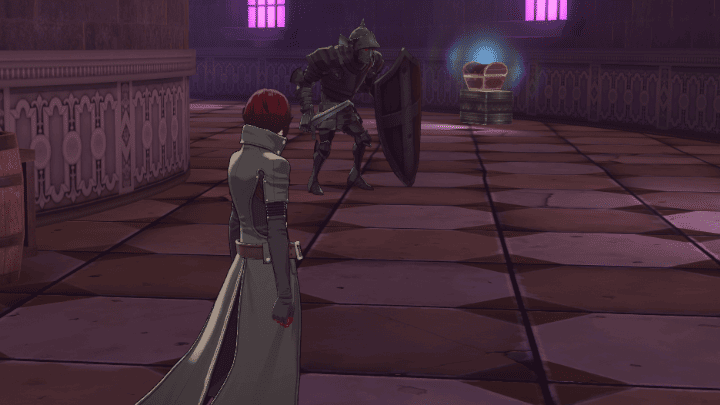
Before going through the bridge, go down the stairs and collect the Volleyball on the boxes. |
| 2 | 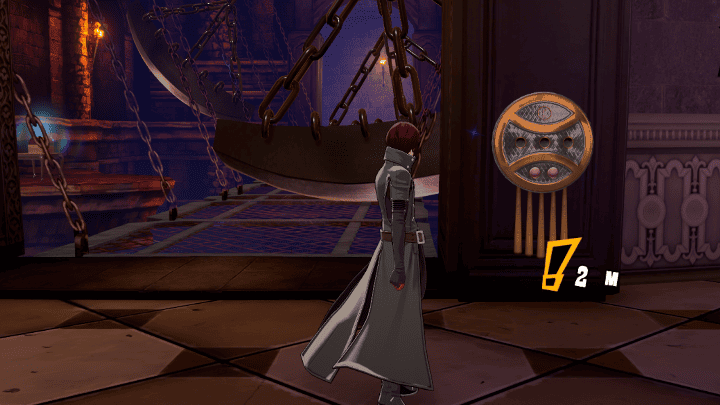
Go back upstairs and insert the baseballs in the mechanism. Grab the chest midway the bridge. |
| 3 | 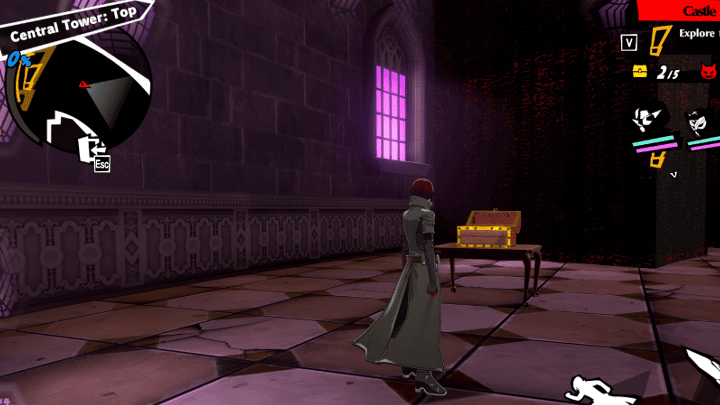
After crossing the bridge, defeat the shadow and grab the chest on the right side. |
| 4 | 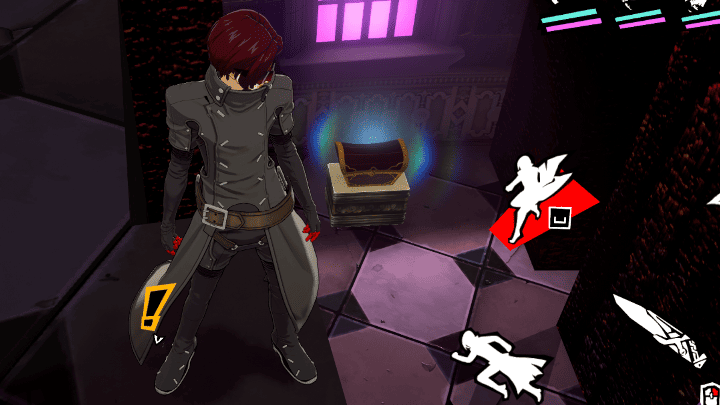
Walk behind the wall and use your grappling hook to climb up. Jump down the other side to grab another treasure chest. |
| 5 | 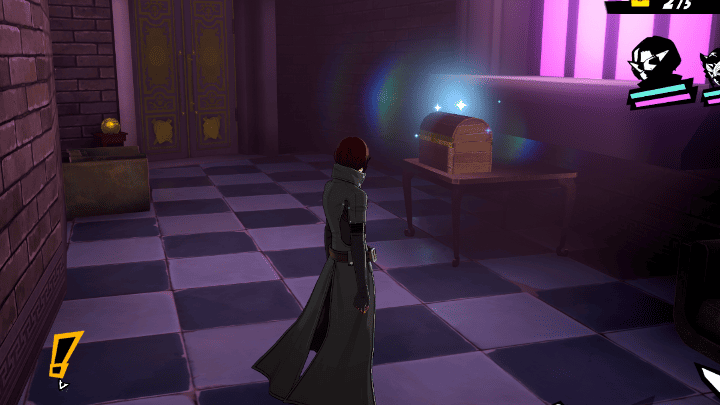
Climb up the stairs and ignore the door for now. continue down the corridor and grab the chest and Volleyball. |
| 6 |
Go back to the door and go to the left pillar. Climb up the pillars and enter a window leading to a treasure chest. |
| 7 | 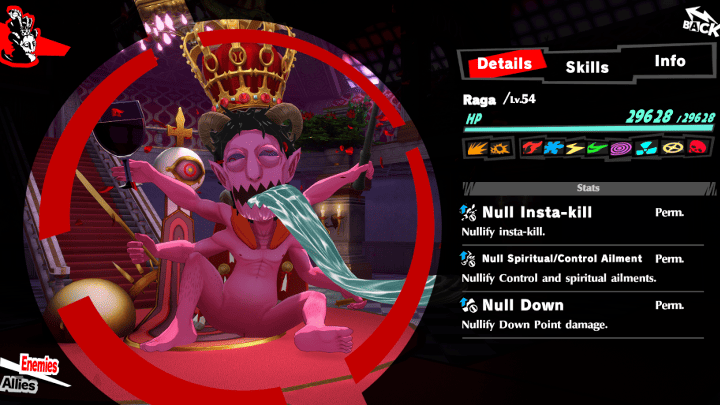
Enter the Throne Room Doors, this will start the fight with the Palace Boss, Raga the Sinner of Lust. Raga has no particular strengths or weaknesses. It is recommended to be at least level 57 before you face this boss. Make sure to break his crown first to stop him from healing. ▲How to Defeat Raga▲ |
Battle Mission: Goal 6 - Defeat Raga with no KO
| How to Complete the Mission |
|---|
|
|
To defeat Raga with no KOs, make sure to have a Character like Marian or Soy to help maintain your Party's HP. You can also bring Healing Items if you don't have a unit or Persona with good healing skills.
| ▲Return to Chapter Selection▲ |
|---|
Kamoshida Palace Rewards
|
|
Scavenge Mission Rewards
| Objective | Reward |
|---|---|
| Open 15 Treasure Chests | ・150 Rebel Coin |
| Open 30 Treasure Chests | ・150 Rebel Coin |
| Open 50 Treasure Chests | ・150 Rebel Coin |
| Collect 10 Obs of Greed | ・150 Rebel Coin |
| Collect 20 Obs of Greed | ・150 Rebel Coin |
| Collect 35 Obs of Greed | ・150 Rebel Coin ・Squabble Emote |
Adventure Mission Rewards
| Objective | Rewards |
|---|---|
| Get 60% Progress in Stage 1-1 | ・150 Rebel Coin ・30 Meta Jewels |
| Get 60% Progress in Stage 1-2 | ・150 Rebel Coin ・30 Meta Jewels |
| Get 60% Progress in Stage 1-3 | ・150 Rebel Coin ・30 Meta Jewels |
| Get 60% Progress in Stage 1-4 | ・150 Rebel Coin ・30 Meta Jewels |
| Get 60% Progress in Stage 1-5 | ・150 Rebel Coin ・30 Meta Jewels ・High Five Emote |
| Get 60% Progress in Stage 1-6 | ・150 Rebel Coin ・30 Meta Jewels |
| Get 60% Progress in Stage 1-7 | ・150 Rebel Coin ・30 Meta Jewels |
| Get 60% Progress in Stage 1-8 | ・150 Rebel Coin ・30 Meta Jewels |
| Get 60% Progress in Stage 1-9 | ・150 Rebel Coin ・30 Meta Jewels |
| Get 60% Progress in Stage 1-10 | ・150 Rebel Coin ・30 Meta Jewels ・Showtime Emote |
| Get 60% Progress in Stage 1-11 | ・150 Rebel Coin ・30 Meta Jewels |
| Get 60% Progress in Stage 1-12 | ・150 Rebel Coin ・30 Meta Jewels |
| Get 60% Progress in Stage 1-13 | ・150 Rebel Coin ・30 Meta Jewels |
| Get 60% Progress in Stage 1-14 | ・150 Rebel Coin ・30 Meta Jewels |
| Get 100% Progress in All stages | ・150 Rebel Coin ・1 Platinum Milicoin ・Seeker: Castle Badge |
Battle Mission Rewards
| Objective | Rewards |
|---|---|
| Defeat 3 strong enemies | ・150 Rebel Coins |
| Defeat 6 strong enemies | ・150 Rebel Coins |
| Clear the last battle in Stage 1-4 within 10 turns | ・150 Rebel Coins |
| Defeat the last 2 foes in Stage 1-7 in 1 turn with Gun attacks | ・150 Rebel Coins |
| Clear the last battle in Stage 1-13 with an All-Out Attack | ・150 Rebel Coins |
| Defeat Raga with no KO'd Allies | ・150 Rebel Coins ・Cheers Emote |
Persona 5: The Phantom X (P5X) Related Guides

All Story Palaces
| List of Story Palaces | |
|---|---|
| 1 | Kiuchi's Palace |
| 2 | Miyazawa's Palace |
| 3 | Katayama's Palace Akashi's Palace |
All Event Palaces
| List of Event Palaces | ||
|---|---|---|
| Palace | Event | |
| 1 | Castle in the Void | Take Your Heart |
| 2 | Museum Arc | Crossroads of Fate |
| 3 | Bank Arc | Crossroads of Fate |
| 4 | Pyramid Arc | Crossroads of Fate |
| 5 | Spaceport Arc | Crossroads of Fate |
Comment
Thank you for letting us know! After checking our gameplay, we've added the location of the last chest to the guide on step 9.
Author

Castle in the Void Palace Puzzles and Walkthrough
Rankings
Gaming News


Popular Games

Genshin Impact Walkthrough & Guides Wiki
Umamusume: Pretty Derby Walkthrough & Guides Wiki
Crimson Desert Walkthrough & Guides Wiki
Monster Hunter Stories 3: Twisted Reflection Walkthrough & Guides Wiki
Honkai: Star Rail Walkthrough & Guides Wiki
Pokemon Pokopia Walkthrough & Guides Wiki
The Seven Deadly Sins: Origin Walkthrough & Guides Wiki
Wuthering Waves Walkthrough & Guides Wiki
Zenless Zone Zero Walkthrough & Guides Wiki
Arknights: Endfield Walkthrough & Guides Wiki


Recommended Games
Fire Emblem Heroes (FEH) Walkthrough & Guides Wiki
Diablo 4: Vessel of Hatred Walkthrough & Guides Wiki
Cyberpunk 2077: Ultimate Edition Walkthrough & Guides Wiki
Yu-Gi-Oh! Master Duel Walkthrough & Guides Wiki
Super Smash Bros. Ultimate Walkthrough & Guides Wiki
Pokemon Brilliant Diamond and Shining Pearl (BDSP) Walkthrough & Guides Wiki
Elden Ring Shadow of the Erdtree Walkthrough & Guides Wiki
Monster Hunter World Walkthrough & Guides Wiki
The Legend of Zelda: Tears of the Kingdom Walkthrough & Guides Wiki
Persona 3 Reload Walkthrough & Guides Wiki


All rights reserved
©Perfect World Adapted from Persona5 ©ATLUS. ©SEGA.
The copyrights of videos of games used in our content and other intellectual property rights belong to the provider of the game.
The contents we provide on this site were created personally by members of the Game8 editorial department.
We refuse the right to reuse or repost content taken without our permission such as data or images to other sites.
how do you get to boxes puzzle in 1-10? it seems bugged -- I can not jump down from the catwalk nearby -- there's exclamation mark in third eye - but there's no interaction available