Museum Arc Palace Walkthrough
★Version 3.3 is now live: Firecracker Rin | Banner
┗ Skill Cards | New Year's Light Banner | LNY Event
☆ Version 3.2.2 is now live: Matoi | Banner
┗ Throne | Entropy Banner | Take Your Love
★Tier Lists: Characters | Personas | Rerolls
☆Boards: Companio | Friends | Toy Trading
This is a guide to the Museum Arc, Madarame's Palace in Persona 5: The Phantom X (P5X). Check out our complete step-by-step walkthrough, brochure locations, and rewards in this guide.
List of Contents
Museum Arc Walkthrough
| Museum Arc | |
|---|---|
|
|
|
Stage 2-2 Brochure Locations
| 2-2 Brochure Locations |
|---|
|
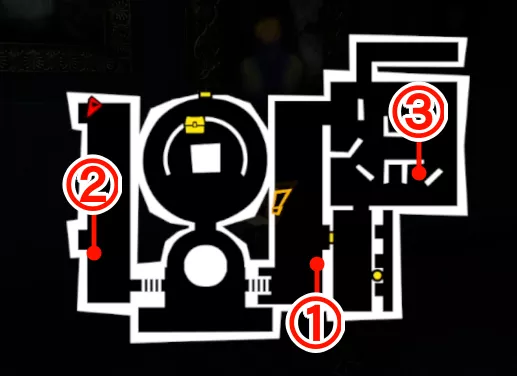
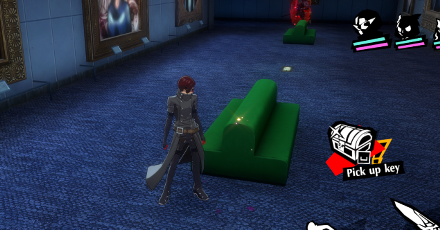
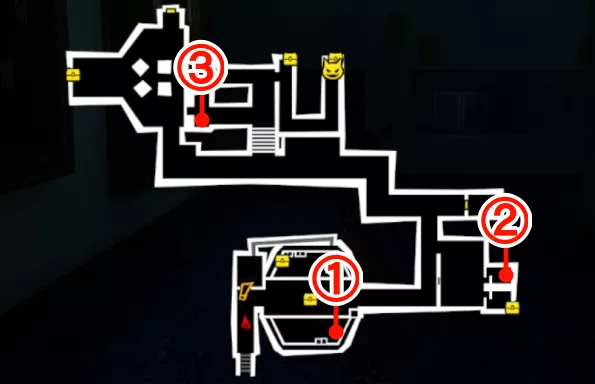
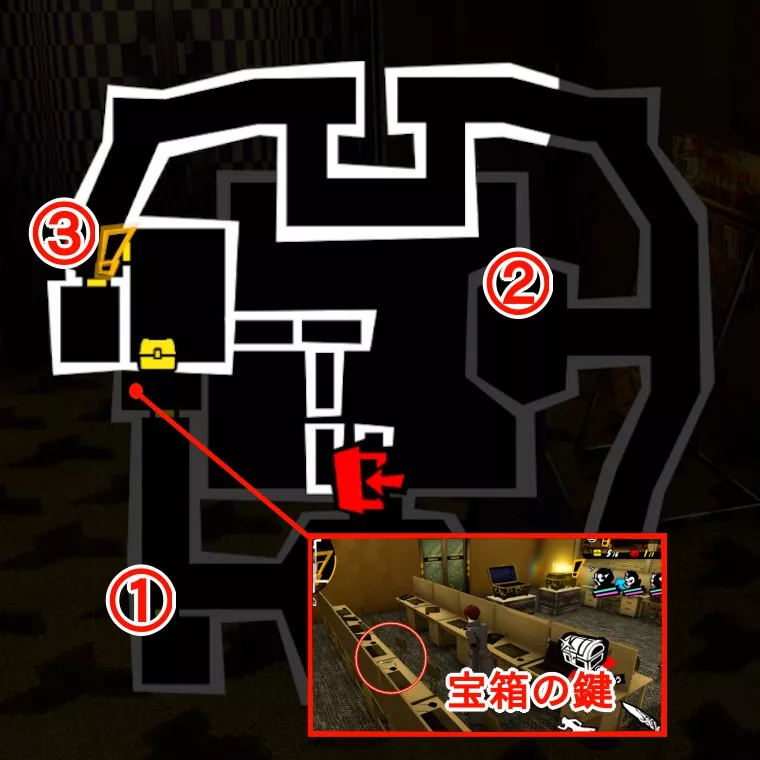
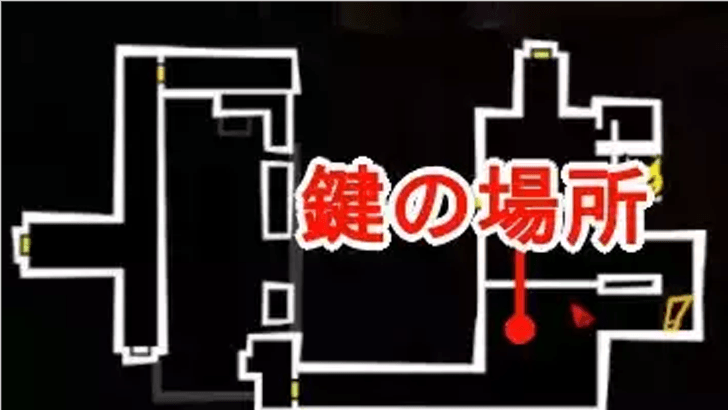
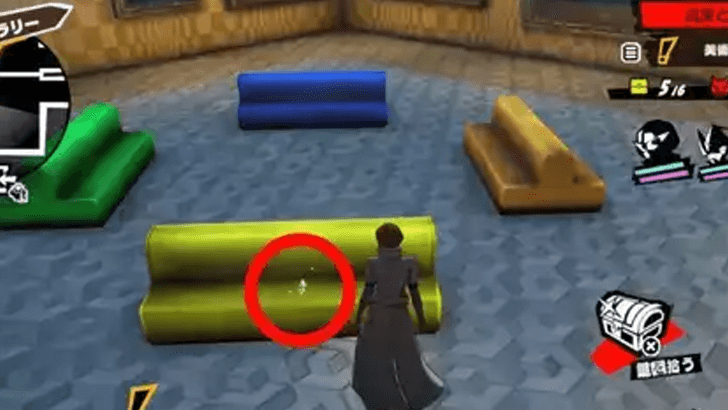
How to Open Treasure Chest in the Middle
The treasure chest found in the middle of the map requires a key for you to open. The key can be found on a "green sofa" on the left side of the map.
Treasure Chest Key Location
 Map |
 Overworld |
Stage 2-3 Brochure Locations
| 2-3 Brochure Locations |
|---|
|
Stage 2-4 Brochure Locations
| 2-4 Brochure Locations |
|---|
|
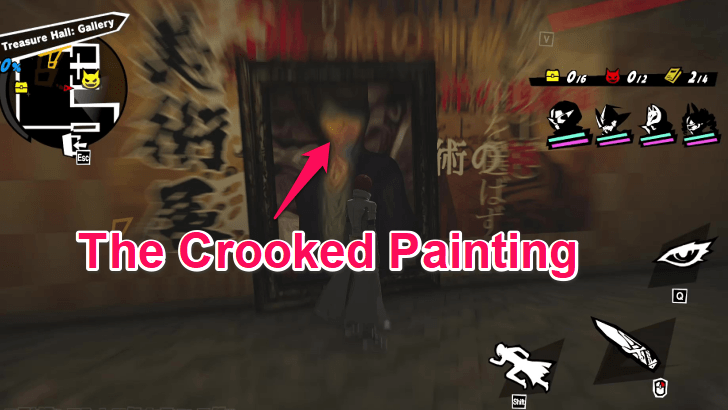
Use Camera to Reveal Secret Path
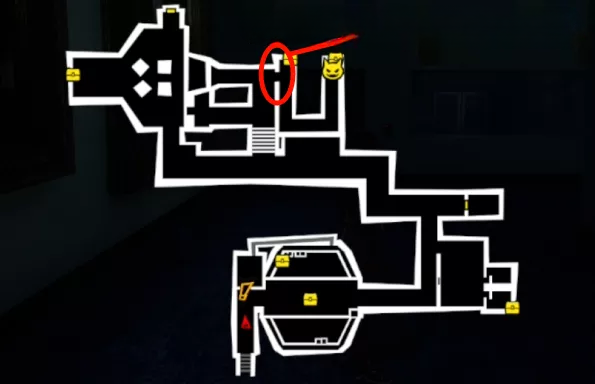 Map |
 Overworld |
By using the camera on the painting
at the end of the hallway, specifically on the opposite side of the treasure chest, you will reveal a secret path that leads you to two treasure chests and an enemy!
Stage 2-5 Brochure Locations
| 2-5 Brochure Locations |
|---|
|
The Third Brochure is Out of Bounds
You can obtain the third brochure by entering an area that is not shown on the map and then further proceeding to the left.
Stage 2-6 Brochure Locations
| 2-6 Brochure Locations |
|---|
|
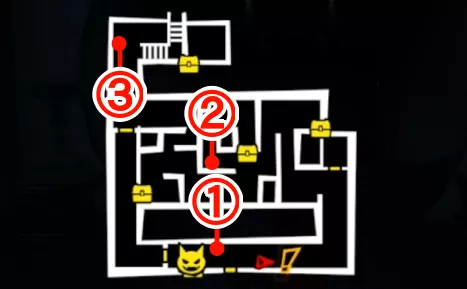
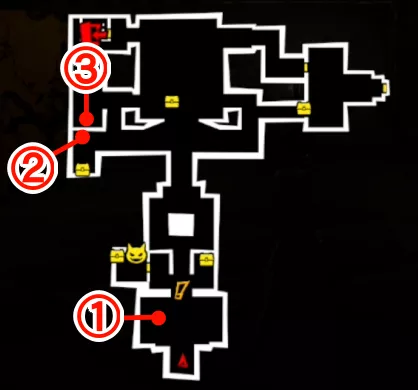
Treasure Chest Key Location
The key to the locked treasure chest in Museum 2-6 can be found on top of the desk in the same room the treasure chest is in.
Stage 2-7 Brochure Locations
| 2-7 Brochure Locations |
|---|
|
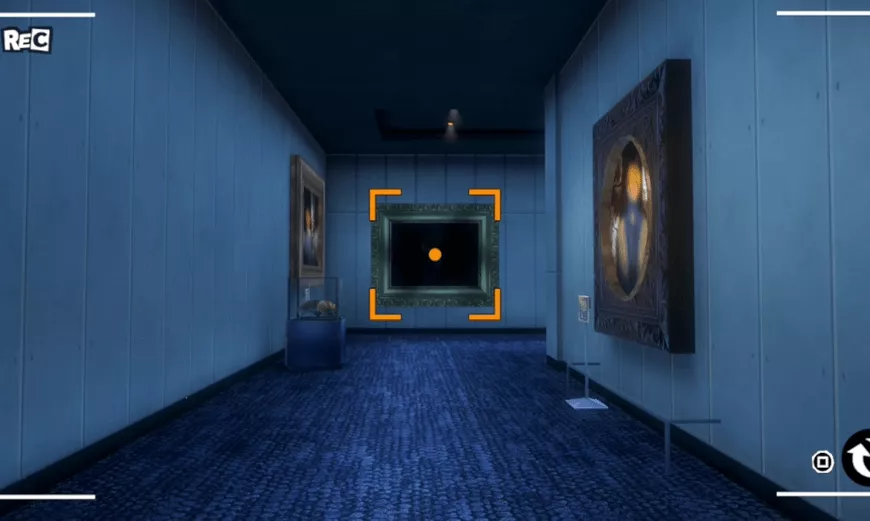
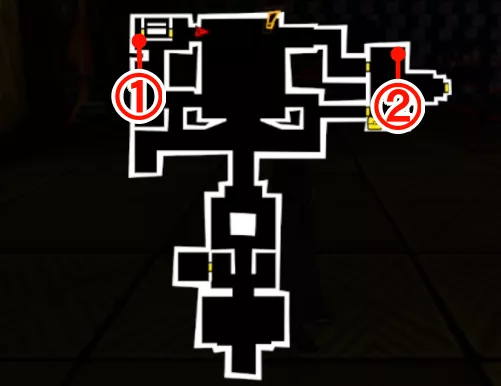
How to Disable the Laser Maze
You will need to turn off the lasers to reach the treasure chest in the top-center of the map. Using the Chroma Key and the camera near the chest, uncover the buttons behind the paintings that can turn off the lasers.
| Button Locations | |
|---|---|
| 1 | 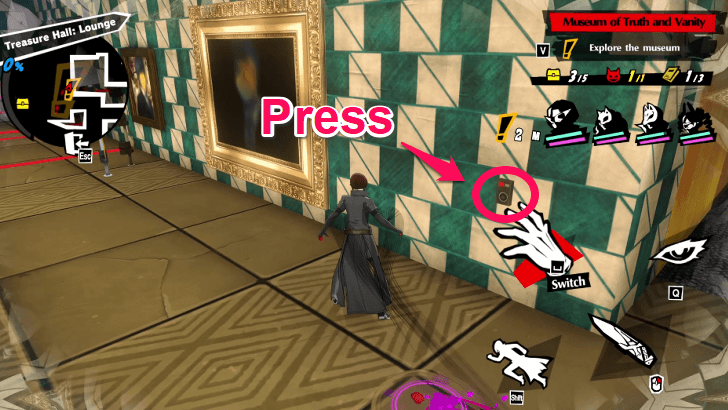 You will find the first button next to the entrance. Press the button to reach the Chroma Key and the Camera. |
| 2 | 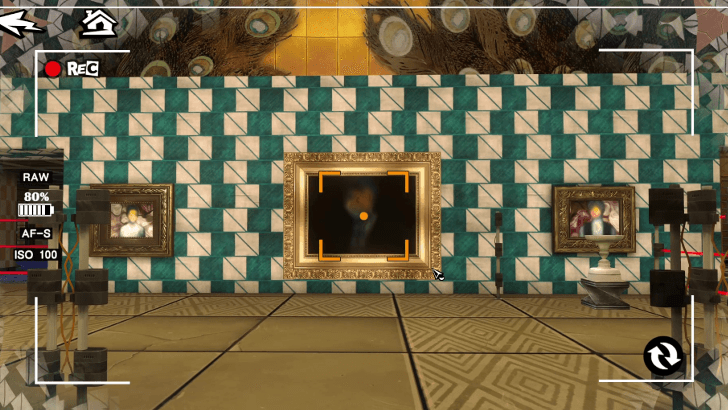 Point the camera at the large painting on the left side of the room to uncover the button. Approach the painting and press the button. |
| 3 | 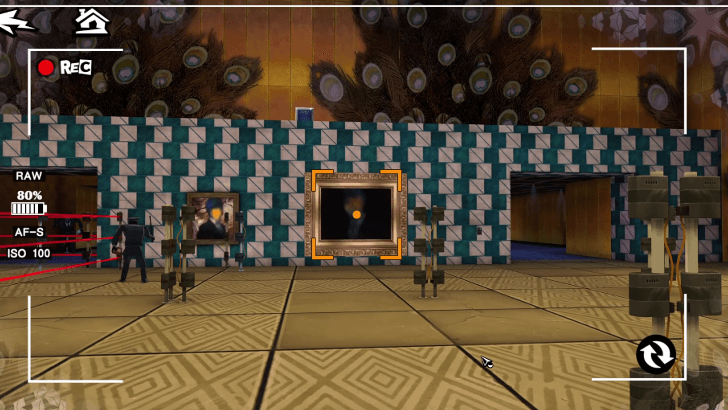 Point the camera at the large painting on the right side of the room and uncover the button. Approach the painting and click the button to clear the way to the chest. |
Stage 2-8 Brochure Locations
| 2-8 Brochure Locations |
|---|
 Lounge |
Gallery |
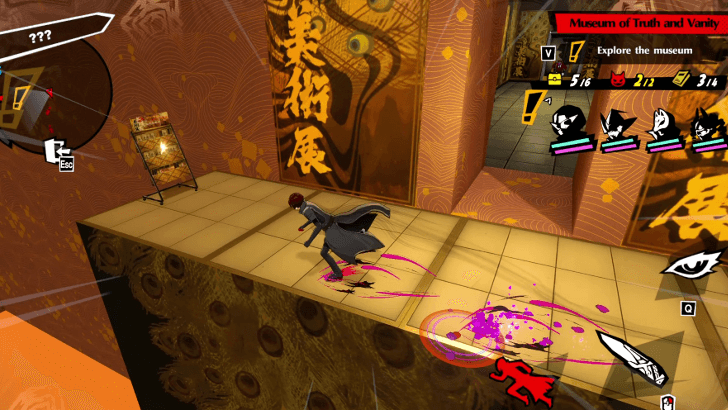
How to Move Through the Painting
| Button Locations | |
|---|---|
| 1 | 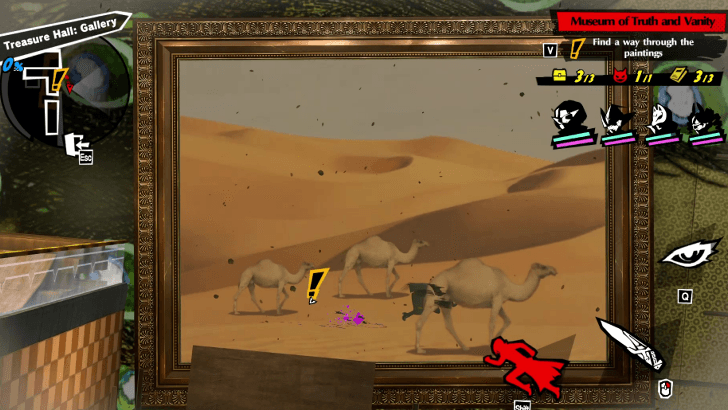 Enter the camel painting and move right. |
| 2 | 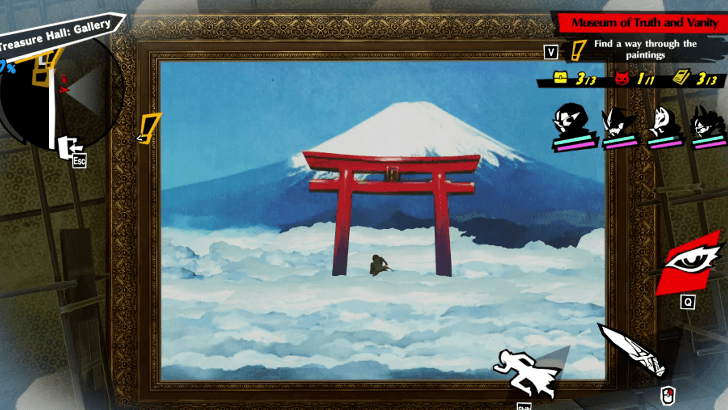 Go to the back of the torii gate painting. |
| 3 | 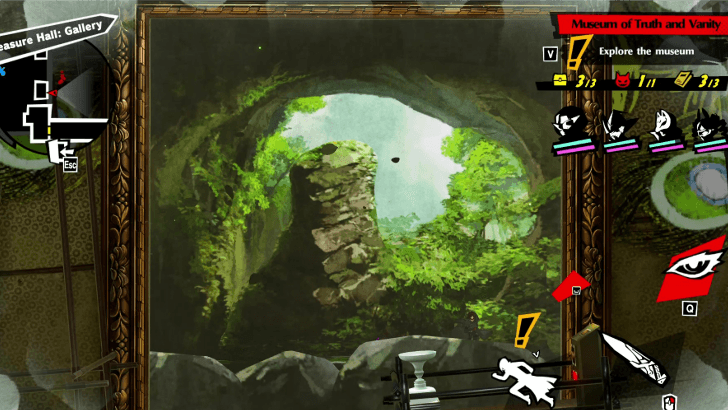 Go to the bottom right of the forest picture and press the button. |
| 4 | 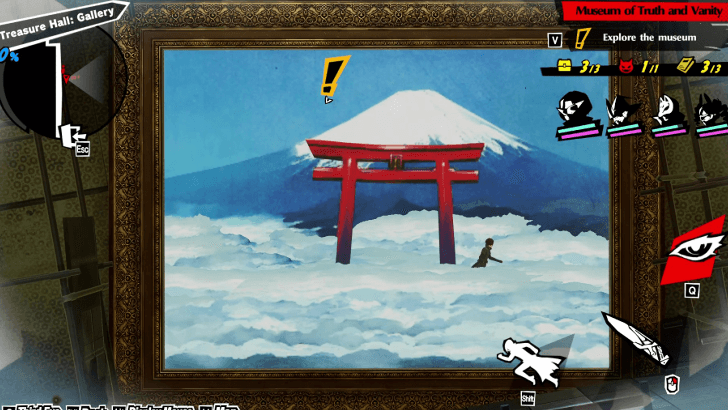 Go back to the torii painting, and go right. |
| 5 | 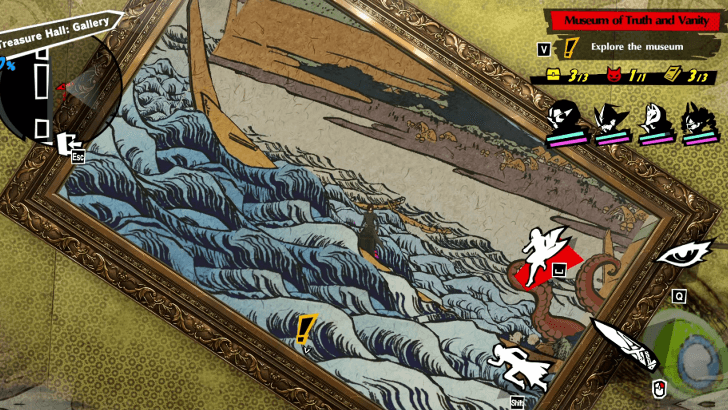 Exit the ocean painting and press the button. |
| 6 | 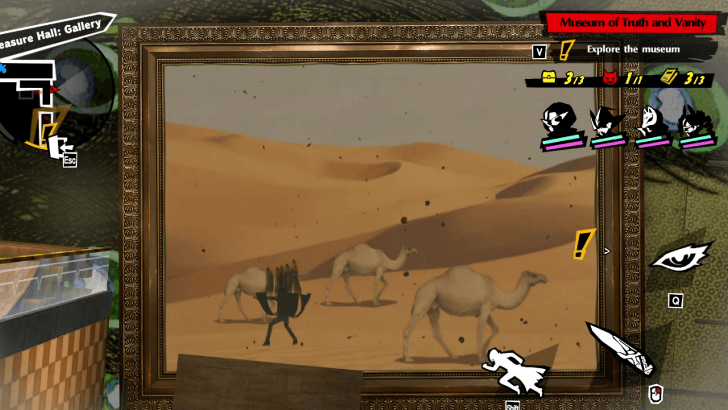 Jump back down and return to the camel painting. |
| 7 | 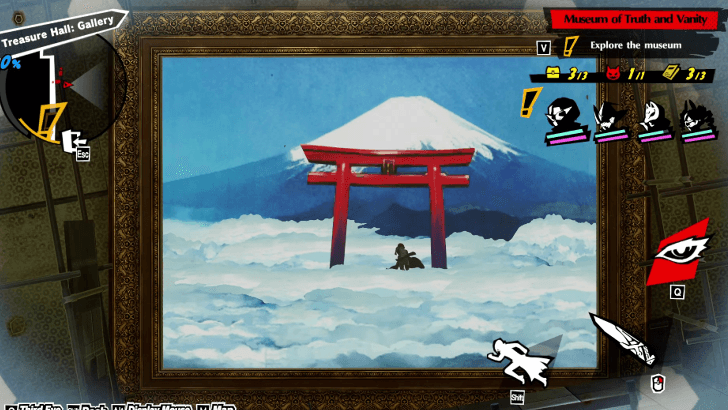 Go back to the forest painting through the torii gate painting. |
| 8 | 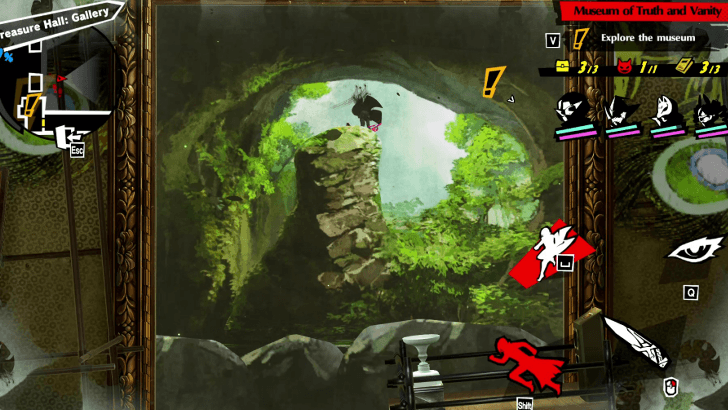 In the forest painting, go up the rock pillar and go deeper inside the picture. |
| 9 | 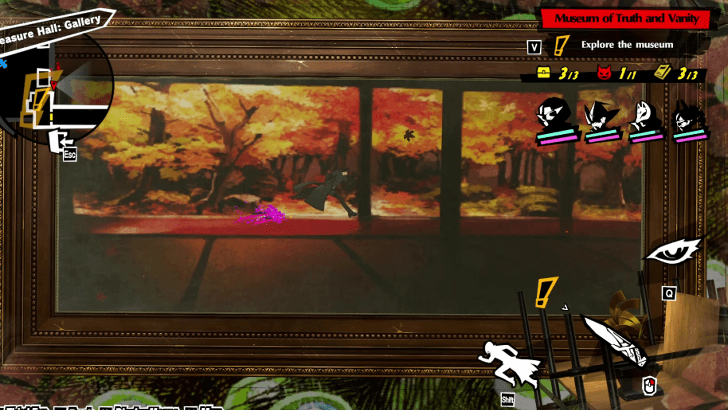 Go to the bottom right of the maple leaf painting, and jump out of the picture. |
Stage 2-9 Brochure Locations
| 2-9 Brochure Locations |
|---|

|
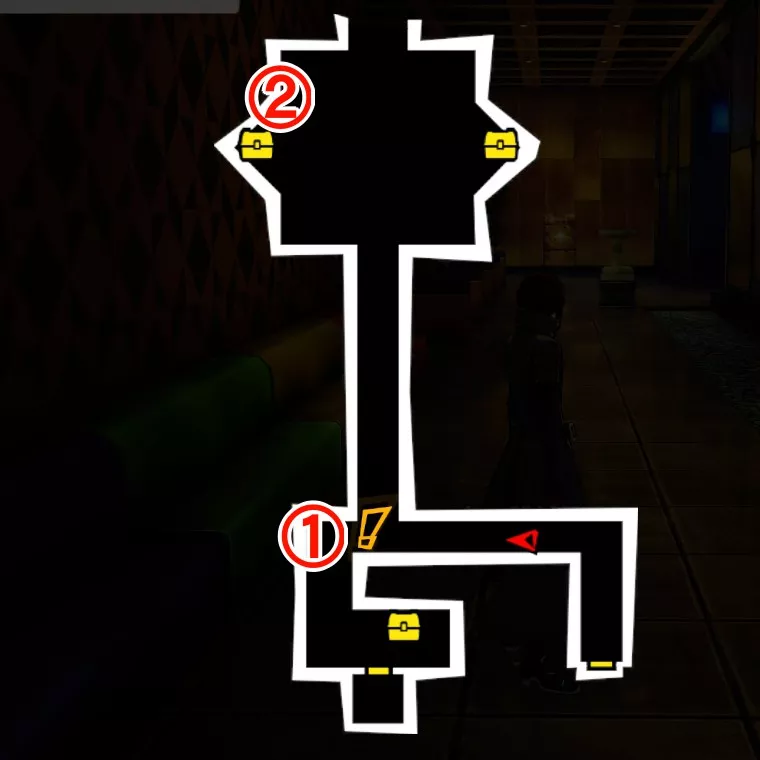
Location of the Formidable Enemy, Treasure Chest, and 3rd Brochure

After passing through 2 blue gateways in the Labyrinth Area, take a left turn at the next intersection and enter the green gateway. After passing through the gateway, defeat the strong enemy at the top of the stairs.
After defeating the enemy, jump across the gap and continue to move forward to reach the chest. You will find the brochure on a platform below.
The Last Brochure at the End of the Labyrinth
You can find the final brochure near the exit point of the area. Before entering the hallway with the strong enemy, go to the edge of the platform to get the brochure.
Treasure Chest Key Location
 |
 |
How to Enter the Toilet
To reach the strong enemy at the toilet, approach the Crooked Painting next to the restrooms. Afterwards, press the button to deactivate the lasers at the entrance of the restrooms.
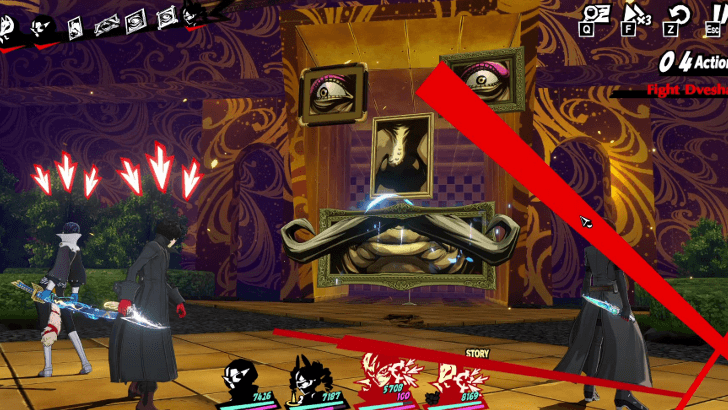
Stage 2-10 Boss Strategy (Dvesha)
Dvesha Boss Details
| | | | |
|---|---|---|---|
| - | - | - | - |
| | | | |
| - | - | Absorb | Absorb |
| | | ||
| Absorb | Absorb | ||
| | | | |
|---|---|---|---|
| - | - | - | - |
| | | | |
| - | - | Absorb | Absorb |
| | | ||
| Absorb | Absorb | ||
| | | | |
|---|---|---|---|
| - | - | Absorb | Absorb |
| | | | |
| Absorb | Absorb | - | - |
| | | ||
| - | - | ||
| | | | |
|---|---|---|---|
| Null | Null | Null | Null |
| | | | |
| Null | Null | Null | Null |
| | | ||
| Null | Null | ||
Prepare a Physical or Curse attacker
Each body part of Dvesha absorbs a different set of attributes.
Fox, the guest party member, deals Ice damage. He can attack both of the Eyes of Dvesha. However, he cannot damage the Nose. To defeat the Nose, pair Fox with another Physical or Curse damage-dealer.
Recommended Party
| Recommended Personas for Wonder | |||
|---|---|---|---|
★★★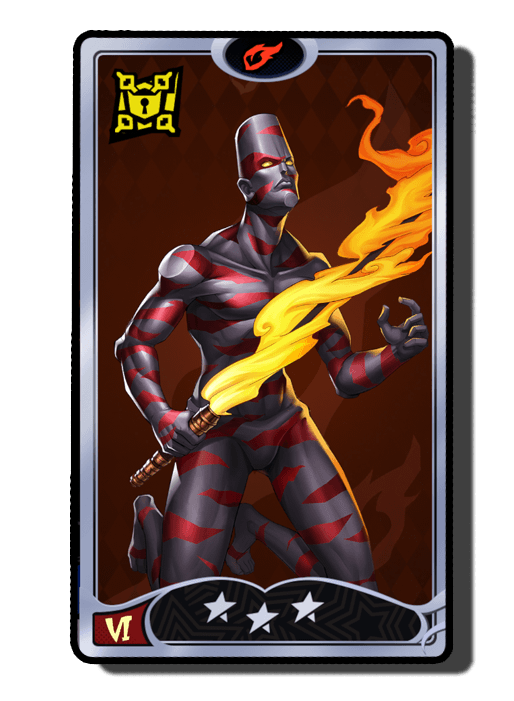 Surt Surt
|
★★★★ Koumokuten Koumokuten
|
★★★★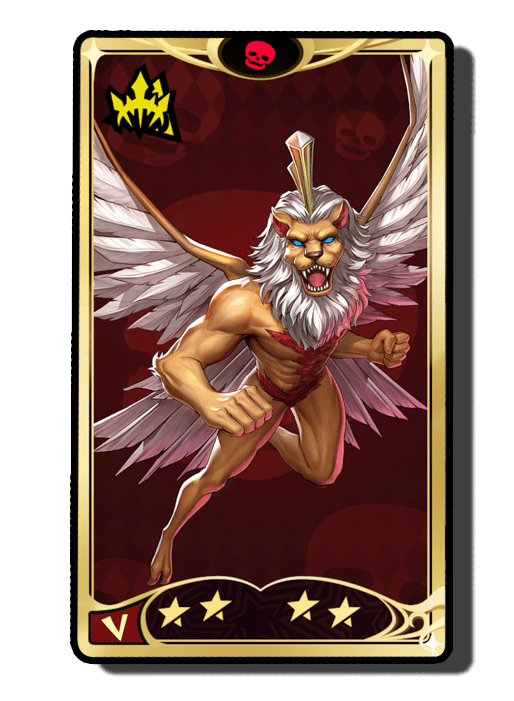 Pazuzu Pazuzu
|
★★★★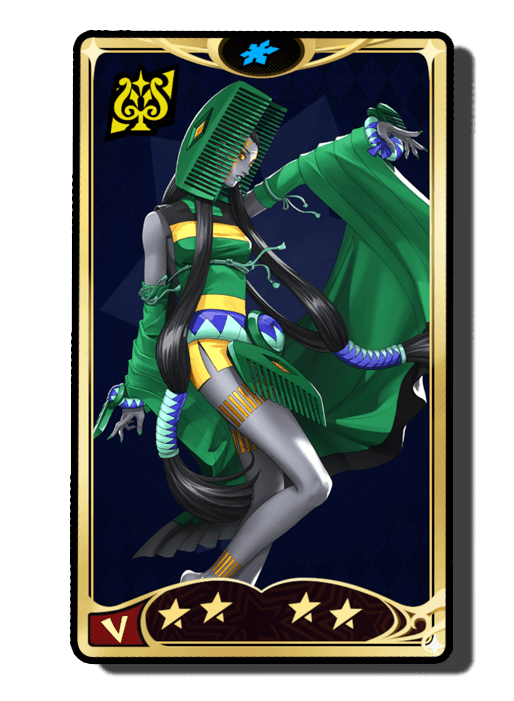 Kushinada Kushinada
|
| Party Composition | |||
 Fox
(Trial) Fox
(Trial) |
 Joker Joker
|
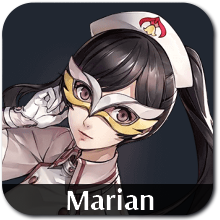 Marian Marian
|
 Puppet Puppet
|
Dvesha (Shadow Madarame) Boss Guide
Museum Arc Palace Rewards
Collectible Rewards
| # | Objective | Reward |
|---|---|---|
| 1 | Open 15 Treasure Chests | ・200 Destiny Badge ・30 Meta Jewels |
| 2 | Open 30 Treasure Chests | ・200 Destiny Badge ・30 Meta Jewels |
| 3 | Collect 10 Brochures | ・200 Destiny Badge ・30 Meta Jewels |
| 4 | Collect 20 Brochures | ・200 Destiny Badge ・30 Meta Jewels |
| 5 | Get 100% progress in all Museum Arc Stages | ・200 Destiny Badge ・30 Meta Jewels ・1 Seeker: Museum Badge |
Persona 5: The Phantom X Related Guides

All Story Palaces
| List of Story Palaces | |
|---|---|
| 1 | Kiuchi's Palace |
| 2 | Miyazawa's Palace |
| 3 | Katayama's Palace Akashi's Palace |
All Event Palaces
| List of Event Palaces | ||
|---|---|---|
| Palace | Event | |
| 1 | Castle in the Void | Take Your Heart |
| 2 | Museum Arc | Crossroads of Fate |
| 3 | Bank Arc | Crossroads of Fate |
| 4 | Pyramid Arc | Crossroads of Fate |
| 5 | Spaceport Arc | Crossroads of Fate |
Comment
is the map for 2-8 gallery part the same as above?
Author

Museum Arc Palace Walkthrough
Rankings
- We could not find the message board you were looking for.
Gaming News


Popular Games

Genshin Impact Walkthrough & Guides Wiki
Umamusume: Pretty Derby Walkthrough & Guides Wiki
Crimson Desert Walkthrough & Guides Wiki
Monster Hunter Stories 3: Twisted Reflection Walkthrough & Guides Wiki
Honkai: Star Rail Walkthrough & Guides Wiki
Pokemon Pokopia Walkthrough & Guides Wiki
The Seven Deadly Sins: Origin Walkthrough & Guides Wiki
Wuthering Waves Walkthrough & Guides Wiki
Zenless Zone Zero Walkthrough & Guides Wiki
Arknights: Endfield Walkthrough & Guides Wiki


Recommended Games
Fire Emblem Heroes (FEH) Walkthrough & Guides Wiki
Diablo 4: Vessel of Hatred Walkthrough & Guides Wiki
Cyberpunk 2077: Ultimate Edition Walkthrough & Guides Wiki
Yu-Gi-Oh! Master Duel Walkthrough & Guides Wiki
Super Smash Bros. Ultimate Walkthrough & Guides Wiki
Pokemon Brilliant Diamond and Shining Pearl (BDSP) Walkthrough & Guides Wiki
Elden Ring Shadow of the Erdtree Walkthrough & Guides Wiki
Monster Hunter World Walkthrough & Guides Wiki
The Legend of Zelda: Tears of the Kingdom Walkthrough & Guides Wiki
Persona 3 Reload Walkthrough & Guides Wiki


All rights reserved
©Perfect World Adapted from Persona5 ©ATLUS. ©SEGA.
The copyrights of videos of games used in our content and other intellectual property rights belong to the provider of the game.
The contents we provide on this site were created personally by members of the Game8 editorial department.
We refuse the right to reuse or repost content taken without our permission such as data or images to other sites.
guide kontol