
This survey will take about 1 minute.
Your answers will help us to improve our website.
Persona 5: The Phantom X (P5X)
Katayama Palace Guide: All Puzzles Walkthrough
★Version 3.3 is now live: Firecracker Rin | Banner
┗ Skill Cards | New Year's Light Banner | LNY Event
☆ Version 3.2.2 is now live: Matoi | Banner
┗ Throne | Entropy Banner | Take Your Love
★Tier Lists: Characters | Personas | Rerolls
☆Boards: Companio | Friends | Toy Trading

This is a guide on how to complete the puzzles and 100% Katayama's Palace in Persona 5: The Phantom X (P5X). Check out our complete step-by-step walkthrough, puzzle guides, fan card locations, bosses, and the rewards in this guide.
 Attention! Attention!
|
This page is a work in progress; it will be updated regularly as we make progress through the game. Sign in and select  under the page's title to be notified of any updates! under the page's title to be notified of any updates! |
List of Contents
Katayama's Palace Walkthrough
| Attention! |
This page contains unmarked and uncovered spoilers from Chapter 3 Phase 1 and Chapter 3 Phase 2 of Persona 5: The Phantom X. Players who are invested in the story are highly encouraged to play through the story chapter themselves first. |
|---|
No Level Scaling
First announced during the Version 2.0 update livestream, Katayama's Palace will not feature any level scaling compared to the first two Palaces.
This means that players must be ready to encounter enemies and boss fights as they are while going through the story quest.
|
|
Initial Infiltration
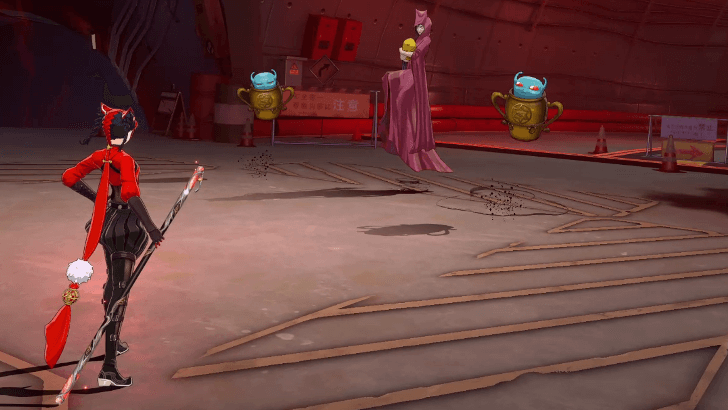
| 1 | 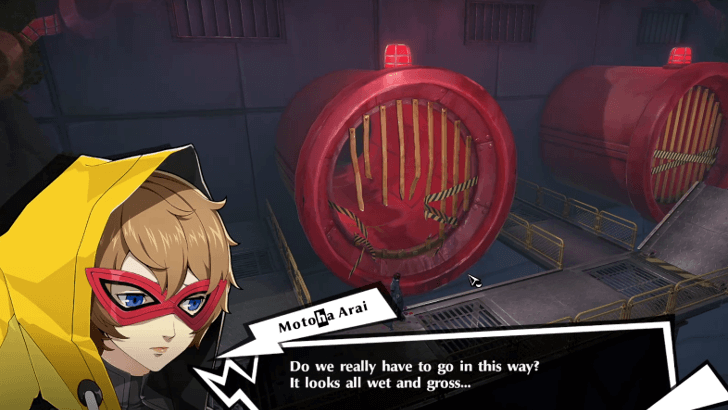 As soon as you enter, you will be greeted with a palace that is reminiscent of a dam. Afterwards, you will be directed to the dam's outlet pipe, wherein there will be one in maintenance for you to enter. |
| 2 | 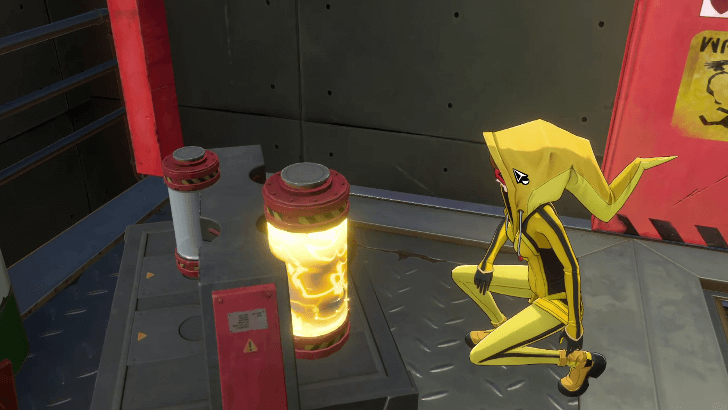 As soon as you enter, Wonder will be introduced with the electricity mechanic, wherein you will slot in a battery to open the door. Another door will remain closed due to tampered electricity, for which you must crawl through a vent and fight a Shadow, to then have the chance to redirect the electricity to the malfunctioning door. |
| 3 | 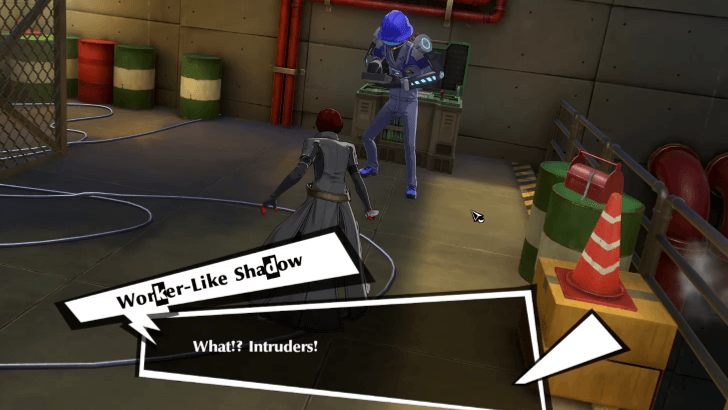 After entering, you will enter a break room full of non-hostile shadows. Simply talk to the mechanic facing the board to find the clue you need to progress. |
| 4 | 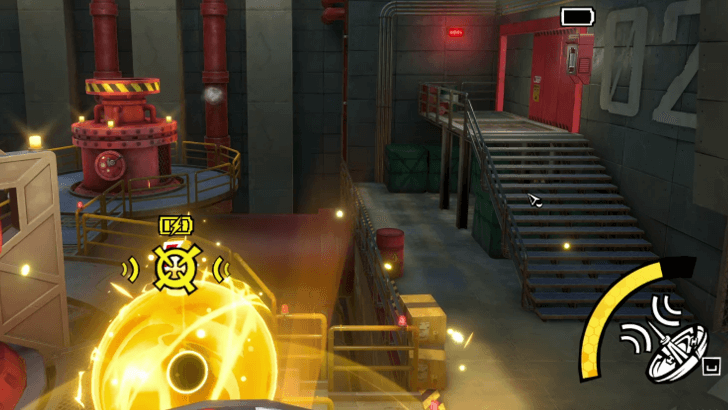 Drain Electricity From For Broken Doors Another electricity puzzle comes up wherein you must power up a different receiver to power the door. |
| 5 | 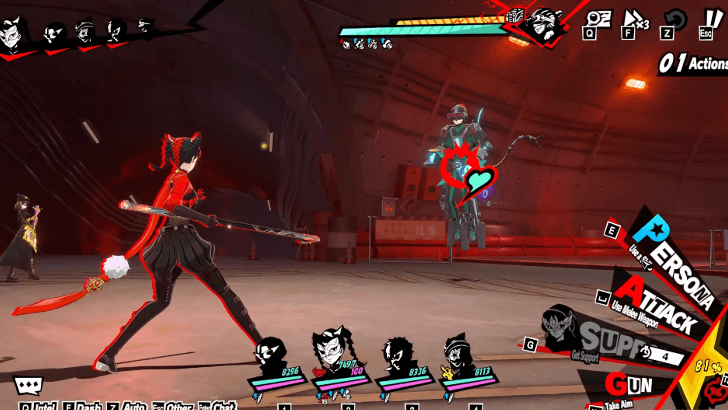 After trying to guess a code on a numpad, Akashi will interrupt the party and start a fight. He absorbs elements upon repeated hits, meaning that mono-element teams will be at a major disadvantage in this fight. However, this is a scripted boss fight as Katayama's fight will end after critically lowering his health twice, after which he fully regenerates his energy, leading to the Phantom Thieves' tactical retreat back to the real world. |
Second Infiltration - Water Treatment Tunnels
| 1 |  Upon entering the Metaverse through Shibuya, Rico will follow the party with the help of a sentient glider and provide the missing password to the code. |
| 2 | 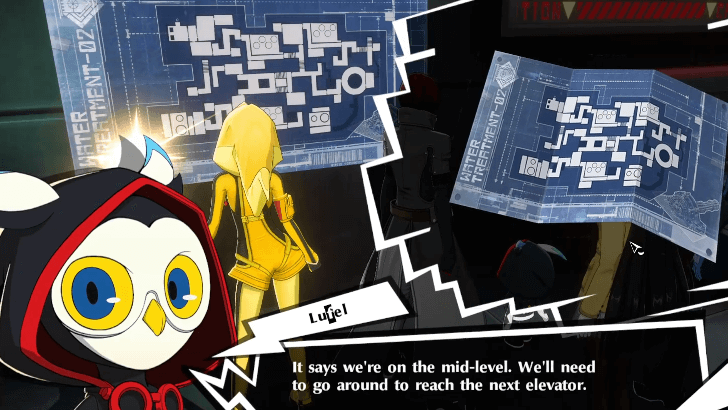 Access the Map Transfer the electricity to a console, and then harvest it to power up the battery of the door. After entering, get the map to show the whole level. |
| 3 | 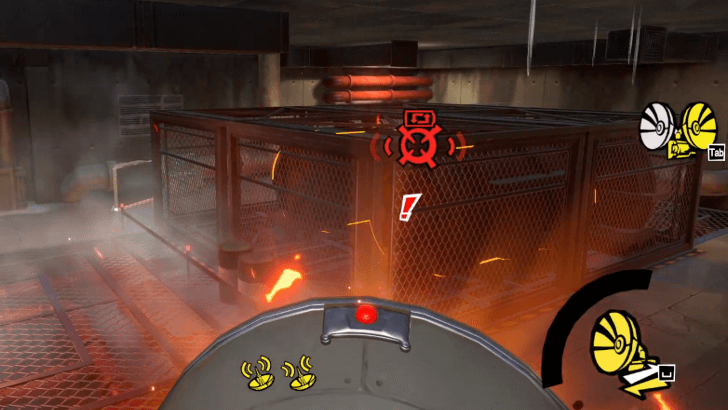 Remove the Hot Steam After defeating a shadow, you can use the console and learn how to transfer thermal energy between the nearby water tanks to remove the steam blocking your way. After that, just keep following the exclamation mark through the broken down hallways. As you progress, you can encounter a vent that will lead you to a treasure room before proceeding to the other room. |
| 4 | 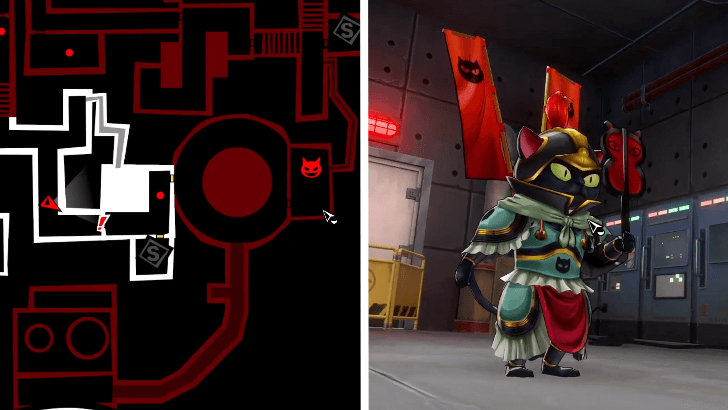 Go to the Control Room Upon proceeding to the Cooling System, you will find that it is broken. Navigate through the broken down area until you reach a broken lift, for which you must extract kinetic energy from the fan to operate it. Upon powering it up and getting on the lift, actively walk on the right side to get a hidden chest. After getting the chest, you can use the grappling hook to access a secret room that contains a Golden Ticket. Proceed to access the control room by giving it kinetic energy as well using the nearby control panel. You will encounter a strong Neko Shogun here, so be prepared! |
| 5 | 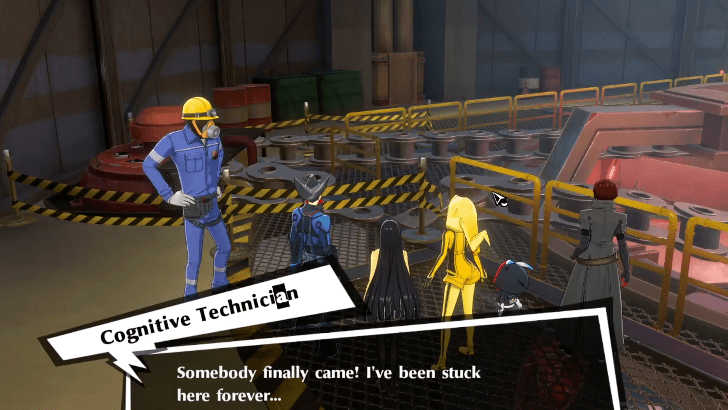 Talk to the Engineer Reaching the top of the cooling system will let you encounter the stuck Shadow that is attempting to fix the cooler system. He informs you that the exhaust fan is broken and you must fix it by gathering three chains. Simply follow the exclamation marks to find the chains, all of which will turn into different items representing events of your homeroom teacher upon using a projector before turning back into a chain. The first chain is found in the control room then turns into a lighter, and then shows an event of a homemade flamethrower and a parent consultation. |
| 6 | 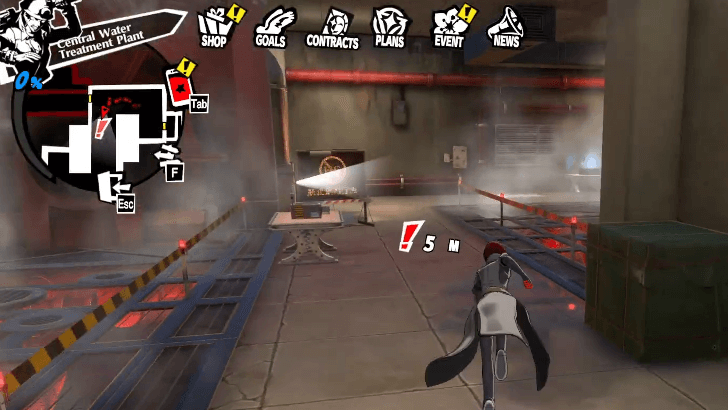 Find the Second Chain Link After getting the first chain, you will then enter a room that has hot steam blocking the way. Access the control panel and extract the thermal energy on the middle emitter to clear the path. The second chain is found in a middle of a bridge then turns into a bowl, and then shows an event of your homeroom teacher inquiring about Shun Kano. |
| 7 | 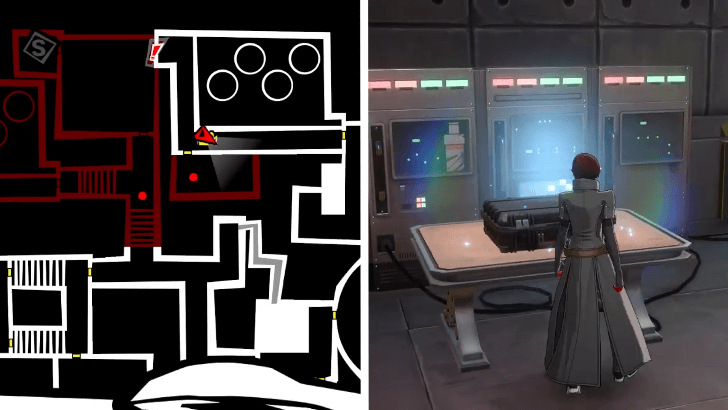 Find the Third Chain Link Like the second chain, you will then enter a room with even more hot steam blocking the way. Before going down, do not forget to get the chest in the room. Access the control panel and extract the kinetic energy on the right-most emitter and give it to the 2nd and 1st emitters to clear a path. The third chain is found in a middle of a bridge then turns into a cup of coffee, and then shows an event of your homeroom teacher talking to Riko Tanemura's parents. |
| 8 | 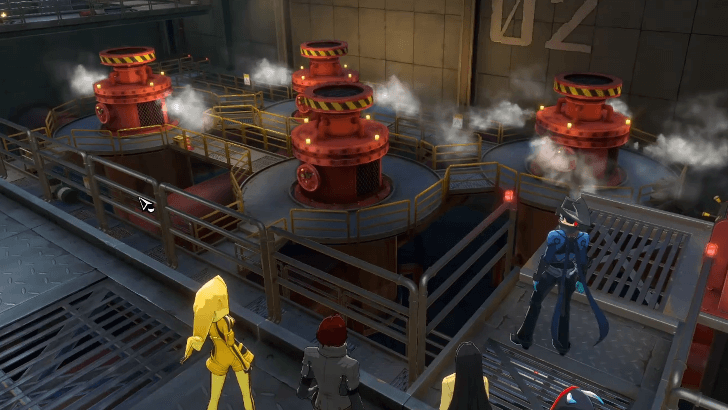 Fix the Cooling System After getting the third chain, you will immediately travel to the exhaust fan room. Talking to the Engineer immediately gets the fan fixed, after which you will return to the previous area! Proceed to follow the exclamation marks while getting the tickets and chests you come along the way before ascending and exiting the lower area. |
| 9 |  Fight Shadow Katayama Upon exiting, you will encounter the Shadow form of your homeroom teacher, which will prompt a fight with her desires being controlled. Again, this is a scripted fight that will follow prompts regarding her acting out with violence that you must Guard to avoid being wiped. Upon fully lowering her health down in this first phase, Katayama will show himself, revealing that there are two palace owners. This will then go into the second phase of the fight, summoning both Jikokuten and Koumokuten. Shadow Katayama deals heavy damage while remaining untargetable for the majority of the fight, so focus your efforts on the two shadows, upon which ends the second phase upon defeat. For the third phase, Riko will awaken her Persona and be the main Navigator of the fight against Thor and Oni, all of which are weak to Curse. Utilize Riko by reducing the shadow's defense and increasing your damage, and this should be an easy fight! |
Third Infiltration - Shadow Katayama
Power Plant Level 1
| 1 | 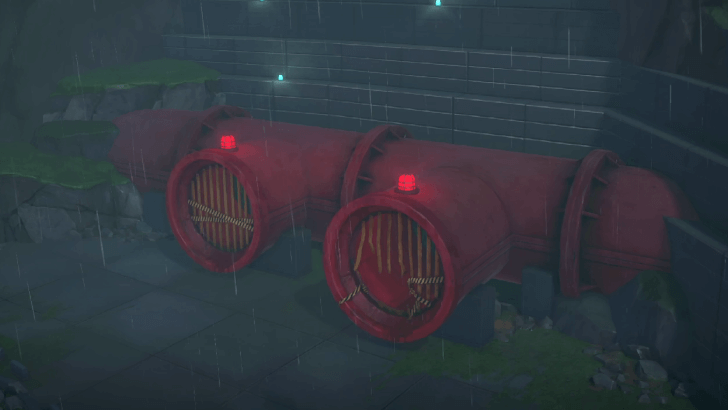 Enter the Drain Pipe After confronting Ms. Katayama, the dam's water level recedes as her rage has been dampened. After a quick road trip on Lufel due to the dam's distance, you will then proceed to enter the drain pipe to find the treasure of the Palace. After sliding down the pipe, do not forget to open the two chests by grappling and using the lifts before following the quest marker and talking to the shadow! Talking to the Shadow reveals that you will need to fix three facilities in the power plant. Additionally, there is a chest behind the computer! |
| 2 | 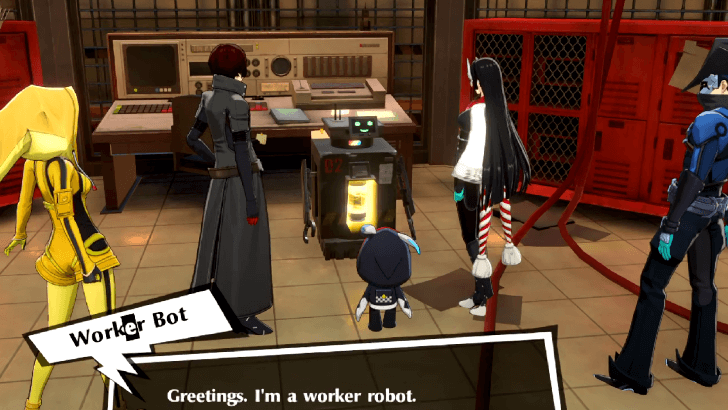 Transport Electrical Energy During this time, you will be taught how to escort and extract energy from robots to give facilities electricity. After doing so, get the map for the Power Plant's first floor, and just follow the quest markers to progress while getting the obvious chests up until the safe room and camera robots. |
| 3 | 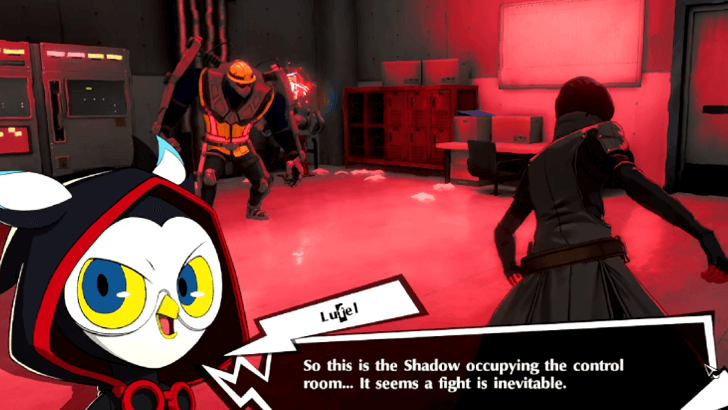 Manipulate the Drainage System After seeing and running through the inactive robots, you will come upon the drainage system. Simply open the two drains and help the caged-up Shadow. You will be informed that you need to flip a switch to close the drains in the Control Room, but it is guarded by a powerful Shadow. Before the, take the flight downstairs for a chest and open a shortcut to one of the safe rooms. The fight itself is simple, but a tip is that it is weak to Psychic! After that, follow the quest markers until the next area and safe room. |
Power Plant Level 2
| 1 |  Get Briefed on the Second Floor Like in the first floor, you will talk to a Shadow that briefs you on the second floor facility issues, tasking you to get all three blueprints. For this floor, you must fix the turbine. Additionally, there is a chest behind the computer! |
| 2 | 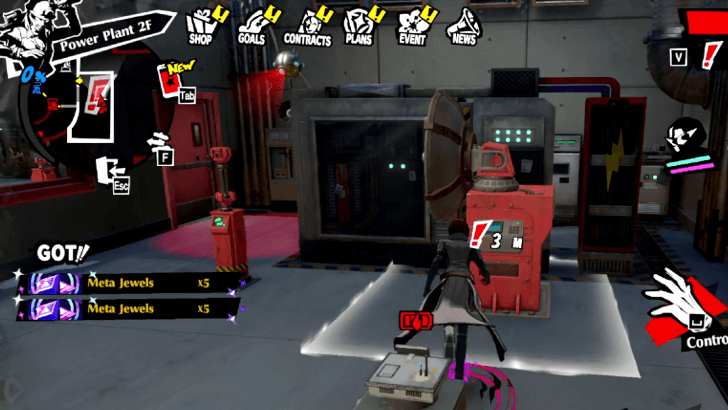 Escort the Robot Through the Cameras After being briefed, follow the quest marker to get the map layout of the 2nd floor. A new mechanic will be introduced during this section, wherein the flying cameras will abduct the robots you need to escort. To avoid this, transfer their energy to the transmitter. When the robot has no energy, it can safely pass through those cameras. After that, the connected transmitter should output the energy you just slotted in, so have the robot extract it and power the device needed to pass. Before proceeding through, make sure to slot in the robot with kinetic energy in the next room to the previous one to get the chest in the middle. |
| 3 |  Calibrate the Connectors After being introduced to the mechanic, you will then need to adjust the connectors. To get the first one with Electric Energy, simply adjust the connector at the far end. For the second one with Thermal Energy, descend the stairs and adjust the second and fourth connector, and then use the control panel to transfer it to the empty robot. Slot in the robot, and then follow the quest markers again to progress up until the safe room. |
| 4 | 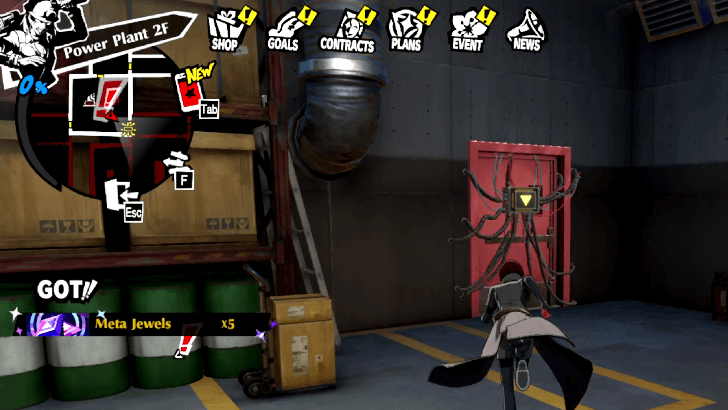 Open the Wired Door You will come upon a new kind of door that is wired up with a screen that flashes an Energy Type. This particular door needs Electrical Energy, so you need to get a Robot with it by following the marker. Escort the robot back, slot it it in the transmitter, and then adjust the cables to power up the door and open it. You will encounter a Shadow that holds the last blueprint for the generator you will repair on the next room. |
| 5 | 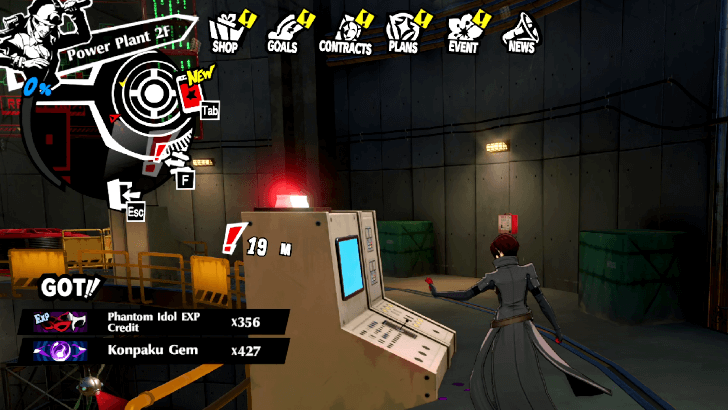 Fix the Generator After getting in the room, simply click on all three terminals to stop and fix the generator, for which you will have to use the grappling hook to reach the safe room before the next floor. You will have to face a boss before proceeding with the fate sisters. Generally, it would be best to deal with this using a team centered around Joker or Makoto! |
Power Plant Level 3
| 1 |  Get Briefed on the Third Floor This is the last floor of the power plant, meaning it will contain the treasure. You will again talk to Shadows that brief you on the third floor facilities, tasking you to get all three blueprints. For this floor, you must fix the generator. Additionally, there is a chest behind the computer! |
| 2 |  Remove the Electronic Barrier After being briefed, follow the quest marker. A new mechanic will be introduced during this section, wherein you must control a robot to gain access to and remove the barrier. Continue to do this until you reach the room with a transmitter and cable with some cameras. Deposit the robot's energy to the transmitter, and then switch back to Wonder. Have him adjust the cables to open the wired door to get to an optional puzzle. However, following the quest marker should lead you to the generator room, for which it will be a wreck with various electrical hazards due to Katayama. You must now remove all the electrical hazards by flipping through x switches. |
| 3 |  Flip the First Switch After checking on the generator room, following the marker will lead you to a room for the first switch. To solve the puzzle, remove the barrier using the first robot, and then have Wonder fix the cables after breaking through the glass window. After that, control the robot again and get the Thermal Energy from the transmitter and slot it in the nearby socket, allowing you to flip the switch and reach the next area and safe room. |
| 4 |  Flip the Second and Third Switches The next area is simply just following the marker to progress! As soon as you reach the second switch room, you will need to control and escort robots again. To get the robot, climb your way up on the side of the switch to grapple over the bars. Have the robot with Kinetic Energy follow you over to the middle of the room, and then slot the energy in the second switch to flip it. After that, control the second robot to open a nearby barrier. Switch back to Wonder, and then slot it in the right switch to flip it, removing the electrical hazards in the process.. |
| 5 |  Attack the Heart After removing the electricity from the room, return to the generator room and attack the beating heart. This should open the door leading to the treasure. Be sure to configure your team before proceeding with the upcoming Palace Boss fight; there is no team configuration menu that pops up after going in; the team that you have in the Palace overworld will be the team used in the fight. |
| 6 |  Save Shadow Katayama Ms. Katayama's Shadow form will meet you at the top, presenting you her treasure as Wind's words earlier managed to get through to her rage. However, Wonder will receive a vision of their teacher lying in their deathbed, so he refuses to get the Treasure. After that, Shadow Akashi will enrage Katayama using his power, triggering her transformation and boss fight. After the fight, you have to leave behind her Treasure to keep the Palace intact, and will need to make a tactical retreat to plan on targeting Akashi next. ▶︎ Shadow Katayama (Kiskil-lilla) Boss Fight Guide |
Katayama's Palace Puzzles
| Jump to each portion of the palace for their puzzles! | |||||
|---|---|---|---|---|---|
| Lower Water Treatment Plant | Upper Water Treatment Plant | ||||
| Power Plant F1 | Power Plant F2 | Power Plant F3 | |||
Lower Water Treatment Plant
First Steam Room Puzzle
| 1 | 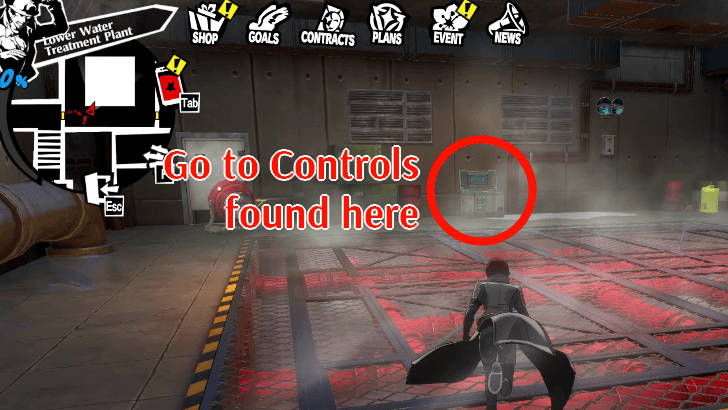 Once you make it to the Steam Room at the Lower Water Treatment Plant, head on over to the console found on the north side of the room. |
|---|---|
| 2 | 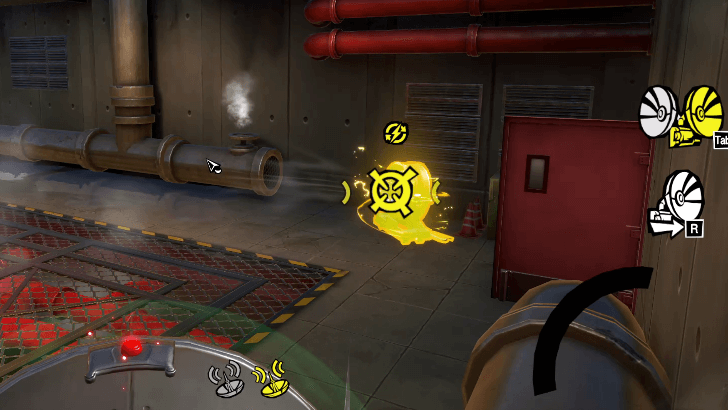 Use the left device to siphon the energy of the left wind turbine. |
| 3 | 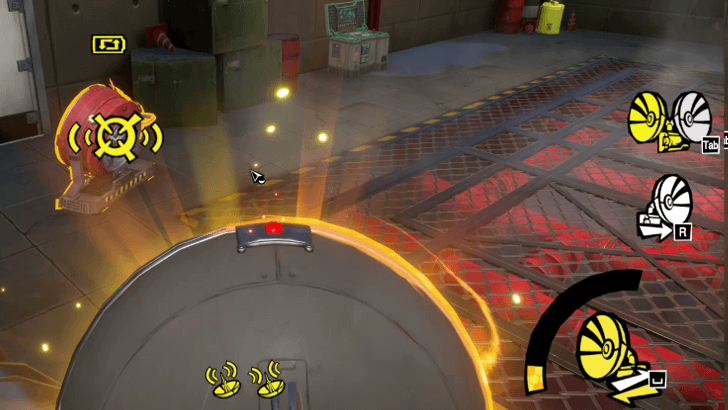 Switch perspectives to the right device, and target the right wind turbine to transfer the siphoned energy and get it activated. |
| 4 | 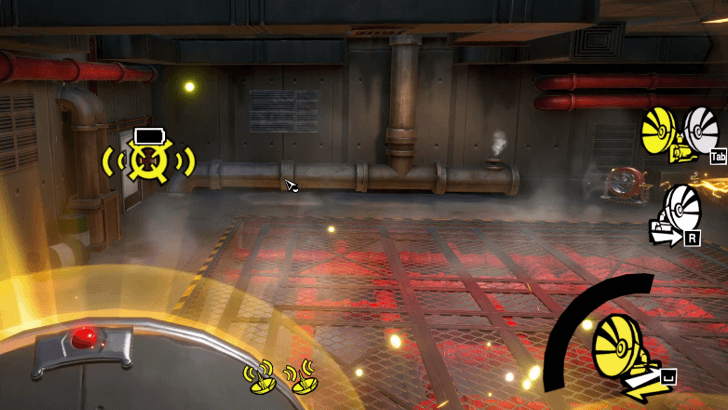 Switch perspectives until you get to see a door with an empty battery icon. Hover the crosshair over it to unlock it and continue your progress. |
Second Steam Room Puzzle
| 1 | 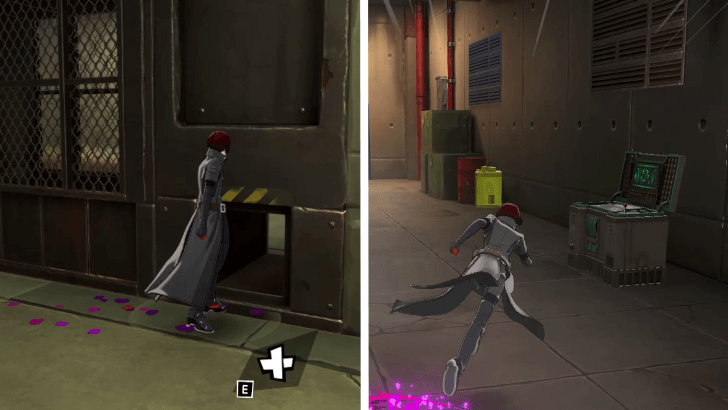 While in the Lower Water Treatment Plant, head to this room where it can only be accessed at first through a vent. Go deeper inside until you see the second Steam Room, where a similar Control Panel can be found immediately. |
|---|---|
| 2 | 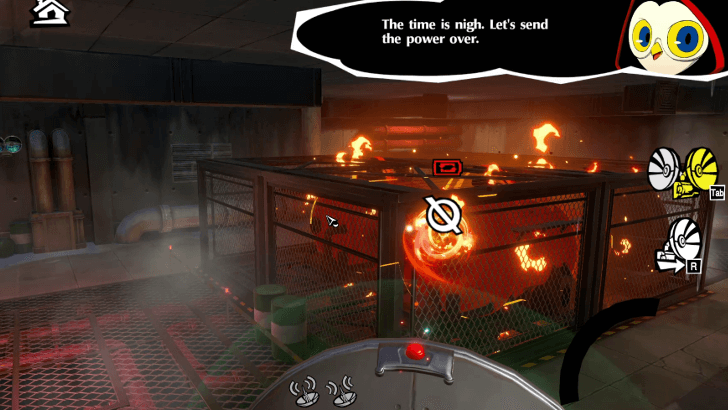 Once you have access to the Energy Transposers, share the Thermal energy already being siphoned from the left tank towards the right tank. This should remove the steam in the middle, and move it to the side |
| 3 | 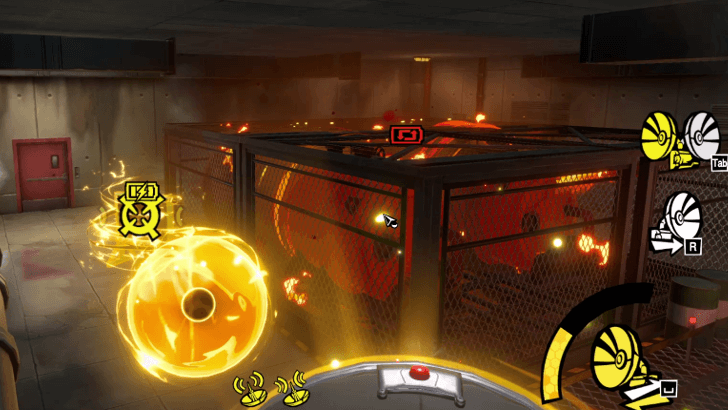 Then, siphon the energy from the left electric sign. This could not be done if the steam from Step 1 was still there. |
| 4 | 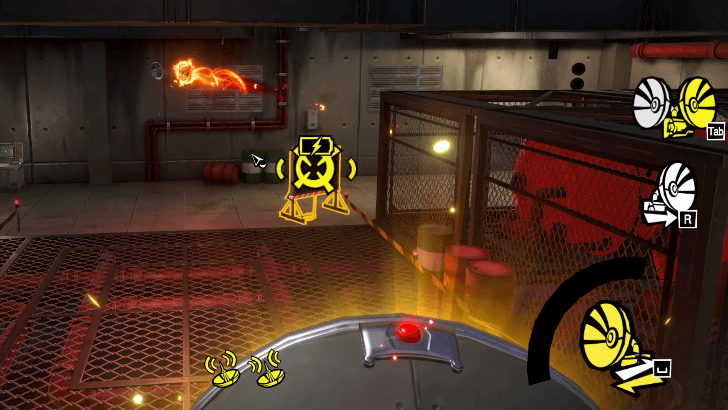 Switch perspectives, then transfer the siphoned electric energy towards the electric sign found near the right tank from Step 2. |
| 5 | 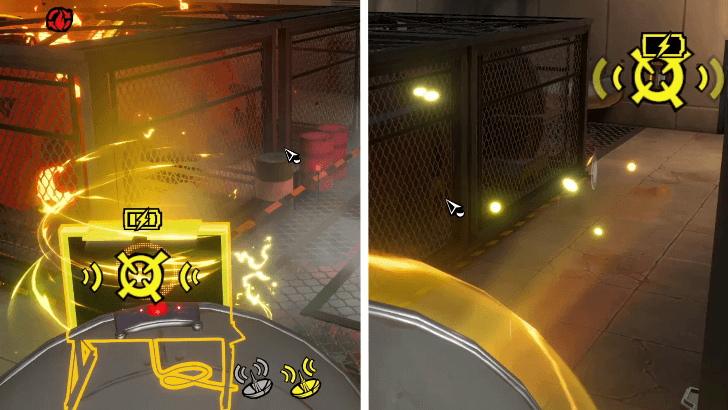 From the electric sign from Step 4, transfer energy from it to the door found on the left side of the current perspective to unlock the door and complete the steam puzzle room. |
Third Steam Room Puzzle

| Step | Action |
|---|---|
| 1 | 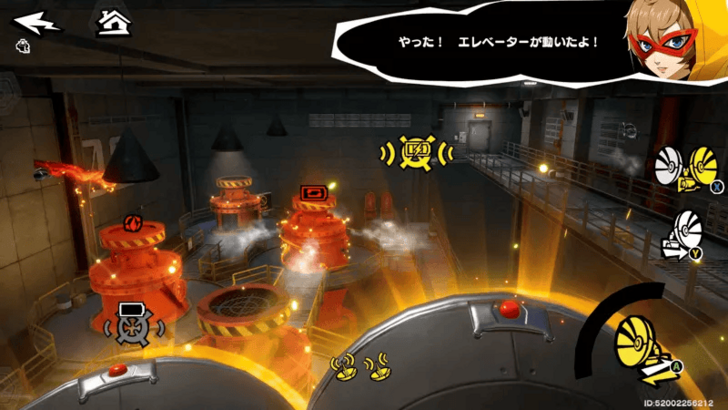 Switch perspectives to activate the elevator on the right, right beside the energy transfer device. |
| 2 | 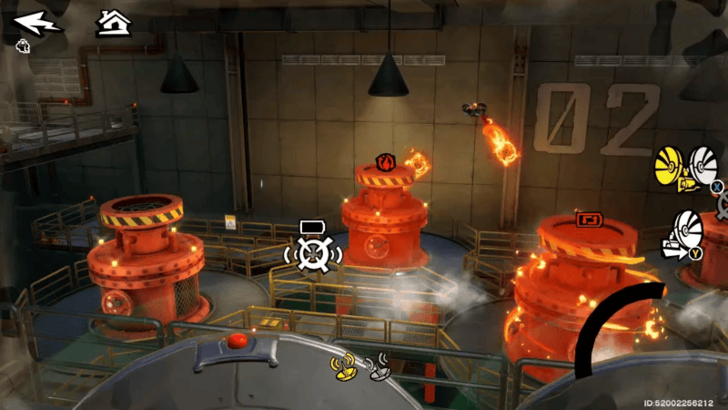 Switch perspectives again, then hover over an empty energy transfer device. Look for what looks like an empty battery hovering over your crosshairs. |
| 3 | 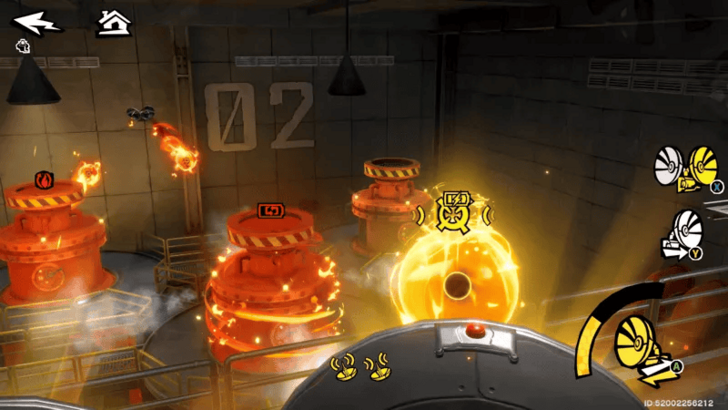 Go to the rightmost energy tank and transfer energy from it. |
| 4 | 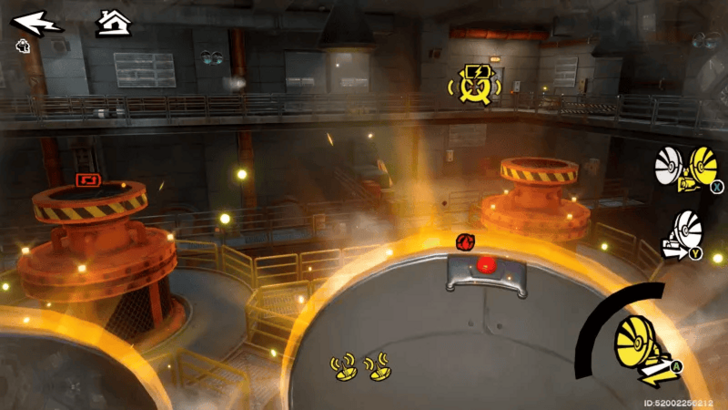 Switch perspectives again, and move the crosshairs over to the door found on the upper right section, on the second floor. |
| 5 |  Next, siphon the energy from the elevator from the door on the left side. |
| 6 | 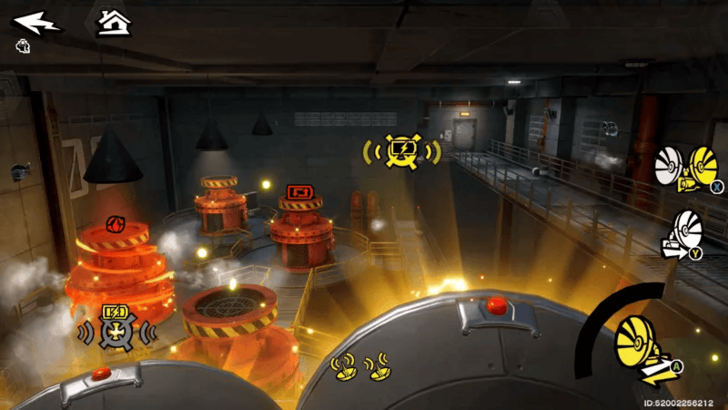 Switch perspectives once, then transfer energy to the elevator again, much like you did back in Step 1. |
| 7 |  Switch perspectives twice, then hover the left tank as seen here. There should be a red battery icon over it. |
| 8 | 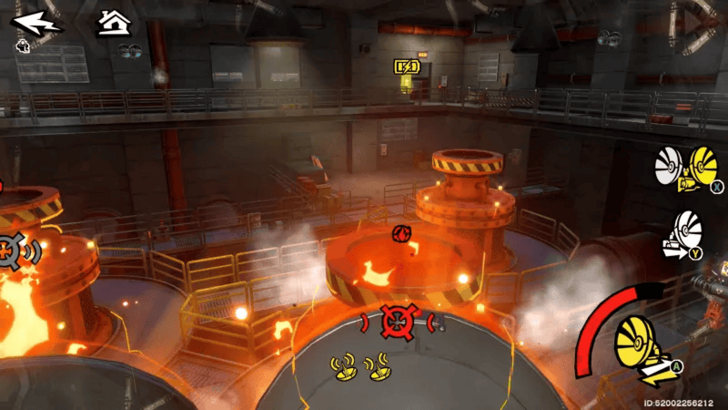 Afterwards, shift the heat energy from right to left. |
| 9 | 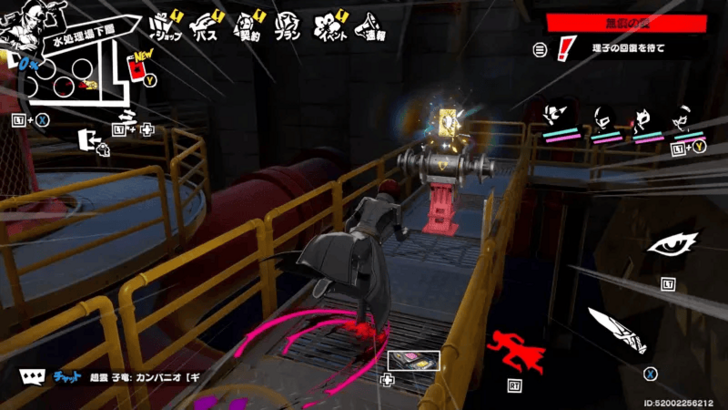 Once you're done, leave the control room and use the elevator to reach the treasure chest! |
Upper Water Treatment Plant
First Steam Room Puzzle
| 1 | 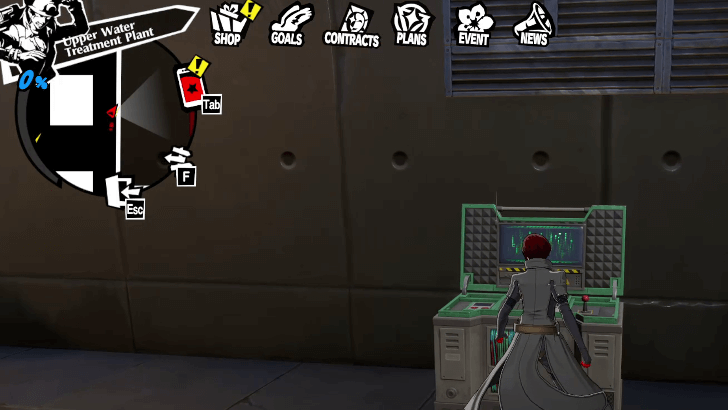 Head to the first location of the Upper Water Treatment Plant where the Steam Room puzzle can be unlocked. The Control Panel is hard to miss. |
|---|---|
| 2 |  Siphon the Steam Tank on the left side, where it generates steam on the far side of the room near the exit door. Do not transfer this energy to the opposite tank. |
| 3 | 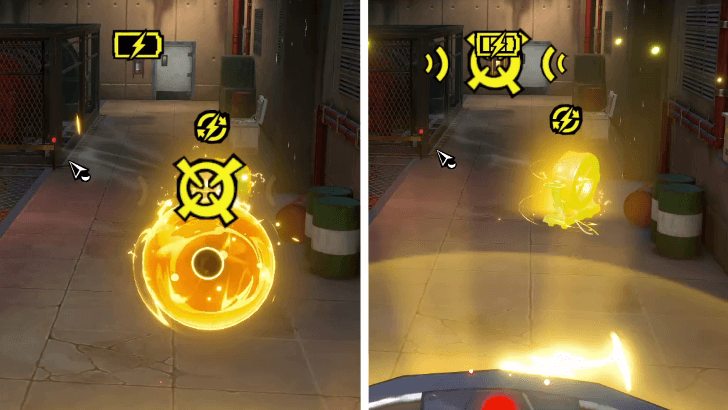 With the steam currently gone, switch perspectives to match the electric turbine. Siphon its energy with the Transponder, and transfer it to the door to unlock it and continue progress. |
Second Steam Room Puzzle
| 1 | 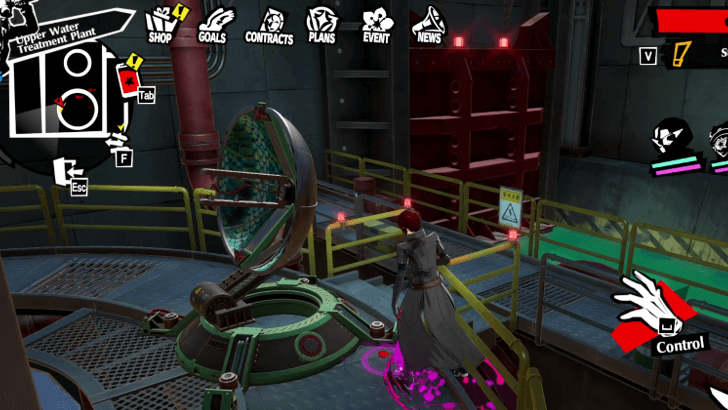 Before you begin the puzzle, make sure to activate the Absorber that can be found at the back of the right Steam Tank. |
|---|---|
| 2 | 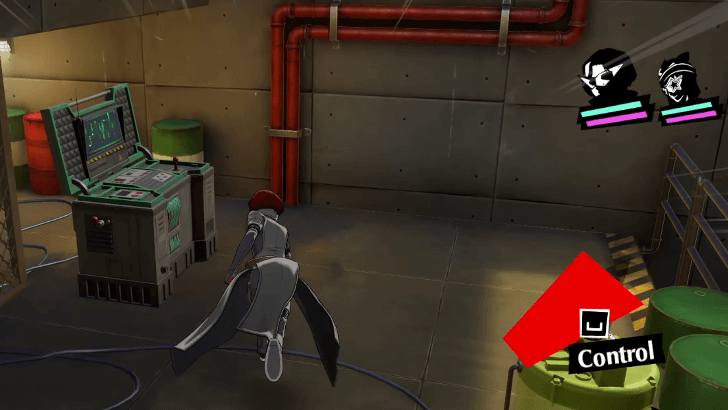 With the absorber activated, head back to the Control Panel nearby to begin the puzzle. |
| 3 | 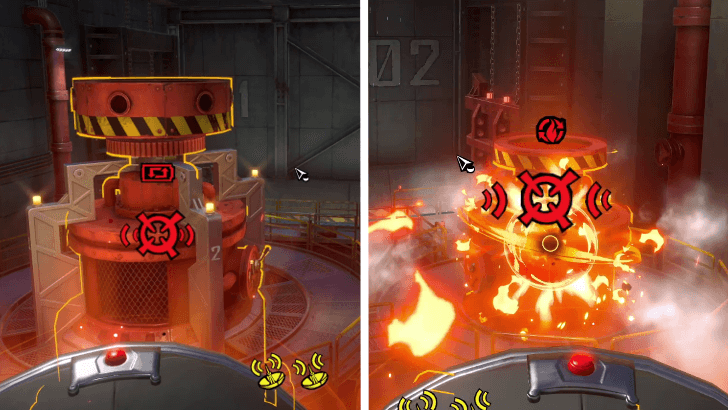 From here, absorb the energy from the left Steam Tank, and transfer it to the right Steam Tank. Because the absorber is currently active, that means it's absorbing the energy of the right tank, thereby effectively turning both off in one fell swoop. |
Electricity Puzzle
| 1 | 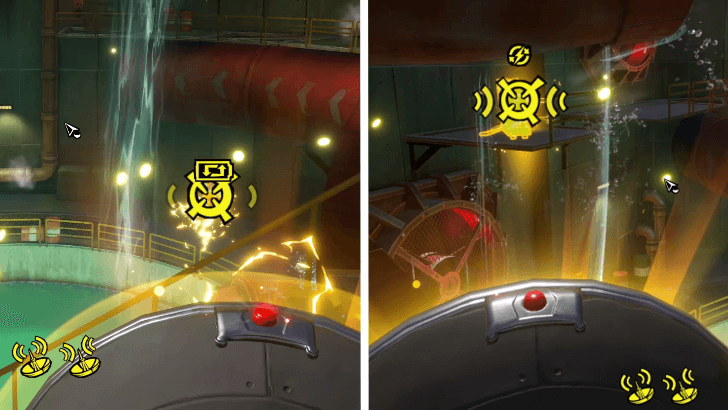 After manning the Energy Transponders via the Control Panel in this area, first siphon the energy from the left turbine on top of a platform, then transfer its energy to the turbine a the lower level. |
|---|---|
| 2 | 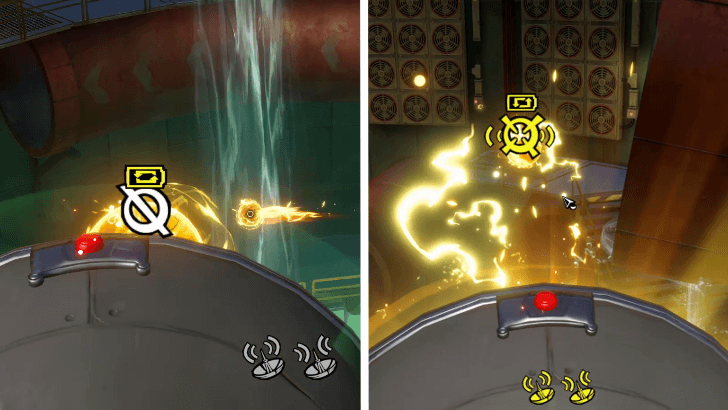 Change perspective, and from that lower turbine, transfer its energy to a turbine at the left most location from its point of view. The turbine should be found near a wall of fans |
| 3 | 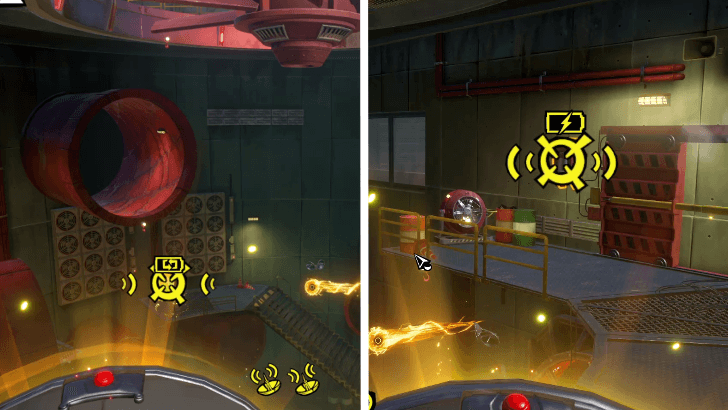 Then, change the perspective again to the highest possible one in this area. Transfer the energy from the turbine near the wall fans towards the door on the left. This should let you enter the room inside. |
Satellite Puzzle
| 1 | 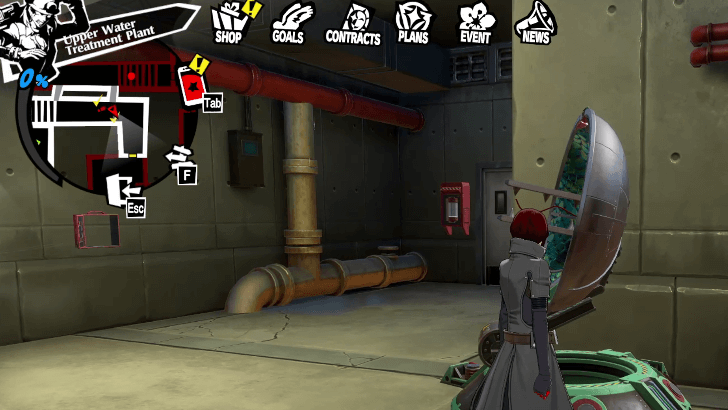 To start the main puzzle, you need to access its main room first. To do this, activate this specific Energy Absorber satellite. |
|---|---|
| 2 | 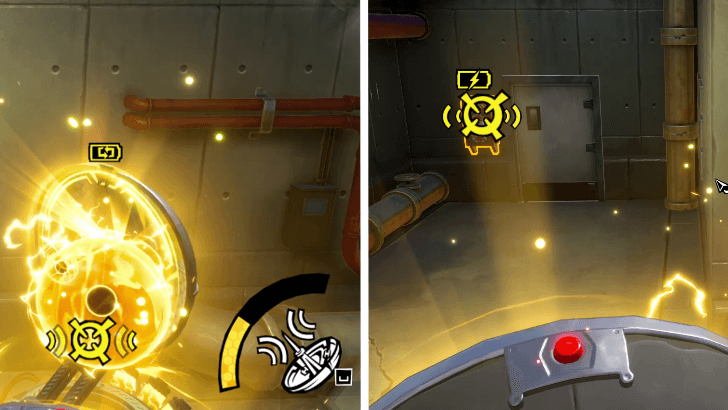 Using the nearby Control Panel, redirect the energy from the Satellite to the nearby door a little to the west. |
| 3 |  Once inside, turn on the Satellite in the middle first to absorb the electricity from the Control Panel it is facing. |
| 4 | 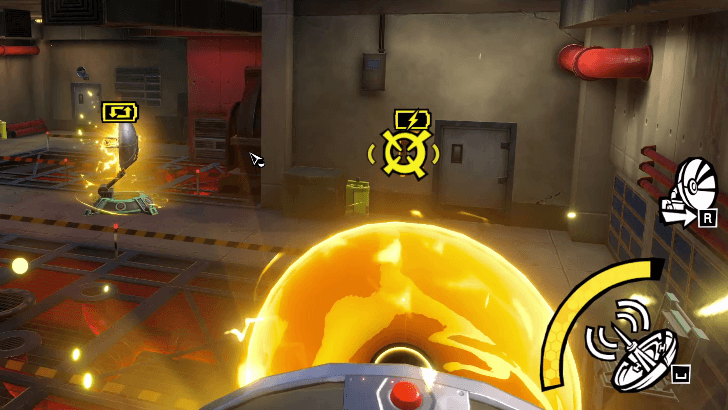 Go to another Control Panel behind the satellite, and transfer the electric energy from the satellite into a closed nearby door. There's a treasure chest inside. |
| 5 |  Once the treasure chest is claimed, go back to the Control Panel and redirect the electricity from Step 4 back to the satellite. |
| 6 | 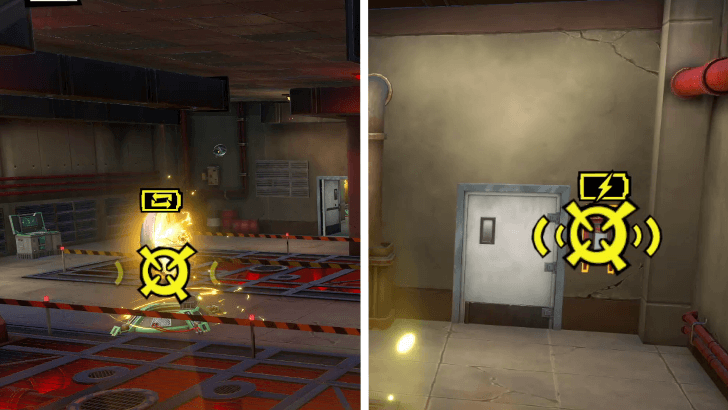 Afterwards, change prespective to redirect the electricity from the Satellite to another closed door found from this point of view. This should lead you into another Steam room with yet another Satellite puzzle. |
Power Plant 1F
Southeast Corridor Robot Puzzle
| 1 | After you have finished the Shadow Katayama boss fight and quest, you will unlock the east portion of the first floor by going through the pipe below the Vertical Shaft. Before going through the vents below the staircase to reach the east corridor, use the console near the exhausts to transfer power to a fuse to open the locked door. This should allow you to open a locked door containing a chest. |
|---|---|
| 2 | Use the robot panel and navigate the robot to get electrical energy, and then go to the room on the right to shut down the electric barrier door. Follow the path indicated in the video above to transfer the electrical energy to the transmitter before exiting control and fixing the conduction poles. Do not forget to retrieve the Dam Shard in the room before proceeding! |
| 3 | Get the robot with thermal energy and go back to the locked door in the previous room to slot it the transposer in the first room to gain access to the Multi-room Puzzle. However, before progressing, use the control panel again to retrieve an additional source of thermal energy. Transfer it to the transposer used to open the door with electrical energy to open a path towards the Energy Transfer Puzzle. |
Multi-room Puzzle
| 1 | Before going to the room with multiple energy transposers, proceed through the corridor first and access a room with a generator and control panel. Use the control panel to transfer the energy from the generator to the empty transposer. Change cameras and get the just transferred energy to bounce it to the fuse to open the door. This room should contain a robot that has electrical energy, which you need to open the first room in the center. |
|---|---|
| 2 | The door you just opened should contain a robot with kinetic energy, which you will then slot in to open a door containing both a treasure chest and a robot with thermal energy. Lead this bot and transfer it to the last empty transposer. |
| 3 | Break the glass wall that is preventing the energy from reaching the next conduction pole, and configure the furthest one to open the elevator door, which leads to the second floor and contains a ticket treasure chest. |
Energy Transfer Puzzle
| 1 | Before using the control panel, break the glass to enter the energy converter room to take control of the robot with electrical energy. After having it follow you, position it just in front of the window so that the transposer can point to it. |
|---|---|
| 2 | After positioning the robot in the correct place, use the control panel to transpose the energy from the robot to the fuse powering the door. This should give you access to a gold treasure chest. |
Southwest Corridor Generator Parts
| 1 | 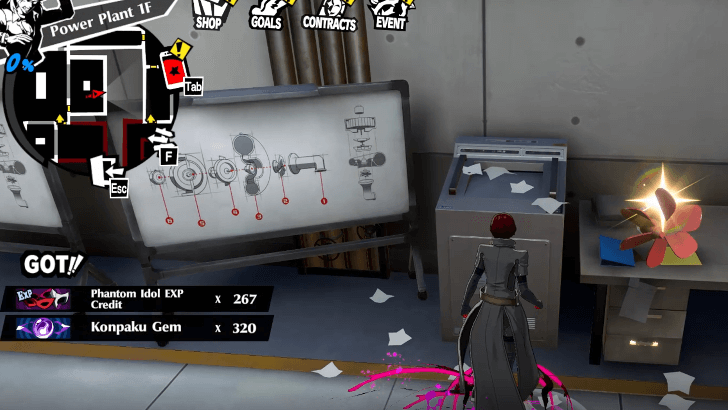 Upon reaching the Southwest Corridor, you will be tasked by a Shadow to find the 2nd and 3rd part of a generator's model. To know the look of the pieces you are trying to find, look at the whiteboard next to the conveniently placed 2nd part, which is the fan. |
|---|---|
| 2 | The last part you need would be the pipe, which can be found in a nearby room with a blue chest by following this path from the whiteboard. |
| 3 | Managing to find both parts will unlock the door with a researcher, which also has a robot fueled with kinetic energy and a chest that requires a Lockpick to open. Have the robot follow you and insert it into the transposer in the first room to get access to a shortcut and a treasure chest with a gold ticket. |
Power Plant 2F
Kinetic Energy Puzzle
| 1 | To start transmitting the energy, go down the flight of stairs. You should be met with a room with a camera console and two robots separated by barriers and a camera bot that prevents the one with energy to cross. You will have to get the robot with energy on the side below the transposer, so position the robot with no energy near the railing and use the console to transfer the kinetic energy. |
|---|---|
| 2 | Position the bot with the kinetic energy just at the bottom of the stairs so that you can change cameras using the console and transfer it to the transposer upstairs. |
| 3 | After getting the kinetic energy to the satellite transposer, you will have to recalibrate the conduction poles upstairs to the next transposer. Get an unpowered robot and have it retrieve the energy to then reach the next area. |
Electric Energy Puzzle
| 1 | After entering the room through a broken window, you must first access the robot console on the right room so that you can start transferring the electrical energy. Adjust the conduction poles so that the energy reaches the center of the room. |
|---|---|
| 2 | To proceed, have the robot without energy on the left side of the room follow you to the satellite transposer and retrieve the electrical energy. You should then position the robot just in front of the window of the left room so that the camera can extract the energy and transfer it over to the door to the next area. |
| 3 | Before leaving the area, make sure to climb up the ceiling through the center of the room to get two chests for completion. |
Energy Doors Puzzle
| 1 | To start, first go through the room on the left, specifically the one that has an active satellite transposer with kinetic energy. Adjust the conductor poles to open the locked area, which should contain a robot with electrical energy. |
|---|---|
| 2 | Have the robot with electrical energy follow you to the room on the right and transfer the energy to the satellite transposer. Like the previous one, adjust the conductor poles to open the door. Doing so should give you access to golden chest in the far middle of this section. |
Elevator Access Puzzle
| 1 | When you reach the western part of the floor, you will have to do a puzzle that gives you access to the elevator. To start, use the console found in the room accessed through a broken window. Using the console should allow you to transfer the energy of the generator to the satellite transposer |
|---|---|
| 2 | Next, adjust the conductor poles to get the energy to the transposer just in front of the elevator door. There should be an empty robot there, so have it get the newly transferred energy and slot it in to the transposer next to the elevator. The room should contain a chest for you to open! |
Power Plant 3F
East Generator Room Puzzle
| 1 | To first get access to the room, you must use the robot console to get the authorization. You should then cross to the other half by going through the middle, and then descend the flight of stairs to reach an otherwise inaccessible area. Upon getting to the other side, have the robot with kinetic energy be transferred to the satellite transposer to start the puzzle. |
|---|---|
| 2 | Return to the first area and recalibrate the conductor poles so that the energy reaches a satellite transposer that is near a robot with no energy. Have that specific robot follow you and transfer the energy to a static transposer to open the door. Doing so should give you entry to a room with a chest and a robot with electrical energy. |
| 3 | Have the robot with electrical energy follow you, and then transfer the energy over to an empty satellite transposer near the area. You will need to adjust the conductor poles, but it should be fairly quick. |
| 4 | After that, you will have to descend the stairs again to reach the side of the room where you can exit. You should be able to extract the electrical energy with a robot and then slot it on the nearby static transposer to progress to the next area. |
Long Corridor Puzzle
| 1 | After reaching the long corridor saferoom, enter the middle room just a little bit below it. This room contains a robot with thermal energy. There should be a vent you can crawl into, giving you access to a room with an electric-powered robot. Have the robot follow you and slot it in the static transposer just near the middle room. Doing so should give you access to a corridor that is not accessible due to a barrier. |
|---|---|
| 2 | Return to the middle room to have the robot follow you back to the corridor with a door barrier. Slot the robot in so you can get access to a room with an authenticator. The robot to give you access should be in a nearby room, which will remove the door barrier. |
Three Corridor Puzzle
| 1 | As you reach the west inner corridor saferoom, you will come upon a long corridor separated into three sections. For the first one, you will need to use the robot console and navigate the bot to the next section to remove the door barrier and transfer the electrical energy to the empty satellite transposer. |
|---|---|
| 2 | Proceed to the second section and adjust the conductor poles to reach the third section. After that, return to the first section and control the robot to get the kinetic energy from the satellite transposer to the static one. Opening the door should lead you to a room with a chest and a thermal-powered robot. |
| 3 | Have the robot with thermal energy follow you back to the west inner corridor saferoom, just in front of the stairs. After that, use the camera console to transfer the energy to the robot with no energy. |
| 4 | Interact with the robot that has thermal energy and lead it to the next room, and then slot it into the empty satellite transposer. Configure the conductor poles to open the energy-locked door that contains a gold ticket and rare chest, as well as access to the elevator! |
Katayama's Palace Bosses
Mechsuit Shadow (Akashi)
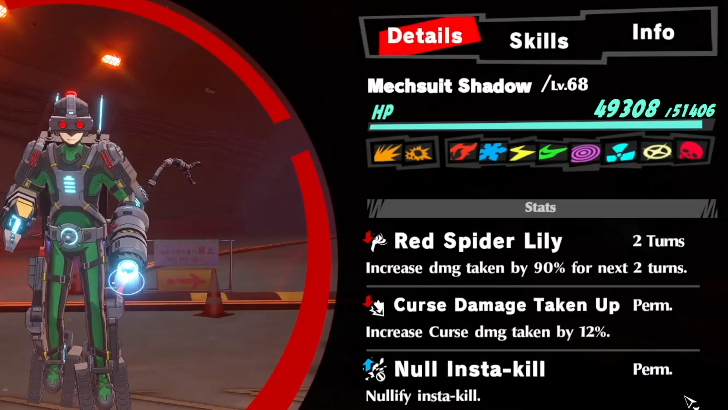
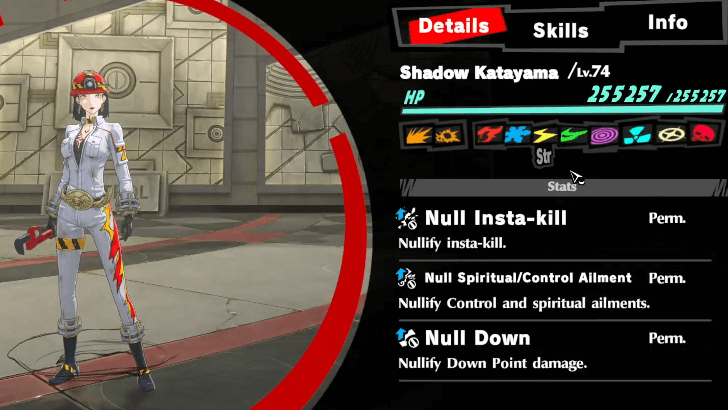
The Mechsuit Shadow, later revealed to be Akashi, is the first major boss fight players will encounter inside Katayama's Palace. There does not seem to be anything notable about this boss fight. Just lower his HP to 0.
Neko Shogun
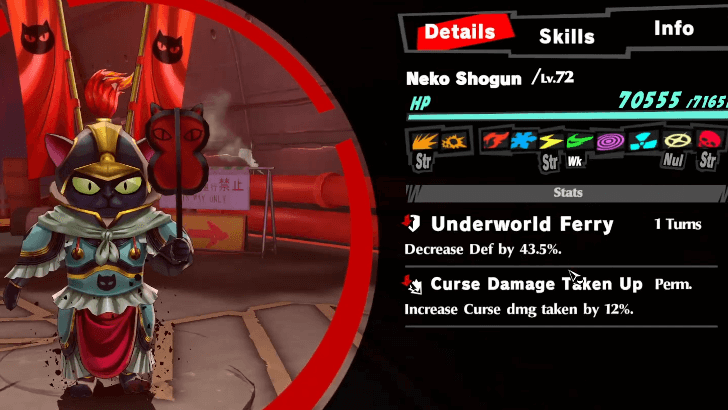
While progressing through the Palace, players will eventually have to face a mandatory fight against a pair of Neko Shoguns. Ne careful not to hit them with Bless attacks as they are nullfied.
Anubis
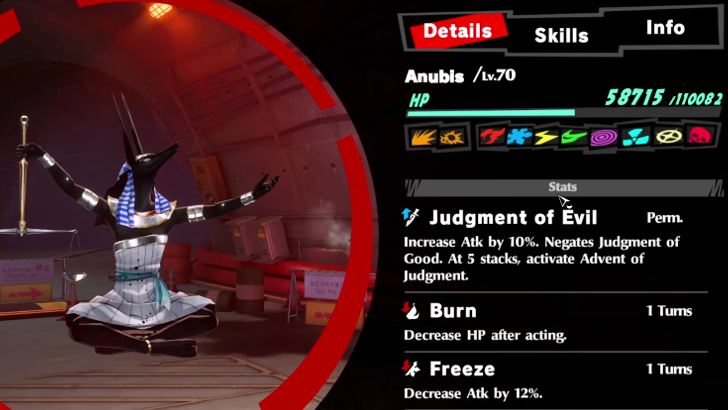
There are three Anubis fights scattered across Katayama's Palace for the player to discover. The first one will have you balance out buffs and attacks; the second fight wants players to go all in on him to avoid him building Judgment of Evil stacks.
Kumbhanda
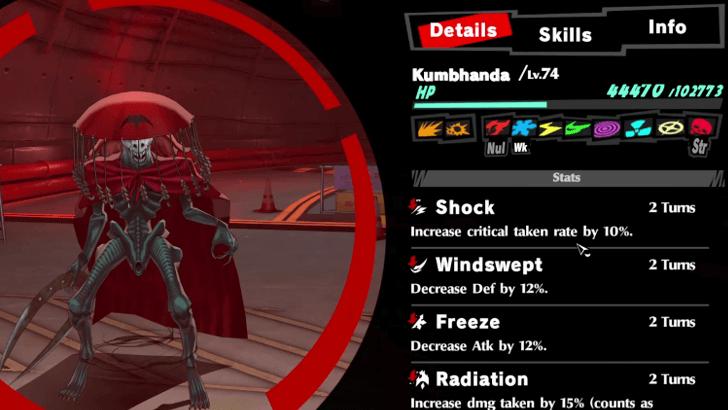
Kumbhanda's boss fight is a tricky one as it needs you to manage the Grudge Stacks he applies. Try to get all Grudge Stacks for all characters so Kumbhanda does not use his massive multi-target attack.
To get grudge stacks, attack his companions instead of him. Once his allies are down, focus him down next.
Hariti
Hariti has high damage reduction compared to the other bosses, so having single-target Assassins against this boss fight is not recommended. Focus on fully lowering the health of the Agathion of instead of killing them to quickly finish Hariti since she uses her health to heal them.
Shadow Katayama
Shadow Katayama is the final boss players will face in Chapter 3 Phase 1. She will have multiple phases, and hits surprisingly hard with sweeping Electric attacks. Be as ready as you can be when you finally face off against her near the end of Phase 1.
Kiskil-lilla Katayama
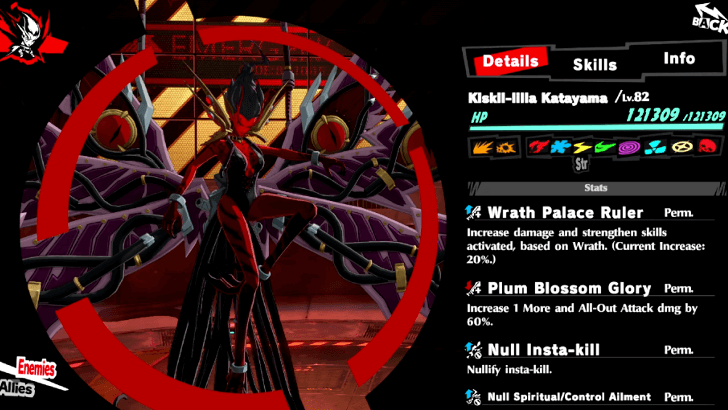
Shadow Katayama gets forced and controlled by Shadow Akashi to fight her students, transforming into Kiskil-lilla Katayama as the final boss of Chapter 3 Phase 2. She has multiple phases like before, and hits even harder than the first Shadow Katayama fight in Chapter 3 Phase 1.
Have your strongest team ready against her, alongside a great Medic in your team to sustain everyone throughout the fight.
Katayama's Palace Rewards
Wind Obtained After Phase 1

Riko Tanemura finally becomes a playable character upon the release of Chapter 3 in Version 2.0. Completing the story for the patch (Phase 1) will also reward the player with a free copy of Wind, as she joins Wonder's team of Phantom Thieves!
Riko Tanemura (Wind) Character Guide
Cu Chulainn for Free in Phase 2 Event

As part of the release of Chapter 3 Phase 2, the Unconditional Love event also gets a Phase 2.
This time, completing the event includes completing and beating the new final boss of Chapter 3 Phase 2, will reward the player with a brand new persona added in Version 2.3: Setanta's grown-up version and the Child of Light in Irish folklore, Cu Chulainn.
Unconditional Love Phase 2 Event
Phase 1 Reward Items
| Quest Rewards | Amount |
|---|---|
| Wonder EXP Credit | x2000 |
 Thief Compendium Tome Thief Compendium Tome
|
x8 |
 Sun Crystal Sun Crystal
|
x15 |
 Konpaku Gem Konpaku Gem
|
x30000 |
Phase 2 Reward Items
| Quest Rewards | Amount |
|---|---|
| Wonder EXP Credit | x2000 |
|
Thief Compendium Tome
|
x8 |
|
Sun Crystal
|
x15 |
|
Konpaku Gem
|
x30000 |
 Skill Incense S Skill Incense S
|
x30 |
How to Get to Katayama's Palace
Progress the Main Story
To get to Katayama's Palace, simply progress through the story. Katayama's Palace unlocks after completing Chapter 2 in Miyazawa's Palace.
Enter Katayama's Palace from Mementos

To Enter Katayama's Palace, tap Meta Verse on the bottom left of the screen to open the other world menu. Click on Katayama's Palace, which is found in the Path of Chemdah of Mementos to enter it!
Use Safe Rooms to Teleport
You can use previously discovered Safe Rooms to teleport to the different areas of the palace.
You will need to unlock these rooms as you explore the palace.
Persona 5: The Phantom X (P5X) Related Guides
All Story Palaces
| List of Story Palaces | |
|---|---|
| 1 | Kiuchi's Palace |
| 2 | Miyazawa's Palace |
| 3 | Katayama's Palace Akashi's Palace |
All Event Palaces
| List of Event Palaces | ||
|---|---|---|
| Palace | Event | |
| 1 | Castle in the Void | Take Your Heart |
| 2 | Museum Arc | Crossroads of Fate |
| 3 | Bank Arc | Crossroads of Fate |
| 4 | Pyramid Arc | Crossroads of Fate |
| 5 | Spaceport Arc | Crossroads of Fate |
Comment
2  Anonymous 4 months
Please, can somebody help me with this! Escort the Robot Through the Cameras- part of the walkthrough (power plant 2f). I take the robot out of the rectangular room on the right to the circular room. in that room there are three things that are interactable, but none work, and the robot with no energy wont connect to any of them. what do i do? I've tried putting the robot close to all of them, but nothing works :((
Author

Katayama Palace Guide: All Puzzles Walkthrough
Please participate in our site
improvement survey
04/2026
improvement survey
04/2026
Would you assist in
improving Game8's site?
improving Game8's site?

×
We are listening to our users' valuable opinions and discussing how to act on them.
The information collected through this survey will be used for the purpose of improving our services. In addition, the information will only be disclosed a part of a statistic in a format that will not allow identification of personal information.
Begin Survey
Not Now
×
Please rate each item regarding Game8.co's Advertisements.
Amount of Ads
Very Dissatisfied
Somewhat Dissatisfied
Fine
Somewhat Satisfied
Highly Satisfied
Placement of Ads
Timing of Ad Display
Ad Loading Speed
Safeness of Ads
Content of Ads
×
Please rate each item regarding Game8.co's Quality of Articles.
Amount of information
Very Dissatisfied
Somewhat Dissatisfied
Fine
Somewhat Satisfied
Highly Satisfied
Frequency of updates
Speed of new information
Accuracy of articles
Understandibility of articles
Readability of sentences
×
Please rate each item regarding Game8.co's Usability of the Site.
Ease of finding information
Very Dissatisfied
Somewhat Dissatisfied
Fine
Somewhat Satisfied
Highly Satisfied
Loading Speed
Use of Color
Font Size
Visibility of Images
Easy to Understand Layout
×
Please rate each item regarding Game8.co's Message Boards, Comments.
Ease of Writing
Very Dissatisfied
Somewhat Dissatisfied
Fine
Somewhat Satisfied
Highly Satisfied
Readability
Ease in Finding Information
Comment Quality
Comment Quantity
Admin Response
×
Please rate each item regarding Game8.co's Site's new design.
Please rate our site's new design
Very Dissatisfied
Somewhat Dissatisfied
Fine
Somewhat Satisfied
Highly Satisfied
Do you think that the website's design change makes the site easier to use?
Has the new design made it easier for you to find information on the site?
Has the new design improved the overall visual appeal of the site?
How would you rate your overall satisfaction with the new design of the site?
×
How likely are you to recommend Game8 to someone you know?
Very Unlikely
0
1
2
3
4
5
6
7
8
9
10
Very Likely
If you have other opinions regarding potential improvement to the website, please share them with us. We would appreciate your honest opinion.
Note: This is a free response section, so you can proceed without entering anything.
Note: Please be sure not to enter any kind of personal information into your response.
Note: Please be sure not to enter any kind of personal information into your response.
×
Thank You
×
Thank you for participating in our survey! Your answers will help us to improve the quality of our website and services.
We hope you continue to make use of Game8.
We hope you continue to make use of Game8.
Close
Rankings
- We could not find the message board you were looking for.
Gaming News

![Forza Horizon 6 Review [Preview] | Beautiful Roads With a Whole Lot of Oversteer](https://img.game8.co/4460981/a7254c24945c43fbdf6ad9bea52b5ce9.png/show)

![Forza Horizon 6 Review [Preview] | Beautiful Roads With a Whole Lot of Oversteer](https://img.game8.co/4460981/a7254c24945c43fbdf6ad9bea52b5ce9.png/thumb)
![Borderlands Mobile Review [Playtest] | The Same Borderlands Made Easy](https://img.game8.co/4465500/aac0c880a39ec5cd46073e49d18f3ed5.png/thumb)
Popular Games

Genshin Impact Walkthrough & Guides Wiki
Crimson Desert Walkthrough & Guides Wiki
Umamusume: Pretty Derby Walkthrough & Guides Wiki
Honkai: Star Rail Walkthrough & Guides Wiki
Monster Hunter Stories 3: Twisted Reflection Walkthrough & Guides Wiki
Wuthering Waves Walkthrough & Guides Wiki
The Seven Deadly Sins: Origin Walkthrough & Guides Wiki
Pokemon TCG Pocket (PTCGP) Strategies & Guides Wiki
Pokemon Pokopia Walkthrough & Guides Wiki
Zenless Zone Zero Walkthrough & Guides Wiki


Recommended Games
Monster Hunter World Walkthrough & Guides Wiki
Fire Emblem Heroes (FEH) Walkthrough & Guides Wiki
Pokemon Brilliant Diamond and Shining Pearl (BDSP) Walkthrough & Guides Wiki
Super Smash Bros. Ultimate Walkthrough & Guides Wiki
Diablo 4: Vessel of Hatred Walkthrough & Guides Wiki
Cyberpunk 2077: Ultimate Edition Walkthrough & Guides Wiki
Yu-Gi-Oh! Master Duel Walkthrough & Guides Wiki
Elden Ring Shadow of the Erdtree Walkthrough & Guides Wiki
The Legend of Zelda: Tears of the Kingdom Walkthrough & Guides Wiki
Persona 3 Reload Walkthrough & Guides Wiki


All rights reserved
©Perfect World Adapted from Persona5 ©ATLUS. ©SEGA.
The copyrights of videos of games used in our content and other intellectual property rights belong to the provider of the game.
The contents we provide on this site were created personally by members of the Game8 editorial department.
We refuse the right to reuse or repost content taken without our permission such as data or images to other sites.
Hello, are you referring to Power Plant 2, Objective 2? Before transferring the energy to the robot, make sure that you've passed it along to the next transmitter first. Move the robot to the next area past the cameras, then have the robot interact with the transmitter you passed the energy to. I hope this helps!