Kiuchi Palace Guide: All Puzzles Walkthrough
★Version 3.3 is now live: Firecracker Rin | Banner
┗ Skill Cards | New Year's Light Banner | LNY Event
☆ Version 3.2.2 is now live: Matoi | Banner
┗ Throne | Entropy Banner | Take Your Love
★Tier Lists: Characters | Personas | Rerolls
☆Boards: Companio | Friends | Toy Trading
This is a guide on how to complete the puzzles and 100% Kiuchi's Palace in Persona 5: The Phantom X (P5X). Check out our complete step-by-step walkthrough, puzzle guides, fan card locations, bosses, and the rewards in this guide.
List of Contents
Kiuchi's Palace Walkthrough
Your progress through Kiuchi's Palace depends on your Protagonist Thief Level (PLVL). At certain points in the story, you will need to increase your PLVL in order to advance through the palace. You can increase your PLVL by completing in-game activities.
Leveling Guide: How to Level Up Fast
Initial Infiltration
| 1 | 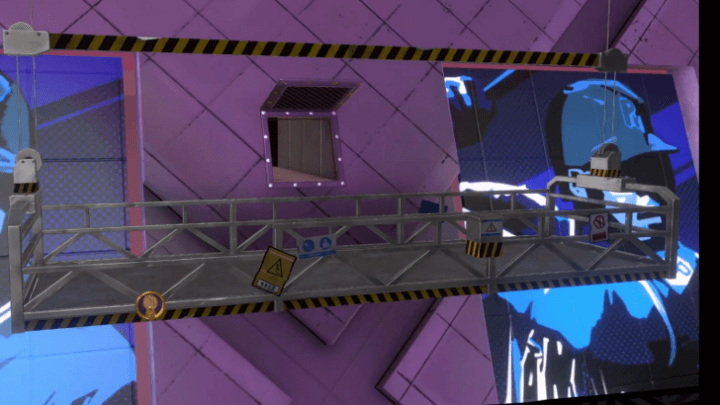 In this section, you will use the grappling hook for the first time. Use it to reach the infiltration point and enter the palace. |
|---|---|
| 2 | 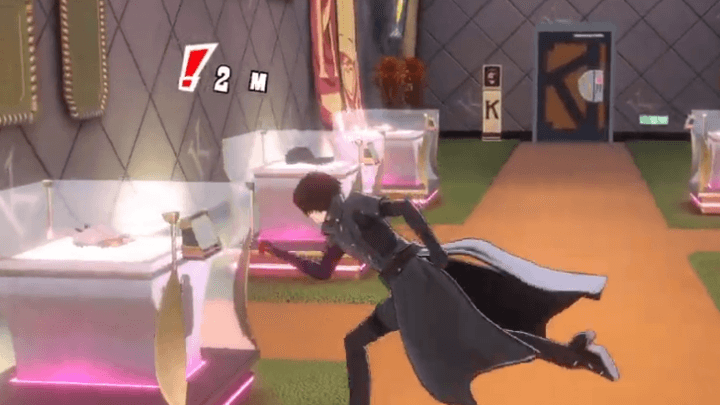
After leaving the locker room and completing the obligatory shadow fight, you will be instructed to choose Kiuchi's most valuable posessions. Choose the two baseball shoes showcases to go to the next area. |
| 3 | 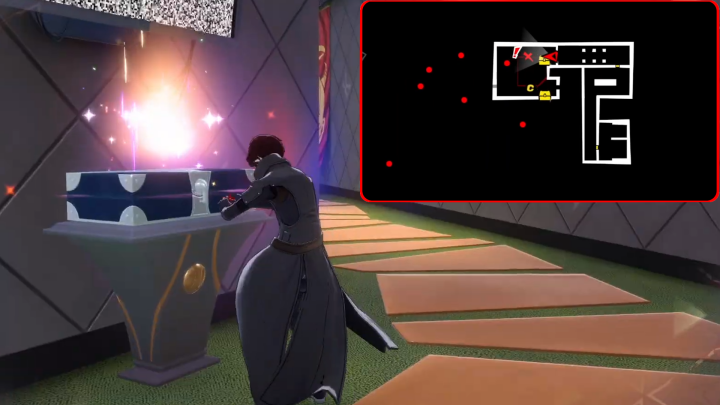 As soon as you leave the first puzzle room, grab the treasure chest to your left. |
| 4 | 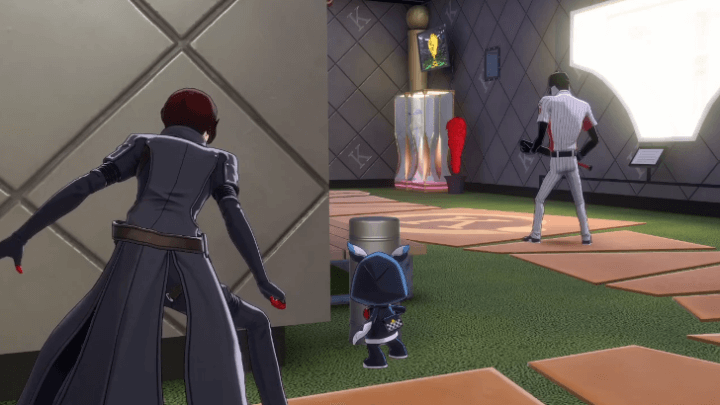 For the next part, you will be taught how to use the cover mechanic to avoid detection from enemy shadows, as well as gain the ability to perform ambushes. |
| 5 | 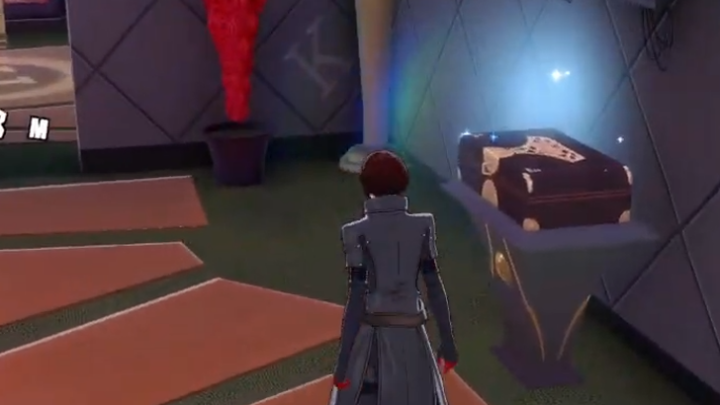 Grab the second treasure chest on your right after following the path past the enemy shadow that you ambush. Enter the room after that and you'll fight another shadow. |
| 6 |  You'll see a room ahead after defeating the shadow. You'll also be introduced to the Velvet Room where you can train Personas. This will unlock the Persona functionality and menu. |
| 7 |  Go to the door nearby and follow the mission marker. You'll be introduced to the Third Eye mechanic. This is useful for identifying obstacles or breakable object. Use the Third Eye to find the vent to get to the next room. |
| 8 | 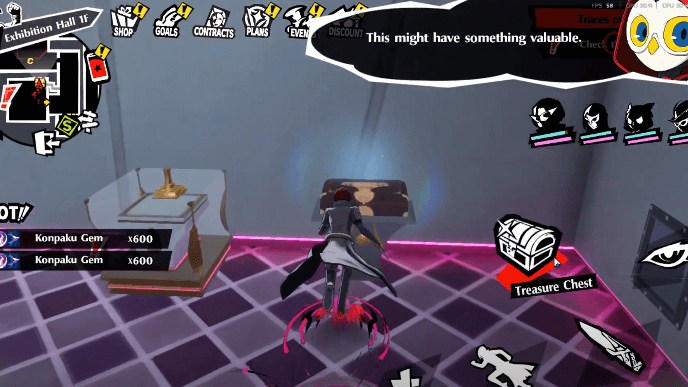 There is a shadow and a chest in the next room. Defeating the shadow will make opening the chest safer. Continue following the mission markers and interact with objects in the room as instructed. |
| 9 | 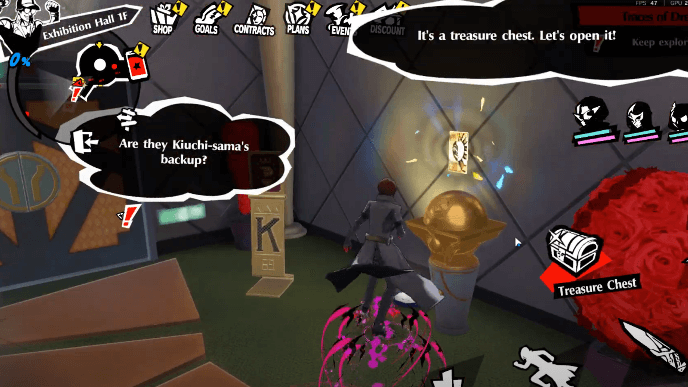 Once the next door is unlocked, head to the next room. Dispose the shadow in this room, and get the treasure chest to the left of the statue. Head to the room on the left. |
| 10 | 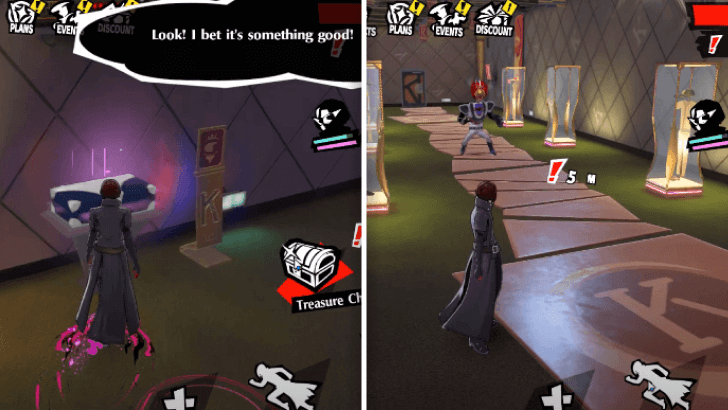 Make your way through the hallway and defeat the shadow that appears. Follow the path and it'll lead you to another treasure chest. There's an elite elite shadow blocking the path after you get the chest, so take it out. Keep proceeding after. |
| 11 |  You'll see another treasure chest to the right side of the door. Enter the Safe Room, then continue to the left and enter the next area. |
| 12 |  In the next room, you'll see a chest past the left side of the statue. Go to the right side of the room next. |
| 13 | 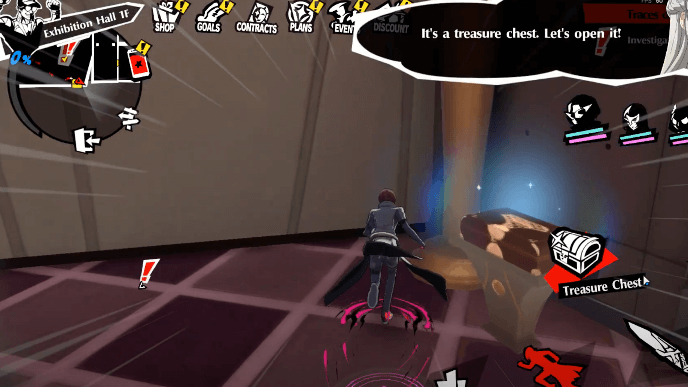 On the right corner of the room, you'll see another chest. Take it and then follow the mission marker to trigger the next scene. |
| 14 | 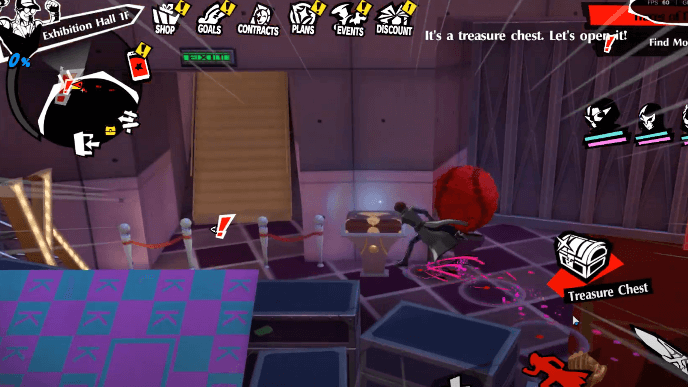 After the dialogue and cutscene, you'll be transported to another area. Follow the mission marker and it'll lead you to the next treasure chest. |
| 15 | 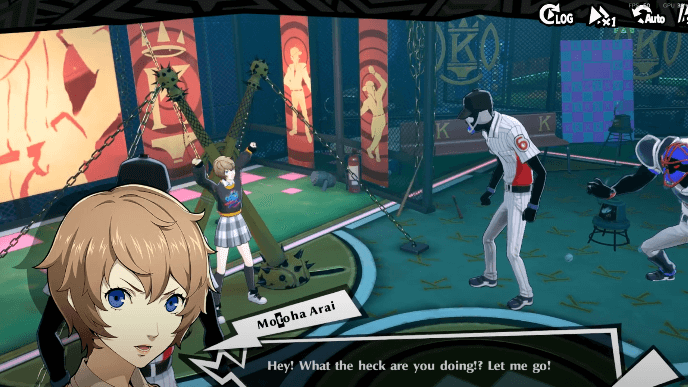 Go up the stairs to the left of the treasure chest and you'll see another Safe Room. Rest in the Safe Room if needed then head to the double doors to trigger the cutscene and fight a short boss battle. Here, you'll be taught about Down Points for tougher Shadows. This is the end of the initial infiltration for the palace and Motoha Arai, codename: Closer, will join the team. |
Second Infiltration
| 1 | 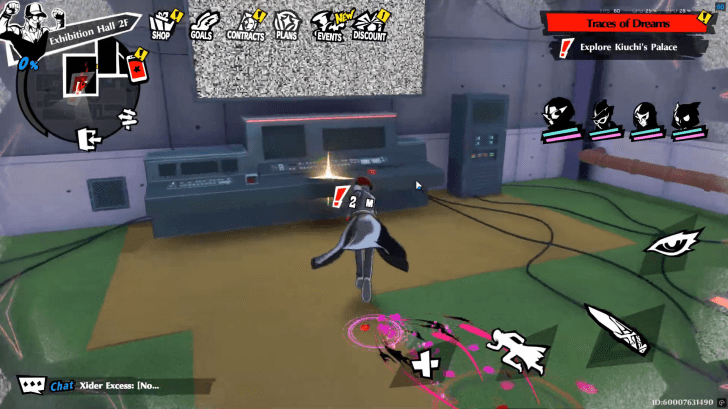 When you return to the Exhibition Hall 2F safe room, go right and claim the map. Then, go to the end of the hallway and enter the server room. Press the button and watch the cutscene. |
|---|---|
| 2 | 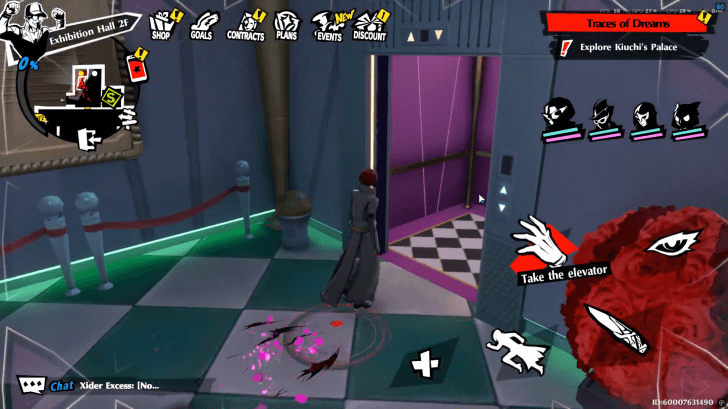 Use the elevator near the safe room to go outside. Manuever through the path by sliding and jump when the prompt appears. |
| 3 | 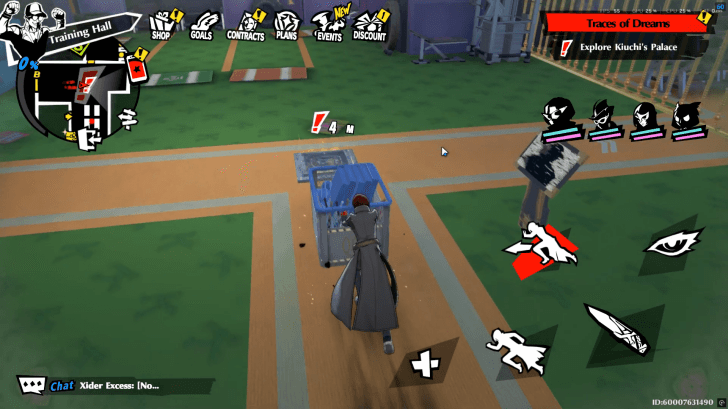 Unlock the Training Hall: Entrance safe room and enter the room. You will do your first box puzzle in the game. Walk next to the box and push it on the tile. These puzzles will be more common from this point onwards. |
| 4 | 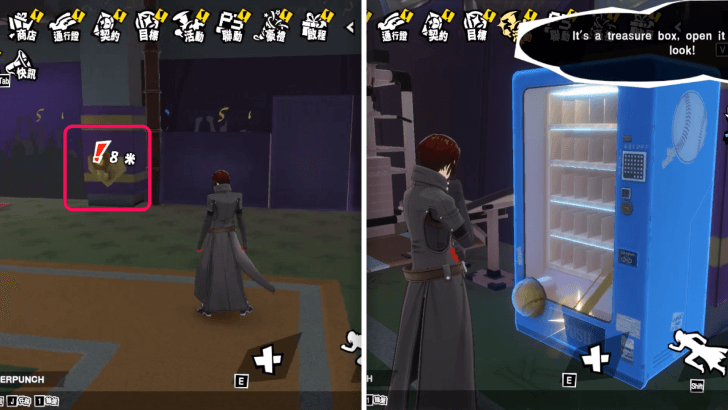 There will be two shadows ahead, and an interactable vending machine that will give two lust shards. The Golden Baseball used for the door near the elevators can be found here as well. |
| 5 | 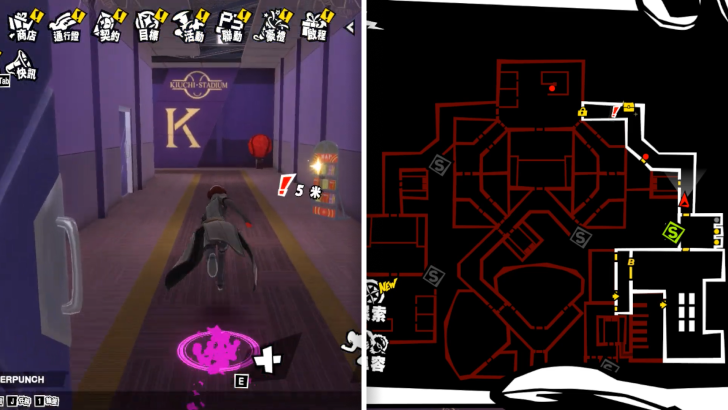 Return to Elevators, and unlock the door with the Golden Baseball. You'll find a map of the Palace once you go through and you will now be able to see the unexpolored areas. |
| 6 | 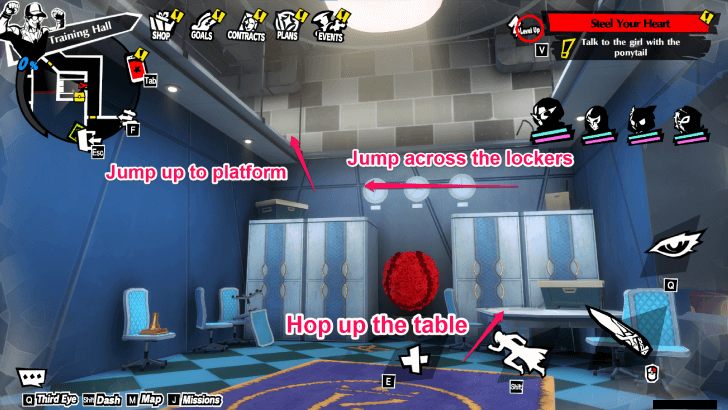 Before proceeding the hallway to the left, there will be a room containing two chests at the end of the corridor. After opening the first one, hop up the table, and jump across to the lockers to open the second chest. Afterwards, you can jump back down to proceed. |
| 7 |  Time moving up strategically to avoid getting hit by the turrets blocking the path. There are another two chests that can be opened before proceeding. A room to the left can be opened to reveal a chest, as well as another chest at the end of the corridor. |
| 8 | 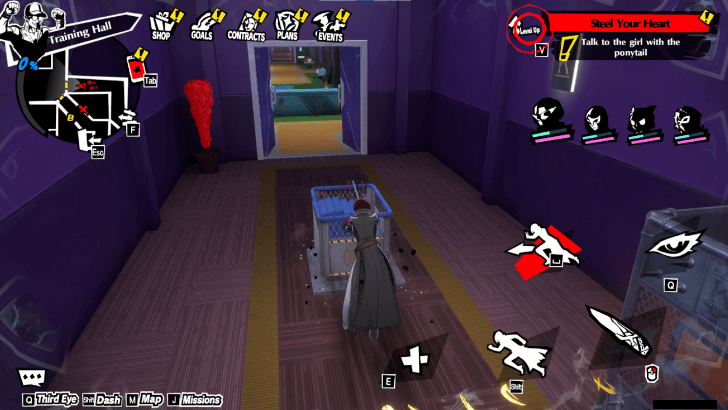 Grab the prop box and move carefully past the turrets. You'll be damaged significantly if timed incorrectly, though a quick visit to a safe room will recover all lost health! |
| 9 | 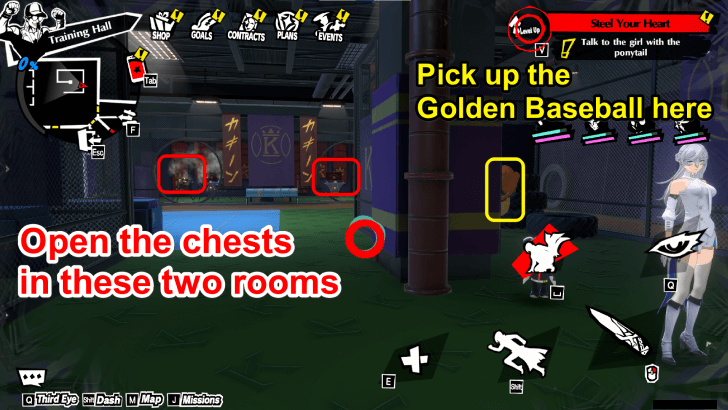 Sneak past the projectiles by hiding against the wall, then break the turret at the end of the corridor. You'll be able to find the Golden Baseball in a little nook across the two rooms containing chests. There is also another chest waiting near the entrance where you had to sneak past the projectiles. Return to the entrance of the room and insert the Golden Baseball to the slot to proceed. |
| 10 | 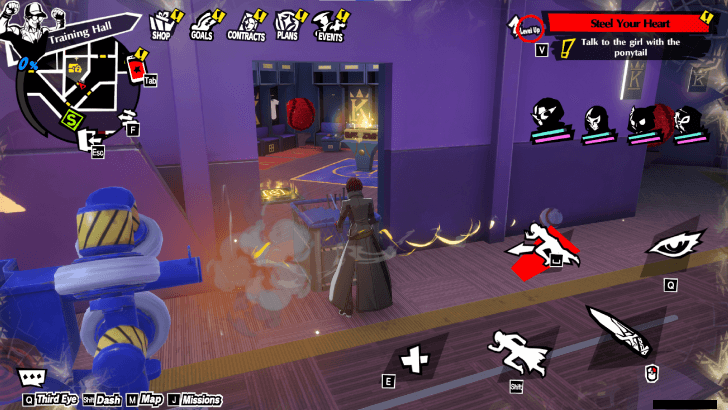 Open the chest up ahead, and a new kind of turret will be waiting for you there. Defeat the shadow, and push the prop box in the left room. |
| 11 | 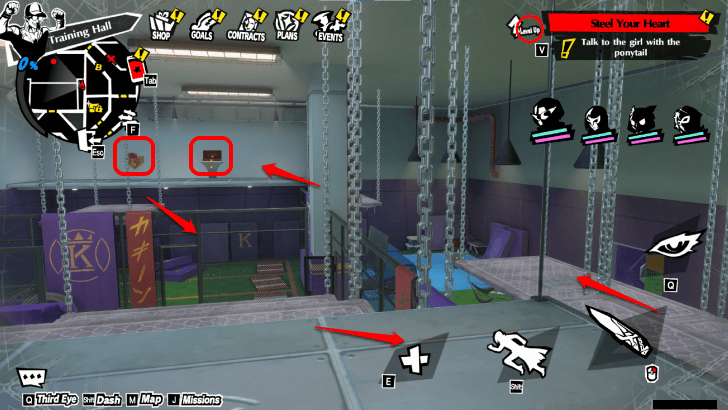 Unlock the safe room up ahead and proceed to the new area. You'll need to find the Pink Baseball to unlock the gates, so climb up the platform, and take the moving platform across the room. This will lead to a chest and the Pink Baseball. You can then jump down and unlock the gate. |
| 12 | 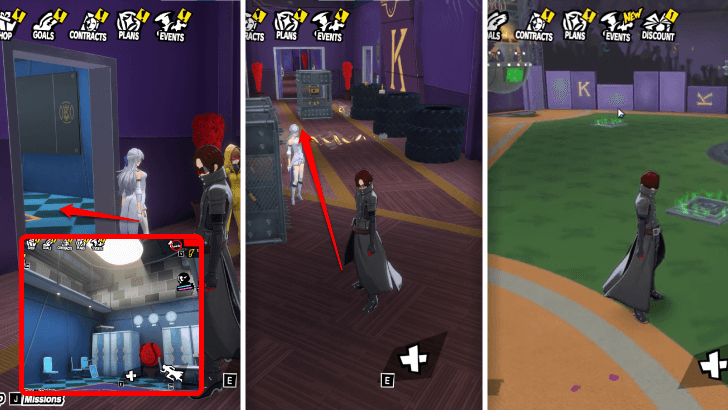 Before proceeding will be a familiar room to the left where a hidden chest is. Proceed afterwards to the corridor and dash past the turrets. You'll be met with another shadow and a new puzzle to solve. Pay attention to the hint on the TV, and push the box accordingly. ▶ Baseball Field Puzzle |
| 13 | 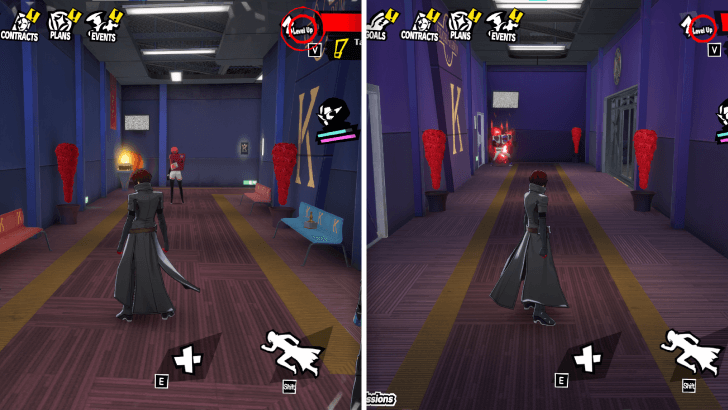 Proceed through the hallway and unlock the new safe room around the corner. Defeat the two shadows patrolling the area, and you'll be back at the first box puzzle from before. Defeat the strong shadow guarding the door to proceed. Keep in mind, you'll have to be Level 22 to face the shadow! You can unlock the second elevator after this battle. |
| 14 |  Proceed through the Northern Rooftop to the other end. You'll go through a cutscene after entering the nearest safe room about the story. Afterwards, continue following objective markers to proceed through the area. |
| 15 | 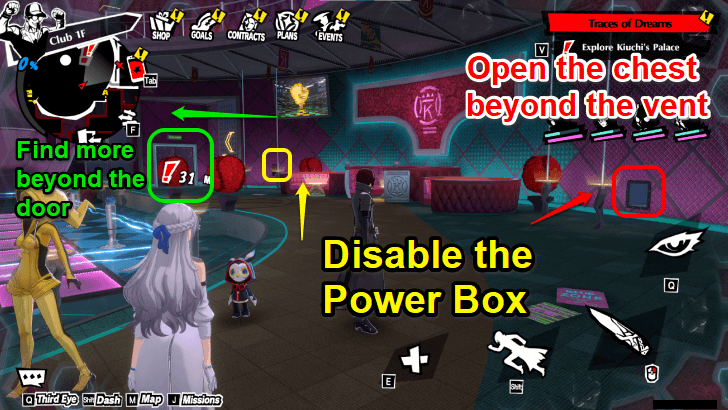 You'll be able to find the powerbox at the other side of the room, but you'll need to find more in a different room to fully disable the obstacles. There is also a vent with a chest hidden in the next room. Defeat the shadows in the area to proceed through safely. |
| 16 | 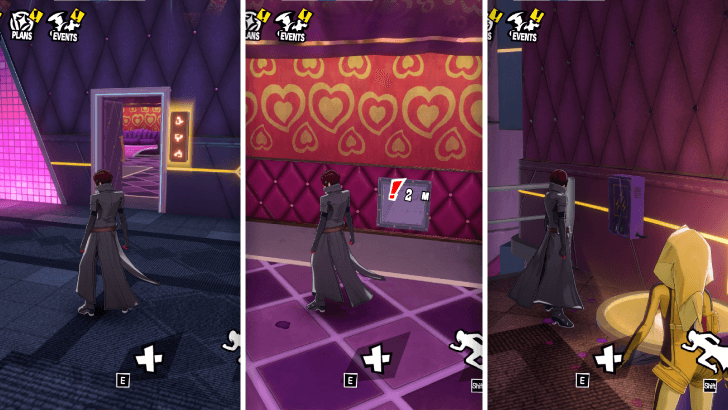 You'll now have to find symbols to open its matching door, but keep in mind that activating any pedestals will apply to any door requiring symbols. Follow the objective marker, and activate the next door. You'll be able to break the second powerbox while proceeding. ▶ Hand Symbols Puzzle |
| 17 | 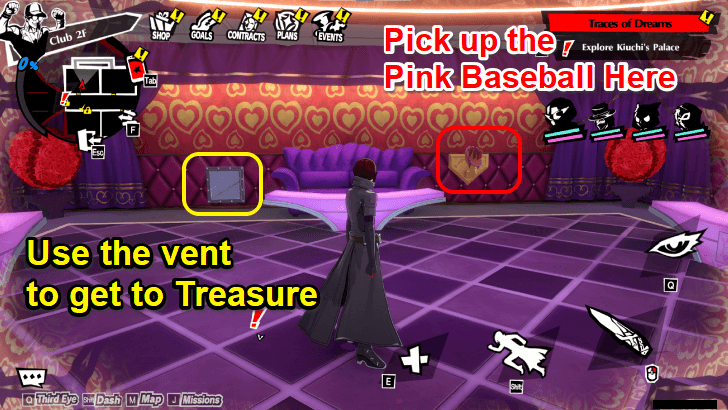 Use your grappling hook to make your way to the other side of the room, and defeat the strong shadow guarding the next area. When you proceed, you'll find the same Hand Symbols puzzle again, where chests will be hiding behind its locked doors. Across the Thumbs up symbol will be the room containing the Pink Baseball to proceed. ▶ Hand Symbols Puzzle |
| 18 | 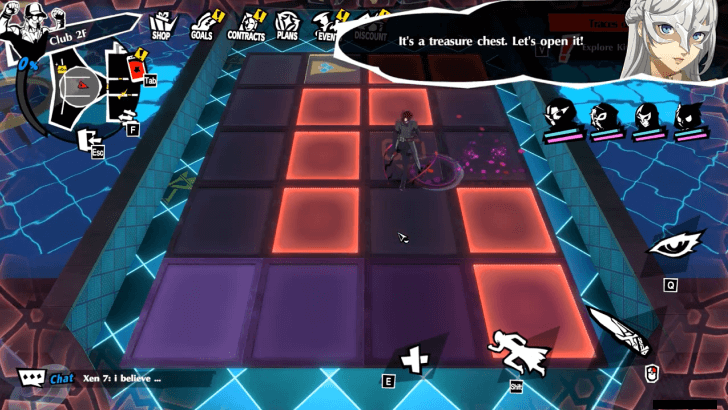 To disable the obstacle on the other side of the corridor from earlier, solve the tile puzzle in this room. Afterwards, you can find the final powerbox for the main room when you follow the objective marker. |
| 19 |  Finish the quick Tile minigame using the same mechanics from the earlier room, and proceed up the stairs. You'll be able to pick up the A-tier fan card after defeating the strong shadow in the area, and finishing the cutscene. You'll also be able to unlock the next elevator to proceed to the next area. |
| 20 |  Keep following the objective marker to advance in the Palace, and you'll soon find yourself at the Baseball Stadium: Center Field. After proceeding to the next area, your route to the Palace's treasure will be secured. You'll have to be level 30 to advance the story. |
| 20 | After advancing to level 30 you'll now be able to send Kiuchi the calling card. Keep in mind that sending the calling card will lock you out of buying possibly lifesaving battle items. |
Kiuchi's Palace Puzzles
Exhibition Hall 1F
|
|
Kiuchi Merchandise Puzzle
Use the Third Eye feature to determine which merchandise best represents Kiuchu as a pitcher and to see the correct sets. Facing north, interact with the bottom right and bottom left panels to open the door.
Kiuchi Baseball Score Puzzle
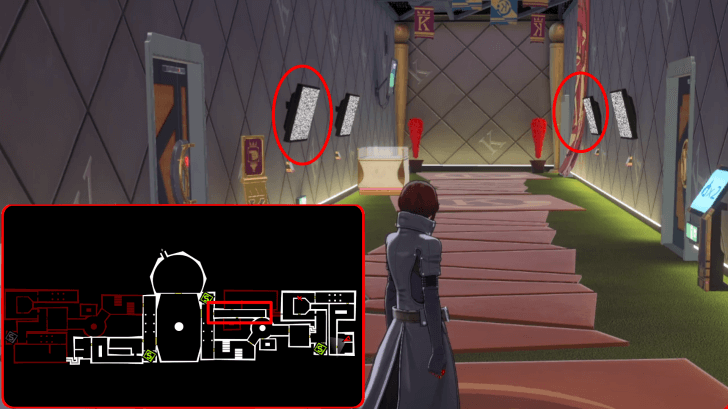
Turn on the screens that only shows a baseball score. When facing east of the map, they will be located at the bottom left and top right.
Kiuchi's Valuables Puzzle
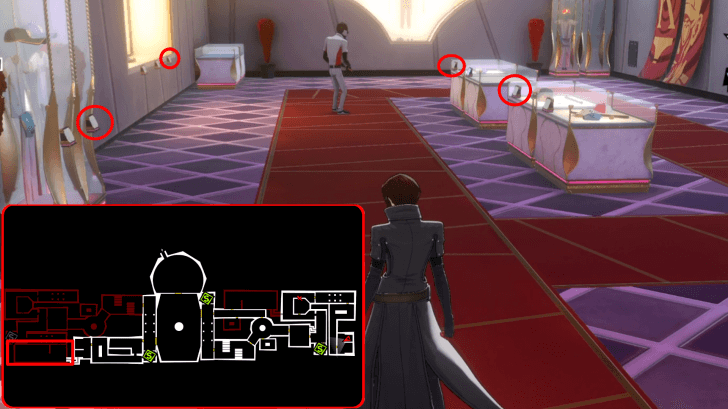
Determine which valuables are correct by observing the Shadow Guard and interacting with the panel on each object he approaches.
Turn on the four panels of the objects that the guard approaches to open the door, and turn off the rest.
Only the four panels should be turned on. They will turn blue once activated, while the rest should remain off.
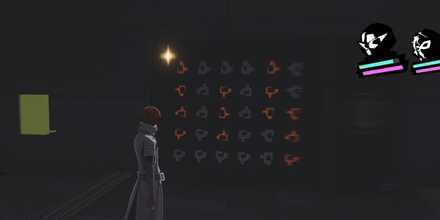
Kiuchi Symbol Puzzle
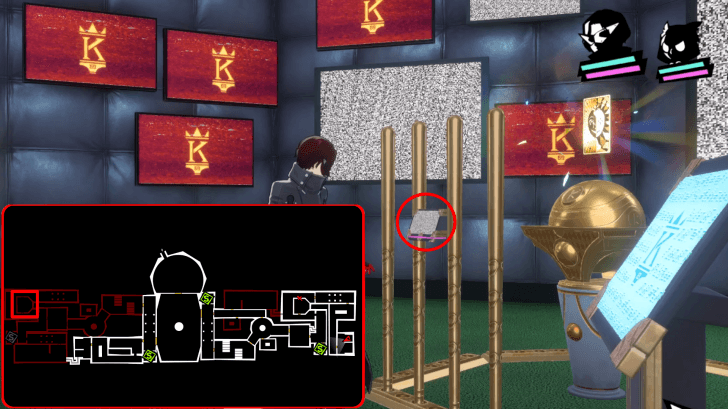
As soon as Kiuchi's symbols appear on the screen, interact with the panel. Do this three times to complete the puzzle.
You can retry an infinite number of times, so take your time and press the button at the right moment.
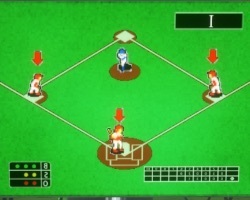
Training Ground Puzzle
There is a pitching machine set up in the training area, and stepping on a pressure plate will launch a ball. Hitting the target with the ball will clear the puzzle and allow you to move on.
Also, some pitching machines can be pushed and pulled to move them around, so move them to the target location and use them.
Baseball Field Puzzle
| Activate the Pressure Plates | |
|---|---|
| Mound Monitor | Home Base Monitor |
 1st and 3rd base, batter's box |
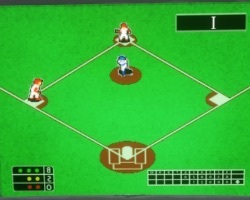 2nd and 3rd base |
| First base monitor | Third base monitor |
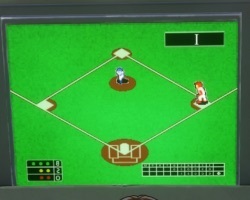
1st Base |
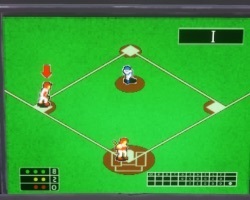
Third base and batter's box |
| Once the central pedestal has been lowered: | |
| Activate the pressure plates in the following order: 1st base ▶ 3rd base ▶ 2nd base Afterwards, The door under the stadium will be unlocked. |
|
When you stand over the pressure plate in the same spot as the offensive player on the monitor for each position, the pedestal will come down, and you can collect the treasure chest.
If you clear the third base, another chest will appear, so be sure to clear the mound monitor last.
After lowering the central pedestal, move all the boxes away from the pressure plate and step on them in the order of 1st, 3rd, and 2nd base to complete the level.
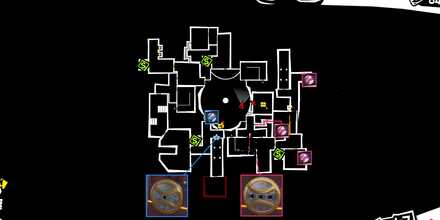
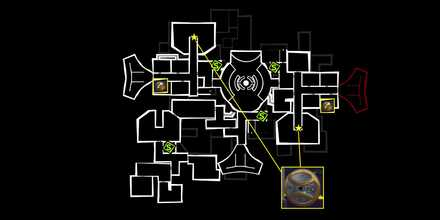
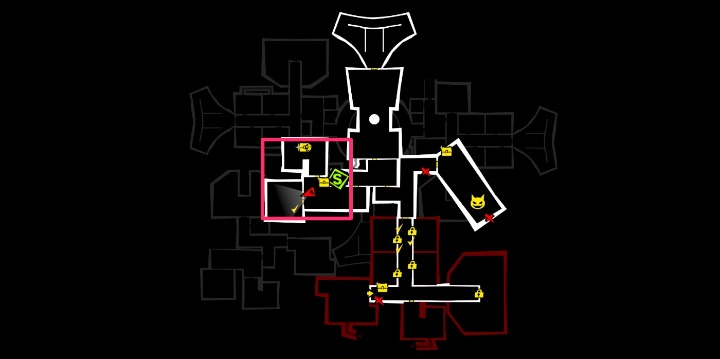
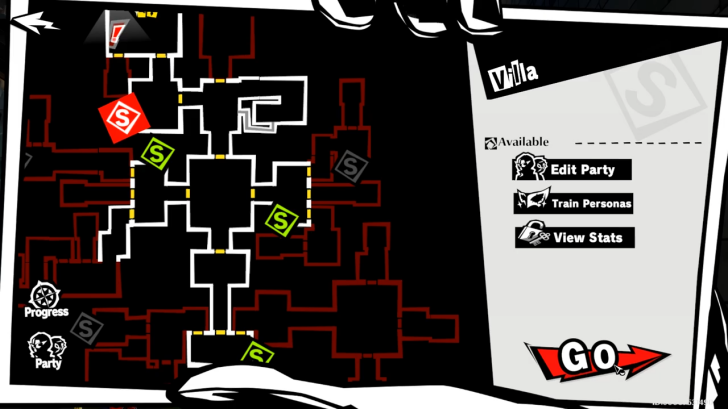
Baseball Field Puzzle Location
| Baseball Field Puzzle Location |
|---|
 It is situated in the lower center of the map. |
Club 1F and 2F Puzzles
|
|
Collect the Pink and Blue Baseballs for Club 1F
| Club 1F Map | ||||||
|---|---|---|---|---|---|---|
 |
||||||
| Pink Baseball | 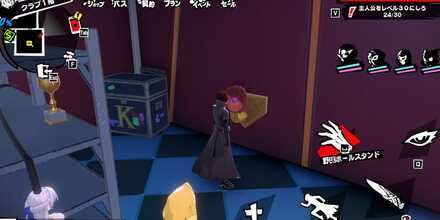 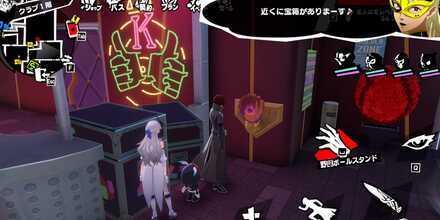 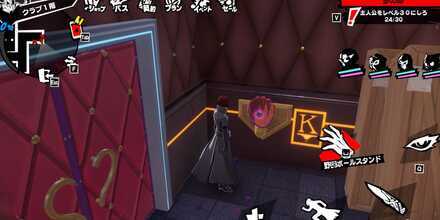 |
|||||
| Blue Baseball | 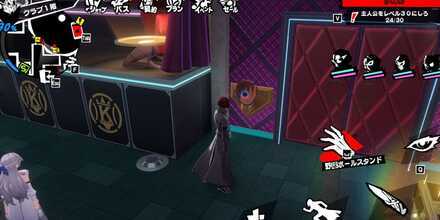 |
|||||
Colored baseballs in Kiuchi Palace serve as unlockable doors that grant access to specific areas. In order to gain access to the locked door, the corresponding colored baseball must be found.
Collect the Gold Baseballs in Club 2F
| Club 2F Map | |||
|---|---|---|---|
 |
|||
| Yellow baseball | |||
 |
 |
||
In Club 2F, you just need to collect Gold Baseballs to open locked doors.
Hand Symbol Puzzles
| All Hand Symbols Location | |
|---|---|
 Left Side of Club 2F |
 Right Side of Club 2F |
The hand symbol puzzles can be completed by interacting with the pedestals in the correct order. The correct sequence is indicated by the symbols next to the door.
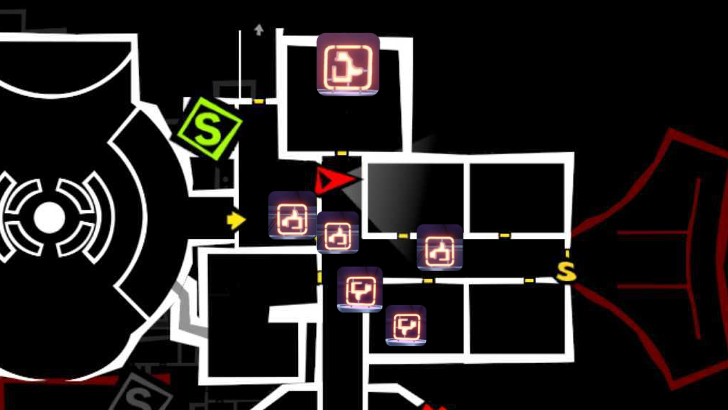
Glowing Tiles Puzzle
 |
|
 |
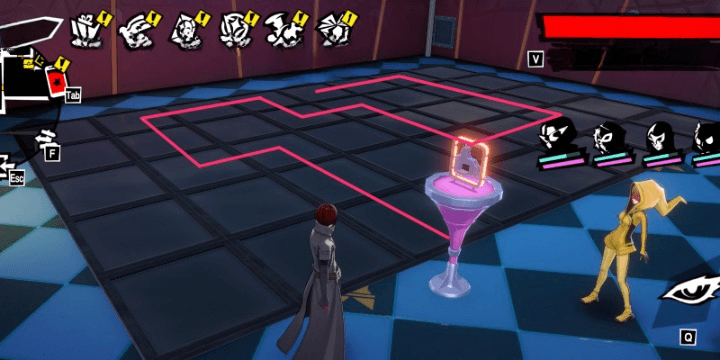 |
On the left side of the map on the 3rd floor, there is a sign that shows the order in which to step on the panels. There is also a room with the panels arranged in it.
Remember the route from the panel to the panel, and step on the panel in the same way. If you succeed, the next room will be unlocked and the treasure chest will open.
If you fail, you can try again by examining the light pedestal.
Boss Room Puzzle
 Puzzle Order Solution |
|
|---|---|
| 1 | Left → Up → Down |
| 2 | ・Right → Left → Up → Down ・Bottom → Right → Top (Blue baseball collection room) ・Right → Bottom → Left |
| 3 | Go to the area at the end of the hall. You can unlock it with the blue ball. |
The puzzles in the four rooms at the back of the third floor correspond to the signs propped up in the boss room on the side path. In three of the four rooms, you need to face right; however, the right light is in a locked room. First, unlock the rooms where you don't need to face right.
There are two blue balls in the room. Collect them and proceed to the back of the room, where you can use both balls to unlock the room.
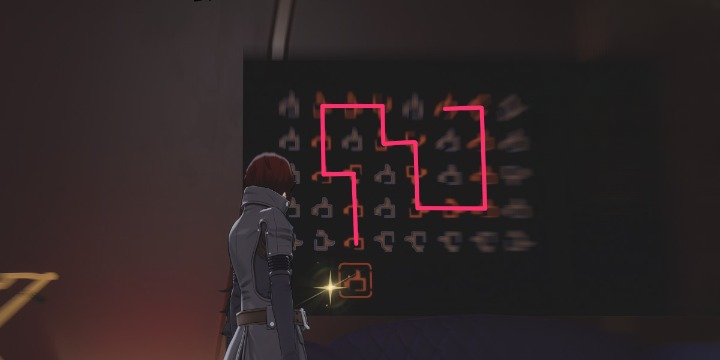
Avoid the Red Tiles
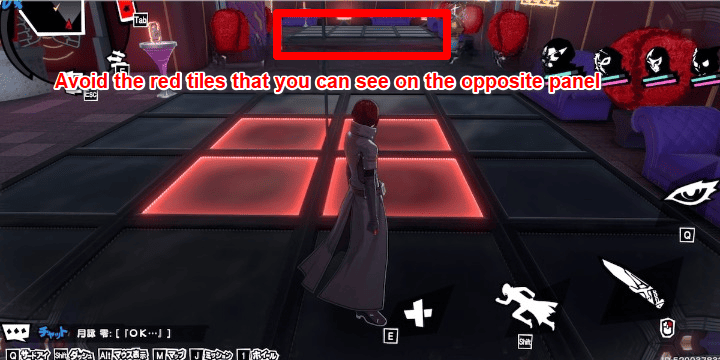
After opening the room with the ball, there will be tiles on the floor arranged symmetricaly across each other. Look at the red tiles on the floor on the first panel, remember this.
Go to the second panel and trace all the unlighted tiles while avoiding the same area where the red tiles are on the first panel. Make sure to avoid stepping on the red tiles to deacativate the puzzle.
You will need to complete this three times to clear the stage. After completion enter the sealed off room near an electric fence on the other side of the hallway.
Fan Card Locations
How to Get the S-Tier Fan Card
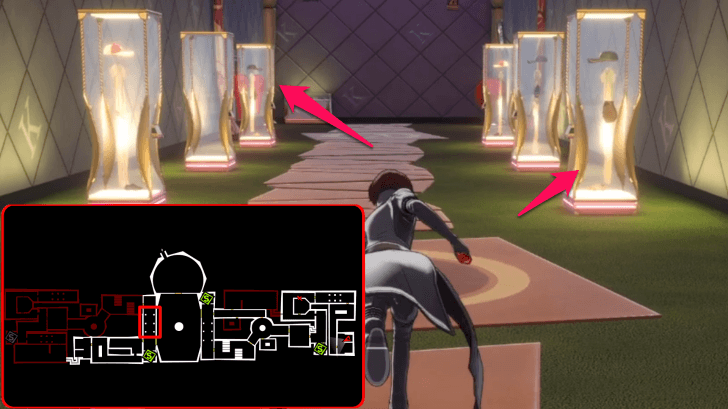
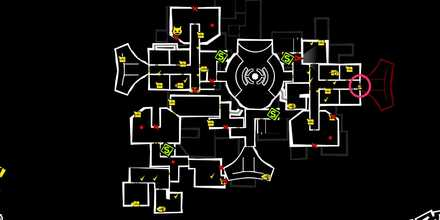
Get the S-Tier Fan Card on the 3rd Floor
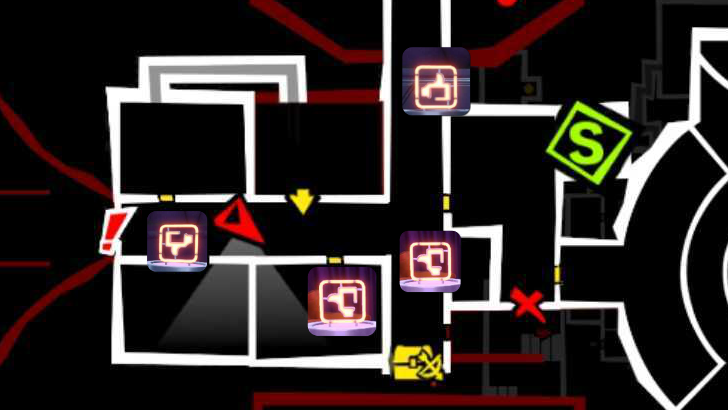
| S-Class Fan Card Location | ||
|---|---|---|
| 1 | 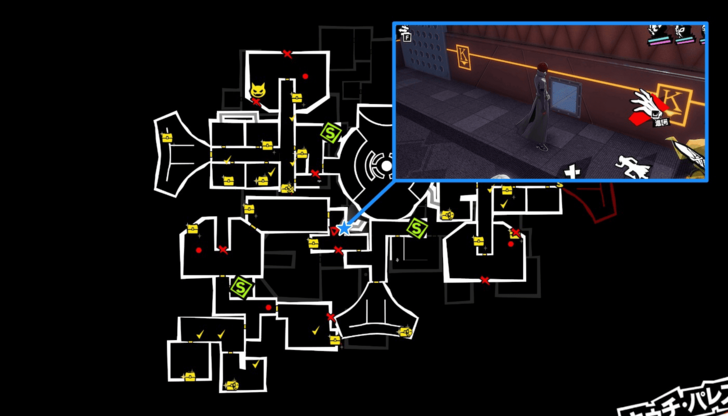 There is a duct on the 2nd floor of the club that leads to the 3rd floor. Make your way there. |
|
| 2 |  Proceed further into the 3rd floor. |
|
| 3 | 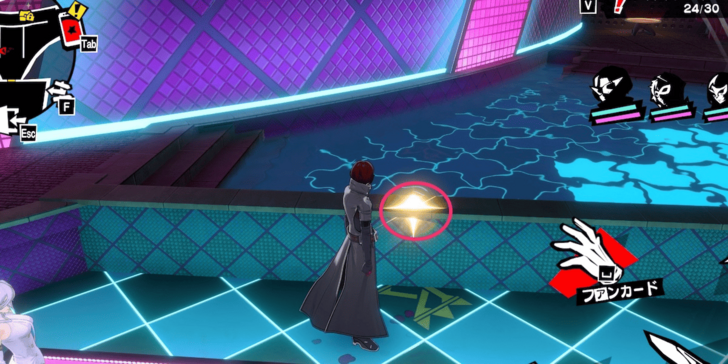 Examine the glowing spot to get the S-Class Fan Card |
|
After getting the S-Class Fan Card go back to the first and second floor to open the locked rooms from each floor.
S-Tier Fan Card Door Locations
| Once you have picked up the S-Class Fan Card, you can access the areas in Club 1F and Club 2F. | ||
|---|---|---|
| Map | 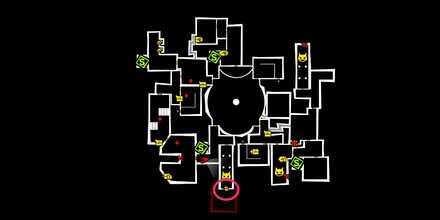 |
 |
How to Get the B-Tier Fan Card
In the Locker Room in the Training Hall
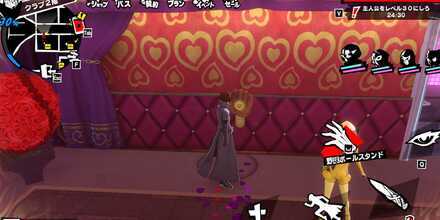
| B-Class Fan Card Location | |
|---|---|
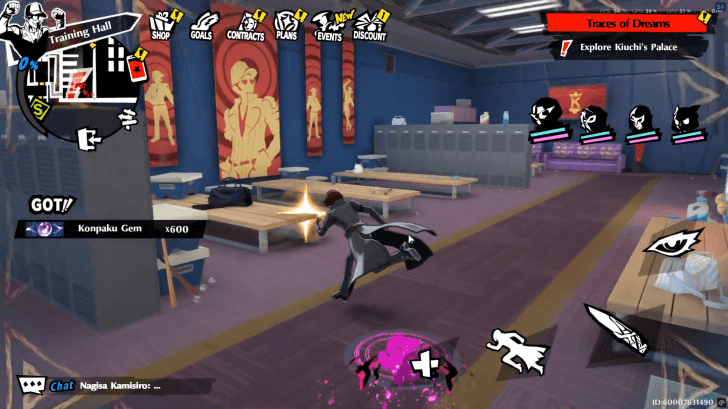 In the server room, after you go back to the palace with Motoha. |
The B-Tier Fan Card will be on a bench in a locker room. Advanced through the initial Training Hall section to obtain it.
How to Get the C-Tier Fan Card
In the Server Room During Second Infiltration
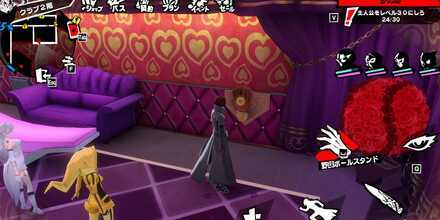
| C-Class Fan Card Location | ||
|---|---|---|
| 1 | In the server room, after you go back to the palace with Motoha. |
|
You will recieve the C-Tier Fan Card after checking the server room. This will happen in your second infiltration to the palace, when Motoha officially joins the team.
Bosses in Kiuchi Palace
Palace Ruler - Shadow Kiuchi
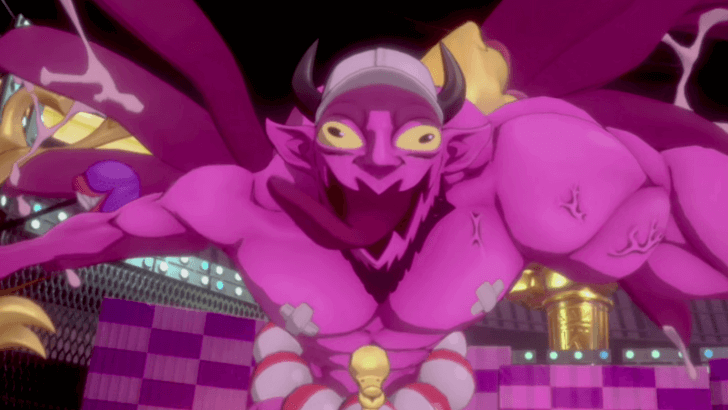
There is only one notable boss to be fought in this palace: the Palace Ruler himself, Shadow Kiuchi.
His boss fight serves as the ending for Chapter 1 of the game's story, and the ending for the story in this palace. Be prepared to fight against this boss once you reach him!
Shadow Kiuchi (Cupid) Boss Guide
Kiuchi's Palace Progress Rewards
| Exploration Progress | Rewards |
|---|---|
| Progress 10% |
・Wonder EXP Credit x250 ・Meta Jewels x70 ・Thief Compendium Tome x5 |
| Progress 20% |
・Wonder EXP Credit x250 ・Meta Jewels x70 ・Gold Parts x8 |
| Progress 30% |
・Wonder EXP Credit x250 ・Meta Jewels x70 ・Legend Cube x3 |
| Progress 40% |
・Wonder EXP Credit x250 ・Meta Jewels x70 ・Schema Points+ x1 |
| Progress 50% |
・Wonder EXP Credit x250 ・Meta Jewels x70 ・Sennight Inferno x1 |
| Progress 60% |
・Wonder EXP Credit x250 ・Meta Jewels x150 ・Lust Chip x1 |
| Progress 70% |
・Wonder EXP Credit x250 ・Meta Jewels x150 ・Whiff of Iris x15 |
| Progress 80% |
・Wonder EXP Credit x250 ・Meta Jewels x150 ・Blue Crystal x15 |
| Progress 90% |
・Wonder EXP Credit x250 ・Meta Jewels x150 ・Skill Incense S x5 |
| Progress 100% |
・Wonder EXP Credit x450 ・Meta Jewels x150 ・Sennight Inferno Shard x1 |
Reaching 50% exploration on Kiuchi's Palace will reward you with Wonder's 5-Star Exlusive Weapon Sennight Inferno. If you reach 100% exploration you will receive a shard of Sennight Inferno to forge your weapon to Forge 1.
Sennight Inferno Stats and How to Get
How to Get to Kiuchi's Palace
Progress the Main Story
To get to Kiuchi Palace, progress through the story. This is part of the game's first chapter.
Enter Kiuchi's Palace from Mementos

To Enter Kiuchi's Palace , tap Meta Verse on the bottom left of the screen to open the other world menu. Click on Kiuchi's Palace to enter it and steal his heart!
Use Safe Rooms to Teleport
You can use previously discovered Safe Rooms to teleport to the different areas of the palace.
You will need to unlock these rooms as you explore the palace.
Persona 5: The Phantom X (P5X) Related Guides
All Story Palaces
| List of Story Palaces | |
|---|---|
| 1 | Kiuchi's Palace |
| 2 | Miyazawa's Palace |
| 3 | Katayama's Palace Akashi's Palace |
All Event Palaces
| List of Event Palaces | ||
|---|---|---|
| Palace | Event | |
| 1 | Castle in the Void | Take Your Heart |
| 2 | Museum Arc | Crossroads of Fate |
| 3 | Bank Arc | Crossroads of Fate |
| 4 | Pyramid Arc | Crossroads of Fate |
| 5 | Spaceport Arc | Crossroads of Fate |
Comment
Author

Kiuchi Palace Guide: All Puzzles Walkthrough
Rankings
- We could not find the message board you were looking for.
Gaming News


Popular Games

Genshin Impact Walkthrough & Guides Wiki
Umamusume: Pretty Derby Walkthrough & Guides Wiki
Crimson Desert Walkthrough & Guides Wiki
Monster Hunter Stories 3: Twisted Reflection Walkthrough & Guides Wiki
Honkai: Star Rail Walkthrough & Guides Wiki
Pokemon Pokopia Walkthrough & Guides Wiki
The Seven Deadly Sins: Origin Walkthrough & Guides Wiki
Wuthering Waves Walkthrough & Guides Wiki
Zenless Zone Zero Walkthrough & Guides Wiki
Arknights: Endfield Walkthrough & Guides Wiki


Recommended Games
Fire Emblem Heroes (FEH) Walkthrough & Guides Wiki
Diablo 4: Vessel of Hatred Walkthrough & Guides Wiki
Cyberpunk 2077: Ultimate Edition Walkthrough & Guides Wiki
Yu-Gi-Oh! Master Duel Walkthrough & Guides Wiki
Super Smash Bros. Ultimate Walkthrough & Guides Wiki
Pokemon Brilliant Diamond and Shining Pearl (BDSP) Walkthrough & Guides Wiki
Elden Ring Shadow of the Erdtree Walkthrough & Guides Wiki
Monster Hunter World Walkthrough & Guides Wiki
The Legend of Zelda: Tears of the Kingdom Walkthrough & Guides Wiki
Persona 3 Reload Walkthrough & Guides Wiki


All rights reserved
©Perfect World Adapted from Persona5 ©ATLUS. ©SEGA.
The copyrights of videos of games used in our content and other intellectual property rights belong to the provider of the game.
The contents we provide on this site were created personally by members of the Game8 editorial department.
We refuse the right to reuse or repost content taken without our permission such as data or images to other sites.