Bank Arc Palace Walkthrough
★Version 3.3 is now live: Firecracker Rin | Banner
┗ Skill Cards | New Year's Light Banner | LNY Event
☆ Version 3.2.2 is now live: Matoi | Banner
┗ Throne | Entropy Banner | Take Your Love
★Tier Lists: Characters | Personas | Rerolls
☆Boards: Companio | Friends | Toy Trading
This is a guide to the Bank Arc, Kaneshiro's Palace in Persona 5: The Phantom X (P5X). Check out our complete step-by-step walkthrough, brochure locations, and rewards in this guide.
List of Contents
Museum Arc Walkthrough
| Bank Arc | |
|---|---|
|
|
|
Stage 3-1 Bank Card Locations
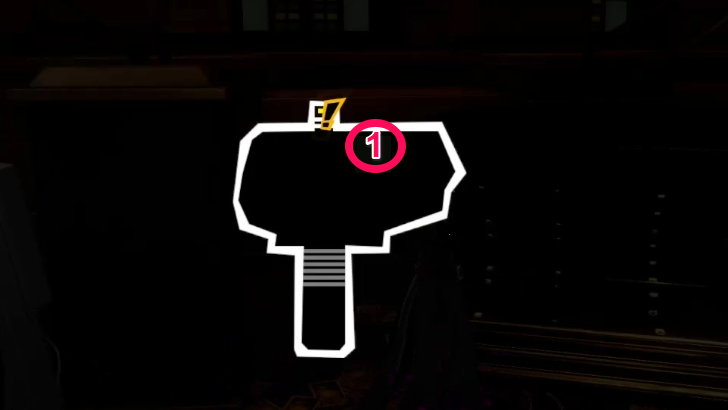 Bank Entrance |
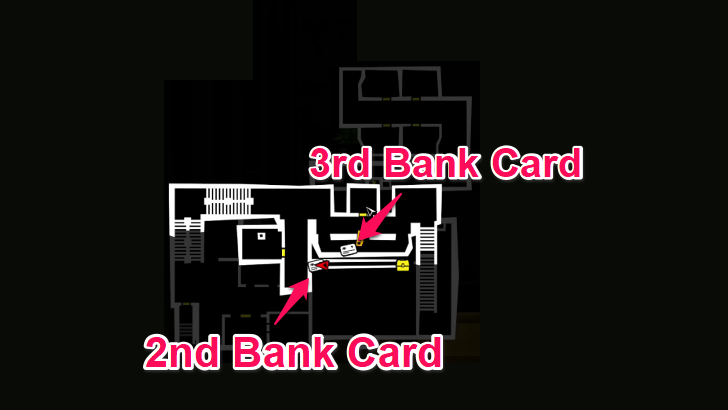 Upper Floor |
Use the grappling hook to reach the upper floor and get the 2nd and 3rd Bank Cards.
Stage 3-2 Bank Card Locations
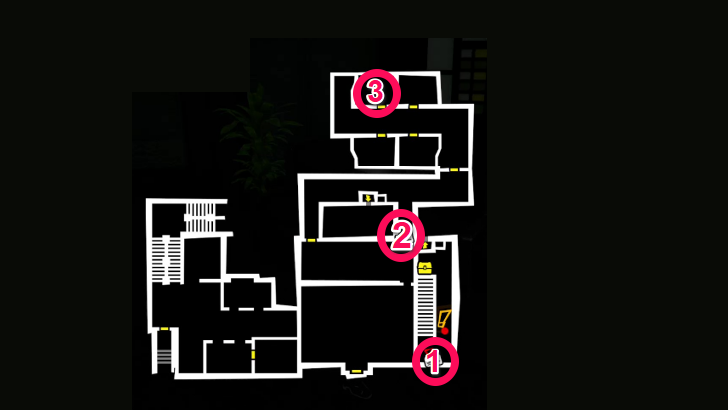 Front Hall |
Enter an air vent to reach the upper part of the map. At the upper part of the map, you will need to look for switches that can open the doors in the area.
How to Reach the 2nd Bank Card
After getting the 1st Bank Card, go to the opposite end of the hallway and approach the lockers. Jump to go up the lockers and to reach the air vent that you need to enter to reach the other side of the hall.
After exiting the air vent, turn right. Enter the first hallway to your right, and you will reach the Bank Card.
How to Reach the 3rd Bank Card
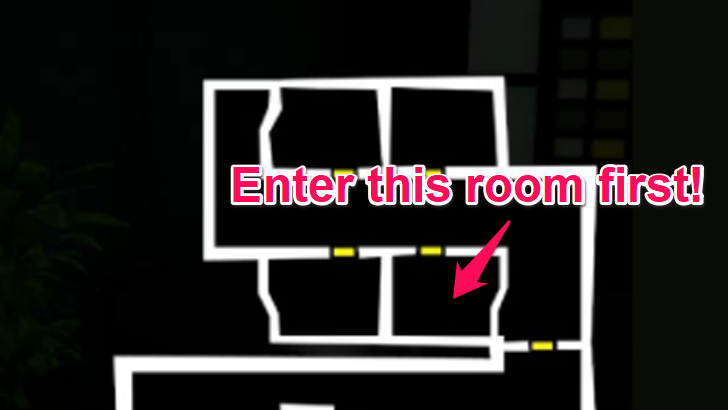 Room With Fake Money |
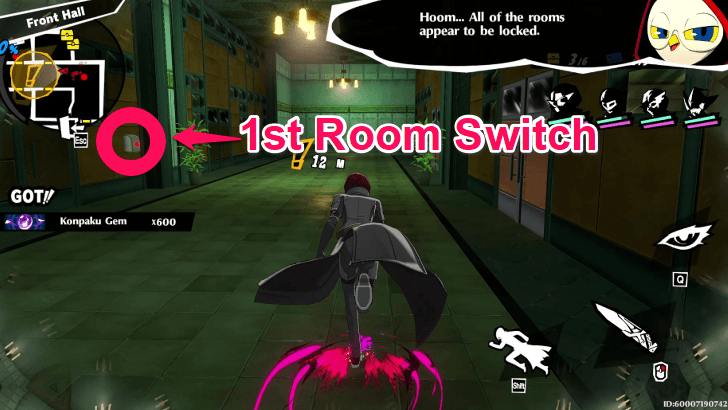 1st Room Switch |
Go first to the room with fake money. Open the said room by pressing the switch on the right side of the door.
After entering the room, press the switch on the opposite side of the room. The switch will open the door to the 3rd Bank Card, but be careful since there is a Shadow roaming the room.
How to Open the Room with 2 Chests
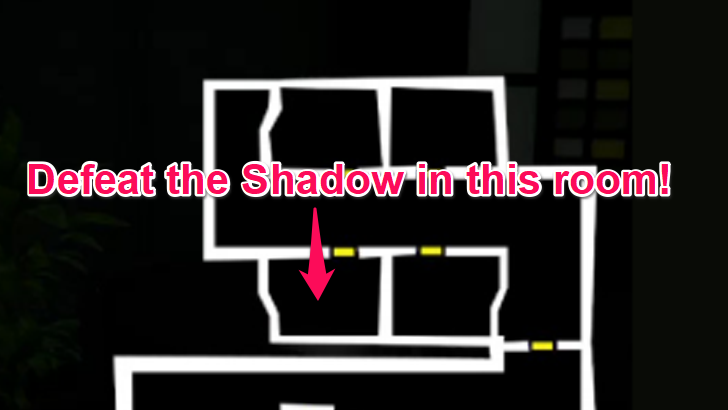
After entering the room where you find the 3rd Bank Card, look for a switch on the right wall of the room and press it. This will open a room with a Shadow, which you need to defeat.
After defeating the Shadow, you can press the switch on the right side of the room, near the entrance, that will open the door to the room with 2 Chests. Another Chest will also appear outside the room after defeating the Shadow.
Stage 3-3 Bank Card Locations
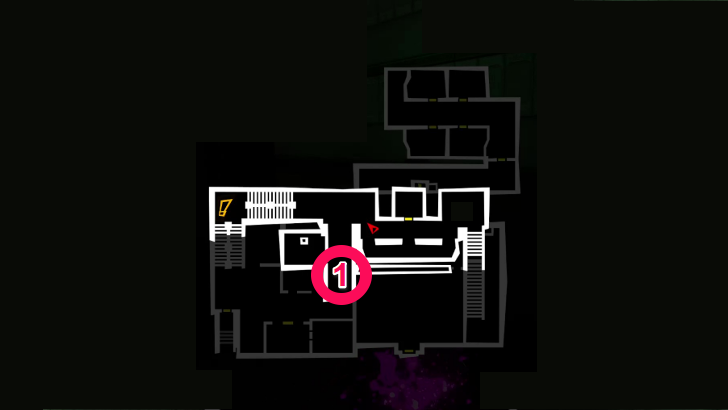 2nd Floor |
 1st Floor |
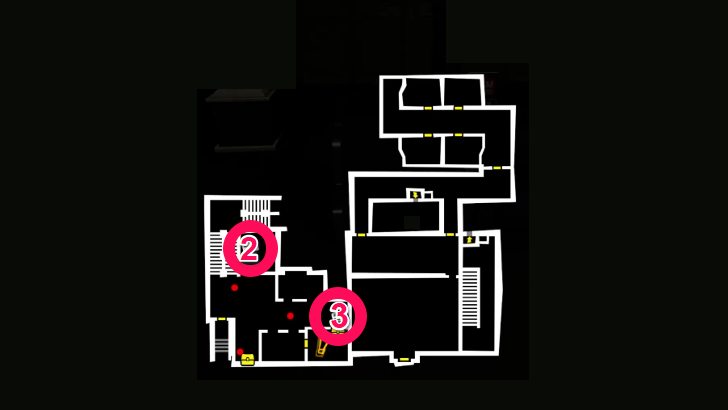
The stage has 3 Bank Cards, 3 Chests, and 1 strong enemy. In order to get all of them, you need to disable the spikes scattered in the stage.
To clear this stage, you also need to find the switch to activate the elevator.
How to Disable the Spikes
In the area where you find the 2nd Bank Card, you will find 2 floor switches. Push the nearby statue to one of the switches and step on the other switch to deactivate all the spikes in the map.
Where to Find the Elevator Switch
Go to the room nearest to the 3rd Bank Card. You can enter it through the room beside it. Inside the room, approach the lockers and jump to reach the elevator switch.
Stage 3-4 Bank Card Locations
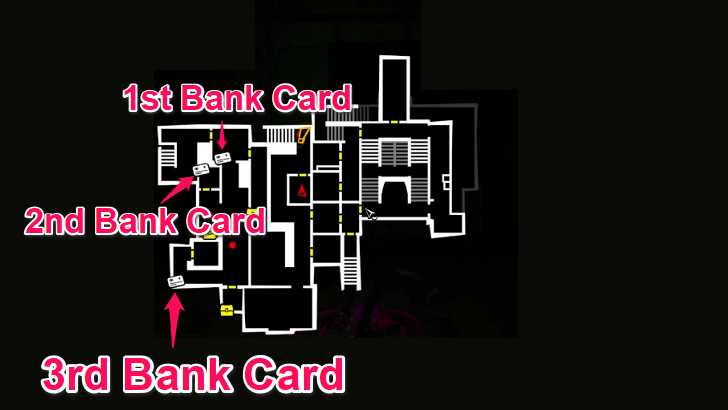 Staff Passageway |
Be careful of surveillance cameras since they will alert enemies if you step within their view.
Destroy the switch near the 2nd Bank Card to deactivate most of the electrical fences on the map.
Where to Use The Bank Key
 |
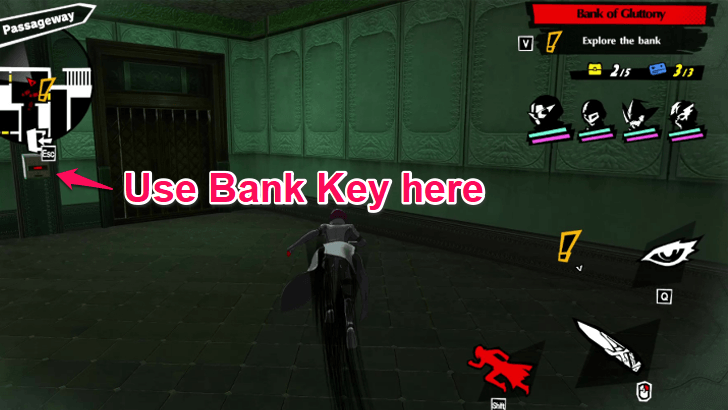 |
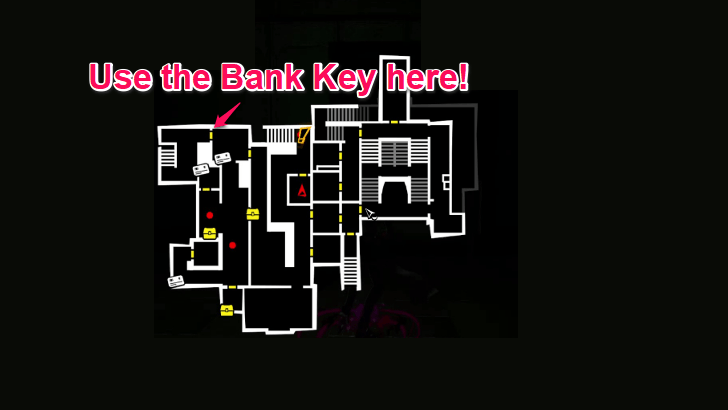
In a room near the 3rd Bank Card, you need to defeat a Shadow to obtain the Bank Key. Use to Bank Key to unlock a stairway at area where you found the 1st Bank Card, and reach a Chest.
Stage 3-5 Bank Card Locations
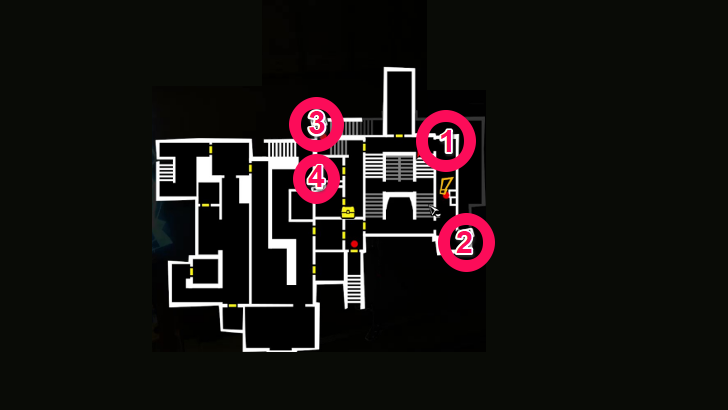 Staff Passageway |
Once again, the stage will be filled with surveillance cameras that will alert enemies if you step within their view.
To reach the 4th Bank Card, enter an air vent from the room above it. You can find the air vent above the lockers.
Stage 3-6 Bank Card Locations
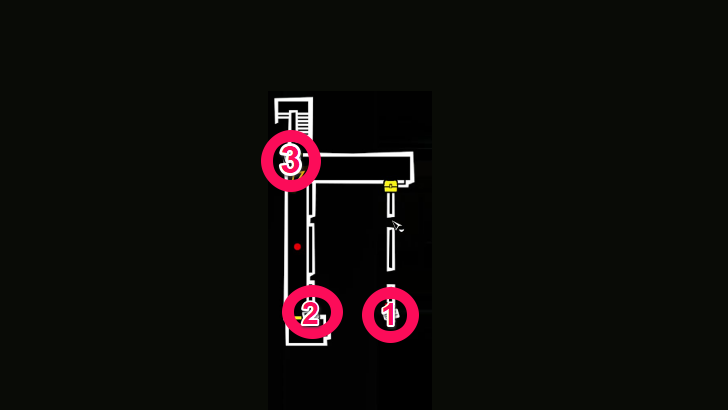 Laundering Office |
To find all the Bank Cards and Chests on the map, look for air vents near the floor. After destroying the switch to disable the electric fences, Cattle will point out the air vent that will allow you to reach the 1st Bank Card.
Stage 3-7 Bank Card Locations
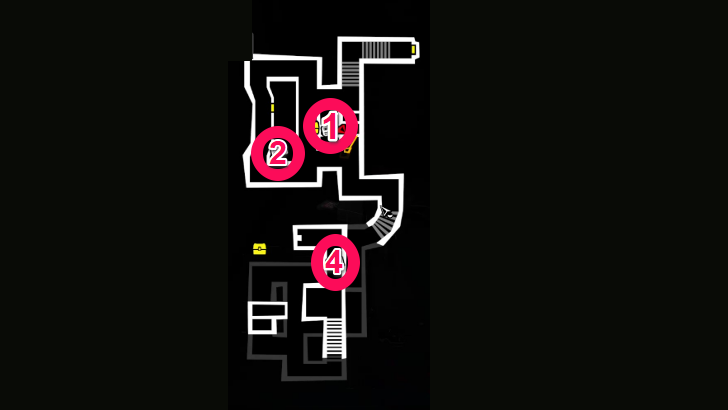 Vault 1st Floor - Upper Level |
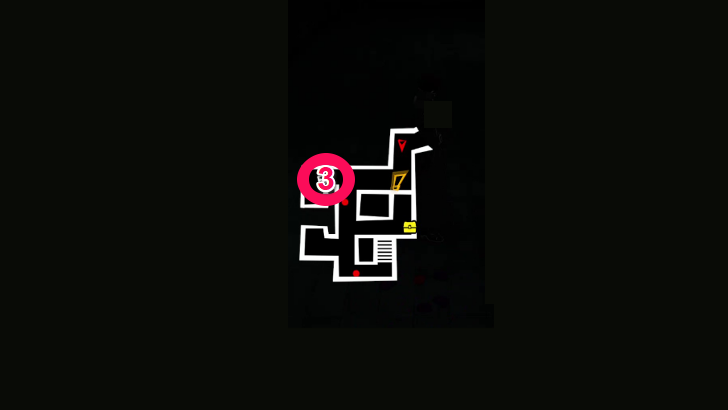 Vault 1st Floor - Lower Level |
To get the 2nd Bank Card, you need to deactivate the spikes around it. Step on the floor switch at the opposite side of the room to deactivate the spikes.
Before opening the final Chest of the stage, continue moving forward in the hallway to get the 4th Bank Card. Opening the chest will end the stage.
Stage 3-8 Bank Card Locations
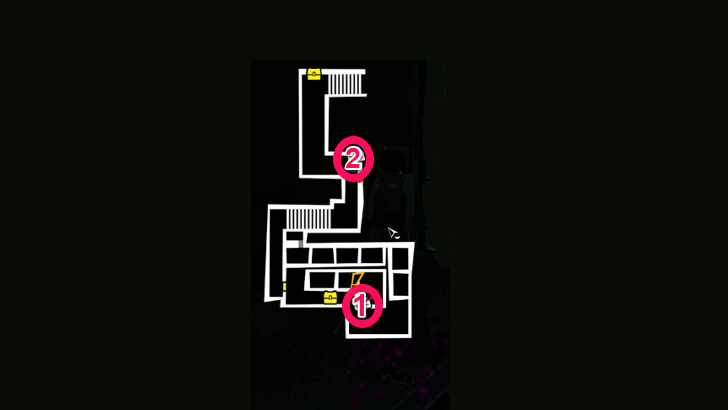 Vault 2nd Floor - Lower Level |
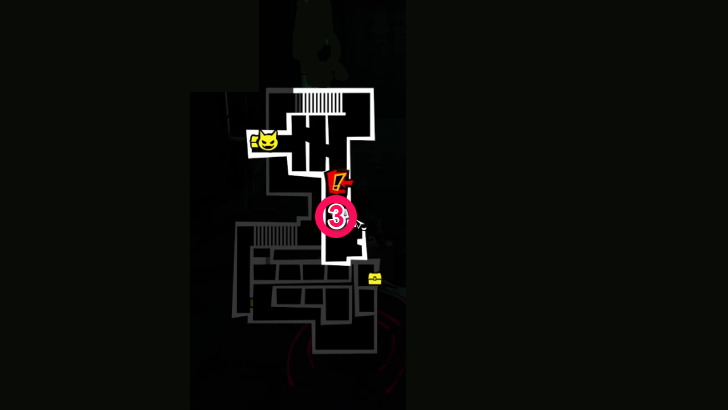 Vault 2nd Floor - Upper Level |
To move forward, deactivate the spikes and electric fences in the map. You can destroy the switch for the electric fences after defeating Orthrus.
Use Grappling Hook to Reach Chest Near Starting Point
From the 3rd Bank Card, keep moving forward until you reach the end of the hallway. Drop down to the starting point and get close to the large shelf to your left. A prompt to use the grappling hook will appear.
Stage 3-9 Bank Card Locations
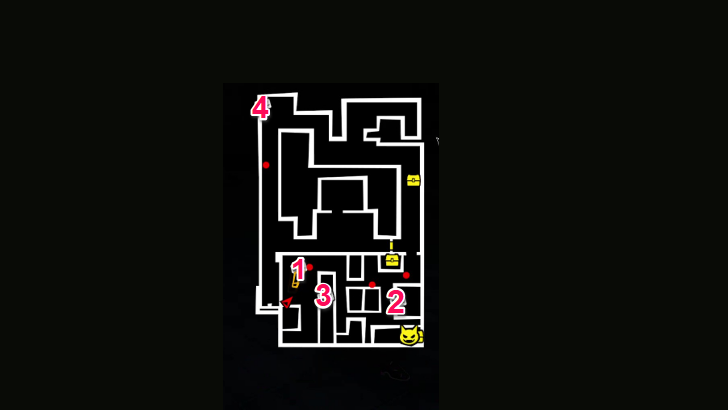 Vault 3rd Floor |
Deactivate the electric fences and the spikes to move forward. You can climb up the large metal shelves to reach the Bank Cards and Chests.
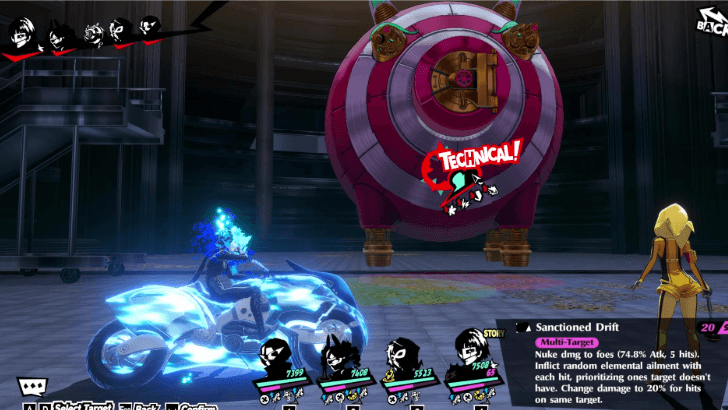
Stage 3-10 Boss Strategy (Irshya)
| | | | |
|---|---|---|---|
| - | - | - | - |
| | | | |
| - | - | - | - |
| | | ||
| - | - | ||
| | | | |
|---|---|---|---|
| - | - | - | - |
| | | | |
| - | - | - | - |
| | | ||
| - | - | ||
Recommended Party
| Recommended Personas for Wonder | |||
|---|---|---|---|
★★★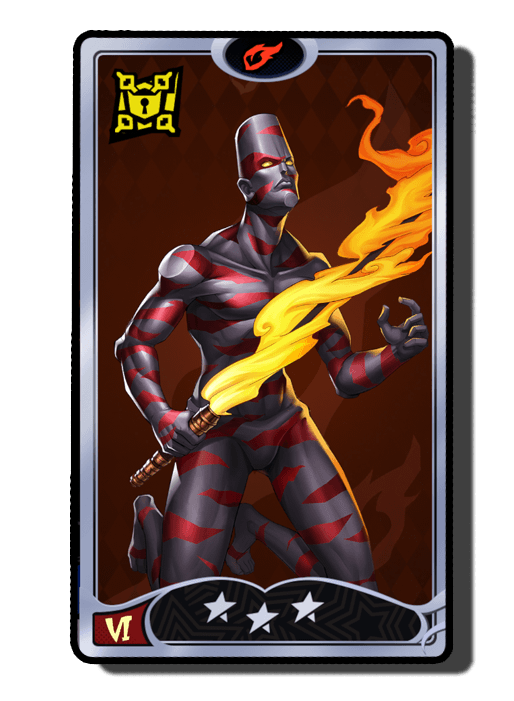 Surt Surt
|
★★★★★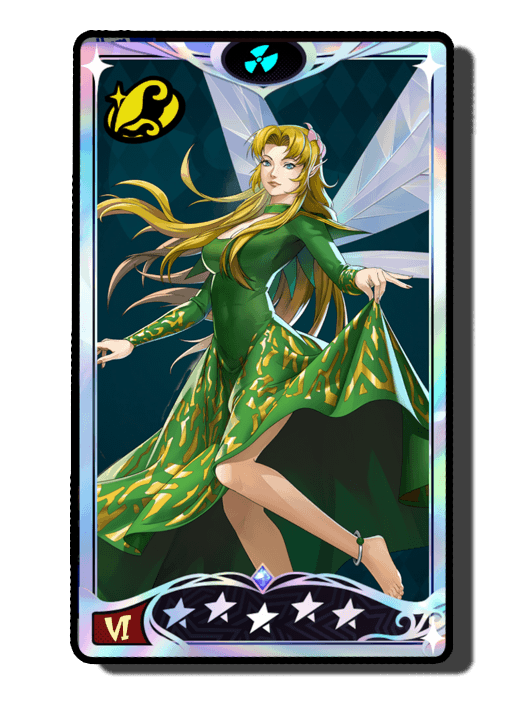 Titania Titania
|
★★★★★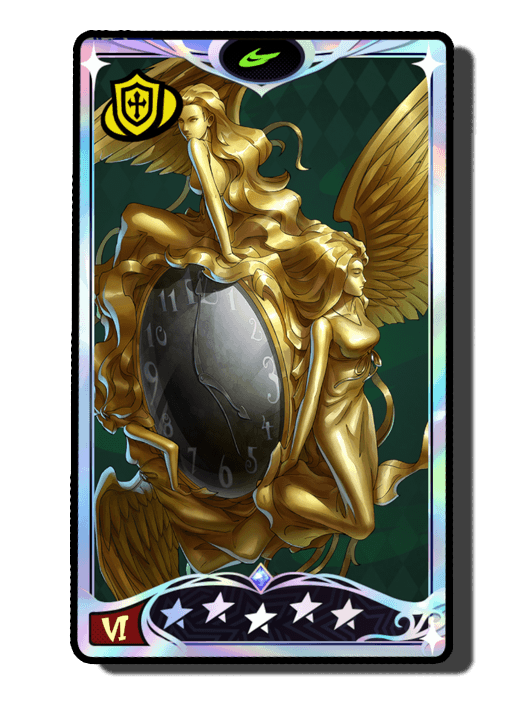 Norn Norn
|
★★★★★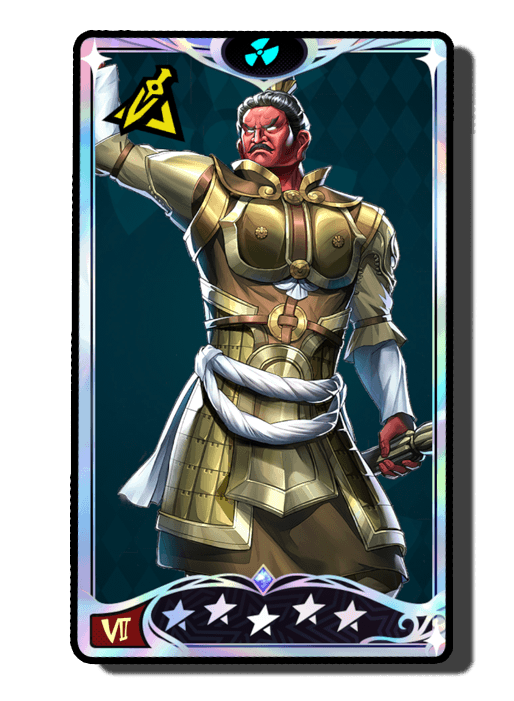 Bishamonten Bishamonten
|
| Party Composition | |||
 Queen Queen
|
 Vino Vino
|
 Leon Leon
|
 Okyann Okyann
|
It is recommended that you bring only one DPS against Irshya. Since Queen is required for the fight, build a team around her.
Vino and Leon are the best supports for Queen. Vino increases the damage of Queen by inflicting multiple elemental ailments, while Leon provides additional attack buffs and shield for Queen.
Irshya (Sinner of Gluttony) Boss Fight Guide
Bank Arc Palace Rewards
Collectible Rewards
| # | Objective | Reward |
|---|---|---|
| 1 | Open 15 Treasure Chests | ・200 Destiny Badge ・30 Meta Jewels |
| 2 | Open 30 Treasure Chests | ・200 Destiny Badge ・30 Meta Jewels |
| 3 | Collect 10 Bank Cards | ・200 Destiny Badge ・30 Meta Jewels |
| 4 | Collect 20 Bank Cards | ・200 Destiny Badge ・30 Meta Jewels |
| 5 | Get 100% progress in all Bank Arc Stages | ・200 Destiny Badge ・30 Meta Jewels |
Persona 5: The Phantom X Related Guides
All Story Palaces
| List of Story Palaces | |
|---|---|
| 1 | Kiuchi's Palace |
| 2 | Miyazawa's Palace |
| 3 | Katayama's Palace Akashi's Palace |
All Event Palaces
| List of Event Palaces | ||
|---|---|---|
| Palace | Event | |
| 1 | Castle in the Void | Take Your Heart |
| 2 | Museum Arc | Crossroads of Fate |
| 3 | Bank Arc | Crossroads of Fate |
| 4 | Pyramid Arc | Crossroads of Fate |
| 5 | Spaceport Arc | Crossroads of Fate |
Comment
Author
Bank Arc Palace Walkthrough
improvement survey
04/2026
improving Game8's site?

Your answers will help us to improve our website.
Note: Please be sure not to enter any kind of personal information into your response.

We hope you continue to make use of Game8.
Rankings
- We could not find the message board you were looking for.
Gaming News
Popular Games

Genshin Impact Walkthrough & Guides Wiki

Crimson Desert Walkthrough & Guides Wiki

Umamusume: Pretty Derby Walkthrough & Guides Wiki

Honkai: Star Rail Walkthrough & Guides Wiki

Monster Hunter Stories 3: Twisted Reflection Walkthrough & Guides Wiki

Wuthering Waves Walkthrough & Guides Wiki

The Seven Deadly Sins: Origin Walkthrough & Guides Wiki

Pokemon TCG Pocket (PTCGP) Strategies & Guides Wiki

Pokemon Pokopia Walkthrough & Guides Wiki

Zenless Zone Zero Walkthrough & Guides Wiki
Recommended Games

Fire Emblem Heroes (FEH) Walkthrough & Guides Wiki

Pokemon Brilliant Diamond and Shining Pearl (BDSP) Walkthrough & Guides Wiki

Super Smash Bros. Ultimate Walkthrough & Guides Wiki

Diablo 4: Vessel of Hatred Walkthrough & Guides Wiki

Cyberpunk 2077: Ultimate Edition Walkthrough & Guides Wiki

Yu-Gi-Oh! Master Duel Walkthrough & Guides Wiki

Elden Ring Shadow of the Erdtree Walkthrough & Guides Wiki

Monster Hunter World Walkthrough & Guides Wiki

The Legend of Zelda: Tears of the Kingdom Walkthrough & Guides Wiki

Persona 3 Reload Walkthrough & Guides Wiki
All rights reserved
©Perfect World Adapted from Persona5 ©ATLUS. ©SEGA.
The copyrights of videos of games used in our content and other intellectual property rights belong to the provider of the game.
The contents we provide on this site were created personally by members of the Game8 editorial department.
We refuse the right to reuse or repost content taken without our permission such as data or images to other sites.


![Forza Horizon 6 Review [Preview] | Beautiful Roads With a Whole Lot of Oversteer](https://img.game8.co/4460981/a7254c24945c43fbdf6ad9bea52b5ce9.png/thumb)
![Borderlands Mobile Review [Playtest] | The Same Borderlands Made Easy](https://img.game8.co/4465500/aac0c880a39ec5cd46073e49d18f3ed5.png/thumb)


