Nornir Chest Locations | How to Open Rune Chests
▶︎ Check out the Best Builds and Recommended Skills for Kratos!
✫ Farming Guides: How to Level Up and Farm EXP, Money, and Mist Echoes
▶︎ Master the Trials of Muspelheim!
★ Done with God of War? Game8's God of War Ragnarok wiki is now live!
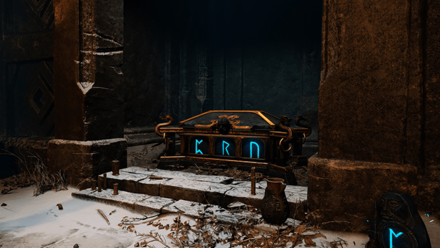
This is a guide to Nornir Chests in God of War (2018) for the PS4. Read on to learn where to find Nornir Chests and what rewards are available for each of the chest.
List of Contents
- What are Nornir Chests?
- Unlockable Trophies
- Midgard Nornir Chest Locations
- Wildwoods
- The River Pass
- Foothills
- The Mountain
- Lookout Tower
- Forgotten Caverns
- Fafnir's Storeroom
- Veithurgard
- Light Elf Outpost
- Tyr's Temple
- Konunsgard
- Alfheim Nornir Chest Locations
- Lake of Light
- Helheim Nornir Chest Location
- God of War Related Links
What are Nornir Chests?
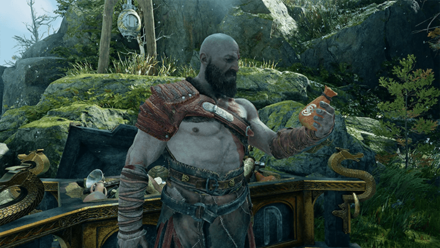
Nornir Chests (Rune Chests) is a type of collectible used to upgrade your Health and Rage. You will need to destroy three seals to unlock these chests.
You can find either an Idunn Apple or a Horn of Blood Mead inside the chest. Find three of these items to increase your maximum Health and Rage, respectively.
Unlockable Trophies
 |
Idunn's Orchard |
|---|---|
| Fully upgrade your Health. |
 |
Quick Tempered |
|---|---|
| Fully upgrade your Rage. |
Midgard Nornir Chest Locations
Wildwoods Nornir Chest Location
 |
||
| Map Location | ||
|---|---|---|
 |
||
| Seal Locations | ||
 |
 |
 |
| Reward | ||
 Idunn Apple Idunn Apple |
||
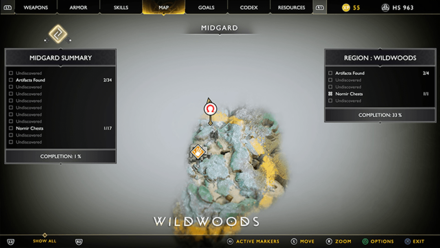
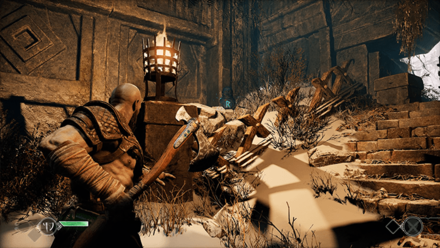
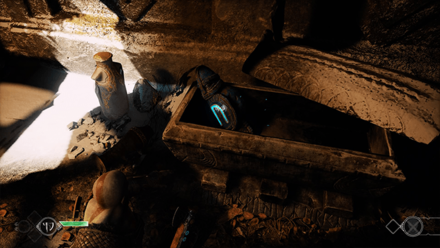
After defeating the Draugrs in The Marked Trees quest, head straight to the temple to find a wooden barricade. Destroy it to find the Nornir Chest inside.
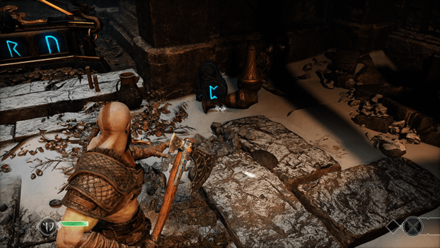
You can find the C rune beside the chest and the N rune is located on the left inside a tomb. Turn around and find the R rune on the corner of the room.
The Marked Trees Quest Walkthrough
The River Pass Nornir Chest Locations
 |
||
| Map Location | ||
|---|---|---|
 |
||
| Seal Locations | ||
 |
 |
 |
| Reward | ||
 Idunn Apple Idunn Apple |
||
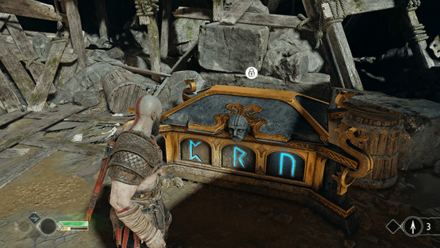
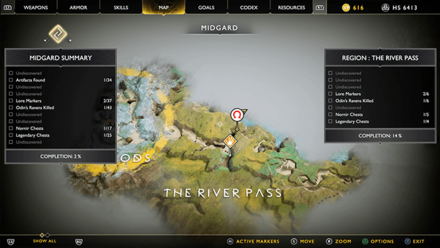
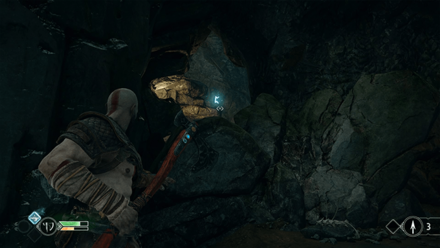
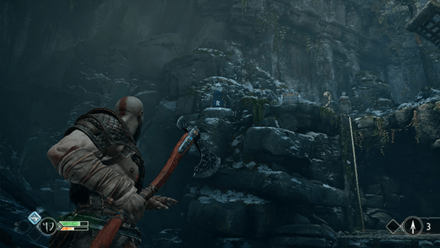
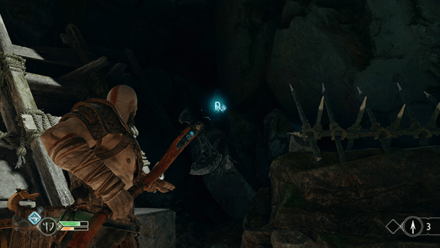
After killing the Revenant during the Path to the Mountain quest, head towards the ruins' exit to find the Nornir Chest.
You can find the N rune above the chest. Head to the cliffs and find the R rune on the cliffside. Unlock the bridge and head further to find the C rune behind a gate.
 |
||
| Map Location | ||
|---|---|---|
 |
||
| Seal Locations | ||
 |
 |
 |
| Reward | ||
 Horn of Blood Mead Horn of Blood Mead |
||
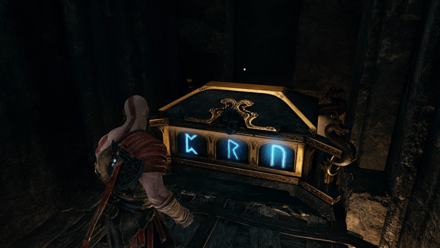
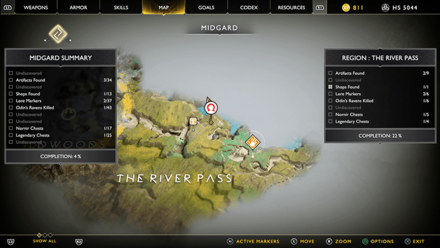
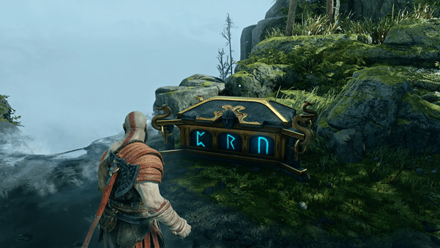
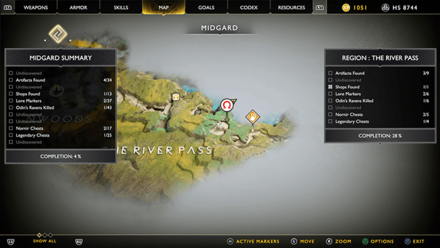
After passing through the spiked platform during the Path to the Mountain quest, turn around to find a small ledge. Jump towards it and find the Nornir Chest on the east corner.
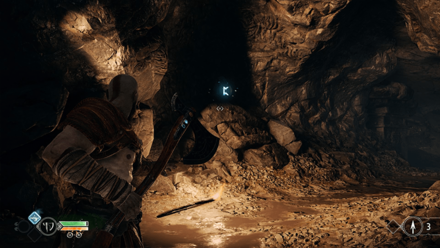
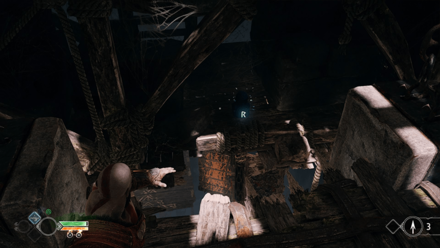
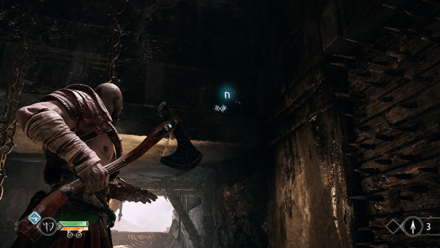
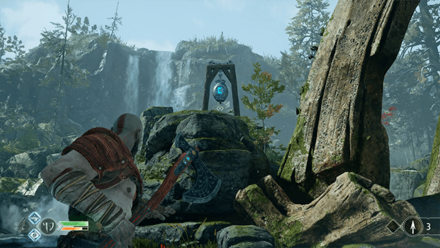
Turn around and find the N rune above you near the exit. Find a small cave opposite of the chest to find the C rune inside. Turn left from the chest to find the R rune hidden behind the wooden beams. Hit the scratched board with an axe to raise the platform to reveal it.
 |
||
| Map Location | ||
|---|---|---|
 |
||
| Seal Locations | ||
 |
 |
 |
| Reward | ||
 Idunn Apple Idunn Apple |
||
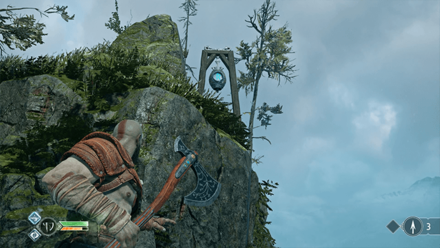
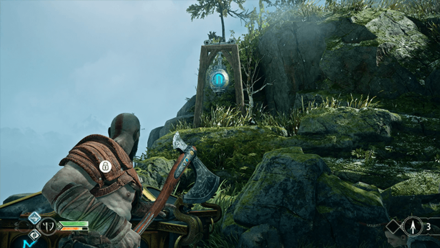
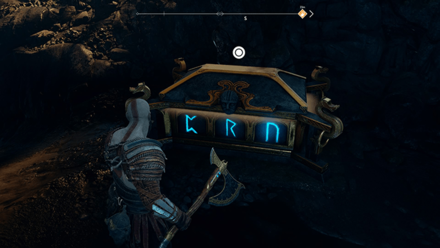
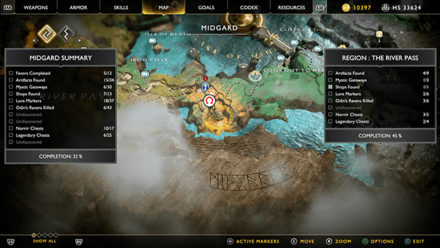
You can find this chest near a waterfall on the west side of the area after defeating Brenna Daudi.
The N rune is right behind the chest and the R rune is on the left above the waterfall. The C rune is located behind one of the giant ribs. Hit all the bells quickly to unlock the chest.
Path to the Mountain Quest Walkthrough
 |
||
| Map Location | ||
|---|---|---|
 |
||
| Seal Locations | ||
 |
 |
 |
| Reward | ||
 Horn of Blood Mead Horn of Blood Mead |
||
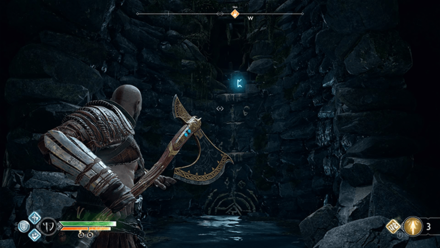
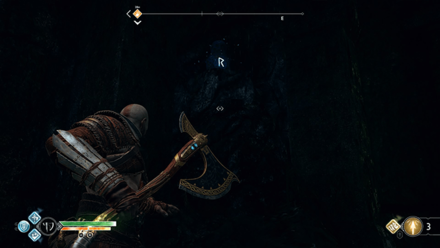
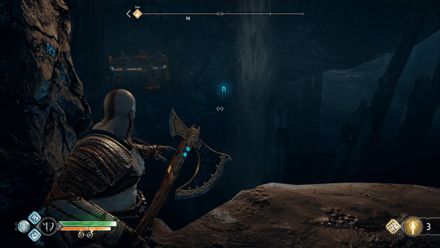
At the start of A New Destination quest, head down to the area until you find a large box. Turn left and hit the two crystals with light arrows to form a path leading towards the Nornir Chest.

Turn around and head straight to the light path and take a Shattering Crystal. Throw it towards the World Tree Sap and have Atreus shoot a Shock Arrow at it. Climb up the ledge and find the R rune near the sealed door.
Return to where you pushed the large box and turn left to find the N rune behind a waterfall.

Head back to the elevator and destroy the World Tree Sap nearby. Defeat the Draugrs and the Revenant that appear. Head inside and find the C Rune on the wall of the well.
A New Destination Quest Walkthrough
 |
||
| Map Location | ||
|---|---|---|
 |
||
| Seal Locations | ||
 |
||
| Reward | ||
 Idunn Apple Idunn Apple |
||

At the start of The Black Rune quest, climb up the well and head down the path. Look for a golden chain in the area and climb up to find a Nornir Chest with no visible runes.

Climb down the golden chain and head left to find a sand bowl.

Climb up the golden chain again and head to the cliff overlooking the runes. Head back to the sand bowl to solve the puzzle. Loot the chest to obtain a Storm of the Elks Runic Summon.

Head to the right side of the arch and grab the Winds of Hel and transfer it to the left side.

Head back to the cliff and grab the Winds of Hel and transfer it to the fallen mechanism.

Hit the spinning mechanism so that it shows a flipped ᛒ rune rune above and a ˄˄ rune below.

Grab the Winds of Hel on the fallen mechanism, while it's showing a ⌄⌄ rune, and transfer it to the orb above the Nornir Chest.
The Black Rune Quest Walkthrough
Foothills Nornir Chest Location
 |
||
| Map Location | ||
|---|---|---|
 |
||
| Seal Locations | ||
 |
 |
 |
| Reward | ||
 Horn of Blood Mead Horn of Blood Mead |
||
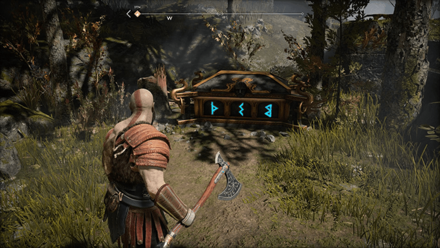
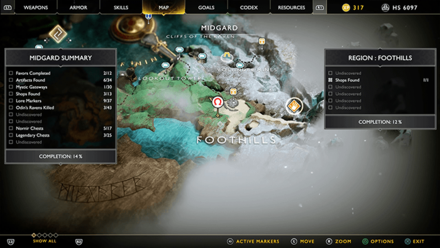
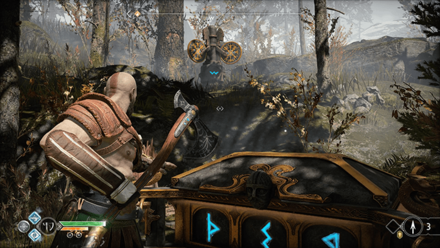
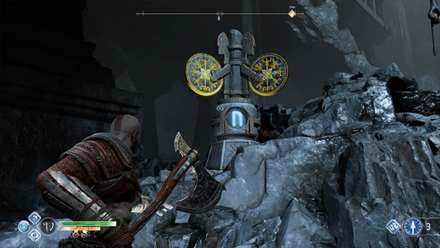
After meeting Sindri at the Foothills during the Path to the Mountain quest, head up the hill where the rune mechanism is and turn right to find a Nornir Chest.
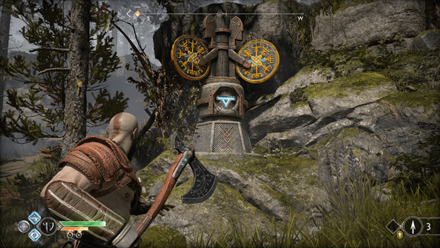
Hit the rune mechanisms to match the runes found on the chest. The ᛊ rune is found above the chest. Head back down the hill and hit the ᚦ rune.
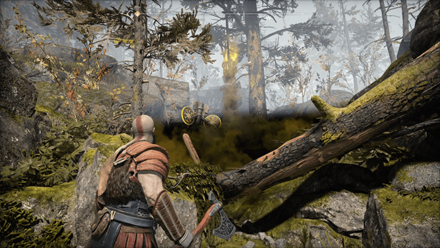
Head right to find a Scorn Pole and the inverted ᛒ rune. Hit the pole first to get rid of the poison gas and then hit the mechanism.
Path to the Mountain Quest Walkthrough
The Mountain Nornir Chest Locations
 |
||
| Map Location | ||
|---|---|---|
 |
||
| Seal Locations | ||
 |
 |
 |
| Reward | ||
 Horn of Blood Mead Horn of Blood Mead |
||
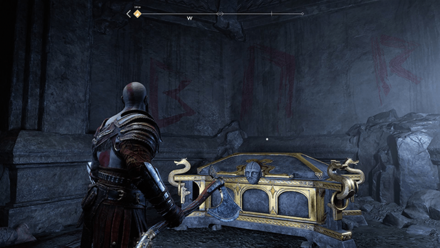
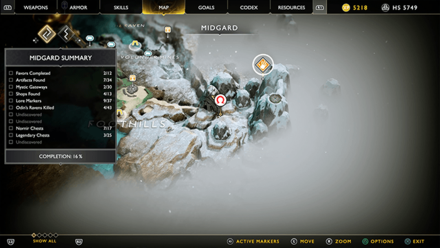
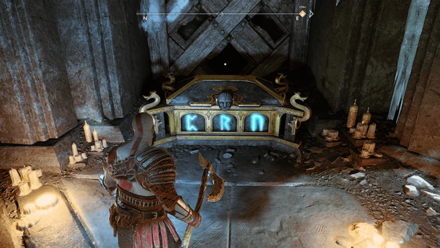
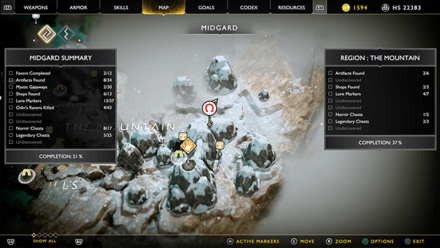
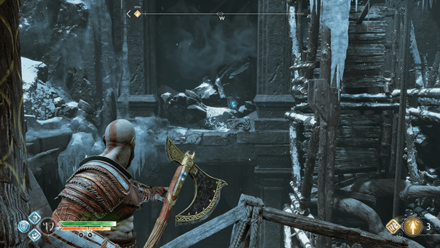
After defeating the Draugrs during the Inside the Mountain quest, head left to find a crystal behind a wooden wall. Destroy the wall and light up the crystal to reveal a path leading to the Nornir Chest.
There are no runes shown on the chest but are found instead painted on the walls above it. The following runes are ᛒ rune, ᚢ rune, and ᚱ rune.
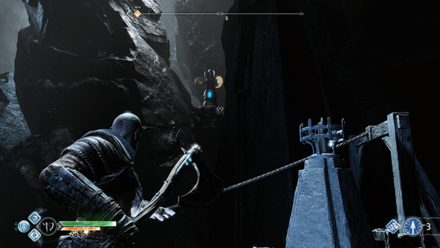
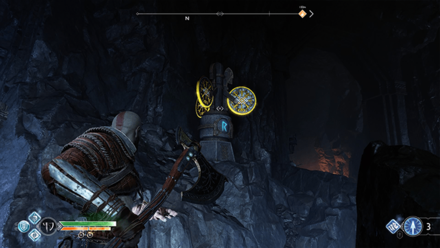
Head left from the Nornir Chest and cross the bridge to find the brazier with a rune symbol. Switch this brazier to the ᛒ rune.
Look for the brazier near the light bridge and change it to the ᚱ rune. Head down from where you climbed the ledge and change the brazier to the ᚢ rune.
 |
||
| Map Location | ||
|---|---|---|
 |
||
| Seal Locations | ||
 |
 |
 |
| Reward | ||
 Idunn Apple Idunn Apple |
||
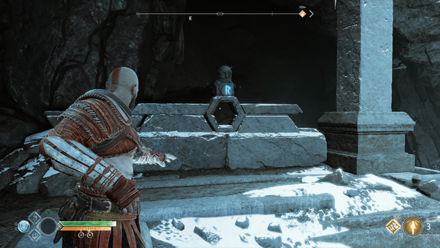
Defeat the praying Reavers and find the Nornir Chest on the left side of the area.
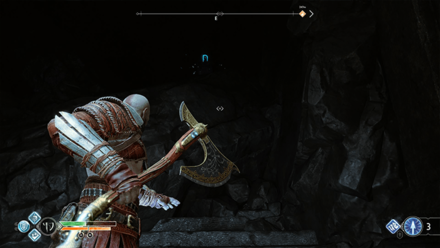
Take some of the Shattering Crystal near the cliffside and go back to the hall with the blocked World Tree Sap. Throw the crystal and have Atreus fire a shock arrow to destroy the wall. Head inside and find the N rune on the right side of the wall.
Head back to the chest and destroy the World Tree Sap on the bridge to lower it. Cross the bridge and look to your right to find the C rune among the rubble.
Use the wheel mechanism to raise the bridge and use your axe to freeze the gear in place. Head up to the bridge and turn right to find the R rune.
Inside the Mountain Quest Walkthrough
Lookout Tower Nornir Chest Locations
 |
||
| Map Location | ||
|---|---|---|
 |
||
| Seal Locations | ||
 |
 |
 |
| Reward | ||
 Idunn Apple Idunn Apple |
||
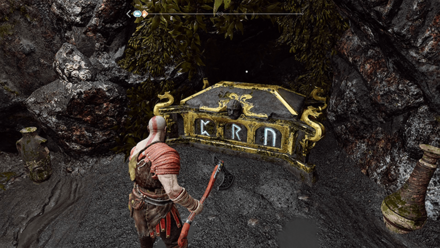
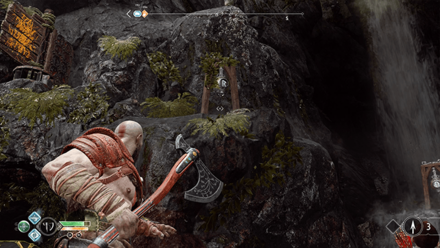
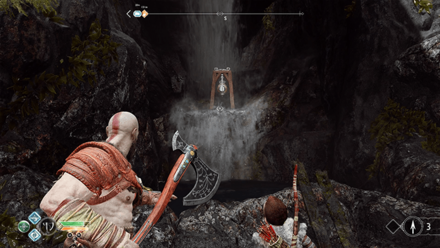
After meeting the World Serpent, open the Map and set a marker to Lookout Tower. Dock the boat and find the Nornir Chest.
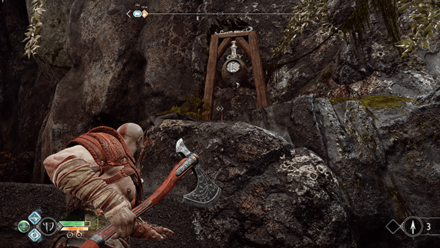
Hit the scratched board above the chest to lower the spikes down. Hit all the bells quickly to unlock the chest.
Forgotten Caverns Nornir Chest Location
 |
||
| Map Location | ||
|---|---|---|
 |
||
| Seal Locations | ||
 |
 |
 |
| Reward | ||
 Idunn Apple Idunn Apple |
||
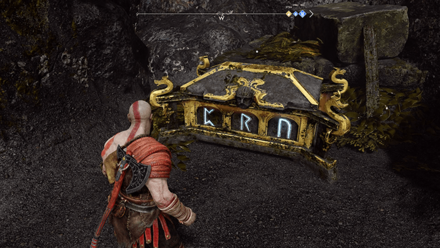
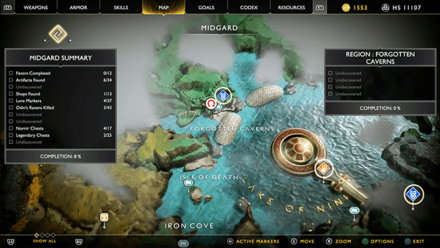
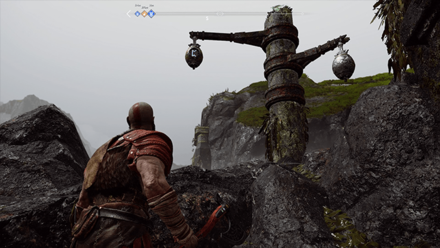
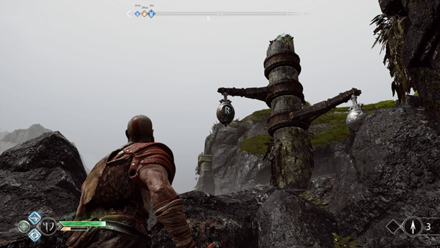
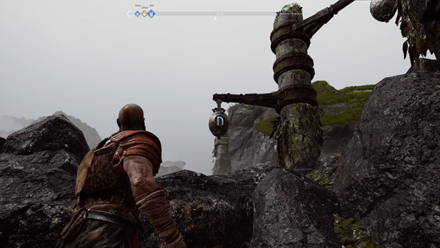
Head to the Forgotten Caverns northwest from where you met the World Serpent. You can find the chest on the left side of the beach.
The pillar to the left has the rune bells attached to it. Hit the bells quickly to unlock the chest.
Fafnir's Storeroom Nornir Chest Location
 |
||
| Map Location | ||
|---|---|---|
 |
||
| Seal Locations | ||
 |
 |
 |
| Reward | ||
 Horn of Blood Mead Horn of Blood Mead |
||
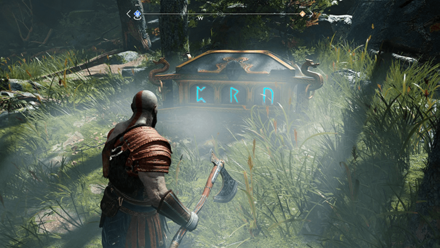
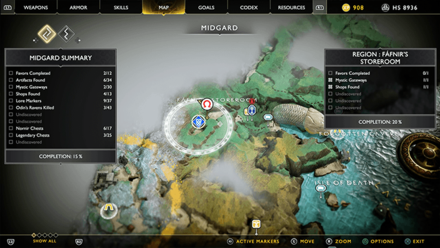
After opening the blue sealed door in Alfheim, talk to Sindri to start the Fafnir's Hoard favor.
Head to Fafnir's Storeroom west of the lake to find the Nornir Chest. Defeat the fire Draugrs and Nightmares and look for the chest on the right of the area.
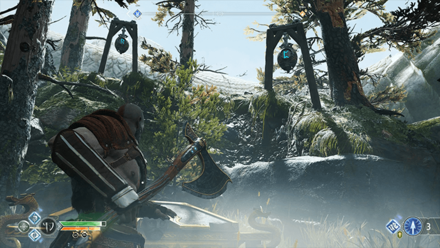
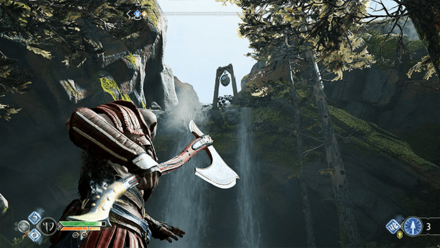
You can find the R and C runes right above the chest. Head right and find the N rune above the waterfall.
Hit the bells in this order: N rune, R rune, and C rune to unlock the chest.
Fafnir's Hoard Favor Walkthrough
Veithurgard Nornir Chest Location
 |
||
| Map Location | ||
|---|---|---|
 |
||
| Seal Locations | ||
 |
 |
 |
| Reward | ||
 Horn of Blood Mead Horn of Blood Mead |
||
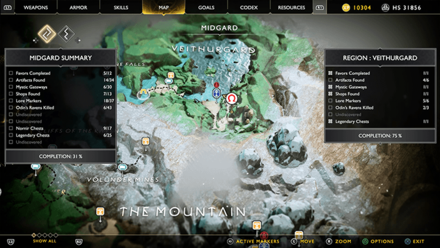
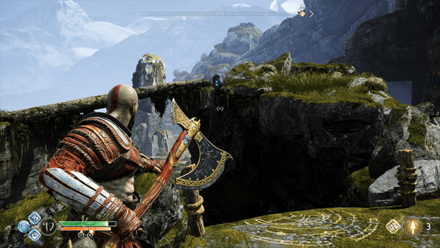
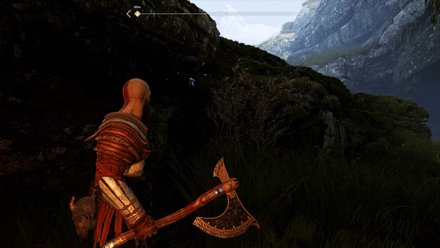
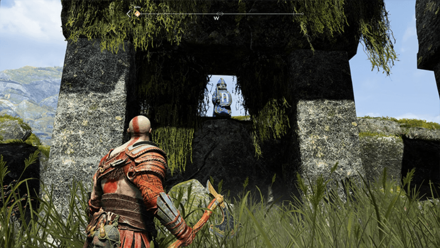
On the area where you free Otr in Veithurgard, you can find a Nornir Chest behind a gate. Head to the area with the tall pillar and climb up the stairs. Turn right and head to the gate.
From the Nornir Chest, turn around and head back to the gate to find the R Rune on the left side.
Head back to the chest and turn right towards a corner near the bridge to find the C Rune sitting on a ledge.
Jump down the ledge and head to the area with the tall pillar. Head to the left side and look through the structure's windows to find the N Rune.
Otr's Imprisonment Favor Walkthrough
Light Elf Outpost Nornir Chest Location
 |
||
| Map Location | ||
|---|---|---|
 |
||
| Seal Locations | ||
 |
 |
 |
| Reward | ||
 Idunn Apple Idunn Apple |
||
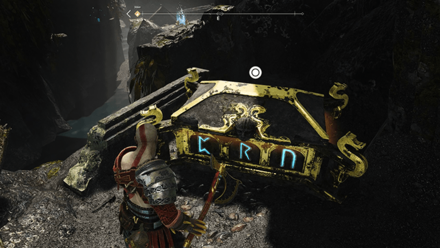
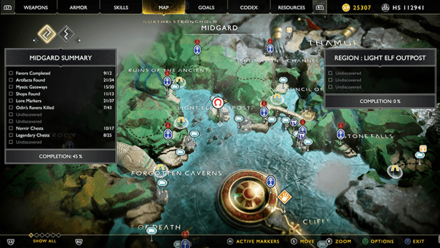
Head to the Light Elf Outpost after completing A New Destination. Destroy the wooden barricade to reveal a light crystal. Have Atreus shoot the light crystal to create a bridge leading to the Nornir Chest.
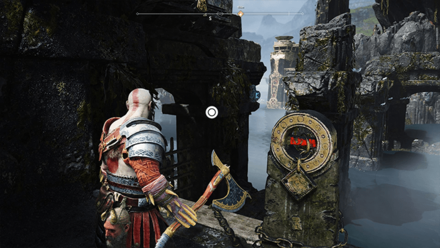
You can find the R rune to the left of the chest. Follow the linear path until you find a golden chain. Turn around from the chain and look to your left to find the N rune on a ruined bridge.
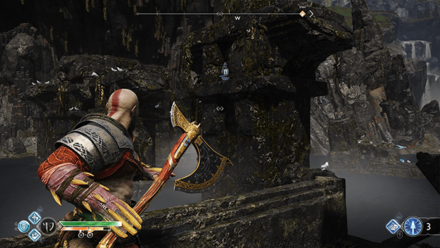
Navigate your way to the outpost until you reach another golden chain and the C rune on a ruined column.
Tyr's Temple Nornir Chest Location
 |
||
| Map Location | ||
|---|---|---|
 |
||
| Seal Locations | ||
 |
 |
 |
| Reward | ||
 Idunn Apple Idunn Apple |
||
After unlocking all the spike hallways during The Black Rune quest, head to the main room with the three spiked hallways. Find the hallway with the two spike blocks moving vertically. Freeze the second spike block and find the Nornir Chest at the end of the hallway.
Turn around from the chest to find the C rune on the first spike block.
Head back to the main room and find the R rune on the shelf.
Enter the hallway with the three spike blocks moving horizontally. Wait for the first spike block to move down and find the N rune on the top-right side of the block.
The Black Rune Quest Walkthrough
Konunsgard Nornir Chest Location
 |
||
| Map Location | ||
|---|---|---|
 |
||
| Seal Locations | ||
 |
 |
 |
| Reward | ||
 Horn of Blood Mead Horn of Blood Mead |
||
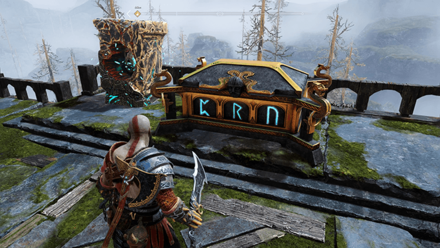
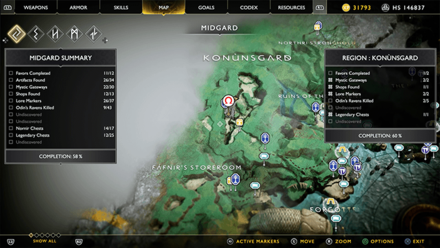
After emerging from the stronghold's secret passage during the Hail to the King favor, follow the path leading to the exit until you find a part of the stronghold. Head left to find the Nornir Chest.
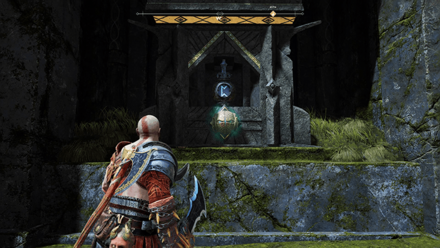
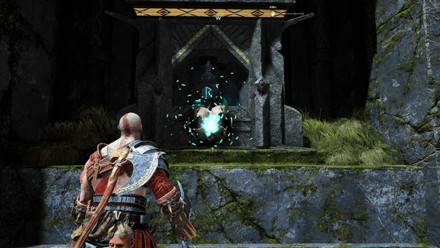
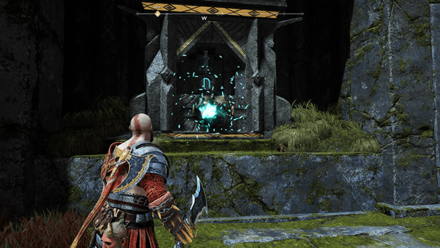
Grab the Winds of Hel and transfer it to the blank bell to reveal the N rune. Grab the winds again so that it shows the N rune and transfer it to the opposite side to reveal both the C and R runes.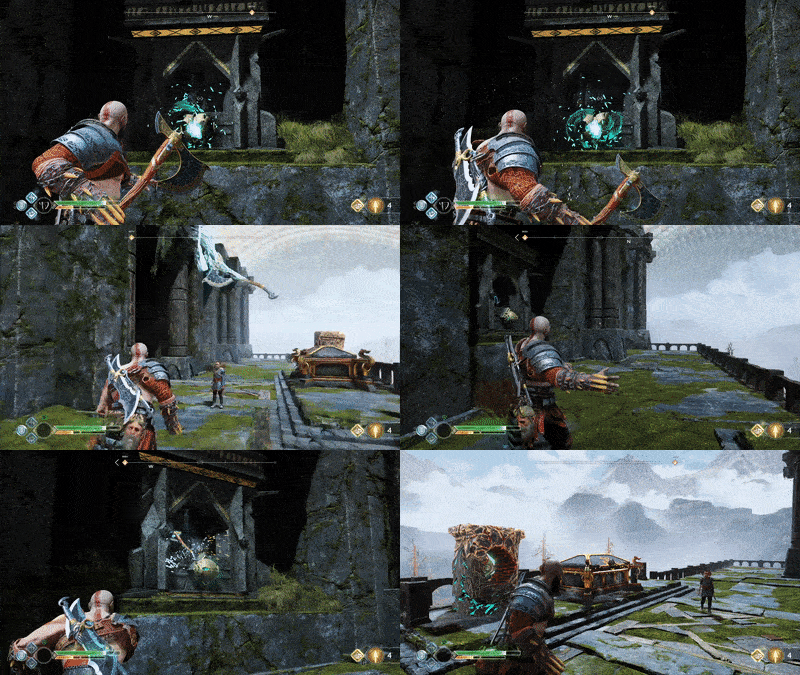
Hit the bells in this order: C rune, R rune, and N rune to unlock the chest.
Hail to the King Favor Walkthrough
Alfheim Nornir Chest Locations
Lake of Light Nornir Chest Locations
 |
||
| Map Location | ||
|---|---|---|
 |
||
| Seal Locations | ||
 |
 |
 |
| Reward | ||
 Idunn Apple Idunn Apple |
||
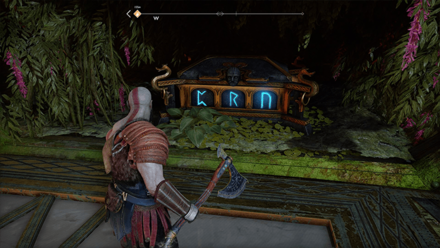
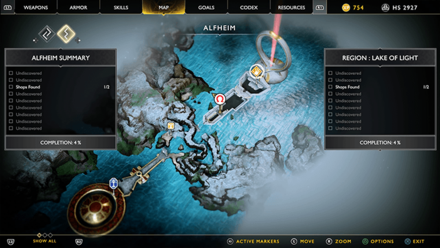
You can find the Nornir Chest opposite of the wheel at the end of the bridge.
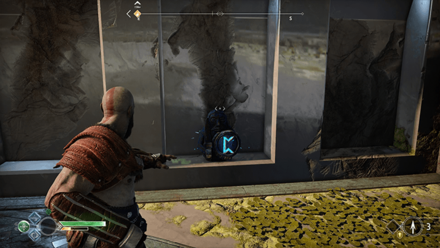
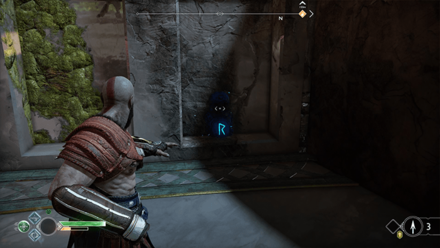
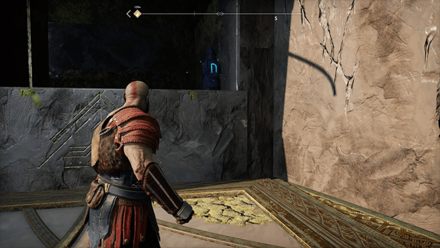
Use the wheel mechanism to slowly lower down the floors and freeze the gear in place. Drop down the ledge to destroy the R rune and turn around to find the C rune.
Recall the axe and return to the wheel. Spin the mechanism until the entire floor drops down. Turn around and find the N rune on top of a ledge.
 |
||
| Map Location | ||
|---|---|---|
 |
||
| Seal Locations | ||
 |
 |
 |
| Reward | ||
 Horn of Blood Mead Horn of Blood Mead |
||
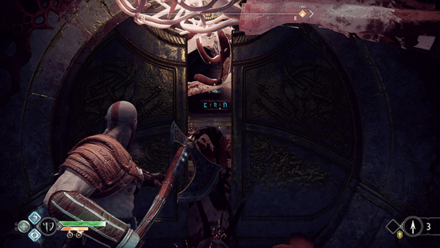
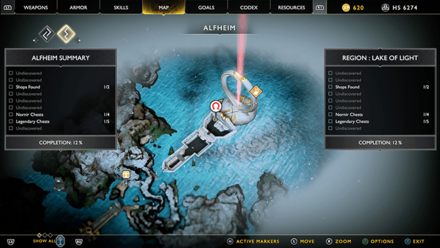
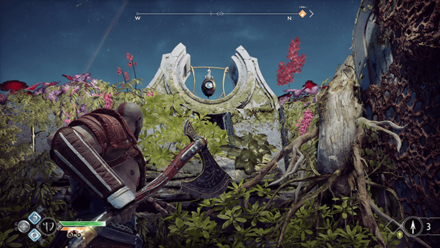
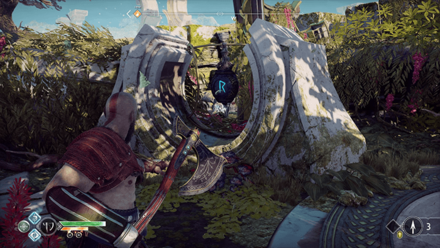
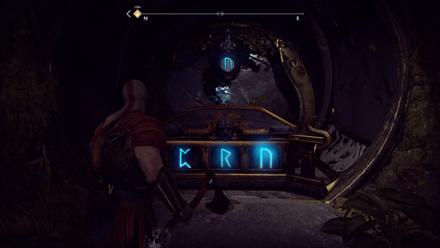
From the sealed blue door, head to the left and descend the stairs. You can find the Nornir Chest inside the room blocked by roots. Destroy the cores to open the door.
The N rune is above the chest, while the C rune is outside on the left of the room's entrance. Turn around and find the R rune near the stairway.
Hit the bells in this order: R rune, C, rune, and N rune to unlock the chest.
 |
||
| Map Location | ||
|---|---|---|
 |
||
| Seal Locations | ||
 |
 |
 |
| Reward | ||
 Horn of Blood Mead Horn of Blood Mead |
||
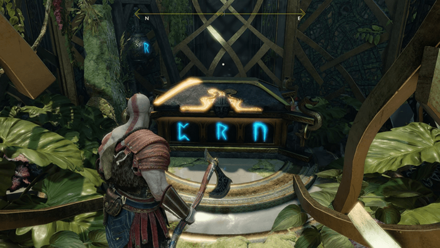
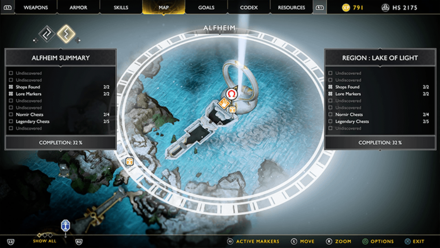
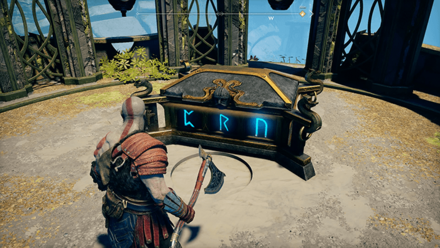
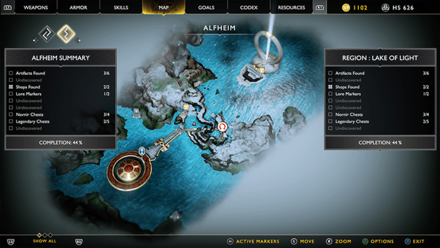
You can find the Nornir Chest on the opposite side of the blue sealed door. You need to take the light crystal from the other room and place it on the pedestal to create a light bridge leading towards it.
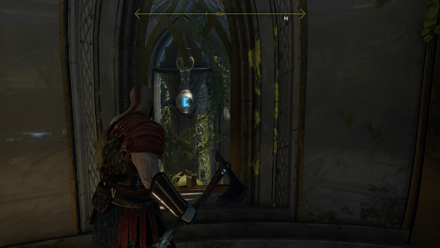
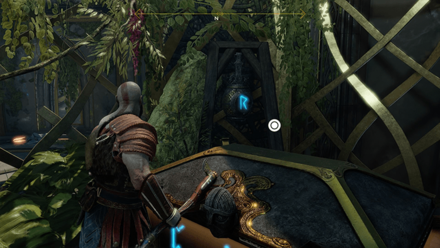
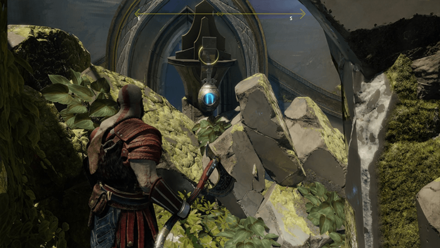
The R rune is behind the chest, and the C rune is hanging through a broken window to the left. Head back to ledges and find the N rune near a rubble.
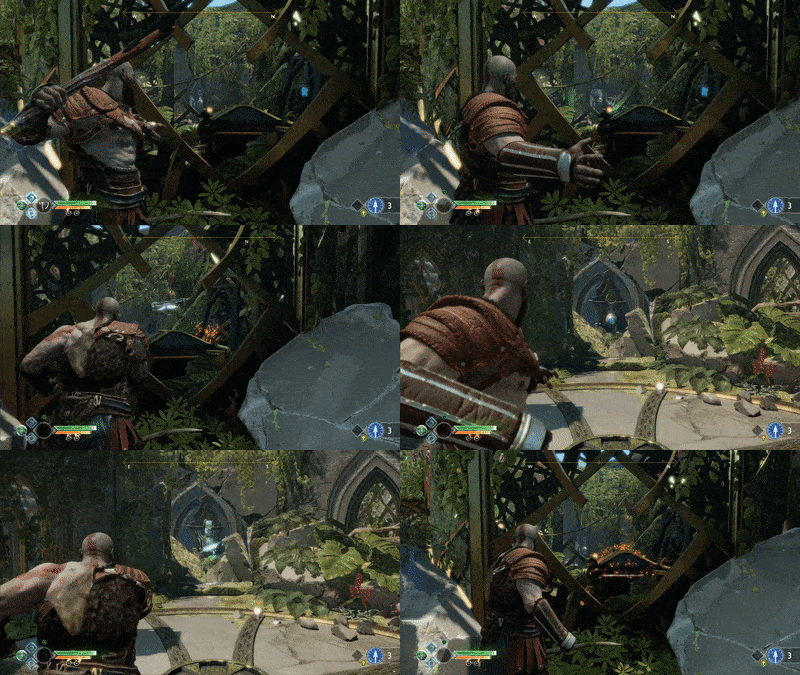
Position yourself so you can see both the C and R runes. Hit the C rune first and then the R rune. Press the Down Arrow on the D-Pad to turn around and hit the N rune to unlock the chest.
 |
||
| Map Location | ||
|---|---|---|
|
||
| Seal Locations | ||
 |
 |
 |
| Reward | ||
 Idunn Apple Idunn Apple |
||
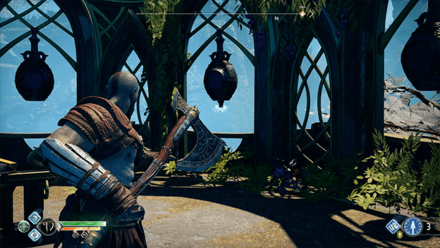
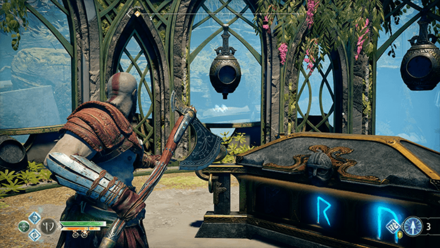
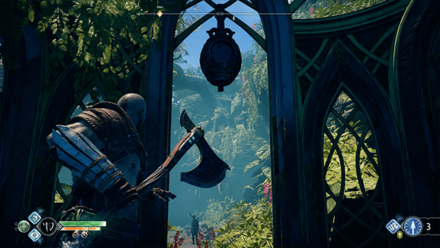
Before leaving Alfheim, head south of the Ringed Temple to find the Light Elf Sanctuary. Defeat the enemies and pass by the gate. Turn left to find the Nornir Chest inside a gazebo surrounded by hanging bells.
There are no visible runes on the hanging bells, so you need to hit the right bell based on the sound cue.
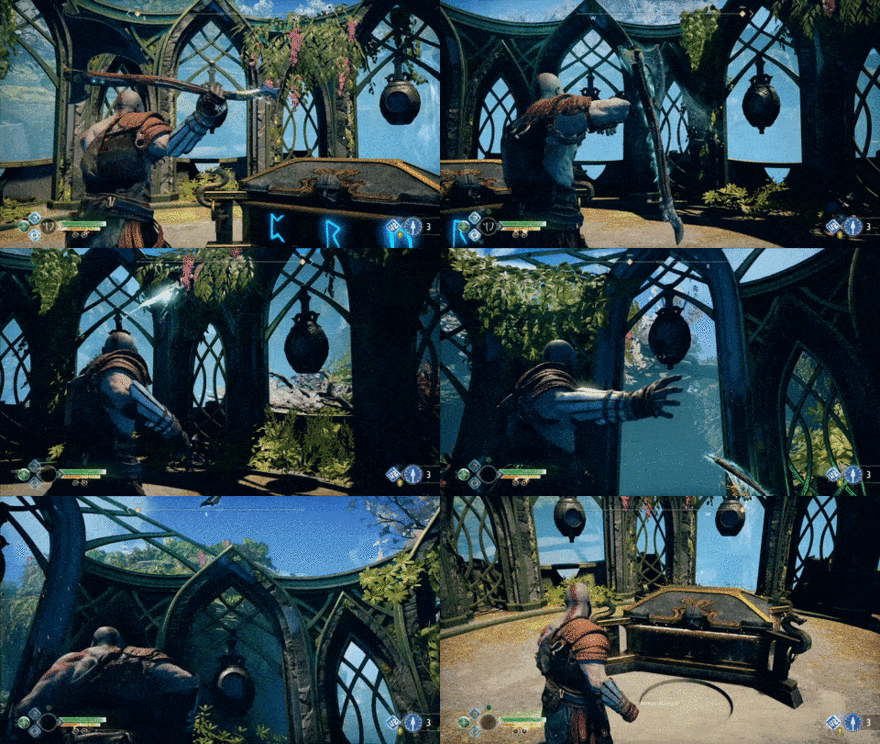
The correct bells are located at the left and right side of the chest. The last bell is located directly behind the chest.
The Light of Alfheim Quest Walkthrough
Helheim Nornir Chest Location
 |
||
| Map Location | ||
|---|---|---|
 |
||
| Seal Locations | ||
 |
 |
 |
| Reward | ||
 Horn of Blood Mead Horn of Blood Mead |
||
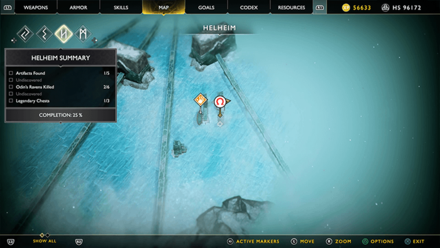
Unlike other Nornir Chests, this one isn't marked on the map and is permanently missable once you board the ship in Escape from Helheim.
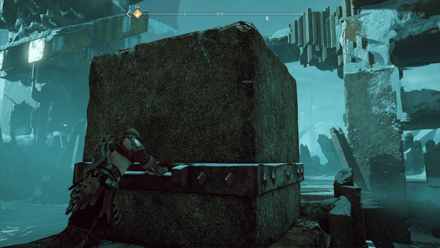
Head opposite of the ship and push the block into the hole. Jump across the ledge and find the Nornir Chest on the other side.
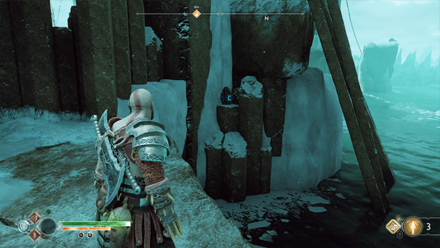
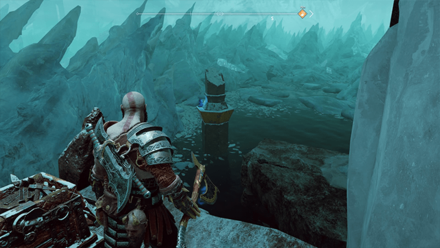
Destroy the Hel Bramble and head left to the corner. Destroy the vase for some Hacksilver and turn around to find the C rune on a pillar.
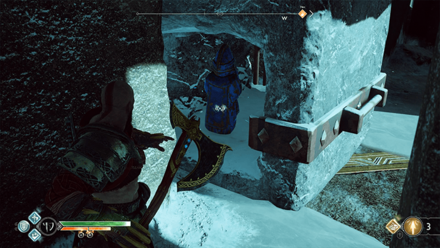
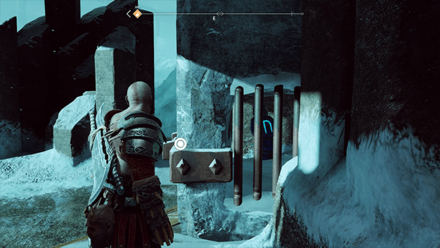
Pull the block halfway and head to the corner to destroy the N rune from the back.
Pull the block all the way and climb up. Loot the chest containing some Hacksilver Look right to find the R rune on a ruined pillar.
Escape from Helheim Quest Walkthrough
God of War Related Links
Beginner's Guide: Tips and Tricks
Author
Nornir Chest Locations | How to Open Rune Chests
improvement survey
03/2026
improving Game8's site?

Your answers will help us to improve our website.
Note: Please be sure not to enter any kind of personal information into your response.

We hope you continue to make use of Game8.
Rankings
- We could not find the message board you were looking for.
Gaming News
Popular Games

Genshin Impact Walkthrough & Guides Wiki

Honkai: Star Rail Walkthrough & Guides Wiki

Umamusume: Pretty Derby Walkthrough & Guides Wiki

Pokemon Pokopia Walkthrough & Guides Wiki

Resident Evil Requiem (RE9) Walkthrough & Guides Wiki

Monster Hunter Wilds Walkthrough & Guides Wiki

Wuthering Waves Walkthrough & Guides Wiki

Arknights: Endfield Walkthrough & Guides Wiki

Pokemon FireRed and LeafGreen (FRLG) Walkthrough & Guides Wiki

Pokemon TCG Pocket (PTCGP) Strategies & Guides Wiki
Recommended Games

Diablo 4: Vessel of Hatred Walkthrough & Guides Wiki

Fire Emblem Heroes (FEH) Walkthrough & Guides Wiki

Yu-Gi-Oh! Master Duel Walkthrough & Guides Wiki

Super Smash Bros. Ultimate Walkthrough & Guides Wiki

Pokemon Brilliant Diamond and Shining Pearl (BDSP) Walkthrough & Guides Wiki

Elden Ring Shadow of the Erdtree Walkthrough & Guides Wiki

Monster Hunter World Walkthrough & Guides Wiki

The Legend of Zelda: Tears of the Kingdom Walkthrough & Guides Wiki

Persona 3 Reload Walkthrough & Guides Wiki

Cyberpunk 2077: Ultimate Edition Walkthrough & Guides Wiki
All rights reserved
"PlayStation" and the "PS" Family logo are registered trademarks of Sony Computer Entertainment Inc. PS3 is a trademark of Sony Interactive Entertainment Inc. © 2017 Sony Interactive Entertainment LLC. God of War is a trademark of Sony Interactive Entertainment LLC.
The copyrights of videos of games used in our content and other intellectual property rights belong to the provider of the game.
The contents we provide on this site were created personally by members of the Game8 editorial department.
We refuse the right to reuse or repost content taken without our permission such as data or images to other sites.


