 The Marked Trees
 Path to the Mountain
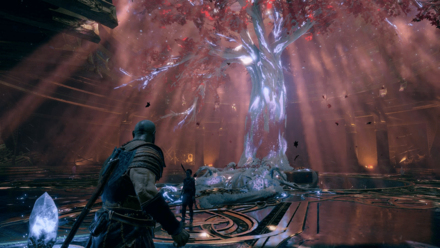 A Realm Beyond
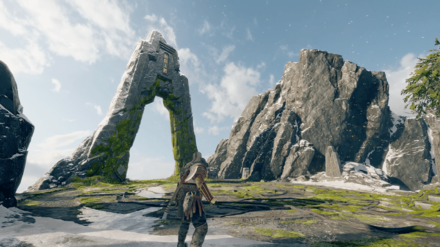 Inside the Mountain
 A New Destination
 The Magic Chisel
 Behind the Lock
 The Sickness
 The Black Rune
 Return to the Summit
 Escape from Helheim
 A Path to Jotunheim
 Between The Realms
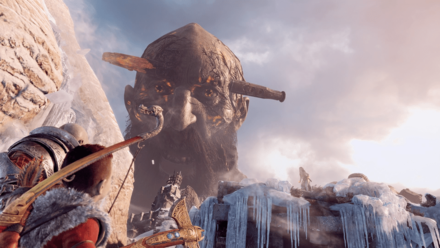 Jotunheim in Reach
 Mother's Ashes
 The Journey Home
This survey will take about 1 minute.
Your answers will help us to improve our website.
God of War PS4 (GoW 4)
The Light of Alfheim Quest Walkthrough
▶︎ Check out the Best Builds and Recommended Skills for Kratos!
✫ Farming Guides: How to Level Up and Farm EXP, Money, and Mist Echoes
▶︎ Master the Trials of Muspelheim!
★ Done with God of War? Game8's God of War Ragnarok wiki is now live!
This is a walkthrough for The Light of Alfheim in God of War (2018) for the PS4. Learn more about the objectives of this quest, quest rewards, tips for completion, puzzle solutions, as well as boss fight strategies!
| Previous Quest | Current Quest | Next Quest |
|---|---|---|
| A Realm Beyond | The Light of Alfheim | Inside the Mountain |
List of Contents
The Light of Alfheim Basic Information
How to Unlock The Light of Alfheim
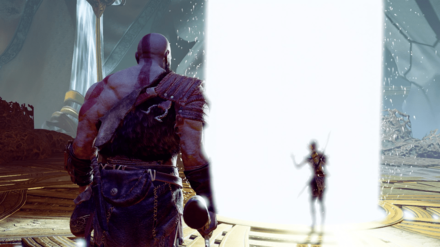
Once you reach Alfheim, you'll be separated from the Witch. She will instruct you on how to get the Light of Alfheim.
The Light of Alfheim Quest Rewards
| Rewards | ||
|---|---|---|
| 3000 XP | - | - |
The Light of Alfheim Quest Walkthrough
Find a Way to the Light, Free the Boat
| Objectives | |
|---|---|
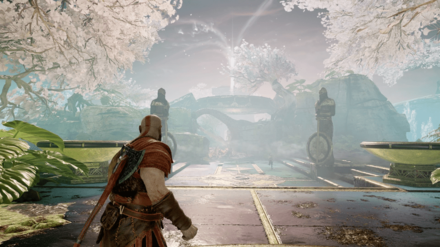
| 1 | Head forward past the square. Destroy the roots blocking your way. |
| 2 | Defeat the enemies across the bridge. |
| 3 | Cross to the other side of the bridge. NOTE: There is a chest containing a Muspelheim Cipher to the right of the bridge's end after destroying the roots. |
| 4 | 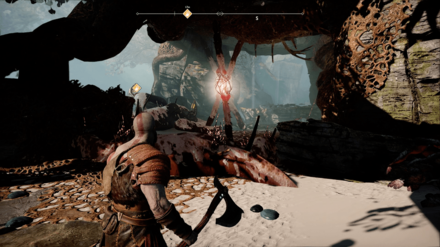 Destroy the roots holding the boat. Head down the path to the side of the roots – throw the Leviathan Axe to the lined up roots. |
| 5 | Push the boat into the water. |
Get to the Ringed Temple, Find a Way In
| 6 | 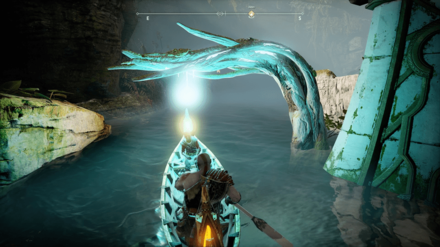 Take the boat down the river. NOTE: You can get Yggdrasil's Dew of Cooldown from a long hanging root with a blue light along the way. |
|---|---|
| 7 | Get to the center island in the Lake of Light. NOTE: There is a chest containing Frost Giant's Frenzy on a cliff along the western beaches from the center island. |
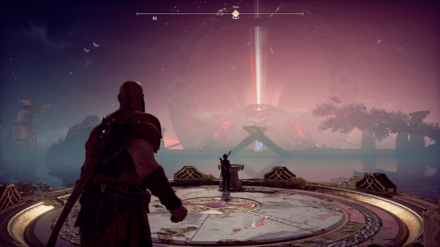
| 8 | Get to the Ringed Temple. Use the wheels on either side of the temple facing the lake to lift spires out from the water. |
| 9 | Head back to the center island. Interact with the sand bowl. |
| 10 | Defeat the enemies. |
Reactivate the Ringed Temple Bridge

| 11 | Use the wheel at the end of the bridge. NOTE: There is a chest with Thiazi's Talon to the right of the platform you came down on. |
|---|---|
| 12 | Enter the tunnel and break the roots at the end of the right path. |
| 13 | Defeat the enemies. |
| 14 | Head down the doorway to the left. Smash through the two roots at the bottom of the bridge. |
| 15 | Climb the wall and defeat the Elves at the top. |
| 16 | Defeat the Stone Ancient. |
| 17 | Defeat the Elves that come after you afterwards. |
| 18 | 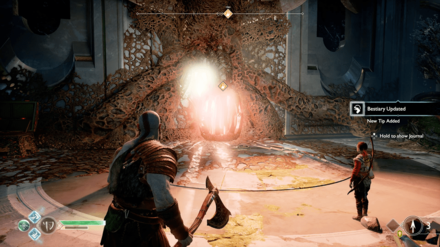 Destroy the root. NOTE: There is a chest with Njord's Tempest to the left of the root. |
| 19 | Head back to the main bridge. Use the elevator across the light bridge. |
Enter the Temple
| 20 | Cross the light bridge and head right. NOTE: There is a chest with a Horn of Blood Mead down the left path. |
|---|---|
| 21 | Head through the tunnel next to Sindri's Shop. |
| 22 | Defeat the Elves and follow the path. NOTE: There is a chest with a Runic War Belt at the far end of the hall. |
| 23 | Climb along the wall until you reach a root you must destroy. |
| 24 | Cross the light bridge that opens up behind you. |
| 25 | Reach the second root and destroy it. |
| 26 | Reach the group of roots you must destroy. You must destroy each line of root three at a time. |
Investigate the Hive
| 27 | Enter the Hive and follow the path. |
|---|---|
| 28 | Destroy the root up the path on the left. |
| 29 | FIght your way through the Hive and destroy the root at the end. |
| 30 | Follow the path. |
Find a Way Out
| 31 | Use Atreus' new Light Arrows to activate the light bridge. |
|---|---|
| 32 | 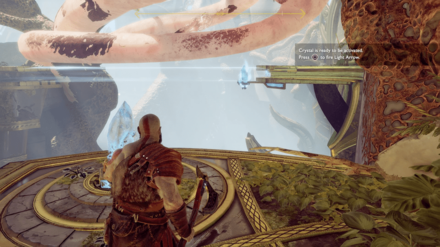 Cross the bridge. Carry the crystal to the slot at the edge. NOTE: You can carry the crystal to the center of the platform to gain access to a chest. |
| 33 | Cross to the other platform. Head to the other side of the roots. Activate the light bridge and line the roots up for you to destroy. |
| 34 | Activate the light bridge and cross. NOTE: There is a chest with the Strike of Utgard you can get on your way out. |
| 35 | Destroy the hanging crystal to break the barrier. NOTE: You can use the fallen crystal to power a nearby receptacle that activates a Lore Panel for Atreus to read. |
| 36 | Carry the crystal to the top and activate it. Cross the light bridge and destroy the roots. |
| 37 | Place the crystal on the newly uncovered pyre and activate it. |
| 38 | Push Atreus up the wall and open the door. |
| 39 | Use the elevator to head down into the chasm. |
Return to Midgard
| 40 | Activate the light bridge at the end of the path and bring the crystal on the ceiling down. |
|---|---|
| 41 | Carry the crystal back to the pyre at the side of the bridge and activate it. |
| 42 | 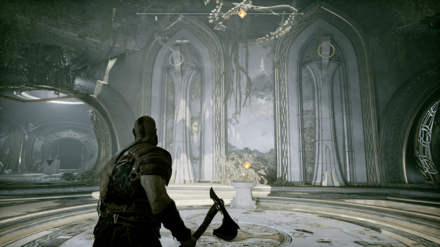 Cross the light bridge and head to the far end towards the Sand Bowl. |
| 43 | Defeat Svartaljofurr. |
| 44 | Head back to the Tyr's Temple. Return to Midgard. |
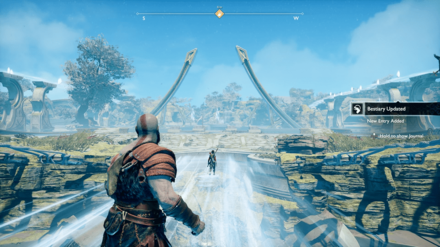
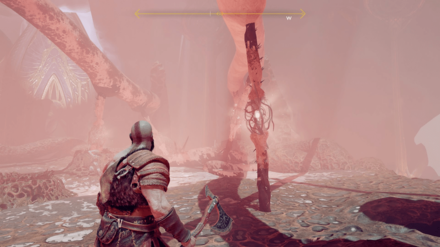
| 45 | Head back up the mountain. |
| 46 | 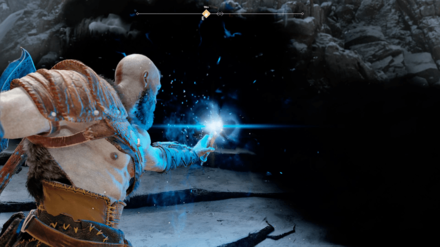 Use the Light of Alfheim to cross the mountain pass. |
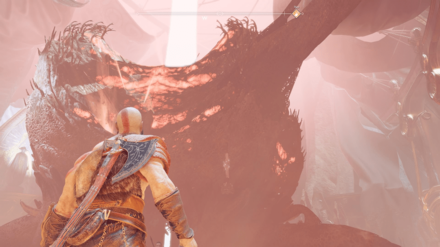
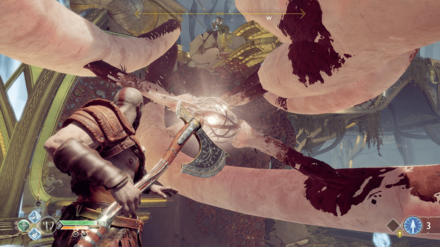
Boss Strategy: Stone Ancient
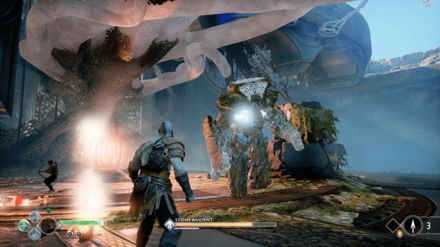
The Stone Ancient is a large and slow opponent you will encounter. It will attack you by opening up its chest and sending forth a surge of magic to damage you – this will be an opportune moment for you to lodge the Leviathan Axe into its open chest for great damage.
How to Beat Stone Ancient | Boss Fight Guide
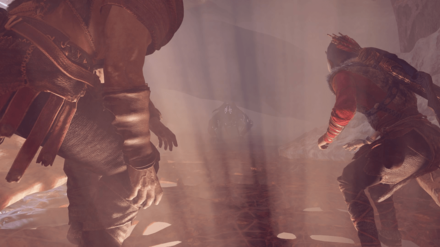
Boss Strategy: Svartaljofurr
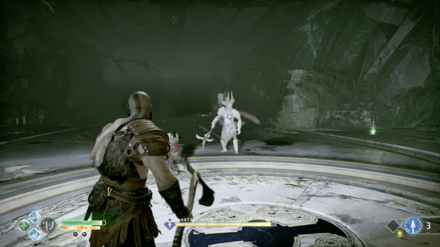
Svartaljofurr isn't that much different from the other Elves you've fought thus far. He will try to rush you in an attempt to attack you, so be sure to be ready to parry/block. Make use of Atreus' bow attacks whenever he tries to dodge or block your own hits.
How to Beat Svartaljofurr | Boss FIght Guide
Alfheim Puzzle Solutions
Boat Puzzle
One of the first obstacles in your way preventing any progress in the Light of Alfheim Journey are the vines that are keeping a boat players need to cross Alfheim's lake. Players will need to destroy the vines around the boat – this can be done by navigating towards a side area that gives you a view from the side of the vines.
Simply line up the vines in a straight line and throw the Leviathan Axe across, destroying all the vines in one single hit, freeing the boat.
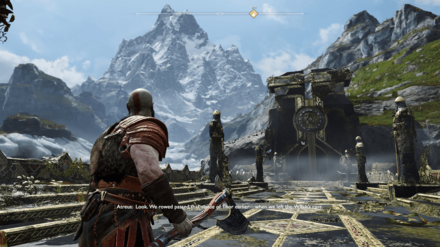
Bridge Puzzle
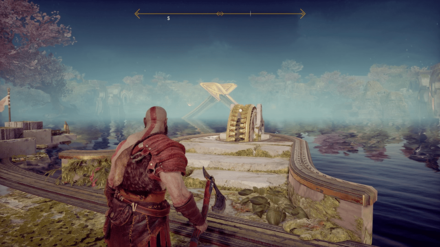
Another one of the early puzzles in Alfheim that players will need to tackle in order to progress their Journey is the so called Bridge Puzzle, which involves raising runes from the lake to create a bridge leading to the Ringed Temple. In order complete this puzzle, players must first take their boat to the central island in the lake, where a sand bowl can be inspected.
Travel to the bridgehead near the end of the lake, where they'll need to use two wheels on either side of the bridgehead to raise the runes. From there, travel back to the central island and interact with the sand bowl, which parts the lake and solves the puzzle.
Root-Locked Hive Entrance
Upon reaching into the deeper parts of the depths, players will come across an area where they'll be unable to progress through an entrance into the hive due to the roots blocking their way – individually trying to destroy the root-points will only cause them to grow back.
Instead, line up three of the root points at a time and throw the Leviathan Axe at them – if successful, each line of three root-points the player destroys will not grow back. Continue this process until you destroy three lines, which reveals the entrance into the hive.
Root-Blocked Bridge
Near the end of the Journey, you'll be presented with Light Arrows that you can use with Atreus' bow. During this, you'll be able to connect a gem to a pyre that activates a light bridge for you to cross, which inevitably leads you to a bridgeway blocked by roots.
You'll have to destroy a line of root-points above the bridgeway, which you can see by moving onto the bridge and looking to your upper left where the roots can be lined up and destroyed.
Nornir Chest Locations
Reactivate the Ringed Temple Bridge
 |
||
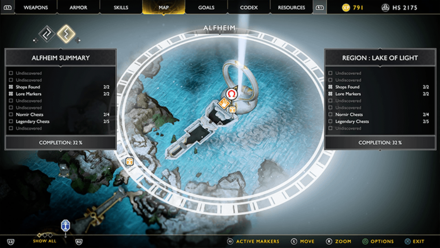
| Map Location | ||
|---|---|---|
 |
||
| Seal Locations | ||
 |
 |
 |
| Reward | ||
 Idunn Apple Idunn Apple |
||
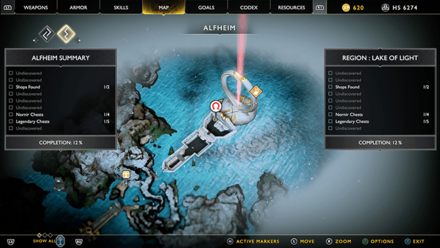
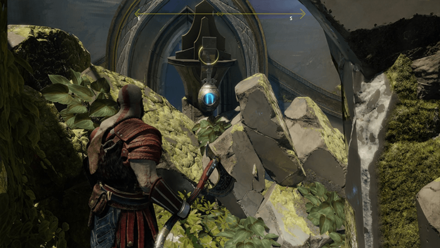
You can find the Nornir Chest opposite of the wheel at the end of the bridge.
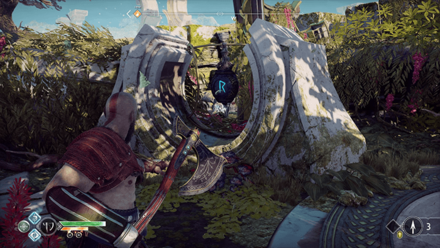
Use the wheel mechanism to slowly lower down the floors and freeze the gear in place. Drop down the ledge to destroy the R rune and turn around to find the C rune.
Recall the axe and return to the wheel. Spin the mechanism until the entire floor drops down. Turn around and find the N rune on top of a ledge.
Find Another Way Into the Temple
 |
||
| Map Location | ||
|---|---|---|
 |
||
| Seal Locations | ||
 |
 |
 |
| Reward | ||
 Horn of Blood Mead Horn of Blood Mead |
||
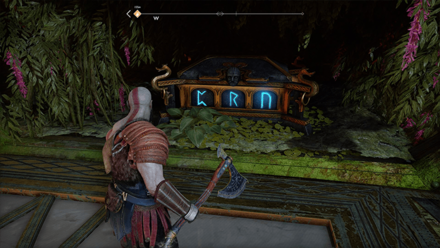
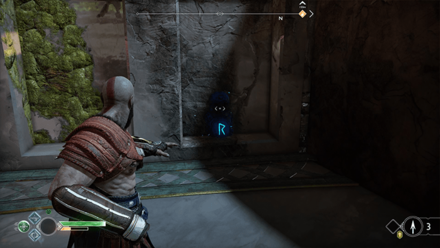
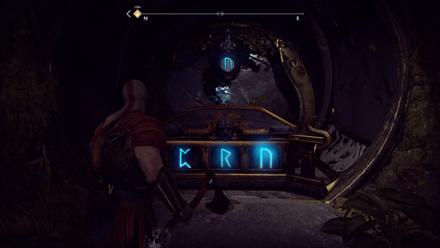
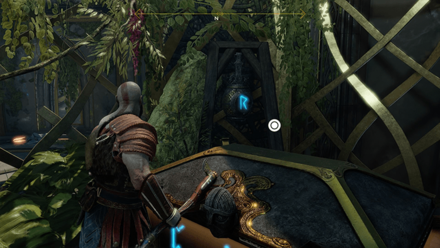
From the sealed blue door, head to the left and descend the stairs. You can find the Nornir Chest inside the room blocked by roots. Destroy the cores to open the door.
The N rune is above the chest, while the C rune is outside on the left of the room's entrance. Turn around and find the R rune near the stairway.
Hit the bells in this order: R rune, C, rune, and N rune to unlock the chest.
Find a Way Out of the Temple
 |
||
| Map Location | ||
|---|---|---|
 |
||
| Seal Locations | ||
 |
 |
 |
| Reward | ||
| Horn of Blood Mead |
||
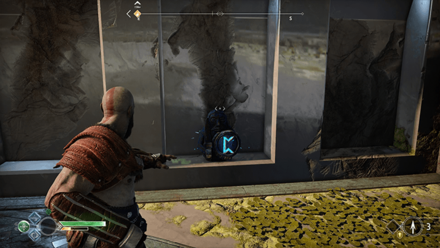
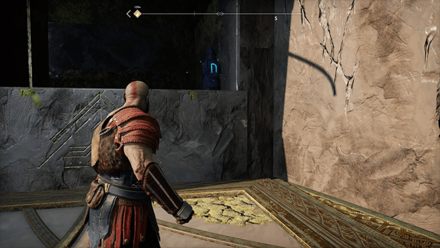
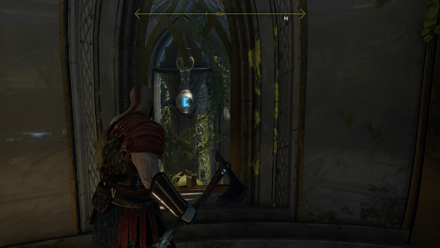
You can find the Nornir Chest on the opposite side of the blue sealed door. You need to take the light crystal from the other room and place it on the pedestal to create a light bridge leading towards it.
The R rune is behind the chest, and the C rune is hanging through a broken window to the left. Head back to ledges and find the N rune near a rubble.
Position yourself so you can see both the C and R runes. Hit the C rune first and then the R rune. Press the Down Arrow on the D-Pad to turn around and hit the N rune to unlock the chest.
Go Back Through the Tower
 |
||
| Map Location | ||
|---|---|---|
|
||
| Seal Locations | ||
 |
 |
 |
| Reward | ||
| Idunn Apple |
||
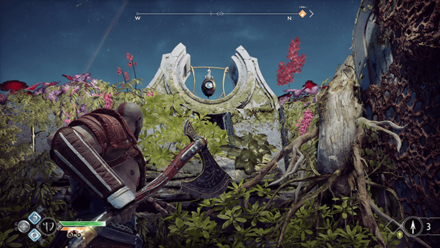
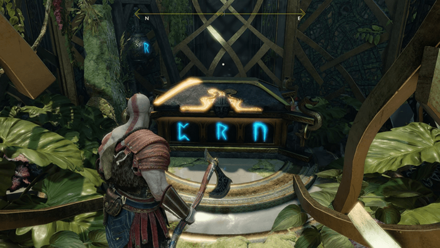
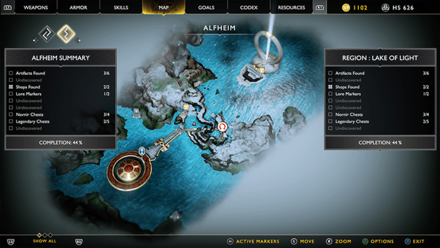
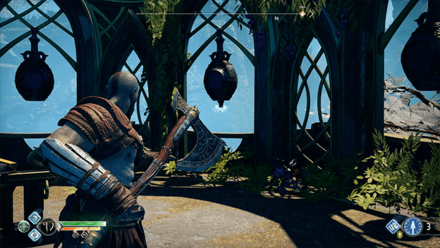
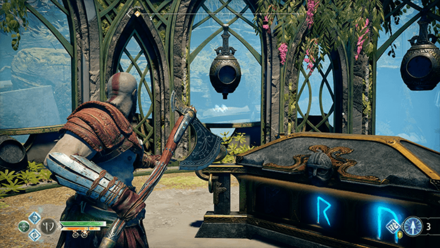
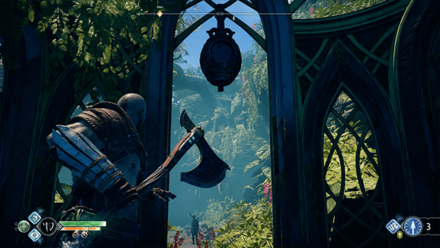
Before leaving Alfheim, head south of the Ringed Temple to find the Light Elf Sanctuary. Defeat the enemies and pass by the gate. Turn left to find the Nornir Chest inside a gazebo surrounded by hanging bells.
There are no visible runes on the hanging bells, so you need to hit the right bell based on the sound cue.
The correct bells are located at the left and right side of the chest. The last bell is located directly behind the chest.
God of War Related Links
Quest Walkthroughs
| Quest Types | |
|---|---|
| Story | Favors |
Author

The Light of Alfheim Quest Walkthrough
Please participate in our site
improvement survey
03/2026
improvement survey
03/2026
Would you assist in
improving Game8's site?
improving Game8's site?

×
We are listening to our users' valuable opinions and discussing how to act on them.
The information collected through this survey will be used for the purpose of improving our services. In addition, the information will only be disclosed a part of a statistic in a format that will not allow identification of personal information.
Begin Survey
Not Now
×
Please rate each item regarding Game8.co's Advertisements.
Amount of Ads
Very Dissatisfied
Somewhat Dissatisfied
Fine
Somewhat Satisfied
Highly Satisfied
Placement of Ads
Timing of Ad Display
Ad Loading Speed
Safeness of Ads
Content of Ads
×
Please rate each item regarding Game8.co's Quality of Articles.
Amount of information
Very Dissatisfied
Somewhat Dissatisfied
Fine
Somewhat Satisfied
Highly Satisfied
Frequency of updates
Speed of new information
Accuracy of articles
Understandibility of articles
Readability of sentences
×
Please rate each item regarding Game8.co's Usability of the Site.
Ease of finding information
Very Dissatisfied
Somewhat Dissatisfied
Fine
Somewhat Satisfied
Highly Satisfied
Loading Speed
Use of Color
Font Size
Visibility of Images
Easy to Understand Layout
×
Please rate each item regarding Game8.co's Message Boards, Comments.
Ease of Writing
Very Dissatisfied
Somewhat Dissatisfied
Fine
Somewhat Satisfied
Highly Satisfied
Readability
Ease in Finding Information
Comment Quality
Comment Quantity
Admin Response
×
Please rate each item regarding Game8.co's Site's new design.
Please rate our site's new design
Very Dissatisfied
Somewhat Dissatisfied
Fine
Somewhat Satisfied
Highly Satisfied
Do you think that the website's design change makes the site easier to use?
Has the new design made it easier for you to find information on the site?
Has the new design improved the overall visual appeal of the site?
How would you rate your overall satisfaction with the new design of the site?
×
How likely are you to recommend Game8 to someone you know?
Very Unlikely
0
1
2
3
4
5
6
7
8
9
10
Very Likely
If you have other opinions regarding potential improvement to the website, please share them with us. We would appreciate your honest opinion.
Note: This is a free response section, so you can proceed without entering anything.
Note: Please be sure not to enter any kind of personal information into your response.
Note: Please be sure not to enter any kind of personal information into your response.
×
Thank You
×
Thank you for participating in our survey! Your answers will help us to improve the quality of our website and services.
We hope you continue to make use of Game8.
We hope you continue to make use of Game8.
Close
Rankings
- We could not find the message board you were looking for.
Gaming News


![Monster Hunter Stories 3 Review [First Impressions] | Simply Rejuvenating](https://img.game8.co/4438641/2a31b7702bd70e78ec8efd24661dacda.jpeg/thumb)
Popular Games

Genshin Impact Walkthrough & Guides Wiki
Honkai: Star Rail Walkthrough & Guides Wiki
Umamusume: Pretty Derby Walkthrough & Guides Wiki
Pokemon Pokopia Walkthrough & Guides Wiki
Resident Evil Requiem (RE9) Walkthrough & Guides Wiki
Monster Hunter Wilds Walkthrough & Guides Wiki
Wuthering Waves Walkthrough & Guides Wiki
Arknights: Endfield Walkthrough & Guides Wiki
Pokemon FireRed and LeafGreen (FRLG) Walkthrough & Guides Wiki
Pokemon TCG Pocket (PTCGP) Strategies & Guides Wiki


Recommended Games
Diablo 4: Vessel of Hatred Walkthrough & Guides Wiki
Cyberpunk 2077: Ultimate Edition Walkthrough & Guides Wiki
Fire Emblem Heroes (FEH) Walkthrough & Guides Wiki
Yu-Gi-Oh! Master Duel Walkthrough & Guides Wiki
Super Smash Bros. Ultimate Walkthrough & Guides Wiki
Pokemon Brilliant Diamond and Shining Pearl (BDSP) Walkthrough & Guides Wiki
Elden Ring Shadow of the Erdtree Walkthrough & Guides Wiki
Monster Hunter World Walkthrough & Guides Wiki
The Legend of Zelda: Tears of the Kingdom Walkthrough & Guides Wiki
Persona 3 Reload Walkthrough & Guides Wiki


All rights reserved
"PlayStation" and the "PS" Family logo are registered trademarks of Sony Computer Entertainment Inc. PS3 is a trademark of Sony Interactive Entertainment Inc. © 2017 Sony Interactive Entertainment LLC. God of War is a trademark of Sony Interactive Entertainment LLC.
The copyrights of videos of games used in our content and other intellectual property rights belong to the provider of the game.
The contents we provide on this site were created personally by members of the Game8 editorial department.
We refuse the right to reuse or repost content taken without our permission such as data or images to other sites.