The River Pass Region Summary and List of Collectibles
▶︎ Check out the Best Builds and Recommended Skills for Kratos!
✫ Farming Guides: How to Level Up and Farm EXP, Money, and Mist Echoes
▶︎ Master the Trials of Muspelheim!
★ Done with God of War? Game8's God of War Ragnarok wiki is now live!
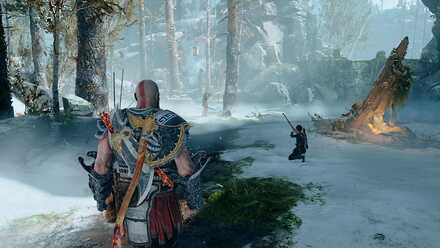
Track your completion rate and all collectibles in The River Pass with The River Pass Region Summary for God of War (2018). Find out what items are still undiscovered and their location in The River Pass region!
List of Contents
The River Pass Region Summary

The River Pass connects the Wildwoods region to the Shores of Nine and is the second region that you will discover in your journey.
| The River Pass Summary | |
|---|---|
| Artifacts | 9 |
| Mystic Gateways | 3 |
| Shops | 1 |
| Lore Markers | 6 |
| Odin's Ravens | 6 |
| Valkyries | 1 |
| Nornir Chests | 5 |
| Legendary Chests | 4 |
Realm and Region Summaries and List of Collectibles
The River Pass Artifact Locations
Artifact #1
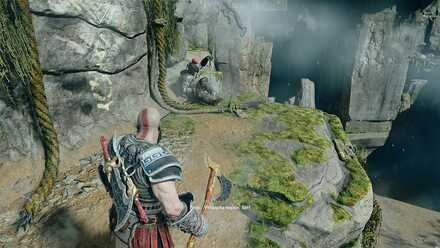
Found on a corpse above the marketplace but can only be reached until after the encounter with the human Reavers. This artifact is the first of The Faces of Magic set.
| 1 | 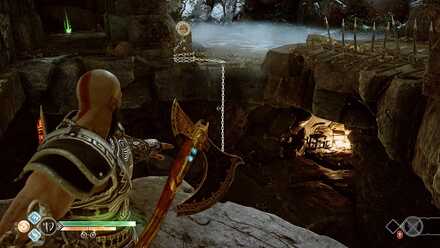 After the battle with the human Reavers, walk along the ledge to the next area then climb down the chain. Follow this path to find a warrior's corpse with this artifact. |
|---|
Artifact #2
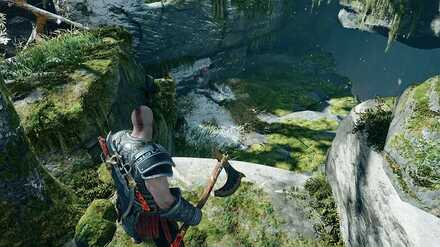
After meeting Brok, check the area where you threw your axe at and you should find this second artifact on another warrior.
Artifact #3
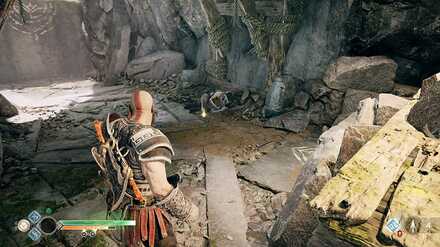
The third artifact of The Faces of Magic set is found on a corpse just before you exit the spiked room past Brok's shop.
Artifact #4
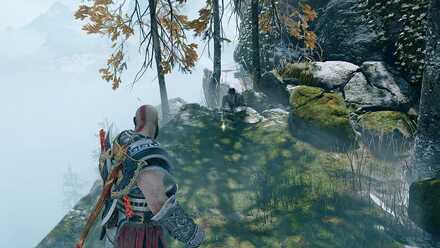
After getting out of the spiked room, take a left to find another corpse where you can find the fourth artifact.
Artifact #5
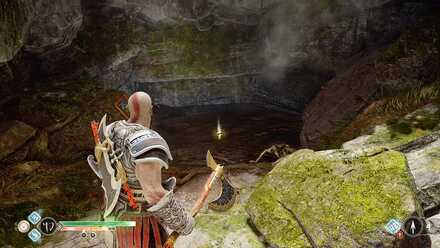
After solving the spinning gate puzzle, follow the path and turn left where it splits to find this artifact.
Artifact #6
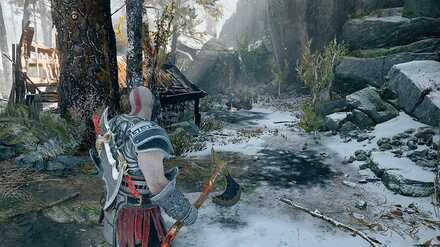
In the village ruins, look for a burning hut and go around the back to find a dead body and the sixth mask of the collection.
Artifact #7
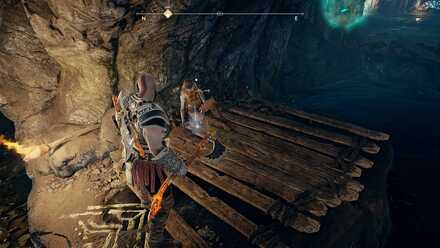
The artifact can be found inside the Witch's Cave, where you need to push a pile of stones to be able to jump over and reach it.
| 1 | 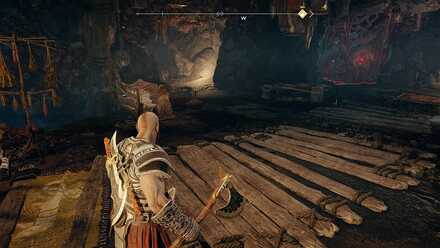 From where you exit the Witch's house, head left until you find a pile of large stones. |
|---|---|
| 2 | 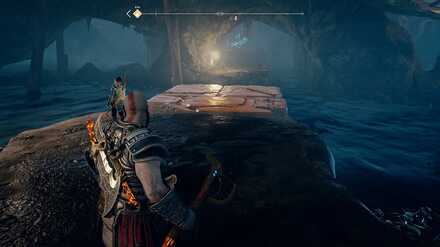 Interact with the pile of stones, push it into the water, and jump to the other side to reach the artifact. |
Artifact #8
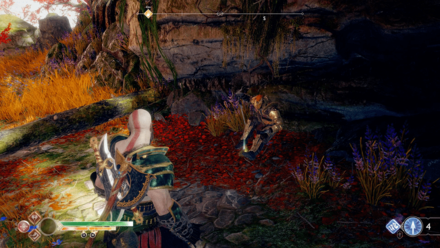
As you return to the Witch's cave after completing the quest Inside the Mountain, exit through the well into the frontyard of the house. The artifact will be just at the bottom of the path leading away from where you exit the well.
Artifact #9
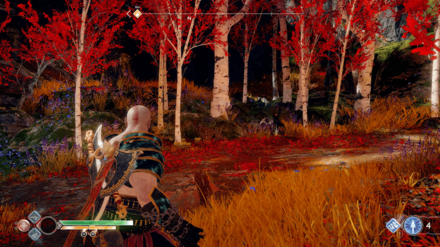
Climb the chain in front of the turtle hiding the Witch's house and look for a corpse on the left side of the path to find the final mask for the set.
List of Artifacts and Locations
The River Pass Mystic Gateway Locations
Mystic Gateway #1
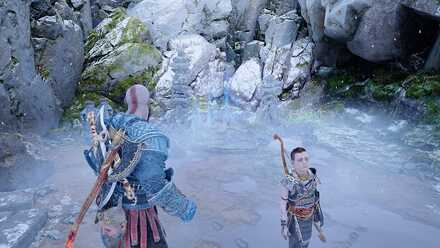
The first mystic gateway is located just before the bridge where you first met Brok.
Mystic Gateway #2
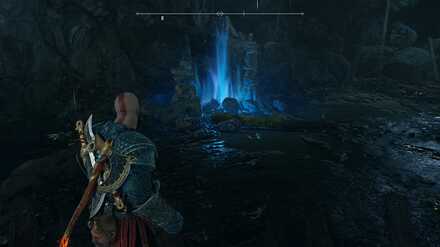
The next gateway is at the lower level of the Witch's Cave, right next to the lift, which means you will only see it after the waters drop at least once.
Mystic Gateway #3
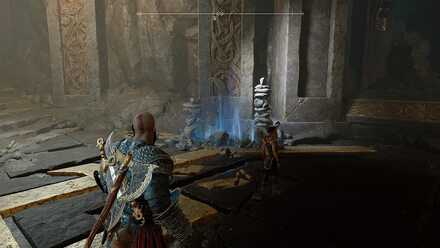
The third mystic gateway is on the lower level of the Hidden Chamber of Odin. Use the Magic Chisel to open the chamber and head down to find the gateway right before you reach the arena.
The River Pass Shop Locations
Shop #1
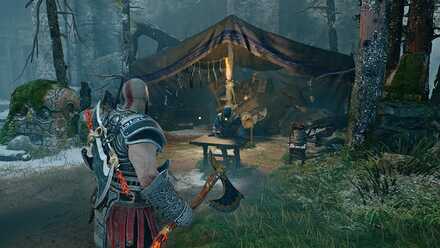
This shop is unlocked after your first meeting with Brok during The Path to the Mountain so it's impossible to miss.
Path to the Mountain Quest Walkthrough
The River Pass Lore Marker Locations
Lore Marker #1
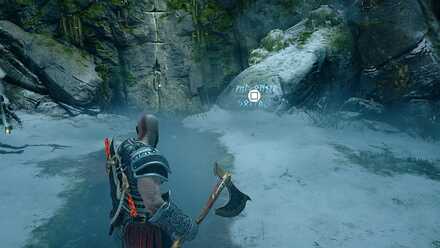
Written on a rock found in the first area of The River Pass, just as you enter the region from Wildwoods.
Lore Marker #2
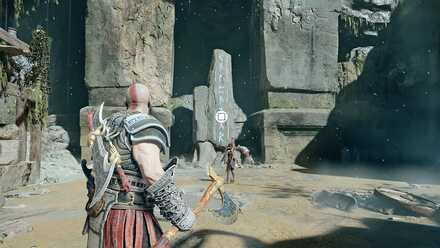
You'll find this lore marker as part of the story by examining the large stone slab in the marketplace. Heavy Draugr will attack soon after reading it for the first time.
Lore Marker #3
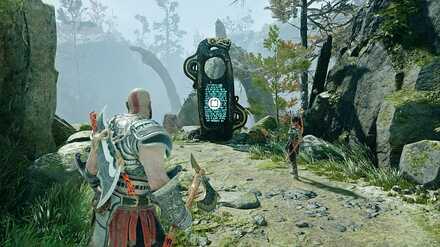
On the area where you fought Brenna Daudi, you'll find wooden planks with a chain beside it, just in front of the Nornir Chest. At the top is where you'll find the third lore marker of the region.
| 1 | 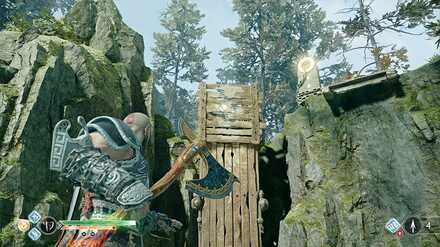 Throw your axe at the wooden planks and give Atreus a boost so he can lower the chain. Climb up and examine the lore marker above. |
|---|
Lore Marker #4
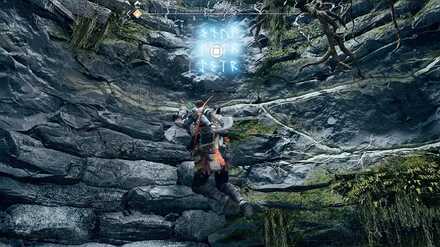
On your way back to the Witch's house during A New Destination, you will pass by this lore marker written on the wall as you climb up through the well.
| 1 | 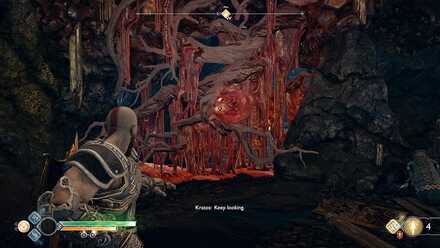 You'll have to destroy the sap blocking the path next to the lift first before you can find the well. |
|---|
Lore Marker #5

This lore marker is found next to the well near the Witch's house. Like the previous lore marker, you'll be able to reach this area during A New Destination.
| 1 | 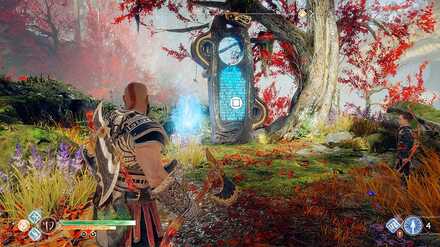 Go around the well and you will find a light crystal behind it. Carry and place it on the holder beside the lore marker and shoot it with a Light Arrow. |
|---|
Lore Marker #6
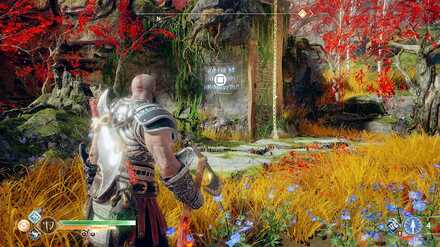
The last lore marker in this region is found right in front of the turtle, written on the wall beside the chain that leads you to a Nornir chest.
The River Pass Odin's Raven Locations
There is an extra raven in The River Pass, which means you can find a total of 7 Odin's ravens in the region.
Odin's Raven #1
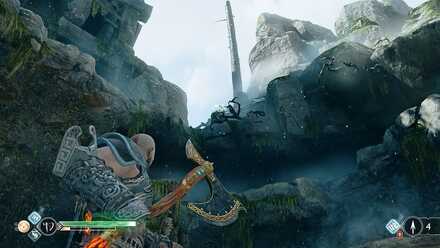
In the area where you fall from the broken bridge, look behind and above you to find this raven sitting on a rock.
Odin's Raven #2
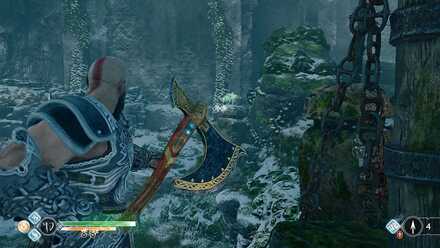
Past Brok's shop is a bridge hanging on a chain. Aim for the lock to get it out of the way and look on its right to find one of Odin's ravens.
Odin's Raven #3
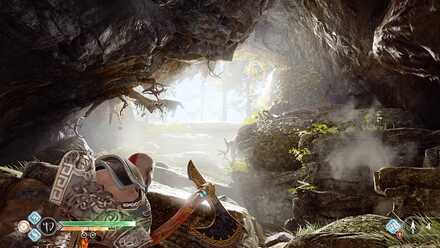
Follow the tunnel revealed by the spinning gate puzzle until you find a large opening above. The raven is sitting at the top but it can be difficult to spot due to the lighting. Try moving sideways and use the trees to get a clear view of it.
Odin's Raven #4
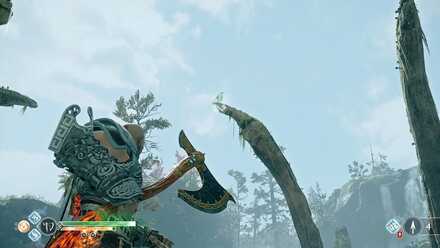
In the area where you fought the troll Brenna Daudi, look for this raven at the tip of one of the giant ribs.
Odin's Raven #5
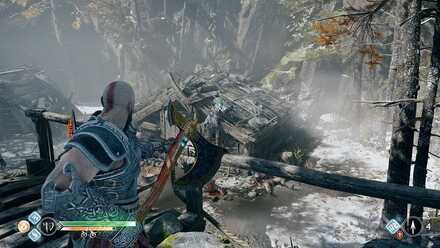
The raven is perched on the first hut you find within the village ruins, right after your encounter with the magical boar.
Odin's Raven #6
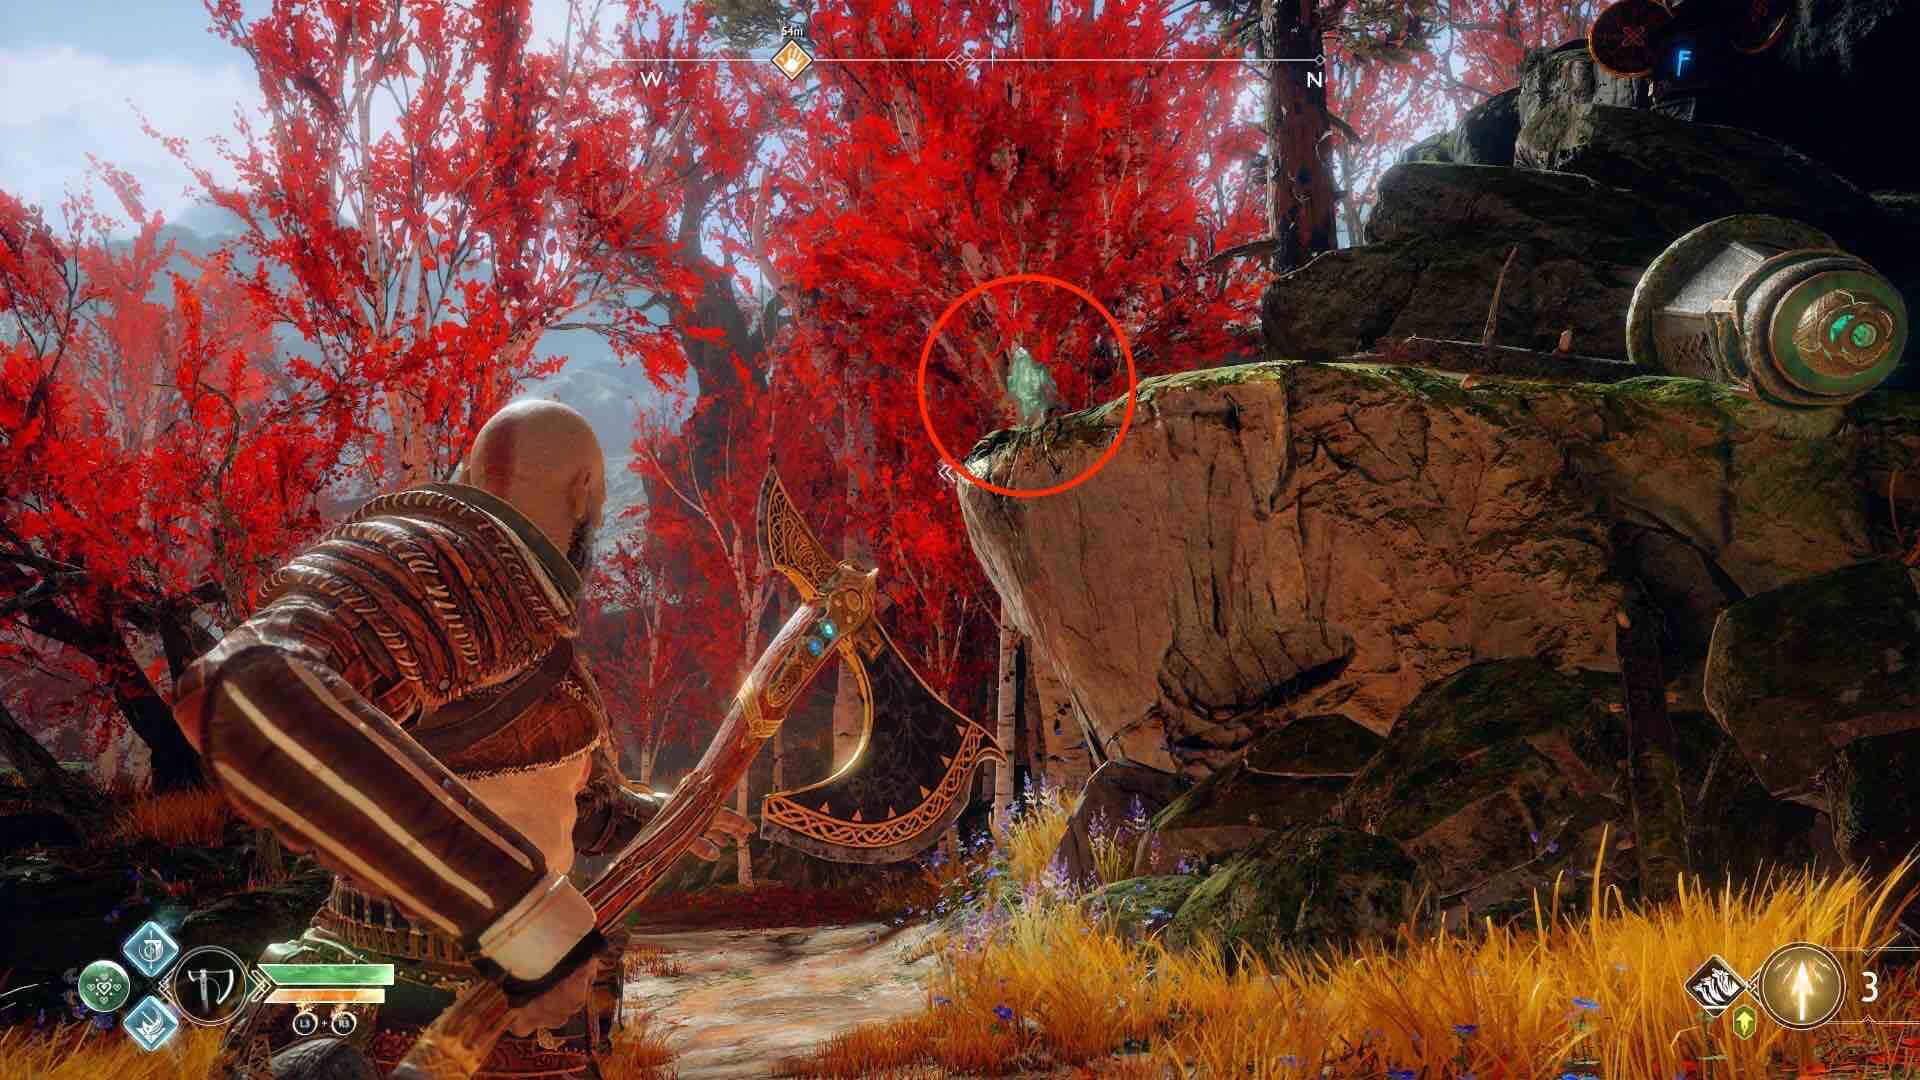
The raven is perched on a rock formation on a plateau facing the turtle's head. There is a rune seal and Hel's Wind chamber stacked near the raven.
Odin's Raven #7
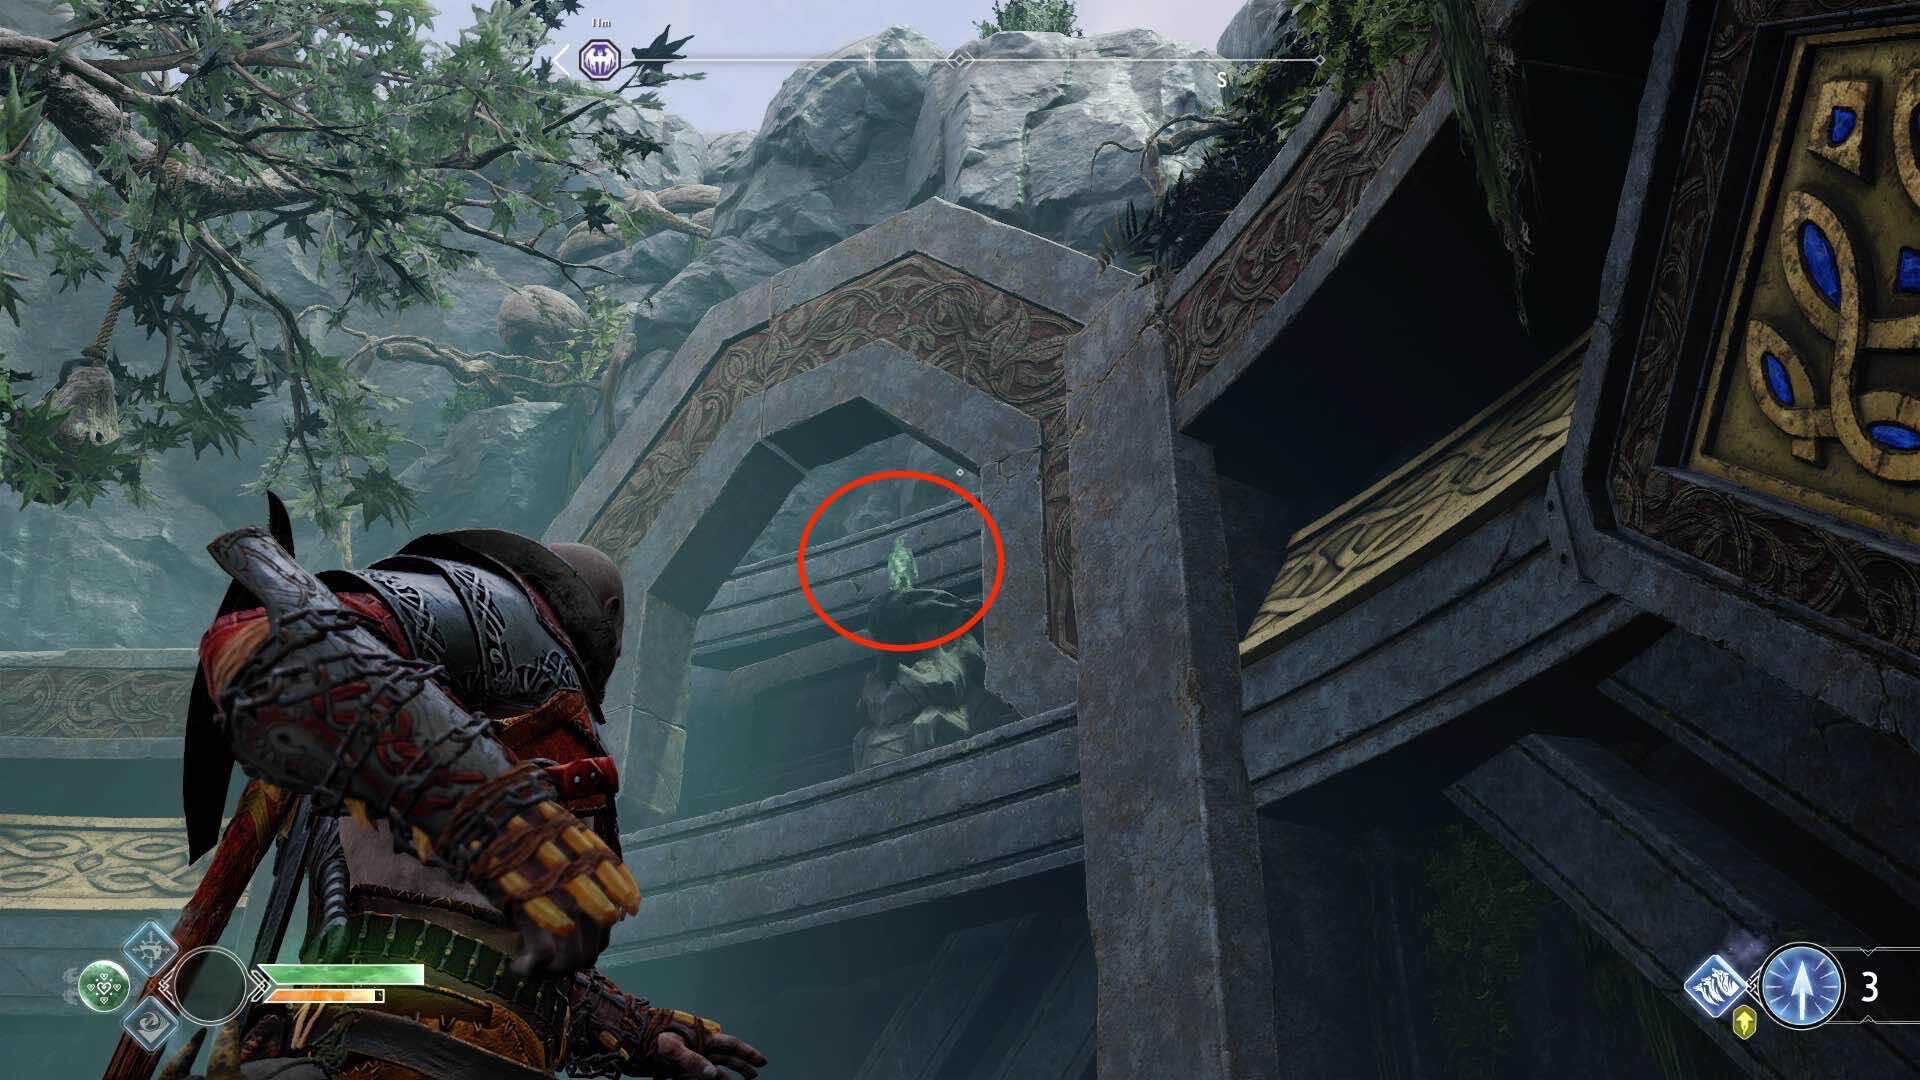
This raven can be found in the Hidden Chamber of Odin located within the Witch’s Cave. Enter the chamber, take the lift down, and go to the arena where Valkyrie Kara is. You should spot the raven perched on the rocks east of your position.
The River Pass Valkyrie Locations
Kara

Kara's Hidden Chamber can be found in the lower levels of the Witch's Cave. Head to the lower caverns and cross the light bridge. Climb up the wall and the door will be right in front of you.
The River Pass Nornir Chest Locations
Nornir Chest #1
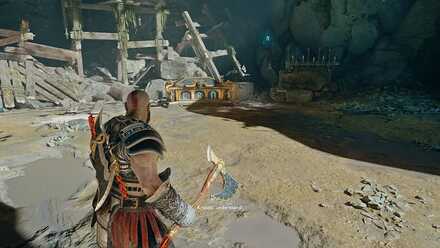
The first Nornir Chest is located on the area above where you fought your first Revenant. Breaking all 3 seals will allow you to open the chest and grab the Idunn Apple inside.
| 1 | 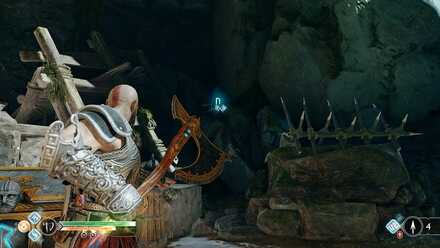 The N rune is sitting just behind the Nornir Chest. |
|---|---|
| 2 | 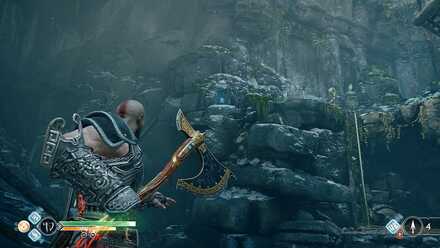 Just before crossing the bridge, look up on your left to find the R rune on a ledge. |
| 3 | 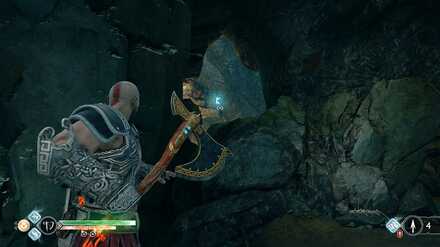 The C rune is found just past the bridge. Cross over to the other side and look at the hole on your right. |
Nornir Chest #2
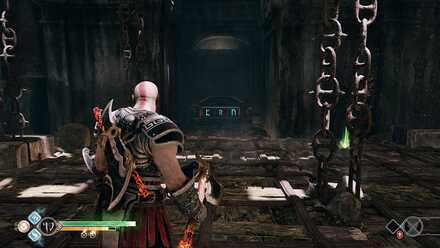
Found above the spiked room past Brok's shop. You have to get to the other side first and lower the spiked ceiling to reach the Nornir Chest. This chest contains a Horn of Blood Mead.
| 1 | 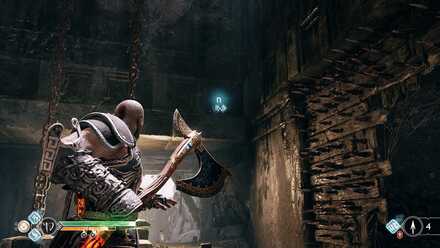 While on the platform, face the exit of the room and look up to find the N rune. |
|---|---|
| 2 | 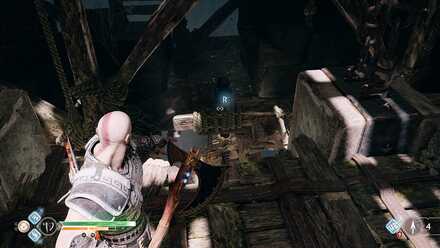 Hit the board on your left to raise the spiked platform high enough to get a clear view of the R rune. |
| 3 | 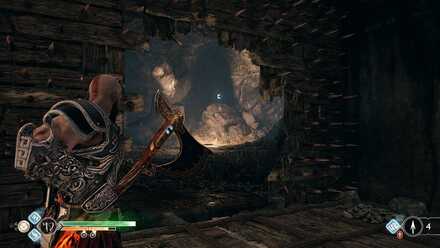 The C rune is found along the narrow path in front of the chest. You can hit the rune with your axe from the opening on the wall. |
Nornir Chest #3
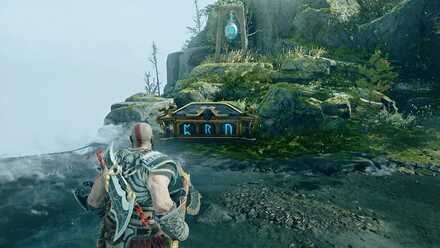
This chest is found in the area where you fought Brenna Daudi, by the waterfall. You have to hit all three bell runes quickly to unlock it and obtain the Idunn Apple inside.
| 1 | 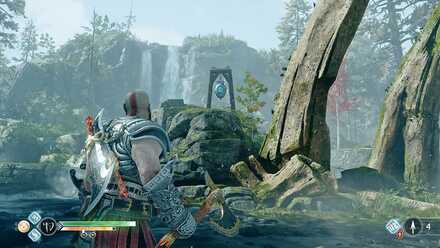 The C rune is found behind one of the ribs in the middle. Hit it with your axe from as far as you can so you can reach the other bells quickly. |
|---|---|
| 2 | 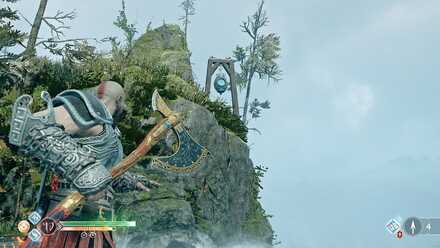 Next, hit the R rune, which is found on the left of the chest, above the waterfall. |
| 3 | 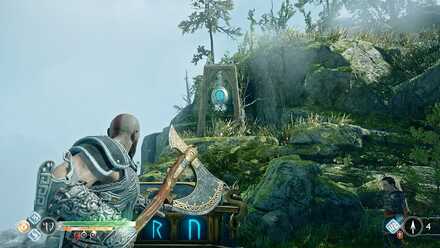 Lastly, hit the N rune behind the chest. |
Nornir Chest #4
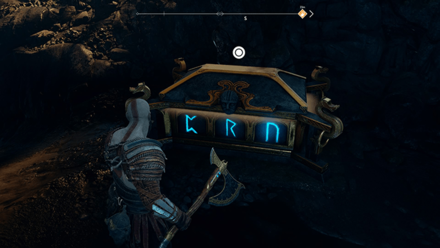
At the start of A New Destination quest, head down to the area until you find a large box. Turn left and hit the two crystals with light arrows to form a path leading towards the Nornir Chest. You'll obtain a Horn of Blood Mead from the chest.
| 1 | 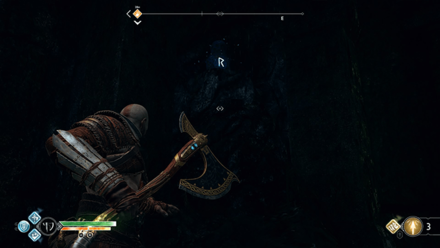 Turn around and head straight to the light path and take a Shattering Crystal. Throw it towards the World Tree Sap and have Atreus shoot a Shock Arrow at it. Climb up the ledge and find the R rune near the sealed door. |
|---|---|
| 2 | 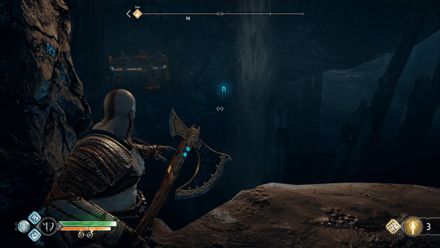 Return to where you pushed the large box and turn left to find the N rune behind a waterfall. |
| 3 | 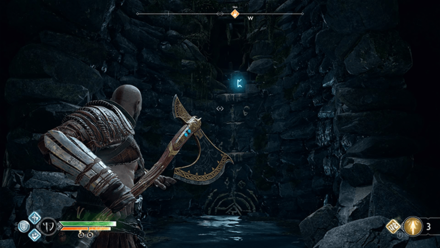 Head back to the elevator and destroy the World Tree Sap nearby. Defeat the Draugr and the Revenant that appear. Head inside and find the C rune on the wall of the well. |
Nornir Chest #5

At the start of The Black Rune quest, climb up the well and head down the path. Look for a golden chain in the area and climb up to find a Nornir Chest with no visible runes. This chest contains an Idunn Apple.
| 1 |  Climb down the golden chain and head left to find a sand bowl. |
|---|---|
| 2 |  Climb up the golden chain again and head to the cliff overlooking the runes. Head back to the sand bowl to solve the puzzle. Loot the chest to obtain a Storm of the Elks Runic Summon. |
| 3 |  Head to the right side of the arch and grab the Winds of Hel and transfer it to the left side. |
| 4 |  Head back to the cliff and grab the Winds of Hel and transfer it to the fallen mechanism. |
| 5 |  Hit the spinning mechanism so that it shows a flipped ᛒ rune above and a ˄˄ rune below. |
| 6 |  Grab the Winds of Hel on the fallen mechanism, while it's showing a ⌄⌄ rune, and transfer it to the orb above the Nornir Chest. |
The River Pass Legendary Chest Locations
Legendary Chest #1
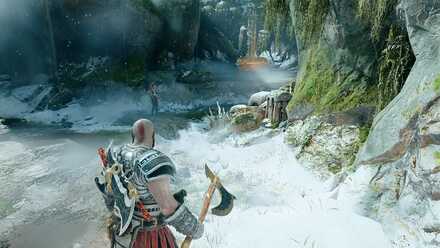
Found just above the first area of The River Pass. You'll spot this chest on your right before reaching the bridge. Atreus will also point it out as you pass by so it's hard to miss.
Legendary Chest #2
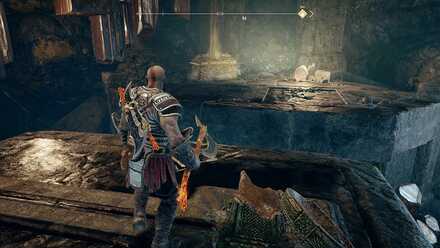
You'll pass by this legendary chest as you progress normally through The Path to the Mountain. The chest is near the dock, found just after you exit the Witch's house and before you first reach the Shores of Nine.
Legendary Chest #3
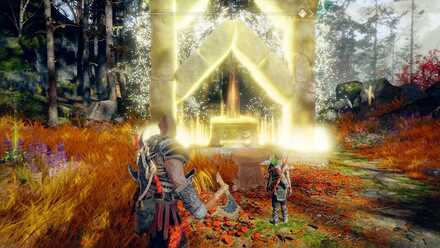
Once you return to the Witch's house with Mimir's head, you can check the right side of the turtle to find a sand bowl and a legendary chest covered by stones. You'll have to solve the riddle of the sand bowl first to clear the rocks and open the chest.
| 1 | 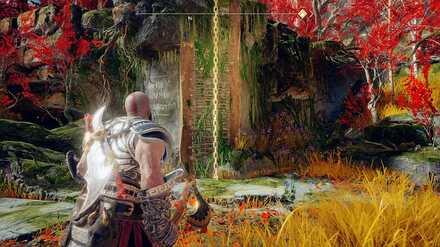 Climb the chain in front of the turtle and follow the path until your reach its end. |
|---|---|
| 2 | 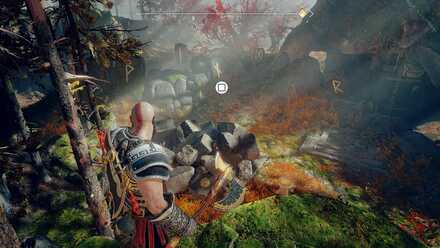 Have Atreus read the runes written on the rocks below then run back to the sand bowl to write the answer and free the chest from the stones. |
Legendary Chest #4
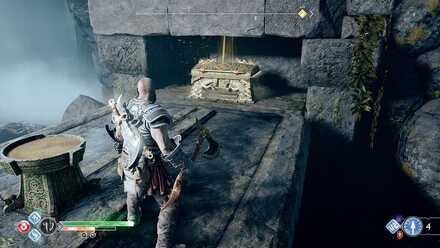
This chest is found inside the Witch's cave and you'll only be able to access it after obtaining the Shock Arrows. Atreus must solve the sand bowl riddle found above the chest to lower the platform.
Take note that if you return here without the Blades of Chaos to remove the Hel's bramble, you'll have to destroy the planks on your left instead, give Atreus a boost, and use the pile of rocks further to your left to help him reach the sand bowl.
| 1 | 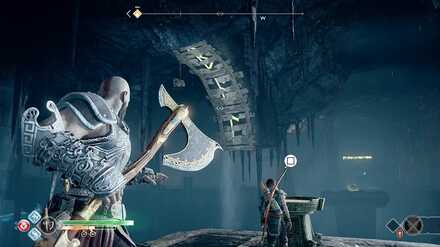 Look above the sand bowl and break the wooden planks covering the runes and have Atreus write it on the sand bowl. |
|---|
God of War Related Guides
Author
The River Pass Region Summary and List of Collectibles
improvement survey
03/2026
improving Game8's site?

Your answers will help us to improve our website.
Note: Please be sure not to enter any kind of personal information into your response.

We hope you continue to make use of Game8.
Rankings
- We could not find the message board you were looking for.
Gaming News
Popular Games

Genshin Impact Walkthrough & Guides Wiki

Honkai: Star Rail Walkthrough & Guides Wiki

Umamusume: Pretty Derby Walkthrough & Guides Wiki

Pokemon Pokopia Walkthrough & Guides Wiki

Resident Evil Requiem (RE9) Walkthrough & Guides Wiki

Monster Hunter Wilds Walkthrough & Guides Wiki

Wuthering Waves Walkthrough & Guides Wiki

Arknights: Endfield Walkthrough & Guides Wiki

Pokemon FireRed and LeafGreen (FRLG) Walkthrough & Guides Wiki

Pokemon TCG Pocket (PTCGP) Strategies & Guides Wiki
Recommended Games

Diablo 4: Vessel of Hatred Walkthrough & Guides Wiki

Cyberpunk 2077: Ultimate Edition Walkthrough & Guides Wiki

Fire Emblem Heroes (FEH) Walkthrough & Guides Wiki

Yu-Gi-Oh! Master Duel Walkthrough & Guides Wiki

Super Smash Bros. Ultimate Walkthrough & Guides Wiki

Pokemon Brilliant Diamond and Shining Pearl (BDSP) Walkthrough & Guides Wiki

Elden Ring Shadow of the Erdtree Walkthrough & Guides Wiki

Monster Hunter World Walkthrough & Guides Wiki

The Legend of Zelda: Tears of the Kingdom Walkthrough & Guides Wiki

Persona 3 Reload Walkthrough & Guides Wiki
All rights reserved
"PlayStation" and the "PS" Family logo are registered trademarks of Sony Computer Entertainment Inc. PS3 is a trademark of Sony Interactive Entertainment Inc. © 2017 Sony Interactive Entertainment LLC. God of War is a trademark of Sony Interactive Entertainment LLC.
The copyrights of videos of games used in our content and other intellectual property rights belong to the provider of the game.
The contents we provide on this site were created personally by members of the Game8 editorial department.
We refuse the right to reuse or repost content taken without our permission such as data or images to other sites.





![Monster Hunter Stories 3 Review [First Impressions] | Simply Rejuvenating](https://img.game8.co/4438641/2a31b7702bd70e78ec8efd24661dacda.jpeg/thumb)


