This survey will take about 1 minute.
Your answers will help us to improve our website.
New Pokemon Snap (Switch)
List of Durice Lentalk Requests
This is a guide to all Lentalk Requests available in the Durice Area of New Pokemon Snap (Pokemon Snap 2) for the Nintendo Switch. Read on to learn how to complete Durice LenTalk Requests, unlock conditions, as well as rewards.
List of Contents
Durice Lentalk Requests
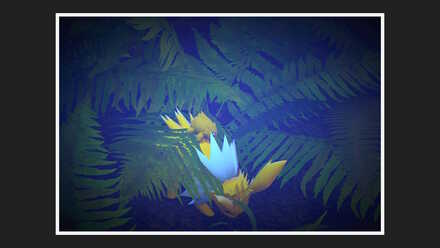
Snowfields (Day)
| Request Name | How to Clear |
|---|---|
 Frolicking Furret Frolicking Furret
Research Lv. 2 or higher |
Throw an Illumina Orb at the Crystabloom to the right of the course. When the Furret jumps out and runs into the other nearby hole, toss Fluffruit to have it come out. Play the melody and take a picture of its face.
Frolicking Furret Walkthrough |
 Snowfield Hide-and-Seek Snowfield Hide-and-Seek
Research Lv. 3 |
Throw a Fluffruit at the snow-capped hill in the beginning on the left and take a picture of the Cubchoo that emerges.
Snowfield Hide-and-Seek Walkthrough |
 Duel on the Snowfields Duel on the Snowfields
Research Lv. 2 |
Throw a fluffruit at the Beartic chasing a Dewgong, then snap a photo of that Beartic roaring at Mamoswine.
Duel on the Snowfields Walkthrough |
 Message from a Friend Message from a Friend
Research Lv. 3 |
Lead the Weavile to the tree with markings on it with Fluffruit. Throw an Illumina Orb at Weavile and the tree, then snap a photo of it reading the markings.
Message from a Friend Walkthrough |
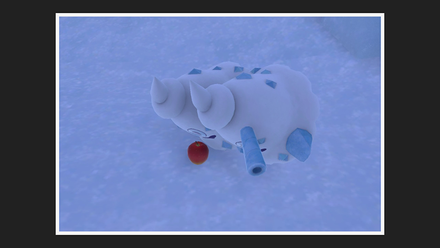
 Dig Here, Swinub! Dig Here, Swinub!
Research Lv. 3 |
Use Fluffruit to lead the Swinub at the end of the course near the Crystalbloom. Throw an Illumina Orb at the Crystalbloom, then take a picture when Swinub rides the hot spring.
Reward: Emote 10 Dig Here, Swinub! Walkthrough |
 The Wrath of Mamoswine The Wrath of Mamoswine
Research Lv. 3 |
Get the Weavile to read the markings on the tree. Hit the Swinup atop the hill with a Fluffruit, then throw an Illumina Orb at the Weavile who chase after it. Get a photo of the Mamoswine counterattacking.
The Wrath of Mamoswine Walkthrough |
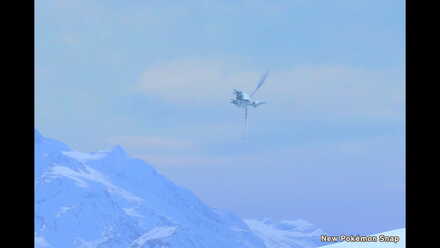 Skarmory's Flying Show Skarmory's Flying Show
Research Lv. 1 or higher |
Snap a photo of Skarmory spinning in the air!
Skarmory's Flying Show Walkthrough |
 Find that Perfect Timing Find that Perfect Timing
Research Lv. 1 or higher |
Get a photo of Sandslash as it burrows into the snow.
Reward: Snow 2 Find that Perfect Timing Walkthrough |
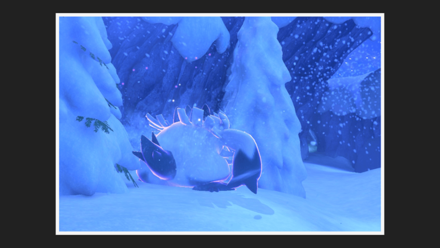
 In the Blizzard In the Blizzard
Research Lv. 3 |
Take the branching path, and get a photo of the three Snoms. Throw an illumina orb at the crystabloom to make a Frosmoth appear, then hit it with an illumina orb. When all four Snoms become visible at once, take a picture of them together.
In the Blizzard Walkthrough |
 It Jumped Out at Me! It Jumped Out at Me!
Research Lv. 3 |
Take the branching path. Look to the left side, and use Scan around the third tree, and you should see a ??? in the background. After the third tree, the Crabominable you scanned will jump out. Get a photo of it jumping or landing.
It Jumped Out at Me! Walkthrough |
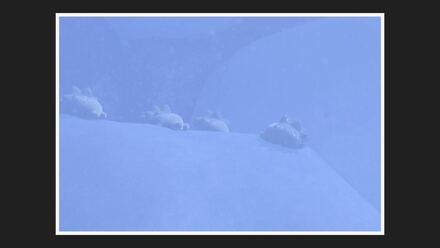
 Fidgety Snorunt Fidgety Snorunt
Research Lv. 3 |
Throw a Fluffruit at an icicle on the ceiling in the cave to bring it down. Take a picture of the Snorunt getting excited at seeing this.
Fidgety Snorunt Walkthrough |
 Icy Armor Icy Armor
Research Lv. 3 |
Throw a fluffruit at the Glalie after it starts moving, then take a picture when its Ice Armor activates.
Icy Armor Walkthrough |
 Icy Playground Icy Playground
Research Lv. 3 |
Take a photo of Spheal being tossed by Dewgong out of the water in the second branching path of Snowfields (Day).
Reward: Music Note 2 Icy Playground Walkthrough |
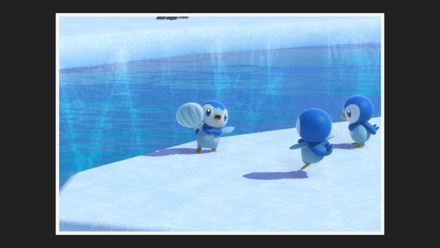 Treasure-Hunting Troupe Treasure-Hunting Troupe
Research Lv. 3 |
Throw an Illumina Orb at the Piplup on the smaller iceberg and take a photo of it holding up a seashell.
Reward: Effect 6 Treasure-Hunting Troupe Walkthrough |
 You Can Do It, Vanilluxe! You Can Do It, Vanilluxe!
Research Lv. 3 |
Take the branching paths and head to the ice cave. Play the Melody near Glalie and throw an Illumina Orb at it. Near the exit point, look left throw a Fluffruit in the hole for Vanilluxe to emerge. Take a photo of Vanilluxe eating the Fluffruit.
You Can Do It, Vanilluxe! Walkthrough |
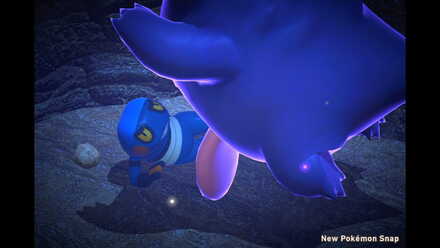
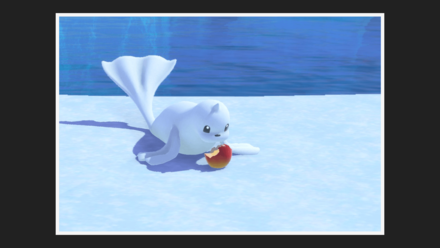 Dining Dewgong Dining Dewgong
Research Lv. 2 |
Capture a photo of Dewgong eating a Fluffruit.
Dining Dewgong Walkthrough |
 Gazing Down on the Snowfields Gazing Down on the Snowfields
Research Lv. 3 |
Before going downward into the cave, look for a Glaceon on top of the hill and snap a picture of it.
Gazing Down on the Snowfields Walkthrough |
Snowfields (Day) Walkthrough: List of Pokemon and How to Unlock
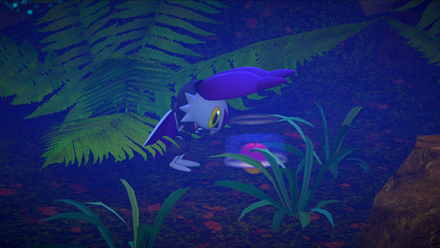
Snowfields (Night)
| Request Name | How to Clear |
|---|---|
 Howling at the Heavens Howling at the Heavens
Research Lv. 1 or higher |
Throw an Illumina Orb at the Furret on the top of the hill. After it is chased by the Mightyena, take a picture of the Mightyena howling at the sky when it goes to the top of the hill.
Reward: Phil's Bag Howling at the Heavens Walkthrough |
 Proud Warrior Proud Warrior
Research Lv. 2 |
Get Braviary to land near the Furret hole and feed it Fluffruit.
Reward: Now that's a surprise! Braviary actually ate your fluffruit! You never fail to impress me! Proud Warrior Walkthrough |
 Whiteout Whiteout
Research Lv. 2 |
Capture a photo of Abomasnow creating a blizzard.
Reward: Design 8 Whiteout Walkthrough |
 A Safe Place to Sleep A Safe Place to Sleep
Research Lv. 2 |
Enter the cave and peek through the first hole on the right. Take a photo of the Vulpix sleeping there.
Reward: Photo Frame 7 A Safe Place to Sleep Walkthrough |
 Present for a Friend Present for a Friend
Research Lv. 2 |
Enter the cave and throw Fluffruit in front of the second hole to the right to bring Delibird out. After it puts the fluffruit into its bag, play the Melody, which will cause it to pull out a fluffruit from its bag. Snap a photo of this pose.
Present for a Friend Walkthrough |
 Like Powder Snow Like Powder Snow
Research Lv. 1 or higher |
Hit any of the 3 Frosmoth clinging to walls with a fluffruit. After you exit the cave, turn right and throw an illumina orb at any of the Frosmoth there, then capture a picture of them using blizzard.
Like Powder Snow Walkthrough |
 Beyond the Wall of Snow Beyond the Wall of Snow
Research Lv. 2 |
Capture a photo of Froslass that appears after an Abomasnow creates a blizzard.
Beyond the Wall of Snow Walkthrough |
 With Their Powers Combined With Their Powers Combined
Research Lv. 2 |
Take the branching path, then the second branching path into the ice cave. Wake up the Jynx with fluffruit, and lure it to the crystabloom. Once it is there, throw an illumina orb at the crystabloom, and get a photo containing the two Jynx as they raise their arms.
With Their Powers Combined Walkthrough |
 A Sheer Face A Sheer Face
Research Lv. 2 |
Take the branching paths and go past the ice cave with the Jynx. After exiting the cave, an Avalugg will climb from the water to the land. Aim upward and throw a fluffruit on its back to make it raise its front legs and growl. Snap a photo of it doing this.
A Sheer Face Walkthrough |
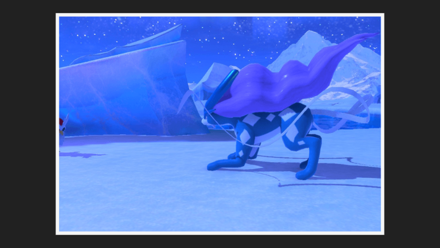
 Shades of Aurorus Shades of Aurorus
Research Lv. 2 |
Follow the steps for the With Their Powers Combined request to make the two Jynx summon an Aurorus from the ice. Snap a photo of the Aurorus when it appears. Alternatively, feed Aurorus two fluffruit and snap a picture after it changes color.
Reward: Effect 6 Shades of Aurorus Walkthrough |
 Wish Upon a Shining Sky Wish Upon a Shining Sky
Research Lv. 2 |
Capture a photo of Suicune growling at a Delibird
Reward: Aurora Wish Upon a Shining Sky Walkthrough |
Snowfields (Night) Walkthrough: List of Pokemon and How to Unlock
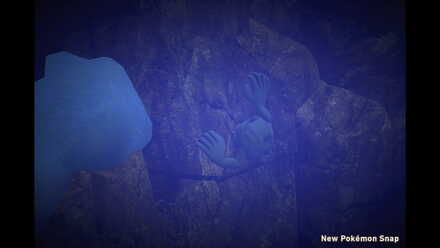
Cave
| Request Name | How to Clear |
|---|---|
 Crobat Touches Down Crobat Touches Down
Research Lv. 1 or 3 |
Feed Crobat a Fluffruit while it is on the ground.
Crobat Touches Down Walkthrough |
 Joltik Adjoined Joltik Adjoined
Research Lv. 3 |
Lure Joltik to Jolteon and let it ride on its back.
Joltik Adjoined Walkthrough |
 Take a Good, Hard Look Take a Good, Hard Look
Research Lv. 2 or higher |
Take a photo of Geodude climbing the cave wall.
Take a Good, Hard Look Walkthrough |
 Gem Royalty Gem Royalty
Research Lv. 3 |
At the entrance of the last area, throw Illumina Orbs behind the leftmost rock formation for a Vivillon to appear. Restart if it doesn't show up. Next, throw Illumina Orbs at the Carbink on the ruins area. Play the melody for Diancie to show up and throw an Illumina Orb at it. Take a photo of the Carbink reacting to Diancie's pink energy attack.
Gem Royalty Walkthrough |
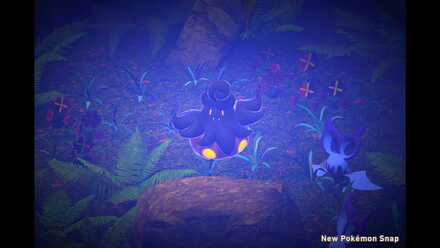
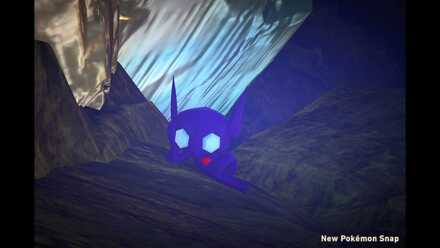
 Gengar the Prankster Gengar the Prankster
Research Lv. 1 or higher |
Lure Gengar to the sleeping Croagunk with Illumina orbs then snap a photo of Gengar scaring Croagunk.
Gengar the Prankster Walkthrough |
 Noibat's Refined Palate Noibat's Refined Palate
Research Lv. 2 or higher |
Snap a photo of Noibat before it eats a fluffruit.
Reward: Glasses 4 Noibat's Refined Palate Walkthrough |
 The Biggest Pumpkaboo of All The Biggest Pumpkaboo of All
Research Lv. 3 |
Throw Illumina orbs at the 4 Pumpkaboos throughout the course in order to encounter and snap a photo of the Super Size Pumpkaboo in the final area after the giant crystals.
Reward: Compass The Biggest Pumpkaboo of All Walkthrough |
 Croagunk Chorus Croagunk Chorus
Research Lv. 3 |
Hit the three Croagunk with fluffruits in the correct order while playing the Melody to make them float.
Reward: Professor Mirror (Smiling) Croagunk Chorus Walkthrough |
 Drifloon Puffed Up Drifloon Puffed Up
Research Lv. 3 |
Make Drifloon puff up by tossing an Illumina Orb at the Crystabloom.
Reward: Todd's Wristband Drifloon Puffed Up Walkthrough |
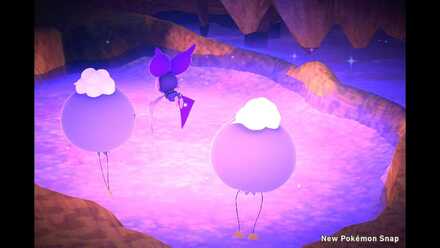
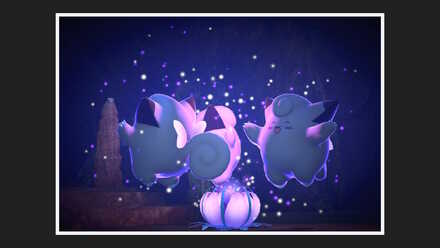 Clefairy by Moonlight Clefairy by Moonlight
Research Lv. 3 |
Light the crystabloom where three Clefairy gather then use Melody to make them dance in the air.
Clefairy by Moonlight Walkthrough |
 Sound Asleep Sound Asleep
Research Lv. 2 or higher |
Snap a photo of the sleeping Sableye on the route that leads to the giant crystals.
Reward: Glasses 5 Sound Asleep Walkthrough |
 Anger Outlet Anger Outlet
Research Lv. 1 or 3 |
Snap a photo of Ramparados headbutting Gengar's portal.
Reward: Speech Bubble 6 Anger Outlet Walkthrough |
 Hydreigon Berserk! Hydreigon Berserk!
Research Lv. 3 |
Take a photo of Hydreigon eating Fluffruit from the water.
Hydreigon Berserk! Walkthrough |
 Having a Goodra Time Having a Goodra Time
Research Lv. 3 |
Light up the crystabloom near Goodra and snap a photo of Goodra celebrating.
Reward: Rita (Heart-Eyes) Having a Goodra Time Walkthrough |
 Look My Way Look My Way
Research Lv. 3 |
Have Diancie calm Mawile then throw a fluffruit at it.
Reward: Rita's Bag Look My Way Walkthrough |
 Fur Standing On End Fur Standing On End
Research Lv. 3 |
Lure Jolteon to Pumpkaboo and make Jolteon use Discharge with an Illumina orb.
Fur Standing On End Walkthrough |
 Myth of the Cave Myth of the Cave
Research Lv. 3 |
Capture a photo of Diancie raising its hands up with its eyes closed.
Reward: Accessory 10 Myth of the Cave Walkthrough |
Cave Walkthrough: List of Pokemon and How to Unlock
Illumina Spot
| Request Name | How to Clear |
|---|---|
 Steelix Takes a Breather Steelix Takes a Breather
Research Lv. 2 or higher |
Throw Illumina Orbs at the three Noibats near the starting point. At the near end of the course, Steelix will emerge and curl into a ball. Take its photo sleeping to complete the request.
Steelix Takes a Breather Walkthrough |
Illumina Spot (Outaway Cave) Walkthrough: List of Pokemon and How to Unlock
New Pokemon Snap Related Guides

LenTalk Guide and List of Requests
| Requests By Area | ||
|---|---|---|
| Florio | Belusylva | Maricopia |
| Voluca | Durice | Aurus |
Author

List of Durice Lentalk Requests
Please participate in our site
improvement survey
03/2026
improvement survey
03/2026
Would you assist in
improving Game8's site?
improving Game8's site?

×
We are listening to our users' valuable opinions and discussing how to act on them.
The information collected through this survey will be used for the purpose of improving our services. In addition, the information will only be disclosed a part of a statistic in a format that will not allow identification of personal information.
Begin Survey
Not Now
×
Please rate each item regarding Game8.co's Advertisements.
Amount of Ads
Very Dissatisfied
Somewhat Dissatisfied
Fine
Somewhat Satisfied
Highly Satisfied
Placement of Ads
Timing of Ad Display
Ad Loading Speed
Safeness of Ads
Content of Ads
×
Please rate each item regarding Game8.co's Quality of Articles.
Amount of information
Very Dissatisfied
Somewhat Dissatisfied
Fine
Somewhat Satisfied
Highly Satisfied
Frequency of updates
Speed of new information
Accuracy of articles
Understandibility of articles
Readability of sentences
×
Please rate each item regarding Game8.co's Usability of the Site.
Ease of finding information
Very Dissatisfied
Somewhat Dissatisfied
Fine
Somewhat Satisfied
Highly Satisfied
Loading Speed
Use of Color
Font Size
Visibility of Images
Easy to Understand Layout
×
Please rate each item regarding Game8.co's Message Boards, Comments.
Ease of Writing
Very Dissatisfied
Somewhat Dissatisfied
Fine
Somewhat Satisfied
Highly Satisfied
Readability
Ease in Finding Information
Comment Quality
Comment Quantity
Admin Response
×
Please rate each item regarding Game8.co's Site's new design.
Please rate our site's new design
Very Dissatisfied
Somewhat Dissatisfied
Fine
Somewhat Satisfied
Highly Satisfied
Do you think that the website's design change makes the site easier to use?
Has the new design made it easier for you to find information on the site?
Has the new design improved the overall visual appeal of the site?
How would you rate your overall satisfaction with the new design of the site?
×
How likely are you to recommend Game8 to someone you know?
Very Unlikely
0
1
2
3
4
5
6
7
8
9
10
Very Likely
If you have other opinions regarding potential improvement to the website, please share them with us. We would appreciate your honest opinion.
Note: This is a free response section, so you can proceed without entering anything.
Note: Please be sure not to enter any kind of personal information into your response.
Note: Please be sure not to enter any kind of personal information into your response.
×
Thank You
×
Thank you for participating in our survey! Your answers will help us to improve the quality of our website and services.
We hope you continue to make use of Game8.
We hope you continue to make use of Game8.
Close
Rankings
- We could not find the message board you were looking for.


Popular Games

Genshin Impact Walkthrough & Guides Wiki
Honkai: Star Rail Walkthrough & Guides Wiki
Umamusume: Pretty Derby Walkthrough & Guides Wiki
Pokemon Pokopia Walkthrough & Guides Wiki
Resident Evil Requiem (RE9) Walkthrough & Guides Wiki
Monster Hunter Wilds Walkthrough & Guides Wiki
Wuthering Waves Walkthrough & Guides Wiki
Arknights: Endfield Walkthrough & Guides Wiki
Pokemon FireRed and LeafGreen (FRLG) Walkthrough & Guides Wiki
Pokemon TCG Pocket (PTCGP) Strategies & Guides Wiki


Recommended Games
Diablo 4: Vessel of Hatred Walkthrough & Guides Wiki
Fire Emblem Heroes (FEH) Walkthrough & Guides Wiki
Yu-Gi-Oh! Master Duel Walkthrough & Guides Wiki
Super Smash Bros. Ultimate Walkthrough & Guides Wiki
Pokemon Brilliant Diamond and Shining Pearl (BDSP) Walkthrough & Guides Wiki
Elden Ring Shadow of the Erdtree Walkthrough & Guides Wiki
Monster Hunter World Walkthrough & Guides Wiki
The Legend of Zelda: Tears of the Kingdom Walkthrough & Guides Wiki
Persona 3 Reload Walkthrough & Guides Wiki
Cyberpunk 2077: Ultimate Edition Walkthrough & Guides Wiki


All rights reserved
©2021 Pokémon. ©1995–2021 Nintendo / Creatures Inc. / GAME FREAK inc. ©1999 Nintendo / HAL Laboratory, Inc. Developed by BANDAI NAMCO Studios Inc.
Pokémon and Nintendo Switch are trademarks of Nintendo. © 2021 Nintendo.
The copyrights of videos of games used in our content and other intellectual property rights belong to the provider of the game.
The contents we provide on this site were created personally by members of the Game8 editorial department.
We refuse the right to reuse or repost content taken without our permission such as data or images to other sites.