This survey will take about 1 minute.
Your answers will help us to improve our website.
New Pokemon Snap (Switch)
Ruins Walkthrough: List of Pokemon and How to Unlock
This guide will cover all of the Pokemon that can be found in Ruins of Ruins of Remembrance in New Pokemon Snap (Pokemon Snap 2) for the Nintendo Switch, as well as how to unlock the level. Locations for all Pokemon in Ruins, as well as alternate routes, requests, crystabloom and ancient ruins locations can be found here!
List of Contents
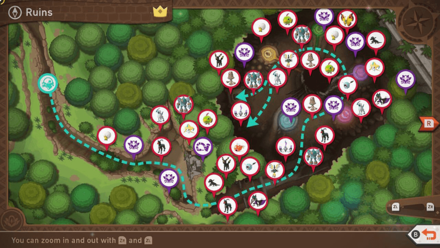
Ruins Map and How to Unlock
| How to Unlock | Unlocked after reaching Research Level 1 on Illumina Spot (Outaway Cave). |
|---|
Expedition Points Per Level
| Lv. 1→Lv. 2 | 40,000 |
|---|---|
| Lv. 2→Lv. 3 | 50,000 |
| Lv. 3→Max Lv. | 40,000 |
Ruins List of Pokemon
List of Pokemon
| Pokemon Minimum Research Level |
|||
|---|---|---|---|
 Houndoom Houndoom
Lv. 1 |
 Eldegoss Eldegoss
Lv. 1 |
 Natu Natu
Lv. 1 |
 Salandit Salandit
Lv. 1 |
 Noivern Noivern
Lv. 1 |
 Woobat Woobat
Lv. 1 |
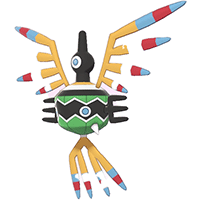 Sigilyph Sigilyph
Lv. 1 |
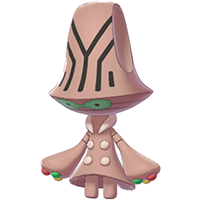 Beheeyem Beheeyem
Lv. 1 |
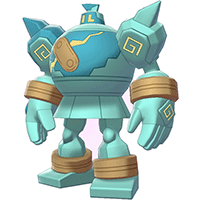 Golurk Golurk
Lv. 1 |
 Jirachi Jirachi
Lv. 1 |
 Absol Absol
Lv. 2 |
 Chandelure Chandelure
Lv. 2 |
 Vivillon Vivillon
Lv. 3 |
 Magikarp Magikarp
Lv. 3 |
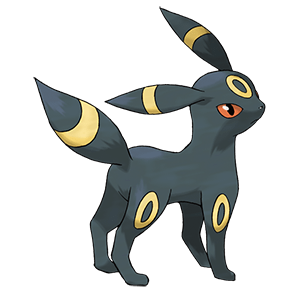 Umbreon Umbreon
Lv. 3 |
|
How to Raise Your Research Level
Pokemon Locations
| Pokemon | Where to Find |
|---|---|
|
Vivillon
|
|
|
Magikarp
|
|
|
Houndoom
|
|
|
Eldegoss
|
|
|
Natu
|
|
|
Salandit
|
|
|
Noivern
|
|
|
Sigilyph
|
|
|
Beheeyem
|
|
|
Golurk
|
|
|
Absol
|
|
|
Woobat
|
|
|
Chandelure
|
|
|
Jirachi
|
|
|
Umbreon
|
|
Ruins Alternate Routes
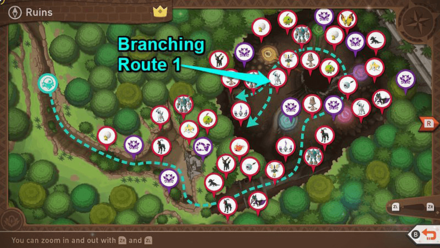
Alternate Route 1 - Elevator of Light
| Research Level | Lv. 2 |
|---|
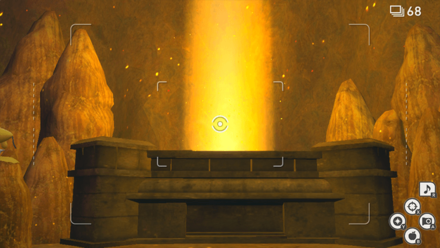
The branching route in Ruins requires following some steps. You need to light all six crystablooms near the statues inside the ruins to enter this branching route.
If done correctly, a pillar of light appears near the exit point and you will automatically head to this path and unlock the Illumina Spot at Outaway Cave.
Ruins Ancient Ruins
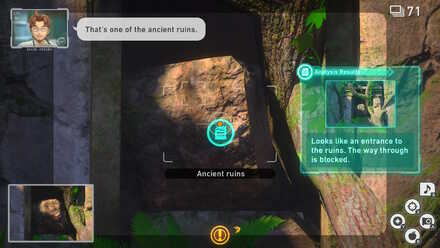
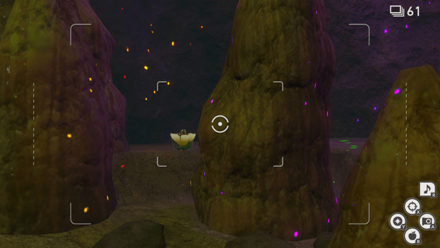
You can find the ancient ruins in the area with the flying Eldegoss near the beginning of this course.
Ruins Requests
| Request Name | How to Clear |
|---|---|
 Houndoom's Breather Houndoom's Breather
Research Lv. 2 or higher |
Wait for the Houndoom just to the left of the ruins to stretch and yawn, then snap a picture of it doing so.
Houndoom's Breather Walkthrough |
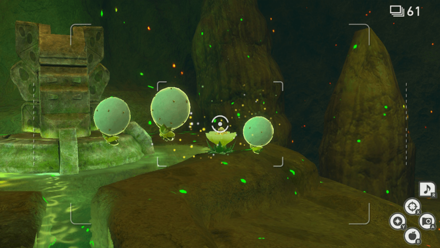
 Blowing Seeds Blowing Seeds
Research Lv. 3 |
Throw a fluffruit at the ruins to bring out Natu. Hit it with a fluffruit after the Eldegoss lands on the ground. When Natu runs toward Eldegoss, get a photo of Eldegoss casting its seeds.
Blowing Seeds Walkthrough |
 Just Perching Here Just Perching Here
Research Lv. 1 |
Throw a fluffruit at the ancient ruins. Natu will come out and sit on top of the Fluffruit. Snap a photo of it sitting on the fruit.
Reward: Rita's Hairpin Just Perching Here Walkthrough |
 A White Pokemon A White Pokemon
Research Lv. 3 |
Feed a fluffruit to the Houndoom a little after the start. Play the Melody for the Absol on the cliff. When it comes down, give it a fluffruit and snap a photo.
A White Pokemon Walkthrough |
 Salandit's Battle Plan Salandit's Battle Plan
Research Lv. 3 |
Throw a fluffruit onto the Salandit claw marks in the final room. Get a picture of Salandit attacking the Noivern that glides in to try and take the fruit.
Reward: Effect 8 Salandit's Battle Plan Walkthrough |
 Gracefully Gliding Gracefully Gliding
Research Lv. 1 or higher |
Throw a fluffruit onto the Salandit claw marks in the final room. Get a picture of Noivern as it glides in.
Reward: Rita's Shoe Gracefully Gliding Walkthrough |
 The Mysterious Heart The Mysterious Heart
Research Lv. 1 or higher |
Throw 5 fluffruit into the well so that Woobat emerge and fly forward. Snap a photo of them stopped at the wall with heart markings on it in the next room.
Reward: Todd's Camera The Mysterious Heart Walkthrough |
 A Break between Patrols A Break between Patrols
Research Lv. 3 |
When entering the large room with the stone statue in the center, look to the left, and get a photo of the sleeping Sigilyph.
Reward: Todd (Smiling) A Break between Patrols Walkthrough |
 Drowsing Beheeyem Drowsing Beheeyem
Research Lv. 2 or higher |
Take a picture of the Beheeyem that looks like it is sleeping in the air behind the Golurk.
Reward: Star 5 Drowsing Beheeyem Walkthrough |
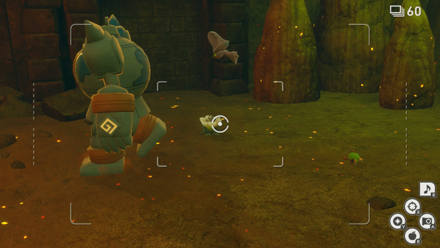
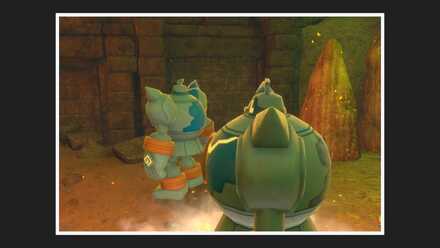 Two Golurk Two Golurk
Research Lv. 2 or higher |
Throw fluffruit at the two Beheeyem. Then throw an illumina orb at the Golurk near the Volcarona statue. When another Golurk flies in, get a picture of them both (focused on the flying one)
Reward: Character: Phil Two Golurk Walkthrough |
 Groovy Chandelure Groovy Chandelure
Research Lv. 3 |
Throw an illumina orb at the Chandelure you encounter in the large room of the ruins. When you encounter the same Chandelure later along the path, feed it a fluffruit. After it finishes eating, throw an illumina orb at it and play the melody, then snap a photo of it dancing.
Groovy Chandelure Walkthrough |
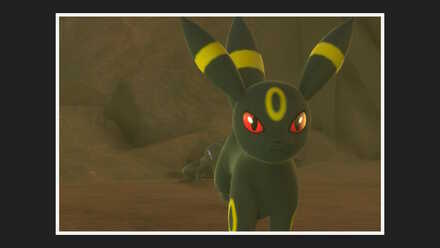 Fading into the Shadows Fading into the Shadows
Research Lv. 3 |
After entering the ruins, play the melody to make the Noivern move. When it does, throw a fluffruit to the left to make Salandit come out. When it calls Umbreon over, snap a picture of Umbreon.
Fading into the Shadows Walkthrough |
 Myth of the Ruins Myth of the Ruins
Research Lv. 2 or higher |
Capture a photo of Jirachi in a praying pose.
Myth of the Ruins Walkthrough |
LenTalk Guide and List of Requests
Ruins Crystablooms
| Crystabloom | Where to Find |
|---|---|
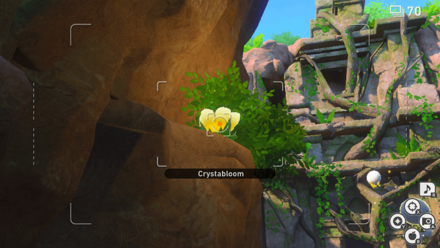 |
You can find this Crystabloom to your left as you approach the Ancient Ruins. |
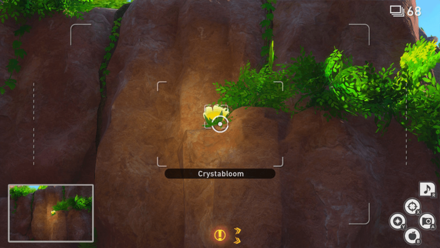 |
Near the Ancient Ruins, look above and to your right to find this Crystabloom on a cliff. |
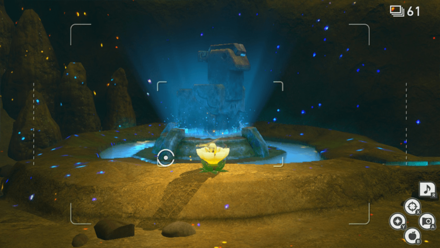 |
Inside the ruins, you can find this Crystabloom next to the Meganium statue. |
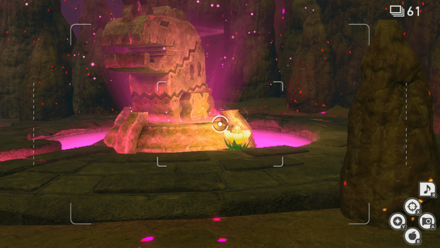 |
This Crystabloom is found beside the Wishiwashi statue inside the ruins. |
 |
You can find this Crystabloom in between the two rocks near the statue in the ruins. |
 |
You need to throw Illumina Orbs at the Eldegoss to move them away and reveal the Crystabloom near the Volcarona statue. |
 |
Throw an Illumina Orb at the Golurk to move it away and reveal the Crystabloom. |
 |
You can find this Crystabloom in the middle of the area with the other Crystablooms. |
New Pokemon Snap Levels

| Florio Nature Park | |||||
|---|---|---|---|---|---|
| Park (Day) | Park (Night) | Illumina Spot | |||
| Founja Jungle | |||||
| Jungle (Day) | Jungle (Night) | ||||
| Sweltering Sands | |||||
| Sands (Day) | Sands (Night) | ||||
| Blushing Beach | |||||
| Beach (Day) | Beach (Night) | ||||
| Maricopia Reef | |||||
| Reef (Day) | Reef (Evening) | ||||
| Lental Seafloor | |||||
| Undersea | Illumina Spot | ||||
| Fireflow Volcano | |||||
| Volcano | Illumina Spot | ||||
| Elsewhere Forest | |||||
| Forest | Illumina Spot | ||||
| Research Camp | |||||
| Research Camp | |||||
| Shiver Snowfields | |||||
| Snowfields (Day) | Snowfields (Night) | ||||
| Outaway Cave | |||||
| Cave | Illumina Spot | ||||
| Ruins of Remembrance | |||||
| Ruins | Illumina Spot | ||||
| Secret Side Path | |||||
| Side Path (Day) | Side Path (Night) | ||||
| Mightywide River | |||||
| River (Day) | River (Night) | ||||
| Barren Badlands | |||||
| Badlands (Day) | Badlands (Night) | ||||
Comment
8  Anonymous about 2 years
The completed map shows 9 crystablooms and it’s only giving you the locations for 8. Where’s the one between jirachi and noivern?
Author

Ruins Walkthrough: List of Pokemon and How to Unlock
Please participate in our site
improvement survey
03/2026
improvement survey
03/2026
Would you assist in
improving Game8's site?
improving Game8's site?

×
We are listening to our users' valuable opinions and discussing how to act on them.
The information collected through this survey will be used for the purpose of improving our services. In addition, the information will only be disclosed a part of a statistic in a format that will not allow identification of personal information.
Begin Survey
Not Now
×
Please rate each item regarding Game8.co's Advertisements.
Amount of Ads
Very Dissatisfied
Somewhat Dissatisfied
Fine
Somewhat Satisfied
Highly Satisfied
Placement of Ads
Timing of Ad Display
Ad Loading Speed
Safeness of Ads
Content of Ads
×
Please rate each item regarding Game8.co's Quality of Articles.
Amount of information
Very Dissatisfied
Somewhat Dissatisfied
Fine
Somewhat Satisfied
Highly Satisfied
Frequency of updates
Speed of new information
Accuracy of articles
Understandibility of articles
Readability of sentences
×
Please rate each item regarding Game8.co's Usability of the Site.
Ease of finding information
Very Dissatisfied
Somewhat Dissatisfied
Fine
Somewhat Satisfied
Highly Satisfied
Loading Speed
Use of Color
Font Size
Visibility of Images
Easy to Understand Layout
×
Please rate each item regarding Game8.co's Message Boards, Comments.
Ease of Writing
Very Dissatisfied
Somewhat Dissatisfied
Fine
Somewhat Satisfied
Highly Satisfied
Readability
Ease in Finding Information
Comment Quality
Comment Quantity
Admin Response
×
Please rate each item regarding Game8.co's Site's new design.
Please rate our site's new design
Very Dissatisfied
Somewhat Dissatisfied
Fine
Somewhat Satisfied
Highly Satisfied
Do you think that the website's design change makes the site easier to use?
Has the new design made it easier for you to find information on the site?
Has the new design improved the overall visual appeal of the site?
How would you rate your overall satisfaction with the new design of the site?
×
How likely are you to recommend Game8 to someone you know?
Very Unlikely
0
1
2
3
4
5
6
7
8
9
10
Very Likely
If you have other opinions regarding potential improvement to the website, please share them with us. We would appreciate your honest opinion.
Note: This is a free response section, so you can proceed without entering anything.
Note: Please be sure not to enter any kind of personal information into your response.
Note: Please be sure not to enter any kind of personal information into your response.
×
Thank You
×
Thank you for participating in our survey! Your answers will help us to improve the quality of our website and services.
We hope you continue to make use of Game8.
We hope you continue to make use of Game8.
Close
Rankings
- We could not find the message board you were looking for.
Gaming News


![Everwind Review [Early Access] | The Shaky First Step to A Very Long Journey](https://img.game8.co/4440226/ab079b1153298a042633dd1ef51e878e.png/thumb)

![Monster Hunter Stories 3 Review [First Impressions] | Simply Rejuvenating](https://img.game8.co/4438641/2a31b7702bd70e78ec8efd24661dacda.jpeg/thumb)
Popular Games

Genshin Impact Walkthrough & Guides Wiki
Honkai: Star Rail Walkthrough & Guides Wiki
Umamusume: Pretty Derby Walkthrough & Guides Wiki
Pokemon Pokopia Walkthrough & Guides Wiki
Resident Evil Requiem (RE9) Walkthrough & Guides Wiki
Monster Hunter Wilds Walkthrough & Guides Wiki
Wuthering Waves Walkthrough & Guides Wiki
Arknights: Endfield Walkthrough & Guides Wiki
Pokemon FireRed and LeafGreen (FRLG) Walkthrough & Guides Wiki
Pokemon TCG Pocket (PTCGP) Strategies & Guides Wiki


Recommended Games
Diablo 4: Vessel of Hatred Walkthrough & Guides Wiki
Fire Emblem Heroes (FEH) Walkthrough & Guides Wiki
Yu-Gi-Oh! Master Duel Walkthrough & Guides Wiki
Super Smash Bros. Ultimate Walkthrough & Guides Wiki
Pokemon Brilliant Diamond and Shining Pearl (BDSP) Walkthrough & Guides Wiki
Elden Ring Shadow of the Erdtree Walkthrough & Guides Wiki
Monster Hunter World Walkthrough & Guides Wiki
The Legend of Zelda: Tears of the Kingdom Walkthrough & Guides Wiki
Persona 3 Reload Walkthrough & Guides Wiki
Cyberpunk 2077: Ultimate Edition Walkthrough & Guides Wiki


All rights reserved
©2021 Pokémon. ©1995–2021 Nintendo / Creatures Inc. / GAME FREAK inc. ©1999 Nintendo / HAL Laboratory, Inc. Developed by BANDAI NAMCO Studios Inc.
Pokémon and Nintendo Switch are trademarks of Nintendo. © 2021 Nintendo.
The copyrights of videos of games used in our content and other intellectual property rights belong to the provider of the game.
The contents we provide on this site were created personally by members of the Game8 editorial department.
We refuse the right to reuse or repost content taken without our permission such as data or images to other sites.
It’s in the wrong place. The crystal bloom is instead behind the Golurk between the last two statues. The Golurk has a Natu on its shoulder and to get it to move you throw an illumina orb at it.