Magna Best Team and Build
NEW: Season 2 | Refinement | Arena
✪ Tiphera: Build | Cards | Banner
☆ Tiana: Partner Guide | Banner
✪ Nine: Build | Cards | Banner
See our Endgame Mode Tier List (Season 2 Updated!)
☆ Tier Lists: Character | Partner | Cards

This is a guide for the best teams and loadout for Magna in Chaos Zero Nightmare (CZN). Learn which combatants are best to pair with Magna, as well as recommended cards, partners, and equipment.
| Magna Guides | |
|---|---|
| Team and Build | Cards and Materials |
List of Contents
Best Magna Build
| Click on a Link to Jump to a Section! | |||||||||||
|---|---|---|---|---|---|---|---|---|---|---|---|
Build Overview
※ Hover over equipments, memory fragments and cards to see effects
| Character | Partner | Equipment |
|---|---|---|

|

|
Sun-Setting Bow Attack Cards with cost 2 or higher, +30% Damage (1 per turn) Mask of Flames Increase damage dealt to Vulnerable targets by 35% Multifaceted Parallel Universe Nexus At the start of the turn, activate 1 random Initiative card in hand Refinement: If Damage is completely blocked, at the start of the next turn, increase Damage Amount of allies by 10% for 1 turn (1 time per turn) |
| Memory Fragments and Stat Priorities | ||
|
Tetra's Authority Set +12% Defense Healer's Journey Set +12% Max HP Executioner's Tool Set +25% Critical Damage |
1. Defense 2. Defense% 3. Crit Chance % 4. Crit Damage% |
|
| Cards and Epiphanies | ||
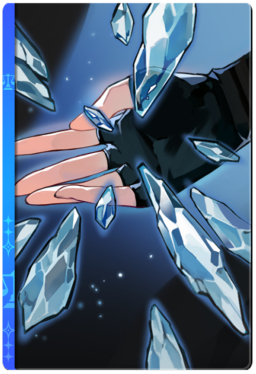 Ice Fragment 4
AP Cost: 2: Type: Tags: Unique, Lead・2 Crystallization ・At the start of the turn, 200% Defense-based Damage to all enemies Ice Fragment 4
AP Cost: 2: Type: Tags: Unique, Lead・2 Crystallization ・At the start of the turn, 200% Defense-based Damage to all enemies Ice Fragment 4
AP Cost: 2: Type: Tags: Unique, Lead・2 Crystallization ・At the start of the turn, 200% Defense-based Damage to all enemies 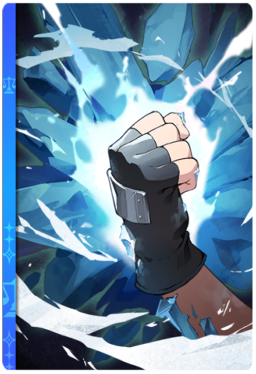 Glacial Iron Fist 1
AP Cost: 2 Type: ・450% Defense-based Damage ・50% Damage dealt as Fixed Shield (Does not exceed 20% of Max HP) Glacial Iron Fist 1
AP Cost: 2 Type: ・450% Defense-based Damage ・50% Damage dealt as Fixed Shield (Does not exceed 20% of Max HP) 

 Storm of Bitter Cold 0
AP Cost: 2 Type: Tags: Lead・When gaining Shield via an ability, 1 Counterattack |
||
| Note: Having a 1 cost reduction Divine Epiphany is recommended for Magna's Glacial Iron Fist if not running a team with Khalipe. | ||
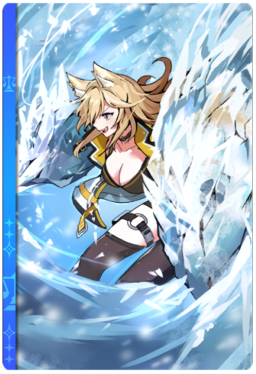
Magna is an upgrade-focused combatant that utilizes Crystallize, Vulnerable, and Counters to provide passive value to the team while generating tons of shield from her Ice Fragment buffs and Glacial Iron Fist. She's not a main DPS and is best played as a pseudo 0 card combatant to aid your team's survivability and damage.
For her Memory Fragments, our setup works best with a 2/2/2 set using Tetra's Authority to provide higher shields and damage through her cards, Executioner's Tool for more big hits with Glacial Iron Fist, and lastly, the Healer's Journey Set to scale your team's HP further. This will also give you a higher shield value from Glacial Iron Fist due to its shield limit from your total HP.
Her favored chaos zone is season 2's featured chaos zone Burning Life which houses new equipment that helps Magnda push her potential further while
| Date | Changes |
|---|---|
| 01-15-2026 | ・Build overhaul for season 2. |
| 01-15-2026 | ・Updated build overview ・Added more alternative team members ・Changed best cards ・Changed best partner to Wilhelmina ・Changed best equipment to Swamp of Judgment ・Added alternative budget equipment ・Added stat priority ・Changed best build tips and playstyle |
| 11-18-2025 | ・Added Magna build overview ・Reworked Magna's best equipment ・Revised Magna build page layout |
Magna Best Team
| Click on a Link to Jump to a Section! | |||||||||||
|---|---|---|---|---|---|---|---|---|---|---|---|
| Main DPS | Support |
|---|---|
 Khalipe Khalipe
|
 Mika Mika
|
Khalipe is one of the best combatants to bring with Magna as Khalipe can easily capitalize on Magna's kit while also benefitting from Magna's low card count deck. With Magna's AoE vulnerable stacking, Khalipe can easily dish out massive AoE damage from her empowered Vulture Ejections from Magna's vulnerable.
Magna can also activate Khalipe's celestial cards which adds another layer of options to your celestial card activation. Mika is then, the best support to add to the team as Mika can supply the team's healing and AP needs.
Alternative Team Members
| Character | Explanation |
|---|---|
 Narja Narja
|
Can replace Mika as the support as she can buff the team's defense-based damage while also providing sustain via Voracity stacks. However, she doesn't provide any ease of use for AP as her main AP conservation method is from Bottomless Hunger which lets her reduce card cost and this effect is also unsynergistic with Khalipe's Vulture Ejection. |
 Haru Haru
|
Haru can replace Khalipe as your DPS. Haru benefits massively from multiplicative damage multipliers which Magna's vulnerable can provide. |
 Nine Nine
|
Can replace Khalipse as the main DPS. Nine have multiple build setups that can excel thanks to Magna's existence. She can provide additional shields via Ironclad, activate Hew using Magna's counters, or just play naturally with her ramping Hew damage by capitalizing on Magna's vulnerable stacks. |
Magna Best Cards
| Click on a Link to Jump to a Section! | |||||||||||
|---|---|---|---|---|---|---|---|---|---|---|---|
| Card | Explanation |
|---|---|
|
Ice Fragment
|
AP Cost: 1
Type:
Tags: Lead
・4 Crystallization ・At the start of the turn, 1 Counterattack |
|
Glacial Iron Fist
|
AP Cost: 2
Type:
・450% Defense-based Damage ・50% Damage dealt as Fixed Shield (Does not exceed 20% of Max HP) |
|
Ice Wall
|
AP Cost: 2
Type:
Tags: Lead
・Counterattack applies to all enemies |
|
Frost Charge
|
AP Cost: 1
Type:
・2 Vulnerable to targets that Counterattack |
|
Storm of Bitter Cold
|
AP Cost: 2
Type:
Tags: Lead
・When gaining Shield via an ability, 1 Counterattack |
Magna's best cards are all catered to her upgrade card epiphanies. This lets her “exhaust” her deck by removing all her upgrade card from the pool while providing massive amounts of vulnerable stacks, shields, and free damage from her counters. She can also generate massive amounts of shields manually by capitalizing her own vulnerable stack with Glacial Iron Fist.
Essential Team Cards and Epiphanies
| Khalipe Cards | Explanation |
|---|---|
 Vulture Ejection Vulture Ejection
|
AP Cost: 3
Type:
Tags: Celestial, Retain
・280% Defense-based damage to all ・Gain 1 Silver Veil |
 Greatsword Aquila Greatsword Aquila
|
AP Cost: 2
Type:
・220% Defense-based Damage to all enemies ・If Vulture Ejection is in hand, 1 Silver Veil |
 Rally Rally
|
AP Cost: 1
Type:
・150% Shield ・Draw 1 Heaven card(s) ・1 Silver Veil |
| Mika Cards | Explanation |
 Source of Water Source of Water
|
AP Cost: 0
Type:
・Heal 150% ・+1 AP ・-2 Allies Stress Draw 1 Divine Epiphany is recommended. |
 Blessing of Waves Blessing of Waves
|
AP Cost: 1
Type:
Tags: Retain
・Heal 150% ・+30% Healing equal to number of AP ・Shield equal to Healing amount exceeding max |
 Tactical Analysis Tactical Analysis
|
AP Cost: 0
Type:
Tags: Unique
・2 Wave ・+50% Healing |
 Deluge Deluge
|
AP Cost: 1
Type:
Tags: Unique
・1 Wave ・At the start of the turn, gain 1 Wave |
Mika's best cards and epiphanies to get must always be the ones that give the most AP and wave stacks so that both Magna and Khalipe can use their high cost cards.
For Khalipe, you'll want to remove every card from her deck except Vulture Ejection, Greatsword Aquila, and Rally while all of them should have the ability to generate Silver Veil. This will let you unleash massive burst damage per turn.
Magna Best Partner
| Click on a Link to Jump to a Section! | |||||||||||
|---|---|---|---|---|---|---|---|---|---|---|---|
| Partner | Details |
|---|---|
 Eishlen Eishlen
|
Passive Effect: Innos's Guardian - The assigned combatant's Defense, Health, and Shield gain are increased by 8% When the assigned combatant gains Counterattack, +15% Defense-based Damage. Ego Skill: Arcane Wave - 100% Shield. At the end of the turn, retain 50% of Shield |
Eishlen is the best partner to consider for Magna. With Eishlen, you'll obtain defense, health, and shield gain which are all stats that Magna values. Her extra defense-based damage condition also works on counters as these are defense-based damage which just amplifies Magna's overall performance.
Alternative Partners
| Partner | Explanation |
|---|---|
 Wilhelmina Wilhelmina
|
Wilhelmina is a decent partner alternative. While she doesn't provide HP and shield gain, she has the highest defense stat bonus at maximum ego, amounting to 25%. Wilhelmina also strengthens your Glacial Iron Fist as enemies will always be in a vulnerable state due to your counters. |
Magna Best Memory Fragments
| Click on a Link to Jump to a Section! | |||||||||||
|---|---|---|---|---|---|---|---|---|---|---|---|
 Tetra's Authority Set Tetra's Authority Set Tetra's Authority Set +12% Defense |
 Healer's Journey Set Healer's Journey Set Healer's Journey Set +12% Max HP |
 Executioner's Tool Set Executioner's Tool Set Executioner's Tool Set +25% Critical Damage |
The best set combination for this build is Tetra's Authority for more defense stat to Magna, Executioner's Tool for more critical damage for her counterattacks and Cursed Corpse to gain 10% multiplicative damage against enemies with Agony.
You can exchange Cursed Corpse with any 2-set memory fragments such as Seth's Scarab or Healer's Journey depending on what you need for her team.
Stat Priority
| Main Stats | Recommended Substats |
|---|---|
|
Ideal: Critical Chance % Desire: Health% Imagination: Defense % |
・Defense
・Defense % ・Critical Chance % ・Critical Damage % |
The main stat and sub stats Magna needs are Defense, Critical Chance and Damage, as well as HP. She scales well with critical strikes from her big hitting multiplicative moves together with Vulnerable and amplifying her HP and Defense gives you better scaling from your shields as a whole.
Magna Best Equipment
| Click on a Link to Jump to a Section! | |||||||||||
|---|---|---|---|---|---|---|---|---|---|---|---|
| Weapon | Armor | Accessory |
|---|---|---|
| [db_element:47709&title=Sun-Setting Bow |
 Mask of Flames Mask of Flames Mask of Flames Increase damage dealt to Vulnerable targets by 35% |
 Multifaceted Parallel Universe Nexus Multifaceted Parallel Universe Nexus Multifaceted Parallel Universe Nexus At the start of the turn, activate 1 random Initiative card in hand |
Sun-Setting Bow is the best weapon that Magna can use as we'll mostly be using one to two attack cards per turn. The Bow immediately amplifies one of our Glacial Iron Fist's damage and if setup with vulnerable, lets you dish out massive damage and gain shield. Mask of Flames also helps with our total damage output as we can perpetually keep vulnerable up against enemies.
Lastly, Multifaceted Parallel Universe Nexus is still a must have due to Magna's high amounts of Lead Cards. This lets us quickly whittle down our upgrade cards for the first few turns without spending AP to easen our transition to the next turns of the fight.
Alternative Budget Equipment
| Weapon | Armor | Accessory |
|---|---|---|
 Obsidian Sword Obsidian Sword Obsidian Sword Increase damage amount by 12% |
 Lush Seaweed Armor Lush Seaweed Armor Lush Seaweed Armor When gaining Shield, gain 30% Fixed Shield |
Multifaceted Parallel Universe Nexus Multifaceted Parallel Universe Nexus At the start of the turn, activate 1 random Initiative card in hand |
If you aren't able to get the best, you can settle for these equipment that some can be found in any chaos zones inside shops. Obsidian Sword to boost the overall damage of all his attacks by 12% multiplicatively. Lush Seaweed Armor for a fixed shield gain after gaining shield from cards. However, Multifaceted Parallel Universe Nexus is a non-negotiable and should always be an accessory you should get for Magna.
Magna Build Tips and Playstyle
| Click on a Link to Jump to a Section! | |||||||||||
|---|---|---|---|---|---|---|---|---|---|---|---|
|
|
Gain Counterattack Through Storm of Bitter Cold
Once Storm of Bitter Cold is active, this will be Magna's main source of counterattack stacks. Each shield gain through cards will give her 1 counterattack stacks up to a maximum of 10.
Shield Gain Outside of Card Effects Will Not Activate Storm of Bitter Cold
However, Storm of Bitter Cold will not activate if the shield did not come from card effects. Therefore, Crystallization will not give you counterattack at turn end.
AoE Counterattack Damage with Ice Wall
Once Ice Wall is active, every counterattack of Magna will hit all enemies making her more viable in fights against multiple enemies.
Counterattack Consumes Vulnerability
When Magna or any character counterattacks, it will consume a stack of Vulnerability per hit. However, if you have her at Manifest Ego 4, her counterattacks will not consume any stack. Since Magna's frost charge upgrade gives us 2 vulnerable, this every counter will still give us one vulnerable trigger after the counter ends.
Multi-hits will also count every vulnerable proc from Magna's counter which can quickly ramp up vulnerable stacks on enemies.
50% Multiplicative Damage to Attack Cards Against Vulnerable Enemies
Attacks against enemies with Vulnerability will increase its damage by 50% multiplicatively. This is why combatants that likes to dish out big damage with few cards are Magna's best teammates.
Fixed Damage Does Not Activate Vulnerability
Attack cards or effects that deals fixed damage will not consume Vulnerability stacks and the damage will not increase also.
Chaos Zero Nightmare (CZN) Related Guides

5 Star Character Builds
 Chizuru Chizuru
|
Haru
|
 Hugo Hugo
|
 Kayron Kayron
|
Khalipe
|
 Luke Luke
|
 Magna Magna
|
 Mei Lin Mei Lin
|
Narja
|
|
Nine
|
 Orlea Orlea
|
 Renoa Renoa
|
 Rin Rin
|
 Sereniel Sereniel
|
 Veronica Veronica
|
 Yuki Yuki
|
4 Star Character Builds
 Amir Amir
|
 Beryl Beryl
|
 Cassius Cassius
|
 Lucas Lucas
|
 Maribell Maribell
|
Mika
|
 Nia Nia
|
 Owen Owen
|
 Rei Rei
|
 Selena Selena
|
 Tressa Tressa
|
Author

Magna Best Team and Build
Premium Articles

Rankings
- We could not find the message board you were looking for.

Gaming News


![Death Stranding 2: On The Beach [PC] Review | A Port That Delivers](https://img.game8.co/4447392/15310a0c9aa1b6843bb713b2ea216930.jpeg/thumb)

Popular Games

Genshin Impact Walkthrough & Guides Wiki
Umamusume: Pretty Derby Walkthrough & Guides Wiki
Pokemon Pokopia Walkthrough & Guides Wiki
Honkai: Star Rail Walkthrough & Guides Wiki
Monster Hunter Stories 3: Twisted Reflection Walkthrough & Guides Wiki
Arknights: Endfield Walkthrough & Guides Wiki
Wuthering Waves Walkthrough & Guides Wiki
Zenless Zone Zero Walkthrough & Guides Wiki
Pokemon TCG Pocket (PTCGP) Strategies & Guides Wiki
Monster Hunter Wilds Walkthrough & Guides Wiki


Recommended Games
Fire Emblem Heroes (FEH) Walkthrough & Guides Wiki
Diablo 4: Vessel of Hatred Walkthrough & Guides Wiki
Cyberpunk 2077: Ultimate Edition Walkthrough & Guides Wiki
Yu-Gi-Oh! Master Duel Walkthrough & Guides Wiki
Super Smash Bros. Ultimate Walkthrough & Guides Wiki
Pokemon Brilliant Diamond and Shining Pearl (BDSP) Walkthrough & Guides Wiki
Elden Ring Shadow of the Erdtree Walkthrough & Guides Wiki
Monster Hunter World Walkthrough & Guides Wiki
The Legend of Zelda: Tears of the Kingdom Walkthrough & Guides Wiki
Persona 3 Reload Walkthrough & Guides Wiki


All rights reserved
© Smilegate. All Rights Reserved.
The copyrights of videos of games used in our content and other intellectual property rights belong to the provider of the game.
The contents we provide on this site were created personally by members of the Game8 editorial department.
We refuse the right to reuse or repost content taken without our permission such as data or images to other sites.
your shield gain equipment combination isnt possible, chains of obsession cant be obtained with the swinging sword