This survey will take about 1 minute.
Your answers will help us to improve our website.
Chaos Zero Nightmare (CZN)
Kayron Best Team and Build
NEW: Season 2 | Refinement | Arena
✪ Tiphera: Build | Cards | Banner
☆ Tiana: Partner Guide | Banner
✪ Nine: Build | Cards | Banner
See our Endgame Mode Tier List (Season 2 Updated!)
☆ Tier Lists: Character | Partner | Cards
This is a guide for the best teams and loadout for Kayron in Chaos Zero Nightmare (CZN). Learn which combatants are best to pair with Kayron, as well as recommended cards, partners, and equipment.
| Kayron Guides | |
|---|---|
| Team and Build | Cards and Materials |
List of Contents
Best Kayron Build
| Click on a Link to Jump to a Section! | |||||||||||
|---|---|---|---|---|---|---|---|---|---|---|---|
Build Overview
※ Hover over equipments, memory fragments and cards to see effects
| Character | Partner | Equipment |
|---|---|---|

|

|
Dagger That Tricked The Shadow +12% Critical Damage Fairy King's Crown +6% Critical Chance Verdant Shackles +12% Attack, +12% DEF Refinement: ・Increase Damage Amount of Attack Cards by 20% |
| Memory Fragments and Stat Priorities | ||
|
Offering of the Void Set When a card is Exhausted, increase Damage Amount of Void Cards by 20% for 1 turn Executioner's Tool Set +25% Critical Damage |
1. Void Damage % 2. Crit Chance % 3. Crit Damage % 4. Attack |
|
| Cards and Epiphanies | ||
 Echo of Futility 5
AP Cost: 0 Type: ・30% Damage ・Create 2 Futility card(s) ・+30% Damage equal to number of Futility created during his battle Echo of Futility 5
AP Cost: 0 Type: ・30% Damage ・Create 2 Futility card(s) ・+30% Damage equal to number of Futility created during his battle Echo of Futility 5
AP Cost: 0 Type: ・30% Damage ・Create 2 Futility card(s) ・+30% Damage equal to number of Futility created during his battle  Brand of Annihiliation 3
AP Cost: 7: Type: ・500% Damage to all enemies ・Decrease cost by number of Exhausted Futility 
 Oath of Vanity 1
AP Cost: 1 Type: Tags: Unique・Upon creating Futility, change to an Attack card with 150% Damage and Healing effect, cost 1  Echoes of True Abyss 0
AP Cost: 2 Type: ・240% damage ・Create 3 Futility cards ・+40% Damage as that amount |
||
| Note: Kayron's performance will significantly improve if Echo of Futility has 1 AP Divine Epiphany | ||
Kayron's best build focuses on creating and exhausting a lot of Futility to increase the damage of his Black Hole and Echo of Futility cards to deal massive single-target damage. This build can be played two separate ways depending on how high the level of your Kayron's Manifest Ego.
For his Memory Fragments, our setup works best with a 4/2 set using Offering of the Void and Executioner's Tool. This lets you gain a 20% multiplicative damage if he exhausted a card which Kayron does frequently. The multiplicative buffs he get works a bit different on his cards as he can increase its base damage infinitely which makes the buffs stronger as you amp up its base multipliers.
His favored chaos zone is Swamp of Judgment to get his best equipment such as Dagger That Tricked The Shadow for a 12% critical damage buff. Fairy King's Crown to get a 6% critical chance for all of his attacks and Verdant Shackles for a 12% attack and defense stat boost which will increase his damage and healing.
| Date | Changes |
|---|---|
| 02-26-2026 | ・Updated build overview ・Changed best team to Tiphera and Veronica ・Changed best cards ・Changed recommended refinements ・Changed best playstyle and build tips |
| 02-20-2026 | ・Updated build overview ・Changed best team to Veronica ・Changed best cards ・Changed best equipment to Swamp of Judgment ・Changed best playstyle and build tips |
| 01-12-2026 | ・Updated build overview ・Changed best team to Tiphera and Nia ・Changed best card reflect the Tiphera and Nia best team change ・Changed best equipment to Laboratory 0 ・Changed playstyle to accomodate Kayron with different manifest ego level |
| 11-18-2025 | ・Added Kayron build overview ・Revised Kayron build page layout |
| 10-26-2025 | ・Combined the 1-cost build and AoE burst into one viable setup. ・Updated recommended cards and playstyle. |
Kayron Best Team
| Click on a Link to Jump to a Section! | |||||||||||
|---|---|---|---|---|---|---|---|---|---|---|---|
| Support | Support |
|---|---|
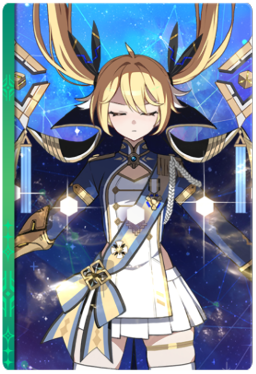
 Tiphera Tiphera
|
 Veronica Veronica
|
Kayron's best team as of Season 2 is Tiphera and Veronica. Kayron always struggle with exhausting his Futility due to AP cost or clogging your deck to increase the damage of his cards but thanks to Tiphera, she can provide AP recovery and have the ability to consistently exhaust Futility.
Veronica, on the other hand, is only here to provide consistent card draw so that the team can play all their cards in one turn.
Alternative Team Members
| Character | Explanation |
|---|---|
 Nine Nine
|
Can replace Veronica or Tiphera as a Sub DPS. Nine has the ability to exhaust cards other than her own cards and can help accelerate Kayron's scaling. She can also deal damage with her Hew but she lacks card draw and AP recovery. |
 Narja Narja
|
Can replace Veronica or Tiphera as another Support. Narja can decrease the AP cost of your cards and can give additive buffs however she provides less AP and heals. |
 Nia Nia
|
Can replace Veronica or Tiphera as another Support. She can draw cards and help deal more damage with extra attacks alongside damage buffs at maximum manifest ego level however she cannot use her Eternal Hunger combo for Season 2 content. |
 Rei Rei
|
Can replace Veronica or Tiphera as another Support. Despite her additive buffs, she can still significantly increase Kayron's damage and thin out the deck if you have her at Manifest Ego 6 but you lose out on AP generation. |
 Cassius Cassius
|
Can replace Veronica or Tiphera as another Support. You can utilize his ability to cycle and find Kayron's cards as much as possible however most of his buffs are additive which Kayron does not utilize well enough. |
 Mika Mika
|
Can replace Veronica or Tiphera as another Support. She can provide high amounts of healing and AP recovery but lacks the damage buffs and card draw. |
Kayron Best Cards
| Click on a Link to Jump to a Section! | |||||||||||
|---|---|---|---|---|---|---|---|---|---|---|---|
| Card | Explanation |
|---|---|
|
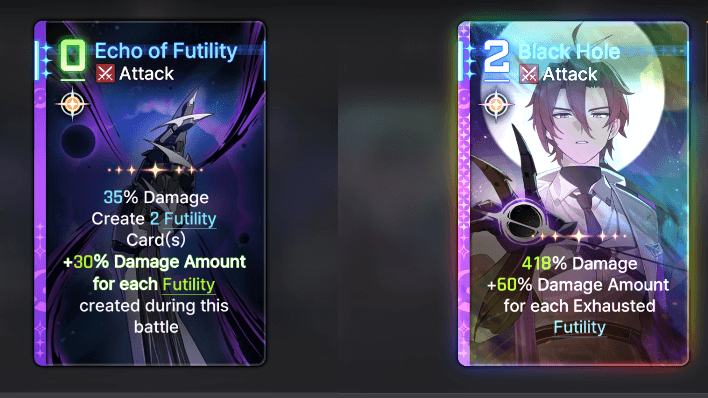
Echo of Futility
|
AP Cost: 0
Type:
・30% Damage ・Create 2 Futility card(s) ・+30% Damage equal to number of Futility created during his battle |
|
Brand of Annihiliation
|
AP Cost: 7
Type:
・500% Damage to all enemies ・Decrease cost by number of Exhausted Futility |
|
Black Hole
|
AP Cost: 2
Type:
・360% Damage ・+60% Damage per Exhausted Futility |
|
Oath of Vanity
|
AP Cost: 1
Type:
Tags: Unique
・Upon creating Futility, change to an Attack card with 150% Damage and Healing effect, cost 1 |
|
Echoes of True Abyss
|
AP Cost: 2
Type:
・240% damage ・Create 3 Futility cards ・+40% Damage as that amount |
Unlike most characters, Kayron has many viable builds but his most effective and strongest build revolves around generating and exhaust Futility to scale two of his main cards and deal the highest possible damage in a single hit.
His choice of epiphany for Echo of Futility is the 0 AP version that can generate Futility at the cost of lower base damage but higher scaling potential and lower AP cost. You need to create at least 25 futility to reach the scaling potential of the other similar epiphany that cost 1 AP. After that, it will scale better.
For Brand of Annihilation, the best epiphany is the 7 AP version as you only need to exhaust 7 Futility for it to cost 0 AP for the entire battle while Black Hole should be the much stronger version of its base effect so that it scales much faster and higher.
As for Oath of Vanity, you either go for the epiphany with the initiation tag only if your Kayron has Manifest Ego level 2 or below, or the 150% Futility damage and heal epiphany if you have him at Manifest Ego level 3 and above so he can also heal the team if you have spare AP to spend.
Essential Team Cards and Epiphanies
| Card | Explanation |
|---|---|
 Quantum Seed Quantum Seed
|
AP Cost: 0
Type:
・Heal 100% ・ Select 1 Archetype card ・ Create 1 in hand and Draw Pile each |
 Form Convergence Form Convergence
|
AP Cost: 1
Type:
Tags: Retain
・Select and Exhaust 3 Exhaust cards from all cards ・ Draw 1 Exhaust card for each Exhausted |
 Dual Creation Dual Creation
|
AP Cost: 1
Type:
Tags: Unique, Initiation
・When 2 Archetype Cards are created, create 1 identical card in Discard Pile |
 Repose Repose
|
AP Cost: 0
Type:
・Draw 2 other combatant's card(s) |
 Sir Kowalski Sir Kowalski
|
AP Cost: 1
Type:
・Choose 1 Ballista in Hand, +150 % Damage until used ・Draw 2 |
With the newly added character, Tiphera, her choice of epiphanies and cards are specific. Quantum Seed must have the epiphany that lets you select any of the three Archetype cards for consistency and should have exactly two copies of it. Next is Form Convergence with exactly three copies that has the epiphany to exhaust cards and draw that many so that she can support Kayron's Futility generation. Lastly, is Dual Creation with that epiphany that gives it the initiation tag to activate it early.
As for Veronica, all she really needs is her Repose that has the epiphany of reducing its cost to 0 to draw 2 and Sir Kowalski with the draw 2 epiphany so that she can draw her own cards too.
Kayron Best Partner
| Click on a Link to Jump to a Section! | |||||||||||
|---|---|---|---|---|---|---|---|---|---|---|---|
| Partner | Details |
|---|---|
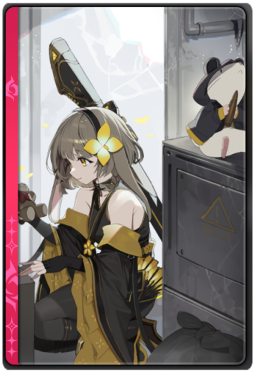
 Bria Bria
|
Passive Effect: Capable Secretary - The assigned Combatant’s Attack is increased by 8% When the assigned combatant generates a card, attack card damage is increased by 10% for 1 turn. Stacks up to 3 times. When the assigned combatant generates a Status ailment card for first time, +25% attack card damage for 1 turn Ego Skill: Check the Instructions - From the Discard Pile, Exhaust all Status Ailment (including cards changed from Status Ailment) and Curse cards. For each card Exhausted, +10% Designated Combatants' Attack card Damage for 1 turn |
Bria is the best partner for Kayron for the AoE Burst and the ability to exhaust all Futilities in the discard pile whenever you want. She can also buff damage multiplicatively, after creating Futilities and additively, when the created card is a status ailment.
After the Season 2 Balance, Bria gained the ability to boost the attack stat of Kayron making her more viable to use and cementing her place as the best partner for him.
Alternative Budget Partner
| Partner | Details |
|---|---|
 Eloise Eloise
|
If you do not have Bria, you can also use Eloise as an alternative as she can provide even greater multiplicative damage buff at max manifest ego level for Kayron at the cost of losing the ability to exhaust cards for her ego skill. |
Kayron Best Memory Fragment
| Click on a Link to Jump to a Section! | |||||||||||
|---|---|---|---|---|---|---|---|---|---|---|---|
 Offering of the Void Set Offering of the Void Set Offering of the Void Set When a card is Exhausted, increase Damage Amount of Void Cards by 20% for 1 turn |
 Executioner's Tool Set Executioner's Tool Set Executioner's Tool Set +25% Critical Damage |
The best set combination for this build is Offering of the Void (4-piece) and Executioner's Tool (2-piece). You can trigger the Offering of the Void damage bonus very consistently, since Kayron's futility card always exhausts when used, and gives him 20% multiplicative damage buff.
This multiplicative buff that he gets aside from the memory fragment is useful for him because he can increase the base damage of his cards which can affect the damage increase of the buffs. For example, at base damage of 200%, a 20% multiplicative buff will raise it to 240%. However, if he stacked it to 440% base damage, then the same 20% multiplicative buff will raise to to 528% instead.
Stat Priority
| Main Stats | Recommended Substats |
|---|---|
|
Ideal: Critical Chance % Desire: Void Damage % Imagination: Attack % |
・Critical Chance %
・Critical Damage % ・Attack ・Attack % |
The main stat and sub stats Kayron needs are Void Damage, Critical Chance, Critical Damage and Attack. His last potential node needs at least 600 attack which is easy to achieve and the more you have attack stats on him the more critical damage he gets.
Kayron Best Equipment
| Click on a Link to Jump to a Section! | |||||||||||
|---|---|---|---|---|---|---|---|---|---|---|---|
| Weapon | Armor | Accessory |
|---|---|---|
 Dagger That Tricked The Shadow Dagger That Tricked The Shadow Dagger That Tricked The Shadow +12% Critical Damage |
 Fairy King's Crown Fairy King's Crown Fairy King's Crown +6% Critical Chance |
 Verdant Shackles Verdant Shackles Verdant Shackles +12% Attack, +12% DEF |
| Refinement: ・Increase Damage Amount of 2-Cost or higher Attack Cards by 25% ・Increase Damage Amount of Attack Cards by 20% ・At the start of battle, if owning 18 or less cards, increase Damage Amount of Attack Cards by 30% |
||
Kayron's best equipment can only be found in Swamp of Judgment with Dagger That Tricked The Shadow giving him 12% more critical damage for all of his attacks. Fairy King's Crown for 6% more critical chance so he can hit his crits more often. Verdant Shackles is the best trinket slot for him as it has +12% attack and defense boost which can significantly increase his damage and healing output.
His best choice for refinements is all about boosting his attack cards with multiplicative damage buffs. The 20% increase will affect all of his cards while the 25% either can only buff the 2 AP or higher card such as Black Hole or Echoes of True Abyss. The last refinement can only work if the whole team's total card count is less than 18 at the start of battle.
Alternative Budget Equipment
| Weapon | Armor | Accessory |
|---|---|---|
 Obsidian Sword Obsidian Sword Obsidian Sword Increase damage amount by 12% |
 Titan Combat Suit Titan Combat Suit Titan Combat Suit When taking Damage, Recover 2% HP (1 per turn) |
 Amorphous Cube Amorphous Cube Amorphous Cube +25% Damage |
If you aren't able to get the best, you can settle for these equipment that some can be found in any chaos zones inside shops. Obsidian Sword to boost the overall damage of all his attacks by 12% multiplicatively. Titan Combat Suit to gain healing after getting hit once every turn and Amorphous Cube gives a permanent +25% additive damage buff to all of his attacks.
Kayron Build Tips and Playstyle
| Click on a Link to Jump to a Section! | |||||||||||
|---|---|---|---|---|---|---|---|---|---|---|---|
|
|
Form Convergence Futility Exhaust Combo
Thanks to Tiphera, Kayron is playable even at base manifest ego level or not having access to Bria. This build revolves around creating Archetype cards to either recover AP for Black Hole use or stack multiplicative damage buffs that is drawn by Form Convergence after exhausting his Futility cards. Here are the steps to do this combo:
- Play all the important upgrade cards of Veronica, Kayron and Tiphera.
- Use Quantum Seed to begin creating Archetype cards in your hand, draw pile and discard pile.
- Generate Futility via Echo of Futility and Echoes of True Abyss then exhaust it using Form Convergence.
- If you have 3 or less Futility in hand and you lack AP for Form Convergence or use it directly, activate his Ego skill to exhaust it.
- (Optional) If you have Bria, only use her skill once you have 5 or more futility in your discard pile.
- Continue exhausting Futilities to strengthen your Black Hole and Echo of Futility.
- If you have enough AP to play both Black Hole cards, use Archetype: △ to buff its damage otherwise, use Archetype: ○ to recover AP and use Black Holes to deal massive single-target damage.
Existing Futility Does Not Convert to Attack Cards
Oath of Vanity converts Futility into attack cards but it does not make already generated and existing Futility into attack cards.
Black Hole and Echo of Futility Scales Infinitely
Most of Kayron's cards scales infinitely and adds the damage multiplier it gets once the condition is fulfilled to its base damage multiplier. What it means is that damage buffs especially multiplicative buffs will be affected by it so that the more you exhaust the higher the bonus damage you get from these buffs.
Chaos Zero Nightmare (CZN) Related Guides

5 Star Character Builds
 Chizuru Chizuru
|
 Haru Haru
|
 Hugo Hugo
|
 Kayron Kayron
|
 Khalipe Khalipe
|
 Luke Luke
|
 Magna Magna
|
 Mei Lin Mei Lin
|
Narja
|
|
Nine
|
 Orlea Orlea
|
 Renoa Renoa
|
 Rin Rin
|
 Sereniel Sereniel
|
Tiphera
|
|
Veronica
|
 Yuki Yuki
|
4 Star Character Builds
 Amir Amir
|
 Beryl Beryl
|
Cassius
|
 Lucas Lucas
|
 Maribell Maribell
|
Mika
|
|
Nia
|
 Owen Owen
|
Rei
|
 Selena Selena
|
 Tressa Tressa
|
Comment
Author

Kayron Best Team and Build
Please participate in our site
improvement survey
03/2026
improvement survey
03/2026
Would you assist in
improving Game8's site?
improving Game8's site?

×
We are listening to our users' valuable opinions and discussing how to act on them.
The information collected through this survey will be used for the purpose of improving our services. In addition, the information will only be disclosed a part of a statistic in a format that will not allow identification of personal information.
Begin Survey
Not Now
×
Please rate each item regarding Game8.co's Advertisements.
Amount of Ads
Very Dissatisfied
Somewhat Dissatisfied
Fine
Somewhat Satisfied
Highly Satisfied
Placement of Ads
Timing of Ad Display
Ad Loading Speed
Safeness of Ads
Content of Ads
×
Please rate each item regarding Game8.co's Quality of Articles.
Amount of information
Very Dissatisfied
Somewhat Dissatisfied
Fine
Somewhat Satisfied
Highly Satisfied
Frequency of updates
Speed of new information
Accuracy of articles
Understandibility of articles
Readability of sentences
×
Please rate each item regarding Game8.co's Usability of the Site.
Ease of finding information
Very Dissatisfied
Somewhat Dissatisfied
Fine
Somewhat Satisfied
Highly Satisfied
Loading Speed
Use of Color
Font Size
Visibility of Images
Easy to Understand Layout
×
Please rate each item regarding Game8.co's Message Boards, Comments.
Ease of Writing
Very Dissatisfied
Somewhat Dissatisfied
Fine
Somewhat Satisfied
Highly Satisfied
Readability
Ease in Finding Information
Comment Quality
Comment Quantity
Admin Response
×
Please rate each item regarding Game8.co's Site's new design.
Please rate our site's new design
Very Dissatisfied
Somewhat Dissatisfied
Fine
Somewhat Satisfied
Highly Satisfied
Do you think that the website's design change makes the site easier to use?
Has the new design made it easier for you to find information on the site?
Has the new design improved the overall visual appeal of the site?
How would you rate your overall satisfaction with the new design of the site?
×
How likely are you to recommend Game8 to someone you know?
Very Unlikely
0
1
2
3
4
5
6
7
8
9
10
Very Likely
If you have other opinions regarding potential improvement to the website, please share them with us. We would appreciate your honest opinion.
Note: This is a free response section, so you can proceed without entering anything.
Note: Please be sure not to enter any kind of personal information into your response.
Note: Please be sure not to enter any kind of personal information into your response.
×
Thank You
×
Thank you for participating in our survey! Your answers will help us to improve the quality of our website and services.
We hope you continue to make use of Game8.
We hope you continue to make use of Game8.
Close
Premium Articles
Rankings
- We could not find the message board you were looking for.

Gaming News


![Monster Hunter Stories 3 Review [First Impressions] | Simply Rejuvenating](https://img.game8.co/4438641/2a31b7702bd70e78ec8efd24661dacda.jpeg/thumb)
Popular Games

Genshin Impact Walkthrough & Guides Wiki
Honkai: Star Rail Walkthrough & Guides Wiki
Umamusume: Pretty Derby Walkthrough & Guides Wiki
Pokemon Pokopia Walkthrough & Guides Wiki
Resident Evil Requiem (RE9) Walkthrough & Guides Wiki
Monster Hunter Wilds Walkthrough & Guides Wiki
Wuthering Waves Walkthrough & Guides Wiki
Arknights: Endfield Walkthrough & Guides Wiki
Pokemon FireRed and LeafGreen (FRLG) Walkthrough & Guides Wiki
Pokemon TCG Pocket (PTCGP) Strategies & Guides Wiki


Recommended Games
Diablo 4: Vessel of Hatred Walkthrough & Guides Wiki
Cyberpunk 2077: Ultimate Edition Walkthrough & Guides Wiki
Fire Emblem Heroes (FEH) Walkthrough & Guides Wiki
Yu-Gi-Oh! Master Duel Walkthrough & Guides Wiki
Super Smash Bros. Ultimate Walkthrough & Guides Wiki
Pokemon Brilliant Diamond and Shining Pearl (BDSP) Walkthrough & Guides Wiki
Elden Ring Shadow of the Erdtree Walkthrough & Guides Wiki
Monster Hunter World Walkthrough & Guides Wiki
The Legend of Zelda: Tears of the Kingdom Walkthrough & Guides Wiki
Persona 3 Reload Walkthrough & Guides Wiki


All rights reserved
© Smilegate. All Rights Reserved.
The copyrights of videos of games used in our content and other intellectual property rights belong to the provider of the game.
The contents we provide on this site were created personally by members of the Game8 editorial department.
We refuse the right to reuse or repost content taken without our permission such as data or images to other sites.