Best Neutral Cards Tier List
NEW: Season 2 | Refinement | Arena
✪ Tiphera: Build | Cards | Banner
☆ Tiana: Partner Guide | Banner
✪ Nine: Build | Cards | Banner
See our Endgame Mode Tier List (Season 2 Updated!)
☆ Tier Lists: Character | Partner | Cards

Here is a list of the best neutral cards in Chaos Zero Nightmare (CZN). Learn more about the best neutral cards and their synergies with this guide!
| Card Guides | |
|---|---|
| Best Neutral Cards | List of All Neutral Cards |
List of Contents
Best Neutral Cards Tier List
Cards Tier List
 Rally (Common) Draw 1
・+3 Action Count to all enemies  Gear Bag Draw 2
 Attack! Choose 1 Attack card(s) from the Draw Pile, move it to hand
 Aggressive Mutant Draw 1 own Attack Card(s)
・ For 1 turn, +50% Damage Amount 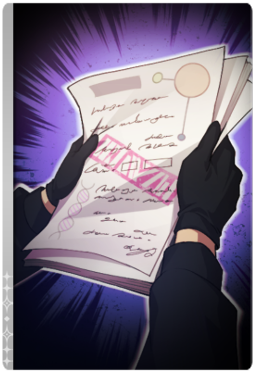 Confiscation Draw 1
・ From Draw Pile or Discard Pile, move 1 random Forbidden Card(s) into hand |
|
 Quickdraw 150% Damage
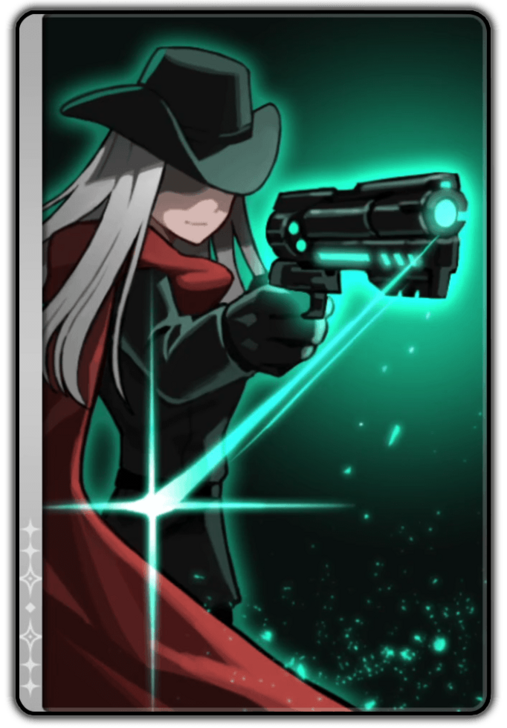
・Mark 1 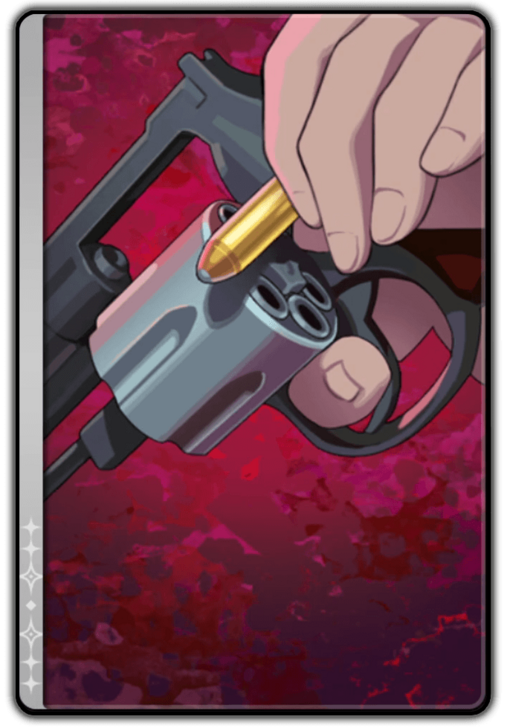 Hidden Bullet 100% Damage
・Retain: +50% Damage 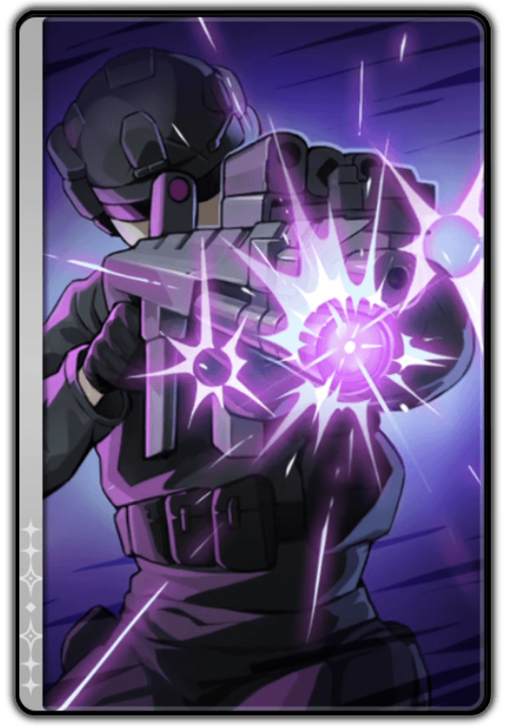 Quick Shelling 80% Damage
・Draw 1  Maneuvering Fire 200% Damage to all enemies
 Energy Barrier 100% Shield
・1 AP  Rage Deal damage 300%. If there are no other combatant cards in hand, reduce this card's cost by 2.
 Glorious Resistance At the start of the turn, each ally takes Fixed Damage equal to 10% of their max HP
・1 AP  Muscle-Enhanced Evolver 80% x 2 Damage
・ Inspiration +2 hits  Forced Learning Apparatus Upon using 4 cards, Draw 1 (1 time for each turn)
|
|
 Overwhelm 100% Damage x 3 to all enemies
・Create 2 Overload card(s) in the Draw Pile  Spiked Shield 100% Defense-based Damage to all enemies
・Destroy: +1 additional hit  Shock 200% Damage to all enemies
・2 Vulnerable  Ambush 80% Damage
・If Ravage, move this card from the Graveyard to hand  Hand-to-Hand Combat 200% Defense-based Damage
・2 Crystallization  Sacred Strike 200% Damage
・2 Tenacity Damage  Negotiate 2 Morale
・2 Morale to all enemies  Financial Therapy Heal 212%
・If HP is full, 30 Credit(s)  Wanderer of the Void For 1 turn, target's Action Count does not decrease
 Determination At the start of the turn, +50% Damage to 1 random Attack card in hand for 1 turn
 Tactical Action +15% Damage against targets with Shield
 Iron Wall 1 Resolve
・1 Fortitude  Destruction 300% Damage
・Discard 1  Repent -1 Morale
・ -1 Resolve  Instinct Ignition Upon card creation, grant random Epiphany ( 1 per turn )
 Propagative Virus Damage 120% x 1
・ Response: +1 hit (Max 5 stacks)  Self-Generating Experiment When there are 6 or more cards in hand, the cost of 1 random card in hand changes to 0 for 1 turn (1 time per turn )
|
|
 Consecutive Attack 50% x 3 Damage
 Heavy Bash 200% Damage
・2 Vulnerable, 2 Weaken  Devotion 100% Defense-based Damage x 2
・For each Resolve, +20% Damage  Tackle 400% Defense-based Damage
・If HP is full, -1 cost to this card  Atomic Decomposition 230% Piercing Damage to all enemies
 Aimed Fire 400% Damage
・Defeat: 20 Credit  Pulverize 150% Damage x2
・Draw 1  Protective Shout Gain 130% Shield
・If there is no Shield, +100% Shield  Counterattack Preparation Replace the Ego Skill slot with other Ego Skills
 Wind of Relief Agony to all enemies
・Select and Exhaust up to 2 Status Ailment or Curse card(s) from hand  Relentless Endurance 350% Shield
 Recycling If Ego Points are 2 or more, +1 AP, -2 Ego Points
 Strategic Starting Point 2 Ego Points
 Somnolent Fruit -5 Stress to a random Combatant
 Camouflage 1 Evade
・Draw Next Turn 2  Knowledge of Darkness Draw 1
・Activate drawn card  Tactical Reformation -1 Next Ego Skill used
 Acid Gas 3 Impair to all enemies
 Shell-Forming Cell 70% Shield
・ For each card in hand, +25% Shield  Forbidden Algorithm Create 1 random Forbidden Card(s) in hand
|
Cards are unordered within each tier
| Date | Changes |
|---|---|
| 11/14/2025 | Added the New Forbidden Catalyst Neutral Cards. |
| 10/21/2025 | Created release day Tier List (October 2025). |
Neutral cards that provide advantageous effects for your team but do not require a specific character to unlock. Listed below are the best neutral cards to have in your deck.
Tier List Evaluation Complete!
With the release of the new season, all new Neutral Cards were properly tested and rated!
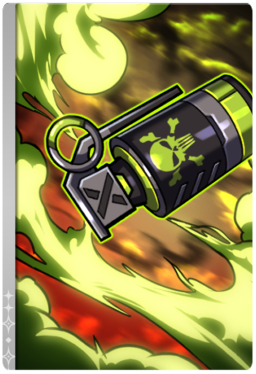
8 New Neutral Cards were evaluated that all revolves around card draw and forbidden cards. We decided to put Confiscation and Aggressive Mutant as the best cards for this update since free card draw is just that good in this game.
Season 1 Update: Forbidden Catalyst Guide
Community Tier List
|
Quick Shelling 80% Damage
・Draw 1 Maneuvering Fire 200% Damage to all enemies
Pulverize 150% Damage x2
・Draw 1 Gear Bag Draw 2
Attack! Choose 1 Attack card(s) from the Draw Pile, move it to hand
|
|
|
Overwhelm 100% Damage x 3 to all enemies
・Create 2 Overload card(s) in the Draw Pile Shock 200% Damage to all enemies
・2 Vulnerable Energy Barrier 100% Shield
・1 AP Rage Deal damage 300%. If there are no other combatant cards in hand, reduce this card's cost by 2.
|
|
|
Wanderer of the Void For 1 turn, target's Action Count does not decrease
Recycling If Ego Points are 2 or more, +1 AP, -2 Ego Points
Iron Wall 1 Resolve
・1 Fortitude |
|
|
Relentless Endurance 350% Shield
Camouflage 1 Evade
・Draw Next Turn 2 Knowledge of Darkness Draw 1
・Activate drawn card |
According to our anonymous user who won the contest, the only neutral cards you will ever need are the ones they ranked on their tier list, which consists of cards with the Draw effect.
The contest is open for Season 1 Phase 1 and will end on December 3, after which we’ll update this section with the tier list that receives the most votes by the end of Phase 1.
▼ Jump to the Tier List Maker ▼
Tier List Explanation
S Tier
|
|
・ Free Card Draw. ・ Exhaust Property thins out your deck and makes it more consistent. |
|---|---|
|
|
・ Free Card Draw ・ + Action Point makes it a card that lets you prevent enemies from using their moves mid-turn such as shields and debuffs. |
|
|
・ Free card fetch. ・ Essentially functions almost the same way as Cassius' Joker card but without a cost making it better in multiple situations. |
|
|
・ Free card draw. ・ Can also search for your Forbidden Card as a bonus. |
|
|
・ Free attack card draw. ・ Provides a +50% damage to all attack cards for a turn and exhausts itself after use. |
A Tier
|
|
・ Gives a permanent +1 AP to the fight. ・ Additional cost is only 10% of the team's HP which is negligible with a healer on the team. ・ Costs 3 AP which makes you commit to a weak turn. |
|---|---|
|
|
・ Becomes a 0 cost card with 200% damage. ・ Slots in perfectly with a damage dealer partnered by low cost card team members. |
|
|
・ Exhaust property means it thins out your deck. ・ Free AP on use + some shield. |
|
|
・ 0 Cost Card ・ 200% AoE damage means you can start fight with a damage advantage. |
|
|
・ 0 Cost Card with a card draw essentially means you get a free 80% damage when its added to your hand. |
|
|
・ 100% Damage with 50% retain bonus gives you an option to hold this card for a long fight to get massive damage with 0 cost. |
|
|
・ 150% damage with free mark makes it a cheap but high-value damage card. |
|
|
・ 80% Damage x 4 for 1 AP if Inspiration is active. ・ Prime target of Morale and Damage buffs. ・ Hard to activate if there is no card draw |
|
|
・ Free card draw after using 4 cards once every turn. ・ Needs low cost cards to work |
B Tier
|
|
・ Limited usability and has low value outside of Chaos Zones. |
|---|---|
|
|
・ 1 Cost card for an enemy debuff makes it a net-negative card for the majority of the time. |
|
|
・ Exhaust makes it a decent card to slot in as it thins out the deck. ・ 300% damage for 1 cost is good value. ・ Discard may be difficult to slot in for majority of DPS-focused characters. |
|
|
・ Grants permanent Resolve and Fortitude. ・ 2 Cost makes it a high-cost investment. |
|
|
・ 1 Cost damage upgrade against shielders. ・ Situationally good against barrier enemies but makes it a dead card against enemies with little to no shield usage. |
|
|
・ Free 50% damage buff for an attack card. ・ 2 Cost card makes it difficult to slot in to most deck. |
|
|
・ Very useful against specific bosses. ・ Poor value against majority of fights while only clogging up a hand slot. |
|
|
・ Double edged card that also buffs enemies while buffing your team. |
|
|
・ Great card for breaking Tenacity. ・ 200% damage for 1 cost card ・ No Draw or Exhaust makes it eat up a card slot which may be more valuable for certain DPS-focused characters. |
|
|
・ 2 Crystallization makes it a decent damage card while providing shield to the team. ・ Defense-based Damage makes it restrictive and only good for certain characters. |
|
|
・ 0 Cost damage card. ・ Ravage/Tenacity break may not always be available which makes it a handclog for the majority of the time. |
|
|
・ 200% damage plus 2 Vulnerable to all makes it a strong damage card. ・ Costs 2 card makes it difficult to use. ・ BulletedExplanation |
|
|
・ AoE damage ・ Defense based damage and its secondary effect requiring a unit kill makes it difficult to use. ・ BulletedExplanation |
|
|
・ High damage against all enemies. ・ Exhaust tag makes it thin out the deck. ・ Leaves 2 Overload card which makes it difficult to use albeit its great effects. |
|
|
・ 1 Cost card heal with exhaust with a 212% multiplier. ・ Additional condition that restores Credit makes it a decent pick up in Chaos but subpar outside of it. |
|
|
・ 120% Damage x 5 if drawn 5 times in one battle ・ Relies heavily on discard and card draw |
|
|
・ Reduces cost of any cards to 0 AP when hand has 6 or more cards once per turn ・ Relies heavily on expensive cards and card draw |
C Tier
|
|
・ 1 Cost card debuff that's effective against shields. ・ Lower benefit than majority of cards rated higher than Acid Gas. |
|---|---|
|
|
・ Reduces Ego Skill cost by 1. ・ Ego Skills are rarely used in low difficulty battles making it a wasted hand slot for the majority of the time. |
|
|
・ 2 cost card that uses the drawn card. Effect will mostly be random unless you have a specific way to decide what you'll draw. Despite this, it's still a bad card due to its 2 cost requirement + being an ultimate card. |
|
|
・ 1 Dodge + Draw 2 Next turn makes its effect decent. ・ Dodge means it only provides good value when an enemy's attack is incoming but its 2 cost makes it difficult to use. |
|
|
・ Stress card makes it useless outside of Chaos Content. ・ 1 Cost ultimate card that only reduces stress makes it a subpar option even during your own chaos runs. |
|
|
・ 1 Cost Card that only provides ego points. ・ Ego Points can passively be built up easily and this card makes you use 1 valuable AP that you can use for other potentially better cards. |
|
|
・ 0 cost card that lets you convert Ego Points to AP. ・ While Ego Points are easy to build up, you'll also want to have Ego points saved up for crucial fights and this card makes that difficult to execute. |
|
|
・ 2 cost card that gives a huge amount of shield. ・ High cost that only provides a shield makes it often a bad card to use most of the time. |
|
|
・ Agony for 1 cost makes it a subpar card. ・ Exhaust for status or ailment cards makes it a very situational card. |
|
|
・ Replace ego skill with other ego skills. ・ You'll ideally build a deck with useful ego skills and a shuffle for it using a card slot and 1 AP cost is a bad investment to do. |
|
|
・ A Shield card that gains more effect when shielded. ・ Rarerly better than other options shield-focused units have. |
|
|
・ 150% damage with 2 hits that draws a card. ・ Decent effect coupled by an extremely high cost for its effect makes it a bad card. |
|
|
・ 2 cost damage card. ・ Conditional effect only rewards credit which is only useful on chaos runs. ・ Overall a high cost card with low benefit when used. |
|
|
・ 2 cost piercing damage card. ・ Only usable by Psionics and Controllers which will often have lower attack stats. ・ Over all a low damage card with high cost. |
|
|
・ 3 cost card with a condition that lowers it to 2 still makes it a bad card. ・ Damage is defense based which makes its damage even lower on average normally. ・ High cost card with minimal benefit when used. |
|
|
・ Defense based damage that stacks more based on Resolve stack. ・ Rarely useful as most shielders will want to focus on defensive moves instead of a 2 cost card that only deals damage. |
|
|
・ 2 cost damage card that also applies Vulnerable and Weaken. ・ Vulnerable becomes hard to use as this move already consumes 2 of your 3 base AP per turn. |
|
|
・ 1 cost card that provides no benefit aside from damage which puts it on the same level as a basic damage card you'll want to remove from your deck in the first place. |
|
|
・ 295% Shield if hand is full when used ・ Reaching the hand size limit is hard to do for an average shield gain. |
|
|
・ Creates a random Forbidden Card in hand ・ Cost is too high and heavily relies on RNG that can easily make the created card unusuable if the team can't properly use it. |
Best Card Tier List Criteria
| Cards that are vital in meta decks, and can significantly boost their effectivity. | |
| Strong cards that can be used in most situations, but are just not as strong as those in the S tier. | |
| Cards that are good overall, but can be replaced by cards in the S or A tier once unlocked. | |
| Cards that are strong in specific setups or situations, and are not necessarily weak. |
Cost-Efficiency
A card's cost must be reasonable for its effect. Ideally, you can comfortably integrate a card in your cycle with your Action Points.
Effectivity
A card's presence should be able to bend the fight to your favor. Whether it is an Attack, Skill, or Upgrade card, the common card should be able to significantly boost your deck's effectivity.
Epiphanies
If applicable, how the card evolves after an epiphany is also an important factor. These changes to the card can affect your playstyle as you progress through rounds.
Chaos Zero Nightmare (CZN) Tier List Maker
| Community Tier List Contest Countdown |
|---|
| Community Contest Has Ended! |
Create your own Tier List with our Tier List Maker above, and share it in the comments!
We also encourage everyone to vote on others' Tier Lists to make your voice heard! The Tier List which receives the most upvotes will be added in the article as the new Community Tier List. Make sure to submit a tier list or vote for one until December 3 before Yuki's rate-up banner ends, and a new character arrives!
How to Vote on a Tier List
| # | How to Create a Tier List |
|---|---|
| 1 | Visit the comments section and find a user-created Tier List |
| 2 |

Click Upvote or Downvote Select the Upvote button to cast one vote for a created Tier List. Note that you will need to Log In or Sign Up (free) to vote. |
How to Use the Community Tier List
| # | How to Create a Tier List |
|---|---|
| 1 |

Click the Plus Button on the Right Side To begin creating your Tier List, click the plus button, which you can find at the right side of each tier. |
| 2 |

Select the Card in Each Tier Afterward, select the Card that correspond to each tier in your list. You can also use the search or sort functions above to make specific Card to appear such as Attack, Skill, Status Ailment, or Upgrade. |
| 3 |
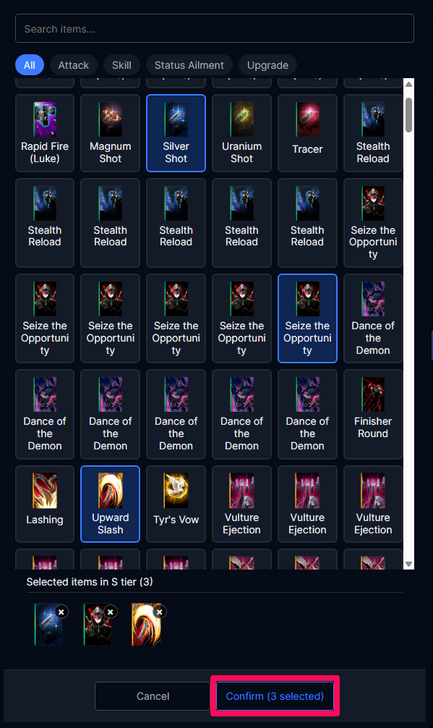
Confirm Your Choices Your selected Card will then appear below. Once you're done selecting your Cards, confirm your choices by clicking the right button at the bottom of the window. |
| 4 |
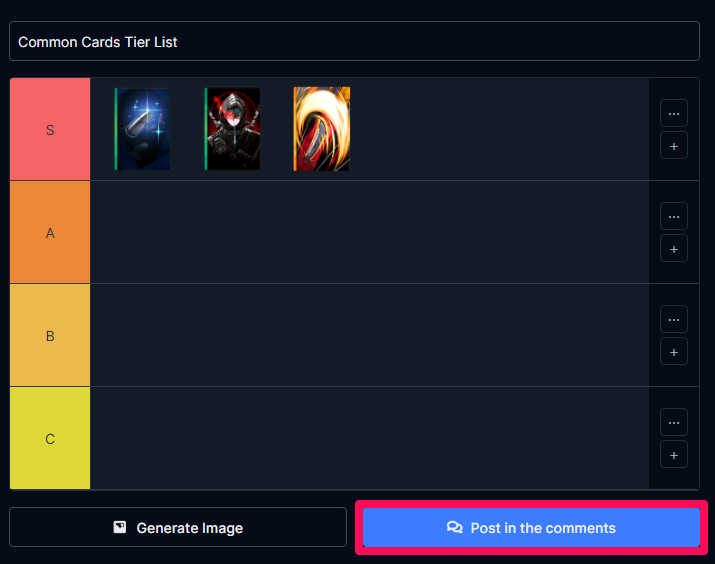
Share Your List in the Comments Now that you've completed your Tier List, share it with other users by posting it in the comments! |
Here is a guide on how to use the Community Tier List. Which Neutral Cards are the strongest for you right now? Share your thoughts and opinions through your list!
Notes on Creating a Tier List
- After making a Tier List, be sure to share and download the image of the Tier List before leaving the page.
- Post any submissions with a username so that you can receive credit for your work.
Chaos Zero Nightmare Related Guides
Chaos Zero Nightmare Wiki Front
Guides by Category
| Chaos Zero Nightmare Wiki Contents | |
|---|---|
 Characters Characters |
 Partners Partners |
 News News |
 Chaos Chaos |
 Ark City Ark City |
 Banners Banners |
 Tips and Tricks Tips and Tricks |
 Equipment Equipment |
 Cards Cards |
 Memory Fragments Memory Fragments |
 Items Items |
 Simulation Simulation |
 Glossary Glossary |
 Missions Missions |
 Galactic Disaster Galactic Disaster |
 Fates Fates |
Recommended Guides
 Best Characters Tier List
 Reroll Guide: Best Reroll Tier List
 Redeem Codes
 Chaos Zero Nightmare x Hololive Collab
 Team Composition Guide
 Best Teams
 Best Partners
 Upcoming Banners
 Neutral Card Tier List
 List of All Trauma Codes
 List of Voice Actors
 Best Memory Fragments
 Best Forbidden Cards
 Corruption Mode Explained
 Chaos Assault Explained
 Purification Protocol Explained
 Best Characters for All Endgame Modes
 Zero System Guide
 ID Card Sharing Board
 Environment Variables Guide
Author

Best Neutral Cards Tier List
Premium Articles
Rankings
- We could not find the message board you were looking for.

Gaming News

![The Liar Princess and the Blind Prince Review [PC] | Lovely to Look at but Tedious to Play](https://img.game8.co/4442586/8d95f5faf05780f1765ce7e0938bd825.jpeg/show)

![Monster Hunter Stories 3 Review [First Impressions] | Simply Rejuvenating](https://img.game8.co/4438641/2a31b7702bd70e78ec8efd24661dacda.jpeg/thumb)
![The Seven Deadly Sins: Origin [First Impressions] | A Promising Start](https://img.game8.co/4440581/584e0bfb87908f12c4eab6e846eb1afd.png/thumb)
Popular Games

Genshin Impact Walkthrough & Guides Wiki
Umamusume: Pretty Derby Walkthrough & Guides Wiki
Pokemon Pokopia Walkthrough & Guides Wiki
Honkai: Star Rail Walkthrough & Guides Wiki
Monster Hunter Stories 3: Twisted Reflection Walkthrough & Guides Wiki
Arknights: Endfield Walkthrough & Guides Wiki
Wuthering Waves Walkthrough & Guides Wiki
Zenless Zone Zero Walkthrough & Guides Wiki
Pokemon TCG Pocket (PTCGP) Strategies & Guides Wiki
Monster Hunter Wilds Walkthrough & Guides Wiki


Recommended Games
Fire Emblem Heroes (FEH) Walkthrough & Guides Wiki
Diablo 4: Vessel of Hatred Walkthrough & Guides Wiki
Cyberpunk 2077: Ultimate Edition Walkthrough & Guides Wiki
Yu-Gi-Oh! Master Duel Walkthrough & Guides Wiki
Super Smash Bros. Ultimate Walkthrough & Guides Wiki
Pokemon Brilliant Diamond and Shining Pearl (BDSP) Walkthrough & Guides Wiki
Elden Ring Shadow of the Erdtree Walkthrough & Guides Wiki
Monster Hunter World Walkthrough & Guides Wiki
The Legend of Zelda: Tears of the Kingdom Walkthrough & Guides Wiki
Persona 3 Reload Walkthrough & Guides Wiki


All rights reserved
© Smilegate. All Rights Reserved.
The copyrights of videos of games used in our content and other intellectual property rights belong to the provider of the game.
The contents we provide on this site were created personally by members of the Game8 editorial department.
We refuse the right to reuse or repost content taken without our permission such as data or images to other sites.
S tier are for the cards that has draw with almost no drawbacks and it has exhaust so you'll have fewer cards to draw after shuffle. C tier for the cards that are only good inside chaos runs.