Dimensional Twilight Guide
NEW: Season 2 | Refinement | Arena
✪ Tiphera: Build | Cards | Banner
☆ Tiana: Partner Guide | Banner
✪ Nine: Build | Cards | Banner
See our Endgame Mode Tier List (Season 2 Updated!)
☆ Tier Lists: Character | Partner | Cards
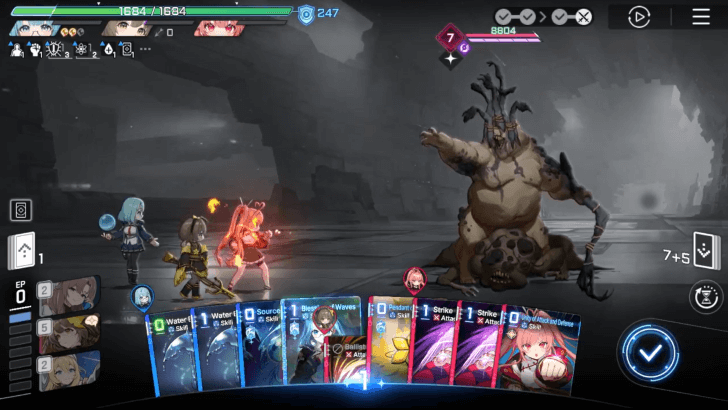
Dimensional Twilight is the harder and monthly rotation content in Basin of Hyperspace in Chaos Zero Nightmare (CZN). Learn how to beat each stage and see the rewards you can get here!
| Basin of Hyperspace Guides | |
|---|---|
| Dimensional Dawn | Dimensional Twilight |
List of Contents
Dimensional Twilight Stages
| Jump to a Specific Stage | ||||
|---|---|---|---|---|
| 1st and 2nd Basin | 3rd and 4th Basin | 5th and 6th Basin | ||
| 7th Basin | 8th Basin | 9th Basin | ||
| 10th Basin | ||||
| Dimensional Twilight Support Buff | ||||
| Damage Amount of cards with Inspiration increases by 50% (1 per turn). | ||||
1st and 2nd Basin
| Stage Info | |
|---|---|
| Rec. Level | Level 35-39 |
| Rec. Attributes | Basin 1:
|
| Team 1 Best Characters | |
| DPS | 

|
| Sub-DPS | 


|
| Support | 

|
| Team 2 Best Characters | |
| DPS | 

|
| Sub-DPS | 


|
| Support | 

|
The first and second stage should be easy to 3 stars. The first team needs to have single-target damage characters since it only consists of a single enemy per wave while the second team wants AoE damage characters as they will face against multiple enemies per wave.
3rd and 4th Basin
| Stage Info | |
|---|---|
| Rec. Level | Level 43-47 |
| Rec. Attributes | Basin 3:
|
| Team 1 Best Characters | |
| DPS |
|
| Sub-DPS |
|
| Support |
|
| Team 2 Best Characters | |
| DPS | 
|
| Sub-DPS |
|
| Support |
|
The third and fourth basin will shave off a few turns from few but you should still be able to clear it out within 6-8 turns. The first team will now be the AoE team as the fights will contain multiple enemies while the second team should have single-target characters since there will only be one enemy per wave.
5th and 6th Basin
| Stage Info | |
|---|---|
| Rec. Level | Level 52-57 |
| Rec. Attributes | Basin 5:
|
| Team 1 Best Characters | |
| DPS |
|
| Sub-DPS |
|
| Support |
|
| Team 2 Best Characters | |
| DPS |
|
| Sub-DPS |
|
| Support |

|
The fifth and six basin will consist of two waves but contains a few enemies with the rare species traits and can deal quite a bit of damage so either finish the fight early or have a decent healer for each team.
The first team will still be AoE characters while the second team will focus on single-target characters that can shut down enemies in one or two turns because the last fight will clog your draw pile with Shock so keep watch of that.
7th Basin
| Stage Info | |
|---|---|
| Rec. Level | Level 62 |
| Rec. Attributes | Team 1:
|
| Team 1 Best Characters | |
| DPS |
|
| Sub-DPS |
|
| Support |
|
| Team 2 Best Characters | |
| DPS |
|
| Sub-DPS |
|
| Support |
|
The 7th basin will now feature enemies known for stalling turns and disrupting your combos with their abilities. Be prepared and make sure you have cards that can increase action count of the enemies such as Rally or Wanderer of the Void.
How to Win the First Team Battle

If you have Yuki in your team, this should be easy enough and done within 2 turns. If you don't have her, simply bring in any AoE character to easily defeat them within 3-4 turns.
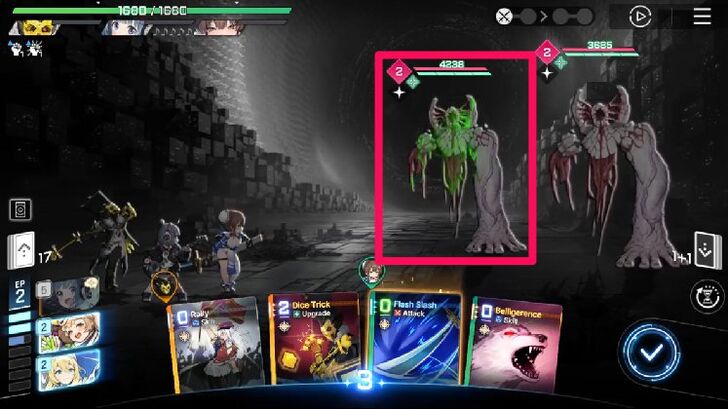
If you only have a single-target character, make sure to kill the enemies shown in the image above first. The enemies in the first wave can heal and essentially prolong the fight while the enemies in the second wave inflicts you with vulnerability after dying while the other two will put Bleed cards on your deck so do not kill the two red enemies first.
How to Win the Second Team Battle
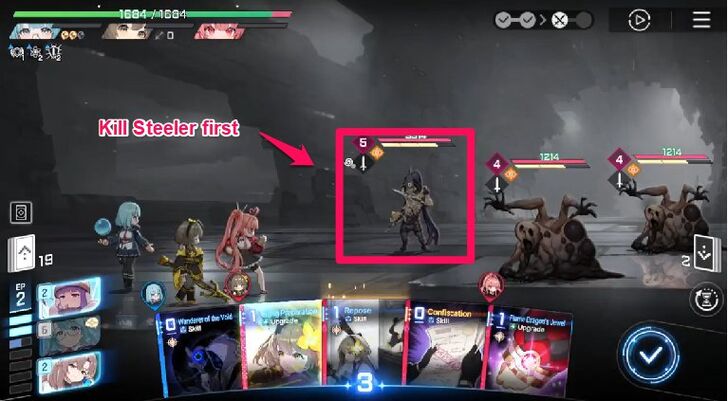
If you have Khalipe, this fight should be done within 2-3 turns as she can easily demolish the fights here. If you do not have her, always kill Steeler first as that enemy can discard 1 of your card forcefully after acting essentially disrupting your combo.
8th Basin
| Stage Info | |
|---|---|
| Rec. Level | Level 67 |
| Rec. Attributes | Team 1:
|
| Team 1 Best Characters | |
| DPS |
|
| Sub-DPS |
|
| Support |
|
| Team 2 Best Characters | |
| DPS |
|
| Sub-DPS |
|
| Support |
|
The 8th basin is still the same for the first team but the second team requires a much specific team composition to complete the fights because of how the enemy works there with shields and card debuffs.
How to Win the First Team Battle

The first wave in 8th basin is enough as the enemies will only attack and buff themselves trying to kill you but if you are able to clear them out within 1-3 turns, you should be good to go.
However, the second wave has this enemy shown in the image above that can stun your character after its second action. Make sure to kill it as soon as possible and deal with the other enemies next.
How to Win the Second Team Battle
Despite favoring the Order attribute, Haru shines better here because the enemies constantly have shields which buffs her cards and the enemy in the first wave will buff your cards depending on how much AP it costs to use. The only thing you need to keep in mind is to never bring a character here that uses a lot of 0-cost cards.
9th Basin
| Stage Info | |
|---|---|
| Rec. Level | Level 71 |
| Rec. Attributes | Team 1:
|
| Team 1 Best Characters | |
| DPS |
|
| Sub-DPS |
|
| Support |
|
| Team 2 Best Characters | |
| DPS |
|
| Sub-DPS |
|
| Support |
|
The 9th basin is the hardest stage in the current rotation due to how the enemies restrict how you play your cards or completely negate damage if conditions are met. Plan ahead your decks and make sure you play around their gimmicks to lessen your turn count.
How to Win the First Team Battle
The first team during the first wave should always watch out and not get your hand full all the time but also finish the fight in a few turns because the second wave will make or break the run.
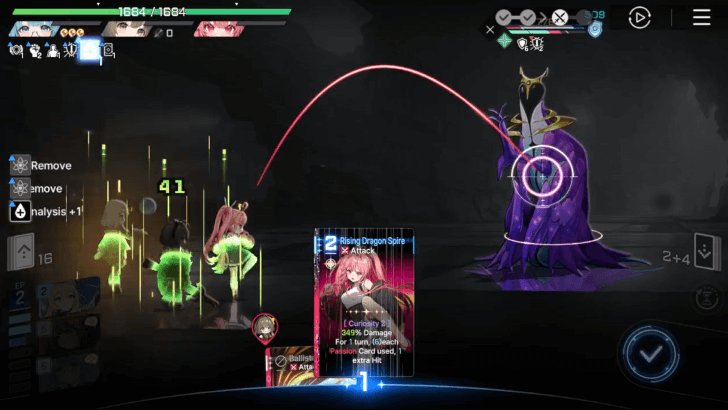
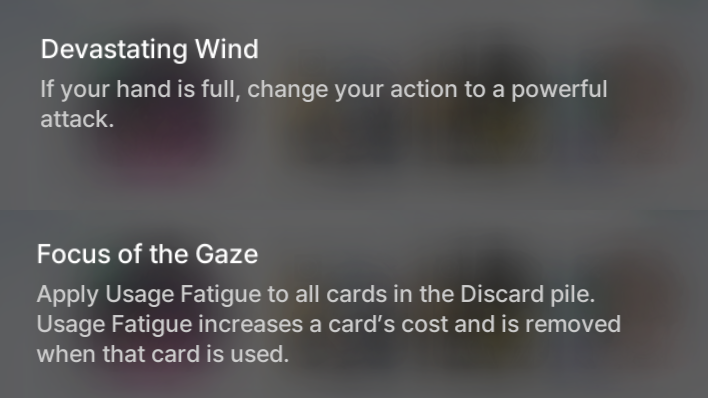
The second wave you have to shuffle your deck by any means so that if you let the enemy act, it won't have the any cards to increase the cost. Other than that, try to kill it as fast as you can because that's the only thing you need to watch out for.
How to Win the Second Team Battle
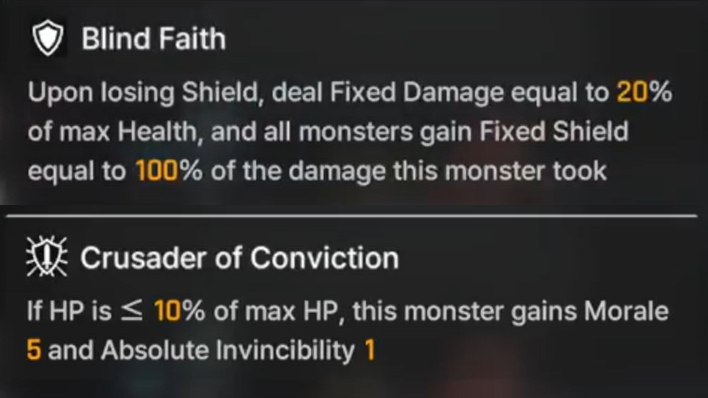
The hardest fight in the game if not played right or you don't have Haru. The first wave revolves around the enemy taking your first attack card every turn and restoring shields after fully depleting it. Make sure to nuke the enemy in one or two hits or wittle it down using small damage cards so that the shield is small every time.
The second wave you must watch out their health and kill them in one hit before they hit less than 10% health. That said, there are no enemies to prioritize because all of them will make your cards miserable to play so only focus on enemy as much as possible and do not spread your damage thin.
10th Basin
| Stage Info | |
|---|---|
| Rec. Level | Level 75 |
| Rec. Attributes | Team 1:
|
| Team 1 Best Characters | |
| DPS |
|
| Sub-DPS |
|
| Support |
|
| Team 2 Best Characters | |
| DPS |
|
| Sub-DPS |
|
| Support |
|
The 10th basin is easy enough, the only problem is their inflated health pool but other than that, their gimmick is pretty simple and will not affect your turn count that much so dish out the most damage you can with your team in this stage.
How to Win the First Team Battle
The first team's first wave is easy enough however, prioritize the first enemy with the green aura as it can debuff your cards even to the next fight and it chunks a lot of your health when used and more so if you don't have a decent healer. The second wave, is just a normal fight so try to output a lot of damage here without care for healing.
How to Win the Second Team Battle
The second team's first wave is also easy enough and will be much more easier if you have Wanderer of the Void card to simply ignore their gimmick all together. Otherwise, finish the fight as soon as possible and pay 1 AP every turn to counterattack its gimmick.
The second wave can also be made easier if you have the Wanderer of the Void card because the enemy here will counterattack you for each card played after its action is done so keep watch on that and end your turn if the enemy is done acting.
Dimensional Twilight Rewards
Monthly Crystals, Zeronium, Growth Materials and Units
| Stars | Rewards |
|---|---|
| 3 ★ | |
| 6 ★ | |
| 9 ★ | |
| 12 ★ | |
| 15 ★ | |
| 18 ★ | |
| 21 ★ | |
| 24 ★ | |
| 27 ★ | |
| 30 ★ | |
| Total Rewards (All 30 ★) |
You can get a total of 1000 Crystals, 300 Zeronium, Character and Memory Fragment Growth Materials and a bunch of Units for getting all the Stars in Dimensional Twilight. These rewards reset every month, allowing you get the rewards again until the next reset.
Chaos Zero Nightmare (CZN) Related Guides
Simulation Guides
| Basin of Hyperspace | |
|---|---|
| Dimensional Dawn | Dimensional Twilight | Spiral Tower of Screams |
Challenges Guides
| Fear Encountered (Judas) | - |
Comment
Author

Dimensional Twilight Guide
Premium Articles
Rankings
- We could not find the message board you were looking for.

Gaming News

![The Liar Princess and the Blind Prince Review [PC] | Lovely to Look at but Tedious to Play](https://img.game8.co/4442586/8d95f5faf05780f1765ce7e0938bd825.jpeg/show)
![Monster Hunter Stories 3 Review [First Impressions] | Simply Rejuvenating](https://img.game8.co/4438641/2a31b7702bd70e78ec8efd24661dacda.jpeg/thumb)
![The Seven Deadly Sins: Origin [First Impressions] | A Promising Start](https://img.game8.co/4440581/584e0bfb87908f12c4eab6e846eb1afd.png/thumb)

Popular Games

Genshin Impact Walkthrough & Guides Wiki
Umamusume: Pretty Derby Walkthrough & Guides Wiki
Pokemon Pokopia Walkthrough & Guides Wiki
Honkai: Star Rail Walkthrough & Guides Wiki
Monster Hunter Stories 3: Twisted Reflection Walkthrough & Guides Wiki
Arknights: Endfield Walkthrough & Guides Wiki
Wuthering Waves Walkthrough & Guides Wiki
Zenless Zone Zero Walkthrough & Guides Wiki
Pokemon TCG Pocket (PTCGP) Strategies & Guides Wiki
Monster Hunter Wilds Walkthrough & Guides Wiki


Recommended Games
Fire Emblem Heroes (FEH) Walkthrough & Guides Wiki
Diablo 4: Vessel of Hatred Walkthrough & Guides Wiki
Cyberpunk 2077: Ultimate Edition Walkthrough & Guides Wiki
Yu-Gi-Oh! Master Duel Walkthrough & Guides Wiki
Super Smash Bros. Ultimate Walkthrough & Guides Wiki
Pokemon Brilliant Diamond and Shining Pearl (BDSP) Walkthrough & Guides Wiki
Elden Ring Shadow of the Erdtree Walkthrough & Guides Wiki
Monster Hunter World Walkthrough & Guides Wiki
The Legend of Zelda: Tears of the Kingdom Walkthrough & Guides Wiki
Persona 3 Reload Walkthrough & Guides Wiki


All rights reserved
© Smilegate. All Rights Reserved.
The copyrights of videos of games used in our content and other intellectual property rights belong to the provider of the game.
The contents we provide on this site were created personally by members of the Game8 editorial department.
We refuse the right to reuse or repost content taken without our permission such as data or images to other sites.