This survey will take about 1 minute.
Your answers will help us to improve our website.
Chaos Zero Nightmare (CZN)
Selena Best Team and Build
NEW: Season 2 | Refinement | Arena
✪ Tiphera: Build | Cards | Banner
☆ Tiana: Partner Guide | Banner
✪ Nine: Build | Cards | Banner
See our Endgame Mode Tier List (Season 2 Updated!)
☆ Tier Lists: Character | Partner | Cards

This is a guide for the best teams and loadout for Selena in Chaos Zero Nightmare (CZN). Learn which combatants are best to pair with Selena, as well as recommended cards, partners, and equipment.
| Selena Related Guides | |
|---|---|
| Team and Build | Cards and Materials |
List of Contents
Selena Best Build
| Click on a Link to Jump to a Section! | |||||||||||
|---|---|---|---|---|---|---|---|---|---|---|---|
Build Overview
※ Hover over equipments, memory fragments and cards to see effects
| Character | Partner | Equipment |
|---|---|---|

|

|
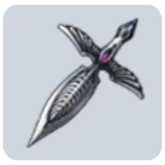
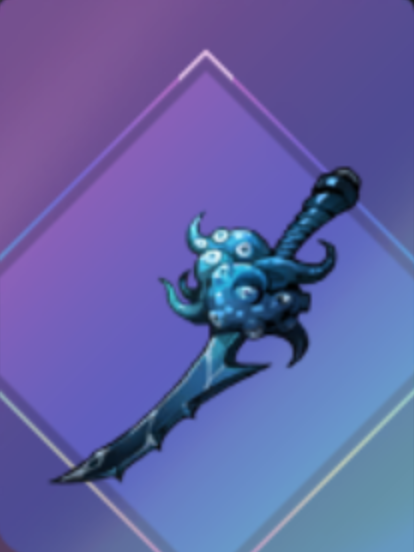
Dagger That Tricked The Shadow +12% Critical Damage Fairy King's Crown +6% Critical Chance Verdant Shackles +12% Attack, +12% DEF Refinement: ・Increase Damage Amount of Extra Attacks by 25% |
| Memory Fragments and Stat Priorities | ||
|
Black Wing Set +12% Attack Cursed Corpse Set Increases damage dealt to targets inflicted with Agony by 10%. Executioner's Tool Set +25% Critical Damage |
1. Passion Damage % 2. Extra Damage % (At least 30%) 3. Crit Chance % 4. Crit Damage % 5. Attack |
|
| Cards and Epiphanies | ||
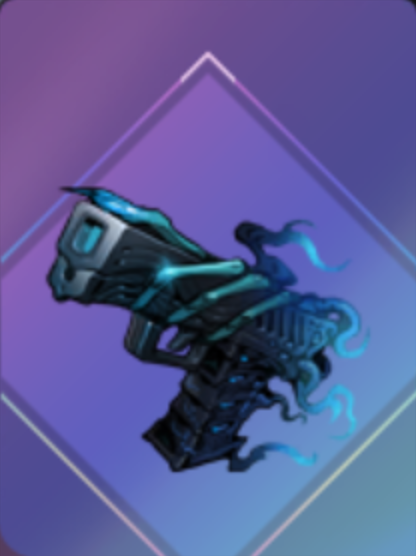
 High-Power Scope 4
AP Cost: 0 Type: ・When another combatant's Attack Card is used,100% Coordinated Attack for 1 turn  Drone Bombing 4
AP Cost: 1 Type: ・For 1 turn, when performing an Attack Weakness, 100% chance to trigger Coordinated Attack on the target 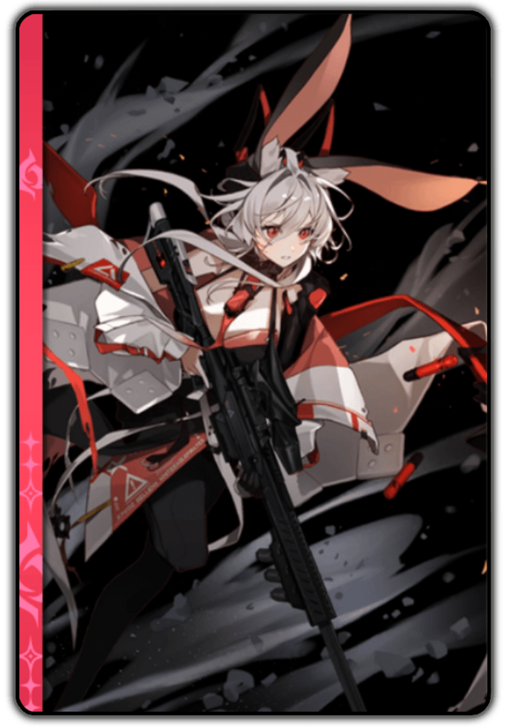 Tactical Maneuver 4
AP Cost: 0 Type: Tags: Retain・If the target is in Ravaged state, recharge Tenacity Tactical Maneuver 4
AP Cost: 0 Type: Tags: Retain・If the target is in Ravaged state, recharge Tenacity Tactical Maneuver 4
AP Cost: 0 Type: Tags: Retain・If the target is in Ravaged state, recharge Tenacity |
||
| Note: Selena's performance significantly improves if her cards has Draw 1 Divine Epiphany. | ||
Selena's best build revolves around dealing damage via coordinated attacks that her other party members activates by using multiple attack cards and her following up with more damage. She can also restore the tenacity bar of the enemy which can re-enable effects from other characters such as Sereniel.
She is best suited with the 2/2/2 set consisting of Black Wing to provide her a 12% attack stat increase, Cursed Corpse for a 10% multiplicative damage buff against targets with Agony and Executioner's Tool to further increase the damage of her extra attacks when it critically strikes.
Her favored chaos zone is Swamp of Judgment to get her best equipment such as Dagger That Tricked The Shadow for a 12% critical damage buff. Fairy King's Crown to get a 6% critical chance for all of her attacks including her coordinated attacks and Verdant Shackles for a 12% attack and defense stat boost which will increase her damage.
| Date | Changes |
|---|---|
| 03-02-2026 | ・Updated build overview ・Changed alternative team members ・Changed alternative budget partner ・Changed best equipment to Swamp of Judgment ・Changed alternative budget equipment ・Changed playstyle and build tips |
| 01-8-2026 | ・Revamped Selena's build to the Ravage focused build. |
| 12-24-2025 | ・Initial Selena build |
Selena Best Team
| Click on a Link to Jump to a Section! | |||||||||||
|---|---|---|---|---|---|---|---|---|---|---|---|
| Main DPS | Support |
|---|---|
 Sereniel Sereniel
|
 Cassius Cassius
|
Selena's best team is Sereniel and Cassius. Selena will activate her buffs that lets her follow up damage with her coordinated attacks after Sereniel uses her high amounts of attack cards while Cassius will provide the Morale buffs that can increase the damage of both DPS characters while he also gives healing and card draw for consistency each turn.
Alternative Team Members
| Character | Explanation |
|---|---|
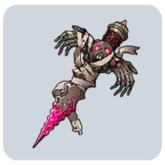
 Narja Narja
|
Can replace Cassius as a Support. She can also provide damage buffs through Voracity but it only applies to attack cards which does not include Selena's extra attacks. She also cannot draw naturally but can heal more than Cassius. |
 Luke Luke
|
Can replace Sereniel as a Main DPS. He can also create numerous amounts of attack cards but at a lesser degree than Sereniel. Also worth noting that if you pick him, Selena's tenacity bar restoration will be rendered useless. |
 Nia Nia
|
Can replace Cassius as a Support. She can discard and draw cards to avoid clogging your hand. However she cannot provide damage buffs the same as Cassius. |
 Tressa Tressa
|
Can replace Sereniel as a Main DPS. Tressa can generate a lot of attack cards that Selena can utilize but she runs at the same problem as Luke where Selena's tenacity bar restoration will be useless for her. |
Selena Best Cards
| Click on a Link to Jump to a Section! | |||||||||||
|---|---|---|---|---|---|---|---|---|---|---|---|
| Card | Explanation |
|---|---|
|
High-Power Scope
|
AP Cost: 0
Type:
・When another combatant's Attack Card is used,100% Coordinated Attack for 1 turn |
|
Drone Bombing
|
AP Cost: 1
Type:
・For 1 turn, when performing an Attack Weakness, 100% chance to trigger Coordinated Attack on the target |
|
Tactical Maneuver
|
AP Cost: 0
Type:
Tags: Retain
・If the target is in Ravaged state, recharge Tenacity |
Her High-Power Scope and Drone Bombing must have the epiphany that lets her initiate a coordinated attack when another character uses an attack card and another one if it hits a weakness so she can deal a lot of follow-up damage when Sereniel attacks. Next, is Tactical Maneuver with the tenacity refresh epiphany to re-enable Sereniel's lasers again.
As for Target Spotted and Sniper's Domain, it is best removed as she does not use any Mark in this build. You can replace it with any Ranger exclusive neutral cards that can draw or provide buffs to the party.
Essential Team Cards and Epiphanies
| Card | Explanation |
|---|---|
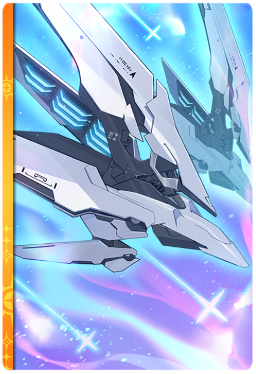 Homing Laser Homing Laser
|
AP Cost: 0
Type:
・100% Damage ・ 1 Afterglow ・ On Ravage or at the start of the turn, Move to hand Note: Try to get 1 AP Divine Epiphany for this card so that she can help provide AP especially for Cassius. |
 Plasma Missile Plasma Missile
|
AP Cost: 1
Type:
・120% Damage ・ 2 Instinct Weakness ・ +60% Damage Amount to Homing Laser for 1 turn(s) |
 Shining Core Shining Core
|
AP Cost: 1
Type:
Tags: Unique, Initiation
・Create 2 Homing Laser L ・ On Ravage, create 2 Homing Laser L |
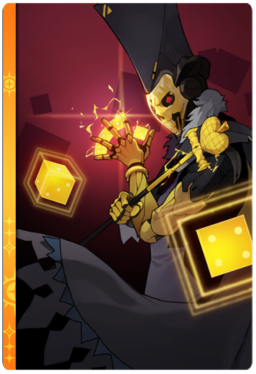
 Pop Eyed Popper Pop Eyed Popper
|
AP Cost: 0
Type:
・From 4 Quests, choose 1 to begin |
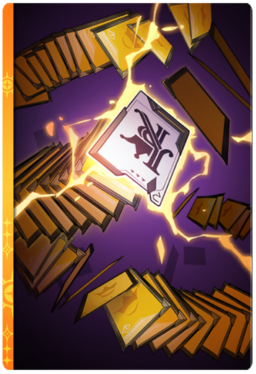
 Devil Dice Devil Dice
|
AP Cost: 1
Type:
・160% Damage ・Draw 1 Note: Make sure to get a "For 1 turn, 2 Morale" Generic/Neutral epiphany. |
 Dice Trick Dice Trick
|
AP Cost: 2
Type:
Tags: Unique
・When Quest Card is used, Heal 100%,100 Fixed Damage to a random enemy |
Sereniel wants her most optimal build of multiple copies of Homing Laser with the epiphany that moves it to your hand at the start of the turn and on ravage so that she can consistently get her attack cards every turn.
The next core card is Plasma Missile with the epiphany that inflicts instinct weakness and a 60% additive damage buff to all her laser cards. Lastly, is Shining Core and she must have the epiphany that creates 2 Homing Lasers after ravage so she can loop her engine without running the risk of clogging your deck.
As for Cassius, he needs his Pop Eyed Popper that has the epiphany that lets him choose any quest cards for consistency. Devil Dice must be the base epiphany but with a generic epiphany that gives the party 2 Morale for 1 turn when used and the Dice Trick epiphany can be the upgrade card that heals the party after question completion.
Selena Best Partner
| Click on a Link to Jump to a Section! | |||||||||||
|---|---|---|---|---|---|---|---|---|---|---|---|
| Partner | Details |
|---|---|
 Rosaria Rosaria
|
Passive Effect: Security Team Requesting Support! - The assigned combatant's Additional Attack damage is increased by 10%. When the assigned combatant uses an Upgrade skill or Skill card, 25% chance to gain Morale for 1 turn. Ego Skill: Financial Support - Draw 1 Enhanced card If there are no Enhance Cards in the Draw Pile, Draw 1 |
Rosaria can provide Morale per skill card or upgrade card use for 1 turn. This lets Selena also amplify the main DPS' damage output by using her Tactical Manuever and other skill cards while also amping her own damage from the morale buff and Rosaria's extra attack damage buff.
Alternative Budget Partner
| Partner | Details |
|---|---|
 Daisy Daisy
|
If you do not have Rosaria, you can use Daisy instead. Both Rosaria and Daisy has the same passive effect of providing attack stat and extra damage increase but they differ on how many Morale buffs they can provide which is much lesser than Rosaria. |
Selena Best Memory Fragments
| Click on a Link to Jump to a Section! | |||||||||||
|---|---|---|---|---|---|---|---|---|---|---|---|
 Black Wing Set Black Wing Set Black Wing Set +12% Attack |
 Cursed Corpse Set Cursed Corpse Set Cursed Corpse Set Increases damage dealt to targets inflicted with Agony by 10%. |
 Executioner's Tool Set Executioner's Tool Set Executioner's Tool Set +25% Critical Damage |
The best memory fragment sets Selena can use are Black Wing for a 12% increase to her attack stat, Cursed Corpse for a 10% multiplicative damage increase against enemies with Agony and Executioner's Tool for a 25% increase to her critical damage.
Stat Priority
| Main Stats | Recommended Substats |
|---|---|
|
Ideal: Critical Chance % Desire: Passion Damage % Imagination: Attack % |
・Extra Damage % (At least 30%) ・Critical Chance % ・Critical Damage % ・Attack ・Attack % |
The main stat and sub stats Selena needs are Passion Damage, Critical Chance, Critical Damage and Attack. Her last potential node needs at least 30% extra damage to get the extra 4% passion damage increase which is essential to enhance all damage she outputs.
Selena Best Equipment
| Click on a Link to Jump to a Section! | |||||||||||
|---|---|---|---|---|---|---|---|---|---|---|---|
| Weapon | Armor | Accessory |
|---|---|---|
 Dagger That Tricked The Shadow Dagger That Tricked The Shadow Dagger That Tricked The Shadow +12% Critical Damage |
 Fairy King's Crown Fairy King's Crown Fairy King's Crown +6% Critical Chance |
 Verdant Shackles Verdant Shackles Verdant Shackles +12% Attack, +12% DEF |
| Refinement: ・When a card is Retained or Exhausted, 100% Fixed Damage to a random enemy (2 times per turn each) ・At the start of battle, Draw 1 Exhaust card(s) of this unit ・Increase Damage Amount of Extra Attacks by 25% |
||
Selena's best equipment can only be found in Swamp of Judgment with Dagger That Tricked The Shadow giving her 12% increase to critical damage. Fairy King's Crown for a 6% critical chance increase so that she can hit critical strikes often. Verdant Shackles is great for her as it has +12% attack and defense stat increase to all of her attacks making her extra damage much more potent.
The best refinement you can get for her is the 25% multiplicative damage increase to extra attacks which counts for both her Marks and Coordinated Attacks.
Use Senectus Equipment If You Are Able to Get It
 Intellect of Discord Intellect of Discord Intellect of Discord +18% Attack On Ravage, decrease Stress of allies by 1 |
 Tentacles of Chaos Tentacles of Chaos Tentacles of Chaos +8% ally Attack Upon enemy Defeat, -2 Stress to the Combatant with the highest Stress |
Intellect of Discord will enhance Selena's attack stat by 18% which can significantly increase the damage of her extra attacks while Tentacles of Chaos provides an 8% attack increase to her and all of her party member when worn however this can only be obtained by chance after defeating Senectus.
Alternative Budget Equipment
| Weapon | Armor | Accessory |
|---|---|---|
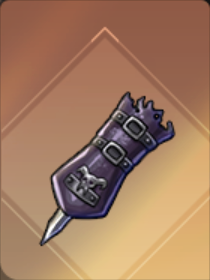 Second Method Second Method Second Method Extra Attack damage +35% |
 Titan Combat Suit Titan Combat Suit Titan Combat Suit When taking Damage, Recover 2% HP (1 per turn) |
 Amorphous Cube Amorphous Cube Amorphous Cube +25% Damage |
If you aren't able to get the best, you can settle for these equipment that can be found in any chaos zones inside shops. Second Method to get a 35% additive damage increase to all her extra attacks. Titan Combat Suit for a heal when hit once per turn and Amorphous Cube gives a permanent +25% additive damage to all her attacks.
Selena Build Tips and Playstyle
| Click on a Link to Jump to a Section! | |||||||||||
|---|---|---|---|---|---|---|---|---|---|---|---|
|
|
Coordinated Attack Homing Laser Combo
Selena's best combo revolves around playing both High-Power Scope and Drone Bombing to get a buff that will initiate a coordinated attack after another ally of her uses an attack card. When paired with Sereniel, the damage Selena deals can accumulate to a high number. Here are the steps to do this combo:
- Use all the upgrade cards you can play from Sereniel, Selena and Cassius
- Draw until you have High-Power Scope, Drone Bombing, Plasma Missile, Tactical Maneuver and at least 5 lasers in hand
- Play High-Power Scope and Drone Bombing first then use Plasma Missile to inflict instinct weakness.
- Make sure to free a lot of space in your hand, especially Cassius generated quest cards, before you start using Homing Lasers
- Activate Tactical Maneuver once the enemy is ravaged then use all the moved Homing Lasers again
- Continue until you run out of Tactical Maneuver to use
Copies of Her Cards Only Increases Turn Duration
All the cards stated in this build will only extend the turn duration of its buffs and not increase its effect if you have multiple copies played in the same turn.
Coordinated Attack Scales with Extra Damage
Even if the tooltip does not explicitly states extra damage, Coordinated Attack scales on both the attack and extra damage stat of Selena.
Chaos Zero Nightmare (CZN) Related Guides

5 Star Character Builds
 Chizuru Chizuru
|
 Haru Haru
|
 Hugo Hugo
|
 Kayron Kayron
|
 Khalipe Khalipe
|
Luke
|
 Magna Magna
|
 Mei Lin Mei Lin
|
Narja
|
 Nine Nine
|
 Orlea Orlea
|
 Renoa Renoa
|
 Rin Rin
|
 Sereniel Sereniel
|
 Tiphera Tiphera
|
 Veronica Veronica
|
 Yuki Yuki
|
4 Star Character Builds
 Amir Amir
|
 Beryl Beryl
|
Cassius
|
 Lucas Lucas
|
 Maribell Maribell
|
 Mika Mika
|
|
Nia
|
 Owen Owen
|
 Rei Rei
|
 Selena Selena
|
Tressa
|
Comment
2  Straytus about 2 months
Straytus about 2 monthsSome parts of the guide are from sereniel, like where it says she needs 60% crit chance because her last potential, that´s from sereniel´s kit
Author

Selena Best Team and Build
Please participate in our site
improvement survey
03/2026
improvement survey
03/2026
Would you assist in
improving Game8's site?
improving Game8's site?

×
We are listening to our users' valuable opinions and discussing how to act on them.
The information collected through this survey will be used for the purpose of improving our services. In addition, the information will only be disclosed a part of a statistic in a format that will not allow identification of personal information.
Begin Survey
Not Now
×
Please rate each item regarding Game8.co's Advertisements.
Amount of Ads
Very Dissatisfied
Somewhat Dissatisfied
Fine
Somewhat Satisfied
Highly Satisfied
Placement of Ads
Timing of Ad Display
Ad Loading Speed
Safeness of Ads
Content of Ads
×
Please rate each item regarding Game8.co's Quality of Articles.
Amount of information
Very Dissatisfied
Somewhat Dissatisfied
Fine
Somewhat Satisfied
Highly Satisfied
Frequency of updates
Speed of new information
Accuracy of articles
Understandibility of articles
Readability of sentences
×
Please rate each item regarding Game8.co's Usability of the Site.
Ease of finding information
Very Dissatisfied
Somewhat Dissatisfied
Fine
Somewhat Satisfied
Highly Satisfied
Loading Speed
Use of Color
Font Size
Visibility of Images
Easy to Understand Layout
×
Please rate each item regarding Game8.co's Message Boards, Comments.
Ease of Writing
Very Dissatisfied
Somewhat Dissatisfied
Fine
Somewhat Satisfied
Highly Satisfied
Readability
Ease in Finding Information
Comment Quality
Comment Quantity
Admin Response
×
Please rate each item regarding Game8.co's Site's new design.
Please rate our site's new design
Very Dissatisfied
Somewhat Dissatisfied
Fine
Somewhat Satisfied
Highly Satisfied
Do you think that the website's design change makes the site easier to use?
Has the new design made it easier for you to find information on the site?
Has the new design improved the overall visual appeal of the site?
How would you rate your overall satisfaction with the new design of the site?
×
How likely are you to recommend Game8 to someone you know?
Very Unlikely
0
1
2
3
4
5
6
7
8
9
10
Very Likely
If you have other opinions regarding potential improvement to the website, please share them with us. We would appreciate your honest opinion.
Note: This is a free response section, so you can proceed without entering anything.
Note: Please be sure not to enter any kind of personal information into your response.
Note: Please be sure not to enter any kind of personal information into your response.
×
Thank You
×
Thank you for participating in our survey! Your answers will help us to improve the quality of our website and services.
We hope you continue to make use of Game8.
We hope you continue to make use of Game8.
Close
Premium Articles
Rankings
- We could not find the message board you were looking for.

Gaming News


![Monster Hunter Stories 3 Review [First Impressions] | Simply Rejuvenating](https://img.game8.co/4438641/2a31b7702bd70e78ec8efd24661dacda.jpeg/thumb)
Popular Games

Genshin Impact Walkthrough & Guides Wiki
Honkai: Star Rail Walkthrough & Guides Wiki
Umamusume: Pretty Derby Walkthrough & Guides Wiki
Pokemon Pokopia Walkthrough & Guides Wiki
Resident Evil Requiem (RE9) Walkthrough & Guides Wiki
Monster Hunter Wilds Walkthrough & Guides Wiki
Wuthering Waves Walkthrough & Guides Wiki
Arknights: Endfield Walkthrough & Guides Wiki
Pokemon FireRed and LeafGreen (FRLG) Walkthrough & Guides Wiki
Pokemon TCG Pocket (PTCGP) Strategies & Guides Wiki


Recommended Games
Diablo 4: Vessel of Hatred Walkthrough & Guides Wiki
Cyberpunk 2077: Ultimate Edition Walkthrough & Guides Wiki
Fire Emblem Heroes (FEH) Walkthrough & Guides Wiki
Yu-Gi-Oh! Master Duel Walkthrough & Guides Wiki
Super Smash Bros. Ultimate Walkthrough & Guides Wiki
Pokemon Brilliant Diamond and Shining Pearl (BDSP) Walkthrough & Guides Wiki
Elden Ring Shadow of the Erdtree Walkthrough & Guides Wiki
Monster Hunter World Walkthrough & Guides Wiki
The Legend of Zelda: Tears of the Kingdom Walkthrough & Guides Wiki
Persona 3 Reload Walkthrough & Guides Wiki


All rights reserved
© Smilegate. All Rights Reserved.
The copyrights of videos of games used in our content and other intellectual property rights belong to the provider of the game.
The contents we provide on this site were created personally by members of the Game8 editorial department.
We refuse the right to reuse or repost content taken without our permission such as data or images to other sites.
This guide needs to be updated, I don't even trust this build because it mentions stats and mechanics from a different character... OP is talking about sereniel stats and not Selena stats for the last potential it's not Crit Chance nor is it 60% it's 30% Extra Damage. Additionally, Selena doesn't use Homing Missles once again that's Sereniel.