Orlea Best Team and Build
NEW: Season 2 | Refinement | Arena
✪ Tiphera: Build | Cards | Banner
☆ Tiana: Partner Guide | Banner
✪ Nine: Build | Cards | Banner
See our Endgame Mode Tier List (Season 2 Updated!)
☆ Tier Lists: Character | Partner | Cards

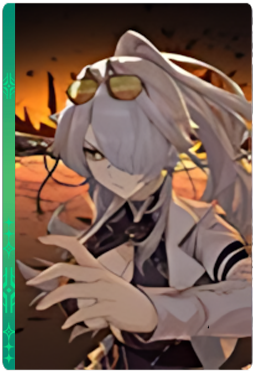
This is a guide for the best teams and loadout for Orlea in Chaos Zero Nightmare (CZN). Learn which combatants are best to pair with Orlea, as well as recommended cards, partners, and equipment.
| Orlea Guides | |
|---|---|
| Team and Build | Cards and Materials |
List of Contents
Best Orlea Build
| Click on a Link to Jump to a Section! | |||||||||||
|---|---|---|---|---|---|---|---|---|---|---|---|
Build Overview
※ Hover over equipments, memory fragments and cards to see effects
| Character | Partner | Equipment |
|---|---|---|

|

|
Pale Eternal Flame When a card is Exhausted, increase Damage Amount of allies by 10% for 1 turn (1 time per turn) Star-Lit Cloak -10% Damage (1 per turn) Combat Drum When 5 Skill Cards are created, increase Damage Amount of the next ally card activated by 20% (max 1 stack) Refinement: At the start of battle, Draw 1 Exhaust card(s) of this unit |
| Memory Fragments and Stat Priorities | ||
|
Glory's Reign Set When generating or using Exhaust Skill Cards, +5% to Damage Amount of all allies (max 15%) Tetra's Authority Set +12% Defense |
1. Defense% 2. Defense 3. Attack 4. Attack% |
|
| Cards and Epiphanies | ||
 Spore Harvester
AP Cost: 0 Type: Tags: Retain, Exhaust・Incinerate: Create 2 Contaminated Spore ・ Retain: Create 1 Contaminated Spore  Growth Acceleration 3
AP Cost: 1 Type: ・Heal 150% ・Select 1 of own Cards in hand and trigger Retain effect 2 time(s) ・If that Card is a Softie, 2 Vulnerable to all enemies  Growing Creature 3
AP Cost: 1 Type: Tags: Retain・Create 1 Creation ★ Card ・Retain: Change this card to Softie ★★★ and apply 2 Vulnerable to all enemies 
|
||
| Note: Orlea's performance will significantly improve if Growth Acceleration have a -1 cost Divine Epiphany. | ||
Orlea's season 2 build focuses on activating Contaminated Spore's stacking multiplicative debuffs via her retain cards to burst enemies in a single turn. Due to her Will of Light, she's able to forcefully duplicate Contaminated Spores via retain effect without ending the turn.
In addition to spores, you're also stacking multiplicative buffs from retaining Softie at the same time from retain effect and with Growth Acceleration, you'll be able to stack vulnerable debuffs to enemies as well.
Her ideal Memory Fragment set are the Glory's Reign Set to give the team a permanent +15% additive damage by exhausting cards which Orlea can easily do with Contaminated spores and her equipment set is found in the Burning Life chaos zone.
Build Changelog
| Date | Changes |
|---|---|
| 2-11-2026 | ・Build updated for season 2 and is focused on activating contaminated spores for big burst damage. |
| 1-20-2026 | ・Orlea build overhaul focusing on Vulnerable stacks and damage amp. |
| 11-18-2025 | ・Added Orlea build overview
・Revised Orlea build page layout |
Orlea Best Team
| Click on a Link to Jump to a Section! | |||||||||||
|---|---|---|---|---|---|---|---|---|---|---|---|
| DPS | Main DPS |
|---|---|
 Nine Nine
|
 Beryl Beryl
|
Nine is the best combatant to capitalize on Orlea's one big multiplicative buffs. Due to the nature of Nine's Hew card, she's able to reach a high base hit for a single cards. Couple it with multiplcative buffs and debuffs and you're able to defeat most elite enemies in a single hit.
For the 3rd combatant, Beryl is the ideal support to bring as Beryl can also stack up her own spores to ramp up the multiplicative debuffs to their target.take note however, that Beryl's Guilty Pleasurr cannot activate Orlea's retain effects but Orlea's Will of Light can to Beryl's spore if she has it in her save data.
Alternative Team Members
| Character | Explanation |
|---|---|
 Chizuru Chizuru
|
Chizuru and her Shadow of the Moon synergizes with Orlea and her interaction with Contaminated Spore. Spore's damage is based on the next attack card so any combatant that can focus their damage in one big attack can capitalize on Orlea's interaction with Contaminated Spore. |
 Veronica Veronica
|
Veronica as a card draw focused combatant can work as a team member for Orlea's setup as she can draw more Will of Lights to quickly ramp up retain effects. However, her ballista can consume the debuff from the contaminated spore so its ideal to remove her ballista card if you plan to include her in the team. |
Orlea Best Cards
| Click on a Link to Jump to a Section! | |||||||||||
|---|---|---|---|---|---|---|---|---|---|---|---|
| Card | Explanation |
|---|---|
|
Spore Harvester
|
AP Cost: 0
Type:
Tags: Retain, Exhaust
・Incinerate: Create 2 Contaminated Spore ・ Retain: Create 1 Contaminated Spore |
|
Growth Acceleration
|
AP Cost: 1
Type:
・Heal 150% ・Select 1 of own Cards in hand and trigger Retain effect 2 time(s) ・If that Card is a Softie, 2 Vulnerable to all enemies ] |
|
Growing Creature
|
AP Cost: 1
Type:
Tags: Retain
・Create 1 Creation ★ Card ・Retain: Change this card to Softie ★★★ and apply 2 Vulnerable to all enemies |
|
Will of Light
|
AP Cost: 1
Type:
・Heal 200% ・Activate the Retain effect of all cards in hand |
For her main setup, you'll remove her creation generator which is Sacred Censer as it will only dilute your hand with unnecessary creation cards. You'll want to get a card that can generate Spores and the best one to have is Spore Harvester as it can immediately give you two for no AP cost.
Once these are setup, simply continue on applying spore debuffs to enemies by using them then activating Growth Acceleration and Will of Light to reactivate their retain effect to repopulate your hand with spores again.
Essential Team Cards and Epiphanies
| Nine Card | Explanation |
|---|---|
 Hew (Extreme) Lv. 5 Hew (Extreme) Lv. 5
|
AP Cost: 2
Type:
Tags: Unique, Exhaust, Retain
・1000% Defense-Based Damage ・ Incinerate: At the start of the turn, create 1 Hew (Extreme) in hand |
 Fighting Spirit Fighting Spirit
|
AP Cost: 1
Type:
・Activate 1 highest-Cost Attack Card(s) of this unit in hand, then Exhaust those cards |
 Fatal Strike Fatal Strike
|
AP Cost: 5
Type:
Tags: Unique, Ignition, Retain
・Change Hew in hand to its final level |
 Counterblade Counterblade
|
AP Cost: 0
Type:
Tags: Unique
・When a card is Exhausted, 1 Honed Edge |
| Beryl Card | Explanation |
 Opening Found Opening Found
|
AP Cost: 1
Type:
・When own card is Retained, +150% Extra Attack to random enemies |
 Guilty Pleasure Guilty Pleasure
|
AP Cost: 0
Type:
・Draw 1 ・Activate Retain effect on all cards in hand |
 Unlimited Firepower Unlimited Firepower
|
AP Cost: 1
Type:
・+30% own Attack Card Damage |
|
Spore Harvester
|
AP Cost: 0
Type:
Tags: Retain, Exhaust
・Incinerate: Create 2 Contaminated Spore ・ Retain: Create 1 Contaminated Spore |
This setup is focused on stacking as much Contaminated Spore against enemies via Orlea and Beryl's retain card. Nine's focus is to reach Hew Extreme level 5 to reach her highest damage potential which can be done via her Fatal Strike's epiphany 3. Once done, the team's role is to continuously stack up spore effects on enemies from their retain activation then using Nine's Hew to dish out tons of damage.
Orlea Best Partner
| Click on a Link to Jump to a Section! | |||||||||||
|---|---|---|---|---|---|---|---|---|---|---|---|
| Partner | Details |
|---|---|
 Nyx Nyx
|
Passive Effect: Errante Hurricane - The assigned combatant's Defense, Health, and Heal Amount are increased by 8%. When the assigned combatant Draws for the first time each turn using an ability, +8% Damage dealt by allies for 1 turn. Ego Skill: Resonance - Discard up to 3 cards, then Draw +1 cards equal to the number discarded |
Nyx is the best partner for her as it solves one of Orlea's weakness which is card draw. It lets you discard cards to cycle through your deck which the creation cards can come in handy as discard options.
Alternative Partners
| Partner | Explanation |
|---|---|
 Arwen Arwen
|
A defensive 4-star Partner replacement that provides Damage Reduction whenever an enemy plans to attack your team. As Orlea doesn't have an active playstyle when it comes to defending, Arwen's 3 cost ego skill and her passive damage reduction helps sustain the team. |
 Noel Noel
|
Noel is a decent partner, specially in chaos runs as it lets you dish out passive damage just by playing with Orlea's strengths which are retaining her creation cards. Noel also passively increases the team's sustain by improving Orlea's creation's healing which stacks up nicely during the entire chaos run. |
Orlea Best Memory Fragments
| Click on a Link to Jump to a Section! | |||||||||||
|---|---|---|---|---|---|---|---|---|---|---|---|
 Glory's Reign Set Glory's Reign Set Glory's Reign Set When generating or using Exhaust Skill Cards, +5% to Damage Amount of all allies (max 15%) |
 Tetra's Authority Set Tetra's Authority Set Tetra's Authority Set +12% Defense |
This set amplifies the majority of Orlea's stat needs while also buffing her team's damage output. With her potential stat changes, opting to defense with Tetra's Wing Set is the superior option as it lets you reach her 300 stat requirement for potential 7 which increases the entire team's critical strike chance. Glory's Reign also adds +15% damage to the entire team's damage output after exhausting 3 cards which Orlea can easily do with spores and creation cards.
Tetra's Authority and Healer's Journey are the standard 2/2 set for defensive combatants to increase the team's survivability.
Orlea Best Equipment
| Click on a Link to Jump to a Section! | |||||||||||
|---|---|---|---|---|---|---|---|---|---|---|---|
| Weapon | Armor | Accessory |
|---|---|---|
 Pale Eternal Flame Pale Eternal Flame Pale Eternal Flame When a card is Exhausted, increase Damage Amount of allies by 10% for 1 turn (1 time per turn) |
 Star-Lit Cloak Star-Lit Cloak Star-Lit Cloak -10% Damage (1 per turn) |
 Combat Drum Combat Drum Combat Drum When 5 Skill Cards are created, increase Damage Amount of the next ally card activated by 20% (max 1 stack) |
Pale Eternal Flame is a permanent effect for Orlea due to her ease of access to exhaust cards and Combat Drum can be activated once we start retaining cards with Will of Light. These 2 equipment combined lets Orlea ramp up her allies' damage output easily. For armor piece, there are no exact equipment that lets Orlea perform better but Star-Lit Cloak is a decent survivability equipment but can easily be slotted by any armor that provides survivability to the team.
Orlea Build Tips and Playstyle
| Click on a Link to Jump to a Section! | |||||||||||
|---|---|---|---|---|---|---|---|---|---|---|---|
Capitalize on Creation Card Effects
 |
||
|---|---|---|
| Retain | Use | |
| Swiftie | Strengthens Swiftie's attack. | Launches an attack, the longer Swiftie is retained, the higher the multiplier. |
| Softie | Strengthens the next attack card used. The buff stacks additively and its effect can be collected for a huge damage burst. | Provides a 1 turn buff for all attack card used this turn. Stacks with its passive effect. |
| Sturdy | Heals the party. Unlike the other 2 creation cards, Sturdy's effect do not stack and its only best retained if you need the healing or wish to increase your hand size. | Shields the party. |
Orlea needs to activate her Sacred Censer upgrade but it costs 2 AP if Lead does not activate. With Multifacted Parallel Universe Nexus and Rocket-Adorned Cape, we'll be able to use most of our starting hand while also immediately activating Orlea's upgrade card in the first turn. This lets us ramp up our creation cards faster.
Cycle Burst With Vulnerable and Contaminated Spores
setup example but is best played with nine and a more condensed deck.
Orlea can quickly setup vulnerable and one big damage nukes. This damage bonus is applicable on the next card's total damage. Try to use the biggest damage and multi-hit card to stack its damage bonus with Orlea's Softie and the vulnerable debuff from enemies.
Chaos Zero Nightmare (CZN) Related Guides

5 Star Character Builds
|
Chizuru
|
 Haru Haru
|
 Hugo Hugo
|
 Kayron Kayron
|
 Khalipe Khalipe
|
 Luke Luke
|
 Magna Magna
|
 Mei Lin Mei Lin
|
 Narja Narja
|
|
Nine
|
 Orlea Orlea
|
 Renoa Renoa
|
 Rin Rin
|
 Sereniel Sereniel
|
Veronica
|
 Yuki Yuki
|
4 Star Character Builds
 Amir Amir
|
Beryl
|
 Cassius Cassius
|
 Lucas Lucas
|
 Maribell Maribell
|
 Mika Mika
|
 Nia Nia
|
 Owen Owen
|
 Rei Rei
|
 Selena Selena
|
 Tressa Tressa
|
Comment
Have to COMPLETLY disagree on Orlea being B tier. She is very easily SSS. She can solo any difficulty of any boss completely solo. Challenge, Codex, or Chaos. You don't need any gear or cards. I suggest her, Mika, and Haru. Mika only needs one epiphany (-5 stress) and you can get two 3* toughie for 100% x2 heals per turn and just hold out as long as you want to have as many swifties in hand with 4000%+ damage. The -5 stress prevents he from status and she can solo any content. 0 gear required
Author

Orlea Best Team and Build
Premium Articles
Rankings

Gaming News


![Marathon Cryo Archive Map Teased as [REDACTED] on Selection Screen](https://img.game8.co/4442236/6357203e58172f6de57f1991e7c39b22.png/thumb)
Popular Games

Genshin Impact Walkthrough & Guides Wiki
Umamusume: Pretty Derby Walkthrough & Guides Wiki
Pokemon Pokopia Walkthrough & Guides Wiki
Honkai: Star Rail Walkthrough & Guides Wiki
Monster Hunter Stories 3: Twisted Reflection Walkthrough & Guides Wiki
Arknights: Endfield Walkthrough & Guides Wiki
Wuthering Waves Walkthrough & Guides Wiki
Zenless Zone Zero Walkthrough & Guides Wiki
Pokemon TCG Pocket (PTCGP) Strategies & Guides Wiki
Monster Hunter Wilds Walkthrough & Guides Wiki


Recommended Games
Fire Emblem Heroes (FEH) Walkthrough & Guides Wiki
Diablo 4: Vessel of Hatred Walkthrough & Guides Wiki
Cyberpunk 2077: Ultimate Edition Walkthrough & Guides Wiki
Yu-Gi-Oh! Master Duel Walkthrough & Guides Wiki
Super Smash Bros. Ultimate Walkthrough & Guides Wiki
Pokemon Brilliant Diamond and Shining Pearl (BDSP) Walkthrough & Guides Wiki
Elden Ring Shadow of the Erdtree Walkthrough & Guides Wiki
Monster Hunter World Walkthrough & Guides Wiki
The Legend of Zelda: Tears of the Kingdom Walkthrough & Guides Wiki
Persona 3 Reload Walkthrough & Guides Wiki


All rights reserved
© Smilegate. All Rights Reserved.
The copyrights of videos of games used in our content and other intellectual property rights belong to the provider of the game.
The contents we provide on this site were created personally by members of the Game8 editorial department.
We refuse the right to reuse or repost content taken without our permission such as data or images to other sites.
she's best for raid