Chaos Manifestation Guide
NEW: Season 2 | Refinement | Arena
✪ Tiphera: Build | Cards | Banner
☆ Tiana: Partner Guide | Banner
✪ Nine: Build | Cards | Banner
See our Endgame Mode Tier List (Season 2 Updated!)
☆ Tier Lists: Character | Partner | Cards
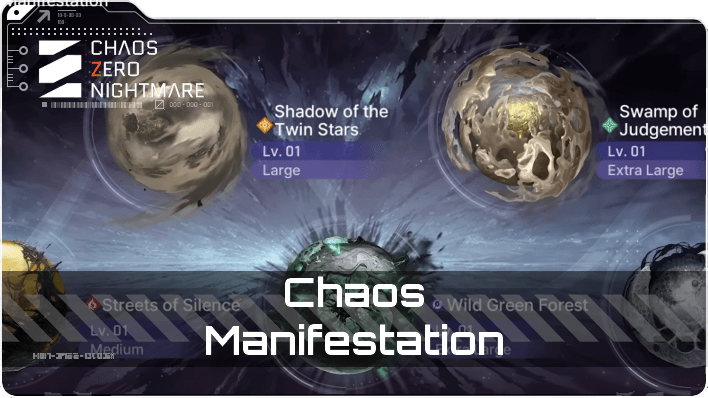
Chaos Manifestation is the roguelike game mode in Chaos Zero Nightmare (CZN). Check out a guide for tips on how to play Chaos Manifestation and what it's all about!
List of Contents
List of All Chaos Manifestation Stages
| Chaos Manifestation Stages | |
|---|---|
| 1 | The Blue Pot |
| 2 | Twin Star's Shadow |
| 3 | City of Mist |
| 4 | Swamp of Judgement |
| 5 | The Foretold Ruin |
| 6 | Laboratory 0 |
| 7 | Burning Life |
The Blue Pot
 The Blue Pot The Blue Pot |
|||
| Size | Small | Affinity |
|
|---|---|---|---|
| Rec. Level | 10 | Difficulty | ★ |
| Description | |||
| • A Street in a city completely consumed by Chaos • [Alert] Mutants are inhabiting this area. • [Alert] The Chaos Order is inhabiting this area. |
|||
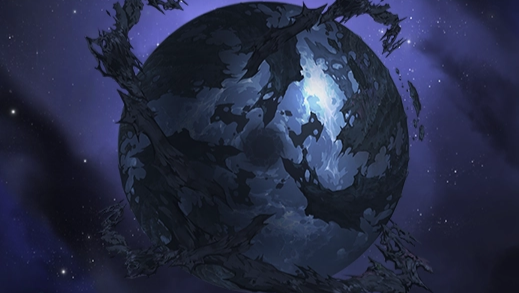
Twin Star's Shadow
 Twin Star's Shadow Twin Star's Shadow |
|||
| Size | Medium | Affinity |
|
|---|---|---|---|
| Rec. Level | 20 | Difficulty | ★★ |
| Description | |||
| • Chaos that occured in the northern region of Elbera, a satellite of the planet Speitz. • [Alert] Invaders are inhabiting this area. • [Alert] The Chaos Order is inhabiting this area. |
|||
Twin Star's Shadow Chaos Guide
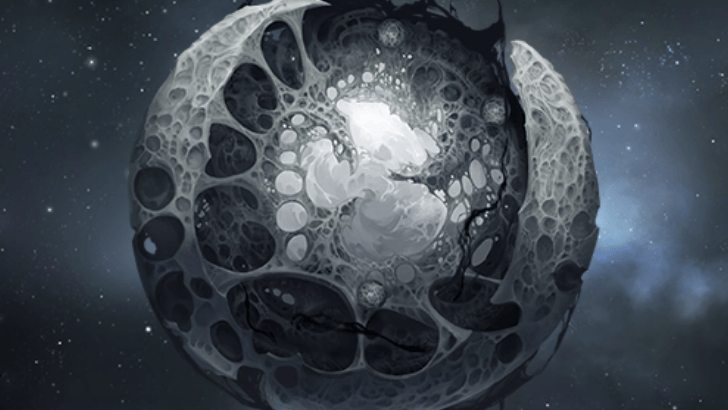
City of Mist
 City of Mist City of Mist |
|||
| Size | Medium | Affinity |
|
|---|---|---|---|
| Rec. Level | 30 | Difficulty | ★★★ |
| Description | |||
| • The city of Planet Siren, managed by The Holy Crusaders. It was under construction and modeled after Earth's cities, but was abandoned after Chaos broke out. • [Alert] Nihilum is inhabiting this area. |
|||
Swamp of Judgement
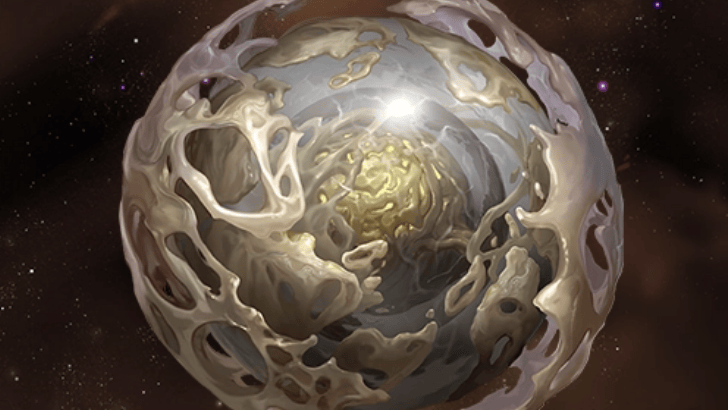 Swamp of Judgement Swamp of Judgement |
|||
| Size | Extra Large | Affinity |
|
|---|---|---|---|
| Rec. Level | 40 | Difficulty | ★★★ |
| Description | |||
| • The Forest within the Giant Pupil, located near the Verdant Wildwood. • [Alert] Sekred inhabit this area. • [Alert] Diallos inhabit this area. |
|||
Swamp of Judgement Chaos Guide
The Foretold Ruin
 The Foretold Ruin The Foretold Ruin |
|||
| Size | Extra Large | Affinity |
|
|---|---|---|---|
| Rec. Level | 50 | Difficulty | ★★★★ |
| Description | |||
| • One of the Massive Chaos entities on Earth, managed by the Holy Crusaders. • [Alert] Diallos inhabit this area. • [Alert] The Chaos Order is inhabiting this area. |
|||
Laboratory 0
 Laboratory 0 Laboratory 0 |
|||
| Size | - | Affinity |
|
|---|---|---|---|
| Rec. Level | 50 | Difficulty | ★★★★ |
| Description | |||
| • Kaguya Pharmaceutical's Secret Laboratory. Chaos is triggered, but it has been thoroughly concealed from the outside world due to the pursuit of forbidden research. • [Alert] Mutants are inhabiting this area. • [Alert] Nihilum is inhabiting this area. |
|||
Burning Life
 Burning Life Burning Life |
|||
| Size | - | Affinity |
|
|---|---|---|---|
| Rec. Level | 50 | Difficulty | ★★★★ |
| Description | |||
| • A peculiar Chaos that is affecting multiple planets. Atop the darkened earth, a blue flame burns in permanence. • [Alert] Mutants are inhabiting this area. • [Alert] Sekred inhabit this area. |
|||
What is Chaos Manifestation?
Roguelike Game Mode
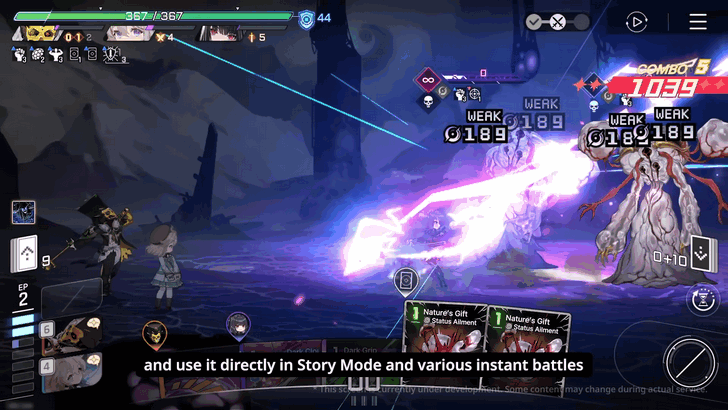
Chaos Manifestation is part of Chaos Zero Nightmare's roguelike game mode, where you can choose three characters for a run, and choose different paths until you reach the final boss. You'll earn rewards such as equipment, and card epiphanies, which are vital for early deck and character building.
There are areas that offer options requiring a dice roll to get an outcome successfully. Using the right characters for specific Dice Roll Effects will greatly help with these rolls.
Stage Size Determines the Map Size
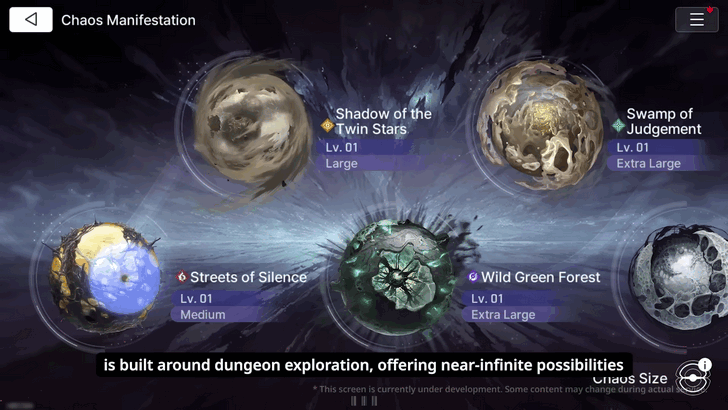
The sizes ranging from Small to Extra Large can be found below the level when viewing the Chaos Manifestation stages. These sizes determine how many tiles or areas you'll need to traverse before reaching the stage boss.
Larger stages mean you’ll spend more time completing the run, but you’ll also have more opportunities to obtain top-tier loot and trigger Combatant and Card Epiphanies.
All Chaos Manifestation Tiles
 Unidentified Area Unidentified Area |
These are random encounters where you can get rewards or not depending on the encounter or dice rolls. It is also possible that you'll be fighting enemies in these tiles. |
 Dellang Shop Dellang Shop |
A rest area with a Dellang Shop. You can spend credits to buy cards and equipment here, as well as delete an unwanted card from your deck. |
 Rest Area Rest Area |
An area where you can replenish your HP and decrease Stress. You can also train and receive common cards for 50 credits. |
 Save Area Save Area |
An area where you can obtain a guaranteed equipment drop. You can also temporarily leave the Chaos Manifestation stage and return some other time. |
 Normal Battle Area Normal Battle Area |
A tile where you'll encounter normal mobs and are typically easy to deal with. |
 Elite Battle Area Elite Battle Area |
A tile on the map where you'll encounter an elite enemy. You'll receive a random equipment upon defeating the elite. |
 Boss Area Boss Area |
The tile where you'll encounter the boss of the stage. You'll receive numerous rewards once it has been defeated. |
Chaos Manifestation Tips
- Check the Recommended Attribute
- Choose Your Fate Properly
- Plan Out Your Path
- Trigger Epiphanies As Much as Possible
- Health and Stress Carries Over to the Next Battle
- Redo Multiple Runs and Achieve the Best Run
- Run Nightmare Mode for Better Rewards
1. Check the Recommended Attribute Before Starting
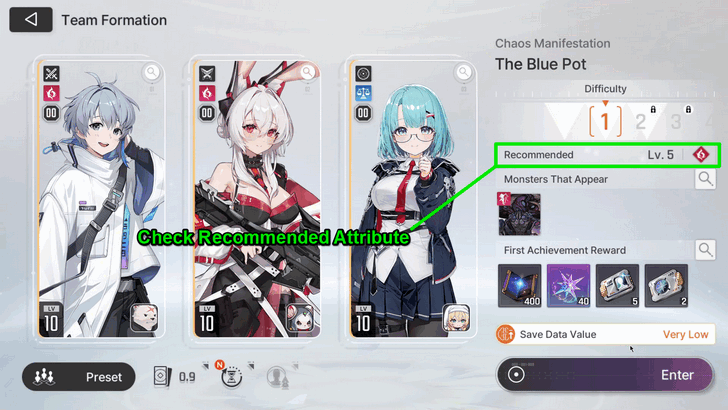
It's always best to set up your team composition with the recommended attribute to deal increased damage and tenacity damage, making battles easier. Most, if not all, enemies in the current run are weak to the recommended attribute.
2. Choose Your Fate Properly
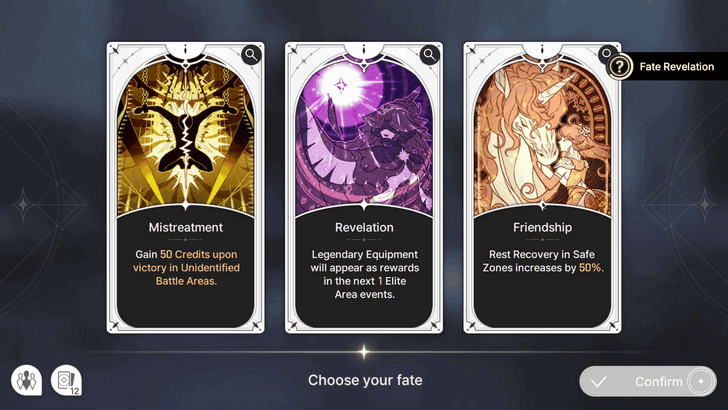
At the beginning of each run, you'll have the option to choose from three Fates, each offering unique effects for your current run. Some Fates come with drawbacks, such as reducing your HP by a certain amount, but grant you credits each time you move between areas. Carefully analyzing your needs is key to choosing your Fate wisely.
Unlock More Fate Options Upon Increasing Exploration Level
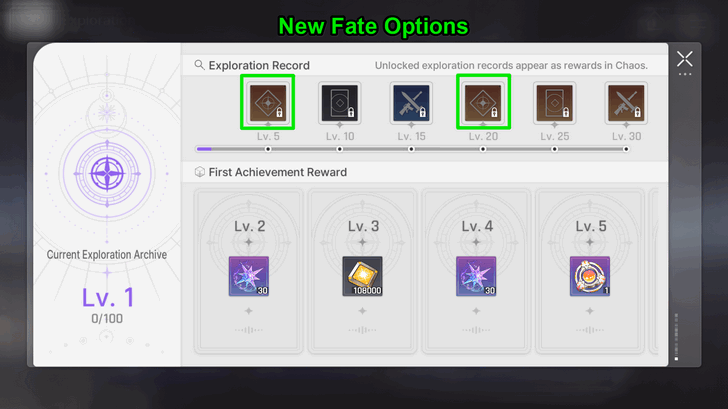
More fates will become available for you to choose from as you increase the exploration level of a Chaos Manifestation stage. You can increase the level by discovering new equipment, fighting monsters and bosses a certain number of times, and uncovering new unidentified areas within the stage.
3. Plan Out Your Path
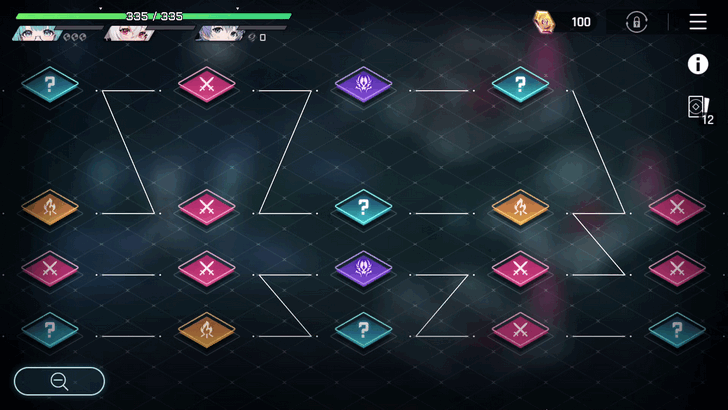
At the start of a run, check the map in the bottom left corner and plan your path to the final boss. Aim to take as many elite enemy tiles as possible for better rewards, such as new equipment and higher credits, provided you're confident you can survive the encounters.
Don't forget to visit Rest Areas to recover HP and reduce stress, or spend credits on training to add new cards to your deck!
Rest Areas Can Include Dellang Shop to Buy Cards and Equipment
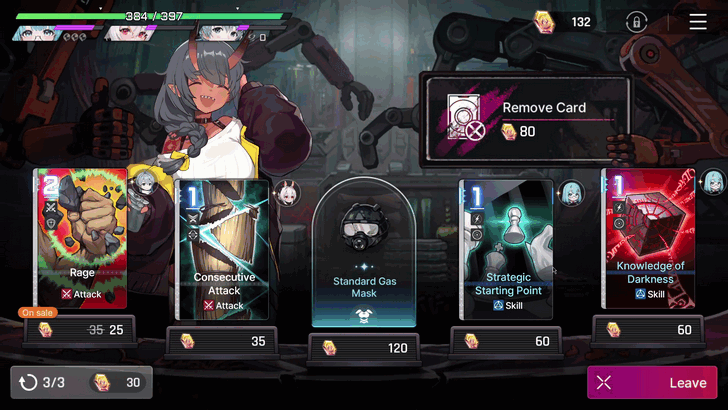
Rest Areas will sometimes display a shop icon, indicating that a Dellang Shop is available inside. You can spend your credits to purchase equipment and cards as much as your credits allow. Only five items are shown at a time, but you can spend credits to refresh the shop and reroll its contents.
You’ll also have the option to remove a card from one of your characters’ decks. This can be useful if a character has too many cards, lowering the chance of drawing your preferred ones each turn.
Even after visiting the Dellang Shop, you can still choose to rest or train and select one of three new cards afterward.
Go to Unknown Tiles for Random Encounters
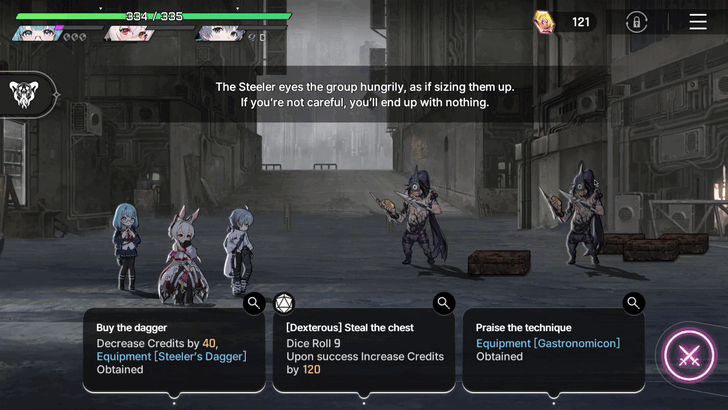
Unknown tiles trigger random encounters, where you might earn a new card, gain credits, trigger Epiphanies, battle an opponent, or fail the encounter and leave with nothing. It’s a high-risk, high-reward scenario for those willing to gamble a bit of progress.
If you prefer guaranteed rewards, you can stick to normal and elite battle areas instead.
4. Trigger Epiphanies As Much as Possible
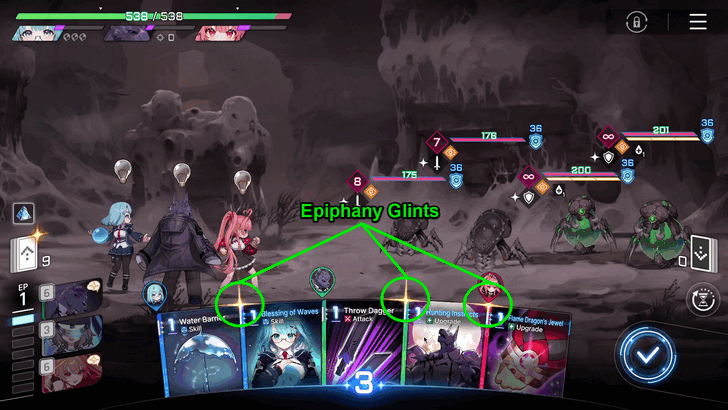
You can identify an Epiphany when a card shines at the top-left corner, or when a character has a light bulb icon above their head. Triggering an Epiphany can either upgrade the effect of the card that caused it or grant the character a new unique card. This also makes the AP Cost of the card 0 during that turn.
It’s best to trigger these as soon as they appear after drawing your cards, since they’ll disappear if not played during the current turn. If that happens, you’ll need to wait for another Epiphany to occur on one of your cards.
Epiphany Cards Are Sometimes Blessed for Better Effects
Epiphanies have a chance to be blessed, enhancing one of the upgrade options unique to the character who blessed the card. Blessed Epiphany cards are generally the better choice, but you’re free to choose other upgrades if they offer better synergy for your team.
5. Health and Stress Carries Over to the Next Battle

Before ending your turn, make sure to heal as much as possible, since your current HP carries over to the next battle. Also before moving to the next area, try to heal as much as possible before defeating the final enemy, so you'll have more health when you reach the next battle. This can become problematic if you're already low on HP and an elite enemy awaits on the next tile.
You should also manage your stress gauge by using shields to avoid damage, and visiting rest areas to reduce stress.
How to Reduce or Increase Stress
6. Redo Multiple Runs and Achieve the Best Run
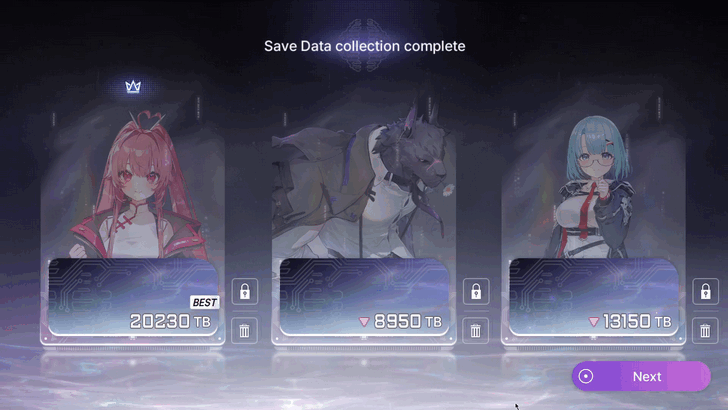
Chaos Manifestations can be played an unlimited number of times, allowing players to finish on a run they’re satisfied with. If you feel that the equipment and cards you obtained from a run aren’t good enough, simply replay the stage and hope that RNG blesses you with the items you need to maximize your characters’ combat prowess in other game modes.
7. Run Nightmare Mode for Better Rewards
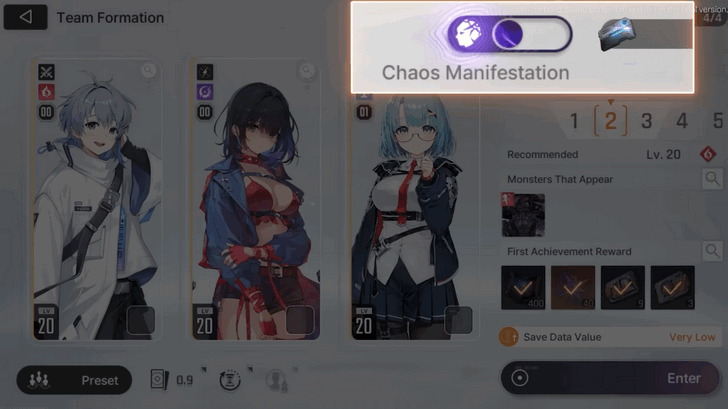
Include a character in your run who has undergone treatment for a mental breakdown through counseling at the Epione Center in Ark City in order to toggle Nightmare Mode, which is basically a hard mode setting for the run.
When Nightmare Mode is active, there is a chance that a powerful monster will appear after battles, offering greater rewards and rarer loot upon defeat.
Chaos Zero Nightmare (CZN) Related Guides
Chaos Game Modes
| Chaos Manifestation | Zero System |
All Chaos Areas
| The Blue Pot | Twin Star's Shadow |
| City of Mist | Swamp of Judgement |
| The Foretold Ruin | Laboratory 0 |
All Seasonal Chaos Areas
| Burning Life |
Author

Chaos Manifestation Guide
Premium Articles
Rankings
- We could not find the message board you were looking for.

Gaming News

![The Seven Deadly Sins: Origin [First Impressions] | A Promising Start](https://img.game8.co/4440581/584e0bfb87908f12c4eab6e846eb1afd.png/show)

![Monster Hunter Stories 3 Review [First Impressions] | Simply Rejuvenating](https://img.game8.co/4438641/2a31b7702bd70e78ec8efd24661dacda.jpeg/thumb)
![The Seven Deadly Sins: Origin [First Impressions] | A Promising Start](https://img.game8.co/4440581/584e0bfb87908f12c4eab6e846eb1afd.png/thumb)
Popular Games

Genshin Impact Walkthrough & Guides Wiki
Umamusume: Pretty Derby Walkthrough & Guides Wiki
Pokemon Pokopia Walkthrough & Guides Wiki
Honkai: Star Rail Walkthrough & Guides Wiki
Monster Hunter Stories 3: Twisted Reflection Walkthrough & Guides Wiki
Arknights: Endfield Walkthrough & Guides Wiki
Wuthering Waves Walkthrough & Guides Wiki
Zenless Zone Zero Walkthrough & Guides Wiki
Pokemon TCG Pocket (PTCGP) Strategies & Guides Wiki
Monster Hunter Wilds Walkthrough & Guides Wiki


Recommended Games
Fire Emblem Heroes (FEH) Walkthrough & Guides Wiki
Diablo 4: Vessel of Hatred Walkthrough & Guides Wiki
Cyberpunk 2077: Ultimate Edition Walkthrough & Guides Wiki
Yu-Gi-Oh! Master Duel Walkthrough & Guides Wiki
Super Smash Bros. Ultimate Walkthrough & Guides Wiki
Pokemon Brilliant Diamond and Shining Pearl (BDSP) Walkthrough & Guides Wiki
Elden Ring Shadow of the Erdtree Walkthrough & Guides Wiki
Monster Hunter World Walkthrough & Guides Wiki
The Legend of Zelda: Tears of the Kingdom Walkthrough & Guides Wiki
Persona 3 Reload Walkthrough & Guides Wiki


All rights reserved
© Smilegate. All Rights Reserved.
The copyrights of videos of games used in our content and other intellectual property rights belong to the provider of the game.
The contents we provide on this site were created personally by members of the Game8 editorial department.
We refuse the right to reuse or repost content taken without our permission such as data or images to other sites.
You not loose Epiphany if you not using a card when it's drawn, instead you can trigger Epiphany at the end of battle wit Latent Epiphany