How to Clear Salandit's Battle Plan Request Walkthrough
This is a guide to completing Salandit's Battle Plan, a request in New Pokemon Snap (Pokemon Snap 2) for the Nintendo Switch. Here you can find what kind of photo you need, and how to take it, in order to clear Salandit's Battle Plan, as well as the reward!
List of Contents
Salandit's Battle Plan Map and Request Information
General Info
| Course | Ruins Lv. 3 |
|---|---|
| Target Pokemon |
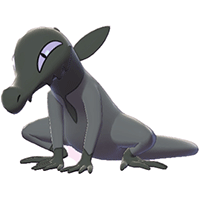
 Salandit Salandit
|
| Target Pokemon 2 |
 Noivern Noivern
|
| Quest Giver | Phil |
| How to Unlock | ・After reaching Ruins Research Level 3 |
| Request Text | ・“This is the aftermath of a battle! It was so exciting, I forgot to take pictures, but if you ever see the rematch, you're in for a treat!” |
Course and Map Information

Ruins Walkthrough: List of Pokemon and How to Unlock
Salandit's Battle Plan Walkthrough Video
How to Clear Salandit's Battle Plan
Throw a Fluffruit on the Claw Marks

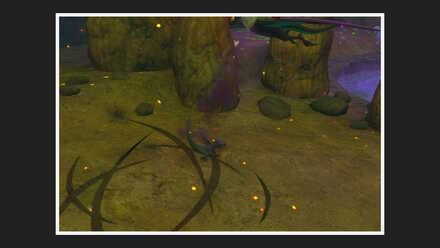
In between the Steelix and Volcarona statues, there should be some claw marks left behind by Salandit. Throw a Fluffruit at them, which will cause Salandit to appear.
Be careful not to throw the fruit too early or you may have a difficult time getting both in the shot.
Get a Photo of Salandit Attacking Noivern

Noivern will glide in from the right to eat the Fluffruit. Salandit will then face the Noivern and attack. Snap a photo of Salandit in the action.
Note that Salandit and Noivern must both be in the photo in order to complete the request.
Gracefully Gliding can be cleared at the same time

If you snap a photo of the Noivern gliding in, you will also clear the Gracefully Gliding request.
How to Clear Gracefully Gliding Request Walkthrough
Reward for Clearing Salandit's Battle Plan
Effect 8

Completing this request will reward you with the Effect 8 sticker.
New Pokemon Snap Request Walkthroughs

Aurus Island Lentalk Requests Walkthrough
| Ruins LenTalk Requests | ||
|---|---|---|
| Houndoom's Breather | Blowing Seeds | Just Perching Here |
| A White Pokemon | Salandit's Battle Plan | Gracefully Gliding |
| The Mysterious Heart | A Break between Patrols | Drowsing Beheeyem |
| Two Golurk | Groovy Chandelure | Fading into the Shadows |
| Myth of the Ruins | ||
Author
How to Clear Salandit's Battle Plan Request Walkthrough
improvement survey
03/2026
improving Game8's site?

Your answers will help us to improve our website.
Note: Please be sure not to enter any kind of personal information into your response.

We hope you continue to make use of Game8.
Rankings
- We could not find the message board you were looking for.
Gaming News
Popular Games

Genshin Impact Walkthrough & Guides Wiki

Honkai: Star Rail Walkthrough & Guides Wiki

Umamusume: Pretty Derby Walkthrough & Guides Wiki

Pokemon Pokopia Walkthrough & Guides Wiki

Resident Evil Requiem (RE9) Walkthrough & Guides Wiki

Monster Hunter Wilds Walkthrough & Guides Wiki

Wuthering Waves Walkthrough & Guides Wiki

Arknights: Endfield Walkthrough & Guides Wiki

Pokemon FireRed and LeafGreen (FRLG) Walkthrough & Guides Wiki

Pokemon TCG Pocket (PTCGP) Strategies & Guides Wiki
Recommended Games

Diablo 4: Vessel of Hatred Walkthrough & Guides Wiki

Cyberpunk 2077: Ultimate Edition Walkthrough & Guides Wiki

Fire Emblem Heroes (FEH) Walkthrough & Guides Wiki

Yu-Gi-Oh! Master Duel Walkthrough & Guides Wiki

Super Smash Bros. Ultimate Walkthrough & Guides Wiki

Pokemon Brilliant Diamond and Shining Pearl (BDSP) Walkthrough & Guides Wiki

Elden Ring Shadow of the Erdtree Walkthrough & Guides Wiki

Monster Hunter World Walkthrough & Guides Wiki

The Legend of Zelda: Tears of the Kingdom Walkthrough & Guides Wiki

Persona 3 Reload Walkthrough & Guides Wiki
All rights reserved
©2021 Pokémon. ©1995–2021 Nintendo / Creatures Inc. / GAME FREAK inc. ©1999 Nintendo / HAL Laboratory, Inc. Developed by BANDAI NAMCO Studios Inc.
Pokémon and Nintendo Switch are trademarks of Nintendo. © 2021 Nintendo.
The copyrights of videos of games used in our content and other intellectual property rights belong to the provider of the game.
The contents we provide on this site were created personally by members of the Game8 editorial department.
We refuse the right to reuse or repost content taken without our permission such as data or images to other sites.


![Monster Hunter Stories 3 Review [First Impressions] | Simply Rejuvenating](https://img.game8.co/4438641/2a31b7702bd70e78ec8efd24661dacda.jpeg/thumb)


I think this is only on lvl 3 for this. I didn't try on lvl 1, but I tried on lvl 2 for another request and tried twice for this one. Lvl 3, no matter how many fluff fruits I threw, I only got one salandit to come over.....lvl 2, I got multiple, but whether it was 1 or 2, lvl 2 didn't trigger any attacks from salandit. They simply moved away from the area when the bat swooped down.