Saboteur Build and Best Skills
★ Classes & Builds: Warrior, Mage, Rogue
★ Equipment: Weapons, Armor, and Accessories
★ All Major Choices and effects on the story
★ Romance Guides for each Companion
★ Beginner and Combat guides for starting out
★ Find all Treasure Chests and Wolf Statues
The Saboteur Rogue Build is a build you can create for the specialization in Dragon Age: The Veilguard. Learn the best skills to get, the best weapon and armor to use, the best companions to bring, and more!
| Rogue Guides | ||
|---|---|---|
| Best Builds | Skill Tree & Priority |
All Equipment |
| Duelist Builds |
Saboteur Builds |
Veil Ranger Builds |
List of Contents
The Best Saboteur Build for Dragon Age: Veilguard
Early-Game Saboteur Build
| Skills | 1.
Pilfer Pilfer Add insult to injury by swiping a Potion when you slice up an enemy. Applies Bleeding on hit. The Potion is automatically consumed after being stolen. Detonates Overwhelmed.
2. Explosive Trap Explosive Trap Repurpose Antaam explosives for your own use. Throw down an explosive trap that detonates when enemies get too close. Highly likely to disrupt enemies. Detonates Overwhelmed.
3. Fortune's Turret Fortune's Turret Throw down a mechanized turret that targets the closest enemy and peppers them with projectiles. When spent, the device explodes, dealing heavy damage likely to disrupt any enemies within range of the blast.
4. Fortune's Fury Fortune's Fury Embrace your fury, equipping a powerful, expendable weapon to bombard enemies. Fire a rapid stream of projectiles and then toss the weapon to deal additional damage. End the attack early by tapping Ultimate.
|
|---|---|
| Main |
Weisshaupt's Wail Weisshaupt's Wail Physical
+15% Light attack damage +20% Light Final attack damage Gain Rally party for every third Final attack you land Companion cooldowns are reduced by 15% while Rally Party is active +10% Weapon Damage |
| Off-Hand |
Barbed Longsword Barbed Longsword Physical
+25% Stagger +25% Stagger |
| Alt. Weapon |
Veil's Edge Veil's Edge Physical
+50% Arrow regeneration Gain Precision on every third Weakpoint hit +10% Precision effectiveness Critical hits from Precision also Knock Back enemies on hit +20% Barrier Damage |
| Helmet |
Defiant Silence Defiant Silence +20% Critical Damage
+25% Stagger with Critical Hits +10% Critical damage relative to Shadow Dragons Allied Strength You now have a 10% chance to deal Critical damage with any weapon attack +20% Resistance (Any) |
| Armor |
Jumper's Deft Leathers (Rogue) Jumper's Deft Leathers (Rogue) +50% Arrow Regeneration
+15% Weakpoint Damage +20% Necrotic Resistance |
| Belt |
Twin Buckle Binding Twin Buckle Binding +23% duration of Potion effect
+10% Ability damage Grants Enhanced Damage on Potion use. Heal for 100 upon using any Ability while Quickened. |
| Amulet |
All-Mother's Copse All-Mother's Copse +20% Tool Ability damage
+25% Tool Ability damage vs. enemies with Low Health Gain 25 Rage when using a Smash Ability vs. an enemy with Armor or Barrier Smash Abilities gain added damage from Flaming Weapons +25% Ultimate Damage |
| Ring 1 |
Bleeding Shard Bleeding Shard +20% Bleeding damage
+20% damage vs. Bleeding enemies +25% Bleeding duration +1 maximum Bleeding stacks +2 Max Arrows |
| Ring 2 |
Graven Opal Graven Opal +20% Ranged attack damage
+15% Weakpoint damage +25% Arrow Generation |
| Runes | 1.
Shatter Shatter 2. Upend Upend 3. Ravage Ravage |
| Companions | Bellara: Galvanized Tear Bellara creates a controlled tear in the Veil concentrated on enemies but sparing allies. Draws enemies toward a point on the battlefield, then deals damage to those pulled close.
Time Slow (Bellara) An Arlathan relic enables Bellara to conjure concentrated time anomalies on the battlefield. While active, these anomalies reduce the movement of enemies and companions but allow you to continue moving and attacking at normal speed.
Replenish (Bellara) Veil Jumpers never know what the Fade might throw at them. Bellara throws you a magical lifeline, instantly restoring your health.
|
| Taash: Dragonfire Strike Taash lands a fiery overhead strike that leaves enemies concussed, confused, and burning. Applies Burning on hit.
Spitfire Taash spits a searing burst of flame that takes the fight out of the foe. Deals high Stagger.
Dragon's Roar Taash roars with draconic fury, drawing enemy attention. Taunts enemies in the area, forcing them to briefly focus their attacks on Taash. Does not affect some of the strongest boss enemies.
|
|
For the early game Saboteur build, we focus on improving weapon damage and stagger since we have limited gear options. Use the best weapons and armor you can find for now.
Endgame Saboteur Build
| Skills | 1.
Explosive Daggers Explosive Daggers Unleash a barrage of sticky, explosive daggers. Fires 3 daggers that stick to their targets, then explode after a short time. Applies Sundered.
+25% Ability Critical Damage 2. Explosive Trap Explosive Trap Repurpose Antaam explosives for your own use. Throw down an explosive trap that detonates when enemies get too close. Highly likely to disrupt enemies. Detonates Overwhelmed.
-25% Cooldown Duration 3. Fortune's Turret Fortune's Turret Throw down a mechanized turret that targets the closest enemy and peppers them with projectiles. When spent, the device explodes, dealing heavy damage likely to disrupt any enemies within range of the blast.
-15% Cooldown Duration 4. Concussive Barrage Concussive Barrage Remind your enemies that a rogue’s pockets are often filled with danger… and explosives. Fire a barrage of concussive bombs that deal increased Stagger. The duration of any Staggered condition from this Ability is increased by 200%.
|
|---|---|
| Main |
Keen With A Twist Keen With A Twist Physical
+20% Agile attack damage Agile attacks apply Bleeding on impact if not already applies +10% Critical damage for each nearby Bleeding enemy Critical bonus is also added to all Bleeding damage +10% Weapon Damage |
| Off-Hand |
Barbed Longsword Barbed Longsword Physical
+25% Stagger +25% Stagger |
| Alt. Weapon |
Azure Bow Azure Bow Physical
+25% Hipfire Damage +4 Max Arrows This bow does not lose accuracy +4% Bow damage per maximum Arrows capacity +20% Hipfire Damage |
| Helmet |
Carastes Double-Hat Carastes Double-Hat +15% Momentum Generated
+25% Stagger on Ability use 25% Ability cost refunded on impact +10% Ultimate Generation |
| Armor |
Duelist's Coat Duelist's Coat +4 Maximum Arrows
+20% Hipfire Damage +300 Stagger on every fourth Arrow shot While you have maximum Momentum, you do not spend Arrows while using Ranged attacks +15% Affliction Duration |
| Belt |
Crow's Bandolier Crow's Bandolier +10% Physical Damage
|
| Amulet |
Magister's Bargain Magister's Bargain +20% Duration Ability damage
+25% Stagger for Duration Abilities Gain 25 Mana on kills with Duration Abilities +15% Critical Damage |
| Ring 1 |
Bleeding Shard Bleeding Shard +20% Bleeding damage
+20% damage vs. Bleeding enemies +25% Bleeding duration +1 maximum Bleeding stacks +25% Duration Ability Damage |
| Ring 2 |
Twin Palladium Twin Palladium +4 Rage on kill
+15% Rage generation +25% Tool Ability Damage |
| Runes | 1.
Upend Upend 2. Shatter Shatter 3. Dominate Dominate |
| Companions | Harding: Heavy Draw Harding draws her bowstring back as far as it will go, unleashing a devastating shot. Deals high Stagger.
Shred Harding shreds her opponent’s defenses with a decisive shot. Deals high Stagger.
Soothing Potion (Harding) An expert scout carries only the best resources. This special brew is a pick-me-up like no other. Harding tosses a restorative tincture to you, granting Rejuvenation.
|
| Taash: Dragonfire Strike Taash lands a fiery overhead strike that leaves enemies concussed, confused, and burning. Applies Burning on hit.
Spitfire Taash spits a searing burst of flame that takes the fight out of the foe. Deals high Stagger.
Dragon's Roar Taash roars with draconic fury, drawing enemy attention. Taunts enemies in the area, forcing them to briefly focus their attacks on Taash. Does not affect some of the strongest boss enemies.
|
|
In the endgame, we want to build for Critical Damage, Stagger, and Ability Damage to improve the effectiveness of all our Abilities and attacks.
Saboteur Skill Priority
Skill Tree Progression
| Order | Skill | Description |
|---|---|---|
| 1 |
Evasive Maneuvers
(Core) |
Use your speed to launch a powerful attack from an Extended Dodge. Also applies to recovering from being Knocked Down. |
| 2 |
Powerful Rebuttal
(Core) |
Gain Precision after a successful Defend. |
| 3 |
Pilfer
(Sustain) |
Add insult to injury by swiping a Potion when you slice up an enemy. Applies Bleeding on hit. The Potion is automatically consumed after being stolen. Detonates Overwhelmed. |
| 4 |
Bulwark
(Sustain) |
Physical Resistance: +10% |
| 5 |
Unending Quiver
(Lord of Fortune) |
Activating any Ability grants 2 more Arrows. |
| 6 |
Ready Shots
(Lord of Fortune) |
Arrow Regeneration: +20 |
| 7 |
Eclectic Armorer
(Lord of Fortune) |
While wearing different classifications of Helm and Armor: Arrow maximum: +4 Weapon damage: +15% Stagger: +25% |
| 8 |
Victory Rush
(Lord of Fortune) |
Defeating an enemy with a Takedown grants Necrotic Weapons. Your attacks also apply 25% bonus Stagger. |
| 9 |
Tipped Arrowheads
(Lord of Fortune) |
Bow damage: +10% |
| 10 |
Explosive Trap
(Lord of Fortune) |
Repurpose Antaam explosives for your own use. Throw down an explosive trap that detonates when enemies get too close. Highly likely to disrupt enemies. Detonates Overwhelmed. |
| 11 |
Sharper Edge
(Lord of Fortune) |
Penetration: +15% |
| 12 |
Some Motivation
(Lord of Fortune) |
Deal 4% more damage per your maximum Arrow count. |
| 13 |
Tipped Arrowheads
(Sustain) |
Maximum Arrows: +2 |
| 14 |
Fan of Arrows
(Lord of Fortune) |
Fire an arc of Arrows, up to your maximum of 5 Arrows. Requires at least 3 Arrows. |
| 15 |
Desolate Malady
(Lord of Fortune) |
Affliction damage: +10% |
| 16 |
Siege Breaker
(Lord of Fortune) |
Tool Abilities deal 25% more damage vs. Armor and Barrier. |
| 17 |
Enduring Reach
(Lord of Fortune) |
Duration Radius or Distance increases, depending on the Ability. |
| 18 |
Salt in the Wound
(Lord of Fortune) |
Hitting an enemy with a Duration Ability increases any existing Affliction stacks by 1. |
| 19 |
Shellbreaker
(Lord of Fortune) |
Damage vs. Armor: +20% |
| 20 |
Close Quarters Combat
(Lord of Fortune) |
Deal 15% more damage to all enemies within 10 meters. |
| 21 |
Fortune's Fury
(Saboteur) |
Embrace your fury, equipping a powerful, expendable weapon to bombard enemies. Fire a rapid stream of projectiles and then toss the weapon to deal additional damage. End the attack early by tapping Ultimate. |
| 22 |
Fortune's Turret
(Saboteur) |
Throw down a mechanized turret that targets the closest enemy and peppers them with projectiles. When spent, the device explodes, dealing heavy damage likely to disrupt any enemies within range of the blast. |
| 23 |
Determination
(Saboteur) |
Physical damage: +10% |
| 24 |
Quick Fix
(Saboteur) |
Defeating an enemy with a Tool Ability grants Quickened. |
| 25 |
Perseverance
(Sustain) |
While at Low Health, gain Deflect whenever you Perfect Dodge or perform Perfect Defense in response to an attack. |
| 26 |
Determination
(Sustain) |
Maximum Momentum: +50 |
| 27 |
Overwhelming Tactics
(Antivan Crow) |
While your Momentum is 100 or higher: Charged Light attacks apply Bleed if they are not already suffering from it. Charged Heavy attacks apply Necrosis if they are not already suffering from it. |
| 28 |
Arcane Defiance
(Antivan Crow) |
Electric Resistance: +10% Necrotic Resistance: +10% |
| 29 |
Adrenaline
(Antivan Crow) |
Successfully striking targets 10 times without taking damage grants Adrenaline, causing your attacks to deal bonus damage and be more likely to disrupt enemies. Resets when taking damage or on combat end. |
| 30 |
Necessary Steps
(Antivan Crow) |
Primer duration: +20% |
| 31 |
Sly Strike
(Antivan Crow) |
Gain 250 health and 10% Ultimate by performing a successful Takedown. |
| 32 |
Traumatize
(Burst) |
Takedown damage: +15% |
| 33 |
Explosive Daggers
(Burst) |
Unleash a barrage of sticky, explosive daggers. Fires 3 daggers that stick to their targets, then explode after a short time. Applies Sundered. |
| 34 |
Swift Death
(Burst) |
Gain Quickened after defeating an enemy with a Critical hit. |
| 35 |
Lightning Flask
(Sustain) |
Throw down a flask of bottled lightning that explodes, unleashing a storm of pain on nearby enemies. Deals damage in a large area upon impact, while creating an aura that deals Electric damage and applies Shocked to nearby enemies. |
| 36 |
Sharper Edge
(Saboteur) |
Penetration: +15% |
| 37 |
Precise Malady
(Saboteur) |
For each equipped Duration Ability, Arrow regeneration increases by 35%. |
| 38 |
Plague Arrow
(Saboteur) |
You can now Charge your Arrows beyond the normal Charge level to apply Necrosis in an area around your target. |
| 39 |
Come Prepared
(Saboteur) |
Maximum Arrows: +2 Arrow regeneration: +20% |
| 40 |
Trick Shot
(Saboteur) |
Every fifth Arrow that strikes a single target splinters into projectiles that may hit nearby enemies. |
| 41 |
A Messy Death
(Saboteur) |
Defeating an enemy with a Charged attack from any weapon causes an explosion after a short delay, dealing additional damage to all around them. |
| 42 |
Deep Cut
(Saboteur) |
Stagger on Weakpoint hit: +20% Stagger on Critical hit: +20% |
| 43 |
Inspired Takedowns
(Saboteur) |
Performing a Takedown now deals 25% bonus damage, grants Rally Party, and reduces your party’s Ability cooldowns by 50%. |
| 44 |
In the Fray
(Saboteur) |
Defeating enemies at close range resets the duration of any active Advantages. |
| 45 |
Salvaged Arrows
(Control) |
Arrows gained after defeating an enemy: +2 |
| 46 |
Bated Breath
(Control) |
Your Bow can now be charged up an additional level. |
| 47 |
Killer Instinct
(Control) |
Stagger from Abilities: +20% |
| 48 |
Time Management
(Control) |
Effects of Duration Abilities are increased by 50%. |
| 49 |
Wrath
(Burst) |
Critical damage: +10% |
| 50 |
Keen Eye
(Control) |
You generate 2 additional Momentum from Arrow hits. This bonus is doubled when hitting an enemy's Weakpoint. |
| 51 |
Determination
(Control) |
Maximum Momentum: +50 |
| 52 |
Marked Target
(Control) |
Duration Abilities are Critical vs. enemies suffering from Bleeding. |
| 53 |
Enervation
(Control) |
Damage vs. Barrier: +20% |
| 54 |
Debilitating Shocks
(Veil Jumper) |
Take 15% less damage from enemies who are Shocked. |
| 55 |
More is Better
(Veil Jumper) |
Maximum Arrows: +2 |
Early Game Progression
For the early game skill progression, pathing towards the Saboteur section of the skill tree requires us to take skills that improve our arrow count and regeneration instead of any specific damage bonuses so it'll feel weak early on.
This changes by taking the Greater Passive, Some Motivation, which gives us a damage bonus that scales with our maximum arrow count. This passive is, by far, the best passive skill in the Rogue skill tree to buff damage.
Rogue Class Abilities and Builds
Late Game Progression
Later on, we'd like to grab more skills that upgrade Tool and Duration Abilities as well as bonuses to maximum arrow count and and bow damage. Stagger and takedown improvements also help a great deal since we inflict a lot of stagger on enemies.
Best Saboteur Weapons
We want to go for the strongest Swords and Bow we can find for damage early on. Weapons with bonus Stagger and Hipfire damage are also great for Saboteurs.
In the endgame, we should use Keen With A Twist for more Bleeding application and extra Critical Damage per Bleeding enemy while Barbed Longsword is still good for the extra stagger. Azure Bow is the best Shortbow for Saboteurs for increased maximum arrow and Hipfire damage.
Best Saboteur Gear
The early game is pretty straightforward for equipment as you will mostly just get them from random chests in the overworld. Make use of equipment with the highest defense stat without thinking about stats too much since they will most likely have their bonuses locked this early.
In the late game, it would be best to use the Carastes Double-Hat for the increased Ability Damage and the Duelist's Coat for more maximum arrows and hipfire damage.
Best Saboteur Runes
| Rune | Pros & Cons | |
|---|---|---|
| Early Game | ||
|
Shatter Shatter |
• Shatter allows ranged attacks to break through the enemies' guard when activated. • This rune is great for Saboteurs since it also increases Ranged attack damage by +10% passively. |
|
|
Upend Upend |
• Gives a passive +5% to all Resistances and turns your existing Resistances into offensive damage bonuses of the same type for 10 seconds when activated. • Activate the rune during extended damage windows to further increase your burst damage. |
|
|
Ravage Ravage |
• Gives you a flat damage boost to the enemy's health bar when activated. • Deals +50% damage when the enemies are reduced to their red health. • Great active effect for finishing off enemies after breaking their armor/barrier. |
|
| End Game | ||
|
Upend Upend |
• Gives a passive +5% to all Resistances and turns your existing Resistances into offensive damage bonuses of the same type for 10 seconds when activated. • Activate the rune during extended damage windows to further increase your burst damage. |
|
|
Shatter Shatter |
• Shatter allows ranged attacks to break through the enemies' guard when activated. • This rune is good for Saboteur specifically since it also increases Ranged attack damage by +10% passively. |
|
|
Dominate Dominate |
• Dominate gives a +10% bonus to Ultimate generation and converts all Momentum generated into Ultimate when activated. • This is useful since Saboteur don't need to use little to no Momentum for their Abilities. |
Early on, make use of any rune that can help with your damage/survivability such as Shatter and Upend which also grant passive bonuses.
In the late game, use Upend, Shatter, and Dominate as your runes for damage and utility. With the right equipment, you'll have a lot of Physical resistance by the endgame which can be turned into damage bonuses by using Upend.
Best Saboteur Companions
Early Game Companions
| Companion | Build |
|---|---|
 Bellara Bellara
|
Skills: Galvanized Tear Bellara creates a controlled tear in the Veil concentrated on enemies but sparing allies. Draws enemies toward a point on the battlefield, then deals damage to those pulled close.
Time Slow (Bellara) An Arlathan relic enables Bellara to conjure concentrated time anomalies on the battlefield. While active, these anomalies reduce the movement of enemies and companions but allow you to continue moving and attacking at normal speed.
Replenish (Bellara) Veil Jumpers never know what the Fade might throw at them. Bellara throws you a magical lifeline, instantly restoring your health.
Equipment: Main Weapon: Storm Storm Physical
Attack My Target deals +50% Barrier damage Deals a burst of Electric damage to all nearby enemies if this attack breaks its target’s Barrier Armor: Utility Dress Utility Dress The entire Party gains +25% Weakened duration
Bellara deals +25% Damage vs. Weakened enemies |
 Taash Taash
|
Skills: Dragonfire Strike Taash lands a fiery overhead strike that leaves enemies concussed, confused, and burning. Applies Burning on hit.
Spitfire Taash spits a searing burst of flame that takes the fight out of the foe. Deals high Stagger.
Dragon's Roar Taash roars with draconic fury, drawing enemy attention. Taunts enemies in the area, forcing them to briefly focus their attacks on Taash. Does not affect some of the strongest boss enemies.
Equipment: Main Weapon: Neckbreaker Neckbreaker Physical
Attack My Target applies Burning to Antaam enemies (30s CD) The entire party deals +25% Damage vs. Antaam enemies Keepsake: Treasure Treasure Physical
Taash gains +25% Weapon damage Taash’s Weapon attacks are always Critical vs. Knocked Down enemies Armor: Plumed Platemail Plumed Platemail +50% Detonation damage vs. Dragons
Detonating Dragons adds 1 stack to every Affliction already on them |
In the early game, we can bring Bellara and Taash to get through the early levels. Bellara can group enemies with Galvanized Tear and Taash can apply Overwhelm with Spitfire which you can detonate with your abilities.
Endgame Companions
In the endgame, you can use Harding with the Overpower upgrade for her Heavy Draw which makes the Overwhelmed effect permanent on targets that have been Detonated. This allows your skills to always do Critical damage.
Taash is still really good to bring with the Spreading Weakness upgrade for Spitfire allowing for a passive application of Overwhelmed every 60 seconds.
How to Play the Saboteur
Saboteurs make use of explosions and Physical damage to overwhelm enemies in an instant. They also deploy turrets to attack targets for them while using their own bows to fire a seemingly endless stream of arrows.
- Use Abilities On Cooldown
- Deploy Turret at the Start of Combat
- Detonate Overwhelm for Burst
- Spam Your Arrows
- Freely Switch Between Swords and Bow
Use Abilities On Cooldown
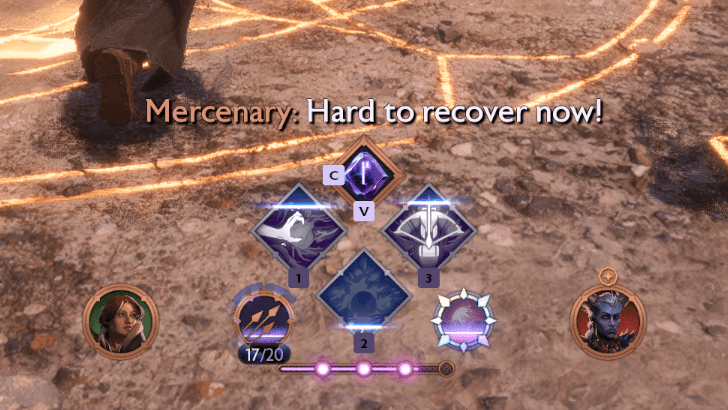
Your Abilities do not require Momentum so use them as much as you can during combat, they will be your main source of damage.
Deploy Turret at the Start of Combat
The Saboteur's Fortune's Turret should be used at the start of combat to maximize its use. It fires at the closest enemy dealing good damage while also exploding when it expires to deal significant damage to enemies.
Detonate Overwhelm for Burst
Two of your abilities detonate Overwhelm which you should aim for to deal huge amounts of damage. Overwhelm can be applied best by Taash and getting the Spitfire ability upgrade, Spreading Weakness. Detonate as much as you can with Explosive Trap and use Pilfer when trap is on cooldown.
Spam Your Arrows
Saboteurs have a lot of arrows in their pocket and are able to regenerate them quickly passively and when using abilities. Shoot arrows as much as you can and make full use of the Fan of Arrows trait to fire multiple at once.
Freely Switch Between Swords and Bow
You should also learn how to use Swords in melee since you'll mostly be in close-quarters combat as a Saboteur. Learn how to dodge and parry attacks to avoid damage and use light attacks with the swords to whittle enemies down.
Dragon Age: The Veilguard Related Guides

All Classes, Specializations, and Best Builds
List of Class and Specialization Builds
| Warrior Class | ||
|---|---|---|
 Champion Champion |
 Slayer Slayer |
 Reaper Reaper |
| Mage Class | ||
 Death Caller Death Caller |
 Spellblade Spellblade |
 Evoker Evoker |
| Rogue Class | ||
 Duelist Duelist |
 Veil Ranger Veil Ranger |
 Saboteur Saboteur |
Comment
Author
Saboteur Build and Best Skills
improvement survey
03/2026
improving Game8's site?

Your answers will help us to improve our website.
Note: Please be sure not to enter any kind of personal information into your response.

We hope you continue to make use of Game8.
Rankings
Gaming News
Popular Games

Genshin Impact Walkthrough & Guides Wiki

Honkai: Star Rail Walkthrough & Guides Wiki

Umamusume: Pretty Derby Walkthrough & Guides Wiki

Pokemon Pokopia Walkthrough & Guides Wiki

Resident Evil Requiem (RE9) Walkthrough & Guides Wiki

Monster Hunter Wilds Walkthrough & Guides Wiki

Wuthering Waves Walkthrough & Guides Wiki

Arknights: Endfield Walkthrough & Guides Wiki

Pokemon FireRed and LeafGreen (FRLG) Walkthrough & Guides Wiki

Pokemon TCG Pocket (PTCGP) Strategies & Guides Wiki
Recommended Games

Diablo 4: Vessel of Hatred Walkthrough & Guides Wiki

Fire Emblem Heroes (FEH) Walkthrough & Guides Wiki

Yu-Gi-Oh! Master Duel Walkthrough & Guides Wiki

Super Smash Bros. Ultimate Walkthrough & Guides Wiki

Pokemon Brilliant Diamond and Shining Pearl (BDSP) Walkthrough & Guides Wiki

Elden Ring Shadow of the Erdtree Walkthrough & Guides Wiki

Monster Hunter World Walkthrough & Guides Wiki

The Legend of Zelda: Tears of the Kingdom Walkthrough & Guides Wiki

Persona 3 Reload Walkthrough & Guides Wiki

Cyberpunk 2077: Ultimate Edition Walkthrough & Guides Wiki
All rights reserved
© 2024 Electronic Arts Inc.
The copyrights of videos of games used in our content and other intellectual property rights belong to the provider of the game.
The contents we provide on this site were created personally by members of the Game8 editorial department.
We refuse the right to reuse or repost content taken without our permission such as data or images to other sites.
 Harding


![Everwind Review [Early Access] | The Shaky First Step to A Very Long Journey](https://img.game8.co/4440226/ab079b1153298a042633dd1ef51e878e.png/thumb)

![Monster Hunter Stories 3 Review [First Impressions] | Simply Rejuvenating](https://img.game8.co/4438641/2a31b7702bd70e78ec8efd24661dacda.jpeg/thumb)


