This survey will take about 1 minute.
Your answers will help us to improve our website.
Crimson Desert
Forbidden Knowledge Walkthrough
☆ Best: Side Quests | Weapons | Armor | Skills
★ Controls | Best Items | What to Do First
☆ Characters: Damiane | Oongka | Kliff
This is a Forbidden Knowledge walkthrough for Crimson Desert. Learn how to complete Forbidden Knowledge and its quest rewards in this guide!
| ◄ Previous Quest | Next Quest ▶ |
|---|---|
| Daily Life | Uninvited Guest |
List of Contents
Forbidden Knowledge Walkthrough
- The Words of Alustin
- Scholastone
- On the Right Path
- Gate to the Otherworld
- Spire of the Stars
- Obsession and Madness
- Casted Shadow
1. The Words of Alustin
| 1.1 | Head to Hernand |
|---|---|
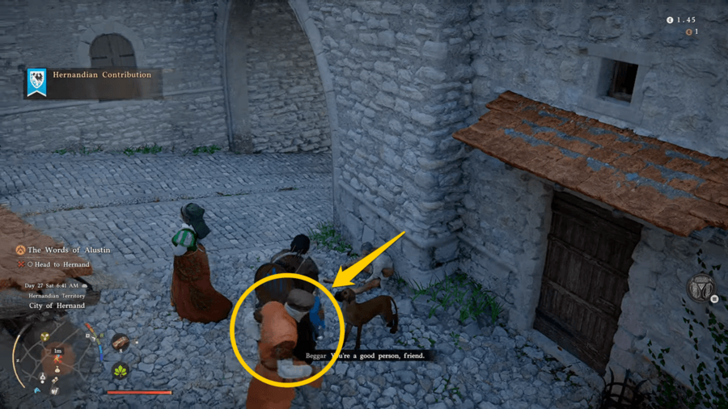 Head to the City of Hernand and proceed toward the orange marker. Upon arrival, an unnamed NPC will randomly bump into you and leave you with Alustin’s Letter. If the NPC does not appear, save and reload, then walk around the area until the encounter triggers. You must read the letter to progress. |
|
| 1.2 | Read Alustin's Letter |
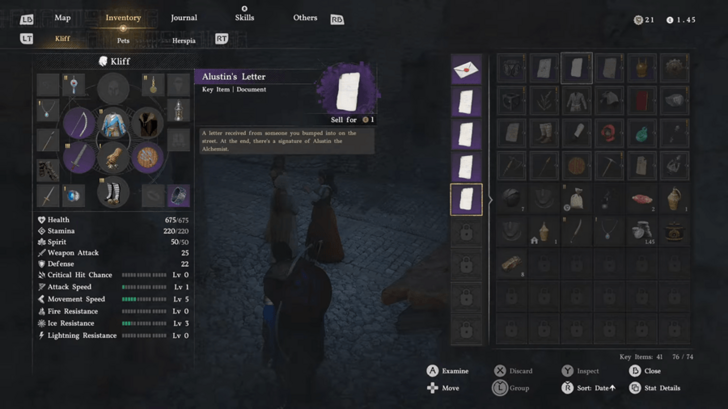 Open your inventory and read Alustin's Letter to get information for the next step. |
The Words of Alustin Walkthrough
2. Scholastone
| 2.1 | Visit the Fence |
|---|---|
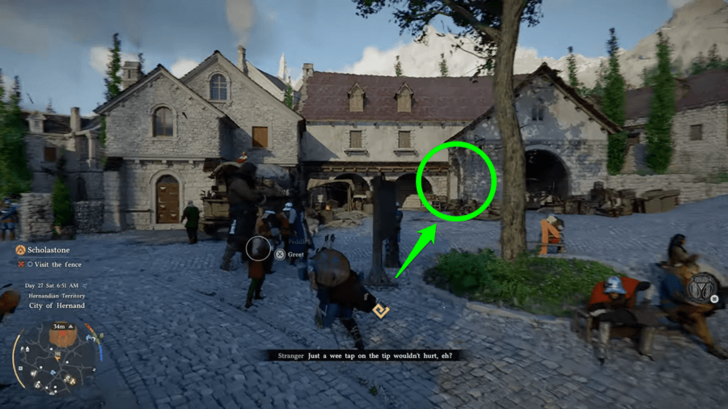 Go north of the beggar towards the plaza with the Message Board. The building with the Fence is to the left of the board, the entrance being the side door to the right. |
|
| 2.2 | |
| Speak to Darroch inside and you will receive the Scholastone Uniform, which you need to enter the Scholastone Institute later. | |
| 2.3 | Head to Scholastone |
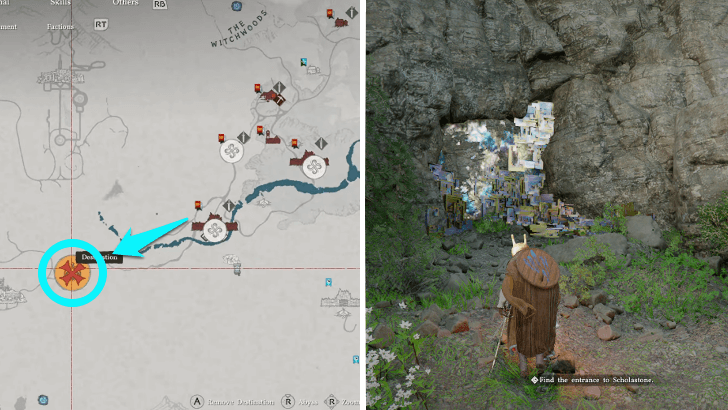 Head deep southwest of the Hernand region to find a hidden cave blocked by a barrier. |
|
| 2.4 | |
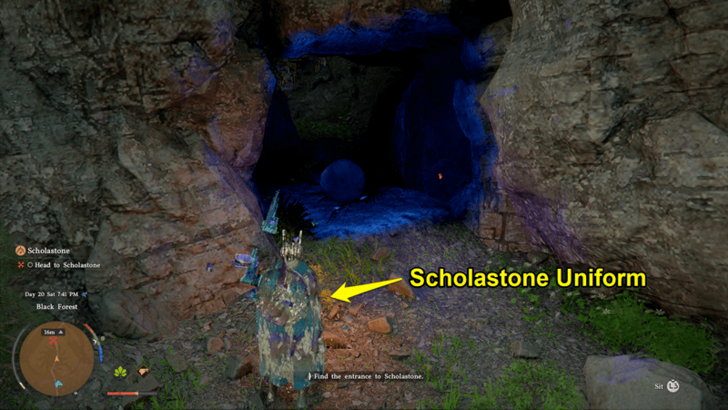 To open the magic entrance, put onn the Scholastone Uniform. The barrier will lift, allowing you to head through. |
|
| 2.5 | |
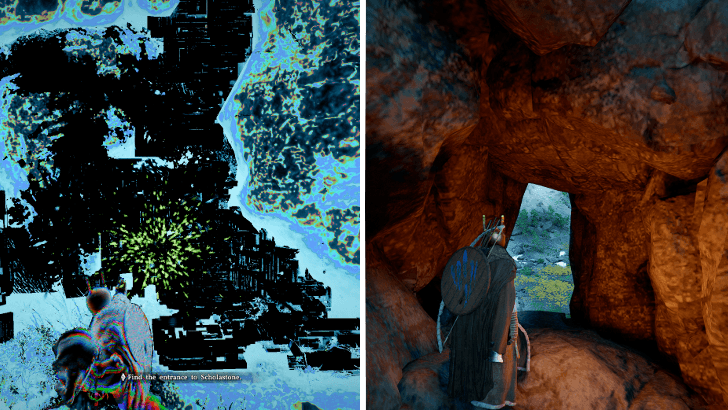 Move forward, and you will learn the Focus Force Palm mechanic. Use it on the glowing green energy in the center to open the path to Scholastone Institute. |
|
| 2.6 | Find the Path to Scholastone Institute |
| Move up and you will meet a Troll who will talk to you and show you the path to Scholastone Institute. You can reach the place by climbing the mountain or riding your mount following the road to the entrance. |
3. On the Right Path
| 3.1 | Meet the Dean of the Scholastone Institute |
|---|---|
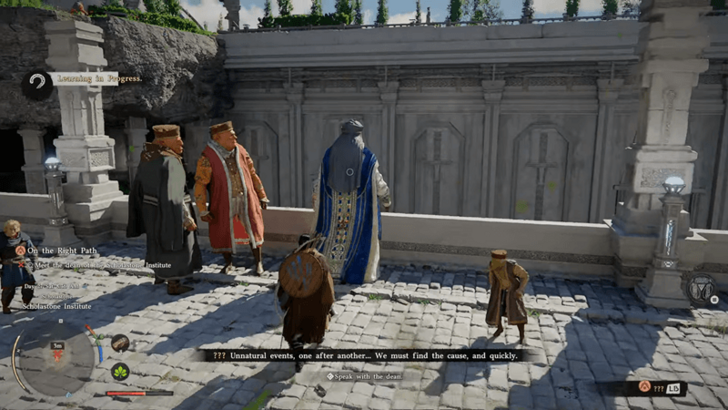 Meet Dean Grundir on the bridge once you arrive in the institute. Follow him to meet Octavius, and after the meeting, you must pass time and return 24 hours for the next part. |
4. Gate to the Otherworld
| 4.1 | Help with Octavius's Experiment |
|---|---|
When ready, speak with Octavius to begin the experiment. Head underground to the lock device by jumping off the ledge to the left of Octavius and gliding to the opening just below. |
|
| 4.2 | Strongbox Lock Device Puzzle |
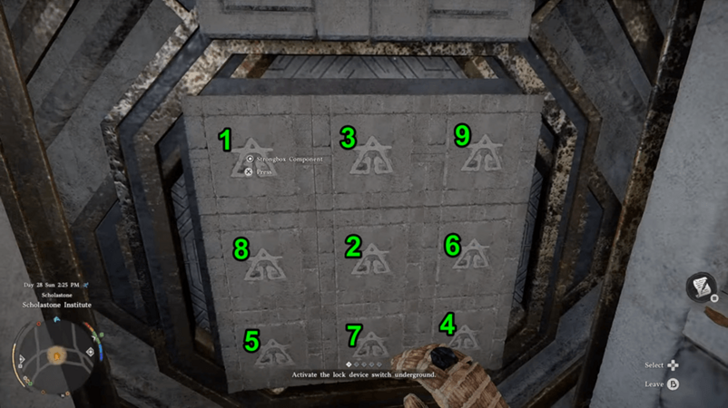 You must activate each square in order so that all symbols light up at the same time. Each block you push down alternates the blocks it is connected to up and down. The correct order to activate the squares:
Note: There can be a faster way to solve the puzzle, stay updated for a faster solution! |
|
| 4.3 | |
 Climb back up and grab the battery cubes with Axiom Force. |
|
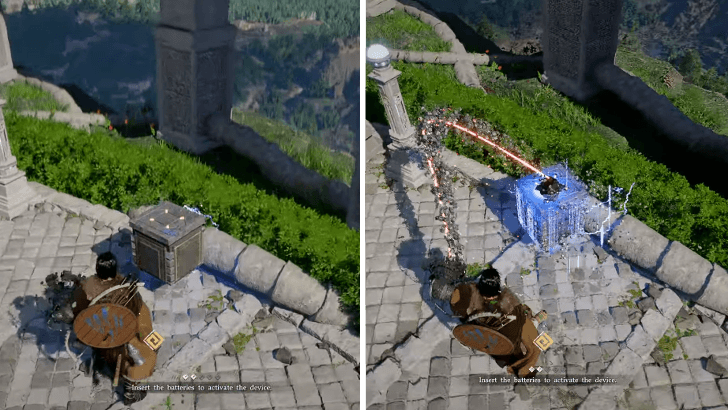
| 4.4 | |
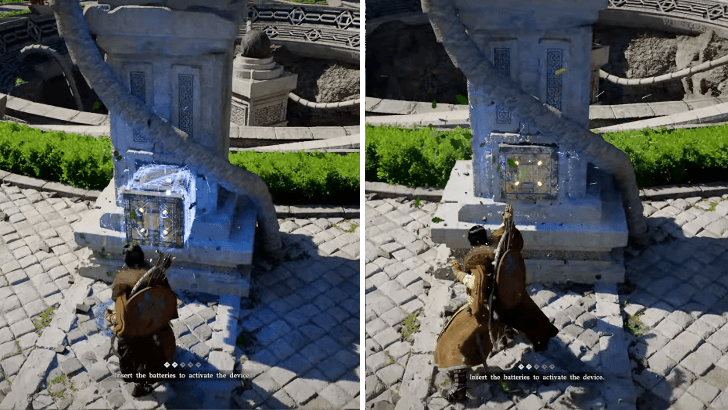 Line the cube into the sockets on the pillars, then use Force Palm on it to shove the battery in. |
|
| 4.5 | |
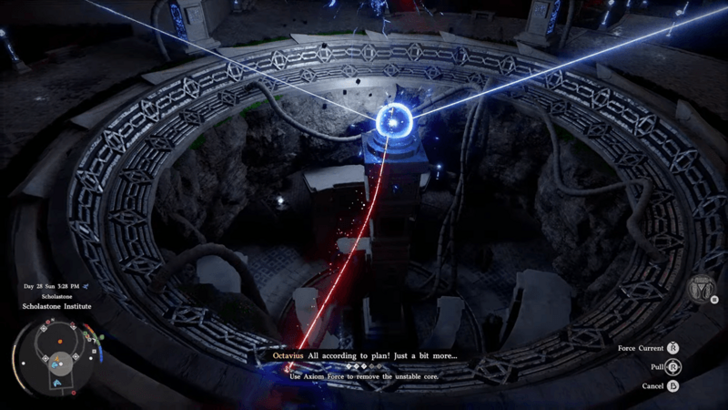 Use Axiom Force on the unstable core and continuously pull it backwards to get it out. |
|
| 4.6 | Defeat Tenebrum |
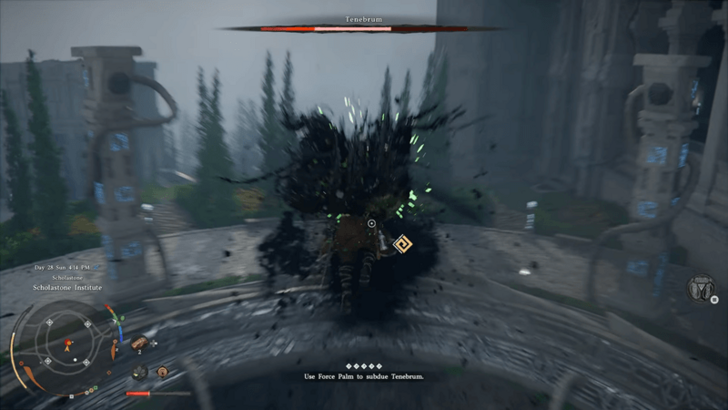 Deal damage to Tenebrum by jumping or climbing up the pillars, then gliding toward it and using Force Palm mid-air to deal heavy damage. Successful hits will defeat the boss in a few hits. Carefully dodge the black projectiles that go towards you to avoid damage. Falling into the middle will reset your position, but it will not kill you. Defeating the boss rewards you with one Abyss Artifact. ▶ How to Beat Tenebrum |
5. Spire of the Stars
| 5.1 | Go to the Spire of the Stars |
|---|---|
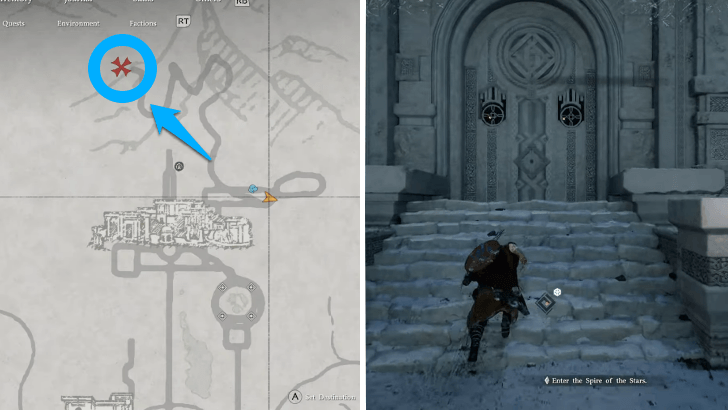 Follow the path outside, northeast of the main building toward the Spire of the Stars. The route is a straightforward staircase leading to the door, passing through a cave and gradually becoming snowier. At the door, insert the core into the center to open it. |
|
| 5.2 | |
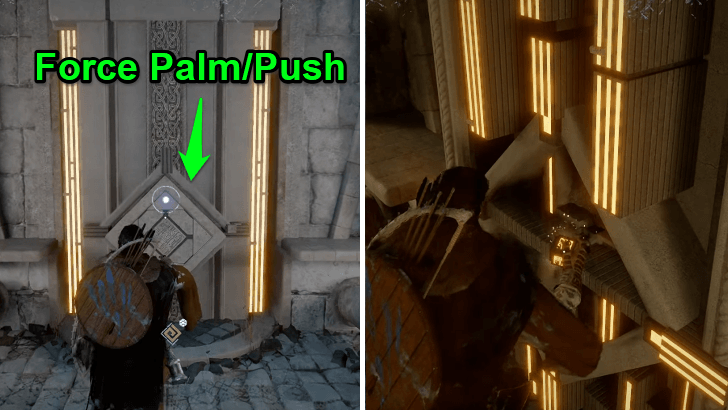 On the sides of the room are diamonds that you can use Force Palm on to retrieve a power core. Take three of these from the shapes around the room, as the fourth one is already activated. |
|
| 5.3 | |
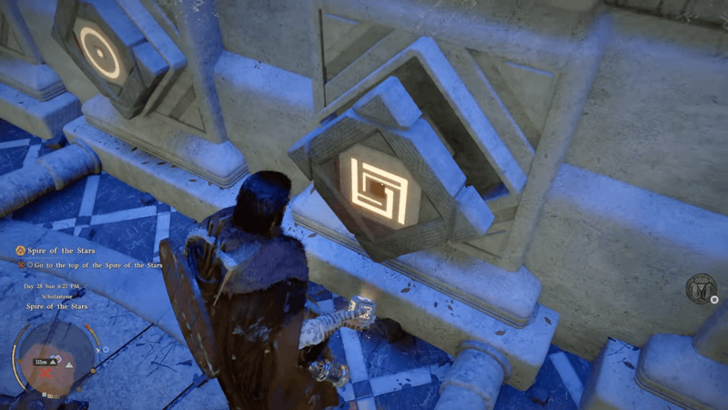 At the center, insert the cores into the slots. The circle shape (second line) will already be activated. |
|
| 5.4 | |
Climb up to each shape and hold down to move them around. To reset a line and bring it back up, Force Palm the buttons on the bottom. |
|
| 5.5 | Spire of the Stars Solution |
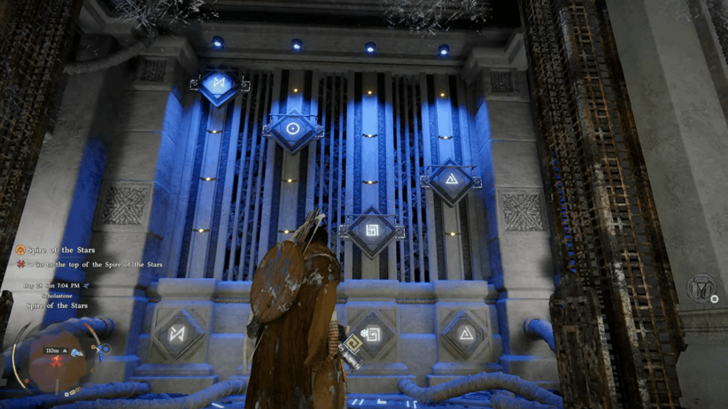 The correct order is to place the first shape at the topmost position, the second shape at the second notch, the third shape at the bottommost position, and the fourth shape at the third notch. With the correct order, the elevator in the center will automatically begin to work and bring you up. |
|
| 5.6 | Go to the Top of the Spire |
| Take the elevator all the way up and run up the stairs. At the top, enter the Abyss Gate. |
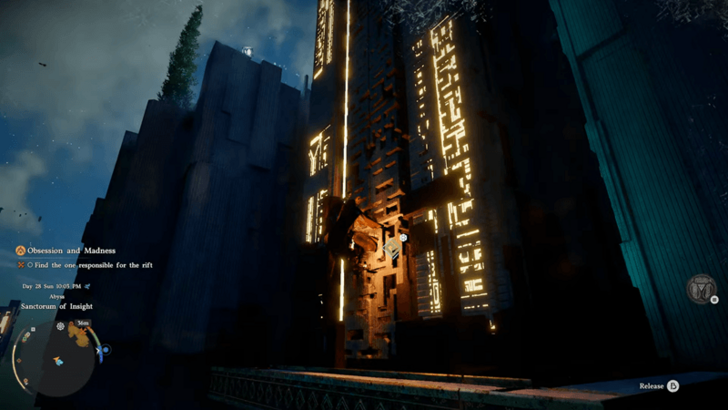
6. Obsession and Madness
| 6.1 | Investigate the Abyss |
|---|---|
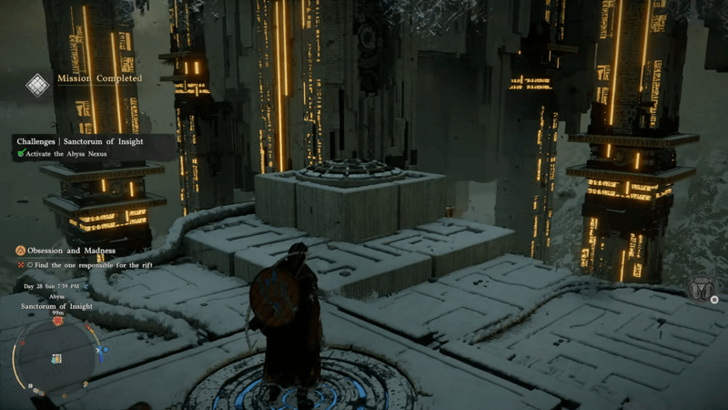 In the Abyss, make sure to step on the first Abyss Nexus right up ahead. If ever you fall, you can fast travel back here easily. |
|
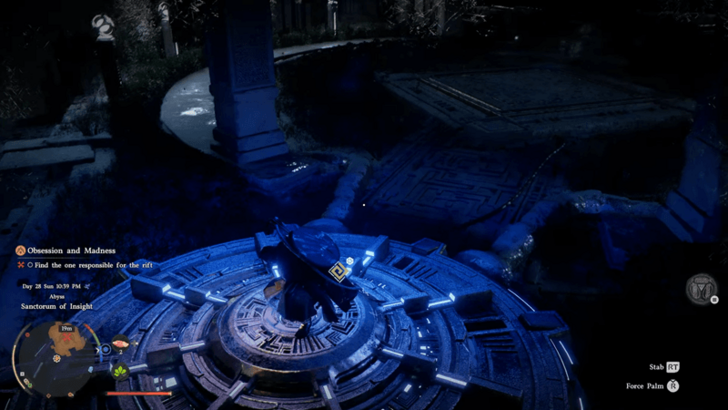
| 6.2 | Find the One Responsible for the Rift |
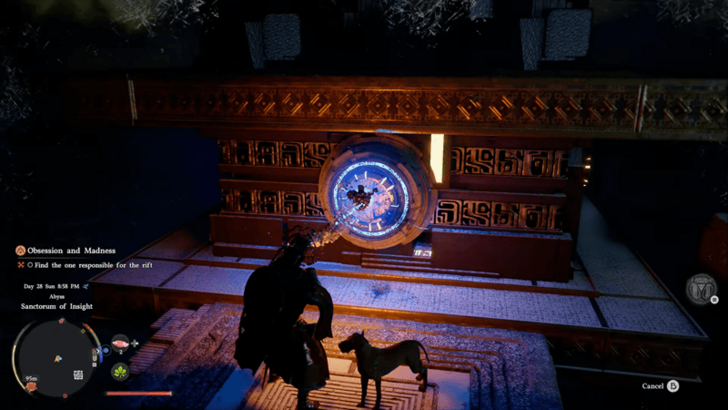 Turn to the right of the Abyss Nexus and find the conductor slot on the large pillar for the Axiom Force. Connect the force on it and lift the pillar up. Tip: You can skip this part by climbing the pillars and gliding over to the next one until you reach the elevated island where the switch is. You can also set a food that gives Stamina in your quick slot as a back up. |
|
| 6.3 | |
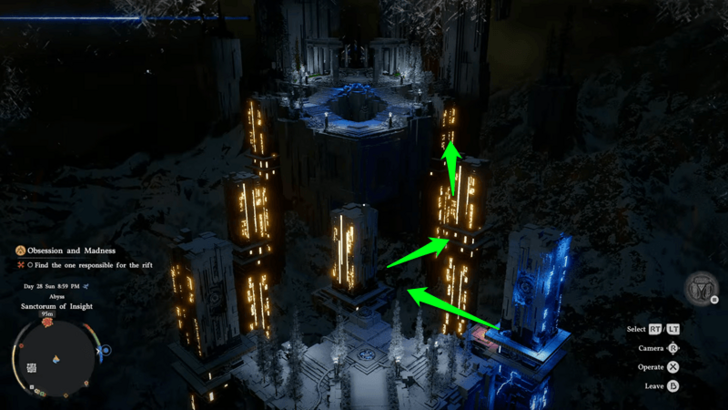 Lifting the pillar moves the camera to an aerial view of the path. The controls for this puzzle are on the bottom right of the screen. You must use L2/R2 or LT/RT to select a pillar, then press X/A to raise it. Select and activate the central pillar first, to move the platforms you are standing on towards it. |
|
| 6.4 | |
Continue moving the platforms by selecting and operating on the pillar nearest to it. Carefully walk along the pillar to find the Axiom Force slot for the next ones, and move all the way to the end. |
|
| 6.5 | |
 Climb to the top of the pillar using the climbable walls. Once at the top, jump to the island and follow the steps up. |
|
| 6.6 | |
 At the top of the stairs, approach the pressure platform and use Force Palm on it to trigger a cutscene. |
Obsession and Madness Puzzle Solution
7. Casted Shadow
| 7.1 | Speak with Grundir |
|---|---|
| After the cutscene, you'll be back in Scholastone and speaking to Grundir. You will be free to go afterward. | |
| 7.2 | Return to Howling Hill |
| Head back to Hernand and to camp, then enter your tent to finish the quest. This transitions immediately to Chapter 5, starting with the Uninvited Guest questline.
▶ Uninvited Guest |
Forbidden Knowledge Rewards
|
・Scholastone Uniform x1 ・Abyss Artifact x1 ・Honey Tea x10 |
Crimson Desert Related Guides
Story Walkthrough and List of Chapters
All Chapters and Quests
Comment
Author

Forbidden Knowledge Walkthrough
Please participate in our site
improvement survey
04/2026
improvement survey
04/2026
Would you assist in
improving Game8's site?
improving Game8's site?

×
We are listening to our users' valuable opinions and discussing how to act on them.
The information collected through this survey will be used for the purpose of improving our services. In addition, the information will only be disclosed a part of a statistic in a format that will not allow identification of personal information.
Begin Survey
Not Now
×
Please rate each item regarding Game8.co's Advertisements.
Amount of Ads
Very Dissatisfied
Somewhat Dissatisfied
Fine
Somewhat Satisfied
Highly Satisfied
Placement of Ads
Timing of Ad Display
Ad Loading Speed
Safeness of Ads
Content of Ads
×
Please rate each item regarding Game8.co's Quality of Articles.
Amount of information
Very Dissatisfied
Somewhat Dissatisfied
Fine
Somewhat Satisfied
Highly Satisfied
Frequency of updates
Speed of new information
Accuracy of articles
Understandibility of articles
Readability of sentences
×
Please rate each item regarding Game8.co's Usability of the Site.
Ease of finding information
Very Dissatisfied
Somewhat Dissatisfied
Fine
Somewhat Satisfied
Highly Satisfied
Loading Speed
Use of Color
Font Size
Visibility of Images
Easy to Understand Layout
×
Please rate each item regarding Game8.co's Message Boards, Comments.
Ease of Writing
Very Dissatisfied
Somewhat Dissatisfied
Fine
Somewhat Satisfied
Highly Satisfied
Readability
Ease in Finding Information
Comment Quality
Comment Quantity
Admin Response
×
Please rate each item regarding Game8.co's Site's new design.
Please rate our site's new design
Very Dissatisfied
Somewhat Dissatisfied
Fine
Somewhat Satisfied
Highly Satisfied
Do you think that the website's design change makes the site easier to use?
Has the new design made it easier for you to find information on the site?
Has the new design improved the overall visual appeal of the site?
How would you rate your overall satisfaction with the new design of the site?
×
How likely are you to recommend Game8 to someone you know?
Very Unlikely
0
1
2
3
4
5
6
7
8
9
10
Very Likely
If you have other opinions regarding potential improvement to the website, please share them with us. We would appreciate your honest opinion.
Note: This is a free response section, so you can proceed without entering anything.
Note: Please be sure not to enter any kind of personal information into your response.
Note: Please be sure not to enter any kind of personal information into your response.
×
Thank You
×
Thank you for participating in our survey! Your answers will help us to improve the quality of our website and services.
We hope you continue to make use of Game8.
We hope you continue to make use of Game8.
Close
Rankings
- We could not find the message board you were looking for.
Gaming News

![Forza Horizon 6 Review [Preview] | Beautiful Roads With a Whole Lot of Oversteer](https://img.game8.co/4460981/a7254c24945c43fbdf6ad9bea52b5ce9.png/show)


![Forza Horizon 6 Review [Preview] | Beautiful Roads With a Whole Lot of Oversteer](https://img.game8.co/4460981/a7254c24945c43fbdf6ad9bea52b5ce9.png/thumb)
Popular Games

Genshin Impact Walkthrough & Guides Wiki
Crimson Desert Walkthrough & Guides Wiki
Umamusume: Pretty Derby Walkthrough & Guides Wiki
Honkai: Star Rail Walkthrough & Guides Wiki
Monster Hunter Stories 3: Twisted Reflection Walkthrough & Guides Wiki
Wuthering Waves Walkthrough & Guides Wiki
The Seven Deadly Sins: Origin Walkthrough & Guides Wiki
Pokemon TCG Pocket (PTCGP) Strategies & Guides Wiki
Pokemon Pokopia Walkthrough & Guides Wiki
Zenless Zone Zero Walkthrough & Guides Wiki


Recommended Games
Monster Hunter World Walkthrough & Guides Wiki
Fire Emblem Heroes (FEH) Walkthrough & Guides Wiki
Pokemon Brilliant Diamond and Shining Pearl (BDSP) Walkthrough & Guides Wiki
Super Smash Bros. Ultimate Walkthrough & Guides Wiki
Diablo 4: Vessel of Hatred Walkthrough & Guides Wiki
Cyberpunk 2077: Ultimate Edition Walkthrough & Guides Wiki
Yu-Gi-Oh! Master Duel Walkthrough & Guides Wiki
Elden Ring Shadow of the Erdtree Walkthrough & Guides Wiki
The Legend of Zelda: Tears of the Kingdom Walkthrough & Guides Wiki
Persona 3 Reload Walkthrough & Guides Wiki


All rights reserved
© Pearl Abyss Corp. All Rights Reserved.
The copyrights of videos of games used in our content and other intellectual property rights belong to the provider of the game.
The contents we provide on this site were created personally by members of the Game8 editorial department.
We refuse the right to reuse or repost content taken without our permission such as data or images to other sites.